There’s something undeniably captivating about a beautifully layered drink, especially when it features rich shades of blue melting into creamy whites and soft golden tones. This stunning blue tea latte brings together visual elegance and comforting flavor, making it a perfect addition to your homemade café lineup. Inspired by popular Starbucks-style creations, this recipe delivers both aesthetic appeal and a soothing, customizable experience right from your kitchen.
Whether you’re a fan of trendy beverages or simply love experimenting with natural ingredients, this blue latte offers a refreshing twist. It’s not just a drink, it’s a moment worth savoring. From its calming hues to its creamy texture, every sip feels special.
Key Takeaways
- This blue latte uses butterfly pea flower tea for its vibrant color
- It’s naturally caffeine-free and perfect for any time of day
- Customizable with different milks and sweeteners
- Visually stunning and perfect for social media sharing
- Easy to recreate with simple ingredients at home
What Makes This Blue Latte So Special?
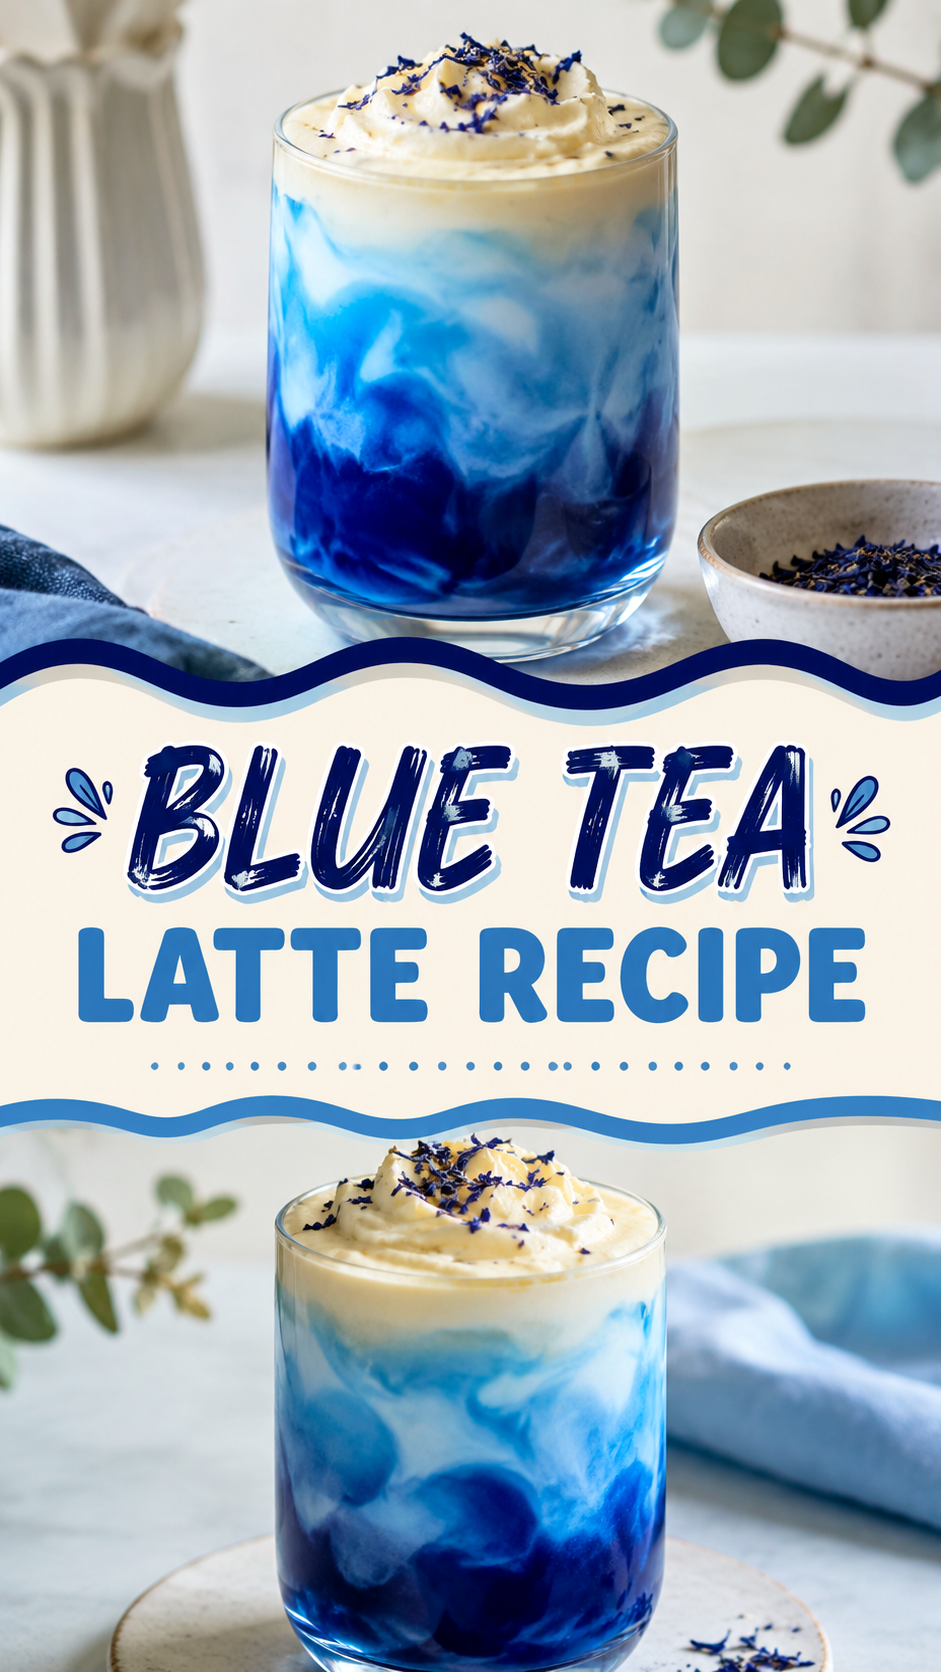
The magic behind this drink lies in butterfly pea flower tea, a natural herbal infusion known for its deep blue color. When combined with milk, it creates a dreamy, cloud-like effect that instantly elevates your drink game. Unlike traditional lattes, this version stands out not only for its taste but also for its visual appeal.
Important: Butterfly pea flower tea is naturally caffeine-free, making this latte a calming choice for evenings or anyone looking to avoid caffeine without sacrificing flavor or experience.
The layered look comes from carefully pouring milk over the brewed tea, allowing the colors to blend slowly. The result is a mesmerizing gradient that feels both luxurious and approachable.
Ingredients You’ll Need
Creating this Starbucks-inspired blue latte at home requires only a few simple ingredients. Most of them are easy to find, and the process is beginner-friendly.
- 1 cup hot water
- 1 to 2 teaspoons butterfly pea flower tea
- 1/2 cup milk (dairy or plant-based)
- Sweetener of choice (honey, sugar, or syrup)
- Ice cubes (optional for iced version)
Optional additions like vanilla extract or flavored syrups can enhance the overall taste while keeping the drink personalized.
Choosing the Right Milk
The type of milk you use can significantly impact both flavor and texture. Almond milk adds a nutty touch, oat milk offers creaminess, and coconut milk pairs beautifully with the floral notes of the tea.
Step-by-Step Preparation
Making this latte is as enjoyable as drinking it. Follow these steps to achieve that signature layered look.
- Brew the butterfly pea flower tea in hot water for 5 to 7 minutes
- Strain the tea and let it cool slightly
- Add sweetener and stir well
- Fill a glass with ice if making an iced version
- Pour the tea into the glass
- Slowly add milk over the back of a spoon to create layers
Pro Tip: Pouring the milk slowly is key to achieving that beautiful gradient effect. Take your time and enjoy the process.
Hot vs Iced Version
This latte works well both hot and iced. The iced version highlights the layered look more dramatically, while the hot version offers a cozy, comforting experience.
Expert Insight
Balancing temperature and layering is essential. Cooler tea and chilled milk help maintain distinct layers, while warmer versions blend more quickly but create a softer visual transition.
Flavor Profile and Experience
Butterfly pea flower tea has a very mild, earthy flavor. This makes it an excellent base for experimentation. When paired with sweeteners and milk, it transforms into a lightly floral, creamy beverage that feels both refreshing and indulgent.
Adding vanilla or a hint of citrus can elevate the taste even further. Lemon juice, for example, can shift the color from blue to purple, creating a fun and interactive element.
Why People Love It
- Visually stunning and Instagram-worthy
- Easy to customize
- Perfect for relaxing moments
- Unique alternative to coffee-based drinks
Tips for the Perfect Blue Latte
Small details can make a big difference when preparing this drink. Paying attention to technique ensures a better result every time.
Important: Always use clear glassware if you want to showcase the layered effect. Presentation plays a huge role in the overall experience.
- Use high-quality butterfly pea flowers for vibrant color
- Adjust sweetness gradually to suit your taste
- Experiment with milk frothing for added texture
- Serve immediately for best visual impact
Creative Variations to Try
Once you master the basic recipe, there are endless ways to customize your blue latte.
Vanilla Blue Latte
Add a splash of vanilla extract for a warm, comforting flavor.
Coconut Blue Latte
Use coconut milk for a tropical twist that pairs beautifully with the floral notes.
Iced Honey Blue Latte
Sweeten with honey and serve over ice for a refreshing summer drink.
Serving and Presentation Ideas
Presentation is part of what makes this drink so appealing. Serve it in a tall glass to highlight the layers. Garnish with whipped cream or a sprinkle of edible flowers for an extra touch of elegance.
For social media or entertaining guests, consider pairing it with neutral backgrounds to let the colors shine. The visual impact alone can turn a simple drink into a memorable experience.
Why This Recipe Fits the Starbucks Copycat Trend
Homemade café-style drinks are more popular than ever. People love recreating their favorite beverages while adding personal touches. This blue latte fits perfectly into that trend by offering something unique, beautiful, and easy to make.
It captures the essence of Starbucks-style creativity while allowing full control over ingredients and customization. Plus, it’s a great way to explore new flavors without needing professional equipment.
At a Glance
- Quick and easy to prepare
- Highly customizable
- Visually striking layered effect
- Perfect for home café experiences
Conclusion
This blue tea latte is more than just a drink. It’s a creative expression that blends beauty, simplicity, and flavor into one delightful experience. Whether you’re exploring new recipes or looking to recreate café favorites at home, this latte offers a perfect starting point.
Its calming color, gentle taste, and customizable nature make it a standout choice for any occasion. From quiet mornings to social gatherings, it brings a sense of joy and creativity to every sip.
Try it once, and it might just become your go-to homemade indulgence.
Tags
Blue Tea Latte Butterfly Pea Flower Starbucks Copycat Recipes Homemade Latte Aesthetic Drinks Caffeine Free Drinks DIY Cafe Drinks