Blog

  • Easy No Knead Cheddar Bread

    Easy No Knead Cheddar Bread

    Easy No Knead Cheddar Bread: A Tropical Delight

    Introduction to Easy No Knead Cheddar Bread

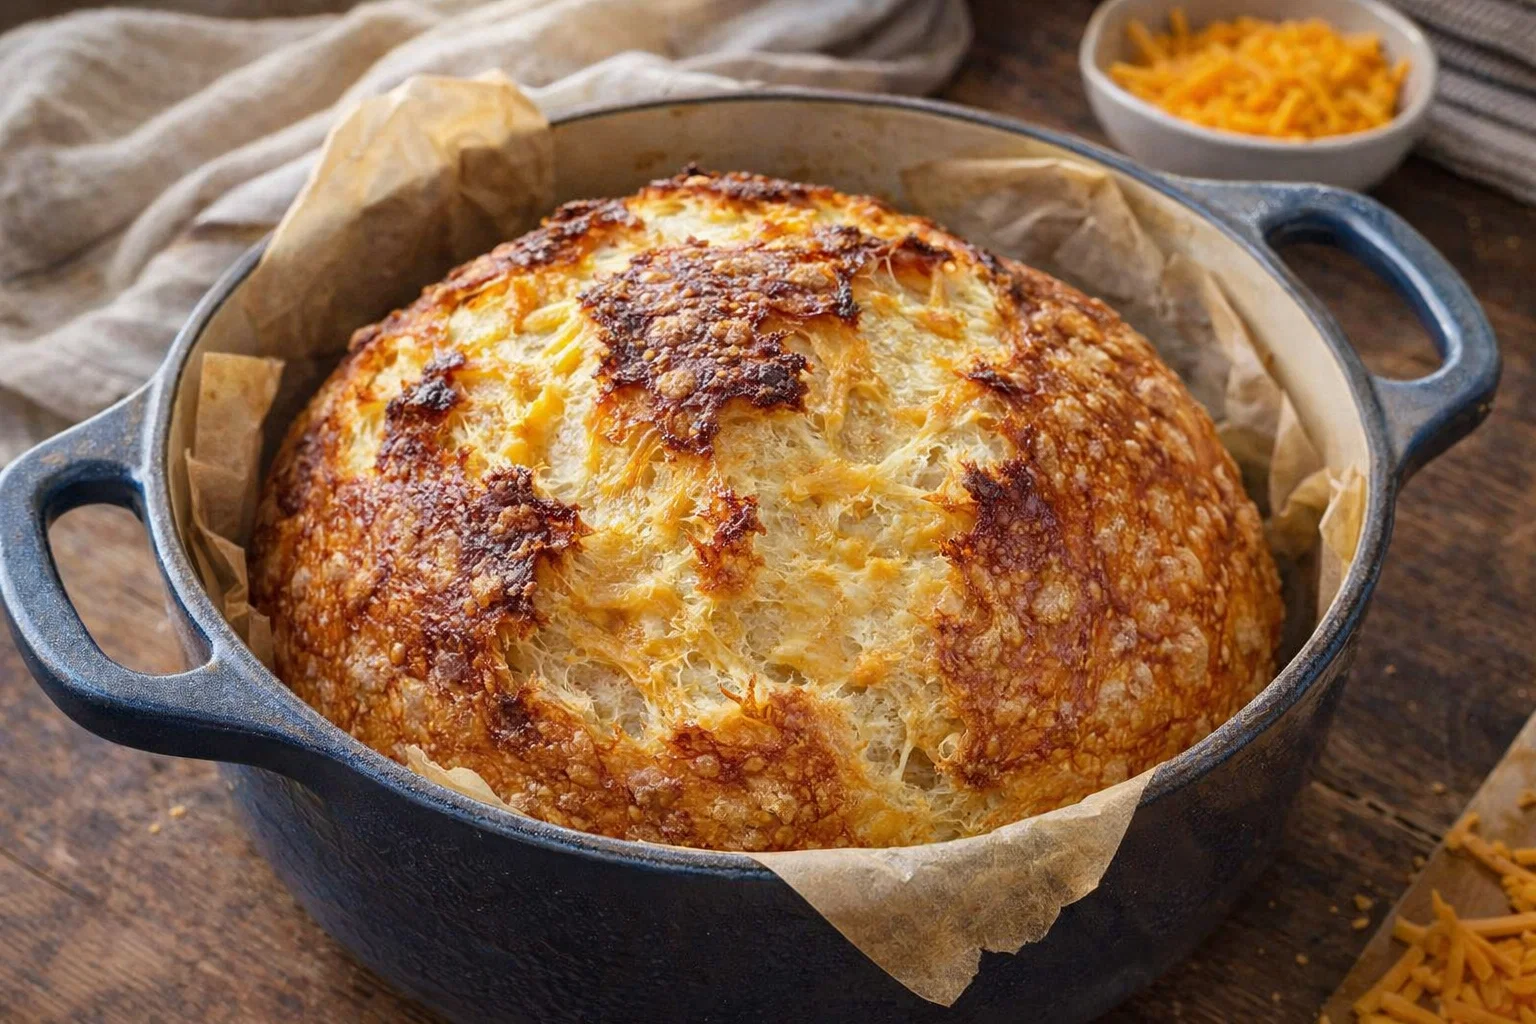
    If you’re searching for easy and delightful dinner recipes that fit into your busy lifestyle, look no further than this Easy No Knead Cheddar Bread. Whether you’re a parent juggling meal prep or a student learning the ropes of cooking, this recipe simplifies bread-making while delivering incredible flavors. You’ll love how the rich, creamy cheddar infuses the dough, creating a cheesy, crusty loaf that complements any meal.

    This no-knead bread is not only simple to prepare, but it is also healthy, as it requires minimal hands-on time and uses wholesome ingredients. For those conscious of their dietary choices, you’ll find options for vegan and gluten-free adaptations, making it suitable for a wide range of taste preferences. Imagine enjoying freshly baked, warm bread straight from the oven, filled with melted cheddar goodness—perfect for teaming up with soups, salads, or as an impressive starter for dinner parties.

    In summary, Easy No Knead Cheddar Bread is a versatile and delicious option, effortlessly enhancing your culinary repertoire without demanding complex techniques or hours in the kitchen. With this straightforward recipe, you can wow your family and friends, no matter how busy life gets.

    Benefits and Advantages of Easy No Knead Cheddar Bread

    One of the main benefits of creating Easy No Knead Cheddar Bread is its simplicity. With minimal ingredients and no requirement for kneading, even novice cooks can achieve excellent results. In just a few steps, you can produce a decadent loaf that tantalizes the taste buds and elevates your meal. This accessibility makes it a standout choice among dinner recipes for busy individuals or families.

    Moreover, the use of cheddar cheese enhances not only the flavor but also the nutritional aspect of the bread. Cheese is recognized for being rich in calcium and protein, and these nutrients contribute to bone health and muscle maintenance. Using high-quality ingredients ensures that your bread is not only delicious but also a good source of nutrition—perfect for health-conscious individuals or families aiming to improve their eating habits.

    Another significant advantage is the flexibility of this no-knead recipe. With suggestions for substitutions to keep it vegan, gluten-free, or low-calorie, it easily caters to diverse dietary needs. Plus, it allows you to get creative with additional ingredients; consider adding herbs, spices, or different types of cheese to personalize each loaf.

    Lastly, the low-effort nature of this recipe aligns beautifully with today’s fast-paced world. You can mix your ingredients, let them rise, and focus on other tasks while the bread bakes in the oven. Who wouldn’t love the aroma of fresh bread wafting through the house without all the hassle? Easy No Knead Cheddar Bread is more than just a recipe; it’s a solution for enjoying home baking without the usual stress.

    Ingredients Overview

    Essential Ingredients for Easy No Knead Cheddar Bread

    Creating the delectable Easy No Knead Cheddar Bread calls for a handful of simple ingredients, each thoughtfully chosen for its role in the recipe. Below is the detailed list along with precise measurements and explanations of their functions:

    • 3 cups all-purpose flour: The main ingredient that provides the dough’s structure.
    • 1.5 teaspoons salt: Enhances flavor and strengthens the gluten structure, promoting a better rise.
    • 1 teaspoon sugar: Aids in activating yeast and improves browning for a lovely crust.
    • 2 teaspoons instant yeast: This helps the bread rise without the need for kneading. You can also use rapid-rise yeast for quicker results.
    • 1.5 cups warm water (about 110°F): Activates the yeast and hydrates the flour, contributing to a soft, pliable dough.
    • 1.5 cups sharp cheddar cheese, shredded: Adds a rich flavor profile and moisture to the bread. For a vegan-friendly option, substitute dairy-free cheese.
    • Optional: 1 tablespoon dried herbs (such as rosemary or thyme): Customize the flavor by incorporating your favorite herbs.

    Dietary Options:

    • Vegan: Substitute cheddar cheese with a plant-based version.
    • Gluten-Free: Use a gluten-free all-purpose flour blend designed for baking; ensure other ingredients (especially yeast) are certified gluten-free.
    • Low-Calorie: Use reduced-fat cheddar or swap half of the cheese with steamed vegetables for a nutritious twist.

    Dietary Substitutions to Customize Your Easy No Knead Cheddar Bread

    Customization is straightforward with the Easy No Knead Cheddar Bread recipe, allowing you to cater to various dietary needs without sacrificing flavor. Here are some substitutions based on common dietary considerations:

    • Dairy-Free: Utilize non-dairy milk alternatives in place of warm water for a milk bread effect. Opt for nutritional yeast if cheese is not preferred, providing a cheesy flavor without dairy.

    • Gluten-Free: In addition to utilizing a gluten-free flour mix, include a tablespoon of xanthan gum to mimic the elasticity that gluten provides.

    • Low-Carb/Keto: Choose almond flour or coconut flour, recalibrating the liquid quantities accordingly, to create a low-carb version of this bread.

    Experimenting with these substitutions broadens the appeal of this recipe, allowing everyone to join in on the enjoyment of freshly baked bread.

    How to Prepare the Perfect Easy No Knead Cheddar Bread: Step-by-Step Guide

    Baking the perfect Easy No Knead Cheddar Bread is as simple as following these easy steps. Each step ensures you create a delicious loaf while highlighting how adaptive this recipe can be for any dietary needs.

    1. Prepare the Base: In a large mixing bowl, combine the 3 cups of all-purpose flour, 1.5 teaspoons of salt, 1 teaspoon of sugar, and 2 teaspoons of instant yeast. Tip: Use a whisk or spatula to incorporate them evenly.

    2. Mix Ingredients: Gradually pour in 1.5 cups of warm water while stirring with a wooden spoon or your hands until the mixture forms a shaggy dough. This dough should not be kneaded.

    3. Add Cheddar: Fold in 1.5 cups of shredded sharp cheddar cheese until evenly distributed throughout the dough. For variations, consider adding dried herbs or spices at this point.

    4. Cover and Rest: Cover the bowl with a clean kitchen towel or plastic wrap. Allow the dough to rest at room temperature for 12 to 18 hours. This slow fermentation creates a more complex flavor, and the dough will double in size.

    5. Preheat the Oven: About 30 minutes before baking, preheat your oven to 450°F (232°C). Place a Dutch oven or heavy pot (with a lid) inside to heat up.

    6. Shape the Dough: Once the dough has risen, scrape it out onto a floured surface. Use a bench scraper or your hands to form it into a round shape, being careful not to deflate it too much.

    7. Prepare for Baking: Carefully remove your hot pot from the oven. Gently place the dough inside. Tip: You can sprinkle a bit of flour on the bottom of the pot to prevent sticking.

    8. Cover and Bake: Place the lid on the Dutch oven and bake for 30 minutes. This will trap steam in, creating a lovely crust.

    9. Uncover and Brown: After 30 minutes, remove the lid and bake for an additional 15-20 minutes until the top turns golden brown and crispy.

    10. Cool: Once baked, carefully remove the bread from the pot and let it cool on a wire rack for at least 30 minutes before slicing. This ensures the inside finishes setting.

    This method aptly demonstrates how straightforward and adaptable this Easy No Knead Cheddar Bread recipe is, enhancing any meal with minimal effort. Experiment with different flavor profiles or methods, ensuring you have a favorite variation of this delightful recipe!

    Mastering Easy No Knead Cheddar Bread: Advanced Tips and Variations

    To elevate your bread-making game even further, consider these advanced tips and variations for your Easy No Knead Cheddar Bread:

    1. Incorporate Flavored Oils: Experiment with infusing olive oil with garlic or rosemary before mixing it into your dough for an aromatic kick.

    2. Double Cheese Delight: Try using a combination of cheeses, such as a mix of cheddar and gouda, for a more complex flavor.

    3. Herb-Infused Bread: Add fresh herbs such as rosemary, parsley, or basil to the dough for an aromatic lift that can complement any meal—pair it with your favorite dinner recipes.

    4. Baking on a Pizza Stone: For an extra-crispy crust, place the dough on a preheated pizza stone instead of a pot. Just be sure to sprinkle cornmeal to prevent sticking.

    5. Toppings: Before baking, sprinkle the top with seeds (such as sesame or poppy seeds) for added texture and nutritional value.

    Each of these variations showcases the adaptability of the Easy No Knead Cheddar Bread recipe, inviting creativity and personal touch into your kitchen. Enjoy exploring flavors and techniques that best suit your taste buds!

    How to Store Easy No Knead Cheddar Bread: Best Practices

    To ensure your Easy No Knead Cheddar Bread remains delicious for days, it’s essential to store it properly. Here are the best practices for refrigeration and freezing:

    1. Room Temperature Storage: Place the cooled bread in a paper bag or a breadbasket lined with a clean kitchen towel. This prevents moisture loss while keeping the crust from getting stale. Avoid plastic bags as they can make the crust soft.

    2. Refrigeration: If you anticipate not consuming the bread within a few days, refrigerate it in an airtight container. This can help prolong its freshness, although refrigeration may slightly affect the texture.

    3. Freezing: For long-term storage, slice the bread and wrap each piece tightly in plastic wrap followed by aluminum foil to prevent freezer burn. When done correctly, it can last for up to three months. To reheat, thaw in the refrigerator overnight and then toast or warm in the oven at 350°F (175°C) until heated through.

    4. Reheating: To enjoy the bread as if it was fresh out of the oven, reheat in the oven or toaster oven for a few minutes to revive its crusty exterior.

    By following these storage methods, you can keep your Easy No Knead Cheddar Bread at its peak quality, ready to accompany your next dinner recipe seamlessly!

    Nutritional Value of Easy No Knead Cheddar Bread

    Understanding the nutritional value of your Easy No Knead Cheddar Bread makes it easier to fit this delicious option into your overall diet. Here is a breakdown based on a typical serving size of one slice (1/12 of the loaf):

    • Calories: Approximately 180
    • Total Fat: 7g
    • Saturated Fat: 4g
    • Cholesterol: 20mg
    • Sodium: 300mg
    • Total Carbohydrates: 25g
    • Dietary Fiber: 1g
    • Sugars: 1g
    • Protein: 6g

    Health Benefits

    • The combination of cheese and flour provides a good source of protein essential for muscle maintenance.
    • Including fiber in your diet (often enhanced with whole-wheat flour) can aid in digestive health.

    By adjusting the ingredients, it’s possible to create a healthier version of this bread to align with your dietary needs. For example, using whole wheat and reduced-fat cheese will enhance the fiber content while lowering calories and fats.

    Incorporating this comfort food into your meal plans can be both enjoyable and nutritious, so there’s no harm in treating yourself with this delightful bread!

    FAQs: Frequently Asked Questions About Easy No Knead Cheddar Bread

    Here are some common queries regarding Easy No Knead Cheddar Bread, along with clear answers to guide your bread-making experience:

    1. Can I make this bread without cheese?

    Yes! You can omit the cheese entirely to make a plain no-knead bread that pairs well with soups and salads or use nutritional yeast for a cheesy flavor without dairy.

    2. How can I adapt this recipe for vegan diets?

    For a vegan version, simply replace the cheddar cheese with a plant-based alternative and ensure that no animal-based ingredients are used.

    3. My bread is too dense; what went wrong?

    If your bread is dense, it could be due to insufficient rising time or an error in measuring flour. Always measure flour accurately and allow the dough to rise adequately.

    4. How can I enhance the flavor of my bread?

    Incorporating fresh herbs, spices, or even garlic powder into the dough can provide an aromatic flavor. Different types of cheese also introduce unique tastes.

    5. Can I freeze the bread?

    Certainly! Be sure to cool the bread completely, slice it, and wrap it tightly before placing it in the freezer. Thaw and reheat as needed for best results!

    6. How long will the bread last?

    At room temperature, it lasts for about 2-3 days, while refrigerated it can last for up to a week, and freezing extends its freshness for up to three months.

    This FAQ section aims to address common concerns and enable a smooth baking experience for anyone trying the Easy No Knead Cheddar Bread recipe. Happy baking!


    This comprehensive guide covers all your bases for making Easy No Knead Cheddar Bread a staple in your cooking repertoire. With its health-conscious ingredients and user-friendly steps, this recipe ensures delightful, fresh bread can easily fit into your everyday meals, complementing both family dinners and quiet evenings at home. Whether you’re a novice or an experienced baker, you can enjoy this simple, flavorful addition to your menu while impressing loved ones with your culinary prowess.

  • Easy Buffalo Chicken Protein Bowl

    Easy Buffalo Chicken Protein Bowl

    Easy Buffalo Chicken Protein Bowl: A Tropical Delight

    Introduction to Easy Buffalo Chicken Protein Bowl

    Are you looking for a delicious and fulfilling meal that doesn’t take hours to prepare? Look no further than the Easy Buffalo Chicken Protein Bowl! This delectable dish combines the spicy flavor profile of traditional buffalo chicken dip with a nutritious twist. It’s simple to make and packed with protein, making it an ideal choice for busy parents, students, and fitness enthusiasts alike. With just a few ingredients, you can whip up a scrumptious meal that adheres to various dietary needs—whether you’re vegan, gluten-free, or simply seeking a low-calorie option.

    What truly sets this protein bowl apart is its versatility. The unique blend of flavors and textures not only satisfies your taste buds but also ensures you’re getting a nutrient-rich meal. Picture tender shredded chicken, crisp veggies, and a creamy sauce, all beautifully layered in a bowl that’s as pleasing to the eye as it is to the palate. It’s a perfect meal prep option for working professionals and busy individuals who want something healthy and fulfilling without the hassle. Grab your ingredients and get ready to dive into an adventure of flavors you will want to repeat time and again.

    Benefits and Advantages of Easy Buffalo Chicken Protein Bowl

    Why should you try the Easy Buffalo Chicken Protein Bowl? First and foremost, the ease of preparation makes it a standout recipe, especially for those with hectic schedules. You can prepare this dish in under 30 minutes, making it perfect for weeknight dinners or lunch at work. It allows you to whip up a nutritious meal in no time, giving you more time to enjoy with your family or focus on other tasks.

    In terms of health benefits, this protein bowl is not only low in calories, depending on your ingredient choices, but it also packs a protein punch. Using lean chicken breast, vegetables, and optional Greek yogurt for creaminess, it’s designed to fuel your day and keep you satiated longer. Furthermore, with the shift towards healthier eating, this dish can easily accommodate flattering substitutions for various dietary preferences. Vegan options consist of chickpeas or plant-based chicken, while the dish can be made gluten-free by selecting certified grains.

    Beyond health, this recipe speaks to your culinary adventurous spirit. The zesty flavor of the buffalo sauce pairs beautifully with the other elements in the bowl, creating a harmonious symphony of taste. Furthermore, the ability to customize each bowl to suit individual preferences means you’ll never get bored with this dish.

    Ingredients Overview

    Essential Ingredients for Easy Buffalo Chicken Protein Bowl

    Here’s what you’ll need to create your Easy Buffalo Chicken Protein Bowl:

    • 1 lb. Boneless, skinless chicken breast (or plant-based chicken for vegan options)
    • 1 cup cooked quinoa (or rice, and swap for gluten-free grains if needed)
    • 1 cup Buffalo sauce (homemade or store-bought)
    • 1 cup Greek yogurt (substitute with vegan yogurt for a dairy-free version)
    • 1 cup chopped celery (adds crunch!)
    • 1 cup shredded carrots
    • 1 cup diced cucumbers (for freshness)
    • 2 green onions, sliced (for garnish)
    • Lettuce leaves (for a fresh base)
    • Salt and pepper to taste

    These ingredients not only come together in a delicious fashion but also offer essential nutrients that contribute positively to your diet.

    Dietary Substitutions to Customize Your Easy Buffalo Chicken Protein Bowl

    Adapting the Easy Buffalo Chicken Protein Bowl to meet your dietary preferences is simple. Here are a few suggestions:

    • For a Vegan Option: Substitute chicken with chickpeas, lentils, or a plant-based meat alternative, paired with vegan yogurt for creaminess.
    • Gluten-Free: Make sure to use certified gluten-free grains like quinoa or brown rice. The buffalo sauce can also be homemade to ensure it meets your dietary requirements.
    • Low-Calorie: Opt for baked or shredded chicken breast over high-fat cuts. You can reduce the quantity of sauce or use a lighter version without sacrificing flavor.
    • Increased Fiber: Add black beans or kidney beans for extra fiber and nutrients.

    This flexibility allows you to create a meal that not only suits your taste but also aligns with your health goals.

    How to Prepare the Perfect Easy Buffalo Chicken Protein Bowl: Step-by-Step Guide

    Let’s get started on creating your Easy Buffalo Chicken Protein Bowl! Follow these simple steps to make this delectable dish come to life:

    1. Cook the Chicken:
      In a large pot, place your boneless, skinless chicken breast. Fill the pot with enough water to cover the chicken and bring it to a boil. Once boiling, reduce the heat and let it simmer for about 15–20 minutes or until fully cooked. For a vegan option, prepare your plant-based chicken alternative according to package instructions.

    2. Prepare the Quinoa:
      While the chicken cooks, rinse your quinoa in cold water. In another pot, combine 1 cup quinoa with 2 cups of water or broth. Bring to a boil, then cover and simmer on low heat for about 15 minutes until the quinoa is fluffy.

    3. Shred the Chicken:
      Once the chicken is cooked through, remove it from the pot and let it cool slightly. Then use two forks to shred it into bite-sized pieces. If you’ve opted for plant-based chicken, shred it using a fork or your hands.

    4. Make the Sauce:
      In a bowl, combine the shredded chicken with 1 cup of buffalo sauce and stir well. For a creamier texture, you can mix in ½ cup of Greek yogurt or vegan yogurt. Adjust the amount of buffalo sauce to your taste.

    5. Chop the Vegetables:
      While the sauce and chicken are mixing, chop your celery, carrots, and cucumbers.

    6. Assemble the Bowl:
      Start with a base of cooked quinoa; follow with a layer of the buffalo chicken mixture. Top this with your chopped vegetables: celery, carrots, and cucumbers. If you wish, you can add lettuce leaves at the bottom for added crunch.

    7. Garnish and Serve:
      Finally, sprinkle sliced green onions over the top for a pop of color and added flavor.

    8. Enjoy Your Creation:
      Serve immediately or prepare for meal prep students, busy parents, and working professionals to take on-the-go.

    By following these steps, you can have your Easy Buffalo Chicken Protein Bowl ready in no time!

    Mastering Easy Buffalo Chicken Protein Bowl: Advanced Tips and Variations

    To take your Easy Buffalo Chicken Protein Bowl to the next level, here are some tips and exciting variations you might want to try:

    • Add More Texture: Incorporate nuts or seeds, like sunflower seeds or walnuts, to give your bowl an extra crunch.
    • Experiment with Flavors: If you love different types of sauces, try other flavors instead of standard buffalo sauce—think about using a barbecue sauce or even a spicy ranch for a different flavor profile.
    • Incorporate a Sauté: For an added depth of flavor, consider sautéing your vegetables lightly in olive oil before adding them to the bowl.
    • Meal Prep Magic: This dish is ideal for meal prepping. Prepare a larger batch over the weekend, and portion it throughout the week for quick lunches or dinners.

    These tweaks can transform your bowl and keep each serving exciting, ensuring that you enjoy the Easy Buffalo Chicken Protein Bowl over and over again.

    How to Store Easy Buffalo Chicken Protein Bowl: Best Practices

    Storing your Easy Buffalo Chicken Protein Bowl correctly can maintain its freshness and flavor:

    • Refrigeration: To store leftovers, place them in an airtight container and keep them in the refrigerator for up to 4 days.
    • Freezing: You can freeze the buffalo chicken mixture separately from the quinoa and vegetables. Store it in a freezer-safe container for up to 3 months. When ready to eat, thaw in the refrigerator overnight and reheat thoroughly.
    • Reheating: For best results, reheat in the microwave or on the stovetop. If reheating from frozen, let it thaw first, then heat until warm.

    By following these storage tips, you can enjoy your Easy Buffalo Chicken Protein Bowl for days to come!

    Nutritional Value of Easy Buffalo Chicken Protein Bowl

    Now, let’s break down the nutritional information of the Easy Buffalo Chicken Protein Bowl. While the exact values can vary based on specific ingredients and portions, here’s a general overview for one serving:

    • Calories: Approximately 450
    • Protein: About 35 grams
    • Carbohydrates: Roughly 40 grams
    • Fat: Approximately 14 grams
    • Fiber: Estimated 5 grams

    This protein bowl is a fantastic option packed with nutrients, ensuring you have the energy to power through your day.

    Note: Adjust the ingredients (like using low-fat yogurt or less sauce) for specific dietary needs or to cut calories further.

    FAQs: Frequently Asked Questions About Easy Buffalo Chicken Protein Bowl

    Can I make this bowl vegetarian or vegan?

    Absolutely! You can easily substitute the chicken for chickpeas, lentils, or a plant-based protein of your choice.

    How can I make this dish gluten-free?

    Swap the quinoa for a gluten-free grain such as brown rice, and ensure your buffalo sauce is gluten-free.

    How long can I store leftovers?

    You can store leftovers in the refrigerator for up to 4 days. For longer storage, freeze the buffalo chicken mixture for up to 3 months.

    Can I use other proteins instead of chicken?

    Certainly! Feel free to replace chicken with turkey, shrimp, or a plant-based alternative, making this dish adaptable to various preferences.

    What can I use instead of quinoa?

    You can replace quinoa with rice, farro, or any other grain you enjoy! For a low-carb option, consider cauliflower rice.

    By addressing these common questions, I hope you feel more confident in preparing your Easy Buffalo Chicken Protein Bowl!

    In conclusion, the Easy Buffalo Chicken Protein Bowl is not just a meal; it’s a beautiful canvas ready for you to paint with flavors that suit your palate and dietary requirements. With its array of benefits, ease of preparation, and room for customization, it’s bound to become a staple in your kitchen. Happy cooking!

  • Tasty Marshmallow Cheesecake Delight

    Tasty Marshmallow Cheesecake Delight

    Tasty Marshmallow Cheesecake Delight: A Tropical Delight

    Introduction to Tasty Marshmallow Cheesecake Delight

    Are you on the hunt for the perfect dessert recipes that offer a delightful blend of flavors and textures? Look no further than the Tasty Marshmallow Cheesecake Delight! This tropical-inspired treat is not only delicious but also simple to make, making it an excellent choice for home cooks and busy parents alike. Whether you’re whipping it up for a family gathering, a special celebration, or just a sweet craving, this cheesecake is bound to impress.

    The Tasty Marshmallow Cheesecake Delight is a harmonious blend of creamy cheesecake, fluffy marshmallows, and a buttery crumb crust. Not only does it boast a rich, decadent taste, but it also showcases a lightness that makes it an ideal choice for those looking to indulge without feeling weighed down. Additionally, this dessert can be easily adapted to suit various dietary preferences.

    It’s vegan, gluten-free, and can be made with low-calorie ingredients, making it suitable for health-conscious individuals, students, and anyone keen on enjoying dessert without the guilt. So roll up your sleeves, because this cheesecake delight not only tastes amazing but also offers a plethora of health benefits.


    Benefits and Advantages of Tasty Marshmallow Cheesecake Delight

    The Tasty Marshmallow Cheesecake Delight is not just any dessert; it’s a versatile option that caters to diverse dietary needs while being incredibly easy to prepare. Here are some standout benefits of this delightful recipe:

    1. Simplicity in Preparation: With straightforward steps and minimal equipment, even beginner cooks will find this recipe easy to follow. In about an hour, you can whip up this stunning dessert that looks professionally made without overwhelming effort.

    2. Health Benefits: The ingredients in this recipe can be easily modified to promote wellness. The marshmallows can be replaced with all-natural options, while the cream cheese can be made with a low-fat or plant-based alternative, lowering the overall calories and fat content.

    3. Customizable for Dietary Needs: The Tasty Marshmallow Cheesecake Delight can easily be made vegan and gluten-free. Substituting traditional cream cheese with cashew or coconut-based varieties provides a creamy texture that is both dairy-free and delicious.

    4. Rich in Flavor yet Light: This dessert strikes a balance between indulgence and lightness, making it a satisfying treat without heavy repercussions. The fluffy marshmallow layer adds sweetness and a unique texture, while the creaminess of the cheesecake melts in your mouth.

    5. Perfect for Any Occasion: Whether you’re hosting a dinner party or celebrating a birthday, this cheesecake is a focal point that sparks joy and appreciation among all guests. Its tropical flavor profile makes it fitting for summer gatherings, holiday potlucks, or even cozy winter evenings.

    6. Value for Money: With easily accessible ingredients, this cheesecake is budget-friendly. You can create a dessert that feels luxurious without breaking the bank, making it accessible for students and working professionals alike.

    Embrace the health benefits and indulgent qualities of this recipe, and you’ll realize why it is a standout among dessert recipes.


    Ingredients Overview

    Essential Ingredients for Tasty Marshmallow Cheesecake Delight

    To bring your Tasty Marshmallow Cheesecake Delight to life, gather the following ingredients. Each element plays a crucial role in creating the desired flavor and texture:

    • For the Crust:
    • 1 ½ cups crushed graham crackers (or gluten-free alternative)
    • ½ cup unsalted butter, melted (or coconut oil for a dairy-free version)
    • ¼ cup granulated sugar (or coconut sugar as a low-calorie option)

    • For the Cheesecake Filling:

    • 2 cups cream cheese, softened (use vegan cream cheese for a plant-based version)
    • 1 cup granulated sugar (or a sugar substitute like stevia)
    • 1 teaspoon vanilla extract
    • 1 cup heavy whipping cream (or coconut cream for a dairy-free alternative)

    • For the Marshmallow Layer:

    • 2 cups mini marshmallows (look for all-natural or vegan alternatives)
    • 1 tablespoon gelatin (vegan alternative: agar-agar)
    • ½ cup hot water

    Dietary Substitutions to Customize Your Tasty Marshmallow Cheesecake Delight

    This Tasty Marshmallow Cheesecake Delight can easily cater to a variety of dietary needs:

    • Vegan Options: Replace dairy cream cheese with a blend of soaked cashews blended with coconut milk and lemon juice. Use coconut whipped cream as an alternative for heavy cream.

    • Gluten-Free Substitutes: Opt for gluten-free graham crackers or use crushed almonds or oats for the crust.

    • Low-Calorie Variants: Consider using low-fat cream cheese and reducing the sugar by half. Moreover, using sugar alternatives can significantly cut down on calories.

    • Nut Allergies: Substitute heavy cream with soy-based alternatives or use oat cream for those with nut allergies.

    By mixing and matching these substitutions, you can create a version of the Tasty Marshmallow Cheesecake Delight that fits your dietary requirements – ensuring everyone can enjoy a slice!


    How to Prepare the Perfect Tasty Marshmallow Cheesecake Delight: Step-by-Step Guide

    Now, it’s time to dive into the detailed preparation of the Tasty Marshmallow Cheesecake Delight. Follow these clear step-by-step instructions to create a luxurious dessert that will wow your family and friends!

    1. Prepare the Base:
    2. In a mixing bowl, combine the crushed graham crackers, melted butter, and granulated sugar. Stir until well mixed.
    3. Press the mixture firmly into the bottom of a 9-inch springform pan, creating an even layer. Set aside in the refrigerator to firm up while you prepare the filling.

    4. Mix the Cream Cheese Filling:

    5. In a large mixing bowl, beat the softened cream cheese with an electric mixer until smooth. Add the granulated sugar and vanilla extract, mixing until well combined.
    6. In another bowl, whip the heavy cream until peaks form. Gently fold the whipped cream into the cream cheese mixture, ensuring a light and airy consistency.

    7. Layer the Cheesecake Mixture:

    8. Remove the crust from the refrigerator. Pour the cream cheese filling over the crust, using a spatula to spread it evenly.
    9. Refrigerate the cheesecake for at least 4 hours or overnight, allowing it to set properly.

    10. Prepare the Marshmallow Layer:

    11. In a small bowl, dissolve the gelatin in half a cup of hot water, stirring until fully dissolved. (For a vegan version, dissolve agar-agar according to package instructions).
    12. In a separate bowl, combine the marshmallows and the dissolved gelatin. Microwave on high for about 30 seconds, then stir until smooth.

    13. Combine Layers:

    14. Once the cheesecake has set, carefully spread the marshmallow mixture on top, smoothing it into an even layer.

    15. Final Chill:

    16. Return the cheesecake to the refrigerator for at least another hour to allow the marshmallow topping to set.

    17. Serve the Cheesecake:

    18. Once fully chilled and set, remove the sides of the springform pan. Slice the cheesecake into wedges and serve chilled. Garnish with extra marshmallows or whipped cream if desired.

    The combination of rich cheesecake and fluffy marshmallows creates a delightful dessert experience. Be sure to take note of any dietary adaptations you wish to make along the way!


    Mastering Tasty Marshmallow Cheesecake Delight: Advanced Tips and Variations

    Elevate your Tasty Marshmallow Cheesecake Delight with these advanced tips and fun variations:

    • Add Fruit: Consider blending in fresh fruit like mango or pineapple to the cream cheese mixture for an extra layer of flavor. This can make the cheesecake even more refreshing.

    • Chocolate Swirl: For a chocolatey twist, melt some dark chocolate and swirl it into the cream cheese filling before it sets. This creates a marbled effect that is as beautiful as it is delicious.

    • Nutty Crust: To add depth to the crust, mix in some finely chopped nuts such as almonds or pecans along with the graham crackers. This adds crunch and flavor.

    • Incorporate Zest: A teaspoon of lemon or orange zest in the cream cheese filling can enhance the flavor profile with a citrusy brightness that pairs beautifully with the marshmallows.

    • Presentation Ideas: Serve slices of cheesecake topped with a drizzle of caramel sauce, shredded coconut, or crushed nuts to make it visually appealing.

    By exploring these variations and tips, you will impress your guests with your creativity and elevate an already delicious dessert to new heights.


    How to Store Tasty Marshmallow Cheesecake Delight: Best Practices

    To keep your Tasty Marshmallow Cheesecake Delight fresh and delicious, follow these storage tips:

    • Refrigeration: Store leftover cheesecake in an airtight container in the refrigerator. It will stay fresh for up to 5 days. The longer it sits, the more the flavors meld together, but the marshmallow topping may lose some of its initial fluffiness.

    • Freezing: If you wish to keep it for an extended period, you can freeze the cheesecake. Wrap it tightly in plastic wrap and then aluminum foil before placing it in the freezer. It can last up to 3 months.

    • Reheating: When you’re ready to enjoy your frozen cheesecake, transfer it to the refrigerator to thaw overnight. Avoid microwaving it as it can make the texture grainy.

    By adhering to these storage guidelines, you can enjoy your Tasty Marshmallow Cheesecake Delight whenever the craving strikes, without losing its heavenly flavor and texture.


    Nutritional Value of Tasty Marshmallow Cheesecake Delight

    Understanding the nutritional value of the Tasty Marshmallow Cheesecake Delight can help you maintain your health while still enjoying the sweetness. Here’s a rough breakdown of the nutritional content per serving (based on traditional ingredients):

    • Calories: 320 kcal
    • Total Fat: 22g
    • Saturated Fat: 12g
    • Cholesterol: 80mg
    • Sodium: 150mg
    • Total Carbohydrates: 28g
    • Dietary Fiber: 1g
    • Sugars: 18g
    • Protein: 4g

    For adaptations, using low-fat cream cheese and reducing sugar can further lower calories and fat. If you employ vegan alternatives, the calorie content might change based on your choices, but overall, you can achieve a lighter dessert without compromising the taste.

    It’s essential to balance indulgence with nutrition, and this dessert allows you to enjoy your sweet tooth guilt-free.


    FAQs: Frequently Asked Questions About Tasty Marshmallow Cheesecake Delight

    Q1: Can I use store-bought marshmallow fluff instead of mini marshmallows?

    Yes, you can substitute store-bought marshmallow fluff for mini marshmallows to make preparation even easier. Just mix it into the gelatin as directed, and you’ll achieve similar results.

    Q2: Is there a way to make this dessert sugar-free?

    Absolutely! You can replace granulated sugar with your preferred sugar substitute, such as stevia or erythritol. Ensure to check the equivalence to achieve desired sweetness.

    Q3: How can I make a low-calorie version of the cheesecake?

    To create a low-calorie version, use low-fat cream cheese, coconut cream, and reduce the amount of sugar. Also, consider altering the crust to a lighter option, such as crushed almonds mixed with a touch of coconut oil.

    Q4: How do I know when the cheesecake is set?

    The cheesecake will look firm and not jiggle when you gently shake the pan. Touching the center with a fingertip should feel firm but soft to the touch.

    Q5: Can this cheesecake be made ahead of time?

    Definitely! In fact, making it a day in advance enhances the flavor and allows it to set perfectly. Just be sure to store it properly in the refrigerator.

    Q6: Can I add flavors to the cheesecake filling?

    Yes, absolutely! Adding flavors like lemon zest, vanilla, or chocolate can infuse the cheesecake with delightful tastes that complement the marshmallow topping beautifully.

    Dreaming of a creamy and fluffy treat? Dive right into the kitchen and indulge in making your Tasty Marshmallow Cheesecake Delight today. With its remarkable taste and versatility, it’s bound to become a favorite in your dessert repertoire!

  • Tasty Coffee Brownie Cheesecake Dessert

    Tasty Coffee Brownie Cheesecake Dessert

    Tasty Coffee Brownie Cheesecake Dessert: A Tropical Delight

    Introduction to Tasty Coffee Brownie Cheesecake Dessert

    If you’re seeking dessert recipes that marry the rich, indulgent flavors of coffee, brownie, and cheesecake, look no further. The Tasty Coffee Brownie Cheesecake Dessert is the ultimate treat that ticks all the boxes for dessert lovers. Its moist brownie base layered with a creamy coffee cheesecake filling creates a delightful harmony of flavors, making it perfect for any occasion.

    What makes this recipe even more appealing is its simplicity. You don’t need to be a baking expert to whip up this dessert. With just a handful of ingredients, you can create a stunning dish that’s sure to impress friends and family. Moreover, it can be tailored to meet various dietary requirements. The base can be made gluten-free, and the cheesecake layer can easily be dairy-free or vegan, allowing everyone to enjoy a slice of this heavenly delight.

    Additionally, the health benefits of this dessert can’t be overlooked. When crafted with wholesome ingredients, this Tasty Coffee Brownie Cheesecake Dessert can serve as a guilt-free indulgence. The combination of protein from the cheesecake and the rich flavor from the coffee offers more than just pleasure—it provides a delicious boost to your day.

    Whether you’re a busy parent searching for an easy dessert recipe or a baking enthusiast looking to try something new, this dessert is versatile enough for every cook, from students to newlyweds. Let’s dive into the delicious world of Tasty Coffee Brownie Cheesecake Dessert!

    Benefits and Advantages of Tasty Coffee Brownie Cheesecake Dessert

    The Tasty Coffee Brownie Cheesecake Dessert stands out due to its numerous benefits and advantages that cater to a variety of tastes and preferences.

    Ease of Preparation

    Firstly, the straightforward preparation ensures that even novice bakers can feel confident tackling this dish. It requires minimal equipment—a mixing bowl, a whisk, and a baking dish—making it easy to whip up without the need for extensive culinary tools. Plus, with just a few steps, you can create a dessert that looks and tastes gourmet.

    Health Benefits

    Many of the ingredients can be tailored to fit a more health-conscious lifestyle. For example, using dark chocolate in the brownie base adds antioxidants while keeping sugar content lower than traditional recipes. Additionally, by substituting regular cream cheese with a low-fat or dairy-free version, you can significantly reduce calories and fat without sacrificing taste.

    Another significant aspect of this recipe is its ability to offer a caffeine boost from the coffee. This energizing touch makes it an excellent choice for a quick pick-me-up during the day or as a comforting evening treat.

    Dietary Versatility

    Catering to dietary restrictions? No problem! This dessert can be adapted to various dietary needs, making it a perfect option for gatherings where guests may have specific preferences. Whether vegan, gluten-free, or low-calorie, you can easily substitute ingredients without losing that delicious flavor and texture.

    In addition to being versatile, this dessert is also visually striking. The contrast of the dark brownie with the creamy coffee cheesecake on top creates an inviting presentation that’s sure to impress. It’s this combination of ease, health benefits, and adaptability that makes the Tasty Coffee Brownie Cheesecake Dessert a showstopper in your collection of dessert recipes.

    Ingredients Overview

    Essential Ingredients for Tasty Coffee Brownie Cheesecake Dessert

    To create this delectable dessert, gather the following ingredients, ensuring you choose the best options for your dietary needs:

    Brownie Layer:

    • 1 cup all-purpose flour (or gluten-free flour blend)
    • 1 teaspoon baking powder
    • 1/4 teaspoon salt
    • 1/2 cup unsweetened cocoa powder
    • 1 cup granulated sugar (or coconut sugar for a lower glycemic option)
    • 1/2 cup melted coconut oil
    • 2 large eggs (or flaxseed meal as a vegan substitute)
    • 1 teaspoon pure vanilla extract
    • 1/2 cup semi-sweet chocolate chips (dairy-free for a vegan option)

    Cheesecake Layer:

    • 8 oz cream cheese (or dairy-free cream cheese)
    • 1/2 cup powdered sugar (or agave syrup for a lower-calorie choice)
    • 1/4 cup brewed coffee (cooled)
    • 1 teaspoon pure vanilla extract
    • 1 tablespoon lemon juice (adds tanginess)

    Topping (optional):

    • Whipped cream (dairy-free if desired)
    • Chocolate shavings or cocoa powder for garnish

    Dietary Substitutions to Customize Your Tasty Coffee Brownie Cheesecake Dessert

    This dessert recipe allows for several substitutions to accommodate different dietary choices:

    • For Vegan: Replace eggs with flaxseed meal (1 tbsp flaxseed meal + 2.5 tbsp water equals one egg). Use dairy-free cream cheese and coconut oil instead of butter.

    • For Gluten-Free: Use a gluten-free flour blend in place of all-purpose flour. Make sure to check that your chocolate chips are also gluten-free.

    • For Low-Calorie: Substitute granulated sugar with stevia or another sugar alternative in both the brownie and cheesecake layers. You can also use low-fat cream cheese instead of full-fat.

    • To Make It Nut-Free: Ensure any toppings or brands of chocolate chips are free from nuts.

    With these substitutions, this Tasty Coffee Brownie Cheesecake Dessert can be enjoyed by nearly everyone, making it a standout recipe for all occasions.

    How to Prepare the Perfect Tasty Coffee Brownie Cheesecake Dessert: Step-by-Step Guide

    Follow these simple steps to create your Tasty Coffee Brownie Cheesecake Dessert, ensuring you savor every moment of this delightful baking journey.

    1. Preheat the Oven: Begin by preheating your oven to 350°F (175°C). This sets the stage for perfectly baked brownies.

    2. Prepare the Brownie Base:

    3. In a large mixing bowl, whisk together the flour, baking powder, salt, cocoa powder, and granulated sugar until well combined.
    4. Pour in the melted coconut oil, eggs (or flaxseed mixture), and vanilla extract. Stir the mixture until smooth.
    5. Fold in the chocolate chips for that extra indulgence.

    6. Bake the Brownie Layer:

    7. Grease a 9×9-inch baking pan or line it with parchment paper.
    8. Pour the brownie batter into the prepared pan, spreading it evenly.
    9. Bake for 20-25 minutes, or until a toothpick inserted in the center comes out with a few moist crumbs.

    10. Prepare the Cheesecake Layer:

    11. In another bowl, beat the cream cheese (or dairy-free alternative) using a hand mixer until creamy and smooth.
    12. Gradually add the powdered sugar, brewed coffee, vanilla extract, and lemon juice, mixing until the filling is light and fluffy.

    13. Layer the Cheesecake:

    14. Once the brownie layer has cooled, gently spread the coffee cheesecake mixture over the brownie base using a spatula.
    15. Smooth the top to create an even layer.

    16. Chill the Dessert:

    17. Place the pan in the refrigerator and allow the dessert to chill for at least 4 hours, preferably overnight. This helps the layers set beautifully.

    18. Serve and Enjoy:

    19. Once chilled, lift the dessert from the pan using the edges of the parchment paper for easy cutting.
    20. Slice into squares or rectangles and serve. Top with whipped cream and chocolate shavings if desired.

    21. Storing Leftovers:

    22. If you have any leftover slices, store them in an airtight container in the fridge for up to 5 days. Enjoy!

    By following these steps, you’ll master the Tasty Coffee Brownie Cheesecake Dessert, a remarkable addition to your diverse repertoire of dessert recipes. The steps are designed for adaptability; you can choose whichever substitutes suit your dietary needs best.

    Mastering Tasty Coffee Brownie Cheesecake Dessert: Advanced Tips and Variations

    To elevate your Tasty Coffee Brownie Cheesecake Dessert even further, consider these advanced tips and possible variations:

    Tips for Success:

    • Quality Ingredients: Always choose high-quality chocolate and coffee for the best flavor. The better the ingredients, the richer your dessert will be.
    • Chill Time is Crucial: Do not rush the chilling process. Allowing the layers to set is key to achieving that creamy cheesecake texture.
    • Use Room Temperature Ingredients: For a smoother cheesecake filling, ensure that the cream cheese is at room temperature before mixing.

    Variations to Try:

    • Nutty Addition: Add walnuts or pecans to the brownie batter for a crunchy texture. This also enhances the flavor profile.
    • Caramel Drizzle: Drizzle some caramel sauce over the cheesecake layer before chilling for an extra indulgent experience.
    • Fruit Infusion: Incorporate chopped strawberries or raspberries into the cheesecake mixture for a fruity twist. Berries pair beautifully with coffee and chocolate!
    • Mocha Flavor: For an intense coffee experience, incorporate 1 tablespoon of instant espresso powder into the cheesecake layer.

    By incorporating these tips and variations, you can tailor this Tasty Coffee Brownie Cheesecake Dessert to suit your personal taste and impress your guests. Remember, experimenting with dessert recipes is all about creativity!

    How to Store Tasty Coffee Brownie Cheesecake Dessert: Best Practices

    Proper storage is essential to keeping your Tasty Coffee Brownie Cheesecake Dessert fresh and delicious. Here are some best practices to follow:

    Refrigeration:

    • Chilled Slices: Store the dessert in an airtight container in the refrigerator. This helps maintain its moisture and flavor. Enjoy within 5 days for the best taste.

    Freezing:

    • To Freeze: If you want to keep some slices for a later date, wrap them tightly with plastic wrap and then place them in a freezer-safe container. You can freeze the dessert for up to 3 months.
    • To Thaw: When you’re ready to enjoy, transfer it to the refrigerator and defrost it overnight. This keeps the texture intact.

    Reheating:

    • To Serve Warm: If you prefer your brownie cheesecake dessert slightly warm, you can reheat individual slices in the microwave for about 15-20 seconds. Just ensure you don’t overheat it, as the cheesecake filling can become runny.

    By following these storage tips, you can look forward to enjoying your Tasty Coffee Brownie Cheesecake Dessert long after it’s made!

    Nutritional Value of Tasty Coffee Brownie Cheesecake Dessert

    Let’s delve into the nutritional aspects of the Tasty Coffee Brownie Cheesecake Dessert. When gauging the healthfulness of dessert recipes, it’s essential to have a sensible balance of calories, fat, and other nutrients. Below is an approximate nutritional breakdown per serving (assuming 12 servings):

    • Calories: 290 – 350 kcal
    • Protein: 4 – 6 grams
    • Total Fat: 18 – 22 grams
    • Saturated Fat: 10 – 12 grams
    • Total Carbohydrates: 32 – 38 grams
    • Dietary Fiber: 1 – 2 grams
    • Sugars: 20 – 25 grams

    Health Benefits

    The dessert provides a moderate amount of protein from the cream cheese and can contain healthy fats if you use coconut oil. By substituting sugar with low-calorie alternatives, you can enjoy a flavorful dessert while keeping your sugar intake in check.

    Given these nutritional benefits, this Tasty Coffee Brownie Cheesecake Dessert is not only satisfying but can also fit into a balanced approach to desserts, especially when enjoyed in moderation.

    FAQs: Frequently Asked Questions About Tasty Coffee Brownie Cheesecake Dessert

    Can I make this dessert ahead of time?

    Absolutely! This dessert can be made a day in advance. The flavors deepen as it chills, making it even more delicious.

    What can I substitute for cream cheese?

    If you’re looking for a dairy-free option, many brands offer vegan cream cheese or cashew cream as a suitable alternative.

    Is it necessary to chill the dessert?

    Yes, chilling is crucial in setting the layers of the cheesecake and ensuring the perfect texture.

    Can I add different flavors to the cheesecake layer?

    Certainly! You can incorporate flavorings such as vanilla bean, almond extract, or even fruit purees to customize your cheesecake layer.

    How do I know when the brownies are baked?

    The brownies are done when a toothpick inserted into the center comes out with a few moist crumbs. Be mindful not to overbake, as this can lead to dry brownies.

    How long can leftovers last in the fridge?

    When stored correctly in an airtight container, leftovers can last up to 5 days in the refrigerator.

    Discovering new dessert recipes can be a delightful journey, and the Tasty Coffee Brownie Cheesecake Dessert is testament to how easy and enjoyable baking can be. This recipe not only satisfies your sweet tooth but offers flexibility for different dietary choices, making it a treat for all. Whether you’re serving it at a family gathering or enjoying it during a quiet evening at home, this dessert will surely bring joy and smiles. Happy baking!

  • The Best Millionaire Cheesecake Recipe

    The Best Millionaire Cheesecake Recipe

    The Best Millionaire Cheesecake Recipe: A Tropical Delight

    Introduction to The Best Millionaire Cheesecake Recipe

    In the world of dessert recipes, few can rival the luxurious and creamy delight of a well-made cheesecake. The Best Millionaire Cheesecake Recipe takes this classic dessert to new heights by combining rich flavors, delightful textures, and a touch of tropical freshness. Whether you are a busy parent juggling countless responsibilities, a student looking to impress friends at a gathering, or simply a dessert enthusiast wanting to indulge in something extraordinary, this recipe is tailored for you.

    Imagine a dessert that not only satisfies your sweet tooth but also caters to various dietary needs. This cheesecake can be made vegan, gluten-free, or low-calorie, making it an inclusive dish that everyone can enjoy. What sets this cheesecake apart is its versatility; it serves as a luxurious centerpiece for celebrations or a simple treat for an ordinary day. Plus, it’s straightforward enough for even novice bakers to master. Join me as we explore the full details of The Best Millionaire Cheesecake Recipe—the ultimate indulgence that is beautifully simple yet profoundly satisfying.

    Benefits and Advantages of The Best Millionaire Cheesecake Recipe

    When it comes to selecting dessert recipes that offer both delicious flavors and health-conscious benefits, The Best Millionaire Cheesecake Recipe shines brightly. One of the standout features of this cheesecake is its impressive adaptability. You can tailor it to meet specific dietary needs while still enjoying rich, creamy goodness.

    1. Simple Preparation: This cheesecake requires minimal intricate techniques, perfect for home cooks of all skill levels. With only a few key steps, busy parents and beginner bakers will find this dessert manageable, making it an excellent option for weeknight desserts or last-minute gatherings.

    2. Health Benefits: By using wholesome ingredients, such as low-fat cream cheese or plant-based cream alternatives, you can significantly reduce the calorie content without sacrificing taste. Plus, incorporating natural sweeteners like maple syrup or agave can make the cake more health-friendly while maintaining a delightful sweetness.

    3. Versatility: This cheesecake caters to a variety of dietary preferences. It can easily be adapted to fit vegan, gluten-free, or even keto diets, ensuring that everyone at your table can enjoy a slice. With a few ingredient substitutions and simple swaps, you can create a tasty dish that resonates with your guests’ dietary preferences.

    Overall, this millionaire cheesecake stands out in the crowded world of dessert recipes, providing a balance of indulgence and health, making it an ideal choice for celebrations and casual get-togethers alike.

    Ingredients Overview

    Essential Ingredients for The Best Millionaire Cheesecake Recipe

    To create The Best Millionaire Cheesecake, keep the following ingredients on hand:

    • For the Crust:
    • 1 ½ cups graham cracker crumbs (or gluten-free alternative)
    • ½ cup unsalted butter, melted (substitute with coconut oil for a vegan option)
    • ¼ cup sugar (can use coconut sugar as a healthier alternative)

    • For the Filling:

    • 3 cups cream cheese, softened (use vegan cream cheese for a dairy-free option)
    • 1 cup sugar (can substitute with a low-calorie sweetener)
    • 3 large eggs (flax eggs work for vegan versions)
    • 1 teaspoon vanilla extract
    • 1 cup heavy whipping cream (or coconut cream for vegan)

    • For Topping:

    • Fresh fruits like mango, strawberries, or passion fruit (opt for organic if possible)
    • Whipped cream (can use coconut whipped cream for a vegan option)
    • Optional: Grated chocolate or caramel drizzle

    These ingredients create a rich flavor profile while being easily customizable to cater to a range of dietary needs.

    Dietary Substitutions to Customize Your The Best Millionaire Cheesecake Recipe

    Adapting The Best Millionaire Cheesecake Recipe to fit various dietary requirements is simple with these substitutions:

    • Gluten-Free: Use gluten-free graham crackers or almond flour mixed with melted coconut oil as a crust substitute.
    • Vegan: Opt for plant-based cream cheese and flax eggs instead of traditional eggs and dairy cream. Coconut cream can provide a rich texture while keeping it plant-based.
    • Low-Calorie: Utilize low-calorie sweeteners such as erythritol or stevia in place of sugar, and even consider low-fat cream cheese to reduce calorie levels significantly.

    These adjustments not only make the cheesecake accessible for all but also allow for creativity in the kitchen.

    How to Prepare the Perfect The Best Millionaire Cheesecake Recipe: Step-by-Step Guide

    Let’s dive into the step-by-step instructions for preparing The Best Millionaire Cheesecake Recipe. This detailed guide ensures simplicity and straightforwardness, which are essential when making delicious dessert recipes.

    1. Prepare the Base:
    2. Preheat your oven to 350°F (175°C).
    3. In a mixing bowl, combine the graham cracker crumbs, melted butter, and sugar.
    4. Press the mixture evenly into the bottom of a 9-inch springform pan to create a sturdy crust.

    5. Mix Ingredients for Filling:

    6. In a separate mixing bowl, beat the cream cheese until smooth and creamy.
    7. Gradually add the sugar, and mix until well blended.
    8. Add the eggs one at a time, mixing after each addition. Then, stir in the vanilla extract.

    9. Incorporate Whipped Cream:

    10. Gently fold in the heavy whipping cream until the mixture is smooth and fluffy. This step will add lightness to your cheesecake.

    11. Pour the Filling:

    12. Pour the cream cheese mixture over the prepared crust in the springform pan. Make sure it’s evenly spread for consistent baking.

    13. Bake the Cheesecake:

    14. Place the springform pan in the preheated oven and bake for approximately 60-70 minutes, or until the center is set but slightly jiggly.
    15. Turn off the oven, crack the door open, and let the cheesecake cool gradually inside for about an hour to prevent cracks.

    16. Chill the Cheesecake:

    17. Once cooled, refrigerate the cheesecake for at least four hours, preferably overnight. Chilling is crucial for the perfect texture.

    18. Prepare the Toppings:

    19. Before serving, top with fresh fruits and whipped cream. Drizzle with caramel or chocolate if desired for an extra indulgent touch.

    20. Slice and Serve:

    21. Carefully release the cheesecake from the springform pan. Use a sharp knife for clean slices and enjoy your delicious creation!

    By following these simple steps, you are well on your way to making a delicious, show-stopping cheesecake that everyone will adore.

    Mastering The Best Millionaire Cheesecake Recipe: Advanced Tips and Variations

    Culinary exploration is part of the fun, and enhancing The Best Millionaire Cheesecake Recipe can lead to incredible results. Here are some advanced tips and variations to take your cheesecake to the next level:

    • Flavor Variations: Experiment with different flavors by adding lemon zest for a citrusy twist or espresso powder for a mocha vibe. You can also swirl in fruit preserves or chocolate for added sophistication.

    • Add Texture: Try incorporating crushed nuts or a sprinkle of granola on top for added crunch. This adds a delightful contrast to the smooth creaminess of the cheesecake.

    • Mini Cheesecakes: For portion control, create mini version cheesecakes using muffin tins. Simply cut the baking time down to about 20-25 minutes.

    • No-Bake Alternative: Prefer a no-bake version? Follow the same process for the crust and filling but skip the baking step. Simply let the cheesecake set in the refrigerator for at least 6 hours.

    By experimenting with these tips and variations, you can create a signature cheesecake that reflects your tastes while delighting friends and family alike.

    How to Store The Best Millionaire Cheesecake Recipe: Best Practices

    Proper storage of your Millionaire Cheesecake is crucial to maintain its flavor and texture. Here are the best practices for refrigeration and freezing:

    • Refrigerating: Keep your cheesecake in the refrigerator for up to one week. Store it in an airtight container or cover it with plastic wrap to prevent it from absorbing other flavors.

    • Freezing: If you want to enjoy this cheesecake later, it can be frozen for up to three months. To freeze, ensure it’s completely cooled, then wrap it tightly in plastic wrap and aluminum foil. Thaw in the fridge overnight before serving.

    • Reheating: If you prefer your cheesecake slightly warm, you can gently reheat slices in the microwave for about 15-20 seconds. Avoid overheating, as it may alter the texture.

    By following these storage tips, you can ensure that The Best Millionaire Cheesecake Recipe remains fresh and delightful for as long as possible.

    Nutritional Value of The Best Millionaire Cheesecake Recipe

    Understanding the nutritional information of desserts is critical for health-conscious individuals. Here’s a breakdown of the nutritional value per slice (assuming 12 servings):

    • Calories: Approximately 360
    • Protein: 6g
    • Fat: 23g
    • Carbohydrates: 28g
    • Fiber: 1g
    • Sugar: 15g

    This cheesecake offers a balance of satisfying flavors while maintaining a reasonable calorie count, especially if you opt for lower-calorie and healthier ingredient substitutes.

    FAQs: Frequently Asked Questions About The Best Millionaire Cheesecake Recipe

    1. Can I make this cheesecake gluten-free?
    2. Absolutely! Substitute the graham cracker crust with gluten-free alternatives such as almond flour.

    3. How long should I refrigerate the cheesecake before serving?

    4. Refrigerate your cheesecake for at least four hours but for best results, overnight chilling is recommended.

    5. Can this cheesecake be made vegan?

    6. Yes, you can use plant-based cream cheese and flax eggs to make a delicious vegan version.

    7. What are some topping ideas?

    8. Fresh fruits, various flavored whipped creams, or chocolate drizzle make wonderful toppings. Feel free to mix and match!

    9. Can I freeze the cheesecake?

    10. Yes! Make sure it’s well-wrapped, and it can be frozen for up to three months. Thaw it in the refrigerator before serving.

    By addressing these common questions, readers can feel more confident in creating The Best Millionaire Cheesecake Recipe while navigating their dietary restrictions and preferences.

    The delightful, creamy nature of this cheesecake is only rivaled by its versatility, making it a beloved choice for dessert lovers everywhere. Happy baking!

  • Cozy Garlic Bread Grilled Cheese

    Cozy Garlic Bread Grilled Cheese

    Cozy Garlic Bread Grilled Cheese: A Tropical Delight

    Introduction to Cozy Garlic Bread Grilled Cheese

    When you’re searching for easy dinner recipes, look no further than this Cozy Garlic Bread Grilled Cheese. This delightful dish combines the warmth of a classic grilled cheese with the robust flavor of garlic bread, creating a satisfying meal that is both comforting and indulgent. This recipe is perfect for home cooks looking to impress their families or anyone who craves a quick, delicious option after a long day. Its simplicity doesn’t compromise quality; instead, it makes cooking joyful, whether you’re a novice or an experienced chef.

    Garlic Bread Grilled Cheese is not just about flavor; it offers several health benefits as well. By using whole grain bread and a moderate amount of cheese, you create a dish rich in nutrients, including fiber and protein. For those following specific dietary needs—be it vegan, gluten-free, or low-calorie—this recipe can be easily adjusted without sacrificing taste.

    With its inviting aroma and golden crust, Cozy Garlic Bread Grilled Cheese is suitable for anyone. Busy parents can whip it up for dinner in no time, while college students can enjoy a nourishing meal that’s quick to prepare. Additionally, its versatility makes it a welcome addition for food enthusiasts wanting to explore new flavors, seniors who appreciate simple yet satisfying meals, and couples who desire a romantic meal without the fuss. Your taste buds will thank you for giving this recipe a try!

    Benefits and Advantages of Cozy Garlic Bread Grilled Cheese

    One of the best things about this easy dinner recipe is its uncomplicated preparation. With minimal ingredients, you don’t need to spend hours in the kitchen. This cozy dish can be made in less than 20 minutes, making it an excellent choice for busy weeknights or spontaneous gatherings with friends.

    From a health perspective, Cozy Garlic Bread Grilled Cheese can be made with nutritious ingredients. Opting for whole grain or gluten-free bread adds fiber to your meal, while choosing reduced-fat cheese can result in a lower-calorie version that’s still incredibly satisfying. Garlic also offers numerous health benefits, including its antioxidant properties and ability to improve immunity.

    Moreover, this recipe stands out because of its adaptability. You can easily modify it to suit dietary preferences or restrictions, ensuring that everyone at the table can enjoy it. Whether you’re a vegan substitute cheese for dairy or seeking gluten-free options, the possibilities are endless. Adding in vegetables like spinach, tomatoes, or avocados can also increase its nutritional value while introducing exciting flavors.

    In summary, the Cozy Garlic Bread Grilled Cheese is a fantastic choice for an easy dinner option that not only meets your culinary needs but also indulges your cravings. Its simplicity, health benefits, and versatility make it a dish you can feel good about serving to anyone.

    Ingredients Overview

    Essential Ingredients for Cozy Garlic Bread Grilled Cheese

    To prepare this mouthwatering dish, gather the following ingredients:

    • Bread (4 slices):
      Use whole grain or gluten-free bread for healthier options. This provides the perfect crispy base.

    • Butter (2 tablespoons):
      For that classic grilled cheese taste. You can opt for vegan butter if you’d like a dairy-free version.

    • Garlic powder (1 teaspoon):
      Adds that essential garlic flavor. Fresh garlic can be used as a substitute for a stronger taste.

    • Cheese (4 slices or 1 cup shredded):
      Cheddar or mozzarella work well here, but feel free to substitute with vegan cheese for a dairy-free meal.

    • Optional Add-ins:

    • Spinach or arugula (a handful) for added nutrients.
    • Sliced tomatoes (1-2) for a refreshing twist.
    • Avocado (half) for creaminess and healthy fats.

    By utilizing these ingredients, you’re able to craft a tantalizing and comforting grilled cheese sandwich that appeals to multiple dietary needs.

    Dietary Substitutions to Customize Your Cozy Garlic Bread Grilled Cheese

    • Vegan Option:
      Choose plant-based cheese and use vegan butter for the bread. You can enhance the recipe with nutritional yeast to give an extra cheesy flavor.

    • Gluten-Free Option:
      Opt for gluten-free bread varieties available on the market. This allows those with gluten sensitivities to enjoy this delightful dish without worry.

    • Low-Calorie Option:
      Replace regular cheese with low-fat cheese and use less butter. You can also load up on veggies for more volume without adding calories.

    • Nut-Free Option:
      Ensure you select cheese that doesn’t contain nut-based ingredients and avoid using any nut-based spreads.

    These substitutions ensure everyone can enjoy Cozy Garlic Bread Grilled Cheese, regardless of dietary restrictions or preferences.

    How to Prepare the Perfect Cozy Garlic Bread Grilled Cheese: Step-by-Step Guide

    Ready to indulge in some cozy goodness? Here’s how to prepare a perfect Cozy Garlic Bread Grilled Cheese in just a few simple steps:

    1. Prepare the Bread:
      Start by laying out four slices of your chosen bread on a clean surface.

    2. Mix Garlic Butter:
      In a small bowl, combine the softened butter with the garlic powder. Mix thoroughly until well blended.

    3. Spread Garlic Mixture:
      Evenly spread the garlic butter mix onto one side of each slice of bread. This gives your grilled cheese that iconic garlic bread flavor.

    4. Assemble the Sandwich:
      On the unbuttered side of two slices, layer your cheese. If using add-ins (such as spinach or tomatoes), place them on top of the cheese before placing another slice of bread on top.

    5. Heat the Pan:
      Preheat a skillet over medium heat. Allow it to warm up for a minute.

    6. Place the Sandwich:
      Carefully lay the assembled sandwiches in the skillet, buttered side down. Cook for about 2-4 minutes until the bread turns golden brown.

    7. Flip Carefully:
      Using a spatula, gently flip the sandwiches over. Toast the other side for an additional 2-4 minutes or until it reaches your desired doneness.

    8. Check the Cheese:
      Once both sides are golden and crispy, and the cheese is melted, remove the sandwiches from the skillet.

    9. Serve with a Twist:
      Slice the Cozy Garlic Bread Grilled Cheese in half and serve hot. Consider pairing it with a warm bowl of tomato soup for a classic combo.

    10. Garnish (Optional):
      Sprinkle fresh herbs or a pinch of additional garlic powder to amp up the flavors even more.

    By following these steps, you can enjoy an easy dinner recipe that brings comfort and satisfaction with every bite!

    Mastering Cozy Garlic Bread Grilled Cheese: Advanced Tips and Variations

    To elevate your Cozy Garlic Bread Grilled Cheese experience, keep a few advanced tips in mind:

    • Use Different Cheeses:
      Explore combining different cheese varieties such as Gouda, pepper jack, or feta for a unique flavor profile.

    • Experiment with Breads:
      Try brioche, sourdough, or ciabatta for a twist on the traditional grilled cheese. Each type of bread gives a different texture and flavor.

    • Add Herbs and Spices:
      Incorporating herbs such as basil, oregano, or crushed red pepper flakes can enhance the taste.

    • Flavor Infused Butters:
      Create compound butters with herbs or chili flakes. These can add depth to your sandwiches that elevate them beyond the ordinary.

    • Change the Cooking Method:
      While skillet cooking is traditional, consider using a panini press or even baking the sandwiches in the oven for a hands-off approach.

    These tips will allow you to master your cozy garlic bread grilled cheese and make each meal a new experience.

    How to Store Cozy Garlic Bread Grilled Cheese: Best Practices

    If you find yourself with leftovers, or if you want to prep ahead of time, here are the best storage practices:

    Refrigeration:

    • Allow the grilled cheese to cool completely before placing it in an airtight container. It can stay fresh in the fridge for up to 3 days.

    Freezing:

    • For longer storage, wrap each sandwich individually in plastic wrap or aluminum foil, then place them in a freezer bag or container. They can be stored in the freezer for up to a month.

    Reheating:

    • To reheat, simply place the sandwich in a skillet over medium heat until warmed through and crispy again. Alternatively, you can pop it in the toaster oven for a few minutes. Avoid microwave reheating as it can result in a soggy sandwich.

    By following these storage methods, your Cozy Garlic Bread Grilled Cheese remains delightful, ensuring you can enjoy this easy dinner recipe any day of the week!

    Nutritional Value of Cozy Garlic Bread Grilled Cheese

    Understanding the nutritional value of your meal is essential for health-conscious individuals. Here’s a rough breakdown of the nutritional content for a serving of Cozy Garlic Bread Grilled Cheese using standard ingredients:

    • Calories: Approximately 350-450 (may vary based on ingredients used)
    • Fat: 18g (with options for reduced fat depending on cheese and butter choices)
    • Saturated Fat: 10g
    • Carbohydrates: 30-40g
    • Fiber: 3g
    • Protein: 15g
    • Vitamins and Minerals: Including calcium (from the cheese) and iron (from whole grain bread)

    Always adjust these numbers based on the specific brands and ingredients you choose for your grilled cheese. The recipe can be tailored to meet different dietary goals, making it a versatile option for those focusing on nutrition.

    FAQs: Frequently Asked Questions About Cozy Garlic Bread Grilled Cheese

    1. Can I use any type of cheese?
    Yes, you can use a variety of cheeses! Popular choices include cheddar, mozzarella, gouda, or even vegan cheese for dairy-free options.

    2. How can I make this gluten-free?
    Simply substitute regular bread with gluten-free bread that suits your taste.

    3. Is it possible to make this dish in advance?
    Absolutely! You can prepare the sandwiches and refrigerate them before cooking. Just heat them in the skillet when you’re ready to eat.

    4. What can I serve with Cozy Garlic Bread Grilled Cheese?
    Pair it with tomato soup, a crispy salad, or any of your favorite dips to complement the grilled cheese.

    5. Is it suitable for children?
    Yes! Kids typically love the cheesy, crispy goodness of this dish. You can also sneak in some veggies for added nutrition.

    By addressing these common questions, you’ll feel more confident in preparing and enjoying your Cozy Garlic Bread Grilled Cheese. Now that you are equipped with all this information, it’s time to gather those ingredients and get cooking. Enjoy your meal!

  • Tasty BBQ Chicken Ranch Bowl

    Tasty BBQ Chicken Ranch Bowl

    Tasty BBQ Chicken Ranch Bowl: A Tropical Delight

    Introduction to Tasty BBQ Chicken Ranch Bowl

    Are you looking for a mouthwatering and satisfying meal that checks all the boxes for flavor, health, and simplicity? Look no further than the Tasty BBQ Chicken Ranch Bowl. This dish is not just another entry in the vast world of chicken recipes; it combines succulent barbecue chicken with fresh veggies and creamy ranch dressing, creating a culinary experience that excites the palate. The great thing about this dish is that it caters to various dietary needs—making it suitable for busy parents, health-conscious individuals, and food enthusiasts alike.

    Preparing the Tasty BBQ Chicken Ranch Bowl is a breeze, saving you valuable time in the kitchen without sacrificing flavor or nutrition. It’s versatile enough to accommodate gluten-free, vegan, and low-calorie diets while still being delicious. The mix of smoky barbecue sauce with the creamy ranch dressing elevates the dish, making it a tropical-like delight that transports your taste buds straight to the summer fiesta.

    This recipe not only serves as a filling meal but also provides benefits such as high protein content and an array of essential vitamins from fresh vegetables. Whether you are a student juggling classes, a newlywed planning your first meals together, or a working professional needing quick and healthy recipes, the Tasty BBQ Chicken Ranch Bowl is here to impress. Plus, its brilliant presentation makes it an ideal choice for your next gathering or meal prep session.

    Benefits and Advantages of Tasty BBQ Chicken Ranch Bowl

    One of the most significant advantages of the Tasty BBQ Chicken Ranch Bowl is its ease of preparation. This recipe is designed for those who may feel overwhelmed in the kitchen. It requires minimal cooking skills and can be made in under 30 minutes, making it ideal for busy weeknights or quick lunches. Not to mention, it requires common ingredients that you can easily find at your local grocery store or even have on hand at all times.

    From a health standpoint, this bowl is packed with protein from the chicken, combined with wholesome vegetables that enhance its nutritional profile. The fresh greens provide fiber, while the ranch dressing offers a delightful experience without excessive calories. The balance of these elements makes this dish not only satisfying but also beneficial for weight management and overall health, allowing you to indulge in a delicious meal without the guilt.

    Another standout quality of this recipe is its adaptability. If you are following specific dietary preferences—be it vegan, gluten-free, or low-carb—the Tasty BBQ Chicken Ranch Bowl can be easily modified to fit your needs. The recipe allows for ingredient substitutions without compromising on taste, making it a favorite among diverse audiences. What’s more, its stunning color palette and layered presentation bring an irresistible appeal to your dining table.

    In summary, the Tasty BBQ Chicken Ranch Bowl is:

    • Quick to make and easy to prepare, perfect for busy lifestyles
    • Nutritionally balanced, combining protein, fiber, and healthy fats
    • Versatile enough to cater to various dietary restrictions and preferences
    • Visually appealing, making it a snack, meal prep, or gathering star

    Ingredients Overview

    Essential Ingredients for Tasty BBQ Chicken Ranch Bowl

    To create your delicious Tasty BBQ Chicken Ranch Bowl, you’ll need the following ingredients:

    • 2 cups cooked chicken breast, shredded or diced (for protein)
    • 1 cup BBQ sauce (use your favorite brand; look for gluten-free options if desired)
    • 2 cups lettuce (romaine or mixed greens) (for fiber and vitamins)
    • 1 cup cherry tomatoes, halved (adds freshness and vitamin C)
    • 1 avocado, diced (for healthy fats)
    • 1 cup corn (fresh, frozen, or canned) (adds sweetness and color)
    • ½ cup black beans, drained and rinsed (for added fiber and protein)
    • ½ cup ranch dressing (store-bought or homemade; look for lighter versions for lower calorie)
    • Salt and pepper, to taste

    Optional Toppings:

    • Cheddar cheese, shredded (adds flavor; can also use a dairy-free version)
    • Green onions, chopped (for an aromatic touch)
    • Jalapeños, sliced (if you like some heat)

    This bowl not only focuses on great taste but also on wholesome ingredients, allowing you to enjoy a nutritious meal. All items can be adjusted based on dietary restrictions, ensuring everyone at your table can enjoy it.

    Dietary Substitutions to Customize Your Tasty BBQ Chicken Ranch Bowl

    To make the Tasty BBQ Chicken Ranch Bowl adaptable for different dietary needs, consider these substitutions:

    • For a Vegan Option: Substitute chicken with grilled tofu or tempeh and use a vegan BBQ sauce along with a cashew-based or vegan ranch dressing. You can add roasted chickpeas for added protein.

    • For a Gluten-Free Meal: Make sure to use a certified gluten-free BBQ sauce and ranch dressing, as many store-bought varieties may contain gluten.

    • For Low-Calorie Diets: Opt for baked or grilled chicken instead of fried, use low-fat ranch dressing, or replace corn with diced cucumbers.

    • For Keto Diets: Swap the beans for extra grilled vegetables like zucchini or bell peppers to lower carb count while still keeping the meal filling.

    These substitutions allow you to cater to various dietary preferences while still providing a delicious and nourishing meal option for everyone.

    How to Prepare the Perfect Tasty BBQ Chicken Ranch Bowl: Step-by-Step Guide

    Creating a Tasty BBQ Chicken Ranch Bowl is simple and straightforward. Follow these easy steps to prepare your delicious meal:

    1. Prepare the Chicken: If you haven’t done so already, cook the chicken breast until fully cooked (165°F internal temperature). You can poach, grill, or bake it for a juicy result.

    2. Shred the Chicken: Once cooked, let it cool slightly, and then shred or dice it into bite-sized pieces. If you’re using pre-cooked or rotisserie chicken, simply shred it and set aside.

    3. Mix the BBQ Sauce: In a mixing bowl, combine shredded chicken with BBQ sauce. Use enough sauce to coat the chicken thoroughly and enhance its flavor. Set aside for a few minutes to let the flavors meld.

    4. Prepare the Base: In a large serving bowl, lay a bed of mixed greens and romaine lettuce. This provides a crisp and refreshing base.

    5. Add the Toppings: Layer the other ingredients on top of the greens. Start with cherry tomatoes, corn, black beans, and diced avocado, distributing them evenly across the bowl.

    6. Include Chicken Mixture: Spoon the BBQ chicken over your prepared base and toppings. Be generous with the portion to ensure every bite is packed with flavor.

    7. Drizzle Ranch Dressing: Lightly drizzle ranch dressing over the top of the bowl. Use as much as you like, but remember you can always serve extra on the side.

    8. Finish with Seasoning: Season your bowl with salt and pepper to taste. You may also add sliced jalapeños or fresh herbs for an extra kick or freshness.

    9. Top it Off: If desired, sprinkle shredded cheese and chopped green onions on top for added flavor and color.

    10. Serve and Enjoy: Toss the ingredients together gently if you like, or serve it as is for an appealing presentation. Enjoy your Tasty BBQ Chicken Ranch Bowl immediately, or store it for later enjoyment.

    It is that easy! Throughout the preparation steps, consider any dietary preferences, ensuring the dish meets the needs of everyone at your table.

    Mastering Tasty BBQ Chicken Ranch Bowl: Advanced Tips and Variations

    For those looking to take their Tasty BBQ Chicken Ranch Bowl to the next level, here are some advanced tips and creative variations to try:

    • Grill Your Veggies: For added depth of flavor, grill the corn and cherry tomatoes beforehand. This caramelization enhances their sweetness and adds a smoky element that pairs well with the BBQ chicken.

    • Experiment with Dressings: Instead of ranch, try using spicy chipotle yogurt dressing for a smoky kick or a balsamic vinaigrette for a tangier profile. The dressing you choose can dramatically change the dish’s taste.

    • Add Different Proteins: Beyond chicken, consider adding shrimp or beef for alternative protein options. You could also make a meatless bowl by using hearty legumes like lentils or chickpeas.

    • Incorporate Seasonal Ingredients: Take advantage of seasonal produce by incorporating items like grilled zucchini in summer or roasted butternut squash in autumn. Variability keeps the recipe interesting throughout the year.

    • Make it a Wrap: If you’re feeling creative, turn your bowl into a wrap by using tortillas. Fill the tortillas with the same ingredients for a delicious portable meal option that’s perfect for lunch or a picnic.

    • Spice it Up: For those who enjoy heat, toss in your favorite hot sauce or use spicy BBQ sauce. You could also sprinkle crushed red pepper flakes or chili lime seasoning for an extra kick.

    These variations and tips can help keep the Tasty BBQ Chicken Ranch Bowl exciting every time you make it. Don’t hesitate to experiment; you may discover a personal favorite twist you never knew you needed.

    How to Store Tasty BBQ Chicken Ranch Bowl: Best Practices

    Storage is essential when it comes to meal prep, and the Tasty BBQ Chicken Ranch Bowl is no exception. Follow these best practices to keep your bowl fresh and delicious:

    1. Refrigerating Leftovers: If you have any leftovers, allow the bowl to cool completely before storing it. Place the ingredients in an airtight container separated if necessary (for example, keep dressing separate to avoid sogginess). Stored this way, it can last up to 3-4 days in the refrigerator.

    2. Freezing for Future Meals: If you want to store the bowl for longer, consider freezing the BBQ chicken separately from the fresh ingredients. Use freezer bags or suitable containers, ensuring to remove any excess air, and label them with the date. The chicken should keep well for 2-3 months in the freezer.

    3. Reheating Guidelines: When ready to eat, simply thaw the chicken in the refrigerator overnight (if frozen), and heat it in the microwave or on the stovetop until warmed through. For those pressed for time, heating the chicken in the microwave will do, though it may not maintain the ideal texture.

    4. Fresh Add-ins: Always prepare the fresh ingredients such as lettuce and avocado just before serving to keep your bowl crisp and flavorful.

    By following these practices, your Tasty BBQ Chicken Ranch Bowl will remain as wholesome and delicious as when it was first made, allowing you to enjoy it even days later.

    Nutritional Value of Tasty BBQ Chicken Ranch Bowl

    Understanding the nutritional breakdown of the Tasty BBQ Chicken Ranch Bowl can help you make informed choices. Here’s a rough estimation of the nutritional content per serving (approximately, based on the ingredients mentioned):

    • Calories: 470-550 kcal (depending on the type and amount of dressing used)
    • Protein: 40-50g (from chicken and optional cheese or beans)
    • Carbohydrates: 40-55g (primarily from corn, beans, and veggies)
    • Fat: 20-30g (largely from avocado and dressing)
    • Fiber: 8-10g (from beans, corn, and leafy greens)

    Vitamins and Minerals:
    Vitamin A: High, thanks to the greens and tomatoes
    Vitamin C: Present in tomatoes and corn
    Calcium: If cheese is included
    Iron: From black beans and chicken

    These nutritional values may vary depending on the precise ingredients used and portion sizes. However, the general profile indicates a balanced meal loaded with protein, healthy fats, and essential vitamins. This bowl can be a fantastic addition to a health-conscious diet while still being incredibly satisfying.

    FAQs: Frequently Asked Questions About Tasty BBQ Chicken Ranch Bowl

    1. Can I make this bowl in advance?

    Absolutely! This dish is perfect for meal prep. Store the chicken and ranch dressing separately from the fresh ingredients for maximum freshness.

    2. What can I substitute if I don’t like ranch dressing?

    Try alternatives such as Greek yogurt, chipotle sauce, or even tahini dressing to best suit your taste preferences.

    3. Is it suitable for meal prep?

    Yes, the Tasty BBQ Chicken Ranch Bowl is great for meal prepping. Just keep the dressing separate to avoid sogginess beforehand.

    4. Can I use different proteins instead of chicken?

    Certainly! Feel free to swap the chicken for grilled shrimp, beef, or even incorporate a plant-based alternative like tofu or chickpeas.

    5. Are there vegan options available for this dish?

    Yes, you can replace chicken with grilled tofu and use a vegan BBQ sauce along with a dairy-free ranch dressing.

    6. How do I make it gluten-free?

    Double-check that all sauces used are gluten-free, as some commercial dressings may contain gluten ingredients.

    7. Can I freeze leftovers?

    Yes! However, try to store the fresh ingredients separately. The chicken can be frozen for up to 3 months, thawed, and reheated when you’re ready to eat.

    This Tasty BBQ Chicken Ranch Bowl is designed with flexibility in mind, ensuring it fits seamlessly into anyone’s lifestyle while delivering bold flavors. Whether it’s a casual weeknight dinner or an elegant meal prep for a busy week, you will find reasons to keep this recipe close at hand. Enjoy the deliciousness and health benefits this meal has to offer!

  • Easy Street Corn Chicken Rice Bowl

    Easy Street Corn Chicken Rice Bowl

    Easy Street Corn Chicken Rice Bowl: A Tropical Delight

    Introduction to Easy Street Corn Chicken Rice Bowl

    Are you looking for easy dinner recipes that are not only simple to prepare but also packed with flavor and nutrition? Look no further! The Easy Street Corn Chicken Rice Bowl is the perfect dish that combines wholesome ingredients while celebrating vibrant flavors. This recipe features tender grilled chicken, sweet corn, and fluffy rice all topped with a zesty lime dressing. Not only is this bowl a feast for the eyes, but it’s also immensely satisfying, making it a great choice for busy weeknights.

    One of the best aspects of this recipe is its versatility. Whether you’re a busy parent trying to get dinner on the table quickly or a health-conscious individual seeking a balanced meal, this dish ticks all the boxes. It’s gluten-free and can easily be adapted for vegans by swapping chicken for plant-based protein sources. Packed with protein, fiber, and vital nutrients, this dish supports a healthy lifestyle while being utterly delicious.

    In this article, we’ll explore the preparation of Easy Street Corn Chicken Rice Bowls in detail. We’ll walk you through the ingredients, step-by-step instructions, and tips to customize this delectable recipe to meet your dietary needs. So, grab your apron and get ready to take your culinary skills to new heights!

    Benefits and Advantages of Easy Street Corn Chicken Rice Bowl

    Creating flavorful and nutritious meals at home doesn’t have to be complicated. The Easy Street Corn Chicken Rice Bowl is an exemplification of just how simple and enjoyable cooking can be. This recipe shines in various important areas:

    1. Ease of Preparation

    One of the standout features of this bowl is its straightforward preparation. With minimal cooking techniques involved, even novice cooks can create a delightful meal in under 30 minutes. The use of readily available ingredients means you won’t spend hours searching for hard-to-find items.

    2. Health Benefits

    Packed with fresh ingredients, this bowl is a powerhouse of nutrition. Chicken provides lean protein, while corn contributes antioxidants, vitamins, and minerals. These nutrients work together to support muscular health and boost your immune system. The addition of lime juice not only amplifies flavor but also offers a dose of vitamin C – essential for overall health.

    3. Adaptability

    Another significant advantage of this recipe is its versatility. From gluten-free diets to vegetarian or vegan lifestyles, the Easy Street Corn Chicken Rice Bowl is easily customizable. You can adjust the ingredients to fit your dietary preferences, ensuring that everyone at your table can enjoy this delicious meal.

    4. Budget-Friendly

    In today’s economic climate, creating meals that are kind to your wallet is essential. This bowl incorporates budget-friendly ingredients that demand little while delivering big on flavor. Bulk cooking is also an option, making meal prepping a breeze.

    Overall, the Easy Street Corn Chicken Rice Bowl epitomizes a wholesome yet easy-to-make meal option. It’s ideal for busy individuals looking to prepare healthy homemade dinners without sacrificing taste.

    Ingredients Overview

    Essential Ingredients for Easy Street Corn Chicken Rice Bowl

    Here’s a detailed list of the ingredients you will need to make the Easy Street Corn Chicken Rice Bowl:

    For the Chicken and Rice:

    1. 1 pound boneless, skinless chicken breasts: This lean protein serves as the main ingredient, providing flavor and nourishment.
    2. 2 cups cooked rice (white, brown, or quinoa for a gluten-free option): This forms the base of your bowl. Quinoa adds extra protein and fiber.
    3. 1 cup fresh or frozen corn: Adds a pop of sweetness and is packed with antioxidants.
    4. 1 tablespoon olive oil: For cooking the chicken and adding healthy fats.
    5. 2 cloves garlic, minced: Provides flavor depth; optional for a milder dish.
    6. Salt and pepper to taste: Basic seasonings that enhance all other flavors.

    For the Dressing:

    1. Juice of 2 limes: Adds acidity, balancing the richness of the chicken and providing vitamin C.
    2. 1 tablespoon honey or agave syrup (for a vegan version): Sweetness that complements the tangy flavors.
    3. 1 teaspoon chili powder: Optional for a zesty kick.

    Dietary Substitutions to Customize Your Easy Street Corn Chicken Rice Bowl

    1. Chicken to Tofu or Tempeh (Vegan option): For a plant-based version, substitute chicken with grilled tofu or tempeh. Their texture absorbs flavors well, making them a worthy substitute.
    2. Rice swap: Consider using cauliflower rice for a low-carb dish or a wild rice blend adding different textures and flavors.
    3. Corn Alternatives: If corn isn’t available or if you have a sensitivity, zucchini or bell peppers can be a great substitute. They retain the crunchy texture and pair well with the rest of the ingredients.

    These substitutions make the recipe accessible and enjoyable for virtually any dietary preference.

    How to Prepare the Perfect Easy Street Corn Chicken Rice Bowl: Step-by-Step Guide

    Creating your Easy Street Corn Chicken Rice Bowl is straightforward and rewarding. Follow these easy steps for a fantastically delicious dinner.

    1. Prepare the Base

    In a medium-sized pot, cook your rice according to package instructions. If using quinoa, rinse it to remove bitterness, then cook following quinoa four parts water to one part grain for approximately 15-20 minutes. This provides a nutritious base for the bowl.

    2. Marinate the Chicken

    In a bowl, combine olive oil, minced garlic, salt, and pepper. Add the chicken breasts, tossing them to coat evenly. Let them marinate for at least 15 minutes. This allows the flavors to infuse, making the chicken juicy and flavorful.

    3. Cook the Chicken

    Heat a grill pan or skillet over medium-high heat. Once hot, add the marinated chicken breasts. Cook for about 7-8 minutes on each side until the chicken is golden brown and cooked through. A meat thermometer inserted should read 165°F (75°C). Remove from heat and allow to rest for a few minutes before slicing.

    4. Sauté the Corn

    In the same skillet, add your corn and cook on medium heat for about 3-4 minutes. This quick sauté brings out the natural sweetness of the corn.

    5. Prepare the Dressing

    In a small mixing bowl, whisk together lime juice, honey, and chili powder (if using). Adjust to your taste preferences. This dressing adds a tangy zest to our rice bowl.

    6. Assemble the Bowl

    Now it’s time for the fun part! In serving bowls, layer cooked rice first. Top it with sliced chicken, sautéed corn, and any additional ingredients you like, such as diced avocado or black beans for added protein.

    7. Drizzle and Enjoy

    Finally, drizzle your prepared lime dressing over the top and garnish with fresh herbs like cilantro or parsley. Serve immediately, enjoy a delightful explosion of flavors and colors!

    Feel free to mix these steps up to suit your taste preferences, and remember: these easy dinner recipes are meant to inspire creativity in the kitchen!

    Mastering Easy Street Corn Chicken Rice Bowl: Advanced Tips and Variations

    To elevate your Easy Street Corn Chicken Rice Bowl further, consider these advanced tips and delicious variations:

    1. Add Spice Variations: For those who enjoy a spicier kick, consider adding diced jalapeños to the sautéed corn or mixing in some hot sauce into the dressing.

    2. Experiment with Toppings: Enhance texture with toppings like crushed tortilla chips, seeds, or nuts. Toasting these ingredients can amplify their flavor.

    3. Explore Other Proteins: Chicken isn’t your only option! Grilled shrimp, diced tempeh, or even canned chickpeas can be deliciously substituted for a different protein experience.

    4. Make It a Burrito Bowl: Take your flavors further by making this dish into a burrito bowl, complete with black beans, salsa, shredded lettuce, and cheese.

    5. Use Fresh Produce: Seasonal vegetables add vibrant color and provide additional nutrients. Consider toppings like radishes, cherry tomatoes, or sliced cucumbers to keep things fresh and exciting.

    Remember, the key to mastering this recipe lies in your creativity and the flexibility to tweak it according to what you love most!

    How to Store Easy Street Corn Chicken Rice Bowl: Best Practices

    To keep your Easy Street Corn Chicken Rice Bowl fresh and safe to eat, follow these storage guidelines:

    1. Refrigeration: Once prepared, store any leftovers in an airtight container in the refrigerator. It keeps well for about 3-4 days—ideal for meal prep!

    2. Freezing: If you plan to make it ahead, you can freeze the chicken and corn mix separately. Freeze in individual portions, ensuring there’s no excess air in the containers to avoid freezer burn. Ideally, consume frozen meals within 2-3 months for the best taste.

    3. Reheating Tips: To reheat, simply thaw in the refrigerator overnight, then warm it up in the microwave or a hot skillet. Add a splash of water or oil to prevent dryness.

    By following these best practices, you will enjoy delicious street corn chicken rice bowls again without compromising quality, flavor, or safety!

    Nutritional Value of Easy Street Corn Chicken Rice Bowl

    Understanding what’s in your meal can enhance your culinary experience! Here’s a breakdown of the nutritional value for one serving of Easy Street Corn Chicken Rice Bowl (approximate values):

    • Calories: 450-500 calories
    • Protein: 35-40g
    • Fat: 10-15g (depending on the cooking oil used)
    • Carbohydrates: 60g
    • Fiber: 5g

    This bowl is not only filling but also provides significant protein content essential for muscle building and repair. The inclusion of corn gives you vitamins A and C while the rice enhances your energy levels with carbohydrates.

    Perfect for busy weeknights and health-conscious individuals, this Easy Street Corn Chicken Rice Bowl aligns with nutritional goals while satisfying hunger effectively.

    FAQs: Frequently Asked Questions About Easy Street Corn Chicken Rice Bowl

    1. Can I make this recipe vegetarian?

    Absolutely! Substitute the chicken with grilled tofu or chickpeas for a protein-packed vegetarian option.

    2. Is this recipe gluten-free?

    Yes! Just ensure that the rice is gluten-free (most rice is). Additionally, confirm the ingredients in your chosen dressing do not contain gluten.

    3. How long can I store leftovers?

    Leftovers can be stored in an airtight container in the refrigerator for 3-4 days. For longer storage, freeze it as detailed above.

    4. Can I use frozen corn in this recipe?

    Definitely! Frozen corn works just as well and requires less preparation. Just sauté for a few minutes until heated through.

    5. How can I adjust the spice level?

    You can easily tailor the spice level by adjusting the amount of chili powder or adding jalapeños for heat. For a milder version, reduce or omit spicy ingredients.

    6. What can I add for extra flavor?

    Consider adding fresh herbs like cilantro or parsley, avocado, or even a sprinkle of cheese for that creamy factor. Fresh salsas or guacamole can also elevate the dish.

    7. Is this recipe kid-friendly?

    Yes! Kids often love the sweet corn combined with chicken over rice. It’s customizable, so you can easily adjust the flavors and spice levels to suit young palates.

    By using this helpful FAQ section, readers can gain clarity on various aspects of creating the Easy Street Corn Chicken Rice Bowl, ensuring a smooth cooking experience.

    Enjoy experimenting with the Easy Street Corn Chicken Rice Bowl, and watch as it quickly becomes one of your favorite easy dinner recipes! Whether for a quick weeknight meal or a family gathering, this dish will satisfy and surprise everyone at your table. Happy cooking!

  • Cozy Spanish Garlic Soup Recipe

    Cozy Spanish Garlic Soup Recipe

    Cozy Spanish Garlic Soup Recipe: A Tropical Delight

    Introduction to Cozy Spanish Garlic Soup Recipe

    Are you looking for a delightful, simple, and healthy recipe to warm your soul? Look no further! The Cozy Spanish Garlic Soup is a standout among soup recipes, offering a perfect balance of rich flavors and nutritional benefits. This soup, rooted in the traditions of Spanish cuisine, is not only easy to prepare but also accommodates a variety of dietary needs, making it an ideal dish for everyone, whether you’re a busy parent, a health-conscious student, or a seasoned food enthusiast.

    This delectable soup features roasted garlic, creating a smooth and comforting base that warms your body and spirit. The recipe is naturally vegan and gluten-free, catering to both dietary restrictions and preferences. If you’re looking to incorporate more immune-boosting foods into your diet, this garlic-infused soup is loaded with vitamins and antioxidants. It’s also low in calories, making it an excellent choice for weight-conscious individuals.

    From busy professionals to newlyweds, everyone can whip up this aromatic soup in no time. With its vibrant flavors and health benefits, cozying up with a bowl of this Spanish Garlic Soup is more than just a meal; it’s an experience. Join us in mastering this delightful dish as we explore its health benefits, essential ingredients, and preparation methods in the sections that follow.

    Benefits and Advantages of Cozy Spanish Garlic Soup Recipe

    There are countless reasons why the Cozy Spanish Garlic Soup stands out among the myriad of soup recipes available today. Firstly, its ease of preparation is unmatched. With minimal ingredients and straightforward steps, anyone, regardless of cooking skills, can prepare this wholesome soup. You do not need to be a seasoned chef or spend hours in the kitchen. Within just 30 minutes, you can have a hearty meal ready to enjoy.

    Health is another paramount advantage of this recipe. Garlic, the primary ingredient, is renowned for its numerous health benefits. It is a powerful immune booster, rich in antioxidants, and has anti-inflammatory properties. Incorporating garlic into your meals can help to reduce blood pressure and enhance your heart health. Furthermore, this soup is low in calories and can be easily customized to fit various dietary preferences, making it an excellent option for those watching their weight.

    Moreover, the soup’s versatility allows for a variety of adaptations. Whether you’re looking to enhance flavor, adjust the texture, or create a heartier meal, this recipe can be modified to suit your tastes. You can add vegetables, grains, or proteins to make it uniquely yours. Importantly, the soup is both comforting and nourishing; it serves as a great companion on chilly evenings and is a fantastic choice for feeding the family or enjoying alongside your favorite novel.

    With all these benefits combined, it’s no wonder that Cozy Spanish Garlic Soup is a sought-after recipe among those looking to combine taste and health effortlessly. So, gather your ingredients, and let’s dive into the flavorful world of this delightful soup.

    Ingredients Overview

    Essential Ingredients for Cozy Spanish Garlic Soup Recipe

    To create the perfect Cozy Spanish Garlic Soup, you will need the following ingredients:

    • Garlic: 10-12 cloves, peeled (provides flavor and health benefits)
    • Olive Oil: 2 tablespoons (adds richness and healthy fats)
    • Vegetable Broth: 4 cups (use low-sodium for a healthier option)
    • Onion: 1 medium, diced (enhances flavor)
    • Red Pepper Flakes: 1/2 teaspoon (for a touch of heat, adjustable)
    • Bread: 2-3 slices (preferably rustic or whole grain, for thickening)
    • Salt: To taste (necessary for seasoning)
    • Fresh Parsley: A handful, chopped (for garnish and freshness)
    • Lemon Juice: From half a lemon (adds brightness)

    This recipe is not only vegan and gluten-free but also offers low-calorie options if you use the right ingredients. The olive oil and bread can be adjusted based on dietary preferences, ensuring that everyone can enjoy this cozy dish.

    Dietary Substitutions to Customize Your Cozy Spanish Garlic Soup Recipe

    Flexibility is one of the hallmarks of this Cozy Spanish Garlic Soup. Here are some dietary substitutions you can incorporate:

    • Gluten-Free Bread: If you’re avoiding gluten, opt for gluten-free bread to thicken the soup.
    • Low-Fat Options: Consider using less olive oil or substituting it with a low-calorie cooking spray to minimize fats.
    • Add-ins for Heartiness:
    • For a protein boost, consider adding chickpeas or white beans.
    • For additional vegetables, mixed greens, spinach, or kale can offer more nutrients while maintaining the soup’s integrity.
    • Herbal Variations: Use thyme or oregano instead of parsley for a different flavor profile.

    Adapt the ingredients to your preference, ensuring that everyone in your household can enjoy this vibrant soup!

    How to Prepare the Perfect Cozy Spanish Garlic Soup Recipe: Step-by-Step Guide

    Creating the perfect Cozy Spanish Garlic Soup is a straightforward process. Follow these easy steps to master this recipe:

    1. Preheat the Oven: Set your oven to 375°F (190°C).
    2. Roast the Garlic:
    3. Place the peeled garlic cloves on a baking sheet, drizzling them with 1 tablespoon of olive oil.
    4. Roast for about 25-30 minutes until golden and tender. This step enhances the sweet flavor of the garlic.
    5. Sauté Aromatics:
    6. In a large pot, heat 1 tablespoon of olive oil over medium heat.
    7. Add the diced onion and sauté for about 5 minutes, or until the onion is soft and translucent.
    8. Add Broth and Spices:
    9. Pour in the vegetable broth, add in the roasted garlic, red pepper flakes, and salt to your taste.
    10. Bring the mixture to a gentle simmer for about 10 minutes to meld the flavors.
    11. Blend the Soup:
    12. Using an immersion blender or a standard blender, puree the soup until smooth.
    13. If using a standard blender, allow the soup to cool before blending in batches to prevent splatters.
    14. Incorporate Bread:
    15. Tear the bread into small pieces and add it to the blended soup. Allow it to cook for an additional 5 minutes. This step helps thicken the soup and adds texture.
    16. Finish with Lemon Juice:
    17. Stir in fresh lemon juice just before serving to give the soup a fresh, vibrant flavor.
    18. Serve and Garnish:
    19. Ladle the soup into bowls, and garnishing with chopped fresh parsley adds a burst of color and flavor.

    Feel free to adjust the seasoning to your liking, and be creative with the toppings—croutons or a drizzle of olive oil elevate this soup even more! Enjoy the warmth and comfort that this Cozy Spanish Garlic Soup brings to your table.

    Mastering Cozy Spanish Garlic Soup Recipe: Advanced Tips and Variations

    Perfecting the Cozy Spanish Garlic Soup comes with practice and creativity. Here are some advanced tips and variations to consider:

    • Herb Infusion: Infusing herbs like rosemary or thyme into the broth during simmering will deepen the flavor profile. Remove the herbs before blending for a more refined taste.
    • Creamy Texture: For a creamier consistency, consider blending in a plant-based cream or a dollop of coconut milk before serving.
    • Seasonal Additions: Incorporate seasonal vegetables like zucchini or bell peppers to make the soup heartier and add color to the dish.
    • Bean Boost: Add canned white beans or lentils during the simmering process for a protein-packed twist that enhances the nutritional value.
    • Cheesy Variation: Top each bowl with crumbled feta or nutritional yeast for a cheesy flavor that many will adore.

    Experimenting with these variations allows you to personalize the soup while keeping the spirit of the original recipe alive. Cooking should be enjoyable, so make it your own!

    How to Store Cozy Spanish Garlic Soup Recipe: Best Practices

    Storing your Cozy Spanish Garlic Soup properly ensures you can enjoy the deliciousness later. Follow these best practices:

    • Refrigeration: Allow the soup to cool completely, then transfer it to an airtight container. It can be stored in the fridge for up to 4-5 days.
    • Freezing: If you wish to keep the soup longer, ladle it into freezer-safe containers, leaving space for expansion as it freezes. Frozen soup can last for up to 3 months.
    • Reheating: To reheat, simply warm the soup on the stovetop over medium heat, stirring occasionally. If it thickens, add a splash of vegetable broth or water to achieve your desired consistency. Reheat slowly to preserve flavors.

    With these storage tips, you’ll always have a comforting meal on hand, ready to bring warmth and joy to any occasion.

    Nutritional Value of Cozy Spanish Garlic Soup Recipe

    Understanding the nutritional value of your dishes can help you make informed eating choices. Here’s a general overview of the nutritional information for a serving of Cozy Spanish Garlic Soup (based on 6 servings):

    • Calories: Approximately 120 per serving
    • Total Fat: 6g
    • Saturated Fat: 1g
    • Cholesterol: 0mg
    • Sodium: 300mg (can be reduced with low-sodium broth)
    • Total Carbohydrates: 15g
    • Dietary Fiber: 2g
    • Sugars: 2g
    • Protein: 3g

    This soup is low-calorie while still providing essential nutrients and satisfying flavors. Its health benefits, combined with its simplicity, make it an excellent option for any dining occasion. Watch out for calories on additional toppings you may add!

    FAQs: Frequently Asked Questions About Cozy Spanish Garlic Soup Recipe

    1. Can I use roasted garlic from a jar instead of fresh?

    Yes! You can substitute jarred roasted garlic. Just keep in mind that flavor intensity may vary, so start with a smaller amount and add more to taste.

    2. How can I make it spicy?

    If you enjoy a spicy kick, increase the amount of red pepper flakes or add a diced jalapeño while sautéing the onions.

    3. What can I use instead of vegetable broth?

    For a richer flavor, chicken broth can be used instead, or make your own broth using simmered vegetables and herbs.

    4. How long does this soup keep in the fridge?

    The Cozy Spanish Garlic Soup can be safely stored in the refrigerator for about 4-5 days when kept in an airtight container.

    5. Can I make this soup ahead of time?

    Absolutely! This soup tastes even better the day after as the flavors continue to meld. Just reheat before serving.

    6. What are some serving suggestions?

    Consider pairing this soup with a fresh salad, crusty bread, or even a light pasta dish for a complete meal.

    With these insights and tips, you are more than ready to create and enjoy this delightful Cozy Spanish Garlic Soup. Embrace the comfort, warmth, and nutritional benefits it offers, and make it a regular star in your home-cooked meals!

  • Easy Spinach  Mushroom White Lasagna

    Easy Spinach Mushroom White Lasagna

    Easy Spinach & Mushroom White Lasagna: A Tropical Delight

    Introduction to Easy Spinach & Mushroom White Lasagna

    If you’re searching for simple yet satisfying easy dinner recipes, look no further than this Easy Spinach & Mushroom White Lasagna. This delightful dish combines the creamy, comforting flavors of white sauce with the nutritious goodness of spinach and mushrooms, making it a deliciously tempting option for any meal. Quick to prepare and packed with health benefits, it shines as a versatile dish that caters to various dietary needs. Whether you’re a busy parent trying to whip up a meal that the whole family will enjoy, a student seeking healthy options after a long day, or even a food enthusiast eager to try something new, this lasagna will not disappoint.

    Beyond its mouthwatering flavor, this easy lasagna is loaded with vitamins, minerals, and fiber courtesy of its vegetable components. Spinach is rich in iron and antioxidants, while mushrooms are a fantastic source of B vitamins and selenium. Furthermore, its flexible recipe allows for easy adaptations to fit vegan, vegetarian, gluten-free, or even low-calorie diets without compromising taste. So, what are you waiting for? Let’s dive into this simple yet impressive dish that promises to become a family favorite!

    Benefits and Advantages of Easy Spinach & Mushroom White Lasagna

    The Easy Spinach & Mushroom White Lasagna presents numerous advantages that make it stand out among various easy dinner recipes. Its simplicity is a game-changer for home cooks and professionals alike. With straightforward ingredients and clear instructions, the cooking process is nearly foolproof, even for novice chefs. Within an hour, you can create a delightful dish that your family will love, leaving you with minimal cleanup.

    Moreover, its health benefits should not be overlooked. By using fresh spinach and mushrooms, you are provided with nutrients that promote good health. Spinach is renowned for its high iron content, which can help increase energy levels and improve overall vitality. Mushrooms add flavor without excessive calories, making this dish a smart choice for those mindful of their diet. Plus, the creamy white sauce, typically made from a combination of ricotta and mozzarella, can easily be substituted with healthier alternatives, like low-fat cheese or cashew cream, catering to diet-conscious individuals.

    Another notable benefit is its adaptability. You can customize this lasagna based on your dietary restrictions or preferences. Whether you want it gluten-free, vegan, or dairy-free, this recipe provides the flexibility to accommodate these needs. Therefore, it’s perfect for gatherings, potlucks, or a cozy family dinner.

    In short, Easy Spinach & Mushroom White Lasagna checks off multiple boxes: it’s quick to prepare, it’s nutritious, and it caters to a variety of dietary preferences, making it an ideal choice for busy parents, students, and food enthusiasts alike.

    Ingredients Overview

    Essential Ingredients for Easy Spinach & Mushroom White Lasagna

    To whip up this Easy Spinach & Mushroom White Lasagna, you will need the following ingredients, which can be easily adapted for various dietary options:

    1. Lasagna Noodles (12 sheets)
      Use regular or gluten-free noodles, depending on your needs. Whole wheat versions can offer added fiber.

    2. Spinach (4 cups)
      Fresh spinach is preferred for its taste and texture, but frozen spinach can also be used—just ensure it is well-drained.

    3. Mushrooms (2 cups)
      Sliced button mushrooms or any variety of your choice add flavor and depth to the dish.

    4. Ricotta Cheese (15 oz.)
      This creamy cheese serves as the base of your white sauce. You can substitute with vegan ricotta or cashew cream for a dairy-free version.

    5. Mozzarella Cheese (2 cups)
      Shredded mozzarella adds a melty texture that makes any lasagna special. Use dairy-free cheese alternatives if necessary.

    6. Parmesan Cheese (1 cup)
      Freshly grated Parmesan will provide a nice finish. Again, vegan Parmesan options are available.

    7. Egg (1)
      This helps bind the cheese mixture. A flaxseed or chia egg can serve as an egg substitute for a vegan version.

    8. Garlic (3 cloves, minced)
      Fresh garlic provides aromatic flavor, which ties the dish together beautifully.

    9. Onion (1 medium, chopped)
      Adding depth and sweetness, onions make this dish more robust.

    10. Olive Oil (2 tablespoons)
      Used for sautéing vegetables. Feel free to use a cooking spray for a lighter option.

    11. Salt and Pepper (to taste)
      Essential for seasoning, these should be added according to your palate.

    Dietary Substitutions to Customize Your Easy Spinach & Mushroom White Lasagna

    • Gluten-Free: Substitute regular lasagna noodles with gluten-free ones or use zucchini slices as a low-carb alternative.

    • Dairy-Free: Replace ricotta and mozzarella cheese with vegan cheese options. Cashew cream can mimic the creamy texture of ricotta.

    • Vegan: As mentioned, incorporate plant-based cheeses and use a flaxseed or chia seed egg substitute.

    • Low-Calorie: Opt for low-fat cheese or yogurt-based sauces to cut down calories while maintaining flavor.

    By considering these ingredient alternatives, you can successfully customize the Easy Spinach & Mushroom White Lasagna to suit your dietary preferences without compromising taste or texture.

    How to Prepare the Perfect Easy Spinach & Mushroom White Lasagna: Step-by-Step Guide

    Creating the Easy Spinach & Mushroom White Lasagna is a straightforward process. Follow these steps for a delicious dinner that could rival any Italian restaurant!

    1. Prepare the Oven: Preheat your oven to 375°F (190°C). Preheating is crucial as it allows for even baking.

    2. Cook the Lasagna Noodles: In a large pot, bring water to a boil. Add a pinch of salt and then cook the lasagna noodles according to the package instructions until al dente. Drain and lay them on a towel to prevent sticking.

    3. Sauté Vegetables: Heat olive oil in a large skillet over medium heat. Add chopped onions and minced garlic, sautéing until they become translucent. Then, add the sliced mushrooms, cooking until they are tender and have released their moisture. Finally, stir in the spinach and cook for 2-3 minutes until wilted. Season with salt and pepper to taste. Turn off the heat and set aside.

    4. Prepare the Cheese Mixture: In a mixing bowl, combine the ricotta cheese, mozzarella cheese (reserve some for topping), grated Parmesan cheese, and the egg. Mix well until smooth. You can add a pinch of nutmeg or Italian seasoning to enhance flavor.

    5. Assemble the Lasagna: In a 9×13-inch baking dish, spread a thin layer of the vegetable mixture on the bottom. Place a layer of noodles over this. Then, spread half of the cheese mixture over the noodles, followed by half of the remaining vegetable mixture. Repeat the layers, finishing with a final layer of noodles on top. Finally, top it off with the remaining mozzarella cheese.

    6. Bake the Lasagna: Cover the baking dish with aluminum foil and bake for 25 minutes. After that, remove the foil and bake for an additional 15-20 minutes, or until the top is golden brown and bubbly.

    7. Cool and Serve: After baking, allow the lasagna to cool for about 10 minutes. This helps it set and makes serving easier. Cut into squares and serve warm.

    Feel free to consider additional variations during these preparations. For instance, adding cooked lentils or other veggies like bell peppers can enhance nutritional value and flavor diversity!

    Mastering Easy Spinach & Mushroom White Lasagna: Advanced Tips and Variations

    To elevate your Easy Spinach & Mushroom White Lasagna, consider these advanced tips and variations:

    • Herbs and Spices: Incorporate fresh herbs like basil or parsley for added flavor. Dried Italian herbs can work well, too. A sprinkle of crushed red pepper can add a pleasant kick.

    • Meat Lovers Version: Add cooked, shredded chicken, ground turkey, or Italian sausage between the layers if you’re looking for a protein boost.

    • Extra Veggies: Bell peppers, zucchini, or carrots can be added to the vegetable mixture for additional nutrients and varying textures.

    • Ingredient Swaps: Experiment with different cheeses—like goat cheese or feta—for a unique twist. You can also mix in sunflower seeds or pine nuts for added crunch and healthy fats.

    • Make-ahead: You can assemble this lasagna ahead of time and refrigerate it. Just increase the baking time by about 10-15 minutes if baking from cold.

    With these strategies, your Easy Spinach & Mushroom White Lasagna can be customized and perfected to satisfy various palates.

    How to Store Easy Spinach & Mushroom White Lasagna: Best Practices

    Storing your Easy Spinach & Mushroom White Lasagna is straightforward and can help you prolong its deliciousness:

    • Refrigeration: Store leftovers in an airtight container in the refrigerator for up to 4 days. It’s perfect for busy weekday lunches or dinners.

    • Freezing: If you want to keep it longer, freeze the lasagna before baking. Wrap it tightly in plastic wrap and aluminum foil; it can last up to 3 months in the freezer. To reheat, bake from frozen at 375°F (190°C) for about 60-75 minutes, or until heated through.

    • Reheating: To reheat, warm individual portions in the microwave or thaw in the refrigerator overnight before reheating in the oven for a few minutes to enjoy that baked texture again.

    Proper storage practices ensure that your easy dinner recipes remain fresh and flavorful, no matter how busy your schedule may be!

    Nutritional Value of Easy Spinach & Mushroom White Lasagna

    The nutritional profile of Easy Spinach & Mushroom White Lasagna is fairly impressive, especially considering its delicious flavor. Here’s a breakdown of the approximate nutritional content per serving (1/8 of the lasagna):

    • Calories: 350-400 kcal
    • Protein: 20-25g
    • Total Fat: 15-20g
    • Saturated Fat: 7-10g
    • Carbohydrates: 35-40g
    • Dietary Fiber: 4-6g
    • Sugars: 3-5g
    • Vitamin A: 30% DV
    • Vitamin C: 15% DV
    • Iron: 15% DV
    • Calcium: 25% DV

    This lasagna packs a decent amount of protein and fiber, making it a filling choice. Packed with vitamins and minerals from spinach and mushrooms, it’s a health-conscious dish that satisfies both cravings and nutritional requirements. Adapting it with lower-fat options or increasing the vegetable content can further boost its health benefits.

    FAQs: Frequently Asked Questions About Easy Spinach & Mushroom White Lasagna

    1. Can I make this lasagna in advance?
    Yes! You can assemble it ahead of time—just store it in the refrigerator or freezer until ready to bake. This is a great strategy for meal prep.

    2. Can I substitute the ricotta cheese?
    Absolutely! Vegan ricotta or homemade cashew cream can serve as fine alternatives, ensuring the dish remains dairy-free.

    3. How do I freeze leftovers?
    Wrap the cooled lasagna tightly in plastic and aluminum foil. Alternatively, store it in an airtight container, and it will last up to three months.

    4. Is it possible to make this dish gluten-free?
    Yes! Just use gluten-free lasagna noodles, or substitute with thinly sliced zucchini or squash for a healthy option.

    5. How can I alter the recipe for extra vegetables?
    Feel free to mix in any vegetables you like! Bell peppers, zucchini, or artichokes can add flavor and nutrients, enhancing the dish.

    With this generous overview of Easy Spinach & Mushroom White Lasagna, you’re equipped to create a dish that will inspire and nourish those you serve. So, gather your ingredients and embrace the joy of cooking this delightful recipe that fits beautifully into a wide range of dietary preferences! Enjoy your journey into the delightful world of easy dinner recipes.