Blog

  • Tasty Honey Lime Chicken Stack

    Tasty Honey Lime Chicken Stack

    Tasty Honey Lime Chicken Stack: A Tropical Delight

    Introduction to Tasty Honey Lime Chicken Stack

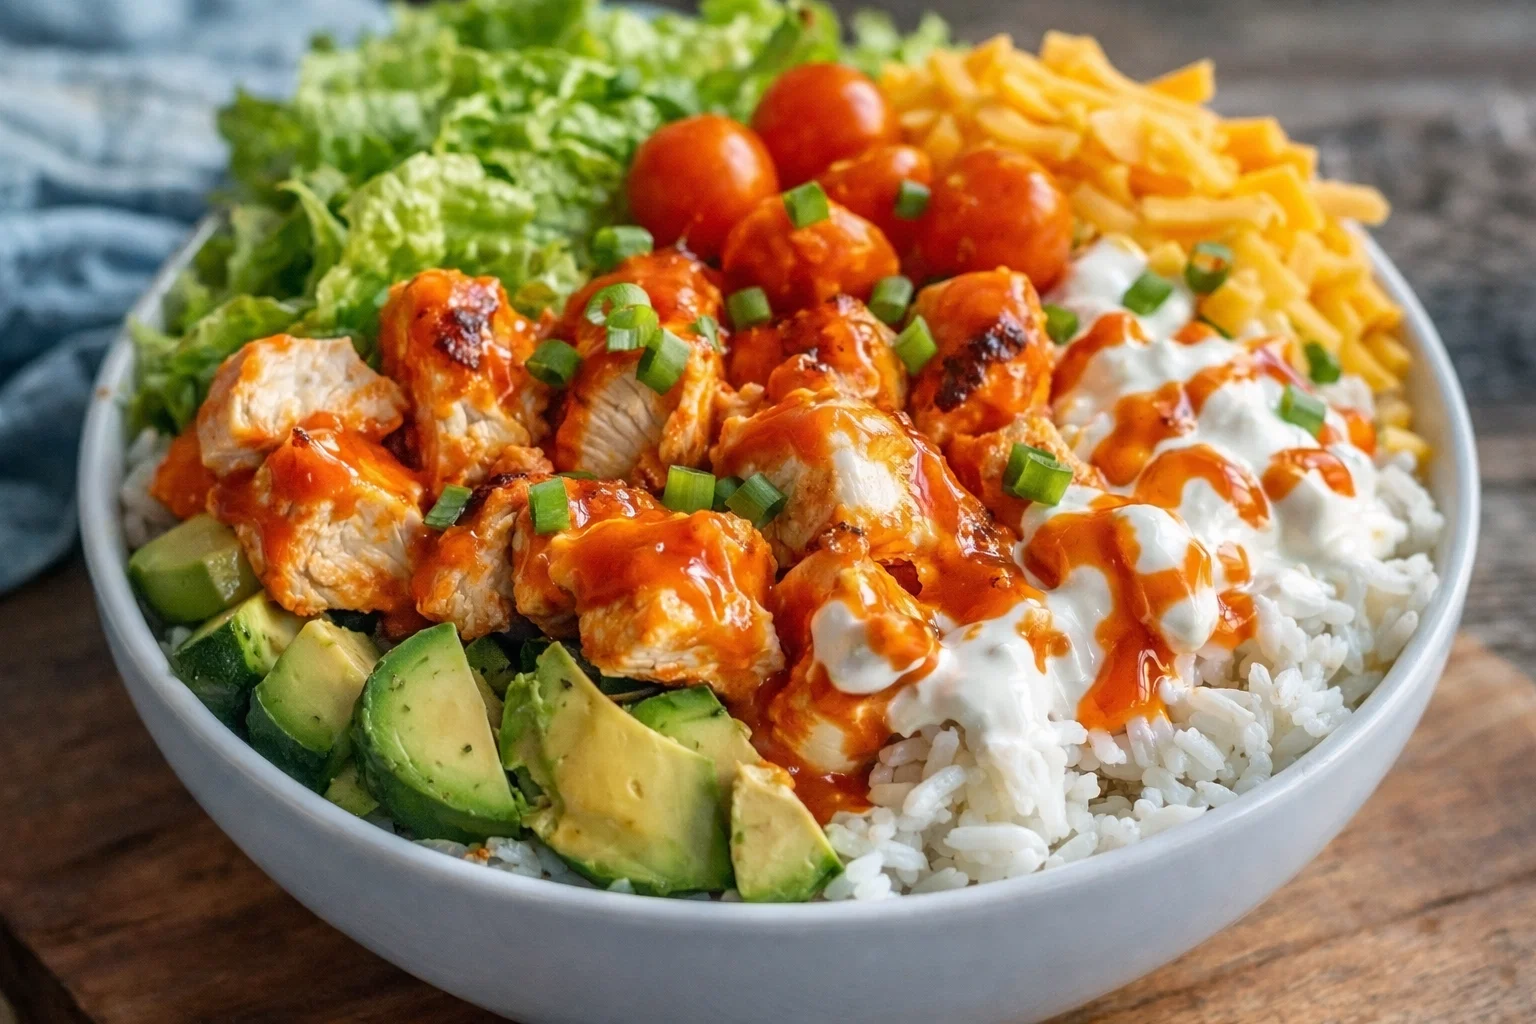
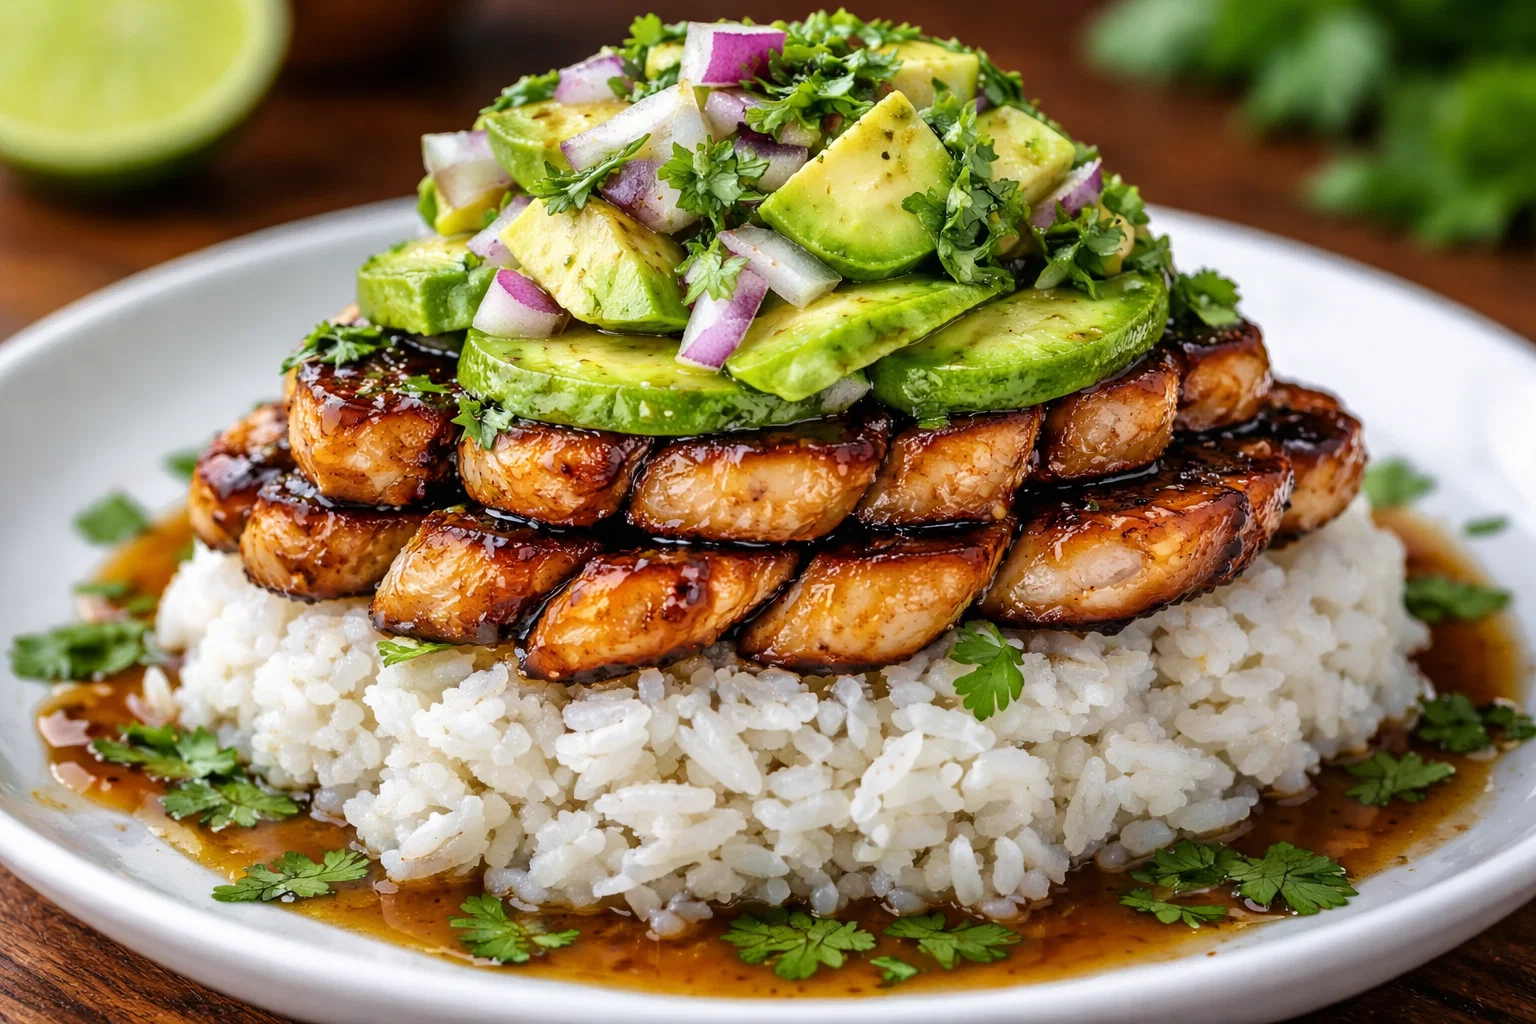
    If you’re on the lookout for a recipe that combines ease, freshness, and a tropical twist, look no further than the Tasty Honey Lime Chicken Stack. This vibrant dish showcases tender chicken marinated in a delicious honey-lime sauce, layered with seasonal veggies, and topped with creamy avocado. Perfect for busy weeknight dinners or as an exquisite meal for guests, this recipe falls into the appealing category of chicken recipes that anyone can master. Furthermore, it’s not just delicious—it’s also packed with health benefits, such as high protein content and essential vitamins from the vegetables.

    What makes this honey lime chicken stack particularly enticing is its versatility. It’s simple enough for novice cooks yet sophisticated enough to impress even the most discerning food enthusiasts. Suitable for various dietary needs, including gluten-free and low-calorie options, this recipe ensures that everyone can enjoy a taste of the tropics. With its fresh ingredients and delightful flavor profile, this dish might just become your new go-to recipe for family dinners, meal prep, or entertaining friends.

    Benefits and Advantages of Tasty Honey Lime Chicken Stack

    The Tasty Honey Lime Chicken Stack stands out among chicken recipes for several reasons. Firstly, the preparation is incredibly straightforward. Even if you’re short on time, marinating the chicken can be done in as little as 15 minutes, making the overall cooking process efficient. You can have a delightful, mouthwatering dish ready in under an hour—perfect for busy parents, working professionals, or anyone leading a hectic lifestyle.

    From a nutritional standpoint, this dish boasts numerous health benefits. Lean chicken is an excellent source of protein, which is essential for muscle building and recovery. The honey-lime marinade not only enhances the chicken’s flavor but also adds a layer of healthy sweetness without excessive sugar. Fresh vegetables are rich in vitamins and minerals, and the addition of avocado contributes healthy fats, further enhancing the dish’s nutritional profile.

    Moreover, this recipe caters to various dietary preferences. Whether you are gluten-free, dairy-free, or simply looking for a low-calorie option, the Tasty Honey Lime Chicken Stack has got you covered. Busy parents will appreciate its simplicity, while food enthusiasts will love engaging with the vibrant flavors. For students looking to impress their friends or newlyweds eager to explore their culinary skills, this dish provides a fantastic balance of ease and elegance.

    In summary, the Tasty Honey Lime Chicken Stack offers a delicious and healthy option for anyone looking to make a positive impact on their dining experience. As you explore this recipe, you’ll discover that it’s not just another chicken dish; it’s a delightful way to embrace wholesome eating.

    Ingredients Overview

    Essential Ingredients for Tasty Honey Lime Chicken Stack

    To create this flavorful Tasty Honey Lime Chicken Stack, gather the following ingredients:

    • 1 lb. Chicken Breasts: The protein base of the dish.
    • 1/4 cup Honey: Adds natural sweetness and moisture.
    • Juice of 2 Limes: Provides brightness and acidity, balancing flavors.
    • 2 cloves Garlic, minced: Enhances flavor depth.
    • 1 tsp. Ground Cumin: Adds warmth and earthiness.
    • Salt & Pepper, to taste: Essential for seasoning.
    • 1 Red Bell Pepper, sliced: For crunch and sweetness.
    • 1 Green Bell Pepper, sliced: Adds freshness.
    • 1 Avocado, sliced: Creaminess and healthy fats.
    • Fresh Cilantro, for garnish: Brightens the dish visually and adds flavor.

    Dietary Options:
    Vegan Substitute: Replace chicken with grilled marinated tofu or tempeh.
    Gluten-Free Option: This recipe is naturally gluten-free; ensure all ingredients are labeled gluten-free.
    Low-Calorie Option: Trim excess fat from chicken and use less honey for a lighter version.

    Dietary Substitutions to Customize Your Tasty Honey Lime Chicken Stack

    There are several ways to customize the Tasty Honey Lime Chicken Stack to accommodate specific dietary needs or personal preferences. For instance, if you follow a keto or low-carb diet, consider serving the chicken stack over a salad instead of using grains or bread. Additionally, for those who may be watching their sugar intake, opting for a sugar-free honey substitute can ensure that you maintain a healthy profile without sacrificing taste.

    If you’re looking to make this dish dairy-free, simply skip the avocado or switch to a dairy-free ranch dressing to sprinkle on top. Alternatively, try a cashew cream for a similar creamy texture without added dairy.

    For those who are spice enthusiasts, you can infuse the marinade with jalapeños or sriracha to add an extra kick. Conversely, if cooking for kids or picky eaters, consider adjusting the seasoning to make it milder yet still delicious.

    By being mindful of these options and substitutions, you can ensure that your Tasty Honey Lime Chicken Stack will appeal to a wide array of dietary preferences while keeping the essence of the dish intact.

    How to Prepare the Perfect Tasty Honey Lime Chicken Stack: Step-by-Step Guide

    Creating the Tasty Honey Lime Chicken Stack is both fun and rewarding. Follow these steps for a successful endeavor in the kitchen:

    1. Prepare the Marinade: In a mixing bowl, whisk together the honey, lime juice, minced garlic, ground cumin, salt, and pepper.

    2. Marinate the Chicken: Place the chicken breasts in a resealable plastic bag or shallow dish and pour the marinade over them. Let it marinate in the refrigerator for at least 30 minutes (or up to 2 hours for more flavor) while you prepare your other ingredients.

    3. Preheat the Grill or Oven: If you’re grilling, preheat the grill to medium-high heat. For oven-baking, preheat the oven to 400°F (200°C).

    4. Prepare the Vegetables: While the chicken marinates, slice the bell peppers and avocado. Set aside for later assembly.

    5. Cook the Chicken: Remove the chicken from the marinade, letting the excess drip off. Grill or bake the chicken for about 6-7 minutes per side or until it reaches an internal temperature of 165°F (75°C). If using a meat thermometer, this is a great way to ensure precise cooking!

    6. Let the Chicken Rest: Once cooked, let the chicken rest for 5 minutes before slicing it into bite-sized pieces. Resting ensures that the juices redistribute, making the chicken more tender.

    7. Assemble the Stack: On a plate, stack the sliced chicken, followed by layers of bell peppers and slices of avocado. Garnish with fresh cilantro for an extra pop of color.

    8. Serve and Enjoy: Serve your Tasty Honey Lime Chicken Stack warm, either on its own or with a side of rice or salad. Enjoy the fresh flavors and tropical inspiration that this dish provides!

    Mastering Tasty Honey Lime Chicken Stack: Advanced Tips and Variations

    Elevating your Tasty Honey Lime Chicken Stack is all about creativity and personal taste. Here are some tips and variations to consider:

    • Switch Up the Proteins: While chicken is the star of this dish, you could experiment with shrimp or fish like salmon for a different protein profile that complements the honey-lime marinade well.

    • Add Seasonal Veggies: Incorporate seasonal greens like spinach, arugula, or even grilled zucchini for added texture and nutrients.

    • Garnish Creatively: Instead of just cilantro, try using thinly sliced green onions or a sprinkle of sesame seeds for added flair.

    • Create a Bowl Dish: Transform this into a healthy bowl by layering the chicken and veggies over brown rice, quinoa, or even riced cauliflower for a low-carb version.

    • Experiment with Marinade Flavors: For a different twist, consider adding spices like paprika, cayenne pepper, or herbs such as oregano and thyme to your marinade for depth.

    By incorporating these advanced tips, you’ll not only enhance the Tasty Honey Lime Chicken Stack experience but could even inspire your own take on this flavorful dish.

    How to Store Tasty Honey Lime Chicken Stack: Best Practices

    Proper storage of your Tasty Honey Lime Chicken Stack is crucial for maintaining freshness and flavor. Here are key practices to follow:

    • Refrigeration: Store any leftover chicken stack in an airtight container in the refrigerator. Consume within 3-4 days for the best taste and texture.

    • Freezing: If you prepare this dish in bulk, consider freezing the chicken separately from the vegetables. Wrap the cooked chicken tightly in plastic wrap and aluminum foil or store it in a freezer-safe bag. It can last up to 3 months in the freezer.

    • Reheating: To reheat, thaw overnight in the refrigerator if frozen. You can warm the chicken in a microwave or reheat it in a skillet over low heat to prevent drying out. If using the oven, wrap the chicken in aluminum foil to help retain moisture.

    Utilizing these storage techniques will ensure that your Tasty Honey Lime Chicken Stack remains delicious and ready for you to enjoy at a moment’s notice.

    Nutritional Value of Tasty Honey Lime Chicken Stack

    Understanding the nutritional aspects of the Tasty Honey Lime Chicken Stack can guide you in making informed dietary choices. Here’s a breakdown:

    • Calories: Approximately 350 per serving (based on one chicken breast with vegetables).
    • Protein: 30g – A powerful source for muscle build and repair.
    • Fat: 12g – Mainly from the avocado, offering healthy fats.
    • Carbohydrates: 25g – Primarily from the honey and vegetables, providing energy.
    • Fiber: 6g – Aiding digestion and keeping you feeling full.

    Each ingredient adds its own nutritious element, ensuring that this recipe not only tastes great but also contributes positively to your overall diet. The combination of lean protein, healthy fats, and fibrous vegetables makes it a well-rounded meal, suitable for anyone looking to maintain a balanced lifestyle.

    FAQs: Frequently Asked Questions About Tasty Honey Lime Chicken Stack

    1. Can I use different proteins for this recipe?

    Absolutely! You can substitute chicken with tofu, shrimp, or fish. Adjust cooking times to ensure the protein is fully cooked.

    2. Is this recipe suitable for meal prep?

    Yes, the Tasty Honey Lime Chicken Stack is perfect for meal prepping due to its ingredients’ sturdiness and the flavor profile that only improves over time.

    3. How can I reduce the sugar content?

    To lower sugar levels, consider using a sugar-free honey substitute or reducing the quantity of honey used.

    4. What sides pair well with this dish?

    This chicken stack pairs wonderfully with a fresh salad, quinoa, or a side of brown rice that can absorb the delicious marinade flavors.

    5. Can I make this dish spicier?

    Definitely! Adding jalapeños to the marinade or a dash of hot sauce will enhance the flavor with a spicy kick.

    6. Is this dish gluten-free?

    Yes, this recipe is naturally gluten-free. Just ensure all ingredients used are verified gluten-free.

    7. Can leftovers be frozen?

    Yes, you can freeze the cooked chicken; just make sure to keep it well-wrapped. However, vegetables are best fresh for optimal taste.

    Engaging with this practical guide will help you create a dazzling Tasty Honey Lime Chicken Stack, while also considering your dietary needs and lifestyle preferences. Enjoy cooking and savor the vibrant flavors that this dish brings to your dining table!

  • Easy One Pot Ravioli Dinner

    Easy One Pot Ravioli Dinner

    Easy One Pot Ravioli Dinner: A Tropical Delight

    Introduction to Easy One Pot Ravioli Dinner

    Are you in search of easy dinner recipes that are both delicious and convenient? Look no further! This Easy One Pot Ravioli Dinner encapsulates simplicity and flavor in one delightful dish, perfect for busy families or anyone looking to whip up a meal without all the fuss. From the creamy sauce enveloping the tender ravioli to the various vegetables adding nutrition, this meal has it all.

    This dish is not just easy to prepare; it also offers a variety of health benefits. Packed with nutrients from fresh vegetables and whole-grain ravioli options for those concerned about their diet, this meal is both a comforting and wholesome choice. Moreover, its versatility makes it suitable for various dietary needs, including vegetarian, vegan, and even gluten-free options. Whether you’re a student with a limited kitchen setup or a working professional short on time, this one pot wonder allows you to create a satisfying meal without sacrificing taste or health.

    Imagine coming home after a long day to the enticing aroma of a hearty meal simmering on the stovetop, all while using just one pot. Plus, cleanup is a breeze! So gather your ingredients, and let’s dive into this delightful recipe that proves fulfilling meals can be both simple and delightful!

    Benefits and Advantages of Easy One Pot Ravioli Dinner

    The Easy One Pot Ravioli Dinner stands out in the category of easy dinner recipes due to its unparalleled ease of preparation and array of health benefits. One of the primary advantages of this dish is the one-pot cooking method, which significantly reduces cooking and cleanup time. This is particularly beneficial for busy parents, student inhabitants, and working professionals who often find themselves juggling multiple tasks.

    Another reason this recipe is a gem is its health-conscious approach. Ravioli can be a heavy meal; however, by incorporating plenty of fresh vegetables into the mix, you’ll find yourself not only satisfied but nourished as well. Iron-rich greens like spinach, antioxidant-packed tomatoes, and flavorful herbs not only elevate the dish’s taste but also enhance its nutritional value.

    For those on specific diets, this recipe proves quite adaptable. You can easily use gluten-free ravioli or a plant-based alternative to cater to vegans. Such flexibility ensures that everyone, whether health-conscious individuals or those with dietary restrictions, can enjoy this delightful meal. Additionally, the recipe allows for a low-calorie adjustment by controlling the cooking oil and portion sizes, making it a variable feast suitable for dietary considerations.

    In conclusion, this Easy One Pot Ravioli Dinner is not just a simple dish; it’s an adventure in cooking that caters to a diverse audience, offering health benefits, flexibility, and, most importantly, a taste that pleases!

    Ingredients Overview

    Essential Ingredients for Easy One Pot Ravioli Dinner

    Here’s what you’ll need to prepare this savory dish:

    • 1 tablespoon olive oil (or avocado oil for a neutral taste)
    • 1 medium onion, diced (adds sweetness)
    • 2 cloves garlic, minced (for that aromatic flavor)
    • 1 bell pepper, diced (for sweetness and color)
    • 2 cups fresh spinach (a good source of iron)
    • 2 cups cherry tomatoes, halved (rich in antioxidants)
    • 1 pound frozen ravioli (cheese or spinach + ricotta for hearty options)
    • 4 cups vegetable broth (low-sodium for a healthier option)
    • 1 teaspoon Italian seasoning (or your favorite herb blends)
    • Salt and pepper, to taste (for seasoning)
    • 1/4 cup grated Parmesan cheese (optional, for non-vegan option)
    • Fresh basil leaves (for garnish)

    Dietary Substitutions to Customize Your Easy One Pot Ravioli Dinner

    To adapt this meal for various dietary preferences, here are some substitutions:

    • Vegan Option: For the cheese ravioli, opt for plant-based ravioli filled with vegetables. Replace Parmesan cheese with nutritional yeast for a cheesy flavor without dairy.

    • Gluten-Free: Use gluten-free ravioli made from rice or quinoa flour. Ensure that your broth and any seasonings are gluten-free.

    • Low-Calorie: Skip the oil for light cooking spray, and use low-fat cheese options if using dairy ingredients.

    • Added Proteins: For a protein boost, consider adding cooked chicken, turkey, or beans (like chickpeas) to your dish.

    • More Veggies: Feel free to incorporate additional veggies like zucchini, mushrooms, or kale to enrich your dish.

    By accommodating these variations, you can engineer this Easy One Pot Ravioli Dinner to suit any dietary requirement or ingredient availability seamlessly.

    How to Prepare the Perfect Easy One Pot Ravioli Dinner: Step-by-Step Guide

    Ready to dive into the delightful world of easy dinner recipes? Here’s a step-by-step guide to crafting the perfect Easy One Pot Ravioli Dinner that everyone will love:

    1. Prepare the Base: Start by heating the olive oil in a large pot over medium-high heat. Add the diced onions and sauté until they become translucent, about 3-4 minutes. This creates a flavorful base for your dish.

    2. Sauté the Aromatics: Next, add the minced garlic and diced bell pepper to the pot. Sauté for another 2-3 minutes until everything is fragrant and the peppers start to soften.

    3. Incorporate Vegetables: Toss in the halved cherry tomatoes and fresh spinach. Stir regularly until the spinach has wilted, which should take about 2-3 minutes. This step brings a burst of color and nutrients to your dish.

    4. Add Frozen Ravioli: Gently pour in the frozen ravioli. These delightful dumplings will soak up the sauce’s flavors as they cook.

    5. Pour in the Broth: Slowly add the vegetable broth to the pot, ensuring that the ravioli is mostly submerged. This will help cook the ravioli evenly and create a lovely sauce.

    6. Season the Dish: Sprinkle in the Italian seasoning, along with salt and pepper to your taste. Stir to combine all of the delightful flavors.

    7. Bring to a Boil: Increase the heat to high and bring the mixture to a rolling boil. This is where all the magic happens!

    8. Simmer Away: Once boiling, reduce the heat to medium-low, cover, and let the pot simmer. Cook for about 5-7 minutes, or until the ravioli is tender and the sauce has thickened slightly.

    9. Finish with Cheese: If desired, stir in the grated Parmesan cheese, allowing it to melt into the sauce. This step adds a rich creaminess that enhances flavor.

    10. Garnish and Serve: Finally, remove the pot from heat, and garnish with fresh basil leaves. This not only adds a pop of color but also a fresh flavor. Serve warm and enjoy a hearty, homemade meal.

    Each of these steps is designed to be adaptable for those with specific dietary needs. Remember, experimenting with your ingredients can lead to delightful discoveries every time you prepare this easy dinner recipe!

    Mastering Easy One Pot Ravioli Dinner: Advanced Tips and Variations

    To elevate your Easy One Pot Ravioli Dinner to the next level, here are some expert tips and variations you can explore:

    1. Creamier Sauce: For a creamy texture, consider adding a splash of heavy cream or a dollop of sour cream while everything simmers. This will create an indulgent flavor.

    2. Spicy Kick: If you’d like a bit of heat, consider incorporating crushed red pepper flakes or diced jalapeños when you’re sautéing the onions and garlic.

    3. Flavor Enhancements: Using homemade broth will bring a depth of flavor that store-bought options may lack. If you can, try making batches of broth to keep on hand.

    4. Customized Herbs: Don’t hesitate to play around with herbs! Adding fresh oregano, thyme, or even a sprinkle of lemon zest can splendidly elevate the dish.

    5. Protein Additions: Boost the protein content with cooked Italian sausage, ground turkey, or vegan sausage. Sauté these options with the onions for an enhanced flavor.

    6. Regular Rotation: Incorporate this dish regularly, but switch up your vegetable choices according to seasonal availability. Bell peppers can be swapped out for asparagus in spring or butternut squash in fall.

    Remember, the key to mastering this Easy One Pot Ravioli Dinner lies in comfortability with your ingredients and discovering what flavors you and your loved ones enjoy most. Get creative and have fun!

    How to Store Easy One Pot Ravioli Dinner: Best Practices

    The storage of your Easy One Pot Ravioli Dinner is straightforward, yet it can greatly affect the taste and quality of your meal for future enjoyment:

    • Refrigeration: Allow any leftovers to cool down at room temperature before transferring them into an airtight container. These can be refrigerated for up to 4 days.

    • Freezing: If you wish to store it longer, consider freezing portions. Use freezer-safe containers or bags for easy meal prep later. This dish can last in the freezer for up to 3 months.

    • Reheating: When ready to enjoy your meal again, remove it from the refrigerator or freezer. If frozen, allow it to thaw overnight in the refrigerator. Reheat it in a saucepan over low-medium heat, adding a splash of broth or water to keep it from drying out. Stir occasionally until heated through.

    By implementing these storage practices, you’ll maximize the longevity of your Easy One Pot Ravioli Dinner while maintaining flavor and texture.

    Nutritional Value of Easy One Pot Ravioli Dinner

    For those conscious of their dining choices, understanding the nutritional value of your meals is crucial. Here is a breakdown of the approximate nutritional information for one serving of the Easy One Pot Ravioli Dinner (based on a recipe that serves 4):

    • Calories: 400
    • Protein: 15 grams
    • Fat: 10 grams
    • Carbohydrates: 60 grams
    • Fiber: 5 grams
    • Sugar: 4 grams
    • Sodium: 600 mg (adjustable based on broth and salt added)

    This analysis provides insight into how this easy dinner recipe can align with your dietary needs. You’ll notice a balanced mix of macronutrients, thanks to the wholesome ingredients used. Moreover, the dish is low in added sugars and provides dietary fiber from the vegetables, promoting digestive health.

    Always remember that individual nutritional needs may vary. Consider adjusting the ingredients to suit your specific health objectives!

    FAQs: Frequently Asked Questions About Easy One Pot Ravioli Dinner

    Q: Can I use fresh ravioli instead of frozen?
    A: Absolutely! Fresh ravioli will cook faster than frozen; just reduce the cooking time slightly to avoid overcooking.

    Q: How can I make this dish dairy-free?
    A: Simply choose vegan ravioli and skip the Parmesan cheese or replace it with nutritional yeast for a cheesy flavor without dairy.

    Q: What can I do if I don’t have vegetable broth?
    A: In a pinch, you can substitute water with added seasonings. However, using broth tends to enhance the flavors significantly.

    Q: How do I ensure the ravioli doesn’t stick together?
    A: Gently stir the ravioli into the pot during the first few minutes of cooking to avoid clumping. The sauce will also help to keep them separate.

    Q: Are there any low-carb options for this dish?
    A: Yes! You can substitute the ravioli with zucchini noodles or cauliflower gnocchi to keep it low-carb while still enjoying the flavor.

    This flexible, Easy One Pot Ravioli Dinner meets various culinary needs and preferences, making it a fabulous choice for any meal of the week! Ready to gather your ingredients? Enjoy a delightful cooking experience!

  • Easy Ginger Soy Cod

    Easy Ginger Soy Cod

    Easy Ginger Soy Cod: A Tropical Delight

    Introduction to Easy Ginger Soy Cod

    Are you in search of easy dinner recipes that bring a burst of flavor to your table while also being wholesome and healthy? Look no further than this delicious Easy Ginger Soy Cod! This delightful dish brings together the rich, savory taste of soy sauce with the warm spice of ginger, creating a culinary masterpiece that’s sure to excite your taste buds.

    Why choose cod for dinner? This lean fish is not only packed with protein but is also low in calories, making it an ideal ingredient for those watching their dietary intake. Moreover, this recipe is incredibly easy to whip up, making it perfect for busy weeknights or family gatherings. Whether you’re a busy parent, a student, or a newlywed looking to impress, Easy Ginger Soy Cod fits the bill.

    Additionally, its vegan and gluten-free components make it suitable for various dietary needs. You can enjoy this dish guilt-free, knowing that it’s not just a treat for your palate but also a nourishing option for your body. With a cooking time of under 30 minutes, this recipe truly epitomizes convenience without sacrificing flavor.

    Stay tuned as we delve into the benefits and advantages of this delightful dish, the ingredients you’ll need, and how to master the cooking process!

    Benefits and Advantages of Easy Ginger Soy Cod

    When it comes to choosing easy dinner recipes, the Easy Ginger Soy Cod stands out for multiple reasons. First, it emphasizes convenience and speed — you can prepare this dish in less than half an hour! In our fast-paced world, this is a game-changer, especially for working professionals or busy families. You no longer have to sacrifice quality for time.

    Second, this recipe is incredibly health-conscious. Cod is a fantastic source of high-quality protein while being low in fat and calories. In addition, ginger contains anti-inflammatory properties and has been shown to improve digestion, making this dish not just delicious but also beneficial for your health. Ditching heavy fats and opting for a soy sauce marinade adds a robust flavor profile that will satisfy your taste buds without the extra calories.

    Third, Easy Ginger Soy Cod is adaptable. Are you vegan or vegetarian? Substitute cod with firm tofu or tempeh. Gluten-free? Use tamari instead of standard soy sauce. You can effortlessly customize this dish to suit a range of dietary restrictions and preferences, making it a flexible choice for gatherings.

    Not only does this dish cater to various diets, but it also inspires creativity in the kitchen. Enhance the recipe with your favorite vegetables like bok choy or green beans for added texture and flavor. You have the freedom to experiment while keeping your meal nutritious and enjoyable!

    Overall, the advantages of Easy Ginger Soy Cod make it an excellent choice for anyone looking to maintain a balanced diet without compromising on flavor or presentation.

    Ingredients Overview

    Essential Ingredients for Easy Ginger Soy Cod

    Here are the ingredients you will need for crafting this delectable dish. Each ingredient has been selected for its flavor-enhancing properties as well as its health benefits.

    • Cod Fillets (4 pieces, about 6 ounces each): Rich in lean protein and Omega-3 fatty acids, cod is the star of our dish. This mild fish easily absorbs flavors, making it perfect for our marinade.
    • Soy Sauce (1/4 cup): Offers a savory umami flavor. For gluten-free options, substitute with tamari.
    • Fresh Ginger (2 tablespoons, grated): Adds a zesty kick. Moreover, ginger is known for its anti-inflammatory and digestive benefits.
    • Garlic (2 cloves, minced): This aromatic adds depth to the dish and enhances overall flavor.
    • Brown Sugar (1 tablespoon): Balances the saltiness of the soy sauce. For a sugar-free version, consider using stevia or coconut sugar.
    • Honey or Maple Syrup (optional, 1 tablespoon): This is a sweetener option that can enhance the taste, especially if you prefer a slightly sweeter sauce.
    • Sesame Oil (1 tablespoon): Adds nuttiness and enhances the overall flavor profile.
    • Chopped Green Onions (for garnish): These add a pop of color and freshness when sprinkled on top before serving.
    • Salt and Pepper (to taste): Essential for seasoning the dish precisely to your preference.
    • Lemon or Lime Wedges (for serving): Provides a fresh acidity that cuts through the richness of the fish.

    This selection of ingredients crafts a dish that is not only vibrant but also packed with nutrients. Additionally, you’ll find that most of these ingredients are pantry staples, making it easy to whip up this recipe on a whim.

    Dietary Substitutions to Customize Your Easy Ginger Soy Cod

    Here are some suggestions if you need to adjust the recipe for different dietary needs or ingredient availability:

    • If you’re vegan: Substitute the cod with firm tofu or tempeh. Marinate the tofu in the same ginger soy mixture, allowing it to absorb those rich flavors.
    • For a gluten-free version: Simply replace regular soy sauce with tamari or coconut aminos to keep the dish gluten-free without losing flavor.
    • Low-calorie alternatives: Use low-sodium soy sauce to reduce sodium intake. You can also skip the added sugars by using nominal amounts of garlic and ginger to enhance the flavor without additional calories.
    • For a spicy twist: Consider adding a teaspoon of red chili flakes or a dash of Sriracha to the marinade for a spicy kick.
    • Add vegetables: Enhance the nutrition by incorporating your favorite vegetables such as broccoli, bell peppers, or snap peas. Simply toss them into the marinade before cooking.

    Customizing recipes not only keeps your meals interesting but also ensures they meet your specific dietary requirements and preferences.

    How to Prepare the Perfect Easy Ginger Soy Cod: Step-by-Step Guide

    Now that you have your ingredients ready, let’s dive into how to prepare this delightful Easy Ginger Soy Cod! Follow these steps for a fail-proof dinner that’s ready in no time.

    1. Prepare the Marinade: In a bowl, whisk together 1/4 cup soy sauce, 2 tablespoons of grated ginger, 2 minced garlic cloves, 1 tablespoon brown sugar, and 1 tablespoon sesame oil. This harmonious blend creates a flavorful marinade that seeps into the fish and enhances its taste.

    2. Marinate the Cod: Place the cod fillets into a shallow dish. Pour the marinade over the fillets, ensuring each piece is well coated. Cover and refrigerate for at least 15 minutes, allowing the flavors to infuse the fish. If you’re pressed for time, even 5 minutes will do!

    3. Preheat the Pan: Heat a non-stick skillet over medium heat. You want a hot surface to achieve a beautiful sear that will lock in moisture.

    4. Cook the Cod: Remove the cod from the marinade, reserving it for later. Place the fillets in the skillet and cook for about 4-5 minutes on each side. The fish should be opaque and flake easily with a fork when done.

    5. Glaze the Fish: If you like a more concentrated flavor, pour the reserved marinade into the pan after flipping the fish. Let it simmer for a minute to thicken slightly, which adds an extra layer of flavor.

    6. Check for Doneness: To determine if the cod is cooked through, look for it to be completely opaque and flaky. You can also use a food thermometer; the internal temperature should reach 145°F (63°C).

    7. Garnish and Serve: Remove the cod from the skillet and transfer it to a serving plate. Sprinkle chopped green onions on top for a fresh finish. Serve with lemon or lime wedges for added zest!

    8. Pairing Suggestions: This dish pairs beautifully with steamed rice or quinoa. Add sautéed vegetables like bok choy or snap peas to complete the meal while keeping it balanced and nutritious.

    By following these step-by-step instructions, you’ll have an incredible meal that not only satisfies your hunger but also delights your senses. Feel free to adjust cooking times and seasonings to match your preferences, making each dinner a personal experience!

    Mastering Easy Ginger Soy Cod: Advanced Tips and Variations

    Taking your Easy Ginger Soy Cod to the next level can be achieved with some advanced tips and variations:

    • Sear and Bake: For an added dimension, sear the cod in a skillet, then transfer the pan to the oven at 400°F (200°C) for about 10 minutes. This method ensures a beautifully flaky texture with a delightful crust.
    • Add Fruits: Consider a tropical twist by adding slices of pineapple or mango during the last few minutes of cooking. Their natural sweetness beautifully complements the savory qualities of the dish.
    • Herb Infusion: Incorporate fresh herbs like cilantro or basil for an aromatic upgrade. Chopping them finely and sprinkling them over the top just before serving elevates the dish visually and flavor-wise.
    • Experiment with Spice Levels: If desired, transform this dish into a more fragrant experience by adding a dash of five-spice powder or a marinade with additional chili paste for spiciness.
    • Different Cooking Methods: Try grilling the cod on an outdoor grill for a smoky flavor or cooking it in foil for an easy clean-up while ensuring the fish retains moisture.

    These variations and tips not only enhance the dish’s flavor but also invite creativity into your kitchen, making every meal a unique experience.

    How to Store Easy Ginger Soy Cod: Best Practices

    Proper storage can extend the life of your Easy Ginger Soy Cod so you can enjoy it for days to come. Here are the best practices for refrigeration, freezing, and reheating:

    • Refrigeration: Store any leftover cod in an airtight container in the refrigerator for up to 3 days. Ensure it cools completely before sealing to prevent hastening spoilage.

    • Freezing: For longer storage, you can freeze cooked cod. Wrap the fillets tightly in plastic wrap, then place them in a freezer-safe bag or container. This method preserves flavor and texture, allowing for storage of up to 2 months.

    • Reheating: When ready to enjoy your leftovers, it’s best to reheat them in the oven at a low temperature (around 300°F or 150°C) for about 10-15 minutes. This gentle reheating will prevent drying out the fish. Alternatively, you can use the microwave on low power, but keep a close watch to avoid overcooking.

    Storing your Easy Ginger Soy Cod properly ensures you can enjoy it again while maintaining its flavor and nutritional benefits.

    Nutritional Value of Easy Ginger Soy Cod

    Understanding the nutritional make-up of your meals is essential for maintaining a well-balanced diet. Here’s a breakdown of approximate nutritional values per serving (based on one cod fillet):

    • Calories: 200-220 kcal
    • Protein: 22-25 g
    • Fat: 8 g (includes healthy fats from sesame oil)
    • Carbohydrates: 6-8 g (primarily from sugars in the marinade)
    • Fiber: 0 g
    • Sugar: 2 g (considered low, especially if you adjust the sugar content)
    • Sodium: 800-900 mg (varies based on the type of soy sauce used)

    This dish is rich in protein while remaining relatively low in calories, making it a great option for those looking to maintain a healthy diet. Plus, the added benefits of ginger contribute antioxidants and anti-inflammatory properties.

    Paying attention to these nutritional details allows you to make informed decisions about the meals you prepare, ensuring a diet that’s both enjoyable and nourishing.

    FAQs: Frequently Asked Questions About Easy Ginger Soy Cod

    Q1: Can I use frozen cod for this recipe?
    – Yes, you can use frozen cod. Just make sure to thaw it completely before marinating and cooking. This will ensure the fish cooks evenly and absorbs all the flavors.

    Q2: How can I make this dish spicier?
    – To add some heat, include red pepper flakes, Sriracha, or chili oil to your marinade. Adjust to taste according to your preference!

    Q3: Is this recipe suitable for meal prep?
    – Absolutely! This Easy Ginger Soy Cod is perfect for meal prep. Simply cook in bulk and store in individual containers. The flavors tend to enhance after marinating, so it remains a delicious option for several days.

    Q4: Can I use other fish instead of cod?
    – Yes, you can use other firm fish like haddock, tilapia, or even salmon. Just be mindful of the cooking times as they may vary depending on the type of fish.

    Q5: What should I serve with Easy Ginger Soy Cod?
    – This dish pairs well with steamed rice, quinoa, or a fresh salad. You can also serve it alongside roasted or stir-fried vegetables for a balanced meal.

    Q6: Can children enjoy this dish?
    – Yes! The flavors are mild and appealing to children. However, feel free to adjust the sweetness and spiciness based on their preferences!

    These FAQs address some of the most common inquiries regarding The Easy Ginger Soy Cod, helping clarify any uncertainties potential cooks may have.

    In conclusion, you now have all the tools, tips, and insights needed to create a stunning Easy Ginger Soy Cod that not only satisfies cravings but also supports a healthy lifestyle. Families, busy professionals, and food enthusiasts alike will appreciate its simplicity and flavor. So why wait? Gather your ingredients, roll up your sleeves, and make this delicious dish your own! Enjoy cooking, and happy eating!

  • Cozy Mushroom Ricotta Pasta

    Cozy Mushroom Ricotta Pasta

    Cozy Mushroom Ricotta Pasta: A Tropical Delight

    Introduction to Cozy Mushroom Ricotta Pasta

    Are you on the hunt for pasta recipes that are not only easy to prepare but also packed with flavor and health benefits? Look no further than Cozy Mushroom Ricotta Pasta. This delightful dish is the epitome of comfort food while still being light and nourishing. Featuring creamy ricotta mingled with earthy mushrooms, every bite brings a taste of warmth and coziness—perfect for busy weeknights or weekends when you want to impress friends and family.

    The beauty of this recipe lies in its simplicity. With just a handful of ingredients, you can whip up a meal that feels indulgent without unnecessary fuss. Not to mention, it can be easily adapted to fit various dietary needs, making it suitable for everyone—from vegan diets to gluten-free eaters. The combination of mushrooms and ricotta provides not only a rich texture but also a host of health benefits, including vital nutrients and protein.

    In the age of convenience cooking, Cozy Mushroom Ricotta Pasta stands as a reminder that delicious meals can come from minimal ingredients and be made in no time. Whether you’re a busy parent trying to juggle dinner preparation after a long day or a student looking for a quick meal between classes, this recipe is designed with you in mind. Join the pasta revolution and discover how to create a magical dish that’s perfect for any occasion!

    Benefits and Advantages of Cozy Mushroom Ricotta Pasta

    Cozy Mushroom Ricotta Pasta presents numerous advantages that make it a standout choice among various pasta recipes. One of the major highlights is its ease of preparation. This dish can be prepared in under 30 minutes, allowing you to enjoy a satisfying meal without spending the whole evening in the kitchen. This makes it perfect for busy families, working professionals, or anyone who values their time yet still wants to enjoy a home-cooked meal.

    Additionally, let’s talk about health benefits. This recipe primarily features mushrooms, which are low in calories but high in essential nutrients, such as riboflavin, selenium, and niacin. The inclusion of ricotta adds a creamy texture without overwhelming calories, offering a good source of protein. It’s also a great way to sneak in those valuable veggies into your diet. Those who are watching their diets can appreciate that this dish can be made with whole-grain pasta or alternative flour options to enhance the nutritional profile even further.

    Another noteworthy advantage is its versatility. Cozy Mushroom Ricotta Pasta can easily be adapted for vegans by substituting the ricotta with a plant-based cheese or cashew cream. Gluten-free pasta options are abundant today, enabling everyone to enjoy this dish without worries. The layering of flavors can also be tailored—adding fresh herbs or spices can elevate the dish to new heights, making it just as suitable for food enthusiasts who enjoy exploring culinary creativity.

    Lastly, the comfort factor is inherent in this dish. With its creamy texture and flavorful aroma, it truly defines what “cozy” cooking is all about. Eliminating the complexities often found in gourmet pasta recipes, this one remains simple, yet it hits all the right notes. Whether you’re hosting a dinner party, preparing a casual meal for yourself, or cooking for your family, this pasta dish understands the importance of connection and heartwarming experiences through food.

    Ingredients Overview

    Essential Ingredients for Cozy Mushroom Ricotta Pasta

    To create your Cozy Mushroom Ricotta Pasta, you will need the following ingredients:

    • 8 oz of pasta (your choice)
      Whole-grain or gluten-free options available.

    • 1 cup of ricotta cheese
      Provides creaminess and protein. For vegan options, use cashew cream or tofu ricotta.

    • 2 cups of fresh mushrooms (sliced)
      Button, cremini, or shiitake are great choices. Packed with fiber and vitamins.

    • 3 tbsp of olive oil
      A healthy fat option that enhances flavor.

    • 2 garlic cloves (minced)
      Adds aromatic richness. Can be substituted with garlic powder (1/2 tsp).

    • 1/2 cup of vegetable broth
      For a depth of flavor. Low-sodium options are available for a healthier variant.

    • Salt and pepper to taste
      Essential seasonings that bring the dish together.

    • Fresh basil or parsley for garnish
      Adds color and aroma. Optional but recommended.

    This collection of ingredients is not only easy to find but also lends itself well to adaptability. They combine effortlessly, forming a dish that exemplifies comfort while catering to a healthier eating style.

    Dietary Substitutions to Customize Your Cozy Mushroom Ricotta Pasta

    Customizing your Cozy Mushroom Ricotta Pasta is straightforward, thanks to the variety of ingredients that can be swapped based on dietary needs or personal preference:

    1. For Vegan Diets: Substitute the ricotta cheese with a plant-based alternative like cashew cream or store-bought vegan ricotta. You can easily make your own by blending soaked cashews, nutritional yeast, lemon juice, and a bit of garlic.

    2. Gluten-Free Options: Use gluten-free pasta made from chickpeas or brown rice instead of traditional wheat pasta. Many brands offer great alternatives that mimic the texture and taste of regular pasta.

    3. Low-Calorie Variations: Choose spiralized vegetables (like zucchini noodles) or shirataki noodles instead of traditional pasta for a lighter version that maintains a comforting feel.

    4. Add Protein: For those who enjoy extra protein, consider tossing in cooked chicken, shrimp, or plant-based options like chickpeas or lentils to further enhance the dish.

    Through these simple substitutions, you can cater to various preferences without losing the essence of Cozy Mushroom Ricotta Pasta, ensuring everyone can enjoy this delicious meal.

    How to Prepare the Perfect Cozy Mushroom Ricotta Pasta: Step-by-Step Guide

    Creating Cozy Mushroom Ricotta Pasta is a simple, enjoyable process. Here’s a detailed step-by-step guide to help you prepare this delightful dish:

    1. Prepare the Pasta:
      Begin by boiling water in a large pot. Add a pinch of salt for flavor and then cook your preferred pasta according to package instructions until al dente. This typically takes about 8-10 minutes. Remember to reserve a cup of pasta water for later use!

    2. Sauté the Mushrooms:
      In a large skillet, heat the olive oil over medium heat. Add the sliced mushrooms to the skillet. Sauté for about 5-7 minutes until they are golden and tender. Stir occasionally to get an even color, as this enhances their flavor.

    3. Add Aromatics:
      Once the mushrooms are cooked, add the minced garlic. Stir for about a minute until fragrant. Be careful not to burn the garlic, as it can turn bitter.

    4. Pour in Vegetable Broth:
      Add the vegetable broth to the skillet and let it simmer for 3-4 minutes. This will help deglaze the pan and bring all those lovely flavors together.

    5. Combine Ingredients:
      Lower the heat, and stir in the ricotta cheese until fully combined. If the sauce seems too thick, gradually add reserved pasta water until you reach your desired consistency.

    6. Season to Taste:
      Add salt and pepper to taste. Stir thoroughly to make sure the seasoning is evenly distributed, ensuring every mouthful is flavorful.

    7. Mix in the Pasta:
      When the pasta is ready, drain it, then add it to the skillet. Toss the pasta with the sauce until it is completely coated. This is where that comforting texture comes into play!

    8. Serve and Garnish:
      Plate the pasta, and finish with freshly chopped basil or parsley for an aromatic touch. Drizzle a bit more olive oil if you want an extra burst of flavor.

    With these clear and actionable steps, you should be well on your way to mastering Cozy Mushroom Ricotta Pasta. Don’t forget to taste and adapt the recipe to suit your preferences!

    Mastering Cozy Mushroom Ricotta Pasta: Advanced Tips and Variations

    Elevating Cozy Mushroom Ricotta Pasta can be as simple as incorporating some thoughtful tips and exploring variations:

    • Add Extra Veggies: Feel free to throw in some spinach or kale during the last few minutes of cooking. These add even more nutritional value and a pop of color.

    • Roasted Vegetables: For an added layer of flavor, consider roasting your mushrooms before incorporating them into the pasta. This process caramelizes the vegetables and enhances their natural sweetness.

    • Experiment with Cheese: If you’re not strictly vegan, consider mixing in some parmesan cheese or mozzarella for a richer flavor profile. Conversely, using a vegan cheese substitute can maintain the dish’s integrity while still catering to different diets.

    • Herbs and Spices: Enhance the dish by experimenting with various herbs like thyme, oregano, or even a hint of red pepper flakes for a kick. Fresh herbs elevate the flavor and presentation, making your dish pop!

    • Add a Protein Boost: Incorporating grilled chicken, sautéed shrimp, or even cannellini beans can transform this pasta into a heartier entrée, suitable for dinner gatherings or meal prepping.

    These advanced tips not only refine the dish but also invite creativity, allowing you to make Cozy Mushroom Ricotta Pasta time and again while keeping it fresh and exciting.

    How to Store Cozy Mushroom Ricotta Pasta: Best Practices

    Storing your Cozy Mushroom Ricotta Pasta properly will ensure you can enjoy leftovers without compromising on taste or texture:

    • Refrigeration: Allow your pasta to cool to room temperature before transferring it to an airtight container. It can be stored in the refrigerator for up to 3 days. Make sure to consume it within this timeframe to maintain optimal freshness.

    • Freezing: For longer storage, you can freeze your pasta. However, it’s generally advisable to freeze it without the sauce for the best texture. When freezing, make sure to use a freezer-safe container. It can last for up to 2-3 months. For best results, consider cooking individual portions.

    • Reheating: When ready to enjoy your frozen or refrigerated pasta, reheat in a skillet over low heat, adding a splash of vegetable broth or water to bring back the creamy consistency. If using the microwave, stir occasionally to ensure even heating.

    By storing your Cozy Mushroom Ricotta Pasta properly, you can enjoy the comforts of this dish beyond the initial meal.

    Nutritional Value of Cozy Mushroom Ricotta Pasta

    Understanding the nutritional value of Cozy Mushroom Ricotta Pasta enhances its appeal as a wholesome option. Below is an approximate breakdown of one serving, assuming a standard recipe yields about four servings:

    • Calories: 350
    • Protein: 12g
    • Fat: 15g
    • Carbohydrates: 45g
    • Fiber: 3g
    • Sugars: 2g

    These values will vary based on specific brands and substitutions, such as using low-fat ricotta or different types of pasta. Notably, the recipe is rich in vitamins and minerals from the mushrooms and herbs, providing health benefits that go beyond satisfying your hunger.

    By keeping this nutritional information in mind, you can make informed choices about serving sizes and substitutions, ensuring your Cozy Mushroom Ricotta Pasta is as healthy as it is delicious.

    FAQs: Frequently Asked Questions About Cozy Mushroom Ricotta Pasta

    Here are some commonly asked questions and answers regarding Cozy Mushroom Ricotta Pasta, aimed at clearing up any confusion and enhancing your cooking experience:

    Can I make this dish ahead of time?

    Yes, you can prepare the sauce ahead of time and mix it with freshly cooked pasta when you’re ready to serve. This way, the dish remains fresh.

    What can I substitute for mushrooms?

    If you’re not a fan of mushrooms, consider using zucchini, bell peppers, or even eggplant for a different texture and flavor.

    Can I use dairy-free alternatives?

    Absolutely! Use plant-based ricotta or cashew cream to create a completely vegan dish. There are numerous dairy-free cheeses available that can replace traditional cow-based products.

    Is this recipe kid-friendly?

    Yes! The creamy texture and mild flavors of the Cozy Mushroom Ricotta Pasta make it appealing to children. You can add additional veggies to boost its nutrition without compromising taste.

    Can I use a different type of pasta?

    Of course! This recipe is versatile. You can use any pasta shape you like, whether it’s penne, fusilli, or spaghetti.

    By addressing these questions, you’ll not only empower your cooking experience but also make it easier for others to enjoy Cozy Mushroom Ricotta Pasta in their own kitchens.


    Cook up a storm with Cozy Mushroom Ricotta Pasta, a dish that harmonizes flavor and health. This quick recipe might just become one of your favorite pasta recipes, capturing hearts and appetites alike! Enjoy the warmth it brings to your dining table.

  • Easy No Knead Cheddar Bread

    Easy No Knead Cheddar Bread

    Easy No Knead Cheddar Bread: A Tropical Delight

    Introduction to Easy No Knead Cheddar Bread

    If you’re searching for easy and delightful dinner recipes that fit into your busy lifestyle, look no further than this Easy No Knead Cheddar Bread. Whether you’re a parent juggling meal prep or a student learning the ropes of cooking, this recipe simplifies bread-making while delivering incredible flavors. You’ll love how the rich, creamy cheddar infuses the dough, creating a cheesy, crusty loaf that complements any meal.

    This no-knead bread is not only simple to prepare, but it is also healthy, as it requires minimal hands-on time and uses wholesome ingredients. For those conscious of their dietary choices, you’ll find options for vegan and gluten-free adaptations, making it suitable for a wide range of taste preferences. Imagine enjoying freshly baked, warm bread straight from the oven, filled with melted cheddar goodness—perfect for teaming up with soups, salads, or as an impressive starter for dinner parties.

    In summary, Easy No Knead Cheddar Bread is a versatile and delicious option, effortlessly enhancing your culinary repertoire without demanding complex techniques or hours in the kitchen. With this straightforward recipe, you can wow your family and friends, no matter how busy life gets.

    Benefits and Advantages of Easy No Knead Cheddar Bread

    One of the main benefits of creating Easy No Knead Cheddar Bread is its simplicity. With minimal ingredients and no requirement for kneading, even novice cooks can achieve excellent results. In just a few steps, you can produce a decadent loaf that tantalizes the taste buds and elevates your meal. This accessibility makes it a standout choice among dinner recipes for busy individuals or families.

    Moreover, the use of cheddar cheese enhances not only the flavor but also the nutritional aspect of the bread. Cheese is recognized for being rich in calcium and protein, and these nutrients contribute to bone health and muscle maintenance. Using high-quality ingredients ensures that your bread is not only delicious but also a good source of nutrition—perfect for health-conscious individuals or families aiming to improve their eating habits.

    Another significant advantage is the flexibility of this no-knead recipe. With suggestions for substitutions to keep it vegan, gluten-free, or low-calorie, it easily caters to diverse dietary needs. Plus, it allows you to get creative with additional ingredients; consider adding herbs, spices, or different types of cheese to personalize each loaf.

    Lastly, the low-effort nature of this recipe aligns beautifully with today’s fast-paced world. You can mix your ingredients, let them rise, and focus on other tasks while the bread bakes in the oven. Who wouldn’t love the aroma of fresh bread wafting through the house without all the hassle? Easy No Knead Cheddar Bread is more than just a recipe; it’s a solution for enjoying home baking without the usual stress.

    Ingredients Overview

    Essential Ingredients for Easy No Knead Cheddar Bread

    Creating the delectable Easy No Knead Cheddar Bread calls for a handful of simple ingredients, each thoughtfully chosen for its role in the recipe. Below is the detailed list along with precise measurements and explanations of their functions:

    • 3 cups all-purpose flour: The main ingredient that provides the dough’s structure.
    • 1.5 teaspoons salt: Enhances flavor and strengthens the gluten structure, promoting a better rise.
    • 1 teaspoon sugar: Aids in activating yeast and improves browning for a lovely crust.
    • 2 teaspoons instant yeast: This helps the bread rise without the need for kneading. You can also use rapid-rise yeast for quicker results.
    • 1.5 cups warm water (about 110°F): Activates the yeast and hydrates the flour, contributing to a soft, pliable dough.
    • 1.5 cups sharp cheddar cheese, shredded: Adds a rich flavor profile and moisture to the bread. For a vegan-friendly option, substitute dairy-free cheese.
    • Optional: 1 tablespoon dried herbs (such as rosemary or thyme): Customize the flavor by incorporating your favorite herbs.

    Dietary Options:

    • Vegan: Substitute cheddar cheese with a plant-based version.
    • Gluten-Free: Use a gluten-free all-purpose flour blend designed for baking; ensure other ingredients (especially yeast) are certified gluten-free.
    • Low-Calorie: Use reduced-fat cheddar or swap half of the cheese with steamed vegetables for a nutritious twist.

    Dietary Substitutions to Customize Your Easy No Knead Cheddar Bread

    Customization is straightforward with the Easy No Knead Cheddar Bread recipe, allowing you to cater to various dietary needs without sacrificing flavor. Here are some substitutions based on common dietary considerations:

    • Dairy-Free: Utilize non-dairy milk alternatives in place of warm water for a milk bread effect. Opt for nutritional yeast if cheese is not preferred, providing a cheesy flavor without dairy.

    • Gluten-Free: In addition to utilizing a gluten-free flour mix, include a tablespoon of xanthan gum to mimic the elasticity that gluten provides.

    • Low-Carb/Keto: Choose almond flour or coconut flour, recalibrating the liquid quantities accordingly, to create a low-carb version of this bread.

    Experimenting with these substitutions broadens the appeal of this recipe, allowing everyone to join in on the enjoyment of freshly baked bread.

    How to Prepare the Perfect Easy No Knead Cheddar Bread: Step-by-Step Guide

    Baking the perfect Easy No Knead Cheddar Bread is as simple as following these easy steps. Each step ensures you create a delicious loaf while highlighting how adaptive this recipe can be for any dietary needs.

    1. Prepare the Base: In a large mixing bowl, combine the 3 cups of all-purpose flour, 1.5 teaspoons of salt, 1 teaspoon of sugar, and 2 teaspoons of instant yeast. Tip: Use a whisk or spatula to incorporate them evenly.

    2. Mix Ingredients: Gradually pour in 1.5 cups of warm water while stirring with a wooden spoon or your hands until the mixture forms a shaggy dough. This dough should not be kneaded.

    3. Add Cheddar: Fold in 1.5 cups of shredded sharp cheddar cheese until evenly distributed throughout the dough. For variations, consider adding dried herbs or spices at this point.

    4. Cover and Rest: Cover the bowl with a clean kitchen towel or plastic wrap. Allow the dough to rest at room temperature for 12 to 18 hours. This slow fermentation creates a more complex flavor, and the dough will double in size.

    5. Preheat the Oven: About 30 minutes before baking, preheat your oven to 450°F (232°C). Place a Dutch oven or heavy pot (with a lid) inside to heat up.

    6. Shape the Dough: Once the dough has risen, scrape it out onto a floured surface. Use a bench scraper or your hands to form it into a round shape, being careful not to deflate it too much.

    7. Prepare for Baking: Carefully remove your hot pot from the oven. Gently place the dough inside. Tip: You can sprinkle a bit of flour on the bottom of the pot to prevent sticking.

    8. Cover and Bake: Place the lid on the Dutch oven and bake for 30 minutes. This will trap steam in, creating a lovely crust.

    9. Uncover and Brown: After 30 minutes, remove the lid and bake for an additional 15-20 minutes until the top turns golden brown and crispy.

    10. Cool: Once baked, carefully remove the bread from the pot and let it cool on a wire rack for at least 30 minutes before slicing. This ensures the inside finishes setting.

    This method aptly demonstrates how straightforward and adaptable this Easy No Knead Cheddar Bread recipe is, enhancing any meal with minimal effort. Experiment with different flavor profiles or methods, ensuring you have a favorite variation of this delightful recipe!

    Mastering Easy No Knead Cheddar Bread: Advanced Tips and Variations

    To elevate your bread-making game even further, consider these advanced tips and variations for your Easy No Knead Cheddar Bread:

    1. Incorporate Flavored Oils: Experiment with infusing olive oil with garlic or rosemary before mixing it into your dough for an aromatic kick.

    2. Double Cheese Delight: Try using a combination of cheeses, such as a mix of cheddar and gouda, for a more complex flavor.

    3. Herb-Infused Bread: Add fresh herbs such as rosemary, parsley, or basil to the dough for an aromatic lift that can complement any meal—pair it with your favorite dinner recipes.

    4. Baking on a Pizza Stone: For an extra-crispy crust, place the dough on a preheated pizza stone instead of a pot. Just be sure to sprinkle cornmeal to prevent sticking.

    5. Toppings: Before baking, sprinkle the top with seeds (such as sesame or poppy seeds) for added texture and nutritional value.

    Each of these variations showcases the adaptability of the Easy No Knead Cheddar Bread recipe, inviting creativity and personal touch into your kitchen. Enjoy exploring flavors and techniques that best suit your taste buds!

    How to Store Easy No Knead Cheddar Bread: Best Practices

    To ensure your Easy No Knead Cheddar Bread remains delicious for days, it’s essential to store it properly. Here are the best practices for refrigeration and freezing:

    1. Room Temperature Storage: Place the cooled bread in a paper bag or a breadbasket lined with a clean kitchen towel. This prevents moisture loss while keeping the crust from getting stale. Avoid plastic bags as they can make the crust soft.

    2. Refrigeration: If you anticipate not consuming the bread within a few days, refrigerate it in an airtight container. This can help prolong its freshness, although refrigeration may slightly affect the texture.

    3. Freezing: For long-term storage, slice the bread and wrap each piece tightly in plastic wrap followed by aluminum foil to prevent freezer burn. When done correctly, it can last for up to three months. To reheat, thaw in the refrigerator overnight and then toast or warm in the oven at 350°F (175°C) until heated through.

    4. Reheating: To enjoy the bread as if it was fresh out of the oven, reheat in the oven or toaster oven for a few minutes to revive its crusty exterior.

    By following these storage methods, you can keep your Easy No Knead Cheddar Bread at its peak quality, ready to accompany your next dinner recipe seamlessly!

    Nutritional Value of Easy No Knead Cheddar Bread

    Understanding the nutritional value of your Easy No Knead Cheddar Bread makes it easier to fit this delicious option into your overall diet. Here is a breakdown based on a typical serving size of one slice (1/12 of the loaf):

    • Calories: Approximately 180
    • Total Fat: 7g
    • Saturated Fat: 4g
    • Cholesterol: 20mg
    • Sodium: 300mg
    • Total Carbohydrates: 25g
    • Dietary Fiber: 1g
    • Sugars: 1g
    • Protein: 6g

    Health Benefits

    • The combination of cheese and flour provides a good source of protein essential for muscle maintenance.
    • Including fiber in your diet (often enhanced with whole-wheat flour) can aid in digestive health.

    By adjusting the ingredients, it’s possible to create a healthier version of this bread to align with your dietary needs. For example, using whole wheat and reduced-fat cheese will enhance the fiber content while lowering calories and fats.

    Incorporating this comfort food into your meal plans can be both enjoyable and nutritious, so there’s no harm in treating yourself with this delightful bread!

    FAQs: Frequently Asked Questions About Easy No Knead Cheddar Bread

    Here are some common queries regarding Easy No Knead Cheddar Bread, along with clear answers to guide your bread-making experience:

    1. Can I make this bread without cheese?

    Yes! You can omit the cheese entirely to make a plain no-knead bread that pairs well with soups and salads or use nutritional yeast for a cheesy flavor without dairy.

    2. How can I adapt this recipe for vegan diets?

    For a vegan version, simply replace the cheddar cheese with a plant-based alternative and ensure that no animal-based ingredients are used.

    3. My bread is too dense; what went wrong?

    If your bread is dense, it could be due to insufficient rising time or an error in measuring flour. Always measure flour accurately and allow the dough to rise adequately.

    4. How can I enhance the flavor of my bread?

    Incorporating fresh herbs, spices, or even garlic powder into the dough can provide an aromatic flavor. Different types of cheese also introduce unique tastes.

    5. Can I freeze the bread?

    Certainly! Be sure to cool the bread completely, slice it, and wrap it tightly before placing it in the freezer. Thaw and reheat as needed for best results!

    6. How long will the bread last?

    At room temperature, it lasts for about 2-3 days, while refrigerated it can last for up to a week, and freezing extends its freshness for up to three months.

    This FAQ section aims to address common concerns and enable a smooth baking experience for anyone trying the Easy No Knead Cheddar Bread recipe. Happy baking!


    This comprehensive guide covers all your bases for making Easy No Knead Cheddar Bread a staple in your cooking repertoire. With its health-conscious ingredients and user-friendly steps, this recipe ensures delightful, fresh bread can easily fit into your everyday meals, complementing both family dinners and quiet evenings at home. Whether you’re a novice or an experienced baker, you can enjoy this simple, flavorful addition to your menu while impressing loved ones with your culinary prowess.

  • Easy Buffalo Chicken Protein Bowl

    Easy Buffalo Chicken Protein Bowl

    Easy Buffalo Chicken Protein Bowl: A Tropical Delight

    Introduction to Easy Buffalo Chicken Protein Bowl

    Are you looking for a delicious and fulfilling meal that doesn’t take hours to prepare? Look no further than the Easy Buffalo Chicken Protein Bowl! This delectable dish combines the spicy flavor profile of traditional buffalo chicken dip with a nutritious twist. It’s simple to make and packed with protein, making it an ideal choice for busy parents, students, and fitness enthusiasts alike. With just a few ingredients, you can whip up a scrumptious meal that adheres to various dietary needs—whether you’re vegan, gluten-free, or simply seeking a low-calorie option.

    What truly sets this protein bowl apart is its versatility. The unique blend of flavors and textures not only satisfies your taste buds but also ensures you’re getting a nutrient-rich meal. Picture tender shredded chicken, crisp veggies, and a creamy sauce, all beautifully layered in a bowl that’s as pleasing to the eye as it is to the palate. It’s a perfect meal prep option for working professionals and busy individuals who want something healthy and fulfilling without the hassle. Grab your ingredients and get ready to dive into an adventure of flavors you will want to repeat time and again.

    Benefits and Advantages of Easy Buffalo Chicken Protein Bowl

    Why should you try the Easy Buffalo Chicken Protein Bowl? First and foremost, the ease of preparation makes it a standout recipe, especially for those with hectic schedules. You can prepare this dish in under 30 minutes, making it perfect for weeknight dinners or lunch at work. It allows you to whip up a nutritious meal in no time, giving you more time to enjoy with your family or focus on other tasks.

    In terms of health benefits, this protein bowl is not only low in calories, depending on your ingredient choices, but it also packs a protein punch. Using lean chicken breast, vegetables, and optional Greek yogurt for creaminess, it’s designed to fuel your day and keep you satiated longer. Furthermore, with the shift towards healthier eating, this dish can easily accommodate flattering substitutions for various dietary preferences. Vegan options consist of chickpeas or plant-based chicken, while the dish can be made gluten-free by selecting certified grains.

    Beyond health, this recipe speaks to your culinary adventurous spirit. The zesty flavor of the buffalo sauce pairs beautifully with the other elements in the bowl, creating a harmonious symphony of taste. Furthermore, the ability to customize each bowl to suit individual preferences means you’ll never get bored with this dish.

    Ingredients Overview

    Essential Ingredients for Easy Buffalo Chicken Protein Bowl

    Here’s what you’ll need to create your Easy Buffalo Chicken Protein Bowl:

    • 1 lb. Boneless, skinless chicken breast (or plant-based chicken for vegan options)
    • 1 cup cooked quinoa (or rice, and swap for gluten-free grains if needed)
    • 1 cup Buffalo sauce (homemade or store-bought)
    • 1 cup Greek yogurt (substitute with vegan yogurt for a dairy-free version)
    • 1 cup chopped celery (adds crunch!)
    • 1 cup shredded carrots
    • 1 cup diced cucumbers (for freshness)
    • 2 green onions, sliced (for garnish)
    • Lettuce leaves (for a fresh base)
    • Salt and pepper to taste

    These ingredients not only come together in a delicious fashion but also offer essential nutrients that contribute positively to your diet.

    Dietary Substitutions to Customize Your Easy Buffalo Chicken Protein Bowl

    Adapting the Easy Buffalo Chicken Protein Bowl to meet your dietary preferences is simple. Here are a few suggestions:

    • For a Vegan Option: Substitute chicken with chickpeas, lentils, or a plant-based meat alternative, paired with vegan yogurt for creaminess.
    • Gluten-Free: Make sure to use certified gluten-free grains like quinoa or brown rice. The buffalo sauce can also be homemade to ensure it meets your dietary requirements.
    • Low-Calorie: Opt for baked or shredded chicken breast over high-fat cuts. You can reduce the quantity of sauce or use a lighter version without sacrificing flavor.
    • Increased Fiber: Add black beans or kidney beans for extra fiber and nutrients.

    This flexibility allows you to create a meal that not only suits your taste but also aligns with your health goals.

    How to Prepare the Perfect Easy Buffalo Chicken Protein Bowl: Step-by-Step Guide

    Let’s get started on creating your Easy Buffalo Chicken Protein Bowl! Follow these simple steps to make this delectable dish come to life:

    1. Cook the Chicken:
      In a large pot, place your boneless, skinless chicken breast. Fill the pot with enough water to cover the chicken and bring it to a boil. Once boiling, reduce the heat and let it simmer for about 15–20 minutes or until fully cooked. For a vegan option, prepare your plant-based chicken alternative according to package instructions.

    2. Prepare the Quinoa:
      While the chicken cooks, rinse your quinoa in cold water. In another pot, combine 1 cup quinoa with 2 cups of water or broth. Bring to a boil, then cover and simmer on low heat for about 15 minutes until the quinoa is fluffy.

    3. Shred the Chicken:
      Once the chicken is cooked through, remove it from the pot and let it cool slightly. Then use two forks to shred it into bite-sized pieces. If you’ve opted for plant-based chicken, shred it using a fork or your hands.

    4. Make the Sauce:
      In a bowl, combine the shredded chicken with 1 cup of buffalo sauce and stir well. For a creamier texture, you can mix in ½ cup of Greek yogurt or vegan yogurt. Adjust the amount of buffalo sauce to your taste.

    5. Chop the Vegetables:
      While the sauce and chicken are mixing, chop your celery, carrots, and cucumbers.

    6. Assemble the Bowl:
      Start with a base of cooked quinoa; follow with a layer of the buffalo chicken mixture. Top this with your chopped vegetables: celery, carrots, and cucumbers. If you wish, you can add lettuce leaves at the bottom for added crunch.

    7. Garnish and Serve:
      Finally, sprinkle sliced green onions over the top for a pop of color and added flavor.

    8. Enjoy Your Creation:
      Serve immediately or prepare for meal prep students, busy parents, and working professionals to take on-the-go.

    By following these steps, you can have your Easy Buffalo Chicken Protein Bowl ready in no time!

    Mastering Easy Buffalo Chicken Protein Bowl: Advanced Tips and Variations

    To take your Easy Buffalo Chicken Protein Bowl to the next level, here are some tips and exciting variations you might want to try:

    • Add More Texture: Incorporate nuts or seeds, like sunflower seeds or walnuts, to give your bowl an extra crunch.
    • Experiment with Flavors: If you love different types of sauces, try other flavors instead of standard buffalo sauce—think about using a barbecue sauce or even a spicy ranch for a different flavor profile.
    • Incorporate a Sauté: For an added depth of flavor, consider sautéing your vegetables lightly in olive oil before adding them to the bowl.
    • Meal Prep Magic: This dish is ideal for meal prepping. Prepare a larger batch over the weekend, and portion it throughout the week for quick lunches or dinners.

    These tweaks can transform your bowl and keep each serving exciting, ensuring that you enjoy the Easy Buffalo Chicken Protein Bowl over and over again.

    How to Store Easy Buffalo Chicken Protein Bowl: Best Practices

    Storing your Easy Buffalo Chicken Protein Bowl correctly can maintain its freshness and flavor:

    • Refrigeration: To store leftovers, place them in an airtight container and keep them in the refrigerator for up to 4 days.
    • Freezing: You can freeze the buffalo chicken mixture separately from the quinoa and vegetables. Store it in a freezer-safe container for up to 3 months. When ready to eat, thaw in the refrigerator overnight and reheat thoroughly.
    • Reheating: For best results, reheat in the microwave or on the stovetop. If reheating from frozen, let it thaw first, then heat until warm.

    By following these storage tips, you can enjoy your Easy Buffalo Chicken Protein Bowl for days to come!

    Nutritional Value of Easy Buffalo Chicken Protein Bowl

    Now, let’s break down the nutritional information of the Easy Buffalo Chicken Protein Bowl. While the exact values can vary based on specific ingredients and portions, here’s a general overview for one serving:

    • Calories: Approximately 450
    • Protein: About 35 grams
    • Carbohydrates: Roughly 40 grams
    • Fat: Approximately 14 grams
    • Fiber: Estimated 5 grams

    This protein bowl is a fantastic option packed with nutrients, ensuring you have the energy to power through your day.

    Note: Adjust the ingredients (like using low-fat yogurt or less sauce) for specific dietary needs or to cut calories further.

    FAQs: Frequently Asked Questions About Easy Buffalo Chicken Protein Bowl

    Can I make this bowl vegetarian or vegan?

    Absolutely! You can easily substitute the chicken for chickpeas, lentils, or a plant-based protein of your choice.

    How can I make this dish gluten-free?

    Swap the quinoa for a gluten-free grain such as brown rice, and ensure your buffalo sauce is gluten-free.

    How long can I store leftovers?

    You can store leftovers in the refrigerator for up to 4 days. For longer storage, freeze the buffalo chicken mixture for up to 3 months.

    Can I use other proteins instead of chicken?

    Certainly! Feel free to replace chicken with turkey, shrimp, or a plant-based alternative, making this dish adaptable to various preferences.

    What can I use instead of quinoa?

    You can replace quinoa with rice, farro, or any other grain you enjoy! For a low-carb option, consider cauliflower rice.

    By addressing these common questions, I hope you feel more confident in preparing your Easy Buffalo Chicken Protein Bowl!

    In conclusion, the Easy Buffalo Chicken Protein Bowl is not just a meal; it’s a beautiful canvas ready for you to paint with flavors that suit your palate and dietary requirements. With its array of benefits, ease of preparation, and room for customization, it’s bound to become a staple in your kitchen. Happy cooking!

  • Tasty Marshmallow Cheesecake Delight

    Tasty Marshmallow Cheesecake Delight

    Tasty Marshmallow Cheesecake Delight: A Tropical Delight

    Introduction to Tasty Marshmallow Cheesecake Delight

    Are you on the hunt for the perfect dessert recipes that offer a delightful blend of flavors and textures? Look no further than the Tasty Marshmallow Cheesecake Delight! This tropical-inspired treat is not only delicious but also simple to make, making it an excellent choice for home cooks and busy parents alike. Whether you’re whipping it up for a family gathering, a special celebration, or just a sweet craving, this cheesecake is bound to impress.

    The Tasty Marshmallow Cheesecake Delight is a harmonious blend of creamy cheesecake, fluffy marshmallows, and a buttery crumb crust. Not only does it boast a rich, decadent taste, but it also showcases a lightness that makes it an ideal choice for those looking to indulge without feeling weighed down. Additionally, this dessert can be easily adapted to suit various dietary preferences.

    It’s vegan, gluten-free, and can be made with low-calorie ingredients, making it suitable for health-conscious individuals, students, and anyone keen on enjoying dessert without the guilt. So roll up your sleeves, because this cheesecake delight not only tastes amazing but also offers a plethora of health benefits.


    Benefits and Advantages of Tasty Marshmallow Cheesecake Delight

    The Tasty Marshmallow Cheesecake Delight is not just any dessert; it’s a versatile option that caters to diverse dietary needs while being incredibly easy to prepare. Here are some standout benefits of this delightful recipe:

    1. Simplicity in Preparation: With straightforward steps and minimal equipment, even beginner cooks will find this recipe easy to follow. In about an hour, you can whip up this stunning dessert that looks professionally made without overwhelming effort.

    2. Health Benefits: The ingredients in this recipe can be easily modified to promote wellness. The marshmallows can be replaced with all-natural options, while the cream cheese can be made with a low-fat or plant-based alternative, lowering the overall calories and fat content.

    3. Customizable for Dietary Needs: The Tasty Marshmallow Cheesecake Delight can easily be made vegan and gluten-free. Substituting traditional cream cheese with cashew or coconut-based varieties provides a creamy texture that is both dairy-free and delicious.

    4. Rich in Flavor yet Light: This dessert strikes a balance between indulgence and lightness, making it a satisfying treat without heavy repercussions. The fluffy marshmallow layer adds sweetness and a unique texture, while the creaminess of the cheesecake melts in your mouth.

    5. Perfect for Any Occasion: Whether you’re hosting a dinner party or celebrating a birthday, this cheesecake is a focal point that sparks joy and appreciation among all guests. Its tropical flavor profile makes it fitting for summer gatherings, holiday potlucks, or even cozy winter evenings.

    6. Value for Money: With easily accessible ingredients, this cheesecake is budget-friendly. You can create a dessert that feels luxurious without breaking the bank, making it accessible for students and working professionals alike.

    Embrace the health benefits and indulgent qualities of this recipe, and you’ll realize why it is a standout among dessert recipes.


    Ingredients Overview

    Essential Ingredients for Tasty Marshmallow Cheesecake Delight

    To bring your Tasty Marshmallow Cheesecake Delight to life, gather the following ingredients. Each element plays a crucial role in creating the desired flavor and texture:

    • For the Crust:
    • 1 ½ cups crushed graham crackers (or gluten-free alternative)
    • ½ cup unsalted butter, melted (or coconut oil for a dairy-free version)
    • ¼ cup granulated sugar (or coconut sugar as a low-calorie option)

    • For the Cheesecake Filling:

    • 2 cups cream cheese, softened (use vegan cream cheese for a plant-based version)
    • 1 cup granulated sugar (or a sugar substitute like stevia)
    • 1 teaspoon vanilla extract
    • 1 cup heavy whipping cream (or coconut cream for a dairy-free alternative)

    • For the Marshmallow Layer:

    • 2 cups mini marshmallows (look for all-natural or vegan alternatives)
    • 1 tablespoon gelatin (vegan alternative: agar-agar)
    • ½ cup hot water

    Dietary Substitutions to Customize Your Tasty Marshmallow Cheesecake Delight

    This Tasty Marshmallow Cheesecake Delight can easily cater to a variety of dietary needs:

    • Vegan Options: Replace dairy cream cheese with a blend of soaked cashews blended with coconut milk and lemon juice. Use coconut whipped cream as an alternative for heavy cream.

    • Gluten-Free Substitutes: Opt for gluten-free graham crackers or use crushed almonds or oats for the crust.

    • Low-Calorie Variants: Consider using low-fat cream cheese and reducing the sugar by half. Moreover, using sugar alternatives can significantly cut down on calories.

    • Nut Allergies: Substitute heavy cream with soy-based alternatives or use oat cream for those with nut allergies.

    By mixing and matching these substitutions, you can create a version of the Tasty Marshmallow Cheesecake Delight that fits your dietary requirements – ensuring everyone can enjoy a slice!


    How to Prepare the Perfect Tasty Marshmallow Cheesecake Delight: Step-by-Step Guide

    Now, it’s time to dive into the detailed preparation of the Tasty Marshmallow Cheesecake Delight. Follow these clear step-by-step instructions to create a luxurious dessert that will wow your family and friends!

    1. Prepare the Base:
    2. In a mixing bowl, combine the crushed graham crackers, melted butter, and granulated sugar. Stir until well mixed.
    3. Press the mixture firmly into the bottom of a 9-inch springform pan, creating an even layer. Set aside in the refrigerator to firm up while you prepare the filling.

    4. Mix the Cream Cheese Filling:

    5. In a large mixing bowl, beat the softened cream cheese with an electric mixer until smooth. Add the granulated sugar and vanilla extract, mixing until well combined.
    6. In another bowl, whip the heavy cream until peaks form. Gently fold the whipped cream into the cream cheese mixture, ensuring a light and airy consistency.

    7. Layer the Cheesecake Mixture:

    8. Remove the crust from the refrigerator. Pour the cream cheese filling over the crust, using a spatula to spread it evenly.
    9. Refrigerate the cheesecake for at least 4 hours or overnight, allowing it to set properly.

    10. Prepare the Marshmallow Layer:

    11. In a small bowl, dissolve the gelatin in half a cup of hot water, stirring until fully dissolved. (For a vegan version, dissolve agar-agar according to package instructions).
    12. In a separate bowl, combine the marshmallows and the dissolved gelatin. Microwave on high for about 30 seconds, then stir until smooth.

    13. Combine Layers:

    14. Once the cheesecake has set, carefully spread the marshmallow mixture on top, smoothing it into an even layer.

    15. Final Chill:

    16. Return the cheesecake to the refrigerator for at least another hour to allow the marshmallow topping to set.

    17. Serve the Cheesecake:

    18. Once fully chilled and set, remove the sides of the springform pan. Slice the cheesecake into wedges and serve chilled. Garnish with extra marshmallows or whipped cream if desired.

    The combination of rich cheesecake and fluffy marshmallows creates a delightful dessert experience. Be sure to take note of any dietary adaptations you wish to make along the way!


    Mastering Tasty Marshmallow Cheesecake Delight: Advanced Tips and Variations

    Elevate your Tasty Marshmallow Cheesecake Delight with these advanced tips and fun variations:

    • Add Fruit: Consider blending in fresh fruit like mango or pineapple to the cream cheese mixture for an extra layer of flavor. This can make the cheesecake even more refreshing.

    • Chocolate Swirl: For a chocolatey twist, melt some dark chocolate and swirl it into the cream cheese filling before it sets. This creates a marbled effect that is as beautiful as it is delicious.

    • Nutty Crust: To add depth to the crust, mix in some finely chopped nuts such as almonds or pecans along with the graham crackers. This adds crunch and flavor.

    • Incorporate Zest: A teaspoon of lemon or orange zest in the cream cheese filling can enhance the flavor profile with a citrusy brightness that pairs beautifully with the marshmallows.

    • Presentation Ideas: Serve slices of cheesecake topped with a drizzle of caramel sauce, shredded coconut, or crushed nuts to make it visually appealing.

    By exploring these variations and tips, you will impress your guests with your creativity and elevate an already delicious dessert to new heights.


    How to Store Tasty Marshmallow Cheesecake Delight: Best Practices

    To keep your Tasty Marshmallow Cheesecake Delight fresh and delicious, follow these storage tips:

    • Refrigeration: Store leftover cheesecake in an airtight container in the refrigerator. It will stay fresh for up to 5 days. The longer it sits, the more the flavors meld together, but the marshmallow topping may lose some of its initial fluffiness.

    • Freezing: If you wish to keep it for an extended period, you can freeze the cheesecake. Wrap it tightly in plastic wrap and then aluminum foil before placing it in the freezer. It can last up to 3 months.

    • Reheating: When you’re ready to enjoy your frozen cheesecake, transfer it to the refrigerator to thaw overnight. Avoid microwaving it as it can make the texture grainy.

    By adhering to these storage guidelines, you can enjoy your Tasty Marshmallow Cheesecake Delight whenever the craving strikes, without losing its heavenly flavor and texture.


    Nutritional Value of Tasty Marshmallow Cheesecake Delight

    Understanding the nutritional value of the Tasty Marshmallow Cheesecake Delight can help you maintain your health while still enjoying the sweetness. Here’s a rough breakdown of the nutritional content per serving (based on traditional ingredients):

    • Calories: 320 kcal
    • Total Fat: 22g
    • Saturated Fat: 12g
    • Cholesterol: 80mg
    • Sodium: 150mg
    • Total Carbohydrates: 28g
    • Dietary Fiber: 1g
    • Sugars: 18g
    • Protein: 4g

    For adaptations, using low-fat cream cheese and reducing sugar can further lower calories and fat. If you employ vegan alternatives, the calorie content might change based on your choices, but overall, you can achieve a lighter dessert without compromising the taste.

    It’s essential to balance indulgence with nutrition, and this dessert allows you to enjoy your sweet tooth guilt-free.


    FAQs: Frequently Asked Questions About Tasty Marshmallow Cheesecake Delight

    Q1: Can I use store-bought marshmallow fluff instead of mini marshmallows?

    Yes, you can substitute store-bought marshmallow fluff for mini marshmallows to make preparation even easier. Just mix it into the gelatin as directed, and you’ll achieve similar results.

    Q2: Is there a way to make this dessert sugar-free?

    Absolutely! You can replace granulated sugar with your preferred sugar substitute, such as stevia or erythritol. Ensure to check the equivalence to achieve desired sweetness.

    Q3: How can I make a low-calorie version of the cheesecake?

    To create a low-calorie version, use low-fat cream cheese, coconut cream, and reduce the amount of sugar. Also, consider altering the crust to a lighter option, such as crushed almonds mixed with a touch of coconut oil.

    Q4: How do I know when the cheesecake is set?

    The cheesecake will look firm and not jiggle when you gently shake the pan. Touching the center with a fingertip should feel firm but soft to the touch.

    Q5: Can this cheesecake be made ahead of time?

    Definitely! In fact, making it a day in advance enhances the flavor and allows it to set perfectly. Just be sure to store it properly in the refrigerator.

    Q6: Can I add flavors to the cheesecake filling?

    Yes, absolutely! Adding flavors like lemon zest, vanilla, or chocolate can infuse the cheesecake with delightful tastes that complement the marshmallow topping beautifully.

    Dreaming of a creamy and fluffy treat? Dive right into the kitchen and indulge in making your Tasty Marshmallow Cheesecake Delight today. With its remarkable taste and versatility, it’s bound to become a favorite in your dessert repertoire!

  • Tasty Coffee Brownie Cheesecake Dessert

    Tasty Coffee Brownie Cheesecake Dessert

    Tasty Coffee Brownie Cheesecake Dessert: A Tropical Delight

    Introduction to Tasty Coffee Brownie Cheesecake Dessert

    If you’re seeking dessert recipes that marry the rich, indulgent flavors of coffee, brownie, and cheesecake, look no further. The Tasty Coffee Brownie Cheesecake Dessert is the ultimate treat that ticks all the boxes for dessert lovers. Its moist brownie base layered with a creamy coffee cheesecake filling creates a delightful harmony of flavors, making it perfect for any occasion.

    What makes this recipe even more appealing is its simplicity. You don’t need to be a baking expert to whip up this dessert. With just a handful of ingredients, you can create a stunning dish that’s sure to impress friends and family. Moreover, it can be tailored to meet various dietary requirements. The base can be made gluten-free, and the cheesecake layer can easily be dairy-free or vegan, allowing everyone to enjoy a slice of this heavenly delight.

    Additionally, the health benefits of this dessert can’t be overlooked. When crafted with wholesome ingredients, this Tasty Coffee Brownie Cheesecake Dessert can serve as a guilt-free indulgence. The combination of protein from the cheesecake and the rich flavor from the coffee offers more than just pleasure—it provides a delicious boost to your day.

    Whether you’re a busy parent searching for an easy dessert recipe or a baking enthusiast looking to try something new, this dessert is versatile enough for every cook, from students to newlyweds. Let’s dive into the delicious world of Tasty Coffee Brownie Cheesecake Dessert!

    Benefits and Advantages of Tasty Coffee Brownie Cheesecake Dessert

    The Tasty Coffee Brownie Cheesecake Dessert stands out due to its numerous benefits and advantages that cater to a variety of tastes and preferences.

    Ease of Preparation

    Firstly, the straightforward preparation ensures that even novice bakers can feel confident tackling this dish. It requires minimal equipment—a mixing bowl, a whisk, and a baking dish—making it easy to whip up without the need for extensive culinary tools. Plus, with just a few steps, you can create a dessert that looks and tastes gourmet.

    Health Benefits

    Many of the ingredients can be tailored to fit a more health-conscious lifestyle. For example, using dark chocolate in the brownie base adds antioxidants while keeping sugar content lower than traditional recipes. Additionally, by substituting regular cream cheese with a low-fat or dairy-free version, you can significantly reduce calories and fat without sacrificing taste.

    Another significant aspect of this recipe is its ability to offer a caffeine boost from the coffee. This energizing touch makes it an excellent choice for a quick pick-me-up during the day or as a comforting evening treat.

    Dietary Versatility

    Catering to dietary restrictions? No problem! This dessert can be adapted to various dietary needs, making it a perfect option for gatherings where guests may have specific preferences. Whether vegan, gluten-free, or low-calorie, you can easily substitute ingredients without losing that delicious flavor and texture.

    In addition to being versatile, this dessert is also visually striking. The contrast of the dark brownie with the creamy coffee cheesecake on top creates an inviting presentation that’s sure to impress. It’s this combination of ease, health benefits, and adaptability that makes the Tasty Coffee Brownie Cheesecake Dessert a showstopper in your collection of dessert recipes.

    Ingredients Overview

    Essential Ingredients for Tasty Coffee Brownie Cheesecake Dessert

    To create this delectable dessert, gather the following ingredients, ensuring you choose the best options for your dietary needs:

    Brownie Layer:

    • 1 cup all-purpose flour (or gluten-free flour blend)
    • 1 teaspoon baking powder
    • 1/4 teaspoon salt
    • 1/2 cup unsweetened cocoa powder
    • 1 cup granulated sugar (or coconut sugar for a lower glycemic option)
    • 1/2 cup melted coconut oil
    • 2 large eggs (or flaxseed meal as a vegan substitute)
    • 1 teaspoon pure vanilla extract
    • 1/2 cup semi-sweet chocolate chips (dairy-free for a vegan option)

    Cheesecake Layer:

    • 8 oz cream cheese (or dairy-free cream cheese)
    • 1/2 cup powdered sugar (or agave syrup for a lower-calorie choice)
    • 1/4 cup brewed coffee (cooled)
    • 1 teaspoon pure vanilla extract
    • 1 tablespoon lemon juice (adds tanginess)

    Topping (optional):

    • Whipped cream (dairy-free if desired)
    • Chocolate shavings or cocoa powder for garnish

    Dietary Substitutions to Customize Your Tasty Coffee Brownie Cheesecake Dessert

    This dessert recipe allows for several substitutions to accommodate different dietary choices:

    • For Vegan: Replace eggs with flaxseed meal (1 tbsp flaxseed meal + 2.5 tbsp water equals one egg). Use dairy-free cream cheese and coconut oil instead of butter.

    • For Gluten-Free: Use a gluten-free flour blend in place of all-purpose flour. Make sure to check that your chocolate chips are also gluten-free.

    • For Low-Calorie: Substitute granulated sugar with stevia or another sugar alternative in both the brownie and cheesecake layers. You can also use low-fat cream cheese instead of full-fat.

    • To Make It Nut-Free: Ensure any toppings or brands of chocolate chips are free from nuts.

    With these substitutions, this Tasty Coffee Brownie Cheesecake Dessert can be enjoyed by nearly everyone, making it a standout recipe for all occasions.

    How to Prepare the Perfect Tasty Coffee Brownie Cheesecake Dessert: Step-by-Step Guide

    Follow these simple steps to create your Tasty Coffee Brownie Cheesecake Dessert, ensuring you savor every moment of this delightful baking journey.

    1. Preheat the Oven: Begin by preheating your oven to 350°F (175°C). This sets the stage for perfectly baked brownies.

    2. Prepare the Brownie Base:

    3. In a large mixing bowl, whisk together the flour, baking powder, salt, cocoa powder, and granulated sugar until well combined.
    4. Pour in the melted coconut oil, eggs (or flaxseed mixture), and vanilla extract. Stir the mixture until smooth.
    5. Fold in the chocolate chips for that extra indulgence.

    6. Bake the Brownie Layer:

    7. Grease a 9×9-inch baking pan or line it with parchment paper.
    8. Pour the brownie batter into the prepared pan, spreading it evenly.
    9. Bake for 20-25 minutes, or until a toothpick inserted in the center comes out with a few moist crumbs.

    10. Prepare the Cheesecake Layer:

    11. In another bowl, beat the cream cheese (or dairy-free alternative) using a hand mixer until creamy and smooth.
    12. Gradually add the powdered sugar, brewed coffee, vanilla extract, and lemon juice, mixing until the filling is light and fluffy.

    13. Layer the Cheesecake:

    14. Once the brownie layer has cooled, gently spread the coffee cheesecake mixture over the brownie base using a spatula.
    15. Smooth the top to create an even layer.

    16. Chill the Dessert:

    17. Place the pan in the refrigerator and allow the dessert to chill for at least 4 hours, preferably overnight. This helps the layers set beautifully.

    18. Serve and Enjoy:

    19. Once chilled, lift the dessert from the pan using the edges of the parchment paper for easy cutting.
    20. Slice into squares or rectangles and serve. Top with whipped cream and chocolate shavings if desired.

    21. Storing Leftovers:

    22. If you have any leftover slices, store them in an airtight container in the fridge for up to 5 days. Enjoy!

    By following these steps, you’ll master the Tasty Coffee Brownie Cheesecake Dessert, a remarkable addition to your diverse repertoire of dessert recipes. The steps are designed for adaptability; you can choose whichever substitutes suit your dietary needs best.

    Mastering Tasty Coffee Brownie Cheesecake Dessert: Advanced Tips and Variations

    To elevate your Tasty Coffee Brownie Cheesecake Dessert even further, consider these advanced tips and possible variations:

    Tips for Success:

    • Quality Ingredients: Always choose high-quality chocolate and coffee for the best flavor. The better the ingredients, the richer your dessert will be.
    • Chill Time is Crucial: Do not rush the chilling process. Allowing the layers to set is key to achieving that creamy cheesecake texture.
    • Use Room Temperature Ingredients: For a smoother cheesecake filling, ensure that the cream cheese is at room temperature before mixing.

    Variations to Try:

    • Nutty Addition: Add walnuts or pecans to the brownie batter for a crunchy texture. This also enhances the flavor profile.
    • Caramel Drizzle: Drizzle some caramel sauce over the cheesecake layer before chilling for an extra indulgent experience.
    • Fruit Infusion: Incorporate chopped strawberries or raspberries into the cheesecake mixture for a fruity twist. Berries pair beautifully with coffee and chocolate!
    • Mocha Flavor: For an intense coffee experience, incorporate 1 tablespoon of instant espresso powder into the cheesecake layer.

    By incorporating these tips and variations, you can tailor this Tasty Coffee Brownie Cheesecake Dessert to suit your personal taste and impress your guests. Remember, experimenting with dessert recipes is all about creativity!

    How to Store Tasty Coffee Brownie Cheesecake Dessert: Best Practices

    Proper storage is essential to keeping your Tasty Coffee Brownie Cheesecake Dessert fresh and delicious. Here are some best practices to follow:

    Refrigeration:

    • Chilled Slices: Store the dessert in an airtight container in the refrigerator. This helps maintain its moisture and flavor. Enjoy within 5 days for the best taste.

    Freezing:

    • To Freeze: If you want to keep some slices for a later date, wrap them tightly with plastic wrap and then place them in a freezer-safe container. You can freeze the dessert for up to 3 months.
    • To Thaw: When you’re ready to enjoy, transfer it to the refrigerator and defrost it overnight. This keeps the texture intact.

    Reheating:

    • To Serve Warm: If you prefer your brownie cheesecake dessert slightly warm, you can reheat individual slices in the microwave for about 15-20 seconds. Just ensure you don’t overheat it, as the cheesecake filling can become runny.

    By following these storage tips, you can look forward to enjoying your Tasty Coffee Brownie Cheesecake Dessert long after it’s made!

    Nutritional Value of Tasty Coffee Brownie Cheesecake Dessert

    Let’s delve into the nutritional aspects of the Tasty Coffee Brownie Cheesecake Dessert. When gauging the healthfulness of dessert recipes, it’s essential to have a sensible balance of calories, fat, and other nutrients. Below is an approximate nutritional breakdown per serving (assuming 12 servings):

    • Calories: 290 – 350 kcal
    • Protein: 4 – 6 grams
    • Total Fat: 18 – 22 grams
    • Saturated Fat: 10 – 12 grams
    • Total Carbohydrates: 32 – 38 grams
    • Dietary Fiber: 1 – 2 grams
    • Sugars: 20 – 25 grams

    Health Benefits

    The dessert provides a moderate amount of protein from the cream cheese and can contain healthy fats if you use coconut oil. By substituting sugar with low-calorie alternatives, you can enjoy a flavorful dessert while keeping your sugar intake in check.

    Given these nutritional benefits, this Tasty Coffee Brownie Cheesecake Dessert is not only satisfying but can also fit into a balanced approach to desserts, especially when enjoyed in moderation.

    FAQs: Frequently Asked Questions About Tasty Coffee Brownie Cheesecake Dessert

    Can I make this dessert ahead of time?

    Absolutely! This dessert can be made a day in advance. The flavors deepen as it chills, making it even more delicious.

    What can I substitute for cream cheese?

    If you’re looking for a dairy-free option, many brands offer vegan cream cheese or cashew cream as a suitable alternative.

    Is it necessary to chill the dessert?

    Yes, chilling is crucial in setting the layers of the cheesecake and ensuring the perfect texture.

    Can I add different flavors to the cheesecake layer?

    Certainly! You can incorporate flavorings such as vanilla bean, almond extract, or even fruit purees to customize your cheesecake layer.

    How do I know when the brownies are baked?

    The brownies are done when a toothpick inserted into the center comes out with a few moist crumbs. Be mindful not to overbake, as this can lead to dry brownies.

    How long can leftovers last in the fridge?

    When stored correctly in an airtight container, leftovers can last up to 5 days in the refrigerator.

    Discovering new dessert recipes can be a delightful journey, and the Tasty Coffee Brownie Cheesecake Dessert is testament to how easy and enjoyable baking can be. This recipe not only satisfies your sweet tooth but offers flexibility for different dietary choices, making it a treat for all. Whether you’re serving it at a family gathering or enjoying it during a quiet evening at home, this dessert will surely bring joy and smiles. Happy baking!

  • The Best Millionaire Cheesecake Recipe

    The Best Millionaire Cheesecake Recipe

    The Best Millionaire Cheesecake Recipe: A Tropical Delight

    Introduction to The Best Millionaire Cheesecake Recipe

    In the world of dessert recipes, few can rival the luxurious and creamy delight of a well-made cheesecake. The Best Millionaire Cheesecake Recipe takes this classic dessert to new heights by combining rich flavors, delightful textures, and a touch of tropical freshness. Whether you are a busy parent juggling countless responsibilities, a student looking to impress friends at a gathering, or simply a dessert enthusiast wanting to indulge in something extraordinary, this recipe is tailored for you.

    Imagine a dessert that not only satisfies your sweet tooth but also caters to various dietary needs. This cheesecake can be made vegan, gluten-free, or low-calorie, making it an inclusive dish that everyone can enjoy. What sets this cheesecake apart is its versatility; it serves as a luxurious centerpiece for celebrations or a simple treat for an ordinary day. Plus, it’s straightforward enough for even novice bakers to master. Join me as we explore the full details of The Best Millionaire Cheesecake Recipe—the ultimate indulgence that is beautifully simple yet profoundly satisfying.

    Benefits and Advantages of The Best Millionaire Cheesecake Recipe

    When it comes to selecting dessert recipes that offer both delicious flavors and health-conscious benefits, The Best Millionaire Cheesecake Recipe shines brightly. One of the standout features of this cheesecake is its impressive adaptability. You can tailor it to meet specific dietary needs while still enjoying rich, creamy goodness.

    1. Simple Preparation: This cheesecake requires minimal intricate techniques, perfect for home cooks of all skill levels. With only a few key steps, busy parents and beginner bakers will find this dessert manageable, making it an excellent option for weeknight desserts or last-minute gatherings.

    2. Health Benefits: By using wholesome ingredients, such as low-fat cream cheese or plant-based cream alternatives, you can significantly reduce the calorie content without sacrificing taste. Plus, incorporating natural sweeteners like maple syrup or agave can make the cake more health-friendly while maintaining a delightful sweetness.

    3. Versatility: This cheesecake caters to a variety of dietary preferences. It can easily be adapted to fit vegan, gluten-free, or even keto diets, ensuring that everyone at your table can enjoy a slice. With a few ingredient substitutions and simple swaps, you can create a tasty dish that resonates with your guests’ dietary preferences.

    Overall, this millionaire cheesecake stands out in the crowded world of dessert recipes, providing a balance of indulgence and health, making it an ideal choice for celebrations and casual get-togethers alike.

    Ingredients Overview

    Essential Ingredients for The Best Millionaire Cheesecake Recipe

    To create The Best Millionaire Cheesecake, keep the following ingredients on hand:

    • For the Crust:
    • 1 ½ cups graham cracker crumbs (or gluten-free alternative)
    • ½ cup unsalted butter, melted (substitute with coconut oil for a vegan option)
    • ¼ cup sugar (can use coconut sugar as a healthier alternative)

    • For the Filling:

    • 3 cups cream cheese, softened (use vegan cream cheese for a dairy-free option)
    • 1 cup sugar (can substitute with a low-calorie sweetener)
    • 3 large eggs (flax eggs work for vegan versions)
    • 1 teaspoon vanilla extract
    • 1 cup heavy whipping cream (or coconut cream for vegan)

    • For Topping:

    • Fresh fruits like mango, strawberries, or passion fruit (opt for organic if possible)
    • Whipped cream (can use coconut whipped cream for a vegan option)
    • Optional: Grated chocolate or caramel drizzle

    These ingredients create a rich flavor profile while being easily customizable to cater to a range of dietary needs.

    Dietary Substitutions to Customize Your The Best Millionaire Cheesecake Recipe

    Adapting The Best Millionaire Cheesecake Recipe to fit various dietary requirements is simple with these substitutions:

    • Gluten-Free: Use gluten-free graham crackers or almond flour mixed with melted coconut oil as a crust substitute.
    • Vegan: Opt for plant-based cream cheese and flax eggs instead of traditional eggs and dairy cream. Coconut cream can provide a rich texture while keeping it plant-based.
    • Low-Calorie: Utilize low-calorie sweeteners such as erythritol or stevia in place of sugar, and even consider low-fat cream cheese to reduce calorie levels significantly.

    These adjustments not only make the cheesecake accessible for all but also allow for creativity in the kitchen.

    How to Prepare the Perfect The Best Millionaire Cheesecake Recipe: Step-by-Step Guide

    Let’s dive into the step-by-step instructions for preparing The Best Millionaire Cheesecake Recipe. This detailed guide ensures simplicity and straightforwardness, which are essential when making delicious dessert recipes.

    1. Prepare the Base:
    2. Preheat your oven to 350°F (175°C).
    3. In a mixing bowl, combine the graham cracker crumbs, melted butter, and sugar.
    4. Press the mixture evenly into the bottom of a 9-inch springform pan to create a sturdy crust.

    5. Mix Ingredients for Filling:

    6. In a separate mixing bowl, beat the cream cheese until smooth and creamy.
    7. Gradually add the sugar, and mix until well blended.
    8. Add the eggs one at a time, mixing after each addition. Then, stir in the vanilla extract.

    9. Incorporate Whipped Cream:

    10. Gently fold in the heavy whipping cream until the mixture is smooth and fluffy. This step will add lightness to your cheesecake.

    11. Pour the Filling:

    12. Pour the cream cheese mixture over the prepared crust in the springform pan. Make sure it’s evenly spread for consistent baking.

    13. Bake the Cheesecake:

    14. Place the springform pan in the preheated oven and bake for approximately 60-70 minutes, or until the center is set but slightly jiggly.
    15. Turn off the oven, crack the door open, and let the cheesecake cool gradually inside for about an hour to prevent cracks.

    16. Chill the Cheesecake:

    17. Once cooled, refrigerate the cheesecake for at least four hours, preferably overnight. Chilling is crucial for the perfect texture.

    18. Prepare the Toppings:

    19. Before serving, top with fresh fruits and whipped cream. Drizzle with caramel or chocolate if desired for an extra indulgent touch.

    20. Slice and Serve:

    21. Carefully release the cheesecake from the springform pan. Use a sharp knife for clean slices and enjoy your delicious creation!

    By following these simple steps, you are well on your way to making a delicious, show-stopping cheesecake that everyone will adore.

    Mastering The Best Millionaire Cheesecake Recipe: Advanced Tips and Variations

    Culinary exploration is part of the fun, and enhancing The Best Millionaire Cheesecake Recipe can lead to incredible results. Here are some advanced tips and variations to take your cheesecake to the next level:

    • Flavor Variations: Experiment with different flavors by adding lemon zest for a citrusy twist or espresso powder for a mocha vibe. You can also swirl in fruit preserves or chocolate for added sophistication.

    • Add Texture: Try incorporating crushed nuts or a sprinkle of granola on top for added crunch. This adds a delightful contrast to the smooth creaminess of the cheesecake.

    • Mini Cheesecakes: For portion control, create mini version cheesecakes using muffin tins. Simply cut the baking time down to about 20-25 minutes.

    • No-Bake Alternative: Prefer a no-bake version? Follow the same process for the crust and filling but skip the baking step. Simply let the cheesecake set in the refrigerator for at least 6 hours.

    By experimenting with these tips and variations, you can create a signature cheesecake that reflects your tastes while delighting friends and family alike.

    How to Store The Best Millionaire Cheesecake Recipe: Best Practices

    Proper storage of your Millionaire Cheesecake is crucial to maintain its flavor and texture. Here are the best practices for refrigeration and freezing:

    • Refrigerating: Keep your cheesecake in the refrigerator for up to one week. Store it in an airtight container or cover it with plastic wrap to prevent it from absorbing other flavors.

    • Freezing: If you want to enjoy this cheesecake later, it can be frozen for up to three months. To freeze, ensure it’s completely cooled, then wrap it tightly in plastic wrap and aluminum foil. Thaw in the fridge overnight before serving.

    • Reheating: If you prefer your cheesecake slightly warm, you can gently reheat slices in the microwave for about 15-20 seconds. Avoid overheating, as it may alter the texture.

    By following these storage tips, you can ensure that The Best Millionaire Cheesecake Recipe remains fresh and delightful for as long as possible.

    Nutritional Value of The Best Millionaire Cheesecake Recipe

    Understanding the nutritional information of desserts is critical for health-conscious individuals. Here’s a breakdown of the nutritional value per slice (assuming 12 servings):

    • Calories: Approximately 360
    • Protein: 6g
    • Fat: 23g
    • Carbohydrates: 28g
    • Fiber: 1g
    • Sugar: 15g

    This cheesecake offers a balance of satisfying flavors while maintaining a reasonable calorie count, especially if you opt for lower-calorie and healthier ingredient substitutes.

    FAQs: Frequently Asked Questions About The Best Millionaire Cheesecake Recipe

    1. Can I make this cheesecake gluten-free?
    2. Absolutely! Substitute the graham cracker crust with gluten-free alternatives such as almond flour.

    3. How long should I refrigerate the cheesecake before serving?

    4. Refrigerate your cheesecake for at least four hours but for best results, overnight chilling is recommended.

    5. Can this cheesecake be made vegan?

    6. Yes, you can use plant-based cream cheese and flax eggs to make a delicious vegan version.

    7. What are some topping ideas?

    8. Fresh fruits, various flavored whipped creams, or chocolate drizzle make wonderful toppings. Feel free to mix and match!

    9. Can I freeze the cheesecake?

    10. Yes! Make sure it’s well-wrapped, and it can be frozen for up to three months. Thaw it in the refrigerator before serving.

    By addressing these common questions, readers can feel more confident in creating The Best Millionaire Cheesecake Recipe while navigating their dietary restrictions and preferences.

    The delightful, creamy nature of this cheesecake is only rivaled by its versatility, making it a beloved choice for dessert lovers everywhere. Happy baking!

  • Cozy Garlic Bread Grilled Cheese

    Cozy Garlic Bread Grilled Cheese

    Cozy Garlic Bread Grilled Cheese: A Tropical Delight

    Introduction to Cozy Garlic Bread Grilled Cheese

    When you’re searching for easy dinner recipes, look no further than this Cozy Garlic Bread Grilled Cheese. This delightful dish combines the warmth of a classic grilled cheese with the robust flavor of garlic bread, creating a satisfying meal that is both comforting and indulgent. This recipe is perfect for home cooks looking to impress their families or anyone who craves a quick, delicious option after a long day. Its simplicity doesn’t compromise quality; instead, it makes cooking joyful, whether you’re a novice or an experienced chef.

    Garlic Bread Grilled Cheese is not just about flavor; it offers several health benefits as well. By using whole grain bread and a moderate amount of cheese, you create a dish rich in nutrients, including fiber and protein. For those following specific dietary needs—be it vegan, gluten-free, or low-calorie—this recipe can be easily adjusted without sacrificing taste.

    With its inviting aroma and golden crust, Cozy Garlic Bread Grilled Cheese is suitable for anyone. Busy parents can whip it up for dinner in no time, while college students can enjoy a nourishing meal that’s quick to prepare. Additionally, its versatility makes it a welcome addition for food enthusiasts wanting to explore new flavors, seniors who appreciate simple yet satisfying meals, and couples who desire a romantic meal without the fuss. Your taste buds will thank you for giving this recipe a try!

    Benefits and Advantages of Cozy Garlic Bread Grilled Cheese

    One of the best things about this easy dinner recipe is its uncomplicated preparation. With minimal ingredients, you don’t need to spend hours in the kitchen. This cozy dish can be made in less than 20 minutes, making it an excellent choice for busy weeknights or spontaneous gatherings with friends.

    From a health perspective, Cozy Garlic Bread Grilled Cheese can be made with nutritious ingredients. Opting for whole grain or gluten-free bread adds fiber to your meal, while choosing reduced-fat cheese can result in a lower-calorie version that’s still incredibly satisfying. Garlic also offers numerous health benefits, including its antioxidant properties and ability to improve immunity.

    Moreover, this recipe stands out because of its adaptability. You can easily modify it to suit dietary preferences or restrictions, ensuring that everyone at the table can enjoy it. Whether you’re a vegan substitute cheese for dairy or seeking gluten-free options, the possibilities are endless. Adding in vegetables like spinach, tomatoes, or avocados can also increase its nutritional value while introducing exciting flavors.

    In summary, the Cozy Garlic Bread Grilled Cheese is a fantastic choice for an easy dinner option that not only meets your culinary needs but also indulges your cravings. Its simplicity, health benefits, and versatility make it a dish you can feel good about serving to anyone.

    Ingredients Overview

    Essential Ingredients for Cozy Garlic Bread Grilled Cheese

    To prepare this mouthwatering dish, gather the following ingredients:

    • Bread (4 slices):
      Use whole grain or gluten-free bread for healthier options. This provides the perfect crispy base.

    • Butter (2 tablespoons):
      For that classic grilled cheese taste. You can opt for vegan butter if you’d like a dairy-free version.

    • Garlic powder (1 teaspoon):
      Adds that essential garlic flavor. Fresh garlic can be used as a substitute for a stronger taste.

    • Cheese (4 slices or 1 cup shredded):
      Cheddar or mozzarella work well here, but feel free to substitute with vegan cheese for a dairy-free meal.

    • Optional Add-ins:

    • Spinach or arugula (a handful) for added nutrients.
    • Sliced tomatoes (1-2) for a refreshing twist.
    • Avocado (half) for creaminess and healthy fats.

    By utilizing these ingredients, you’re able to craft a tantalizing and comforting grilled cheese sandwich that appeals to multiple dietary needs.

    Dietary Substitutions to Customize Your Cozy Garlic Bread Grilled Cheese

    • Vegan Option:
      Choose plant-based cheese and use vegan butter for the bread. You can enhance the recipe with nutritional yeast to give an extra cheesy flavor.

    • Gluten-Free Option:
      Opt for gluten-free bread varieties available on the market. This allows those with gluten sensitivities to enjoy this delightful dish without worry.

    • Low-Calorie Option:
      Replace regular cheese with low-fat cheese and use less butter. You can also load up on veggies for more volume without adding calories.

    • Nut-Free Option:
      Ensure you select cheese that doesn’t contain nut-based ingredients and avoid using any nut-based spreads.

    These substitutions ensure everyone can enjoy Cozy Garlic Bread Grilled Cheese, regardless of dietary restrictions or preferences.

    How to Prepare the Perfect Cozy Garlic Bread Grilled Cheese: Step-by-Step Guide

    Ready to indulge in some cozy goodness? Here’s how to prepare a perfect Cozy Garlic Bread Grilled Cheese in just a few simple steps:

    1. Prepare the Bread:
      Start by laying out four slices of your chosen bread on a clean surface.

    2. Mix Garlic Butter:
      In a small bowl, combine the softened butter with the garlic powder. Mix thoroughly until well blended.

    3. Spread Garlic Mixture:
      Evenly spread the garlic butter mix onto one side of each slice of bread. This gives your grilled cheese that iconic garlic bread flavor.

    4. Assemble the Sandwich:
      On the unbuttered side of two slices, layer your cheese. If using add-ins (such as spinach or tomatoes), place them on top of the cheese before placing another slice of bread on top.

    5. Heat the Pan:
      Preheat a skillet over medium heat. Allow it to warm up for a minute.

    6. Place the Sandwich:
      Carefully lay the assembled sandwiches in the skillet, buttered side down. Cook for about 2-4 minutes until the bread turns golden brown.

    7. Flip Carefully:
      Using a spatula, gently flip the sandwiches over. Toast the other side for an additional 2-4 minutes or until it reaches your desired doneness.

    8. Check the Cheese:
      Once both sides are golden and crispy, and the cheese is melted, remove the sandwiches from the skillet.

    9. Serve with a Twist:
      Slice the Cozy Garlic Bread Grilled Cheese in half and serve hot. Consider pairing it with a warm bowl of tomato soup for a classic combo.

    10. Garnish (Optional):
      Sprinkle fresh herbs or a pinch of additional garlic powder to amp up the flavors even more.

    By following these steps, you can enjoy an easy dinner recipe that brings comfort and satisfaction with every bite!

    Mastering Cozy Garlic Bread Grilled Cheese: Advanced Tips and Variations

    To elevate your Cozy Garlic Bread Grilled Cheese experience, keep a few advanced tips in mind:

    • Use Different Cheeses:
      Explore combining different cheese varieties such as Gouda, pepper jack, or feta for a unique flavor profile.

    • Experiment with Breads:
      Try brioche, sourdough, or ciabatta for a twist on the traditional grilled cheese. Each type of bread gives a different texture and flavor.

    • Add Herbs and Spices:
      Incorporating herbs such as basil, oregano, or crushed red pepper flakes can enhance the taste.

    • Flavor Infused Butters:
      Create compound butters with herbs or chili flakes. These can add depth to your sandwiches that elevate them beyond the ordinary.

    • Change the Cooking Method:
      While skillet cooking is traditional, consider using a panini press or even baking the sandwiches in the oven for a hands-off approach.

    These tips will allow you to master your cozy garlic bread grilled cheese and make each meal a new experience.

    How to Store Cozy Garlic Bread Grilled Cheese: Best Practices

    If you find yourself with leftovers, or if you want to prep ahead of time, here are the best storage practices:

    Refrigeration:

    • Allow the grilled cheese to cool completely before placing it in an airtight container. It can stay fresh in the fridge for up to 3 days.

    Freezing:

    • For longer storage, wrap each sandwich individually in plastic wrap or aluminum foil, then place them in a freezer bag or container. They can be stored in the freezer for up to a month.

    Reheating:

    • To reheat, simply place the sandwich in a skillet over medium heat until warmed through and crispy again. Alternatively, you can pop it in the toaster oven for a few minutes. Avoid microwave reheating as it can result in a soggy sandwich.

    By following these storage methods, your Cozy Garlic Bread Grilled Cheese remains delightful, ensuring you can enjoy this easy dinner recipe any day of the week!

    Nutritional Value of Cozy Garlic Bread Grilled Cheese

    Understanding the nutritional value of your meal is essential for health-conscious individuals. Here’s a rough breakdown of the nutritional content for a serving of Cozy Garlic Bread Grilled Cheese using standard ingredients:

    • Calories: Approximately 350-450 (may vary based on ingredients used)
    • Fat: 18g (with options for reduced fat depending on cheese and butter choices)
    • Saturated Fat: 10g
    • Carbohydrates: 30-40g
    • Fiber: 3g
    • Protein: 15g
    • Vitamins and Minerals: Including calcium (from the cheese) and iron (from whole grain bread)

    Always adjust these numbers based on the specific brands and ingredients you choose for your grilled cheese. The recipe can be tailored to meet different dietary goals, making it a versatile option for those focusing on nutrition.

    FAQs: Frequently Asked Questions About Cozy Garlic Bread Grilled Cheese

    1. Can I use any type of cheese?
    Yes, you can use a variety of cheeses! Popular choices include cheddar, mozzarella, gouda, or even vegan cheese for dairy-free options.

    2. How can I make this gluten-free?
    Simply substitute regular bread with gluten-free bread that suits your taste.

    3. Is it possible to make this dish in advance?
    Absolutely! You can prepare the sandwiches and refrigerate them before cooking. Just heat them in the skillet when you’re ready to eat.

    4. What can I serve with Cozy Garlic Bread Grilled Cheese?
    Pair it with tomato soup, a crispy salad, or any of your favorite dips to complement the grilled cheese.

    5. Is it suitable for children?
    Yes! Kids typically love the cheesy, crispy goodness of this dish. You can also sneak in some veggies for added nutrition.

    By addressing these common questions, you’ll feel more confident in preparing and enjoying your Cozy Garlic Bread Grilled Cheese. Now that you are equipped with all this information, it’s time to gather those ingredients and get cooking. Enjoy your meal!