Blog

  • Tasty BBQ Chicken Ranch Bowl

    Tasty BBQ Chicken Ranch Bowl

    Tasty BBQ Chicken Ranch Bowl: A Tropical Delight

    Introduction to Tasty BBQ Chicken Ranch Bowl

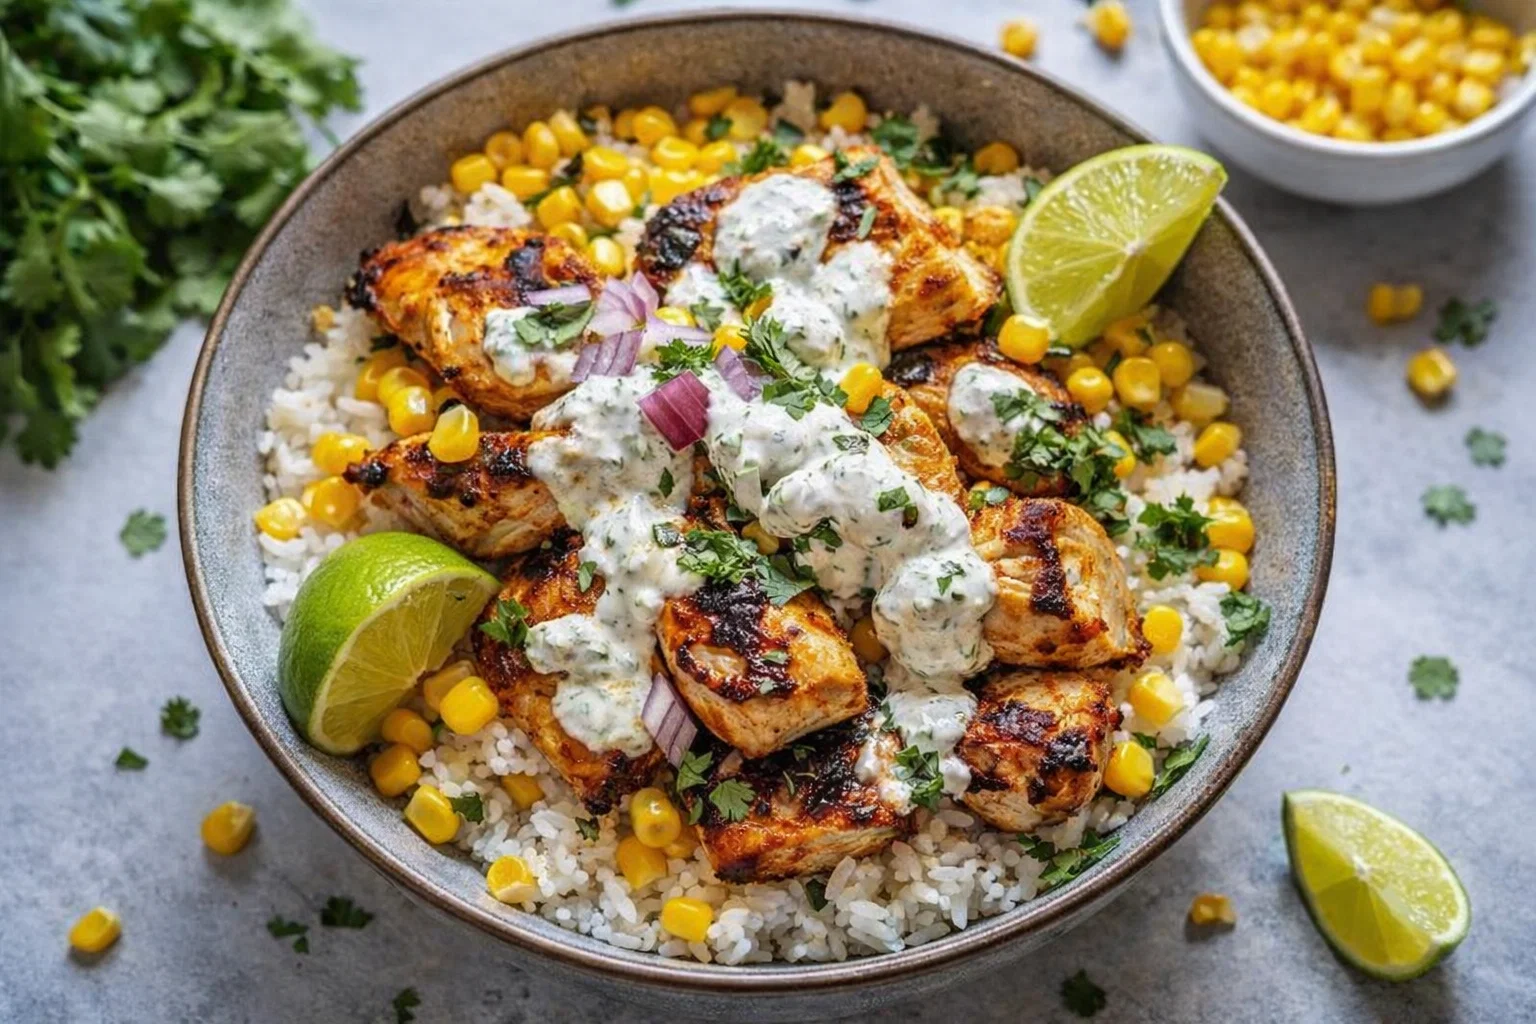
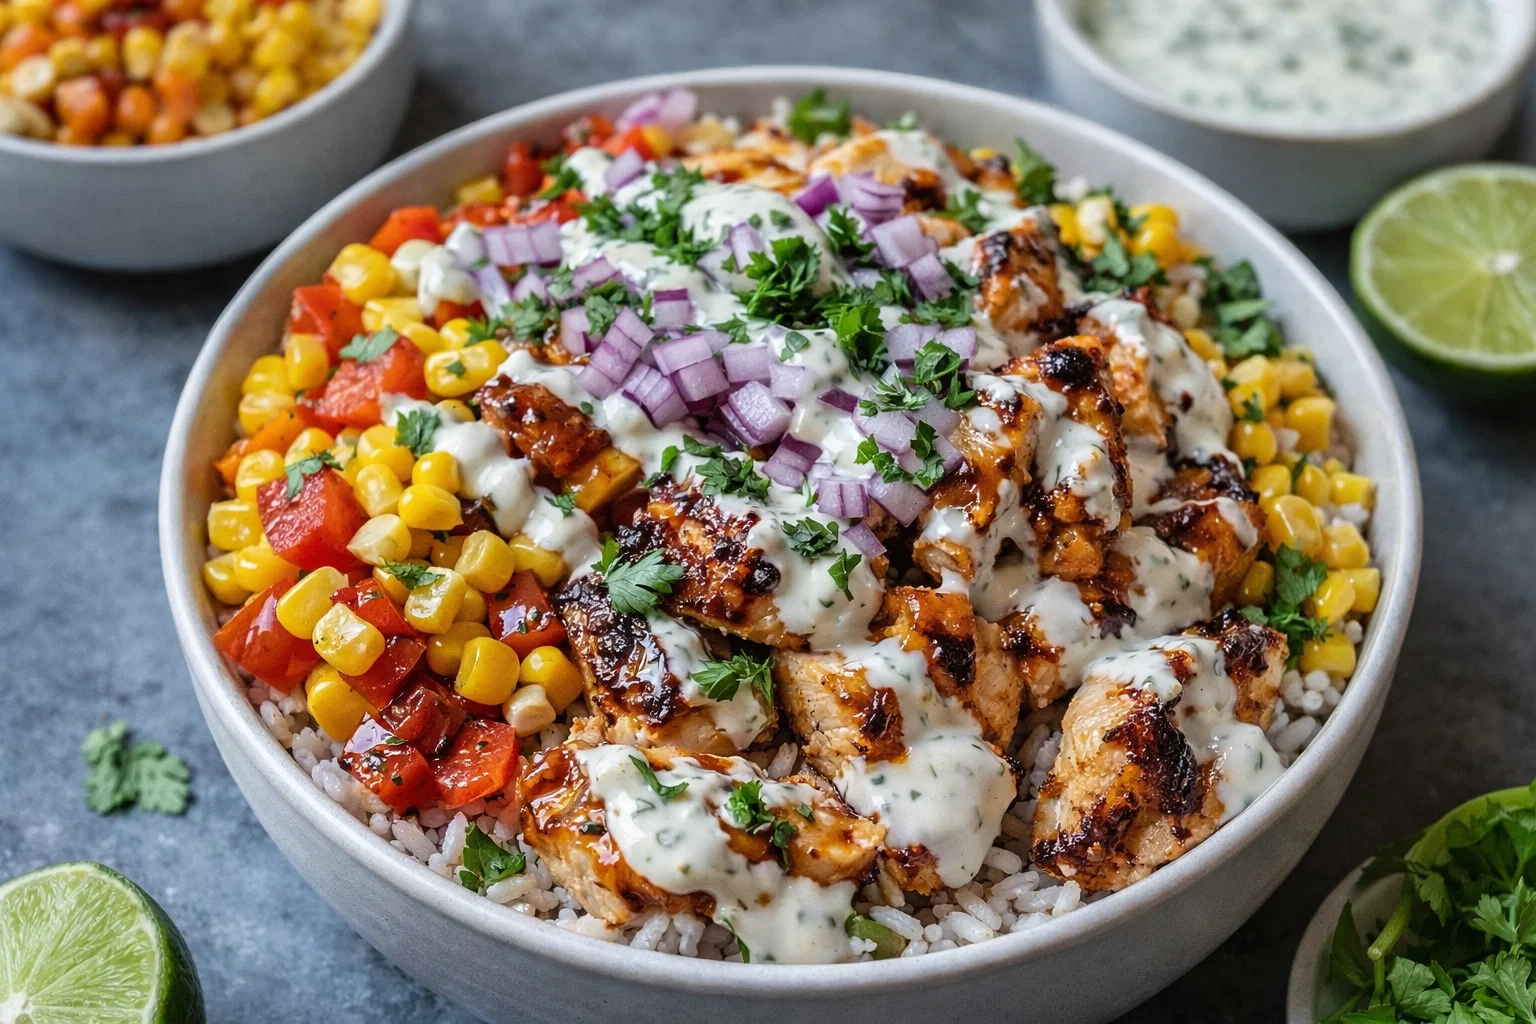
    Are you looking for a mouthwatering and satisfying meal that checks all the boxes for flavor, health, and simplicity? Look no further than the Tasty BBQ Chicken Ranch Bowl. This dish is not just another entry in the vast world of chicken recipes; it combines succulent barbecue chicken with fresh veggies and creamy ranch dressing, creating a culinary experience that excites the palate. The great thing about this dish is that it caters to various dietary needs—making it suitable for busy parents, health-conscious individuals, and food enthusiasts alike.

    Preparing the Tasty BBQ Chicken Ranch Bowl is a breeze, saving you valuable time in the kitchen without sacrificing flavor or nutrition. It’s versatile enough to accommodate gluten-free, vegan, and low-calorie diets while still being delicious. The mix of smoky barbecue sauce with the creamy ranch dressing elevates the dish, making it a tropical-like delight that transports your taste buds straight to the summer fiesta.

    This recipe not only serves as a filling meal but also provides benefits such as high protein content and an array of essential vitamins from fresh vegetables. Whether you are a student juggling classes, a newlywed planning your first meals together, or a working professional needing quick and healthy recipes, the Tasty BBQ Chicken Ranch Bowl is here to impress. Plus, its brilliant presentation makes it an ideal choice for your next gathering or meal prep session.

    Benefits and Advantages of Tasty BBQ Chicken Ranch Bowl

    One of the most significant advantages of the Tasty BBQ Chicken Ranch Bowl is its ease of preparation. This recipe is designed for those who may feel overwhelmed in the kitchen. It requires minimal cooking skills and can be made in under 30 minutes, making it ideal for busy weeknights or quick lunches. Not to mention, it requires common ingredients that you can easily find at your local grocery store or even have on hand at all times.

    From a health standpoint, this bowl is packed with protein from the chicken, combined with wholesome vegetables that enhance its nutritional profile. The fresh greens provide fiber, while the ranch dressing offers a delightful experience without excessive calories. The balance of these elements makes this dish not only satisfying but also beneficial for weight management and overall health, allowing you to indulge in a delicious meal without the guilt.

    Another standout quality of this recipe is its adaptability. If you are following specific dietary preferences—be it vegan, gluten-free, or low-carb—the Tasty BBQ Chicken Ranch Bowl can be easily modified to fit your needs. The recipe allows for ingredient substitutions without compromising on taste, making it a favorite among diverse audiences. What’s more, its stunning color palette and layered presentation bring an irresistible appeal to your dining table.

    In summary, the Tasty BBQ Chicken Ranch Bowl is:

    • Quick to make and easy to prepare, perfect for busy lifestyles
    • Nutritionally balanced, combining protein, fiber, and healthy fats
    • Versatile enough to cater to various dietary restrictions and preferences
    • Visually appealing, making it a snack, meal prep, or gathering star

    Ingredients Overview

    Essential Ingredients for Tasty BBQ Chicken Ranch Bowl

    To create your delicious Tasty BBQ Chicken Ranch Bowl, you’ll need the following ingredients:

    • 2 cups cooked chicken breast, shredded or diced (for protein)
    • 1 cup BBQ sauce (use your favorite brand; look for gluten-free options if desired)
    • 2 cups lettuce (romaine or mixed greens) (for fiber and vitamins)
    • 1 cup cherry tomatoes, halved (adds freshness and vitamin C)
    • 1 avocado, diced (for healthy fats)
    • 1 cup corn (fresh, frozen, or canned) (adds sweetness and color)
    • ½ cup black beans, drained and rinsed (for added fiber and protein)
    • ½ cup ranch dressing (store-bought or homemade; look for lighter versions for lower calorie)
    • Salt and pepper, to taste

    Optional Toppings:

    • Cheddar cheese, shredded (adds flavor; can also use a dairy-free version)
    • Green onions, chopped (for an aromatic touch)
    • Jalapeños, sliced (if you like some heat)

    This bowl not only focuses on great taste but also on wholesome ingredients, allowing you to enjoy a nutritious meal. All items can be adjusted based on dietary restrictions, ensuring everyone at your table can enjoy it.

    Dietary Substitutions to Customize Your Tasty BBQ Chicken Ranch Bowl

    To make the Tasty BBQ Chicken Ranch Bowl adaptable for different dietary needs, consider these substitutions:

    • For a Vegan Option: Substitute chicken with grilled tofu or tempeh and use a vegan BBQ sauce along with a cashew-based or vegan ranch dressing. You can add roasted chickpeas for added protein.

    • For a Gluten-Free Meal: Make sure to use a certified gluten-free BBQ sauce and ranch dressing, as many store-bought varieties may contain gluten.

    • For Low-Calorie Diets: Opt for baked or grilled chicken instead of fried, use low-fat ranch dressing, or replace corn with diced cucumbers.

    • For Keto Diets: Swap the beans for extra grilled vegetables like zucchini or bell peppers to lower carb count while still keeping the meal filling.

    These substitutions allow you to cater to various dietary preferences while still providing a delicious and nourishing meal option for everyone.

    How to Prepare the Perfect Tasty BBQ Chicken Ranch Bowl: Step-by-Step Guide

    Creating a Tasty BBQ Chicken Ranch Bowl is simple and straightforward. Follow these easy steps to prepare your delicious meal:

    1. Prepare the Chicken: If you haven’t done so already, cook the chicken breast until fully cooked (165°F internal temperature). You can poach, grill, or bake it for a juicy result.

    2. Shred the Chicken: Once cooked, let it cool slightly, and then shred or dice it into bite-sized pieces. If you’re using pre-cooked or rotisserie chicken, simply shred it and set aside.

    3. Mix the BBQ Sauce: In a mixing bowl, combine shredded chicken with BBQ sauce. Use enough sauce to coat the chicken thoroughly and enhance its flavor. Set aside for a few minutes to let the flavors meld.

    4. Prepare the Base: In a large serving bowl, lay a bed of mixed greens and romaine lettuce. This provides a crisp and refreshing base.

    5. Add the Toppings: Layer the other ingredients on top of the greens. Start with cherry tomatoes, corn, black beans, and diced avocado, distributing them evenly across the bowl.

    6. Include Chicken Mixture: Spoon the BBQ chicken over your prepared base and toppings. Be generous with the portion to ensure every bite is packed with flavor.

    7. Drizzle Ranch Dressing: Lightly drizzle ranch dressing over the top of the bowl. Use as much as you like, but remember you can always serve extra on the side.

    8. Finish with Seasoning: Season your bowl with salt and pepper to taste. You may also add sliced jalapeños or fresh herbs for an extra kick or freshness.

    9. Top it Off: If desired, sprinkle shredded cheese and chopped green onions on top for added flavor and color.

    10. Serve and Enjoy: Toss the ingredients together gently if you like, or serve it as is for an appealing presentation. Enjoy your Tasty BBQ Chicken Ranch Bowl immediately, or store it for later enjoyment.

    It is that easy! Throughout the preparation steps, consider any dietary preferences, ensuring the dish meets the needs of everyone at your table.

    Mastering Tasty BBQ Chicken Ranch Bowl: Advanced Tips and Variations

    For those looking to take their Tasty BBQ Chicken Ranch Bowl to the next level, here are some advanced tips and creative variations to try:

    • Grill Your Veggies: For added depth of flavor, grill the corn and cherry tomatoes beforehand. This caramelization enhances their sweetness and adds a smoky element that pairs well with the BBQ chicken.

    • Experiment with Dressings: Instead of ranch, try using spicy chipotle yogurt dressing for a smoky kick or a balsamic vinaigrette for a tangier profile. The dressing you choose can dramatically change the dish’s taste.

    • Add Different Proteins: Beyond chicken, consider adding shrimp or beef for alternative protein options. You could also make a meatless bowl by using hearty legumes like lentils or chickpeas.

    • Incorporate Seasonal Ingredients: Take advantage of seasonal produce by incorporating items like grilled zucchini in summer or roasted butternut squash in autumn. Variability keeps the recipe interesting throughout the year.

    • Make it a Wrap: If you’re feeling creative, turn your bowl into a wrap by using tortillas. Fill the tortillas with the same ingredients for a delicious portable meal option that’s perfect for lunch or a picnic.

    • Spice it Up: For those who enjoy heat, toss in your favorite hot sauce or use spicy BBQ sauce. You could also sprinkle crushed red pepper flakes or chili lime seasoning for an extra kick.

    These variations and tips can help keep the Tasty BBQ Chicken Ranch Bowl exciting every time you make it. Don’t hesitate to experiment; you may discover a personal favorite twist you never knew you needed.

    How to Store Tasty BBQ Chicken Ranch Bowl: Best Practices

    Storage is essential when it comes to meal prep, and the Tasty BBQ Chicken Ranch Bowl is no exception. Follow these best practices to keep your bowl fresh and delicious:

    1. Refrigerating Leftovers: If you have any leftovers, allow the bowl to cool completely before storing it. Place the ingredients in an airtight container separated if necessary (for example, keep dressing separate to avoid sogginess). Stored this way, it can last up to 3-4 days in the refrigerator.

    2. Freezing for Future Meals: If you want to store the bowl for longer, consider freezing the BBQ chicken separately from the fresh ingredients. Use freezer bags or suitable containers, ensuring to remove any excess air, and label them with the date. The chicken should keep well for 2-3 months in the freezer.

    3. Reheating Guidelines: When ready to eat, simply thaw the chicken in the refrigerator overnight (if frozen), and heat it in the microwave or on the stovetop until warmed through. For those pressed for time, heating the chicken in the microwave will do, though it may not maintain the ideal texture.

    4. Fresh Add-ins: Always prepare the fresh ingredients such as lettuce and avocado just before serving to keep your bowl crisp and flavorful.

    By following these practices, your Tasty BBQ Chicken Ranch Bowl will remain as wholesome and delicious as when it was first made, allowing you to enjoy it even days later.

    Nutritional Value of Tasty BBQ Chicken Ranch Bowl

    Understanding the nutritional breakdown of the Tasty BBQ Chicken Ranch Bowl can help you make informed choices. Here’s a rough estimation of the nutritional content per serving (approximately, based on the ingredients mentioned):

    • Calories: 470-550 kcal (depending on the type and amount of dressing used)
    • Protein: 40-50g (from chicken and optional cheese or beans)
    • Carbohydrates: 40-55g (primarily from corn, beans, and veggies)
    • Fat: 20-30g (largely from avocado and dressing)
    • Fiber: 8-10g (from beans, corn, and leafy greens)

    Vitamins and Minerals:
    Vitamin A: High, thanks to the greens and tomatoes
    Vitamin C: Present in tomatoes and corn
    Calcium: If cheese is included
    Iron: From black beans and chicken

    These nutritional values may vary depending on the precise ingredients used and portion sizes. However, the general profile indicates a balanced meal loaded with protein, healthy fats, and essential vitamins. This bowl can be a fantastic addition to a health-conscious diet while still being incredibly satisfying.

    FAQs: Frequently Asked Questions About Tasty BBQ Chicken Ranch Bowl

    1. Can I make this bowl in advance?

    Absolutely! This dish is perfect for meal prep. Store the chicken and ranch dressing separately from the fresh ingredients for maximum freshness.

    2. What can I substitute if I don’t like ranch dressing?

    Try alternatives such as Greek yogurt, chipotle sauce, or even tahini dressing to best suit your taste preferences.

    3. Is it suitable for meal prep?

    Yes, the Tasty BBQ Chicken Ranch Bowl is great for meal prepping. Just keep the dressing separate to avoid sogginess beforehand.

    4. Can I use different proteins instead of chicken?

    Certainly! Feel free to swap the chicken for grilled shrimp, beef, or even incorporate a plant-based alternative like tofu or chickpeas.

    5. Are there vegan options available for this dish?

    Yes, you can replace chicken with grilled tofu and use a vegan BBQ sauce along with a dairy-free ranch dressing.

    6. How do I make it gluten-free?

    Double-check that all sauces used are gluten-free, as some commercial dressings may contain gluten ingredients.

    7. Can I freeze leftovers?

    Yes! However, try to store the fresh ingredients separately. The chicken can be frozen for up to 3 months, thawed, and reheated when you’re ready to eat.

    This Tasty BBQ Chicken Ranch Bowl is designed with flexibility in mind, ensuring it fits seamlessly into anyone’s lifestyle while delivering bold flavors. Whether it’s a casual weeknight dinner or an elegant meal prep for a busy week, you will find reasons to keep this recipe close at hand. Enjoy the deliciousness and health benefits this meal has to offer!

  • Easy Street Corn Chicken Rice Bowl

    Easy Street Corn Chicken Rice Bowl

    Easy Street Corn Chicken Rice Bowl: A Tropical Delight

    Introduction to Easy Street Corn Chicken Rice Bowl

    Are you looking for easy dinner recipes that are not only simple to prepare but also packed with flavor and nutrition? Look no further! The Easy Street Corn Chicken Rice Bowl is the perfect dish that combines wholesome ingredients while celebrating vibrant flavors. This recipe features tender grilled chicken, sweet corn, and fluffy rice all topped with a zesty lime dressing. Not only is this bowl a feast for the eyes, but it’s also immensely satisfying, making it a great choice for busy weeknights.

    One of the best aspects of this recipe is its versatility. Whether you’re a busy parent trying to get dinner on the table quickly or a health-conscious individual seeking a balanced meal, this dish ticks all the boxes. It’s gluten-free and can easily be adapted for vegans by swapping chicken for plant-based protein sources. Packed with protein, fiber, and vital nutrients, this dish supports a healthy lifestyle while being utterly delicious.

    In this article, we’ll explore the preparation of Easy Street Corn Chicken Rice Bowls in detail. We’ll walk you through the ingredients, step-by-step instructions, and tips to customize this delectable recipe to meet your dietary needs. So, grab your apron and get ready to take your culinary skills to new heights!

    Benefits and Advantages of Easy Street Corn Chicken Rice Bowl

    Creating flavorful and nutritious meals at home doesn’t have to be complicated. The Easy Street Corn Chicken Rice Bowl is an exemplification of just how simple and enjoyable cooking can be. This recipe shines in various important areas:

    1. Ease of Preparation

    One of the standout features of this bowl is its straightforward preparation. With minimal cooking techniques involved, even novice cooks can create a delightful meal in under 30 minutes. The use of readily available ingredients means you won’t spend hours searching for hard-to-find items.

    2. Health Benefits

    Packed with fresh ingredients, this bowl is a powerhouse of nutrition. Chicken provides lean protein, while corn contributes antioxidants, vitamins, and minerals. These nutrients work together to support muscular health and boost your immune system. The addition of lime juice not only amplifies flavor but also offers a dose of vitamin C – essential for overall health.

    3. Adaptability

    Another significant advantage of this recipe is its versatility. From gluten-free diets to vegetarian or vegan lifestyles, the Easy Street Corn Chicken Rice Bowl is easily customizable. You can adjust the ingredients to fit your dietary preferences, ensuring that everyone at your table can enjoy this delicious meal.

    4. Budget-Friendly

    In today’s economic climate, creating meals that are kind to your wallet is essential. This bowl incorporates budget-friendly ingredients that demand little while delivering big on flavor. Bulk cooking is also an option, making meal prepping a breeze.

    Overall, the Easy Street Corn Chicken Rice Bowl epitomizes a wholesome yet easy-to-make meal option. It’s ideal for busy individuals looking to prepare healthy homemade dinners without sacrificing taste.

    Ingredients Overview

    Essential Ingredients for Easy Street Corn Chicken Rice Bowl

    Here’s a detailed list of the ingredients you will need to make the Easy Street Corn Chicken Rice Bowl:

    For the Chicken and Rice:

    1. 1 pound boneless, skinless chicken breasts: This lean protein serves as the main ingredient, providing flavor and nourishment.
    2. 2 cups cooked rice (white, brown, or quinoa for a gluten-free option): This forms the base of your bowl. Quinoa adds extra protein and fiber.
    3. 1 cup fresh or frozen corn: Adds a pop of sweetness and is packed with antioxidants.
    4. 1 tablespoon olive oil: For cooking the chicken and adding healthy fats.
    5. 2 cloves garlic, minced: Provides flavor depth; optional for a milder dish.
    6. Salt and pepper to taste: Basic seasonings that enhance all other flavors.

    For the Dressing:

    1. Juice of 2 limes: Adds acidity, balancing the richness of the chicken and providing vitamin C.
    2. 1 tablespoon honey or agave syrup (for a vegan version): Sweetness that complements the tangy flavors.
    3. 1 teaspoon chili powder: Optional for a zesty kick.

    Dietary Substitutions to Customize Your Easy Street Corn Chicken Rice Bowl

    1. Chicken to Tofu or Tempeh (Vegan option): For a plant-based version, substitute chicken with grilled tofu or tempeh. Their texture absorbs flavors well, making them a worthy substitute.
    2. Rice swap: Consider using cauliflower rice for a low-carb dish or a wild rice blend adding different textures and flavors.
    3. Corn Alternatives: If corn isn’t available or if you have a sensitivity, zucchini or bell peppers can be a great substitute. They retain the crunchy texture and pair well with the rest of the ingredients.

    These substitutions make the recipe accessible and enjoyable for virtually any dietary preference.

    How to Prepare the Perfect Easy Street Corn Chicken Rice Bowl: Step-by-Step Guide

    Creating your Easy Street Corn Chicken Rice Bowl is straightforward and rewarding. Follow these easy steps for a fantastically delicious dinner.

    1. Prepare the Base

    In a medium-sized pot, cook your rice according to package instructions. If using quinoa, rinse it to remove bitterness, then cook following quinoa four parts water to one part grain for approximately 15-20 minutes. This provides a nutritious base for the bowl.

    2. Marinate the Chicken

    In a bowl, combine olive oil, minced garlic, salt, and pepper. Add the chicken breasts, tossing them to coat evenly. Let them marinate for at least 15 minutes. This allows the flavors to infuse, making the chicken juicy and flavorful.

    3. Cook the Chicken

    Heat a grill pan or skillet over medium-high heat. Once hot, add the marinated chicken breasts. Cook for about 7-8 minutes on each side until the chicken is golden brown and cooked through. A meat thermometer inserted should read 165°F (75°C). Remove from heat and allow to rest for a few minutes before slicing.

    4. Sauté the Corn

    In the same skillet, add your corn and cook on medium heat for about 3-4 minutes. This quick sauté brings out the natural sweetness of the corn.

    5. Prepare the Dressing

    In a small mixing bowl, whisk together lime juice, honey, and chili powder (if using). Adjust to your taste preferences. This dressing adds a tangy zest to our rice bowl.

    6. Assemble the Bowl

    Now it’s time for the fun part! In serving bowls, layer cooked rice first. Top it with sliced chicken, sautéed corn, and any additional ingredients you like, such as diced avocado or black beans for added protein.

    7. Drizzle and Enjoy

    Finally, drizzle your prepared lime dressing over the top and garnish with fresh herbs like cilantro or parsley. Serve immediately, enjoy a delightful explosion of flavors and colors!

    Feel free to mix these steps up to suit your taste preferences, and remember: these easy dinner recipes are meant to inspire creativity in the kitchen!

    Mastering Easy Street Corn Chicken Rice Bowl: Advanced Tips and Variations

    To elevate your Easy Street Corn Chicken Rice Bowl further, consider these advanced tips and delicious variations:

    1. Add Spice Variations: For those who enjoy a spicier kick, consider adding diced jalapeños to the sautéed corn or mixing in some hot sauce into the dressing.

    2. Experiment with Toppings: Enhance texture with toppings like crushed tortilla chips, seeds, or nuts. Toasting these ingredients can amplify their flavor.

    3. Explore Other Proteins: Chicken isn’t your only option! Grilled shrimp, diced tempeh, or even canned chickpeas can be deliciously substituted for a different protein experience.

    4. Make It a Burrito Bowl: Take your flavors further by making this dish into a burrito bowl, complete with black beans, salsa, shredded lettuce, and cheese.

    5. Use Fresh Produce: Seasonal vegetables add vibrant color and provide additional nutrients. Consider toppings like radishes, cherry tomatoes, or sliced cucumbers to keep things fresh and exciting.

    Remember, the key to mastering this recipe lies in your creativity and the flexibility to tweak it according to what you love most!

    How to Store Easy Street Corn Chicken Rice Bowl: Best Practices

    To keep your Easy Street Corn Chicken Rice Bowl fresh and safe to eat, follow these storage guidelines:

    1. Refrigeration: Once prepared, store any leftovers in an airtight container in the refrigerator. It keeps well for about 3-4 days—ideal for meal prep!

    2. Freezing: If you plan to make it ahead, you can freeze the chicken and corn mix separately. Freeze in individual portions, ensuring there’s no excess air in the containers to avoid freezer burn. Ideally, consume frozen meals within 2-3 months for the best taste.

    3. Reheating Tips: To reheat, simply thaw in the refrigerator overnight, then warm it up in the microwave or a hot skillet. Add a splash of water or oil to prevent dryness.

    By following these best practices, you will enjoy delicious street corn chicken rice bowls again without compromising quality, flavor, or safety!

    Nutritional Value of Easy Street Corn Chicken Rice Bowl

    Understanding what’s in your meal can enhance your culinary experience! Here’s a breakdown of the nutritional value for one serving of Easy Street Corn Chicken Rice Bowl (approximate values):

    • Calories: 450-500 calories
    • Protein: 35-40g
    • Fat: 10-15g (depending on the cooking oil used)
    • Carbohydrates: 60g
    • Fiber: 5g

    This bowl is not only filling but also provides significant protein content essential for muscle building and repair. The inclusion of corn gives you vitamins A and C while the rice enhances your energy levels with carbohydrates.

    Perfect for busy weeknights and health-conscious individuals, this Easy Street Corn Chicken Rice Bowl aligns with nutritional goals while satisfying hunger effectively.

    FAQs: Frequently Asked Questions About Easy Street Corn Chicken Rice Bowl

    1. Can I make this recipe vegetarian?

    Absolutely! Substitute the chicken with grilled tofu or chickpeas for a protein-packed vegetarian option.

    2. Is this recipe gluten-free?

    Yes! Just ensure that the rice is gluten-free (most rice is). Additionally, confirm the ingredients in your chosen dressing do not contain gluten.

    3. How long can I store leftovers?

    Leftovers can be stored in an airtight container in the refrigerator for 3-4 days. For longer storage, freeze it as detailed above.

    4. Can I use frozen corn in this recipe?

    Definitely! Frozen corn works just as well and requires less preparation. Just sauté for a few minutes until heated through.

    5. How can I adjust the spice level?

    You can easily tailor the spice level by adjusting the amount of chili powder or adding jalapeños for heat. For a milder version, reduce or omit spicy ingredients.

    6. What can I add for extra flavor?

    Consider adding fresh herbs like cilantro or parsley, avocado, or even a sprinkle of cheese for that creamy factor. Fresh salsas or guacamole can also elevate the dish.

    7. Is this recipe kid-friendly?

    Yes! Kids often love the sweet corn combined with chicken over rice. It’s customizable, so you can easily adjust the flavors and spice levels to suit young palates.

    By using this helpful FAQ section, readers can gain clarity on various aspects of creating the Easy Street Corn Chicken Rice Bowl, ensuring a smooth cooking experience.

    Enjoy experimenting with the Easy Street Corn Chicken Rice Bowl, and watch as it quickly becomes one of your favorite easy dinner recipes! Whether for a quick weeknight meal or a family gathering, this dish will satisfy and surprise everyone at your table. Happy cooking!

  • Cozy Spanish Garlic Soup Recipe

    Cozy Spanish Garlic Soup Recipe

    Cozy Spanish Garlic Soup Recipe: A Tropical Delight

    Introduction to Cozy Spanish Garlic Soup Recipe

    Are you looking for a delightful, simple, and healthy recipe to warm your soul? Look no further! The Cozy Spanish Garlic Soup is a standout among soup recipes, offering a perfect balance of rich flavors and nutritional benefits. This soup, rooted in the traditions of Spanish cuisine, is not only easy to prepare but also accommodates a variety of dietary needs, making it an ideal dish for everyone, whether you’re a busy parent, a health-conscious student, or a seasoned food enthusiast.

    This delectable soup features roasted garlic, creating a smooth and comforting base that warms your body and spirit. The recipe is naturally vegan and gluten-free, catering to both dietary restrictions and preferences. If you’re looking to incorporate more immune-boosting foods into your diet, this garlic-infused soup is loaded with vitamins and antioxidants. It’s also low in calories, making it an excellent choice for weight-conscious individuals.

    From busy professionals to newlyweds, everyone can whip up this aromatic soup in no time. With its vibrant flavors and health benefits, cozying up with a bowl of this Spanish Garlic Soup is more than just a meal; it’s an experience. Join us in mastering this delightful dish as we explore its health benefits, essential ingredients, and preparation methods in the sections that follow.

    Benefits and Advantages of Cozy Spanish Garlic Soup Recipe

    There are countless reasons why the Cozy Spanish Garlic Soup stands out among the myriad of soup recipes available today. Firstly, its ease of preparation is unmatched. With minimal ingredients and straightforward steps, anyone, regardless of cooking skills, can prepare this wholesome soup. You do not need to be a seasoned chef or spend hours in the kitchen. Within just 30 minutes, you can have a hearty meal ready to enjoy.

    Health is another paramount advantage of this recipe. Garlic, the primary ingredient, is renowned for its numerous health benefits. It is a powerful immune booster, rich in antioxidants, and has anti-inflammatory properties. Incorporating garlic into your meals can help to reduce blood pressure and enhance your heart health. Furthermore, this soup is low in calories and can be easily customized to fit various dietary preferences, making it an excellent option for those watching their weight.

    Moreover, the soup’s versatility allows for a variety of adaptations. Whether you’re looking to enhance flavor, adjust the texture, or create a heartier meal, this recipe can be modified to suit your tastes. You can add vegetables, grains, or proteins to make it uniquely yours. Importantly, the soup is both comforting and nourishing; it serves as a great companion on chilly evenings and is a fantastic choice for feeding the family or enjoying alongside your favorite novel.

    With all these benefits combined, it’s no wonder that Cozy Spanish Garlic Soup is a sought-after recipe among those looking to combine taste and health effortlessly. So, gather your ingredients, and let’s dive into the flavorful world of this delightful soup.

    Ingredients Overview

    Essential Ingredients for Cozy Spanish Garlic Soup Recipe

    To create the perfect Cozy Spanish Garlic Soup, you will need the following ingredients:

    • Garlic: 10-12 cloves, peeled (provides flavor and health benefits)
    • Olive Oil: 2 tablespoons (adds richness and healthy fats)
    • Vegetable Broth: 4 cups (use low-sodium for a healthier option)
    • Onion: 1 medium, diced (enhances flavor)
    • Red Pepper Flakes: 1/2 teaspoon (for a touch of heat, adjustable)
    • Bread: 2-3 slices (preferably rustic or whole grain, for thickening)
    • Salt: To taste (necessary for seasoning)
    • Fresh Parsley: A handful, chopped (for garnish and freshness)
    • Lemon Juice: From half a lemon (adds brightness)

    This recipe is not only vegan and gluten-free but also offers low-calorie options if you use the right ingredients. The olive oil and bread can be adjusted based on dietary preferences, ensuring that everyone can enjoy this cozy dish.

    Dietary Substitutions to Customize Your Cozy Spanish Garlic Soup Recipe

    Flexibility is one of the hallmarks of this Cozy Spanish Garlic Soup. Here are some dietary substitutions you can incorporate:

    • Gluten-Free Bread: If you’re avoiding gluten, opt for gluten-free bread to thicken the soup.
    • Low-Fat Options: Consider using less olive oil or substituting it with a low-calorie cooking spray to minimize fats.
    • Add-ins for Heartiness:
    • For a protein boost, consider adding chickpeas or white beans.
    • For additional vegetables, mixed greens, spinach, or kale can offer more nutrients while maintaining the soup’s integrity.
    • Herbal Variations: Use thyme or oregano instead of parsley for a different flavor profile.

    Adapt the ingredients to your preference, ensuring that everyone in your household can enjoy this vibrant soup!

    How to Prepare the Perfect Cozy Spanish Garlic Soup Recipe: Step-by-Step Guide

    Creating the perfect Cozy Spanish Garlic Soup is a straightforward process. Follow these easy steps to master this recipe:

    1. Preheat the Oven: Set your oven to 375°F (190°C).
    2. Roast the Garlic:
    3. Place the peeled garlic cloves on a baking sheet, drizzling them with 1 tablespoon of olive oil.
    4. Roast for about 25-30 minutes until golden and tender. This step enhances the sweet flavor of the garlic.
    5. Sauté Aromatics:
    6. In a large pot, heat 1 tablespoon of olive oil over medium heat.
    7. Add the diced onion and sauté for about 5 minutes, or until the onion is soft and translucent.
    8. Add Broth and Spices:
    9. Pour in the vegetable broth, add in the roasted garlic, red pepper flakes, and salt to your taste.
    10. Bring the mixture to a gentle simmer for about 10 minutes to meld the flavors.
    11. Blend the Soup:
    12. Using an immersion blender or a standard blender, puree the soup until smooth.
    13. If using a standard blender, allow the soup to cool before blending in batches to prevent splatters.
    14. Incorporate Bread:
    15. Tear the bread into small pieces and add it to the blended soup. Allow it to cook for an additional 5 minutes. This step helps thicken the soup and adds texture.
    16. Finish with Lemon Juice:
    17. Stir in fresh lemon juice just before serving to give the soup a fresh, vibrant flavor.
    18. Serve and Garnish:
    19. Ladle the soup into bowls, and garnishing with chopped fresh parsley adds a burst of color and flavor.

    Feel free to adjust the seasoning to your liking, and be creative with the toppings—croutons or a drizzle of olive oil elevate this soup even more! Enjoy the warmth and comfort that this Cozy Spanish Garlic Soup brings to your table.

    Mastering Cozy Spanish Garlic Soup Recipe: Advanced Tips and Variations

    Perfecting the Cozy Spanish Garlic Soup comes with practice and creativity. Here are some advanced tips and variations to consider:

    • Herb Infusion: Infusing herbs like rosemary or thyme into the broth during simmering will deepen the flavor profile. Remove the herbs before blending for a more refined taste.
    • Creamy Texture: For a creamier consistency, consider blending in a plant-based cream or a dollop of coconut milk before serving.
    • Seasonal Additions: Incorporate seasonal vegetables like zucchini or bell peppers to make the soup heartier and add color to the dish.
    • Bean Boost: Add canned white beans or lentils during the simmering process for a protein-packed twist that enhances the nutritional value.
    • Cheesy Variation: Top each bowl with crumbled feta or nutritional yeast for a cheesy flavor that many will adore.

    Experimenting with these variations allows you to personalize the soup while keeping the spirit of the original recipe alive. Cooking should be enjoyable, so make it your own!

    How to Store Cozy Spanish Garlic Soup Recipe: Best Practices

    Storing your Cozy Spanish Garlic Soup properly ensures you can enjoy the deliciousness later. Follow these best practices:

    • Refrigeration: Allow the soup to cool completely, then transfer it to an airtight container. It can be stored in the fridge for up to 4-5 days.
    • Freezing: If you wish to keep the soup longer, ladle it into freezer-safe containers, leaving space for expansion as it freezes. Frozen soup can last for up to 3 months.
    • Reheating: To reheat, simply warm the soup on the stovetop over medium heat, stirring occasionally. If it thickens, add a splash of vegetable broth or water to achieve your desired consistency. Reheat slowly to preserve flavors.

    With these storage tips, you’ll always have a comforting meal on hand, ready to bring warmth and joy to any occasion.

    Nutritional Value of Cozy Spanish Garlic Soup Recipe

    Understanding the nutritional value of your dishes can help you make informed eating choices. Here’s a general overview of the nutritional information for a serving of Cozy Spanish Garlic Soup (based on 6 servings):

    • Calories: Approximately 120 per serving
    • Total Fat: 6g
    • Saturated Fat: 1g
    • Cholesterol: 0mg
    • Sodium: 300mg (can be reduced with low-sodium broth)
    • Total Carbohydrates: 15g
    • Dietary Fiber: 2g
    • Sugars: 2g
    • Protein: 3g

    This soup is low-calorie while still providing essential nutrients and satisfying flavors. Its health benefits, combined with its simplicity, make it an excellent option for any dining occasion. Watch out for calories on additional toppings you may add!

    FAQs: Frequently Asked Questions About Cozy Spanish Garlic Soup Recipe

    1. Can I use roasted garlic from a jar instead of fresh?

    Yes! You can substitute jarred roasted garlic. Just keep in mind that flavor intensity may vary, so start with a smaller amount and add more to taste.

    2. How can I make it spicy?

    If you enjoy a spicy kick, increase the amount of red pepper flakes or add a diced jalapeño while sautéing the onions.

    3. What can I use instead of vegetable broth?

    For a richer flavor, chicken broth can be used instead, or make your own broth using simmered vegetables and herbs.

    4. How long does this soup keep in the fridge?

    The Cozy Spanish Garlic Soup can be safely stored in the refrigerator for about 4-5 days when kept in an airtight container.

    5. Can I make this soup ahead of time?

    Absolutely! This soup tastes even better the day after as the flavors continue to meld. Just reheat before serving.

    6. What are some serving suggestions?

    Consider pairing this soup with a fresh salad, crusty bread, or even a light pasta dish for a complete meal.

    With these insights and tips, you are more than ready to create and enjoy this delightful Cozy Spanish Garlic Soup. Embrace the comfort, warmth, and nutritional benefits it offers, and make it a regular star in your home-cooked meals!

  • Easy Spinach  Mushroom White Lasagna

    Easy Spinach Mushroom White Lasagna

    Easy Spinach & Mushroom White Lasagna: A Tropical Delight

    Introduction to Easy Spinach & Mushroom White Lasagna

    If you’re searching for simple yet satisfying easy dinner recipes, look no further than this Easy Spinach & Mushroom White Lasagna. This delightful dish combines the creamy, comforting flavors of white sauce with the nutritious goodness of spinach and mushrooms, making it a deliciously tempting option for any meal. Quick to prepare and packed with health benefits, it shines as a versatile dish that caters to various dietary needs. Whether you’re a busy parent trying to whip up a meal that the whole family will enjoy, a student seeking healthy options after a long day, or even a food enthusiast eager to try something new, this lasagna will not disappoint.

    Beyond its mouthwatering flavor, this easy lasagna is loaded with vitamins, minerals, and fiber courtesy of its vegetable components. Spinach is rich in iron and antioxidants, while mushrooms are a fantastic source of B vitamins and selenium. Furthermore, its flexible recipe allows for easy adaptations to fit vegan, vegetarian, gluten-free, or even low-calorie diets without compromising taste. So, what are you waiting for? Let’s dive into this simple yet impressive dish that promises to become a family favorite!

    Benefits and Advantages of Easy Spinach & Mushroom White Lasagna

    The Easy Spinach & Mushroom White Lasagna presents numerous advantages that make it stand out among various easy dinner recipes. Its simplicity is a game-changer for home cooks and professionals alike. With straightforward ingredients and clear instructions, the cooking process is nearly foolproof, even for novice chefs. Within an hour, you can create a delightful dish that your family will love, leaving you with minimal cleanup.

    Moreover, its health benefits should not be overlooked. By using fresh spinach and mushrooms, you are provided with nutrients that promote good health. Spinach is renowned for its high iron content, which can help increase energy levels and improve overall vitality. Mushrooms add flavor without excessive calories, making this dish a smart choice for those mindful of their diet. Plus, the creamy white sauce, typically made from a combination of ricotta and mozzarella, can easily be substituted with healthier alternatives, like low-fat cheese or cashew cream, catering to diet-conscious individuals.

    Another notable benefit is its adaptability. You can customize this lasagna based on your dietary restrictions or preferences. Whether you want it gluten-free, vegan, or dairy-free, this recipe provides the flexibility to accommodate these needs. Therefore, it’s perfect for gatherings, potlucks, or a cozy family dinner.

    In short, Easy Spinach & Mushroom White Lasagna checks off multiple boxes: it’s quick to prepare, it’s nutritious, and it caters to a variety of dietary preferences, making it an ideal choice for busy parents, students, and food enthusiasts alike.

    Ingredients Overview

    Essential Ingredients for Easy Spinach & Mushroom White Lasagna

    To whip up this Easy Spinach & Mushroom White Lasagna, you will need the following ingredients, which can be easily adapted for various dietary options:

    1. Lasagna Noodles (12 sheets)
      Use regular or gluten-free noodles, depending on your needs. Whole wheat versions can offer added fiber.

    2. Spinach (4 cups)
      Fresh spinach is preferred for its taste and texture, but frozen spinach can also be used—just ensure it is well-drained.

    3. Mushrooms (2 cups)
      Sliced button mushrooms or any variety of your choice add flavor and depth to the dish.

    4. Ricotta Cheese (15 oz.)
      This creamy cheese serves as the base of your white sauce. You can substitute with vegan ricotta or cashew cream for a dairy-free version.

    5. Mozzarella Cheese (2 cups)
      Shredded mozzarella adds a melty texture that makes any lasagna special. Use dairy-free cheese alternatives if necessary.

    6. Parmesan Cheese (1 cup)
      Freshly grated Parmesan will provide a nice finish. Again, vegan Parmesan options are available.

    7. Egg (1)
      This helps bind the cheese mixture. A flaxseed or chia egg can serve as an egg substitute for a vegan version.

    8. Garlic (3 cloves, minced)
      Fresh garlic provides aromatic flavor, which ties the dish together beautifully.

    9. Onion (1 medium, chopped)
      Adding depth and sweetness, onions make this dish more robust.

    10. Olive Oil (2 tablespoons)
      Used for sautéing vegetables. Feel free to use a cooking spray for a lighter option.

    11. Salt and Pepper (to taste)
      Essential for seasoning, these should be added according to your palate.

    Dietary Substitutions to Customize Your Easy Spinach & Mushroom White Lasagna

    • Gluten-Free: Substitute regular lasagna noodles with gluten-free ones or use zucchini slices as a low-carb alternative.

    • Dairy-Free: Replace ricotta and mozzarella cheese with vegan cheese options. Cashew cream can mimic the creamy texture of ricotta.

    • Vegan: As mentioned, incorporate plant-based cheeses and use a flaxseed or chia seed egg substitute.

    • Low-Calorie: Opt for low-fat cheese or yogurt-based sauces to cut down calories while maintaining flavor.

    By considering these ingredient alternatives, you can successfully customize the Easy Spinach & Mushroom White Lasagna to suit your dietary preferences without compromising taste or texture.

    How to Prepare the Perfect Easy Spinach & Mushroom White Lasagna: Step-by-Step Guide

    Creating the Easy Spinach & Mushroom White Lasagna is a straightforward process. Follow these steps for a delicious dinner that could rival any Italian restaurant!

    1. Prepare the Oven: Preheat your oven to 375°F (190°C). Preheating is crucial as it allows for even baking.

    2. Cook the Lasagna Noodles: In a large pot, bring water to a boil. Add a pinch of salt and then cook the lasagna noodles according to the package instructions until al dente. Drain and lay them on a towel to prevent sticking.

    3. Sauté Vegetables: Heat olive oil in a large skillet over medium heat. Add chopped onions and minced garlic, sautéing until they become translucent. Then, add the sliced mushrooms, cooking until they are tender and have released their moisture. Finally, stir in the spinach and cook for 2-3 minutes until wilted. Season with salt and pepper to taste. Turn off the heat and set aside.

    4. Prepare the Cheese Mixture: In a mixing bowl, combine the ricotta cheese, mozzarella cheese (reserve some for topping), grated Parmesan cheese, and the egg. Mix well until smooth. You can add a pinch of nutmeg or Italian seasoning to enhance flavor.

    5. Assemble the Lasagna: In a 9×13-inch baking dish, spread a thin layer of the vegetable mixture on the bottom. Place a layer of noodles over this. Then, spread half of the cheese mixture over the noodles, followed by half of the remaining vegetable mixture. Repeat the layers, finishing with a final layer of noodles on top. Finally, top it off with the remaining mozzarella cheese.

    6. Bake the Lasagna: Cover the baking dish with aluminum foil and bake for 25 minutes. After that, remove the foil and bake for an additional 15-20 minutes, or until the top is golden brown and bubbly.

    7. Cool and Serve: After baking, allow the lasagna to cool for about 10 minutes. This helps it set and makes serving easier. Cut into squares and serve warm.

    Feel free to consider additional variations during these preparations. For instance, adding cooked lentils or other veggies like bell peppers can enhance nutritional value and flavor diversity!

    Mastering Easy Spinach & Mushroom White Lasagna: Advanced Tips and Variations

    To elevate your Easy Spinach & Mushroom White Lasagna, consider these advanced tips and variations:

    • Herbs and Spices: Incorporate fresh herbs like basil or parsley for added flavor. Dried Italian herbs can work well, too. A sprinkle of crushed red pepper can add a pleasant kick.

    • Meat Lovers Version: Add cooked, shredded chicken, ground turkey, or Italian sausage between the layers if you’re looking for a protein boost.

    • Extra Veggies: Bell peppers, zucchini, or carrots can be added to the vegetable mixture for additional nutrients and varying textures.

    • Ingredient Swaps: Experiment with different cheeses—like goat cheese or feta—for a unique twist. You can also mix in sunflower seeds or pine nuts for added crunch and healthy fats.

    • Make-ahead: You can assemble this lasagna ahead of time and refrigerate it. Just increase the baking time by about 10-15 minutes if baking from cold.

    With these strategies, your Easy Spinach & Mushroom White Lasagna can be customized and perfected to satisfy various palates.

    How to Store Easy Spinach & Mushroom White Lasagna: Best Practices

    Storing your Easy Spinach & Mushroom White Lasagna is straightforward and can help you prolong its deliciousness:

    • Refrigeration: Store leftovers in an airtight container in the refrigerator for up to 4 days. It’s perfect for busy weekday lunches or dinners.

    • Freezing: If you want to keep it longer, freeze the lasagna before baking. Wrap it tightly in plastic wrap and aluminum foil; it can last up to 3 months in the freezer. To reheat, bake from frozen at 375°F (190°C) for about 60-75 minutes, or until heated through.

    • Reheating: To reheat, warm individual portions in the microwave or thaw in the refrigerator overnight before reheating in the oven for a few minutes to enjoy that baked texture again.

    Proper storage practices ensure that your easy dinner recipes remain fresh and flavorful, no matter how busy your schedule may be!

    Nutritional Value of Easy Spinach & Mushroom White Lasagna

    The nutritional profile of Easy Spinach & Mushroom White Lasagna is fairly impressive, especially considering its delicious flavor. Here’s a breakdown of the approximate nutritional content per serving (1/8 of the lasagna):

    • Calories: 350-400 kcal
    • Protein: 20-25g
    • Total Fat: 15-20g
    • Saturated Fat: 7-10g
    • Carbohydrates: 35-40g
    • Dietary Fiber: 4-6g
    • Sugars: 3-5g
    • Vitamin A: 30% DV
    • Vitamin C: 15% DV
    • Iron: 15% DV
    • Calcium: 25% DV

    This lasagna packs a decent amount of protein and fiber, making it a filling choice. Packed with vitamins and minerals from spinach and mushrooms, it’s a health-conscious dish that satisfies both cravings and nutritional requirements. Adapting it with lower-fat options or increasing the vegetable content can further boost its health benefits.

    FAQs: Frequently Asked Questions About Easy Spinach & Mushroom White Lasagna

    1. Can I make this lasagna in advance?
    Yes! You can assemble it ahead of time—just store it in the refrigerator or freezer until ready to bake. This is a great strategy for meal prep.

    2. Can I substitute the ricotta cheese?
    Absolutely! Vegan ricotta or homemade cashew cream can serve as fine alternatives, ensuring the dish remains dairy-free.

    3. How do I freeze leftovers?
    Wrap the cooled lasagna tightly in plastic and aluminum foil. Alternatively, store it in an airtight container, and it will last up to three months.

    4. Is it possible to make this dish gluten-free?
    Yes! Just use gluten-free lasagna noodles, or substitute with thinly sliced zucchini or squash for a healthy option.

    5. How can I alter the recipe for extra vegetables?
    Feel free to mix in any vegetables you like! Bell peppers, zucchini, or artichokes can add flavor and nutrients, enhancing the dish.

    With this generous overview of Easy Spinach & Mushroom White Lasagna, you’re equipped to create a dish that will inspire and nourish those you serve. So, gather your ingredients and embrace the joy of cooking this delightful recipe that fits beautifully into a wide range of dietary preferences! Enjoy your journey into the delightful world of easy dinner recipes.

  • Easy Mediterranean Chicken Tenders Recipe

    Easy Mediterranean Chicken Tenders Recipe

    Easy Mediterranean Chicken Tenders Recipe: A Tropical Delight

    Introduction to Easy Mediterranean Chicken Tenders Recipe

    Are you looking for a delectable yet straightforward meal that captures the essence of Mediterranean cuisine? Look no further! This Easy Mediterranean Chicken Tenders Recipe is an exciting take on traditional chicken recipes, promising simplicity and health benefits, perfect for busy evenings or special occasions alike. Whether you’re a novice home cook, a busy parent, a student on the go, or someone keen on healthy eating, this dish fits seamlessly into your lifestyle.

    These chicken tenders are marinated in a blend of fragrant Mediterranean spices, making them succulent and flavorful. They require minimal prep time and can be cooked to perfection in less than 30 minutes. This recipe not only supports a busy schedule but also aligns perfectly with various dietary preferences, being naturally low in carbs and gluten-free. Plus, it offers a vibrant twist to meal planning, ensuring that you never get bored with “same old” chicken recipes.

    Packed with protein, this dish is great for fitness enthusiasts as well. With its fresh ingredients, you will feel good about serving this to your family and friends, knowing they are indulging in a nutritious and tasty meal. So, grab your apron and let’s dive into this simple yet satisfying dish that will inspire you to cook and explore more vibrant chicken recipes.

    Benefits and Advantages of Easy Mediterranean Chicken Tenders Recipe

    The Easy Mediterranean Chicken Tenders Recipe stands out for various reasons, making it a top choice for many home cooks looking for quick and healthy meals without compromising flavor.

    1. Simplicity in Preparation

    This recipe shines in its simplicity. With just a handful of ingredients, you can whip up a delightful meal that requires minimal cooking skills. Whether you’re a busy parent or a student looking to save time in the kitchen, these chicken tenders are your go-to solution for quick dinners.

    2. Health Benefits

    This chicken tenders recipe is not only delicious but also healthy. Chicken is a great source of lean protein while the Mediterranean marinade includes heart-healthy olive oil, vibrant herbs, and spices that can boost metabolism and promote overall health. These ingredients can offer anti-inflammatory benefits and are packed with essential vitamins and minerals.

    3. Versatility for Dietary Needs

    Another advantage is the recipe’s adaptability. Whether you’re vegan, gluten-free, or on a low-calorie diet, this recipe can be easily swapped or adjusted to meet those needs. With a few simple substitutions, such as using chickpea flour for breading or incorporating more veggies, everyone can enjoy this dish, which is a game-changer in the realm of chicken recipes.

    4. Flavorful and Satisfying

    The flavors of the Mediterranean—think garlic, lemon, and herbs—make these chicken tenders not only satisfying but genuinely enjoyable. You won’t feel like you’re sacrificing taste for health, which is essential when trying to maintain a balanced diet.

    These aspects make the Easy Mediterranean Chicken Tenders Recipe a wonderful addition to your repertoire of chicken recipes. It not only caters to various dietary needs but also comes together in no time, making it a perfect solution for your meal planning challenges.

    Ingredients Overview

    Essential Ingredients for Easy Mediterranean Chicken Tenders Recipe

    1. Chicken Tenderloins (1 lb): The main protein source, lean and easy to cook.
    2. Olive Oil (3 tablespoons): Offers healthy fats and helps retain moisture.
    3. Lemon Juice (2 tablespoons): Adds acidity and brightens flavors.
    4. Garlic Powder (1 teaspoon): Delivers a staple flavor element.
    5. Italian Seasoning (1 teaspoon): A mix of basil, oregano, and thyme that adds depth.
    6. Salt and Pepper to taste: Essential seasonings to enhance flavor.
    7. Panko Breadcrumbs (optional; 1 cup): For those who prefer a crunchy texture.
    8. Gluten-Free Option: Substitute with crushed gluten-free crackers.
    9. Fresh Parsley for Garnish: Adds a fresh touch and color.

    This list is straightforward, ensuring even beginner cooks feel empowered to recreate the dish. Each ingredient plays a crucial role in creating that Mediterranean-inspired flavor while balancing health and nutrition.

    Dietary Substitutions to Customize Your Easy Mediterranean Chicken Tenders Recipe

    1. For a Vegan Option: Replace chicken tenderloins with firm tofu or tempeh, marinating it in the same spices. The cooking time will remain similar.

    2. If You’re Gluten-Free: Use crushed cereal or gluten-free breadcrumbs instead of regular panko.

    3. Lower-Calorie Option: Reduce the amount of olive oil used or use spray olive oil for a lighter version.

    4. For a Spicy Kick: Add crushed red pepper flakes or cayenne pepper to the marinade for an enhanced flavor profile.

    These substitutions ensure that the Easy Mediterranean Chicken Tenders Recipe caters to a variety of dietary preferences, making it a versatile staple for different lifestyles while maintaining restorative health aspects.

    How to Prepare the Perfect Easy Mediterranean Chicken Tenders Recipe: Step-by-Step Guide

    With each step explained clearly, preparing these chicken tenders becomes a delightful experience that even busy individuals can tackle with ease. Here’s how to create this Mediterranean delight!

    1. Prepare the Marinade:
      In a medium bowl, combine olive oil, lemon juice, garlic powder, Italian seasoning, salt, and pepper. Whisk until well blended.

    2. Marinate the Chicken:
      Add chicken tenderloins to the bowl with the marinade, ensuring all pieces are well-coated. Cover and let marinate in the refrigerator for at least 30 minutes, or up to 2 hours for more flavor – perfect for meal prep!

    3. Preheat the Oven:
      Preheat your oven to 400°F (200°C) if baking, or heat a non-stick skillet over medium heat if you prefer pan-searing.

    4. Prepare the Breading (Optional):
      If you desire a crunchy texture, add panko breadcrumbs to a shallow dish. This step is optional; skipping it will yield tender, juicy chicken tenders.

    5. Coat the Chicken (if breading):
      Remove marinated chicken from the fridge. Dredge each tender in panko breadcrumbs, ensuring they are fully coated.

    6. Cook the Chicken:

    7. For Baking: Place coated (or uncoated) chicken tenders on a baking sheet lined with parchment paper. Bake for 18-20 minutes until golden brown and cooked through.
    8. For Pan-searing: Place coated chicken in the hot skillet. Cook for about 5-7 minutes on each side or until golden and cooked through (internal temperature should reach 165°F or 75°C).

    9. Rest the Chicken:
      Once cooked, remove from heat and let the chicken tenders rest for 5 minutes. This step allows the juices to redistribute, ensuring juicy bites.

    10. Garnish and Serve:
      Sprinkle chopped fresh parsley over the chicken tenders and serve with lemon wedges for added freshness. Pair your dish with a light salad or your favorite dipping sauce.

    This step-by-step guide provides you with all the necessary knowledge to prepare the Easy Mediterranean Chicken Tenders Recipe confidently. The focus on action verbs ensures clarity, making the cooking process enjoyable and straightforward.

    Mastering Easy Mediterranean Chicken Tenders Recipe: Advanced Tips and Variations

    Once you become proficient in preparing this delightful dish, consider these advanced tips and variations to elevate your cooking game further.

    1. Marination Time:

    For optimal flavor, let your chicken marinate overnight. This allows for deeper flavor penetration and juicier tenders.

    2. Experiment with Herbs:

    If you’re a herb enthusiast, consider adding fresh herbs like rosemary, thyme, or dill to the marinade for a more fragrant profile.

    3. Grilling Extra Flavors:

    For an outdoor twist, grill your chicken tenders to infuse them with a smoky flavor. Adjust cooking times to ensure they’re fully cooked.

    4. Create a Dipping Sauce:

    Mix Greek yogurt with cucumber, garlic, and lemon for a refreshing tzatziki sauce. Alternatively, whip together mustard and honey for a sweet-spicy dip.

    5. Bake Instead of Fry:

    If opting for a healthier version, simply skip the breadcrumbs and bake chicken directly in the marinade. This will keep the dish low in calories while still being incredibly tasty.

    6. Add Vegetables:

    While cooking, consider throwing in some bell peppers or zucchini in the same skillet for a one-pan meal. This adds color and nutrition to your dish.

    These tips and variations will not only enhance your Easy Mediterranean Chicken Tenders Recipe but also inspire you to explore further in the world of chicken recipes.

    How to Store Easy Mediterranean Chicken Tenders Recipe: Best Practices

    Proper storage is essential to maintain the quality and taste of your Mediterranean chicken tenders. Here are some best practices to follow:

    Refrigeration

    To store leftovers, allow the chicken tenders to cool completely after cooking. Place them in an airtight container and store them in the refrigerator. They can last up to 3-4 days when stored correctly.

    Freezing

    For longer storage, you can freeze the cooked chicken tenders. After cooling, wrap each tender in plastic wrap and place them in a freezer-safe bag or container. These can be kept in the freezer for up to 3 months.

    Reheating

    When you’re ready to enjoy your leftovers:
    Microwave: Place on a microwave-safe dish and cover it. Heat in short intervals until warmed through, usually around 2-3 minutes.
    Oven: Preheat your oven to 350°F (175°C). Place chicken on a baking sheet and heat for about 10-15 minutes, ensuring they reach an internal temperature of 165°F (75°C) before serving.

    By following these storage methods, you ensure that your Easy Mediterranean Chicken Tenders Recipe maintains its deliciousness while also optimizing convenience for busy weekdays.

    Nutritional Value of Easy Mediterranean Chicken Tenders Recipe

    Understanding the nutritional content of your dishes can greatly influence meal planning, particularly for many readers conscious of their dietary choices. Here’s a general breakdown of the nutritional value per serving (based on a serving size of 4 tenders):

    • Calories: Approximately 325 calories
    • Protein: 26 grams
    • Fat: 18 grams
    • Saturated Fat: 3 grams
    • Carbohydrates: 14 grams
    • Dietary Fiber: 0.5 grams
    • Sugars: 1 gram
    • Sodium: 400 mg
    • Vitamin A: 4% of Daily Value (DV)
    • Vitamin C: 6% of DV
    • Calcium: 1% of DV
    • Iron: 5% of DV

    This nutritional overview showcases the Easy Mediterranean Chicken Tenders Recipe as a protein-rich choice that’s relatively low in calories and carbs, complementing a balanced diet. All while aligning with Mediterranean eating principles.

    FAQs: Frequently Asked Questions About Easy Mediterranean Chicken Tenders Recipe

    1. Can I use chicken breasts instead of tenders?

    Yes, you can substitute chicken breasts; just adjust the cooking time accordingly, as they will need a bit longer to cook through.

    2. How can I make this recipe lower in fat?

    To lower fat content, reduce or eliminate the olive oil and skip the breadcrumbs. Instead, roast your seasoned chicken for a naturally low-fat dish.

    3. Can I marinate the chicken overnight?

    Absolutely! Marinating overnight will deepen the flavor, making your chicken even more delicious.

    4. Are there alternatives to olive oil?

    Yes, you can use avocado oil or coconut oil for marinating your chicken, as both provide healthy fat options.

    5. How do I know if the chicken is cooked?

    Ensure the internal temperature reaches 165°F (75°C) for safe consumption. Use a meat thermometer for accuracy.

    6. Can I prepare these chicken tenders ahead of time?

    Yes, you can marinate the chicken the night before and cook them fresh on the day of serving, making for an efficient meal prep.

    The Easy Mediterranean Chicken Tenders Recipe is versatile, delicious, and suitable for various dietary needs. Feel free to experiment with different ingredients and techniques, as cooking should be an exploration of flavors and creativity. Enjoy your cooking journey!

  • Tasty 3-Ingredient Cottage Cheese Pizza

    Tasty 3-Ingredient Cottage Cheese Pizza

    Tasty 3-Ingredient Cottage Cheese Pizza: A Tropical Delight

    Introduction to Tasty 3-Ingredient Cottage Cheese Pizza

    Welcome to your new go-to dinner recipe that turns the concept of pizza on its head! Introducing the Tasty 3-Ingredient Cottage Cheese Pizza, where simplicity meets flavor in an amazing twist. Imagine a pizza that is not only incredibly easy to make but also packed with nutrients, perfect for everyone—from busy parents to health-conscious individuals.

    Gone are the days of complex ingredient lists and lengthy preparations. This cottage cheese pizza uses just three simple ingredients, allowing you to whip up a delightful dish that can be a quick weekday meal or a satisfying weekend treat. This pizza is versatile, making it suitable for various dietary needs, including vegetarian and gluten-free options. In addition to its ease of preparation, it serves as a healthier alternative to traditional pizzas, loaded with protein and low in carbs, making it a great choice for those watching their calorie intake.

    So, if you’re looking for dinner recipes that promise flavor without fuss, this is it! Let’s dive into this culinary adventure, ensuring that your kitchen endeavors are not just about nourishment, but also about creativity and joy.

    Benefits and Advantages of Tasty 3-Ingredient Cottage Cheese Pizza

    The Tasty 3-Ingredient Cottage Cheese Pizza is more than just a quick meal; it’s a thoughtful approach to cooking that benefits both you and your family. Here are several reasons why you should consider adding this dish to your rotation of dinner recipes:

    1. Simplicity and Convenience

    Life can get hectic, especially for busy parents and working professionals who juggle different responsibilities. This recipe is exceptionally straightforward, requiring only three main ingredients. It’s perfect for anyone feeling tired after a long day or for those who want a meal ready in just a few minutes without compromising quality.

    2. Nutritional Value

    When you opt for cottage cheese, you’re treating your body to a food that is rich in protein and low in fat. Since this meal is a healthier alternative to traditional pizzas, it offers essential nutrients without the extra calories. This makes it an excellent choice for diet-conscious individuals or anyone hoping to make healthier food choices without sacrificing taste.

    3. Versatility

    Whether you’re a student looking for a quick lunch, or a family who wishes to enjoy a simple pizza night, this recipe adapts effortlessly. You can customize it with your favorite toppings or switch the base for various dietary requirements. As a bonus, it can easily be made gluten-free, vegan, or just bland enough for picky eaters, appealing to diverse palates.

    4. Quick Preparation Time

    This cottage cheese pizza is not just about simplicity; it’s also incredibly fast. In less than 30 minutes, you can have a delicious meal on the table. Thanks to its straightforward preparation process, it’s perfect for unexpected guests or a spontaneous dinner plan.

    5. Family-Friendly

    Cooking should be fun, and with this recipe, the whole family can get involved. Children will enjoy adding their favorite toppings, and it becomes an opportunity to teach them about healthy eating. The fun flavors and textures are bound to win over even the pickiest eaters!

    In summary, the Tasty 3-Ingredient Cottage Cheese Pizza is a stellar option among dinner recipes for its simplicity, nutritional benefits, and wide appeal. It is time to take your cooking game up a notch and discover how easy it can be to create meals that satisfy everyone.

    Ingredients Overview

    Essential Ingredients for Tasty 3-Ingredient Cottage Cheese Pizza

    To whip up your own Tasty 3-Ingredient Cottage Cheese Pizza, you will need:

    1. Cottage Cheese (1 cup)
    2. This forms the base of your pizza and provides creaminess as well as a hefty dose of protein. Opt for low-fat if you’re watching your calorie intake.

    3. Olive Oil (2 tablespoons)

    4. Adds flavor and helps to crisp up the pizza base. Olive oil is a healthy fat, rich in antioxidants and beneficial for heart health.

    5. Oats (1 cup, finely ground)

    6. Ground oats act as a gluten-free flour alternative. They bind everything together while also increasing the fiber content. For a lower-calorie option, consider using a blend of oat flour.

    Dietary Substitutions to Customize Your Tasty 3-Ingredient Cottage Cheese Pizza

    While the basic ingredients of this pizza are fantastic on their own, they can be easily adapted to suit various dietary preferences and needs. Here are some suggestions:

    1. Gluten-Free Option:
    2. Instead of using ordinary oats, ensure you purchase certified gluten-free oats for the base. This way, even those with gluten sensitivities can enjoy this delicious meal.

    3. Vegan Adaptation:

    4. For a vegan version, switch cottage cheese with a plant-based alternative like almond or soy yogurt. You might need to adjust the amount slightly for consistency.

    5. Dairy-Free Alternative:

    6. If you’re avoiding dairy but still want the same creamy consistency, cashew cheese or nutritional yeast can provide the desired flavor with added nutritional benefits.

    7. Flavor Enhancements:

    8. Experiment with spices like oregano, basil, or garlic powder in the oat mix to elevate the flavor profile. This will allow every bite to feel unique.

    Overall, the Tasty 3-Ingredient Cottage Cheese Pizza is not just a quick dinner fix; it’s adaptable to numerous dietary constraints while retaining its delightful taste.

    How to Prepare the Perfect Tasty 3-Ingredient Cottage Cheese Pizza: Step-by-Step Guide

    Creating the Tasty 3-Ingredient Cottage Cheese Pizza is a straightforward process that involves a few easy-to-follow steps. Let’s dive right in!

    1. Prepare the Base:
    2. Start by preheating your oven to 400°F (200°C). This ensures that the pizza cooks evenly and the base becomes perfectly crisp.

    3. Mix Ingredients:

    4. In a large mixing bowl, combine the cottage cheese and olive oil. Mix them thoroughly until you achieve a smooth, creamy consistency. This step is essential as it helps to create a rich flavor in your pizza base.

    5. Add Oats:

    6. Gradually add the finely ground oats into the mixture. Stir until well combined. Aim for a dough-like consistency that is neither too sticky nor too dry. If it’s too wet, add a touch more oats.

    7. Shape the Base:

    8. On a parchment-lined baking sheet, pour the mixture. Use your hands or a spatula to spread it into a round pizza shape, about ½ inch thick. Make sure to form a slight edge around the pizza to hold toppings and sauce.

    9. Pre-bake the Crust:

    10. Place the pizza base into the pre-heated oven and bake for about 10-12 minutes, until it starts to golden and firm up. This first baking step helps ensure that the base doesn’t become soggy when topped.

    11. Add Toppings:

    12. After the base is ready, remove it from the oven and feel free to add any toppings of your choice. For a classic pizza, add marinara sauce, veggies, and cheese. If you’re keeping it light, consider topped greens or a simple sprinkle of herbs.

    13. Bake Again:

    14. Put the topped pizza back into the oven and bake for an additional 10 minutes or until the cheese is melted and bubbly (if using cheese). This step helps meld the flavors together.

    15. Cool and Serve:

    16. Once out of the oven, let your pizza cool slightly before cutting it into slices. This little wait time ensures that the toppings are set and makes it easier to handle.

    This step-by-step guide ensures that anyone can perfect the Tasty 3-Ingredient Cottage Cheese Pizza. Remember to experiment with the toppings to suit your palate, making this pizza your own.

    Mastering Tasty 3-Ingredient Cottage Cheese Pizza: Advanced Tips and Variations

    To make the most of your Tasty 3-Ingredient Cottage Cheese Pizza, consider these advanced tips and creative tweaks:

    1. Crispy Crust:

    • For a crunchier texture, try pre-cooking the base for a few minutes longer or using a pizza stone instead of a baking sheet. This helps derive more moisture and results in a beautifully crisp crust.

    2. Herb Infusion:

    • Incorporate fresh herbs, such as basil or thyme, into the oat mixture before baking. This infuses the crust with additional flavors and makes your pizza more aromatic.

    3. Seasonal Veggies:

    • Make your pizza versatile by adding seasonal vegetables. Think spinach in spring, tomatoes in summer, and roasted root vegetables in fall. This adds freshness, flavor, and even more nutrients.

    4. Cheesy Options:

    • If you’re a cheese lover, consider adding a layer of mozzarella or ricotta on top before the second bake. Be mindful of quantities to maintain the dish’s low-calorie profile.

    5. Dipping Sauce:

    • Serve alongside a homemade dipping sauce made with yogurt and herbs for an added layer of flavor. Alternatively, a simple balsamic glaze can complement the toppings perfectly.

    By incorporating these tips, you can make your Tasty 3-Ingredient Cottage Cheese Pizza a true standout among dinner recipes. Enjoy the freedom to experiment while relishing the deliciousness that comes from this basic, yet adaptable, recipe.

    How to Store Tasty 3-Ingredient Cottage Cheese Pizza: Best Practices

    To maintain the fresh taste of your Tasty 3-Ingredient Cottage Cheese Pizza, proper storage is essential. Here are some best practices:

    1. Refrigeration:

    • After enjoying your pizza, let the leftovers cool completely. Place them in an airtight container and refrigerate. Your pizza will stay fresh for up to 3 days.

    2. Freezing:

    • If you want to store the pizza for longer, consider freezing it. Wrap individual slices in plastic wrap before placing them in a freezer-safe bag. They can last up to 2 months in the freezer.

    3. Reheating:

    • Reheat your pizza slices in an oven or toaster oven at 350°F (175°C) for about 10 minutes or until heated through. This method keeps the crust crispy. Alternatively, use a microwave for a quick warm-up, but note that this may result in a softer crust.

    Proper storage not only helps you enjoy this delightful pizza for longer but also retains its texture and flavor, ensuring that every bite is as satisfying as the first.

    Nutritional Value of Tasty 3-Ingredient Cottage Cheese Pizza

    Understanding the nutritional content of your meals is crucial, especially when preparing healthy dinner recipes. Here’s a breakdown of the nutritional value for one serving of the Tasty 3-Ingredient Cottage Cheese Pizza:

    Nutritional Information (Per Serving):

    • Calories: 150
    • Total Fat: 5 g
    • Saturated Fat: 1.5 g
    • Cholesterol: 20 mg
    • Sodium: 250 mg
    • Total Carbohydrates: 15 g
    • Dietary Fiber: 3 g
    • Sugars: 1 g
    • Protein: 10 g

    Health Benefits:

    1. High in Protein: The cottage cheese contributes significantly to your protein intake, essential for muscle repair and growth.

    2. Low in Calories: At just 150 calories per serving, this pizza fits seamlessly into a calorie-controlled diet.

    3. Rich in Fiber: Thanks to the oats, this meal provides dietary fiber that aids digestion and promotes satiety.

    When you savor this Tasty 3-Ingredient Cottage Cheese Pizza, not only are you indulging in a delicious meal, but you are also treating your body to a nutritious option that aligns beautifully with your health goals.

    FAQs: Frequently Asked Questions About Tasty 3-Ingredient Cottage Cheese Pizza

    1. Can I make this pizza ahead of time?

    Yes, you can prepare the base ahead of time, bake it without toppings, and store it in the refrigerator for a couple of days. Add toppings and bake just before serving.

    2. How can I make this pizza vegan?

    To make it vegan, substitute cottage cheese with a non-dairy yogurt option, like almond or soy yogurt. Ensure that the yogurt is thick enough to provide a similar consistency.

    3. What types of toppings can I use?

    Feel free to experiment with various toppings! Vegetables, meats, or plant-based alternatives are great options. Just keep in mind to adjust the cooking time for certain ingredients to ensure they’re cooked through.

    4. How do I prevent the crust from becoming soggy?

    Bake the crust for slightly longer initially to create a firm base before adding toppings. You can also limit the amount of watery toppings, like fresh tomatoes, to prevent excess moisture.

    5. Can I freeze leftover pizza?

    Absolutely! Wrap slices tightly in plastic wrap and store them in freezer bags. They can be frozen for up to two months and reheated in the oven for the best results.

    6. Are there any other base options?

    Yes! While oats are an excellent gluten-free alternative, you can also try using almond flour or chickpea flour to create a different flavor profile.

    In conclusion, the Tasty 3-Ingredient Cottage Cheese Pizza is a winning option among dinner recipes, combining simplicity, health benefits, and versatility. Explore this culinary gem in your kitchen, and bring your loved ones together for a deliciously satisfying experience that resonates with happiness and good health!

  • Tasty 3-Ingredient Cottage Cheese Pizza

    Tasty 3-Ingredient Cottage Cheese Pizza

    Tasty 3-Ingredient Cottage Cheese Pizza: A Tropical Delight

    Introduction to Tasty 3-Ingredient Cottage Cheese Pizza

    Imagine this: a delicious pizza fresh from your oven, yet you only had to use three simple ingredients. Welcome to the world of Tasty 3-Ingredient Cottage Cheese Pizza! This easy dinner recipe simplifies your weeknight meals and showcases the versatility of cottage cheese in a way that you might not have considered before.

    This recipe not only reduces your time in the kitchen but also aligns with various dietary needs, making it a fantastic option for busy parents, students, and health-conscious individuals. The best part? It’s gluten-free and can be made vegan with simple alternatives. As you prep this dish, you’ll discover how painlessly it comes together, allowing you to enjoy a homemade pizza experience without the fuss.

    Whether you’re a baking enthusiast looking to whip up a meal in no time or a working professional seeking wholesome options after a long day, this cottage cheese pizza is sure to inspire your culinary journey. Let’s dive into the benefits and advantages of this scrumptious recipe, which will quickly become a staple among your favorite easy dinner recipes!

    Benefits and Advantages of Tasty 3-Ingredient Cottage Cheese Pizza

    The beauty of Tasty 3-Ingredient Cottage Cheese Pizza lies in its myriad benefits. To start, it’s incredibly straightforward to prepare. Just three ingredients create a delicious pizza that anyone can master, making it ideal for beginner cooks and seasoned bakers alike. In about 30 minutes, you can pull off a meal that looks and tastes like it took hours to create.

    But the advantages don’t stop there. One of the standout features of this dish is its health benefits. Cottage cheese is high in protein, which helps keep you full and satisfied, making it a perfect option for diet-conscious individuals. It’s also lower in calories compared to traditional pizza bases, so you can indulge without that guilty feeling afterward. Perfect for everyone from health enthusiasts to those simply looking to eat better, this dish supports various weight-loss goals.

    Additionally, the recipe can be easily adapted to cater to various dietary preferences. For vegans, plant-based substitutes can replace cottage cheese effectively, while gluten-free tortillas or bases can make the pizza suitable for those avoiding gluten. All in all, Tasty 3-Ingredient Cottage Cheese Pizza is not only a quick and healthy meal option, but also a canvas for creativity, allowing you to customize flavors and toppings that suit your taste buds.

    When you’re seeking easy dinner recipes that cater to diverse diets and schedules, this dish certainly checks all the boxes. Thus, it becomes much more than just a recipe; it transforms into a practical solution for the everyday cook.

    Ingredients Overview

    Essential Ingredients for Tasty 3-Ingredient Cottage Cheese Pizza

    Here, we’ll break down the essential elements you need to create this delightful cottage cheese pizza.

    1. Cottage Cheese (1 cup)
    2. Purpose: The base ingredient that contributes to the creamy texture and rich flavor.
    3. Health Benefit: High in protein, low in calories, and packed with essential nutrients.

    4. Flatbread or Gluten-Free Tortilla (1 piece)

    5. Purpose: Serves as the crust of your pizza. Use whatever flatbread you have on hand, whether it’s whole wheat, low-carb, or gluten-free.
    6. Health Benefit: Offers a low-calorie alternative to traditional pizza dough options.

    7. Your Favorite Pizza Seasoning or Tomato Sauce (to taste)

    8. Purpose: Provides flavor and seasoning that takes this pizza from bland to amazing. Use a pre-made sauce or a mix of herbs like oregano, basil, garlic powder, and even red pepper flakes for a kick.
    9. Health Benefit: Allows for endless customizations—choose align with your dietary needs.

    This simple selection of ingredients leverages convenience and ensures that your pizza doesn’t compromise on taste or wellness.

    Dietary Substitutions to Customize Your Tasty 3-Ingredient Cottage Cheese Pizza

    Are you looking to tailor the Tasty 3-Ingredient Cottage Cheese Pizza to fit your dietary preferences? Here are some suggested substitutions:

    • For Vegan Pizza: Substitute cottage cheese with a vegan alternative made from blended tofu mixed with nutritional yeast. This provides a creamy texture while keeping your dish plant-based.

    • For Dairy-Free Options: Use unsweetened coconut yogurt or an almond-based cheese spread as a base instead of cottage cheese.

    • For Gluten-Free Lovers: Select a gluten-free tortilla or flatbread made from almond flour or chickpea flour as your pizza base.

    • For Low-Calorie Enthusiasts: Keep the base and toppings minimal to stay within your caloric goals. Opt for fresh veggies as toppings instead of heavier, calorie-dense options like cheese.

    Adapting this recipe to meet various dietary needs doesn’t only make it versatile; it also adds a personal touch to your culinary creativity. Feel free to explore different combinations as you develop your unique version of Tasty 3-Ingredient Cottage Cheese Pizza!

    How to Prepare the Perfect Tasty 3-Ingredient Cottage Cheese Pizza: Step-by-Step Guide

    Creating your Tasty 3-Ingredient Cottage Cheese Pizza is straightforward and enjoyable. Just follow these easy steps for a pizza that’s both delightful and fulfilling!

    1. Prepare the Base:
      Start by preheating your oven to 400°F (200°C). If using flatbread, lay it on a baking sheet lined with parchment paper for easy cleanup. If you’re using a tortilla, ensure it’s sturdy enough to hold up during baking.

    2. Spread the Cottage Cheese:
      Spoon the cottage cheese onto the prepared base. Use the back of the spoon to spread it evenly across the surface, about 1/4 inch thick. This layer acts as your cheesy component, providing flavor and moisture to your pizza.

    3. Season Wisely:
      Lightly sprinkle your preferred seasonings over the cottage cheese. If you opted for tomato sauce, spread a thin layer over the cheese instead. Make sure to cover the base evenly to ensure a flavorful bite in each slice.

    4. Top with Fresh Ingredients:
      Feel free to get creative! Add your choice of toppings, such as fresh vegetables, mushrooms, olives, or even a sprinkle of vegan cheese for a richer flavor. Remember, the more colorful, the better!

    5. Bake in the Oven:
      Place your pizza in the preheated oven and bake for about 12-15 minutes or until it turns golden and crispy around the edges. Keep an eye on the pizza to prevent overcooking.

    6. Slice and Serve:
      Once your pizza is done, take it out and let it cool for a few minutes. Then, slice it into wedges, and it’s ready to be enjoyed! Serve it alongside a fresh salad or some homemade dipping sauce for an extra treat.

    7. Experiment with Variations:
      This is where the fun begins! Try out different toppings, herbs, or even sauces to create your personalized version. Consider adding cooked chicken for extra protein or a drizzle of balsamic vinegar for a gourmet touch.

    When you opt for this easy dinner recipe, each step allows you the flexibility to create a meal that embodies your favorite flavors while accommodating your dietary restrictions.

    Mastering Tasty 3-Ingredient Cottage Cheese Pizza: Advanced Tips and Variations

    For those looking to elevate their Tasty 3-Ingredient Cottage Cheese Pizza, here are some advanced tips and variations to try:

    • Cheese Variations: While cottage cheese works wonderfully, you can enhance the flavor by mixing in herbs or spices right into your cheese before spreading it. Consider trying garlic powder, Italian seasoning, or even a hint of chili powder for a unique twist.

    • Crust Alternatives: Get adventurous! Swap out the flatbread for cauliflower crust or even chickpea flour-based dough. These options not only add an interesting dimension but are also beneficial for health-conscious eaters.

    • Sneak in Nutrients: Blend in spinach or kale into the cottage cheese before use. This masquerades the greens while adding crucial nutrients.

    • Make It a Meal: For a heartier pizza experience, layer in some pre-cooked proteins, like chicken or turkey sausage, to give you that extra satisfaction while keeping it healthy.

    • Chill Out: If you’re a fan of cold pizza, prepare it ahead of time, refrigerate, and enjoy it chilled the next day. The flavors often intensify after sitting for a while, presenting a perfect cold meal on hot days!

    These advanced tips and variations not only enhance your cooking skills but also inspire creativity in your kitchen, enabling you to create an always-evolving pizza experience.

    How to Store Tasty 3-Ingredient Cottage Cheese Pizza: Best Practices

    To maintain the freshness and deliciousness of your Tasty 3-Ingredient Cottage Cheese Pizza, proper storage is key. Here’s how to ensure it stays tasty whether you’re planning to eat it right away or save some for later:

    1. Refrigeration:
      After preparing your pizza, allow it to cool to room temperature, then cover it tightly with plastic wrap or aluminum foil. It can be stored in the refrigerator for up to 3 days. When you’re ready to enjoy it, reheat the pizza in the oven or microwave until warmed through.

    2. Freezing:
      If you’ve made extra pizza or want to prepare it ahead of time, freezing is a great option! Slice the cooled pizza into individual wedges and place them in a freezer-safe container, separated by parchment paper. It will keep well in the freezer for up to 2 months. When you’re ready to eat, simply reheat from frozen, adjusting your baking time accordingly.

    3. Reheating:
      To reheat, placing your pizza slices in a preheated oven ensures a crispy base. If using a microwave, place a slice on a microwave-safe plate and cover with a damp paper towel to prevent it from drying out.

    Storing your Tasty 3-Ingredient Cottage Cheese Pizza properly means you can enjoy the ultimate convenience of easy dinner recipes without sacrificing quality or flavor.

    Nutritional Value of Tasty 3-Ingredient Cottage Cheese Pizza

    Understanding the nutritional value of your meals plays a vital role in making informed dietary choices. Below is the estimated nutritional breakdown for one slice of Tasty 3-Ingredient Cottage Cheese Pizza (calculated based on a standard size pizza cut into six slices):

    • Calories: Approximately 120-150 kcal
    • Protein: 8-10 grams
    • Fat: 3-5 grams
    • Carbohydrates: 15-20 grams
    • Fiber: 1-3 grams
    • Sugar: 1-2 grams
    • Sodium: 250-300 mg

    This nutritional profile highlights the pizza as a protein-rich meal within a reasonably low-calorie range, making it suitable for those exploring easy dinner recipes that are both nutritious and satisfying.

    Since ingredients can vary widely—especially if you opt for specific dietary substitutions—be sure to calculate your nutritional values if you make substantial changes to the recipe. Maintaining awareness of your nutrient intake can help you achieve desired health goals without sacrificing taste.

    FAQs: Frequently Asked Questions About Tasty 3-Ingredient Cottage Cheese Pizza

    Q1: Can I use Greek yogurt instead of cottage cheese?
    A: Yes! Greek yogurt can be a suitable alternative for cottage cheese. It can provide a similar creamy texture while boosting protein content.

    Q2: Is there a way to make this pizza spicy?
    A: Absolutely! Sprinkle some crushed red pepper flakes or drizzle hot sauce on top before baking to add a spicy kick to your pizza.

    Q3: Can this pizza be made ahead of time?
    A: Yes, you can prepare the pizza and store it in the refrigerator or freezer. Just follow the storage guidelines outlined earlier in this article to maintain its taste and freshness.

    Q4: What’s the best method for reheating leftovers?
    A: For reheating, use an oven for the best texture. Place the pizza on a baking sheet at 350°F (175°C) for about 5-10 minutes until hot. Alternatively, a microwave works if you’re short on time—just be sure to cover it to retain moisture.

    Q5: Are there any low-carb options available?
    A: For a low-carb option, consider using a cauliflower crust. You can also reduce the amount of flatbread you use and load up on healthy veggies instead.

    Exploring the world of pizza creation doesn’t have to be tedious or time-consuming. The Tasty 3-Ingredient Cottage Cheese Pizza opens the door to easy dinner recipes that can delight your family while accommodating various diets and taste preferences. Now get ready to enjoy a fulfilling meal that you can feel confident sharing, no matter who’s at your dinner table!

  • The Best Blueberry Muffin Bread Recipe

    The Best Blueberry Muffin Bread Recipe

    The Best Blueberry Muffin Bread Recipe: A Tropical Delight

    Introduction to The Best Blueberry Muffin Bread Recipe

    Welcome to a delightful culinary experience that merges the comfort of home baking with the nutritious goodness of fresh blueberries! This Blueberry Muffin Bread is not just another loaf; it’s an extraordinary take on traditional blueberry muffins, bringing forth a moist, fluffy texture that is simply irresistible. With its genius combination of flavors and health benefits, it serves as one of the best breakfast ideas any busy parent or student can rely upon for making mornings easier and more delicious.

    This recipe is not only easy to follow but also customizable to suit various dietary needs, including vegan and gluten-free options. It’s perfect for everyone—from working professionals needing a quick grab-and-go meal to baking enthusiasts who wish to experiment in their kitchens. This blueberry muffin bread encapsulates the essence of wholesome ingredients while ensuring you won’t compromise on taste. So, grab your apron! Let this recipe inspire your cooking adventures and become a staple in your breakfast rotation.

    Benefits and Advantages of The Best Blueberry Muffin Bread Recipe

    In a world where quick and healthy breakfast ideas are a rarity, our Blueberry Muffin Bread stands out due to its multitude of benefits. First and foremost, the simplicity of preparation is a breath of fresh air; with just one bowl, minimal effort, and about 10 simple ingredients, you can whip up this delightful bread in no time. It’s ideal for busy individuals or families looking for a nutritious breakfast solution without the hassle of overly complex procedures.

    Health is another core aspect of this recipe. Blueberries are packed with antioxidants, vitamins, and smart carbs that promote heart health and lower blood pressure. By incorporating whole-grain flour options or gluten-free alternatives, you can create a loaf that is not only delicious but also conducive to health-conscious lifestyles. You can even opt for reduced-sugar or natural sweetener alternatives to make this treat even more aligned with your dietary preferences.

    What really makes this blueberry muffin bread shine is the versatility it offers. You could slice it for an on-the-go breakfast, toast it for an afternoon snack, or even serve it warm with a smear of almond butter for a wholesome treat. This recipe serves as a canvas, allowing you to add your unique twist, whether by including nuts, seeds, or even a sprinkle of cinnamon or lemon zest. Indeed, it’s an excellent choice for anyone looking to elevate their morning meal options!

    Ingredients Overview

    Essential Ingredients for The Best Blueberry Muffin Bread Recipe

    Here’s the full list of ingredients you’ll need to create the best blueberry muffin bread. Each ingredient serves its purpose and adds to the flavor profile, nutritional content, and overall joinability of the final product:

    • 2 cups all-purpose flour or whole wheat flour (for a healthier option)
    • 1 cup sugar or ½ cup honey (for a natural sweetener option)
    • 1 tablespoon baking powder
    • ½ teaspoon baking soda
    • ½ teaspoon salt
    • 1 cup buttermilk or plant-based milk (like almond or oat milk for vegan options)
    • ½ cup unsalted butter, melted or coconut oil (for dairy-free)
    • 2 large eggs, or flax eggs (1 tablespoon ground flaxseed mixed with 3 tablespoons water for vegan adaptation)
    • 1 teaspoon vanilla extract
    • 2 cups fresh blueberries (or frozen ones if fresh are unavailable)

    This collection of ingredients harmonizes beautifully, creating a balance between sweet, tangy, and healthy, providing a guilt-free option for your breakfast ideas.

    Dietary Substitutions to Customize Your The Best Blueberry Muffin Bread Recipe

    The beauty of this blueberry muffin bread lies in its adaptability to suit various dietary restrictions. Here are some suggested substitutions to ensure your recipe meets your loved ones’ needs:

    • Gluten-Free: Substitute all-purpose flour with gluten-free flour blends or almond flour. Ensure that your baking powder is gluten-free as well.
    • Vegan: Replace eggs with flax eggs (1 tablespoon ground flaxseed mixed with 3 tablespoons water per egg) and use plant-based milk. Coconut oil can be a great butter substitute here.
    • Lower Sugar: Reduce sugar content by utilizing ripe bananas or unsweetened applesauce to sweeten naturally. You can also use stevia or erythritol for a low-calorie sweetener.
    • Healthier Fats: Instead of butter, using unsweetened applesauce or Greek yogurt can also lower the calorie count while maintaining moisture.
    • Additives: Feel free to incorporate nuts (like walnuts or pecans), seeds (chia or hemp), or spices (cinnamon or nutmeg) to enhance flavor while also boosting nutritional content.

    By making these simple ingredient swaps, you can create a blueberry muffin bread tailored perfectly to fit a variety of palates and dietary desires.

    How to Prepare the Perfect The Best Blueberry Muffin Bread Recipe: Step-by-Step Guide

    Crafting your Blueberry Muffin Bread is straightforward and enjoyable. Follow this step-by-step guide for an effortless baking experience. Not only will you enjoy the fruits of your labor, but your creativity in the kitchen will shine through!

    1. Preheat Your Oven:

    Begin by preheating your oven to 350°F (175°C). This ensures even baking, so your bread rises perfectly.

    2. Prepare the Pan:

    Grease a 9×5-inch loaf pan with butter or cooking spray to prevent the bread from sticking, or line it with parchment paper for easy cleanup.

    3. Mix Dry Ingredients:

    In a large mixing bowl, whisk together the flour, sugar, baking powder, baking soda, and salt until well combined. This step is crucial because it evenly distributes the leavening agents.

    4. Combine Wet Ingredients:

    In another bowl, mix the buttermilk, melted butter, eggs, and vanilla extract. Whisk until smooth. This combination adds moisture and richness to the bread.

    5. Blend the Mixtures:

    Pour the wet ingredients into the bowl with the dry ingredients. Use a spatula to gently fold the mixture together until just combined. Be careful not to overmix; small lumps are acceptable!

    6. Add Blueberries:

    Gently fold in the blueberries. If using frozen ones, there’s no need to thaw them, but dust them with a little flour to prevent sinking.

    7. Transfer to Pan:

    Pour the batter into your prepared loaf pan, smoothing the top lightly with a spatula.

    8. Bake:

    Place the loaf in the oven and bake for 60-70 minutes. Check doneness by inserting a toothpick into the center; it should come out clean.

    9. Cool:

    Once baked, remove the bread from the oven and let it cool in the pan for about 15 minutes. Then, transfer it to a wire rack to cool completely.

    10. Slice and Serve:

    After cooling, slice into thick pieces and serve. Enjoy your blueberry muffin bread fresh or toasted!

    This recipe offers flexibility—feel free to enjoy it straight from the oven or add a layer of nut butter or a drizzle of honey, expanding its repertoire as a versatile part of your breakfast ideas!

    Mastering The Best Blueberry Muffin Bread Recipe: Advanced Tips and Variations

    To elevate your baking experience, consider the following advanced tips and variations:

    Tips for Perfecting Your Muffin Bread:

    • Room Temperature Ingredients: Ensure your eggs and milk are at room temperature. This will help your bread rise better and create a fluffier texture.
    • Do Not Overmix: Keep your mixing to a minimum after combining wet and dry ingredients—this results in a tender loaf.
    • Blueberry Quality: Using high-quality, fresh blueberries boosts the flavor significantly. Look for plump, juicy berries!

    Variations to Try:

    • Zesty Lemon: Add the zest of one lemon to the batter for a refreshing kick.
    • Nutty Add-In: Mix in a cup of chopped nuts, such as walnuts or pecans, for a crunchy texture.
    • Spiced Up: Add a teaspoon of cinnamon or nutmeg to bring warmth to the bread, enhancing its cozy vibe.
    • Chocolate Delight: For a dessert twist, fold in semi-sweet dark chocolate chips with the blueberries.

    These tips and variations transform the basic recipe into endless possibilities, ensuring it remains a favorite for everyone, regardless of dietary preferences!

    How to Store The Best Blueberry Muffin Bread Recipe: Best Practices

    Storing your Blueberry Muffin Bread correctly extends its freshness and flavor, ensuring that every slice retains its deliciousness. Here are some effective methods:

    Refrigeration:

    If you plan to eat your bread within a week, store it at room temperature, wrapped tightly in plastic wrap or aluminum foil to avoid drying. Placing it in an airtight container works well, too.

    Freezing:

    For longer storage, freezing is an excellent option. Wrap the cooled bread tightly in plastic wrap, followed by a layer of aluminum foil, ensuring no air pockets for optimal preservation. It can be stored in the freezer for up to three months. When you’re ready to enjoy it, thaw it in the refrigerator overnight before slicing.

    Reheating:

    To rewarm slices, you can either use a toaster or place them briefly in a microwave. For a warm, crusty edge, pop slices in the oven at low heat for a few minutes.

    Whether you’re preparing breakfast options for kids heading to school or a cozy Sunday brunch, knowing how to store and maintain this blueberry muffin bread ensures that it’s always ready to serve!

    Nutritional Value of The Best Blueberry Muffin Bread Recipe

    Understanding the nutritional profile of your Blueberry Muffin Bread allows you to enjoy it guilt-free. An average slice contains:

    • Calories: 210
    • Total Fat: 7g
    • Saturated Fat: 4g
    • Cholesterol: 30mg
    • Sodium: 200mg
    • Total Carbohydrates: 35g
    • Dietary Fiber: 1g
    • Sugars: 12g
    • Protein: 3g

    This can vary based on the substitutions made, such as using agave nectar in place of sugar or non-dairy milk instead of buttermilk.

    Packed with antioxidants from blueberries, as well as vitamins and minerals, this bread supports a balanced diet while delivering an enjoyable taste. Whether enjoyed as a breakfast idea or an afternoon snack, it fits health and taste effortlessly.

    FAQs: Frequently Asked Questions About The Best Blueberry Muffin Bread Recipe

    1. Can I use frozen blueberries?

    Absolutely! Frozen blueberries are a great alternative. Just toss them in a little flour to help prevent them from sinking while baking.

    2. What can I substitute for eggs if I want a vegan option?

    You can use flax eggs (1 tablespoon ground flaxseed mixed with 3 tablespoons water per egg) as a perfect substitute.

    3. How long will the blueberry muffin bread last?

    At room temperature, the bread will last for about 5-7 days. It can be frozen for up to 3 months.

    4. Is it possible to make this recipe gluten-free?

    Yes! Just replace regular flour with a gluten-free blend. Ensure all other ingredients, like baking powder, are gluten-free as well.

    5. Can I add nuts or other fruits?

    Certainly! Feel free to add chopped nuts, or experiment with different fruits like raspberries or chocolate chips for variety.

    With these FAQs, we hope you have all you need to enjoy this scrumptious blueberry muffin bread to its fullest! Your new favorite recipe for versatile breakfast ideas awaits!

  • Tasty Crispy Shrimp Cakes with Aioli

    Tasty Crispy Shrimp Cakes with Aioli

    Tasty Crispy Shrimp Cakes with Aioli: A Tropical Delight

    Introduction to Tasty Crispy Shrimp Cakes with Aioli

    If you’re on the hunt for a delicious and easy-to-make dish, look no further! Our Tasty Crispy Shrimp Cakes with Aioli are not just a tantalizing treat but also a healthy alternative to many traditional seafood recipes. As one of those delightful shrimp recipes that easily capture the essence of a tropical getaway, these shrimp cakes combine the goodness of fresh shrimp with an assortment of vibrant flavors. Perfect for busy parents, working professionals, and food enthusiasts alike, these cakes are not just a meal; they are a celebration on your plate.

    What makes this recipe stand out is its simplicity. Just a handful of ingredients come together to create an amazing experience for your taste buds. Whether you’re catering to dietary needs or simply looking to impress guests at a dinner party, these shrimp cakes can be made gluten-free and low-calorie without sacrificing flavor. The accompanying aioli, a creamy, garlicky wonder, elevates the dish even further and caters to those looking for vegan options as well—simply substitute the mayonnaise with a plant-based version.

    As you embark on a culinary journey with our Tasty Crispy Shrimp Cakes, you not only satisfy your cravings but also provide your body with the nutrients it deserves. These shrimp cakes are packed with protein, healthy fats, and tons of flavor, making them a great choice any day of the week.

    Benefits and Advantages of Tasty Crispy Shrimp Cakes with Aioli

    One of the primary advantages of making Tasty Crispy Shrimp Cakes with Aioli is their straightforward preparation process. This dish remarkably blends a variety of textures and flavors while being incredibly easy to whip up. Perfect for those busy weeknights or casual weekend gatherings, you can have a restaurant-quality dish ready in less than an hour.

    Health Benefits: Unlike many traditional fried seafood dishes, this recipe allows you to control the cooking method and ingredients, leading to a healthier meal overall. Shrimp is often considered a lean source of protein, low in calories but high in essential nutrients like vitamin B12, selenium, and even omega-3 fatty acids. By preparing these cakes at home, you can add fresh herbs and spices, enriching them with antioxidants and micronutrients.

    Versatility: When considering dietary needs, these shrimp recipes stand out for their adaptability. They can easily be transformed to accommodate gluten-free, low-carb, and even vegan diets with simple substitutions. Parents can feel good serving these cakes to their kids, knowing they contain wholesome ingredients rather than processed ones. The aioli, typically made with mayonnaise, can also be modified to suit different preferences, including adding herbs to the base or using alternative thickeners for a vegan-friendly sauce.

    Impressive Presentation: If you’re hosting a dinner or looking to impress your family and friends, these shrimp cakes provide a beautiful presentation and bursting flavors, making them an excellent choice for any occasion. Garnished with fresh herbs and served with a side salad, they make for a stunning plate that will have your guests raving.

    Ingredients Overview

    Essential Ingredients for Tasty Crispy Shrimp Cakes with Aioli

    For our Tasty Crispy Shrimp Cakes with Aioli, you’ll need the following ingredients:

    • 1 lb fresh shrimp (peeled and deveined): The star ingredient rich in protein and low in fat.
    • 1/2 cup breadcrumbs or panko bread crumbs (use gluten-free for gluten-free option): Provides structure and adds a crispy texture.
    • 1/4 cup finely chopped onion: Adds flavor and moisture to the cakes.
    • 1/4 cup chopped fresh parsley or cilantro: Fresh herbs enhance the taste and visual appeal.
    • 2 cloves garlic, minced: Garlic adds depth and a punch of flavor.
    • 1 egg (or flax egg for vegan option): Acts as a binding agent to hold everything together.
    • 1 teaspoon Old Bay seasoning (optional): A classic seasoning blend that emphasizes the shrimp flavor.
    • Salt and pepper to taste: Essential for balancing all the flavors.
    • 1/4 cup mayonnaise (or vegan mayonnaise): To make the aioli; includes a dash of lemon juice for tanginess.

    Dietary Substitutions to Customize Your Tasty Crispy Shrimp Cakes with Aioli

    1. Gluten-Free Option: Use gluten-free breadcrumbs instead of regular ones. This simple substitution will allow your gluten-sensitive friends and family to enjoy this dish without worry.

    2. Low-Calorie Adjustments: If you’re looking to cut calories, consider removing the egg or using a lower-fat mayonnaise alternative for the aioli. You can also bake the cakes instead of frying them to reduce fat content, cooking them in a lightly oiled pan until crisp on both sides.

    3. Vegan Version: To adapt the recipe for a vegan diet, replace shrimp with a plant-based alternative such as mashed chickpeas or lentils, season them well, and use a flax egg (1 tablespoon flaxseed meal mixed with 2.5 tablespoons water) for binding. Pair this with a creamy vegan aioli made from mashed avocado and a splash of lemon juice.

    4. Additional Spice: If you love heat, consider adding chopped jalapeños or a dash of cayenne pepper to the mixture. This will provide extra flavor and zest to your shrimp cakes.

    With these substitutions, you’ll cater to various dietary needs and create a dish that everyone can enjoy.

    How to Prepare the Perfect Tasty Crispy Shrimp Cakes with Aioli: Step-by-Step Guide

    Creating your Tasty Crispy Shrimp Cakes with Aioli is as easy as 1-2-3! Follow along with this step-by-step guide:

    1. Prepare the Shrimp:
      Begin by placing the fresh shrimp in a food processor. Pulse them a few times until the shrimp are roughly ground but not pureed. Alternatively, chop shrimp finely with a knife for a chunkier texture.

    2. Mix Ingredients:
      Transfer the chopped shrimp into a large mixing bowl. Add the breadcrumbs, onions, herbs, minced garlic, egg, seasoning, salt, and pepper. Mix everything thoroughly until well combined.

    3. Form Cakes:
      Using your hands, shape the mixture into patties of about 3 inches in diameter and 1 inch thick. Make sure to pack them tightly together so they hold their shape.

    4. Chill the Cakes:
      For better texture and easier handling, place the formed cakes on a tray and refrigerate them for at least 20 minutes. This step also helps them firm up, making them easier to cook.

    5. Make the Aioli:
      In a small bowl, combine mayonnaise, minced garlic, and lemon juice. Stir well until smooth and creamy, then season with salt and pepper to taste.

    6. Cook the Cakes:
      Heat a splash of oil in a large skillet over medium heat. Once hot, add the shrimp cakes (working in batches if necessary). Cook for about 4-5 minutes on each side or until golden brown and crispy.

    7. Drain and Serve:
      Once fully cooked, transfer the cakes to a paper towel-lined plate to drain excess oil. Serve immediately with homemade aioli on the side.

    8. Optional Garnish:
      For a fresh touch, garnish with additional chopped herbs or a slice of lemon to add a pop of color to your dish.

    Mastering Tasty Crispy Shrimp Cakes with Aioli: Advanced Tips and Variations

    To truly elevate your cooking game with our Tasty Crispy Shrimp Cakes with Aioli, consider these advanced tips and variations:

    • Additions and Mix-ins: Feel free to experiment with additional flavors such as diced bell peppers, corn, or even jalapeños for a spicy kick. Different types of herbs, like dill or chives, can also impart a unique character.

    • Cooking Methods: While pan-frying yields a delicious crispiness, consider baking them in a preheated oven at 400°F (200°C) for 20 minutes, flipping halfway through. This healthier method will provide a lovely texture with a fraction of the oil.

    • Serving Ideas: Pair these shrimp cakes with a fresh salad, slaw, or rice pilaf for a complete meal. For a fun appetizer, serve them as bite-sized cakes on toothpicks with a drizzle of aioli.

    • Experiment with Sauces: Besides aioli, consider serving with a zesty mango salsa, sweet chili sauce, or even a spicy remoulade, depending on your flavor preferences.

    With these tips and variations, you can tailor the recipe to suit your individual taste and impress your guests with your culinary prowess.

    How to Store Tasty Crispy Shrimp Cakes with Aioli: Best Practices

    Proper storage of Tasty Crispy Shrimp Cakes with Aioli ensures you get to enjoy every last bite. Here are some best practices:

    • Refrigeration: Allow the shrimp cakes to cool completely before placing them in an airtight container. They can be stored in the refrigerator for up to 3 days, retaining their flavor and texture.

    • Freezing: If you want to see how well these shrimp recipes freeze, place individual cakes on a baking sheet lined with parchment paper, and freeze until solid. Then transfer to a freezer-safe container or bag, layering parchment paper between each cake to prevent sticking. They can be stored in the freezer for up to 2 months.

    • Reheating: When you’re ready to enjoy the leftover shrimp cakes, you can reheat them in the oven at 350°F (175°C) for about 10-15 minutes, or until heated through. For a quicker option, use a microwave, but this may result in a softer texture.

    By following these storage tips, you ensure that your shrimp cakes remain delicious and ready to enjoy at a moment’s notice.

    Nutritional Value of Tasty Crispy Shrimp Cakes with Aioli

    It’s important to consider the nutritional value of your meals. Here’s a breakdown of the approximate nutritional information for one serving (two shrimp cakes with aioli):

    • Calories: 250
    • Protein: 20g
    • Fat: 15g
    • Carbohydrates: 10g
    • Fiber: 1g
    • Sugars: 1g
    • Sodium: 500mg

    This nutritional profile highlights the balance of high protein, moderate fat, and low carbohydrate content, making it suitable for many dietary preferences. By incorporating plenty of fresh ingredients and options for vegetarian or vegan adaptations, these shrimp recipes cater to diverse dietary habits while still offering flavor-packed servings.

    FAQs: Frequently Asked Questions About Tasty Crispy Shrimp Cakes with Aioli

    Can I use frozen shrimp for this recipe?

    Absolutely! Just ensure that the shrimp are fully thawed, peeled, and deveined before using. You might need to squeeze out excess moisture from thawed shrimp to avoid a watery mixture.

    How can I make this recipe gluten-free?

    Simply replace regular breadcrumbs with gluten-free breadcrumbs, and make sure all other ingredients are certified gluten-free, especially the mayonnaise.

    Can the shrimp cakes be baked instead of fried?

    Yes! Baking is a healthier alternative. Cook the cakes at 400°F (200°C) for 20 minutes, flipping halfway through, until they are golden brown and heated through.

    What can I substitute for mayonnaise in the aioli?

    You can make a delicious vegan aioli using mashed avocado, silken tofu, or a store-bought vegan mayonnaise. Customize it with herbs or spices for added flavor.

    How do I reheat leftover shrimp cakes without losing their crispiness?

    To maintain the crispy texture, reheat them in an oven at 350°F (175°C) for about 10-15 minutes until warmed through. Avoid microwave reheating if possible, as they can become soggy.

    These FAQs provide clarity for home cooks, ensuring everyone feels confident about making Tasty Crispy Shrimp Cakes with Aioli.

    By focusing on quality ingredients and a simple yet delicious method, you can create shrimp recipes that not only satisfy cravings but also provide a healthy and enjoyable dining experience. Dive into this tropical delight today!

  • Easy Chicken Bacon Ranch Wrap

    Easy Chicken Bacon Ranch Wrap

    Easy Chicken Bacon Ranch Wrap: A Tropical Delight

    Introduction to Easy Chicken Bacon Ranch Wrap

    If you’re on the lookout for easy dinner recipes that cater to busy lifestyles without compromising flavor, look no further than the Easy Chicken Bacon Ranch Wrap! This delightful wrap combines tender, juicy chicken with crispy bacon, crisp vegetables, and creamy ranch dressing, all wrapped in a soft tortilla. It’s not just a meal; it’s a culinary escape that’s quick to prepare, making it perfect for busy weeknights, potlucks, or even lazy weekend lunches.

    Not only is this recipe incredibly simple to whip up, but it also brings together a medley of flavors and textures that your entire family will love. Unlike traditional dinner options, this wrap is versatile; it can be made gluten-free or even vegan with a few simple substitutions, ensuring that it meets various dietary needs. With its abundant protein from chicken and the added crunch of fresh vegetables, you can feel good about serving this dish. Plus, it takes less than 30 minutes from start to finish!

    So, whether you’re a busy parent looking for quick meal ideas or a student needing nourishment between classes, this Easy Chicken Bacon Ranch Wrap fits seamlessly into any routine. Focus on your family or your studies while enjoying a delightful meal that’s sure to inspire your cooking adventures!

    Benefits and Advantages of Easy Chicken Bacon Ranch Wrap

    The Easy Chicken Bacon Ranch Wrap isn’t just another recipe; it’s an example of how innovative meal preparation can bring joy back to dinnertime. Here are some key benefits and advantages of this dish:

    1. Simplicity and Convenience: With straightforward steps and minimal cooking time, this wrap epitomizes the idea of easy dinner recipes. It requires very little prep work and utilizes just a handful of ingredients, making it accessible for even novice cooks.

    2. Customizable Options: The beauty of this wrap lies in its versatility. You can easily substitute chicken for turkey, tofu, or even beans for a vegetarian option. This makes it suitable for a wide range of diets, which is particularly appealing to those who are health-conscious or have specific dietary restrictions.

    3. Nutritional Benefits: Packed with protein from chicken and healthy fats from bacon, this wrap can help keep you satiated for hours. The addition of fresh greens not only adds color and flavor but also boosts the fiber content, contributing to a balanced meal.

    4. Comfort Food Vibes: The familiar flavors of ranch dressing, bacon, and grilled chicken evoke comfort and satisfaction. It’s the kind of dish that warms your heart and fills your belly, making it a family favorite.

    5. Meal Prep Friendly: Preparing multiple wraps at once can save a lot of time during the busy workweek. You can store them in the refrigerator or freezer, making them an ideal choice for meal prepping.

    By choosing the Easy Chicken Bacon Ranch Wrap as your next dinner option, you’re ensuring a satisfying and nourishing meal without succumbing to the stress of complicated cooking. It stands out from other easy dinner recipes thanks to its deliciousness and flexibility.

    Ingredients Overview

    Essential Ingredients for Easy Chicken Bacon Ranch Wrap

    To create the perfect Easy Chicken Bacon Ranch Wrap, you’ll need the following key ingredients:

    • 2 cups cooked chicken breast, shredded or chopped
      (Provides lean protein for a filling meal)
    • 4 slices of bacon, cooked and crumbled
      (Adds a rich and savory flavor)
    • 1 cup lettuce, shredded (Iceberg or Romaine)
      (Adds freshness and crunch)
    • 1 medium tomato, diced
      (Provides juiciness and adds a pop of color)
    • 1/2 cup shredded cheese (Cheddar or Pepper Jack)
      (Enhances flavor and adds creaminess)
    • 1/4 cup ranch dressing (or more to taste)
      (Gives the wrap its signature flavor)
    • 4 large tortillas (whole wheat or gluten-free for dietary needs)
      (Forms the base of the wrap)
    • Optional: Avocado slices, jalapeños, or additional spices for flavor customization

    Dietary Substitutions to Customize Your Easy Chicken Bacon Ranch Wrap

    Everyone has different dietary needs, and the Easy Chicken Bacon Ranch Wrap allows for numerous substitutions to accommodate them:

    • Gluten-Free Option: Use gluten-free wraps or lettuce leaves as an alternative. The lettuce wrap adds a refreshing crunch and reduces carbohydrates.

    • Vegan Option: Substitute chicken with a plant-based protein such as grilled tofu, tempeh, or chickpeas. Swap the bacon for a smoky vegan bacon alternative and use a dairy-free ranch dressing.

    • Dairy-Free Option: Use dairy-free cheese and a vegan ranch dressing to ensure the wrap is completely free from dairy products.

    • Low-Calorie Version: Use low-fat ranch dressing or plain Greek yogurt mixed with herbs to create a creamy, healthier dressing. Whole grain wraps can also help keep the calorie count down.

    These substitutions make the Easy Chicken Bacon Ranch Wrap an inclusive recipe suitable for everyone, allowing you to cater to a variety of dietary needs without sacrificing flavor.

    How to Prepare the Perfect Easy Chicken Bacon Ranch Wrap: Step-by-Step Guide

    Follow these step-by-step instructions to create your Easy Chicken Bacon Ranch Wrap. Each step emphasizes the wrap’s adaptability for various dietary preferences, emphasizing the ease and convenience of preparing one of those ideal easy dinner recipes.

    1. Prepare the Filling:
    2. In a large bowl, combine the cooked chicken, crumbled bacon, shredded lettuce, diced tomato, and shredded cheese. Mix thoroughly, ensuring all ingredients are well incorporated.

    3. Add the Dressing:

    4. Drizzle the ranch dressing over the mixture. Stir gently to combine, ensuring that all ingredients are coated with ranch dressing. Adjust the amount of dressing according to your taste preference.

    5. Warm the Tortillas:

    6. On a skillet over medium heat, warm each tortilla for about 10-15 seconds on each side. This step makes the tortillas more pliable and easier to roll.

    7. Assemble the Wrap:

    8. Take one warmed tortilla and place a generous portion of the chicken and bacon filling towards the center. Leave about an inch of space at the edges for rolling.

    9. Roll the Wrap:

    10. Fold the sides of the tortilla inward and then roll from the bottom up, holding tightly as you go. Ensure the filling stays encased within the tortilla. Place seam side down on a plate.

    11. Repeat:

    12. Repeat the process for the remaining tortillas and filling. This recipe makes about four wraps.

    13. Serve or Store:

    14. You can slice the wraps in half diagonally for easier handling. Serve immediately with extra ranch dressing or your favorite dip. Alternatively, store any leftovers in an airtight container.

    15. Customize for Dietary Needs:

    16. If you have guests with specific diets, prepare a separate filling with plant-based protein or low-calorie ingredients and follow the same assembly procedure.

    Making an Easy Chicken Bacon Ranch Wrap is a quick process that can seamlessly fit into your plans for the week. Making this recipe all the more satisfying is its adaptability for various dietary preferences, aligning perfectly with what anyone would want from easy dinner recipes!

    Mastering Easy Chicken Bacon Ranch Wrap: Advanced Tips and Variations

    Even though the Easy Chicken Bacon Ranch Wrap is simple to prepare, there are several tips and variations to elevate your experience:

    • Grilled Variation: For an added depth of flavor, consider grilling the assembled wraps for a few minutes on each side until they are golden brown. This creates a delicious crispiness on the outside while keeping the filling warm and gooey.

    • Herbed Ranch Dressing: Enhance the flavor profile of your wraps by mixing fresh herbs such as dill, parsley, or chives into your ranch dressing. This adds a fresh touch that complements the other ingredients.

    • Spicy Kick: Add spicy elements like sliced jalapeños, red pepper flakes, or a dash of hot sauce to the chicken and bacon filling for those who enjoy a little heat.

    • Extra Veggies: Incorporate additional vegetables such as bell peppers, cucumbers, or spinach to increase fiber and nutrients while adding various colors to your wrap.

    • Use Pita Pockets: Instead of traditional tortillas, try using whole-grain pita pockets to create a different presentation. Pita pockets add a fun twist and make for an easy handheld meal.

    By incorporating these tips and variations into your preparation, the Easy Chicken Bacon Ranch Wrap can transform into an even more exciting dining experience, showcasing the versatility that makes it a standout among easy dinner recipes.

    How to Store Easy Chicken Bacon Ranch Wrap: Best Practices

    To preserve the freshness and flavor of your Easy Chicken Bacon Ranch Wrap, it’s essential to store it properly:

    • Refrigeration: If you have prepared wraps that you plan to eat within a few days, store them in an airtight container in the refrigerator. They will stay fresh for up to 3 days. This method helps maintain the integrity of the ingredients.

    • Freezing Instructions: To store wraps for a more extended period, freeze them individually wrapped in plastic wrap or foil, then place them in a freezer-safe bag. These can last for up to a month. When you’re ready to eat, thaw in the refrigerator overnight before reheating.

    • Reheating Tips: For optimal results, reheat the wraps in a pan on medium-low heat until warmed through. You may also choose to place them in the microwave for 30-60 seconds, but this may result in a softer tortilla texture.

    By following these best practices for storing the Easy Chicken Bacon Ranch Wrap, you can enjoy its deliciousness over several meals without losing flavor or quality, reinforcing its place among your favorite easy dinner recipes.

    Nutritional Value of Easy Chicken Bacon Ranch Wrap

    Understanding the nutritional breakdown of the Easy Chicken Bacon Ranch Wrap can help you make informed choices about your meals. Here’s a general estimate of the nutrition per wrap when using the traditional ingredients:

    • Calories: Approximately 450-600 calories (depending on tortilla size and ingredients)
    • Protein: 30g (mainly from chicken and cheese)
    • Fat: 25g (from bacon and cheese; opt for turkey bacon to reduce fat)
    • Carbohydrates: 40g (depends on tortilla type)
    • Fiber: 4g (from vegetables and whole grain tortillas)
    • Sugars: 2g (natural sugars from veggies)

    When preparing your wraps, keep in mind your dietary preferences. For those opting for alternate ingredients, such as low-fat cheese or healthier dressings, the nutritional content will adjust accordingly. This recipe works exceptionally well as one of those wholesome easy dinner recipes that delivers on taste while being mindful of your daily nutritional needs.

    FAQs: Frequently Asked Questions About Easy Chicken Bacon Ranch Wrap

    Q1: Can I use pre-cooked chicken for the Easy Chicken Bacon Ranch Wrap?

    Absolutely! Pre-cooked or rotisserie chicken is a great time-saver and works perfectly for this recipe.

    Q2: How do I make my Easy Chicken Bacon Ranch Wrap lo-carb?

    To create a low-carb version, use large romaine lettuce leaves instead of tortillas. This reduces the carbohydrate count significantly while providing a refreshing crunch.

    Q3: What’s the best way to customize the dressing?

    Experiment with different dressings! Try Greek yogurt mixed with seasonings for a healthier ranch, or spice up plain yogurt with herbs and lemon juice for a zesty twist.

    Q4: Can I prepare the Easy Chicken Bacon Ranch Wrap ahead of time?

    Yes, you can! Just be sure to store them in the refrigerator and eat within 2-3 days for optimal freshness. Wrap them tightly to avoid sogginess.

    Q5: What’s the best way to store leftovers?

    Place any leftover wraps in an airtight container in the fridge. They stay fresh for up to 3 days but are best consumed within 24 hours for optimal flavor and texture.

    Each of these FAQs provides invaluable information for navigating the preparation and customization of the Easy Chicken Bacon Ranch Wrap. By exploring these common questions, you can enhance your cooking experience, making this one of your go-to easy dinner recipes!

    In summary, the Easy Chicken Bacon Ranch Wrap is an accessible, wholesome, and customizable option that fits into various diets, ensuring satisfaction for all who enjoy it. Don’t hesitate; get started today and elevate your dinner game!