Blog

  • I CanT Stop Making This Tangy Rhubarb Dessert

    I CanT Stop Making This Tangy Rhubarb Dessert

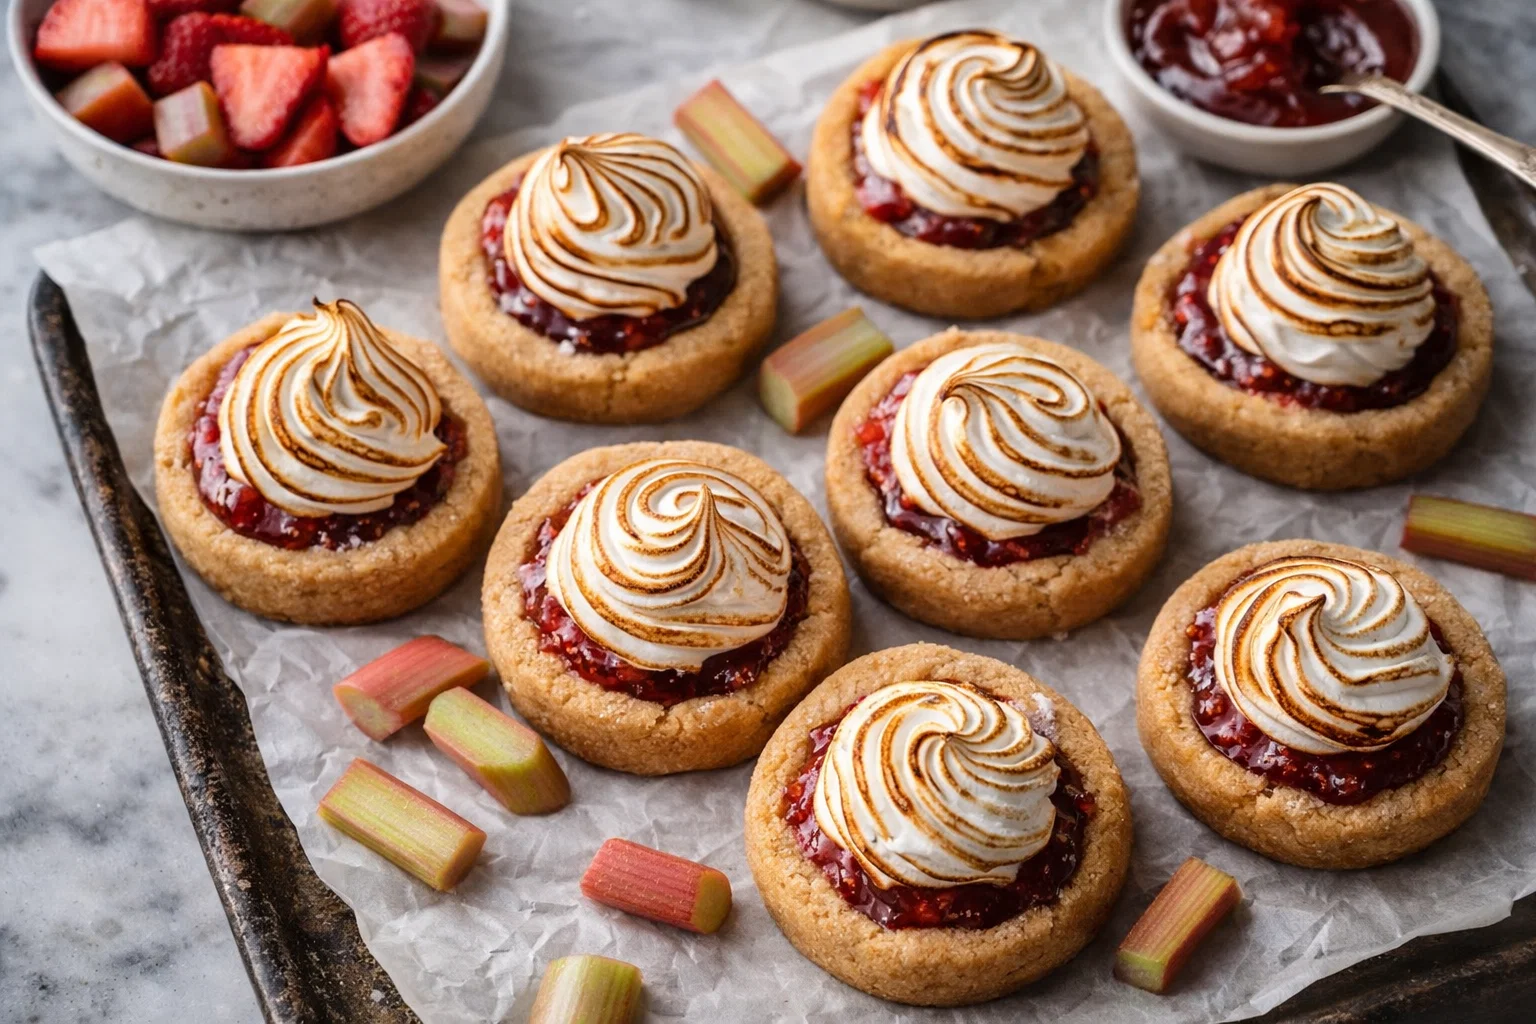
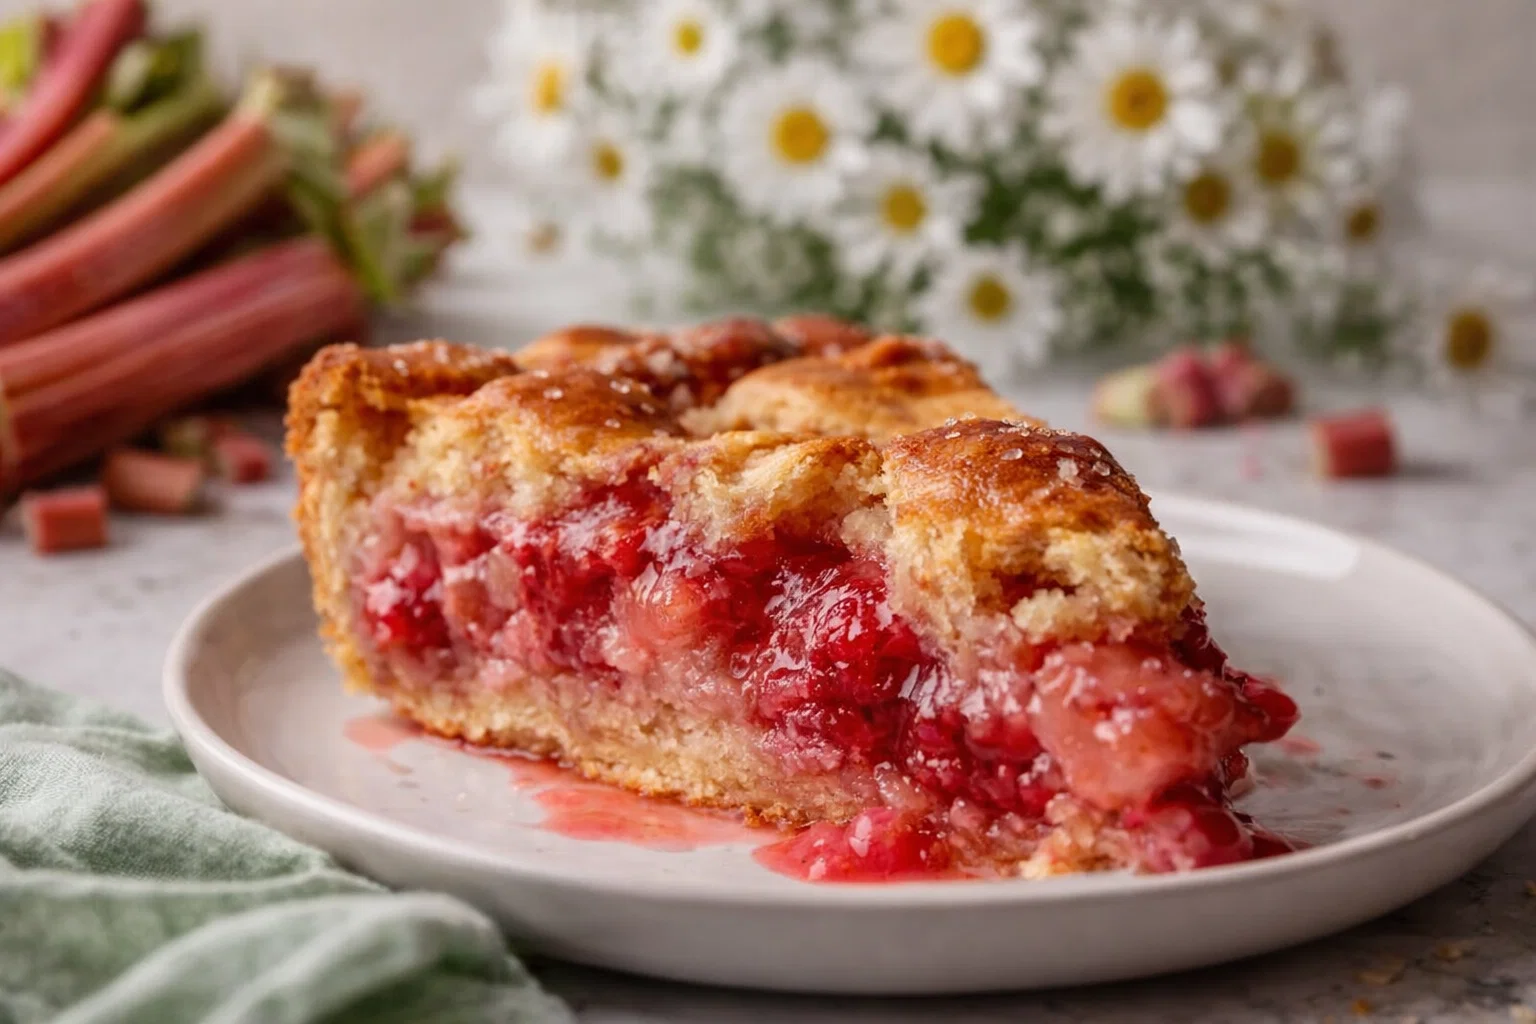
    I Can’T Stop Making This Tangy Rhubarb Dessert: A Tropical Delight

    Introduction to I Can’T Stop Making This Tangy Rhubarb Dessert

    Welcome to a culinary adventure featuring I Can’T Stop Making This Tangy Rhubarb Dessert! This tantalizing recipe combines the unique tartness of rhubarb with complementary flavors to create a refreshing dessert that is perfect for any occasion. With an emphasis on simplicity, this dish caters to a variety of dietary needs, whether you’re a busy parent, a health-conscious individual, or just someone who loves exploring delectable flavors.

    Rhubarb often takes the spotlight in spring and summer, thanks to its vibrant color and zesty taste. And what’s more, this dessert serves as a delicious canvas for creativity! It’s simple to prepare, making it an excellent choice for beginner cooks and seasoned bakers alike. Plus, this delightful dish is not just about flavor; it’s packed with health benefits, including high fiber content and essential vitamins.

    Whether you’re hunting for vegan dessert recipes, gluten-free options, or a tasty treat that everyone can enjoy, this tangy rhubarb dessert is remarkably versatile, fitting seamlessly into different dietary lifestyles. Get ready to impress your friends and family with this unique dessert that is sure to inspire repeat requests!

    Benefits and Advantages of I Can’T Stop Making This Tangy Rhubarb Dessert

    This Tangy Rhubarb Dessert is not just another item on your dessert recipes list; it stands out in its simplicity, health benefits, and adaptability. Let’s dive into the numerous advantages of preparing this delightful dish.

    Ease of Preparation

    One of the main attractions of this recipe is its straightforward process. Minimal cooking skills are required, making it accessible for newer cooks or those with a busy lifestyle. With just a handful of ingredients, you can whip up a batch of this dessert in no time. Consider it a great option for surprise guests or potlucks—effortlessly impressive!

    Health Benefits

    Packed with essential nutrients, rhubarb is a powerhouse ingredient. It’s low in calories but high in fiber, promoting better digestion and a feeling of fullness. Rich in antioxidants, rhubarb can help combat oxidative stress, contributing to overall health. Plus, when prepared without refined sugars and enriched with natural sweeteners, this dessert can be suitable for those keeping an eye on their sugar intake.

    Dietary Compatibility

    This recipe shines in its versatility. By offering vegan and gluten-free adaptations, you can cater to various dietary preferences. Busy parents can serve this to their kids without guilt, while health enthusiasts can indulge in a treat that nourishes their bodies. Whether you’re a student living in a dorm or a working professional seeking a nutritious snack, this dessert ticks all the right boxes.

    Creative Culinary Exploration

    Have some fun with this recipe! It serves as a base for experimentation, whether you wish to add different fruit combinations to the tangy rhubarb or swap out ingredients based on what you have on hand. With this dessert, the possibilities are as vast as your imagination!

    In essence, this rhubarb dessert is an exemplary choice for those searching for health-conscious, uncomplicated, and absolutely delicious dessert recipes that everyone can enjoy.

    Ingredients Overview

    Essential Ingredients for I Can’T Stop Making This Tangy Rhubarb Dessert

    Let’s discuss the star ingredients you’ll need for this delightful Tangy Rhubarb Dessert.

    • Fresh Rhubarb (4 cups, chopped): The star of the show, bringing that iconic tangy flavor. Whole-food enthusiasts will appreciate its health benefits.

    • Granulated Sugar (1 cup): This typical sweetener balances rhubarb’s tartness. For a healthier alternative, consider using coconut sugar or a sugar substitute.

    • Lemon Juice (2 tablespoons): Freshly squeezed lemon juice brightens the flavor profile and enhances the rhubarb’s natural acidity.

    • All-Purpose Flour (1 cup): Provides structure to the dessert. For gluten-free options, substitute with almond flour, oat flour, or a blended gluten-free flour mix.

    • Baking Powder (1 teaspoon): This ensures your dessert has a light, fluffy texture.

    • Coconut Oil (½ cup, melted): This acts as the fat component, lending flavor and moisture while also being vegan. You can substitute it with butter if you’re not vegan.

    • Almond Milk (½ cup): A non-dairy milk adds moisture. Any milk (dairy or plant-based) will work here, ensuring it matches your dietary needs.

    • Salt (½ teaspoon): Enhances the overall flavor of the dessert.

    • Optional Toppings: You may sprinkle on some chopped nuts or a dollop of whipped coconut cream for an extraordinary finish.

    Remember, you can adjust these ingredients based on dietary preferences or what is available in your pantry!

    Dietary Substitutions to Customize Your I Can’T Stop Making This Tangy Rhubarb Dessert

    Customizing your Tangy Rhubarb Dessert to suit various dietary needs has never been easier! Here are some substitutions and adaptations to consider:

    • Vegan Options: Instead of traditional butter, use coconut oil, and for an egg replacement if needed, try flaxseed meal mixed with water (1 tablespoon of flaxseed meal + 3 tablespoons of water = 1 egg).

    • Gluten-Free: Replace all-purpose flour with gluten-free blends or almond flour for a nutty flavor.

    • Lower Sugar: Opt for sugar substitutes like stevia or monk fruit sweetener for a lower-calorie dessert without sacrificing sweetness.

    • No Nuts: If allergies are a concern, you can easily omit nuts or replace them with seeds like pumpkin or sunflower seeds.

    In Summary

    With these ingredient options and substitutions, you can adapt the Tangy Rhubarb Dessert to meet the individual dietary preferences and restrictions of your family and friends! Each version maintains the essence of the original recipe, ensuring everyone gets to enjoy this delightful treat.

    How to Prepare the Perfect I Can’T Stop Making This Tangy Rhubarb Dessert: Step-by-Step Guide

    Now, let’s dive into the fun part—creating this exquisite dessert! Follow these easy steps to achieve the perfect Tangy Rhubarb Dessert.

    1. Prepare the Base:
      Start by preheating your oven to 350°F (175°C). Grease a baking dish with a bit of coconut oil or cooking spray to prevent sticking.

    2. Chop the Rhubarb:
      Wash and chop 4 cups of fresh rhubarb into small, bite-sized pieces. This will help the rhubarb cook evenly and allow its tangy flavor to distribute throughout the dessert.

    3. Mix Rhubarb with Sugar & Lemon Juice:
      In a mixing bowl, combine the chopped rhubarb with 1 cup of granulated sugar and 2 tablespoons of lemon juice. Toss to coat the rhubarb evenly. Let it sit for about 10 minutes to allow the flavors to meld.

    4. Prepare the Dry Ingredients:
      In another bowl, whisk together 1 cup of all-purpose flour, 1 teaspoon of baking powder, and ½ teaspoon of salt. If using gluten-free flour, ensure it’s well-mixed for even consistency.

    5. Combine the Wet Ingredients:
      In a separate bowl, melt ½ cup of coconut oil (or butter) and let it cool slightly. Then, mix in ½ cup of almond milk. If desired, you can add a splash of vanilla extract for an aromatic touch.

    6. Combine Dry and Wet Ingredients:
      Gradually add the dry ingredients to the wet ingredients, stirring until the mixture is just combined. Avoid over-mixing to ensure a fluffy texture.

    7. Assemble:
      In your greased baking dish, spread half of the batter evenly across the bottom. Then, add the rhubarb filling on top, creating an even layer. Finally, spoon the remaining batter over the rhubarb layer—it doesn’t need to be perfect!

    8. Bake to Perfection:
      Place the baking dish in the preheated oven. Bake for approximately 35-40 minutes or until the top is golden brown and a toothpick inserted into the center comes out clean.

    9. Cool and Serve:
      After removing the dessert from the oven, allow it to cool for about 20 minutes before slicing it into squares. This cooling time allows the dessert to set for easier serving.

    10. Enjoy Your Creation:
      Serve it warm or at room temperature, perhaps with a scoop of your favorite ice cream or whipped topping. Enjoy this irresistible dessert with family and friends!

    The beauty of this recipe is its adaptability. You can customize it as needed for dietary preferences, whether you require vegan, gluten-free, or reduced-sugar options.

    Mastering I Can’T Stop Making This Tangy Rhubarb Dessert: Advanced Tips and Variations

    Once you’ve successfully made this dessert, consider these tips and variations to enhance your experience and share with others:

    • Fruit Combinations: Feel free to mix in berries like strawberries or blueberries for a burst of additional flavor and color. The sweetness of the berries contrasts beautifully with rhubarb’s tanginess.

    • Spice it Up: Add a touch of cinnamon or ginger to the batter for a warming note that complements the tangy rhubarb.

    • Create a Crumble Topping: For an extra crunchy texture, mix oats, almond flour, and a small amount of melted coconut oil and sprinkle it over the top before baking.

    • Lemon Zest: Incorporating the zest of a lemon into the batter will elevate the flavor profile and add a fresh citrusy aroma.

    • Sauces: Serve your dessert drizzled with a homemade fruit sauce or a light vanilla glaze to add elegance and sweetness.

    These techniques will not only elevate your Tangy Rhubarb Dessert but will also give you a chance to personalize it further according to your taste. Enjoy the exploration and creativity that cooking this dessert brings!

    How to Store I Can’T Stop Making This Tangy Rhubarb Dessert: Best Practices

    To ensure your Tangy Rhubarb Dessert remains fresh and delicious, follow these storage suggestions:

    Refrigeration

    After cooling, cover the dessert with plastic wrap or transfer it to an airtight container. Store it in the refrigerator for up to four days. The flavors meld together beautifully during the refrigeration period, enhancing the overall taste.

    Freezing

    If you want to keep this dessert longer, it can be frozen. Cut it into squares and wrap each piece tightly in plastic wrap or aluminum foil. Place the wrapped slices into a freezer-safe bag or container. It can be stored in the freezer for up to three months. To thaw, place it in the refrigerator overnight before enjoying.

    Reheating

    To reheat, simply pop it in the oven at 350°F (175°C) for 10-15 minutes, or until warmed through. If you prefer, using a microwave works well, too—heat in 30-second intervals until just warm.

    Proper storage not only extends the life of your dessert but also maintains its delightful texture and taste, ensuring that every bite is just as good as the first!

    Nutritional Value of I Can’T Stop Making This Tangy Rhubarb Dessert

    Understanding the nutritional profile of your Tangy Rhubarb Dessert can enhance your appreciation, especially when it aligns with health goals. Here’s a rough breakdown of the nutritional value per serving (assuming the dessert is divided into 12 portions):

    • Calories: Approximately 180 calories per serving
    • Total Fat: 8g
    • Saturated Fat: 6g (if using coconut oil; less if using butter)
    • Cholesterol: 0mg (if vegan)
    • Sodium: 120mg
    • Total Carbohydrates: 26g
    • Dietary Fiber: 2g
    • Sugars: 10g (may vary based on research on sweeteners used)
    • Protein: 3g

    Vitamins & Minerals

    • Calcium: Contributes to bone health
    • Vitamin K: Promotes proper blood clotting and bone metabolism
    • Manganese: Supports metabolism and bone formation

    The nutritional benefits of rhubarb, and other healthy additions make this dessert not just a treat but also a thoughtful way to indulge without derailing your healthy eating plan. This dessert caters to various dietary needs and preferences, so you can enjoy a delicious and nutrient-rich experience.

    FAQs: Frequently Asked Questions About I Can’T Stop Making This Tangy Rhubarb Dessert

    1. Can I use frozen rhubarb for this recipe?

    Yes, frozen rhubarb works well in this dessert. Just let it thaw and drain excess moisture before using.

    2. How can I make this dessert lower in sugar?

    You can substitute granulated sugar with coconut sugar, stevia, or monk fruit sweetener to reduce the sugar content.

    3. Can I skip the lemon juice?

    While the lemon juice enhances flavor, if you don’t have it, you can omit it but consider using a little more sweetener to balance the tartness.

    4. Is this dessert suitable for a vegan diet?

    Absolutely! Simply use coconut oil instead of butter and any plant-based milk to keep it vegan-friendly.

    5. What can I serve with this dessert?

    This Tangy Rhubarb Dessert is delightful on its own, but serving it with vanilla ice cream, whipped coconut cream, or fresh fruit makes it even more satisfying!

    6. How long can I keep leftovers?

    Stored properly in an airtight container, it can last in the refrigerator for up to four days, and in the freezer for three months.

    7. Can I add nuts or seeds to this recipe?

    Definitely! Chopped almonds or walnuts work wonderfully mixed into the batter or sprinkled on top before baking.

    8. Is it possible to reduce the baking time?

    If you’re using smaller baking dishes or making individual servings, check for doneness earlier, as the baking time may be reduced.

    Through these FAQs, aspiring cooks will feel more confident to dive into making this delightful Tangy Rhubarb Dessert and experience the joy of cooking unique dishes, tailored to personal lifestyle choices and dietary needs.


    Feel free to adapt the recipe as needed while enjoying the journey of creating and savoring this irresistible Tangy Rhubarb Dessert! Happy cooking! 🍰

  • Chewy Strawberry Rhubarb Pie Cookies

    Chewy Strawberry Rhubarb Pie Cookies

    Chewy Strawberry Rhubarb Pie Cookies: A Tropical Delight

    Introduction to Chewy Strawberry Rhubarb Pie Cookies

    If you’re on the hunt for delicious strawberry recipes that combine the juicy sweetness of strawberries with the tartness of rhubarb, look no further! Our Chewy Strawberry Rhubarb Pie Cookies are cheerful morsels that perfectly embody the spirit of a classic pie but with the convenience of a cookie. These delightful bites are simple to make and are ideal for busy families, working professionals, students, and anyone who loves to savor sweet treats. You can enjoy them fresh out of the oven or pack them in a lunchbox or picnic basket for a delightful snack on the go.

    The allure of this recipe lies in its versatility. Chewy Strawberry Rhubarb Pie Cookies are not only quick to whip up but can also easily adapt to various dietary needs. Interested in a vegan or gluten-free option? We’ve got you covered! The combination of strawberries and rhubarb gives these cookies a unique flavor profile that will impress friends and family alike, making them perfect for gatherings, celebrations, and casual afternoon snacks.

    Plus, you’ll love the health benefits! Strawberries are rich in vitamins, minerals, and antioxidants, contributing to overall well-being. Rhubarb, while less commonly known, is high in fiber and low in calories. When combined in our Chewy Strawberry Rhubarb Pie Cookies, they create a sweet treat that’s not just tasty but also has some nutritional perks. This recipe brings a delightful twist to traditional cookie baking—let’s dive into this scrumptious adventure together!

    Benefits and Advantages of Chewy Strawberry Rhubarb Pie Cookies

    Why choose Chewy Strawberry Rhubarb Pie Cookies over other strawberry recipes? Allow us to share the myriad benefits and advantages this recipe provides!

    First and foremost, these cookies are incredibly easy to make. With just a few pantry staples, you can craft delicious cookies in under an hour. This is a perfect option for busy parents who want to whip up a quick and satisfying treat after a long day.

    Moreover, the health benefits are worth noting. Strawberries, well-known for their vitamin C and antioxidant content, are great for boosting immunity. Rhubarb adds a unique tartness and is a good source of dietary fiber, which helps with digestion and keeping you feeling full longer. By combining both of these ingredients, you’re not just indulging; you’re also nourishing your body!

    Additionally, these cookies stand out because they cater to diverse dietary requirements, including vegan, gluten-free, and low-calorie options. By adjusting a few ingredients or using substitutes, everyone can enjoy these chewy delights regardless of their dietary restrictions.

    Another advantage of this recipe is its versatility. Beyond just enjoying them as is, these cookies can be further enhanced with add-ins like nuts, oats, or chocolate chips to create even more flavor combinations. For those who love creativity in the kitchen, experimenting with texture and taste will only enhance the experience.

    In short, Chewy Strawberry Rhubarb Pie Cookies are a delightful blend of simplicity, health benefits, and versatility. Perfect for all kinds of cooks, they make for an enjoyable baking excursion that you won’t soon forget.

    Ingredients Overview

    Essential Ingredients for Chewy Strawberry Rhubarb Pie Cookies

    To make your Chewy Strawberry Rhubarb Pie Cookies, you will need the following ingredients:

    • 1 cup all-purpose flour (or gluten-free all-purpose flour for a gluten-free option)
      Provides the base for the cookies and contributes to their chewy texture.

    • 1/2 teaspoon baking soda
      Helps the cookies rise and achieve that perfect chewy texture.

    • 1/4 teaspoon salt
      Balances the sweetness and enhances flavor.

    • 1/2 cup unsalted butter (or coconut oil for a vegan option)
      Adds moisture and richness.

    • 1/2 cup brown sugar
      Introduces deep molasses flavor and contributes to chewiness.

    • 1/4 cup granulated sugar
      Enhances sweetness while providing a nice texture contrast.

    • 1 large egg (or flaxseed egg for a vegan option)
      Acts as a binding agent and helps with the structure.

    • 1 cup fresh strawberries, chopped
      Brings sweetness and moisture to the cookies.

    • 1 cup rhubarb, chopped
      Creates that unique tartness that sets these cookies apart.

    • 1 teaspoon vanilla extract
      Adds depth of flavor and enhances sweetness.

    You can always adjust the quantities or ingredients based on personal preferences or dietary needs. These substitutions ensure the cookies remain delightful no matter who you’re baking for.

    Dietary Substitutions to Customize Your Chewy Strawberry Rhubarb Pie Cookies

    One of the best parts about baking is that it’s all about customization! Here are some suggestions for dietary substitutions you can implement while making your Chewy Strawberry Rhubarb Pie Cookies:

    • Vegan Option: Substitute the unsalted butter with coconut oil or vegan butter. Replace the egg with a flaxseed egg (1 tablespoon ground flaxseed + 2.5 tablespoons water; let sit for 5 minutes to thicken). This makes the recipe completely plant-based.

    • Gluten-Free Option: Use a high-quality gluten-free all-purpose flour mix in place of regular flour. Be sure it has xanthan gum in the blend to hold the cookies together properly.

    • Lower Sugar Option: Feel free to substitute one-half of the brown sugar with an equal amount of applesauce in order to reduce added sugars while maintaining moisture. It also contributes to a fruity flavor.

    • Sweetener Alternatives: Substitute sugar with coconut sugar or stevia for a low-calorie option, adjusting based on the sweetness level desired.

    Each of these substitutions will allow you to customize this cookie recipe to meet various dietary needs while still delivering that chewy, decadent flavor profile everyone will love. Now that we’ve covered the ingredients and how to make them work for your dietary restrictions, let’s move on to the fun part: preparing the perfect batch!

    How to Prepare the Perfect Chewy Strawberry Rhubarb Pie Cookies: Step-by-Step Guide

    Now that you have your ingredients ready, let’s dive into the step-by-step instructions for preparing the Chewy Strawberry Rhubarb Pie Cookies. Follow this guide to bake deliciously chewy and flavorful cookies that everyone will adore!

    1. Preheat the Oven:
      Preheat your oven to 350°F (175°C). This ensures your cookies bake evenly and attain a beautiful golden color.

    2. Prepare the Baking Sheet:
      Line a baking sheet with parchment paper or a silicone baking mat for easy cleanup. This prevents the cookies from sticking and helps them bake evenly.

    3. Mix Dry Ingredients:
      In a medium bowl, whisk together the all-purpose flour, baking soda, and salt. Set this mixture aside. This combination will provide the right structure and texture for your cookies.

    4. Cream Butter and Sugars:
      In a large mixing bowl, use an electric mixer to cream the unsalted butter with the brown sugar and granulated sugar until light and fluffy, about 2-3 minutes. This step aerates the butter, aiding in a light and chewy texture.

    5. Add Egg and Vanilla:
      Beat in the egg (or flaxseed egg) and vanilla extract. Mix until fully incorporated. The egg binds the ingredients and adds moisture.

    6. Combine Dry and Wet Ingredients:
      Gradually add the dry ingredient mixture to the wet ingredients, mixing just until combined. Do not overmix, as this can lead to tougher cookies.

    7. Fold in the Strawberries and Rhubarb:
      Gently stir in the chopped strawberries and rhubarb. Make sure to fold them in evenly, distributing the fruity goodness throughout the dough.

    8. Scoop the Dough:
      Using a cookie scoop or tablespoon, portion out cookie dough onto the prepared baking sheet, spacing them about 2 inches apart. The cookies will spread while baking.

    9. Bake:
      Place the baking sheet in the preheated oven and bake for 10-12 minutes or until the edges are golden brown. The centers may look slightly underbaked, but they will continue cooking on the baking sheet as they cool.

    10. Cool the Cookies:
      Once baked, remove the sheet from the oven and let the cookies cool on the pan for 5 minutes. Then transfer them to a wire rack to cool completely. This step ensures they retain their chewy texture.

    11. Enjoy!
      Once cooled, dig into your delightful Chewy Strawberry Rhubarb Pie Cookies! They can be paired with a warm cup of tea or coffee for an extra special treat.

    Feel free to make adjustments based on personal preference or dietary needs at various stages. Enjoying the baking process and being creative can lead to delicious discoveries in your kitchen.

    Mastering Chewy Strawberry Rhubarb Pie Cookies: Advanced Tips and Variations

    Baking is a world of endless possibilities, and your Chewy Strawberry Rhubarb Pie Cookies can be made even more enjoyable with these expert tips and variations:

    1. Add-ins and Mix-ins:
      Consider incorporating additional mix-ins like chopped nuts (walnuts or pecans), chocolate chips, or shredded coconut to enhance flavor and texture. These add-ins can create a unique twist that takes the cookies up a notch.

    2. Zest it up:
      Try adding a hint of lemon or orange zest to the dough for a citrusy brightness. The acidity will highlight the natural flavors of the strawberries and rhubarb beautifully.

    3. Experiment with Oats:
      For a chewy cookie with added fiber, consider mixing in some rolled oats. They impart a nutty flavor and delightful texture that complements the sweetness of the fruits.

    4. Rhubarb Sauce Variations:
      If you’re looking to deepen the rhubarb flavor, create a quick rhubarb sauce with sugar and water, letting it simmer until thickened, then fold it into the cookie dough. This packs in extra moisture and flavor.

    5. Chill Your Dough:
      For a firmer cookie, chill the dough in the refrigerator for 30 minutes before baking. Chilling helps prevent excessive spreading while baking.

    6. Chocolate Drizzle or Glaze:
      Once cooled, consider drizzling melted chocolate over the cookies for an elegant touch. A white chocolate drizzle adds visual appeal and pairs nicely with the fruity flavors.

    By adding these advanced tips and variations, you can take your Chewy Strawberry Rhubarb Pie Cookies to the next level and impress your friends and family with your baking prowess.

    How to Store Chewy Strawberry Rhubarb Pie Cookies: Best Practices

    Proper storage of your Chewy Strawberry Rhubarb Pie Cookies ensures they remain fresh and delicious for days. Here’s how to store them effectively:

    • Room Temperature Storage:
      If you plan to enjoy the cookies within a few days, simply place them in an airtight container at room temperature. Keeping them sealed will help preserve their chewy texture and flavor.

    • Refrigeration:
      For longer storage, consider refrigerating the cookies. Place them in an airtight container with parchment paper between layers to prevent sticking. They can last up to a week in the fridge.

    • Freezing Options:
      To freeze, layer the cookies between sheets of parchment paper in an airtight freezer bag. They’ll maintain their quality for up to three months. When ready to enjoy, simply thaw them at room temperature or reheat them in the oven for a few minutes to regain that fresh-baked warmth.

    By following these storage guidelines, your Chewy Strawberry Rhubarb Pie Cookies can be enjoyed long after they’re baked, making them perfect for planning ahead for snacks, lunchboxes, or parties.

    Nutritional Value of Chewy Strawberry Rhubarb Pie Cookies

    Understanding the nutritional value of your Chewy Strawberry Rhubarb Pie Cookies can help you make informed decisions for your diet. Here’s a nutritional breakdown per cookie (assuming this recipe yields about 24 cookies):

    • Calories: 130
    • Total Fat: 7g
    • Saturated Fat: 4g
    • Cholesterol: 20mg
    • Sodium: 50mg
    • Total Carbohydrates: 15g
    • Dietary Fiber: 1g
    • Sugars: 7g
    • Protein: 2g

    These cookies contain essential vitamins and minerals, especially thanks to the strawberries and rhubarb. The wholesome ingredients also provide beneficial fiber and antioxidants from the fruit, contributing to your daily nutrient goals. Keep in mind that nutritional values may vary based on ingredient substitutions, so adapt accordingly based on your choices.

    By savoring Chewy Strawberry Rhubarb Pie Cookies, you not only delight your taste buds but also enjoy a treat that offers some wholesome benefits.

    FAQs: Frequently Asked Questions About Chewy Strawberry Rhubarb Pie Cookies

    1. Can I use frozen strawberries and rhubarb for this recipe?

    Absolutely! Frozen strawberries and rhubarb can be used, but make sure to thaw them and drain any excess moisture before adding them to the cookie dough to prevent sogginess.

    2. What can I substitute for eggs in this recipe?

    If you’re looking to make a vegan version, you can substitute one egg with a flaxseed egg. To make this, mix 1 tablespoon of ground flaxseed with 2.5 tablespoons of water and let it rest for about 5 minutes until it thickens.

    3. How can I make these cookies gluten-free?

    Simply replace all-purpose flour with a good-quality gluten-free flour blend. Ensure it includes xanthan gum or add a small amount to aid in binding and structural stability.

    4. How do I prevent my cookies from spreading too much while baking?

    Chilling the cookie dough for at least 30 minutes before baking can help. It firms up the fat in the dough, leading to less spreading.

    5. Can I store leftover cookies in the freezer?

    Yes! Place cooled cookies in an airtight container or resealable bag with parchment paper in between layers to prevent sticking. They can be frozen for up to three months.

    6. What should I do if I don’t have rhubarb on hand?

    If you don’t have rhubarb, you can experiment with other tart fruits like cranberries or a combination of tart apples and a bit of lemon juice. Adjust the sugar content accordingly to balance sweetness.

    7. Are these cookies suitable for kids?

    Yes, Chewy Strawberry Rhubarb Pie Cookies are kid-friendly! Their sweet and fruity flavor profile makes them an excellent treat for children. Plus, engaging kids in the baking process can be a fun and educational activity!

    With these frequently asked questions, we hope to clarify any uncertainties and inspire you to embark on this delicious Chewy Strawberry Rhubarb Pie Cookies baking adventure! Happy baking!

  • Easy Sourdough Rhubarb Bread

    Easy Sourdough Rhubarb Bread

    Easy Sourdough Rhubarb Bread: A Tropical Delight

    Introduction to Easy Sourdough Rhubarb Bread

    As the flowers bloom and the days grow warmer, the arrival of spring meals awakens our taste buds and inspires our creativity in the kitchen. If you’re looking for a delightful recipe that embodies the freshness of the season, look no further than Easy Sourdough Rhubarb Bread. This recipe not only highlights the tartness of rhubarb, but it also infuses the wholesome qualities of sourdough, creating a loaf that’s both flavorful and nutritious.

    What earns this delectable bread a place in your spring cooking is its simplicity. With straightforward steps and minimal preparation, even novice bakers can tackle this recipe with confidence. Plus, you can customize it to meet various dietary needs; whether you’re vegan, gluten-free, or simply seeking a healthier alternative to traditional bread, this Easy Sourdough Rhubarb Bread can fit the bill. Its combination of nutritious ingredients also means you can enjoy it guilt-free, making it a splendid addition to breakfast or as a tasty snack.

    Beyond its impressive taste and health benefits, the stunning visuals of the pink rhubarb peeking through the golden bread make this recipe a feast for the eyes as well. So gather your ingredients, preheat your oven, and let’s dive into this delightful spring treat!

    Benefits and Advantages of Easy Sourdough Rhubarb Bread

    There are countless reasons why Easy Sourdough Rhubarb Bread stands out in the world of spring meals. Here are a few compelling benefits that elevate this recipe:

    1. Ease of Preparation: One of the most attractive qualities of this recipe is its straightforwardness. You don’t need to be a seasoned baker to succeed—this bread is perfect for busy parents, students, or anyone looking for a quick yet rewarding baking project. Just combine your ingredients, let them mingle for a while, and soon you’ll be welcoming a fresh loaf into your home.

    2. Health Benefits: The tangy rhubarb is rich in vitamins C and K, while the sourdough process allows for easier digestibility. Using whole grain flour adds fiber, which contributes to a well-rounded diet. Those focusing on healthier eating—and looking for lighter spring meals—will appreciate this balancing act between taste and nutritional value.

    3. Versatility: This recipe can easily accommodate diverse dietary requirements. With simple substitutions, you can create a vegan or gluten-free version without sacrificing taste or texture. Enjoy it as a traditional loaf, create mini loaves for gifting, or experiment by adding nuts or seeds for an additional crunch.

    4. Seasonal Appeal: Harnessing the flavors of spring, this loaf is an ideal centerpiece for holiday gatherings, brunches, or picnics. It embodies spring meals that showcase seasonal produce, making it perfect for entertaining or enjoying a leisurely afternoon snack.

    5. A Treat for the Senses: Besides the incredible flavor, the aroma of baking bread mixed with the tang of rhubarb creates a warm, welcoming environment that beckons family and friends to the kitchen. Plus, its lovely appearance makes it an attractive addition to any table.

    As you can see, Easy Sourdough Rhubarb Bread brings a plethora of benefits to the table. Its simplicity, health attributes, and adaptability make it a must-try for anyone eager to embrace the flavors of the season.

    Ingredients Overview

    Essential Ingredients for Easy Sourdough Rhubarb Bread

    To make this delightful Easy Sourdough Rhubarb Bread, you’ll need the following ingredients:

    • 2 cups active sourdough starter (preferably fed and bubbly)—provides the leavening and flavor.
    • 1 cup whole wheat flour—adds fiber and nourishment. (For a gluten-free option, use 1 cup of gluten-free all-purpose flour).
    • 1 cup all-purpose flour—for the structure. You can substitute with a gluten-free blend for gluten-sensitive diets.
    • 1/2 cup brown sugar—for sweetness and moisture. Feel free to substitute with coconut sugar or a low-calorie sweetener.
    • 1 tsp baking powder—helpful for a tender crumb.
    • 1/2 tsp baking soda—adds a bit more lift.
    • 1/2 tsp salt—enhances the flavor.
    • 1 1/2 cups chopped fresh rhubarb—the star ingredient that lends tartness and moisture. (Frozen rhubarb can work well if fresh isn’t available).
    • 1/4 cup vegetable oil—adds moisture. You can replace with melted coconut oil for a vegan option.
    • 1 tsp vanilla extract—adds depth of flavor.
    • 1/2 cup non-dairy milk (for a vegan version)—or regular milk for a non-vegan loaf.

    Dietary Substitutions to Customize Your Easy Sourdough Rhubarb Bread

    1. Gluten-Free: As previously mentioned, opt for gluten-free flour blends in place of wheat flour. Adding xanthan gum can help replicate the bread’s texture.

    2. Vegan: Replace the non-dairy milk with almond, soy, or oat milk. Make sure to use a vegan sugar, as some sugars are processed with bone char.

    3. Lower Sugar: For a lower-sugar version, you can reduce the amount of brown sugar to 1/3 cup or use a natural sweetener like maple syrup or agave nectar.

    4. Add-ins: Feel free to mix in walnuts, pecans, or even chocolate chips for added texture and flavor if desired.

    With these ingredient variations, Easy Sourdough Rhubarb Bread can align perfectly with various dietary preferences while maintaining the essence of your spring meals!

    How to Prepare the Perfect Easy Sourdough Rhubarb Bread: Step-by-Step Guide

    Follow these simple steps to create your Easy Sourdough Rhubarb Bread. This section emphasizes how you can weave this recipe into your array of spring meals, ensuring it becomes a staple in your kitchen.

    1. Prepare the Base: In a large mixing bowl, combine your active sourdough starter and the non-dairy milk (or regular milk) until thoroughly mixed. If your starter has been refrigerated, allow it to come to room temperature before using.

    2. Mix Dry Ingredients: In another bowl, whisk together the whole wheat flour, all-purpose flour, baking powder, baking soda, and salt. This ensures that the leavening agents are evenly distributed throughout the loaf.

    3. Combine Mixtures: Gradually add the dry mixture into the wet mixture, stirring until just combined. Avoid over-mixing as it can lead to a dense texture.

    4. Incorporate Sweetener: Gently fold in your brown sugar, ensuring it’s evenly dispersed. The sweetness balances the tang of the rhubarb beautifully.

    5. Add Rhubarb: Carefully fold in the chopped rhubarb, making sure to distribute it evenly throughout the batter. The pieces should be coated in the batter for even baking.

    6. Prepare the Baking Dish: Preheat your oven to 350°F (175°C) and grease a standard loaf pan with cooking spray or line it with parchment paper for easy removal.

    7. Pour the Batter: Spoon the batter into your prepared loaf pan, smoothing the top with a spatula for even baking. Optionally, you can sprinkle a bit of sugar on top for a lovely crust.

    8. Bake: Place the loaf pan in the preheated oven. Bake for about 50-65 minutes, or until a toothpick inserted into the center comes out clean. If the top begins to brown too quickly, cover it loosely with aluminum foil.

    9. Cool the Bread: Once done, remove the bread from the oven and allow it to cool for about 10 minutes in the pan. Then transfer it onto a wire rack to cool completely. Don’t rush this step; cooling allows the flavors to set!

    10. Serve and Enjoy: Slice and serve the Easy Sourdough Rhubarb Bread warm or at room temperature. It pairs beautifully with a spread of butter or jam, adding a delightful layer to your spring meals.

    Each step has been designed to highlight the ease of preparation while allowing for customization, catering to different dietary needs.

    Mastering Easy Sourdough Rhubarb Bread: Advanced Tips and Variations

    To take your Easy Sourdough Rhubarb Bread to the next level, here are some advanced tips and exciting variations to consider:

    1. Rhubarb Compote: Before baking, you can create a rhubarb compote by simmering chopped rhubarb with a bit of sugar and lemon juice. Swirl this compote into the batter for an enhanced rhubarb flavor and moisture.

    2. Herbal Touch: Add a pinch of cinnamon, nutmeg, or cardamom to the dry ingredients to introduce a warm spice that complements the tartness of rhubarb beautifully.

    3. Experiment with Shapes: Instead of a standard loaf, consider baking mini loaves or muffins. This size is perfect for portion control and makes for an excellent on-the-go snack.

    4. Stay Aware of Seasonality: During autumn, try replacing the rhubarb with pears or apples for a seasonal twist while keeping the same basic sourdough method. It’s a great way to expand your repertoire of spring meals!

    5. Presentation: Serve your bread cut into slices, presented on a colorful platter with fruit and cheese, making a charming centerpiece for brunch or gatherings.

    6. Sourdough Discard: If you have sourdough discard from previous baking, don’t toss it—use it for this bread! Just ensure you adjust the amount of flour and liquid accordingly to maintain the right consistency.

    By following these tips and experimenting with variations, you’ll master the delightful art of baking Easy Sourdough Rhubarb Bread, making it a staple for your seasonal meals.

    How to Store Easy Sourdough Rhubarb Bread: Best Practices

    Storing your Easy Sourdough Rhubarb Bread properly can help prolong its freshness and flavor, allowing you to enjoy this delightful spring meal for days to come.

    1. Room Temperature: If you plan to consume the bread within a day or two, simply wrap it tightly in plastic wrap or place it in a bread box at room temperature to keep it fresh.

    2. Refrigeration: For longer storage of up to a week, consider wrapping the bread in foil or plastic wrap and placing it in the refrigerator. However, be aware that refrigeration may alter the bread’s texture slightly.

    3. Freezing: If you want to store the bread for a more extended period, freezing is the best option. First, slice the bread, then wrap each slice tightly in plastic wrap and aluminum foil, or place them in a freezer-safe bag. When you’re ready to enjoy it again, simply thaw at room temperature or toast slices directly from the freezer.

    4. Reheating: To enjoy your bread warm, preheat your oven to 350°F (175°C) and place it directly on the rack for about 5-10 minutes. If it’s frozen, you can toast individual slices in a toaster or oven for that warm, freshly baked taste.

    By following these storage methods, your Easy Sourdough Rhubarb Bread will stay delightful and ready to complement your spring meals throughout the week!

    Nutritional Value of Easy Sourdough Rhubarb Bread

    Understanding the nutritional value of your Easy Sourdough Rhubarb Bread will empower you to make informed choices for your dietary needs. Here’s a breakdown of the approximate nutrition per slice (based on 12 slices per loaf):

    • Calories: 150-200
    • Total Fat: 6g (saturated fat: 1g)
    • Cholesterol: 0mg
    • Sodium: 150mg
    • Total Carbohydrates: 30g (dietary fiber: 2g, sugars: 6g)
    • Protein: 4g

    These values can fluctuate based on ingredient substitutions made, but generally speaking, this bread offers a balanced profile that aligns with healthy spring meals. The rhubarb adds nutrients like vitamin C and antioxidants, while whole wheat flour contributes fiber.

    For those mindful of calories or sugar intake, you can easily reduce the sugar or substitute with healthier alternatives as discussed earlier.

    Incorporating Easy Sourdough Rhubarb Bread into your diet not only brightens your meals but also provides you with beneficial nutrients.

    FAQs: Frequently Asked Questions About Easy Sourdough Rhubarb Bread

    1. Can I use frozen rhubarb for this recipe?

    Absolutely! If fresh rhubarb isn’t available, frozen rhubarb can be used—just be sure to thaw and drain any excess moisture before incorporating it into the batter.

    2. How can I tell when the bread is done baking?

    Insert a toothpick or skewer into the center of the loaf. If it comes out clean or with just a few crumbs attached, the bread is done. As a tip, if the top of the loaf is browning too quickly, cover it loosely with aluminum foil.

    3. Can I make this bread without sourdough starter?

    While this recipe relies on sourdough starter for flavor and rise, you can try using instant yeast as a substitute, increasing the bread’s prep time.

    4. Is this bread suitable for gluten-free diets?

    Yes, with appropriate substitutions using gluten-free flour blends, this bread can be made gluten-free. Make sure to also verify that other ingredients, like baking powder, are gluten-free.

    5. How long does it take for the sourdough starter to rise?

    Typically, allowing your starter to rise for about 4-6 hours at room temperature will yield an active and bubbly starter, ready for baking. Just remember, the timing can vary based on the temperature and activity of your starter.

    6. Can I add nuts or seeds to this recipe?

    Definitely! Adding nuts like walnuts or seeds such as sunflower seeds can enhance the nutrition and texture of your Easy Sourdough Rhubarb Bread. Just ensure total mix-in ingredients don’t exceed your measured flour components.

    By addressing these common questions, we aim to provide clarity and encouragement to both novice and experienced bakers alike. Easy Sourdough Rhubarb Bread is not only a delightful treat but a recipe that invites creativity and adaptability, making it a fantastic addition to your spring meals.

    Now grab your ingredients, roll up those sleeves, and immerse yourself in the joyful process of baking!”

  • This Amazing Rhubarb Bread Recipe Has Me Hooked

    This Amazing Rhubarb Bread Recipe Has Me Hooked

    This Amazing Rhubarb Bread Recipe Has Me Hooked!: A Tropical Delight

    Introduction to This Amazing Rhubarb Bread Recipe Has Me Hooked!

    Rhubarb is often hailed as a superfood, bursting with flavor and nutrients. When transformed into a delightful bread, it becomes not just a treat but a versatile offering for every home cook—whether you’re a busy parent, a student, or someone just looking for delicious recipe ideas that cover various dietary needs. This amazing rhubarb bread recipe has me hooked because it strikes the perfect balance between sweet and tart, delivering a delightful slice that can be enjoyed at any time of the day.

    One of the great aspects of this recipe is its simplicity. You don’t need to be an expert baker to achieve a loaf that’s moist, flavorful, and utterly satisfying. Moreover, it accommodates various dietary preferences, as it can be easily adjusted to be gluten-free, vegan, or low-calorie. This makes it a perfect fit for those who might typically feel left out of the baking scene. It’s like having the best of all worlds in one delicious loaf!

    Not only does this recipe provide a burst of flavor, but it’s also packed with health benefits. Rhubarb is rich in vitamins C and K, and it has anti-inflammatory properties, making it a wholesome addition to your diet. If you’re looking for recipe ideas to impress guests or simply indulge in your love for baking, then this outstanding rhubarb bread is your go-to choice.


    Benefits and Advantages of This Amazing Rhubarb Bread Recipe Has Me Hooked!

    When considering the effectiveness of this rhubarb bread recipe, several beneficial attributes come to mind. First and foremost, its ease of preparation makes it ideal for home cooks of any skill level, whether they are seasoned bakers or just starting. In just a few simple steps, you can have a moist and delicious loaf baked and ready to share or enjoy on your own.

    Another notable feature is the health aspect. Rhubarb, often regarded as a vegetable but used like a fruit, is low in calories yet high in essential nutrients. It contains dietary fiber, which aids digestion and keeps you feeling full longer. This makes it a perfect incorporation into a balanced diet, especially for those monitoring their calorie intake or looking for healthier dessert options.

    In today’s fast-paced world, convenience is key. This amazing rhubarb bread can be prepared ahead of time, making it an excellent pick for busy parents, working professionals, or students who want something quick and easy. Plus, it holds its flavor and moisture exceptionally well, meaning you can bake it in batches to enjoy over several days.

    Additionally, this recipe shines brightly in its versatility. It can be tailored to suit various dietary preferences. For instance, gluten-free flour blends can easily replace regular flour, while flax eggs or applesauce can act as substitutes for traditional eggs, making it vegan. These adaptations ensure that everyone can partake in and savor the bread.

    Ultimately, the combination of its simplicity, nutritional benefits, and adaptability is what truly sets this amazing rhubarb bread recipe apart from others. It’s more than just dessert; it’s a wholesome treat that everyone can enjoy!


    Ingredients Overview

    Essential Ingredients for This Amazing Rhubarb Bread Recipe Has Me Hooked!

    Creating this delectable rhubarb bread requires a straightforward list of ingredients that you likely have on hand. Below are the essential components you’ll need, along with precise measurements and the purpose of each ingredient:

    • 2 cups rhubarb, chopped: The star of the recipe, rhubarb adds both moisture and a unique tart flavor.
    • 1 ½ cups all-purpose flour (or gluten-free flour): This forms the base of the bread. You can use a gluten-free blend to make this recipe accommodating for those on a gluten-free diet.
    • 1 cup granulated sugar (or coconut sugar for a healthier alternative): Sweetens the loaf and balances the tartness of the rhubarb.
    • ½ cup vegetable oil (or unsweetened applesauce for a lower-calorie option): Provides moisture; applesauce serves as a great substitute for a lower fatty content and a vegan-friendly option.
    • 2 large eggs (or flax eggs for a vegan version): Eggs add richness and structure. To make flax eggs, mix 2 tablespoons of ground flaxseed with 6 tablespoons of water, allowing it to sit until it thickens.
    • 1 teaspoon baking powder: Helps the bread rise.
    • ½ teaspoon baking soda: This addition also aids in leavening the bread to provide a light texture.
    • ½ teaspoon salt: Enhances overall flavor.
    • 1 teaspoon vanilla extract: Adds depth to the flavor profile.
    • Optional: 1 teaspoon cinnamon (or nutmeg): For an extra layer of warmth and spice.

    Feel free to adapt any of these ingredients based on your personal taste or dietary needs, ensuring everyone can enjoy this tasty loaf!

    Dietary Substitutions to Customize Your This Amazing Rhubarb Bread Recipe Has Me Hooked!

    Catering to various dietary restrictions can seem challenging, but this rhubarb bread recipe makes it easy to customize! Here, we’ll explore some substitutions to ensure that everyone can enjoy a slice:

    • Gluten-free Option: As mentioned, simply use a gluten-free flour blend in place of all-purpose flour. Make sure to check the ratio required, as some blends work differently.

    • Vegan Option: Instead of using traditional eggs, use flax eggs as described above, or you can experiment with commercial egg replacers.

    • Lower-Calorie Option: If you’re watching your calorie intake, swap out oil for applesauce, which keeps moisture without added fat. Also, consider reducing sugar by ¼ cup or using a natural sweetener like stevia or monk fruit extract to lower the calorie count even further.

    • Nut-Free: If allergies are a concern, be cautious with any additional mix-ins like walnuts or almonds, which can easily be omitted.

    By utilizing these substitutions, home cooks can modify this amazing rhubarb bread to meet diverse dietary preferences without sacrificing flavor or texture!


    How to Prepare the Perfect This Amazing Rhubarb Bread Recipe Has Me Hooked!: Step-by-Step Guide

    Baking this amazing rhubarb bread is an easy and enjoyable activity. Follow these step-by-step instructions, and you’ll be rewarded with a moist and tangy loaf that will have everyone coming back for more. Don’t forget to think of this as another one of your go-to recipe ideas!

    1. Preheat the Oven: Start by preheating your oven to 350°F (175°C). Grease or line a 9×5-inch loaf pan with parchment paper for easy removal.

    2. Prepare the Rhubarb: Chop the fresh rhubarb into small pieces, about ½ inch in length. Set aside while you prepare the other ingredients.

    3. Mix Dry Ingredients: In a mixing bowl, combine the flour, baking powder, baking soda, salt, and optional spices. Whisk these together to ensure they’re well combined, which helps create a consistent texture.

    4. Combine Wet Ingredients: In a separate large bowl, combine the sugar (or coconut sugar) with the oil (or applesauce). Mix until well combined. Add the eggs (or flax eggs) and vanilla extract, stirring until fully incorporated.

    5. Combine Wet and Dry Mixtures: Slowly add the dry mixture to the wet mixture, stirring gently with a spatula or wooden spoon. Do not overmix; it’s okay if there are a few lumps remaining.

    6. Fold in Rhubarb: Gently fold the chopped rhubarb into the batter until evenly distributed. This ensures that the rhubarb flavor is present in every bite without breaking down too much during mixing.

    7. Pour Batter into Pan: Transfer the batter into the prepared loaf pan, smoothing the top with a spatula.

    8. Bake the Bread: Place the loaf in the preheated oven and bake for approximately 50-60 minutes. To check for doneness, insert a toothpick in the center of the loaf; it should come out clean or with a few crumbs attached.

    9. Cool the Bread: Once baked, remove the loaf from the oven and allow it to cool in the pan for about 10 minutes. Then, transfer it to a wire rack to cool completely.

    10. Slice and Serve: Once cooled, slice your amazing rhubarb bread and serve it plain, or enjoy it with a spread of your choice, like butter or cream cheese!

    With these straightforward steps, you’ll create a fantastic loaf of rhubarb bread that is sure to become a favorite for all types of bakers. Whether it’s for a special occasion or an everyday delight, this recipe is a great addition to your collection of recipe ideas.


    Mastering This Amazing Rhubarb Bread Recipe Has Me Hooked!: Advanced Tips and Variations

    To elevate your baking experience and make this amazing rhubarb bread uniquely yours, consider these advanced tips and creative variations:

    • Add-ins for Extra Flavor: You can incorporate different add-ins into the batter, such as chopped nuts (like walnuts or pecans), dried cranberries, or even a swirl of cream cheese mixture for a richer taste.

    • Glaze or Frosting: Top the cooled bread with a lemon or vanilla glaze for extra sweetness. Simply mix powdered sugar with a splash of milk or lemon juice until smooth and drizzle it over the loaf.

    • Storing Variations: For extra convenience, feel free to bake mini loaves or muffins instead of a single large loaf, making them great for individual servings.

    • Spice Variations: Experimenting with different spices can enhance the flavor. Consider adding ground ginger for a warm, spicy twist, or lemon zest for a refreshing citrus note.

    • Fruit Combinations: While rhubarb is fantastic alone, you can also pair it with strawberries or blueberries for a mixed fruit bread.

    Using these tips, you can master this amazing rhubarb bread recipe and make it your own. Each variation offers a new flavor profile and texture, ensuring your baked goods will always be exciting and delicious.


    How to Store This Amazing Rhubarb Bread Recipe Has Me Hooked!: Best Practices

    To ensure your amazing rhubarb bread remains fresh and delicious, it’s important to store it properly. Here’s how to do just that:

    • Room Temperature: If you plan to consume the bread within a few days, simply store it in an airtight container at room temperature. This will keep the bread moist and flavorful.

    • Refrigeration: If you want to prolong its freshness, consider refrigerating the bread. Wrap it tightly in plastic wrap or foil, then place it in an airtight container. It can last for up to a week in the refrigerator.

    • Freezing: For longer storage, freeze the bread. Slice it first for easy thawing and wrap each slice in plastic wrap, then place them in a freezer-safe bag. This way, you can pull out individual slices whenever you desire! It’s best enjoyed within three months of freezing.

    • Reheating: To reheat, pop individual slices in the microwave for about 15-20 seconds, or toast it in a toaster oven to enjoy a warm slice that feels freshly baked.

    By following these best practices, you can enjoy this amazing rhubarb bread long after it has cooled, ensuring you always have a delicious treat ready to go!


    Nutritional Value of This Amazing Rhubarb Bread Recipe Has Me Hooked!

    Understanding the nutritional value of your amazing rhubarb bread can help you appreciate the health benefits it brings to your table. Here’s a general breakdown of the components per slice (based on a total of 12 slices):

    • Calories: 150-200 (depending on sugar and oil substitutes)
    • Total Fat: 6-8g (if using oil versus applesauce)
    • Saturated Fat: 1g (varies based on your ingredient choices)
    • Cholesterol: 37mg (use vegan options to lower)
    • Sodium: 150-200mg (may vary due to salt)
    • Total Carbohydrates: 25-30g
    • Dietary Fiber: 1-2g
    • Sugars: 8-12g (depending on sweetness adjustment)
    • Protein: 2-3g

    This bread is not only a delightful treat but also provides essential nutrients, thanks to rhubarb’s rich vitamin profile. Enjoying slices in moderation helps incorporate this healthy vegetable into your diet, aligning it with your health goals.


    FAQs: Frequently Asked Questions About This Amazing Rhubarb Bread Recipe Has Me Hooked!

    Q1: Can I substitute fresh rhubarb with frozen rhubarb in this recipe?

    Yes, you can use frozen rhubarb! Make sure to thaw, drain the excess liquid, and then chop it before adding it to the batter. The texture may be slightly softer, but it will still work well in the bread.

    Q2: Can I make this rhubarb bread sugar-free?

    Absolutely! You can replace granulated sugar with a sugar substitute like stevia, monk fruit, or erythritol. Just be sure to follow the specific conversion instructions provided by the brand for the best results.

    Q3: How can I make this recipe nut-free?

    To ensure your amazing rhubarb bread is nut-free, simply exclude any nuts from the add-ins. For a more robust flavor, you could try incorporating rolled oats instead of nuts for added texture.

    Q4: How long does this rhubarb bread last?

    When stored properly, this bread can last 3-5 days in an airtight container at room temperature, up to a week in the refrigerator, and for about three months in the freezer.

    Q5: Can I add other fruits to the bread, such as blueberries or strawberries?

    Yes, mixing in other fruits like blueberries or strawberries can add delightful flavors and a twist to your rhubarb bread. Adjust the quantity slightly to maintain a good batter consistency.


    This amazing rhubarb bread recipe is more than just a baking project; it’s a celebration of flavors and textures perfect for a wide range of audiences. Share it at a gathering, enjoy it by yourself, or customize it to fit your dietary needs—this recipe is indeed a treasure in your collection of recipe ideas! So grab your apron and enjoy the wonderful adventure of baking this delicious loaf today!

  • Simple Honey Mustard Chicken Pasta Salad

    Simple Honey Mustard Chicken Pasta Salad

    Simple Honey Mustard Chicken Pasta Salad: A Tropical Delight

    Introduction to Simple Honey Mustard Chicken Pasta Salad

    If you’re searching for a delightful dish that combines simplicity, health benefits, and versatility, look no further than the Simple Honey Mustard Chicken Pasta Salad. This recipe marries tender, juicy chicken with a vibrant pasta base, all enlivened by a tangy honey mustard dressing. Perfect for busy weekdays or relaxing weekends, this pasta salad not only tantalizes the taste buds but also packs a nutritional punch, making it an ideal meal for anyone—from health-conscious foodies to busy parents juggling meal prep.

    One of the wonderful attributes of this pasta salad is its ease of preparation. The ingredients are straightforward, making it a suitable choice for novice cooks and seasoned chefs alike. It’s equally beneficial for those following various dietary lifestyles, as you can easily customize it to be gluten-free, low-calorie, or even vegetarian by substituting the chicken with plant-based proteins. This dish offers the perfect balance of protein, carbs, and healthy fats, ensuring it keeps you full while also promoting your well-being.

    With its explosion of flavors and textures, this Honey Mustard Chicken Pasta Salad is more than just a meal; it’s a culinary experience that you’ll want to share with family and friends. Whether you’re planning a picnic, a potluck, or just a simple family dinner, this recipe is sure to impress. So, roll up your sleeves and get ready to discover a new favorite that you’ll turn to time and again!

    Benefits and Advantages of Simple Honey Mustard Chicken Pasta Salad

    The Sweet Honey Mustard Chicken Pasta Salad stands out for several compelling reasons, making it an excellent choice for various diners. First and foremost, its preparation is an effortless endeavor. Within 30 minutes, you can whip up a flavorful salad that serves as a complete meal, saving you precious cooking time. Cooking for a larger group? No problem! This recipe can easily be doubled or halved to accommodate any gathering.

    Health-wise, the salad offers a balanced profile that meets your dietary needs. Chicken breast provides lean protein, vital for muscle repair and growth, while whole-grain pasta offers fiber to support digestive health. The honey mustard dressing not only enhances flavor but also introduces essential vitamins and antioxidants. Feel free to add colorful veggies like bell peppers, cherry tomatoes, or spinach for an additional nutrient boost!

    Another significant advantage of this pasta salad is its adaptability, making it suitable for various dietary preferences. For anyone following a vegan lifestyle, you can easily replace the chicken with chickpeas or tofu, and choose a plant-based dressing. Gluten-free eaters can swap regular pasta for gluten-free alternatives, ensuring everyone can enjoy it without worry.

    In summary, the Simple Honey Mustard Chicken Pasta Salad excels in practicality and health benefits, proving to be a delicious and fulfilling option. Its versatility and ease of preparation make it your go-to dish for any occasion—be it a quick weeknight dinner or a fancy potluck offering that leaves your guests wanting more.

    Ingredients Overview

    Essential Ingredients for Simple Honey Mustard Chicken Pasta Salad

    To create this vibrant and flavorful pasta salad, you will need the following ingredients:

    • 2 cups cooked pasta (rotini or fusilli work well)
    • 1 pound chicken breast, cooked and diced (substitute with chickpeas for vegan option)
    • 1 cup cherry tomatoes, halved
    • 1 cup cucumber, diced
    • 1/2 cup red onion, diced
    • 1/4 cup fresh parsley, chopped
    • 1/4 cup honey mustard dressing (store-bought or homemade—tip to see below)
    • Salt and pepper to taste

    Optional Add-ins:
    1 cup bell peppers, diced (for added color and crunch)
    1/2 cup olives, sliced (for a briny kick)
    1/2 cup avocado, diced (for healthy fats and creaminess)

    Vegan Option: Substitute cooked chicken with 1 1/2 cups chickpeas or tofu cubes.

    Gluten-Free Option: Choose gluten-free pasta like quinoa or rice pasta.

    This ingredient list reflects the concept of balance—it combines proteins, healthy fats, and carbohydrates, ensuring it’s a satisfying dish. Plus, it utilizes fresh produce to ensure the salad is packed with vitamins and minerals, making it a fantastic choice for health-conscious individuals.

    Dietary Substitutions to Customize Your Simple Honey Mustard Chicken Pasta Salad

    One of the appealing aspects of this pasta salad is its flexibility. Here are several optional substitutions to cater to different dietary needs or ingredient availability:

    • For Lower Calories: Use whole grain pasta instead of regular pasta and opt for a lighter dressing or reduce the quantity if you’re watching your calorie intake.
    • Dairy-Free Substitution: If you prefer to keep your salad dairy-free, simply avoid garnishing with any cheese or creamy elements, as the honey mustard dressing itself adds a delightful flavor.
    • Vegetable Variations: Swap the cucumber for zucchini noodles for a low-carb twist, or add seasonal veggies such as asparagus or roasted zucchini for variety.
    • Plant-Based Protein: While chickpeas are a great substitute for chicken, consider using tempeh or seitan for a meat-like texture in the salad.
    • Nut Allergies: Should you have nut allergies, avoid adding nuts or opt for seeds like sunflower or pumpkin seeds as a crunchy alternative.

    With these substitutions, anyone can tailor the Honey Mustard Chicken Pasta Salad to fit their dietary preferences or restrictions, making the dish universal and inviting!

    How to Prepare the Perfect Simple Honey Mustard Chicken Pasta Salad: Step-by-Step Guide

    Creating your own Simple Honey Mustard Chicken Pasta Salad is a straightforward process, and you’ll find that it comes together quickly. Follow these step-by-step instructions to ensure your salad turns out delicious every time:

    1. Cook the Pasta:
    2. Begin by bringing a large pot of salted water to a boil. Add your chosen pasta and cook according to the package instructions until al dente. Draining the pasta right after cooking ensures it won’t become mushy in the salad.

    3. Prepare Chicken:

    4. If you’re not using pre-cooked chicken, season your chicken breast with salt and pepper, and grill or pan-fry them until golden brown and cooked through. Once complete, let it rest for a few minutes before dicing it into bite-sized pieces.

    5. Chop Vegetables:

    6. While your pasta is cooking, wash and chop your vegetables. Dice the cucumber, halved cherry tomatoes, and minced red onion and parsley. Having these ingredients prepped ensures a smooth assembly process.

    7. Make the Dressing:

    8. If you’re opting for homemade honey mustard dressing, whisk together 1/4 cup honey, 1/4 cup mustard (yellow or Dijon), along with 2 tablespoons of olive oil, salt, and pepper to taste. This adds a homemade touch while controlling the ingredients.

    9. Combine Ingredients:

    10. In a large mixing bowl, combine the cooked pasta, diced chicken, and all the chopped vegetables. Drizzle the honey mustard dressing over the top.

    11. Toss to Combine:

    12. Use a spatula or large spoon to gently toss everything together until the pasta and veggies are well coated with the honey mustard dressing. Ensure that the chicken is evenly distributed throughout the salad.

    13. Adjust Seasoning:

    14. Taste your pasta salad and adjust seasoning with salt, pepper, or additional dressing as necessary, ensuring the flavors are just right.

    15. Chill or Serve Immediately:

    16. You can serve the salad right away or chill it in the refrigerator for about 30 minutes for the flavors to meld. This step facilitates a fresh, flavorful experience.

    17. Garnish and Serve:

    18. If desired, sprinkle additional fresh parsley or sesame seeds on top before serving. These final touches add a burst of color and flavor.

    19. Storing Leftovers:

    20. Place any leftovers in an airtight container in the refrigerator. When you’re ready to enjoy again, simply stir and add a splash more dressing if needed.

    With these simple steps, you can masterfully create a Simple Honey Mustard Chicken Pasta Salad that dazzles the palate and delights your dining companions.

    Mastering Simple Honey Mustard Chicken Pasta Salad: Advanced Tips and Variations

    Once you’ve mastered the basics, consider these advanced tips and variations to elevate your Simple Honey Mustard Chicken Pasta Salad:

    • Add Different Textures: Incorporate nuts like walnuts or almonds for crunch, or sprinkle some croutons on top just before serving for added crunch.
    • Experiment with Dried Fruit: Include dried cranberries or raisins for a surprising sweet twist that complements the honey mustard dressing beautifully.
    • Incorporate Cheese: If you’re not following a strict diet, crumbled feta cheese or shredded cheddar can enhance the flavor profile of your salad, adding saltiness and creaminess.
    • Spice it Up: To liven up the dish, consider adding a dash of red pepper flakes or a squeeze of lemon juice for a zesty finish.
    • Mediterranean Twist: Substitute traditional ingredients with Mediterranean flavors by including kalamata olives, artichoke hearts, or sun-dried tomatoes for a completely different experience.

    Feel free to adapt and modify the recipe further to suit your taste preferences or seasonal ingredient availability. The beauty of a salad like this lies in its versatility—each iteration can become a new favorite!

    How to Store Simple Honey Mustard Chicken Pasta Salad: Best Practices

    Proper storage of your Simple Honey Mustard Chicken Pasta Salad is essential to ensure it remains fresh and delicious. Here are the best practices for storing:

    • Refrigeration: Store any leftover pasta salad in an airtight container. It can remain in your refrigerator for up to 3 days, maintaining its taste and texture. Before serving, give it a good stir; flavors develop and meld further over time.

    • Freezing: Although pasta salads do not typically freeze well because the texture of the pasta may change, if you find that you have a substantial portion left, you can freeze it for up to one month. Place the pasta salad in a freezer-safe bag, removing as much air as possible before sealing. When you’re ready to eat, thaw it in the refrigerator and then serve cold or at room temperature.

    • Reheating: If you enjoy warm pasta salad, reheat individual portions in the microwave, adding a splash of broth or extra dressing after microwaving to prevent dryness.

    Taking time to store the salad correctly will help retain its flavor and quality, allowing you to savor it over multiple meals.

    Nutritional Value of Simple Honey Mustard Chicken Pasta Salad

    When preparing the Simple Honey Mustard Chicken Pasta Salad, understanding its nutritional content can help you make informed dietary choices. Below is a breakdown of the approximate nutritional value per serving (1 cup):

    • Calories: 350
    • Protein: 28g
    • Carbohydrates: 38g
    • Dietary Fiber: 5g
    • Fats: 10g
    • Saturated Fat: 2g
    • Cholesterol: 75mg
    • Sodium: 450mg

    The combination of protein from chicken, healthy fats from olive oil, and carbohydrates from whole grain pasta makes this dish a balanced meal option. Moreover, the inclusion of fresh veggies adds valuable vitamins and antioxidants, promoting overall well-being!

    Feel free to adjust the recipe to fit specific dietary needs—for example, opting for whole grain or gluten-free pasta can slightly alter the calorie count and nutrient profile while still delivering a satisfying and nutritious meal.

    FAQs: Frequently Asked Questions About Simple Honey Mustard Chicken Pasta Salad

    1. Can I make this pasta salad ahead of time?

    Absolutely! In fact, making the salad a few hours ahead allows the flavors to meld and develop even more. It can be stored in the refrigerator for up to 3 days.

    2. How can I make this recipe vegetarian?

    To create a vegetarian version, simply replace the chicken with chickpeas or tofu. You can also skip the chicken altogether and load up on extra veggies for a refreshing twist.

    3. Is it necessary to cook the pasta al dente?

    Cooking your pasta al dente is recommended, as it holds its shape better in the salad. Overcooked pasta can become mushy when mixed and stored.

    4. What are some ideal side dishes to pair with this salad?

    This pasta salad serves well on its own but can also be complemented by grilled vegetables, a simple green salad, or even garlic bread for a well-rounded meal.

    5. Can I use a different dressing?

    Certainly! While honey mustard dressing is delightful, other dressings like Italian, balsamic vinaigrette, or even a creamy ranch can yield delicious results.

    6. What if I have a nut allergy?

    Feel free to leave out any nuts or uses seeds as a substitute to avoid allergic reactions.

    The Simple Honey Mustard Chicken Pasta Salad is more than just a meal; it’s a canvas for flavors and textures, and with the tips and insights shared in this article, you’re ready to create your own delicious version. Enjoy experimenting with your ingredients and savor each bite of this delightful dish!

  • Fudgy Vegan Sourdough Brownies

    Fudgy Vegan Sourdough Brownies

    Fudgy Vegan Sourdough Brownies: A Tropical Delight

    Introduction to Fudgy Vegan Sourdough Brownies

    Are you searching for innovative dessert recipes that cater to your dietary preferences without sacrificing taste? Look no further! Fudgy Vegan Sourdough Brownies are a delightful combination of rich flavors and healthy ingredients, making them a fantastic option for anyone—whether you’re a busy parent, a student on the go, or someone simply trying to adopt a healthier lifestyle. These brownies are the perfect fusion of moistness, fudginess, and a subtle tang from the sourdough, ensuring that every bite is an explosion of deliciousness.

    What makes these brownies stand out is their versatility. They’re not just vegan; they’re also gluten-free and low-calorie, making them suitable for various dietary needs. You don’t need to feel guilty after enjoying a sweet treat! With simple preparation and wholesome ingredients, these brownies prove that you can indulge your sweet tooth without compromising on health.

    Moreover, the satisfaction of making desserts from scratch can bring joy to anyone. So, whether you’re a seasoned baker looking for a new challenge or a novice trying out new dessert recipes, this guide will inspire you to whip up a batch of these decadent brownies that will impress your family and friends. Let’s dive into the benefits of these fudgy delights!

    Benefits and Advantages of Fudgy Vegan Sourdough Brownies

    When it comes to dessert recipes, Fudgy Vegan Sourdough Brownies shine for multiple reasons. First and foremost, they are extraordinarily easy to prepare. With a handful of common ingredients and straightforward steps, you can create these scrumptious brownies in no time! Perfect for those busy weekdays or for a spontaneous dessert craving, these brownies are a reliable go-to.

    Health benefits are another standout feature of this recipe. Traditional brownies often pack in calories and unhealthy fats, but our vegan version uses ingredients that are kind to your body. For example, the sourdough adds nutritional value, promoting digestive health while contributing to the delectable texture. Plus, using wholesome plant-based substitutes ensures that these brownies are lower in saturated fats. The inclusion of nut butter, oats, and plant-based milks offers healthy fats and proteins, giving you energy to power through your day.

    In terms of flavor, these brownies draw you in with their unique taste. They’re not just your average dessert; they deliver a rich, chocolatey experience combined with a hint of tanginess. You will find that they easily satisfy even the most discerning sweet tooth while being mindful of dietary preferences. Additionally, these fudgy wonders are perfect for gatherings, potlucks, or simply enjoying at home, showcasing your culinary prowess without intense effort.

    The versatility doesn’t end there! You can adapt this recipe to include your favorite add-ins, such as nuts, seeds, or dried fruit, to elevate them even further. For those in search of wholesome dessert recipes that deliver both taste and comfort, look no further than these brownies.

    Ingredients Overview

    Essential Ingredients for Fudgy Vegan Sourdough Brownies

    To create these delectable Fudgy Vegan Sourdough Brownies, you’ll need the following ingredients:

    1. Sourdough Starter (1 cup): This will provide the distinct tanginess and contribute moisture to the brownies. If you’re new to sourdough, check your local bakery for a starter, or you can create your own at home.

    2. Flour (1 cup): Use gluten-free flour (e.g., almond or oat flour) for a gluten-free version. This is essential for structure without making the brownies dense.

    3. Cocoa Powder (⅓ cup): Unsweetened cocoa powder gives that classic chocolaty flavor. Aim for high-quality cocoa for the best results.

    4. Nut Butter (½ cup): Options include almond, peanut, or cashew butter. This adds creaminess and healthy fats, ensuring a fudgy texture.

    5. Maple Syrup or Agave Syrup (¾ cup): Use these natural sweeteners as a substitute for refined sugars. They will also provide moisture.

    6. Plant-Based Milk (¼ cup): Almond, soy, or oat milk work best. This will keep the brownies moist without dairy.

    7. Baking Powder (½ tsp): This helps the brownies rise slightly and adds a bit of fluffiness.

    8. Salt (¼ tsp): Enhances flavor, balancing the sweetness.

    9. Dark Vegan Chocolate Chips (optional, ½ cup): For chocolate lovers, these add richness and additional texture.

    These ingredients are not only easy to find but also allow for various modifications to suit your taste preferences while sticking to vegan, gluten-free, and low-calorie diets.

    Dietary Substitutions to Customize Your Fudgy Vegan Sourdough Brownies

    Here’s how you could customize your Fudgy Vegan Sourdough Brownies based on dietary needs or personal preferences:

    • Flour: Substitute with any gluten-free flour blends or even whole wheat flour if you are not gluten-sensitive.

    • Sugar: Swap maple syrup with date syrup or coconut sugar for a different sweet profile.

    • Nut Butter: If you have nut allergies, try using sunflower seed butter or tahini for a nut-free option.

    • Milk Alternatives: Choose any plant-based milk depending on your flavor preference, such as coconut milk for a tropical twist.

    • Add-Ins: Consider incorporating ingredients like chopped nuts, dried fruits, or even a dash of espresso powder for an enhanced flavor punch.

    There’s no limit to how you can make these brownies your own, proving yet again that dessert recipes can be flexible and adjustable for everyone!

    How to Prepare the Perfect Fudgy Vegan Sourdough Brownies: Step-by-Step Guide

    Now that you have everything you need, let’s get to the fun part: preparing your Fudgy Vegan Sourdough Brownies!

    1. Preheat the Oven: Begin by preheating your oven to 350°F (175°C). This ensures that your brownies bake evenly.

    2. Prepare Your Baking Dish: Line an 8×8 inch square baking dish with parchment paper, allowing some overhang for easy removal later. Lightly grease the parchment for the best results.

    3. Mix Dry Ingredients: In a large mixing bowl, combine the flour, cocoa powder, baking powder, and salt. Whisk these together until evenly mixed.

    4. Combine Wet Ingredients: In another bowl, mix the sourdough starter, nut butter, maple syrup, and plant-based milk until well blended. Use a hand mixer to ensure a smooth consistency for your wet ingredients.

    5. Combine Wet & Dry Mixtures: Gradually fold the wet mixture into the dry ingredients using a spatula. Take care to mix until just combined. Overmixing may lead to a denser texture.

    6. Add Chocolate Chips (Optional): If you’re including dark chocolate chips, gently fold them into the brownie batter now.

    7. Pour Batter into the Baking Dish: Transfer the brownie mixture into your prepared baking dish. Smooth the top with the spatula for an even bake.

    8. Bake: Place the dish in the preheated oven and bake for 25-30 minutes, or until a toothpick inserted into the center comes out with a few moist crumbs. This ensures a fudgy center.

    9. Cool: Allow the brownies to cool in the baking dish for about 10-15 minutes before removing them using the parchment paper. Transfer to a wire rack to cool completely.

    10. Cut and Serve: Once fully cooled, slice the brownies into squares and enjoy! For an extra touch, dust with cocoa powder or serve with a scoop of vegan ice cream.

    This step-by-step guide makes it easy for anyone to follow along and create delicious Fudgy Vegan Sourdough Brownies. Remember, the beauty of baking is that you can tailor it to your tastes and preferences!

    Mastering Fudgy Vegan Sourdough Brownies: Advanced Tips and Variations

    To take your Fudgy Vegan Sourdough Brownies to the next level, consider these advanced tips and variations:

    • Texture Tweaks: If you prefer a less fudgy brownie, fold in an extra 1-2 tablespoons of flour. Conversely, more nut butter can enhance the fudginess.

    • Flavor Infusion: Add a splash of vanilla extract or peppermint extract for a unique taste experience. You could also incorporate spices such as cinnamon for an extra depth of flavor.

    • Swirl It Up: Try creating a marbled effect by swirling in some vegan cream cheese or additional nut butter on top before baking.

    • Nut Varieties: Experiment with different nuts. Walnuts or pecans can add a delightful crunch, while also contributing healthy fats and nutrients.

    • Frosting Options: If you want to elevate your brownies further, consider topping them with a vegan chocolate frosting or a simple dusting of powdered sugar before serving.

    These tips and variations not only offer opportunities for creativity but also ensure that your brownies become a signature dish that impresses anyone who gets to enjoy them.

    How to Store Fudgy Vegan Sourdough Brownies: Best Practices

    To keep your Fudgy Vegan Sourdough Brownies fresh and delicious, proper storage is essential. Here are some best practices:

    • Room Temperature: If you plan to consume the brownies within a few days, you can store them in an airtight container at room temperature. They should stay fresh for about 3-4 days depending on humidity.

    • Refrigeration: For longer storage, refrigerate the brownies in an airtight container lined with parchment paper. They will keep well for up to a week. This will slightly firm up the brownies but will still retain their rich flavor.

    • Freezing: To extend their shelf life even further, these brownies can be frozen. Wrap them individually in plastic wrap, then place them in a freezer-safe bag or container. Enjoy them for up to 3 months. To eat, simply let them thaw at room temperature or microwave for a few seconds.

    • Reheating: If you prefer warm brownies, simply pop a square in the microwave for about 10-15 seconds, or until warmed through.

    By following these storage tips, you can enjoy your brownies long after they’ve left the oven while also maintaining their fudgy texture and rich flavor!

    Nutritional Value of Fudgy Vegan Sourdough Brownies

    Knowing the nutritional information can enhance the baking experience, especially for those watching their diet. Below is an approximate nutritional breakdown for a serving (1 square) of Fudgy Vegan Sourdough Brownies, assuming the recipe yields 16 squares:

    • Calories: 120
    • Total Fat: 6g
    • Saturated Fat: 1g
    • Cholesterol: 0mg
    • Sodium: 65mg
    • Total Carbohydrates: 15g
    • Dietary Fiber: 2g
    • Sugars: 7g
    • Protein: 3g

    These brownies provide a wholesome treat packed with nutrients while being lower in calories than traditional options. The healthy fats from nut butter and the fiber from whole ingredients contribute to a more balanced dessert that fits well within your nutritional goals.

    FAQs: Frequently Asked Questions About Fudgy Vegan Sourdough Brownies

    1. Can I use a different sweetener besides maple syrup?

    Absolutely! You can use agave syrup, coconut sugar, or date syrup as alternatives. Just make sure the consistency aligns with the recipe for best results.

    2. Is it possible to make these brownies nut-free?

    Yes, simply substitute the nut butter with sunbutter (sunflower seed butter) or tahini. Ensure that any add-ins you use, like chocolate chips, are also nut-free.

    3. How do I know when the brownies are done baking?

    Check for doneness by inserting a toothpick into the center. If it comes out with a few moist crumbs, they are ready. Be wary not to overbake, as you want that fudgy consistency!

    4. Can I bake these brownies in a larger or smaller pan?

    Yes, you can; however, adjust the baking time accordingly. A larger pan yields thinner brownies that will bake faster, while a smaller pan will create thicker brownies requiring a longer bake time.

    5. How can I enhance the flavor of these brownies?

    Consider adding espresso powder, spices like cinnamon, or your favorite extract (like almond or vanilla) to elevate the flavor profile of your brownies!

    These FAQs address common queries to help readers confidently prepare their Fudgy Vegan Sourdough Brownies.

    In conclusion, Fudgy Vegan Sourdough Brownies are more than just a dessert; they’re a versatile and healthy treat that fits perfectly into a diverse lifestyle. From their rich flavor to their nutritional benefits, these brownies stand out as an ideal option for anyone seeking delicious dessert recipes. So roll up your sleeves and give this recipe a try; you won’t be disappointed!

  • Easy Broccoli Salad With Italian Dressing

    Easy Broccoli Salad With Italian Dressing

    Easy Broccoli Salad With Italian Dressing: A Tropical Delight

    Introduction to Easy Broccoli Salad With Italian Dressing

    If you’re on the hunt for healthy recipes that require minimal effort yet burst with flavor and nutrients, look no further than this Easy Broccoli Salad With Italian Dressing. With its vibrant green hues and hearty ingredients, this salad is not just visually appealing; it’s a powerhouse of health benefits. This recipe is incredibly simple to whip up, making it a perfect choice for busy parents, students, or anyone looking for a quick and nutritious meal option.

    Packed with fresh broccoli, colorful veggies, and a tangy Italian dressing, this dish is vegan and gluten-free, catering to various dietary needs without sacrificing taste. Not only does it delight the palate, but it also offers numerous health advantages—rich in vitamins, fiber, and antioxidants—making it an ideal addition to your meal rotation. Whether served as a side dish at a family gathering or as a light lunch, this Easy Broccoli Salad stands out for its versatility and appeal.

    Get ready to inspire your kitchen journey with this delightful salad! Let’s dive into the benefits and advantages of incorporating this fantastic recipe into your lifestyle.

    Benefits and Advantages of Easy Broccoli Salad With Italian Dressing

    One of the standout features of Easy Broccoli Salad With Italian Dressing is its ease of preparation. This dish can be assembled in under 20 minutes, making it an excellent choice for busy days when time is of the essence. The straightforward nature of the recipe makes it accessible for all skill levels, from novices to seasoned chefs.

    From a health perspective, this salad is brimming with benefits that cater to diet-conscious individuals. Broccoli is renowned for its numerous health benefits; it is low in calories yet high in vitamins C and K, managing to pack a significant nutritional punch while remaining a low-calorie option. The inclusion of other fresh vegetables, such as bell peppers and carrots, not only enhances the flavor but also adds a variety of nutrients, providing a well-rounded meal in one bowl.

    Another significant advantage is its adaptability. This Easy Broccoli Salad can shine as a side dish, complementing grilled meats or sandwiches, or you can toss in some protein to transform it into a complete meal. This versatility allows it to cater to a wide range of dietary needs, from vegan to gluten-free, while continuing to adhere to the principles of healthy recipes.

    Moreover, the freshness of the ingredients and the zesty Italian dressing infuse every bite with fantastic flavor, encouraging even the most reluctant veggie lovers to rejoice in greens. By prioritizing fresh, whole ingredients, this salad appeals to both taste buds and health-conscious diners alike—making it a go-to recipe for various occasions, from picnics to potlucks.

    Ingredients Overview

    Essential Ingredients for Easy Broccoli Salad With Italian Dressing

    To make the perfect Easy Broccoli Salad With Italian Dressing, gather the following ingredients:

    • Fresh Broccoli (2 cups, chopped): Broccoli is the star of this salad, providing a crunchy texture and plenty of vitamins.
    • Red Bell Pepper (1 medium, diced): Adds a splash of color and rich antioxidants.
    • Carrots (1 cup, shredded): Provide a natural sweetness and extra fiber.
    • Red Onion (½ cup, thinly sliced): For a hint of sharpness and added flavor depth.
    • Cherry Tomatoes (1 cup, halved): These juicy gems bring a burst of sweetness to each bite.
    • Italian Dressing (½ cup, store-bought or homemade): This tangy dressing binds the flavors together.
    • Olive Oil (2 tablespoons, optional): To enhance richness; use if you’d like a silkier dressing.
    • Salt & Pepper (to taste): Essential seasonings that facilitate flavor balance.

    Dietary Friendly Options:
    Vegan: This recipe is inherently vegan when using a plant-based Italian dressing.
    Gluten-Free: Ensure the dressing you choose is gluten-free for those with gluten intolerance.
    Low-Calorie: The salad is low in calories, making it a perfect option for those watching their caloric intake.

    Dietary Substitutions to Customize Your Easy Broccoli Salad With Italian Dressing

    The beauty of this Easy Broccoli Salad is its adaptability. Here are some substitutions to ensure it fits your dietary needs or preferences perfectly:

    • Vegetable Choices: Instead of red bell pepper, feel free to use any color bell pepper or even shredded cabbage for a crunchy twist. You can also add ingredients like peas, corn, or diced cucumbers for an element of freshness.
    • Dressings: While Italian dressing is the classic choice here, you can experiment with balsamic vinaigrette, lemon-tahini dressing, or a simple olive oil and vinegar combination for a lighter option.
    • Nuts & Seeds: For added crunch and nutrition, consider tossing in chopped nuts (like almonds or walnuts) or seeds (like sunflower or pumpkin seeds). These additions will also allow you to elevate this salad’s protein content.
    • Protein Additions: If you’d like to make this salad a heartier meal, add grilled chicken, chickpeas, or tofu cubes for a satisfying dose of protein, making it more suitable for those looking for a complete meal.

    Adjusting this Easy Broccoli Salad recipe to fit various dietary needs has never been simpler, ensuring it’s a staple in your culinary repertoire while embodying the essence of healthy recipes.

    How to Prepare the Perfect Easy Broccoli Salad With Italian Dressing: Step-by-Step Guide

    Now that you’ve gathered your ingredients, let’s walk through the preparation of your Easy Broccoli Salad With Italian Dressing with this detailed step-by-step guide. Each step is crafted with clarity to ensure that your salad turns out perfectly!

    1. Prepare the Base: Begin by washing and thoroughly drying your fresh broccoli. Cut it into bite-sized florets and place them in a large mixing bowl.

    2. Add Colorful Veggies: Dice the red bell pepper and shred the carrots, then add them to the bowl with the broccoli. Follow up by thinly slicing the red onion and halving the cherry tomatoes. Toss all these ingredients together gently, ensuring they are well mixed.

    3. Make the Dressing: In a separate bowl, whisk together the Italian dressing and olive oil if you’re using it. This process emulsifies the dressing, promoting a rich consistency.

    4. Season the Salad: Drizzle the dressing over your vegetable mix. Add salt and pepper to taste, ensuring you incorporate flavor without overpowering the fresh veggie taste.

    5. Toss and Coat: Using salad tongs or two forks, gently toss the salad to distribute the dressing evenly. Make sure every piece of broccoli and each vegetable is coated with the flavorful dressing.

    6. Chill for Best Flavor: If time allows, cover the bowl with plastic wrap and refrigerate for at least 30 minutes. Chilling enhances the flavor, allowing the ingredients to marinate together.

    7. Serve and Enjoy: Once chilled, give the salad a final toss. Serve as a side dish during dinner, or enjoy it as a light and refreshing lunch on its own!

    This straightforward preparation method ensures success each time you create this salad, reinforcing the appeal of healthy recipes for home cooks of all backgrounds.

    Mastering Easy Broccoli Salad With Italian Dressing: Advanced Tips and Variations

    To truly make the most out of your Easy Broccoli Salad, consider these advanced tips and variations:

    • Experimenting with Flavors: Feel free to add cheese like feta or shredded Parmesan to elevate the salad’s flavor profile. The salty creaminess complements the crisp vegetables beautifully.

    • Seasonal Variations: Adapt the recipe based on seasonal produce. During summertime, add fresh corn or zucchini, while in fall, consider butternut squash or apples for a different taste.

    • Add Grains: For a more substantial meal, mix in cooked quinoa or bulgur wheat. Not only do they add texture, but they also provide an extra nutritional boost.

    • Spice it Up: If you enjoy spicy flavors, consider incorporating red pepper flakes or jalapeños for an extra kick.

    • Serve Fresh or Warm: While the salad is refreshing when served cold, consider roasting the broccoli lightly before adding it to the salad for a different texture and flavor experience.

    These tips and variations not only help keep your Easy Broccoli Salad exciting but also reinforce that healthy recipes can be both simple and endlessly adaptable.

    How to Store Easy Broccoli Salad With Italian Dressing: Best Practices

    Storing your Easy Broccoli Salad properly will preserve its freshness and flavors. Here are the best practices for refrigeration and maintaining its quality:

    • Refrigeration: If you have leftovers or want to prepare the salad ahead of time, store it in an airtight container in the refrigerator. It will stay fresh for up to three days. The flavor often benefits from sitting overnight as the vegetables soak up the dressing.

    • Freezing: While this salad is best enjoyed fresh, if you wish to store it long-term, consider freezing the broccoli and other veggies before adding the dressing. Once thawed, you can prepare the salad fresh with a new dressing to enjoy a taste comparable to freshly made.

    • Reheating: If you’ve frozen the ingredients, make sure to let them defrost in the fridge overnight before assembling the salad. Never reheat the salad once dressed, as this will make the vegetables soggy.

    By following these storage methods, you ensure that your Easy Broccoli Salad remains a delightful option for healthy meals throughout the week, reinforcing the message of healthy recipes that cater to a busy lifestyle.

    Nutritional Value of Easy Broccoli Salad With Italian Dressing

    When it comes to healthy recipes, understanding the nutritional value is essential. Here’s a breakdown of the nutritional content per serving (based on a typical serving size):

    • Calories: Approximately 150 calories
    • Total Fat: 9g (Healthy fats from olive oil)
    • Saturated Fat: 1.5g
    • Cholesterol: 0mg
    • Sodium: 250mg (will vary based on dressing brand)
    • Total Carbohydrates: 14g
    • Dietary Fiber: 4g
    • Sugars: 2g
    • Protein: 3g

    This nutritional composition demonstrates that Easy Broccoli Salad With Italian Dressing provides a low-calorie yet nutrient-rich option. Its high fiber content contributes to digestive health while the array of vitamins and minerals from the fresh veggies supports overall wellness.

    Integrating this salad into your diet can help increase your daily vegetable intake while enjoying delicious flavors, perfectly aligning with the goals of healthy recipes.

    FAQs: Frequently Asked Questions About Easy Broccoli Salad With Italian Dressing

    1. Can I make this salad ahead of time?

    Yes! The Easy Broccoli Salad can be made up to 2-3 days in advance. Store it in an airtight container in the refrigerator for the best results.

    2. How long does this salad last in the fridge?

    When stored correctly, your Easy Broccoli Salad can stay fresh for up to three days. However, it is best enjoyed within the first two days for optimal crunchiness.

    3. Can I use frozen broccoli?

    While fresh broccoli is recommended for texture and flavor, you can use frozen broccoli. Just thaw and drain it well before adding it to the salad to avoid excess moisture.

    4. How can I adjust the dressing for a different flavor profile?

    You can experiment by using different types of dressings, such as ranch, lemon-tahini, or balsamic vinaigrette to suit your taste preferences. Homemade dressings are also a great option!

    5. Is this salad suitable for meal prep?

    Absolutely! This salad is ideal for meal prepping. Consider preparing separate containers with the dry ingredients and dressing in a separate small container to keep the salad fresh until ready to eat.

    By addressing these common questions about Easy Broccoli Salad With Italian Dressing, you not only provide your readers with reassurance but also encourage them to embark on their culinary journey, embracing healthy recipes in their daily cooking.

    With its delightful mix of flavors, textures, and a myriad of health benefits, Easy Broccoli Salad With Italian Dressing is set to become a beloved staple in your kitchen. Whether shared at a social gathering or enjoyed as a solo treat, this recipe embodies the best of healthy recipes, inviting everyone to savor the health benefits of fresh, wholesome ingredients. Enjoy!

  • I CanT Stop Making This Crispy Broccoli Salad

    I CanT Stop Making This Crispy Broccoli Salad

    I Can’T Stop Making This Crispy Broccoli Salad: A Tropical Delight

    Introduction to I Can’T Stop Making This Crispy Broccoli Salad

    Are you searching for healthy dinner recipes that delight your taste buds while being incredibly simple to prepare? Look no further! I Can’T Stop Making This Crispy Broccoli Salad is an irresistible dish that bursts with flavor and nutrition. Perfect for busy weeknights, potlucks, or as a quick side for any meal, this recipe will quickly become a staple in your kitchen.

    Imagine fresh, crisp broccoli combined with tropical elements like pineapple and coconut, all tied together with a zesty dressing. The contrast of textures—from crunchy nuts to tender broccoli—creates a delightful mouthfeel that makes every bite exciting. Additionally, this salad is vegan-friendly, gluten-free, and low-calorie, making it accessible for various dietary preferences. With its vibrant colors and refreshing taste, it not only enchants your palate but also serves as a visual treat.

    By incorporating wholesome ingredients like broccoli, which is packed with vitamins and minerals, this salad is more than just a side dish; it’s a nutritional powerhouse. Whether you’re trying to eat healthier, impress guests, or simply enjoy cooking, this crispy broccoli salad is the answer. So, let’s dive into this delightful recipe that promises to elevate your dining experience!

    Benefits and Advantages of I Can’T Stop Making This Crispy Broccoli Salad

    This Crispy Broccoli Salad sets itself apart from typical salad recipes in numerous ways. Here are some compelling reasons why you should add it to your meal rotation:

    1. Easy Preparation

    One of the most significant advantages of this recipe is its ease of preparation. With straightforward instructions and minimal cooking time, you can whip up this salad in under 30 minutes. Ideal for busy parents or students, it requires no complex culinary skills—just a bit of chopping and mixing!

    2. Nutritional Powerhouse

    Broccoli is known for its numerous health benefits, including being rich in vitamin C, vitamin K, and various antioxidants. Not only does it help boost your immune system, but it also promotes digestion and supports heart health. This salad combines broccoli with other nutrient-dense ingredients like nuts and pineapple, delivering an array of vitamins and minerals in every bite.

    3. Versatile and Customizable

    This salad can easily be adapted to meet various dietary needs. Whether you follow a vegan diet, are gluten intolerant, or simply want a lighter meal, this recipe fits the bill. You can even experiment with different dressings or toppings based on your personal preferences.

    4. Delicious Flavor Combination

    The unique combination of flavors—crunchy broccoli, sweet pineapple, creamy avocado, and zesty dressing—creates an explosion of taste that will make your palate rejoice. It’s a fantastic way to make vegetables appealing to kids and adults alike.

    5. Meal Prep Friendly

    Not only is this salad delicious and easy to prepare, but it’s also perfect for meal prepping. You can make a batch at the start of the week, store it in the fridge, and enjoy it throughout the week as a snack, side dish, or even a light lunch.

    By focusing on the advantages listed above, you can understand why I Can’T Stop Making This Crispy Broccoli Salad is not only a dish worth trying but also a recipe that aligns perfectly with your health-conscious lifestyle.

    Ingredients Overview

    Essential Ingredients for I Can’T Stop Making This Crispy Broccoli Salad

    To create this delightful salad, you’ll need the following ingredients:

    • 2 heads of fresh broccoli (approximately 4 cups, chopped)
    • 1 cup of pineapple chunks (fresh or canned in juice)
    • 1/2 cup of sliced almonds or sunflower seeds (for crunch)
    • 1/4 cup of shredded coconut (unsweetened preferred)
    • 1 ripe avocado (diced)
    • 1/2 red onion (finely chopped)
    • 1/4 cup of olive oil (for dressing)
    • 2 tablespoons of apple cider vinegar (for tanginess)
    • 1 tablespoon of maple syrup or honey (adjust to taste)
    • Salt and pepper to taste
    • Optional: 1 tablespoon of sesame seeds (for garnish)

    Gluten-Free and Vegan Options

    • Use gluten-free soy sauce instead of regular if you want to add a umami flavor.
    • Substitute honey with maple syrup or agave nectar for a vegan-friendly option.

    Dietary Substitutions to Customize Your I Can’T Stop Making This Crispy Broccoli Salad

    Making this salad suitable for various dietary preferences is simpler than you might think. Here are some suggested substitutions:

    • Nut Allergy: If you or your loved ones have a nut allergy, replace sliced almonds with seeds like pumpkin or sunflower seeds.
    • No Avocado: If you don’t have avocado on hand or are not a fan, you can omit it or substitute it with diced cucumber for a refreshing crunch.
    • Different Vegetables: Feel free to add or replace vegetables based on your preferences—carrots, bell peppers, or even peas work wonderfully in this salad.
    • Customized Dressing: If you prefer a different flavor profile for your dressing, a tahini-based or yogurt dressing can add an interesting twist.

    These substitutions allow you to tailor this salad to fit your preferences, making it not just a recipe, but a customizable culinary experience.

    How to Prepare the Perfect I Can’T Stop Making This Crispy Broccoli Salad: Step-by-Step Guide

    Follow these easy steps to create your own I Can’T Stop Making This Crispy Broccoli Salad in no time.

    1. Prepare the Broccoli

    Begin by rinsing two heads of fresh broccoli under cold water. Shake off any excess water, and then chop the broccoli into bite-sized florets. You may also include the chopped stems for added crunch. Place the broccoli in a large mixing bowl and set aside.

    2. Add the Pineapple

    Next, incorporate one cup of pineapple chunks into the bowl with the broccoli. If you’re using canned pineapple, make sure to drain it well. The pineapples will add a sweet, tropical flavor that enhances the overall taste of your salad.

    3. Mix in the Nuts and Coconut

    Now, add in half a cup of sliced almonds or sunflower seeds for a satisfying crunch, along with a quarter cup of shredded coconut (unsweetened preferred) for added sweetness and texture. Mixing these ingredients into the bowl right away helps to ensure that they are evenly distributed.

    4. Prepare the Dressing

    In a separate small bowl, whisk together a quarter cup of olive oil, two tablespoons of apple cider vinegar, and one tablespoon of maple syrup or honey until well combined. Taste the dressing and add salt and pepper to your preference. If you like a bit of zing, consider adding a pinch of red pepper flakes.

    5. Combine Everything Together

    Pour the dressing over the broccoli mixture. Use a spatula or tongs to gently toss everything together, ensuring that the dressing coats all the ingredients well. Be careful not to mash the avocado, as you will add it in the next step.

    6. Incorporate the Avocado

    Add one diced ripe avocado to the bowl. Again, gently toss everything together. The creaminess of the avocado balances perfectly with the crunchiness of the broccoli and the sweetness of the pineapple.

    7. Garnish and Serve

    Finally, for an added flair, sprinkle some sesame seeds on top of the salad before serving. Serve immediately or allow it to chill in the fridge for about 15-30 minutes for the flavors to meld beautifully together.

    This quick yet delightful salad is perfect for those looking for healthy dinner recipes that can be put together effortlessly, ensuring you have more time to relax and enjoy your meal.

    Mastering I Can’T Stop Making This Crispy Broccoli Salad: Advanced Tips and Variations

    To elevate your experience with I Can’T Stop Making This Crispy Broccoli Salad, consider the following advanced tips and variations:

    Add Protein

    For a more filling meal, toss in some protein-rich ingredients, such as grilled chicken, chickpeas, or tofu. This addition transforms the salad from a side dish to a complete meal.

    Experiment with Dressings

    While the maple and olive oil dressing is delicious, you can explore other dressing options. A tahini-based dressing or a creamy ranch (using a plant-based yogurt) can completely change the flavor profile while keeping it healthy.

    Incorporate Extra Veggies

    Feel free to add more varieties of vegetables for added color and nutrients. Carrots, bell peppers, or even edamame can enhance the salad’s visual appeal and nutritional content.

    Infuse Flavors with Herbs

    Fresh herbs can brighten up your salad even more. Consider adding chopped cilantro, parsley, or even mint for a refreshing twist that complements the tropical elements.

    Seasonal Variations

    Don’t hesitate to modify the recipe based on seasonal availability. For instance, during the fall, adding roasted butternut squash gives it a delicious autumnal touch.

    These tips allow you to make I Can’T Stop Making This Crispy Broccoli Salad unique to your tastes while maintaining the essence of the recipe.

    How to Store I Can’T Stop Making This Crispy Broccoli Salad: Best Practices

    To keep your I Can’T Stop Making This Crispy Broccoli Salad fresh for longer, follow these best practices for storage:

    Refrigeration

    Store any leftover salad in an airtight container in the refrigerator. It’s best consumed within 3 days for optimal freshness, but refrigeration will allow it to last up to 5 days. Note that the avocado will brown over time, so it’s best to store the salad without it if you plan to keep it for more than a day.

    Freezing

    While this salad is not particularly freezer-friendly due to the high water content in fresh vegetables, you can prepare the dressing and store it separately in a sealed container in the freezer for up to a month. When ready to use, just thaw the dressing and fresh ingredients before combining them.

    Reheating

    Generally, it’s best to enjoy this salad cold, but if you prefer a warm meal, consider lightly sautéing the broccoli before adding other ingredients. Just remember that you might lose some crunch.

    By adhering to these storage methods, you can enjoy your I Can’T Stop Making This Crispy Broccoli Salad throughout the week while ensuring maximum freshness and flavor.

    Nutritional Value of I Can’T Stop Making This Crispy Broccoli Salad

    Understanding the nutritional content of your meals, especially when considering healthy dinner recipes, is crucial for maintaining a balanced diet. Here’s a breakdown of the nutritional values you can expect from one serving of I Can’T Stop Making This Crispy Broccoli Salad:

    • Calories: Approximately 220
    • Total Fat: 16g
    • Saturated Fat: 3g
    • Cholesterol: 0mg
    • Sodium: 150mg
    • Total Carbohydrates: 21g
    • Dietary Fiber: 6g
    • Sugars: 3g
    • Protein: 4g

    Vitamins and Minerals

    This salad is an excellent source of:

    • Vitamin A: Supports eye health and immune function
    • Vitamin C: Important for skin health and immune system
    • Vitamin K: Helps with blood clotting and bone health
    • Folate: Essential for cell division and DNA synthesis
    • Potassium: Helps regulate blood pressure

    By incorporating this salad into your meals, you are providing your body with a plethora of essential nutrients. It’s a guilt-free addition to your meal plan that aligns perfectly with various dietary needs.

    FAQs: Frequently Asked Questions About I Can’T Stop Making This Crispy Broccoli Salad

    Can I prepare this salad ahead of time?

    Absolutely! You can prepare the salad and store it in the refrigerator. However, it’s best to add the avocado and dressing just before serving to maintain freshness.

    Is it possible to customize the salad for different diets?

    Yes! With the suggested substitutions for nuts, proteins, and dressings, this salad can cater to various dietary needs, including vegan, gluten-free, or lower-calorie diets.

    Can I use frozen broccoli instead of fresh?

    While it’s ideal to use fresh broccoli for the best texture and flavor, you can use frozen broccoli. Just make sure to thaw and drain it well before adding it to the salad.

    How do I prevent the avocado from browning?

    To minimize browning, you can toss the avocado with a bit of lemon or lime juice before adding it to the salad. Additionally, storing the salad in an airtight container can help limit exposure to air.

    What can I serve this salad with?

    This salad pairs wonderfully with grilled meats, sandwiches, or as a stand-alone light meal. It also complements various cuisines, making it versatile for any dining occasion.

    I Can’T Stop Making This Crispy Broccoli Salad is an exceptional recipe that checks all the boxes for easy preparation, health benefits, and deliciousness. No wonder I can’t stop making it! So what are you waiting for? Gather your ingredients and indulge in a bowl of this vibrant dish today!

  • Best Keto Greek Yogurt Cookies

    Best Keto Greek Yogurt Cookies

    Best Keto Greek Yogurt Cookies: A Tropical Delight

    Introduction to Best Keto Greek Yogurt Cookies

    If you’re on the lookout for delicious and easy-to-make cookie recipes, look no further than these Best Keto Greek Yogurt Cookies. This recipe combines the tangy goodness of Greek yogurt with the warmth of tropical flavors, making it a delightful treat for anyone following a ketogenic diet or simply aiming to reduce sugar intake. These cookies are not only low in carbs but are also packed with protein, resulting in a wholesome snack that satisfies your sweet tooth without the guilt.

    Imagine biting into a soft, chewy cookie that feels indulgent yet is laden with nutrients. What sets these cookies apart is their versatility. They cater to various dietary needs; they’re gluten-free, and you can easily tailor them to be vegan-friendly. Whether you’re a busy parent looking to whip up a quick treat for your kids, a health-conscious individual wanting to stay on track with your diet, or a baking enthusiast eager to experiment in the kitchen, this recipe is the right fit for you. Not only do they tantalize the taste buds, but they also invite opportunities for creativity, as you can mix in your favorite flavors or toppings. Let’s dive into this tropical delight and discover why you should make these Best Keto Greek Yogurt Cookies today!

    Benefits and Advantages of Best Keto Greek Yogurt Cookies

    Baking is an exciting journey, and finding the perfect cookie recipes that match your lifestyle can be challenging. However, the Best Keto Greek Yogurt Cookies stand out due to their outstanding health benefits and ease of preparation. Here’s why you should consider adding this cookie recipe to your baking repertoire.

    1. Health-Conscious Ingredients: Made with Greek yogurt, these cookies contain valuable nutrients and protein that help maintain muscle mass and support gut health. The yogurt also introduces probiotics essential for digestion, making these cookies a healthier option than traditional dessert recipes often loaded with sugar and calories.

    2. Keto-Friendly: With minimal carbohydrates, these cookies seamlessly fit into a ketogenic lifestyle. They provide a tasty solution for those craving sweets while striving to stay within their macro counts. The low sugar content means you won’t have to worry about blood sugar spikes.

    3. Simplicity: The ingredient list is minimal, and the steps to create these cookies are straightforward, encouraging even novice bakers to try their hand at cookie-making. You won’t need special equipment or complicated techniques; just basic kitchen tools and a few wholesome ingredients.

    4. Customizable: Another significant advantage is the ability to customize flavors and mix-ins to fit different tastes and dietary preferences. Whether you prefer adding nuts, seeds, dark chocolate chunks, or even dried fruits, the possibilities are endless. You can easily adapt the recipe according to the flavors you enjoy or what you have on hand.

    5. Suitable for the Whole Family: These cookies cater to various dietary needs. With a few adjustments, they can be gluten-free and dairy-free, making them perfect for families with particular dietary restrictions.

    6. Quick Preparation Time: Perfect for busy parents or individuals on the go, these cookies can be prepared in under 30 minutes. You don’t have to plan a whole day for baking, making it easy to whip up a batch whenever cravings strike.

    In essence, the Best Keto Greek Yogurt Cookies are not just a snack; they’re a nutritious treat that allows you to enjoy dessert without the added sugars and unhealthy fats. Why not embrace the joy of baking while nourishing your body with wholesome ingredients?

    Ingredients Overview

    Essential Ingredients for Best Keto Greek Yogurt Cookies

    Here is a detailed list of all the essential ingredients you’ll need to make the Best Keto Greek Yogurt Cookies, complete with precise measurements and explanations on their benefits:

    • 1 cup Greek yogurt (preferably full-fat): Adds moisture, protein, and tanginess, functioning as a great binding agent while cutting down on the need for added fats. Ideal for keeping the cookies soft and chewy.

    • 1 cup almond flour (or coconut flour for a gluten-free option): Provides the necessary structure and a subtle nutty flavor. Almond flour is lower in carbs compared to traditional wheat flour, making it keto-friendly.

    • 1/4 cup erythritol (or another keto-friendly sweetener): A natural sugar substitute that provides sweetness without the calories or sugar spikes, making it perfect for those on a keto diet.

    • 1 large egg: Serves as a binder and helps with the cookie’s rise. It also contributes protein to the recipe.

    • 1 tsp baking powder: Helps the cookies rise and create the desired texture.

    • 1 tsp vanilla extract: Adds depth and a sweet, inviting flavor that elevates the overall taste of the cookies.

    • 1/2 cup sugar-free chocolate chips (optional): Adds a delicious hint of chocolate while keeping the carbs in check. You can also use nuts or dried fruit based on your preference.

    Optional Toppings and Add-Ins

    • Shredded coconut: For a tropical flair and added texture.
    • Chopped nuts: Such as walnuts or pecans, for extra crunch and healthy fats.
    • Spices: A dash of cinnamon or nutmeg can bring warmth to your cookies.

    Dietary Substitutions to Customize Your Best Keto Greek Yogurt Cookies

    To ensure that everyone can enjoy these delectable cookies, consider these dietary substitutions:

    • Vegan Version: Replace the egg with a flaxseed meal or chia seed egg substitute (1 tbsp of flaxseed meal or chia seeds soaked in 2.5 tbsp of water for 15 minutes).

    • Gluten-Free Options: Stick with almond flour or try using a gluten-free all-purpose blend to keep the cookies free from gluten and still delicious.

    • Low-Calorie Sweetener Options: If erythritol isn’t available, consider Monk Fruit sweetener or stevia, adjusting to taste as each sweetener has different levels of sweetness.

    • Nut-Free: Use oat flour as a substitute for almond flour to make the cookies nut-free while still maintaining a low-carb count.

    These substitutions not only enhance the cookies but also ensure that they can be tailored for those with various dietary restrictions. By modifying a few ingredients, you can create a cookie that meets any dietary requirement without sacrificing taste.

    How to Prepare the Perfect Best Keto Greek Yogurt Cookies: Step-by-Step Guide

    Baking the Best Keto Greek Yogurt Cookies is a rewarding experience that anyone can enjoy. Here’s your detailed step-by-step guide on how to whip up this tropical delight:

    1. Prepare the Base: Preheat your oven to 350°F (175°C) and line a baking sheet with parchment paper. This ensures that your cookies don’t stick and makes cleanup easy.

    2. Mix Ingredients: In a large mixing bowl, combine the Greek yogurt, erythritol, and egg. Use a whisk or a spatula to thoroughly mix these ingredients together until smooth. The yogurt should be creamy and well-blended with the sweetener and egg.

    3. Combine Dry Ingredients: In a separate bowl, mix the almond flour and baking powder. This ensures even distribution of the baking powder throughout the cookies, leading to a uniform rise and texture.

    4. Add Dry to Wet: Gradually incorporate the dry mixture into the wet mixture. Stir gently until fully combined. It’s crucial to not over-mix; simply combine until you see no dry flour.

    5. Incorporate Flavorings: At this point, add in the vanilla extract and any optional add-ins like sugar-free chocolate chips or shredded coconut. Mix gently just until evenly distributed.

    6. Scoop Cookies: Using a cookie scoop or spoon, drop the dough onto the prepared baking sheet, spacing them a couple of inches apart. These cookies won’t spread much, so you can shape them as desired.

    7. Bake: Place the baking sheet in the preheated oven and bake for about 10-12 minutes or until the edges are light golden brown. The center will remain soft, which is perfect for a chewy texture.

    8. Cool: Allow the cookies to cool on the baking sheet for five minutes before transferring them to a wire rack to cool completely. This step is essential for achieving the right texture.

    9. Enjoy or Store: Once cooled, enjoy your tropical treats with a cup of tea or coffee. Alternatively, store them in an airtight container for later.

    10. Freezing (Optional): If you’d like to make a batch ahead of time, these cookies freeze beautifully! Just make sure they’re fully cooled before storage.

    Throughout the preparation, feel free to adapt the instructions based on dietary needs; the beauty of these cookies is in their versatility!

    Mastering Best Keto Greek Yogurt Cookies: Advanced Tips and Variations

    While the Best Keto Greek Yogurt Cookies are simple and delicious on their own, here are some advanced tips and variations to elevate your cookie-baking experience:

    1. Flavor Variations: Experiment with different flavor extracts! For instance, almond extract can give a delightful twist, or consider orange or mint extract for a refreshing change.

    2. Mix-In Ideas: Create your own custom flavor profile by adding spices like cinnamon or cardamom. You can also incorporate cocoa powder for chocolate-flavored cookies.

    3. Texture Adjustment: If you prefer a crunchier cookie, consider briefly chilling the dough before baking. This helps them hold their shape better and provides a firmer bite.

    4. Cookies as a Base: Use these cookies as a base for ice cream sandwiches – simply place your favorite keto-friendly ice cream between two cookies for a decadent treat!

    5. Frosting Options: A keto-friendly cream cheese frosting drizzled on top transforms these cookies into an elevated dessert without sacrificing health goals.

    Experimenting with these tips can enhance your baking journey and allow you to create unique versions of the Best Keto Greek Yogurt Cookies. The pleasure of baking extends beyond following the recipe; it’s about personalizing your experience!

    How to Store Best Keto Greek Yogurt Cookies: Best Practices

    Proper storage extends the life of your delicious cookies while preserving their texture and taste. Here’s how to keep your Best Keto Greek Yogurt Cookies in top condition:

    Room Temperature

    • Airtight Container: Store cookies in an airtight container at room temperature for up to five days. Just ensure they’re completely cool before sealing, or moisture may build up and lead to sogginess.

    Refrigeration

    • Chilled Storage: If you want your cookies to last longer, storing them in the refrigerator increases their shelf life to about two weeks. Again, place them in a sealed container, but ensure they’re spaced apart to avoid sticking.

    Freezing

    • Long-Term Storage: To freeze your cookies, place them in a single layer in a freezer-safe container. You can separate layers with parchment paper to prevent sticking. Properly stored, they’ll keep for up to three months. When ready to eat, thaw at room temperature or warm them in the microwave for a few seconds for that fresh-baked taste.

    By following these best practices, you can always have a delightful treat ready to accompany your coffee, satisfying your sweet tooth without straying from your dietary goals.

    Nutritional Value of Best Keto Greek Yogurt Cookies

    Knowing the nutritional content of your meals can help you stay aligned with your dietary goals. Here’s a breakdown of the nutritional value for one Best Keto Greek Yogurt Cookie (assuming the recipe yields 12 cookies):

    • Calories: 110
    • Total Fat: 6g
    • Saturated Fat: 1g
    • Cholesterol: 30mg
    • Sodium: 50mg
    • Total Carbohydrates: 4g
    • Dietary Fiber: 2g
    • Sugars: 0g
    • Protein: 4g

    These cookies present an excellent snack with balanced macros suitable for those on a keto plan. They offer ample protein while keeping carbohydrates low, making them a healthier alternative to traditional cookie recipes.

    Feel free to adjust the measurements or ingredients based on your dietary needs while maintaining a healthy balance of nutrition.

    FAQs: Frequently Asked Questions About Best Keto Greek Yogurt Cookies

    1. Can I substitute Greek yogurt for regular yogurt?
    2. Yes! However, Greek yogurt has a higher protein content, which contributes to a better texture. Non-fat or low-fat yogurt could work, but might alter the final result.

    3. What can I use instead of almond flour?

    4. You can use coconut flour, which is a great low-carb alternative. Just remember that coconut flour absorbs more moisture, so adjust the liquid in the recipe accordingly.

    5. How can I make these cookies vegan?

    6. You can replace the egg with a flaxseed or chia seed egg, as mentioned earlier, creating a plant-based option without sacrificing flavor.

    7. Can I add protein powder to the recipe?

    8. Absolutely! You can add in powdered protein, but reduce the almond flour slightly, as protein powder may change the dough’s consistency.

    9. What sweeteners can I use besides erythritol?

    10. Other keto-friendly options include monk fruit sweetener or stevia. Always adjust to taste, as sweetness can vary significantly between sweeteners.

    These FAQs should help clarify common concerns and enable you to adapt the Best Keto Greek Yogurt Cookies to suit your needs perfectly.

    The Best Keto Greek Yogurt Cookies are not just a treat; they are a celebration of healthy baking that can be enjoyed by everyone, regardless of dietary restrictions or preferences. Embrace the joy of baking these cookies and experience the delightful flavors and textures they offer! Happy baking! 🍪

  • Sweet Lemon Broccoli Salad

    Sweet Lemon Broccoli Salad

    Sweet Lemon Broccoli Salad: A Tropical Delight

    Introduction to Sweet Lemon Broccoli Salad

    If you’re on the hunt for healthy recipes that are both delightful and uncomplicated, then look no further than the Sweet Lemon Broccoli Salad. This vibrant dish combines the robust flavors of fresh broccoli with a zesty lemon dressing, creating a refreshing salad that makes an excellent addition to any meal—or even a tantalizing dish all on its own.

    Not only is this recipe simple and quick to prepare, but it’s also packed with nutrients that offer numerous health benefits. Broccoli is loaded with vitamins K and C, fiber, and antioxidants. Moreover, the sweet and tangy notes of the lemon dressing elevate the dish while keeping it light and invigorating. Whether you’re vegan, gluten-free, or simply looking to include more plant-based meals in your diet, this salad ticks all the boxes.

    Ideal for busy parents looking for a nutritious meal prep option, food enthusiasts eager to experiment in the kitchen, or anyone who enjoys the simplicity of making delightful, healthy recipes at home, the Sweet Lemon Broccoli Salad is an inspired choice. It’s perfect for sharing at gatherings and adaptative enough for various palates, ensuring everyone will find joy in this scrumptious dish.

    Benefits and Advantages of Sweet Lemon Broccoli Salad

    The Sweet Lemon Broccoli Salad is more than just a pretty dish—it’s a powerhouse of health benefits and unparalleled convenience. One of its greatest advantages lies in its ease of preparation. With minimal cooking time and simple steps, you can whip up this delectable salad in less than 30 minutes! This is particularly beneficial for busy professionals and students who need meals that fit into a tight schedule without compromising on nutrition.

    From a health perspective, the core ingredient, broccoli, stands out as a superfood. Rich in fiber, it promotes digestive health while also contributing to a sense of fullness that can help manage your weight. Furthermore, it’s known for its cancer-fighting properties due to the presence of sulforaphane, an antioxidant that supports the body’s detoxification process.

    The inclusion of fresh ingredients offers a balance of vitamins, minerals, and healthy fats, especially when you incorporate wholesome nuts or seeds, making it a great option for anyone seeking healthy recipes that nourish the body. The bright lemon dressing not only tantalizes the taste buds but also provides Vitamin C, which is essential for immune function.

    This salad is not only nutritious but also versatile. It can easily be customized to suit different dietary preferences; whether you want to add proteins like grilled chicken, tofu, or chickpeas to make it heartier, or simply keep it plant-based and refreshing, the Sweet Lemon Broccoli Salad adapts seamlessly. Its gluten-free nature and vegan options allow it to cater to a wide audience—making it an ideal dish for gatherings where dietary restrictions might be in play.

    Ingredients Overview

    Essential Ingredients for Sweet Lemon Broccoli Salad

    To create the perfect Sweet Lemon Broccoli Salad, you will need the following ingredients:

    • 2 cups fresh broccoli florets
      Packed with vitamins and minerals, broccoli provides fiber and antioxidants.

    • 1 cup cherry tomatoes, halved
      These add a sweet burst of flavor along with Vitamin C and lycopene, which is beneficial for heart health.

    • 1/4 cup red onion, thinly sliced
      Provides a spicy crunch along with Vitamin B6 and antioxidants.

    • 1/4 cup nuts (walnuts or almonds), chopped
      Offers healthy fats and proteins. Walnuts are rich in Omega-3 fatty acids.

    • 1/4 cup feta cheese (optional for non-vegan version)
      A delicious creamy addition that provides calcium and protein.

    • For the dressing:

    • Juice of 1 large lemon
      The star of the dish, offering a refreshing zest packed with Vitamin C.
    • 2 tablespoons olive oil
      A source of healthy fats that helps absorb fat-soluble vitamins.
    • 1 tablespoon honey or maple syrup (for vegan version)
      Adds sweetness and can help manage blood sugar levels.
    • Salt and pepper to taste
      Enhances all the flavors in the salad.

    Note: All ingredients are naturally gluten-free, and using maple syrup instead of honey makes the salad vegan-friendly. The recipe remains low-calorie while being rich in nutrients, making it an ideal candidate for your list of healthy recipes.

    Dietary Substitutions to Customize Your Sweet Lemon Broccoli Salad

    Customizing your Sweet Lemon Broccoli Salad to fit specific dietary needs is easy. Here are some suggestions:

    • For a Protein-Packed Version:
    • Add Grilled Chicken or Tofu: Including proteins like grilled chicken strips or marinated tofu can make the salad more filling.
    • Add Canned Chickpeas: This is a great way to add fiber and protein while keeping the salad entirely plant-based.

    • For a Low-Carb Option:

    • Skip the Honey: For a lower sugar option, you can leave out sweeteners or replace them with a sugar substitute like erythritol.
    • Remove the Cherry Tomatoes: While tomatoes are healthy, you can eliminate them for a more strictly low-carb option.

    • For a Nut-Free Version:

    • Skip the Nuts: Omit the nuts altogether or substitute sunflower seeds, which still provide a crunch without tree nuts.
    • Use Pumpkin Seeds: These can dramatically enhance the flavor profile while keeping it safe for those with nut allergies.

    By implementing these substitutions, the Sweet Lemon Broccoli Salad can easily adapt, maintaining its delicious taste while ensuring it meets varied dietary needs and preferences.

    How to Prepare the Perfect Sweet Lemon Broccoli Salad: Step-by-Step Guide

    Creating this delightful Sweet Lemon Broccoli Salad is not only straightforward but a fun activity to engage culinary skills. Here’s how you can prepare it step-by-step:

    1. Prepare the Base:
    2. Start by rinsing the fresh broccoli florets thoroughly under cold water. Pat them dry with a kitchen towel.

    3. Blanch the Broccoli:

    4. Bring a pot of salted water to a boil. Add the broccoli florets and blanch them for about 1-2 minutes until they turn bright green. This step will keep them crisp while enhancing their color.

    5. Shock the Broccoli:

    6. Remove the broccoli with a slotted spoon and immediately immerse them in a bowl of ice water to halt the cooking process. Drain once cooled and set aside.

    7. Chop Additional Ingredients:

    8. While the broccoli cools, slice the cherry tomatoes, red onion, and any nuts you’re using (like walnuts or almonds). If you choose to add feta cheese, crumble it into smaller pieces.

    9. Prepare the Dressing:

    10. In a small bowl, whisk together the lemon juice, olive oil, honey (or maple syrup), salt, and pepper until well combined. Taste and adjust seasoning if needed.

    11. Combine the Salad:

    12. In a large mixing bowl, add the blanched broccoli, sliced cherry tomatoes, chopped nuts, and red onion. Pour the dressing over the top and toss gently to combine all ingredients.

    13. Taste and Adjust:

    14. Take a moment to taste your salad. Feel free to add more lemon juice for extra zing, or a sprinkle of salt and pepper to enhance the flavors.

    15. Garnish and Serve:

    16. If desired, garnish your salad with crumbled feta cheese or additional nuts for an aesthetic finish. Serve immediately for the freshest flavor, or chill in the refrigerator for 30 minutes to allow the flavors to meld.

    Remember, this Sweet Lemon Broccoli Salad is versatile, and you can easily customize it based on your dietary preferences while still adhering to the principles of healthy recipes.

    Mastering Sweet Lemon Broccoli Salad: Advanced Tips and Variations

    There’s always room to elevate your Sweet Lemon Broccoli Salad with these tips and variations:

    1. Add Fresh Herbs: Incorporate fresh herbs like parsley, basil, or dill to bring an aromatic kick to the salad. Herbs can also help in digestion and add significant flavor without additional calories.

    2. Experiment with Dressings: Feel free to try different dressings. A mustard vinaigrette or a sesame ginger dressing can completely change the flavor profile, keeping the dish exciting.

    3. Mix It Up with Seasonal Veggies: Depending on the season, feel free to mix in seasonal vegetables like asparagus in the spring or roasted squash in the fall to add variety and freshness.

    4. Spice It Up: If you enjoy a bit of heat, add a pinch of red pepper flakes or sliced jalapeños to add an exciting layer of flavor.

    5. Serve as a Side or Main Dish: This salad can go beyond a side dish; top it with grilled salmon or chicken for a full meal. It’s satisfying enough to serve as the main event yet light and fresh.

    These advanced tips and variations allow you to play with the recipe, encouraging creativity while ensuring you enjoy a delicious and nutritious dish that embodies the essence of healthy recipes.

    How to Store Sweet Lemon Broccoli Salad: Best Practices

    Storing your Sweet Lemon Broccoli Salad properly can ensure that it stays fresh and tasty for later enjoyment. Here are the best practices:

    1. Refrigeration:
    2. If you have leftovers, store the salad in an airtight container in the refrigerator. The salad is best consumed within 3-4 days for optimal freshness.

    3. Avoid Sogginess:

    4. If you plan to keep the salad for a couple of days, consider storing the dressing separately to prevent the salad from getting soggy. Toss it just before serving for the best texture.

    5. Freezing Guidance:

    6. While this salad is best fresh, if you have a lot of leftovers, you can freeze the broccoli florets after blanching. Keep the other ingredients separate. This allows you to prepare a fresh batch of salad whenever you desire.

    7. Reheating Tips:

    8. If you’ve included any grilled proteins, they can be quickly reheated in a microwave or skillet. However, fresh vegetables are best enjoyed cold or at room temperature, so avoid reheating them.

    By following these storage guidelines, you can ensure your Sweet Lemon Broccoli Salad remains a go-to choice for your collection of healthy recipes!

    Nutritional Value of Sweet Lemon Broccoli Salad

    When it comes to healthy recipes, understanding the nutritional value is essential. The Sweet Lemon Broccoli Salad is not only nutrient-dense but also low in calories, making it perfect for any health-conscious lifestyle.

    Here’s a breakdown of the average nutritional values for one serving (approximately 1 cup):

    • Calories: 150
    • Total Fat: 10g (healthy fats from olive oil and nuts)
    • Saturated Fat: 1.5g
    • Cholesterol: 5mg (if using feta cheese)
    • Sodium: 85mg (can be adjusted based on salt use)
    • Total Carbohydrates: 12g
    • Dietary Fiber: 5g
    • Sugars: 2g (natural sugars from vegetables)
    • Protein: 4g

    The salad contains a wealth of vitamins and minerals, including Vitamin A, Vitamin C, calcium, and potassium. The fiber content assists in digestion, while the antioxidants present in broccoli and tomatoes support overall health.

    Adding proteins like chicken or chickpeas will adjust the nutritional values but enhance the beneficial aspects of your meal. Whether you’re tracking macros, managing your weight, or just looking for ways to incorporate more healthy recipes into your cooking routine, this salad delivers on all fronts.

    FAQs: Frequently Asked Questions About Sweet Lemon Broccoli Salad

    1. Can I make this salad ahead of time?

    Yes! You can prepare the salad and store it in the fridge for up to 3-4 days. Ideally, keep the dressing separate until you’re ready to serve to maintain the crispness of the ingredients.

    2. What if I don’t have honey? Can I use something else?

    Absolutely! You can substitute honey with maple syrup or agave nectar for a vegan-friendly option. If you prefer a sugar-free choice, consider using a sugar substitute like stevia or erythritol.

    3. Is the salad gluten-free?

    Yes, the Sweet Lemon Broccoli Salad is inherently gluten-free, making it suitable for those with gluten sensitivities or celiac disease.

    4. How can I bulk up this salad for meal prep?

    You can easily add protein sources such as grilled chicken, chickpeas, lentils, or even quinoa to make this salad heartier and more filling.

    5. Can I use frozen broccoli?

    While fresh broccoli provides the best texture and flavor, frozen broccoli can be used in a pinch. Just be sure to thaw and drain it thoroughly before using it in the salad.

    6. What else can I add for flavor?

    Feel free to experiment with additions like nuts (almonds or pecans), seeds (pumpkin or sunflower), or even fresh herbs (basil, cilantro, parsley) for added layers of flavor.

    With these insights and tips, you’re now equipped to create a delicious and nutritious Sweet Lemon Broccoli Salad that can fit into your repertoire of healthy recipes! Enjoy bringing this joyful dish to your table, and savor the delightful flavors it offers.