Blog

  • The Best Peruvian Chicken Rice

    The Best Peruvian Chicken Rice

    The Best Peruvian Chicken Rice: A Tropical Delight

    Introduction to The Best Peruvian Chicken Rice

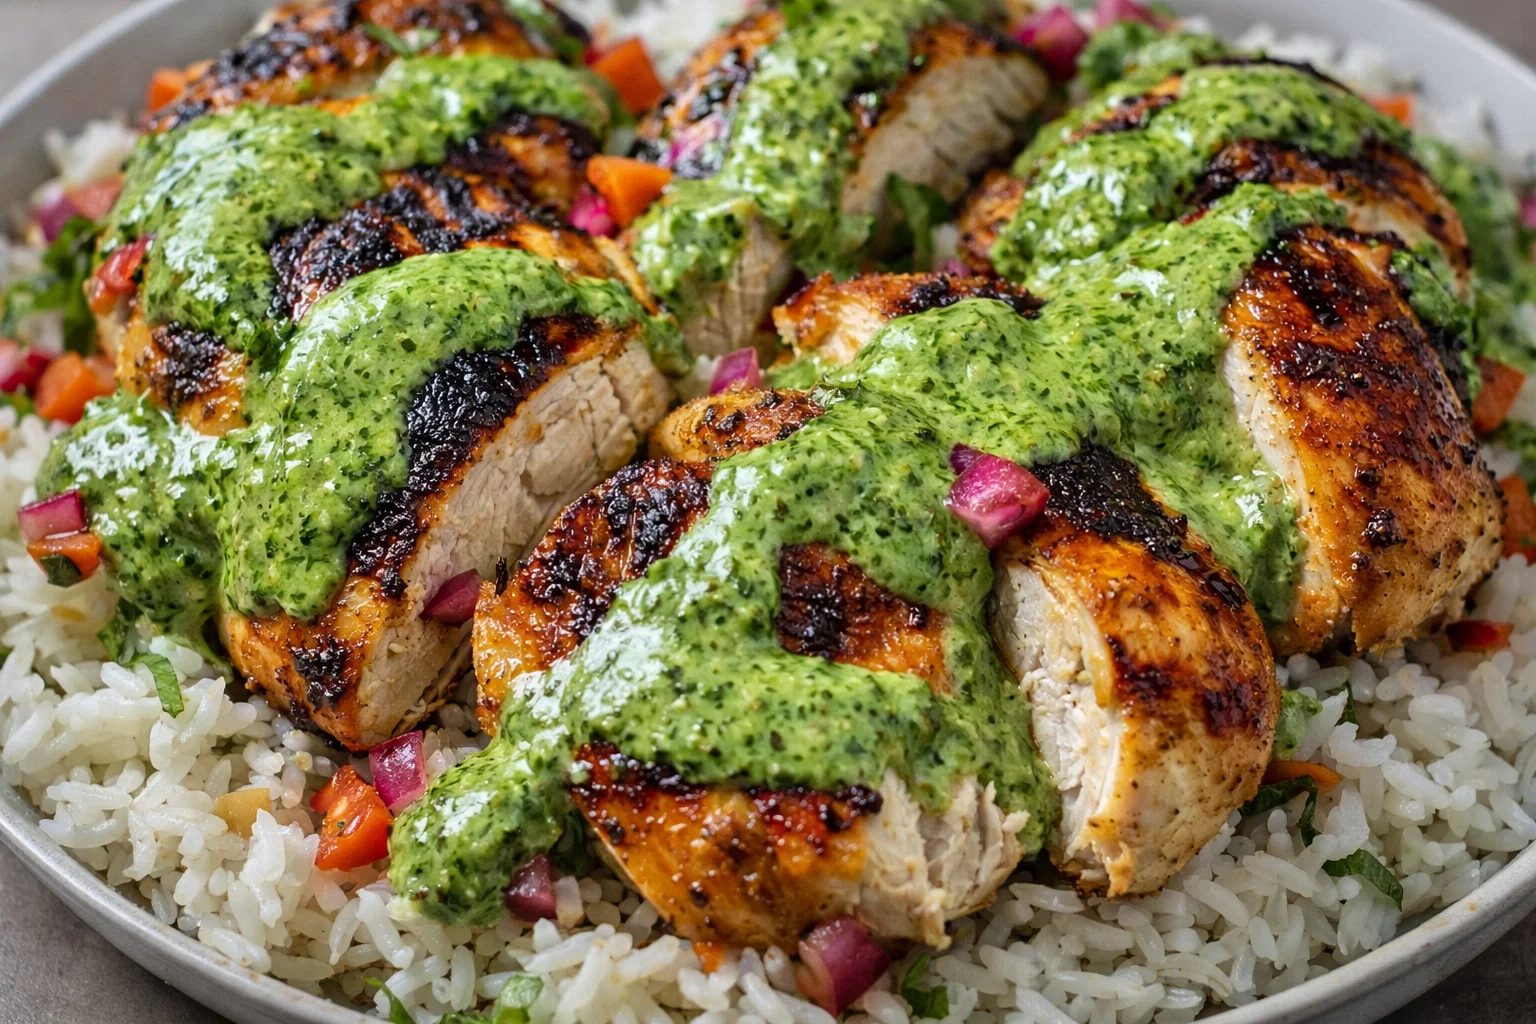
    Welcome to a culinary adventure that will transport you straight to the heart of Peru! The Best Peruvian Chicken Rice is not just a dish; it’s an experience that combines rich flavors, aromatic spices, and vibrant colors in one pot. This recipe promises a delightful fusion of tender chicken and savory rice, infused with the exotic essence of Peruvian cuisine. If you’re on the lookout for chicken recipes that are both simple to make and brimming with flavor, you’ve just struck culinary gold!

    What makes this dish stand out is its versatility. Whether you are a busy parent rushing to prepare dinner, a student seeking an affordable meal, or a health-conscious individual searching for nutritious options, this Peruvian classic has got your back. It’s packed with lean protein from the chicken, fiber-rich rice, and can easily be adapted to cater to various dietary needs—such as being gluten-free and low-calorie. Not only is it delicious, but this dish also offers comfort and nourishment in one hearty plate.

    Cooking should inspire joy and creativity, and The Best Peruvian Chicken Rice fits the bill perfectly. We’ll break down the necessary ingredients, offer tips for customization, and walk you through a step-by-step guide to create an unforgettable dish. So, can you feel your taste buds tingling with excitement? Let’s dive in!

    Benefits and Advantages of The Best Peruvian Chicken Rice

    When choosing a recipe, especially for everyday meals, you want something that is not only tasty but also practical. The Best Peruvian Chicken Rice is just that—a dish that marries ease of preparation with an explosion of flavors.

    Simple Preparation

    One of the standout features of this recipe is its simplicity. You don’t need to be a culinary expert to master this dish, making it ideal for home cooks at any skill level. With just a few essential ingredients, you can whip up this delightful meal in under an hour. Since the recipe employs common pantry items, there’s no need for an extensive shopping list.

    Health Benefits

    Not only does this dish satisfy your taste buds, but it also provides nourishment. Chicken is a great source of lean protein that helps in muscle-building and keeps you full for hours. The rice serves as a complex carbohydrate, offering sustained energy without the post-meal sluggishness often associated with simple carbs. Additionally, when you incorporate veggies, such as peas and carrots, you enhance the nutritional profile of the dish, giving you that extra fiber, vitamins, and minerals.

    Adaptable for Dietary Needs

    Whether you’re a vegan, gluten-intolerant person, or someone on a calorie-conscious diet, The Best Peruvian Chicken Rice can be customized easily. Follow our ingredient suggestions to use plant-based proteins and gluten-free options to ensure everyone can enjoy this dish.

    Budget-Friendly

    Lastly, this recipe stands out because it is budget-friendly. High-quality ingredients do not have to be expensive, and this dish proves that great flavors can come without breaking the bank. Ideal for busy parents or students looking to stretch their dollar while providing wholesome meals!

    In summary, if you’re looking for uncomplicated chicken recipes that offer numerous benefits without compromising on flavor, putting The Best Peruvian Chicken Rice on the table will make everyone happy!

    Ingredients Overview

    Essential Ingredients for The Best Peruvian Chicken Rice

    To prepare The Best Peruvian Chicken Rice, gather these essential ingredients:

    • 2 cups of long-grain rice – a versatile base that absorbs all the flavors; consider using brown rice for a healthier option.
    • 1 lb (450g) chicken thighs or breasts – tender protein source that can easily be replaced with tofu or chickpeas for a vegan version.
    • 1 medium onion, finely chopped – adds sweetness and depth.
    • 4 cloves of garlic, minced – enhances the dish’s aromatic profile.
    • 1 teaspoon cumin – for a warm, earthy flavor that’s a must in Peruvian cooking.
    • 1 teaspoon paprika – for a touch of smokiness.
    • 2 cups chicken or vegetable broth – for added flavor; you can also use water in a pinch.
    • 1 cup frozen peas – for added color and nutrients; feel free to add more vegetables like bell peppers for a veggie-packed dish.
    • Salt and pepper to taste.

    Dietary Substitutions to Customize Your The Best Peruvian Chicken Rice

    Providing flexibility in dietary needs is essential for any home cook. Here are some easy substitutions:

    • Vegan Option: Substitute the chicken with extra-firm tofu, tempeh, or chickpeas. Use vegetable broth instead of chicken broth and enhance with nutritional yeast for a cheesy flavor.
    • Gluten-Free: Ensure the broth is gluten-free, and opt for gluten-free rice varieties if desired.
    • Low-Calorie: Utilize skinless chicken cutlets and incorporate more veggies, reducing the portion of rice.

    With all these options available, adapting this recipe for anyone’s diet becomes a breeze!

    How to Prepare the Perfect The Best Peruvian Chicken Rice: Step-by-Step Guide

    Ready to bring the vibrant flavors of Peru right into your kitchen? Here’s your complete step-by-step guide to prepare The Best Peruvian Chicken Rice:

    1. Prepare the Chicken:
    2. Start by seasoning the chicken pieces with salt, pepper, cumin, and paprika. Allow them to marinate for at least 20 minutes to absorb the flavors. If you’re using tofu or chickpeas, season similarly.

    3. Sauté Aromatics:

    4. In a large skillet or pot, heat a splash of olive oil over medium heat. Add the chopped onions and cook until they become translucent, roughly 5 minutes. Stir in the minced garlic and sauté for an additional minute until fragrant.

    5. Brown the Chicken:

    6. Add the marinated chicken pieces to the skillet and cook for about 5-7 minutes on each side until they’re golden brown. Ensure the chicken is mostly cooked through.

    7. Combine Rice:

    8. Add the rice directly into the skillet, stirring to mix with the chicken and aromatics.

    9. Add Liquid:

    10. Pour in the chicken or vegetable broth and bring to a light boil. Stir the mixture to ensure the rice is evenly distributed.

    11. Simmer:

    12. Reduce the heat to low, cover the pot, and let it simmer for about 20 minutes. Check occasionally to ensure it doesn’t stick, and add more broth if necessary.

    13. Add Vegetables:

    14. After the rice absorbs most of the liquid, gently fold in the frozen peas and any additional vegetables you choose. Cover again and let it cook for an additional 5 minutes until the vegetables are heated through.

    15. Check for Doneness:

    16. Once the rice is fluffy and the chicken is fully cooked, remove the pot from heat. Allow it to sit, covered, for 10 minutes before serving.

    17. Garnish:

    18. Serve hot, garnished with fresh cilantro or parsley and a squeeze of lime juice for that authentic touch.

    This easy, quick process ensures anyone can replicate this delicious Peruvian dish at home with minimal fuss!

    Mastering The Best Peruvian Chicken Rice: Advanced Tips and Variations

    Now that you’ve got the basics down for creating The Best Peruvian Chicken Rice, let’s explore some advanced tips and variations to help you elevate your dish!

    Adjusting Flavors

    • Spicy Kick: For those who love heat, add sliced jalapeños or a few dashes of hot sauce during cooking.
    • Herbaceous Notes: Incorporate fresh herbs such as cilantro, parsley, or even a bay leaf while cooking to infuse additional flavors.

    Serving Suggestions

    • Accompaniments: Consider offering side dishes, such as a fresh salad or a classic Peruvian salsa criolla, to balance out the meal.
    • Presentation: For special occasions, serve in bowls with a side of lime wedges, allowing diners to add a zesty touch as they please.

    Variations

    • One-Pot Chicken Rice: For enhanced convenience, consider converting this into a one-bed dish by using a pressure cooker or rice cooker, allowing you to set it and forget it while you enjoy your day!

    By choosing from these advanced tips and variations, you can easily keep the meal exciting and fresh every time you cook it!

    How to Store The Best Peruvian Chicken Rice: Best Practices

    Leftovers are a wonderful perk of making The Best Peruvian Chicken Rice! Here’s how to store it properly:

    Refrigeration

    • Cooling: Allow the dish to cool to room temperature before storing.
    • Containers: Transfer it to an airtight container, where it can last in the refrigerator for about 3-4 days.

    Freezing

    • Portion It: Freeze the chicken rice in individual portions for easy reheating later.
    • Storage Bags: Use freezer-safe zip bags or containers to prevent freezer burn, and label them with the date.

    Reheating

    • For quick reheating, pop it in the microwave covered with a damp paper towel to keep moisture in or reheat on the stovetop with a splash of broth for added moisture.

    By following these best practices, you can enjoy delicious, homemade Peruvian Chicken Rice even days after preparing it!

    Nutritional Value of The Best Peruvian Chicken Rice

    Curious about the nutritional content of The Best Peruvian Chicken Rice? Here’s a basic breakdown per serving. Note that specific values may vary based on your ingredient choices.

    • Calories: Approximately 350-400 kcal
    • Protein: 30g from chicken
    • Carbohydrates: 45g, predominantly from rice
    • Fat: 8-12g, varying with the use of additional oils
    • Fiber: 4-5g, depending on the added vegetables
    • Sodium: 500-800mg, largely from broth and seasoning

    As evidenced, this dish is balanced with protein, fiber, and complex carbohydrates, making it a wholesome choice for families or anyone seeking nutritious chicken recipes.

    Incorporating veggies can further enhance its health profile, so feel free to make it as colorful as possible!

    FAQs: Frequently Asked Questions About The Best Peruvian Chicken Rice

    1. Can I prepare The Best Peruvian Chicken Rice ahead of time?
    Absolutely! This dish is perfect for meal prep. Cook it ahead, store it in the refrigerator, and reheat it when needed.

    2. What type of rice should I use?
    Long-grain rice is traditional, but switching to jasmine, basmati, or gluten-free options like quinoa and cauliflower rice works too!

    3. How can I make this dish spicier?
    To add heat, mix in sliced jalapeños, spicy paprika, or a dash of hot sauce during the cooking process.

    4. Is this recipe suitable for freezing?
    Yes, chill the dish and portion it into freezer-safe containers. It lasts for up to three months in the freezer.

    5. Can I use brown rice instead of white rice?
    Certainly! Just be sure to adjust the liquid and cooking times as brown rice takes longer to cook.

    Now, armed with these FAQs, you’ll have all the information you needs to turn The Best Peruvian Chicken Rice into a family favorite!


    Delight your taste buds with this mouth-watering Peruvian dish. By following this comprehensive guide, you can create a flavorful, healthful meal that fits any dietary profile or occasion. Happy cooking!

  • Easy Healthy Sticky Chicken Bowls Dinner

    Easy Healthy Sticky Chicken Bowls Dinner

    Easy Healthy Sticky Chicken Bowls Dinner: A Tropical Delight

    Introduction to Easy Healthy Sticky Chicken Bowls Dinner

    Are you on the lookout for easy dinner recipes that are not only delicious but also healthy? Look no further! The Easy Healthy Sticky Chicken Bowls Dinner is a simple yet flavorful recipe that brings the taste of tropical flavors right to your kitchen. This dish combines tender chicken pieces with a luscious sticky sauce, all served over rice and paired with vibrant veggies. It’s perfect for a fast weeknight dinner, with minimal prep time and most importantly, it’s packed with nutrients.

    What makes this recipe stand out is its versatility. Whether you are a busy parent, a student on the go, or someone who simply wants to maintain a healthy lifestyle, this dish can meet your needs. You can easily customize it to fit various diets, including gluten-free and keto options. Additionally, the recipe is quick to prepare, making it an excellent choice for individuals looking to whip up a meal without spending hours in the kitchen.

    Enjoy the delightful combination of sweet and savory flavors with this Quick and Easy Healthy Sticky Chicken Bowls Dinner, enticing even the pickiest eaters! Let’s dive into why this dish has quickly become a go-to in various households, highlighting its benefits and advantages.

    Benefits and Advantages of Easy Healthy Sticky Chicken Bowls Dinner

    The Easy Healthy Sticky Chicken Bowls Dinner is not just a recipe; it’s a holistic meal solution. Below are some compelling reasons why this dish is ideal for everyone, from health-conscious individuals to busy professionals.

    1. Ease of Preparation

    One of the primary draws of easy dinner recipes is their simplicity. This recipe features straightforward steps and uses commonly found ingredients. You won’t need to spend time hunting for exotic spices or complex items. Most meals can be made in under 30 minutes, freeing up precious time for other responsibilities—or perhaps even a much-deserved break.

    2. Health Benefits

    This chicken bowl is a well-balanced meal that provides ample protein, essential vitamins, and healthy fats. The chicken serves as a great source of lean protein, essential for muscle growth and repair. Adding vegetables such as bell peppers, broccoli, and carrots enriches the dish with vitamins A and C, among others. Moreover, by using whole grain rice or cauliflower rice, you provide added fiber, which supports digestive health.

    3. Dietary Adaptability

    What if you or someone in your family has dietary restrictions? No problem! This recipe is easily adaptable to suit various needs. Those following a gluten-free diet can simply swap out the soy sauce for a gluten-free alternative. For vegans, substituting chicken with tofu or tempeh achieves a similar sticky goodness without compromising flavor.

    4. Budget-Friendly

    This meal can be relatively inexpensive to prepare. You can easily use leftover chicken or rice, and seasonal vegetables, enabling you to make the most out of what you already have in your pantry. Plus, minimal shopping for specialty ingredients means it won’t break the bank.

    5. Suitable for Meal Prep

    Planning ahead? The Easy Healthy Sticky Chicken Bowls make great meal prep options. You can cook a batch on the weekend, store them in individual containers, and have ready-to-eat meals for busy weekdays.

    Ingredients Overview

    Essential Ingredients for Easy Healthy Sticky Chicken Bowls Dinner

    Here’s what you’ll need to whip up this delightful dish:

    • Chicken Breast (500g): Lean protein that is low in fat.
    • Soy Sauce (1/4 cup): Adds saltiness and umami flavor (use gluten-free sauce if necessary).
    • Honey or Maple Syrup (2 tablespoons): Natural sweeteners that create the sticky glaze.
    • Garlic (2 cloves, minced): For aromatic flavor.
    • Ginger (1 tablespoon, grated): Provides a zesty kick.
    • Vegetable Oil (2 tablespoons): Used for cooking the chicken.
    • Bell Peppers (1 cup, sliced): Offer color and crunch, rich in Vitamin C.
    • Broccoli Florets (1 cup): Nutrient-dense, adding fiber and vitamins.
    • Carrots (1 cup, sliced): Also enriches the dish with bright color and beta-carotene.
    • Cooked Rice or Cauliflower Rice (2 cups): As a base for the chicken and veggies.
    • Sesame Seeds (1 tablespoon, optional): For garnish.

    Dietary Substitutions to Customize Your Easy Healthy Sticky Chicken Bowls Dinner

    • For Vegetarian/Vegan Option: Replace chicken with tofu or chickpeas. Ensure to sauté them until golden brown for an enhanced texture.
    • For Gluten-Free Option: As stated earlier, use gluten-free soy sauce or tamari.
    • For Lower-Carb Option: Substitute the rice with cauliflower rice or spiralized zucchini.
    • To Add More Fiber: Add black beans or chickpeas for extra protein and fiber content.

    How to Prepare the Perfect Easy Healthy Sticky Chicken Bowls Dinner: Step-by-Step Guide

    Creating your Easy Healthy Sticky Chicken Bowls Dinner is straightforward. With the following steps, you’ll have a delicious and nutritious meal ready in no time!

    1. Prepare the Chicken:
    2. Begin by cutting the chicken breast into bite-sized cubes. This allows for quicker cooking and more even flavor distribution.

    3. Marinate the Chicken:

    4. In a mixing bowl, combine soy sauce, honey (or maple syrup), minced garlic, and grated ginger. Add the chicken cubes to this mixture. Allow it to marinate for at least 15 minutes; this enhances flavor significantly.

    5. Cook the Chicken:

    6. Heat vegetable oil in a large skillet over medium-high heat. Once heated, add the marinated chicken. Stir frequently, allowing the chicken to cook evenly and absorb all the flavors, about 5-7 minutes.

    7. Sauté the Vegetables:

    8. Once the chicken is fully cooked, add sliced bell peppers, broccoli florets, and carrots into the skillet. Sauté them for an additional 5 minutes until the vegetables are tender.

    9. Thicken the Sauce:

    10. To make the sauce sticky, lower the heat and let the mixture simmer for 2-3 minutes, making sure the sauce coats everything evenly. If desired, add a cornstarch slurry to thicken the sauce further.

    11. Prepare the Base:

    12. While the chicken and vegetables are cooking, prepare your rice or cauliflower rice according to package instructions.

    13. Assemble the Bowls:

    14. To serve, place a generous portion of the cooked rice or cauliflower rice in a bowl. Top it with the sticky chicken and sautéed vegetables.

    15. Garnish:

    16. Sprinkle sesame seeds on top for added flavor and texture. You can also add chopped green onions or cilantro for a fresh touch.

    17. Serve and Enjoy:

    18. Your Easy Healthy Sticky Chicken Bowls Dinner is now ready to eat! Pair it with your favorite sauce or additional toppings according to your preference.

    Mastering Easy Healthy Sticky Chicken Bowls Dinner: Advanced Tips and Variations

    To take your Easy Healthy Sticky Chicken Bowls Dinner to the next level, consider these expert tips and variations:

    • Extra Sauce: Love sauce? Increase the quantity of the glaze ingredients, allowing for some extra sticky goodness on your rice.
    • Experiment with Spices: Add a pinch of chili flakes or sriracha for some heat, or try adding some cumin or paprika to elevate the flavor profile.
    • Add Nuts: Toss in some cashews or peanuts for added crunch and healthy fats, turning this meal into a delightful treat.
    • Meal Prep Variations: Prepare individual servings to grab on busy mornings. This not only saves time but can also ensure you make healthier choices during the week.

    How to Store Easy Healthy Sticky Chicken Bowls Dinner: Best Practices

    Storing your Easy Healthy Sticky Chicken Bowls Dinner properly ensures it remains fresh and flavorful for your next meal.

    Refrigeration

    • Allow the dish to cool completely before transferring it to an airtight container. Stored correctly, it can be kept in the fridge for up to 3-4 days.

    Freezing

    • To freeze, portion out the sticky chicken bowls into freezer-safe containers. Make sure to label each container with the contents and date. Properly sealed, they can last for up to 3 months.

    Reheating

    • For best results, reheat in the oven at 350°F (175°C) until heated through. Alternatively, you can microwave for a quick meal. If you’re concerned about the rice becoming too dry, adding a splash of water before reheating helps maintain moistness.

    Nutritional Value of Easy Healthy Sticky Chicken Bowls Dinner

    Understanding the nutritional value of your meals can help you make healthier choices. Here’s a breakdown of the nutritional content for a serving of Easy Healthy Sticky Chicken Bowls Dinner:

    • Calories: Approximately 450-500 (dependent on rice vs. cauliflower rice)
    • Protein: 30g
    • Carbohydrates: 50g
    • Fiber: 5g
    • Fat: 10g
    • Sodium: Varies (depending on soy sauce choice)

    This recipe is low in fat and high in protein, making it an excellent option for those looking for healthy dinner alternatives without compromising on taste.

    FAQs: Frequently Asked Questions About Easy Healthy Sticky Chicken Bowls Dinner

    1. Can I make this recipe ahead of time?

    Yes, this is one of the easy dinner recipes that can be made in advance. Store it in an airtight container in the fridge or freeze portions.

    2. Can I replace the chicken with another protein?

    Absolutely! You can use shrimp, tofu, or even chickpeas for a plant-based version.

    3. What can I use in place of soy sauce for a low-sodium option?

    Consider using coconut aminos, a great alternative that provides a similar flavor profile with lower sodium content.

    4. Is this recipe suitable for meal prepping?

    Yes! This dish is perfect for meal prepping. Just prepare a larger batch and divide into single servings for easy lunches or dinners.

    5. How spicy is this dish?

    The recipe as written is not spicy. However, you can easily adjust the heat by adding chili flakes or other spicy sauces according to your preference.

    6. Can I use frozen vegetables instead of fresh?

    Yes, frozen vegetables work seamlessly. Just be mindful of cooking times as frozen veggies may cook quicker.

    Now that you have this comprehensive guide, you’re ready to bring the tropical flavors of the Easy Healthy Sticky Chicken Bowls Dinner into your home. Try it today, and discover why it’s become a favorite among home cooks and busy families alike!

  • Easy Lemon Garlic Shrimp Orzo Dinner

    Easy Lemon Garlic Shrimp Orzo Dinner

    Easy Lemon Garlic Shrimp Orzo Dinner: A Tropical Delight

    Introduction to Easy Lemon Garlic Shrimp Orzo Dinner

    Are you searching for an exhilarating dish that embodies flavor yet is perfect for a busy lifestyle? Look no further than the Easy Lemon Garlic Shrimp Orzo Dinner! This delightful recipe combines succulent shrimp, zesty lemon, and tender orzo pasta, creating a harmonious medley that will tantalize your taste buds without overwhelming your schedule. As one of the easiest shrimp recipes to whip up, it caters to everyone—from working professionals to busy parents and food enthusiasts alike.

    With its vibrant flavors and simple preparation, this dish also highlights numerous health benefits. Shrimp is an excellent source of protein, while orzo pasta, when paired with lots of fresh vegetables, can create a relatively low-calorie, nutrient-packed meal. It’s versatile enough to be modified for various dietary preferences, whether you’re looking for vegetarian alternatives, gluten-free options, or even low-carb substitutes. Ideal for new couples, seniors, and students alike, this Easy Lemon Garlic Shrimp Orzo Dinner serves as a quick yet impressive solution to weeknight meals. Embrace the flavor and simplicity of this tropical delight!

    Benefits and Advantages of Easy Lemon Garlic Shrimp Orzo Dinner

    When it comes to weeknight dinners, simplicity is key. The Easy Lemon Garlic Shrimp Orzo Dinner stands out as an easy-to-prepare dish, often taking less than 30 minutes from start to finish. This makes it one of the most accessible shrimp recipes you can try at home. With minimal preparation and cooking time, you can have a delicious meal ready for your family or friends without compromising on quality or taste.

    Additionally, this dish is packed with health benefits. Shrimp is low in calories but high in protein, making it an excellent choice for health-conscious individuals. Moreover, lemon adds not only zesty flavor but also vitamin C, which is important for immune function and skin health. On top of that, the addition of fresh vegetables ensures your dinner is rich in fiber, vitamins, and minerals.

    Whether you are accommodating a gluten-free diet, looking for low-calorie recipes, or simply desire a delicious, wholesome meal, this Easy Lemon Garlic Shrimp Orzo Dinner proves to be a foolproof option. The use of orzo pasta allows for easy incorporation of various vegetables or spices, enabling cooks of all levels to make it their own. If you seek a quick, nutritious, and flavorful dish, this shrimp recipe should be at the top of your list.

    Ingredients Overview

    Essential Ingredients for Easy Lemon Garlic Shrimp Orzo Dinner

    To prepare the Easy Lemon Garlic Shrimp Orzo Dinner, you will need the following ingredients:

    • 8 oz. orzo pasta (or gluten-free orzo for a gluten-free option)
    • 1 lb. shrimp (peeled and deveined; you can use large, medium, or even frozen shrimp)
    • 3 tbsp. olive oil (or avocado oil for a different flavor)
    • 4 cloves garlic (minced; you can adjust based on your taste)
    • 1 lemon (juiced and zested; adds a refreshing tang)
    • 1 cup cherry tomatoes (halved; for a burst of sweetness)
    • 1 cup spinach (or kale; adds nutritional value and color)
    • Salt and pepper (to taste)
    • Fresh parsley or basil (for garnish; optional)

    This ingredient list emphasizes the freshness and health benefits, providing a balanced meal with protein, carbohydrates, and vegetables. Furthermore, the flexibility in ingredient choices allows for personal preferences or dietary needs to be met.

    Dietary Substitutions to Customize Your Easy Lemon Garlic Shrimp Orzo Dinner

    This recipe is highly adaptable. Here are a few substitutions to consider:

    • Pasta Variations: Instead of orzo, you can use whole grain, gluten-free pasta, or even zucchini noodles for a low-carb option.
    • Protein Options: For a vegetarian option, replace shrimp with chickpeas or sautéed tofu, providing a satisfying source of protein without animal products.
    • Vegetable Alternatives: You can incorporate a wide variety of vegetables. Broccoli, bell peppers, or zucchini would be fantastic options to add more color and nutrition.
    • Oil Substitutions: Substitute olive oil with coconut oil for a hint of tropical flavor or use a light spray of cooking oil for a lower-calorie option.

    Understanding these dietary substitutions allows readers to tailor the Easy Lemon Garlic Shrimp Orzo Dinner according to their specific needs, making it ideal for every home cook.

    How to Prepare the Perfect Easy Lemon Garlic Shrimp Orzo Dinner: Step-by-Step Guide

    Now that you’ve gathered all the ingredients, let’s dive into the step-by-step instructions to prepare the Easy Lemon Garlic Shrimp Orzo Dinner.

    1. Prepare the Orzo: Bring a large pot of salted water to a boil. Add the orzo pasta and cook according to the package instructions, usually around 8-10 minutes. Stir occasionally to prevent sticking. Once cooked, drain and set aside.

    2. Sauté the Garlic: In a large skillet over medium heat, add the olive oil. Once the oil is hot, add in the minced garlic. Sauté for about 1-2 minutes, until the garlic is fragrant but not burnt.

    3. Cook the Shrimp: Add the peeled and deveined shrimp to the skillet. Season with salt and pepper. Cook the shrimp for about 2-3 minutes on each side or until they turn pink and opaque. Be careful not to overcook them as they can become tough.

    4. Incorporate the Vegetables: Add the halved cherry tomatoes and spinach (or kale) to the skillet. Squeeze in the lemon juice and add the lemon zest. Stir frequently and allow everything to cook together for another 2-3 minutes until the spinach is wilted and tomatoes soften.

    5. Combine with Orzo: Gently incorporate the cooked orzo pasta into the skillet. Toss all the ingredients together to ensure the pasta is coated with the oil, lemon juice, and flavors from the shrimp and vegetables.

    6. Finalize the Dish: Remove from heat and taste to adjust seasoning with more salt, pepper, or lemon juice, as desired. If you want more creaminess, a splash of vegetable or chicken broth can be added here.

    7. Garnish and Serve: Sprinkle freshly chopped parsley or basil on top before serving. Enjoy your Easy Lemon Garlic Shrimp Orzo Dinner warm!

    Feel free to adapt any of the steps based on dietary concerns or personal preferences, ensuring that this shrimp recipe resonates with everyone at your table.

    Mastering Easy Lemon Garlic Shrimp Orzo Dinner: Advanced Tips and Variations

    To elevate your Easy Lemon Garlic Shrimp Orzo Dinner, here are some advanced tips and variations:

    1. Herbs and Spices: Experiment with fresh or dried herbs, such as thyme, dill, or oregano, to add even more depth of flavor to the dish. A pinch of red pepper flakes can introduce an excellent spicy kick.

    2. Creamy Twist: For those who enjoy creamy textures, consider stirring in a dollop of cream cheese or a splash of heavy cream after combining the orzo and shrimp for a richer flavor that pairs excellently with the garlic and lemon.

    3. Protein Variations: Instead of shrimp, try using different seafood like scallops or even fish fillets. Grilled chicken or turkey can also work as an excellent protein alternative, integrating well with the other ingredients.

    4. Make it a Salad: Transform this dish into a refreshing salad by allowing it to cool and serving it chilled. Add in elements like avocado or feta cheese for a delightful twist.

    By uncovering these additional tips and variations, readers can further personalize this shrimp recipe to meet their cravings or special occasions.

    How to Store Easy Lemon Garlic Shrimp Orzo Dinner: Best Practices

    Storing your Easy Lemon Garlic Shrimp Orzo Dinner properly ensures you can enjoy the flavors later. Here’s how to do it right:

    Refrigeration

    If you plan to enjoy leftovers, store the dish in an airtight container in the refrigerator. It will maintain its freshness for up to 3 days. Remember that the orzo may absorb some liquid over time, so feel free to drizzle a bit of olive oil or lemon juice when reheating to restore moisture.

    Freezing

    If you want to store it for a longer period, freezing is a viable option. Allow the dish to cool completely before transferring it to a freezer-safe container. Label the container with the date and freezer storage instructions. The dish can be frozen for up to 2 months. When ready to eat, thaw it in the refrigerator overnight before reheating.

    Reheating

    To reheat the Easy Lemon Garlic Shrimp Orzo Dinner, use a stovetop or microwave. On a stovetop, add a splash of broth or water to a skillet and gently reheat over medium-low heat, stirring occasionally. In the microwave, reheat in 30-second intervals, ensuring even warming.

    By following these best practices for storage, you can enjoy the delicious taste of this shrimp recipe multiple times without losing its quality.

    Nutritional Value of Easy Lemon Garlic Shrimp Orzo Dinner

    Understanding the nutritional aspects of the Easy Lemon Garlic Shrimp Orzo Dinner can help you plan healthier meals. Here’s a breakdown of the key nutritional elements per serving, based on standard ingredients used:

    • Calories: Approximately 350
    • Fat: 12g (primarily from olive oil)
    • Protein: 25g (from shrimp)
    • Carbohydrates: 40g (from orzo)
    • Fiber: 4g (from vegetables)
    • Sugars: 3g
    • Sodium: Varies based on added salt

    Incorporating fresh ingredients enhances the nutritional profile of this dish, making it not only delicious but beneficial for a balanced diet. This shrimp recipe becomes a valuable addition to any health-conscious meal plan.

    FAQs: Frequently Asked Questions About Easy Lemon Garlic Shrimp Orzo Dinner

    1. Can I use frozen shrimp for this recipe?

    Absolutely! Frozen shrimp work perfectly in this dish. Just be sure to thaw them overnight in the refrigerator or in cold water before cooking.

    2. Is this recipe suitable for meal prep?

    Yes! The Easy Lemon Garlic Shrimp Orzo Dinner is excellent for meal prep. Store individual portions in airtight containers, and you can heat them as needed for lunch or dinner throughout the week.

    3. How can I make this recipe gluten-free?

    Just substitute the orzo pasta with a gluten-free alternative, ensuring that all other ingredients are gluten-free as well.

    4. Can I prepare this dish in advance?

    While you can prepare the shrimp and vegetables ahead of time, it is best to cook the orzo and combine all ingredients just before serving to maintain the best texture and flavor.

    5. What vegetables work well in this dish?

    This recipe is versatile! Feel free to use a variety of vegetables such as bell peppers, zucchini, or asparagus. Just be sure to adjust the cooking time according to the vegetables you choose.

    By addressing these frequently asked questions, you can clarify any uncertainties readers may have about creating this delicious shrimp recipe in their kitchens.


    In conclusion, the Easy Lemon Garlic Shrimp Orzo Dinner is a winner for anyone seeking a quick, nutritious, and flavorful meal option. Whether you’re a novice cook or a kitchen expert, this dish offers endless possibilities that cater to multiple dietary considerations and personal tastes. Enjoy crafting this delightful shrimp recipe in your home today!

  • The Best Strawberry Shortcake Cupcakes Ever

    The Best Strawberry Shortcake Cupcakes Ever

    The Best Strawberry Shortcake Cupcakes Ever: A Tropical Delight

    Introduction to The Best Strawberry Shortcake Cupcakes Ever

    Welcome to a delightful journey through flavor with The Best Strawberry Shortcake Cupcakes Ever! If you’re searching for the ultimate summer treat, look no further. Bursting with the fresh, vibrant taste of strawberries, these cupcakes are not only mouthwateringly delicious but also incredibly simple to make. Whether you’re whipping them up for a family event, a picnic, or just a cozy night in, this recipe is perfect for all types of home cooks, busy parents, students, and even baking enthusiasts.

    What sets these strawberry cupcakes apart is their versatility. You can whip up a batch that’s vegan or gluten-free without sacrificing taste or texture. Plus, they are relatively light on calories, making them a fantastic choice for those watching their diets. This recipe embraces the whole idea of strawberry recipes by showcasing how easily you can bring seasonal ingredients to life in an innovative way.

    In this article, I will guide you through every step of the process, highlighting health benefits and how easily adapt the recipe to suit various dietary needs. So, grab your apron and let’s create a tropical delight that your friends and family will absolutely adore!

    Benefits and Advantages of The Best Strawberry Shortcake Cupcakes Ever

    Why are these strawberry shortcake cupcakes the best? It’s simple! First, they are incredibly easy to prepare. With just a handful of ingredients and minimal steps, even beginner bakers can successfully create these scrumptious cupcakes. The batter comes together quickly, minimizing the time you spend in the kitchen and maximizing your enjoyment at the dessert table.

    These cupcakes are also health-conscious. Made with ripe strawberries, they contribute vitamins and antioxidants, making them a great pick for a guilt-free indulgence. Strawberries are rich in vitamin C, known for its immune-boosting properties, and they’re a natural source of fiber. Plus, by customizing them to be vegan, gluten-free, or low in sugar, you can cater to various dietary preferences without compromising flavor.

    What really makes this recipe stand out is its flexibility. You can easily adapt it for numerous occasions, whether it’s a birthday party, bridal shower, or just a regular afternoon tea time. Additionally, you will find that these cupcakes keep well, making them an excellent bake-ahead option for those busy days.

    In summary, The Best Strawberry Shortcake Cupcakes Ever not only tantalize your taste buds but also check off all of the boxes on your health-conscious list, making them a fantastic addition to your collection of strawberry recipes.

    Ingredients Overview

    Essential Ingredients for The Best Strawberry Shortcake Cupcakes Ever

    To create these delightful cupcakes, you will need the following essential ingredients:

    1. 1 ½ cups all-purpose flour (or gluten-free flour)
    2. Purpose: The base for the cupcakes, giving them structure.

    3. 1 cup granulated sugar (or coconut sugar for a lower-glycemic option)

    4. Purpose: Sweetens the cupcakes; can be adjusted for taste.

    5. ½ teaspoon baking powder

    6. Purpose: Provides leavening to help them rise.

    7. ¼ teaspoon baking soda

    8. Purpose: Works in conjunction with the baking powder for a light texture.

    9. ½ teaspoon salt

    10. Purpose: Balances and enhances sweetness.

    11. ½ cup unsalted butter (or vegan butter)

    12. Purpose: Adds richness and moisture.

    13. 2 large eggs (or 1/4 cup unsweetened applesauce for vegan)

    14. Purpose: Binds the ingredients together; gives a fluffier texture.

    15. 1 teaspoon vanilla extract

    16. Purpose: Adds flavor depth.

    17. ½ cup milk (or almond milk for a dairy-free option)

    18. Purpose: Moisture enhancer; choose according to dietary needs.

    19. 1 ½ cups fresh strawberries, diced

      • Purpose: A star ingredient, adding natural sweetness and vibrant color.
    20. Whipped cream (for frosting, use coconut whipped cream for vegan)

      • Purpose: Finishing touch for that classic strawberry shortcake experience.

    Feel free to experiment with substitutions that meet your dietary needs while maintaining the essence of what makes these cupcakes delightful!

    Dietary Substitutions to Customize Your The Best Strawberry Shortcake Cupcakes Ever

    Customizing The Best Strawberry Shortcake Cupcakes Ever for different dietary needs is easy:

    • Gluten-Free: Replace all-purpose flour with a gluten-free blend that contains xanthan gum for structure.
    • Vegan: Substitute eggs with unsweetened applesauce and milk with almond milk. Use coconut whipped cream for a rich frosting.
    • Lower-Calorie: Use almond flour for fewer calories, and opt for natural sweeteners like honey or a sugar substitute to cut down on sugar content.
    • Nut-Free: Stick with traditional dairy milk and ensure that all substitutions are free from Nut sources.

    With these substitutions, anyone can savor the lovely taste of strawberry shortcake without worries!

    How to Prepare the Perfect The Best Strawberry Shortcake Cupcakes Ever: Step-by-Step Guide

    Follow these easy steps to create your strawberry shortcake cupcakes:

    1. Prepare the Base:
    2. Preheat your oven to 350°F (175°C). Line a 12-cup muffin tin with paper liners.

    3. Mix Dry Ingredients:

    4. In a mixing bowl, whisk together 1 ½ cups of flour, 1 cup of sugar, ½ teaspoon of baking powder, ¼ teaspoon of baking soda, and ½ teaspoon of salt until well combined.

    5. Cream Butter and Sugar:

    6. In another large bowl, beat ½ cup of unsalted butter until creamy. Gradually add in the sugar, beating until light and fluffy.

    7. Add Eggs to Butter Mixture:

    8. Add 2 large eggs (or 1/4 cup applesauce) one at a time, mixing well after each addition. Stir in 1 teaspoon of vanilla extract.

    9. Combine Wet and Dry Mixtures:

    10. Gradually add your dry mixture to the wet mixture, alternating with ½ cup of milk (or almond milk). Mix until just combined; do not overmix.

    11. Fold in Fresh Strawberries:

    12. Gently fold in 1 ½ cups of diced fresh strawberries. Ensure they are evenly distributed throughout the batter.

    13. Fill Muffin Tin:

    14. Spoon the batter into the prepared muffin cups, filling each about two-thirds full.

    15. Bake:

    16. Bake in the preheated oven for 18-20 minutes or until a toothpick inserted into the center comes out clean. Be attentive not to overbake!

    17. Cool:

    18. Remove the cupcakes from the oven and allow them to cool in the tin for about 5 minutes. Then, transfer them to a wire rack to cool completely.

    19. Frost with Whipped Cream:

      • Once cool, top each cupcake with whipped cream (or coconut whipped cream for a vegan option) and garnish with additional strawberry slices if desired.
    20. Serve & Enjoy:

      • These cupcakes are now ready to serve! Enjoy them as a delightful dessert that is sure to impress.

    By following these steps, you’ll master the art of baking The Best Strawberry Shortcake Cupcakes Ever. Remember to customize each step based on your dietary preferences, effortlessly adapting this recipe to ensure everyone can enjoy it!

    Mastering The Best Strawberry Shortcake Cupcakes Ever: Advanced Tips and Variations

    To elevate your experience with The Best Strawberry Shortcake Cupcakes Ever, here are some advanced tips and variations:

    1. Infuse Flavor:
    2. Enhance the batter by adding lemon zest or mint leaves for a refreshing twist.

    3. Different Fulfillments:

    4. Instead of strawberries, experiment with other fruits like blueberries or raspberries for delightful variations.

    5. Cream Cheese Frosting:

    6. Swap whipped cream for a soft cream cheese frosting to add a tangy counterpoint to the sweetness.

    7. Sprinkle Some Sugar:

    8. Add a sprinkle of coarse sugar on top before baking for a sweet, crackly texture.

    9. Layered Options:

    10. Create a layered cupcake by slicing longer cupcakes in half and adding some strawberry filling or jam in-between.

    11. Stuffed Cupcakes:

    12. For added fun, create a well in the cupcake and fill it with a berry jam before icing to surprise your guests with a burst of flavor.

    These tips and variations will not only help you master the recipe but also encourage you to experiment, making each batch uniquely yours!

    How to Store The Best Strawberry Shortcake Cupcakes Ever: Best Practices

    After mastering The Best Strawberry Shortcake Cupcakes Ever, you might wonder how to store these delicious treats. Here are some best practices:

    1. Refrigeration:
    2. Store the cupcakes in an airtight container, preferably in the refrigerator if you have topped them with cream. They will keep well for 3-5 days.

    3. Freezing:

    4. You can freeze the cupcakes before applying the frosting. Place the cooled cupcakes in a single layer on a baking sheet. Once frozen solid, transfer them to a freezer-safe bag. They’ll maintain their quality for up to 3 months.

    5. Reheating:

    6. When ready to serve, thaw the frozen cupcakes in the refrigerator overnight. For a warm treat, microwave them for about 15-20 seconds just before adding the whipped cream topping.

    7. Avoid Sogginess:

    8. If you’ve added fresh strawberries for garnish, it’s best to add them fresh at the time of serving to avoid sogginess.

    These storage tips ensure you’ll enjoy The Best Strawberry Shortcake Cupcakes Ever at any moment, even if they come from the fridge or freezer!

    Nutritional Value of The Best Strawberry Shortcake Cupcakes Ever

    Understanding the nutritional value of The Best Strawberry Shortcake Cupcakes Ever can help you enjoy them responsibly. Below is an approximate breakdown for one standard cupcake (without frosting):

    • Calories: 180-220 (can vary depending on ingredients)
    • Total Fat: 7-10g
    • Saturated Fat: 4g
    • Cholesterol: 40mg (if using eggs)
    • Sodium: 120mg
    • Total Carbohydrates: 30g
    • Dietary Fiber: 1g
    • Sugars: 10g (depends on sugar used)
    • Protein: 2-3g

    If you opt for vegan or gluten-free alternatives, these values may slightly change. These cupcakes provide a delightful treat without overwhelming your daily caloric intake, allowing you to enjoy dessert while keeping health in mind.

    FAQs: Frequently Asked Questions About The Best Strawberry Shortcake Cupcakes Ever

    Can I make these cupcakes vegan?

    Yes! Simply replace the eggs with unsweetened applesauce and the milk with a plant-based alternative (like almond milk or soy milk).

    How should I store leftover cupcakes?

    Store them in an airtight container in the refrigerator for up to 5 days. If topped with whipped cream, it’s best to serve immediately.

    Can I use frozen strawberries instead of fresh?

    While fresh strawberries are preferred for flavor and texture, thawed frozen strawberries can work in a pinch. Be cautious—drain excess liquid before adding them to the batter.

    What can I use for frosting instead of whipped cream?

    Cream cheese frosting or a vegan whipped topping works well as alternatives to enhance flavor and complement the cupcakes.

    How do I know when the cupcakes are done?

    Insert a toothpick into the center of a cupcake. If it comes out clean or with a few moist crumbs, they are finished baking.

    By answering these frequently asked questions, you can feel more confident attempting this recipe and handling any concerns that arise along the way!


    Now that you have all the details about The Best Strawberry Shortcake Cupcakes Ever, it’s time to embrace your inner baker and enjoy this delicious dessert. Perfect for any occasion, these cupcakes are bound to impress and satisfy every palate. Happy baking!

  • The Best Mini Cadbury Egg Blondies

    The Best Mini Cadbury Egg Blondies

    The Best Mini Cadbury Egg Blondies: A Tropical Delight

    Introduction to The Best Mini Cadbury Egg Blondies

    Looking for a delightful dessert that impresses both in flavor and visual appeal? The Best Mini Cadbury Egg Blondies are the ideal choice! These incredibly easy dessert recipes combine the rich, buttery flavor of blondies with the fun and festive twist of Mini Cadbury Eggs. They are perfect for parties, seasonal gatherings, or simply indulging your sweet tooth.

    What makes this recipe stand out is not only its simplicity but also its health-conscious adaptations. You can easily craft these blondies to suit a variety of dietary requirements, including gluten-free and vegan modifications. It’s always a challenge to find dessert recipes that everyone can enjoy, but with these blondies, you don’t have to compromise on taste or dietary restrictions.

    Additionally, using Mini Cadbury Eggs adds a delightful crunch and chocolatey richness that elevates these blondies from basic to extraordinary. Despite being a treat, these blondies can also offer some health benefits when crafted with mindful ingredients. You can use healthier swaps without sacrificing flavor. Whether you’re a busy parent craving a sweet snack after a long day, a newlywed aiming to experiment in the kitchen, or a working professional who loves quick recipes, these blondies are adaptable and enjoyable for everyone.

    So gather your ingredients, roll up your sleeves, and prepare yourself for a sweet adventure with The Best Mini Cadbury Egg Blondies!

    Benefits and Advantages of The Best Mini Cadbury Egg Blondies

    The Best Mini Cadbury Egg Blondies are not just another batch of dessert recipes; they offer numerous advantages that make them an irresistible option for many home bakers. Here’s why you should consider whipping them up in your kitchen.

    1. Easy to Prepare

    One of the standout features of these blondies is their simplicity. You don’t need to be a professional baker to achieve perfect results. With minimal equipment and straightforward steps, you can quickly prepare the batter and bake your delicious treats. This ease makes them an excellent choice for busy individuals or families who may lack time but still want a homemade dessert.

    2. Versatile Ingredients

    These blondies allow for a lot of creativity. You can incorporate various ingredients based on your preferences or dietary needs. For example, if you prefer fewer calories or want to eliminate gluten, simply substitute the flour with a blend of almond flour or gluten-free flour. The flexibility regarding ingredients makes this recipe suitable for various diets, including gluten-free, vegan, and low-sugar diets.

    3. Health-Conscious Adjustments

    While blondies are inherently indulgent, you still can make healthier choices with this recipe. Opting for natural sweeteners like coconut sugar or maple syrup can reduce the impact on blood sugar levels. By using dark chocolate mini eggs, you can also increase the antioxidant content, giving you a treat that feels decadent but has a bit of nutritional value.

    4. Family-Friendly Fun

    Making blondies can become a fun family activity! Kids will love participating by assisting in measuring and mixing the ingredients, selecting their favorite additions, or helping with the decoration. It’s an excellent way to bond over baking while teaching children valuable cooking skills.

    5. Great for Any Occasion

    Whether it’s a festive holiday gathering, a casual get-together, or a simple weeknight dessert, these blondies are versatile enough to fit any occasion. They bring joy and sweetness to all kinds of events, making them an easy go-to dessert to impress your friends and family.

    Emphasizing ease of preparation and dietary flexibility allows more people to enjoy these Mini Cadbury Egg Blondies, making them a must-try in your toolkit of dessert recipes!

    Ingredients Overview

    Essential Ingredients for The Best Mini Cadbury Egg Blondies

    To prepare The Best Mini Cadbury Egg Blondies, you’ll need the following essential ingredients:

    • 1 cup of unsalted butter (softened): This is the base for your blondies, giving them that rich, buttery flavor.
    • 1 cup of brown sugar: Provides sweetness and moisture. You can substitute this with coconut sugar for a healthier option.
    • 1 cup of granulated sugar: Adds sweetness and contributes to the chewy texture.
    • 2 large eggs: These are essential for binding the ingredients together.
    • 2 teaspoons of vanilla extract: Enhances the overall flavor of the blondies.
    • 2 cups of all-purpose flour: This is the main structure of the blondies. For a gluten-free option, substitute with a gluten-free flour blend.
    • 1 teaspoon of baking powder: To help the blondies rise properly and create a light texture.
    • 1/2 teaspoon of salt: Balances out the sweetness and enhances overall flavor.
    • 1 cup of Mini Cadbury Eggs (coarsely chopped): This is the star ingredient that adds a chocolatey crunch to the blondies.

    Dietary Substitutions to Customize Your The Best Mini Cadbury Egg Blondies

    1. Vegan Version: Substitute eggs with flax eggs (1 tablespoon ground flaxseed mixed with 2.5 tablespoons of water for each egg). Use vegan butter in place of unsalted butter, and opt for a plant-based milk.

    2. Gluten-Free Version: Use a 1:1 gluten-free baking flour blend instead of all-purpose flour. Make sure that all other ingredients are gluten-free, including the Mini Cadbury Eggs, or substitute with dairy-free chocolate pieces.

    3. Lower Sugar Option: Utilize a sugar alternative like monk fruit or stevia. You might need to adjust the quantity based on the specific alternative’s sweetness levels.

    4. Nut-Free Alternative: Ensure your flour and chocolate are certified nut-free if you’re catering to allergies.

    These substitutions make The Best Mini Cadbury Egg Blondies a versatile treat that accounts for various dietary needs and preferences.

    How to Prepare the Perfect The Best Mini Cadbury Egg Blondies: Step-by-Step Guide

    Now that you have your ingredients, let’s dive into the recipe with a step-by-step guide to creating these delightful blondies!

    Step 1: Prepare the Base

    Start by preheating your oven to 350°F (175°C). Grease a 9×13 inch baking pan or line it with parchment paper for easy removal later.

    Step 2: Mix Dry Ingredients

    In a medium bowl, whisk together the flour, baking powder, and salt. This step ensures that your dry ingredients are well combined and aerated.

    Step 3: Cream Butter and Sugars

    In a large mixing bowl, beat the softened unsalted butter, brown sugar, and granulated sugar together using an electric mixer or a whisk. Mix until the mixture becomes light and fluffy, usually around 3-5 minutes.

    Step 4: Add Eggs and Vanilla

    Add the eggs one at a time, mixing well after each addition. Then stir in the vanilla extract until everything is combined.

    Step 5: Incorporate Dry Mixtures

    Gradually add the dry ingredient mixture to the wet ingredients. Mix on low speed or fold with a spatula until just combined. Avoid over-mixing to keep your blondies chewy.

    Step 6: Add Mini Cadbury Eggs

    Gently fold in the chopped Mini Cadbury Eggs, ensuring they’re evenly distributed throughout the batter.

    Step 7: Bake the Blondies

    Pour the batter into the prepared baking pan and spread it out evenly. Bake in the preheated oven for 25-30 minutes or until the edges are lightly golden and the center is set.

    Step 8: Cool and Slice

    Once baked, remove the blondies from the oven and let them cool in the pan on a wire rack for at least 15-20 minutes. Then, lift them out of the pan using the parchment paper and allow them to cool completely before slicing into squares.

    Step 9: Serve and Enjoy

    Now that you’ve prepared a batch of The Best Mini Cadbury Egg Blondies, it’s time to serve! Enjoy them with coffee, tea, or as a standout dessert at your next gathering.

    These steps ensure that the recipe remains a favorite among dessert recipes enthusiasts, accommodating different tastes and preferences seamlessly.

    Mastering The Best Mini Cadbury Egg Blondies: Advanced Tips and Variations

    To elevate your baking game, consider these advanced tips and variations for The Best Mini Cadbury Egg Blondies:

    1. Explore Flavor Combinations

    Thinking about flavor profiles can add uniqueness to your blondies. For example, adding a teaspoon of almond extract or a pinch of cinnamon can enhance the taste and provide a delicious twist.

    2. Stuffed Blondies

    Consider making stuffed blondies! Instead of mixing the Mini Cadbury Eggs into the batter, layer them in between two layers of batter for a gooey surprise.

    3. Top with Frosting

    If you’re looking to go the extra mile, whip up some cream cheese frosting or vanilla buttercream to top your blondies. Drizzling chocolate or caramel sauce on top can also provide that extra flair!

    4. Customize Texture

    For additional texture, incorporate nuts like pecans or walnuts into the mix. These crunchy elements contrast wonderfully against the chewy blondies.

    5. Serving Suggestions

    Pair your blondies with ice cream for a delicious sundae. Vanilla ice cream complements the buttery flavor of the blondies while adding creaminess that everyone will love.

    Utilizing these tips can ensure that your rendition of the blondies becomes a staple among your dessert recipes.

    How to Store The Best Mini Cadbury Egg Blondies: Best Practices

    To ensure the longevity of your delicious blondies, proper storage is crucial:

    1. Refrigeration

    Store the cooled blondies in an airtight container in the refrigerator for up to one week. This will help keep them fresh and moist.

    2. Freezing

    If you want to keep them for an extended period, these blondies freeze beautifully. Place them in a single layer in a freezer-safe container, separating layers with parchment paper, and freeze for up to three months. To enjoy, simply thaw them in the refrigerator overnight or at room temperature for a few hours.

    3. Reheating

    To reheat, pop a blondie in the microwave for 10-15 seconds. This will restore some of that gooey texture, making them taste freshly baked again.

    Storing your treats wisely ensures that your Mini Cadbury Egg Blondies remain a delightful option among dessert recipes every time you crave something sweet!

    Nutritional Value of The Best Mini Cadbury Egg Blondies

    One of the key aspects to consider when preparing dessert recipes is their nutritional value. Here’s a general overview of the nutritional content per serving of The Best Mini Cadbury Egg Blondies (based on a standard recipe making 24 servings):

    • Calories: Approximately 200 calories
    • Total Fat: 10g
    • Saturated Fat: 6g
    • Cholesterol: 40mg
    • Sodium: 150mg
    • Total Carbohydrates: 27g
    • Dietary Fiber: 1g
    • Sugars: 15g
    • Protein: 2g

    These numbers may vary slightly based on the exact ingredients used and specific serving sizes.

    You can always modify the ingredients to lower sugar content, fat, or calories, enhancing the nutritional profile while still offering a delicious taste. With conscious ingredient choices, these blondies can be an enjoyable treat without too much guilt, fitting nicely into your lifestyle without sacrificing flavor.

    FAQs: Frequently Asked Questions About The Best Mini Cadbury Egg Blondies

    1. Can I replace Mini Cadbury Eggs with other candies?

    Absolutely! You can use other types of chocolate candies or chocolate chips to customize the flavor of your blondies.

    2. How can I make these blondies more festive?

    Consider adding sprinkles or serving them with seasonal toppings like whipped cream or fruit for a fun twist during holidays!

    3. What is the best way to prevent blondies from drying out?

    Make sure not to overbake them, and store them in an airtight container once cooled. Adding a slice of bread in the container can also help retain moisture.

    4. Are these blondies kid-friendly?

    Yes, they are perfect for kids! The colorful Mini Cadbury Eggs make them visually appealing and fun for children.

    5. Can I make these blondies ahead of time?

    Definitely! They stay fresh for several days and can be frozen for an easy grab-and-go dessert option.

    By asking questions and getting answers associated with dessert recipes, you can work to refine your baking skills and ensure your kitchen experience is enjoyable and informative.


    These steps and sections not only provide a comprehensive recipe for The Best Mini Cadbury Egg Blondies but also highlight their versatility, health benefits, and the joy they can bring to any occasion! Enjoy baking and sharing these mouthwatering treats!

  • Easy Cinnamon Sugar Air Fryer Banana Chips

    Easy Cinnamon Sugar Air Fryer Banana Chips

    Easy Cinnamon Sugar Air Fryer Banana Chips: A Tropical Delight

    Introduction to Easy Cinnamon Sugar Air Fryer Banana Chips

    If you’re in search of delicious healthy snacks that are easy to prepare, then look no further than these Easy Cinnamon Sugar Air Fryer Banana Chips. This recipe is a fantastic way to turn ripe bananas into a crispy treat that satisfies your sweet tooth without compromising your health goals.

    The beauty of making banana chips in an air fryer lies in their simplicity. Not only does this method ensure a wonderfully crispy texture with less oil compared to traditional frying methods, but it also delivers that scrumptious cinnamon sugar flavor that will keep your family reaching for more. These banana chips are not just a hit among kids; they delight adults too, making them a versatile snack for every member of the family.

    Moreover, these chips are not only vegan and gluten-free but also low in calories, making them an ideal option for health-conscious eaters. Whether you’re a busy parent looking for quick, nutritious snacks for your kids, a student needing a study break, or a newlywed looking to impress your spouse with delicious treats, these banana chips will surely be a crowd-pleaser. So, grab your air fryer, and let’s dive into this delightful recipe!


    Benefits and Advantages of Easy Cinnamon Sugar Air Fryer Banana Chips

    When it comes to preparing healthy snacks, few options are as appealing and straightforward as Easy Cinnamon Sugar Air Fryer Banana Chips. Here’s why this recipe stands out:

    1. Quick and Easy Preparation:
      The air fryer cooks bananas to perfection in a fraction of time compared to traditional methods. In less than 30 minutes, you can transform simple bananas into a delectable snack without spending hours in the kitchen.

    2. Health Benefits:
      Bananas are a powerhouse of nutrients. Rich in potassium, vitamin C, and vitamin B6, they contribute to heart health, improved digestion, and enhanced mood. Making chips from bananas can be a way to preserve their nutrients while enjoying a satisfyingly crunchy texture. By choosing air frying over deep frying, the overall fat content remains low, making these chips a guilt-free pleasure.

    3. Customizable Flavor:
      Although cinnamon sugar is a classic flavor pairing, these banana chips can easily be modified to fit different taste preferences. You might consider adding a pinch of nutmeg, incorporating cocoa powder for a chocolatey twist, or even using spices like cayenne for a kick!

    4. Diet-Friendly:
      This recipe fits various dietary needs, including vegan, gluten-free, and low-calorie diets. With simple substitutions, you can cater to your specific dietary preferences while still enjoying a tasty snack. It allows you to avoid the preservatives and added sugar often found in store-bought snacks.

    5. Perfect for Meal Prep:
      Making a large batch of banana chips for the week is not only easy but also a smart choice for those busy days when you need a healthy on-the-go option. You can prep these chips in advance and have a crispy snack ready whenever hunger strikes.

    In conclusion, the Easy Cinnamon Sugar Air Fryer Banana Chips combine ease of preparation, health benefits, and flavor versatility. They make snacking enjoyable and guilt-free, ensuring that you stay on track with your healthy lifestyle!


    Ingredients Overview

    Essential Ingredients for Easy Cinnamon Sugar Air Fryer Banana Chips

    Making Easy Cinnamon Sugar Air Fryer Banana Chips requires just a handful of ingredients. Here’s what you’ll need:

    1. Ripe Bananas: 3 large
    2. Bananas should be perfectly ripe for maximum sweetness. Overripe bananas work best as they are sweeter, which means less added sugar!

    3. Cinnamon: 1 tablespoon

    4. Cinnamon adds a warm, aromatic flavor that complements the sweetness of the bananas and may help regulate blood sugar levels.

    5. Sugar (or Sugar Substitute): 2 tablespoons

    6. You can use granulated sugar, coconut sugar, or a sugar substitute like Stevia to keep the calorie count down, depending on your dietary preference.

    7. Cooking Oil (optional): 1 teaspoon

    8. A light coating of oil (like coconut or olive oil) can help achieve that extra crispiness, but it’s optional if you’re aiming for the lowest calorie option.

    9. Salt: A pinch

    10. A small amount of salt enhances the flavor profile, balancing the sweetness of the cinnamon sugar.

    Dietary Substitutions to Customize Your Easy Cinnamon Sugar Air Fryer Banana Chips

    Healthy snacks can and should cater to various dietary preferences. Here are some suggested substitutions to customize your Easy Cinnamon Sugar Air Fryer Banana Chips:

    • Banana Alternative: If you want to try a different base, consider using plantains! Plantains have a starchier texture and can provide a different yet delightful flavor when cooked.

    • Sugar Alternatives: For a sugar-free option, replace granulated sugar with erythritol, monk fruit, or another zero-calorie sweetener. This substitution makes the snack suitable for diabetics or those watching their sugar intake.

    • Gluten-Free Considerations: The entire recipe is inherently gluten-free; however, if you add additional spices or toppings, make sure they are labeled gluten-free.

    • Add-Ins: To add variety, try mixing in chopped nuts or seeds for a crunchy texture, or sprinkles of unsweetened cocoa powder for a chocolate flavor.

    • Flavor Variations: Instead of cinnamon, feel free to experiment with other spices like vanilla powder or nutmeg to switch things up.

    These substitutions not only cater to dietary needs but also encourage creativity in the kitchen. Have fun customizing your Easy Cinnamon Sugar Air Fryer Banana Chips to fit your health preferences while exploring new flavors!


    How to Prepare the Perfect Easy Cinnamon Sugar Air Fryer Banana Chips: Step-by-Step Guide

    Follow these straightforward steps to create your own batch of Easy Cinnamon Sugar Air Fryer Banana Chips that are delicious, crisp, and packed with flavor:

    1. Prepare the Base: Begin by selecting 3 ripe bananas. Peel and slice them into 1/8-inch thick rounds. The thickness is crucial—too thick, and they won’t crisp up; too thin, and they may burn.

    2. Mix Ingredients: In a mixing bowl, combine the cinnamon, sugar, and a pinch of salt. This blend will coat the banana slices irregularly, providing that classic cinnamon sugar flavor.

    3. Coat the Banana Slices: Gently mix the sliced bananas with the cinnamon-sugar mixture until they are uniformly coated. If using oil, lightly drizzle it over the bananas before coating them to help them crisp up.

    4. Preheat the Air Fryer: Preheat your air fryer to 350°F (175°C) for about 3-5 minutes. Preheating ensures an even cooking temperature, giving you that desired crunch.

    5. Arrange the Banana Slices: Place the bananas in a single layer within the air fryer basket. Avoid overcrowding; if needed, cook in batches for the best results.

    6. Air Fry the Chips: Cook the bananas at 350°F (175°C) for about 10-15 minutes. Check halfway through and shake the basket to ensure even cooking. The chips will be done when they are golden brown and crispy.

    7. Cool and Crisp: Once cooked, remove the chips from the air fryer and let them cool on a wire rack. Cooling helps them become even crisper.

    8. Store Properly: If you have any leftover chips, store them in an airtight container once completely cooled to prolong their crispiness.

    Make sure to monitor the cooking time closely as some air fryers may vary. This simple, step-by-step approach ensures that you create perfect Easy Cinnamon Sugar Air Fryer Banana Chips every time, making them one of the best healthy snacks you can offer yourself and your loved ones!


    Mastering Easy Cinnamon Sugar Air Fryer Banana Chips: Advanced Tips and Variations

    To take your Easy Cinnamon Sugar Air Fryer Banana Chips to the next level, consider these advanced tips and fun variations:

    1. Use Perfectly Ripe Bananas: Selecting your bananas is key. The ideal banana for chips is one that’s slightly overripe, providing natural sweetness for your healthy snack. Avoid any bananas that have green tinges—they’re not sweet enough.

    2. Experiment with Different Spices: While cinnamon sugar is delightful, innovate with a mix of spices like pumpkin spice or cardamom. They can introduce a new flavor profile that enchants the palate.

    3. Add Other Fruits: Feel free to mix in apple or pear slices. They can cook at similar times as bananas, creating a delightful medley of flavors.

    4. Try Sweet and Savory Together: For an unexpected twist, sprinkle some chili powder or cayenne for a sweet and spicy version of your banana chips.

    5. Sugary Crunch: If you want a bit of extra crunch, consider adding finely crushed nuts such as almonds or walnuts to your cinnamon-sugar mixture. They won’t just add flavor, but extra nutrients as well!

    6. Food Pairing Ideas: Enhance your healthy snacking experience by pairing these chips with nut butter for a protein boost or a yogurt dip for additional freshness. This combination can make your snack more filling and satisfying.

    By following these tips and experimenting with variations, your Easy Cinnamon Sugar Air Fryer Banana Chips can be an exciting endeavor each time you make them. Such creativity keeps snacking engaging and can help maintain a healthy lifestyle—a perfect example of how healthy snacks can be full of variety and flavor!


    How to Store Easy Cinnamon Sugar Air Fryer Banana Chips: Best Practices

    Storing your freshly made Easy Cinnamon Sugar Air Fryer Banana Chips requires some special care to retain their delightful crunch:

    1. Cooling is Crucial: First, always allow your banana chips to cool completely before placing them in storage. This step prevents moisture from trapping, which can make your chips soggy.

    2. Airtight Containers: Store cooled banana chips in airtight containers. Glass jars, zip-lock bags, or plastic containers can all work well, but ensure they are sealed tightly to keep air out.

    3. Room Temperature Storage: For best results, keep your banana chips at room temperature in a cool, dry place. Never refrigerate them, as this will change the texture and lead to moisture buildup.

    4. Longer Storage Option: If you want to store your banana chips for an extended period, consider freezing them. Lay them out on parchment paper in a single layer and freeze until solid. Once frozen, transfer them to a freezer-safe bag or container. Note that they may lose some crispiness upon thawing, so they’re best enjoyed fresh.

    By following these best practices for storage, you can enjoy your Easy Cinnamon Sugar Air Fryer Banana Chips as healthy snacks that remain fresh and crispy over several days. Knowing how to store your snacks properly means you can indulge guilt-free whenever the craving arises.


    Nutritional Value of Easy Cinnamon Sugar Air Fryer Banana Chips

    When considering healthy snacks, understanding the nutritional value is vital. Here’s a breakdown of the approximate nutritional value per serving (based on a 1-ounce serving size, or about 10 chips):

    • Calories: Approximately 150 calories
    • Total fat: 2g
    • Saturated fat: 1g
    • Carbohydrates: 34g
    • Dietary fiber: 3g
    • Sugars: 12g (includes both naturally occurring sugars and any added sugars)
    • Protein: 1g
    • Potassium: 300mg
    • Vitamin C: 10% of daily value
    • Calcium: 2% of daily value
    • Iron: 2% of daily value

    Health Benefits:

    • Low in calories: These chips offer a guilt-free option for snacking.
    • Nutrient-rich: Naturally rich in potassium, bananas support heart health and blood pressure regulation.
    • Dietary fiber: The presence of dietary fiber promotes healthy digestion and can help you feel fuller longer.

    Adopting these Easy Cinnamon Sugar Air Fryer Banana Chips into your array of healthy snacks provides not only a delectable treat but also nutritional benefits that support your overall health. Made with simple, wholesome ingredients, you can enjoy them without any of the guilt associated with typical junk food!


    FAQs: Frequently Asked Questions About Easy Cinnamon Sugar Air Fryer Banana Chips

    Q: Can I use green bananas to make these chips?
    A: It’s best to use ripe bananas for the ideal sweetness and texture. Green bananas are too starchy and won’t provide the same flavor or crispiness.

    Q: How long do the banana chips last?
    A: When stored in an airtight container at room temperature, they can last up to one week. For longer preservation, freeze them as detailed above.

    Q: Can I make these banana chips without cinnamon?
    A: Absolutely! Feel free to omit cinnamon and substitute it with other spices like nutmeg or even flavored extracts to customize them to your taste.

    Q: How do I know when the banana chips are done?
    A: The chips should be golden brown and crispy to the touch. Each air fryer may vary, so check frequently during the cooking process.

    Q: Are these chips suitable for kids?
    A: Yes! These banana chips are a fun, healthy snack that kids usually love. They are a great alternative to sugary and processed snacks.

    Q: How can I make them spicier?
    A: You can add a pinch of chili powder or cayenne pepper to the cinnamon sugar mixture for a sweet and spicy flavor that’s both exciting and unique!

    These frequently asked questions should help clarify any uncertainties and encourage readers to take the plunge into making these wonderful healthy snacks, allowing everyone to enjoy their homemade Easy Cinnamon Sugar Air Fryer Banana Chips!

    In conclusion, by embracing this deliciously simple recipe, you’re not just making snacks but also creating healthier habits for yourself and your loved ones. Enjoy the crispy crunch and delightful sweetness any time you need a quick, nutritious bite!

  • Homemade Crustless Rhubarb Pie

    Homemade Crustless Rhubarb Pie

    Homemade Crustless Rhubarb Pie: A Tropical Delight

    Introduction to Homemade Crustless Rhubarb Pie

    Are you a fan of easy and delectable dessert recipes that don’t require complicated steps or extensive ingredients? If so, then this homemade crustless rhubarb pie is just what you need! This recipe not only simplifies the traditional pie-making process but also embraces the vibrant, tart flavor of rhubarb, making it a delightful treat for any occasion. The beauty of this pie is that you can enjoy it without the added calories and carbs from a crust, allowing the rhubarb to shine as the star ingredient.

    What sets our crustless rhubarb pie apart is its versatility; it’s a fantastic option for various dietary needs. Whether you’re looking for a vegan, gluten-free, or low-calorie dessert, this pie has got you covered. Made with fresh rhubarb and simple pantry staples, this recipe will inspire busy parents, health-conscious individuals, and anyone who loves baked goods to whip it up in no time. Plus, it’s a delightful way to introduce your family to the wonderful taste of rhubarb, often overlooked in the world of dessert recipes.

    Why You Should Try This Recipe

    With its straightforward preparation, minimal cooking skills required, and nourishing properties, homemade crustless rhubarb pie is a fabulous choice for home cooks of all levels. It makes a charming end to family dinners, a sweet surprise for guests, or even a post-work treat for yourself. Let’s dive deeper into the benefits and advantages of this scrumptious dessert!

    Benefits and Advantages of Homemade Crustless Rhubarb Pie

    Crafting a delicious pie doesn’t have to be a daunting task. This homemade crustless rhubarb pie is perfect for those who want to indulge without the hassle of making a traditional pie crust. Here are the benefits of choosing this delightful dessert:

    1. Simplicity: With just a handful of ingredients, you can create a beautiful pie without the fuss. There is no rolling, shaping, or baking a separate crust to worry about — you simply focus on the filling.

    2. Health Benefits: Rhubarb is incredibly nutritious, offering a good amount of dietary fiber, calcium, and vitamins. By omitting the crust, you cut down on calories and carbs, which is always a plus for those watching their diet.

    3. Versatile for Dietary Needs: This recipe can easily accommodate various dietary requirements. Whether you’re vegan, gluten-free, or need a low-calorie treat, this pie can be adapted accordingly. Use plant-based milk and egg substitutes for a vegan version, and ensure your sweeteners align with gluten-free needs.

    4. Perfect for All Occasions: Whether you’re hosting a dinner party, celebrating a special occasion, or simply want a comforting dessert at home, this pie fits all situations. It’s light enough for summer gatherings and cozy enough for winter nights.

    5. Quick Preparation: Ideal for busy parents or students, this recipe yields a delicious dessert with minimal time investment. It’s an excellent way to surprise and delight family or roommates without spending hours in the kitchen.

    By creating this homemade crustless rhubarb pie, you will not only satisfy your sweet tooth but also serve up a dish rich in flavor and nutrients. Let’s explore the essential ingredients that make this pie a winner.

    Ingredients Overview

    Essential Ingredients for Homemade Crustless Rhubarb Pie

    This crustless pie requires a short list of ingredients to deliver incredible taste and texture. Here’s what you’ll need:

    • 4 cups of fresh rhubarb, chopped
    • Rhubarb gives this pie its signature tangy flavor. Make sure to use fresh, tender stalks for the best results.

    • 1 1/2 cups of granulated sugar (or your choice of natural sweetener)

    • Sweetens the filling. If you’re looking for a low-calorie option, consider using stevia or monk fruit sweetener to reduce sugar content.

    • 4 large eggs (or flax eggs for vegan option)

    • Acts as a binder to hold the pie together. For a vegan alternative, mix 1 tablespoon of ground flaxseed with 2.5 tablespoons of water to create a flax egg.

    • 1 cup of milk (dairy or plant-based)

    • Adds creaminess to the filling. Almond milk, coconut milk, or oat milk works as excellent vegan alternatives.

    • 1 cup of all-purpose flour (or a gluten-free flour blend)

    • This provides structure. For a gluten-free option, choose a gluten-free 1:1 baking flour.

    • 1 teaspoon of vanilla extract

    • Enhances the flavor, adding a warm depth to the pie.

    • 1 teaspoon of baking powder

    • Gives the pie an airy texture.

    • Pinch of salt

    • Balances sweetness and enhances flavor.

    These ingredients come together to create a light and fluffy pie, bursting with the bright flavors of rhubarb. Next, we’ll discuss how to customize this recipe for various dietary needs with substitutions.

    Dietary Substitutions to Customize Your Homemade Crustless Rhubarb Pie

    Customization is key when it comes to accommodating different dietary preferences. Here are some smart substitutions that you can make in this crustless rhubarb pie:

    • Flour: If you’re gluten-free, opt for almond flour or a certified gluten-free all-purpose blend. Not only does this work perfectly, but it can also add a lovely nutty flavor to your pie.

    • Sweeteners: If you want a healthier sweetener option, consider using dates or maple syrup instead of granulated sugar. Just make sure to adjust the amount accordingly, as these natural sweeteners are often sweeter.

    • Dairy Alternatives: For lactose intolerance or a vegan diet, swapping regular milk for almond, soy, or coconut milk works seamlessly. The flavor will still shine through, ensuring you don’t miss out on the creamy texture.

    • Egg Replacement: Besides flax eggs, you can use unsweetened applesauce (1/4 cup = 1 egg) or silken tofu blended until smooth as viable substitutes for eggs in a vegan diet.

    How to Prepare the Perfect Homemade Crustless Rhubarb Pie: Step-by-Step Guide

    Creating this delicious homemade crustless rhubarb pie is a seamless process, even for novice bakers. Follow this step-by-step guide to ensure your pie turns out perfectly every time:

    1. Preheat the Oven: Set your oven to 350°F (175°C) to ensure it’s hot when your pie is ready to bake.

    2. Prepare Your Dish: Grease a 9-inch pie pan or round baking dish with a bit of oil or cooking spray to prevent sticking.

    3. Chop the Rhubarb: Wash and chop your rhubarb into small, even pieces (about 1-inch long). This helps ensure consistent cooking.

    4. Mix the Dry Ingredients: In a large bowl, whisk together the flour, sugar, baking powder, and salt until combined. If you’re using gluten-free flour, ensure it’s blended well with the other dry ingredients.

    5. Combine the Wet Ingredients: In a separate bowl, beat the eggs (or flax eggs), vanilla extract, and milk until well combined.

    6. Combine Wet and Dry Ingredients: Slowly pour the wet mixture into the dry ingredients, stirring until just combined. Keep mixing until you achieve a smooth batter – it’s okay to have a few lumps!

    7. Fold in the Rhubarb: Gently fold in the rhubarb pieces until they are coated evenly with the batter. This ensures every bite is filled with the delightful flavor of the fruit.

    8. Pour into the Baking Dish: Transfer the mixture into your prepared pie pan, scraping the bowl to ensure no batter is left behind.

    9. Bake the Pie: Place the pie dish in your preheated oven and bake for 40-45 minutes, or until the top is golden and the center is set. A toothpick inserted into the center should come out clean.

    10. Cool the Pie: Once baked, remove it from the oven and allow it to cool completely on a wire rack. This will help the pie firm up as it cools.

    11. Serve: Slice and serve your delicious crustless rhubarb pie plain, or with a dollop of whipped cream or dairy-free alternative, if desired.

    Following these steps ensures you create a delightful pie that resonates with both traditional and innovative dessert recipes. Ready for some advanced tips and variations to elevate your pie game?

    Mastering Homemade Crustless Rhubarb Pie: Advanced Tips and Variations

    While the basic recipe for homemade crustless rhubarb pie is fantastic on its own, experimenting with variations can take your baking experience to another level. Here are some advanced tips and ideas for variations:

    • Add Spices: Enhance the flavor by adding ground cinnamon or nutmeg. A teaspoon of cinnamon can add warmth and complement the tartness of the rhubarb beautifully.

    • Fruit Blends: Consider mixing rhubarb with other fruits like strawberries or blueberries. Not only does this add color, but it can also enhance sweetness and complexity in flavor.

    • Nuts and Seeds: For a delightful crunch, fold in some chopped nuts or seeds, such as walnuts or pumpkin seeds. They add texture and healthy fats to the dish.

    • Zest for Flavor: Grate some lemon or orange zest into the batter for a refreshing citrus touch that brightens up the overall flavor profile of the pie.

    • Top with Oats: For a streusel-like topping, mix oats with a bit of melted coconut oil or butter, brown sugar, and a sprinkle of cinnamon. Spread this mixture over the pie before baking for an enticing crunchy top.

    These simple variations can transform your crustless rhubarb pie from ordinary to extraordinary, making it a hit at any gathering.

    How to Store Homemade Crustless Rhubarb Pie: Best Practices

    Storing your homemade crustless rhubarb pie properly can keep it fresh and delicious for several days. Here are the best practices for storage:

    • Room Temperature: If you plan to eat the pie within a day or two, it’s perfectly safe to leave it covered at room temperature.

    • Refrigeration: For longer storage, cover the pie with plastic wrap or transfer it to an airtight container and refrigerate it. It can last up to one week in the fridge.

    • Freezing: If you’d like to store it for even longer, consider freezing your pie. Slice it into individual portions, wrap each slice in plastic wrap, and place it in a freezer-safe bag or container. This allows you to enjoy it later without defrosting the entire pie. It can be frozen for up to three months.

    • Reheating: To reheat, take a slice straight from the fridge or freezer, and warm it in the oven at 350°F (175°C) for about 10-15 minutes, or until heated through. Enjoy with a scoop of ice cream or whipped topping for a comforting dessert experience.

    By following these storage methods, your homemade crustless rhubarb pie will stay fresh and ready to relish at any time.

    Nutritional Value of Homemade Crustless Rhubarb Pie

    Understanding the nutritional content of your homemade crustless rhubarb pie can help you make informed choices about indulging in this delicious dessert. Here’s a general breakdown based on typical ingredients:

    • Serving Size: 1 slice (1/8 of pie)
    • Calories: Approximately 180
    • Total Fat: 5g
    • Saturated Fat: 1.5g
    • Cholesterol: 35mg
    • Sodium: 50mg
    • Total Carbohydrates: 30g
    • Dietary Fiber: 2g
    • Sugars: 15g
    • Protein: 4g

    This crustless pie is relatively low in calories and fat compared to traditional pies, making it a more nutritious dessert option. Adjustments for ingredients like using a sugar substitute or alternative flour can further impact the nutritional profile, giving you the flexibility to create a dessert that fits your dietary needs.

    FAQs: Frequently Asked Questions About Homemade Crustless Rhubarb Pie

    Q1: Can I use frozen rhubarb for this recipe?
    Yes, you can use frozen rhubarb! Just remember to thaw and drain excess moisture before adding it to the mixture to prevent extra liquid.

    Q2: How do I know when my rhubarb pie is done?
    Your pie is done when the top is golden brown and a toothpick inserted into the center comes out clean.

    Q3: Is rhubarb pie gluten-free?
    The traditional recipe isn’t gluten-free but can easily be made gluten-free by substituting all-purpose flour with a gluten-free flour blend.

    Q4: Can I make this pie without eggs?
    Absolutely! You can use flax eggs or applesauce as a substitute. Check the earlier section on ingredient substitutions for specific measurements.

    Q5: How can I enhance the sweetness without adding sugar?
    Try natural sweeteners like agave syrup, maple syrup, or stevia. These alternatives can provide sweetness without the calories of refined sugar.

    By addressing these frequently asked questions, you can make informed decisions and adjustments to ensure your rhubarb pie is a true reflection of your taste preferences and dietary needs.


    Now that you have a comprehensive guide to making a delightful homemade crustless rhubarb pie, it’s time to gather your ingredients and get baking! This simple yet satisfying dessert is bound to amaze your friends and family, and it’s a wonderful way to celebrate the vibrant flavors of rhubarb in a healthier way. Enjoy your culinary adventure!

  • Buttermilk Rhubarb Pie Cake

    Buttermilk Rhubarb Pie Cake

    Buttermilk Rhubarb Pie Cake: A Tropical Delight

    Introduction to Buttermilk Rhubarb Pie Cake

    Welcome to the delightful world of Buttermilk Rhubarb Pie Cake, a luscious dessert that masterfully blends the tartness of rhubarb with the creamy richness of buttermilk. If you’re seeking new dessert recipes that are simple, healthy, and versatile, this cake could be your next favorite! Perfect for home cooks, busy parents, students, and anyone who loves baking, this pie cake serves as a wonderful way to enjoy seasonal rhubarb.

    This recipe not only showcases the unique flavor combination of tangy rhubarb and rich, smooth buttermilk but also presents opportunities for dietary adjustments. Whether you’re looking for a vegan option, gluten-free subs, or mindful calories, this cake can cater to diverse dietary needs. Plus, it’s a breeze to make, which means you won’t spend all afternoon in the kitchen—leaving you with more time to relish the delicious results.

    Imagine serving this delightful treat at your next family gathering or enjoying a slice as a refreshing end to your busy day. With its irresistible flavors, Buttermilk Rhubarb Pie Cake promises to inspire your next baking adventure!

    Benefits and Advantages of Buttermilk Rhubarb Pie Cake

    The Buttermilk Rhubarb Pie Cake is more than just a delicious dessert; it offers numerous benefits that make it a standout choice among many dessert recipes available today. To begin with, the preparation is straightforward. Even if you’re a beginner baker, you can follow this recipe and impress your friends and family with minimal effort.

    This cake is also incredibly adaptable. The primary flavor—rhubarb—brings a punch of tartness that pairs beautifully with the sweet and creamy butter. Moreover, rhubarb is rich in vitamin K and fiber, which can contribute to better digestion and promote heart health. And thanks to buttermilk, the cake achieves a moist texture while being lower in fat than traditional heavy creams.

    For those concerned with dietary restrictions, this pie cake stands out due to its flexibility. You can easily alter the base recipe for vegan-friendly ingredients or gluten-free alternatives, ensuring that everyone at the table can enjoy a slice. It fits right into the busy lifestyles of working professionals or newlyweds who want quick yet satisfying homemade desserts.

    Finally, the Buttermilk Rhubarb Pie Cake is not just a dessert; it acts as a crowd-pleaser, ideal for special occasions or simple family dinners alike. It appeals to all—from food enthusiasts to health-conscious individuals—making it a must-try for any dessert lover.

    Ingredients Overview

    Essential Ingredients for Buttermilk Rhubarb Pie Cake

    To successfully create this mouthwatering Buttermilk Rhubarb Pie Cake, gather the following ingredients:

    • 2 cups rhubarb, diced: Provides the signature tang and unique flavor.
    • 1 cup granulated sugar: Balances the tartness of the rhubarb.
    • 1 cup all-purpose flour (or gluten-free flour): Acts as the cake’s base; a gluten-free option keeps it accessible for gluten-sensitive readers.
    • 1/2 cup unsalted butter, melted (or coconut oil for vegan): Contributes moisture and richness. Vegan alternative options offer flexibility for dietary needs.
    • 1 cup buttermilk (or almond milk + vinegar for vegan): Adds creaminess and a slight tangy flavor that enhances the cake’s overall profile.
    • 2 large eggs (or flaxseed meal for vegan): Provides structure and binding. Substitute with flaxseed meal for an egg-free version.
    • 1 teaspoon vanilla extract: Infuses a warm undertone and enhances flavor.
    • 1 teaspoon baking powder: Helps the cake rise.
    • 1/2 teaspoon baking soda: Works alongside baking powder for optimal fluffiness.
    • 1/4 teaspoon salt: Enhances flavor and balances sweetness.

    This ingredients list allows for various dietary adaptations, ensuring everyone can enjoy a phenomenal piece of dessert.

    Dietary Substitutions to Customize Your Buttermilk Rhubarb Pie Cake

    To appeal to various dietary needs, here are some suggested substitutions:

    • Gluten-Free Option: Choose gluten-free all-purpose flour in place of conventional flour for those avoiding gluten. Ensure that any additional binders are included if required.

    • Vegan Alternative: For a vegan version, use coconut oil instead of butter. Substitute the eggs with a flaxseed meal (1 tablespoon of flaxseed mixed with 2.5 tablespoons of water, let sit until gel-like).

    • Dairy-Free: Use almond milk combined with apple cider vinegar to create a buttermilk alternative, ensuring that it remains creamy without using dairy.

    • Reduced Sugar: For those conscious of sugar intake, consider a sugar substitute such as coconut sugar, honey, or maple syrup, keeping in mind this may change the texture slightly.

    By implementing these substitutions, you can tailor your Buttermilk Rhubarb Pie Cake to fit multiple dietary needs without sacrificing flavor or texture. This versatility sets it apart from other dessert recipes.

    How to Prepare the Perfect Buttermilk Rhubarb Pie Cake: Step-by-Step Guide

    Creating the perfect Buttermilk Rhubarb Pie Cake involves a few straightforward steps. Follow these instructions carefully, and you’ll have a delicious treat to share.

    1. Prepare the Oven: Preheat your oven to 350°F (175°C). This initial step ensures an even bake as soon as the cake goes in.

    2. Combine Dry Ingredients: In a mixing bowl, whisk together the flour, baking powder, baking soda, and salt. This ensures your cake rises evenly and has a balanced flavor.

    3. Mix Wet Ingredients: In a separate bowl, combine the melted butter (or coconut oil) and sugar until creamy. Next, incorporate the buttermilk (or almond milk) and vanilla extract, mixing until well blended.

    4. Incorporate the Eggs: Add the eggs (or flaxseed mixture) into the wet ingredients, stirring until fully combined. This binding ingredient is vital for cake structure.

    5. Merge Dry and Wet Mixtures: Gradually incorporate the dry mixture into the wet ingredients. Be careful not to overmix; a few lumps are fine, as overworking the batter can lead to a tough cake.

    6. Add Rhubarb: Gently fold in the diced rhubarb until evenly distributed throughout the batter. This step ensures each bite features that lovely tang.

    7. Prepare the Baking Pan: Grease an 8-inch round cake pan with butter or cooking spray. Pour the batter into the prepared pan, smoothing out the top with a spatula.

    8. Bake: Place the pan in the preheated oven and bake for about 45-50 minutes. To ensure it’s baked through, insert a toothpick in the center; it should come out clean or with a few moist crumbs.

    9. Cool: Once baked, remove the cake from the oven and allow it to cool in the pan for about 10 minutes. Then, carefully transfer it to a wire rack to cool completely.

    10. Serve: Slice the cooled cake into wedges, serving with a dollop of whipped cream or a drizzle of vanilla glaze if desired.

    This step-by-step process ensures that everyone, from novice bakers to seasoned pastry chefs, can master this delightful Buttermilk Rhubarb Pie Cake. It’s indeed one of those dessert recipes worth making in any kitchen!

    Mastering Buttermilk Rhubarb Pie Cake: Advanced Tips and Variations

    To elevate your Buttermilk Rhubarb Pie Cake, consider the following advanced tips and delightful variations:

    • Add Spices: Enhance the flavor profile by adding cinnamon or nutmeg to the batter. Just a teaspoon can infuse warmth and depth.

    • Glaze it Up: After the cake cools, consider drizzling a simple glaze made from powdered sugar and lemon juice for a zesty finish that pairs well with the rhubarb.

    • Incorporate Other Fruits: Get creative by mixing in or substituting other fruits like strawberries or blueberries alongside the rhubarb for a mixed fruit experience.

    • Serve Warm: This pie cake can be served warm, paired with a scoop of vanilla ice cream or whipped cream for extra indulgence.

    • Layering: Turn your cake into a layered dessert by slicing it horizontally and spreading whipped cream and additional rhubarb filling between the layers. This presentation is perfect for special occasions.

    These tips not only help you master your baking skills but also allow you to personalize your cake to suit any gathering or event, making it a standout among dessert recipes.

    How to Store Buttermilk Rhubarb Pie Cake: Best Practices

    After making your Buttermilk Rhubarb Pie Cake, knowing how to store it properly is essential to maintain its freshness and flavor.

    • Refrigeration: To keep your cake fresh for about 3-5 days, store it in an airtight container in the refrigerator. This method keeps moisture in and prevents it from drying out.

    • Freezing: If you wish to save some for later, this cake freezes well, lasting up to 2-3 months. Wrap individual slices in plastic wrap and then a layer of aluminum foil. This double-wrapping helps avoid freezer burn.

    • Reheating: For the best flavor, thaw the cake in the refrigerator overnight before reheating. Warm individual slices in the microwave for about 20 seconds or until just heated through, ensuring the cake remains moist.

    By following these storage tips, you maximize the life and flavor of your Buttermilk Rhubarb Pie Cake, making it an ideal candidate for meal prep among dessert recipes.

    Nutritional Value of Buttermilk Rhubarb Pie Cake

    Understanding the nutritional value of your dessert can be insightful, especially for those tracking calories or dietary intake. Here’s an approximate breakdown of the nutritional content for one slice of Buttermilk Rhubarb Pie Cake based on a recipe serving 12 slices:

    • Calories: 180-220
    • Total Fat: 7-9g
    • Saturated Fat: 3-4g
    • Cholesterol: 45mg
    • Sodium: 150-200mg
    • Total Carbohydrates: 28-33g
    • Dietary Fiber: 1-2g
    • Sugars: 8-12g
    • Protein: 3-4g

    The cake delivers a balance of macronutrients while providing some vitamins and minerals, particularly when incorporating rhubarb, which adds fiber. For those adapting the recipe for health reasons, consider substituting sugar with natural sweeteners to lower calories, or using almond milk to reduce saturated fat.

    In summary, while indulging in this delightful pie cake, you also contribute to your nutritional intake positively—an excellent choice among the multitude of dessert recipes out there.

    FAQs: Frequently Asked Questions About Buttermilk Rhubarb Pie Cake

    Q1: Can I use frozen rhubarb for this recipe?
    Yes, you can use frozen rhubarb. Make sure to thaw and drain excess moisture before adding it to the batter to prevent a watery cake.

    Q2: How do I know when the cake is done?
    The cake is done when a toothpick inserted into the center comes out clean or with just a few moist crumbs. Keep an eye on it, especially towards the end of the baking time.

    Q3: Is it possible to make this cake ahead of time?
    Absolutely! You can bake the cake a day in advance. Just store it properly as mentioned above, and it will remain delicious for your event.

    Q4: Can I make this cake without eggs?
    Yes, you can replace the eggs with a flaxseed meal or a store-bought egg substitute. Just remember to adjust cooking times slightly, as egg-free options may require different settings.

    Q5: How can I enhance the flavor?
    Consider adding spices such as cinnamon or almond extract to heighten the flavors. A topping of vanilla glaze or fresh whipped cream can elevate the presentation as well.

    With these FAQs answered, you are well-prepared to embark on your baking journey with Buttermilk Rhubarb Pie Cake, a dessert that satisfies cravings while accommodating diverse dietary preferences—truly a masterpiece among dessert recipes!

  • This Sweet Sourdough Recipe Will Change Your Life

    This Sweet Sourdough Recipe Will Change Your Life

    This Sweet Sourdough Recipe Will Change Your Life!: A Tropical Delight

    Introduction to This Sweet Sourdough Recipe Will Change Your Life!

    Are you ready to transform your baking game? Look no further than this sweet sourdough recipe! When it comes to recipe ideas, this one is a true gem that combines the tangy depth of traditional sourdough with a sweetness that makes it irresistibly delightful. Perfect for home cooks, busy parents, and baking enthusiasts alike, this recipe delivers an exceptionally simple yet scrumptious treat that everyone will love.

    What sets this sweet sourdough apart is its versatility. It’s not just another loaf of bread; it’s a canvas for creativity! You can easily adapt it to be vegan, gluten-free, or low-calorie, making it an inclusive option for various dietary needs. This recipe is not only simple but also packed with health benefits, boosting your well-being while satiating your sweet tooth.

    Imagine waking up to the enticing aroma of freshly baked bread, knowing that it’s both nutritious and delicious. Whether you share it with family or enjoy a slice yourself, it’s bound to make your day a little sweeter. This recipe will inspire you to experiment in the kitchen and create something genuinely extraordinary that your loved ones will cherish.

    Benefits and Advantages of This Sweet Sourdough Recipe Will Change Your Life!

    Embracing this sweet sourdough recipe is about more than just baking; it’s about discovering numerous benefits that elevate your culinary experience. First, let’s acknowledge its ease of preparation. You do not need to be a seasoned baker to navigate this recipe successfully. With just a few simple steps, you’ll find yourself crafting a delicious loaf that draws admiration from all who taste it.

    Additionally, making your own sourdough has incredible health benefits. Sourdough fermentation improves the digestibility of gluten and enhances the availability of nutrients. By utilizing fresh, wholesome ingredients, you’re also able to control what goes into your food, steering clear of hidden preservatives often found in store-bought options.

    This recipe is incredibly versatile, making it suitable for various dietary needs. You will find that it’s easy to modify for those following vegan or gluten-free diets. For instance, you can substitute traditional flour with gluten-free blends, and opt for plant-based ingredients to appeal to vegan eaters.

    Moreover, this sweet sourdough recipe offers a refreshing twist, combining the beloved tang of sourdough with a delightful sweetness. Whether you choose to enjoy this bread on its own, slathered with your favorite spread, or even as a base for creative sandwiches, your taste buds will thank you. This experience is certain to inspire you and your friends, turning any ordinary day into an extraordinary one.

    Ingredients Overview

    Essential Ingredients for This Sweet Sourdough Recipe Will Change Your Life!

    To make this sweet sourdough, gather the following ingredients:

    • Sourdough Starter: 1 cup (240g) – This key ingredient gives the bread its characteristic tang and flavor.
    • Warm Water: 1 cup (240ml) – Helps activate the yeast in your sourdough starter.
    • All-Purpose Flour or Gluten-Free Flour: 4 cups (480g) – The base of the bread; for gluten-free, use a blend like almond, oat, or brown rice flour.
    • Sugar: 1/4 cup (50g) – This adds a touch of sweetness; feel free to use alternatives like coconut sugar or honey.
    • Salt: 1 teaspoon (5g) – Essential for flavor enhancement; skip it if on a low-sodium diet.
    • Coconut Milk or Dairy Milk: 1/2 cup (120ml) – For added moisture and richness; can be substituted with almond milk or any plant-based milk.
    • Eggs (optional): 2 – Using eggs contributes to a richer texture; for a vegan option, substitute with flaxseed meal or chia seeds mixed with water (1 tablespoon of seeds + 2.5 tablespoons of water = 1 egg).

    Each ingredient plays a vital role in the recipe. Sourdough starter is critical for leavening and flavor, while flour forms the structure of your bread. The sugar balances flavors and promotes browning during baking. If you’re looking for healthy recipe ideas, substituting sugars and fats with wholesome options contributes to a more nutritious outcome, making it suitable for diet-conscious individuals.

    Dietary Substitutions to Customize Your This Sweet Sourdough Recipe Will Change Your Life!

    Customizing this recipe to meet various dietary needs is incredibly easy! Here are a few suggested substitutes to consider:

    • Gluten-Free: Substitute all-purpose flour with a 1:1 gluten-free flour blend. Ensure that it includes xanthan gum to help bind the ingredients.
    • Vegan: As mentioned, replace eggs with a flaxseed meal or chia seed mixture. Additionally, use plant-based milk to maintain the fluffiness of the dough.
    • Lower Sugar: You can reduce the sugar by half, or use natural sweeteners like maple syrup or stevia, depending on your taste preference.
    • Dairy-Free: Should you prefer to avoid dairy, coconut milk or almond milk is an excellent substitute for the milk in this recipe.

    These substitutions not only make the recipe versatile but also keep it adaptable to your personal dietary choices.

    How to Prepare the Perfect This Sweet Sourdough Recipe Will Change Your Life!: Step-by-Step Guide

    Baking this sweet sourdough bread is a rewarding endeavor! Follow these step-by-step instructions to get started:

    1. Gather All Ingredients: Before you start, ensure you have all essential ingredients measured and ready. This will streamline the process!

    2. Activate Your Sourdough Starter: In a bowl, mix the sourdough starter with warm water. Leave it to sit for about 30 minutes until it becomes bubbly and active.

    3. Combine Dry Ingredients: In a large mixing bowl, blend the flour, sugar, and salt using a whisk. This step ensures even distribution of all ingredients.

    4. Mix in Wet Ingredients: Add your activated starter and coconut milk to the dry ingredients. Stir until everything is fully combined and forms a shaggy dough.

    5. Knead the Dough: Lightly flour your work surface and transfer the dough onto it. Knead for about 10 minutes until the dough becomes smooth and elastic. If it’s too sticky, sprinkle a little extra flour.

    6. First Rise: Place the kneaded dough in a lightly greased bowl. Cover it with a damp cloth and let it rise for 4-6 hours at room temperature or until it has doubled in size.

    7. Shape the Dough: Once risen, gently punch down the dough to release air. Transfer it to your floured countertop and shape it into a round or oval loaf.

    8. Second Rise: Place the shaped loaf on a parchment-lined baking sheet. Cover it again with a cloth and let it rise for about 1-2 hours or until it has puffed up.

    9. Preheat the Oven: About 30 minutes before baking, preheat your oven to 450°F (230°C), ensuring it’s nice and hot.

    10. Score the Loaf: Before baking, use a sharp knife or razor to make shallow cuts on the top of the dough. This helps release steam during baking and adds a decorative touch.

    11. Bake: Place the loaf in the oven and bake for 25-30 minutes or until it’s golden brown and has a hollow sound when tapped on the bottom.

    12. Cool: Once baked, transfer your delicious sourdough to a wire rack. Allow it to cool completely before slicing.

    With these easy-to-follow steps, your sweet sourdough will be a standout feature in your kitchen! You can adapt each step easily to fit dietary preferences or ingredient availability, making it a recipe that works for everyone.

    Mastering This Sweet Sourdough Recipe Will Change Your Life!: Advanced Tips and Variations

    To elevate this recipe, consider exploring these advanced tips and creative variations:

    • Add Ins: For a unique flavor profile, try mixing in dried fruits like raisins, cranberries, or chopped nuts into the dough during the kneading process. They add texture and a nutritional boost!

    • Herbs and Spices: Experiment with adding cinnamon, vanilla extract, or even herbs like rosemary for a savory twist.

    • Glazing: Before baking, brush the loaf with an egg wash or plant-based milk for a beautiful golden crust.

    • Adjust Sweetness: If you prefer a sweeter loaf, consider increasing the sugar or adding a bit of honey or maple syrup directly into the mix.

    • Check Doneness: An instant-read thermometer is your best friend! The internal temperature should reach around 200°F (93°C) for perfectly baked sourdough.

    Remember, these variations are about being creative in the kitchen. With every modification, you take this recipe to new culinary heights, ensuring that it remains exciting and enjoyable.

    How to Store This Sweet Sourdough Recipe Will Change Your Life!: Best Practices

    Storing your sweet sourdough properly is essential to maintain its freshness and texture:

    • Room Temperature: If you plan to consume your bread within 3 days, you can keep it wrapped in a kitchen towel or placed in a paper bag at room temperature.

    • Refrigeration: For longer storage, consider refrigerating the bread. Wrap it tightly in plastic wrap or aluminum foil, as this helps retain moisture. However, fridge-treated bread may dry out faster, so it’s best consumed within a week.

    • Freezing: For extended storage (up to three months), slice the loaf and wrap each piece individually in plastic wrap before placing them in a freezer-safe bag. This allows you to thaw only what you need.

    • Reheating: To enjoy your sweet sourdough, you can toast slices straight from the freezer or reheat the whole loaf in a low oven (350°F/175°C) for about 10-15 minutes until warmed through.

    By following these best practices, you ensure that your sweet sourdough stays fresh and delicious for as long as possible.

    Nutritional Value of This Sweet Sourdough Recipe Will Change Your Life!

    Understanding the nutritional value of your sweet sourdough helps you make informed choices. Each slice offers a balanced combination of macronutrients and vitamins, including:

    • Calories: Approximately 150 calories per slice (based on a 12-slice loaf).
    • Carbohydrates: 30g, supplying a quick energy source.
    • Protein: 4g, helping repair tissues and supporting overall health.
    • Fat: 2g, depending on the use of eggs and milk.
    • Fiber: 2g, aiding digestion and promoting satiety.

    By using whole food ingredients and customizing your loaf, you can adjust these nutritional values. Opting for gluten-free flour could slightly alter the calorie count, while adding nuts or seeds increases protein and healthy fats.

    This sweet sourdough recipe is not only a delicious treat but a well-balanced addition to your diet when prepared mindfully.

    FAQs: Frequently Asked Questions About This Sweet Sourdough Recipe Will Change Your Life!

    1. Can I use whole wheat flour instead of all-purpose flour?

    Yes! Whole wheat flour will add a nuttier flavor and more fiber. However, it may make the bread denser. Consider combining it with all-purpose flour for a lighter loaf.

    2. How do I know when my sourdough is ready to bake?

    The dough should have doubled in size during the rising time and appear puffy. Performing the “poke test” is another trick; if your finger leaves a small dent without springing back, it’s ready.

    3. What can I use instead of sugar?

    You can replace sugar with honey, agave syrup, or coconut sugar. Just keep in mind the liquid adjustment if you’re using a liquid sweetener.

    4. Can this recipe be made without a sourdough starter?

    You can try using store-bought yeast; however, the sourdough flavor will not fully develop without the starter’s unique fermentation process.

    5. How should I store sourdough if it gets dry?

    If your sourdough starts to dry out, wrap it tightly in a damp cloth for a few hours to revive its moisture.

    6. Can I adapt the recipe for different flavors?

    Yes! Feel free to add various spices, herbs, or fruits to the dough. This way, you can experiment with flavors!

    By addressing these questions, we hope to clear any doubts and encourage you to embark on your baking adventure with this sweet sourdough recipe. Preparing it allows for creativity, dietary consideration, and, most importantly, a delightful outcome. Enjoy your baking!

  • Moist Rhubarb Quick Bread

    Moist Rhubarb Quick Bread

    Moist Rhubarb Quick Bread: A Tropical Delight

    Introduction to Moist Rhubarb Quick Bread

    Are you on the hunt for simple yet delectable breakfast ideas that can effortlessly elevate your morning routine? Look no further than this Moist Rhubarb Quick Bread! A delightful blend of sweet and tart, this quick bread is an ideal choice for busy parents, college students, or anyone looking to indulge in a heartwarming treat.

    Rhubarb—a fascinating vegetable often mistaken for fruit—adds a unique flavor profile, along with vibrant color, to this bread. It’s healthy, easy to prepare, and adaptable to a variety of dietary needs, including vegan and gluten-free options. This quick bread doesn’t just cater to those with specific dietary considerations; it’s also perfect for anyone who cherishes wholesome, homemade breakfast ideas that brighten up the morning.

    Not only is this recipe quick and hassle-free, but it also boasts several health benefits thanks to rhubarb, which is low in calories and high in fiber and antioxidants. Imagine the aroma wafting through your kitchen as you bake this delightful treat—perfect for a lazy Sunday brunch or even for meal prepping for busy weekdays. Let’s dive into how you can make the freshest and most scrumptious Moist Rhubarb Quick Bread in your own kitchen!

    Benefits and Advantages of Moist Rhubarb Quick Bread

    When considering breakfast ideas, it’s crucial to select recipes that are not only delicious but also beneficial to your health. Moist Rhubarb Quick Bread offers you a plethora of advantages that make this recipe stand out.

    One of the main attractions of any quick bread is its ease of preparation. Thanks to the straightforward mixing method, you won’t find yourself battling with complex instructions or lengthy prep times. This recipe is especially appealing for busy parents or working professionals who may not have hours to spend in the kitchen.

    Additionally, the health benefits of rhubarb cannot be overlooked. It’s packed with various nutrients, including vitamins K and C, as well as minerals like calcium and potassium. These nutrients contribute to better bone health, improved digestion, and stronger immunity. Incorporating rhubarb into your diet encourages healthy eating habits without sacrificing taste, making it an exceptional choice for those of you who are diet-conscious.

    Moreover, this recipe can be easily customized. Whether you need it to be gluten-free or vegan, substitutions can make it suitable for various dietary restrictions. Everybody deserves to enjoy delicious breakfast ideas, and this Moist Rhubarb Quick Bread is versatile enough to cater to everyone.

    In a world where convenience often trumps nutritional value, this quick bread provides an excellent balance. You’ll not only enjoy a flavorful breakfast but also reap the health benefits, making it a winning addition to your breakfast repertoire. Now let’s move on to the ingredients that make this dish so special!

    Ingredients Overview

    Essential Ingredients for Moist Rhubarb Quick Bread

    Creating this delicious Moist Rhubarb Quick Bread requires just a handful of ingredients, most of which you might already have in your pantry. Here’s a detailed breakdown:

    • 2 cups all-purpose flour: Gives the bread structure. For a gluten-free option, consider using almond or coconut flour.
    • 1 tsp baking soda: Helps the bread rise.
    • 1 tsp baking powder: Adds additional lift.
    • 1/2 tsp salt: Enhances overall flavor.
    • 1 cup granulated sugar: Sweetens the bread. You can substitute with coconut sugar or a sugar alternative for a lower-calorie option.
    • 1/2 cup vegetable oil (or melted coconut oil): Keeps the bread moist. Use unsweetened applesauce for a lighter, vegan alternative.
    • 2 large eggs: Provide richness and structure. For a vegan option, use flax eggs (1 tbsp ground flaxseed + 2.5 tbsp water per egg).
    • 1 cup chopped rhubarb (fresh or frozen): The star ingredient that offers a tangy flavor.
    • 1 tsp vanilla extract: Adds depth to the flavor.
    • Optional: 1/2 cup nuts or chocolate chips: For extra texture and flavor.

    This combination of ingredients is both simple and accessible. It allows you to bake a delicious breakfast that is also nutritious. If you’re seeking alternative ingredients due to dietary preferences or restrictions, continue reading to explore possible substitutions.

    Dietary Substitutions to Customize Your Moist Rhubarb Quick Bread

    • Flour Options: For a gluten-free option, substitute all-purpose flour with gluten-free flour blends or almond flour. This means you won’t have to miss out on delightful breakfast ideas because of dietary restrictions.

    • Sweeteners: If you’re watching your sugar intake, you can use natural sweeteners like agave nectar or stevia in place of granulated sugar. Just remember to adjust the liquid components of your recipe accordingly.

    • Oils: Swap vegetable oil for unsweetened applesauce to drastically reduce calorie count. Alternatively, use coconut or avocado oil for healthier fat options.

    • Eggs: If you’re making the recipe vegan, remember to use flax eggs instead of regular ones. One flax egg is made by mixing 1 tablespoon of ground flaxseed with 2.5 tablespoons of water; let it sit until it thickens.

    • Add-ins: Feel free to customize your quick bread with different add-ons. For example, nuts like walnuts or pecans can provide additional texture, while chocolate chips can cater to a sweet tooth.

    Tailoring this Moist Rhubarb Quick Bread to meet your specific dietary needs while not sacrificing flavor or texture makes this recipe a fantastic choice for everyone. Now that you have a comprehensive understanding of the ingredients, let’s dive into the step-by-step preparation process!

    How to Prepare the Perfect Moist Rhubarb Quick Bread: Step-by-Step Guide

    Are you ready to whip up a batch of this Moist Rhubarb Quick Bread? Follow these straightforward steps for an effortless baking experience:

    1. Preheat the Oven: Start by preheating your oven to 350°F (175°C). This ensures that the bread bakes evenly.

    2. Prepare Your Baking Pan: Grease a 9×5-inch loaf pan or line it with parchment paper. This step helps the bread to release effortlessly after baking.

    3. Whisk Dry Ingredients: In a large bowl, whisk together the flour, baking soda, baking powder, and salt. This helps to evenly distribute the leavening agents throughout the flour.

    4. Combine Wet Ingredients: In another bowl, beat together the sugar and oil until well combined. Then, add the eggs (or flax eggs for vegan) and vanilla extract. Mix until smooth.

    5. Mix the Two Bowls: Slowly incorporate the dry ingredients into the wet mixture. Stir until just combined—do not overmix, as this can result in a dense bread.

    6. Add Chopped Rhubarb: Gently fold in the chopped rhubarb. Make sure it’s evenly distributed, as this will ensure a delightful taste in every bite.

    7. Optional Add-ins: If you’re choosing to add nuts or chocolate chips, now is the time to fold them into the batter.

    8. Pour into the Pan: Transfer the batter to your prepared loaf pan, spreading it evenly.

    9. Bake: Place the loaf in the preheated oven and bake for about 60-70 minutes. To check if it’s done, insert a toothpick into the center; it should come out clean or with a few moist crumbs.

    10. Cool: Once baked, remove the loaf from the oven and let it cool in the pan for about 10 minutes before transferring it to a wire rack to cool completely.

    11. Slice and Serve: Once cooled, slice the bread and enjoy it plain or with a spread of butter or cream cheese. Your delicious, moist rhubarb quick bread is now ready to be devoured!

    By following these simple steps, you can create an irresistible breakfast idea that will delight your family and friends. Feel free to customize the steps according to your baking habits, and get creative with your add-ins!

    Mastering Moist Rhubarb Quick Bread: Advanced Tips and Variations

    To make the most out of your Moist Rhubarb Quick Bread, here are some advanced tips and variations that will elevate this recipe even further:

    • Test Your Rhubarb: Ensure your rhubarb is fresh and tender. It should be firm to the touch but not too hard; this ensures optimal texture in your finished bread.

    • Experiment with Spices: Consider adding a pinch of cinnamon or nutmeg for an aromatic kick. These spices not only add flavor but also bring out the natural sweetness of the rhubarb.

    • Top with Crumble: For added texture, top the batter with a crumble made from oats, flour, and butter before baking. This will create a lovely crust.

    • Zest It Up: Add citrus zest (like lemon or orange) to the batter for an extra burst of flavor. This will complement the tartness of the rhubarb beautifully.

    • Serve Warm: For a delightful twist, try serving the bread warm, perhaps with a drizzle of honey or maple syrup. Pairing it with coffee or tea increases your enjoyment!

    By utilizing these tips and variations, you’re on your way to mastering the art of creating Moist Rhubarb Quick Bread, a versatile addition to your breakfast ideas.

    How to Store Moist Rhubarb Quick Bread: Best Practices

    To ensure your Moist Rhubarb Quick Bread stays delicious for days, proper storage is essential. Here are some best practices:

    • Refrigeration: If you plan to consume the bread within a week, store it in an airtight container or wrap it tightly in foil or plastic wrap and refrigerate, where it can last for up to a week.

    • Freezing: For longer storage, wrap the bread tightly in plastic wrap and place it in a freezer-safe bag or container. Label the package with the date for easy identification. The bread can be frozen for up to 3 months.

    • Thawing and Reheating: When you’re ready to enjoy your frozen bread, transfer it to the refrigerator to thaw overnight. If you prefer warm bread, reheat slices in the microwave for about 20 seconds or in a toaster oven until warmed through.

    Following these storage methods will ensure that your Moist Rhubarb Quick Bread remains moist and flavorful, making it a convenient option for breakfast or snacks, even on the busiest days.

    Nutritional Value of Moist Rhubarb Quick Bread

    Understanding the nutritional value of your homemade Moist Rhubarb Quick Bread can help you make informed decisions about your diet. Here’s a breakdown of the key nutritional elements per slice (assuming 10 slices from the loaf):

    • Calories: Approximately 190 calories
    • Total Fat: 7g
    • Saturated Fat: 1.5g
    • Cholesterol: 30mg (omit for a vegan bread)
    • Sodium: 180mg
    • Total Carbohydrates: 30g
    • Dietary Fiber: 1g
    • Sugars: 10g
    • Protein: 2g

    This quick bread offers a relatively low-calorie option while providing a satisfying treat for breakfast. By implementing dietary substitutions, you can easily adjust calorie counts or enhance the nutritional profile further.

    In the quest for viable breakfast ideas, this recipe presents a delightful choice that balances enjoyment with health, giving you the satisfaction of a homemade pastry without added guilt.

    FAQs: Frequently Asked Questions About Moist Rhubarb Quick Bread

    1. Can I use frozen rhubarb for this recipe?

    Absolutely! Frozen rhubarb works well in this recipe. Just ensure to thaw and drain any excess moisture to avoid a soggy bread.

    2. Can I make this recipe gluten-free?

    Yes! Substitute all-purpose flour with a gluten-free flour blend to enjoy this delightful quick bread without gluten.

    3. What can I use instead of eggs for a vegan version?

    You can use flax eggs made by mixing 1 tablespoon of ground flaxseed with 2.5 tablespoons of water for each egg you want to replace.

    4. How long does this quick bread last?

    When stored in an airtight container, it can last up to a week in the refrigerator. If frozen, it can last up to 3 months.

    5. Can I add other fruits to the batter?

    Certainly! While rhubarb is the star of the show, you can add fruits like strawberries or blueberries for additional sweetness and flavor.

    6. Is this bread suitable for kids?

    Yes! This bread is not only kid-friendly but also makes a wholesome option for their breakfast ideas, especially when well-balanced with the addition of rhubarb.

    By providing clear answers to these frequently asked questions, you can further enhance your understanding of Moist Rhubarb Quick Bread, making it a go-to recipe for your home baking adventures. Its versatility and health benefits make it an excellent choice for all!

    Now that you’ve journeyed through the entire process of preparing Moist Rhubarb Quick Bread, it’s time to grab your apron and kick off your baking session! Enjoy the satisfaction of creating something delicious and nutritious that’s perfect for breakfast or any time of the day.