Blog

  • Goat Cheese Spring Mix Salad With Raspberry Dressing

    Goat Cheese Spring Mix Salad With Raspberry Dressing

    Goat Cheese Spring Mix Salad With Raspberry Dressing: A Tropical Delight

    Introduction to Goat Cheese Spring Mix Salad With Raspberry Dressing

    Spring is a season of renewal and vibrant colors, making it the perfect time to explore fresh and light dishes. One such delightful creation is the Goat Cheese Spring Mix Salad with Raspberry Dressing. This salad is not just a feast for the eyes but also a culinary celebration of the flavors and textures that spring meals often feature.

    This dish combines a medley of crisp greens, creamy goat cheese, and a zesty raspberry dressing, producing a harmonious blend of sweet and tangy. With its simple preparation and wholesome ingredients, this salad is perfect for busy home cooks, nurturing parents looking for an easy yet nutritious dish, and busy professionals seeking a quick but elegant meal. Furthermore, it caters to various dietary needs, being inherently gluten-free and easily adaptable for vegan diets by substituting traditional ingredients.

    By incorporating fresh produce and nutrient-dense foods, this salad not only satisfies your taste buds but also contributes to your well-being. The combination of goat cheese, spring greens, and antioxidant-rich raspberry dressing elevates it beyond a typical salad while maintaining its ease of preparation. Whether you’re planning a light lunch, a side dish for a dinner party, or a refreshing picnic treat, this Goat Cheese Spring Mix Salad promises to be a hit that transcends seasons.

    With such enticing characteristics, this recipe will inspire even the most novice cooks to embrace more vibrant and colorful spring meals in their kitchens.

    Benefits and Advantages of Goat Cheese Spring Mix Salad With Raspberry Dressing

    The Goat Cheese Spring Mix Salad with Raspberry Dressing is a stellar representation of what spring meals should embody: freshness, health, and flavor. Its preparation is as straightforward as it gets, consisting of minimal cooking while highlighting the natural flavors of seasonal ingredients.

    Nutritional Benefits

    One of the primary benefits of this salad lies in its nutritional profile. The spring mix greens—often a combination of spinach, arugula, and other leafy greens—are loaded with vitamins A, C, and K, as well as fiber. Goat cheese not only adds creaminess but also provides protein and beneficial fatty acids, enhancing your overall nutrient intake.

    The raspberry dressing encapsulates the tangy sweetness of fresh berries, packed with antioxidants that combat oxidative stress in the body. Additionally, preparing the dressing at home allows for a healthier option compared to store-bought ones that can be high in added sugars and preservatives.

    Ease of Preparation

    This recipe shines in its simplicity. With just a handful of ingredients and minimal kitchen equipment required, busy parents or students can whip it up in under 30 minutes. The ability to prepare the components ahead of time makes it a practical choice for meal prep, ensuring you can enjoy balanced spring meals without the hassle of daily cooking.

    Versatility

    Versatility is another key advantage of this salad. You can easily customize it to accommodate various dietary preferences. Whether you’re looking for vegan alternatives or need a gluten-free option, this salad’s basic premise allows it to adapt seamlessly. It can be enjoyed as a main dish, a side, or even scaled up for meal prep.

    Ultimately, the Goat Cheese Spring Mix Salad with Raspberry Dressing stands out as a vibrant, nourishing option that embraces the spirit of spring while meeting diverse dietary needs. Its ease of preparation, health benefits, and flexibility truly make it a must-try for anyone looking to elevate their spring meals.

    Ingredients Overview

    Essential Ingredients for Goat Cheese Spring Mix Salad With Raspberry Dressing

    Here’s a detailed list of the ingredients you will need for this refreshing salad, along with their precise measurements:

    • 4 cups spring mix greens
      (You can use a blend of baby spinach, arugula, and other baby greens.)

    • 1 cup fresh raspberries
      (Rich in antioxidants and vitamins, ideal for the dressing.)

    • 1/3 cup goat cheese, crumbled
      (Provides a creamy texture and tangy flavor. Can be substituted with vegan cheese.)

    • 1/4 cup walnuts or pecans, toasted
      (Adds crunch and healthy fats; you can also use sunflower seeds for a nut-free option.)

    • 1/4 cup red onion, thinly sliced
      (A great source of antioxidants; can be omitted if you prefer a milder flavor.)

    • 1/2 cup extra virgin olive oil
      (Provides healthy monounsaturated fats; choose cold-pressed for maximum benefits.)

    • 1/4 cup balsamic vinegar
      (For acidity, enhancing the flavor of the salad; can substitute with apple cider vinegar.)

    • Honey or agave syrup to taste
      (Used in the dressing to balance the tartness of the raspberries. Optional for vegan diets.)

    Dietary Substitutions to Customize Your Goat Cheese Spring Mix Salad With Raspberry Dressing

    Adapting this salad for different dietary needs is as easy as a few ingredient swaps. For a vegan version, replace the goat cheese with crumbled tofu, avocado, or a store-bought vegan cheese option that meets your palate. Instead of honey in the dressing, a liquid sweetener like agave syrup or maple syrup works beautifully while adhering to vegan guidelines.

    For gluten-free meals, you’ll be glad to know this salad is naturally free from gluten as long as you check the labels on vinaigrettes or any packaged ingredients.

    If you’re looking for a lower-calorie option, you might reduce the amount of oil in the dressing or use a lighter variant like Greek yogurt mixed with raspberry puree.

    These substitutions ensure that the Goat Cheese Spring Mix Salad with Raspberry Dressing can cater to every dietary requirement without compromising on taste.

    How to Prepare the Perfect Goat Cheese Spring Mix Salad With Raspberry Dressing: Step-by-Step Guide

    Creating the perfect Goat Cheese Spring Mix Salad with Raspberry Dressing involves a few simple steps. Follow this clear guide to achieve a vibrant and delicious salad.

    1. Prepare the Dressing: In a blender or food processor, combine the fresh raspberries, balsamic vinegar, and honey (or agave syrup). Blend until smooth. Gradually add in the olive oil while blending until well emulsified. Taste and adjust seasoning as necessary, setting aside to allow the flavors to meld.

    2. Toast the Nuts: In a small skillet over medium heat, toast your walnuts or pecans until they become golden and fragrant, usually around 5-7 minutes. Stir frequently to prevent burning. Once done, set aside to cool.

    3. Prepare the Base: Rinse and dry the spring mix greens thoroughly. In a large salad bowl, add the greens as your base, allowing for plenty of space to mix the other ingredients easily.

    4. Add Vegetables: Thinly slice the red onion and scatter it among the greens. This will impart its flavor throughout the salad.

    5. Add the Cheese: Crumble the goat cheese over the greens. Keeping it chunky will create varied textures in the salad.

    6. Add the Berries and Nuts: Scatter the fresh raspberries and toasted nuts over the salad. Their pop of color will enhance the salad’s visual appeal.

    7. Dress the Salad: Just before serving, pour the raspberry dressing over the salad. Gently toss to coat all ingredients evenly with the dressing.

    8. Serve Immediately: This is best enjoyed fresh, as the greens can wilt if dressed too early. Serve with extra dressing on the side.

    By following these easy steps, you’re sure to create a colorful, delicious dish. This process also opens up options to customize and adjust based on any dietary needs. Feel free to add or remove any ingredients you prefer or have on hand. In no time, you’ll be enjoying a refreshing spring meal that satisfies both your palate and health goals.

    Mastering Goat Cheese Spring Mix Salad With Raspberry Dressing: Advanced Tips and Variations

    To elevate your Goat Cheese Spring Mix Salad with Raspberry Dressing and make it even more delightful, consider these advanced tips and variations:

    • Incorporate Seasonal Fruits: Beyond raspberries, feel free to add seasonal fruits like strawberries, blueberries, or even diced apples to bring additional sweetness and flavor complexity to your salad. This is a great way to enhance the fruitiness and allow for creative variations.

    • Explore Different Greens: While spring mix is delicious, consider mixing it up! Blend in some kale, romaine, or even cooked quinoa or farro for added texture and nutrition. This will create a unique base for your salad each time you prepare it.

    • Experiment with Dressings: Don’t shy away from experimenting with other dressings. A lemon vinaigrette or a poppy seed dressing could provide a different yet complementary flavor profile and experience in your spring meals.

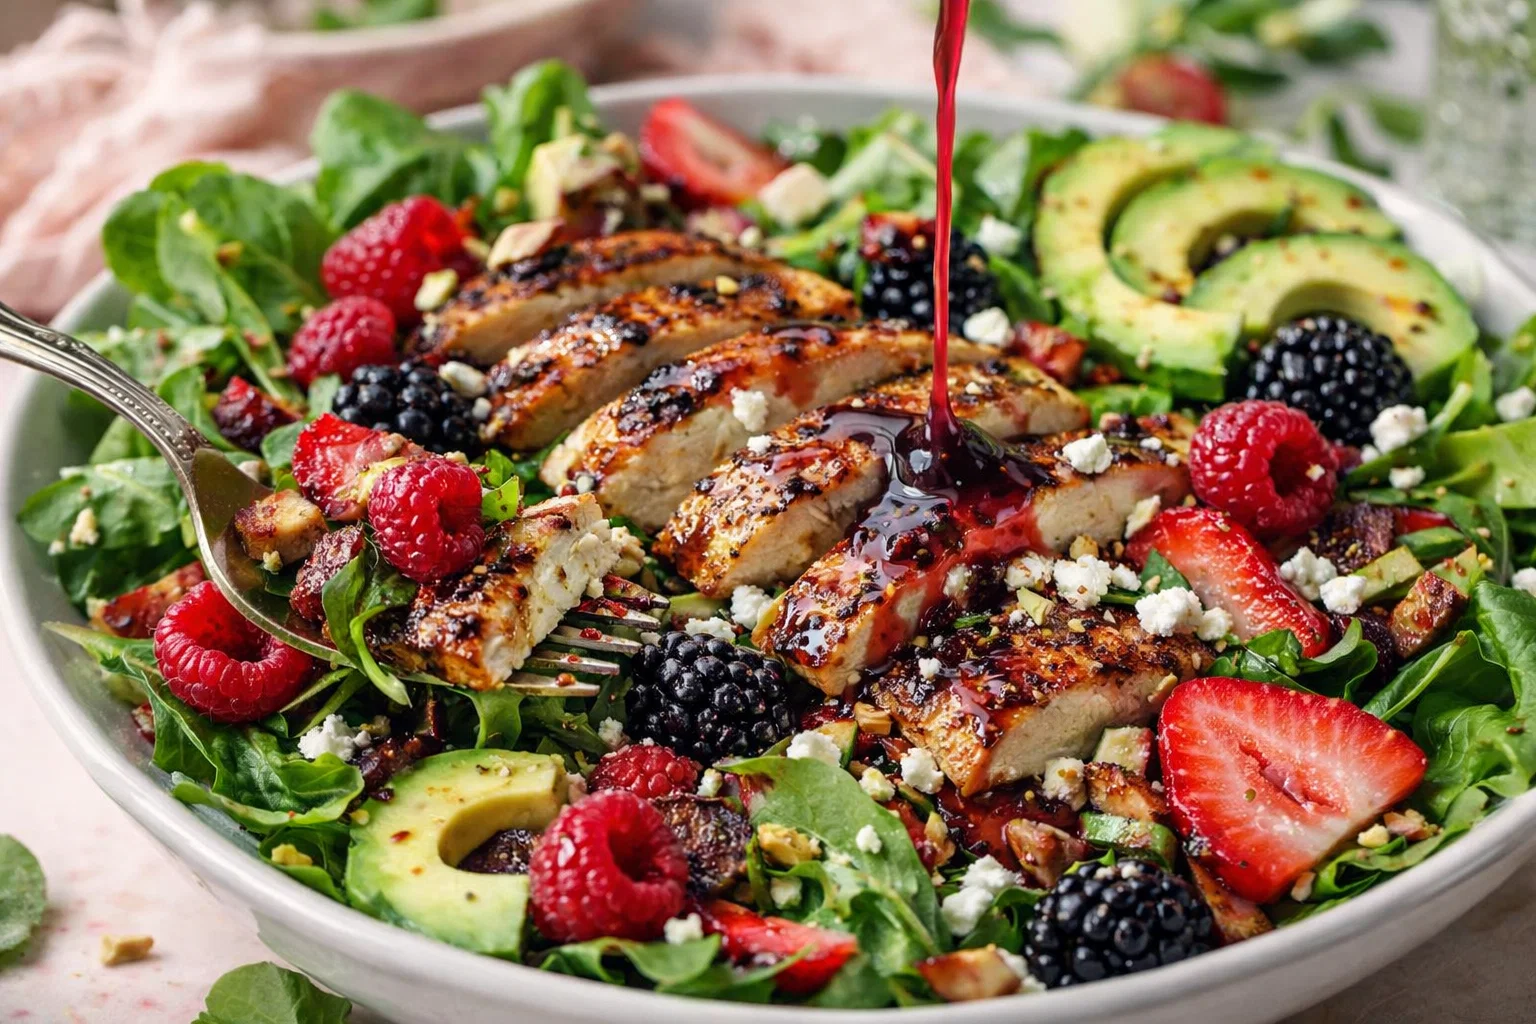
    • Add Proteins for a Complete Meal: Mix in some grilled chicken, shrimp, or chickpeas to turn this salad into a full meal, making it even more satisfying for hungry family members or friends.

    • Garnish for Presentation: Lastly, think about garnishing your salad with edible flowers, such as nasturtiums, which are safe to eat and add a stunning visual element. This brings elegance to your dish, perfect for hosting a spring gathering.

    These advanced tips will help you master the Goat Cheese Spring Mix Salad with Raspberry Dressing and personalize it to your taste, making it a go-to dish for spring meals or any nutrition-packed occasion.

    How to Store Goat Cheese Spring Mix Salad With Raspberry Dressing: Best Practices

    Storing leftover Goat Cheese Spring Mix Salad with Raspberry Dressing requires careful attention to maintain its freshness and quality. Here are the best practices for storing your salad:

    • In the Refrigerator: Place any leftovers in an airtight container without the dressing to keep the greens crisp. If the salad is tossed with dressing, the greens will become soggy over time. Consume any dressed salad within one day for the best taste.

    • Separating Components: If you want to store this salad for later meals, store the components separately. The dressing can be kept in a sealed jar in the refrigerator for up to a week. Just give it a shake before using.

    • Freezing: While it is not recommended to freeze the dressing or greens, you can freeze the toasted nuts or leftover goat cheese. When ready to use, thaw them in the refrigerator before adding them to your salad.

    Following these storage tips will help maintain the salad’s quality, ensuring that whenever you’re ready to enjoy again, it will taste fresh and delightful as your first serving.

    Nutritional Value of Goat Cheese Spring Mix Salad With Raspberry Dressing

    The nutritional value of the Goat Cheese Spring Mix Salad with Raspberry Dressing makes it an excellent choice for health-conscious individuals. Each serving offers a range of essential nutrients that contribute to a balanced diet. Below is a breakdown of the approximate nutritional values per serving, based on the ingredients listed above:

    • Calories: 250-300 kcal
    • Total Fat: 20g
    • Saturated Fat: 5g
    • Carbohydrates: 15g
    • Dietary Fiber: 5g
    • Sugars: 8g
    • Protein: 6g

    Nutritional Highlights:

    • Vitamins and Minerals: Rich in vitamins A, C, and K due to the leafy greens and raspberries, promoting a healthy immune system and skin.
    • Antioxidants: Raspberries offer powerful antioxidants, combating free radicals and reducing inflammation.
    • Healthy Fats: The extra virgin olive oil and goat cheese provide heart-healthy fats necessary for nutrient absorption and overall health.

    The balanced macronutrients while remaining low in calories make this salad a fantastic option for anyone aiming to incorporate more nutritious meals into their diet. You can confidently enjoy this filling meal knowing it aligns with your health goals while being immensely satisfying.

    FAQs: Frequently Asked Questions About Goat Cheese Spring Mix Salad With Raspberry Dressing

    1. Can I make the Goat Cheese Spring Mix Salad ahead of time?

    Yes, you can prepare the components ahead but keep the dressing separate until just before serving for the best texture.

    2. Is this salad suitable for vegans?

    Absolutely! Substitute the goat cheese with a vegan cheese option or avocado, and use agave syrup instead of honey in the dressing.

    3. What if I don’t have fresh raspberries?

    If fresh raspberries are unavailable, you can use frozen raspberries—just make sure to thaw and drain them before blending.

    4. Can I add protein to this salad?

    Yes! Grilled chicken, shrimp, or even beans can be added for a heartier meal, making it perfect for lunch or dinner.

    5. How long does the raspberry dressing last?

    When stored in a sealed container in the refrigerator, the raspberry dressing should be consumed within 5-7 days.

    6. What can I substitute for goat cheese?

    You can try feta cheese, crumbled tofu, or nutritional yeast for a similar creamy texture with added flavor.

    7. What are some other spring meals I can prepare?

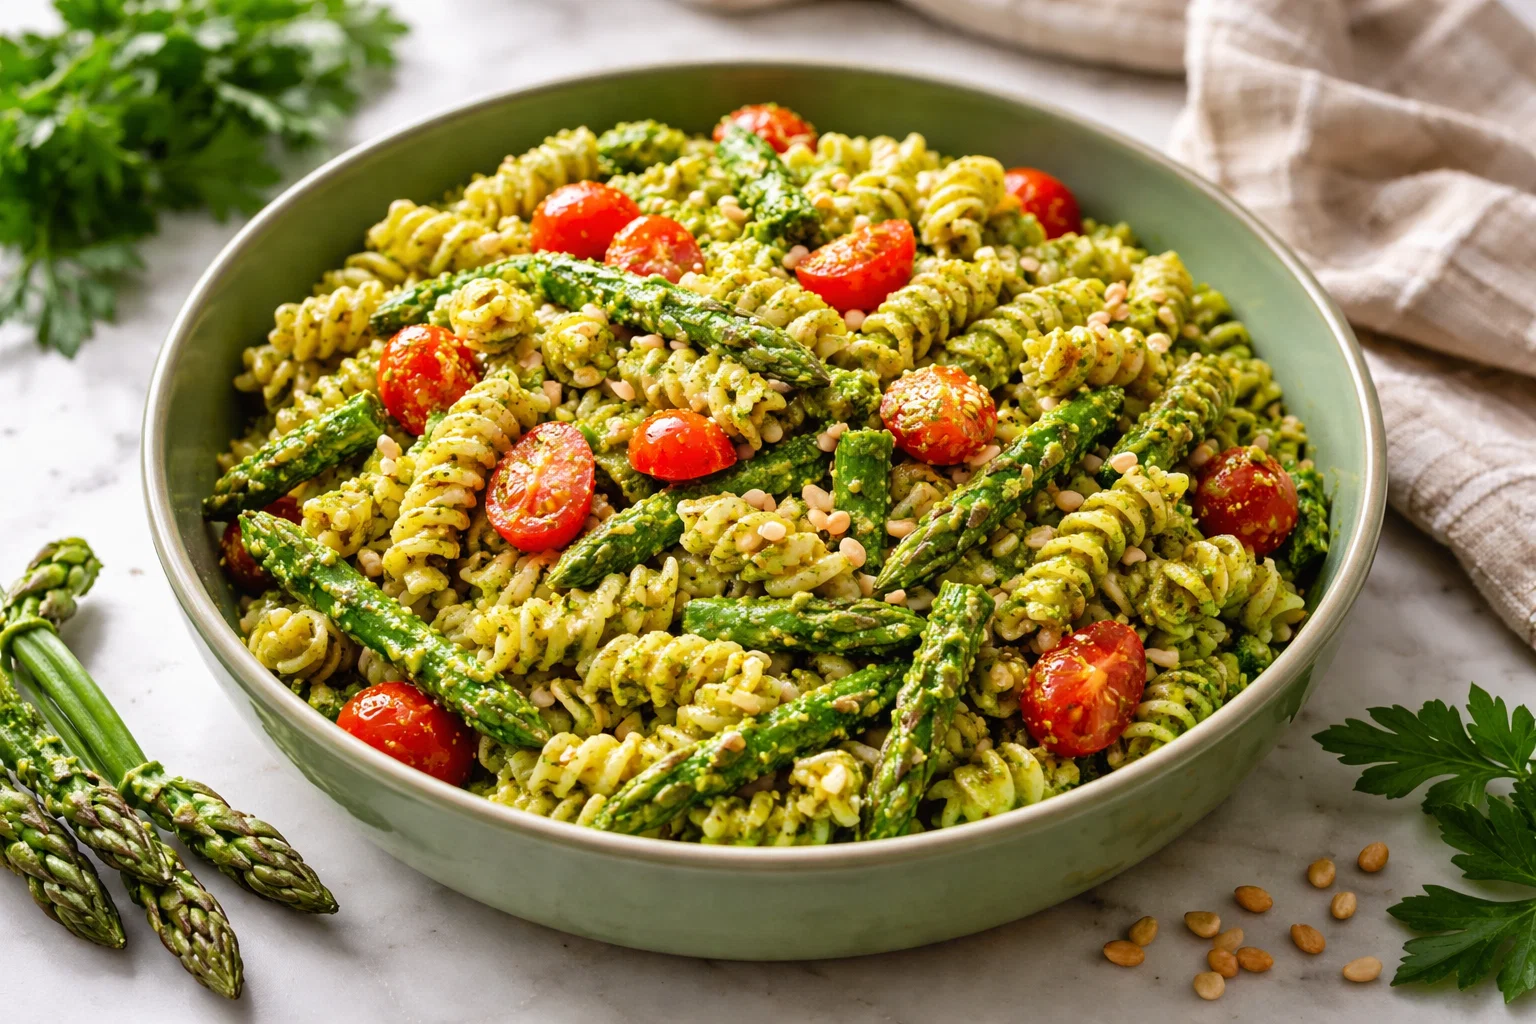
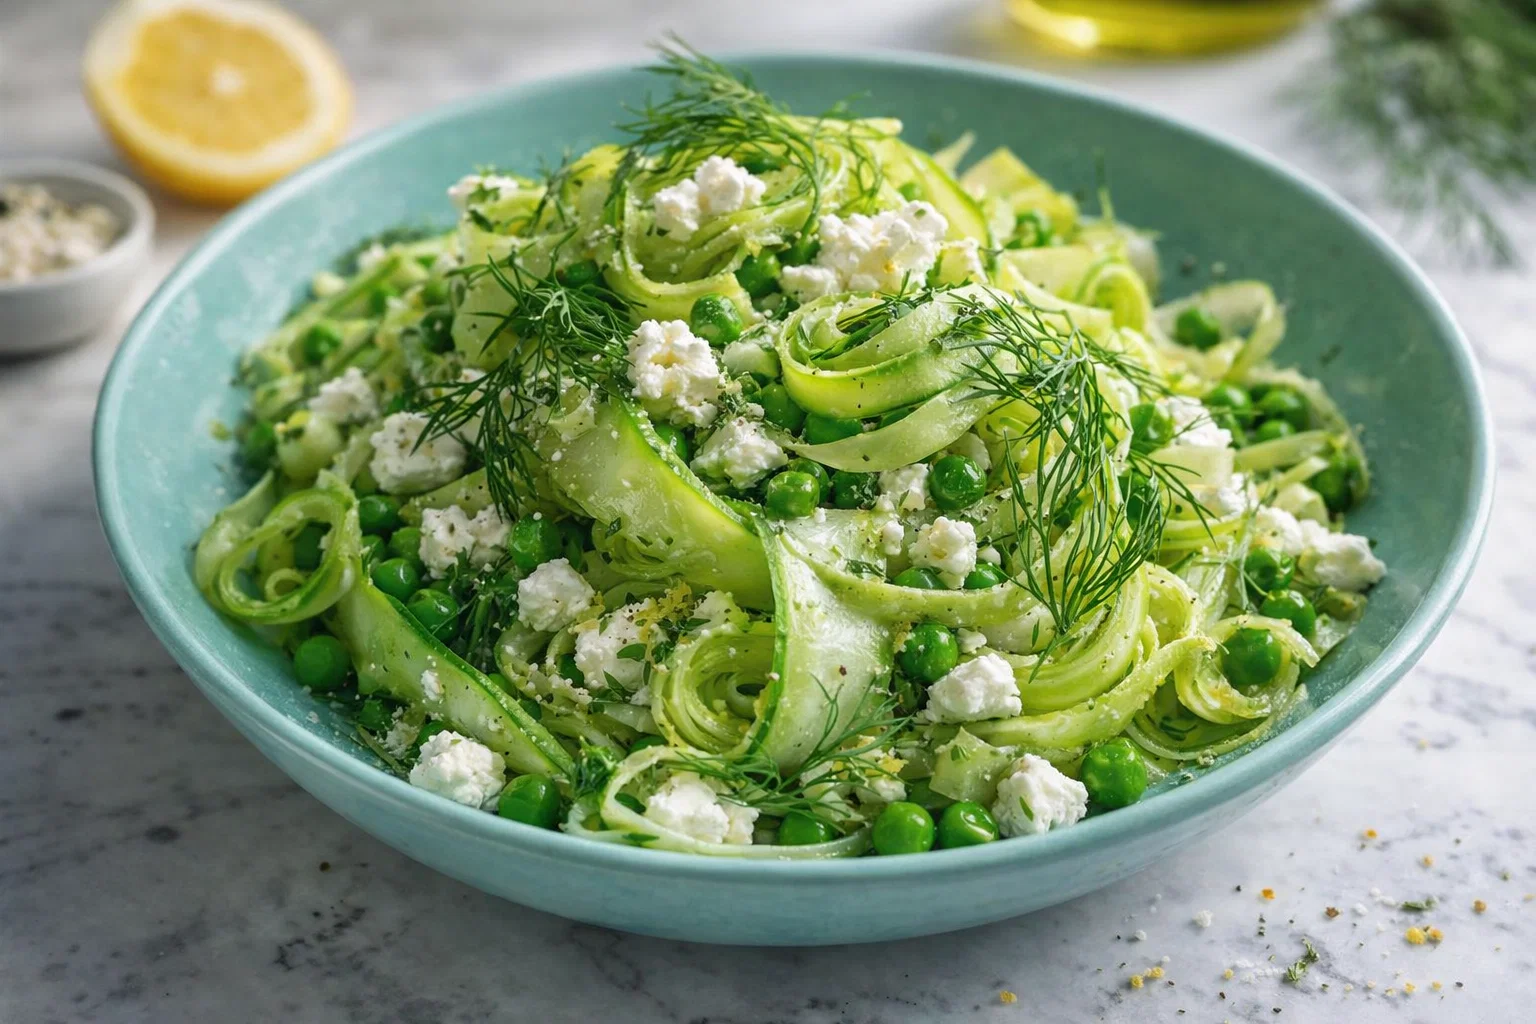
    Besides this salad, consider light pasta dishes, vegetable stir-frys, or fresh fruit bowls filled with seasonal produce to celebrate spring.

    Empowering readers with clear answers to these frequently asked questions will enhance their cooking experience and encourage them to embrace this Goat Cheese Spring Mix Salad with Raspberry Dressing as a staple in their spring meals. Whether you’re hosting gatherings or enjoying a solo meal, this salad is sure to impress.

  • Vegan Asparagus Pesto Pasta Salad

    Vegan Asparagus Pesto Pasta Salad

    Vegan Asparagus Pesto Pasta Salad: A Tropical Delight

    Introduction to Vegan Asparagus Pesto Pasta Salad

    Are you in search of a bright, fresh dish that effortlessly combines flavor, nutrition, and versatility? Look no further than Vegan Asparagus Pesto Pasta Salad! This wonderful creation features tender pasta tossed with vibrant asparagus and a creamy, dairy-free pesto sauce that bursts with flavor. Not only is this pasta salad simple to whip up—making it a fantastic option for busy weeknights or meal prepping—but it is also vegan and gluten-free, appealing to a wide audience of health-conscious eaters.

    This scrumptious pasta salad boasts an array of nutrients, providing a satisfying meal or side dish that’s perfect for anyone from students to families to professionals on the go. The star ingredient, asparagus, is packed with vitamins A, C, E, and K, making this salad not just delicious, but rich in health benefits as well. You can easily customize it to suit different dietary preferences, making this dish not only a culinary delight but a convenient solution for providing nutritious meals without the hassle.

    With its colorful presentation and earthy flavors, this Vegan Asparagus Pesto Pasta Salad truly embodies a tropical respite. So, grab your apron, and let’s dive into the world of healthy, delicious, and satisfying cooking!

    Benefits and Advantages of Vegan Asparagus Pesto Pasta Salad

    The Vegan Asparagus Pesto Pasta Salad is an exceptional recipe designed to cater to a vast range of culinary needs. Here are a few compelling reasons why you will love making this dish:

    1. Ease of Preparation: One of the most notable advantages of this pasta salad is its simplicity. You can prepare it in under 30 minutes, making it ideal for busy families or anyone with a hectic lifestyle. With just a few fresh ingredients combined with cooked pasta, you have an enticing meal at your fingertips without spending hours in the kitchen.

    2. Health Benefits: This salad is not only bursting with flavors, but it’s also packed with nutrients. Asparagus is a fantastic source of dietary fiber and antioxidants, which can promote overall health and reduce inflammation. Additionally, using whole-grain or gluten-free pasta not only caters to various dietary needs but also increases fiber content, ensuring you feel full and satisfied.

    3. Vegan and Gluten-Free: With the rising trend towards plant-based diets, this recipe checks off all the boxes. It’s free from animal products, making it a perfect choice for vegans and vegetarians alike. Plus, it’s gluten-free when made with the right type of pasta, ensuring everyone at your table can enjoy it without worry.

    4. Versatility: The Vegan Asparagus Pesto Pasta Salad is highly adaptable. You can enjoy it warm or cold, making it suitable for any season or occasion. Whether you need a quick lunch, a potluck contribution, or a light dinner, this dish fits seamlessly into any menu.

    5. Satisfying and Flavorful: While being healthy, it doesn’t compromise on taste. The combination of basil, garlic, pine nuts, and nutritional yeast in the pesto sauce creates a rich and hearty flavor profile. Your taste buds will rejoice with every bite!

    In summary, the Vegan Asparagus Pesto Pasta Salad is a must-try recipe that combines health, ease of preparation, and deliciousness in one memorable dish. You can be assured that making this pasta salad will not only cater to your taste but also provide a nourishing meal for yourself and your loved ones.

    Ingredients Overview

    Essential Ingredients for Vegan Asparagus Pesto Pasta Salad

    Here’s a detailed list of the ingredients you will need to create a mouthwatering Vegan Asparagus Pesto Pasta Salad:

    • Pasta (16 oz): Choose whole-grain pasta, gluten-free pasta, or chickpea pasta for added protein and fiber.
    • Asparagus (1 lb): Fresh asparagus, trimmed and cut into 1-inch pieces.
    • Fresh Basil (1 cup): Packed with flavor, basil is an essential ingredient for pesto.
    • Pine Nuts (⅓ cup): These nuts add a rich creaminess to the pesto; alternatively, you can use walnuts or sunflower seeds for a nut-free version.
    • Garlic (2 cloves): Adds an aromatic kick; you can adjust to your preference.
    • Nutritional Yeast (¼ cup): Provides a cheesy flavor without dairy, making this dish a favorite among cheese lovers (without the guilt!).
    • Olive Oil (½ cup): Acts as a base for the pesto sauce while offering healthy fats.
    • Lemon Juice (2 tablespoons): Adds freshness and brightness to the salad.
    • Salt and Pepper (to taste): Enhance the flavors of the pasta salad to your liking.

    By selecting high-quality ingredients, you not only ensure the best flavor but also enhance the nutritional profile of your dish. For those looking to create a low-calorie version of this pasta salad, consider reducing the olive oil and using less pasta while increasing the proportion of vegetables.

    Dietary Substitutions to Customize Your Vegan Asparagus Pesto Pasta Salad

    Cooking is an art, and your ingredients should reflect your palette, lifestyle, and dietary needs. Here are some substitutions you can make to customize your Vegan Asparagus Pesto Pasta Salad:

    • Pasta Options: If you’re following a low-carb diet, consider using spiralized zucchini or spaghetti squash. For higher fiber content, choose lentil or black bean pasta.
    • Nut Alternatives: If you have nut allergies, try using pumpkin seeds or hemp hearts instead of pine nuts for the pesto, which will still provide creaminess.
    • Herb Variations: While basil is traditional, feel free to mix in parsley, spinach, or arugula for added flavor and color.
    • Creaminess Boost: For a creamier texture, incorporate a tablespoon of tahini or a few tablespoons of vegan yogurt into the pesto.

    By following these suggestions, you can create your personalized version of Vegan Asparagus Pesto Pasta Salad, ensuring that it suits your taste preferences or dietary restrictions perfectly.

    How to Prepare the Perfect Vegan Asparagus Pesto Pasta Salad: Step-by-Step Guide

    Creating a mouthwatering Vegan Asparagus Pesto Pasta Salad is straightforward. Follow these simple steps:

    1. Prepare the Pasta:
    2. Bring a large pot of salted water to a boil. Add the pasta of your choice and cook according to package instructions until al dente. Drain and rinse under cold water to stop the cooking process. Set aside.

    3. Cook Asparagus:

    4. In a steaming pot, steam the asparagus pieces for about 3-5 minutes until they are tender yet vibrant. You want them to maintain a slight crunch for texture. Remove from heat and let cool.

    5. Make the Pesto:

    6. In a food processor, combine the basil, pine nuts, garlic, nutritional yeast, lemon juice, and olive oil. Blend until smooth, scraping down the sides as needed. Adjust the seasoning with salt and pepper to your taste.

    7. Mix Ingredients:

    8. In a large mixing bowl, combine the cooked pasta, steamed asparagus, and pesto. Toss gently until everything is evenly coated.

    9. Taste and Adjust:

    10. Sample the pasta salad and adjust the seasoning, adding more salt, pepper, or lemon juice depending on your preference.

    11. Chill (Optional):

    12. For best results, let the salad sit for at least 30 minutes in the refrigerator. This allows the flavors to meld together beautifully.

    13. Serve:

    14. Serve the Vegan Asparagus Pesto Pasta Salad chilled or at room temperature. Garnish with extra pine nuts or nutritional yeast if desired.

    15. Storage Instructions:

    16. If you have leftovers, store them in an airtight container in the fridge for up to 3 days. The flavors will deepen as it sits!

    This detailed guide helps you conquer the art of pasta salad preparation with ease, ensuring everyone at your table enjoys this delightful experience.

    Mastering Vegan Asparagus Pesto Pasta Salad: Advanced Tips and Variations

    To elevate your Vegan Asparagus Pesto Pasta Salad to an extraordinary level, consider these advanced tips and variations:

    • Add Protein: For a heartier meal, incorporate protein-rich ingredients like chickpeas, tofu, or edamame. They enhance the nutrition of the dish while keeping it plant-based.

    • Roast the Asparagus: For an added depth of flavor, roast the asparagus in the oven drizzled with olive oil for about 15 minutes at 400°F before adding it to the pasta salad.

    • Spice It Up: If you enjoy a kick, consider adding crushed red pepper flakes to your pesto or tossing in some cherry tomatoes for contrast.

    • Herbed Beyond Basil: Mix and match fresh herbs to change the flavor profile. Try cilantro or mint for a fresh tint that changes the nature of the entire dish.

    • Hosting a Gathering: If serving at a gathering, consider adding some color with diced bell peppers, carrots, or even a sprinkle of toasted sesame seeds on top for extra flair.

    By influencing the dish with these personalized touches, you’ll inspire your family and friends to embrace vegan cuisine wholeheartedly while enjoying varied flavors.

    How to Store Vegan Asparagus Pesto Pasta Salad: Best Practices

    When it comes to food storage, proper techniques can ensure the quality and freshness of your Vegan Asparagus Pesto Pasta Salad:

    • Refrigeration: Store your pasta salad in an airtight container in the refrigerator to maintain its freshness. It should last for about 3-5 days, though the flavor may deepen over time.

    • Freezing: If you’ve prepared a large batch and want to save it for later, consider freezing the salad without the pesto. When ready to eat, defrost and mix with fresh pesto for an enjoyable meal.

    • Reheating: If you must reheat, do so gently in a microwave with a splash of olive oil or water to maintain its moisture without compromising texture. Remember, this pasta salad is delightful served cold too!

    By following these storage tips, you can ensure that your Vegan Asparagus Pesto Pasta Salad remains fresh and flavorful, ready for you to enjoy anytime.

    Nutritional Value of Vegan Asparagus Pesto Pasta Salad

    Understanding the nutritional profile of this delicious Vegan Asparagus Pesto Pasta Salad offers insight into its health benefits. Here’s a rough breakdown of the nutritional values for a standard serving (1 cup):

    • Calories: 350-400
    • Total Fat: 14-16g (mainly healthy fats from olive oil and nuts)
    • Saturated Fat: 2g
    • Carbohydrates: 45-50g (with a good amount of fiber depending on the pasta used)
    • Fiber: 7-9g
    • Protein: 11-13g (without protein boosters such as tofu or chickpeas)
    • Vitamins: Rich in Vitamin A, C, K, and Folate

    This nutrient density not only ensures you stay satisfied and energized, but it also aligns perfectly with a holistic approach to eating well. So whether you’re watching your macros, or simply aiming for a colorful plate, this pasta salad can help you reach your dietary goals deliciously!

    FAQs: Frequently Asked Questions About Vegan Asparagus Pesto Pasta Salad

    1. Can I make the pesto in advance?

    Absolutely! You can prepare the pesto a few days in advance. Store it in an airtight container in the fridge, and add it to your pasta salad when you’re ready to serve.

    2. Is this pasta salad good for meal prep?

    Yes, this Vegan Asparagus Pesto Pasta Salad stores well and makes an excellent meal prep option. Just store the pesto separately if you plan to enjoy it over several days to maintain its freshness.

    3. Can I substitute asparagus with other vegetables?

    Certainly! You can use a variety of vegetables such as broccoli, zucchini, or bell peppers. Just remember to adjust cooking times accordingly for different veggies.

    4. How can I adjust the flavor of the pesto?

    Feel free to personalize your pesto! Add more garlic for a stronger flavor, or lemon juice for extra zing. You can also include different herbs to suit your taste preferences.

    5. Is this a suitable dish for kids?

    Definitely! This pasta salad can be a hit among kids, especially when you customize it with their favorite veggies or even serve it with a side of added protein like chickpeas or beans.

    Conclusion

    In conclusion, the Vegan Asparagus Pesto Pasta Salad is more than just a meal; it’s an experience. Combining fresh ingredients, health benefits, and adaptability, this dish serves as a perfect testament to the joys of vegan cooking. Whip it up for a family gathering or savor it solo. This vibrant, nutritious pasta salad is sure to delight and inspire those who partake. So, gather your ingredients and treat yourself to a vibrant taste of health!

  • Mouthwatering Deviled Eggs With Tuna

    Mouthwatering Deviled Eggs With Tuna

    Mouthwatering Deviled Eggs With Tuna: A Tropical Delight

    Introduction to Mouthwatering Deviled Eggs With Tuna

    Deviled eggs are a classic favorite among appetizer recipes, beloved for their creamy texture and burst of flavor. However, adding tuna to this delightful dish creates a delicious twist that elevates it to new heights. This recipe for mouthwatering deviled eggs with tuna not only brings a tropical flavor but also ensures a wholesome, nutritious appetizer that’s perfect for any occasion.

    With just a few simple ingredients, you can create a satisfying dish that’s packed with flavor, protein, and healthy fats. Whether you’re hosting a weekend brunch, preparing for a potluck, or simply looking for a healthy snack option, these deviled eggs tick all the right boxes. They are incredibly easy to make, taking only a short time, which is perfect for busy home cooks, parents looking for quick meals, or even students on the go.

    Moreover, this recipe meets various dietary needs. You can opt for gluten-free or low-calorie versions, making it suitable for anyone, regardless of dietary restrictions. With a beautiful presentation and flavorful taste, these deviled eggs make for an impressive appetizer that will surely delight your guests at any gathering. So let’s dive in and discover how to make these irresistibly mouthwatering deviled eggs with tuna!

    Benefits and Advantages of Mouthwatering Deviled Eggs With Tuna

    Why should you try making mouthwatering deviled eggs with tuna? This delightful dish offers numerous advantages that set it apart from traditional appetizer recipes. First and foremost, the ease of preparation is a significant plus. With minimal cooking and straightforward steps, even beginner cooks can successfully whip up this dish in no time.

    One of the standout features of these deviled eggs is their nutritional profile. Tuna is packed with high-quality protein, omega-3 fatty acids, and essential vitamins, making it a healthy component of any meal. The inclusion of eggs provides additional protein and nutrients like B vitamins and selenium. Together, these ingredients create a filling appetizer that keeps you satisfied without packing on excess calories.

    Furthermore, this dish can be easily customized to cater to various tastes and dietary needs. For instance, by swapping mayonnaise for avocado or Greek yogurt, you can create a lighter version or make it vegan-friendly. This adaptability makes it an excellent option for gatherings, as you can accommodate different dietary preferences without compromising on flavor.

    Lastly, deviled eggs with tuna are a hit with people of all ages. They are a great choice for celebrations, family gatherings, or even a simple snack at home. With their appealing presentation and delicious taste, these deviled eggs can impress even the most discerning palates.

    Ingredients Overview

    Essential Ingredients for Mouthwatering Deviled Eggs With Tuna

    To create these mouthwatering deviled eggs with tuna, you will need the following ingredients:

    • 6 large eggs: The base of our dish, packed with protein and healthy fats.
    • 1 can (5 oz) tuna: Drained tuna, providing flavor and nutrition. Look for sustainably sourced options.
    • 3 tablespoons mayonnaise: Traditional binder; can substitute with Greek yogurt or avocado for a healthier touch.
    • 1 teaspoon Dijon mustard: Adds a zing to the filling.
    • 1 tablespoon fresh lemon juice: Brightens the flavors and balances the richness.
    • 1 tablespoon chopped green onions: For a fresh crunch.
    • Salt and pepper to taste: Essential for enhancing flavors.
    • Paprika (for garnish): Adds color and a hint of smokiness.

    Diet-conscious Options:
    Vegan: Substitute tuna with chickpeas or tofu.
    Gluten-Free: All ingredients are naturally gluten-free; however, ensure the mayo is verified gluten-free.

    These ingredients ensure that your deviled eggs are not only delicious but also healthful, catering to a variety of preferences and dietary needs.

    Dietary Substitutions to Customize Your Mouthwatering Deviled Eggs With Tuna

    Customizing your mouthwatering deviled eggs with tuna to fit different dietary needs can be simple. Below are some suggested substitutions:

    1. For a Vegan Option: Replace the canned tuna with mashed chickpeas or crumbled tofu. Mix in chopped celery and pickles for an extra crunch and flavor.
    2. For a Lighter Version: Use Greek yogurt or avocado instead of mayonnaise. This swap cuts down on calories and adds a creamy texture without the fat.
    3. Low-Carb Adaptation: If you are following a low-carb diet, these deviled eggs are naturally a great fit. Just ensure to pair them with low-carb veggies as garnishes.
    4. Herb Variations: Experiment with fresh herbs like dill, chives, or parsley to change the flavor profile and add extra nutrition.

    These substitutions ensure that everyone can enjoy this delectable dish, no matter their dietary requirements.

    How to Prepare the Perfect Mouthwatering Deviled Eggs With Tuna: Step-by-Step Guide

    Making mouthwatering deviled eggs with tuna is straightforward and rewarding. Follow this step-by-step guide for perfect results:

    1. Prepare the Eggs: Place the six eggs in a pot and cover them with water. Bring to a boil over medium heat. Once boiling, cover the pot and turn off the heat, leaving the eggs in the hot water for 12 minutes.
    2. Cool and Peel: After 12 minutes, rapidly cool the eggs by transferring them to an ice bath. Allow them to sit for about 5-10 minutes. Once cool, carefully peel the eggs under running water for easier shell removal.
    3. Slice the Eggs: Cut each egg in half lengthwise and gently remove the yolks into a mixing bowl, setting the egg whites aside on a serving platter.
    4. Mix the Tuna Filling:
    5. Add the drained tuna, mayonnaise, Dijon mustard, lemon juice, salt, and pepper to the egg yolks.
    6. Use a fork to mash the yolks and mix all ingredients until smooth and creamy. If you prefer a chunkier texture, lightly fold in the ingredients instead of mashing.
    7. Add Garnishes: Fold in chopped green onions to the mixture, adding flavor and color. Optionally, you can mix in finely chopped pickles or a dash of hot sauce for extra zing.
    8. Fill the Egg Whites: Using a spoon or a piping bag, fill the egg white halves generously with the tuna mixture, creating a nice mound on each.
    9. Garnish and Serve: Sprinkle paprika over the filled eggs for garnishing and an appealing presentation. Chill in the refrigerator for at least 30 minutes before serving to allow the flavors to meld.

    By following these simple steps, you create a fabulous dish that not only tastes great but also serves wonderfully as a crowd-pleasing appetizer recipe.

    Mastering Mouthwatering Deviled Eggs With Tuna: Advanced Tips and Variations

    To take your mouthwatering deviled eggs with tuna to another level, consider these advanced tips and variations:

    1. Spice It Up: For those who enjoy heat, add a dash of cayenne pepper or mix in some chopped jalapeños to the tuna filling.
    2. Gourmet Touches: Experiment with different gourmet toppings such as crispy bacon bits or capers for added texture and flavor.
    3. Serve Differently: Instead of serving them on a platter, place the eggs in small individual cups for an elegant presentation at formal gatherings.
    4. Flavor Infusions: Try incorporating flavor-infused oils, such as garlic or chili oil, either in the filling or drizzled on top for an extra kick.
    5. Make-ahead Options: Prepare the tuna filling a day in advance and store it in the refrigerator. Fill the egg whites just before serving to ensure they remain fresh and vibrant.

    These tips will not only enhance the taste and presentation but will also give your guests an experience they won’t forget!

    How to Store Mouthwatering Deviled Eggs With Tuna: Best Practices

    Storing your mouthwatering deviled eggs with tuna properly ensures they stay fresh and delicious. Here are some best practices:

    1. Refrigeration: Place leftovers in an airtight container and store them in the refrigerator. They are best consumed within 2-3 days.
    2. Freezing: While freezing is not generally recommended for deviled eggs due to the texture change, you can freeze the tuna filling separately. Just be sure to thaw it overnight in the fridge before filling the eggs again for serving.
    3. Reheating: Avoid reheating the filled eggs in the microwave, as this could make the egg whites rubbery. Instead, serve them cold straight from the refrigerator.

    By following these storage tips, you can extend the life of your deviled eggs while maintaining their flavor and texture.

    Nutritional Value of Mouthwatering Deviled Eggs With Tuna

    Understanding the nutritional value of your delicious mouthwatering deviled eggs with tuna can help you make informed choices. Here’s a breakdown of the estimated nutritional content per serving (two halves):

    • Calories: Approximately 180-220 calories
    • Protein: About 15 grams
    • Fat: 12-15 grams (depending on the amount of mayonnaise used)
    • Carbohydrates: Less than 2 grams
    • Fiber: Less than 1 gram
    • Cholesterol: Approximately 210 mg

    These eggs are a wholesome option packed with protein, healthy fats, and essential nutrients. They offer a nutritious choice for busy individuals looking for filling and healthful appetizer recipes without compromising on taste.

    FAQs: Frequently Asked Questions About Mouthwatering Deviled Eggs With Tuna

    Here are some common questions regarding mouthwatering deviled eggs with tuna, along with concise answers that clarify any doubts:

    Q1: Can I use fresh tuna instead of canned tuna?

    A1: Yes, fresh tuna is a great option! Just ensure it’s cooked well and flaked before mixing it into the egg yolk filling.

    Q2: How can I make these deviled eggs spicier?

    A2: To add heat, incorporate chopped jalapeños, hot sauce, or cayenne pepper into your tuna filling.

    Q3: Are these deviled eggs gluten-free?

    A3: Yes, all ingredients used are naturally gluten-free. However, always check the mayonnaise to ensure it is gluten-free.

    Q4: How long can I store leftover deviled eggs?

    A4: Leftover deviled eggs can be kept in the refrigerator for 2-3 days. Store them in an airtight container for best results.

    Q5: What is a good alternative to mayonnaise for a lighter option?

    A5: Greek yogurt or mashed avocado serves as a fantastic, creamy substitute for mayonnaise, adding flavor and health benefits.

    With these insights and enhancements, your deviled eggs with tuna will shine as the star dish at your next gathering, showcasing creativity, health, and deliciousness. Now, step into the kitchen and experience this delightful tropical twist on the classic deviled egg!

  • IM Obsessed Been Making These Deviled Eggs Non-Stop

    IM Obsessed Been Making These Deviled Eggs Non-Stop

    I’M Obsessed! Been Making These Deviled Eggs Non-Stop!: A Tropical Delight

    Introduction to I’M Obsessed! Been Making These Deviled Eggs Non-Stop!

    Are you looking for a quick yet impressive dish that will surely delight guests and family alike? Well, search no further! This recipe for deviled eggs is not just any appetizer; it’s a culinary masterpiece that transports the ordinary to extraordinary with ease. A perfect addition to your collection of appetizer recipes, these deviled eggs combine simplicity and robust flavor, making them ideal for any occasion—be it a family gathering, picnic, or a casual get-together with friends.

    What makes this recipe even more appealing is its healthy twist. Rich in protein yet low in carbohydrates, this option caters effortlessly to various dietary needs, including being gluten-free and low-calorie. Furthermore, it can be easily modified to suit vegan diets without sacrificing any flavor. Just imagine serving a delightful dish everyone can enjoy while effortlessly impressing your loved ones. By following this easy recipe and its variations, you’ll find yourself making these scrumptious deviled eggs non-stop!

    Benefits and Advantages of I’M Obsessed! Been Making These Deviled Eggs Non-Stop!

    The advantages of preparing these deviled eggs go beyond just taste. Firstly, let’s highlight the ease of preparation. This recipe requires minimal cooking and fewer than ten ingredients, making it ideal for busy parents, working professionals, and students. All you need are some eggs, a few condiments, and spices to create this delicious appetizer that enhances its appeal.

    Moreover, when considering the health benefits, deviled eggs provide a solid source of protein, essential vitamins, and minerals. Eggs are known for their nutritional richness; they contain choline, which supports brain health, and various antioxidants that keep your body functioning optimally.

    Furthermore, if you make these deviled eggs the centerpiece of your appetizer spread, they cater to diverse dietary needs. For health-conscious individuals, swapping traditional mayonnaises with Greek yogurt or avocado can result in a creamy texture without the extra calories—delivering a delicious dip that even the pickiest eaters will appreciate.

    These deviled eggs also stand out for their versatility! Feel free to get creative with flavors. From classic to contemporary, there are numerous ways to put your spin on them; why not add some tropical flair? A sprinkle of pineapple or a dash of curry can elevate this classic recipe to something truly unique. Consequently, this dish can blend seamlessly into any occasion, making it a must-try in your collection of appetizer recipes.

    Ingredients Overview

    Essential Ingredients for I’M Obsessed! Been Making These Deviled Eggs Non-Stop!

    To prepare these delightful deviled eggs, you’ll need the following ingredients:

    • 6 large eggs: The base of your dish, providing protein and a creamy texture.
    • 3 tablespoons mayonnaise: Adds creaminess; substitute with Greek yogurt or avocado for a healthier option.
    • 1 teaspoon Dijon mustard: Brings a zesty flavor; can be replaced with yellow mustard for a milder taste.
    • 1 teaspoon white vinegar: Enhances flavor; lemon juice can be a great substitute.
    • Salt and pepper: Essential seasonings; adjust according to taste.
    • Paprika: A classic garnish that adds color and a slight smokiness; optional.
    • Chives or green onions: For a fresh touch and garnish; can also be omitted if unavailable.

    Diet-Conscious Options:
    1. Vegan: For a vegan version, replace eggs with tofu or use a pre-packaged vegan egg substitute.
    2. Gluten-Free: Confirm that condiments used (especially mayonnaise) are gluten-free, as brands vary.

    Dietary Substitutions to Customize Your I’M Obsessed! Been Making These Deviled Eggs Non-Stop!

    As we aim to cater to diverse dietary preferences, here are some suggested substitutions for varying tastes:

    • Substituting Eggs: For those avoiding eggs, consider using silken tofu to mimic the creamy texture typically associated with deviled eggs. Simply blend it with your desired seasonings for a scrumptious vegan filling.

    • Healthy Fat Options: Instead of mayonnaise, experiment with Greek yogurt or hummus. Both provide a creamy texture with added protein and nutrients, ideal for anyone looking to cut out unnecessary calories while still satisfying their palate.

    • Flavor Variations: Want to bring a twist to your deviled eggs? Add some sriracha or hot sauce for those who like it spicy, or incorporate some smoked salmon for a gourmet touch. Spice blends like cajun seasoning or Old Bay can uplift the typical flavors to something sensational.

    • Herb Enhancements: Fresh herbs can significantly alter your dish’s profile. Garnish with dill, cilantro, or basil for an aromatic presentation that tantalizes the taste buds.

    By modifying these ingredients, you can not only cater to specific dietary requirements but make your deviled eggs even more scrumptious.

    How to Prepare the Perfect I’M Obsessed! Been Making These Deviled Eggs Non-Stop!: Step-by-Step Guide

    Now that we’ve covered the essential ingredients and substitutions, let’s get into the nitty-gritty of preparing these delightful deviled eggs.

    1. Boil the Eggs: Place the eggs in a pot, cover with water, and bring to a boil. As soon as it boils, cover the pot, remove it from heat, and let the eggs sit for 12 minutes.

    2. Cool and Peel: After 12 minutes, transfer the eggs to an ice water bath. Let them cool for about 5 minutes. Once cool, carefully crack the shell and peel under running water for a smoother finish.

    3. Slice Eggs: Once peeled, cut the eggs in half vertically. Carefully scoop out the yolks and place them in a mixing bowl.

    4. Mix Ingredients: To the yolks, add mayonnaise, mustard, vinegar, a pinch of salt, and pepper. Whisk everything together until smooth and creamy.

    5. Taste and Adjust: Before proceeding to fill the eggs, taste the mixture and adjust seasonings if necessary—feel free to add a touch more mustard or vinegar.

    6. Fill the Egg Whites: Using a spoon or pastry bag, carefully fill each halved egg white with the yolk mixture.

    7. Garnish and Serve: Finally, sprinkle with paprika or fresh herbs, depending on your choice. Chill for at least 30 minutes to enhance the flavors before serving.

    8. Serve your Creations: Arrange the deviled eggs on a platter and serve immediately. Alternatively, they can be stored in the refrigerator, making them ideal for party prep.

    With these straightforward steps, you’ll establish an appetizer that is bound to impress guests and suit various dietary preferences!

    Mastering I’M Obsessed! Been Making These Deviled Eggs Non-Stop!: Advanced Tips and Variations

    To elevate your dilapidated eggs from ordinary to extraordinary, consider these advanced tips and exciting variations:

    • Spice It Up: For the adventurous eater, add spices like cayenne pepper, garlic powder, or even curry powder into your filling for an exciting twist.

    • International Influence: Take inspiration from different cultures! Consider adding wasabi for an Asian-inspired flavor or pesto for an Italian flair.

    • Presentation Matters: Elevate the visual element by using different colors of paprika or finely chopped fresh herbs as a garnish. Making your deviled eggs visually appealing enhances the overall dining experience.

    • Create a Theme: If you’re hosting a party, consider having a deviled egg bar with various fillings that guests can mix and match. This interactivity can be a fun focal point at any gathering.

    • Make Ahead: Prepare your egg filling a day ahead for a more efficient hosting experience. Just fill the egg whites right before serving for maximum freshness.

    By integrating these tips and variations, you not only keep your dish exciting but also adapt it easily to seasonal flavors, ensuring your guests are constantly impressed.

    How to Store I’M Obsessed! Been Making These Deviled Eggs Non-Stop!: Best Practices

    If you have any leftover deviled eggs, here’s how to store them without losing their quality:

    1. Refrigeration: Place the deviled eggs in an airtight container or cover with plastic wrap to keep them fresh for up to 3-4 days in the refrigerator.

    2. Freezing: While it’s not recommended to freeze the completed deviled eggs due to their texture, you can freeze the egg yolk mixture in freezer-safe bags for up to one month. Just remember to thaw and mix in the remaining ingredients before filling the egg whites to maintain that creamy consistency.

    3. Reheating: If you’re planning to serve them warm, avoid microwaving them as it can alter the texture. Instead, let them sit at room temperature for a brief period, or use a gentle oven heat method to warm them slightly.

    Using proper storage techniques not only saves leftovers but also maintains the integrity of these beloved appetizer recipes.

    Nutritional Value of I’M Obsessed! Been Making These Deviled Eggs Non-Stop!

    One of the best aspects of deviled eggs is their impressive nutritional profile. Here’s a breakdown of the nutrition per serving (2 egg halves):

    • Calories: Approximately 140 kcal
    • Protein: 6 g
    • Fat: 11 g
    • Saturated Fat: 2 g
    • Carbohydrates: 1 g
    • Fiber: 0 g
    • Cholesterol: 186 mg
    • Sodium: 150 mg

    With high protein content, low calorie count, and good fats, deviled eggs are a perfect snack or appetizer choice, especially for those mindful of their diets. Additionally, you can boost the nutritional profile further by adding fresh herbs or making healthy substitutions, ensuring they remain a staple in your delicious repertoire of appetizer recipes.

    FAQs: Frequently Asked Questions About I’M Obsessed! Been Making These Deviled Eggs Non-Stop!

    1. Can I make deviled eggs in advance?
      Yes! You can prepare them a day in advance and store them covered in the refrigerator. Just add garnishes right before serving to maintain freshness.

    2. Can I make these vegan?
      Absolutely! Boil silken tofu or use store-bought vegan egg products as a substitute for the eggs. Mix it with herbs and spices to create a flavorful filling.

    3. What can I use instead of mayonnaise?
      Greek yogurt, avocado, or hummus can swap mayonnaise, decreasing calories while increasing nutrition.

    4. How can I store leftovers?
      Store leftovers in an airtight container in the fridge for up to 3-4 days. While it’s best to consume them fresh, they can still be tasty later on.

    5. What are some interesting flavor variations?
      Try incorporating ingredients like bacon bits, sriracha, or jalapeños for a spicy kick. Consider flavored oils or infused vinegars to explore different taste profiles.

    6. Are deviled eggs gluten-free?
      Yes! Traditional deviled eggs without added ingredients are gluten-free. Always check any condiments used, such as mayonnaise, for gluten-free certification.

    In conclusion, the experience of making and sharing these deviled eggs can be fulfilling, enriching not only your palate but also inviting connections among loved ones. With tips, variations, and a straightforward recipe, you have everything you need to create a delightful culinary experience that keeps everyone coming back for more. Enjoy your cooking adventure!

  • Homemade Deviled Eggs Without Mayo

    Homemade Deviled Eggs Without Mayo

    Homemade Deviled Eggs Without Mayo: A Tropical Delight

    Introduction to Homemade Deviled Eggs Without Mayo

    Eggs have long been a staple in many kitchens, celebrated for their versatility and nutritional value. One of the most popular ways to enjoy eggs is by making deviled eggs. However, if you are looking for appetizer recipes that are healthier and different from the traditional versions, look no further! These homemade deviled eggs without mayo offer a delightful twist that will please both your palate and your health-conscious friends.

    Imagine creamy egg yolks mixed with zesty ingredients, all while eliminating mayo. This recipe is not only simple to follow but is also vegan-friendly, gluten-free, and low-calorie. The lack of mayonnaise means that it is lighter, allowing the natural flavors of the eggs and accompanying spices to shine through. This dish is perfect for a variety of occasions—from casual family meals to festive gatherings, ensuring there’s something for everyone to enjoy.

    Furthermore, the ease of preparation means that even busy parents, students, and working professionals can whip up a batch with minimal effort. Whether you’re traveling, newlywed, or simply someone who loves to try new snacks, these deviled eggs provide a burst of flavor and can be made quickly, requiring just a few basic ingredients. So roll up your sleeves and get ready to impress your family and friends with this delectable and healthy version of a classic appetizer.

    Benefits and Advantages of Homemade Deviled Eggs Without Mayo

    Homemade deviled eggs without mayo truly stand out for several reasons. First and foremost, the simplicity of the recipe makes it accessible for cooks of all skill levels. You don’t have to be a culinary expert to execute this dish perfectly. Moreover, this appetizer is a breeze to assemble, requiring little more than eggs and a few flavorings.

    Health-minded individuals will appreciate that this recipe excludes mayonnaise, which can be high in calories and fats. Instead, ingredients like avocado, Greek yogurt, or mustard can be utilized to create that creamy texture while adding beneficial nutrients. Avocado, for example, contributes healthy fats that promote heart health and keep you feeling satiated longer. Including Greek yogurt adds protein and probiotics, making this dish not only delicious but also nutritious.

    These deviled eggs are an excellent option for anyone with dietary restrictions. They are naturally gluten-free and can be tailored to meet vegan needs by using plant-based substitutes, ensuring that no one misses out at gatherings. For busy parents or working professionals, these deviled eggs serve as a quick snack or a nutritious addition to a lunch box, providing essential protein and vitamins on the go.

    To top it all off, homemade deviled eggs without mayo are every bit as delightful as their traditional counterparts, making them perfect for gatherings. These flavorful little bites will surely earn rave reviews and are versatile enough to fit into any party spread or meal plan.

    Ingredients Overview

    Essential Ingredients for Homemade Deviled Eggs Without Mayo

    To create these delectable homemade deviled eggs without mayo, you will need the following ingredients:

    • 6 large eggs: The foundation of the recipe; hard-boiled for the right texture.
    • 1 ripe avocado: Acts as a creamy substitute for mayo, packed with healthy fats.
    • 2 tablespoons Greek yogurt (use dairy-free versions for vegan option): Adds creaminess and a slight tang, while also boosting protein content.
    • 1 teaspoon Dijon mustard: Provides a kick of flavor and depth.
    • 1 tablespoon freshly squeezed lemon juice: Brightens and enhances the overall taste while preventing browning of the avocado.
    • Salt and pepper to taste: Essential seasoning to bring all flavors together.
    • Paprika or cayenne pepper for garnish: Enhances visual appeal and adds a hint of spice.

    This ingredient list caters specifically to those who seek health benefits without sacrificing taste. Feel free to experiment with additional seasonings or herbs such as chives, dill, or cilantro to further personalize your deviled eggs to suit your taste buds.

    Dietary Substitutions to Customize Your Homemade Deviled Eggs Without Mayo

    This recipe is highly adaptable, making it easy to modify based on dietary needs. Here are some suggested substitutions:

    • For a Vegan Option: Use an additional avocado in place of Greek yogurt, blending it until smooth. You could also opt for a store-bought vegan mayo if you desire that vegan creaminess.
    • For a Lower-Calorie Version: Substitute the Greek yogurt with plain yogurt (fat-free or low-fat) or omit it entirely and use additional lemon juice to keep the structure.
    • Spice Variations: Swap out the Dijon mustard for hot sauce or horseradish for a spicier kick.
    • Herb Add-Ins: Add finely chopped fresh herbs like parsley or dill to infuse more flavor.

    Tailoring the ingredients to fit your dietary needs or personal preferences is part of what makes this recipe exciting. No matter how you choose to customize it, the delightful essence of deviled eggs remains intact!

    How to Prepare the Perfect Homemade Deviled Eggs Without Mayo: Step-by-Step Guide

    Creating the perfect homemade deviled eggs without mayo is as easy as following these step-by-step instructions:

    1. Hard Boil Your Eggs: Place the eggs in a saucepan and cover them with cold water. Bring to a boil over medium heat. Once boiling, cover the pot, remove it from the heat, and let it sit for 12-15 minutes.

    2. Cool the Eggs: Carefully drain the hot water and transfer the eggs to an ice bath. Let them cool for about 5-10 minutes before peeling.

    3. Peel the Eggs: Once cooled, gently tap each egg on a hard surface and roll it to crack the shell. Peel under running water for easier removal of the shell.

    4. Cut and Scoop: Slice each egg in half lengthwise. Carefully scoop out the yolks and place them in a mixing bowl. You should have 12 egg halves ready for stuffing.

    5. Mix Ingredients: In the bowl with the yolks, add the ripe avocado, Greek yogurt, Dijon mustard, lemon juice, salt, and pepper. Mash the ingredients together using a fork or potato masher until smooth and creamy.

    6. Taste and Adjust: Taste the mixture and adjust the seasoning by adding more salt, pepper, or mustard if needed. You want the filling to be flavorful and refreshing.

    7. Fill the Eggs: Using a spoon or a piping bag, fill each egg white half with the yolk mixture until they are heaping.

    8. Garnish and Serve: Sprinkle paprika or cayenne pepper over the top for a touch of color and flavor. You can also garnish with fresh herbs or chopped vegetables for an extra pop.

    9. Chill Before Serving (optional): For best taste, refrigerate the deviled eggs for 15-30 minutes before serving to allow the flavors to meld.

    This simple guide ensures that you can create delicious homemade deviled eggs without mayo that everyone will love. Whether you serve them as an appetizer at a gathering, a snack at home, or a packed lunch, they are guaranteed to be a hit every time.

    Mastering Homemade Deviled Eggs Without Mayo: Advanced Tips and Variations

    To truly master the art of homemade deviled eggs without mayo, consider these advanced tips and variations for even better results:

    • Experiment with Flavors: Try incorporating spices like curry powder, smoked paprika, or even tahini for unique flavor profiles that surprise your guests.
    • Texture Enhancements: Add crunch by mixing in finely chopped celery, pickles, or bell peppers into the yolk mixture with the avocado for an exciting texture.
    • Herbed Variations: Try using flavored oils or vinegar (like truffle oil or red wine vinegar) mixed into the filling for an aromatic flair.
    • Presentation: Serve your deviled eggs on a decorative platter or individual egg racks for a beautiful display. You could even use avocado skins as natural cups for a fun presentation!
    • Themed Twists: Create themed deviled eggs for holidays. For Halloween, use black olives for spiders, or for Christmas, sprinkle red and green herbs and spices for a festive touch.

    The versatility of this recipe means that there are endless ways to make it your own! Your friends and family will marvel at your creativity with variations that keep them coming back for more.

    How to Store Homemade Deviled Eggs Without Mayo: Best Practices

    To enjoy your homemade deviled eggs without mayo at their best, knowing how to store them properly is essential. Here’s how to maximize freshness:

    • Refrigeration: After preparing your deviled eggs, store them in an airtight container in the refrigerator. They can last for up to 3 to 5 days if stored correctly. Cover the eggs with a piece of plastic wrap or parchment paper to retain moisture and flavors.
    • Freezing: It’s generally not recommended to freeze deviled eggs, as the texture of the egg whites may become rubbery after thawing. However, if you must make a large batch, you can freeze the yolk filling mixture separately. Just ensure to blend it well after thawing before using.
    • Ready-to-Eat: When it’s almost time for serving, you can make an as-needed garnish with herbs or spices just before serving for maximum freshness.

    Storing your deviled eggs properly ensures they remain flavorful and safe to eat, so you can savor them at your leisure!

    Nutritional Value of Homemade Deviled Eggs Without Mayo

    When it comes to nutritional content, homemade deviled eggs without mayo shine. Each serving (2 halves) contains:

    • Calories: Approximately 70-80 calories
    • Protein: 5-6 grams
    • Fat: 5-6 grams (dependent on the use of avocado or yogurt)
    • Carbohydrates: 1-2 grams
    • Fiber: 1-2 grams (from avocado)
    • Cholesterol: 186 mg (from eggs, which is still within heart-healthy limits for most people)

    Many vitamins and minerals can also be found in deviled eggs, including B vitamins, vitamin K, and selenium. The presence of avocado increases fiber intake and provides an array of healthy fats beneficial for heart health.

    This nutritious snack can easily fit within various dietary plans, making it a flexible option for any health-conscious individual. Enjoy these homemade deviled eggs as part of a balanced diet, and relish the knowledge that you’re fueling your body with positive nutrition.

    FAQs: Frequently Asked Questions About Homemade Deviled Eggs Without Mayo

    Can I use regular mayonnaise in this recipe instead of Greek yogurt or avocado?
    Yes, you can! However, the aim of this recipe is to create a healthier version without mayo. For a creamier texture while maintaining health benefits, consider the alternative options listed.

    What if I don’t have Dijon mustard? Can I use regular mustard?
    Absolutely! Any type of mustard will work, whether it’s yellow, spicy brown, or whole grain. Adjust the amount according to your taste preference.

    How can I make this recipe vegan?
    To make vegan deviled eggs, substitute the Greek yogurt with additional avocado or use a plant-based yogurt alternative. Additionally, ensure to avoid any egg products.

    How do I prevent the avocado from browning?
    Add lemon juice to the avocado immediately after cutting it. The acidity helps slow down the browning process and keeps your filling looking fresh.

    Can these be served at room temperature?
    While they can be served at room temperature, it’s advised to keep them refrigerated until just before serving for best flavors and food safety.

    Can I prepare them ahead of time?
    Yes! You can prepare the filling a day ahead and store it separately in the refrigerator. Just fill the egg whites right before serving to keep them fresh and visually appealing.

    Discover the joy of homemade deviled eggs without mayo—this recipe encourages healthy living without sacrificing flavor. Perfect for any gathering, these delightful little bites will quickly become a favorite among friends and family alike. Enjoy your culinary adventure!

  • Classic Nutella Hot Cross Buns

    Classic Nutella Hot Cross Buns

    Classic Nutella Hot Cross Buns: A Tropical Delight

    Introduction to Classic Nutella Hot Cross Buns

    Imagine a beautifully soft and sweet bun, spilling with rich, velvety Nutella. Now, picture it adorned with a lovely cross, symbolizing tradition while embracing modern indulgence. Welcome to the world of Classic Nutella Hot Cross Buns! This scrumptious treat stands out not only for its delightful flavors but also for its versatility as a dessert recipe that can cater to various dietary preferences.

    Making these buns is a breeze; you can whip them up even on the busiest days. They shine as a perfect afternoon snack or a delightful addition to brunch gatherings. The simplicity of this recipe appeals to everyone—from busy parents who need a quick treat for their kids to students looking for a fun baking project or teachers wanting to impress their colleagues.

    Furthermore, we recognize the growing trend of health-conscious eating. These buns can easily adapt to gluten-free and vegan diets without sacrificing their heavenly taste. By infusing your homemade buns with Nutella, they become not just a treat but a celebration of flavor and joy. Plus, making them at home ensures that you control the ingredients, providing an opportunity for healthier substitutions.

    With this recipe, you’ll not only satisfy your sweet tooth but also enjoy a delightful baking adventure that can bring family and friends together. So, whether you’re a seasoned baker or a novice in the kitchen, you’ll find this recipe straightforward and rewarding. Get ready to transform your dessert repertoire with Classic Nutella Hot Cross Buns!


    Benefits and Advantages of Classic Nutella Hot Cross Buns

    Classic Nutella Hot Cross Buns offer an array of benefits that make them an appealing choice among dessert recipes. This recipe doesn’t compromise on flavor while providing a range of options suitable for various dietary needs. Here’s how these buns stand out:

    1. Simplicity in Preparation

    The recipe is designed with ease in mind. With simple everyday ingredients and clear instructions, even beginner bakers can achieve great results. The preparation process takes only a few hours, including the rising time, encouraging novices to give baking a try without feeling overwhelmed. The joy of freshly baked buns can be achieved with minimal fuss!

    2. Versatile Dietary Options

    One of the primary reasons to love this recipe is its adaptability. You can easily swap out regular flour for gluten-free flour, or use a vegan butter substitute instead of dairy butter. This versatility caters to individuals with specific dietary restrictions, allowing everyone to enjoy these delightful buns. Additionally, you can sweeten them using alternative sweeteners like honey or agave syrup, making these buns suitable for those watching their sugar intake.

    3. Healthier Alternatives

    By baking at home, you can control the ingredients that go into your buns. Using whole grain flour can not only enhance nutritional value but also add a unique flavor. Additionally, Nutella can be enjoyed in moderation—it’s a delightful indulgence that brings joy without overwhelming the dish with excess sugar or artificial fillers.

    4. Perfect for Any Occasion

    These hot cross buns seamlessly transition from cozy brunches to festive holiday gatherings. Whether you’re celebrating Easter or just sharing a friendly get-together, they make a stunning centerpiece. They’re perfect for sharing, providing a warm and inviting dessert that can spark joyful conversations around the table.

    5. Culinary Skill Development

    Making your own Nutella hot cross buns allows you to hone various baking skills, from kneading dough to the precise art of creating perfectly symmetrical crosses on top. You’ll have the opportunity to experiment with flavors, fillings, and toppings, further developing your baking talents over time.

    6. Nostalgic Appeal

    For many, hot cross buns are tied to cherished memories of family gatherings or holiday traditions. By making them at home, you can introduce this comforting tradition to a new generation. The aroma of freshly baked buns wafting through your home will create an inviting atmosphere that evokes nostalgia and warmth.

    In conclusion, Classic Nutella Hot Cross Buns are not only a delicious dessert recipe but also a versatile, healthy, and simple baking project. The ease of preparation, combined with the possibility for substitutions, ensures they cater to every culinary need. So, gather your ingredients and prepare to delight your loved ones!


    Ingredients Overview

    Essential Ingredients for Classic Nutella Hot Cross Buns

    Creating the perfect batch of Classic Nutella Hot Cross Buns requires a few essential ingredients that ensure a rich and fulfilling flavor. Here’s what you’ll need:

    1. All-Purpose Flour (3.5 cups) – This forms the base of your buns and provides the necessary structure. For gluten-free options, substitute with a 1:1 gluten-free flour blend.
    2. Instant Yeast (2.25 teaspoons) – This is crucial for the buns to rise properly. Instant yeast ensures quick fermentation due to its fine particles dissolving easily in dough.
    3. Sugar (1/4 cup) – Adds slight sweetness and activates the yeast. Alternatives include coconut sugar for a lower glycemic index.
    4. Salt (3/4 teaspoon) – Balances the sweetness and enhances flavors.
    5. Milk (1 cup, warm) – Use dairy or a plant-based milk like almond or soy milk for a vegan option.
    6. Butter (1/4 cup, melted) – This adds richness and flavor. Substitute with coconut oil for a vegan version.
    7. Egg (1 large) – Provides moisture and helps bind the other ingredients. For vegans, substitute 1 tablespoon of ground flaxseed mixed with 2.5 tablespoons of water.
    8. Nutella (1/2 cup) – The star ingredient, giving the buns their signature taste. Opt for hazelnut spread with lower sugar content if preferred.
    9. Spices (optional) – Cinnamon and nutmeg (1 teaspoon each) for additional warmth.

    Dietary Substitutions to Customize Your Classic Nutella Hot Cross Buns

    Everyone has unique dietary preferences and requirements, and here are some excellent substitutions to help you cater to those needs:

    1. Gluten-Free: Use a gluten-free all-purpose flour blend that includes xanthan gum, which mimics the elasticity of traditional flour.
    2. Vegan: Replace dairy butter with coconut oil or vegan margarine and use non-dairy milk. As mentioned, flax egg is a great alternative for the egg.
    3. Low-Calorie: Reduce sugar content or opt for a natural sweetener like stevia. Additionally, you can replace the Nutella with a homemade healthier version using mashed bananas and cocoa powder.

    By considering these substitutions, everyone in your household can enjoy the magic of Classic Nutella Hot Cross Buns without compromising their dietary preferences or needs.


    How to Prepare the Perfect Classic Nutella Hot Cross Buns: Step-by-Step Guide

    Baking Classic Nutella Hot Cross Buns is both an enjoyable and rewarding experience. Follow these simple steps to create your delicious treat:

    1. Prepare the Base: In a large mixing bowl, combine the flour, sugar, instant yeast, and salt. Mix them together to ensure even distribution of ingredients.

    2. Heat the Milk: Warm the milk in a small saucepan until it’s around 110°F (43°C). It should feel warm but not scalding. If you’re using a microwave, do it in 30-second intervals.

    3. Combine Wet Ingredients: In a separate bowl, whisk together the melted butter, egg, and warm milk. Ensure they are well blended.

    4. Mix Ingredients: Gradually pour the wet ingredients into the dry mixture while stirring with a wooden spoon. Continue mixing until a shaggy dough begins to form.

    5. Knead the Dough: Turn the dough out onto a floured surface and knead for around 10 minutes. If it’s sticky, lightly flour your hands. Kneading develops the gluten and creates a soft, pliable bun.

    6. First Rise: Place the kneaded dough into a greased bowl and cover it with a clean cloth. Let it rise in a warm place for about 1 to 1.5 hours until it doubles in size.

    7. Shape the Buns: Once the dough has risen, punch it down gently and transfer it to a floured surface. Divide the dough into 10 equal portions. Flatten each piece slightly and place a generous tablespoon of Nutella in the center. Fold the dough around the filling and shape it into a ball.

    8. Second Rise: Place the shaped dough balls onto a lined baking tray, ensuring they are touching. Cover with a towel and let them rise for another 30-45 minutes. This second rise contributes to their fluffiness.

    9. Preheat the Oven: Preheat your oven to 375°F (190°C) during the second rise.

    10. Prepare the Crosses: In a small bowl, combine 1/4 cup of all-purpose flour and enough water to form a thick paste. Use a piping bag or a plastic zip bag with a small corner cut off to pipe crosses on top of each bun.

    11. Bake: Place the buns in the preheated oven and bake for about 15-20 minutes or until golden brown. You can brush a little melted butter on top immediately after removing them from the oven for extra richness.

    12. Cool and Serve: Allow the buns to cool slightly before serving. Best enjoyed warm!

    With these steps, you’ll create soft, indulgent Classic Nutella Hot Cross Buns that everyone will love. This path to deliciousness is not only manageable but also a delightful kitchen endeavor.


    Mastering Classic Nutella Hot Cross Buns: Advanced Tips and Variations

    To ensure your Classic Nutella Hot Cross Buns stand out even more, consider these advanced tips and variations:

    Tips for Success

    • Perfect Hydration: Ensure your liquid ingredients are at the correct temperature to activate the yeast effectively. Too hot can kill the yeast, while too cold may not activate it properly.
    • Kneading Technique: When kneading the dough, use the heel of your hand to push the dough away from you, then fold it back toward yourself. This technique is crucial for developing gluten.
    • Check for Doneness: Buns should sound hollow when tapped on the bottom and should be golden brown on top. If unsure, use an instant-read thermometer; it should read around 190°F (88°C) when fully cooked.

    Flavor Variations

    • Add Fruit: Incorporate candied citrus peel, raisins, or chocolate chips as additional fillings together with Nutella for bursts of sweetness.
    • Spices and Extracts: Enhance the flavor profile by adding vanilla extract or spices like cardamom or cinnamon to the dough for a rich aroma.
    • Nutty Touch: Fold in chopped hazelnuts or walnuts with the Nutella to give added texture and taste.

    Through these tips and variations, you can elevate your Classic Nutella Hot Cross Buns, making them a unique creation that will impress anyone who tries them.


    How to Store Classic Nutella Hot Cross Buns: Best Practices

    After baking your delicious Classic Nutella Hot Cross Buns, it’s essential to store them correctly to maintain their freshness. Here’s how to store them effectively:

    1. At Room Temperature: Allow the buns to cool completely before storing. Place them in an airtight container at room temperature. They will stay fresh for about 2-3 days.

    2. Refrigeration: If you want to extend their shelf life further, you can refrigerate the buns. Wrap them tightly in plastic wrap or store them in an airtight container. They can last up to a week in the fridge.

    3. Freezing: For long-term storage, freeze the buns. Individually wrap each bun in plastic wrap and then place them in a freezer-safe bag. They will maintain their quality for up to 3 months. To enjoy, simply take them out the night before and let them thaw at room temperature.

    4. Reheating: To reheat, you can toast them in a toaster oven or warm them in a microwave for a few seconds. Avoid overheating, as it may alter the texture.

    Proper storage solutions ensure your Classic Nutella Hot Cross Buns remain delicious and ready to enjoy whenever the mood strikes, adding to their appeal as effortless dessert recipes.


    Nutritional Value of Classic Nutella Hot Cross Buns

    Knowing the nutritional value of what you eat helps in making informed choices. Here’s the estimated nutritional breakdown per serving of Classic Nutella Hot Cross Buns, based on a standard recipe that yields 10 buns:

    • Calories: 230 calories
    • Total Fat: 8g (Saturated Fat: 4g)
    • Cholesterol: 30mg
    • Sodium: 150mg
    • Total Carbohydrates: 35g (Dietary Fiber: 1g, Sugars: 7g)
    • Protein: 5g

    Note: These values can vary based on ingredient substitutions and portion sizes. For healthier versions, consider using whole grain flour, less sugar, and lighter versions of Nutella.

    The ingredient choices and modifications allow you to retain the indulgence of these buns while making them more in line with dietary goals. It’s a win-win for dessert recipes lovers who are looking to indulge wisely!


    FAQs: Frequently Asked Questions About Classic Nutella Hot Cross Buns

    Here are some insightful answers to commonly asked questions that home cooks have regarding Classic Nutella Hot Cross Buns:

    1. Can I use active dry yeast instead of instant yeast?

    Yes, you can. If using active dry yeast, dissolve it in warm liquid (milk) with a bit of sugar and let it sit for 5-10 minutes until frothy before mixing it into the dry ingredients.

    2. How can I make these buns ahead of time?

    You can prepare the dough, shape the buns, and place them in the refrigerator overnight. The next morning, allow them to rise at room temperature before baking.

    3. Can I fill these buns with something other than Nutella?

    Certainly! You can fill them with any chocolate spread, fruit jams, or even a cream cheese filling. Be creative and explore your favorite flavors!

    4. What if I want a less sweet version?

    Reduce the amount of sugar in the dough and opt for a healthier spread than Nutella, or try a homemade cocoa-nut spread that uses less sugar.

    5. What’s the best way to reheat leftover buns?

    For the best results, gently reheat them in a toaster oven or a microwave for a few seconds. You can also wrap them in aluminum foil and warm them in the oven at low heat.

    6. Are these buns suitable for freezing?

    Absolutely! Freeze them individually wrapped for later. Just ensure to let them thaw before reheating for the best texture.

    These FAQs aim to inspire confident baking while addressing the most common concerns about crafting delicious Classic Nutella Hot Cross Buns. Enjoy the process, indulge in the delightful flavors, and watch your loved ones savor every bite!


    With this comprehensive guide, you’re well-equipped to create Classic Nutella Hot Cross Buns that are delicious, satisfying, and a perfect fit for any dessert recipe collection. Happy baking!

  • Sweet Tangzhong Hot Cross Buns

    Sweet Tangzhong Hot Cross Buns

    Sweet Tangzhong Hot Cross Buns: A Tropical Delight

    Introduction to Sweet Tangzhong Hot Cross Buns

    Are you searching for delightful breakfast ideas that combine tradition with a tropical twist? Look no further than Sweet Tangzhong Hot Cross Buns! These soft, fluffy buns encapsulate a rich history while providing a contemporary taste that’s both sweet and satisfying. The Tangzhong method, a Japanese technique that involves cooking a portion of flour and water to create a roux, ensures these buns remain incredibly moist and tender, making them irresistible to anyone who takes a bite.

    What’s more, Sweet Tangzhong Hot Cross Buns offer a variety of dietary options, seamlessly accommodating those who are gluten-free, vegan, or health-conscious. This recipe is not just simple; it’s a wonderful gateway for family-friendly cooking, making it perfect for busy parents, newlyweds, and even seasoned baking enthusiasts. Imagine biting into warm, spiced buns, perfectly primed for your busy morning or special brunch gatherings! These buns also make a charming addition to holiday festivities, and their versatility means they can be enjoyed by all, regardless of dietary restrictions.

    In this guide, we will explore the benefits, ingredients, and techniques behind Sweet Tangzhong Hot Cross Buns, making them an ideal recipe for all levels of home cooks. Get ready to inspire your breakfast routine and satisfy your cravings with this tropical delight!

    Benefits and Advantages of Sweet Tangzhong Hot Cross Buns

    Sweet Tangzhong Hot Cross Buns aren’t just another baked good; they are a delightful experience with numerous benefits. First and foremost, their preparation is straightforward. Ideal for bakers of all skill levels, this recipe requires minimal ingredients and simple techniques. Utilizing the Tangzhong method guarantees an unbelievable texture, creating buns that stay soft for several days—if they last that long!

    Health-conscious individuals will appreciate the flexibility of this recipe. You can easily adapt the basic buns into a vegan version using plant-based milk and oil instead of dairy. Moreover, with the option of gluten-free flour, those with dietary restrictions don’t need to miss out on the delectable flavors and sensations that these buns promise.

    The buns are also packed with spices like cinnamon and nutmeg, which not only enhance flavor but may also provide health benefits (think anti-inflammatory properties). With the inclusion of dried fruits or nuts, you can boost their nutritional value, making them a healthier alternative to other sweet breakfast options. This means that when you serve Sweet Tangzhong Hot Cross Buns, you’re not just serving delight but also nourishment.

    Moreover, these buns are incredibly versatile. You can use them as a base for other breakfast ideas, such as turning them into delightful breakfast sandwiches filled with avocado and scrambled eggs, or simply enjoying them with a spread of your choice. The possibilities are endless, making these buns a smart culinary investment for anyone looking to elevate their breakfast game.

    Ingredients Overview

    Essential Ingredients for Sweet Tangzhong Hot Cross Buns

    Before diving into the preparation, let’s gather the essential ingredients that make these Sweet Tangzhong Hot Cross Buns a memorable treat. Below is a detailed list, complete with precise measurements and the purpose of key ingredients, including notes for dietary options:

    • Tangzhong Mix:
    • 1/4 cup (30g) all-purpose flour
    • 1 cup (240ml) water or plant-based milk (for vegan version)

    • Bun Ingredients:

    • 3 1/4 cups (400g) all-purpose flour (or 400g gluten-free flour blend for gluten-free version)
    • 1/4 cup (50g) sugar (use coconut sugar for a lower-glycemic option)
    • 2 teaspoons active dry yeast
    • 1 teaspoon salt
    • 1 teaspoon ground cinnamon
    • 1/2 teaspoon ground nutmeg
    • 1/2 cup (120ml) milk (or plant-based milk for vegan version)
    • 1/4 cup (60g) unsalted butter or coconut oil, melted (for vegan version)
    • 1/2 cup (75g) mixed dried fruits (like raisins and currants)

    • Crosses:

    • 1/4 cup (30g) all-purpose flour
    • 1/4 cup (60ml) water

    • Glaze:

    • 1 tablespoon apricot jam, warmed (or maple syrup for vegan version)

    By using alternatives such as gluten-free flour or plant-based milk, these buns can cater to a variety of dietary needs without sacrificing flavor or texture. Thus, everyone can enjoy this tropical delight, making it a fantastic addition to your list of delectable breakfast ideas.

    Dietary Substitutions to Customize Your Sweet Tangzhong Hot Cross Buns

    Adaptability is key when it comes to baking, and Sweet Tangzhong Hot Cross Buns are no exception. Here are some suggested substitutions to accommodate different dietary preferences:

    • For Vegan Version:
    • Replace dairy milk with almond, soy, or oat milk.
    • Substitute butter with coconut oil or a vegan butter alternative.

    • For Gluten-Free Version:

    • Use a 1:1 gluten-free flour blend that includes xanthan gum or another binding agent to maintain the structure.

    • Lower in Sugar:

    • Swap out sugar for a sugar alternative like Stevia or erythritol, keeping in mind that results might vary in sweetness and texture.

    • Extra Nutritional Boost:

    • Add flaxseeds or chia seeds to the dough for added fiber and protein.
    • Include nuts, like walnuts or almonds, for crunch and healthy fats.

    These modifications not only cater to various dietary needs and personal preferences but also allow everyone to enjoy these delicious buns without compromising taste or satisfaction. The versatility of Sweet Tangzhong Hot Cross Buns makes them a unique entry in your collection of healthy breakfast ideas.

    How to Prepare the Perfect Sweet Tangzhong Hot Cross Buns: Step-by-Step Guide

    Now that you’ve gathered your ingredients, let’s delve into the cooking process of Sweet Tangzhong Hot Cross Buns. Follow this comprehensive step-by-step guide to create your tropical delight:

    1. Prepare the Tangzhong:
    2. In a saucepan, combine 1/4 cup flour with 1 cup water (or milk).
    3. Cook over medium heat, constantly whisking until the mixture thickens and reaches a pudding-like consistency. Remove from heat and let it cool.

    4. Activate the Yeast:

    5. In a bowl, combine 1 teaspoon of active dry yeast, 1 tablespoon of sugar, and 1/4 cup of warm water. Allow it to sit for 5-10 minutes until it becomes frothy.

    6. Mix Ingredients:

    7. In a large mixing bowl, add 3 1/4 cups of flour, 1/4 cup sugar, 2 teaspoons of yeast mixture, 1 teaspoon salt, 1 teaspoon cinnamon, and 1/2 teaspoon nutmeg.
    8. Create a well in the center, then add the cooled Tangzhong and melted butter (or oil). Pour in 1/2 cup of milk (or plant milk).

    9. Knead the Dough:

    10. Mix the ingredients until they form a dough. Then knead on a floured surface for about 10-15 minutes until the dough is elastic and smooth. You can also use a stand mixer with a dough hook attachment for this step.

    11. Add Dried Fruits:

    12. Once the dough is smooth, flatten it slightly and sprinkle in 1/2 cup of dried fruits. Fold the dough over to encase the fruits and knead to distribute evenly.

    13. First Rise:

    14. Place the dough in a greased bowl, cover with a damp cloth, and let it rise in a warm spot for about 1-2 hours or until doubled in size.

    15. Shape the Buns:

    16. After the dough has risen, punch it down to release excess air. Turn it out onto a lightly floured surface and divide into 12 equal portions. Roll each portion into a ball.

    17. Second Rise:

    18. Place the dough balls in a greased 9×13-inch baking dish, ensuring they are close but not touching. Cover and let them rise again for about 30-45 minutes.

    19. Prepare the Cross Mixture:

    20. While the dough is rising, preheat your oven to 375°F (190°C).
    21. In a small bowl, mix 1/4 cup flour with 1/4 cup water to make a paste. Transfer this mixture into a piping bag (or a ziplock bag with the corner snipped off) and pipe crosses onto the risen buns.

    22. Bake the Buns:

      • Bake in the preheated oven for 25-30 minutes, or until golden brown.
    23. Glaze the Buns:

      • As soon as the buns come out of the oven, brush them with warmed apricot jam (or maple syrup) for a lovely sheen.
    24. Cool and Enjoy:

      • Allow the buns to cool slightly before serving warm.

    Congratulations! You’ve just mastered the art of baking Sweet Tangzhong Hot Cross Buns. They are perfect for sharing over a leisurely breakfast or creating new delicious breakfast ideas. You can serve them plain, with butter, or even transform them into delightful sandwiches, making them a versatile addition to your breakfast lineup.

    Mastering Sweet Tangzhong Hot Cross Buns: Advanced Tips and Variations

    To elevate your Sweet Tangzhong Hot Cross Buns experience, here are some advanced tips and creative variations to try:

    • Flavored Variations:
    • Experiment with different spices like cardamom or ginger to add a unique twist.
    • Consider integrating chocolate chips, citrus zest, or even a filling like almond paste or cinnamon sugar for added flavor.

    • Perfecting Texture:

    • For even softer buns, you can incorporate a bit of potato flour or milk powder into the dough. This helps retain moisture and adds an exceptional fluffiness.

    • Presentation:

    • After glazing, you can sprinkle powdered sugar or cinnamon on top for a sweet finish. Or, if you’re feeling adventurous, create decorative toppings like a simple icing for a more indulgent treat.

    • Gifting Ideas:

    • Wrap the cooled hot cross buns in parchment paper and twine for a delightful homemade gift. A jar of homemade jam alongside does wonders, making it a charming present for friends and family.

    • Make Ahead:

    • Prepare the dough ahead of time and refrigerate it overnight. You can shape the buns in the morning, allow them to rise, and bake fresh hot cross buns just in time for breakfast.

    By incorporating these advanced techniques and variations, you are bound to impress your family and friends. Plus, you’ll discover new ways to enjoy these buns, making them an essential part of your creative breakfast ideas.

    How to Store Sweet Tangzhong Hot Cross Buns: Best Practices

    Storage is vital to preserving the freshness of your Sweet Tangzhong Hot Cross Buns. Here are some best practices:

    • Room Temperature:
    • Allow the buns to cool completely, and then store them in an airtight container or resealable bag at room temperature. They can last up to 3-4 days this way.

    • Refrigeration:

    • If you live in a more humid climate or want to extend their shelf life, consider placing them in the fridge. Just be aware that refrigeration might slightly affect their texture.

    • Freezing:

    • For longer storage, individually wrap each cooled bun in plastic wrap and place them in a freezer-safe bag. They will maintain their quality for up to 3 months. To enjoy, simply thaw at room temperature or pop them in the microwave for a few seconds to reheat.

    Storing these Sweet Tangzhong Hot Cross Buns properly ensures you can enjoy your creation for days, giving you more fantastic breakfast ideas at your fingertips!

    Nutritional Value of Sweet Tangzhong Hot Cross Buns

    Understanding the nutritional value of Sweet Tangzhong Hot Cross Buns helps you make informed decisions about your meal choices. Below is an estimate of the nutrition per bun (assuming a recipe yields 12 buns):

    • Calories: Approximately 180-220 kcal
    • Protein: Around 4-5 grams
    • Fat: 6-8 grams (using butter or coconut oil)
    • Carbohydrates: Approximately 32 grams
    • Fiber: 1-2 grams
    • Sugar: 5-10 grams (varies based on sugar used)

    By incorporating whole foods such as dried fruits and alternative sweeteners, you can boost the nutritional profile even further. Plus, swaps for gluten-free flour and plant-based milk allow for even healthier options, ensuring everyone can partake in this delicious breakfast treat.

    With such appealing nutritional benefits, Sweet Tangzhong Hot Cross Buns can effortlessly become a staple in your array of delightful breakfast ideas.

    FAQs: Frequently Asked Questions About Sweet Tangzhong Hot Cross Buns

    1. Can I make Sweet Tangzhong Hot Cross Buns ahead of time?

    Absolutely! You can prepare the dough the night before, store it in the fridge, and bake fresh buns in the morning. Just let the dough come to room temperature before shaping.

    2. How long can I store these buns?

    If properly stored, Sweet Tangzhong Hot Cross Buns can be kept at room temperature for 3-4 days or frozen for up to 3 months.

    3. Can I use whole wheat flour instead of all-purpose flour?

    Yes, feel free to substitute with whole wheat flour. However, you may need to adjust the liquid to achieve the desired dough consistency, as whole wheat absorbs more moisture.

    4. Are there any delicious alternative fillings I can use?

    Certainly! Explore adding chocolate chips, different dried fruits, or even a mixture of spices and nuts for a unique twist on the classic recipe.

    5. How can I make these hot cross buns gluten-free?

    Use a gluten-free flour blend designed for baking. You may also want to include xanthan gum to help bind the ingredients and maintain proper structure.

    With these FAQs, we hope to clarify any doubts and encourage you to embrace your baking adventure with Sweet Tangzhong Hot Cross Buns. Explore, experiment, and make these buns your very own, adding to your delightful collection of breakfast ideas!

  • These Heavenly Hot Cross Buns Are Pure Addiction

    These Heavenly Hot Cross Buns Are Pure Addiction

    These Heavenly Hot Cross Buns Are Pure Addiction!: A Tropical Delight

    Introduction to These Heavenly Hot Cross Buns Are Pure Addiction!

    Imagine waking up to the enticing aroma of freshly baked goods wafting through your kitchen, beckoning you to indulge in a treat that is both comforting and delicious. These Heavenly Hot Cross Buns Are Pure Addiction! offer more than just a delightful taste—they represent a wholesome breakfast idea that perfectly balances sweet and spice, making your mornings brighter.

    Not only are these buns simple to craft, but they are also incredibly versatile, accommodating various dietary needs including vegan and gluten-free options. As a home cook, busy parent, or a health-conscious individual, you’ll appreciate how easy it is to whip these up and enjoy them fresh out of the oven. These buns are not just limited to breakfast; they can seamlessly transition into snacks or desserts, fulfilling your craving anytime. Whether you’re looking for breakfast ideas for a special occasion, a wholesome lunchbox snack for your kids, or simply a cozy evening treat, these hot cross buns hit the mark.

    With the perfect blend of spices, dried fruits, and a hint of citrus, they’re not only delicious but also packed with nutrients that serve as a great energy booster. Plus, they are an excellent conversation starter when hosting brunches or gatherings, making them a surefire hit at any social event. Join me on this culinary adventure where these heavenly buns transform your breakfast experiences and bring joy to your kitchen!

    Benefits and Advantages of These Heavenly Hot Cross Buns Are Pure Addiction!

    When it comes to breakfast ideas, few can compare to the sheer satisfaction of these Heavenly Hot Cross Buns. Let’s dive into the various benefits that make this recipe an indispensable part of your baking repertoire.

    Ease of Preparation

    One of the most appealing aspects of this recipe is its simplicity. Perfect for home bakers of any skill level, the steps involved don’t require advanced baking techniques, making it easy for even novice cooks to succeed. The buns come together in a matter of minutes, and with minimal effort, you can enjoy the taste of homemade goodness without spending hours in the kitchen.

    Health Benefits

    While they captivate the taste buds, these buns also offer health benefits. Packed with fruits such as raisins and currants, they are great sources of fiber and antioxidants. Whole grain flour options can add additional nutrients, making these buns a wholesome breakfast choice that keeps you satisfied longer. Instead of store-bought pastries that often incorporate artificial ingredients and added sugars, these buns allow you to control what goes into your food, promoting healthier eating habits.

    Customization Options

    Being able to accommodate various dietary restrictions is another huge advantage. Whether you are vegan, gluten-free, or simply looking to reduce your calorie intake, this recipe is adaptable. By using plant-based milks, egg replacements, and gluten-free flour blends, you can create a version that suits your personal dietary needs without compromising on flavor.

    Perfect for Every Occasion

    These buns are more than just a breakfast idea; they’re a versatile treat that can be enjoyed any time of day. Breakfast, afternoon tea, or dessert after dinner—there’s never a wrong time for a warm, spiced bun. Moreover, their delightful aroma and beautiful presentation make them an ideal choice for impressing guests during brunch gatherings or holiday celebrations.

    In conclusion, not only do these Heavenly Hot Cross Buns offer flavor and versatility, but they also align with various dietary preferences, making them the perfect addition to your culinary collection.

    Ingredients Overview

    Essential Ingredients for These Heavenly Hot Cross Buns Are Pure Addiction!

    To successfully whip up a batch of these delicious buns, you will need the following key ingredients:

    • 4 cups all-purpose flour (or a gluten-free blend)
    • 1 packet (2 ¼ teaspoons) of active dry yeast
    • ½ cup sugar (can use coconut sugar for a healthier alternative)
    • 1 tablespoon ground cinnamon
    • 1 teaspoon nutmeg
    • 1 teaspoon salt
    • ½ cup almond milk (or any plant-based milk)
    • ½ cup water
    • ¼ cup softened vegan butter (or regular butter)
    • 1 medium-sized orange (zest and juice)
    • 1 cup mixed dried fruits (raisins, currants, or apricots)
    • 1 tablespoon of egg replacement (for vegan option: use flaxseed powder mixed with water)
    • Glaze: ½ cup apricot jam (optional, for a shiny finish)

    Key Ingredient Benefits

    • Whole Grains: Opting for whole grain flour increases fiber content, making these buns even healthier.
    • Plant-Based Milk: A dairy-free alternative helps cater to lactose-intolerant individuals.
    • Dried Fruits: These not only add natural sweetness but are packed with vitamins and minerals, making them a functional ingredient in your breakfast ideas.

    Dietary Substitutions to Customize Your These Heavenly Hot Cross Buns Are Pure Addiction!

    Here are some substitutions to make the buns fit various dietary needs:

    • Gluten-Free: Replace all-purpose flour with gluten-free flour blends. Make sure the mix contains xanthan gum for proper structure.
    • Vegan: Use flax egg instead of traditional eggs and coconut oil in place of butter.
    • Low-Calorie: Reduce the amount of sugar by half or substitute it with a natural sweetener like stevia or monk fruit sweetener.
    • Nut-Free Option: Substitute almond milk with oat milk or rice milk to avoid nuts.

    This adaptability ensures that anyone can enjoy these Heavenly Hot Cross Buns without compromising on flavor or nutrition, reinforcing their status as one of the quintessential breakfast ideas in your home.

    How to Prepare the Perfect These Heavenly Hot Cross Buns Are Pure Addiction!: Step-by-Step Guide

    Creating these Heavenly Hot Cross Buns is a soothing experience that combines both mechanics and memories. The following step-by-step guide ensures you achieve perfect results every time.

    1. Prepare the Dough Starter: In a bowl, mix warm water, 1 tablespoon of sugar, and the yeast. Allow it to rest for about 5-10 minutes until frothy, indicating the yeast is active.

    2. Mix Dry Ingredients: In a large mixing bowl, combine flour, remaining sugar, salt, cinnamon, and nutmeg. Whisk together to evenly distribute all dry ingredients.

    3. Combine Wet Ingredients: In a separate bowl, combine almond milk, orange juice, orange zest, and softened vegan butter. Pour this mixture into the dry ingredients.

    4. Mix in the Yeast: Add the frothy yeast mixture into the bowl of dry ingredients and stir using a wooden spoon until a dough begins to form.

    5. Knead the Dough: Turn the dough onto a floured surface. Knead for about 10 minutes, or until it becomes smooth and elastic. This process develops the gluten, giving the buns their structure.

    6. Incorporate Dried Fruits: In the last minute of kneading, incorporate the mixed dried fruits until evenly distributed throughout the dough.

    7. First Rise: Place the kneaded dough into a greased bowl, covering it with a damp cloth. Allow it to rise in a warm area for 1-2 hours or until doubled in size.

    8. Shape the Buns: Once risen, punch down the dough to release excess air. Divide it into 12 equal pieces and shape them into balls. They should be sized similarly to golf balls.

    9. Second Rise: Place the shaped buns on a baking tray lined with parchment paper, leaving space between them for expansion. Cover with a clean cloth and let rise again for 30 minutes.

    10. Preheat Oven: While the buns are rising, preheat your oven to 375°F (190°C).

    11. Prepare Glaze: If you’d like a shiny finish, gently warm the apricot jam for glazing once the buns come out of the oven.

    12. Bake: Bake the buns for 20-25 minutes in the preheated oven until golden brown. An instant-read thermometer should read around 190°F (88°C) when done.

    13. Cool Down: Let the buns cool on a wire rack for a few minutes. Brush the warm buns with the apricot glaze for extra sweetness and shine.

    14. Serve and Enjoy: These Heavenly Hot Cross Buns Are Pure Addiction, best enjoyed fresh! Pair them with your favorite dairy-free spread, or enjoy them plain for the ultimate breakfast idea.

    This simple step-by-step guide empowers every home cook, whether novice or expert, to create delectable hot cross buns that resonate nostalgia while satisfying various dietary preferences.

    Mastering These Heavenly Hot Cross Buns Are Pure Addiction!: Advanced Tips and Variations

    To elevate your experience with these Heavenly Hot Cross Buns, consider these advanced tips and delightful variations that will surely entice further exploration.

    Adding Flavors & Spices

    Experiment with different spices such as cardamom or allspice for a unique twist. You can also infuse the dough with flavors like vanilla extract or almond extract for added depth.

    Stuffed Buns

    Make your hot cross buns even more indulgent by stuffing them! Insert a piece of dark chocolate or a dollop of vegan cream cheese before shaping the dough into balls for a lovely surprise at first bite.

    Toppings and Garnishes

    Feel free to top your buns with a dusting of powdered sugar, a simple icing made from powdered sugar and non-dairy milk, or even crushed nuts for a delightful crunch.

    Perfect for a Crowd

    Should you want to impress guests, consider making mini versions for bite-sized delights. Simply divide the dough into smaller portions before baking, ensuring everyone has a taste.

    By utilizing these advanced tips and variations, you can elevate the classic hot cross bun into something entirely distinct. Such creativity will ensure they remain a cherished breakfast idea in your household for generations to come.

    How to Store These Heavenly Hot Cross Buns Are Pure Addiction!: Best Practices

    Preserving the freshness of your Heavenly Hot Cross Buns requires strategic storage methods. Follow these practices to ensure they remain delicious long after baking.

    Room Temperature Storage

    To maintain the soft texture, store the buns in an airtight container at room temperature. They can last for about 2-3 days this way. Remember to separate layers with parchment paper to prevent sticking.

    Refrigeration

    If you wish to extend their freshness, you can refrigerate them. However, keep in mind that they may lose some softness. Store them in an airtight container, and they should remain good for up to a week. Just warm them up in your microwave or oven before serving.

    Freezing for Longevity

    For longer durations, freezing is the best option. Place the cooled buns in a freezer-safe bag labeled with the date. They can remain frozen for up to three months. When ready to enjoy, thaw them overnight in the fridge and reheat in the oven or microwave.

    By following these storage guidelines, you can ensure that your Heavenly Hot Cross Buns Are Pure Addiction both remain enjoyable and ready for any breakfast idea or snack craving.

    Nutritional Value of These Heavenly Hot Cross Buns Are Pure Addiction!

    To appreciate the nutritional benefits of these Heavenly Hot Cross Buns, let’s break down their composition. This overview will assist you in making educated dietary choices.

    Serving Size

    The nutritional information will be based on one hot cross bun.

    • Calories: 190-210 kcal
    • Carbohydrates: 35 g
    • Protein: 4 g
    • Fat: 5 g
    • Fiber: 2 g
    • Sugars: 8 g
    • Sodium: 150 mg

    Nutritional Highlights

    • High in Fiber: Thanks to the addition of whole grain flour and dried fruit, these buns offer a good dose of dietary fiber.
    • Moderate Protein: The buns provide a moderate amount of protein, especially if you incorporate plant-based sources.
    • Vitamins and Minerals: Including dried fruits not only adds sweetness but also infuses the buns with vitamins A, C, and iron.

    With this nutritional insight, you can clearly see how these Heavenly Hot Cross Buns Are Pure Addiction can be part of a balanced diet, fulfilling those delightful breakfast ideas or sweet cravings without indulging in excessive unhealthy options.

    FAQs: Frequently Asked Questions About These Heavenly Hot Cross Buns Are Pure Addiction!

    1. Can I add nuts to my hot cross buns?

    Absolutely! Adding nuts such as chopped walnuts or pecans can introduce a pleasant crunch and additional nutrients.

    2. How do I make these buns gluten-free?

    To make your Heavenly Hot Cross Buns gluten-free, simply substitute the all-purpose flour with a gluten-free flour blend and ensure that no gluten-containing ingredients are added.

    3. How long do these buns stay fresh?

    These buns can last up to 3 days at room temperature in an airtight container. For extended storage, freeze them for up to three months.

    4. Can I use fresh fruit instead of dried?

    While dried fruits add a unique sweetness and texture, you can use fresh fruit. Just be cautious with moisture levels, as it may affect the dough consistency.

    5. What should I serve with these buns?

    These Heavenly Hot Cross Buns go wonderfully with various spreads like dairy-free butter, jam, or fruit preserves. For a brunch setting, they pair well with coffee or tea!

    6. Can I make these buns in advance?

    Certainly! You can prepare the dough the night before, let it rise, and store it in the fridge overnight. Bake it fresh the following morning for a delightful breakfast idea.

    By addressing these common inquiries, you can feel confident in your baking journey while catering to personal preferences and maximizing enjoyment with these Heavenly Hot Cross Buns Are Pure Addiction!

  • Traditional Xl Hot Cross Buns

    Traditional Xl Hot Cross Buns

    Traditional XL Hot Cross Buns: A Tropical Delight

    Introduction to Traditional XL Hot Cross Buns

    If you’re in search of breakfast ideas that satisfy your cravings while being simple to prepare, look no further: Traditional XL Hot Cross Buns are a delightful option. Originating from England, these spiced sweet buns flaunt their signature cross on top, a symbol of tradition and a harbinger of the Easter season. These indulgent treats not only boast a warm, fragrant aroma but are also incredibly versatile, catering to a variety of tastes and dietary needs.

    What truly makes these buns stand out is their combination of flavors and textures. Soft and pillowy, the dough is enriched with a medley of spices and fruits, creating a mouthwatering experience with each bite. But it doesn’t stop there! Hot Cross Buns can easily be made healthier with simple substitutions, making them a fitting choice for the health-conscious, vegans, or gluten-free dieters. They are ideal for busy parents looking to nourish their families, students seeking a quick breakfast fix, or travel enthusiasts eager to enjoy a taste of home wherever they go.

    With their simple preparation method and staggering flavor profile, these buns can elevate your breakfast game, providing a delicious yet easy option suitable for all occasions. So, whether you’re a baking novice or an experienced culinary enthusiast, Traditional XL Hot Cross Buns are sure to inspire you to try your hand at this cherished recipe.

    Benefits and Advantages of Traditional XL Hot Cross Buns

    Traditional XL Hot Cross Buns offer a variety of benefits that make them a staple in many households, especially during festive seasons. Here’s why this recipe stands out:

    1. Simplicity of Preparation

    One of the most appealing advantages is how easy these buns are to prepare. The recipe involves straightforward steps and beginner-friendly techniques that allow anyone to bake with confidence. From mixing the ingredients to letting the dough rise, every stage is manageable, making it an excellent option for home cooks of all skill levels.

    2. Health Benefits

    Contrary to typical pastries loaded with sugar and unhealthy fats, these buns can be tailored to be more nutritious. For instance, consider replacing white flour with whole grain versions or using natural sweeteners like honey or maple syrup. Additionally, by including dried fruits, you not only enhance flavor but also load the recipe with vitamins and minerals, offering an array of health benefits.

    3. Dietary Adaptations

    The versatility of the recipe allows for numerous substitutions to meet dietary restrictions. Whether you’re catering to a vegan diet or a gluten-free lifestyle, modifications can be made with ease. This flexibility not only makes Traditional XL Hot Cross Buns accessible to a wider audience but also showcases how delicious and satisfying healthier options can be.

    4. Cultural Significance

    There’s something uniquely special about enjoying these buns, particularly during the Easter season. For many families, preparing and sharing Hot Cross Buns carries sentimental value, conjuring memories of gathering around the table with loved ones. This recipe encourages bonding over cooking and celebrating tradition, making it a wonderful addition to any household.

    5. Perfect for Various Occasions

    Hot Cross Buns transcend their status as mere breakfast items. They are also suitable for brunch, afternoon tea, or even as a snack. They’re equally delightful when served fresh and warm from the oven or toasted with a pat of butter. This makes them a versatile option that remains delightful regardless of how or when they’re enjoyed.

    Incorporating Traditional XL Hot Cross Buns into your breakfast ideas will not only increase meal diversity but also offer a delectable and heartwarming experience for everyone.

    Ingredients Overview

    Essential Ingredients for Traditional XL Hot Cross Buns

    When preparing Traditional XL Hot Cross Buns, the following ingredients are essential. Each plays a role in contributing to the flavor and texture of the final product:

    • 4 cups all-purpose flour (or whole wheat flour for added nutrition)
    • ½ cup granulated sugar (can substitute with coconut sugar for a healthier option)
    • 2 teaspoons instant yeast
    • 1 teaspoon ground cinnamon
    • ½ teaspoon ground nutmeg
    • ½ teaspoon ground allspice
    • ½ teaspoon salt
    • 1 cup mixed dried fruit (such as raisins, currants, and cranberries)
    • ½ cup warm milk (or almond milk for a dairy-free version)
    • 3 tablespoons unsalted butter (or coconut oil for dairy-free)
    • 2 large eggs (or flaxseed eggs for a vegan substitute)
    • For the cross: ¼ cup flour mixed with enough water to create a paste
    • For the glaze: ¼ cup apricot jam (optional for sweetness and shine)

    Dietary Substitutions to Customize Your Traditional XL Hot Cross Buns

    Traditional XL Hot Cross Buns can easily be adapted to fit various dietary needs. Consider the following substitutions:

    • Vegan: Replace eggs with flaxseed eggs (1 tablespoon ground flaxseed mixed with 2.5 tablespoons water, let sit until gelatinous) and use almond milk or oat milk instead of regular milk.
    • Gluten-Free: Substitute the all-purpose flour for a gluten-free flour blend, ensuring that you include a binding agent like xanthan gum if required by your mix.
    • Lower-Calorie Option: Use a sugar substitute like stevia or erythritol to reduce calories without sacrificing sweetness.
    • Dairy-Free: Instead of butter, incorporate coconut oil or a vegan butter substitute to keep the buns rich and moist.

    With these substitutions, you can enjoy Traditional XL Hot Cross Buns while accommodating various dietary preferences and restrictions, allowing everyone to partake in this delightful treat.

    How to Prepare the Perfect Traditional XL Hot Cross Buns: Step-by-Step Guide

    Creating Traditional XL Hot Cross Buns is a straightforward yet rewarding process. Follow these step-by-step instructions to achieve the perfect buns:

    1. Prepare the Base:
      In a large mixing bowl, combine the flour, sugar, and salt. Make a well in the center and add the warm milk, melted butter or oil, eggs, and instant yeast. Mix until a soft dough forms.

    2. Knead the Dough:
      Turn the dough onto a lightly floured surface. Knead for about 10 minutes, or until the dough is smooth and elastic. If it’s too sticky, sprinkle in a little more flour as needed.

    3. Incorporate the Spices:
      Add the ground cinnamon, nutmeg, and allspice to the dough. Knead again for a few minutes to ensure the spices are evenly distributed throughout the mixture.

    4. Add the Dried Fruit:
      Gently fold in the mixed dried fruit until it’s well incorporated into the dough. This is where the flavor of the buns truly begins to shine.

    5. First Rise:
      Place the dough in a greased bowl, cover it with a clean kitchen towel, and let it rise in a warm, draft-free spot for about 1 to 1.5 hours or until it has doubled in size.

    6. Shape the Buns:
      Once the dough has risen, punch it down to release air. Divide the dough into 12 equal pieces and shape each piece into a ball. Place the balls on a greased baking tray, ensuring they are slightly touching each other for soft buns.

    7. Prepare the Cross Mixture:
      Mix the flour with just enough water to form a paste. Using a piping bag or a small plastic bag with a corner cut off, pipe a cross onto each bun.

    8. Second Rise:
      Cover the buns again with a towel and let them rise for an additional 30 minutes, allowing them to puff up.

    9. Bake the Buns:
      Preheat your oven to 375°F (190°C). Bake the buns in the oven for 20-25 minutes or until golden brown and sounding hollow when tapped on the bottom.

    10. Glaze (Optional):
      For a shiny finish, you can heat the apricot jam until it becomes liquid, then brush it over the hot buns as soon as they come out of the oven.

    11. Cool Before Serving:
      Allow the buns to cool on a wire rack for a few minutes before serving warm or at room temperature.

    With these simple steps, you can create luscious Traditional XL Hot Cross Buns that serve as an excellent addition to your breakfast ideas, perfect for special occasions or everyday indulgences.

    Mastering Traditional XL Hot Cross Buns: Advanced Tips and Variations

    Though the classic recipe is delightful on its own, there are several advanced tips and variations you can explore to elevate your Hot Cross Buns:

    1. Flavor Enhancements

    For an added depth of flavor, consider incorporating citrus zest (like orange or lemon) with the dried fruit. This addition creates a refreshing contrast that brightens the buns.

    2. Herbal Essence

    Infuse the dough with finely chopped fresh herbs such as rosemary or thyme to give your buns a savory twist, perfect for pairing with cheeses or charcuterie.

    3. Chocolate Chip Variation

    For those with a sweet tooth, swapping some dried fruit for chocolate chips can create a decadent chocolate Hot Cross Bun. This variation is often favored by children.

    4. Toasted Nut Addition

    Mixing in chopped nuts, such as almonds or walnuts, adds crunch and nutritious benefits. Carefully toast the nuts beforehand to enhance their flavor.

    5. Experiment with Spices

    Don’t be afraid to play around with different spices. While cinnamon and nutmeg are traditional, cardamom and ginger could provide an exciting twist.

    6. Serving Suggestions

    Serve these buns with a variety of spreads to enhance their appeal. Consider butter, cream cheese, or even an herb-infused spread for a savory option.

    7. Presentation

    A fun way to present your Traditional XL Hot Cross Buns for gatherings is by pairing them with an assortment of toppings or dips on a large charcuterie board, showcasing their elegance and versatility.

    By applying these tips and experimenting with variations, you can create an unforgettable experience with your Traditional XL Hot Cross Buns while further exploring your creativity in the kitchen.

    How to Store Traditional XL Hot Cross Buns: Best Practices

    Proper storage of your Traditional XL Hot Cross Buns ensures they maintain their freshness and flavor. Here’s how to best store and enjoy your buns:

    1. Refrigeration

    If you plan to eat the buns within a few days, wrap them tightly in plastic wrap or store them in an airtight container. Keeping them at room temperature will help preserve their fluffy texture.

    2. Freezing for Future Enjoyment

    For longer storage, freeze the buns. First, let them cool completely, then place them in a freezer-safe bag, removing as much air as possible. They can be stored frozen for up to three months. To enjoy, simply thaw at room temperature and warm in the oven before serving.

    3. Reheating

    When you want to enjoy leftover buns, the best method is to reheat in the oven. Preheat the oven to 350°F (175°C), wrap the buns in aluminum foil, and bake for about 10-15 minutes until heated through. This will help retain their softness, making them feel freshly baked.

    4. Avoiding Stale Buns

    If your buns do become slightly stale, consider slicing them in half and toasting them. Spreading a little butter or jam can rejuvenate their flavor and texture.

    By following these storage practices, you can ensure that your Traditional XL Hot Cross Buns remain delicious, making them a viable option among your breakfast ideas for days to come.

    Nutritional Value of Traditional XL Hot Cross Buns

    Understanding the nutritional value of your food is essential, especially for those looking to maintain a balanced diet. Here’s a general breakdown of the nutritional information typical for Traditional XL Hot Cross Buns (per bun, assuming a recipe yields 12):

    • Calories: Approximately 200-250 kcal
    • Total Fat: 5-8g
    • Saturated Fat: 2-4g
    • Cholesterol: 30-50mg
    • Sodium: 100-150mg
    • Total Carbohydrates: 35-40g
    • Dietary Fiber: 1-2g
    • Sugars: 6-10g
    • Protein: 4-6g

    Nutrient Contributions:

    The ingredients used, especially the dried fruits, provide a source of natural sweetness along with vitamins and minerals such as potassium, iron, and vitamin C. Opting for whole wheat flour increases fiber content, further contributing to digestive health.

    By making thoughtful substitutions and crafting these delicious buns, you can enjoy a tasty treat without compromising on nutrition. Given their recovery potential, Traditional XL Hot Cross Buns offer a unique blend of satisfaction and nourishment, making them an excellent option within your breakfast ideas repertoire.

    FAQs: Frequently Asked Questions About Traditional XL Hot Cross Buns

    1. Can I make Traditional XL Hot Cross Buns without eggs?

    Yes, you can use flaxseed eggs or commercial egg replacers to create an egg-free version of this delicious treat.

    2. How long can I store Hot Cross Buns?

    When stored properly, Hot Cross Buns can last for about 2-3 days at room temperature or up to 3 months if frozen.

    3. What is the best way to reheat leftover buns?

    Reheat leftover buns in a preheated oven wrapped in aluminum foil for about 10-15 minutes, ensuring they remain soft and enjoyable.

    4. How can I make these buns suitable for a vegan diet?

    Replace the eggs with flaxseed eggs, use a dairy-free milk alternative, and swap regular butter for coconut oil or vegan butter.

    5. Can I use different fruits in the recipe?

    Absolutely! Feel free to mix and match your favorite dried fruits, such as apricots, figs, or even chocolate bits for a sweeter version.

    6. What makes these buns “Traditional”?

    The term refers to the classic spices, the cross on top representing the crucifixion, and the cultural heritage associated with baking and sharing them, particularly during Easter.

    In conclusion, Traditional XL Hot Cross Buns encompass an array of flavors, traditions, and health benefits that cater to various dietary needs. Their ease of preparation, combined with the ability to customize, makes them not just a delightful treat but also a versatile part of your breakfast ideas. Whether you’re gathering with loved ones or enjoying a quiet moment alone, these buns are sure to bring comfort and joy to your mornings. Happy baking!

  • Quick Cucumber Pea Salad

    Quick Cucumber Pea Salad

    Quick Cucumber Pea Salad: A Tropical Delight

    Introduction to Quick Cucumber Pea Salad

    When it comes to light and refreshing dishes, Quick Cucumber Pea Salad is the undisputed champion. This vibrant cucumber salad combines crisp cucumbers and sweet peas to create a delightful medley that is not only delicious but also incredibly nourishing. Perfect for busy home cooks and individuals following a health-conscious lifestyle, this salad is a fantastic choice for any meal. Packed with essential vitamins and minerals, it is suitable for various dietary needs, including vegan, gluten-free, and low-calorie options.

    Imagine serving this colorful dish at a picnic, cookout, or even as a quick weekday lunch. Its simple preparation makes it a go-to for busy parents and students alike. You can easily whip up this cucumber salad in just 15 minutes, making it an ideal option for those pressed for time but still wanting to enjoy a wholesome meal. Furthermore, the light and refreshing flavors can transport you to tropical paradises, while the crispness of the cucumbers and the sweetness of the peas tantalize your taste buds.

    As we delve deeper into this quick cucumber pea salad recipe, prepare yourself to be inspired by its simplicity, health benefits, and versatility. Whether you are a seasoned cook or a novice in the kitchen, this salad is sure to become a staple in your culinary repertoire.

    Benefits and Advantages of Quick Cucumber Pea Salad

    Nutritional Powerhouse

    The combination of cucumbers and peas in this cucumber salad ensures that you consume a wealth of nutrients in every serving. Cucumbers are low in calories, high in water content, and an excellent source of vitamin K. They also provide potassium and magnesium, crucial for maintaining muscle function and electrolyte balance. On the other hand, peas are a powerhouse of protein, fiber, and essential vitamins such as vitamin A, vitamin C, and B vitamins. Together, these ingredients create a nutritious salad that supports overall health and well-being.

    Easy Preparation

    One of the main advantages of the Quick Cucumber Pea Salad is how convenient it is to prepare. In just a few straightforward steps, you can have a delicious dish ready that serves as a side or main course. For busy parents or working professionals, this means you can put together a healthy meal without a significant time investment. Simply chop your vegetables, mix the dressing, and toss everything together in a bowl—easy peasy!

    Versatility for Everyone

    This cucumber salad caters to a wide range of dietary requirements. Whether you’re following a vegan diet, need something gluten-free, or are watching your calorie intake, this salad has it all covered. You can easily adjust the recipe based on available ingredients or personal preferences. This adaptability also makes it a perfect dish for potlucks, barbecues, and family gatherings, ensuring that everyone can enjoy it, no matter their dietary restrictions.

    Great for Meal Prepping

    Another noteworthy benefit of the Quick Cucumber Pea Salad is its suitability for meal prepping. It can be made in bulk and stored in the refrigerator for a few days, allowing you to plan healthy lunches or dinners throughout the week effortlessly. In fact, the flavors continue to meld together as it sits, which can enhance the overall taste of the dish! Simply pack it in meal prep containers, and you’ve got lunch sorted for several days.

    Refreshing Taste

    The crispness of cucumbers and the sweetness of peas create a light, refreshing taste that can brighten up any meal. This makes the cucumber salad the perfect companion alongside heavier dishes, adding balance to your plate. Furthermore, its refreshing nature makes it an excellent option for warm summer days or alongside grilled meats at a cookout.

    Ingredients Overview

    Essential Ingredients for Quick Cucumber Pea Salad

    This cucumber salad recipe features a simple list of essential ingredients, each playing a crucial role in the dish’s flavor and texture. Here’s what you’ll need:

    1. Cucumbers (2 medium-sized): Slice them for a refreshing base. Cucumbers have high-water content, which is excellent for hydration.

    2. Fresh Peas (1 cup): You can use fresh or frozen peas (thawed) for sweetness and color.

    3. Cherry Tomatoes (1 cup, halved): For vibrant color and a burst of flavor. They are also rich in antioxidants.

    4. Red Onion (1 small, finely chopped): Adds tanginess to the salad. You can opt for shallots for a milder taste.

    5. Fresh Dill or Mint (2 tablespoons, chopped): These herbs enhance the salad’s fresh flavor profile. Mint offers a cooling effect, while dill adds a savory twist.

    6. Olive Oil (3 tablespoons): Acts as a flavorful dressing base, providing healthy fats.

    7. Lemon Juice (2 tablespoons): Adds acidity to balance the flavors.

    8. Salt and Pepper (to taste): Essential for enhancing all flavors in the salad.

    Dietary Substitutions to Customize Your Quick Cucumber Pea Salad

    Customizing the cucumber salad to suit various dietary needs is easy. Here are some substitution ideas:

    • Cucumbers: For individuals who are looking for something crunchier, zucchini can serve as an alternative.

    • Peas: Chickpeas or black beans can replace peas for those seeking a higher protein content.

    • Cherry Tomatoes: If you dislike tomatoes, you could use bell peppers for a different texture and flavor.

    • Olive Oil: Avocado oil or any light oil can be an alternative, particularly for those who prefer different flavor profiles.

    • Lemon Juice: In case of citrus allergies or preferences, apple cider vinegar can provide a similar tang.

    • Herbs: Don’t have dill or mint on hand? Basil or cilantro could lend unique flavors and freshness.

    For vegan eaters, the salad remains entirely plant-based as it has no animal products. This flexibility makes the Quick Cucumber Pea Salad a delightful option for gatherings and meal prep, aligning with diverse tastes and requirements.

    How to Prepare the Perfect Quick Cucumber Pea Salad: Step-by-Step Guide

    Now that you have all your ingredients ready, let’s dive into the step-by-step guide to preparing your cucumber salad.

    1. Prepare the Base: Begin by washing your cucumbers thoroughly. Slice them in half lengthwise, then cut them into half-moon shapes for easy eating.

    2. Mix Ingredients: Place the sliced cucumbers in a large mixing bowl. Next, add the fresh peas, diced cherry tomatoes, and chopped red onion.

    3. Make the Dressing: In a separate small bowl, whisk together olive oil, lemon juice, salt, and pepper. Adjust the seasoning to your preference—add more salt or lemon juice if desired.

    4. Combine Everything: Drizzle the dressing over the cucumber and pea mixture. Use a spatula or spoon to toss the ingredients gently until everything is well-coated.

    5. Add Herbs: Lastly, sprinkle the chopped dill or mint over the salad. Toss again gently, ensuring the herbs are distributed evenly.

    6. Chill: For the best flavor, allow the salad to sit in the refrigerator for about 20 minutes. This waiting period helps all the flavors meld together nicely.

    7. Serve: Once chilled, give the salad a final toss before serving. You can garnish with additional herbs or seeds for extra flair.

    Optional Cooking Steps (For Those Who Prefer Cooked Peas)

    If you prefer your peas cooked, simply bring a pot of water to a boil, add the peas, and cook for about 2-3 minutes until tender. Drain and cool the peas before adding them to your salad.

    Presentation Tips

    To elevate your cucumber salad, serve it in a chilled bowl or over a bed of greens. You can also add some crumbled feta or goat cheese for an extra layer of flavor.

    Mastering Quick Cucumber Pea Salad: Advanced Tips and Variations

    To truly master the Quick Cucumber Pea Salad, consider these advanced tips and variations:

    • Add Crunch: For an extra crunch, toss in some chopped nuts or seeds, like sunflower seeds or sliced almonds.

    • Spice it Up: If you enjoy heat, a pinch of red pepper flakes can add a delightful spice.

    • Change the Dressing: Experiment with different dressings like tahini or yogurt-based dressings for a creamier texture.

    • Protein Boost: Incorporate some protein by adding grilled chicken or shrimp, making the salad more filling for larger meals.

    • Social Gatherings: Make a larger batch and serve it as a refreshing dish at barbecues or parties, where guests can help themselves.

    These ideas will not only add variety but also ensure that your cucumber salad stays interesting, no matter how often you make it.

    How to Store Quick Cucumber Pea Salad: Best Practices

    To ensure your Quick Cucumber Pea Salad remains fresh and delicious, proper storage is essential. Here are some best practices to keep in mind:

    • Refrigeration: Place the salad in an airtight container and store it in the refrigerator. The salad should last 3-4 days when properly stored. Note that the cucumbers may release water over time, making the dressing thinner. This is normal, and you can always give it a quick toss before serving.

    • Freezing: It’s not recommended to freeze this salad due to the high-water content of cucumbers, which can turn mushy after thawing. Enjoy it fresh instead!

    • Reheating: If you choose to add cooked peas or any other ingredients that need to be heated, gently warm them in a pot before mixing them with the other cold ingredients to avoid sogginess.

    Nutritional Value of Quick Cucumber Pea Salad

    The nutritional benefits of this cucumber salad are noteworthy. Here’s a rough estimate of the nutritional profile per serving (approximately 1 cup):

    • Calories: 120
    • Protein: 4g
    • Fat: 7g (mostly from olive oil)
    • Carbohydrates: 13g
    • Fiber: 4g
    • Sugars: 3g

    Vitamins and Minerals

    • Vitamin A: 10% of Daily Value (DV)
    • Vitamin C: 40% of DV
    • Vitamin K: 35% of DV
    • Potassium: 10% of DV

    This balance of macronutrients and the abundance of vitamins make the cucumber salad an excellent choice for maintaining a healthy diet. The high fiber content aids digestion, while the healthy fats from olive oil promote heart health.

    FAQs: Frequently Asked Questions About Quick Cucumber Pea Salad

    1. Can I add other vegetables to this cucumber salad?

    Absolutely! Feel free to add any veggies you enjoy. Bell peppers, carrots, or avocados can add a delightful crunch and additional nutrients.

    2. How long does Quick Cucumber Pea Salad last in the fridge?

    When stored in an airtight container, this salad can last for up to 3-4 days. However, for the freshest flavor, it’s best enjoyed within the first couple of days.

    3. Is the salad suitable for a vegan diet?

    Yes! The Quick Cucumber Pea Salad is entirely plant-based, making it suitable for vegans and those avoiding animal products.

    4. Can I use dried herbs instead of fresh?

    Certainly! If fresh herbs are unavailable, you can use dried herbs, keeping in mind that dried herbs are more concentrated. Typically, one tablespoon of fresh herbs equals about one teaspoon of dried.

    5. What can I use instead of peas?

    If you don’t have peas, consider using diced avocado, cooked chickpeas, or edamame for a similar texture. Each will lend a unique flavor profile to your salad.

    6. How can I enhance the flavor of my cucumber salad?

    Consider adding a splash of balsamic vinegar, a pinch of garlic powder, or even a dash of hot sauce for an extra kick, depending on your taste preferences.

    In conclusion, the Quick Cucumber Pea Salad is not only simple and quick to make but also serves as a nutritious addition to your meal plans. With its versatility and vibrant flavors, it’s sure to become a favorite recipe for any occasion. Dive into this tropical delight and enjoy the health benefits it has to offer!