Easy Spicy Chicken Ramen Dinner Recipe: A Tropical Delight
Introduction to Easy Spicy Chicken Ramen Dinner Recipe
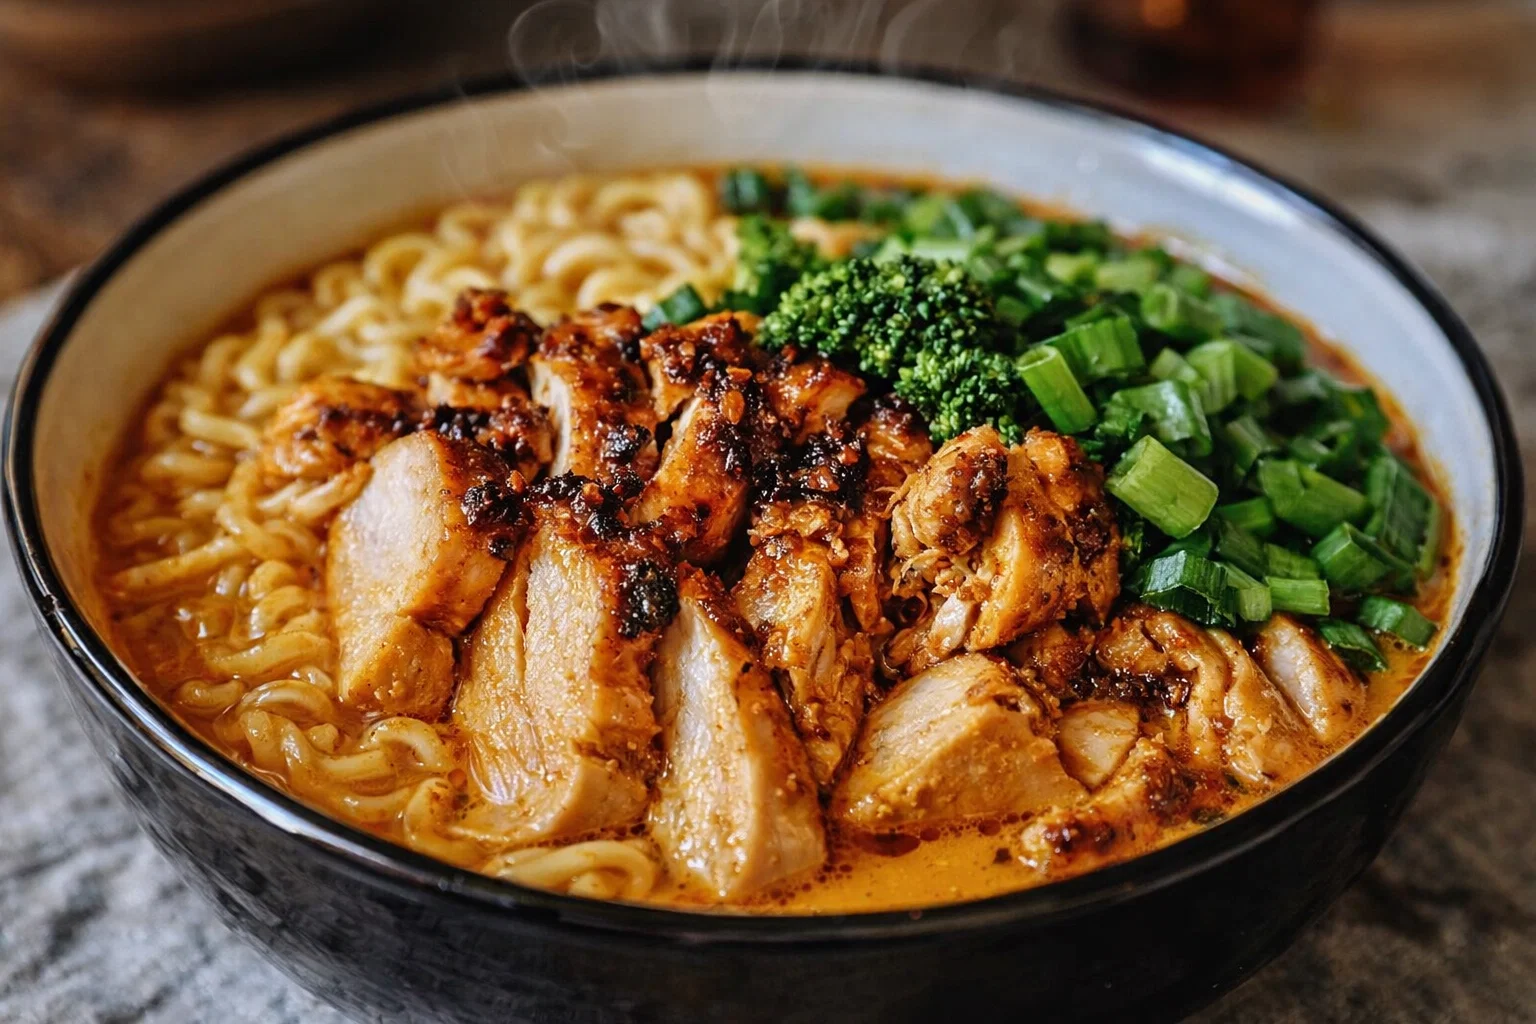
If you’re searching for simple yet delicious easy dinner recipes, look no further! The Easy Spicy Chicken Ramen Dinner Recipe checks all the boxes for busy families, students, and anyone looking for a quick meal that doesn’t skimp on flavor. This recipe not only simplifies your dinner preparations but also introduces a delightful kick that will satisfy your taste buds.
Picture a steaming bowl of ramen featuring tender chicken, vibrant vegetables, and a rich, spicy broth that warms the soul. With versatile ingredients, this dish is adaptable for various diets, including gluten-free and low-calorie options.
Health-conscious eaters will appreciate the benefits as well—this ramen is loaded with protein, packed with vitamins from fresh veggies, and can be customized to your heart’s content. Whether you’re a seasoned cook or just beginning your culinary journey, this recipe encourages you to get creative in the kitchen. Enjoy the fun and flavor of making your own ramen while keeping it simple, nutritious, and satisfying, ideal for all occasions—dinner time, late-night snacks, or even meal prepping for the week ahead.
So, grab your ingredients and prepare for a delightful and spicy culinary adventure that fits perfectly into the realm of quick and easy dinner recipes!
Benefits and Advantages of Easy Spicy Chicken Ramen Dinner Recipe
The Easy Spicy Chicken Ramen Dinner Recipe stands out for numerous reasons, making it a top choice for your family dinners or solo meals. Below, we explore the specific benefits this dish offers:
1. Simplicity of Preparation
One of the most significant advantages of this ramen recipe is its simplicity. With straightforward instructions and easy-to-find ingredients, you can whip up a hearty meal in under 30 minutes. Whether you’re a novice cook or pressed for time post-work, you’ll find this recipe incredibly approachable.
2. Health Benefits
This ramen isn’t just about flavor; it’s a nourishing meal! By incorporating chicken, you add a protein boost essential for muscle repair and recovery. The vegetables—such as spinach, carrots, and bell peppers—provide vital nutrients including fiber, vitamins A and C, and antioxidants.
Moreover, using low-sodium broth allows you to control your salt intake, making this dish heart-healthier than conventional takeout options. If you’re seeking to reduce calories, consider replacing traditional ramen noodles with veggie noodles or gluten-free alternatives to lower the carb count while still delivering a satisfying meal.
3. Versatility for Everyone
Catering to diverse dietary needs is effortless with this recipe. You can easily modify it for different preferences, whether you’re accommodating gluten-free, low-carb, or even vegetarian diets. With simple substitutions, you can turn this spicy ramen into a completely vegan dish or adjust the heat level to suit children or spice lovers alike.
4. Budget-Friendly
Homemade meals can dramatically cut costs compared to dining out. This Easy Spicy Chicken Ramen Dinner Recipe uses affordable ingredients—and because it’s a one-pot dish, you save on cleanup too!
In summary, this recipe offers convenience, health benefits, versatility, and economic savings, making it an excellent addition to your repertoire of easy dinner recipes.
Ingredients Overview
Essential Ingredients for Easy Spicy Chicken Ramen Dinner Recipe
To create your Easy Spicy Chicken Ramen Dinner, gather the following ingredients:
- Chicken Breast: 1 pound, sliced thinly (provides protein)
- Ramen Noodles: 2 packs (traditionally wheat-based or opt for gluten-free options)
- Chicken Broth: 4 cups (use low-sodium for healthier choice)
- Soy Sauce: 2 tablespoons (use tamari for gluten-free)
- Sriracha: 1-2 tablespoons (adjust for spice preference)
- Garlic: 3 cloves, minced (adds flavor and health benefits)
- Ginger: 1 tablespoon, grated (boosts immunity)
- Carrots: 1 cup, julienned (for texture and vitamins)
- Spinach: 2 cups (packed with nutrients)
- Bell Pepper: 1, sliced (adds color and vitamins)
- Green Onions: ½ cup, chopped (for garnish)
- Sesame Oil: 1 teaspoon (optional for added flavor)
- Salt and Pepper: to taste
Vegan, Gluten-Free, and Low-Calorie Options
- Substitute the chicken breast with tofu or tempeh for a vegan version.
- Use zucchini noodles or shirataki noodles to reduce calories and carbs.
- Ensure to use gluten-free soy sauce and gluten-free ramen for dietary adherence.
Dietary Substitutions to Customize Your Easy Spicy Chicken Ramen Dinner Recipe
This ramen is wonderfully adaptable! Here are some substitution options:
- Chicken: For a vegetarian version, replace chicken with chickpeas or mushrooms to maintain protein content.
- Noodles: Choose whole grain, or egg noodles if gluten isn’t a concern. For low-carb, zucchini noodles work beautifully.
- Vegetables: Other vegetables like bok choy, broccoli, and snap peas can be substituted depending on your taste or what you have on hand.
- Heat Level: Adjust the level of sriracha or omit altogether for a milder dish. You can also use chili flakes or fresh chili in its place.
By offering these substitutions, the recipe broadens its appeal, ensuring that anyone can enjoy this delightful and spicy ramen dish!
How to Prepare the Perfect Easy Spicy Chicken Ramen Dinner Recipe: Step-by-Step Guide
Now, let’s dive into the preparation of your Easy Spicy Chicken Ramen Dinner. Here’s a clear, step-by-step guide to get you cooking deliciously:
-
Prepare the Base: In a large pot, heat a tablespoon of sesame oil over medium heat. Add the minced garlic and grated ginger. Sauté for about 1-2 minutes until fragrant.
-
Add Broth: Pour in 4 cups of low-sodium chicken broth, and bring to a boil. This creates a rich base for your ramen, enhancing the flavor profile.
-
Introduce Spices: Stir in the soy sauce and sriracha. Use a whisk if necessary to combine them well with the broth to ensure a consistent flavor throughout.
-
Cook the Chicken: Add the sliced chicken breast to the pot. Allow it to simmer for about 5-7 minutes, or until the chicken is fully cooked and tender. This step adds a nice protein kick.
-
Prepare the Noodles: While the chicken cooks, prepare your ramen noodles according to package instructions. If using gluten-free noodles, adjust the cooking time as necessary to avoid mushiness.
-
Add Vegetables: Incorporate the julienned carrots, spinach, and bell pepper into the pot. They just need a few minutes to soften—approximately 3-4 minutes. This step adds color, crunch, and nutrients to the dish.
-
Combine Noodles and Broth: Once your noodles are cooked, drain them and then add them directly into the pot with the broth and chicken. Stir gently to ensure everything is well combined.
-
Final Seasoning: Taste the ramen and adjust seasoning with salt and pepper as needed. Remember, the broth should have a rich flavor without being overwhelming.
-
Garnish and Serve: Ladle the hot ramen into bowls and garnish with chopped green onions. Additional sriracha can be offered at the table for those who crave more heat!
-
Enjoy: Relish your homemade Easy Spicy Chicken Ramen for a comforting dinner that packs a flavorful punch!
Remember, this recipe is flexible! If you have leftovers, meal-prep some for lunches later in the week or adjust the portions for a smaller or larger crowd.
Mastering Easy Spicy Chicken Ramen Dinner Recipe: Advanced Tips and Variations
To elevate your Easy Spicy Chicken Ramen Dinner experience, consider these advanced tips and variations:
Experiment with Broths
While chicken broth is traditional, you can use vegetable broth for a lighter vegetarian version or miso broth for added umami. Each stock will impart a different flavor profile, allowing for personalization.
Spice Levels
With sriracha, you can control the heat. For a truly spicy experience, add fresh chilies during the cooking process. On the flip side, if you prefer milder flavors, reduce the sriracha amount or omit it altogether.
Adopt Seasonal Ingredients
Ramen can be customized based on the season. In spring, add fresh peas and asparagus; in winter, root vegetables like turnips and parsnips can add hearty texture. This rotational ingredient strategy makes your ramen fresh and exciting year-round.
Protein Variations
Apart from chicken, consider beef strips, shrimp, or even a soft-boiled egg for added richness. If creating a vegetarian version, chickpeas or tempeh can provide that protein element without sacrificing flavor.
Add a Crunch
For additional texture, top the ramen with fried onions, sesame seeds, or crushed peanuts when serving. This adds a fun crunch that balances the soupiness of the ramen.
By exploring these variations and tips, you enhance your culinary skills while making your Easy Spicy Chicken Ramen truly your own.
How to Store Easy Spicy Chicken Ramen Dinner Recipe: Best Practices
Storing leftovers or preparing in advance is simple when it comes to Easy Spicy Chicken Ramen. Here are some storage tips:
Refrigeration
Store your ramen in an airtight container in the refrigerator for up to 3 days. However, if you notice the noodles getting mushy after refrigeration, you might prefer to keep noodles separate from the broth and vegetables. Simply reheat them together when you’re ready to enjoy.
Freezing
For longer storage, consider freezing your ramen. The best practice is to freeze the broth and chicken together, while keeping the noodles and vegetables separate in their own bags. This will prevent any textural issues when reheating. You can store the dish for up to 2 months.
Reheating
When you’re ready to enjoy your frozen ramen, thaw it overnight in the refrigerator. Reheat the broth on the stovetop, adding the cooked noodles and vegetables just before serving to prevent overcooking. For fresh ramen, you can use the microwave, but do so in bursts to avoid hot spots.
By following these storage suggestions, you ensure your Easy Spicy Chicken Ramen remains tasty and satisfying, making it one of the most convenient easy dinner recipes out there.
Nutritional Value of Easy Spicy Chicken Ramen Dinner Recipe
Understanding the nutrition behind your meals can help you make informed choices. Here’s the breakdown for a typical serving of Easy Spicy Chicken Ramen:
- Calories: Approximately 450 per serving
- Protein: 30 grams (thanks to chicken and veggies)
- Fat: 12 grams (varies with the use of oils and chicken skin)
- Carbohydrates: 60 grams (from ramen noodles and vegetables)
- Fiber: 4 grams (primarily from vegetables)
- Sodium: Approx. 800 mg (reducing sodium in broth and soy sauce can lower this)
Feel free to adjust serving sizes according to your dietary needs. For example, using zucchini noodles instead of traditional ramen can significantly reduce the carbohydrate content.
Adding vegetable content will also boost fiber and nutrients without massively increasing calories. Through mindful substitutions and portions, this Easy Spicy Chicken Ramen can fit snugly into various dietary plans.
FAQs: Frequently Asked Questions About Easy Spicy Chicken Ramen Dinner Recipe
1. Can I make this dish vegetarian?
Absolutely! Substitute chicken with tofu or chickpeas, and ensure to use vegetable broth instead of chicken broth.
2. Is this ramen gluten-free?
Yes, by using gluten-free ramen noodles and tamari in place of soy sauce, this recipe can be made gluten-free.
3. How can I reduce the spiciness?
To decrease the heat level, simply reduce the amount of sriracha or omit it entirely. You can also add a dollop of plain yogurt when serving for a cooling effect.
4. Can I batch-cook this recipe?
Yes, it’s perfect for batch cooking! Just store the noodles separately if you have leftovers to prevent them from becoming mushy.
5. What can I use in place of ramen noodles?
You can opt for zucchini noodles, shirataki noodles, or other whole grains that suit your dietary preferences for a different twist.
6. How can I customize my ramen further?
Feel free to add any veggies, proteins, or spices that fit your taste. You can mix in corn, peas, or seasonal vegetables based on availability and personal preference.
In conclusion, the Easy Spicy Chicken Ramen Dinner Recipe is a delightful mix of flavors that caters to various dietary preferences while being easy to prepare and manipulate according to your tastes. So don’t hesitate—grab your ingredients, get cooking, and enjoy a scrumptious bowl of homemade ramen that’s sure to please everyone!