Blog

  • My British GrandmaS Secret Recipe For Best Hot Cross Buns

    My British GrandmaS Secret Recipe For Best Hot Cross Buns

    My British Grandma’s Secret Recipe for Best Hot Cross Buns!: A Tropical Delight

    Introduction to My British Grandma’s Secret Recipe for Best Hot Cross Buns!

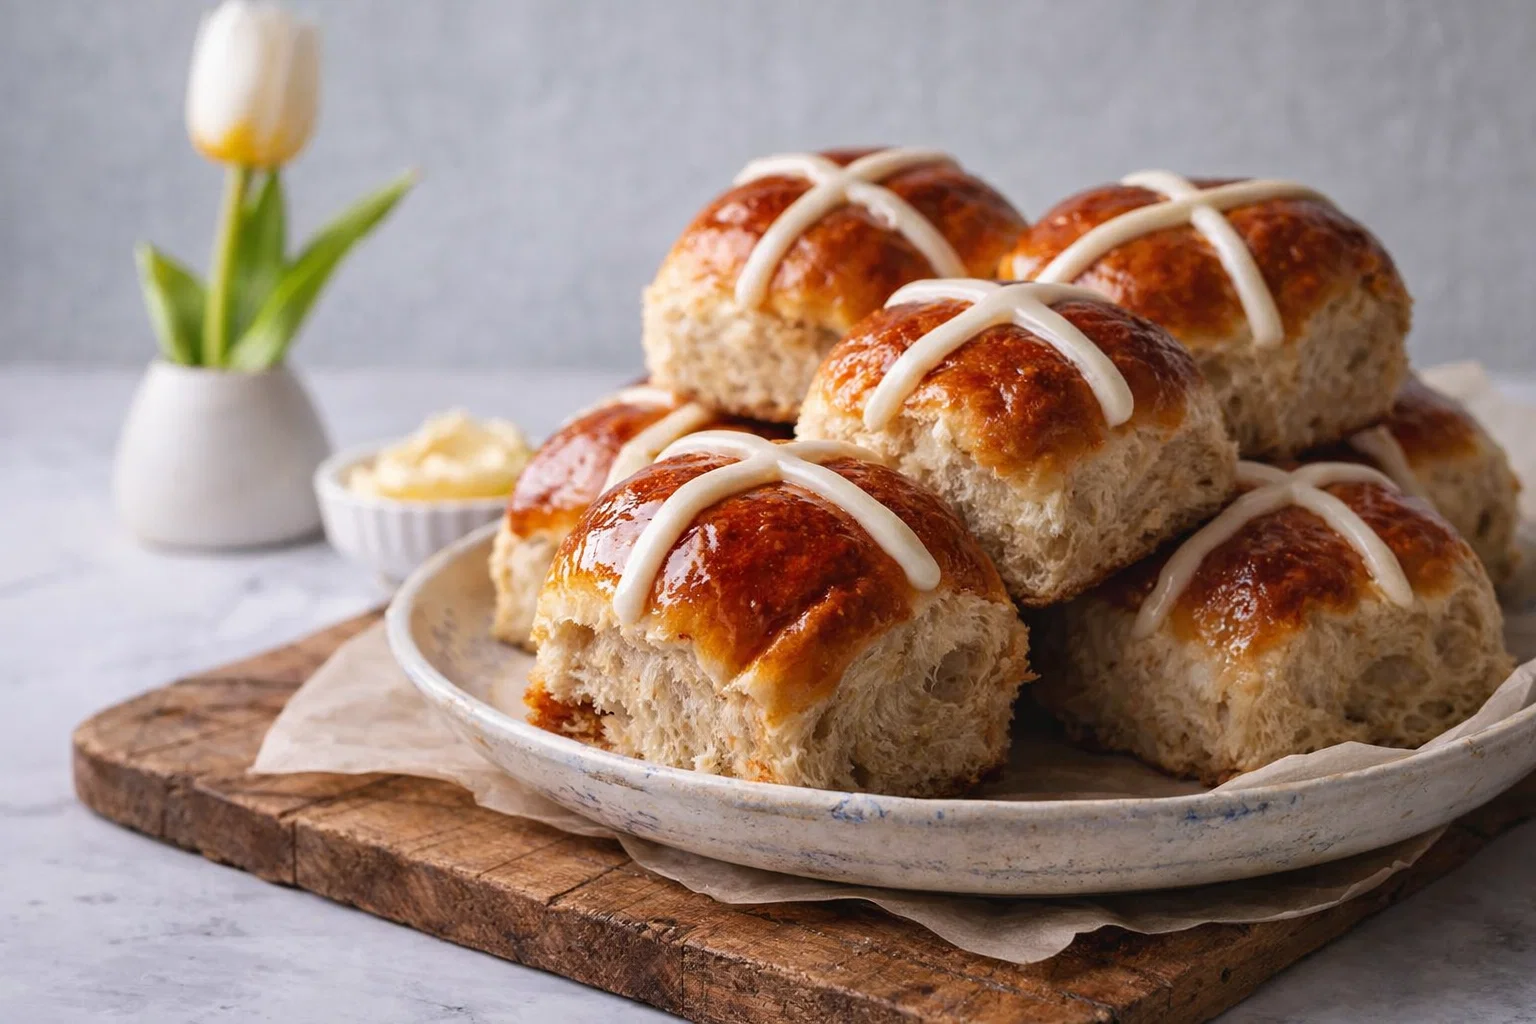
    When it comes to comfort baking, few recipes rival the delightful experience of making hot cross buns. This British classic not only warms the heart but also brings family and friends together during festive seasons, especially Easter. With my British grandma’s secret recipe, you’ll discover that preparing these flavorful buns is simpler than you might think!

    These hot cross buns are perfect for busy parents, students, and baking enthusiasts alike, featuring a wonderfully fragrant mix of spices, currants, and a touch of sweetness, while being adaptable for various dietary needs. Whether you’re looking for indulgent treats to share with guests or healthy snack options for kids, these buns can be tailored to your preferences or dietary restrictions, including gluten-free and vegan options.

    Plus, with the increasing demand for recipe ideas that cater to specific health needs, this recipe tickles the fancy of diet-conscious individuals and food lovers alike. So roll up your sleeves, preheat that oven, and get ready to bake what may just become your new favorite recipe!

    Benefits and Advantages of My British Grandma’s Secret Recipe for Best Hot Cross Buns!

    Why should you choose my British grandma’s secret recipe for hot cross buns over others? For starters, the ease of preparation is phenomenal. Even those who consider themselves novice bakers can successfully create these luscious buns with just a few simple steps. You don’t need any fancy tools or skills—just your hands, a mixing bowl, and a bit of patience.

    In addition to being easy to make, this recipe boasts several health benefits. Hot cross buns can be made with whole grain flour for added fiber, while dried fruits like currants and raisins provide natural sweetness, reducing the need for refined sugars. Plus, you can substitute ingredients to include healthier options, such as almond milk or coconut oil, making these buns suitable for various dietary needs. This makes it a great alternative for those who want delicious treats without the guilty conscience often associated with baked goods.

    Moreover, hot cross buns are traditionally served on Good Friday, but they make for a delightful breakfast or snack year-round! They are perfect for busy families looking for healthy breakfast options or for students needing a quick bite between classes. The versatility and delightful flavor profile make these buns a standout choice for any occasion. As the aroma wafts through your home, it is hard not to feel a profound sense of nostalgia and warmth.

    By using this recipe, you’re not only getting an irresistible treat but also embracing a lovely tradition rooted in history. So gather your favorite ingredients and get ready to enjoy the simple joys of baking!

    Ingredients Overview

    Essential Ingredients for My British Grandma’s Secret Recipe For Best Hot Cross Buns!

    To create the best hot cross buns, it’s essential to gather the right ingredients. Here’s what you need:

    • 4 cups of all-purpose flour (or gluten-free flour blend for a gluten-free option)
    • 1 packet (2¼ teaspoons) of active dry yeast
    • ½ cup of milk (or unsweetened almond milk for a vegan option)
    • ¼ cup of sugar (or coconut sugar for a healthier alternative)
    • ½ teaspoon of salt
    • 2 teaspoons of ground cinnamon
    • 1 teaspoon of ground nutmeg
    • ¼ cup of unsalted butter (or coconut oil, for a vegan alternative)
    • 2 large eggs (or flax eggs for a vegan substitute)
    • 1 cup of mixed dried fruits (like currants or raisins)
    • Zest of 1 orange for added flavor
    • For the cross: A mixture of flour and water, or apricot jam for glazing

    Noteworthy Ingredients:

    • Whole Wheat Flour can replace all-purpose flour for a higher fiber content.
    • Chia Seeds or Applesauce can act as a substitute for eggs for vegans.
    • Adding seeds like sunflower or pumpkin can make the buns even more nutritious.

    Each ingredient serves a purpose, from enhancing flavor to influencing texture and nourishment, making this recipe a wholesome choice for everyone.

    Dietary Substitutions to Customize Your My British Grandma’s Secret Recipe For Best Hot Cross Buns!

    Customizing your hot cross buns to meet specific dietary needs is both simple and rewarding:

    • Gluten-Free Option: Substitute all-purpose flour with a 1:1 gluten-free baking blend to enjoy the same fluffy texture.
    • Vegan Adaptation: Replace milk with plant-based alternatives like almond or soy milk, and use flaxseed meal mixed with water instead of eggs.
    • Low-Calorie Version: Opt for stevia or monk fruit as a sweetener instead of sugar, and use unsweetened applesauce in place of butter or oil.

    Feel free to get creative with flavor too! Adding cardamom, ginger, or even chocolate chips can bring unique twists to the classic recipe, catering to diverse taste buds. No matter your dietary restriction or taste preference, there are endless recipe ideas you can explore!

    How to Prepare the Perfect My British Grandma’s Secret Recipe For Best Hot Cross Buns!: Step-by-Step Guide

    Ready to bake some of the best hot cross buns you’ve ever tasted? Follow these step-by-step instructions for guaranteed success:

    1. Activate the Yeast:
      In a small heatproof bowl, warm the milk until it’s Lukewarm (around 110°F). Add the sugar and sprinkle the yeast over the top. Let it sit for about 5-10 minutes until it becomes frothy.

    2. Mix Dry Ingredients:
      In a large mixing bowl, combine the all-purpose flour, salt, cinnamon, and nutmeg. Mix well to ensure that the spices are evenly distributed.

    3. Integrate Wet Ingredients:
      Make a well in the center of the dry ingredients. Pour in the activated yeast mixture, melted butter (or coconut oil), and eggs (or flax eggs). Mix until fully incorporated.

    4. Knead the Dough:
      On a floured surface, knead the dough for about 10 minutes until it is smooth and elastic. If the dough is sticky, sprinkle a bit more flour as needed. This step is vital, as it develops the gluten structure for fluffy buns.

    5. Incorporate Dried Fruits:
      Gently fold in the mixed dried fruits and orange zest until well-distributed in the dough.

    6. First Rise:
      Place the dough in a lightly greased bowl, cover with cling film or a damp cloth, and let it rise in a warm area until doubled in size (about 1 hour).

    7. Shape the Buns:
      Once the dough has risen, punch it down to release air. Divide the dough into 12 equal portions and shape them into smooth balls. Place them onto a parchment-lined baking tray, leaving enough space between each bun.

    8. Second Rise:
      Cover the shaped buns with a cloth and let them rise again for about 30-45 minutes, until puffed up.

    9. Prepare the Cross Mixture:
      In a small bowl, mix equal parts of flour and water to create a paste. Transfer it to a piping bag or zip-lock bag with a corner snipped off and pipe crosses over the buns.

    10. Preheat the Oven:
      While the buns are rising, preheat your oven to 375°F (190°C).

    11. Bake the Buns:
      Bake the risen buns in the preheated oven for about 20-25 minutes or until golden brown on top.

    12. Glaze the Buns:
      For an added touch of sweetness, brush the tops with warm apricot jam or a simple syrup made of equal parts sugar and water.

    13. Cool and Enjoy:
      Let the buns cool slightly before serving. They can be enjoyed warm or at room temperature and are best served with butter or a jam of your choice.

    The joy of baking is in the customizations. Feel free to add unique spices or even replace dried fruits with fresh alternatives to suit your preferences!

    Mastering My British Grandma’s Secret Recipe For Best Hot Cross Buns!: Advanced Tips and Variations

    While the basic recipe is fantastic on its own, you can enhance your hot cross buns in several ways. Here are some advanced tips and variations to elevate your baking experience:

    • Spice It Up: In addition to the classic cinnamon and nutmeg, try incorporating cardamom or allspice for a unique flavor twist.
    • Fruity Variations: Experiment with various dried fruits such as chopped apricots, cranberries, or any seasonal berries to add a different burst of flavor.
    • Nutty Additions: Chopped nuts like almonds or pecans can provide a satisfying crunchy texture.
    • Experiment with Glazes: Aside from apricot jam, consider using a simple glaze made from icing sugar and water for a sweeter touch or even a chocolate drizzle for a rich finish.
    • Make Them Savory: For those who prefer less sweetness, reduce the sugar and try adding herbs like rosemary or thyme for a savory bun that pairs well with cheese.

    No matter how you decide to customize your buns, remember that the aim is to have fun baking and creating memorable experiences around the table with loved ones.

    How to Store My British Grandma’s Secret Recipe For Best Hot Cross Buns!: Best Practices

    Storage is key to keeping your hot cross buns fresh and delicious. Here are the best practices:

    1. Room Temperature Storage:
      If you plan to enjoy the buns within a couple of days, place them in a bread box or an airtight container at room temperature. They will stay fresh for about 2-3 days.

    2. Refrigeration:
      For longer shelf life, you can refrigerate the buns. Wrap them in plastic wrap or place them in a container. However, be aware that refrigeration may change the texture slightly.

    3. Freezing for Later:
      If you wish to store your hot cross buns for an extended period, consider freezing them. Place the completely cooled buns in a freezer-safe bag or container. They will remain fresh for up to 3 months. When ready to enjoy, thaw them at room temperature and optionally reheat them in the oven for a crispy finish.

    Preserving your homemade buns with optimal storage allows you to enjoy this delightful treat even after your baking adventure is over—perfect for those busy parents or working professionals craving a sweet indulgence at any time.

    Nutritional Value of My British Grandma’s Secret Recipe For Best Hot Cross Buns!

    Understanding the nutritional value of homemade hot cross buns can help you enjoy them guilt-free. Here’s a breakdown of what you can expect from each bun (based on the average recipe):

    • Calories: Approximately 180-200 calories per bun.
    • Total Fat: About 5g (less if you use coconut oil instead of butter).
    • Carbohydrates: Around 33g, primarily from whole grains and dried fruits.
    • Fiber: 2-3g, depending on whether you use whole wheat flour.
    • Protein: About 4g, providing a good mix of macros for energy.

    If you opt for dietary substitutions, keep in mind that these numbers may vary. For example, using almond milk or coconut oil can reduce calories and fat, offering a lighter version. Balancing traditional flavors with health-conscious choices makes these hot cross buns a treat you can feel good about enjoying.

    FAQs: Frequently Asked Questions About My British Grandma’s Secret Recipe For Best Hot Cross Buns!

    Here are some common questions you might have regarding making hot cross buns:

    1. Can I use instant yeast instead of active dry yeast?
    Yes! If you’re using instant yeast, you can mix it directly into the dry ingredients without proofing it first.

    2. How can I ensure my hot cross buns are soft?
    Make sure not to overbake them and choose the right flour. Kneading the dough well and allowing adequate rising time are also key factors.

    3. Can I make the dough ahead of time?
    Absolutely! You can prepare the dough and place it in the fridge overnight. Just allow it to come back to room temperature before shaping and baking.

    4. What can I do with leftover buns?
    They’re great for making bread pudding or French toast! Or you can simply reheat and enjoy them with your favorite spread.

    5. Are hot cross buns suitable for freezing?
    Yes! Just ensure they are completely cooled before placing them in a freezer-safe container. They can last for several months in the freezer.

    6. How can I adjust this recipe for different dietary needs?
    Simply follow the suggested substitutions listed earlier in the article. Whether gluten-free, vegan, or lower in sugar, these modifications allow you to personalize each batch.

    With these answers to common questions, anyone can tackle this delightful recipe with confidence, ensuring your baking journey is as enjoyable as the end result!

    By exploring my British grandma’s secret recipe, you’ll not only connect with a cherished family tradition but also bring delicious joy to your own kitchen. Happy baking!

  • Fresh Vietnamese Spring Rolls Easy Healthy

    Fresh Vietnamese Spring Rolls Easy Healthy

    Fresh Vietnamese Spring Rolls Easy Healthy: A Tropical Delight

    Introduction to Fresh Vietnamese Spring Rolls Easy Healthy

    Welcome to the vibrant world of Fresh Vietnamese Spring Rolls! This delightful dish showcases a perfect blend of colorful vegetables, fresh herbs, and flavorful proteins wrapped in a delicate rice paper. Not only are these spring rolls a feast for the eyes, but they also deliver numerous health benefits that make them stand out in the realm of healthy recipes. Whether you’re a busy parent, a student, or anyone seeking simple yet delicious options, this recipe will become your go-to.

    Preparing these spring rolls is easy and quick, making them an excellent choice for weeknight dinners or meal prep for lunches. Imagine the satisfaction of making a dish that not only delights your palate but also packs a nutritional punch—these rolls can be vegan, gluten-free, and low-calorie, catering to a wide range of dietary needs. The versatility and freshness of ingredients like crisp vegetables and aromatic herbs ensure that each bite is bursting with flavor and vitality. Plus, they make for a visually stunning appetizer or light meal perfect for any occasion!


    Benefits and Advantages of Fresh Vietnamese Spring Rolls Easy Healthy

    What makes Fresh Vietnamese Spring Rolls such a stellar choice? Let’s delve deeper into the benefits that come with this simple yet fulfilling dish.

    Ease of Preparation

    One of the most attractive benefits of these spring rolls is their simplicity. The foundational technique involves soaking rice paper, layering ingredients, and rolling—all of which require minimal culinary skills. This means you can prepare a wholesome meal without spending hours in the kitchen. Whether you’re a novice cook or someone seasoned in the kitchen, making these spring rolls is straightforward and rewarding.

    Health Benefits

    Fresh Vietnamese Spring Rolls score high on the health meter. Packed with colorful veggies like bell peppers, cucumbers, and carrots, they are rich in vitamins and minerals. The inclusion of fresh herbs allows you to tap into their numerous health advantages, such as improved digestion and enhanced immunity. These rolls are low in calories yet satisfyingly filling, making them a fantastic option for weight watchers or those pursuing a healthier lifestyle.

    Versatility

    Another notable aspect of these healthy recipes is their adaptability. You can easily swap out ingredients based on dietary preferences. Whether you choose shrimp, chicken, tofu, or even go completely plant-based, these spring rolls can cater to everyone at the table. In addition, you have the freedom to personalize the fillings to suit your taste, making it an exciting dish that can evolve with each preparation.

    In summary, Fresh Vietnamese Spring Rolls are easy to make, healthful, and versatile. They are perfect for families, students, or anyone looking for a delicious way to enjoy fresh ingredients. Let’s explore the essential components and how to make these delightful spring rolls!


    Ingredients Overview

    Essential Ingredients for Fresh Vietnamese Spring Rolls Easy Healthy

    To make Fresh Vietnamese Spring Rolls, you’ll need the following key ingredients. Each element plays a crucial role in ensuring the delicious taste and fulfilling nature of the dish.

    1. Rice Paper Wrappers (8-10 sheets)
    2. The base of the rolls, rice paper wrappers are gluten-free and can be found in most Asian grocery stores.

    3. Proteins (Pick one or more)

    4. Shrimp (7 oz, cooked and sliced)
    5. Chicken (7 oz, cooked and shredded)
    6. Tofu (8 oz, firm, diced, and lightly sautéed for extra flavor)

    7. Veggies:

    8. Red Bell Pepper (1, julienned)
    9. Carrot (1 large, julienned or grated)
    10. Cucumber (1, julienned)
    11. Lettuce (Romaine or Butter Lettuce for wrapping)

    12. Herbs:

    13. Fresh Mint (1/2 cup, chopped)
    14. Cilantro (1/2 cup, chopped)
    15. Basil (1/2 cup, chopped for added flavor)

    16. Dipping Sauce:

    17. Peanut Sauce or Soy Sauce (1/4 cup)
    18. Chili Sauce (optional for heat)

    This ingredient list provides a colorful, nutritious base for your healthy recipes. Remember to adjust measurements and ingredients based on taste preference and dietary requirements!

    Dietary Substitutions to Customize Your Fresh Vietnamese Spring Rolls Easy Healthy

    Customize your spring rolls with easy substitutions:

    1. Gluten-Free: Ensure your dipping sauce is gluten-free—choose tamari instead of soy sauce.

    2. Vegan: Use tofu as your protein source while ensuring your dipping sauce doesn’t include fish sauce. There are many plant-based peanut sauces available.

    3. Low-Calorie: Focus on adding more veggies and herbs, decreasing the quantity of protein if you’re tracking calories.

    4. Spicy: For those who enjoy a kick, add sliced jalapeños or a sprinkle of Sriracha inside the roll to awaken the flavors.

    These substitutions demonstrate the versatility that Fresh Vietnamese Spring Rolls offer, making it a delightful choice for everyone.


    How to Prepare the Perfect Fresh Vietnamese Spring Rolls Easy Healthy: Step-by-Step Guide

    Are you ready to create delicious Fresh Vietnamese Spring Rolls? Follow these simple steps for an enjoyable cooking experience!

    1. Prepare the Ingredients:
    2. Start by julienning your vegetables (bell pepper, carrot, cucumber) and set them aside.
    3. Cook any protein if necessary (shrimp should be boiled and peeled, chicken should be rotisserie or grilled, and tofu should be sautéed).

    4. Soften Rice Paper Wrappers:

    5. Fill a shallow dish or plate with warm water.
    6. Gently dip one rice paper wrapper in the water for about 15-20 seconds.
    7. Remove it once it becomes pliable but not overly soft.

    8. Lay the Wrapper:

    9. Place the softened rice paper flat on a clean surface or a damp kitchen towel.

    10. Add the Filling:

    11. In the lower third of the wrapper, layer a small handful of lettuce, followed by a few pieces of each vegetable, a portion of your chosen protein, and a sprinkle of fresh herbs.

    12. Roll Tight:

    13. Fold the sides of the wrapper inward over the filling.
    14. Starting from the bottom, tightly roll up the spring roll while keeping the filling packed tightly.

    15. Seal Edges:

    16. Moisten the top edges of the rice paper with a bit of water to help seal the roll.
    17. Press to ensure it sticks.

    18. Repeat:

    19. Continue this process for the remaining wrappers and filling, keeping the finished rolls covered with a damp cloth to prevent drying.

    20. Serve:

    21. Arrange the rolls on a serving platter and serve with your choice of dipping sauce.

    As you create these fresh rolls, feel free to experiment and adjust the ingredients to match various preferences. The resulting spring rolls will be a delightful addition to any meal or gathering.


    Mastering Fresh Vietnamese Spring Rolls Easy Healthy: Advanced Tips and Variations

    Now that you’ve perfected the basic spring roll recipe, let’s explore some advanced tips and variations to take your culinary creation to the next level.

    Advanced Tips:

    1. Use Fresh Ingredients: Always choose the freshest vegetables and herbs. This not only enhances the flavor but also ensures optimal nutrition—important if you’re striving for healthy recipes.

    2. Experiment with Proteins: While shrimp and chicken are traditional proteins, don’t shy away from trying seared tofu, grilled portobello mushrooms, or even quinoa for a plant-based twist.

    3. Herb Combinations: Try blending different herbs such as Thai basil or even arugula for a spicy kick. The variety of flavors will elevate the taste of your rolls.

    4. Prep in Advance: For busy nights, prep your ingredients ahead of time! Store chopped vegetables and cooked proteins separately and roll them just before serving to keep everything fresh.

    Variations:

    1. Fruit Spring Rolls: For a refreshing dessert or a light snack, swap the vegetables with fruits like mango, strawberries, or kiwi, pairing them with a coconut or yogurt dip.

    2. Rice Paper Salad: Tear up the rice paper and use it as a unique base for a salad, mixing chopped spring roll ingredients with a light vinaigrette.

    3. Add Flavor Boosts: Incorporate ingredients like pickled carrots, bean sprouts, or crushed nuts for additional texture and taste.

    These suggestions allow you to customize your Fresh Vietnamese Spring Rolls while maintaining their healthy essence, making them dishes you can enjoy throughout diverse meal plans.


    How to Store Fresh Vietnamese Spring Rolls Easy Healthy: Best Practices

    To maintain the freshness and quality of your Fresh Vietnamese Spring Rolls, proper storage is crucial. Here are some best practices to follow:

    Refrigerator Storage

    • Short-Term: If you have leftover spring rolls, keep them in an airtight container. Place parchment paper between layers to prevent sticking. Refrigerate and consume within 1-2 days for best taste and texture.

    Freezing Spring Rolls

    • Long-Term Storage: For longer preservation, consider freezing the rolls. Wrap each roll in plastic wrap tightly and place in a freezer-safe bag. They can last up to 2 months.
    • Thawing: To enjoy, thaw them overnight in the refrigerator. Serve cold or dip in warm water briefly if you wish to enjoy them fresh again.

    Reheating Tips

    • If you’d like to serve them warm, avoid microwaving as it can make the wrappers tough. Instead, lightly steam the rolls for a few minutes.

    By following these storage methods, you can create healthy recipes that last not only in flavor but also in freshness for days to come.


    Nutritional Value of Fresh Vietnamese Spring Rolls Easy Healthy

    Understanding the nutritional value of your Fresh Vietnamese Spring Rolls enriches the cooking experience. Here’s a general breakdown of the nutritional content per roll, assuming a filling of shrimp, fresh veggies, and herbs, with peanut sauce for dipping.

    • Calories: Approximately 80-100 calories per roll.
    • Protein: Around 6-8 grams (primarily from shrimp or tofu).
    • Carbohydrates: Approximately 15-20 grams (depending on the amount of rice paper).
    • Fat: About 2-4 grams (largely from the dipping sauce, especially if using peanut sauce).
    • Fiber: Roughly 2-3 grams (thanks to the rich array of veggies).
    • Vitamins and Minerals: A great source of Vitamin A, Vitamin C, iron, and calcium, due to the fresh produce used.

    This nutritional profile emphasizes how Fresh Vietnamese Spring Rolls are not only delicious but also a smart choice, aligning perfectly with your goal of incorporating healthy recipes into your meal planning.


    FAQs: Frequently Asked Questions About Fresh Vietnamese Spring Rolls Easy Healthy

    Q1: Can I make spring rolls in advance?

    A: Yes, you can prepare them a few hours in advance. Store the prepared rolls covered with a damp cloth to keep them moist.

    Q2: How do I prevent the rice paper from sticking?

    A: Always ensure that the wrappers are kept moist. You can stack them with parchment paper in between to prevent sticking.

    Q3: What can I substitute for peanut sauce?

    A: If you have nut allergies, consider using soy sauce, hoisin sauce, or a sesame dressing as alternatives.

    Q4: Are these spring rolls suitable for meal prepping?

    A: Absolutely! They are perfect for meal prep. Just ensure you keep them refrigerated and enjoy within a couple of days.

    Q5: Can I use cooked ingredients?

    A: Yes, you can certainly use cooked ingredients! Grilled chicken, shrimp, or sautéed tofu all work beautifully in spring rolls.

    Each of these FAQs provides valuable information while ensuring to align with the overarching theme of healthy recipes our readers are excited to explore.

    In conclusion, Fresh Vietnamese Spring Rolls are a vibrant, nutritious, and versatile dish perfect for everyone. This easy-to-follow recipe will bring a tropical delight to your dining table, allowing you to shine as a home cook while embracing healthy eating habits! So roll up your sleeves and dive into the refreshing flavors of this fantastic dish today!

  • Easy Sushi Cucumber Salad Fresh Recipe

    Easy Sushi Cucumber Salad Fresh Recipe

    Easy Sushi Cucumber Salad Fresh Recipe: A Tropical Delight

    Introduction to Easy Sushi Cucumber Salad Fresh Recipe

    Are you searching for a refreshing dish that brings a taste of the tropics right to your kitchen? Look no further than our Easy Sushi Cucumber Salad. This bright and delectable cucumber salad is the perfect blend of crisp vegetables and zesty flavors, making it an ideal side dish or a light meal. Not only is it simple to prepare, but it’s also a health-conscious choice, suitable for various dietary needs, including vegan and gluten-free diets.

    The best part is that this recipe comes together in under 30 minutes, making it a fantastic option for busy parents, students, or working professionals who appreciate healthy eating without spending hours in the kitchen. The vibrant colors and fresh ingredients make this salad not just a treat for the taste buds but also a feast for the eyes. Whether you’re a first-time cook or a seasoned chef, this cucumber salad will inspire creativity in your kitchen.

    This Easy Sushi Cucumber Salad is also loaded with health benefits. Cucumbers are low in calories but high in vital nutrients, making this salad an ideal choice for diet-conscious individuals. The addition of ingredients like avocado and lime juice not only enhances the flavor profile but also boosts the nutritional value, providing healthy fats and vitamin C. Whether you’re looking for a delightful dish for a summer gathering or a nutritious meal option for your everyday routine, this sushi cucumber salad is a must-try.


    Benefits and Advantages of Easy Sushi Cucumber Salad Fresh Recipe

    The Easy Sushi Cucumber Salad offers an array of benefits that make it a standout dish. First and foremost, this recipe’s simplicity is one of its significant advantages. With minimal preparation and a short cooking time, busy individuals can whip up a delicious, healthy meal or side dish without encountering stress in the kitchen.

    Health Benefits

    Incorporating cucumber into your diet has numerous health advantages. Cucumbers are hydrating and provide essential nutrients while remaining low in calories—making them a perfect addition to any meal. This salad is especially rich in:

    1. Hydration: Cucumbers are composed of about 95% water, helping you stay hydrated.
    2. Vitamins and Minerals: They are a good source of vitamins K and C, which play roles in bone health and immune function.
    3. Antioxidants: Cucumbers contain antioxidants, such as beta-carotene and flavonoids, which help combat free radicals in the body.

    Diet Compatibility

    This cucumber salad is an exceptional choice for a wide range of diets. It is inherently vegan and gluten-free, making it suitable for those with specific dietary restrictions. Additionally, the use of easily available ingredients means you can maintain consistently healthy eating habits without sacrificing flavor.

    Versatility

    Another benefit is its versatility; you can customize the salad by adding various proteins such as tofu for a vegan option or shrimp for a seafood twist. You can easily throw in some additional vegetables or herbs, making it a adaptable dish perfect for different occasions, tastes, and dietary needs.

    In summary, this Easy Sushi Cucumber Salad is a nutritious, versatile, and simple recipe that fits into various lifestyles, ensuring everyone can enjoy a delicious and health-conscious meal.


    Ingredients Overview

    Essential Ingredients for Easy Sushi Cucumber Salad Fresh Recipe

    To create this delightful sushi cucumber salad, you will need the following fresh ingredients:

    • 2 large cucumbers – These are the star of the dish; choose firm, ripe cucumbers for the best texture.
    • 1 ripe avocado – Adds creaminess and healthy fats.
    • 1 small red onion (finely sliced) – Offers crunch and a hint of sharpness.
    • 1 bell pepper (preferably red or yellow) – Provides color and sweetness.
    • 1 small carrot (peeled and shredded) – for a pop of color and extra nutrients.
    • 3 tablespoons soy sauce – Choose low-sodium if preferred.
    • 2 tablespoons rice vinegar – Adds a tangy flavor.
    • 1 tablespoon sesame oil – Provides a nutty undertone.
    • 1 teaspoon freshly grated ginger – Adds zest and a hint of warmth.
    • Chopped fresh cilantro or green onions (for garnish) – This enhances flavor and adds freshness.

    Special Notes:

    • Vegan & Gluten-Free Options: Ensure that the soy sauce is gluten-free, or substitute it with tamari.
    • Low-Calorie Option: Reduce the sesame oil if you wish to make it calorie-friendly without compromising flavor.

    Dietary Substitutions to Customize Your Easy Sushi Cucumber Salad Fresh Recipe

    To tailor the Easy Sushi Cucumber Salad to your dietary needs or ingredient availability, consider the following substitutions:

    1. Cucumbers: While English cucumbers are ideal due to their thin skin and few seeds, you can also use Persian or Japanese varieties for a similar texture.
    2. Avocado: If you’re averse to avocados or are looking to lower your calories, you might substitute it with a dollop of Greek yogurt or leave it out completely.
    3. Vegetables: Don’t hesitate to get creative with veggies! Zucchini, radishes, or even sprouts can be excellent substitutes or additions.
    4. Soy Sauce: For those avoiding soy, coconut aminos provide a similar flavor profile with a different nutritional composition.
    5. Ginger: If fresh ginger is unavailable, powdered ginger can be a suitable substitute, although the flavor may differ slightly.

    These substitutions ensure that everyone can enjoy this cucumber salad, no matter their dietary needs or preferences!


    How to Prepare the Perfect Easy Sushi Cucumber Salad Fresh Recipe: Step-by-Step Guide

    Creating a delicious Easy Sushi Cucumber Salad is simple when you follow these clear instructions. Let’s break it down into easy-to-follow steps.

    1. Prepare the Base:
    2. Wash and Slice the Cucumbers: Begin by washing your cucumbers thoroughly. Then, slice them thinly using either a sharp knife or a mandoline for even pieces. To create a noodle-like effect, you can spiralize the cucumbers into long strands.

    3. Chop the Vegetables:

    4. Dice the avocado and bell pepper. Use a sharp knife to slice the red onion, making sure to keep the pieces small for easy biting in this refreshing cucumber salad. Shred the carrot using a grater.

    5. Toss the Ingredients:

    6. In a large mixing bowl, combine the sliced cucumbers, avocado, bell pepper, red onion, and shredded carrot. Gently toss them together to mix without mashing the avocado.

    7. Make the Dressing:

    8. In a separate bowl, whisk together the soy sauce, rice vinegar, sesame oil, and grated ginger. Ensure the dressing is well mixed, as this will provide flavor to your cucumber salad.

    9. Combine with Dressing:

    10. Pour the dressing over the vegetable mixture. Gently fold the ingredients until the vegetables are evenly coated with the dressing. This step ensures that each bite is filled with flavor.

    11. Add Garnishes:

    12. Sprinkle fresh cilantro or chopped green onions over the top of the salad. These herbs enhance the flavor and gives the dish a vibrant look.

    13. Chill:

    14. For optimum flavor, cover the salad and let it chill in the refrigerator for at least 15-30 minutes. This allows the flavors to meld beautifully.

    15. Serve:

    16. Serve your Easy Sushi Cucumber Salad cold. It’s perfect as a side dish for grilled meals, as part of a picnic, or enjoyed on its own as a light lunch or dinner.

    Adaptations for Dietary Needs

    This recipe can be adapted for various dietary preferences, such as substituting vegetables according to what is available or using gluten-free sauces as previously mentioned. For a protein boost, consider adding grilled chicken, tofu, or even chickpeas, depending on your dietary choices and preferences.


    Mastering Easy Sushi Cucumber Salad Fresh Recipe: Advanced Tips and Variations

    Once you’re comfortable with the basic recipe, consider trying these advanced tips and variations to elevate your Easy Sushi Cucumber Salad experience:

    Add Crunch

    1. Nuts or Seeds: Incorporating toasted sesame seeds, walnuts, or even slivers of almonds can add a delightful crunch and healthy fats.

    2. Crunchy Vegetables: Incorporate radishes, snap peas, or water chestnuts for additional texture and flavor complexity.

    Flavor Enhancements

    1. Add Heat: If you prefer a spice kick, consider adding a dash of sriracha or red pepper flakes to the dressing for a subtle heat.

    2. Herb Variations: Switch up the fresh herbs. Dill or mint can provide a different flavor profile that works beautifully with the refreshing cucumbers.

    Create a Meal

    1. Protein-Packed: Turn this salad into a complete meal by adding grilled shrimp, marinated tofu, or even shredded rotisserie chicken. Pairing proteins makes it hearty enough to serve as a stand-alone dish.

    2. Sushi-Inspired Presentation: Consider rolling the salad in rice paper or serving it over sushi rice for a sushi-inspired bowl theme to impress guests.

    These variations and tips allow you to master the Easy Sushi Cucumber Salad, catering it perfectly to your taste preferences and dietary requirements!


    How to Store Easy Sushi Cucumber Salad Fresh Recipe: Best Practices

    Storing your Easy Sushi Cucumber Salad correctly is essential to maintain its freshness and flavor. Here are some best practices:

    Refrigeration

    • Short-Term Storage: If you plan to eat the salad within a couple of days, store it in an airtight container in the refrigerator. The salad can typically last for up to 2-3 days, but be aware that cucumbers will release moisture over time.

    Freezing

    • Long-Term Storage: While you can freeze cucumber salads, it is not recommended due to the texture changes after thawing. If you still wish to freeze for later use, consider freezing just the dressing and other ingredients (excluding the cucumbers) and combine them fresh before serving.

    Reheating

    • Serving Cold: Enjoy this salad cold; it retains its refreshing taste, so reheating is unnecessary and could alter the desired refreshing aspect.

    By following these storage tips, you can ensure that your cucumber salad remains fresh, delicious, and ready to enjoy when needed.


    Nutritional Value of Easy Sushi Cucumber Salad Fresh Recipe

    Understanding the nutritional value of the Easy Sushi Cucumber Salad allows you to appreciate its health benefits fully. Here’s a breakdown of the nutritional content based on standard servings:

    Nutritional Information (per serving)

    • Calories: Approximately 150
    • Total Fat: 10g (Healthy fats from avocado and sesame oil)
    • Sodium: 290mg (depending on soy sauce used)
    • Carbohydrates: 12g
    • Fiber: 5g (Benefits of fiber from cucumbers and vegetables)
    • Protein: 3g

    This cucumber salad is nutrient-rich and essential for maintaining a balanced diet. It’s packed with vitamins, minerals, and dietary fiber, helping promote fullness and satisfaction without excess caloric intake.

    Health Factors

    • Low-Calorie: With a generous amount of vegetables and healthy fats, this salad is filling yet low in calories—a great choice for those wanting to manage their weight.

    • High in Vitamins: It’s an excellent source of vitamins K and C, which support bone health and the immune system.

    In summary, the Easy Sushi Cucumber Salad combines taste and nutrition, making it an ideal option whether you’re looking to enhance your diet or simply enjoy a delicious meal.


    FAQs: Frequently Asked Questions About Easy Sushi Cucumber Salad Fresh Recipe

    1. Can I make this salad ahead of time?

    Yes, you can prepare the salad in advance. However, it’s best to store the dressing separately and mix it in shortly before serving to avoid the cucumbers becoming soggy.

    2. What can I use instead of soy sauce?

    If you’re looking for a gluten-free option, tamari works well. Alternatively, coconut aminos can also provide a soy sauce-like flavor without the gluten.

    3. Is this salad suitable for meal prep?

    Absolutely! The salad can be prepared at the beginning of the week and stored in the fridge, making it a convenient option for quick meals.

    4. Can I add protein to this salad?

    Definitely! Adding grilled chicken, shrimp, or tofu turns this sushi cucumber salad into a complete meal.

    5. How do I keep the avocado from browning in the salad?

    To prevent the avocado from browning, you could toss it in a little lime juice right after slicing, or you can add it just before serving instead of mixing it in earlier.

    6. What else can I add to this salad?

    Feel free to get creative! Other vegetables like radish, zucchini, or bell peppers can add more crunch and flavor to your cucumber salad.

    By providing clear answers to these frequently asked questions, you can empower readers to make adjustments and enjoy this fresh and vibrant recipe confidently!


    With these detailed steps, tips, and variations, you now have everything you need to create your very own Easy Sushi Cucumber Salad. Now, gather your ingredients, and dive into a refreshing culinary adventure full of health benefits and delicious flavors! Enjoy your cooking!

  • Easy Pineapple Chicken And Rice Dinner

    Easy Pineapple Chicken And Rice Dinner

    Easy Pineapple Chicken And Rice Dinner: A Tropical Delight

    Introduction to Easy Pineapple Chicken And Rice Dinner

    In the world of easy dinner recipes, few dishes can compete with the vibrant flavors and simplicity of Easy Pineapple Chicken and Rice Dinner. This delightful dish combines tender chicken, succulent pineapple, and fluffy rice, all intertwined with the tangy sweetness of pineapple juice. Not only does this recipe deliver an explosion of tropical flavors, but it also fuels your body with nutritious ingredients, making it a great choice for busy families, health-conscious individuals, and adventurous foodies alike.

    This recipe shines with its versatility. Whether you’re a newlywed looking to impress your partner with minimal effort, a working professional seeking a healthy weeknight meal, or a parent trying to satisfy picky eaters, Easy Pineapple Chicken and Rice Dinner caters to all. It’s a crowd-pleaser, appealing to various dietary needs, as it can easily be adapted for gluten-free and low-calorie diets.

    With just minimal prep time required, this dish is perfect for anyone looking to whip up a quick and healthy meal without sacrificing flavor. In just under an hour, you can serve a nourishing dinner that encapsulates both tropical flair and homely comfort. So, let’s dive deeper into this easy dinner recipe that could become a staple in your kitchen!

    Benefits and Advantages of Easy Pineapple Chicken And Rice Dinner

    When it comes to easy dinner recipes, Easy Pineapple Chicken and Rice Dinner offers a plethora of benefits that make it stand out in anyone’s meal rotation.

    1. Quick and Convenient: This recipe is incredibly straightforward to prepare, making it ideal for busy weekday dinners. With straightforward steps and minimal ingredients, you’ll spend less time in the kitchen and more time with your family or enjoying your evening.

    2. Nutritious Ingredients: The key components of this dish—chicken, pineapple, and rice—combine to create a well-rounded meal that is rich in protein, vitamins, and minerals. Chicken provides lean protein which is essential for muscle health, while pineapple adds a dose of vitamin C, aiding in immune function. Brown rice or quinoa, often used as a substitute, adds complex carbohydrates and fiber for a healthy digestive system.

    3. Natural Sweetness: The pineapple not only enhances flavor but also provides natural sweetness, reducing the need for added sugars. This makes it a smart choice for those looking to cut down on processed carbohydrates.

    4. Versatile and Adaptable: Whether you are following a vegan, gluten-free, or low-calorie lifestyle, this easy dinner recipe can easily cater to your dietary preferences. You can substitute chicken with tofu or chickpeas for a vegan version, and use brown rice or cauliflower rice to lower carbs while keeping the flavor intact.

    5. Family-Friendly: Picky eaters might just have their minds changed with this dish, as the sweet and savory flavors come together beautifully to create an irresistible meal. Kids will love the fun pineapple chunks, and parents will appreciate the balance of nutrients.

    All of these benefits come together to create a delicious meal that not only satisfies hunger but also contributes to overall well-being. With Easy Pineapple Chicken and Rice Dinner, you get convenience, nutrition, and taste all in one dish.

    Ingredients Overview

    Essential Ingredients for Easy Pineapple Chicken And Rice Dinner

    To craft a tantalizing Easy Pineapple Chicken and Rice Dinner, gather the following ingredients:

    • 1.5 lbs (680g) Chicken Breast (boneless, skinless): This lean protein serves as the main component, ensuring a filling meal.
    • 1 can (14oz or 400g) Pineapple Chunks (in juice or water): Adds natural sweetness and vibrant flavor.
    • 1 cup (185g) Long-Grain Rice: Provides a wholesome base; brown rice can be a healthier option.
    • 1 medium Bell Pepper (any color): Adds crunch and nutrients.
    • 1 medium Onion: Enhances depth of flavor.
    • 2 cloves Garlic: Offers aromatic flavor.
    • 1 tablespoon Soy Sauce: For a hint of umami. (Use tamari for gluten-free).
    • 1 tablespoon Olive Oil or Coconut Oil: For cooking.
    • Salt and Pepper: To taste.
    • 1 teaspoon Ginger (fresh or powdered): Adds a spicy warmth.

    These ingredients come together to create a harmonious dish that packs both flavor and nutrition.

    Dietary Substitutions to Customize Your Easy Pineapple Chicken And Rice Dinner

    If you want to tailor the recipe to meet dietary preferences, consider these substitutions:

    • For a Vegan Version: Substitute chicken with 1.5 cups of cubed firm tofu or chickpeas. Marinate with soy sauce and spices to infuse flavor.

    • Make It Gluten-Free: Use tamari instead of regular soy sauce and ensure the rice used is certified gluten-free.

    • Low-Calorie: Swap regular rice for cauliflower rice to significantly cut down on calories while maintaining volume.

    • Additional Nutrients: Incorporate vegetables like carrots or snap peas for added vitamins and variety. Simply sauté them along with the onion and bell pepper.

    These adaptations allow you to enjoy Easy Pineapple Chicken and Rice Dinner while adhering to dietary needs, making it even more appealing to a wider audience.

    How to Prepare the Perfect Easy Pineapple Chicken And Rice Dinner: Step-by-Step Guide

    Cooking Easy Pineapple Chicken and Rice Dinner is an easy-going experience, perfect for novice cooks or anyone tight on time. Follow this step-by-step guide to create your tropical delight:

    1. Prepare the Base: Start by cooking your rice according to the package instructions. If using brown rice, allow for an additional 10-15 minutes cooking time compared to white rice.

    2. Chop Your Ingredients: While your rice is cooking, begin by chopping the bell pepper, onion, and garlic. Having everything prepped will streamline your cooking process.

    3. Marinate the Chicken (optional): For enhanced flavor, consider marinating your chicken breasts in a mix of soy sauce, garlic, and ginger for about 15-20 minutes prior to cooking.

    4. Heat the Oil: In a large skillet or wok, heat your olive or coconut oil over medium-high heat.

    5. Cook the Chicken: Add the chicken breasts to the skillet in a single layer. Cook for about 5-7 minutes on each side until golden brown and cooked through. They should reach an internal temperature of 165°F (75°C).

    6. Add the Vegetables: Once the chicken is cooked, add the chopped onion and bell pepper to the skillet. Sauté them for about 3-4 minutes until softened.

    7. Incorporate the Pineapple: Stir in the pineapple chunks along with a bit of the juice from the can. Cook for another 3 minutes to warm through and let the flavors meld.

    8. Combine with Rice: Once everything is heated through, add the cooked rice to the skillet. Mix well, ensuring the rice is coated with the pineapple and chicken mixture.

    9. Season to Taste: Taste the dish and adjust the salt, pepper, and any additional soy sauce if necessary.

    10. Serve and Garnish: Serve the dish warm, garnishing with fresh herbs like cilantro or green onions, if desired. Enjoy your Easy Pineapple Chicken and Rice Dinner!

    Each step is easy to follow, and you can adapt the cooking method to suit your kitchen equipment. Don’t hesitate to get creative by adding your favorite vegetables or adjusting the flavors!

    Mastering Easy Pineapple Chicken And Rice Dinner: Advanced Tips and Variations

    To elevate your Easy Pineapple Chicken and Rice Dinner, follow these advanced tips and variations that can add depth and excitement to your dish:

    Tips for Success

    • Use Fresh Pineapple: If possible, opt for fresh pineapple to maximize flavor and nutrition. It provides a vibrant sweetness that is hard to beat.

    • Pre-cook the Rice: For even quicker preparation, consider pre-cooking a batch of rice at the beginning of the week. Just reheat it when you’re ready to make the dish.

    • Pan-Searing Tips: For the perfect sear on your chicken, avoid overcrowding the pan. Cook in batches if necessary.

    Variations

    • Spicy Twist: Add crushed red pepper flakes or a drizzle of sriracha for those who enjoy a little heat.
    • Coconut Variation: Replace olive oil with coconut oil for a more tropical feel and drizzle some coconut milk into the rice for added richness.
    • One-Pan Wonders: For an even simpler cleanup, try making this dish all in one pot. After sautéing the chicken, add in all your ingredients and simmer with the rice.

    Exploring these variations allows for a new culinary experience and can keep this dish exciting for multiple meals throughout the week!

    How to Store Easy Pineapple Chicken And Rice Dinner: Best Practices

    Proper storage of your Easy Pineapple Chicken and Rice Dinner is crucial for maintaining taste and quality. Here are the best methods for refrigerating, freezing, and reheating your leftovers:

    Refrigeration

    Allow the meal to cool to room temperature before transferring it to an airtight container. This dish can last in the refrigerator for 3-4 days. Be sure to store it in smaller portions for convenient reheating.

    Freezing

    For longer storage, you can freeze the dish. Place it in a freezer-safe container or freezer bag. It will maintain its quality for up to 2-3 months. When you’re ready to eat, set it in the refrigerator to defrost overnight before reheating.

    Reheating

    To reheat, you can use the microwave or stovetop. If using the microwave, heat in 1-minute intervals, stirring in between until warmed through. On the stovetop, add a splash of water or pineapple juice to avoid drying out the dish, warming it on low heat.

    These storage tips ensure you can enjoy your Easy Pineapple Chicken and Rice Dinner even days after its initial preparation, with taste and texture intact.

    Nutritional Value of Easy Pineapple Chicken And Rice Dinner

    Easy Pineapple Chicken and Rice Dinner not only pleases the palate but also provides considerable nutritional value. Here’s a breakdown of its average nutritional content per serving (approximately 1 cup):

    • Calories: 400-450 kcal
    • Protein: 30 grams
    • Carbohydrates: 45 grams
    • Fiber: 3 grams
    • Fat: 10 grams
    • Sodium: 500-600 mg
    • Vitamin C: Significant amounts from pineapple and bell pepper
    • Calcium and Iron: Present in minor amounts, beneficial for overall health

    This simple dish offers a balanced profile of macronutrients; it’s rich in protein and carbohydrates with a moderate amount of healthy fats. The inclusion of fruits and vegetables boosts its vitamin and mineral content, making it a wholesome choice for all ages.

    FAQs: Frequently Asked Questions About Easy Pineapple Chicken And Rice Dinner

    1. Can I use frozen chicken for this recipe?
    2. Yes, but it’s best to thaw frozen chicken before cooking to ensure even cooking and flavor absorption.

    3. Is this dish suitable for meal prepping?

    4. Absolutely! This dish stores well and can be portioned out for quick meals throughout the week.

    5. What side dishes pair well with Easy Pineapple Chicken and Rice?

    6. A fresh garden salad, steamed broccoli, or a light coleslaw would all complement this dish beautifully.

    7. How can I make this recipe spicier?

    8. Incorporate chili flakes, sriracha, or even jalapeños to add some heat, depending on your preference.

    9. Can I swap the chicken for another protein?

    10. Yes, feel free to use shrimp, pork, or plant-based proteins like tofu to create delicious variations!

    By answering these frequently asked questions, you can help cater to a variety of readers while ensuring they have all the information they need to successfully create this delicious meal.

    Conclusion

    Easy Pineapple Chicken and Rice Dinner is a delightful, versatile dish that caters to an array of tastes and dietary needs, making it an excellent addition to any weeknight meal plan. It combines wholesome ingredients with tropical flavors, all while being simple to prepare and highly nutritious. Whether you’re feeding a family or simply looking for a quick meal for one, this easy dinner recipe is bound to become a favorite. So why not gather the ingredients today and embark on your culinary adventure? Enjoy!

  • Tasty Din Tai Fung Cucumber Salad Recipe

    Tasty Din Tai Fung Cucumber Salad Recipe

    Tasty Din Tai Fung Cucumber Salad Recipe: A Tropical Delight

    Introduction to Tasty Din Tai Fung Cucumber Salad Recipe

    Welcome to the world of refreshing flavors, where simplicity meets health in the delightful Tasty Din Tai Fung Cucumber Salad Recipe! This vibrant, crunchy cucumber salad is not only a centerpiece for your dining table but also an easy dish that can be prepared in just minutes. Imagine lightly crisp cucumbers tossed with aromatic seasonings and flavors inspired by, and reminiscent of, the famous Din Tai Fung restaurant style.

    This cucumber salad is a fantastic option for everyone—whether you’re a busy parent looking for quick recipes, a college student on a budget, or a health-conscious individual seeking delicious vegan and gluten-free options. Its versatility makes it suitable for any meal, serving as a refreshing appetizer, a palate cleanser between courses, or even as a light, nourishing side dish during summer barbecues.

    What truly sets this cucumber salad apart is not just its flavor profile but also its health benefits. Packed with vitamins, antioxidants, and hydrating elements, this cucumber salad can be the perfect addition to your diet-centric meal plans, helping you maintain energy and vitality. With its delectable crunch and vibrant taste, it’s an excellent choice for food enthusiasts and novice cooks alike. Let’s dive into this aromatic, health-centric delight!

    Benefits and Advantages of Tasty Din Tai Fung Cucumber Salad Recipe

    The Tasty Din Tai Fung Cucumber Salad Recipe offers numerous benefits that make it a stand-out dish for anyone looking to prepare a fresh and healthy meal.

    Ease of Preparation

    First and foremost, one of the main advantages of this delightful cucumber salad is its simplicity. With minimal preparation time—approximately 15 to 20 minutes—you can create a refreshing dish that can impress your friends and family. The ingredients are easy to source, and the directions are straightforward, making it accessible for cooks of all skill levels. Even if you’re a novice in the kitchen, you can prepare this dish without any fear!

    Health Benefits

    In today’s world, health is at the forefront of everyone’s mind. Cucumbers are a fabulous source of hydration and are low in calories, which makes this salad an excellent option for those who are diet-conscious. Rich in vitamins K and C, cucumbers also provide antioxidants that help combat free radicals, thereby promoting overall wellness. Additionally, cucumbers contain fiber, which aids digestion and keeps you feeling full longer.

    Diet Compatibility

    Moreover, this cucumber salad is incredibly versatile. It’s vegan, gluten-free, and can easily be adapted to accommodate various dietary preferences and needs. You can enjoy it alongside grilled meats for a hearty sandwich-style meal or as a standalone appetizer. Plus, for those watching their sodium intake, the dressing can be adjusted perfectly to fit your health goals.

    By prioritizing taste and health in your choice of recipes, this Tasty Din Tai Fung Cucumber Salad not only offers a wealth of benefits but also stands out as a delicious, colorful dish that’s suitable for any occasion.

    Ingredients Overview

    Essential Ingredients for Tasty Din Tai Fung Cucumber Salad Recipe

    Here’s a comprehensive list of all the ingredients you’ll need to prepare the Tasty Din Tai Fung Cucumber Salad, complete with precise measurements:

    1. 1 pound of cucumbers: Choose fresh, firm cucumbers for the best crunch. They can be regular or Persian cucumbers.
    2. 1 tablespoon salt (or to taste): This enhances the flavor and helps to draw moisture out of the cucumbers.
    3. 2 tablespoons rice vinegar: This brings a tangy flavor to the salad. You can use apple cider vinegar for a different twist.
    4. 1 tablespoon soy sauce (or tamari for a gluten-free option): The umami flavor enriches the overall taste.
    5. 1 teaspoon sesame oil: Adds a nutty aroma that complements the cucumbers.
    6. 1 tablespoon sugar (or agave syrup for vegan option): Balances the tanginess with a hint of sweetness.
    7. 2 cloves garlic, minced: Fresh garlic provides an aromatic kick.
    8. 1 teaspoon chili oil (optional): For those who love heat, this adds a spicy kick.
    9. Sesame seeds for garnish: These add texture and additional flavor to the serving dish.

    This salad is naturally low in calories, so you can enjoy it guilt-free. It is also inherently vegan and gluten-free, making it an ideal option for diverse dietary needs.

    Dietary Substitutions to Customize Your Tasty Din Tai Fung Cucumber Salad Recipe

    Making this cucumber salad your own is simple! Here are some suggested substitutions to cater to different dietary preferences or ingredient availability:

    • Cucumbers: If cucumbers are not available, you can substitute them with zucchini, which has a similar crunch and mild flavor.
    • Salt: If you’re following a low-sodium diet, consider using herbs like dill or parsley to add flavor without extra sodium.
    • Rice Vinegar: Feel free to experiment with lime juice or lemon juice for a zesty twist.
    • Soy Sauce: For a low-sodium or gluten-free version, tamari or coconut aminos work well.
    • Sugar: Use honey or maple syrup as alternative sweeteners, or simply omit if you prefer a lower sugar dish.

    These substitutions allow the salad not only to fit various diets but also introduce exciting flavors, making every serving unique.

    How to Prepare the Perfect Tasty Din Tai Fung Cucumber Salad Recipe: Step-by-Step Guide

    Ready to get started on this aroma-filled adventure? Follow these step-by-step instructions to prepare your Tasty Din Tai Fung Cucumber Salad:

    1. Prepare the Base: Begin by washing the cucumbers thoroughly under cold water. Trim off the ends and slice them in half lengthwise. Depending on your preference, you may choose to remove the seeds with a spoon. Then, slice each half into thin half-moon shapes or chop them into bite-sized pieces.

    2. Salt the Cucumber: Place the cut cucumbers into a colander and sprinkle the salt over them. Give them a gentle toss, ensuring all pieces are coated. This step draws out excess water and enhances flavor. Allow them to sit for about 15 minutes. You’ll notice the cucumbers will release moisture during this time.

    3. Prepare the Dressing: While the cucumbers are resting, in a mixing bowl, whisk together the rice vinegar, soy sauce, sesame oil, sugar, minced garlic, and chili oil if you’re using it. Mix until the sugar dissolves and the dressing is well-combined.

    4. Rinse the Cucumbers: After 15 minutes, rinse the salted cucumbers under cold water to remove excess salt. Drain them well in the colander and pat them dry with a clean kitchen towel. This will ensure your salad is not too salty and that it retains a nice crunch.

    5. Mix Ingredients: In a large mixing bowl, combine the prepared cucumbers and the dressing. Toss gently, making sure each cucumber slice is evenly coated with the flavorful dressing.

    6. Garnish and Serve: After you’ve mixed everything well, transfer the salad to your serving dish. Sprinkle the sesame seeds on top for that added crunch and aesthetic appeal.

    7. Taste and Adjust: Take a moment to taste your cucumber salad. You might decide to add a bit more sweetness, acid, or salt according to your liking. Feel free to incorporate fresh herbs such as chopped cilantro or green onions at this point.

    8. Chill and Enjoy: If you’ve got time, allow the salad to chill in the refrigerator for about 30 minutes before serving. This helps the flavors meld together beautifully.

    This simple yet flavorful Tasty Din Tai Fung Cucumber Salad Recipe perfectly complements a range of dishes. Enjoy it as a standalone appetizer, or serve it alongside grilled chicken, fish, or tofu.

    Mastering Tasty Din Tai Fung Cucumber Salad Recipe: Advanced Tips and Variations

    To elevate your Tasty Din Tai Fung Cucumber Salad experience, consider these advanced tips and variations to keep things exciting:

    • Herbs and Spices: Feel free to experiment with different herbs like mint or dill for refreshing twists. You can also add red pepper flakes for an added kick.
    • Added Textures: Incorporate other crunchy vegetables like bell peppers or shredded carrots to boost nutrition while maintaining the crunchiness you love.
    • Protein Boost: For a more substantial meal, try adding cooked shrimp, grilled chicken, or tofu cubes. This will transform your cucumber salad into a balanced, nutrient-rich dish.
    • Make it a Meal: Toss this cucumber salad with cooked quinoa or brown rice. This adds fiber and makes it a complete meal.

    Each variation offers an exciting way to keep this dish as a staple in your kitchen, catering to various tastes and dietary needs.

    How to Store Tasty Din Tai Fung Cucumber Salad Recipe: Best Practices

    Storing your Tasty Din Tai Fung Cucumber Salad properly can enhance its shelf life and flavor. Here are the best practices for storage:

    • Refrigeration: Place any leftover salad in an airtight container. It will remain fresh in the refrigerator for up to 2 days but is best enjoyed within the first day for optimal crunchiness.

    • Freezing: For the best quality, avoid freezing the cucumber salad. The texture of cucumbers may not hold up well after freezing, which can lead to a mushy consistency upon thawing.

    • Reheating: If you wish to warm up your salad, it’s best to remove cucumbers and any delicate vegetables you’ve added, and instead, gently warm protein options in a pan. Combine back only when serving, as a cold salad offers the best taste.

    By following these storage guidelines, you can preserve the fresh taste and nutritional value of your cucumber salad.

    Nutritional Value of Tasty Din Tai Fung Cucumber Salad Recipe

    Understanding the nutritional aspects of the Tasty Din Tai Fung Cucumber Salad Recipe is key to enjoying your meal without any qualms. Here’s a breakdown of the estimated nutritional value per serving (based on four servings):

    • Calories: ~60 kcal
    • Protein: 1 g
    • Fat: 3 g
    • Carbohydrates: 8 g
    • Fiber: 1 g
    • Sugar: 2 g
    • Sodium: 200 mg (adjusted for non-salted preparation)
    • Vitamin K: 16% of the Daily Recommended Intake
    • Vitamin C: 9% of the Daily Recommended Intake

    This cucumber salad not only supports hydration but also adds essential vitamins and minerals to your diet. As a low-calorie option, it allows you to indulge without worrying about excess calories.

    FAQs: Frequently Asked Questions About Tasty Din Tai Fung Cucumber Salad Recipe

    1. Can I prepare this cucumber salad in advance?

    Absolutely! The Tasty Din Tai Fung Cucumber Salad can be prepared a few hours in advance. However, for the best texture, it’s ideal to enjoy it fresh or within a day of preparation.

    2. Is it possible to make this salad without soy sauce?

    Yes, if you have dietary restrictions, you can substitute soy sauce with coconut aminos or simply use a salt and additional vinegar if you wish for a stronger taste.

    3. What type of cucumber is best for this recipe?

    Larger cucumbers like English or Persian varieties are recommended for their firm texture and fewer seeds, giving the salad an enjoyable crunch.

    4. Can I store leftovers?

    Yes, store any leftover salad in an airtight container in the refrigerator, and consume it within 1-2 days for the best taste and crunch.

    5. Can I use other vegetables in this salad?

    Certainly! Feel free to add shredded carrots, radishes, or bell peppers to elevate both flavor and nutritional content.

    This Tasty Din Tai Fung Cucumber Salad is an embodiment of freshness and simplicity that every cook can appreciate, making it a must-try recipe for anyone looking to add radiant flavors to their meal! So go ahead, give it a try and share your creations! Enjoy!

  • Tasty Honey Hot Chicken Salad Easy

    Tasty Honey Hot Chicken Salad Easy

    Tasty Honey Hot Chicken Salad Easy: A Tropical Delight

    Introduction to Tasty Honey Hot Chicken Salad Easy

    If you’re searching for an exciting and nutritious addition to your culinary repertoire, look no further! The Tasty Honey Hot Chicken Salad Easy is a dish that ticks all the boxes: it’s simple to prepare, packed with vibrant flavors, and offers impressive health benefits. This salad combines the richness of succulent chicken with the sweet and spicy undertones of honey and hot sauce. Not only does it make for a tantalizing meal, but it’s also versatile enough to cater to various dietary needs, including making it gluten-free or low-calorie.

    This recipe deserves a spot in your kitchen, especially if you find yourself overwhelmed by complex chicken recipes. The ease of preparation allows busy parents and working professionals to whip up a delicious meal without spending hours in the kitchen. Additionally, it’s an excellent option for health-conscious individuals. Packed with lean protein, fresh vegetables, and wholesome ingredients, it’s sure to nourish your body and delight your taste buds.

    Whether you’re a student searching for an easy meal plan, a newlywed experimenting with cooking, or a food enthusiast looking to impress guests, this honey hot chicken salad is an ideal choice. Let’s dive deeper into the benefits of this delightful recipe, the ingredients required, and how you can prepare this tropical treat with ease!

    Benefits and Advantages of Tasty Honey Hot Chicken Salad Easy

    The Tasty Honey Hot Chicken Salad Easy is not just another recipe; it’s a warm embrace of flavors and benefits that can elevate your dining experience. Here are some compelling reasons to make this dish your next go-to in the realm of chicken recipes:

    1. Quick and Simple Preparation

    In our fast-paced world, finding time to cook can be challenging. This chicken salad offers a straightforward approach, allowing you to prepare a wholesome meal in 30 minutes or less. From seasoned chefs to novice cooks, anyone can enjoy the simplicity of tossing together a few ingredients.

    2. Health Benefits

    One of the greatest advantages of this salad is its health focus. Lean chicken breast provides a protein-packed base, while honey offers natural sweetness without the guilt of refined sugars. Additionally, incorporating fresh veggies provides essential vitamins, minerals, and fiber, making it a well-rounded meal.

    3. Dietary Versatility

    Whether you’re following a vegan diet or require a gluten-free option, this salad has you covered. You can easily substitute chicken with plant-based proteins or gluten-free grains, making it a flexible recipe for diners with various dietary requirements.

    4. Flavor Explosion

    Combining sweet honey and spicy hot sauce creates a unique flavor profile that’s sure to impress. This dish is a delightful dance of sweet and spicy that can please any palate, perfect for potlucks or family gatherings.

    5. Meal Prep Friendly

    With its ability to store well, this chicken salad is not just a one-time meal. Make a batch ahead of time and enjoy it for lunch or dinner throughout the week. It retains its great taste, even after refrigeration.

    In conclusion, the Tasty Honey Hot Chicken Salad Easy stands out due to its ease, health benefits, dietary adaptability, and deliciousness. The next sections will guide you through the ingredients, preparation, and variations of this exceptional salad.

    Ingredients Overview

    Essential Ingredients for Tasty Honey Hot Chicken Salad Easy

    To make your Tasty Honey Hot Chicken Salad Easy, you’ll need the following ingredients. Each item plays a distinct role, offering flavor, texture, and nutrition. Here’s the detailed list:

    1. Chicken Breast (2 cups, cooked and shredded): The primary source of protein. Opt for grilled or baked chicken for a healthier option.
    2. Honey (1/4 cup): Acts as a natural sweetener, balancing the spiciness of the dish.
    3. Hot Sauce (2 tablespoons): Adds a kick of flavor. You can adjust this to meet your spice preference.
    4. Greek Yogurt (1/2 cup): A creamy base that adds a tangy taste, serving as a healthier alternative to mayonnaise.
    5. Red Bell Pepper (1, diced): Offers a punch of color and sweetness, rich in vitamins A and C.
    6. Green Onions (2, chopped): Adds freshness and a mild onion flavor.
    7. Celery (1 cup, chopped): Provides crunch and fiber.
    8. Mixed Greens (4 cups): A bed for the salad, offering a mix of nutrients. For a vegan option, replace it with spinach or kale.
    9. Salt and Pepper (to taste): Enhances the overall flavor of the salad.

    Dietary Substitutions to Customize Your Tasty Honey Hot Chicken Salad Easy

    Here are some great substitutions to ensure this recipe fits your dietary preferences:

    • Vegan Option: Substitute the chicken with chickpeas or tofu. For protein-rich content, use quinoa as the base.
    • Gluten-Free: Ensure that your hot sauce and all packaged ingredients are labeled gluten-free.
    • Dairy-Free: Replace Greek yogurt with dairy-free yogurt or mashed avocado for creaminess.
    • Low-Calorie: Use grilled chicken breast and replace honey with a sugar-free sweetener to cut down on calories.
    • Spice Level Adjustment: Depending on your tolerance for heat, you can reduce the amount of hot sauce or choose milder versions.

    With these ingredients outlined and potential substitutes provided, you are ready to embark on your cooking adventure with the Tasty Honey Hot Chicken Salad Easy!

    How to Prepare the Perfect Tasty Honey Hot Chicken Salad Easy: Step-by-Step Guide

    Creating the Tasty Honey Hot Chicken Salad Easy is an enjoyable process that can be accomplished with simple, actionable steps. Here’s how to make it:

    1. Prepare the Chicken: To start, if you haven’t cooked your chicken yet, grill or bake it until fully cooked. Shred it with two forks or chop it into bite-sized pieces for easier mixing.
    2. Make the Dressing: In a mixing bowl, combine honey, hot sauce, and Greek yogurt. Whisk until smooth, adjusting the honey and hot sauce based on your sweetness and spiciness preferences.
    3. Chop the Vegetables: Dice the red bell pepper and chop the celery and green onions. Make sure to use fresh ingredients for the best flavor and health benefits.
    4. Mix the Base Ingredients: In a large bowl, add the shredded chicken, chopped vegetables, and the dressing you prepared. Toss well until all components are evenly coated.
    5. Prepare the Greens: On a large serving platter or individual plates, lay out the mixed greens as a bed for your salad.
    6. Top the Greens: Spoon the chicken mixture over the greens, making sure to distribute it evenly.
    7. Season to Taste: Sprinkle with salt and pepper according to your preference. Optionally, add crushed red pepper flakes if you desire extra heat.
    8. Garnish: For an additional touch, top with fresh herbs like cilantro or parsley. This adds an aromatic finish to your dish.
    9. Serve Immediately: This salad is best served fresh but can be refrigerated for later. If storing, keep the dressing separate to avoid soggy greens.

    Congratulations! You now have a Tasty Honey Hot Chicken Salad Easy that’s not only healthy but also bursting with flavor. This dish can easily be customized based on your preferences, making it a staple among your chicken recipes.

    Mastering Tasty Honey Hot Chicken Salad Easy: Advanced Tips and Variations

    To enhance your experience with the Tasty Honey Hot Chicken Salad Easy, here are some advanced tips and exciting variations to try:

    1. Add Texture

    Consider incorporating nuts or seeds such as sliced almonds, sunflower seeds, or pumpkin seeds. They’ll provide a satisfying crunch and additional nutrients.

    2. Make it a Wrap

    For a portable version, take your chicken salad and spoon it into whole-wheat pita pockets or spinach tortillas for a delicious wrap. This transformation makes the dish suitable for outings or lunch on the go.

    3. Experiment with Flavors

    If you’re looking for varied flavors, try adding fruits like diced apples or mango for a sweet twist. Their natural sweetness will enhance the honey without overpowering the dish.

    4. Add Grains

    For a heartier meal, introduce a base of quinoa or brown rice underneath the chicken salad. This variation not only adds flavor but also makes the dish more filling.

    5. Herbs and Spices

    Don’t hesitate to experiment with herbs such as basil or dill. Fresh herbs elevate the freshness and enhance the overall flavor profile, making your salad extraordinary.

    6. Spicy Variations

    If you crave more heat, consider adding jalapeños or a splash of Sriracha to the dressing. This will give it an extra kick and create layers of flavor.

    With these tips and variations, you can continue to reinvent the Tasty Honey Hot Chicken Salad Easy, ensuring it never gets dull and remains a favored option in your collection of chicken recipes.

    How to Store Tasty Honey Hot Chicken Salad Easy: Best Practices

    Understanding how to properly store your Tasty Honey Hot Chicken Salad Easy is essential for maintaining freshness. Here are some guidelines to ensure you enjoy your dish at its best:

    1. Refrigeration

    Store leftovers in an airtight container in the refrigerator. This will keep the salad fresh for up to three days. However, remember to keep the dressing separate if you plan to store it for an extended period, as it keeps greens crisp.

    2. Freezing

    While this dish is not ideal for freezing due to the fresh ingredients’ texture, if you have leftover chicken, you can freeze that separately. Cooked chicken can be stored in the freezer for up to 3 months. Just be sure to thaw it in the refrigerator before adding it back to your salad.

    3. Reheating

    If you prefer a warm chicken salad, consider reheating the chicken separately. Microwaving the chicken for about 1-2 minutes or warming it in a pan will bring it back to life. However, avoid reheating mixed greens as they can become wilted and lose their crunch.

    4. Serving Tips

    When ready to serve the refrigerated salad, give it a good stir to recombine the ingredients and dressing. If it appears a little dry, you can add a splash more of Greek yogurt or honey to revitalize it.

    With these storage practices, you can ensure that your Tasty Honey Hot Chicken Salad Easy remains delicious for days to come!

    Nutritional Value of Tasty Honey Hot Chicken Salad Easy

    Understanding the nutritional value of your meals is vital to maintaining a balanced diet. Here’s a breakdown of the key nutritional components for a serving of Tasty Honey Hot Chicken Salad Easy:

    • Calories: Approximately 300-350 calories
    • Protein: 30g (coming from chicken and Greek yogurt)
    • Fat: 10g (mostly unsaturated fats from Greek yogurt)
    • Carbohydrates: 30g (from vegetables and honey)
    • Fiber: 5g (from vegetables and greens)
    • Sugars: 10g (natural sugars from honey and vegetables)

    This nutrient-packed salad provides an excellent source of protein, vitamins, antioxidants, and healthy fats. Its balanced composition makes it a fantastic option for those looking to maintain a healthy lifestyle. Additionally, you can tailor the dish to suit your dietary goals, whether you’re aiming for higher protein, lower calories, or more fiber.

    In conclusion, not only is the Tasty Honey Hot Chicken Salad Easy delicious, but it also brings a load of nutrition to the table, making it a great choice for anyone interested in tasty chicken recipes.

    FAQs: Frequently Asked Questions About Tasty Honey Hot Chicken Salad Easy

    1. Can I substitute the chicken with something else?

    Absolutely! For a vegan option, consider using chickpeas, tofu, or grilled tempeh. Each option offers great protein content while ensuring the salad remains hearty and satisfying.

    2. Is this salad gluten-free?

    Yes, the Tasty Honey Hot Chicken Salad Easy can be made gluten-free by ensuring your hot sauce and ingredients are labeled as such. Opt for gluten-free grains if you decide to add those.

    3. How long does the salad last in the fridge?

    When stored in an airtight container, the salad will stay fresh for about three days. Ensure you keep the dressing separate to maintain the integrity of the greens.

    4. Can I make this ahead of time?

    Certainly! You can prepare the salad base and separately package the dressing, then mix before serving to retain freshness. This makes it perfect for meal prep.

    5. What can I serve with this chicken salad?

    This salad can be a standalone dish but pairs wonderfully with crusty whole-grain bread, tortillas, or even as a topping for baked sweet potatoes.

    6. How can I adjust the spice level?

    Simply modify the amount of hot sauce you use in the dressing. You can also add milder options like mild salsa or skip the hot sauce altogether if desired.

    In summary, the Tasty Honey Hot Chicken Salad Easy is versatile, easy to prepare, and offers nutritional benefits that cater to various dietary preferences. Whether you’re cooking for yourself or hosting a gathering, this refreshing salad is bound to impress. So, roll up your sleeves and get ready to enjoy a vibrant meal that’s as nutritious as it is delicious!

  • Easy Easter Oreo Cookie Casserole Dessert

    Easy Easter Oreo Cookie Casserole Dessert

    Easy Easter Oreo Cookie Casserole Dessert: A Tropical Delight

    Introduction to Easy Easter Oreo Cookie Casserole Dessert

    If you’re looking for a delightful recipe that’s perfect for the Easter celebration, look no further than the Easy Easter Oreo Cookie Casserole Dessert. This show-stopping dish combines the beloved flavors of Oreo cookies with a rich blend of creaminess, making it an irresistible addition to any dessert table. Ideal for both novice cooks and experienced bakers, it demands only a few simple ingredients and minimal time in the kitchen, making it one of the most hassle-free dessert recipes available.

    The beauty of this casserole lies in its versatility. It’s naturally simple and indulgent, yet you can also adapt it for various dietary needs, thanks to its ability to accommodate vegan, gluten-free, and low-calorie options. This makes it perfect for busy parents looking for an easy dessert to make for their children, working professionals seeking time-saving solutions, and even diet-conscious individuals wanting an occasional treat. With its delightful combination of flavors and textures, the Easy Easter Oreo Cookie Casserole is sure to impress both family and friends alike.

    So, prepare to indulge in a creamy, mouth-watering dessert that is not just easy to make but also a healthy option for everyone. This delectable casserole is perfect for Easter gatherings and will leave you craving more. Let’s dive into why this dish should be on your baking list this spring!

    Benefits and Advantages of Easy Easter Oreo Cookie Casserole Dessert

    The Easy Easter Oreo Cookie Casserole Dessert is a crowd-pleaser for multiple reasons. One of its standout attributes is its ease of preparation. With minimal cooking skills required, this dish allows anyone, regardless of their culinary experience, to create a stunning dessert. The casserole can be prepared in roughly 30 minutes, ensuring you won’t be spending hours in the kitchen while missing out on family time or the Easter festivities.

    In terms of health benefits, this casserole can be easily customized to cater to various dietary needs. For instance, by substituting traditional dairy with non-dairy options, you can create a delicious dessert suitable for vegans. Furthermore, you can use gluten-free Oreo cookies or a gluten-free cake mix to cater to those with gluten sensitivities. By being flexible with ingredients, you not only accommodate guests’ dietary restrictions but also enhance the overall appeal of the casserole.

    This dessert recipe is also a great fit for families with children. The sweet and creamy layers are sure to captivate kids, making your dessert selection a hit during Easter celebrations. On top of that, the satisfaction of making this dish can spark creativity in young cooks, encouraging them to be involved in the baking process.

    To summarize, the Easy Easter Oreo Cookie Casserole offers a wonderful combination of simplicity, health benefits, and versatility, making it an excellent choice for any occasion. You can elevate your dessert game with minimal effort while maintaining a healthy balance, making this dish a must-have for your Easter festivities.

    Ingredients Overview

    Essential Ingredients for Easy Easter Oreo Cookie Casserole Dessert

    To create your easy Easter Oreo Cookie Casserole Dessert, you’ll need the following ingredients:

    • Oreo Cookies (1 package) – The star of the show; choose regular or gluten-free depending on your dietary needs.
    • Cream Cheese (8 oz) – Use softened cream cheese for a smooth filling; vegan cream cheese works well for a dairy-free option.
    • Whipped Topping (1 container, 8 oz) – Preferably non-dairy whipped topping if you’re making a vegan version.
    • Vanilla Extract (1 tsp) – Adds depth to the flavor.
    • Powdered Sugar (1 cup) – Sweetens the filling; you can use a sugar substitute if desired.
    • Milk (1 cup) – Regular, almond, or any other plant-based milk can be used.
    • Chocolate Syrup (for drizzling) – Optional, but adds a rich, chocolatey finish to the casserole.

    By selecting these ingredients, you not only whip up an incredibly tasty dish but also have the opportunity to make it align with various dietary preferences.

    Dietary Substitutions to Customize Your Easy Easter Oreo Cookie Casserole Dessert

    Making this casserole even more versatile is the ease with which you can swap out ingredients to suit different dietary requirements. Here are some potential substitutions:

    • For Vegan Options: Replace cream cheese with a vegan alternative such as cashew cream or a store-bought vegan cream cheese. Use a plant-based whipped topping instead of dairy.

    • For Gluten-Free Options: Swap the conventional Oreo cookies for gluten-free varieties. Ensure that any cake mix or additional ingredients you select are certified gluten-free.

    • For Reduced Sugar: Consider using a sugar substitute, such as erythritol or stevia, to lessen caloric intake without sacrificing flavor. Alternatively, reducing the amount of powdered sugar can still yield a delicious dessert.

    • For Nut-Free Options: When altering the milk, choose oat milk or rice milk. Always check labels to ensure that other ingredients do not include traces of nuts.

    These substitutions empower you to create a dish suited to a broad audience, making your Easy Easter Oreo Cookie Casserole Dessert a perfect fit for any gathering, no matter the dietary needs of your guests.

    How to Prepare the Perfect Easy Easter Oreo Cookie Casserole Dessert: Step-by-Step Guide

    Creating your Easy Easter Oreo Cookie Casserole Dessert is an enjoyable process that can be broken down into clear, actionable steps. Follow this straightforward guide to prepare your mouth-watering dessert in no time.

    1. Prepare the Base: Start by crushing about 2 cups of Oreo cookies into fine crumbs. You can place the cookies in a zip-lock bag and crush them with a rolling pin or use a food processor for quicker results. This forms the delicious base of your casserole.

    2. Mix Cookie Crust: In a mixing bowl, combine the crushed cookie crumbs with ½ cup of melted butter. Mix until fully incorporated. This mixture will form the bottom layer of your casserole.

    3. Press Mixture into Dish: Using a spatula or your fingers, press the crust evenly into the bottom of a greased 9×13 baking dish. Ensure that it’s even, as this will provide a great foundation for your layers.

    4. Prepare the Filling: In a separate bowl, combine the softened cream cheese, powdered sugar, and vanilla extract. Beat with an electric mixer until the mixture is smooth and creamy. This is the first layer of creamy goodness.

    5. Fold in Whipped Topping: Gently fold in the whipped topping into the cream cheese mixture until no streaks remain. This will create a luscious, light filling that perfectly complements the cookie crust.

    6. Layer the Casserole: Spread half of the filling over the cookie crust using an offset spatula. Make sure it’s evenly distributed.

    7. Add More Oreo Cookie Crumbles: Sprinkle another layer of crushed Oreo cookies over the cream cheese filling. This adds texture and extra chocolaty goodness.

    8. Repeat the Filling Layer: Spread the remaining cream cheese mixture on top of the crushed Oreos, smoothing it out to cover the entire surface.

    9. Final Crust Layer: Top the entire mixture with the remaining Oreo crumbles, ensuring a beautiful, crunchy topping.

    10. Chill the Casserole: Place the dish in the refrigerator for at least 4 hours, preferably overnight, to allow the flavors to meld and the filling to firm up.

    11. Drizzle with Chocolate Syrup: Before serving, drizzle chocolate syrup over the top for an additional touch of sweetness and decoration.

    12. Serve and Enjoy: Cut the casserole into squares and serve chilled. Enjoy the joyous flavors as you celebrate Easter with friends and family!

    Remember, you can modify certain steps to cater to specific dietary preferences. Adjust ingredients, and feel free to add layers of fruit or alternative toppings such as nuts or coconut, depending on your dietary needs and taste.

    Mastering Easy Easter Oreo Cookie Casserole Dessert: Advanced Tips and Variations

    To bring your Easy Easter Oreo Cookie Casserole Dessert to the next level, consider these advanced tips and creative variations:

    • Incorporate Flavor Variations: Experiment with different flavored Oreo cookies, such as peppermint or seasonal varieties, to give your dessert a unique twist based on the occasion.

    • Layer with Fresh Fruits: Layer in sliced strawberries, raspberries, or bananas between the cookie and cream cheese layers. This adds a refreshing tang and beautiful color that makes the dish even more visually appealing.

    • Use Different Toppings: Besides chocolate syrup, consider sprinkling crushed nuts or shredded coconut as a topping. A sprinkle of colorful Easter-themed sprinkles can enhance visual charm and create excitement for kids.

    • Make a Cookie Dough Layer: For those seeking an indulgent treat, create a cookie dough layer by mixing flour, butter, sugars, and milk to mimic cookie dough texture. Add this layer beneath your filling for an extra-rich dessert.

    • Add Coffee Flavor: For an adult twist, you can mix instant espresso powder into the cream cheese layer for a mocha-inspired flavor, perfect for sophisticated gatherings.

    Remember, the key to mastering this dessert recipe lies in your creativity and preference. Adjustments and variations can be made to cater to different palates, ensuring everyone enjoys this delightful casserole.

    How to Store Easy Easter Oreo Cookie Casserole Dessert: Best Practices

    To preserve the freshness of your Easy Easter Oreo Cookie Casserole Dessert, follow these storage best practices:

    • Refrigeration: Store any leftovers in an airtight container in the refrigerator. The casserole can safely be kept chilled for up to 4-5 days. The flavors often deepen and meld together over time, making it even more delicious.

    • Freezing: If you want to prepare this dessert in advance, it’s possible to freeze it. Slice the casserole into individual servings and wrap each piece tightly in plastic wrap before placing it in a freezer-safe container. It can be frozen for up to 2 months.

    • Thawing: When you’re ready to enjoy the frozen casserole, transfer it to the refrigerator to thaw overnight. Allow it to sit at room temperature for a few minutes before serving to bring back the creamy texture.

    Following these practices ensures that your Easy Easter Oreo Cookie Casserole remains flavorful and delicious for every gathering or family occasion.

    Nutritional Value of Easy Easter Oreo Cookie Casserole Dessert

    Understanding the nutritional profile of the Easy Easter Oreo Cookie Casserole Dessert is essential, especially for those who maintain a healthy lifestyle.

    A typical serving (1 slice) of this casserole may provide the following nutrition facts (approximate values):

    • Calories: 250-350 calories
    • Total Fat: 15-20g
    • Saturated Fat: 7-10g
    • Cholesterol: 30-40mg
    • Sodium: 200-300mg
    • Total Carbohydrates: 30-40g
    • Dietary Fiber: 1g
    • Sugars: 15-25g
    • Protein: 3-5g

    Nutritional values may vary depending on the specific ingredient brands used and any substitutions made. For instance, switching to a low-fat cream cheese or a sugar substitute could result in fewer calories while retaining great taste.

    By understanding the nutritional value, you can tailor servings to your dietary goals, ensuring that everyone can enjoy a piece of this delightful dessert without guilt.

    FAQs: Frequently Asked Questions About Easy Easter Oreo Cookie Casserole Dessert

    Can I use different cookies besides Oreos?

    Absolutely! While Oreo cookies are the classic choice, feel free to explore alternatives such as chocolate wafer cookies or even gluten-free cookie options. Experimenting with different flavors will bring exciting twists to the casserole.

    How long does the casserole need to chill?

    For the best flavor and texture, it’s advised to let the casserole chill for at least 4 hours; overnight is even better! This allows all the layers to settle and the flavors to meld seamlessly.

    Can I make this recipe ahead of time?

    Yes, the Easy Easter Oreo Cookie Casserole Dessert is perfect for make-ahead preparation. You can assemble it a day prior to your gathering, allowing for ease and convenience.

    Is this dessert suitable for kids?

    Definitely! The appealing flavors and creamy texture are sure to be a hit with kids. You can even involve them in the preparation process to make it a fun family activity.

    What are some ways to customize this dessert?

    This dessert is incredibly customizable! You can try various cookie flavors, mix in fruit layers, or opt for different toppings to make it your own. Vegan, gluten-free, and vegan-friendly options also allow diverse dietary adaptations.

    How do I store leftovers?

    Leftovers can be kept in an airtight container in the refrigerator for up to 4-5 days. You can also freeze individual portions, ensuring that you enjoy this dessert beyond the Easter celebrations.

    By exploring the answers to these frequently asked questions, you can maximize your enjoyment of the Easy Easter Oreo Cookie Casserole Dessert, ensuring it becomes a staple in your dessert arsenal.

    With its simplicity, delicious flavors, and versatility, the Easy Easter Oreo Cookie Casserole Dessert stands out as a must-try recipe that fits a variety of tastes and dietary needs. Enjoy your baking journey and the delightful experience it brings to your next celebration!

  • The Best Baked Salmon Meatballs Avocado Sauce

    The Best Baked Salmon Meatballs Avocado Sauce

    The Best Baked Salmon Meatballs Avocado Sauce: A Tropical Delight

    Introduction to The Best Baked Salmon Meatballs Avocado Sauce

    Welcome to a culinary adventure that combines the delightful flavors of the sea with the creamy goodness of avocado! If you are looking for delectable salmon recipes that are not just easy to make but also packed with nutrients, you’ve stumbled upon the perfect dish. These Baked Salmon Meatballs with Avocado Sauce are not only delicious but also cater to a variety of dietary needs, making them ideal for busy parents, health-conscious individuals, food enthusiasts, and everyone in between.

    This recipe pairs succulent salmon meatballs with a vibrant avocado sauce that adds a refreshing twist. It’s simple enough for beginner cooks yet sophisticated enough to impress your family and friends. In addition, this dish is gluten-free and can be made low-calorie or vegan! With the right balance of protein, healthy fats, and savory spices, these salmon meatballs are a nutritious option that provides a delightful dining experience without compromising flavor.

    By crafting this recipe, you can enjoy a dish that fits seamlessly into a healthy lifestyle. Plus, the leftovers—if there are any—make for a perfect meal prep option. Dive into this easy yet impressive recipe, and discover how a few fresh ingredients can come together to create a meal that is both memorable and satisfying!

    Benefits and Advantages of The Best Baked Salmon Meatballs Avocado Sauce

    When it comes to salmon recipes, the Baked Salmon Meatballs with Avocado Sauce stand out for several reasons. Firstly, the preparation is incredibly straightforward. You can whip up these meatballs in a short amount of time, making them an excellent choice for weeknight dinners or last-minute entertaining. The simplicity of the recipe helps demystify cooking with salmon, making it accessible for even the most novice of cooks.

    One of the biggest advantages of this dish is its health benefits. Salmon is renowned for being a powerhouse of nutrients, particularly omega-3 fatty acids, which support heart health and brain function. These meatballs are also rich in protein, making them a great choice for those aiming to maintain a balanced diet. The avocado sauce adds an extra layer of texture and creaminess while providing essential vitamins and healthy fats.

    Additionally, this recipe caters to various dietary preferences. Whether you are gluten-free, vegan (with substitutions), or watching your calorie intake, this dish can easily be adjusted to fit your needs. By focusing on wholesome ingredients and straightforward preparation, you’ll find that the Baked Salmon Meatballs with Avocado Sauce not only satisfies your taste buds but also contributes positively to your dietary goals.

    Overall, incorporating this dish into your meal rotation could lead to a more diverse and exciting diet, while ensuring that you and your loved ones enjoy nutritious and delicious meals. So why not explore the joys of cooking with salmon through this fantastic recipe?

    Ingredients Overview

    Essential Ingredients for The Best Baked Salmon Meatballs Avocado Sauce

    To create your Baked Salmon Meatballs with Avocado Sauce, you’ll want to ensure you have the following ingredients on hand:

    For the Salmon Meatballs:

    • 1 pound fresh salmon fillet, skin removed and diced
    • 1/2 cup breadcrumbs (use gluten-free breadcrumbs if needed)
    • 1/4 cup grated Parmesan cheese (optional; or nutritional yeast for a vegan option)
    • 1/4 cup fresh parsley or cilantro, chopped
    • 1 egg (or a flax egg for a vegan substitute: 1 tablespoon ground flaxseed + 2.5 tablespoons water)
    • 2 cloves garlic, minced
    • 1 teaspoon onion powder
    • 1/2 teaspoon salt
    • 1/4 teaspoon black pepper
    • 1 tablespoon lemon juice

    For the Avocado Sauce:

    • 2 ripe avocados
    • Juice of 1 lime
    • 2 tablespoons Greek yogurt (or dairy-free yogurt for vegan)
    • 1 garlic clove, minced
    • Salt and pepper to taste
    • Optional: 1 tablespoon olive oil for creaminess

    This list ensures you have everything you need for a delicious and satisfying meal. Each ingredient plays a role in building flavor and nutrition in this dish. Feel free to customize based on your preferences and dietary needs!

    Dietary Substitutions to Customize Your The Best Baked Salmon Meatballs Avocado Sauce

    One of the joys of cooking is the opportunity to create personalized meals that cater to individual dietary requirements. Here are some suggested substitutions that can help you customize your Baked Salmon Meatballs with Avocado Sauce to better meet your needs:

    • Bread Crumbs: Use almond flour or crushed nuts for a gluten-free or low-carb option.
    • Parmesan Cheese: Replace with nutritional yeast for a vegan alternative that provides a cheesy flavor.
    • Egg: If you’re avoiding eggs, consider using a chia egg (1 tablespoon chia seeds mixed with 3 tablespoons water) as a binder.
    • Greek Yogurt: Switch to coconut yogurt or a dairy-free sour cream for a vegan-friendly version.
    • Add-ins: For extra nutrients, consider adding finely diced vegetables, such as zucchini or bell peppers, to the meatball mixture.

    These substitutions will ensure that you can still enjoy the delightful flavors of the dish while adhering to your specific dietary preferences. Whether you are vegan, gluten-free, or just looking to try something new, you can adapt this recipe with ease.

    How to Prepare the Perfect The Best Baked Salmon Meatballs Avocado Sauce: Step-by-Step Guide

    Ready to create your delicious Baked Salmon Meatballs with Avocado Sauce? Let’s get started! Follow these easy steps to master this delightful recipe.

    1. Prepare the Oven: Preheat your oven to 375°F (190°C). Line a baking sheet with parchment paper for easy cleanup.

    2. Prep the Salmon: Take your fresh salmon fillet and remove the skin if it’s still attached. Dice it into small pieces, ensuring there are no bones.

    3. Mix Meatball Ingredients: In a large mixing bowl, combine the diced salmon, breadcrumbs, Parmesan cheese (or nutritional yeast), parsley, egg (or chickpea flour mixture), minced garlic, onion powder, salt, pepper, and lemon juice. Mix everything together until well incorporated.

    4. Form the Meatballs: Use your hands to shape the mixture into small meatballs, about 1 to 1.5 inches in diameter, and place them on the prepared baking sheet. Leave some space between each meatball to ensure even cooking.

    5. Bake the Meatballs: Place the baking sheet in the preheated oven and bake for 15-20 minutes or until the meatballs are cooked through and slightly golden on the outside. An internal temperature of 145°F (63°C) indicates they are ready.

    6. Prepare the Avocado Sauce: While the meatballs are baking, prepare the avocado sauce. In a medium bowl, mash the ripe avocados until smooth. Add lime juice, Greek yogurt (or dairy-free alternative), minced garlic, and salt & pepper. Mix well until creamy and adjust seasoning to taste.

    7. Serve: Once the salmon meatballs are cooked, remove them from the oven. You can serve them on a plate with a generous drizzle of avocado sauce over the top.

    8. Garnish (Optional): Sprinkle freshly chopped parsley or cilantro for an extra pop of color and flavor.

    That’s it! Your delicious Baked Salmon Meatballs with Avocado Sauce are ready to be enjoyed. This recipe allows for creativity, so feel free to serve with a side of steamed vegetables, a fresh salad, or whole-grain rice to round out your meal.

    Mastering The Best Baked Salmon Meatballs Avocado Sauce: Advanced Tips and Variations

    To elevate your Baked Salmon Meatballs with Avocado Sauce, consider these advanced tips and variations:

    • Spice it Up: Add a pinch of cayenne pepper or smoked paprika to the meatball mixture for a little kick. Alternatively, throw in some chopped jalapeños in the avocado sauce for an added layer of flavor.
    • Herb Variations: Switch up the herbs based on what you have at home. Dill and chives can add a vibrant flavor, especially when paired with salmon.
    • Make It a Meal: Serve your meatballs on a bed of zoodles (zucchini noodles) or whole grain pasta for a satisfying meal that’s both healthy and filling.
    • Freezing Options: Make a double batch and freeze half of the uncooked meatballs. They can be baked straight from the freezer, just add a few extra minutes to the cooking time for convenience next week.

    By exploring these options, you can discover new flavor profiles and textures, keeping your dinner exciting and fresh!

    How to Store The Best Baked Salmon Meatballs Avocado Sauce: Best Practices

    If you find yourself with leftovers (which is often the best part!), proper storage is essential to maintain flavor and freshness. Here are some best practices for storing your Baked Salmon Meatballs with Avocado Sauce:

    • Refrigeration: Store the baked salmon meatballs in an airtight container in the refrigerator. They will last for about 3-4 days. Keep the avocado sauce separate to prevent it from browning.

    • Freezing: To freeze, allow the meatballs to cool completely, then place them in a freezer-safe container. You can store them for up to 3 months. For easy meal prep, divide them into servings.

    • Reheating: To reheat, simply pop the meatballs in the oven at 350°F (175°C) for about 10-15 minutes until warmed through. Alternatively, you can reheat them in the microwave for 1-2 minutes. Just make sure to stir the avocado sauce before using it again to restore its creamy texture.

    These practices not only help in meal prep but also ensure that you can savor your delicious creation for days to come!

    Nutritional Value of The Best Baked Salmon Meatballs Avocado Sauce

    When considering any recipe, it’s essential to review the nutritional value, especially when focusing on health benefits. The Baked Salmon Meatballs with Avocado Sauce are not only flavorful but also provide a well-rounded nutritional profile.

    Here’s a breakdown per serving (assuming the recipe makes about four servings):

    • Calories: Approximately 300-350 calories
    • Protein: 25-30 grams
    • Fat: 15-20 grams (largely from salmon and avocado)
    • Carbohydrates: 20-25 grams (depending on breadcrumbs)
    • Fiber: 5-7 grams (from avocado and optional ingredients)
    • Omega-3 Fatty Acids: A significant source due to the salmon, supporting heart and cognitive health.

    The high protein content helps with muscle building and recovery, while healthy fats promote satiety and heart health. The addition of fiber and vitamins from the avocado and herbs further enhances the nutritional value, making this dish a well-balanced meal.

    FAQs: Frequently Asked Questions About The Best Baked Salmon Meatballs Avocado Sauce

    1. Can I use frozen salmon for this recipe?

    Absolutely! Just make sure to thaw it completely before using it in the meatball mixture to ensure even cooking.

    2. How can I make this recipe dairy-free?

    You can easily substitute the cheese with nutritional yeast and use a dairy-free yogurt for the avocado sauce.

    3. Can I add other ingredients to the meatball mixture?

    Yes! Feel free to add chopped vegetables like spinach or bell peppers for an extra nutritional boost.

    4. Are these meatballs suitable for meal prep?

    Definitely! You can prepare these meatballs in advance and store them in the fridge or freezer for quick meals.

    5. What can I serve with the salmon meatballs?

    These meatballs pair beautifully with a side of quinoa, a fresh salad, or steamed veggies. You can also serve them with pasta or zoodles for a heartier meal.

    6. Can I make the avocado sauce spicier?

    Of course! Add jalapeños or crushed red pepper flakes to the avocado sauce according to your spice preference.

    7. How long do leftovers last in the fridge?

    Stored in an airtight container, the salmon meatballs will last about 3-4 days. Make sure to keep the avocado sauce separate for optimal freshness.

    Cooking is a journey of exploration and creativity, and the Baked Salmon Meatballs with Avocado Sauce will surely delight your taste buds. Now that you have all the information, grab your ingredients and let the culinary adventure begin! Enjoy your meal!

  • Easy Baby Lemon Impossible Pies Dessert

    Easy Baby Lemon Impossible Pies Dessert

    Easy Baby Lemon Impossible Pies Dessert: A Tropical Delight

    Introduction to Easy Baby Lemon Impossible Pies Dessert

    Welcome to the world of dessert recipes that not only tantalize your taste buds but also brighten your day! The Easy Baby Lemon Impossible Pies Dessert is an exquisite tropical treat that combines the zesty flavor of lemon with the creamy consistency of pie, all while being incredibly easy to prepare. This delightful dessert is perfect for home cooks, busy parents, students, and anyone eager to please with a light yet indulgent sweet treat.

    What makes this dessert stand out? It’s not just its delicious taste; it’s also a champion among healthy options. It can be made vegan, gluten-free, and low-calorie without compromising on flavor, making it suitable for a wide range of dietary preferences. Moreover, the preparation is so straightforward that even novice bakers can accomplish it with ease. With minimal cooking time and only a few pantry staples required, this lemon dessert is perfect for those who want something quick and satisfying after a meal or as a special occasion treat.

    So why wait? Dive into this easy, guilt-free dessert recipe and discover how simplicity can create something truly spectacular.

    Benefits and Advantages of Easy Baby Lemon Impossible Pies Dessert

    The Easy Baby Lemon Impossible Pies Dessert is a masterpiece of simplicity and flavor, offering numerous benefits that make it indispensable in the world of dessert recipes. Here are some reasons you should make this delightful dish:

    1. Quick and Simple: One of the biggest draws of this pie is that it requires minimal effort and ingredients. You won’t need to spend hours in the kitchen. In fact, preparation can take as little as 15 minutes!

    2. Health-Conscious: This recipe is light on calories and sugar, making it a great option for health-conscious individuals. Whether you’re counting calories or just aiming for a more balanced diet, this dessert allows you to indulge without guilt.

    3. Vegan and Gluten-Free Friendly: With simple substitutions, this dessert can easily cater to both vegan and gluten-free diets. This flexibility makes it perfect for gatherings where guests may have various dietary restrictions.

    4. Fresh and Flavorful: The bright lemon flavor adds a refreshing touch, especially during warm months. Unlike more traditional desserts that can feel heavy, this one tends to be light and invigorating.

    5. Versatility in Serving: Whether you’re serving this pie for a casual family dinner or a more formal occasion, its sophisticated taste allows it to shine in any setting. You can easily dress it up with fresh berries or a sprinkle of powdered sugar for an elegant touch.

    6. Nutritional Benefits: Lemons are well known for their vitamin C content and antioxidant properties. This dessert not only satisfies your sweet tooth but can also contribute positively to your dietary needs.

    Overall, the Easy Baby Lemon Impossible Pies Dessert is not just another recipe; it’s a tool for making healthier choices without sacrificing flavor or satisfaction.

    Ingredients Overview

    Essential Ingredients for Easy Baby Lemon Impossible Pies Dessert

    The beauty of this Easy Baby Lemon Impossible Pies Dessert lies in its simplicity, and the ingredients reflect that. Here’s what you’ll need:

    • 1 cup almond milk (or your preferred non-dairy milk): This acts as a creamy base while keeping the recipe vegan and low in calories.
    • 1/2 cup lemon juice (freshly squeezed for best flavor): The star of the show, giving the pie its zesty kick.
    • 1/2 cup coconut oil (melted): Adds richness while keeping the pie dairy-free. You can substitute with vegetable oil if needed.
    • 1 cup sugar (or sugar substitute): Sweetens the pie; consider using stevia or erythritol for a low-calorie option.
    • 1 cup all-purpose gluten-free flour (optional): Keeps the dessert gluten-free without altering the texture significantly.
    • 1 teaspoon baking powder: Helps the pie rise slightly, contributing to its fluffy texture.
    • A pinch of salt: Enhances the flavors and balances the sweetness.
    • Zest of one lemon: Adds an extra layer of citrusy flavor to the pie.

    Dietary Substitutions to Customize Your Easy Baby Lemon Impossible Pies Dessert

    Customizing the Easy Baby Lemon Impossible Pies Dessert to fit varying dietary needs is straightforward. Here are some substitutions to consider:

    • For Nut-Free Options: Use oat milk or rice milk instead of almond milk to ensure the dessert is suitable for those with nut allergies.
    • For Sugar-Free Versions: Replace regular sugar with a natural sweetener like monk fruit sweetener or coconut sugar for a lower glycemic index option.
    • For A Gluten-Free Version: Use gluten-free flour blends found in most supermarkets; ensure that your rising agents, such as baking powder, are gluten-free.
    • For a Richer Flavor: Adding a splash of vanilla extract can enhance the taste, though it can be omitted for a more straightforward approach.
    • Swap Coconut Oil: Vegetable or canola oil can be used as a substitute if coconut oil isn’t available or if a more neutral flavor is desired.

    These substitutions allow you to tailor the Easy Baby Lemon Impossible Pies Dessert to meet personal preferences or dietary restrictions while maintaining its delightful charm!

    How to Prepare the Perfect Easy Baby Lemon Impossible Pies Dessert: Step-by-Step Guide

    Now that you’re equipped with the knowledge of ingredients and substitutions, let’s dive into the fun part: preparing the Easy Baby Lemon Impossible Pies Dessert! Follow these step-by-step instructions:

    1. Preheat the oven: Start by preheating your oven to 350°F (175°C). This ensures that the pie begins cooking at an optimal temperature right away.

    2. Prepare a baking dish: Grease a 9-inch pie dish or baking pan with a bit of coconut oil or non-stick spray to prevent sticking.

    3. Mix the wet ingredients: In a mixing bowl, combine the almond milk, melted coconut oil, lemon juice, and lemon zest. Whisk these ingredients together until they are well blended.

    4. Combine the dry ingredients: In a separate bowl, mix the sugar, gluten-free flour, baking powder, and salt together. This will ensure even distribution of all dry ingredients.

    5. Combine wet and dry: Slowly pour the wet ingredient mixture into the bowl with the dry ingredients. Stir until just combined. Avoid over-mixing to maintain a light texture.

    6. Transfer to baking dish: Pour the combined mixture into the prepared pie dish, spreading it evenly to ensure uniform cooking.

    7. Bake the pie: Place the baking dish in the preheated oven. Bake for approximately 30-35 minutes or until the top is golden brown and a toothpick inserted in the center comes out clean.

    8. Cool before serving: Once baked, remove the pie from the oven and let it cool for at least 15 minutes. Cooling will help set the texture before serving.

    9. Serve and enjoy: Enjoy your Easy Baby Lemon Impossible Pies Dessert served warm or chilled. It can be adorned with fresh berries, a dollop of whipped cream, or a sprinkle of powdered sugar for an elegant touch.

    And there you have it—a straightforward recipe that effortlessly brings tropical flavors to your table! Adapt the steps as necessary for dietary needs, ensuring everyone can enjoy the deliciousness of this pie.

    Mastering Easy Baby Lemon Impossible Pies Dessert: Advanced Tips and Variations

    Want to take your Easy Baby Lemon Impossible Pies Dessert to the next level? Here are some advanced tips and appealing variations to consider:

    • Add a Crust: For an added layer of texture, consider baking this pie in a pre-made gluten-free graham cracker crust. This can enhance the overall experience while maintaining the dessert’s simplicity.

    • Lemon Meringue Twist: Whip up a simple vegan meringue using aquafaba (the liquid from canned chickpeas). Spread it over the top before finishing in the oven for a light-toasted meringue finish.

    • Infuse with Herbs: For a refreshing spin, include fresh herbs like mint or basil mixed into the batter for a unique flavor profile.

    • Fruit Compote Topper: Serve your pie with a homemade lemon-blueberry or lemon-strawberry compote. This adds vibrant color and a burst of sweet-tart flavor.

    • Adjusting Sweetness: If you want an extra zesty kick, raising the amount of lemon juice improves flavor depth. Conversely, decreasing sugar can lighten the calories further.

    These variations and tips keep the dessert exciting and encourage creativity in the kitchen, making it fun for newcomers and seasoned bakers alike!

    How to Store Easy Baby Lemon Impossible Pies Dessert: Best Practices

    Proper storage is essential to maintain the freshness and flavor of your Easy Baby Lemon Impossible Pies Dessert. Here’s how to do it right:

    • Refrigeration: If you have leftovers, cover the pie with plastic wrap or transfer it to an airtight container. Refrigerate it for up to 5 days. This will help preserve flavors and moisture.

    • Freezing Options: You can freeze the pie for up to 2 months. Make sure to wrap it tightly in plastic wrap and then in aluminum foil for additional protection against freezer burn.

    • Thawing: To enjoy frozen pie, simply transfer it to the refrigerator overnight to thaw before serving. Heat individual slices in a microwave for a few seconds if you prefer it warm.

    • Presentation After Storage: For the best presentation, consider topping the pie with fresh fruit or whipped cream just before serving. This restores some freshness that may be lost during storage.

    With these tips on storage, you can savor your Easy Baby Lemon Impossible Pies Dessert over several days, making dessert time a delight whenever you crave it!

    Nutritional Value of Easy Baby Lemon Impossible Pies Dessert

    When considering dessert recipes, incorporating nutritional information is essential for those who are health-conscious. The Easy Baby Lemon Impossible Pies Dessert not only tastes delightful but also provides valuable nutrition. Here’s a breakdown of the key nutritional components per serving (assuming the recipe serves 8):

    • Calories: Approximately 150 kcal
    • Protein: 2g
    • Carbohydrates: 22g
    • Fiber: 1g
    • Sugars: 6g (varies based on sweetener choice)
    • Fat: 7g
    • Saturated fat: 6g (primarily from coconut oil)
    • Vitamin C: 8% of Daily Value (DV) (from lemon juice)
    • Calcium: 5% of DV

    This dessert contains moderate calories while supplying a boost of vitamin C thanks to the fresh lemons. With the low sugar potentially achievable by using sugar substitutes, it remains a sweet option without excessive carbohydrates.

    As you can see, you can satisfy your sweet tooth without feeling guilty, making this recipe a great choice for daily dessert indulgence!

    FAQs: Frequently Asked Questions About Easy Baby Lemon Impossible Pies Dessert

    What if I can’t find gluten-free flour?

    If gluten-free flour is unavailable, regular all-purpose flour is a good substitute, but it won’t cater to gluten-sensitive individuals. You might also explore other flour alternatives, like almond or coconut flour, but this may require adjusting the recipe slightly for texture.

    Can I make this pie in advance?

    Absolutely! This pie can be made a day in advance and stored in the refrigerator. Just allow it to cool completely before covering it to maintain its freshness.

    How can I customize the sugar content?

    You can reduce sugar by up to half without significantly impacting the taste. Alternatively, you can use sugar substitutes like agave, honey, or stevia, adjusting amounts based on sweetness preferences.

    Is this pie suitable for children?

    Yes, this pie is child-friendly! It features a light lemon flavor and a creamy texture that’s likely to appeal to younger taste buds. Parents can also control sweetness based on preferences.

    How do I keep leftovers fresh?

    Store leftovers covered in the refrigerator in an airtight container. It can last up to 5 days. If freezing, remember to wrap it properly to prevent freezer burn!

    Can I add other flavors to this pie?

    Definitely! Feel free to get creative by adding complementary flavors such as blueberries, raspberries, or even coconut. Simple swaps can provide new taste sensations!

    With this extensive guidance, you’re now equipped and inspired to create the Easy Baby Lemon Impossible Pies Dessert. Enjoy the delightful blend of simplicity, flavor, and health benefits it offers—perfect for any occasion! Happy baking!

  • The Best Texas Roadhouse Rattlesnake Bites

    The Best Texas Roadhouse Rattlesnake Bites

    The Best Texas Roadhouse Rattlesnake Bites: A Tropical Delight

    Introduction to The Best Texas Roadhouse Rattlesnake Bites

    Welcome to a culinary adventure that’s sure to enliven your taste buds! The Best Texas Roadhouse Rattlesnake Bites are not just any appetizer recipes; they embody a blend of flavors that excite and inspire. These delicious bites are perfect for gatherings, game days, or a cozy night in. As a quick, gluten-free dish made with simple ingredients, they offer a versatile option for diverse dietary needs.

    The beauty of Rattlesnake Bites lies in their ability to satisfy both taste and texture cravings. They are crispy on the outside yet delightfully cheesy on the inside, creating a sensational contrast that makes them irresistible. Best of all, this recipe can be customized to cater to vegan and low-calorie preferences, ensuring that everyone at the table can enjoy these tasty morsels. So whether you’re a busy parent, a newlywed looking for easy culinary solutions, or a seasoned food enthusiast, this dish is perfect for you!

    Get ready to dive into a world of flavor and sensation with these delightful appetizer recipes that anyone can prepare. Let’s explore why they stand out and how you can whip them up in no time!

    Benefits and Advantages of The Best Texas Roadhouse Rattlesnake Bites

    Rattlesnake Bites offer multiple benefits that are sure to make your cooking experience enjoyable and stress-free. First and foremost, these appetizer recipes are incredibly simple to prepare. You don’t need to be an experienced chef to create an impressive dish that your family and friends will rave about. With straightforward instructions and readily available ingredients, even novice cooks can master this recipe.

    Moreover, these bites present a healthier alternative to typical fried appetizers. By baking or air-frying them instead of deep-frying, you reduce excess oil and calories without sacrificing flavor. Not to mention, the main ingredients—cheese and jalapeños—provide health benefits. Cheese is a great source of calcium and protein, while jalapeños contain antioxidants and may enhance metabolism.

    Additionally, these Rattlesnake Bites are easily adaptable for various dietary needs. If you’re looking to create a vegan version, simply substitute the cheese with your favorite plant-based alternative. Similarly, for individuals monitoring their calorie intake, you can opt for low-fat cheese options or arm them with vegetables for added nutrition.

    In summary, this recipe not only satisfies your cravings but also caters to diverse dietary preferences and offers a healthier alternative to typical fried snacks. That’s why these Texas Roadhouse Rattlesnake Bites deserve a spot in your repertoire of favorite appetizer recipes.

    Ingredients Overview

    Essential Ingredients for The Best Texas Roadhouse Rattlesnake Bites

    Here is the detailed list of ingredients you’ll need to create The Best Texas Roadhouse Rattlesnake Bites:

    • 1 cup shredded cheddar cheese: Provides a creamy, delicious flavor. For a vegan option, use plant-based cheddar cheese.
    • 1 cup cream cheese (softened): Helps to bind the ingredients together. Look for a low-fat version if you’re calorie-conscious.
    • ½ cup diced jalapeños: Adds the vital heat and flavor. You can choose mild or medium-level depending on your heat tolerance.
    • ½ cup all-purpose flour: Gives the bites a crispy exterior. For gluten-free, consider using almond flour or a gluten-free blend.
    • ½ cup breadcrumbs: Enhances crunchiness. Use gluten-free breadcrumbs if necessary.
    • 1 teaspoon garlic powder: Infuses the bites with savory goodness.
    • Salt and pepper to taste: Essential for seasoning.
    • Oil for frying or cooking spray for baking: If frying, use a light oil like canola or sunflower for better health.

    Dietary Substitutions to Customize Your The Best Texas Roadhouse Rattlesnake Bites

    1. For Vegan Rattlesnake Bites: Replace cheddar and cream cheese with vegan cheese alternatives.
    2. For Gluten-Free Options: Swap all-purpose flour with gluten-free flour and use gluten-free breadcrumbs too.
    3. For Lower Calorie Bites: Utilize low-fat cream cheese and cheese alternatives to cut down on calories without losing flavor.
    4. For A Healthier Version: Add finely chopped vegetables like bell peppers or spinach to sneak in more nutrients.

    With these substitutions, you can tailor your Rattlesnake Bites to meet your family’s various dietary preferences and needs, making this dish versatile and accessible for everyone.

    How to Prepare the Perfect The Best Texas Roadhouse Rattlesnake Bites: Step-by-Step Guide

    Creating The Best Texas Roadhouse Rattlesnake Bites is both fun and easy. Follow this step-by-step guide to ensure that your appetizer turns out perfectly every time:

    1. Prepare the Cheese Mixture: In a large mixing bowl, combine 1 cup of shredded cheddar cheese and 1 cup of softened cream cheese. Mix well until smooth. This base can be customized by adding diced vegetables if desired.

    2. Add Jalapeños and Seasoning: Incorporate ½ cup of diced jalapeños, 1 teaspoon of garlic powder, and salt and pepper to taste. If you prefer milder flavors, reduce the amount of jalapeños.

    3. Form the Bites: Using your hands, scoop out a small amount of the cheese mixture and shape it into small balls, about 1 tablespoon in size. Ensure they are compact so they hold their shape while cooking.

    4. Prepare the Breading: In one bowl, place ½ cup of all-purpose flour, and in another, combine ½ cup of breadcrumbs. For gluten-free, replace flour and breadcrumbs with suitable alternatives mentioned earlier.

    5. Coat the Bites: First, roll each cheese ball in the flour, ensuring it’s covered well. Next, dip it into flour again, and finally roll it in breadcrumbs, pressing slightly to adhere.

    6. Preheat the Oven or Oil: If baking, preheat your oven to 375°F (190°C). For frying, heat oil in a deep pan over medium heat. Baking results in a lighter version, while frying gives a delightful crunch.

    7. Cook the Bites: For baking: Place the coated bites on a baking sheet lined with parchment paper, spray lightly with cooking spray, and bake for 15-20 minutes or until golden brown. For frying: Carefully drop the bites into the heated oil and fry until golden brown, about 3-4 minutes on each side.

    8. Drain and Cool: Once done, use a slotted spoon or a spatula to remove the bites from the oil (if frying). Let them sit on paper towels to drain any excess oil.

    9. Serve with Dipping Sauce: Enjoy these delightful bites hot with your favorite dipping sauce—ranch, spicy aioli, or guacamole work wonderfully!

    Through each step, feel free to adjust the ingredients or cooking methods according to your dietary preferences to make these appetizer recipes all your own.

    Mastering The Best Texas Roadhouse Rattlesnake Bites: Advanced Tips and Variations

    While the basic recipe for Rattlesnake Bites is already fantastic, here are some advanced tips and variations to elevate your creation:

    1. Experiment with Flavors: Add herbs such as chives or cilantro to the cheese mixture for an extra layer of flavor. You can also incorporate spices like smoked paprika or cayenne pepper to kick the heat up a notch.

    2. Baked vs. Fried: If you want to enjoy a healthier version, baking instead of frying can be just as satisfying. Consider air-frying for a quicker option with less oil while still achieving a crisp exterior.

    3. Make Them Mini: For bite-sized snacks or kid-friendly events, consider making mini versions of the Rattlesnake Bites. Smaller bites mean they cook faster and are great finger food.

    4. Pair with Sides: Serve these delightful bites with a fresh salad or a side of grilled vegetables for a wholesome meal.

    5. Prepare Ahead: Make a batch ahead of time and freeze them. Just bake or fry straight from the freezer when you’re ready to serve!

    By exploring these tips and variations, you can put your unique spin on these Texas Roadhouse Rattlesnake Bites, making them a signature dish everyone will love!

    How to Store The Best Texas Roadhouse Rattlesnake Bites: Best Practices

    Storing your Rattlesnake Bites properly ensures they maintain their deliciousness and texture. Here’s how to do it right:

    • Refrigeration: Allow the bites to cool completely before placing them in an airtight container. They will stay fresh in the refrigerator for about 3-4 days.

    • Freezing: If you’ve made a large batch or have leftovers, consider freezing them. Place the cooled bites in a single layer on a baking sheet and freeze for about an hour. Once solid, transfer them to an airtight container or freezer bag. They can be stored in the freezer for up to 2 months.

    • Reheating: For the best results when reheating, bake the frozen or refrigerated bites in the oven at 375°F (190°C) for 10-15 minutes. If you prefer, you can also reheat them in an air fryer for 5-7 minutes to retain their crispy texture.

    By following these storage practices, your Texas Roadhouse Rattlesnake Bites will always be ready to enjoy, making them perfect for quick appetizers or snacks anytime!

    Nutritional Value of The Best Texas Roadhouse Rattlesnake Bites

    Understanding the nutritional value of The Best Texas Roadhouse Rattlesnake Bites can help you enjoy them while maintaining a balanced diet. Here’s the approximate nutritional breakdown for one serving (6 bites):

    • Calories: 250
    • Total Fat: 15g
    • Saturated Fat: 8g
    • Cholesterol: 45mg
    • Sodium: 400mg
    • Total Carbohydrates: 23g
    • Dietary Fiber: 1g
    • Sugars: 1g
    • Protein: 6g

    Note: These values will vary based on the specific ingredients used, including whether you select low-fat or vegan cheese alternatives.

    For those aiming to make healthier choices, consider the suggested substitutions previously mentioned. By doing so, you can lower the calorie count and enhance the nutritional profile of these appetizer recipes without sacrificing flavor.

    FAQs: Frequently Asked Questions About The Best Texas Roadhouse Rattlesnake Bites

    Q1: Can I make The Best Texas Roadhouse Rattlesnake Bites in advance?
    Yes! You can prepare these bites ahead of time and store them in the refrigerator for up to 3 days or freeze them for 2 months.

    Q2: What can I use instead of cream cheese?
    For a vegan option, use cashew cream or other non-dairy cream cheese alternatives. For a lighter version, consider Greek yogurt.

    Q3: Are there gluten-free options for this recipe?
    Absolutely! Replace the all-purpose flour with almond flour and use gluten-free breadcrumbs to ensure the bites are safe for gluten-sensitive individuals.

    Q4: How spicy are these bites?
    The level of spiciness can be controlled by adjusting the amount of jalapeños used. For milder bites, you can remove the seeds and membranes of the jalapeños before adding them to the mixture.

    Q5: Can I bake instead of frying?
    Yes! These Texas Roadhouse Rattlesnake Bites can be baked for a healthier alternative. Just bake them in a preheated oven at 375°F (190°C) for 15–20 minutes until golden brown.

    Q6: What can I serve with Rattlesnake Bites?
    These bites pair perfectly with dips like ranch, guacamole, or salsa. Additionally, you can serve them alongside a fresh salad or grilled vegetables for a more substantial meal.

    Now you’re ready to whip up a batch of The Best Texas Roadhouse Rattlesnake Bites! Enjoy creating and sharing this delicious appetizer recipe with your friends, family, or just for yourself. Happy cooking!