The Best Marry Me Chicken Recipe: A Tropical Delight
Introduction to The Best Marry Me Chicken Recipe
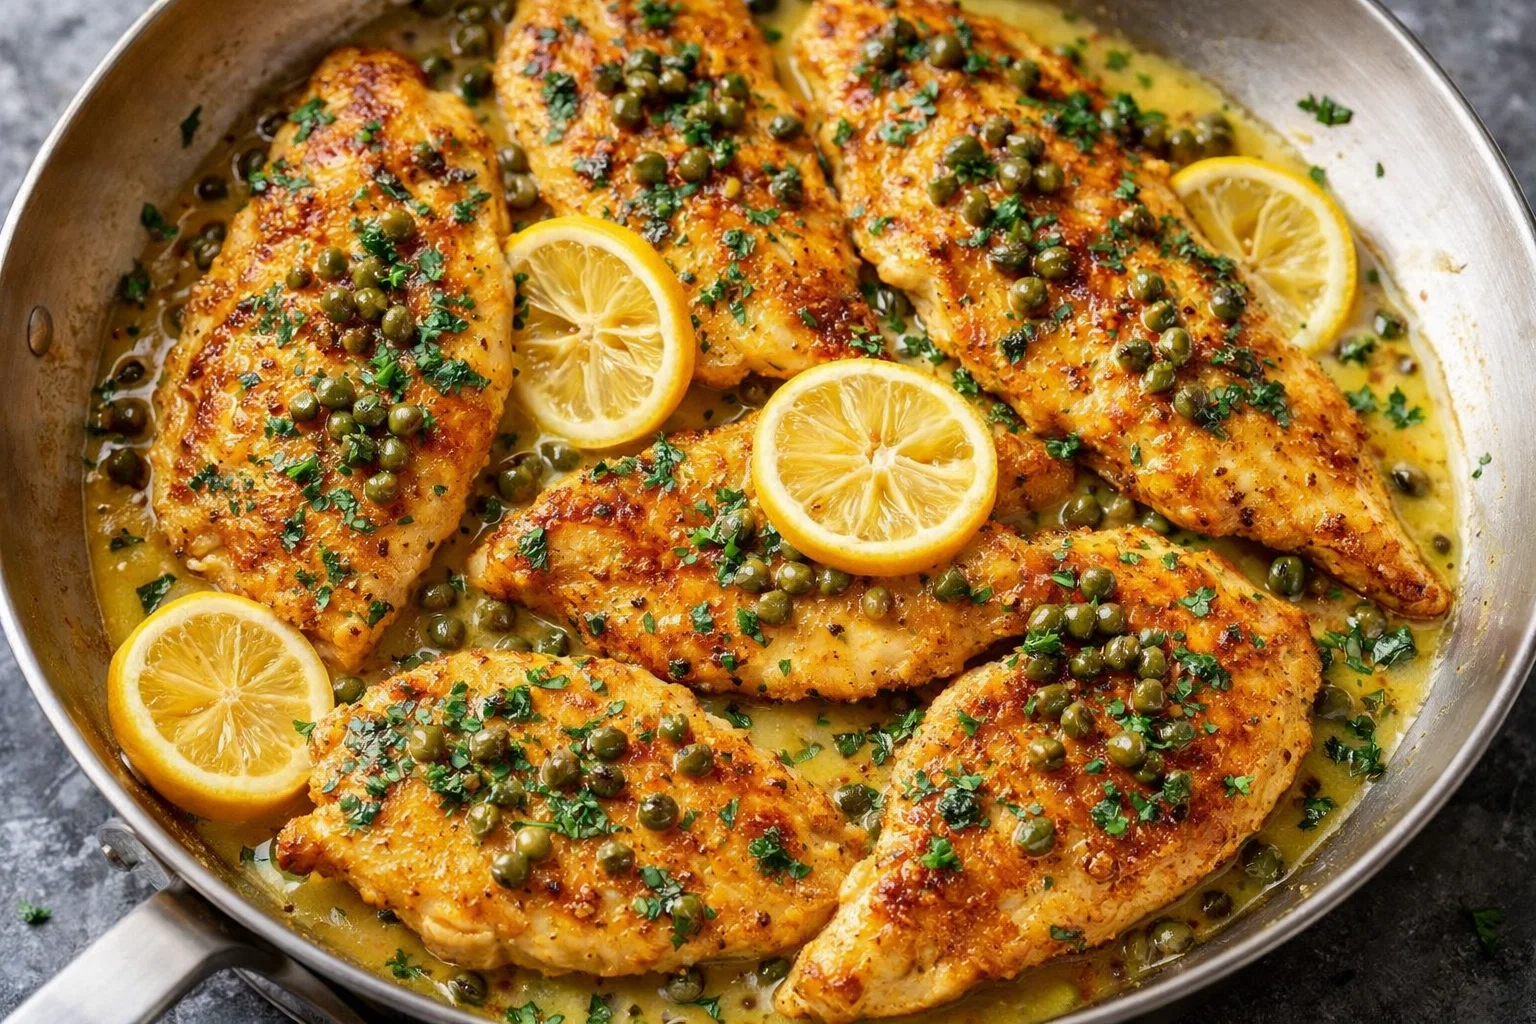
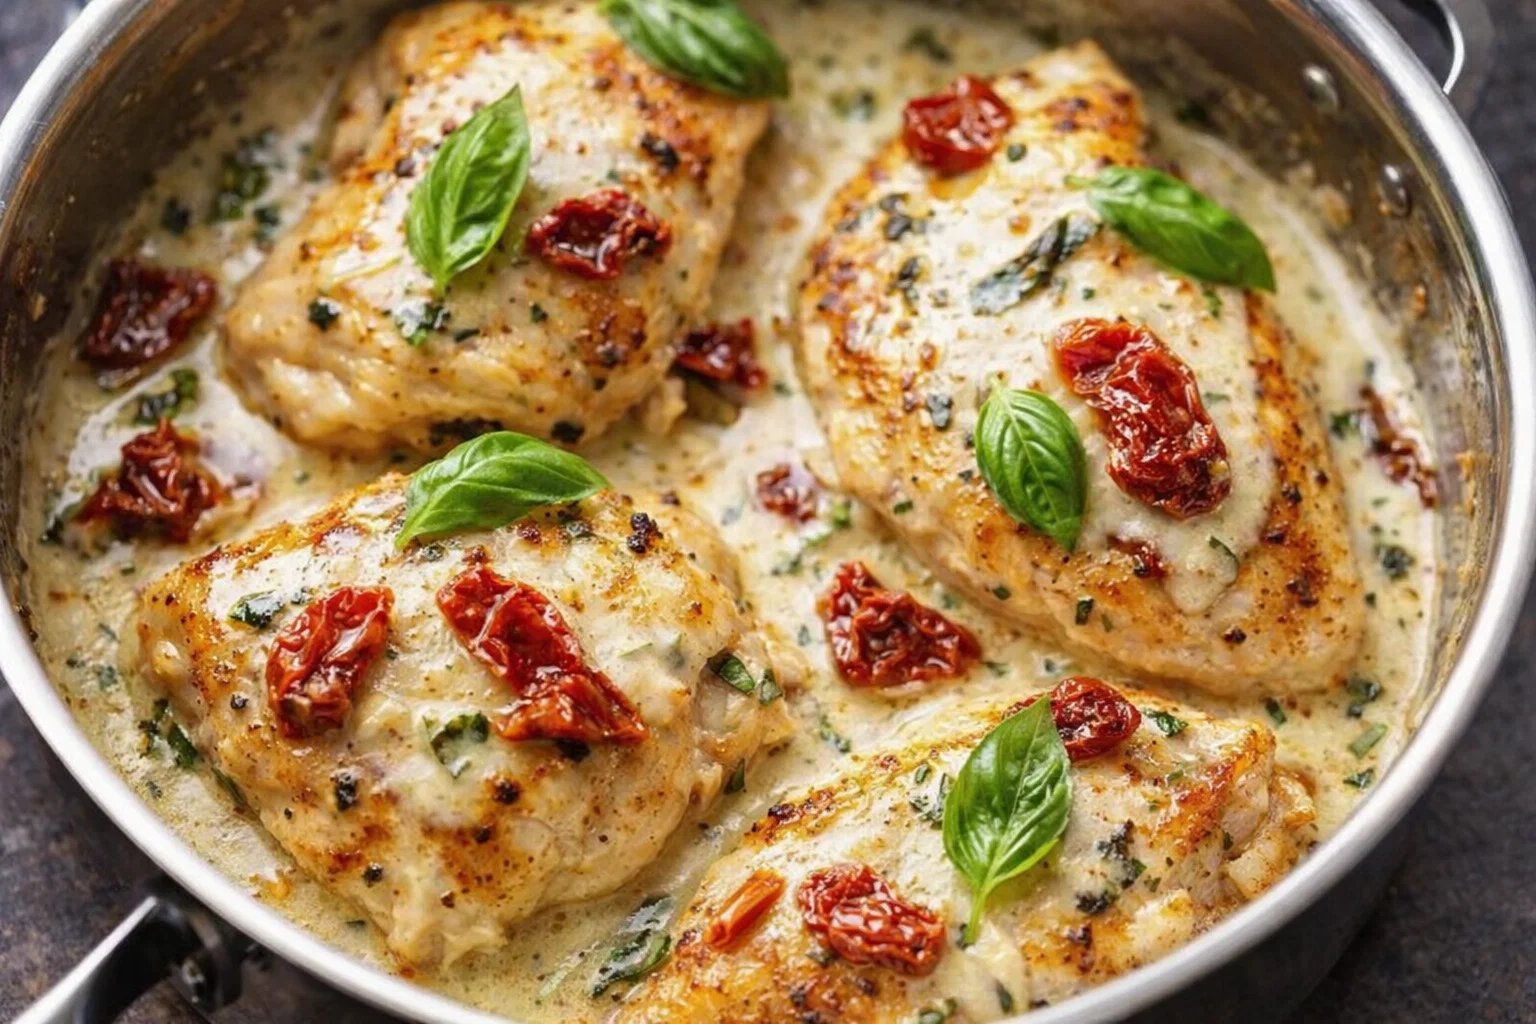
Are you ready to discover a dish that combines simplicity, incredible flavor, and irresistible appeal? Enter The Best Marry Me Chicken Recipe—a delightful choice among chicken recipes that’s perfect for busy weeknights or special occasions. This mouthwatering meal showcases tender chicken breasts smothered in a creamy, dreamy sauce crafted from sun-dried tomatoes, garlic, and rich herbs. It’s not just easy to prepare; it also provides health advantages that fit well into various dietary needs.
Imagine serving a dish that not only impresses your loved ones but could also be the key to igniting romance at the dinner table! The incredible flavor profile and creamy texture of this recipe make it an ideal comfort meal for newlyweds and busy parents alike. Moreover, the recipe is adaptable to suit those who may prefer gluten-free or low-calorie diets. Whether you’re a working professional looking for a quick weeknight meal or a baking enthusiast hoping to impress your guests, this dish is sure to resonate with everyone.
In less than an hour, you can whip up a wholesome dinner that everyone will rave about. With Marry Me Chicken, you gain the confidence of a chef and the satisfaction of nourishing loved ones with quality ingredients. Let’s dive deeper into the benefits and advantages of this amazing dish!
Benefits and Advantages of The Best Marry Me Chicken Recipe
When it comes to chicken recipes, The Best Marry Me Chicken stands out for several compelling reasons. Firstly, its ease of preparation is unparalleled. With minimal cooking skills required and quick cooking time, this recipe allows even the busiest of home cooks to enjoy a gourmet-like experience. The combination of chicken, a creamy sauce, and a hint of tangy goodness from the sun-dried tomatoes and herbs makes for an unforgettable dish.
Moreover, the health benefits are noteworthy. Each serving is packed with lean protein, which is essential for muscle health and overall well-being. Chicken is also a good source of various vitamins and minerals, including B vitamins and phosphorus. If you’re looking for a meal that’s nutritious and satisfying, Marry Me Chicken is the way to go.
Another advantage is its adaptability. You can customize the dish to meet diverse dietary preferences—making it a perfect match for your guests or family members following gluten-free, dairy-free, or low-calorie diets. This versatility opens up avenues for every cook, regardless of their dietary restrictions. Plus, the flavors can be amplified through easy variations, allowing you to explore exciting ingredients like fresh spinach, mushrooms, or even a sprinkle of Parmesan cheese, enhancing its overall appeal.
This recipe not only fills plates; it fills hearts! Its simplicity makes it feasible for anyone, whether you’re a student learning the ropes of cooking or a seasoned chef looking for a delicious quick meal. Plus, the delightful aroma will have everyone rushing to the dining room when dinner is served!
Ingredients Overview
Essential Ingredients for The Best Marry Me Chicken Recipe
To create this delicious dish, you’ll need the following key ingredients:
- 2 large boneless, skinless chicken breasts (about 1.5 lbs) – The star of the dish; chicken provides protein and versatility.
- 1 cup sliced sun-dried tomatoes (packed in oil) – Adds a sweet, tangy flavor and vibrant color.
- 1 cup heavy cream – For that rich, creamy sauce; alternative options are below for those with dietary restrictions.
- 4 cloves garlic, minced – Infuses the dish with aromatic flavor.
- 1 teaspoon Italian seasoning – A blend of dried herbs that enhances the fragrance of the chicken.
- Salt and pepper, to taste – Essential for seasoning.
- 2 tablespoons olive oil – Required for searing the chicken; additionally, you could use avocado oil or coconut oil for a different flavor profile.
- Fresh basil or parsley, chopped (for garnish) – Provides a beautiful finish and fresh flavor.
Dietary Options:
- Vegan Option: Substitute chicken breasts with firm tofu or chickpeas, and use coconut cream or a nut-based alternative for the cream.
- Gluten-Free: This recipe is naturally gluten-free. Just ensure to confirm that the sun-dried tomatoes are gluten-free as some brands may vary.
- Low-Calorie: Use a low-fat cream or alternative milk like almond or cashew for a lighter version.
Dietary Substitutions to Customize Your The Best Marry Me Chicken Recipe
To cater to different dietary preferences, consider the following substitutions:
- Chicken to Tofu or Tempeh: For a plant-based version, replacing chicken with tofu or tempeh offers a flavorful and satisfying meal.
- Heavy Cream Variants: Heavy cream can be swapped with Greek yogurt or light cream alternatives to reduce caloric intake while still maintaining creaminess.
- Garlic Alternatives: Use garlic powder if you don’t have fresh garlic on hand.
- Fresh Herbs: If fresh basil isn’t available, dried herbs like thyme or oregano can also work beautifully, adding depth to your dish.
- Vegetable Additions: Feel free to include fresh spinach, asparagus, or bell peppers for extra nutrients and color.
The versatility of this Marry Me Chicken recipe makes it easy to adapt to any dietary requirements or ingredient availability, ensuring that it can become a staple in your rotation of chicken recipes.
How to Prepare the Perfect The Best Marry Me Chicken Recipe: Step-by-Step Guide
Follow these clear steps to create your own version of The Best Marry Me Chicken Recipe.
- Prepare the Base: Start by patting the chicken breasts dry with a paper towel. This will help the chicken sear beautifully.
- Season the Chicken: Sprinkle salt, pepper, and Italian seasoning on both sides of the chicken breasts, ensuring an even coating.
- Heat the Oil: In a large skillet over medium-high heat, add the olive oil. Allow it to warm up for about 2 minutes.
- Sear the Chicken: Add the chicken breasts to the skillet. Sear them for 5-7 minutes on each side or until golden brown. The internal temperature should reach 165°F (75°C).
- Remove and Set Aside: Once cooked, take the chicken out of the skillet and place it on a plate. Cover with foil to keep warm.
- Sauté the Garlic: In the same skillet, add minced garlic. Sauté for about 1 minute until fragrant, stirring frequently to prevent burning.
- Add Sun-Dried Tomatoes: Once the garlic is fragrant, toss in the sun-dried tomatoes. Stir them in for about 1-2 minutes, allowing their flavors to meld with the garlic.
- Create the Sauce: Slowly pour in the heavy cream, stirring continuously. Bring the mixture to a gentle simmer.
- Combine Ingredients: After the sauce has thickened slightly, return the chicken breasts to the skillet, spooning the creamy mixture over them.
- Simmer for Flavor: Allow everything to simmer together for an additional 2-3 minutes, ensuring the chicken is well-coated and warmed through.
- Garnish and Serve: Once everything is combined, remove the skillet from the heat. Top with freshly chopped basil or parsley and serve warm.
Feel free to modify the cooking time based on the size of your chicken breasts, or substitute the chicken with tofu or vegetables as discussed, maintaining the same delicious creamy sauce!
Tips for Preparation
- Check Doneness: Use a meat thermometer to ensure the chicken is cooked perfectly.
- Flavor Enhancements: Consider adding different spices or herb blends to customize the flavor profile to your liking.
- Cook in Batches: If you are making a larger portion, consider searing the chicken in batches to ensure they cook evenly.
Mastering The Best Marry Me Chicken Recipe: Advanced Tips and Variations
Once you’ve mastered the basic preparation, consider these advanced tips and variations to elevate your dish:
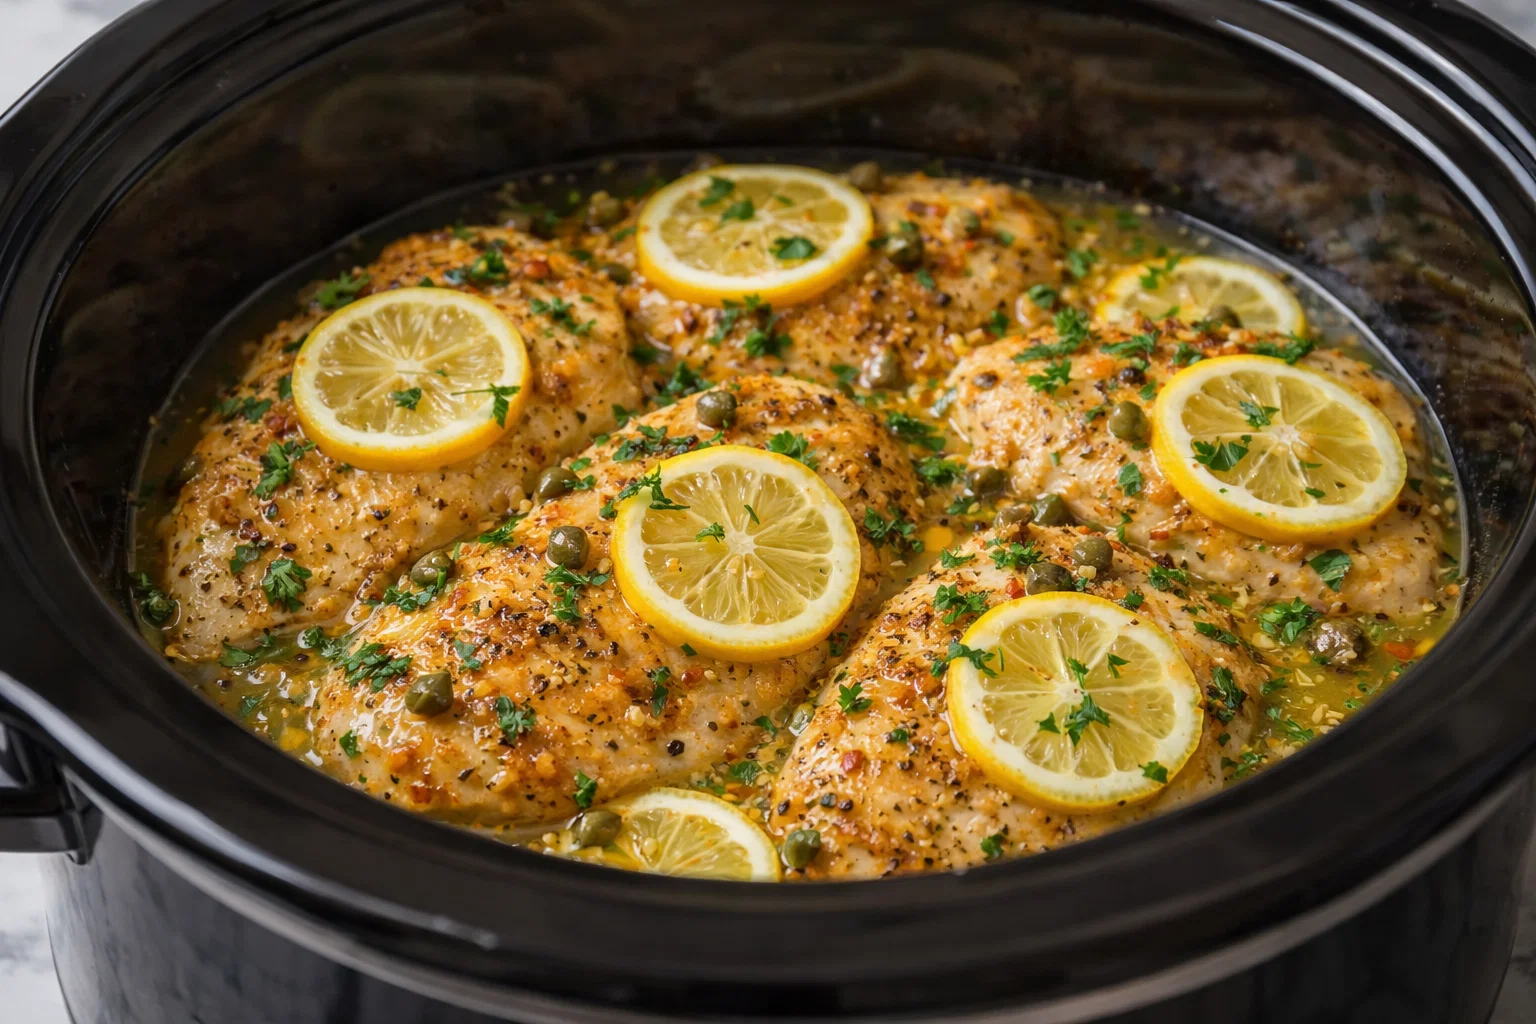
- Cooking Methods: For a healthier twist, you can bake the chicken at 375°F (190°C) in a baking dish for about 20-25 minutes instead of pan-frying, ensuring it remains juicy.
- Flavor Boost: To heighten the flavor, add white wine to deglaze the skillet before adding the cream. This gives the sauce an added layer of richness.
- Additional Textures: Incorporate sautéed mushrooms for an earthy flavor or fresh spinach for a touch of vibrancy and nutrition.
- Cheesy Goodness: If you enjoy a cheesy flavor, sprinkle grated Parmesan or mozzarella cheese on top in the last minutes of cooking. Cover the skillet to melt the cheese perfectly.
- Serving Suggestions: Pair the dish with a side of garlic bread, spinach salad, or creamy mashed potatoes to complement the savory chicken flavors.
As you experiment and find the variations that best suit your taste, you’ll make this Marry Me Chicken recipe truly your own!
How to Store The Best Marry Me Chicken Recipe: Best Practices
Storing leftover Marry Me Chicken properly is crucial for maintaining its flavors and texture. Here’s how:
- Refrigeration: Allow the chicken to cool completely before transferring it to an airtight container. Store in the refrigerator for up to 3 days.
- Freezing: If you plan to freeze the dish, ensure it’s stored in a freezer-safe airtight container. It can be kept frozen for up to 3 months. To prevent freezer burn, wrap the container with plastic wrap before sealing.
- Reheating: For best results, thaw the chicken overnight in the refrigerator if frozen. To reheat, place it in a skillet over medium heat, adding a splash of water or broth to the pan to prevent drying out. Alternatively, you can use a microwave-safe dish covered with a damp paper towel to keep moisture while reheating.
Using these storage practices will help keep your delicious Marry Me Chicken tasting fresh and delightful for your next meal.
Nutritional Value of The Best Marry Me Chicken Recipe
Understanding the nutritional value of your meals is important, especially when trying to maintain a balanced diet. Here is an approximate nutritional breakdown per serving (1 chicken breast with sauce):
- Calories: 420
- Total Fat: 25g
- Saturated Fat: 12g
- Cholesterol: 130mg
- Sodium: 350mg
- Total Carbohydrates: 6g
- Dietary Fiber: 1g
- Sugars: 2g
- Protein: 45g
If you’re opting for substitutions like tofu or low-fat cream, the nutrition facts will change, typically resulting in lower caloric intake and fat content. Always check labels for the specific products used in your recipe.
Getting familiar with the nutritional aspects can help you enjoy this dish while keeping it aligned with your dietary goals and needs!
FAQs: Frequently Asked Questions About The Best Marry Me Chicken Recipe
-
Can I use chicken thighs instead of breasts?
Absolutely! Chicken thighs are a great alternative and will add an even richer flavor and texture to the dish. -
Is it possible to make this dish dairy-free?
Yes, you can substitute the heavy cream with coconut cream or any nut-based cream alternative to achieve a delicious dairy-free version. -
How do you recommend serving this dish?
This Marry Me Chicken is best served over a bed of rice, pasta, or alongside crusty bread to soak up the creamy sauce. -
Can I prepare this meal ahead of time?
While the chicken can be marinated and prepared ahead, we recommend cooking it fresh for the best flavor. However, you can refrigerate leftovers for easy reheating! -
Is this recipe spicy?
The recipe is not inherently spicy, but you can add red pepper flakes or your favorite spicy seasoning to adapt it to your taste!
By addressing common queries in a clear fashion, you equip readers with confidence and knowledge that will encourage them to try this wonderful recipe.
Conclusion
The Best Marry Me Chicken Recipe is an outstanding dish that blends flavor and ease, making it a prized addition to your collection of chicken recipes. With its numerous health benefits, dietary adaptability, and delicious taste, it will surely become a favorite in your household. Whether for a cozy family dinner or an impressive date night, this enchanting meal promises to leave a lasting impression. So, put on your apron, gather your ingredients, and get ready to create a culinary experience that may just be the key to “marrying” the hearts around your dinner table!