Easy Ninja Creami Watermelon Sorbet Recipe: A Tropical Delight
Introduction to Easy Ninja Creami Watermelon Sorbet Recipe
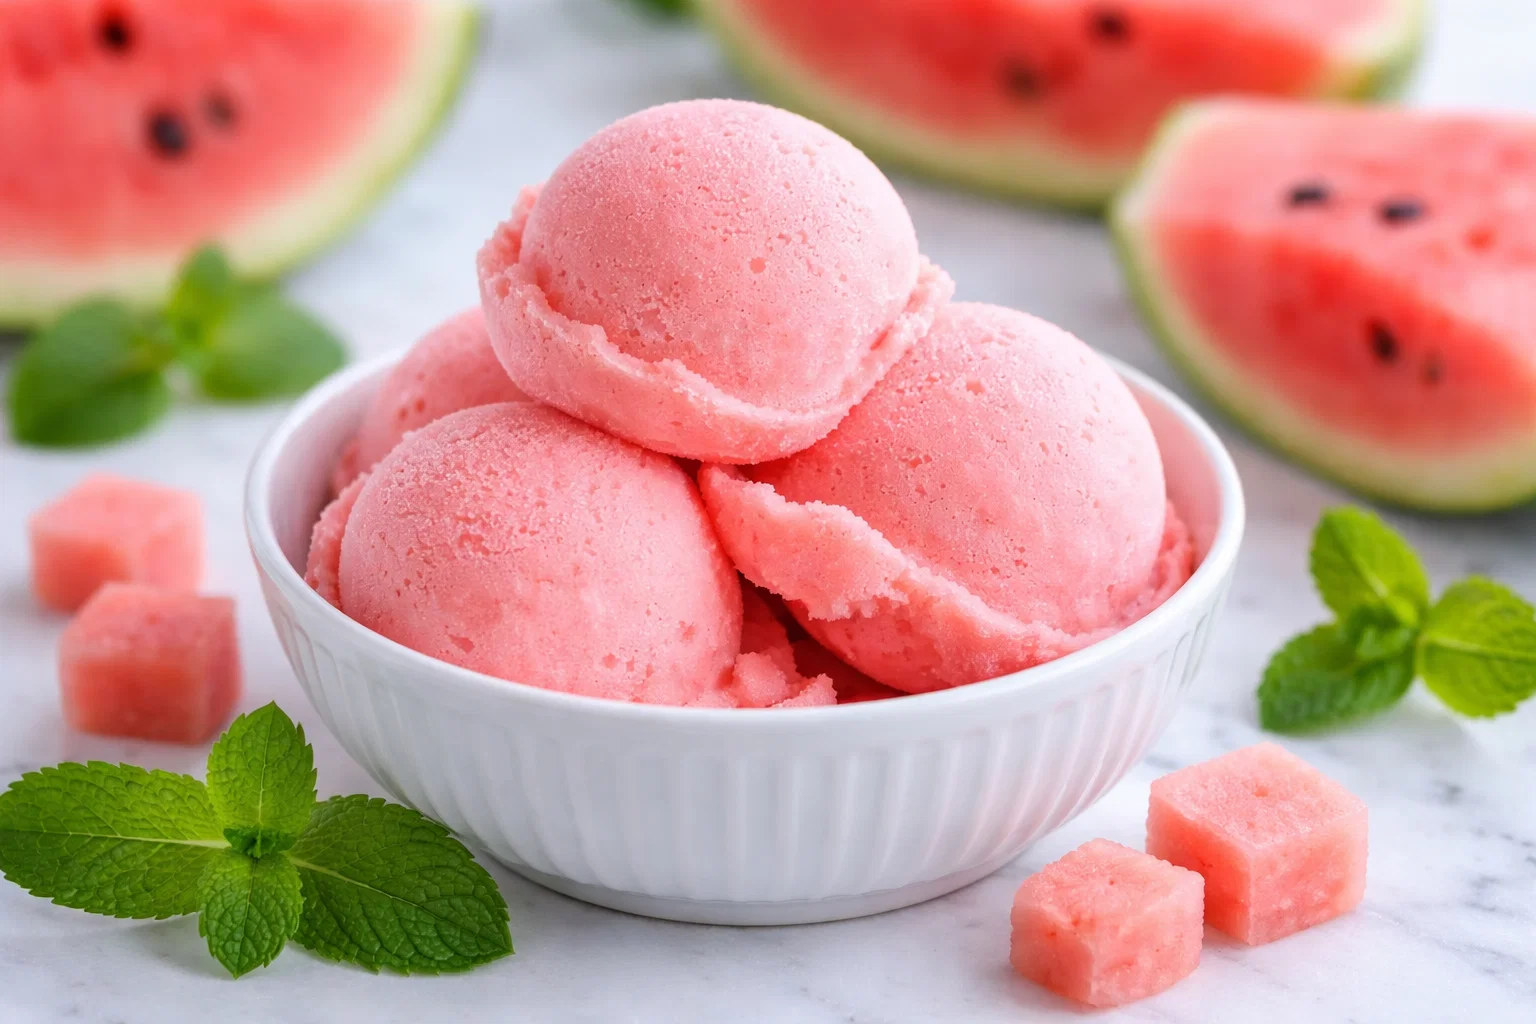
If you’re on the lookout for the perfect summer treat, the Easy Ninja Creami Watermelon Sorbet Recipe is your answer! This refreshing dessert is not only vibrant and delicious but also packs a punch of health benefits, making it a standout among dessert recipes. Imagine indulging in a bowl of sweet, icy watermelon sorbet on a hot day—it’s the ultimate way to cool down while satisfying your sweet tooth.
This recipe is incredibly simple and requires just a few ingredients, which means you can whip it up in no time, even on the busiest of days. It’s suitable for a myriad of dietary preferences as it’s entirely vegan and gluten-free. Furthermore, watermelon, the star ingredient, is low in calories yet high in hydration, amino acids, and vitamins A and C, making it a nourishing choice for everyone from busy parents to health-conscious individuals.
Whether you’re a novice in the kitchen or a culinary enthusiast, this watermelon sorbet will prove to be an accessible and rewarding dish to create. Ideal for casual gatherings, barbecues, or simply to enjoy as an everyday treat, this recipe is bound to impress friends and family alike. Read on to discover the ease and joy of making this delightful sorbet!
Benefits and Advantages of Easy Ninja Creami Watermelon Sorbet Recipe
One of the primary reasons to love the Easy Ninja Creami Watermelon Sorbet Recipe is its ease of preparation. With minimal effort and time, you can achieve a refreshing and healthy dessert that delights the taste buds. It does not require any elaborate cooking techniques or prolonged cooling times, making it an excellent choice for both seasoned cooks and novices.
Another key advantage of this recipe is its health benefits. Watermelon is often considered a superfood; it is rich in antioxidants, vitamins, and electrolytes. Including watermelon in your regular diet can enhance hydration, improve skin health, and contribute to weight management, thanks to its low-calorie content. What’s not to love in a dessert that not only satisfies cravings but also nourishes your body?
Moreover, this watermelon sorbet caters to diverse dietary needs, as it’s both vegan and gluten-free. By avoiding dairy and gluten, it becomes an inclusive dessert option for those with specific dietary restrictions or preferences. Busy parents can feel relieved offering their children a wholesome treat without worrying about unhealthy additives.
In addition, the versatility of this sorbet unlocks room for creativity. You can add extra fruits or even mint to elevate the flavors, customizing it to your liking. Overall, these attributes make the Easy Ninja Creami Watermelon Sorbet not just a treat, but a healthy dessert solution that stands out among traditional dessert recipes.
Ingredients Overview
Essential Ingredients for Easy Ninja Creami Watermelon Sorbet Recipe
To create the Easy Ninja Creami Watermelon Sorbet, you will need the following key ingredients:
-
Watermelon: 4 cups, cubed and frozen. This is the star ingredient that provides sweetness and a refreshing flavor. Choose ripe and juicy watermelon for the best results.
-
Agave Syrup or Honey: 1/4 cup. This natural sweetener complements the watermelon while adding a hint of caramel notes. For a vegan option, stick with agave. For a low-calorie option, reduce the amount to taste.
-
Lemon Juice: 1 tablespoon. Freshly squeezed lemon juice enhances the flavor profile and balances the sweetness of the watermelon.
-
Salt: A pinch. This elevates the flavor and brings out the natural sweetness.
Feel free to adjust ingredient measurements based on your preferences. The beauty of this recipe lies in its flexibility.
Dietary Substitutions to Customize Your Easy Ninja Creami Watermelon Sorbet Recipe
-
Sweetener Alternatives: If you’re looking to avoid added sugars, you can opt for stevia or monk fruit as a low-calorie alternative to agave or honey. Just remember to adjust the quantity since these sweeteners are typically much sweeter.
-
Citrus Variations: Instead of lemon juice, you can use lime juice or even orange juice for a different citrus twist.
-
Add-In Options: Enhance your watermelon sorbet by adding other fruits such as strawberries, mangoes, or even some mint leaves for a refreshing twist. You can blend them with the watermelon before freezing to create a fruit medley.
These substitutions allow you to adapt the recipe further to suit dietary restrictions and ingredient availability, making it a truly versatile addition to your collection of dessert recipes.
How to Prepare the Perfect Easy Ninja Creami Watermelon Sorbet Recipe: Step-by-Step Guide
Creating the Easy Ninja Creami Watermelon Sorbet is as simple as 1, 2, 3. Follow this step-by-step guide to achieve the perfect sorbet:
-
Prepare the Watermelon: Start by cutting the watermelon into cubes. Spread the cubes on a baking sheet and freeze them for at least 4 hours or until solid. This step is crucial for achieving a smooth sorbet consistency.
-
Blend the Ingredients: Once the watermelon is fully frozen, add it to a high-speed blender or food processor. Then, pour in the agave syrup (or honey), lemon juice, and a pinch of salt. Blend on high speed until the mixture is smooth and creamy, stopping to scrape down the sides if necessary. This process should take about 1-2 minutes.
-
Transfer to Ninja Creami: Once blended, transfer the mixture into your Ninja Creami pint. Secure the lid and freeze for an additional 24 hours to allow it to firm up to a sorbet-like consistency.
-
Process in the Ninja Creami: After the freezing period, place the pint back in the Ninja Creami machine. Select the ‘Sorbet’ function and process until you achieve a light and fluffy texture. This typically takes a minute or so.
-
Serve and Enjoy: Spoon your soft sorbet into bowls or glasses. For an added touch, garnish with fresh mint leaves or enjoy it alongside fresh fruit for a pop of color. Relish in the sweetness and refreshing taste of your homemade watermelon sorbet!
-
Storage: If you have leftovers, store the sorbet in an airtight container in the freezer. Remember to let it sit at room temperature for a few minutes before scooping out the portions on your next serving!
This method ensures a delicious, healthy dessert option that suits various dietary needs. As you follow these easy steps, you’ll discover just how enjoyable the process of creating your own watermelon sorbet can be!
Mastering Easy Ninja Creami Watermelon Sorbet Recipe: Advanced Tips and Variations
To elevate your Easy Ninja Creami Watermelon Sorbet to the next level, here are some expert tips and variations to consider:
-
Infuse Flavor: Try infusing unique flavors by adding herbs or spices. Fresh basil or mint gives the sorbet a refreshing twist, while a touch of cayenne pepper can add a subtle heat.
-
Creamy Version: For a creamier consistency, you can substitute a portion of the watermelon with canned coconut milk or almond milk. This change can help create a richer mouthfeel while keeping the recipe vegan).
-
Layered Sorbet: Get creative by layering this watermelon sorbet with other fruit sorbets. Strawberry or kiwi sorbets pair beautifully and create a vibrant dessert presentation.
-
Frozen Fruit Alternatives: If watermelon isn’t in season, you can use frozen mango or pineapple as a base for a similarly delightful tropical sorbet.
Implementing these tips ensures that your dessert not only looks beautiful but also tastes fantastic. Whether you choose to stick with the classic version or mix it up with variations, you’ll have a treat that stands out and delights any palate!
How to Store Easy Ninja Creami Watermelon Sorbet Recipe: Best Practices
Storing your Easy Ninja Creami Watermelon Sorbet correctly ensures that it maintains its flavor and texture. Here are some best practices for refrigeration, freezing, and serving:
-
Airtight Container: Transfer the watermelon sorbet to an airtight container after you’ve finished processing it in the Ninja Creami. This helps prevent ice crystals from forming and keeps the sorbet smooth.
-
Freezing: Store the sorbet in the freezer for long-term storage. It can keep for up to two weeks without significant loss in quality. However, for the best taste, try to consume it within the first week.
-
Serving Suggestions: If the sorbet becomes too hard to scoop after prolonged freezing, let it sit out at room temperature for about 10-15 minutes before serving. This makes scooping much easier, ensuring that your dessert is ready to enjoy at a moment’s notice.
Following these storage tips allows you to savor your watermelon sorbet whenever you, your family, or guests crave a refreshing treat, making it a reliable addition to your go-to dessert recipes!
Nutritional Value of Easy Ninja Creami Watermelon Sorbet Recipe
Understanding the nutritional value of your Easy Ninja Creami Watermelon Sorbet Recipe is essential, especially for those mindful of their dietary choices. Here’s a breakdown of the approximate nutritional content per serving (1/2 cup):
- Calories: 70 (varies based on sweetener used)
- Total Fat: 0g
- Saturated Fat: 0g
- Sodium: 5mg
- Total Carbohydrates: 17g
- Dietary Fiber: 1g
- Sugars: 15g (naturally occurring)
- Protein: 1g
- Vitamin A: 6% DV
- Vitamin C: 15% DV
The nutritional benefits of this watermelon sorbet are impressive. Besides being low-calorie, it is primarily made up of hydrating watermelon, providing you with essential vitamins and antioxidants while staying light on sugar. Creating a dessert that allows you to indulge without guilt is precisely what the Easy Ninja Creami Watermelon Sorbet delivers, making it an ideal choice for health-conscious individuals.
FAQs: Frequently Asked Questions About Easy Ninja Creami Watermelon Sorbet Recipe
Can I make this watermelon sorbet without a Ninja Creami?
Absolutely! If you don’t have a Ninja Creami, you can still make watermelon sorbet using a traditional blender or food processor. After blending the mixture, transfer it to a container and freeze it. Stir every 30 minutes for the first few hours to prevent ice crystals from forming until it reaches a creamy consistency.
How can I adjust the sweetness of the sorbet?
Since taste preferences vary, you can easily adjust the sweetness by adding more or less sweetener. Taste the mixture before freezing and adjust the sweetener as needed, remembering that flavors may intensify upon freezing.
What’s the best way to serve the sorbet?
This sorbet is best served scooped into bowls or glasses. You can also garnish with fresh herbs, edible flowers, or chunks of fresh fruit for extra visual appeal. For a fun touch, consider making sorbet popsicles by pouring the mixture into molds instead of a container.
Is it possible to make this sorbet in bulk and store it?
Yes, you can double or triple the recipe! Just ensure to store it in multiple airtight containers to prevent excessive exposure to air and moisture that can affect texture and flavor.
Can I use other fruits in this recipe?
Certainly! Variations can include berries, mangoes, or other summer fruits. Just make sure to maintain a similar ratio for freezing purposes to achieve the desired sorbet consistency.
By answering these questions, readers gain a better understanding of how to customize the Easy Ninja Creami Watermelon Sorbet Recipe and enjoy a delicious, refreshing treat tailored to their preferences!
Embark on your culinary journey today and discover just how delightful homemade sorbet can be! Enjoy every scoop!