Tag: desserts

  • Irresistible Rhubarb Zucchini Crisp

    Irresistible Rhubarb Zucchini Crisp

    Irresistible Rhubarb Zucchini Crisp: A Tropical Delight

    Introduction to Irresistible Rhubarb Zucchini Crisp

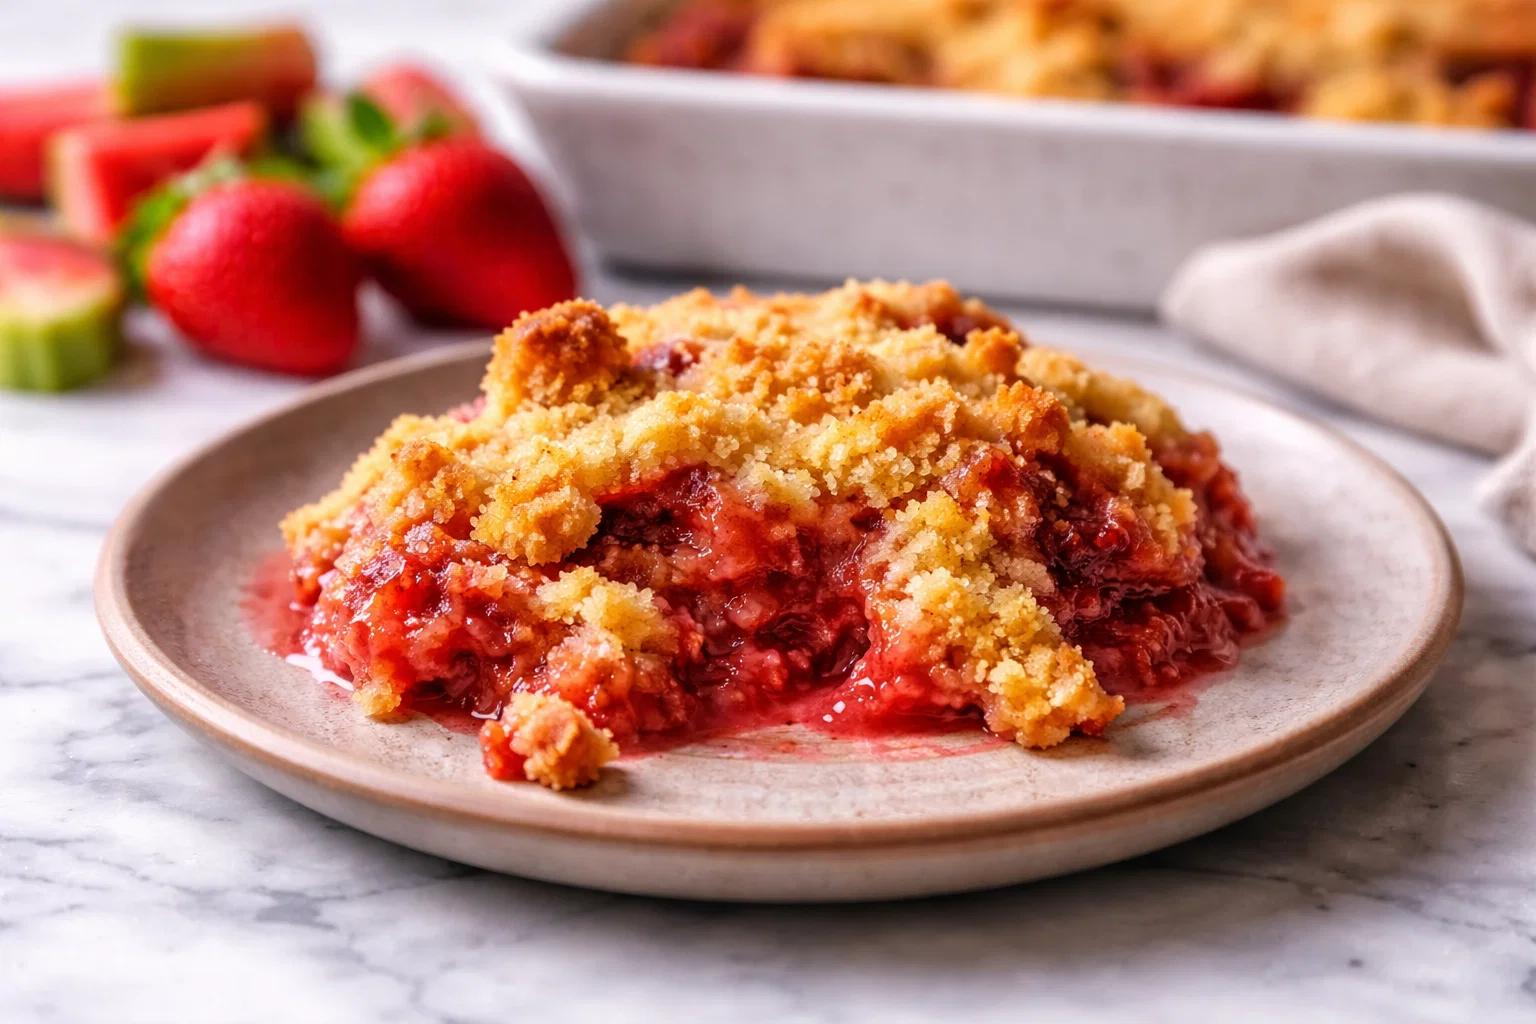
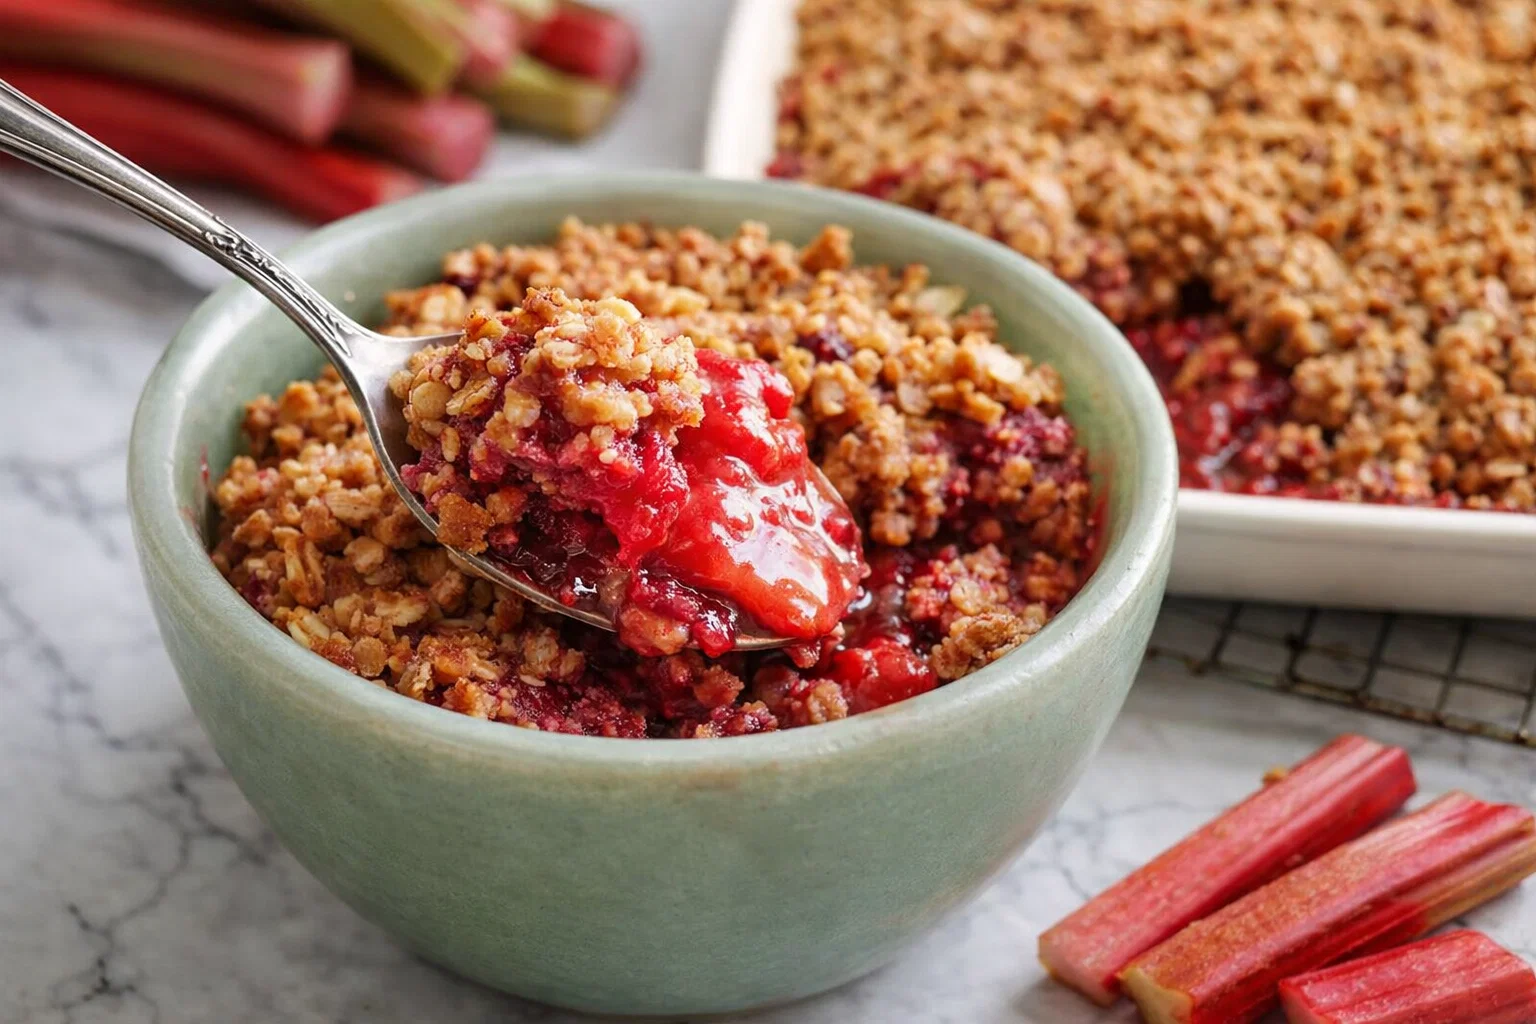
    When it comes to dessert recipes, the “Irresistible Rhubarb Zucchini Crisp” stands out as a vibrant, nourishing option that perfectly captures the essence of summer. This unique dish marries the tartness of fresh rhubarb with the subtle sweetness of grated zucchini, creating a delightful textural contrast that tickles the palate. Whether you’re a busy parent looking to whip up a quick treat or a student searching for an easy recipe to impress your friends, this crisp is a fantastic choice.

    Not only is it simple to make, but it’s also packed with health benefits. By utilizing whole ingredients, this recipe is inherently health-conscious, making it suitable for various dietary needs. It’s vegan, gluten-free, and can easily be adapted to become low-calorie by using alternatives like sugar substitutes. The zesty flavor of rhubarb is complemented by the moisture of zucchini, producing a crispy, crumbly topping that makes it irresistible! Moreover, the freshness of the ingredients ensures that every bite is bursting with flavor. This is not just a dish; it’s a celebration of the bounty of nature, designed to delight your taste buds while being easy on your waistline.

    Benefits and Advantages of Irresistible Rhubarb Zucchini Crisp

    The “Irresistible Rhubarb Zucchini Crisp” is particularly effective for several reasons. First, its ease of preparation makes it an ideal weeknight dessert or a delightful addition to any potluck. Without complicated techniques or hard-to-find ingredients, even novice cooks can create a masterpiece in their own kitchens.

    Health and Nutritional Benefits

    Moreover, this dish brings numerous health benefits to the table. Rhubarb is rich in dietary fiber, vitamins C and K, and minerals like calcium and magnesium. The addition of zucchini boosts the nutrient profile even further by providing antioxidants and additional fiber, which are essential for digestion and maintaining healthy blood sugar levels. Alternatively, if you’re concerned about sugar intake, you can easily replace granulated sugar with natural sweeteners like maple syrup or agave nectar.

    Additionally, this crisp is wonderfully versatile. You can enjoy it warm or cold, with a dollop of vegan ice cream or a splash of coconut cream. Perfect for those following a vegan or gluten-free lifestyle, it satisfies sweet cravings without compromising dietary restrictions. You can bring it to gatherings, serve it as a mid-week treat to your family, or simply indulge in it yourself.

    Ingredients Overview

    Essential Ingredients for Irresistible Rhubarb Zucchini Crisp

    Establishing a solid foundation for the “Irresistible Rhubarb Zucchini Crisp” is crucial for achieving ultimate deliciousness. Below is a list of all necessary ingredients along with their precise measurements and the benefits of key components:

    • 2 cups of chopped rhubarb: Provides the tartness that balances the sweetness.
    • 2 cups of grated zucchini: Adds moisture and important nutrients.
    • 1 cup of rolled oats: Gives the crisp topping a hearty texture.
    • 1/2 cup of all-purpose flour (or gluten-free flour): Helps bind the topping.
    • 1/2 cup of brown sugar (or coconut sugar): Sweetens the dish while giving it a caramel-like flavor.
    • 1/4 cup of melted coconut oil (or vegan butter): Imparts richness and moisture.
    • 1 tsp of vanilla extract: Enhances overall flavor.
    • 1/2 tsp of cinnamon (optional): Adds warmth and depth to the crisp topping.
    • 1/4 tsp of salt: Balances flavors.

    Dietary Substitutions to Customize Your Irresistible Rhubarb Zucchini Crisp

    Switching things up is easy with this recipe; here are some dietary substitutions to consider:

    • For a Vegan option: Use maple syrup or agave nectar instead of honey and ensure your butter is plant-based.
    • Gluten-Free: Swap all-purpose flour for gluten-free alternatives like coconut or almond flour.
    • Low-Calorie: Replace sugar with natural low-calorie sweeteners like stevia or erythritol.

    Immediate adaptability means your “Irresistible Rhubarb Zucchini Crisp” can cater to health-conscious consumers and those with dietary restrictions, ensuring that everyone can enjoy this delicious dessert.

    How to Prepare the Perfect Irresistible Rhubarb Zucchini Crisp: Step-by-Step Guide

    Taking on dessert recipes can be a rewarding experience, especially when you have a clear, actionable plan. Follow these easy steps to prepare your Irresistible Rhubarb Zucchini Crisp.

    1. Preheat the Oven: Start by preheating your oven to 350°F (175°C). This ensures uniform cooking.
    2. Prepare the Fruit: Wash and chop the rhubarb into small pieces. Grate the zucchini, squeezing out excess moisture using a clean dish towel or cheesecloth.
    3. Mix the Fruit Filling: In a large mixing bowl, combine the chopped rhubarb and grated zucchini. Add 1/4 cup of sugar and 1 tsp of vanilla extract, mixing well until everything is evenly coated.
    4. Prepare the Topping: In another bowl, mix the rolled oats, flour, brown sugar, cinnamon, and salt. Stir in the melted coconut oil until the mixture resembles coarse crumbs.
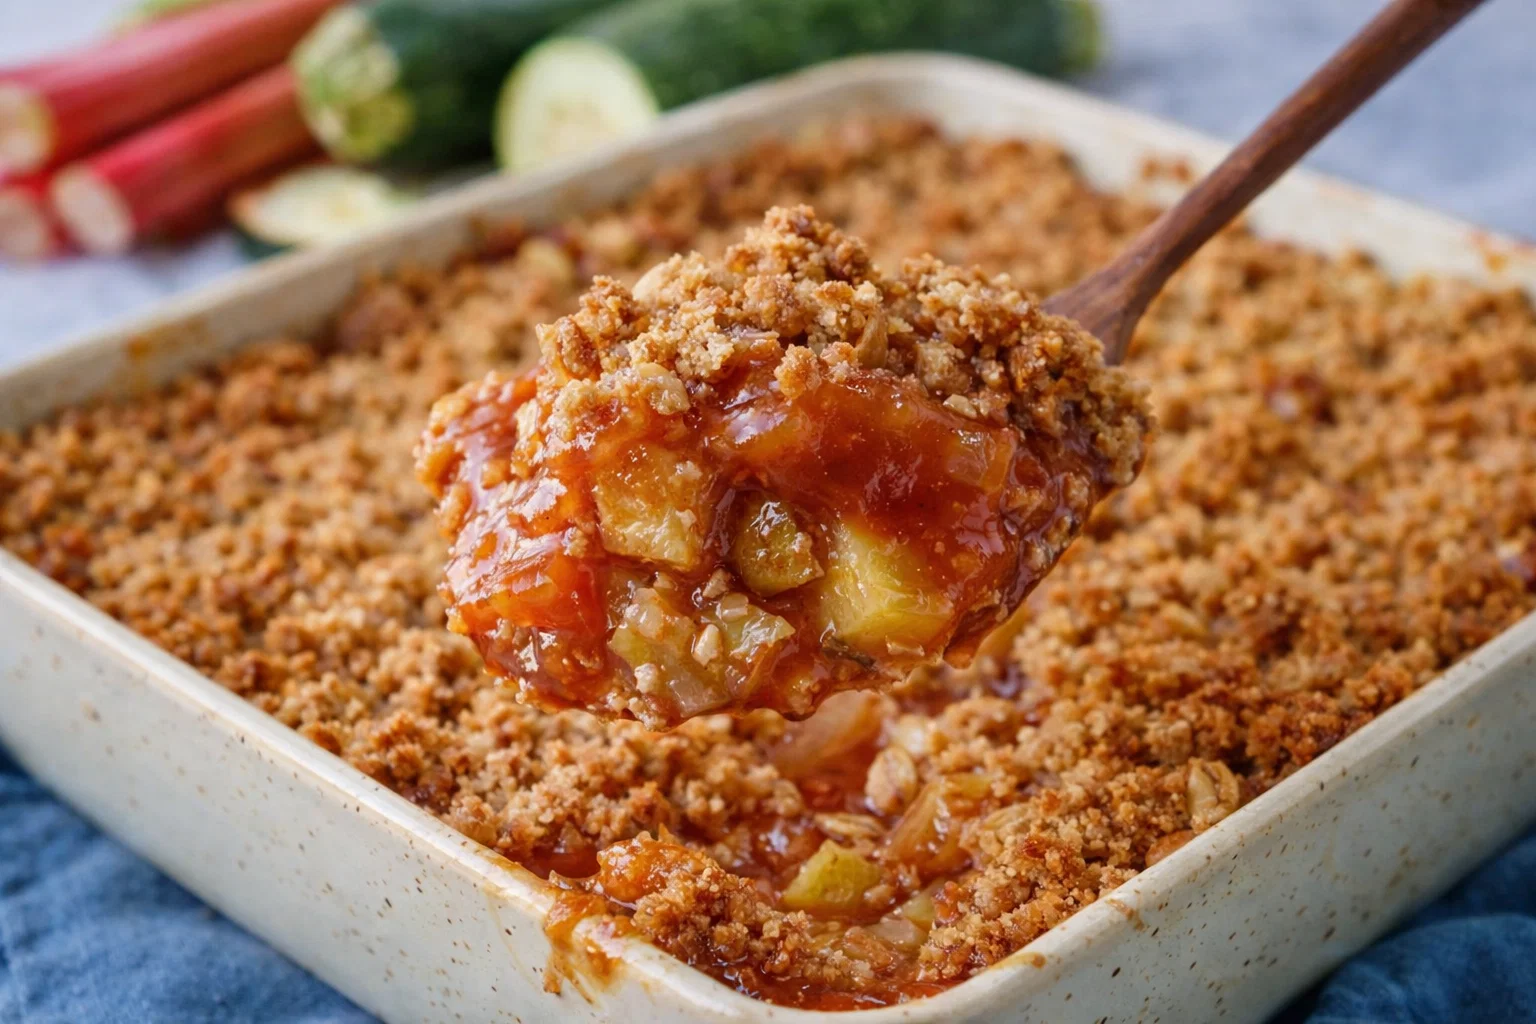
    5. Assemble the Dish: Spread the rhubarb and zucchini mixture evenly at the bottom of a greased baking dish. Top it generously with the oat mixture, ensuring an even layer.
    6. Bake: Place the baking dish in the preheated oven and bake for about 35–45 minutes, or until the top is golden brown and the juices are bubbling.
    7. Cool Before Serving: Once baked, remove from the oven and let it cool for about 10–15 minutes before serving. This cooling time helps the flavors meld beautifully.
    8. Optional Serving Suggestions: Serve warm topped with a scoop of vegan ice cream or enjoy it plain for a comforting dessert.

    By following these straightforward steps, you can easily create a delightful and wholesome treat while ensuring that it’s suitable for an array of dietary preferences.

    Mastering Irresistible Rhubarb Zucchini Crisp: Advanced Tips and Variations

    To truly elevate your Irresistible Rhubarb Zucchini Crisp, consider these advanced tips and variations that might inspire you:

    • Experiment with Spices: Feel free to add nutmeg, ginger, or cardamom to your topping mixture for an unexpected depth of flavor.
    • Add Nuts or Seeds: Chopped pecans, walnuts, or sunflower seeds can add a delightful crunch and a healthy dose of fats.
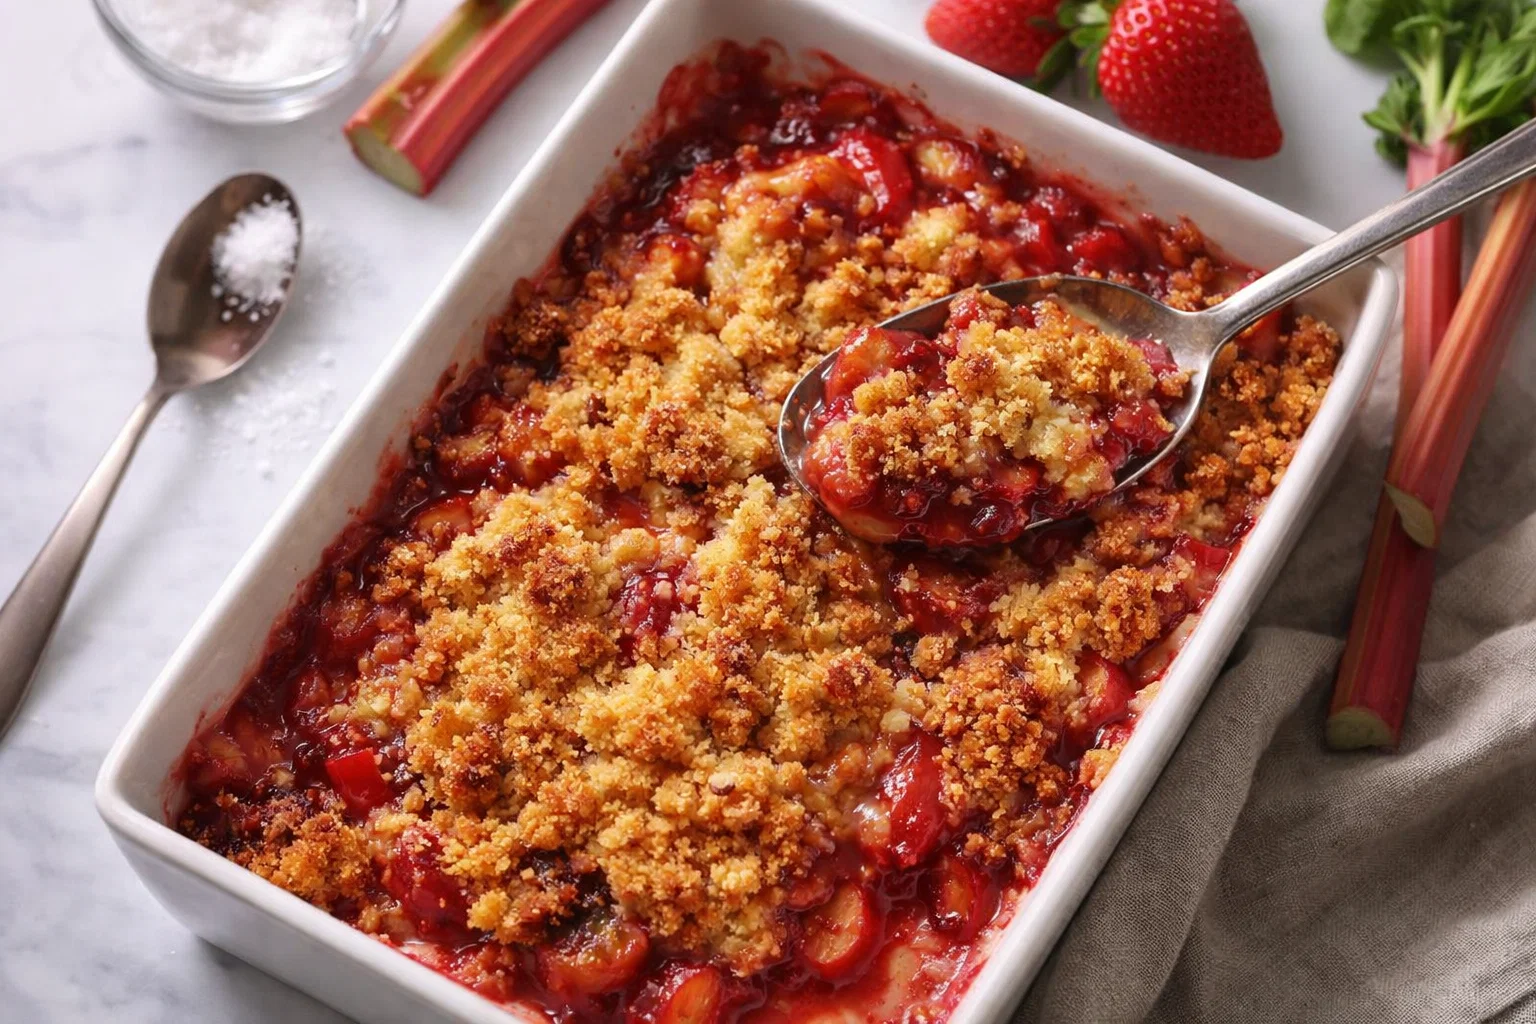
    • Try Different Fruits: Mix in other fruits like strawberries or apples for more flavor complexity. Each fruit will add a unique twist.
    • Make it a Breakfast Dish: Serve the crisp with a dollop of yogurt or as part of a hearty breakfast parfait, turning it into a healthy morning staple.

    Incorporating these suggestions into your preparation can allow the flexibility of this dish to shine through, making it adaptable and enjoyable for any occasion.

    How to Store Irresistible Rhubarb Zucchini Crisp: Best Practices

    After making your delightful crisp, proper storage ensures you can enjoy it for days. Here are the best practices for keeping your dessert recipes fresh:

    • Refrigeration: Allow the crisp to cool completely before transferring it to an airtight container. It will keep in the refrigerator for up to 4 days.
    • Freezing: If you wish to keep it longer, you can freeze the crisp. Wrap tightly in plastic wrap and place it in a freezer-safe container; it can last for up to 3 months.
    • Reheating: To enjoy leftovers, reheat in an oven preheated to 350°F (175°C) for about 15 minutes or until warm. Alternatively, you can microwave it for about a minute, but the oven retains the crispness better.

    These methods ensure that your Irresistible Rhubarb Zucchini Crisp preserves its flavor and texture, allowing you to enjoy it whenever you please.

    Nutritional Value of Irresistible Rhubarb Zucchini Crisp

    Understanding the nutritional value of your dessert recipes is important, especially if you’re health-conscious. Here’s a breakdown of a serving of Irresistible Rhubarb Zucchini Crisp:

    • Calories: Approximately 220
    • Total Fat: 8g (Saturated Fat: 5g)
    • Cholesterol: 0mg
    • Sodium: 150mg
    • Carbohydrates: 35g (Dietary Fiber: 4g, Sugars: 10g)
    • Protein: 3g

    This dessert contains a good balance of macronutrients and is a source of fiber, thanks to the oats and vegetables. Key vitamins and minerals from the rhubarb and zucchini enhance the overall nutritional profile, making your treat not just delicious but beneficial for your body.

    FAQs: Frequently Asked Questions About Irresistible Rhubarb Zucchini Crisp

    Q1: Can I substitute rhubarb with something else?
    A: Absolutely! You can substitute rhubarb with apples, strawberries, or even mixed berries. Just remember to adjust the sweetness to accommodate sweeter fruits.

    Q2: How can I make this recipe nut-free?
    A: Simply omit any nuts that may be added for crunch. The crisp still delivers great texture without compromising flavor.

    Q3: Is the Irresistible Rhubarb Zucchini Crisp suitable for meal prep?
    A: Yes, this crisp can easily be prepared in advance and stored in the refrigerator for several days or frozen for longer storage.

    Q4: What can I serve with this crisp?
    A: Pairing it with whipped coconut cream or a scoop of dairy-free ice cream can elevate this dish further. It works well as a breakfast or dessert!

    Q5: How can I make it more visually appealing?
    A: Adding fresh mint leaves as a garnish before serving or sprinkling crushed nuts on top can make your dish look enticing and elegant.

    By addressing these common queries, you provide further insight into the versatility and convenience of the Irresistible Rhubarb Zucchini Crisp, making it accessible for various readers interested in dessert recipes.

    In conclusion, the Irresistible Rhubarb Zucchini Crisp is a perfect illustration of how simple, healthy ingredients can come together to create something truly special. Whether you’re serving it at a gathering, enjoying it as a personal treat, or making it for your family, this recipe is bound to impress. Don’t hesitate to dive into the world of baking and enjoy the delightful flavors that this dish has to offer!

  • This Easy Rhubarb Dessert Will Change Your Life

    This Easy Rhubarb Dessert Will Change Your Life

    This Easy Rhubarb Dessert Will Change Your Life!: A Tropical Delight

    Introduction to This Easy Rhubarb Dessert Will Change Your Life!

    Are you tired of the same old dessert recipes that take hours to prepare and leave you feeling sluggish? Look no further! This easy rhubarb dessert is here to change your culinary game. Bursting with flavor and incredibly simple to make, this delightful treat is not only a feast for your taste buds but also a boon for your health. Whether you’re a busy parent juggling work and family, a student looking for quick recipes, or a health-conscious individual, this dessert is perfect for you!

    Rhubarb, often celebrated for its unique tanginess, adds a splash of color and flavor to this dessert. It’s also low in calories, high in fiber, and packed with vitamins K and C. What’s more, this recipe can easily be made vegan or gluten-free, making it suitable for a wide array of dietary preferences. With minimal ingredients and a quick prep time, you’re just a few simple steps away from a mouthwatering experience that your friends and family will adore. This rhubarb delight promises to be a refreshing addition to your cooking repertoire, inviting you to explore the wonders of seasonal ingredients in easy-to-make dessert recipes.

    Benefits and Advantages of This Easy Rhubarb Dessert Will Change Your Life!

    When it comes to dessert recipes, simplicity is key. This easy rhubarb dessert stands out not only for its delectable flavor but also for its numerous advantages. To begin with, preparing this dessert requires minimal effort, allowing you to whip it up even on the busiest days. Busy parents, students, and working professionals will appreciate that it takes very little time to prepare and bake, freeing up your schedule for more enjoyable activities.

    Health benefits abound with rhubarb as your star ingredient. It’s low in calories yet high in fiber, making it an ideal choice for those watching their weight. Additionally, rhubarb contains essential vitamins and minerals, giving you a guilt-free indulgence. Not to mention, it comes with antioxidants that can help combat free radical damage in your body.

    Our easy rhubarb dessert also shines in its adaptability. Whether you’re catering to vegan friends or gluten-sensitive family members, this recipe can be tweaked to suit various dietary needs. The flavors can easily be customized with your choice of sweeteners or add-ins, ensuring you get that perfect taste. Plus, it’s a fantastic way to introduce kids to cooking while fostering their interest in healthy, homemade food.

    In summary, this easy rhubarb dessert offers a myriad of benefits—it’s simple, healthy, and adaptable. It is bound to impress while making your life easier, establishing itself as a go-to recipe in your domestic kitchen. So why not embrace simplicity, health, and flavor all at once with this stunning dessert option?

    Ingredients Overview

    Essential Ingredients for This Easy Rhubarb Dessert Will Change Your Life!

    Here’s a detailed list of the ingredients you’ll need to create this delicious rhubarb dessert, along with their purposes and benefits:

    • Rhubarb (3 cups): Fresh, trimmed, and chopped; provides the essential tart flavor and is low in calories while rich in nutritional benefits.

    • Granulated Sugar (1 cup): Acts as the sweetener. You can substitute with coconut sugar, honey, or a sugar alternative like stevia for a lower-calorie option.

    • All-Purpose Flour (1 cup): Serves as the base for the dessert. For gluten-free options, you can use almond flour or a gluten-free flour blend.

    • Unsalted Butter (½ cup): Adds richness to the dessert; can be replaced with coconut oil or vegan butter for a dairy-free version.

    • Eggs (2 large): Helps bind the ingredients together. If you’d like a vegan option, use flaxseed eggs (1 tablespoon of ground flaxseed mixed with 2.5 tablespoons of water for each egg).

    • Vanilla Extract (1 teaspoon): Enhances the flavor of the dessert.

    • Baking Powder (1 teaspoon): Provides the necessary leavening to create a fluffy texture.

    • Salt (½ teaspoon): Balances the sweetness; it’s an essential ingredient for flavor enhancement.

    Dietary Substitutions to Customize Your This Easy Rhubarb Dessert Will Change Your Life!

    This easy rhubarb dessert is highly customizable, perfect for accommodating various dietary preferences. Here are some suggested substitutions:

    • Vegan Option: Replace unsalted butter with equal parts coconut oil or a vegan butter alternative. Substitute eggs with flaxseed eggs as mentioned previously.

    • Gluten-Free Option: Simply swap all-purpose flour with almond flour, coconut flour, or a gluten-free flour blend. These alternatives still maintain a great texture while keeping the dish gluten-free.

    • Lower Sugar Version: You can cut down the sugar by half and rely on the natural tartness of rhubarb. Consider using a zero-calorie sweetener like erythritol, or even maple syrup for a more wholesome choice.

    Feel free to mix and match these substitutions based on your dietary needs, and remember that these adjustments can keep the essence of this dessert intact while making it suitable for everyone at the table.

    How to Prepare the Perfect This Easy Rhubarb Dessert Will Change Your Life!: Step-by-Step Guide

    Follow these simple steps to whip up a delicious rhubarb dessert that everyone will love. This guide ensures that the process is easy and delightful:

    1. Preheat the Oven: Set your oven to 350°F (180°C) to allow it to reach the perfect baking temperature while you prepare the other ingredients.

    2. Prepare the Baking Dish: Grease an 8×8 inch baking dish with a bit of butter or oil to prevent sticking. If you prefer, line it with parchment paper for easy removal.

    3. Mix the Rhubarb: In a large bowl, combine the chopped rhubarb with half of the sugar (½ cup). Let this sit for about 10-15 minutes so that the rhubarb releases some of its juices.

    4. Make the Batter: In another bowl, whisk together the remaining sugar, flour, baking powder, and salt. Create a well in the center and add the eggs, melted butter (or oil), and vanilla extract. Mix thoroughly until smooth.

    5. Combine the Mixtures: Gently fold the rhubarb mixture into the batter until just blended. Be careful not to overmix so you can retain a nice texture.

    6. Pour into Baking Dish: Pour the rhubarb batter into the greased baking dish, spreading it evenly.

    7. Bake: Place in the oven and bake for 35-45 minutes or until the top is golden and a toothpick inserted into the center comes out clean.

    8. Cool & Serve: Once baked, remove from the oven and let cool for about 15 minutes. Cut into squares and serve warm, with optional whipped cream or a scoop of vanilla ice cream for an extra treat!

    By following these straightforward steps, you’ll create a rhubarb dessert that is not only easy but also packed with flavor. Adapt the serving style to cater to your guests’ preferences, and don’t hesitate to experiment with different toppings or presentations.

    Mastering This Easy Rhubarb Dessert Will Change Your Life!: Advanced Tips and Variations

    Once you’ve mastered the basic recipe, why not get creative with some advanced tips and variations? Here are some ways to elevate your rhubarb dessert:

    • Fruit Add-ins: Consider adding strawberries or blueberries to the mix for additional sweetness and color. This combination complements the tartness of rhubarb wonderfully.

    • Spice It Up: Enhance the flavor with cinnamon, nutmeg, or ginger. A teaspoon of cinnamon can give your dessert an aromatic lift.

    • Nutty Crunch: Consider folding in some chopped nuts, like walnuts or almonds, to add a delightful crunch. This not only ups the texture but also adds an extra layer of nutrients.

    • Serve with Sauces: Drizzle with a homemade raspberry sauce or honey glaze before serving to amplify the taste and visual appeal.

    These variations ensure your rhubarb dessert stays exciting and adaptable. Feel free to experiment and find the combinations that speak to your personal taste!

    How to Store This Easy Rhubarb Dessert Will Change Your Life!: Best Practices

    Storing this easy rhubarb dessert is simple and will ensure you can enjoy leftovers (if there are any) in the best possible way. Here’s how:

    • Refrigeration: Store any leftover dessert in an airtight container in the fridge for up to 4-5 days. To maintain its texture, consider wrapping individual pieces with plastic wrap or parchment paper.

    • Freezing: If you want to keep it longer, freeze portions of the dessert. Wrap them tightly in plastic wrap, followed by aluminum foil, and place them in a freezer-safe container. Properly stored, they can last for up to 3 months. When you’re ready to enjoy, simply thaw overnight in the fridge and warm in the oven at a low temperature to retain texture.

    • Reheating: For reheating, place your piece(s) in the microwave for about 30 seconds or warm them up in the oven at 350°F (180°C) for about 10-15 minutes. This ensures that the moisture is retained and your dessert tastes as if it were just made.

    With these storage tips, you can ensure that your rhubarb dessert remains delicious whenever you choose to indulge in it.

    Nutritional Value of This Easy Rhubarb Dessert Will Change Your Life!

    Curious about how this easy rhubarb dessert stacks up nutritionally? Here’s a breakdown of the nutritional values per serving (based on 9 servings):

    • Calories: Approximately 180
    • Fat: 7g
    • Carbohydrates: 28g
    • Fiber: 2g
    • Sugar: 10g
    • Protein: 2g

    This dessert provides a balanced combination of macronutrients while allowing you to enjoy a sweet treat without overindulging. The content may vary based on your specific ingredient choices, especially if you opt for sugar substitutes or different flours, so feel free to calculate based on your unique modifications.

    FAQs: Frequently Asked Questions About This Easy Rhubarb Dessert Will Change Your Life!

    Q1: Can I use frozen rhubarb for this recipe?

    Absolutely! Frozen rhubarb works just as well as fresh. There’s no need to thaw it beforehand, but you may need to slightly adjust the baking time.

    Q2: How can I make this dessert sugar-free?

    You can substitute the granulated sugar with a sugar alternative like stevia or erythritol. Just ensure to follow the conversion ratio on the packaging.

    Q3: What can I serve with the rhubarb dessert?

    This rhubarb dessert pairs beautifully with whipped cream, vanilla ice cream, or a drizzle of yogurt for a tangy contrast.

    Q4: Can I add other fruits to the mix?

    Yes! Adding fruit like strawberries, blueberries, or apples can enhance the flavor profile. Just ensure the total quantity remains similar to keep the consistency right.

    Q5: How can I modify this recipe for a smaller serving?

    To make a smaller portion, simply cut the ingredient amounts in half and use a smaller baking dish, such as a 6×6 inch square.

    By addressing your common questions, we hope to empower you to embark on your rhubarb dessert journey with confidence. Enjoy the process, and savor every delicious bite!


    This easy rhubarb dessert has the potential to change your dessert game and add a delightful touch to your meals. With its simplicity, health benefits, and adaptability, it’s bound to please everyone, from working professionals to baking enthusiasts. Dive into this recipe today and discover why this dessert is a must-try!

  • Easy Easter Oreo Cookie Casserole Dessert

    Easy Easter Oreo Cookie Casserole Dessert

    Easy Easter Oreo Cookie Casserole Dessert: A Tropical Delight

    Introduction to Easy Easter Oreo Cookie Casserole Dessert

    If you’re looking for a delightful recipe that’s perfect for the Easter celebration, look no further than the Easy Easter Oreo Cookie Casserole Dessert. This show-stopping dish combines the beloved flavors of Oreo cookies with a rich blend of creaminess, making it an irresistible addition to any dessert table. Ideal for both novice cooks and experienced bakers, it demands only a few simple ingredients and minimal time in the kitchen, making it one of the most hassle-free dessert recipes available.

    The beauty of this casserole lies in its versatility. It’s naturally simple and indulgent, yet you can also adapt it for various dietary needs, thanks to its ability to accommodate vegan, gluten-free, and low-calorie options. This makes it perfect for busy parents looking for an easy dessert to make for their children, working professionals seeking time-saving solutions, and even diet-conscious individuals wanting an occasional treat. With its delightful combination of flavors and textures, the Easy Easter Oreo Cookie Casserole is sure to impress both family and friends alike.

    So, prepare to indulge in a creamy, mouth-watering dessert that is not just easy to make but also a healthy option for everyone. This delectable casserole is perfect for Easter gatherings and will leave you craving more. Let’s dive into why this dish should be on your baking list this spring!

    Benefits and Advantages of Easy Easter Oreo Cookie Casserole Dessert

    The Easy Easter Oreo Cookie Casserole Dessert is a crowd-pleaser for multiple reasons. One of its standout attributes is its ease of preparation. With minimal cooking skills required, this dish allows anyone, regardless of their culinary experience, to create a stunning dessert. The casserole can be prepared in roughly 30 minutes, ensuring you won’t be spending hours in the kitchen while missing out on family time or the Easter festivities.

    In terms of health benefits, this casserole can be easily customized to cater to various dietary needs. For instance, by substituting traditional dairy with non-dairy options, you can create a delicious dessert suitable for vegans. Furthermore, you can use gluten-free Oreo cookies or a gluten-free cake mix to cater to those with gluten sensitivities. By being flexible with ingredients, you not only accommodate guests’ dietary restrictions but also enhance the overall appeal of the casserole.

    This dessert recipe is also a great fit for families with children. The sweet and creamy layers are sure to captivate kids, making your dessert selection a hit during Easter celebrations. On top of that, the satisfaction of making this dish can spark creativity in young cooks, encouraging them to be involved in the baking process.

    To summarize, the Easy Easter Oreo Cookie Casserole offers a wonderful combination of simplicity, health benefits, and versatility, making it an excellent choice for any occasion. You can elevate your dessert game with minimal effort while maintaining a healthy balance, making this dish a must-have for your Easter festivities.

    Ingredients Overview

    Essential Ingredients for Easy Easter Oreo Cookie Casserole Dessert

    To create your easy Easter Oreo Cookie Casserole Dessert, you’ll need the following ingredients:

    • Oreo Cookies (1 package) – The star of the show; choose regular or gluten-free depending on your dietary needs.
    • Cream Cheese (8 oz) – Use softened cream cheese for a smooth filling; vegan cream cheese works well for a dairy-free option.
    • Whipped Topping (1 container, 8 oz) – Preferably non-dairy whipped topping if you’re making a vegan version.
    • Vanilla Extract (1 tsp) – Adds depth to the flavor.
    • Powdered Sugar (1 cup) – Sweetens the filling; you can use a sugar substitute if desired.
    • Milk (1 cup) – Regular, almond, or any other plant-based milk can be used.
    • Chocolate Syrup (for drizzling) – Optional, but adds a rich, chocolatey finish to the casserole.

    By selecting these ingredients, you not only whip up an incredibly tasty dish but also have the opportunity to make it align with various dietary preferences.

    Dietary Substitutions to Customize Your Easy Easter Oreo Cookie Casserole Dessert

    Making this casserole even more versatile is the ease with which you can swap out ingredients to suit different dietary requirements. Here are some potential substitutions:

    • For Vegan Options: Replace cream cheese with a vegan alternative such as cashew cream or a store-bought vegan cream cheese. Use a plant-based whipped topping instead of dairy.

    • For Gluten-Free Options: Swap the conventional Oreo cookies for gluten-free varieties. Ensure that any cake mix or additional ingredients you select are certified gluten-free.

    • For Reduced Sugar: Consider using a sugar substitute, such as erythritol or stevia, to lessen caloric intake without sacrificing flavor. Alternatively, reducing the amount of powdered sugar can still yield a delicious dessert.

    • For Nut-Free Options: When altering the milk, choose oat milk or rice milk. Always check labels to ensure that other ingredients do not include traces of nuts.

    These substitutions empower you to create a dish suited to a broad audience, making your Easy Easter Oreo Cookie Casserole Dessert a perfect fit for any gathering, no matter the dietary needs of your guests.

    How to Prepare the Perfect Easy Easter Oreo Cookie Casserole Dessert: Step-by-Step Guide

    Creating your Easy Easter Oreo Cookie Casserole Dessert is an enjoyable process that can be broken down into clear, actionable steps. Follow this straightforward guide to prepare your mouth-watering dessert in no time.

    1. Prepare the Base: Start by crushing about 2 cups of Oreo cookies into fine crumbs. You can place the cookies in a zip-lock bag and crush them with a rolling pin or use a food processor for quicker results. This forms the delicious base of your casserole.

    2. Mix Cookie Crust: In a mixing bowl, combine the crushed cookie crumbs with ½ cup of melted butter. Mix until fully incorporated. This mixture will form the bottom layer of your casserole.

    3. Press Mixture into Dish: Using a spatula or your fingers, press the crust evenly into the bottom of a greased 9×13 baking dish. Ensure that it’s even, as this will provide a great foundation for your layers.

    4. Prepare the Filling: In a separate bowl, combine the softened cream cheese, powdered sugar, and vanilla extract. Beat with an electric mixer until the mixture is smooth and creamy. This is the first layer of creamy goodness.

    5. Fold in Whipped Topping: Gently fold in the whipped topping into the cream cheese mixture until no streaks remain. This will create a luscious, light filling that perfectly complements the cookie crust.

    6. Layer the Casserole: Spread half of the filling over the cookie crust using an offset spatula. Make sure it’s evenly distributed.

    7. Add More Oreo Cookie Crumbles: Sprinkle another layer of crushed Oreo cookies over the cream cheese filling. This adds texture and extra chocolaty goodness.

    8. Repeat the Filling Layer: Spread the remaining cream cheese mixture on top of the crushed Oreos, smoothing it out to cover the entire surface.

    9. Final Crust Layer: Top the entire mixture with the remaining Oreo crumbles, ensuring a beautiful, crunchy topping.

    10. Chill the Casserole: Place the dish in the refrigerator for at least 4 hours, preferably overnight, to allow the flavors to meld and the filling to firm up.

    11. Drizzle with Chocolate Syrup: Before serving, drizzle chocolate syrup over the top for an additional touch of sweetness and decoration.

    12. Serve and Enjoy: Cut the casserole into squares and serve chilled. Enjoy the joyous flavors as you celebrate Easter with friends and family!

    Remember, you can modify certain steps to cater to specific dietary preferences. Adjust ingredients, and feel free to add layers of fruit or alternative toppings such as nuts or coconut, depending on your dietary needs and taste.

    Mastering Easy Easter Oreo Cookie Casserole Dessert: Advanced Tips and Variations

    To bring your Easy Easter Oreo Cookie Casserole Dessert to the next level, consider these advanced tips and creative variations:

    • Incorporate Flavor Variations: Experiment with different flavored Oreo cookies, such as peppermint or seasonal varieties, to give your dessert a unique twist based on the occasion.

    • Layer with Fresh Fruits: Layer in sliced strawberries, raspberries, or bananas between the cookie and cream cheese layers. This adds a refreshing tang and beautiful color that makes the dish even more visually appealing.

    • Use Different Toppings: Besides chocolate syrup, consider sprinkling crushed nuts or shredded coconut as a topping. A sprinkle of colorful Easter-themed sprinkles can enhance visual charm and create excitement for kids.

    • Make a Cookie Dough Layer: For those seeking an indulgent treat, create a cookie dough layer by mixing flour, butter, sugars, and milk to mimic cookie dough texture. Add this layer beneath your filling for an extra-rich dessert.

    • Add Coffee Flavor: For an adult twist, you can mix instant espresso powder into the cream cheese layer for a mocha-inspired flavor, perfect for sophisticated gatherings.

    Remember, the key to mastering this dessert recipe lies in your creativity and preference. Adjustments and variations can be made to cater to different palates, ensuring everyone enjoys this delightful casserole.

    How to Store Easy Easter Oreo Cookie Casserole Dessert: Best Practices

    To preserve the freshness of your Easy Easter Oreo Cookie Casserole Dessert, follow these storage best practices:

    • Refrigeration: Store any leftovers in an airtight container in the refrigerator. The casserole can safely be kept chilled for up to 4-5 days. The flavors often deepen and meld together over time, making it even more delicious.

    • Freezing: If you want to prepare this dessert in advance, it’s possible to freeze it. Slice the casserole into individual servings and wrap each piece tightly in plastic wrap before placing it in a freezer-safe container. It can be frozen for up to 2 months.

    • Thawing: When you’re ready to enjoy the frozen casserole, transfer it to the refrigerator to thaw overnight. Allow it to sit at room temperature for a few minutes before serving to bring back the creamy texture.

    Following these practices ensures that your Easy Easter Oreo Cookie Casserole remains flavorful and delicious for every gathering or family occasion.

    Nutritional Value of Easy Easter Oreo Cookie Casserole Dessert

    Understanding the nutritional profile of the Easy Easter Oreo Cookie Casserole Dessert is essential, especially for those who maintain a healthy lifestyle.

    A typical serving (1 slice) of this casserole may provide the following nutrition facts (approximate values):

    • Calories: 250-350 calories
    • Total Fat: 15-20g
    • Saturated Fat: 7-10g
    • Cholesterol: 30-40mg
    • Sodium: 200-300mg
    • Total Carbohydrates: 30-40g
    • Dietary Fiber: 1g
    • Sugars: 15-25g
    • Protein: 3-5g

    Nutritional values may vary depending on the specific ingredient brands used and any substitutions made. For instance, switching to a low-fat cream cheese or a sugar substitute could result in fewer calories while retaining great taste.

    By understanding the nutritional value, you can tailor servings to your dietary goals, ensuring that everyone can enjoy a piece of this delightful dessert without guilt.

    FAQs: Frequently Asked Questions About Easy Easter Oreo Cookie Casserole Dessert

    Can I use different cookies besides Oreos?

    Absolutely! While Oreo cookies are the classic choice, feel free to explore alternatives such as chocolate wafer cookies or even gluten-free cookie options. Experimenting with different flavors will bring exciting twists to the casserole.

    How long does the casserole need to chill?

    For the best flavor and texture, it’s advised to let the casserole chill for at least 4 hours; overnight is even better! This allows all the layers to settle and the flavors to meld seamlessly.

    Can I make this recipe ahead of time?

    Yes, the Easy Easter Oreo Cookie Casserole Dessert is perfect for make-ahead preparation. You can assemble it a day prior to your gathering, allowing for ease and convenience.

    Is this dessert suitable for kids?

    Definitely! The appealing flavors and creamy texture are sure to be a hit with kids. You can even involve them in the preparation process to make it a fun family activity.

    What are some ways to customize this dessert?

    This dessert is incredibly customizable! You can try various cookie flavors, mix in fruit layers, or opt for different toppings to make it your own. Vegan, gluten-free, and vegan-friendly options also allow diverse dietary adaptations.

    How do I store leftovers?

    Leftovers can be kept in an airtight container in the refrigerator for up to 4-5 days. You can also freeze individual portions, ensuring that you enjoy this dessert beyond the Easter celebrations.

    By exploring the answers to these frequently asked questions, you can maximize your enjoyment of the Easy Easter Oreo Cookie Casserole Dessert, ensuring it becomes a staple in your dessert arsenal.

    With its simplicity, delicious flavors, and versatility, the Easy Easter Oreo Cookie Casserole Dessert stands out as a must-try recipe that fits a variety of tastes and dietary needs. Enjoy your baking journey and the delightful experience it brings to your next celebration!

  • Easy Baby Lemon Impossible Pies Dessert

    Easy Baby Lemon Impossible Pies Dessert

    Easy Baby Lemon Impossible Pies Dessert: A Tropical Delight

    Introduction to Easy Baby Lemon Impossible Pies Dessert

    Welcome to the world of dessert recipes that not only tantalize your taste buds but also brighten your day! The Easy Baby Lemon Impossible Pies Dessert is an exquisite tropical treat that combines the zesty flavor of lemon with the creamy consistency of pie, all while being incredibly easy to prepare. This delightful dessert is perfect for home cooks, busy parents, students, and anyone eager to please with a light yet indulgent sweet treat.

    What makes this dessert stand out? It’s not just its delicious taste; it’s also a champion among healthy options. It can be made vegan, gluten-free, and low-calorie without compromising on flavor, making it suitable for a wide range of dietary preferences. Moreover, the preparation is so straightforward that even novice bakers can accomplish it with ease. With minimal cooking time and only a few pantry staples required, this lemon dessert is perfect for those who want something quick and satisfying after a meal or as a special occasion treat.

    So why wait? Dive into this easy, guilt-free dessert recipe and discover how simplicity can create something truly spectacular.

    Benefits and Advantages of Easy Baby Lemon Impossible Pies Dessert

    The Easy Baby Lemon Impossible Pies Dessert is a masterpiece of simplicity and flavor, offering numerous benefits that make it indispensable in the world of dessert recipes. Here are some reasons you should make this delightful dish:

    1. Quick and Simple: One of the biggest draws of this pie is that it requires minimal effort and ingredients. You won’t need to spend hours in the kitchen. In fact, preparation can take as little as 15 minutes!

    2. Health-Conscious: This recipe is light on calories and sugar, making it a great option for health-conscious individuals. Whether you’re counting calories or just aiming for a more balanced diet, this dessert allows you to indulge without guilt.

    3. Vegan and Gluten-Free Friendly: With simple substitutions, this dessert can easily cater to both vegan and gluten-free diets. This flexibility makes it perfect for gatherings where guests may have various dietary restrictions.

    4. Fresh and Flavorful: The bright lemon flavor adds a refreshing touch, especially during warm months. Unlike more traditional desserts that can feel heavy, this one tends to be light and invigorating.

    5. Versatility in Serving: Whether you’re serving this pie for a casual family dinner or a more formal occasion, its sophisticated taste allows it to shine in any setting. You can easily dress it up with fresh berries or a sprinkle of powdered sugar for an elegant touch.

    6. Nutritional Benefits: Lemons are well known for their vitamin C content and antioxidant properties. This dessert not only satisfies your sweet tooth but can also contribute positively to your dietary needs.

    Overall, the Easy Baby Lemon Impossible Pies Dessert is not just another recipe; it’s a tool for making healthier choices without sacrificing flavor or satisfaction.

    Ingredients Overview

    Essential Ingredients for Easy Baby Lemon Impossible Pies Dessert

    The beauty of this Easy Baby Lemon Impossible Pies Dessert lies in its simplicity, and the ingredients reflect that. Here’s what you’ll need:

    • 1 cup almond milk (or your preferred non-dairy milk): This acts as a creamy base while keeping the recipe vegan and low in calories.
    • 1/2 cup lemon juice (freshly squeezed for best flavor): The star of the show, giving the pie its zesty kick.
    • 1/2 cup coconut oil (melted): Adds richness while keeping the pie dairy-free. You can substitute with vegetable oil if needed.
    • 1 cup sugar (or sugar substitute): Sweetens the pie; consider using stevia or erythritol for a low-calorie option.
    • 1 cup all-purpose gluten-free flour (optional): Keeps the dessert gluten-free without altering the texture significantly.
    • 1 teaspoon baking powder: Helps the pie rise slightly, contributing to its fluffy texture.
    • A pinch of salt: Enhances the flavors and balances the sweetness.
    • Zest of one lemon: Adds an extra layer of citrusy flavor to the pie.

    Dietary Substitutions to Customize Your Easy Baby Lemon Impossible Pies Dessert

    Customizing the Easy Baby Lemon Impossible Pies Dessert to fit varying dietary needs is straightforward. Here are some substitutions to consider:

    • For Nut-Free Options: Use oat milk or rice milk instead of almond milk to ensure the dessert is suitable for those with nut allergies.
    • For Sugar-Free Versions: Replace regular sugar with a natural sweetener like monk fruit sweetener or coconut sugar for a lower glycemic index option.
    • For A Gluten-Free Version: Use gluten-free flour blends found in most supermarkets; ensure that your rising agents, such as baking powder, are gluten-free.
    • For a Richer Flavor: Adding a splash of vanilla extract can enhance the taste, though it can be omitted for a more straightforward approach.
    • Swap Coconut Oil: Vegetable or canola oil can be used as a substitute if coconut oil isn’t available or if a more neutral flavor is desired.

    These substitutions allow you to tailor the Easy Baby Lemon Impossible Pies Dessert to meet personal preferences or dietary restrictions while maintaining its delightful charm!

    How to Prepare the Perfect Easy Baby Lemon Impossible Pies Dessert: Step-by-Step Guide

    Now that you’re equipped with the knowledge of ingredients and substitutions, let’s dive into the fun part: preparing the Easy Baby Lemon Impossible Pies Dessert! Follow these step-by-step instructions:

    1. Preheat the oven: Start by preheating your oven to 350°F (175°C). This ensures that the pie begins cooking at an optimal temperature right away.

    2. Prepare a baking dish: Grease a 9-inch pie dish or baking pan with a bit of coconut oil or non-stick spray to prevent sticking.

    3. Mix the wet ingredients: In a mixing bowl, combine the almond milk, melted coconut oil, lemon juice, and lemon zest. Whisk these ingredients together until they are well blended.

    4. Combine the dry ingredients: In a separate bowl, mix the sugar, gluten-free flour, baking powder, and salt together. This will ensure even distribution of all dry ingredients.

    5. Combine wet and dry: Slowly pour the wet ingredient mixture into the bowl with the dry ingredients. Stir until just combined. Avoid over-mixing to maintain a light texture.

    6. Transfer to baking dish: Pour the combined mixture into the prepared pie dish, spreading it evenly to ensure uniform cooking.

    7. Bake the pie: Place the baking dish in the preheated oven. Bake for approximately 30-35 minutes or until the top is golden brown and a toothpick inserted in the center comes out clean.

    8. Cool before serving: Once baked, remove the pie from the oven and let it cool for at least 15 minutes. Cooling will help set the texture before serving.

    9. Serve and enjoy: Enjoy your Easy Baby Lemon Impossible Pies Dessert served warm or chilled. It can be adorned with fresh berries, a dollop of whipped cream, or a sprinkle of powdered sugar for an elegant touch.

    And there you have it—a straightforward recipe that effortlessly brings tropical flavors to your table! Adapt the steps as necessary for dietary needs, ensuring everyone can enjoy the deliciousness of this pie.

    Mastering Easy Baby Lemon Impossible Pies Dessert: Advanced Tips and Variations

    Want to take your Easy Baby Lemon Impossible Pies Dessert to the next level? Here are some advanced tips and appealing variations to consider:

    • Add a Crust: For an added layer of texture, consider baking this pie in a pre-made gluten-free graham cracker crust. This can enhance the overall experience while maintaining the dessert’s simplicity.

    • Lemon Meringue Twist: Whip up a simple vegan meringue using aquafaba (the liquid from canned chickpeas). Spread it over the top before finishing in the oven for a light-toasted meringue finish.

    • Infuse with Herbs: For a refreshing spin, include fresh herbs like mint or basil mixed into the batter for a unique flavor profile.

    • Fruit Compote Topper: Serve your pie with a homemade lemon-blueberry or lemon-strawberry compote. This adds vibrant color and a burst of sweet-tart flavor.

    • Adjusting Sweetness: If you want an extra zesty kick, raising the amount of lemon juice improves flavor depth. Conversely, decreasing sugar can lighten the calories further.

    These variations and tips keep the dessert exciting and encourage creativity in the kitchen, making it fun for newcomers and seasoned bakers alike!

    How to Store Easy Baby Lemon Impossible Pies Dessert: Best Practices

    Proper storage is essential to maintain the freshness and flavor of your Easy Baby Lemon Impossible Pies Dessert. Here’s how to do it right:

    • Refrigeration: If you have leftovers, cover the pie with plastic wrap or transfer it to an airtight container. Refrigerate it for up to 5 days. This will help preserve flavors and moisture.

    • Freezing Options: You can freeze the pie for up to 2 months. Make sure to wrap it tightly in plastic wrap and then in aluminum foil for additional protection against freezer burn.

    • Thawing: To enjoy frozen pie, simply transfer it to the refrigerator overnight to thaw before serving. Heat individual slices in a microwave for a few seconds if you prefer it warm.

    • Presentation After Storage: For the best presentation, consider topping the pie with fresh fruit or whipped cream just before serving. This restores some freshness that may be lost during storage.

    With these tips on storage, you can savor your Easy Baby Lemon Impossible Pies Dessert over several days, making dessert time a delight whenever you crave it!

    Nutritional Value of Easy Baby Lemon Impossible Pies Dessert

    When considering dessert recipes, incorporating nutritional information is essential for those who are health-conscious. The Easy Baby Lemon Impossible Pies Dessert not only tastes delightful but also provides valuable nutrition. Here’s a breakdown of the key nutritional components per serving (assuming the recipe serves 8):

    • Calories: Approximately 150 kcal
    • Protein: 2g
    • Carbohydrates: 22g
    • Fiber: 1g
    • Sugars: 6g (varies based on sweetener choice)
    • Fat: 7g
    • Saturated fat: 6g (primarily from coconut oil)
    • Vitamin C: 8% of Daily Value (DV) (from lemon juice)
    • Calcium: 5% of DV

    This dessert contains moderate calories while supplying a boost of vitamin C thanks to the fresh lemons. With the low sugar potentially achievable by using sugar substitutes, it remains a sweet option without excessive carbohydrates.

    As you can see, you can satisfy your sweet tooth without feeling guilty, making this recipe a great choice for daily dessert indulgence!

    FAQs: Frequently Asked Questions About Easy Baby Lemon Impossible Pies Dessert

    What if I can’t find gluten-free flour?

    If gluten-free flour is unavailable, regular all-purpose flour is a good substitute, but it won’t cater to gluten-sensitive individuals. You might also explore other flour alternatives, like almond or coconut flour, but this may require adjusting the recipe slightly for texture.

    Can I make this pie in advance?

    Absolutely! This pie can be made a day in advance and stored in the refrigerator. Just allow it to cool completely before covering it to maintain its freshness.

    How can I customize the sugar content?

    You can reduce sugar by up to half without significantly impacting the taste. Alternatively, you can use sugar substitutes like agave, honey, or stevia, adjusting amounts based on sweetness preferences.

    Is this pie suitable for children?

    Yes, this pie is child-friendly! It features a light lemon flavor and a creamy texture that’s likely to appeal to younger taste buds. Parents can also control sweetness based on preferences.

    How do I keep leftovers fresh?

    Store leftovers covered in the refrigerator in an airtight container. It can last up to 5 days. If freezing, remember to wrap it properly to prevent freezer burn!

    Can I add other flavors to this pie?

    Definitely! Feel free to get creative by adding complementary flavors such as blueberries, raspberries, or even coconut. Simple swaps can provide new taste sensations!

    With this extensive guidance, you’re now equipped and inspired to create the Easy Baby Lemon Impossible Pies Dessert. Enjoy the delightful blend of simplicity, flavor, and health benefits it offers—perfect for any occasion! Happy baking!

  • Easy Strawberry Shortcake Egg Bombs Dessert

    Easy Strawberry Shortcake Egg Bombs Dessert

    Easy Strawberry Shortcake Egg Bombs Dessert: A Tropical Delight

    Introduction to Easy Strawberry Shortcake Egg Bombs Dessert

    Are you ready to elevate your dessert game? The Easy Strawberry Shortcake Egg Bombs Dessert combines all the great flavors of traditional strawberry shortcake into delightful little egg bombs. This recipe is perfect for indulging your sweet tooth while keeping your health in mind. Not only is it incredibly simple to whip up, but it’s also versatile enough to cater to various dietary needs, including vegan and gluten-free options. This makes it one of the most inviting strawberry recipes available.

    Imagine biting into a fluffy, mouth-watering shell filled with fresh strawberries and whipped cream, all enveloped in a light sponge texture that feels like a hug. Whether you’re a busy parent, a student in need of a quick treat, or someone who loves exploring unique dessert ideas, this dessert can fit perfectly into your lifestyle.

    The health benefits of strawberries are well-documented; they are loaded with vitamins and antioxidants, making our egg bombs not only delicious but also nutritious. Plus, by controlling the ingredients, you can create a more wholesome version that fits within your dietary preferences.

    So, gather your ingredients and get ready to impress your family and friends with this easy-to-make treat that shines in both flavor and presentation. Get set for a delightful culinary experience and discover why this dessert is bound to become a favorite in your repertoire!

    Benefits and Advantages of Easy Strawberry Shortcake Egg Bombs Dessert

    When it comes to desserts, simplicity is key for many home cooks. The Easy Strawberry Shortcake Egg Bombs Dessert is not just easy to prepare; it delivers on numerous fronts that make it stand out. Here are some notable benefits that set this dessert apart:

    1. Simple Preparation: This recipe is ideal for those who might be intimidated by complex baking techniques. The step-by-step nature makes it accessible to cooks of all skill levels, enabling anyone—from beginners to seasoned chefs—to successfully recreate it.

    2. Health Benefits: Strawberries are a superfood, rich in essential vitamins like Vitamin C and antioxidants. By using fresh strawberries in this dessert, you’re adding a healthy component to a traditional treat. Since the recipe can be adapted to use low-fat or dairy-free options, it promotes a guilt-free indulgence.

    3. Dietary Versatility: Suiting various dietary requirements, you can easily modify ingredients to make this dessert gluten-free, vegan, or low-sugar. This flexibility allows everyone at your table to enjoy a taste of this delight without restrictions.

    4. Perfect for Any Occasion: Whether you’re hosting a picnic, celebrating a birthday, or simply treating yourself after a long day, these easy egg bombs can fit any gathering. Their bite-sized nature makes them convenient for parties, while also being visually appealing.

    5. Great Make-Ahead Option: These egg bombs can be made in advance, providing an excellent solution for busy days. You can even store them to enjoy later, making them perfect for meal prep enthusiasts.

    In summary, the Easy Strawberry Shortcake Egg Bombs Dessert isn’t just another dish; it’s a wholesome and enjoyable way to indulge in one of the most beloved strawberry recipes. It’s about flavor, health, and joy—embodied in a scrumptious little package!

    Ingredients Overview

    Essential Ingredients for Easy Strawberry Shortcake Egg Bombs Dessert

    1. For the Egg Bombs:
    2. 1 cup all-purpose flour (or almond flour for gluten-free)
    3. 1 teaspoon baking powder
    4. 1/4 teaspoon salt
    5. 1/2 cup unsweetened almond milk (or your choice of milk)
    6. 1/4 cup coconut oil (melted)
    7. 1/3 cup maple syrup (or honey)
    8. 1 teaspoon vanilla extract

    9. For the Filling:

    10. 2 cups fresh strawberries (sliced)
    11. 1/4 cup powdered sugar (or stevia for a low-calorie option)
    12. 1 cup whipped coconut cream (or dairy whipped cream)

    13. For Garnishing (optional):

    14. Mint leaves (for a refreshing touch)
    15. More sliced strawberries

    Note: All ingredients can be customized to fit dietary restrictions where necessary. For instance, use gluten-free flour or a sugar substitute if needed.

    Dietary Substitutions to Customize Your Easy Strawberry Shortcake Egg Bombs Dessert

    1. Flour Choices: If you require a gluten-free version, opt for almond flour or a gluten-free all-purpose blend. Each provides unique textures and flavors while keeping the dessert enjoyable.

    2. Dairy Alternatives: For those who are lactose intolerant or following a vegan diet, almond milk works wonderfully. Additionally, you can use coconut cream or dairy-free whipped topping in place of traditional whipped cream.

    3. Sweetener Variations: Replace maple syrup with agave nectar or any preferred sweetener to lower the glycemic load. Honey also serves as a great natural sweetener with similar benefits if veganism isn’t a concern.

    4. Flavor Additions: Feel free to add a touch of lemon zest to the strawberries for a zestier kick, or incorporate other berries for a mixed-fruit option.

    By utilizing these substitutions, you can ensure that the Easy Strawberry Shortcake Egg Bombs Dessert fits seamlessly into various dietary preferences. This adaptability also makes it a friendly choice for gatherings where guests might have different dietary needs.

    How to Prepare the Perfect Easy Strawberry Shortcake Egg Bombs Dessert: Step-by-Step Guide

    Ready to make your Easy Strawberry Shortcake Egg Bombs Dessert? Follow these clear instructions to achieve dessert perfection.

    Step-by-Step Instructions

    1. Prepare the Base:
    2. In a mixing bowl, combine 1 cup of flour, 1 teaspoon of baking powder, and 1/4 teaspoon of salt. Mix well until evenly incorporated.

    3. Mix the Wet Ingredients:

    4. In another bowl, whisk together 1/2 cup of almond milk, 1/4 cup of melted coconut oil, 1/3 cup of maple syrup, and 1 teaspoon of vanilla extract.

    5. Combine Mixtures:

    6. Gradually add the wet mixture into the dry ingredients, stirring until just combined. Be cautious not to over-mix, as this could affect texture.

    7. Preheat and Prepare the Baking Dish:

    8. Preheat your oven to 350°F (175°C). Grease a muffin tray or line with silicone molds for easy removal.

    9. Fill the Molds:

    10. Evenly distribute your batter into the prepared molds, filling each about halfway to allow space for rising.

    11. Bake the Bases:

    12. Place the muffin tray in the preheated oven and bake for approximately 15-18 minutes, or until a toothpick inserted into the center comes out clean.

    13. Cool the Bases:

    14. Once baked, remove from the oven and let the tray cool for about 10 minutes before transferring to a wire rack. Allow them to cool completely.

    15. Prepare the Strawberry Filling:

    16. While the bases cool, mix 2 cups of sliced fresh strawberries with 1/4 cup of powdered sugar in a bowl. Allow them to sit for about 15-20 minutes, creating a syrupy mix.

    17. Assemble the Egg Bombs:

    18. Once the muffin bases have cooled, make a small hollow in the center of each base using a spoon. Carefully fill with the macerated strawberries.

    19. Top with Whipped Cream:

      • Generously dollop 1 cup of whipped coconut cream or dairy whipped cream over the strawberry filling.
    20. Garnish and Serve:

      • Optionally, top each egg bomb with mint leaves and additional strawberry slices for a stunning presentation. Serve immediately or chill for later enjoyment!

    Variations and Adaptations

    • To create a blueberry version of this dessert, simply swap out fresh strawberries for blueberries.
    • For a chocolate twist, mix cocoa powder into the batter for a chocolate cake base and fill with strawberries.

    This detailed guide ensures you can create memorable strawberry recipes right in your kitchen, tailored to various tastes and dietary needs.

    Mastering Easy Strawberry Shortcake Egg Bombs Dessert: Advanced Tips and Variations

    To take your Easy Strawberry Shortcake Egg Bombs Dessert to the next level, here are some expert tips and creative variations to consider:

    1. Achieving Fluffiness: For an even lighter texture, sift your flour before mixing. This aerates the flour and results in a fluffier base for your egg bombs.

    2. Flavored Whipped Cream: Give your whipped cream an extra punch by adding in vanilla bean seeds or a splash of almond extract. It adds a subtle yet delightful flavor enhancement.

    3. Berry Combinations: Consider mixing different berries for a more complex taste profile. Try adding raspberries or blackberries for a delightful twist and delightful pop of colors.

    4. Adding a Crunch: For those who enjoy extra textures, consider folding in chopped nuts or granola to the batter. This will provide a satisfying crunch in contrast to the soft cake and creamy filling.

    5. Savory Version: Switch gears and make a savory version using herbs like basil in your whipped cream and filling it with savory cheeses and lightly seasoned strawberries. This could inspire an intriguing appetizer option.

    6. Decorative Presentation: When garnishing, use edible flowers to give your egg bombs a refined touch that can impress guests at special gatherings or celebrations.

    These advanced ideas and variations will make the Easy Strawberry Shortcake Egg Bombs Dessert even more versatile and enjoyable for various occasions, ensuring that your cooking adventures remain exciting and delicious!

    How to Store Easy Strawberry Shortcake Egg Bombs Dessert: Best Practices

    After making the Easy Strawberry Shortcake Egg Bombs Dessert, you might have leftovers (if you’re lucky!). Knowing how to store them properly will help retain their freshness and deliciousness.

    1. Refrigeration: Store leftover egg bombs in an airtight container in the refrigerator. They can last for up to 3 days.

    2. Freezing for Longer Preservation: If you want to extend their life, consider freezing them. Place them in a single layer on a baking sheet to freeze individually, then transfer them to a freezer-safe bag or container. They can be kept frozen for up to 2 months.

    3. Reheating: If you’ve frozen them, thaw in the refrigerator overnight. For quick reheating, warm them in a microwave for about 10-15 seconds or in an oven at 350°F (175°C) for about 5 minutes until warmed through.

    4. Serving After Storage: Whether you’re serving refrigerated or reheated frozen egg bombs, consider adding a fresh dollop of whipped cream and fruity garnish to restore their original appeal before enjoying.

    By following these storage techniques, you can enjoy the Easy Strawberry Shortcake Egg Bombs Dessert over several days without losing its delightful flavor or texture.

    Nutritional Value of Easy Strawberry Shortcake Egg Bombs Dessert

    Nutritional values can vary depending on specific ingredients and the quantities used, but here’s a general breakdown of the nutrition facts for one serving of Easy Strawberry Shortcake Egg Bombs Dessert:

    • Calories: Approximately 150-200 calories per egg bomb
    • Protein: 2.5g
    • Fat: 6g
    • Carbohydrates: 26g
    • Fiber: 2g
    • Sugars: 10g
    • Vitamin C: 40% of the daily value (from strawberries)
    • Calcium: 2% of the daily value (depends on the milk choice)

    This dessert can be a wonderful addition to your diet, especially with the benefits the strawberries offer. The use of alternative ingredients helps keep it as healthy as possible, making these treats suitable for various dietary restrictions while providing essential nutrients.

    FAQs: Frequently Asked Questions About Easy Strawberry Shortcake Egg Bombs Dessert

    1. Can I make this dessert ahead of time?
    Absolutely! You can prepare the egg bombs a day in advance and store them in the refrigerator. Just add the filling on the day you’re ready to serve.

    2. Can I use frozen strawberries?
    While fresh strawberries are ideal, you can substitute them with thawed frozen strawberries if necessary. Just ensure they are well-drained to avoid excess moisture in your filling.

    3. How can I make this dessert lower in sugar?
    You can replace the sugar in the dessert with a sugar substitute like stevia or monk fruit sweetener, keeping the taste delightful while reducing calories.

    4. This dessert was too dry; what went wrong?
    Overmixing the batter or baking for too long can dry out your egg bombs. Ensure you mix just until combined and keep an eye on the baking time.

    5. What’s the best way to serve these?
    Serve them chilled or slightly warmed with a fresh dollop of whipped cream on top, garnished with mint leaves for an added touch of elegance!

    Enjoy making your Easy Strawberry Shortcake Egg Bombs Dessert, a delightful addition to your culinary repertoire! This recipe merges simplicity with flavor in ways that make it refreshing and appealing, perfect as one of the go-to strawberry recipes for any season. Happy baking!

  • Raspberry Greek Yogurt Jello Fluff

    Raspberry Greek Yogurt Jello Fluff

    Raspberry Greek Yogurt Jello Fluff: A Tropical Delight

    Introduction to Raspberry Greek Yogurt Jello Fluff

    Welcome to the world of delightful dessert recipes, where taste meets health and simplicity! If you’re searching for a light, fluffy, and creamy dessert that captivates both the eye and the palate, look no further than the Raspberry Greek Yogurt Jello Fluff. This scrumptious concoction combines the tartness of fresh raspberries with the creamy goodness of Greek yogurt, creating a treat that is not only refreshing but also packed with benefits.

    Made with only a handful of ingredients, this recipe comes together in just minutes, making it perfect for busy parents, students, or anyone in need of a simple yet satisfying dessert. With its vibrant colors and light texture, this dish is bound to impress guests at gatherings or simply provide you with a sweet escape from the daily grind.

    Health benefits abound in this dessert. Greek yogurt is renowned for its probiotic properties, which support gut health and overall well-being. Paired with raspberries, which boast high levels of antioxidants and fiber, this treat works wonders for your body. Additionally, this recipe is adaptable, allowing for vegan and gluten-free options, ensuring that everyone can indulge without worry. Dive into this easy-to-make Raspberry Greek Yogurt Jello Fluff and elevate your dessert game!

    Benefits and Advantages of Raspberry Greek Yogurt Jello Fluff

    When it comes to dessert recipes, the Raspberry Greek Yogurt Jello Fluff stands out for several reasons. Here are some compelling benefits that make this dish an excellent choice for everyone:

    1. Ease of Preparation: One of the best things about this fluffy dessert is its simplicity. With minimal ingredients and utensils, even novice cooks can whip it up in no time. The quick prep means you can spend less time in the kitchen and more time enjoying the fruits of your labor.

    2. Health Benefits: Greek yogurt is a powerhouse ingredient. Rich in protein and probiotics, it helps boost your metabolism and supports digestive health. Raspberries add a refreshing flavor while providing vitamins, minerals, and antioxidants, supporting your immune system.

    3. Adaptable for Dietary Needs: The versatility of this dessert is unrivaled. With a few simple substitutions, you can create a delightful vegan or gluten-free version, making it suitable for various dietary requirements. Whether you’re catering to a friend with dietary restrictions or simply trying to eat healthier, this recipe can be customized to fit your needs.

    4. Light and Satisfying: This dessert offers a light texture that doesn’t weigh you down while still delivering satisfaction when your sweet tooth kicks in. Perfect for warmer months or whenever you’re craving something sweet but not too heavy.

    5. Ideal for Any Occasion: Hosting a party, celebrating a special occasion, or just looking for a post-dinner sweet treat? Raspberry Greek Yogurt Jello Fluff is your best friend. It appeals to both kids and adults alike, making it a fantastic centerpiece for any gathering.

    6. Great for Meal Prep: This delightful fluff can be made ahead of time and stored in the fridge, making it a convenient choice for those who like to plan their meals. You can make a batch and savor it throughout the week, ensuring that healthier dessert options are always available.

    By integrating these elements into your cooking, you not only enhance your dessert-making skills but also enjoy the numerous health perks this recipe brings to your table.

    Ingredients Overview

    Essential Ingredients for Raspberry Greek Yogurt Jello Fluff

    Here’s what you’ll need to create this light, velvety delight:

    • 1 cup Greek yogurt (plain or vanilla): Adds creaminess and is rich in protein. Make sure to choose low-fat or fat-free for a lighter option.
    • 1 package (3 oz) raspberry-flavored gelatin: Provides that vibrant raspberry flavor and a fun, jiggly texture.
    • 1 cup boiling water: Required to dissolve the gelatin and blend it smoothly with yogurt.
    • 1-2 cups fresh raspberries: A nutritious addition, packed with flavor, antioxidants, and fiber.
    • Optional Sweetener (honey or maple syrup): Depending on your preference for sweetness, you may wish to add a natural sweetener to balance tartness from the raspberries.

    Dietary options:
    – For a vegan version, substitute Greek yogurt with a coconut-based or almond-based yogurt.
    – Choose a gelatin substitute such as agar-agar to make it suitable for vegetarians and vegans.
    – Make it gluten-free by ensuring all ingredients (especially the gelatin) are certified gluten-free.

    Dietary Substitutions to Customize Your Raspberry Greek Yogurt Jello Fluff

    This recipe can be tailored to meet various dietary needs seamlessly:

    • Plant-Based Yogurt: As mentioned, replace Greek yogurt with a plant-based alternative like coconut, soy, or almond yogurt. This retains the creamy texture while making it suitable for vegans.
    • Sugar-Free Gelatin: If you’re watching your sugar intake, use a sugar-free gelatin option. These alternatives maintain taste without the extra calories.
    • Fruit Variations: While raspberries shine at the forefront, feel free to experiment with other berries like blueberries, strawberries, or blackberries. Each offers unique flavors and nutrients.

    In this way, you can place your own twist on the Raspberry Greek Yogurt Jello Fluff while catering to the dietary preferences and restrictions of your family and friends.

    How to Prepare the Perfect Raspberry Greek Yogurt Jello Fluff: Step-by-Step Guide

    Creating the Raspberry Greek Yogurt Jello Fluff is a breeze with these straightforward steps. Follow along for a delightful dessert that your taste buds will love!

    1. Prepare the Gelatin Mixture: In a medium-sized bowl, dissolve the raspberry-flavored gelatin in 1 cup of boiling water. Stir thoroughly until fully dissolved and let it cool slightly. This mixture provides the base for your fluffy delight.

    2. Combine the Yogurt: In another bowl, add 1 cup of Greek yogurt. If you prefer it sweeter, now’s the time to stir in honey or maple syrup. This enriches the flavor and balances the tartness of the raspberries.

    3. Fold in the Gelatin: Gradually pour the slightly cooled gelatin mixture into the Greek yogurt. Gently fold the two components together using a spatula. Be careful not to overmix, as you want to maintain a light, airy texture.

    4. Add Fresh Raspberries: Gently fold in 1 cup of fresh raspberries. You can reserve a handful for garnishing later. The berries will add delicious bites and enhance both the presentation and taste of the dish.

    5. Chill the Mixture: Transfer the fluff mixture into serving bowls or cups. Cover them with plastic wrap or lids and refrigerate for at least 2-3 hours, allowing the gelatin to set properly. This chilling stage is essential to achieving the delightful fluffiness.

    6. Serve and Garnish: Once set, remove the bowls from the fridge. Optionally, top with additional fresh raspberries and a dollop of yogurt or whipped topping for an extra touch.

    7. Enjoy!: Your Raspberry Greek Yogurt Jello Fluff is now ready to dazzle your family and friends. Serve it at a gathering, or simply indulge in its creamy, fruity goodness.

    In these simple steps, you’ve created a delightful dessert that’s perfect for all occasions, and aligns with many dietary preferences. By following the process carefully, you not only ensure a delicious result but also make this beautiful dessert accessible to all.

    Mastering Raspberry Greek Yogurt Jello Fluff: Advanced Tips and Variations

    Once you have mastered the basics of Raspberry Greek Yogurt Jello Fluff, consider these advanced tips and variations to elevate your dessert even further:

    1. Flavored Yogurt: Experiment with different flavors of Greek yogurt, such as lemon or peach, to create unique adaptations of the classic recipe. Each flavor will bring a distinct profile, enhancing the overall experience.

    2. Add a Crunch: For a textural contrast, consider folding in some granola or crushed nuts before chilling. This adds a delightful crunch and enhances the health benefits even more.

    3. Layered Presentation: For a stunning visual presentation, try making layers with the yogurt fluff and additional fruits or pureed fruits in clear glasses. This creates an eye-catching dessert that’s sure to impress.

    4. Infuse with Herbs: For an added twist, infuse flavors using fresh herbs like mint or basil, which pair beautifully with raspberries. Incorporate finely chopped herbs into the yogurt mixture for a refreshing surprise.

    5. Fruity Sauces: Drizzle a homemade raspberry sauce over the top for even more flavor. Simmer fresh raspberries with a touch of water and honey until they break down into a coulis, then top the fluff just before serving.

    These variations will not only intrigue your palate but also invite you to explore endless adaptations, making Raspberry Greek Yogurt Jello Fluff a beloved staple in your collection of dessert recipes.

    How to Store Raspberry Greek Yogurt Jello Fluff: Best Practices

    Proper storage of your Raspberry Greek Yogurt Jello Fluff ensures that you can enjoy this delightful dessert over several days without losing its texture or flavor. Here are some best practices for storage:

    • Refrigeration: Store the fluff in airtight containers in the refrigerator. It will stay fresh for up to 5 days. Make sure the container is sealed tightly to prevent any absorption of odors from other foods.

    • Freezing (Not Recommended): While this dessert can be stored in the freezer, freezing may alter its texture, making it less fluffy upon thawing. If you do freeze it, consume within 1 month for the best taste.

    • Reheating: The fluff is best enjoyed chilled, so there’s no need for reheating. If you prefer to serve it warm, let it come to room temperature for 15-20 minutes before serving.

    Following these storage guidelines will help you savor the refreshing taste of Raspberry Greek Yogurt Jello Fluff long after it’s been made, making it a go-to for meal prep or a quick sweet fix.

    Nutritional Value of Raspberry Greek Yogurt Jello Fluff

    Understanding the nutritional value of your dessert can be crucial for those who monitor their dietary intake. Below is an estimated nutritional breakdown for one serving of Raspberry Greek Yogurt Jello Fluff (assuming the recipe yields four servings):

    | Nutrient | Amount per serving |
    |——————–|——————–|
    | Calories | 120 |
    | Protein | 8g |
    | Carbohydrates | 20g |
    | Sugars | 10g |
    | Fat | 2g |
    | Fiber | 2g |
    | Calcium | 150 mg |
    | Iron | 0.5 mg |

    Raspberry Greek Yogurt Jello Fluff is a guilt-free dessert that provides a healthy dose of protein and fiber. Its relatively low calorie count makes it an excellent dessert option for health-conscious individuals looking to satisfy their sweet cravings without going overboard. The abundance of antioxidants from raspberries also makes it an ideal choice for a health-forward dessert.

    Knowing the nutritional data can help you align your sweet indulgences with your dietary goals, making it an invaluable aspect of your dessert recipes.

    FAQs: Frequently Asked Questions About Raspberry Greek Yogurt Jello Fluff

    Q1: Can I use a different flavor of gelatin?
    Yes! Feel free to experiment with other gelatin flavors to change the taste profile of the fluff. Just ensure the flavor matches the yogurt you’re using to maintain harmony in taste.

    Q2: Is it possible to make this dessert vegan?
    Absolutely! Use a dairy-free yogurt substitute and a plant-based gelatin alternative like agar-agar.

    Q3: How long does Raspberry Greek Yogurt Jello Fluff last in the fridge?
    When stored in airtight containers, the fluff can stay fresh for up to 5 days in the refrigerator.

    Q4: Can I add other fruits beyond raspberries?
    Yes! This recipe is flexible; you can incorporate strawberries, blueberries, or any other favorite fruit. Just adjust the quantity according to personal preference.

    Q5: What if I want a sugar-free version of this dessert?
    To make a sugar-free Raspberry Greek Yogurt Jello Fluff, opt for sugar-free gelatin and a low-calorie sweetener to achieve the sweetness without added sugar.

    By addressing these common questions, readers can feel more comfortable and informed about trying their hand at this delightful recipe. Raspberry Greek Yogurt Jello Fluff is a versatile and easy-to-follow treat that can bring joy to all.


    This Raspberry Greek Yogurt Jello Fluff recipe is a fun and healthy dessert to enjoy any time of day. Packed with benefits, simple to make, and adaptable for various dietary preferences, it is sure to become a favorite among both seasoned cooks and beginners alike. Don’t miss out on this tropical delight—grab your ingredients and start creating today!

  • Tasty Vegan Rhubarb Crisp

    Tasty Vegan Rhubarb Crisp

    Tasty Vegan Rhubarb Crisp: A Tropical Delight

    Introduction to Tasty Vegan Rhubarb Crisp

    Are you searching for the perfect addition to your lineup of dessert recipes? Look no further! This Tasty Vegan Rhubarb Crisp is not only simple to prepare but also a delightfully healthy option for dessert lovers. With its sweet and tangy flavor profile, combined with a crunchy topping, it’s bound to become a favorite for everyone from busy parents seeking quick meals for their families to curious food enthusiasts eager to try something new.

    This vegan version of rhubarb crisp is gluten-free and can be customized to suit various dietary needs. Rhubarb, often praised for its tartness, pairs harmoniously with natural sweeteners, making this dish low in refined sugars yet high in flavor. Moreover, this recipe showcases whole ingredients, ensuring that your dessert is delicious without compromising your health goals. The beauty of this dish lies in its versatility; whether it’s a family dinner, a casual gathering, or a romantic evening at home, this crisp will certainly impress. So, let’s dive into the delectable world of Tasty Vegan Rhubarb Crisp and see how it can elevate your dessert game!

    Benefits and Advantages of Tasty Vegan Rhubarb Crisp

    There are numerous reasons why Tasty Vegan Rhubarb Crisp stands out among other dessert recipes. First and foremost, its simplicity makes it accessible for home cooks of all skill levels. With just a few common ingredients, this recipe delivers fantastic results without a lot of fuss. Not only is the preparation straightforward, but cleanup is a breeze, reinforcing its appeal for busy parents and working professionals alike.

    Another significant advantage is the health benefits. Rhubarb is an excellent source of vitamins K and C, calcium, and fiber. By using wholesome, plant-based ingredients, this dessert avoids the excessive fats and sugars found in traditional versions, making it suitable for those on a vegan, gluten-free, or low-calorie diet. Plus, the inclusion of oats and nuts in the topping ensures added fiber and protein.

    Additionally, this dessert is perfect for customization. For those who may be gluten-sensitive, it’s easy to swap in gluten-free oats and flour. Alternatively, if you’re looking to reduce sugar intake, you can use natural sweeteners like maple syrup or agave nectar. The flexibility of this recipe allows it to cater to various dietary needs without sacrificing flavor or texture.

    Ultimately, Tasty Vegan Rhubarb Crisp is not just a dessert; it is an experience that brings together health, simplicity, and satisfaction in one delightful dish.

    Ingredients Overview

    Essential Ingredients for Tasty Vegan Rhubarb Crisp

    To create this mouth-watering Tasty Vegan Rhubarb Crisp, gather the following ingredients:

    • 4 cups rhubarb, chopped (fresh or frozen)
    • 1 cup coconut sugar (or brown sugar for a more traditional taste)
    • 2 tablespoons cornstarch (for thickening)
    • 1 teaspoon vanilla extract
    • 1 teaspoon cinnamon (adds warmth and depth)
    • ½ teaspoon salt (balances flavors)

    For the Topping:

    • 1 cup rolled oats (choose gluten-free, if necessary)
    • 1 cup almond flour (or any gluten-free flour)
    • ½ cup walnuts or pecans, chopped (for added crunch and healthy fats)
    • ⅓ cup coconut oil, melted (can substitute with vegan butter)
    • ¼ cup maple syrup (or agave nectar for a lower glycemic option)
    • ½ teaspoon baking powder (for a light, crispy topping)

    These ingredients are not only scrumptious but also serve various dietary needs. For instance, both the oats and nuts provide fiber, while the rhubarb delivers vitamins and minerals essential for well-being.

    Dietary Substitutions to Customize Your Tasty Vegan Rhubarb Crisp

    If you have specific dietary requirements, there are several substitutions you can make to ensure everyone can enjoy Tasty Vegan Rhubarb Crisp:

    1. Gluten-Free Options: Substitute the rolled oats with gluten-free oats. Additionally, use almond flour instead of standard flour to keep the topping light and gluten-free.

    2. Nut-Free Option: Replace walnuts or pecans with seeds such as sunflower seeds or pumpkin seeds for crunch without the nuts, which are perfect for those with nut allergies.

    3. Lower Sugar Option: Reduce the coconut sugar and substitute some of the sweetener with mashed bananas or applesauce to keep the natural sweetness while lowering the overall sugar content.

    4. Fruity Twist: Enhance the flavor by mixing in other fruits like strawberries or apples. This will not only add natural sweetness but also additional nutrients and flavors.

    With these simple adjustments, your Tasty Vegan Rhubarb Crisp can be tailored to fit any dietary need, ensuring no one misses out on this delightful treat.

    How to Prepare the Perfect Tasty Vegan Rhubarb Crisp: Step-by-Step Guide

    Now, let’s dive into how to prepare your Tasty Vegan Rhubarb Crisp with this easy-to-follow, step-by-step guide. Each step has been designed to make the recipe straightforward, ensuring that you can successfully create this scrumptious dessert.

    1. Preheat the Oven: Start by preheating your oven to 350°F (175°C). Preheating helps achieve that ideal crisp texture.

    2. Prepare the Rhubarb: If you’re using fresh rhubarb, wash it thoroughly and chop it into small pieces (you want about 4 cups). If using frozen rhubarb, thaw it and drain any excess liquid to prevent the crisp from becoming soggy.

    3. Mix the Filling: In a large mixing bowl, combine the chopped rhubarb, coconut sugar, cornstarch, vanilla extract, cinnamon, and salt. Stir well until the rhubarb is evenly coated. Pour this mixture into a greased 9×13 inch baking dish.

    4. Prepare the Topping: In another mixing bowl, combine the rolled oats, almond flour, chopped nuts, melted coconut oil, maple syrup, and baking powder. Mix until crumbly and well combined.

    5. Assemble the Crisp: Evenly spread the oat topping over the rhubarb filling in the baking dish. Make sure to cover the filling thoroughly for that perfect crunch on every bite.

    6. Bake the Crisp: Place the baking dish in the preheated oven and let it bake for 30-40 minutes or until the topping is golden brown and the filling is bubbling around the edges.

    7. Cool and Serve: Once baked, remove from the oven and allow it to cool for about 10-15 minutes. This cooling time will help the filling set a little before serving. Serve warm, and enjoy your Tasty Vegan Rhubarb Crisp with a scoop of vegan ice cream or a dollop of coconut whipped cream!

    This step-by-step process is not only engaging but also ensures that you can enjoy a homemade treat with minimal effort. It’s an excellent recipe for all types of occasions, effortlessly combining health with indulgence.

    Mastering Tasty Vegan Rhubarb Crisp: Advanced Tips and Variations

    Once you’ve mastered the basic Tasty Vegan Rhubarb Crisp, you may want to explore some advanced tips and variations to elevate your dessert experience.

    1. Experiment with Flavors: While cinnamon is a classic addition, consider integrating other spices like nutmeg or ginger for added warmth. You could even add a touch of citrus zest—think lemon or orange—to brighten the flavors.

    2. Mix in Other Fruits: For a fruity twist, don’t hesitate to add other seasonal fruits, such as strawberries or blueberries, to the rhubarb filling. The sweetness from these fruits will complement the tartness of rhubarb beautifully.

    3. Nuts and Seeds for Crunch: Feel free to vary the types of nuts used in the topping. Almonds or hazelnuts can be delightful replacements. Alternatively, including seeds like chia or flax can also boost nutrition.

    4. Change Up the Sweetener: Try different sweeteners to find your favorite flavor profile. Honey, agave nectar, or even date syrup can offer unique tastes and benefits.

    5. Serving Suggestions: For a special touch when serving, top your crisp with coconut whipped cream, vegan vanilla ice cream, or a drizzle of chocolate sauce for a decadent finish.

    These tips and variations add a personal touch to your recipe while ensuring that every batch of Tasty Vegan Rhubarb Crisp can feel fresh and new!

    How to Store Tasty Vegan Rhubarb Crisp: Best Practices

    Knowing how to store your Tasty Vegan Rhubarb Crisp properly is imperative to preserving its taste and texture. Here’s how to ensure you get the most out of your delightful dessert:

    • Refrigeration: Once cooled, cover the baking dish with plastic wrap or aluminum foil and store it in the refrigerator. The crisp will stay fresh for up to 4-5 days. When ready to serve, reheat in the oven or microwave.

    • Freezing: For longer storage, you can freeze the crisp. Make sure it’s completely cooled, then wrap it tightly in plastic wrap and aluminum foil or place it in an airtight freezer container. It can be stored in the freezer for up to 3 months. Thaw in the fridge overnight before reheating.

    • Reheating: To reheat, place the crisp in the oven at 350°F (175°C) for about 15-20 minutes or until warmed throughout. If using a microwave, heat individual servings for about 30-60 seconds, but be aware that this may alter the texture slightly.

    These best practices will help you enjoy your Tasty Vegan Rhubarb Crisp longer while ensuring it remains a delicious treat.

    Nutritional Value of Tasty Vegan Rhubarb Crisp

    When it comes to indulgent dessert recipes, understanding the nutritional content can be essential for health-conscious individuals. Let’s take a closer look at the approximate nutritional values of a serving of Tasty Vegan Rhubarb Crisp:

    • Calories: 220
    • Protein: 3g
    • Fat: 10g (mostly healthy fats from nuts and coconut oil)
    • Carbohydrates: 32g
    • Fiber: 5g (helpful for digestion)
    • Sugars: 10g (depending on the sweetener used)

    This nutritional profile shows that the Tasty Vegan Rhubarb Crisp provides a satisfying yet wholesome option for a dessert. It offers a balance of sweet and tart flavors, making it not only a treat for the taste buds but also a mindful choice for those keeping an eye on their diet. The fiber content from the oats and rhubarb benefits digestion, making it suitable for diet-conscious individuals, seniors, and anyone looking to maintain a balanced eating pattern.

    FAQs: Frequently Asked Questions About Tasty Vegan Rhubarb Crisp

    Q1: Can I use frozen rhubarb for this recipe?

    A: Absolutely! Frozen rhubarb works perfectly in this recipe. Just ensure it’s thawed and drained of excess liquid beforehand.

    Q2: What can I substitute for coconut sugar?

    A: You have several options. Brown sugar, maple syrup, or agave nectar can be used in place of coconut sugar; adjust the quantities accordingly.

    Q3: Is there a way to make this recipe nut-free?

    A: Yes! You can simply omit the nuts in the topping or substitute them with seeds like sunflower seeds or pumpkin seeds for added crunch.

    Q4: How can I make Tasty Vegan Rhubarb Crisp lower in sugar?

    A: You can reduce the amount of sweetener or use naturally sweet ingredients like mashed bananas or applesauce in the filling. Additionally, choosing a ripe fruit mix will also help achieve a perfect balance of sweetness.

    Q5: Can I prepare the crisp ahead of time?

    A: Yes! You can prepare the filling and topping separately and refrigerate them. When you’re ready to bake, simply assemble them in the dish and bake as directed.

    Q6: Is Tasty Vegan Rhubarb Crisp suitable for meal prep?

    A: Yes, it can definitely be made ahead of time and stored appropriately! It’s a perfect option for meal prep since it keeps well in the fridge or freezer.

    Embrace these helpful tips and variations while enjoying the delightful simplicity of Tasty Vegan Rhubarb Crisp. Its graceful blend of flavors and adaptability makes it a must-try among the myriad dessert recipes available to you today. Enjoy this delicious treat and experience the joy of baking!

  • Buttery Rhubarb Zucchini Crisp

    Buttery Rhubarb Zucchini Crisp

    Buttery Rhubarb Zucchini Crisp: A Tropical Delight

    Introduction to Buttery Rhubarb Zucchini Crisp

    If you’re on the hunt for scrumptious dessert recipes that cater to a variety of dietary preferences, look no further! Buttery Rhubarb Zucchini Crisp is not just delicious; it’s also a celebration of the summer harvest. This delightful dish combines the tartness of rhubarb with the subtle sweetness of zucchini, creating a perfect balance of flavors that is both satisfying and refreshing.

    Designed with busy home cooks in mind, this recipe is straightforward and quick to make, ensuring that even the most novice bakers will shine in the kitchen. The best part? It’s versatile—a vegan, gluten-free option is available, making it a delightful choice for family gatherings or a cozy night in. With each bite, you’ll indulge in a warm, buttery topping that contrasts beautifully with the tender fruit beneath. While it makes a fabulous dessert, it’s versatile enough to be enjoyed at breakfast or as a snack too!

    Incorporating fresh, wholesome ingredients, this rhubarb zucchini crisp is rich in dietary fiber, vitamins, and minerals. Say goodbye to sugary store-bought desserts and embrace this healthier homemade option! Through this right mix of flavors, you can satisfy your sweet tooth while staying mindful of your health. Let’s dive into how you can create this tropical delight for yourself!

    Benefits and Advantages of Buttery Rhubarb Zucchini Crisp

    When it comes to easy dessert recipes, Buttery Rhubarb Zucchini Crisp stands out for several reasons. First and foremost, the simplicity of this dish makes it accessible even to those with the busiest of schedules. Using just a handful of fresh ingredients, you can create a memory that your family and friends will cherish.

    Health Benefits

    One of the significant advantages of this recipe is its nutritional profile. Both rhubarb and zucchini are low-calorie vegetables packed with nutrients. Rhubarb is an excellent source of vitamin K, which supports bone health, while zucchini adds a splash of vitamins A, C, and folate. The recipe allows you to enjoy all these health benefits in a dessert format, making it easier to satisfy your sweet cravings without compromising your diet.

    Dietary Flexibility

    In today’s world, many individuals have specific dietary needs, whether they are vegan, gluten-free, or simply seeking to cut back on sugar. The Buttery Rhubarb Zucchini Crisp is easily adaptable. You can swap conventional butter for a plant-based alternative and use gluten-free oats to ensure that everyone can enjoy it.

    Moreover, this dessert can be customized with natural sweeteners like maple syrup or agave nectar instead of brown sugar, making it compatible with diet plans focused on reducing sugar intake. This versatility is especially appealing for meal prep—bake a batch on the weekend, and you’ll have a healthy treat ready for the week ahead.

    All of these opportunities for customization mean that you can effortlessly make Buttery Rhubarb Zucchini Crisp fit into your dietary regimen while still indulging in delightful dessert recipes.

    Ingredients Overview

    Essential Ingredients for Buttery Rhubarb Zucchini Crisp

    To create this mouthwatering Buttery Rhubarb Zucchini Crisp, you will need the following essential ingredients:

    • 2 cups rhubarb, chopped: Provides a tangy flavor and high fiber content.
    • 2 cups zucchini, grated: Adds moisture and sweetness while being low in calories.
    • ¾ cup brown sugar (or coconut sugar for a healthier option): Sweetens the dish; adjust based on preference.
    • 1 cup rolled oats (gluten-free varieties if needed): Serves as a base, adding texture and nutrients.
    • ½ cup all-purpose flour (or almond flour for a gluten-free option): Helps bind the topping together.
    • ½ cup unsalted butter (or vegan butter): Adds richness and flavor; can be substituted with coconut oil.
    • 1 tsp cinnamon: Infuses warmth and enhances the natural sweetness of the fruits.
    • 1 tsp vanilla extract: Boosts flavor depth.

    This combination of ingredients ensures a crisp with both nutritional benefits and delightful flavors.

    Dietary Substitutions to Customize Your Buttery Rhubarb Zucchini Crisp

    To adapt this recipe for various dietary needs, consider the following substitutions:

    • Butter: Use coconut oil or vegan butter for a dairy-free option.
    • Sugar: If you’re looking to cut calories, opt for honey, maple syrup, or agave nectar to sweeten your dish naturally.
    • Oats: Rolled oats can be replaced with quinoa flakes or an oat-free granola for a gluten-free alternative.
    • Flour: Almond flour can be used instead of all-purpose flour to create a lower-carb version.

    By making these simple adjustments, you can serve a delightful dessert suitable for everyone at your table!

    How to Prepare the Perfect Buttery Rhubarb Zucchini Crisp: Step-by-Step Guide

    Creating the Buttery Rhubarb Zucchini Crisp is an enjoyable experience. Just follow these clear and simple steps:

    1. Preheat Your Oven: Begin by preheating your oven to 350°F (175°C). This step is crucial as it ensures even baking.

    2. Prepare Your Base:

    3. In a large mixing bowl, combine the chopped rhubarb and grated zucchini.
    4. Add ½ cup of brown sugar and 1 tsp of cinnamon. Stir until the fruit is well coated. This mixture is the heart of your crisp and will infuse the dish with flavor.

    5. Create the Topping:

    6. In another bowl, mix together 1 cup of rolled oats, ½ cup of flour, and the remaining ¼ cup of brown sugar.
    7. Cut in ½ cup of butter or your alternative (e.g., coconut oil) until the mixture resembles coarse crumbs. You can use a pastry cutter or simply your hands to achieve the right texture.

    8. Combine:

    9. Spoon the rhubarb and zucchini mixture into a greased 9×9 inch baking dish, spreading it out evenly.
    10. Sprinkle the oat topping over the fruit layer, ensuring it covers the entire surface.

    11. Bake to Perfection:

    12. Place the dish in your preheated oven and let it bake for about 35-45 minutes, or until the topping is golden brown and the fruit is bubbling.

    13. Cool and Serve:

    14. Once the crisp has baked to perfection, remove it from the oven and let it cool for at least 10-15 minutes. This cooling time will allow the flavors to meld beautifully.

    15. Garnish and Enjoy:

    16. Serve warm, optionally topped with a scoop of vanilla ice cream or a dollop of whipped cream. You can also serve it with a sprinkle of additional cinnamon for an extra touch of flavor.

    From start to finish, the Buttery Rhubarb Zucchini Crisp takes about 1 hour, making it an easy yet fulfilling dessert perfect for gatherings or family dinners.

    Mastering Buttery Rhubarb Zucchini Crisp: Advanced Tips and Variations

    While the classic recipe is sure to please, you might want to experiment further! Here are some advanced tips and enticing variations to enhance your Buttery Rhubarb Zucchini Crisp:

    1. Add Nuts or Seeds: For an extra crunch, consider adding chopped nuts such as walnuts or pecans to your topping mixture. This adds a delightful texture and boosts the nutritional value further.

    2. Experiment with Fruit: Don’t hesitate to add other fruits to the mix! Strawberries or apples can complement the rhubarb’s tartness beautifully. Just be mindful of the sweetness levels while adjusting the sugar accordingly.

    3. Flavored Variations: Incorporate spices like nutmeg or ginger for an exotic twist. You might also consider adding lemon zest to brighten the flavors further.

    4. Serving Suggestions: For an elegant presentation, try layering the crisp in individual serving dishes or cups. This approach makes it perfect for entertaining guests or for special occasions.

    Employing these variations can breathe new life into your dessert recipes while ensuring that your family and friends will marvel at your culinary creativity.

    How to Store Buttery Rhubarb Zucchini Crisp: Best Practices

    To ensure that your Buttery Rhubarb Zucchini Crisp remains fresh and delicious, follow these storage best practices:

    • Refrigeration: Allow the crisp to cool down completely before covering it tightly with plastic wrap or transferring it to an airtight container. It can be stored in the refrigerator for up to 5 days without losing its delightful taste.

    • Freezing: If you wish to prolong its shelf life, freezing is an excellent method. Cut the cooled crisp into individual portions, place them in freezer-safe containers, and freeze for up to 3 months. When you’re ready to enjoy, thaw overnight in the refrigerator and reheat in a warm oven.

    • Reheating: To reheat, preheat your oven to 350°F (175°C). Place the crisp in the oven for about 15-20 minutes, or until warmed through, ensuring you enjoy the crisp’s delightful texture.

    Proper storage ensures your creation remains a delightful treat, making this one of the go-to dessert recipes that offers sweetness any time you desire.

    Nutritional Value of Buttery Rhubarb Zucchini Crisp

    When considering dessert recipes, it’s essential to be aware of the dish’s nutritional value. A single serving of Buttery Rhubarb Zucchini Crisp provides:

    • Calories: Approximately 180-220 calories
    • Total Fat: About 8-10 grams
    • Saturated Fat: Ranging from 4-5 grams (depending on the butter used)
    • Cholesterol: Approximately 15-20 mg (if using butter)
    • Sodium: Around 15-30 mg
    • Total Carbohydrates: Roughly 30 grams
    • Dietary Fiber: Approximately 3-4 grams
    • Sugars: About 10-15 grams
    • Protein: Roughly 3 grams

    With the fiber content being relatively high, this dessert can help keep your digestive system in check while satisfying your sweet cravings. Remember, the nutritional values can vary based on the ingredient substitutions you make.

    FAQs: Frequently Asked Questions About Buttery Rhubarb Zucchini Crisp

    Can I use frozen rhubarb?

    Yes, frozen rhubarb can be used! Just ensure to thaw and drain excess moisture before mixing it with other ingredients.

    Is it possible to make this recipe ahead of time?

    Absolutely! You can prepare the mixture ahead of time, store it in the refrigerator, and bake when you’re ready to serve. This is a great strategy for busy parents or hosts.

    How do I achieve a crispier topping?

    For a crunchier topping, consider adding a tablespoon or two of almond meal to the oat mixture. You can also bake it slightly longer while keeping an eye to prevent burning!

    Can I reduce the sugar without compromising taste?

    Yes, feel free to reduce the sugar by up to half! Rhubarb is tart, and the natural sweetness from zucchini will still provide a balanced flavor profile.

    What are other vegetable substitutes for zucchini?

    If zucchini isn’t available, consider using finely grated carrots or sweet potatoes as a substitute for a different flavor profile.

    By addressing these common FAQs, you’ll empower readers to be more confident in attempting this delightful dessert, reassuring them that Buttery Rhubarb Zucchini Crisp is not only easy to make but also adaptable to different preferences.

    Each bite of Buttery Rhubarb Zucchini Crisp encapsulates the flavors of summer and the comforts of home in a wholesome manner. So gather your ingredients, roll up your sleeves, and get ready for a delightful dessert that promises to impress!

  • IM Officially Addicted To This Golden Rhubarb Crisp

    IM Officially Addicted To This Golden Rhubarb Crisp

    I’M Officially Addicted To This Golden Rhubarb Crisp!: A Tropical Delight

    Introduction to I’M Officially Addicted To This Golden Rhubarb Crisp!

    If you’re on the lookout for irresistible dessert recipes that are both delicious and easy to prepare, then you’re in for a treat! This Golden Rhubarb Crisp is the perfect balance of tart and sweet, bringing a touch of tropical charm to your kitchen. Whether you’re a busy parent, a student on the go, or a newlywed looking to impress, this recipe is designed to cater to all culinary skill levels.

    What makes this dish stand out is its simplicity. With minimal preparation and easily accessible ingredients, you can have this delightful dessert ready in no time. Plus, it’s packed with health benefits. Rhubarb is a great source of vitamins K and C, fiber, and antioxidants, making it a wholesome choice for your dessert table.

    This recipe is also versatile, accommodating various dietary preferences. It can easily be made gluten-free or vegan, ensuring that everyone at your gathering can savor each bite. So, whether you’re serving it as a comforting family dessert or a sweet treat for guests, this Golden Rhubarb Crisp will surely be a crowd-pleaser. Let’s dive into the delectable details!

    Benefits and Advantages of I’M Officially Addicted To This Golden Rhubarb Crisp!

    One of the standout features of the Golden Rhubarb Crisp is how simple it is to create. With just a few core ingredients, you can whip up a dessert that impresses both the eyes and the palate. Unlike complex pastries that require intricate techniques, this crisp allows you to embrace the joy of baking without the stress.

    Health Benefits

    Eating rhubarb isn’t just about enjoying a delightful dessert. This vegetable (though often treated like a fruit) provides several health benefits, making it a worthy addition to your diet. Rich in vitamins K and C, rhubarb supports bone health and boosts your immune system. Additionally, its high fiber content promotes good digestion, which is especially beneficial for those looking to maintain a balanced diet. The lower sugar content in this recipe compared to many traditional desserts also makes it less guilt-inducing.

    Diet-Friendly Options

    Moreover, this baking marvel is easily adaptable. For health-conscious individuals, the crisp can be made using oats and almond flour for a gluten-free option that still provides a satisfying texture. Vegan eaters can use coconut oil instead of butter, maintaining a rich flavor without compromising their dietary preferences. Even calorie-watchers can enjoy this treat by substituting sugar with a natural sweetener, keeping the deliciousness intact while making it lighter.

    As you can see, the Golden Rhubarb Crisp is not just another dessert; it embodies a delightful symphony of taste and health, making it an ideal choice for any dessert lover.

    Ingredients Overview

    Essential Ingredients for I’M Officially Addicted To This Golden Rhubarb Crisp!

    To create this delightful dessert, gather the following ingredients:

    • Rhubarb (4 cups, chopped): The star of our dish! Its tartness gives a beautiful contrast to the sweetness of the crisp topping.
    • Granulated sugar (1 cup): Sweetens the rhubarb; can be replaced with coconut sugar for a healthier option.
    • All-purpose flour (½ cup): Forms the base of the crisp; gluten-free flour can be used for those with dietary restrictions.
    • Rolled oats (1 cup): Adds texture and heartiness. Regular or gluten-free oats work well.
    • Brown sugar (½ cup): Enriches the flavor of the topping, giving it a caramel-like touch.
    • Butter (½ cup, melted): Essential for the crumbly texture; substitute with coconut oil for a vegan option.
    • Cinnamon & Nutmeg (1 tsp each): These spices elevate the flavor profile, giving a warm essence to the dish.
    • Salt (a pinch): Balances sweetness and enhances the overall flavor.

    Dietary Substitutions to Customize Your I’M Officially Addicted To This Golden Rhubarb Crisp!

    Depending on dietary preferences and availability, here are some suggested substitutions for the ingredients used in this Golden Rhubarb Crisp:

    • Gluten-Free Flour: Replace all-purpose flour with a gluten-free blend to make this crisp suitable for those with gluten sensitivities.
    • Coconut Oil: Use in place of butter for a fully vegan dessert option, providing similar richness without the dairy.
    • Natural Sweeteners: Consider substituting granulated and brown sugars with honey, maple syrup, or even monk fruit sweetener for a low-calorie alternative.
    • Nuts and Seeds: Enhance the crisp topping by adding chopped walnuts or sliced almonds for additional flavor and crunch.

    These substitutions ensure that everyone can enjoy a bite of this delicious Golden Rhubarb Crisp while adhering to their specific dietary needs.

    How to Prepare the Perfect I’M Officially Addicted To This Golden Rhubarb Crisp!: Step-by-Step Guide

    Here’s how to create the most delicious dessert recipes using this Golden Rhubarb Crisp recipe! Follow these simple steps for a perfect bake every time:

    1. Preheat Your Oven: Set your oven to 375°F (190°C) to prepare for baking.

    2. Prepare the Rhubarb: In a large mixing bowl, toss the chopped rhubarb with granulated sugar. Allow it to sit for about 10 minutes to draw out some juices.

    3. Mix Dry Ingredients: In a separate bowl, mix the flour, oats, brown sugar, cinnamon, nutmeg, and salt until well combined.

    4. Combine Wet Ingredients: In another bowl, mix melted butter (or coconut oil) into the dry mixture until it resembles coarse crumbs. If using a vegan option, ensure it’s thoroughly mixed to avoid clumping.

    5. Assemble the Dish: In a greased baking dish, layer the sugar-coated rhubarb evenly before topping it with the crumb mixture. Make sure to cover all the rhubarb to lock in the sweetness.

    6. Bake: Place the dish in the preheated oven and bake for 30-35 minutes or until the top is golden brown and the rhubarb is bubbling.

    7. Cool and Serve: Once baked, allow the crisp to cool for at least 10 minutes. Serve warm with a scoop of vanilla ice cream or a dollop of whipped cream for an extra indulgence.

    8. Enjoy: Dive into this delightful dessert and share your experience with family and friends!

    This step-by-step guide ensures that the Golden Rhubarb Crisp comes out perfectly every time. Adapt each step according to any dietary requirements, making it suitable for anyone to enjoy.

    Mastering I’M Officially Addicted To This Golden Rhubarb Crisp!: Advanced Tips and Variations

    Creating the perfect Golden Rhubarb Crisp isn’t just about following the recipe; it’s also about mastering some advanced techniques and variations! Here are some tips to elevate your rustic dessert:

    • Add Fruits: Consider incorporating other fruits such as strawberries or apples to enhance the flavor and add a sweetness that complements the rhubarb. Cinnamon apples can be a delightful addition.

    • Try Different Nuts: For an extra crunch, add various nuts like pecans or almonds to your topping mixture. This not only adds texture but also enriches flavor.

    • Experiment with Spices: Besides cinnamon and nutmeg, you can try adding ginger or cardamom for a unique twist on traditional flavor.

    • Personal Touch: Top your crisp with straight-from-the-oven, homemade vanilla or coconut ice cream to make it a truly decadent dessert.

    By exploring these variations, you can personalize your Golden Rhubarb Crisp every time you make it, ensuring it stays exciting and fresh!

    How to Store I’M Officially Addicted To This Golden Rhubarb Crisp!: Best Practices

    Refrigeration

    Once the Golden Rhubarb Crisp has cooled completely, store it in an airtight container in the refrigerator. This ensures it remains fresh and delicious for up to a week. Simply reheat individual servings in the microwave or an oven.

    Freezing

    To freeze, allow the crisp to cool completely before wrapping it securely in plastic wrap and then aluminum foil. It can be stored in the freezer for up to three months. When you’re ready to enjoy, thaw overnight in the refrigerator before reheating.

    Reheating

    To reheat the crisp, place it in a preheated oven at 350°F (175°C) for about 10-15 minutes until warmed through. This method keeps the topping crispy and delightful, maintaining that satisfying crunch.

    Proper storage methods ensure that your Golden Rhubarb Crisp remains a top choice among dessert recipes, even days after you’ve prepared it.

    Nutritional Value of I’M Officially Addicted To This Golden Rhubarb Crisp!

    Understanding the nutritional value of your dessert can enhance your eating experience. Here’s a typical breakdown of a serving of Golden Rhubarb Crisp, approximately one-eighth of the recipe:

    • Calories: 220
    • Total Fat: 8g (Saturated Fat: 4g)
    • Cholesterol: 20mg
    • Sodium: 150mg
    • Total Carbohydrates: 36g
    • Dietary Fiber: 3g
    • Sugars: 12g
    • Protein: 2g

    This nutritional information suggests that the Golden Rhubarb Crisp is a relatively light dessert option particularly when compared to heavier cakes and pastries. The fiber from the rhubarb and oats adds health benefits while still being a delightful treat.

    Feel free to adjust recipes based on dietary needs, such as using lower-calorie sweeteners or substituting healthier fats to make it even more nutritious.

    FAQs: Frequently Asked Questions About I’M Officially Addicted To This Golden Rhubarb Crisp!

    Q: Can I use frozen rhubarb instead of fresh?
    A: Absolutely! Frozen rhubarb works well, but you may need to adjust the cooking time slightly as it may release more water.

    Q: Is it possible to make this recipe without sugar?
    A: Yes! You can substitute with natural sweeteners like agave syrup or stevia, making it perfect for those monitoring their sugar intake.

    Q: How can I make this rhubarb crisp vegan?
    A: Use coconut oil instead of butter, and replace any dairy toppings with plant-based options like vegan ice cream or whipped topping.

    Q: Can other fruits be added to the rhubarb crisp?
    A: Certainly! Sliced strawberries, apples, or peaches can enhance the flavor and provide additional sweetness.

    Q: How do I know when the crisp is done baking?
    A: Look for a golden-brown top and bubbling juices from the rhubarb. The crisp should be firm, not too soft.

    By addressing these common questions, readers can enjoy making their version of the Golden Rhubarb Crisp with confidence.


    In conclusion, this Golden Rhubarb Crisp is a simple yet profound delight that meets the needs of various dietary preferences, from gluten-free to vegan. The ease of preparation and the nutritional advantages make it a perfect addition to any dessert menu. Whether for a family meal or a dinner party, it guarantees smiles all around. So what are you waiting for? Whip up your own batch and become addicted to this fantastic dessert!

  • My Southern MamaS Secret Recipe For Best Bang Bang

    My Southern MamaS Secret Recipe For Best Bang Bang

    My Southern Mama’S Secret Recipe For Best Bang Bang!: A Tropical Delight

    Introduction to My Southern Mama’S Secret Recipe For Best Bang Bang!

    Welcome to a culinary journey where flavor knows no bounds! My Southern Mama’s Secret Recipe for the Best Bang Bang is more than just a meal; it’s a delightful adventure for your taste buds that makes for excellent dinner recipes. This dish beautifully combines the crunch of fresh ingredients with creamy sauces, elevating your dining experience from simple to extraordinary.

    One of the standout features of this recipe is its versatility. It caters to a variety of tastes and dietary requirements, making it ideal for home cooks, busy parents, and food enthusiasts alike. It’s also incredibly simple to prepare, allowing you to whip it up on a busy weeknight, or impressing guests at a social gathering with minimal effort involved.

    Moreover, this Bang Bang recipe packs a serious punch in the health department. Made with wholesome ingredients, it can easily be tailored to meet different dietary needs, including vegan and gluten-free adaptations. Whether you’re meal prepping for the week, looking for nutritious options for your family, or just want something delicious to try, this recipe will not disappoint. So, let’s dive into the world of Bang Bang and bring some Southern flair to your kitchen!

    Benefits and Advantages of My Southern Mama’S Secret Recipe For Best Bang Bang!

    What makes my Southern Mama’s Bang Bang truly special? It begins with its remarkable ease of preparation. You don’t need to be a culinary expert to nail this dish; even novice cooks will find it manageable and enjoyable. Ideal for any dinner recipe at home, it simplifies your cooking process without sacrificing quality or taste.

    Health is another big advantage. The recipe is packed with fresh vegetables and lean proteins, making it a great option for anyone looking to maintain a healthy diet. For busy parents and diet-conscious individuals, this dish hits the mark by being both satisfying and nutritious. Moreover, it allows you to incorporate a variety of colorful veggies, adding visual appeal along with essential vitamins and minerals.

    The versatility of this recipe is another noteworthy benefit. You can serve it as an appetizer, a main course, or even as a side dish alongside rice or quinoa. It’s perfect for travelers seeking quick and delicious meals on the go, and it can be modified to cater to a variety of dietary preferences. For example, substituting ingredients allows you to create a vegan version or a dish tailored for gluten-free diets. Such adaptable features make Bang Bang a standout amidst traditional dinner recipes that might not offer the same level of flexibility.

    Through the combination of simplicity, health benefits, and adaptability, my Southern Mama’s Bang Bang transcends the ordinary and invites you to experience a delicious slice of Southern cuisine with a global twist.

    Ingredients Overview

    Essential Ingredients for My Southern Mama’S Secret Recipe For Best Bang Bang!

    To make the best Bang Bang, you need a selection of fresh and fulfilling ingredients. Below is the detailed list you will need, complete with measurements:

    • 1 lb shrimp (peeled and deveined): A great source of lean protein and omega-3 fatty acids.
    • 2 cups uncooked rice or quinoa (gluten-free option available): This will serve as the hearty base for your dish.
    • 1 cup green bell pepper (chopped): Adds color and crunch, plus essential vitamins.
    • 1 cup red cabbage (shredded): Rich in antioxidants, it provides a delightful texture.
    • 1/2 cup carrots (shredded): Offers a natural sweetness and crunchy element.
    • 1/4 cup green onions (chopped): For added flavor and garnish.
    • 1/2 cup mayonnaise (can substitute with vegan mayo for dairy-free options): Creates that creamy sauce.
    • 1/4 cup sweet chili sauce: Gives the Bang Bang its signature sweet and spicy kick.
    • 1 tsp garlic powder: Enhances flavor.
    • Salt and pepper to taste: Essential for seasoning.

    Alternatively, if you want lower-calorie options, consider using baked tofu instead of shrimp as a protein source.

    Dietary Substitutions to Customize Your My Southern Mama’S Secret Recipe For Best Bang Bang!

    This recipe is inherently adaptable. Here are some suggested substitutions:

    • For a vegan version: Replace shrimp with baked tofu or chickpeas, maintaining the same seasoning.
    • Gluten-free: Ensure that the mayonnaise and sweet chili sauce are certified gluten-free.
    • Low-carb option: Instead of rice or quinoa, you can use cauliflower rice, a fantastic low-carb alternative abundant in fiber.
    • For enhanced spice: If you like it hot, add a few drops of sriracha or a sprinkle of red pepper flakes to the sauce mixture.

    By providing these substitutions, this recipe caters to a diverse audience, ensuring everyone can enjoy a taste of Southern cuisine.

    How to Prepare the Perfect My Southern Mama’S Secret Recipe For Best Bang Bang!: Step-by-Step Guide

    Ready to create your own Southern Mama’s Bang Bang? Follow these straightforward steps to prepare this delicious dish seamlessly:

    1. Prepare the Base: Begin by cooking your rice or quinoa according to package instructions. This will provide a wholesome base for your Bang Bang dish.

    2. Make the Sauce Mix: In a medium bowl, combine the mayonnaise, sweet chili sauce, garlic powder, salt, and pepper. Adjust the ingredients based on your taste preferences, adding more sriracha for extra heat if desired.

    3. Sauté the Vegetables: In a large skillet over medium heat, add a dash of olive oil. Once hot, toss in the chopped green bell pepper, shredded carrots, and red cabbage. Sauté for 4-5 minutes or until the vegetables are tender but still crisp.

    4. Add the Shrimp: Stir in the shrimp and continue to sauté for an additional 3-4 minutes or until the shrimp turn pink and opaque. This step infuses the dish with juicy flavor.

    5. Combine Ingredients: Once the shrimp is cooked, remove the skillet from the heat, and pour the prepared sauce over the shrimp and vegetable mixture. Gently toss everything together, allowing the sauce to coat all ingredients evenly.

    6. Serve Over Rice/Quinoa: Fluff your cooked rice or quinoa with a fork. Spoon the Bang Bang mixture over the top, ensuring an evenly portioned serving.

    7. Garnish: Finally, sprinkle the chopped green onions over the top before serving for a fresh touch.

    8. Enjoy: Dig in and savor the explosion of flavors!

    This simplified step-by-step guide ensures that you can prepare the best Bang Bang with ease, linking each action clearly while maintaining the vibrant essence of Southern cooking.

    Mastering My Southern Mama’S Secret Recipe For Best Bang Bang!: Advanced Tips and Variations

    Now that you have the basics down, let’s look at some advanced tips and variations that can elevate your Bang Bang!

    • Do-Ahead Prep: You can chop your vegetables and prepare the sauce in advance. This will significantly cut down preparation time, making it even easier to throw together at dinner time.

    • Additional Proteins: This recipe can also work beautifully with chicken, scallops, or even tempeh, offering a variety for different tastes while sticking to the Southern Mama theme.

    • Experiment with Veggies: Feel free to incorporate other vegetables such as snap peas, zucchini, or broccoli for a new flavor profile and added nutrition.

    • Add a Twist of Citrus: Adding a splash of lemon or lime juice right before serving brightens the dish and enhances its tropical flavors.

    • Serving Styles: You can present the dish in lettuce cups for an interactive serving experience, perfect for family dinners or gatherings.

    By integrating these tips and variations into your cooking, you’ll master the art of Bang Bang, turning a classic recipe into an exciting undertaking suitable for diverse tastes.

    How to Store My Southern Mama’S Secret Recipe For Best Bang Bang!: Best Practices

    Storing your Bang Bang properly is key to ensuring it remains fresh and tasty. Here are some guidelines for keeping it at its best:

    • Refrigeration: Store any leftovers in an airtight container in the fridge. The dish is best consumed within 3 days to maintain the quality of fresh ingredients.

    • Freezing: If you want longer-lasting storage, consider freezing the Bang Bang mixture (without rice) in a freezer-safe bag. Lay the bag flat to save space. It can be frozen for up to 2 months.

    • Reheating: When you’re ready to enjoy your leftovers, reheating in a skillet over low heat is preferred for even warming. If you stored the dish in the freezer, let it thaw in the refrigerator overnight before reheating.

    These storage methods ensure that your Southern Mama’s Bang Bang remains delicious and ready to serve time and again, while also fitting within the realm of practical dinner recipes to ease your meal planning.

    Nutritional Value of My Southern Mama’S Secret Recipe For Best Bang Bang!

    Understanding the nutritional content of your meals is essential for those mindful of their diets. Here’s a breakdown of the estimated nutritional value per serving of My Southern Mama’s Best Bang Bang:

    • Calories: Approximately 450
    • Protein: 28g (primarily from shrimp and your protein choice)
    • Total Fat: 17g (including healthy fats from olive oil)
    • Saturated Fat: 3g (from mayonnaise, which can be reduced with substitutes)
    • Carbohydrates: 55g (depending on your choice of base such as rice/quinoa)
    • Fiber: 6g (okay for vegetable intake)
    • Sugar: 5g (mostly from sweet chili sauce)

    Additionally, this recipe is rich in vitamins A and C and minerals such as iron and calcium, making it a balanced choice for anyone wanting satisfying dinner recipes.

    FAQs: Frequently Asked Questions About My Southern Mama’S Secret Recipe For Best Bang Bang!

    Q1: Can I make this recipe ahead of time?

    Absolutely! You can prepare the sauce and chop the vegetables a day ahead to speed up cooking time.

    Q2: Is there a non-seafood alternative for this recipe?

    Yes, you can use chicken, tofu, or chickpeas as a substitute for shrimp, depending on dietary preferences.

    Q3: How spicy is the Bang Bang?

    The recipe provides a sweet and slightly spicy flavor. You can adjust the heat level by modifying the amount of sweet chili sauce or adding sriracha.

    Q4: Can I make this dish vegan?

    Yes! By substituting shrimp with baked tofu and egg-free mayonnaise, you can create a fully vegan version of this Bang Bang recipe.

    Q5: Is it possible to store leftovers?

    Definitely! Store in an airtight container in the refrigerator for up to 3 days or freeze for up to 2 months.

    By addressing these common inquiries, the recipe is made more accessible, and your readers can engage with confidence in the cooking process.


    In conclusion, My Southern Mama’s Secret Recipe for Best Bang Bang is a delightful fusion of fresh ingredients, simplicity, and adaptability, making it perfect for all types of cooks. Whether you’re a busy parent, a student, or just love whipping up dinner recipes for your family, this dish embodies the comfort and joy of Southern cooking. Give it a try, and treat your tastebuds to a flavor explosion like no other!