Tag: desserts

  • My GrandmaS Secret Recipe For Best Rhubarb Crisp

    My GrandmaS Secret Recipe For Best Rhubarb Crisp

    My Grandma’S Secret Recipe For Best Rhubarb Crisp!: A Tropical Delight

    Introduction to My Grandma’S Secret Recipe For Best Rhubarb Crisp!

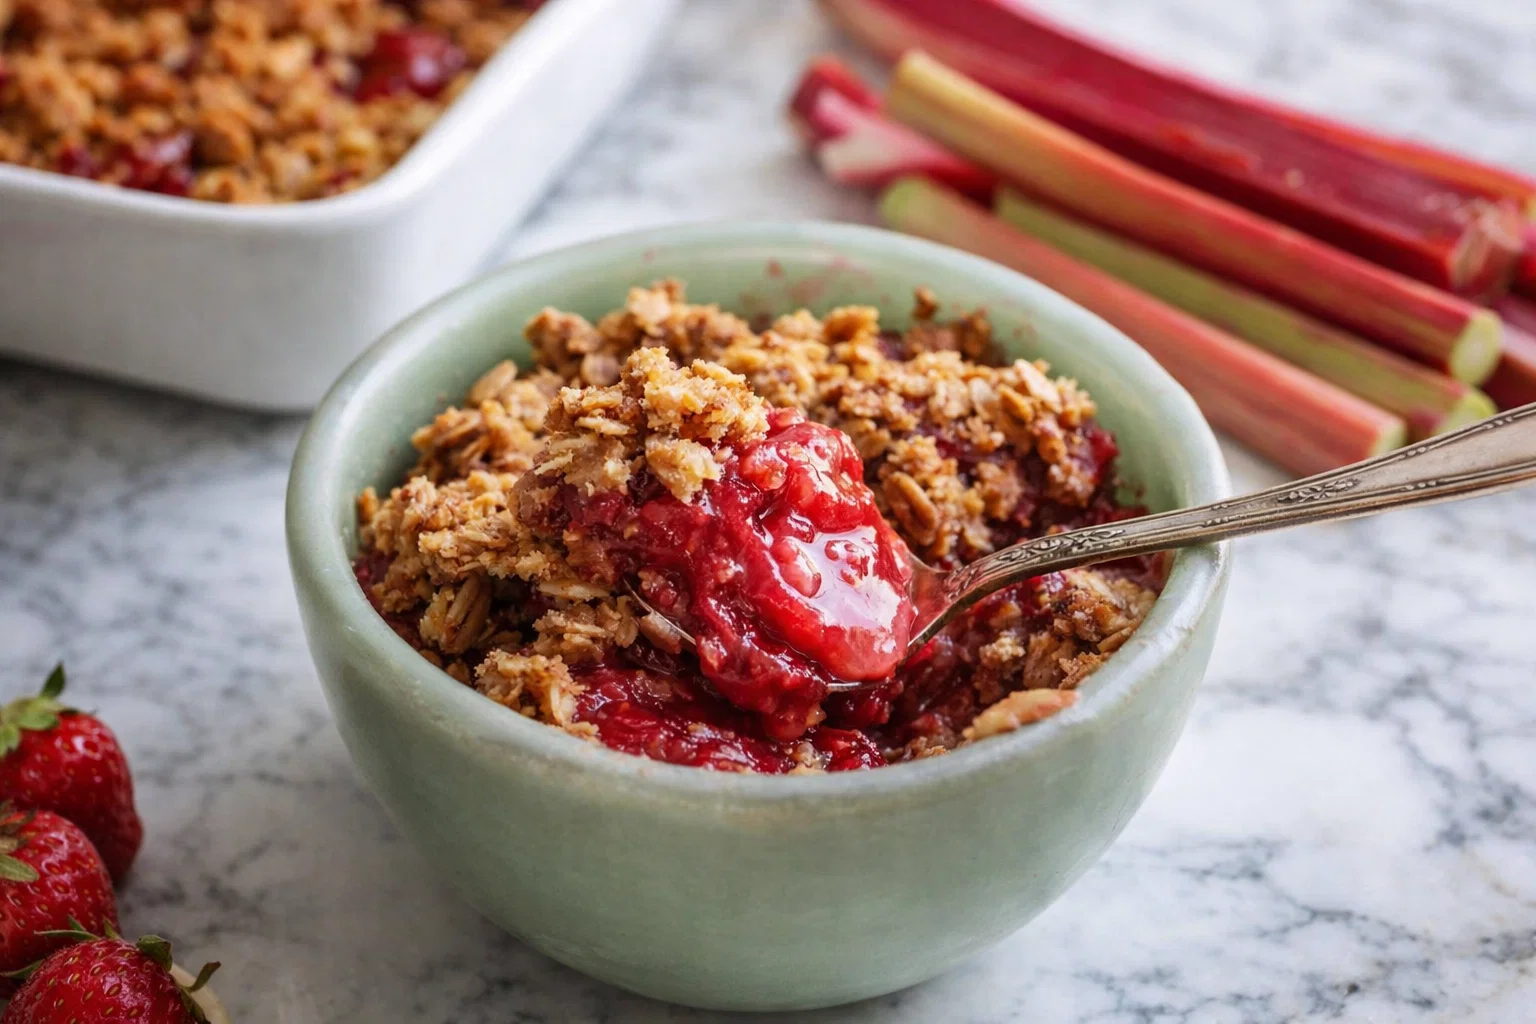
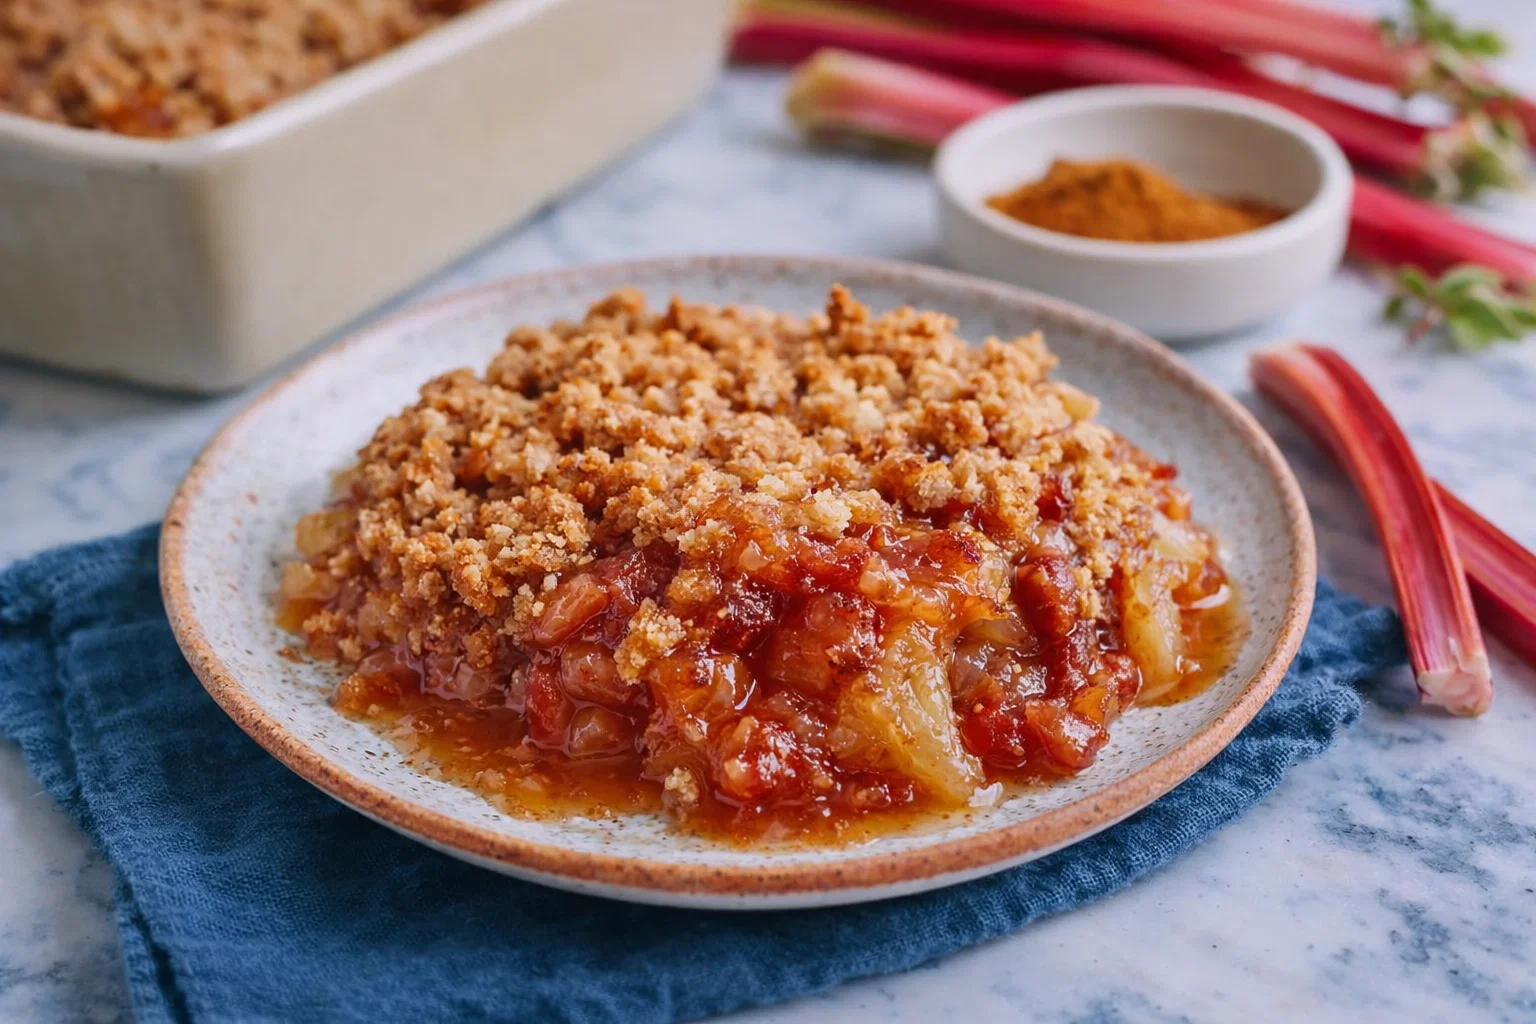
    Welcome to the heartwarming world of my grandma’s secret recipe for the best rhubarb crisp! This delightful dessert brings together tart rhubarb and a crumbly, flavorful topping, creating a treat that is not only delicious but also simple to make. We all appreciate dessert recipes that don’t require hours in the kitchen, and this one fits the bill perfectly.

    Not only is this rhubarb crisp easy to prepare, but it also caters to various dietary preferences. For busy parents, students, or working professionals, this recipe offers a guilt-free indulgence that can be made in about 30 minutes. You will love that it can be adapted to be vegan and gluten-free, allowing everyone to enjoy its tangy-sweet flavor.

    Imagine the aroma wafting through your kitchen as you bake this treat! It’s a nostalgic experience that invites friends and family around the table, perfect for gatherings or cozy dinners. Moreover, rhubarb is known for its health benefits – it’s low in calories and high in fiber, making this dessert an excellent choice that doesn’t compromise your wellness goals.

    So, grab your ingredients and let’s unveil this secret family recipe that is bound to become a staple in your collection of cherished dessert recipes!

    Benefits and Advantages of My Grandma’S Secret Recipe For Best Rhubarb Crisp!

    My grandma’s secret recipe for rhubarb crisp shines among various dessert recipes for several reasons. Firstly, it is incredibly easy to prepare. With minimal ingredients, this recipe minimizes stress while delivering maximum flavor. Perfect for novice cooks and baking enthusiasts alike, this dish requires only basic kitchen tools, ensuring that you can whip it up without any fuss.

    Health Benefits: Rhubarb is not just a flavorful option; it is also among the most nutrient-dense foods available. It’s low in calories while providing essential vitamins and minerals. Rhubarb is an excellent source of vitamin K, calcium, and antioxidants, making this dessert recipe a healthier option amid sweets. Plus, the fiber content supports digestion, allowing you to enjoy this guilt-free treat.

    Additionally, this recipe caters to a wide range of dietary preferences, making it inclusive for any dinner table. Are you looking for vegan dessert recipes? Simply substitute butter with coconut oil or vegan margarine, and you’re all set! For gluten-free options, use almond flour or gluten-free oats to create a tender topping that everyone can enjoy.

    Lastly, it stands out not just because of its wholesome ingredients but also due to its adaptability. With the option to customize based on your taste or specific dietary needs, this rhubarb crisp can transform from a traditional treat to an innovative dessert that you will define for your family and friends.

    Ingredients Overview

    Essential Ingredients for My Grandma’S Secret Recipe For Best Rhubarb Crisp!

    The beauty of my grandma’s rhubarb crisp lies in its simple yet satisfying ingredients. Here’s what you will need:

    • 4 cups fresh rhubarb, chopped: Rhubarb provides a tangy flavor and forms the base of the crisp.
    • 1 cup granulated sugar: This balances the tartness of rhubarb. Consider using coconut sugar for a healthier alternative.
    • 1 tablespoon cornstarch: A thickening agent that helps the filling hold together.
    • 1 teaspoon vanilla extract: Adds an aromatic sweetness to the dish.
    • 1 cup rolled oats (gluten-free if needed): The heart of the crisp topping, contributing texture and fiber.
    • 1 cup all-purpose flour (or gluten-free flour): Creates a crumbly topping; for a gluten-free option, almond flour works well too.
    • 1/2 cup brown sugar: This enhances the depth of sweetness in the topping.
    • 1/2 cup unsalted butter (or coconut oil for vegan): Adds richness and binds the topping together. If you prefer a vegan option, replace it with coconut oil or vegan butter.
    • 1 teaspoon cinnamon: A warm spice that elevates the flavor profile.

    Dietary Substitutions to Customize Your My Grandma’S Secret Recipe For Best Rhubarb Crisp!

    Here are some suggested substitutions to accommodate different dietary needs:

    • For vegan variations, substitute the butter with coconut oil or vegan margarine. You won’t lose any flavor, and the crisp will still be deliciously rich.
    • If you need a gluten-free option, opt for gluten-free all-purpose flour and certified gluten-free oats instead of regular flour and oats. This substitution maintains the integrity and flavor of the dish while ensuring it remains accessible to everyone.
    • For a lower-calorie alternative, consider using a sugar substitute like stevia or erythritol in place of granulated and brown sugar. This choice allows you to enjoy a guilt-free dessert without compromising on taste.

    It’s remarkable how versatile this rhubarb crisp can be. You can play with these ingredients based on what you have on hand or what fits your dietary preferences.

    How to Prepare the Perfect My Grandma’S Secret Recipe For Best Rhubarb Crisp!: Step-by-Step Guide

    Now that we have gathered our ingredients, let’s dive into the step-by-step instructions for preparing this delightful rhubarb crisp.

    1. Preheat the Oven: Start by preheating your oven to 350°F (175°C). A properly heated oven ensures that the crisp bakes evenly.

    2. Prepare the Rhubarb Filling: In a large mixing bowl, combine 4 cups of chopped fresh rhubarb, 1 cup of granulated sugar, 1 tablespoon of cornstarch, and 1 teaspoon of vanilla extract. Stir until the rhubarb is evenly coated and let it sit for about 10 minutes. This allows the rhubarb to release its juices and enhances the flavor.

    3. Make the Crisp Topping: In another mixing bowl, mix 1 cup of rolled oats, 1 cup of all-purpose flour (or gluten-free flour), 1/2 cup of brown sugar, and 1 teaspoon of cinnamon. Add in 1/2 cup of softened unsalted butter (or coconut oil). Use a fork or your fingers to mix until the mixture resembles coarse crumbs.

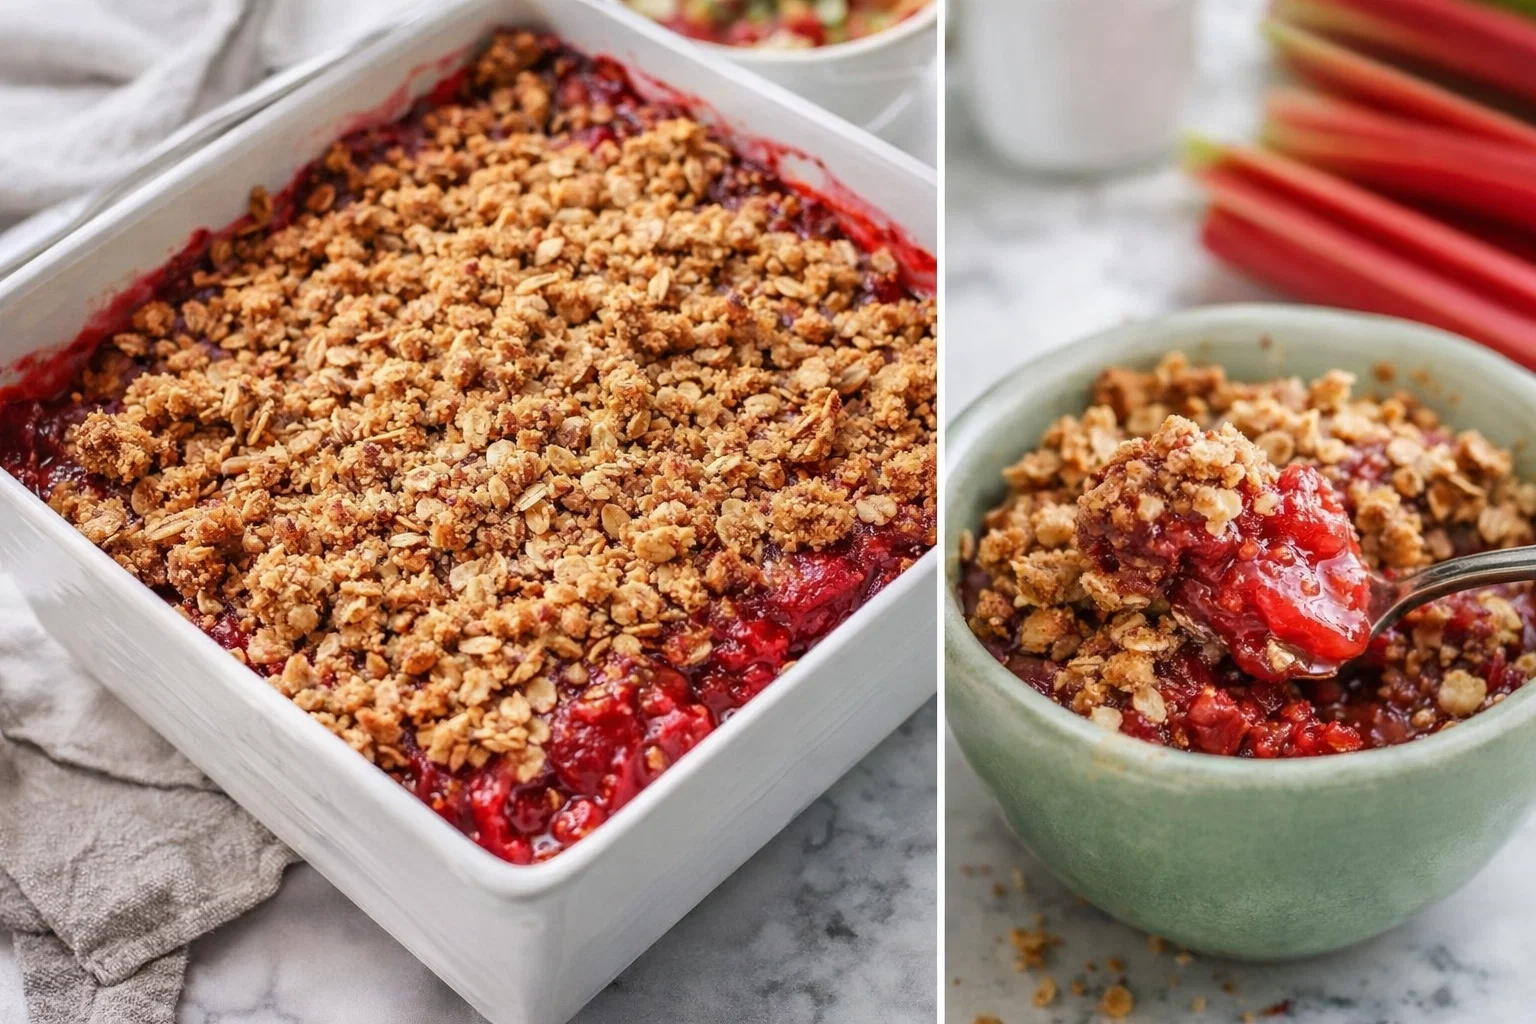
    4. Combine the Filling and Topping: Pour the rhubarb mixture into a greased 9×13-inch baking dish. Sprinkle the oat topping evenly over the rhubarb filling, ensuring that it covers the top completely.

    5. Bake the Crisp: Place the baking dish in the preheated oven and bake for 35-45 minutes, or until the topping is golden brown and the rhubarb is bubbling around the edges.

    6. Cool Before Serving: Once baked, remove the rhubarb crisp from the oven and let it cool for at least 10 minutes before serving. This cooling time allows the juices to settle, preventing the crisp from becoming too runny.

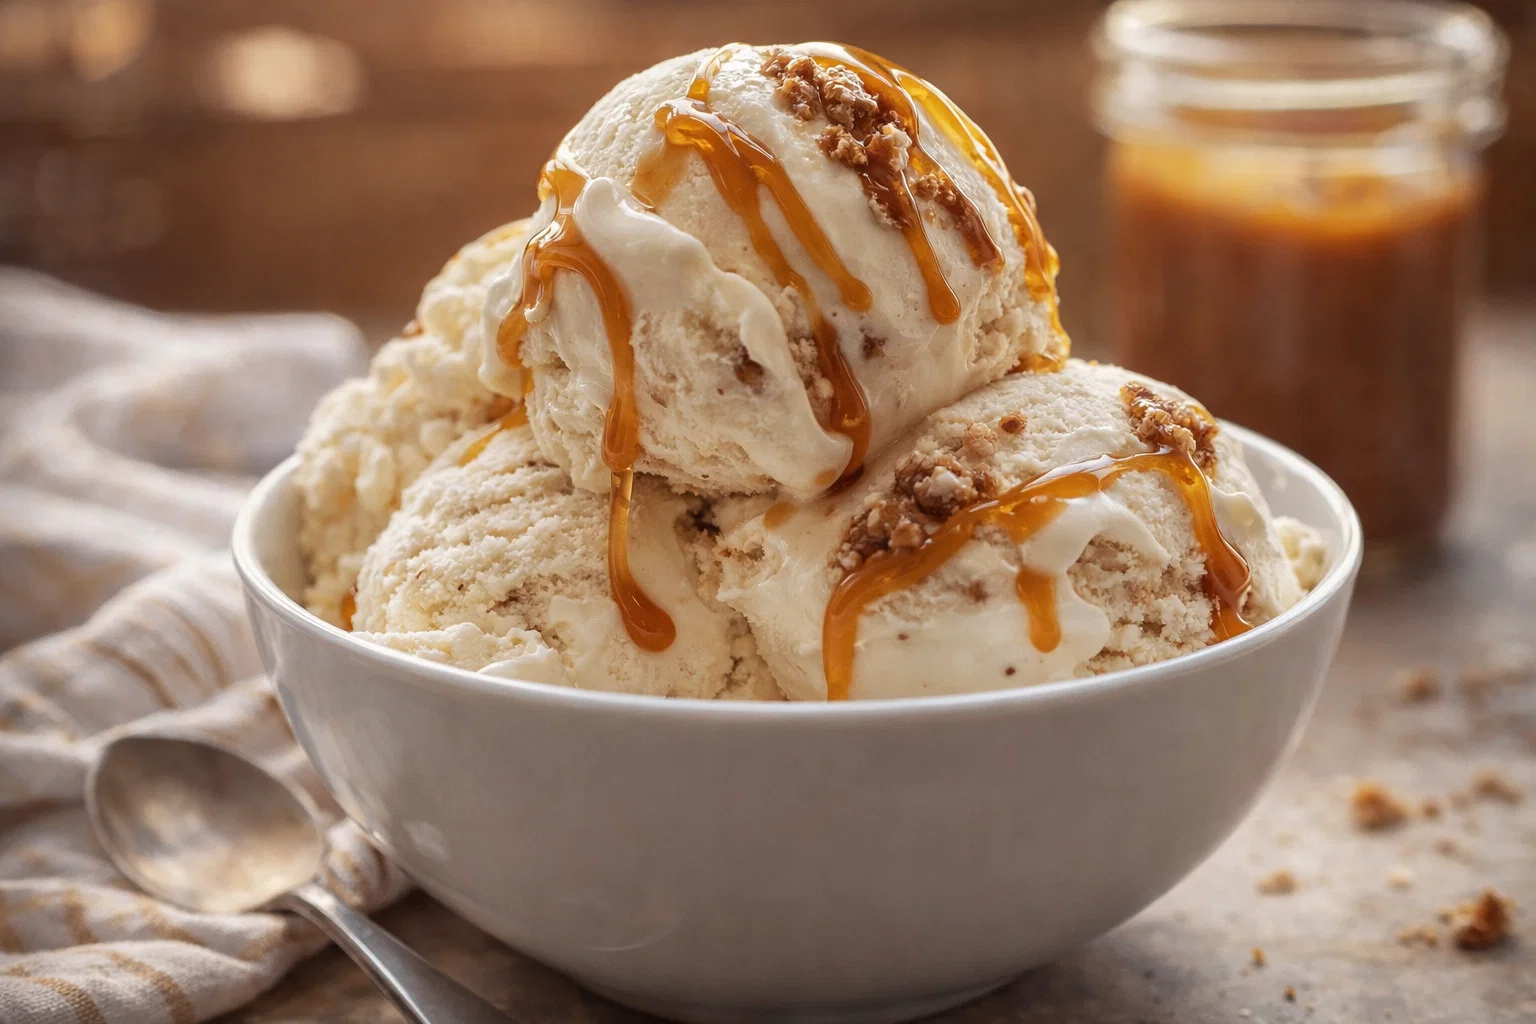
    7. Serve with Accompaniments: For an extra treat, serve your rhubarb crisp warm with a scoop of vanilla ice cream or a dollop of whipped cream. This addition makes for an indulgent dessert experience!

    8. Storage Instructions: If you have leftovers (which is doubtful!), store them in an airtight container in the refrigerator for up to three days. To reheat, pop it back into the oven or microwave until warmed through.

    This step-by-step guide ensures that even those who are new to baking can create an incredible dessert to share with loved ones. The versatility of this dish allows it to cater to various dietary needs while still delivering a delightful flavor.

    Mastering My Grandma’S Secret Recipe For Best Rhubarb Crisp!: Advanced Tips and Variations

    While this rhubarb crisp recipe is fantastic as is, there are various advanced tips and unique variations to explore.

    1. Add a Twisted Fruit Combination: Mix strawberries, blueberries, or apples into the rhubarb filling. A combination of flavors can elevate your rhubarb crisp to new flavor heights, offering a delightful burst of sweetness alongside the tang.

    2. Incorporate Nuts: For added crunch, consider mixing chopped nuts such as almonds or walnuts into the crisp topping. This addition will not only provide a nutty flavor but also enhance the nutritional profile, offering healthy fats and protein.

    3. Experiment with Spices: Beyond cinnamon, you could add nutmeg or ginger to the topping for an extra layer of warmth and complexity.

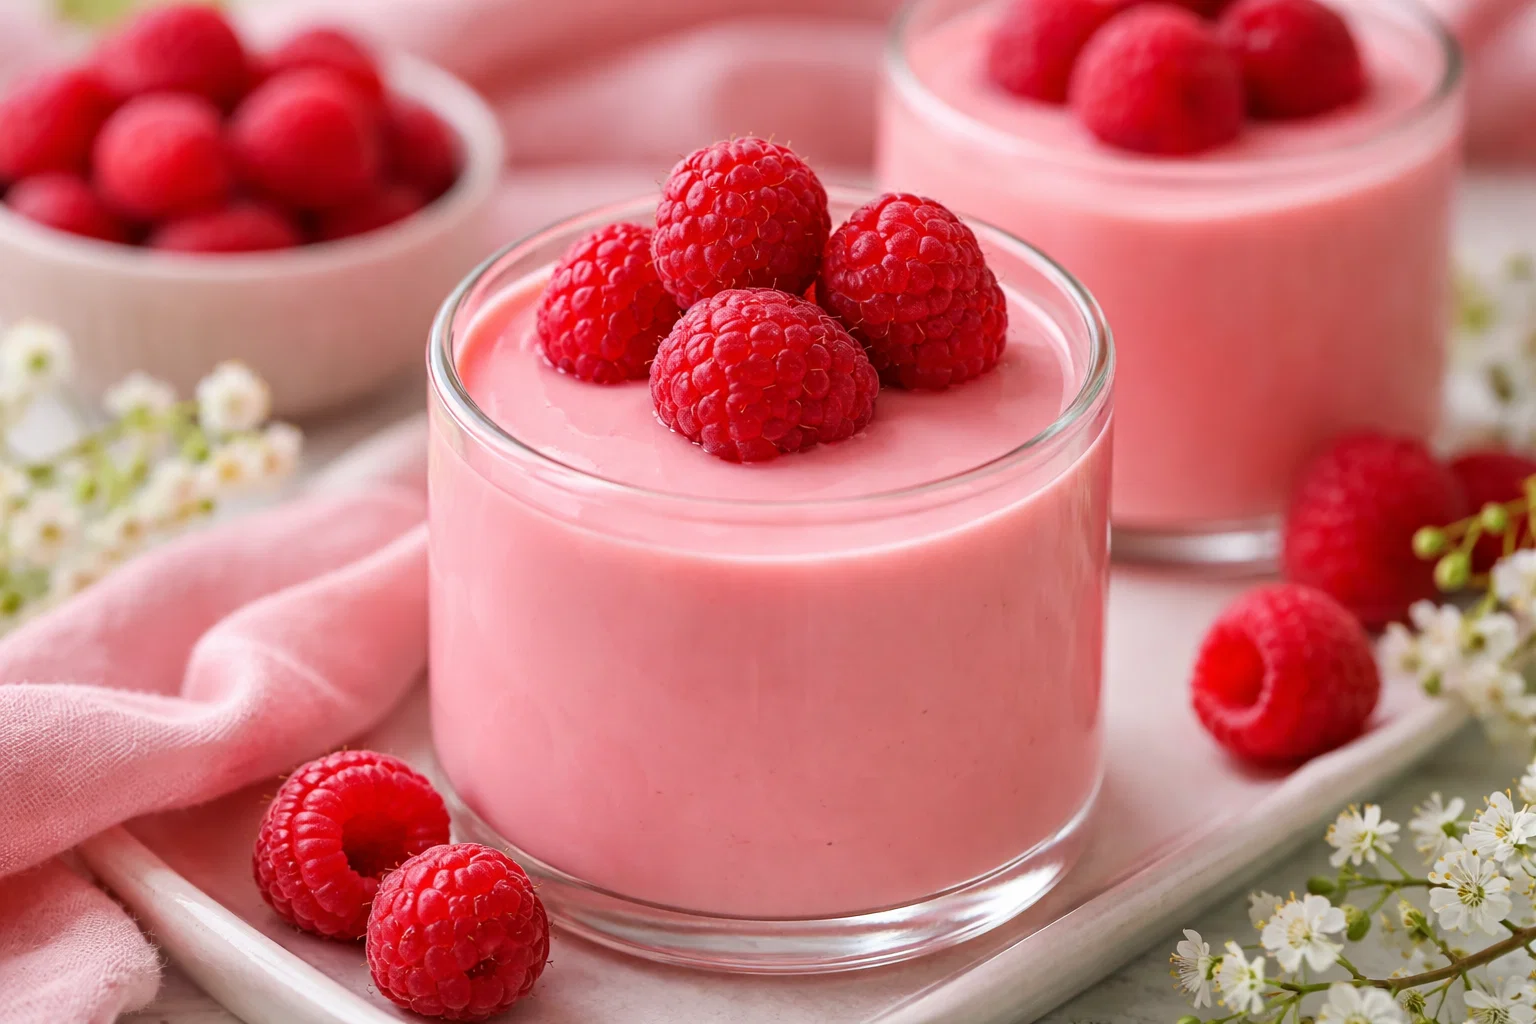
    4. Make it a Breakfast Delight: Consider serving rhubarb crisp as a breakfast option. By using less sugar and adding some Greek yogurt, you can enjoy a sweet breakfast that’s loaded with probiotics.

    5. Try Unique Sweeteners: Instead of granulated sugar, experiment with maple syrup or honey for a more natural sweetening option. Just be mindful of the liquid ratios in your recipe.

    Each of these variations allows you to tailor the recipe to your taste and mood, making it an ever-evolving family favorite.

    How to Store My Grandma’S Secret Recipe For Best Rhubarb Crisp!: Best Practices

    To enjoy the delightful flavors of my grandma’s secret rhubarb crisp over several days, follow these storage tips:

    • Refrigeration: Store any leftovers in an airtight container in the refrigerator for up to three days. The crisp topping may lose its crunch, but the flavors will continue to meld beautifully.

    • Freezing: For longer storage, you can freeze the unbaked crisp. Assemble the filling and topping but do not bake it. Instead, cover it tightly with plastic wrap and aluminum foil, storing it in the freezer for up to 3 months. When you’re ready to enjoy it, bake from frozen, adding an extra 10-15 minutes to the baking time.

    • Reheating: To reheat, place the crisp in a preheated oven at 350°F (175°C) for about 15-20 minutes, or until heated through. If you microwaved it, be cautious as it may become soggy; enjoy it straight from the oven for the best texture.

    By following these best practices, you can savor the deliciousness of this rhubarb crisp even after the initial bake!

    Nutritional Value of My Grandma’S Secret Recipe For Best Rhubarb Crisp!

    Understanding the nutritional value of our favorite dessert recipes helps us make informed choices. Here is a breakdown of the approximate nutritional content of one serving (based on an 8 serving recipe):

    • Calories: 220
    • Total Fat: 10g
    • Saturated Fat: 5g
    • Cholesterol: 20mg
    • Sodium: 130mg
    • Total Carbohydrates: 32g
    • Dietary Fiber: 3g
    • Sugars: 14g
    • Protein: 3g

    Given the healthful ingredients like rhubarb, oats, and the option for natural sweeteners, you can feel good about indulging in this dessert. This balance of flavor and nutritional value is why my grandma’s rhubarb crisp is an enduring favorite across generations. Plus, with adaptations, you can easily make the dish fit your specific dietary needs.

    FAQs: Frequently Asked Questions About My Grandma’S Secret Recipe For Best Rhubarb Crisp!

    Q1: Can I use frozen rhubarb for this recipe?
    Absolutely! You can use frozen rhubarb instead of fresh. Just ensure to thaw and drain excess liquid before mixing it with the other ingredients to avoid a watery filling.

    Q2: Can I add other fruits to my rhubarb crisp?
    Yes! Mixing in fruits like strawberries, apples, or pears is a fantastic way to complement the tanginess of rhubarb and create a flavor explosion in your dessert.

    Q3: How can I make this crisp topping lower in sugar?
    To reduce sugar, you can cut back on the amount of granulated sugar or substitute it with natural sweeteners like maple syrup or stevia.

    Q4: Is this rhubarb crisp suitable for those with gluten intolerance?
    Yes! By using gluten-free flour and oats, you can easily adapt this recipe to meet gluten-free dietary needs.

    Q5: How do I ensure a crispy topping?
    For the best crunch, make sure to mix your topping ingredients until they are crumbly and spread it evenly over your filling. Also, avoid over-baking, as excessive baking can dry it out.

    Trying out my grandma’s secret recipe for the best rhubarb crisp is sure to bring joy to your kitchen and hearts. It’s a simple, delicious, and heartwarming dish that embodies the essence of comfort food. Enjoy this unique dessert while embracing the memories it creates in your home for years to come!

  • Easy Rhubarb Crisp With Yellow Cake Mix

    Easy Rhubarb Crisp With Yellow Cake Mix

    Easy Rhubarb Crisp With Yellow Cake Mix: A Tropical Delight

    Introduction to Easy Rhubarb Crisp With Yellow Cake Mix

    Are you searching for a delectable and uncomplicated addition to your repertoire of dessert recipes? Look no further than this Easy Rhubarb Crisp with Yellow Cake Mix! This delightful dish marries the tartness of rhubarb with the sweet crumbly goodness of cake mix, creating a dessert that’s not only satisfying to your taste buds but also straightforward to prepare.

    This rhubarb crisp is the epitome of simplicity. With just a few ingredients, it promises a delightful treat even for the busiest of home cooks. It’s incredibly quick to whip up and perfect for various occasions, be it a family gathering or a casual weeknight dessert.

    Moreover, this recipe is a great option for those with specific dietary needs. It can easily be adapted to be gluten-free or vegan, making it a versatile choice for everyone, including busy parents, health-conscious individuals, and baking enthusiasts. Packed with fiber and vitamins from rhubarb, this dessert not only delights your palate but also brings nutritional benefits. So, gather your ingredients, unleash your inner baker, and savor this tropical delight!

    Benefits and Advantages of Easy Rhubarb Crisp With Yellow Cake Mix

    One of the standout qualities of this Easy Rhubarb Crisp with Yellow Cake Mix is its simplicity. Unlike many complex dessert recipes, this one requires minimal time and effort. You won’t need to steam, whip, or fold—just layer your ingredients, and let the oven do the work! This quality makes it particularly appealing for busy parents or working professionals who crave delicious homemade desserts but lack the time.

    Another advantage is the health benefits encompassed within its core ingredient—rhubarb. This unique vegetable is low in calories but rich in dietary fiber, vitamins C and K, and antioxidants. Therefore, when you indulge in this crisp, you’re also benefiting from the nutrients it provides. Plus, you can tailor the sweetness to your liking by adjusting the sugar content without compromising the delightful taste.

    Additionally, this rhubarb crisp is a fantastic option for a range of dietary preferences. For those looking for gluten-free options, simply substitute the yellow cake mix with a gluten-free alternative. If you’re seeking a vegan treat, use plant-based butter and a dairy-free cake mix. This adaptability makes it an ideal recipe for anyone wishing to explore the delightful world of dessert recipes without worrying about dietary restrictions.

    Lastly, this recipe serves well as a crowd-pleaser. Whether you are hosting a potluck or simply sharing a dessert with your family, this rhubarb crisp is sure to be a hit among both young and old. Its delightful combination of flavors is something everyone can enjoy, making it a universal choice for all occasions.

    Ingredients Overview

    Essential Ingredients for Easy Rhubarb Crisp With Yellow Cake Mix

    To prepare this Easy Rhubarb Crisp with Yellow Cake Mix, gather the following ingredients:

    • 4 cups fresh rhubarb, chopped: Provides the tartness; you can substitute with frozen rhubarb if fresh isn’t available.
    • 1 cup granulated sugar: Sweetens the tart rhubarb; adjust for sweetness based on personal preference.
    • 1 package of yellow cake mix (about 15.25 oz): The star ingredient that creates the delicious crumb topping; choose gluten-free if necessary.
    • 1/2 cup butter, melted: Adds richness and moisture; for vegan options, use plant-based butter.
    • 1 teaspoon cinnamon (optional): Enhances the flavor profile and complements the tartness of rhubarb.
    • 1/2 cup old-fashioned oats (optional): For added texture and heartiness; can be omitted for a simpler version.

    Dietary Substitutions to Customize Your Easy Rhubarb Crisp With Yellow Cake Mix

    • Gluten-Free Option: Swap the yellow cake mix with a certified gluten-free cake mix. You can also find gluten-free flour blends that work well in this crisp.

    • Vegan Option: Use a vegan butter substitute in place of regular butter. For a simpler vegan shortcut, you can even use coconut oil.

    • Lower Sugar Version: Substitute half of the granulated sugar with a natural sweetener like agave syrup or coconut sugar to cut down on calories while still providing sweetness.

    • Fruit Variations: If rhubarb isn’t available, you can experiment with other fruits like strawberries or apples. Just balance the sugar level accordingly!

    These substitutions ensure that this Easy Rhubarb Crisp is not only delicious but also inclusive for various dietary preferences, making it an adaptable addition to your collection of dessert recipes.

    How to Prepare the Perfect Easy Rhubarb Crisp With Yellow Cake Mix: Step-by-Step Guide

    Follow these detailed steps to create your Easy Rhubarb Crisp with Yellow Cake Mix:

    1. Preheat the Oven: Set your oven to 350°F (175°C) to ensure it’s ready when you are.

    2. Prepare the Rhubarb Filling:

    3. In a large mixing bowl, combine the chopped rhubarb with granulated sugar.
    4. Toss gently to coat the rhubarb evenly.

    5. Add Optional Cinnamon and Oats:

    6. If desired, sprinkle in the cinnamon and add the oats.
    7. Mix until well distributed.

    8. Transfer to Baking Dish:

    9. Place the rhubarb mixture in a greased 9×13-inch baking dish, spreading it evenly.

    10. Combine Cake Mix and Butter:

    11. In a separate bowl, mix the yellow cake mix with the melted butter.
    12. Use a fork or your fingers to combine until crumbly.

    13. Spread Cake Mixture Over Rhubarb:

    14. Evenly distribute the cake mix over the rhubarb filling.
    15. Avoid pressing down; the topping should remain crumbly.

    16. Bake the Crisp:

    17. Place the baking dish in the preheated oven and bake for 45-50 minutes or until the topping turns a lovely golden brown.

    18. Check for Doneness:

    19. You can insert a toothpick into the topping; it should come out clean or with a few crumbs attached.

    20. Cool Slightly:

    21. Once baked, remove the dish from the oven and allow it to cool for at least 15 minutes.

    22. Serve and Enjoy:

      • Serve warm on its own or with a scoop of vanilla ice cream for indulgence.
      • Enjoy the delightful taste of homemade goodness reveling in this crispy delight!

    Feel free to mix and match your toppings, perhaps adding nuts for crunch or even drizzling some caramel sauce for added decadence. This crisp can cater to diverse tastes within your household while being an easy addition to your list of dessert recipes!

    Mastering Easy Rhubarb Crisp With Yellow Cake Mix: Advanced Tips and Variations

    To elevate your Easy Rhubarb Crisp with Yellow Cake Mix, consider these tips and variations:

    • Energizing Add-ins: Add chopped nuts like walnuts or pecans to the cake mix topping for extra texture. This will introduce a nutty flavor that pairs fabulously with the tart rhubarb.

    • Herbal Infusion: Incorporate a pinch of fresh mint or basil into the filling for an unexpected twist. This herbaceous note can brighten the flavors.

    • Flavorful Alternatives: Swap half of the rhubarb with strawberries, blueberries, or apples for a different fruit profile. This fusion of flavors creates a delightful medley that’s sure to impress!

    • Rhubarb Variance: For a more intense flavor, consider adding a splash of vanilla extract to the rhubarb mixture. This adds warmth and complements the sweet and tart flavors beautifully.

    • Presentation: Serve your baked rhubarb crisp in a beautiful dish, garnish with fresh mint leaves, or dust with powdered sugar before serving. This will not only enhance its appeal but also make it more inviting to guests.

    With these tips, you can personalize your rhubarb crisp, catering to various taste preferences while ensuring the main flavor remains at the forefront. Each time you prepare it, it can be something uniquely delightful, adding to your cache of dessert recipes for future mood lifting.

    How to Store Easy Rhubarb Crisp With Yellow Cake Mix: Best Practices

    To ensure the longevity of your Easy Rhubarb Crisp with Yellow Cake Mix, proper storage is vital. Here’s how to store it effectively:

    • Refrigeration: Allow the crisp to cool completely after baking. Once cooled, you can cover it with plastic wrap or aluminum foil and store it in the refrigerator for up to 3-4 days. The flavors continue to meld together, making it even tastier the next day!

    • Freezing: For longer storage, freeze your rhubarb crisp. Wrap it tightly with plastic wrap, followed by foil, or place it in an airtight container. It can be stored in the freezer for up to 3 months. Ensure to label it with the date for reference.

    • Reheating: When ready to enjoy, simply reheat the crisp directly from the refrigerator or frozen. Preheat your oven to 350°F (175°C), cover it with foil (to prevent over-browning), and heat for about 20-30 minutes until warmed through. You can also microwave individual servings for a quicker option.

    Storing your Easy Rhubarb Crisp wisely guarantees that you can enjoy this delightful dessert recipe for days or weeks to come!

    Nutritional Value of Easy Rhubarb Crisp With Yellow Cake Mix

    The nutritional profile of your Easy Rhubarb Crisp with Yellow Cake Mix may vary based on ingredients and portion size, but here’s a general breakdown per serving (assuming a standard 12 servings):

    • Calories: Approximately 200-250
    • Total Fat: 8-10 g
    • Saturated Fat: 4-5 g
    • Cholesterol: Varies based on butter used
    • Sodium: 150-200 mg
    • Total Carbohydrates: 35-40 g
    • Dietary Fiber: 1-2 g
    • Sugars: 10-15 g
    • Protein: 2-3 g

    Incorporating rhubarb into your dessert not only adds flavor but also increases fiber intake and contributes essential vitamins to your diet. By customizing the sugar and fat content with alternatives, you can make this dessert even healthier without compromising on taste.

    The nutritional value may differ based on dietary adjustments you implement. Always be sure to consider your specific ingredient choices when calculating nutritional information for your personalized dessert recipes.

    FAQs: Frequently Asked Questions About Easy Rhubarb Crisp With Yellow Cake Mix

    1. Can I use frozen rhubarb instead of fresh?

    Yes, frozen rhubarb works perfectly well in this recipe. Just ensure it’s thawed and drained before use to eliminate excess moisture.

    2. How can I make this recipe gluten-free?

    Simply replace the yellow cake mix with a certified gluten-free cake mix. This will maintain the texture and taste while catering to gluten sensitivities.

    3. Can I prepare the rhubarb crisp ahead of time?

    Absolutely! You can assemble the crisp a day in advance. Store it in the refrigerator before baking, and then pop it into the oven just before serving.

    4. How should I serve it?

    This crisp is delightful on its own, but for an indulgent treat, serve it warm with a scoop of vanilla ice cream or a dollop of whipped cream.

    5. How long will leftovers last?

    Properly covered, your Easy Rhubarb Crisp will last in the refrigerator for about 3-4 days. It can be frozen for up to 3 months as well.

    Feel free to explore various avenues surrounding this Easy Rhubarb Crisp with Yellow Cake Mix, and remember to enjoy the creation process. With this comprehensive guide to one of the finest dessert recipes, your culinary journey is bound to bring joy to your kitchen and the taste buds of everyone who indulges!

  • Spiced Carrot Cake Jam

    Spiced Carrot Cake Jam

    Spiced Carrot Cake Jam: A Tropical Delight

    Introduction to Spiced Carrot Cake Jam

    Are you ready to embark on a culinary journey that harmonizes the warmth of baking with the delightful spreadability of jam? Look no further than this Spiced Carrot Cake Jam, a unique twist on traditional dessert recipes that captivates your taste buds while also offering a plethora of health benefits. With its harmonious blend of spices and the natural sweetness of carrots, this jam not only serves as an outstanding topping but also stands out as a wholesome dessert alternative.

    This recipe is remarkable for several reasons. First and foremost, its preparation is incredibly straightforward, making it ideal for busy parents, students, or anyone who wishes to whip up something delicious without delving into complex baking techniques. Additionally, it caters to various dietary needs—being naturally vegan, gluten-free, and low-calorie, it bridges dietary preferences while still providing comfort and flavor.

    Imagine spreading this spiced jam on your morning toast, dolloping it on pancakes, or using it as a unique filling for pastries. Versatile and delightful, Spiced Carrot Cake Jam makes every meal feel special. Not only does it add a tropical touch to your breakfast, but it serves as a vibrant companion for cheese platters and enhances desserts with that needed zing.

    If you’re looking for an innovative addition to your repertoire of dessert recipes or a healthy, tasty gift for loved ones, this jam is the perfect choice. Ready to dive into the world of wholesome indulgence? Let’s begin!

    Benefits and Advantages of Spiced Carrot Cake Jam

    Spiced Carrot Cake Jam is much more than just a delicious spread; it offers a variety of benefits that make it an essential addition to your kitchen. Here’s why you should consider incorporating this delightful recipe into your culinary creations.

    1. Easy Preparation

    One of the primary advantages of making Spiced Carrot Cake Jam is its simplicity. Even if you’re new to jam-making, you’ll find that the process is beginner-friendly. The ingredients are generally easy to find, and the steps are straightforward, which makes it a great project for busy parents looking to involve kids in the kitchen or for students preparing quick snacks.

    2. Health Benefits

    Carrots are not only naturally sweet but also packed with essential nutrients. They are a fantastic source of beta-carotene, fiber, vitamin K1, potassium, and antioxidants. This jam allows you to leverage the nutritional benefits of carrots while enjoying them in a unique form. Additionally, this recipe utilizes minimal sugar compared to traditional jams, providing a healthier alternative. The spices—like cinnamon and nutmeg—also contribute antioxidants and anti-inflammatory properties, making this dessert not just a treat but also a little health boost.

    3. Versatility

    This jam can easily transition across different meals and occasions, making it a versatile dish. Whether you want a sweet topping for breakfast, a flavorful addition to a cheese board, or a dessert filling, this jam fits the bill. You can serve it warm or cold, and it pairs well with various foods, from bagels to ice cream.

    4. Dietary Accommodating

    With the rising demand for inclusive cooking, this Spiced Carrot Cake Jam caters to various dietary requirements. It is vegan, gluten-free, and low in refined sugars, making it suitable for individuals with dietary restrictions or those simply trying to eat healthier. Whether you have family members with allergies or are simply conscious of what you’re consuming, this recipe adapts seamlessly.

    5. Gift-Worthy

    In today’s fast-paced world, homemade gifts carry a special sentiment. Spiced Carrot Cake Jam can easily be jarred and decorated, making it not just a treat for you but a thoughtful present for friends and family on special occasions. It showcases both your culinary skills and your consideration for loved ones’ taste preferences.

    By embracing Spiced Carrot Cake Jam in your cooking endeavors, you’re not only treating yourself to an exquisite taste experience but also making a wholesome choice that benefits your overall well-being and that of your family and friends.

    Ingredients Overview

    Essential Ingredients for Spiced Carrot Cake Jam

    To create your own batch of Spiced Carrot Cake Jam, gather the following ingredients:

    • 2 cups finely grated carrots (about 4-5 medium carrots)
    • Benefit: Packed with vitamins and adds natural sweetness.
    • 1 cup granulated sugar (or coconut sugar for a lower glycemic option)
    • Benefit: Acts as a preservative and sweetener.
    • 1/2 cup apple cider
    • Benefit: Adds acidity and depth while being low in calories.
    • 1 tablespoon lemon juice (freshly squeezed)
    • Benefit: Brightens flavors and aids in preservation.
    • 1 teaspoon ground cinnamon
    • Benefit: Known for anti-inflammatory properties.
    • 1/2 teaspoon ground nutmeg
    • Benefit: Enhances the warm flavor profile.
    • 1/4 teaspoon ground allspice
    • Benefit: Provides a unique flavor twist.
    • 1/4 teaspoon ground ginger
    • Benefit: Adds warmth and has digestive properties.
    • 1 tablespoon cornstarch (optional, for thicker jam)
    • Benefit: Helps in gel-forming, does not add calories if omitted.
    • 1/2 cup crushed walnuts or pecans (optional)
    • Benefit: Adds richness and healthy fats.

    Make sure to double-check the labels on your ingredients to ensure they fit any specific dietary needs you or your loved ones might have. Each ingredient contributes to the balance of flavor and nutrition, making this jam not only tasty but also wholesome.

    Dietary Substitutions to Customize Your Spiced Carrot Cake Jam

    Customization can enhance satisfaction, especially when accommodating different dietary preferences:

    • Sugar Alternatives: Substitute granulated sugar for honey, agave nectar, or a sugar substitute like Stevia or monk fruit for a low-sugar version.
    • Gluten-Free Options: Ensure that your cornstarch is certified gluten-free if you choose to use any, as some brands may contain gluten.
    • Nuts: If allergies are a concern, skip the nuts, or replace them with sunflower seeds for crunch without the allergen.
    • Spices: Consider adding a dash of cardamom or cloves for added flavor complexity if you enjoy experimenting with spices.

    Your Spiced Carrot Cake Jam can be tailored to fit your needs, ensuring everyone at the table can indulge in a guilt-free delight that mirrors their dietary requirements.

    How to Prepare the Perfect Spiced Carrot Cake Jam: Step-by-Step Guide

    Now that we’ve gathered all the essential ingredients and considered our dietary preferences, let’s dive into the process of making this delicious jam. Follow these clear, actionable steps to achieve the perfect consistency and flavor for your Spiced Carrot Cake Jam.

    1. Prepare the Carrots:
    2. Begin by washing and peeling 4-5 medium carrots. Finely grate them using a box grater or food processor; ensure you have about 2 cups of grated carrots.

    3. Combine Ingredients in a Pot:

    4. In a medium-sized saucepan, combine the grated carrots, 1 cup of sugar (or sweetener), 1/2 cup of apple cider, 1 tablespoon of freshly squeezed lemon juice, 1 teaspoon of ground cinnamon, 1/2 teaspoon of ground nutmeg, 1/4 teaspoon of ground allspice, and 1/4 teaspoon of ground ginger. This mixture will become the flavorful base for your jam.

    5. Cook the Mixture:

    6. Place the saucepan over medium heat. Stir the ingredients together until the sugar has dissolved completely and the mixture begins to simmer.

    7. Simmer and Stir:

    8. Allow the mixture to simmer for about 10-15 minutes, stirring frequently to prevent sticking. The carrots will soften, and the flavors will meld beautifully.

    9. Thicken the Jam (Optional):

    10. If you prefer a thicker jam, mix 1 tablespoon of cornstarch with a few tablespoons of cold water to create a slurry. Slowly add it to the simmering pot while stirring continuously to avoid lumps. Cook for an additional 3-5 minutes until thickened.

    11. Add Nuts (Optional):

    12. If using crushed walnuts or pecans, fold them in now for added texture and flavor. They will enhance both the taste and visual appeal of your jam.

    13. Select Containers:

    14. Prepare your jars: If you’re planning to store the jam for an extended period, ensure you are using sterilized jars. To sterilize, place the clean jars in a hot oven for about 10 minutes, or boil them in water.

    15. Fill the Jars:

    16. Carefully pour the hot jam into the sterilized jars, leaving about 1/4 inch of headspace at the top.

    17. Seal and Cool:

    18. Seal the jars with lids tightly and let them cool to room temperature. This step helps to create a vacuum seal, which extends the shelf life of your jam.

    19. Store the Jam:

    20. Once cooled, store your Spiced Carrot Cake Jam in the refrigerator for up to three weeks, or follow proper canning procedures for longer preservation.

    Each step in this recipe offers you the chance to alter it based on your taste or dietary requirements. Enjoy the delightful aroma that fills your kitchen as you prepare a batch of this tropical-inspired jam that celebrates the essence of dessert recipes!

    Mastering Spiced Carrot Cake Jam: Advanced Tips and Variations

    Creating an extraordinary Spiced Carrot Cake Jam isn’t just about following the recipe—it’s also about being creative and adapting to personal taste preferences. Here are some advanced tips and exciting variations to elevate your jam-making experience:

    Tips for Success:

    • Use Fresh Ingredients: Always use fresh organic carrots; they are sweeter and have a better texture.
    • Monitor Cooking Time: It’s crucial to pay attention to cooking times. Overcooking may lead to a burnt flavor, while undercooking prevents the flavors from melding well.
    • Taste as You Go: As you cook, don’t hesitate to taste your jam and adjust the spices or sweetness according to your preference.
    • Experiment with Citrus Zest: Adding zest from the lemon or even an orange can give your jam a bright, zesty flavor that complements the spices beautifully.

    Variations to Try:

    • Spiced Carrot Pineapple Jam: Add 1 cup of crushed pineapple to the mix to enhance the tropical aspect, while still maintaining the spiced flavor of the original recipe.
    • Chai-Spiced Carrot Jam: Infuse your jam with chai tea bags—just steep a couple of chai tea bags in the apple cider for about 10 minutes before adding it to the mixture. This will add a delightful depth of flavor.
    • Cream Cheese Jam: For a sweeter dessert, mix the jam with softened cream cheese in a 1:1 ratio to use as a spread for bagels or toast.

    By implementing these advanced tips and unique spins, you can masterfully create a Spiced Carrot Cake Jam that not only satisfies your cravings but also impresses everyone around you!

    How to Store Spiced Carrot Cake Jam: Best Practices

    Proper storage of your Spiced Carrot Cake Jam is essential to ensure it remains fresh and flavorful. Here are the best practices for refrigeration, freezing, and reheating your delicious creation:

    Refrigeration

    Once your jam has cooled, you can store it in the refrigerator for up to three weeks. Make sure to keep it in an airtight container or jar to prevent exposure to air, which can lead to spoilage.

    Freezing

    If you wish to extend the shelf life of your jam, you can freeze it! Here’s how:
    Choose Freezer-Safe Containers: Use glass or plastic containers designed for freezing. Jam may expand while freezing, so leave some space at the top.
    Label and Date: Always label your jars with the date and contents to keep track of your jam’s freshness.
    Defrosting: To use frozen jam, transfer it to the refrigerator to thaw overnight. Avoid microwave thawing, as this can alter the texture.

    Reheating

    Although the jam is best served fresh or at room temperature, if you prefer it warm, you can gently reheat small amounts in the microwave or on the stovetop. Be sure not to overheat, as it can change the consistency and flavor.

    With these effective storage methods, you can enjoy your delicious Spiced Carrot Cake Jam at any time, making it a perfect addition to your pantry!

    Nutritional Value of Spiced Carrot Cake Jam

    Understanding the nutritional value of your Spiced Carrot Cake Jam can enhance the experience of enjoying it without guilt. Below is a general breakdown of the possible nutritional content per serving (1 tablespoon):

    | Nutrient | Amount per Serving |
    |——————–|——————–|
    | Calories | 45-60 |
    | Total Fat | 0-2g |
    | Saturated Fat | 0g |
    | Carbohydrates | 12-15g |
    | Dietary Fiber | 0.5-1g |
    | Sugars | 10-12g |
    | Protein | 0-1g |
    | Vitamin A | 100-150% DV |
    | Vitamin C | 2% DV |
    | Calcium | 0-2% DV |
    | Iron | 0-2% DV |

    Key Nutritional Notes:

    • Carbohydrates and Sugars: While the jam does contain natural and added sugars, it’s lower in sugar than conventional jams, making it a healthier choice.
    • Vitamins: Carrots are rich in vitamin A, which is vital for healthy vision and skin, as well as immune function.
    • Low Fat: The jam is virtually fat-free, making it a light addition to your meals.

    This sweet treat not only serves as a delightful condiment but also provides essential nutrients, aligning perfectly with various health-conscious diets.

    FAQs: Frequently Asked Questions About Spiced Carrot Cake Jam

    1. Can I use pre-grated carrots for this jam?

    Yes, you can, but freshly grated carrots yield a better texture and flavor. Pre-grated carrots may also contain preservatives, affecting the taste.

    2. How can I reduce the sugar content in this recipe?

    You can use natural sweeteners like honey, maple syrup, or stevia to maintain sweetness with fewer calories. You may need to adjust quantities slightly, so start with less and taste as you go.

    3. How do I ensure my jam is properly canned for longer storage?

    Make sure to follow proper canning techniques, including sterilizing jars and lids, using a hot water bath if necessary, and ensuring that the jars are sealed correctly.

    4. Can I use spices other than those listed?

    Definitely! Feel free to experiment with various spices like cardamom, cloves, or lemon zest to customize flavors according to your taste preference.

    5. How long can I store Spiced Carrot Cake Jam?

    When stored in a sealed container in the refrigerator, the jam can last for up to three weeks. If frozen, it can last for about six months.

    6. What can I serve with Spiced Carrot Cake Jam?

    This jam pairs wonderfully with toast, bagels, pancakes, or waffles. It’s also perfect for cheese boards, ice cream, or as a filling for pastries.

    With these answers and insights, you’re now fully equipped to delve into the world of Spiced Carrot Cake Jam. Whether you’re looking to indulge your sweet tooth or impress your guests with homemade delicacies, this jam is the versatile and nutritious choice you’ve been searching for. Enjoy your culinary adventures and the delightful flavors of this unique dessert recipe!

  • The Best Butterscotch Ice Cream Recipe

    The Best Butterscotch Ice Cream Recipe

    The Best Butterscotch Ice Cream Recipe: A Tropical Delight

    Introduction to The Best Butterscotch Ice Cream Recipe

    Are you on the hunt for scrumptious dessert recipes that require minimal effort but yield maximum satisfaction? Look no further! This best butterscotch ice cream recipe is perfect for home cooks, including busy parents who crave a simple treat at the end of the day, students looking for an easy culinary project, and food enthusiasts eager to create a delightful homemade dessert.

    Not only does this recipe embody the rich, creamy essence of butterscotch, but it can also accommodate various dietary preferences, being easily modified to fit vegan, gluten-free, or low-calorie diets. The beauty of this ice cream lies in its uncomplicated preparation—using basic ingredients you likely already have in your pantry.

    Butterscotch ice cream is not just a sweet indulgence; it carries the warmth of nostalgia, reminiscent of homemade kitchens and family gatherings. As you savor each spoonful of this creamy delight, you’re essentially enjoying a moment of bliss and satisfaction—the perfect antidote to a stressful day or a sweet reward to share with loved ones. Let’s dive into the benefits and advantages of making this delightful dessert recipe at home!

    Benefits and Advantages of The Best Butterscotch Ice Cream Recipe

    The best butterscotch ice cream recipe isn’t just delicious—it’s also packed with advantages that make it the ideal choice for dessert lovers of all kinds. The simplicity of its preparation is a significant benefit; even those with the most hectic of schedules can whip up this creamy concoction without needing extensive culinary skills. Additionally, the ingredients can be easily sourced at your local grocery store, making it budget-friendly for families and individuals alike.

    One of the standout features of this recipe is its versatility. Do you have dietary restrictions? No problem! This ice cream can be adapted to be cholesterol-free and lower in calories if you choose dairy-free alternatives, such as almond milk or coconut cream. Plus, it can easily cater to gluten-free diets by ensuring all your components are certified gluten-free.

    Not only does butterscotch ice cream offer a sinfully sweet experience, but it also contains health benefits when prepared thoughtfully. Choosing natural sweeteners like maple syrup or coconut sugar can reduce the glycemic impact of your dessert while providing a delightful caramel flavor. With these alternatives, you can indulge in a sweet treat without the guilt that often accompanies traditional dessert recipes.

    So whether you’re a busy parent, a student, or simply someone looking for a delicious ice cream option that doesn’t compromise on dietary needs or flavor, this butterscotch ice cream recipe covers all bases!

    Ingredients Overview

    Essential Ingredients for The Best Butterscotch Ice Cream Recipe

    Here’s what you’ll need to make the best butterscotch ice cream:

    1. Heavy Cream (2 cups): The richness of heavy cream is essential for that dense, creamy texture. For a vegan option, substitute with coconut cream or cashew cream.

    2. Whole Milk (1 cup): Adds a smoothness to the ice cream base. If you prefer dairy-free, opt for almond milk or oat milk.

    3. Brown Sugar (¾ cup): This is the primary sweetener, providing that deep butterscotch flavor. Coconut sugar is a great alternative.

    4. Granulated Sugar (¼ cup): Adjust for sweetness. Feel free to use agave syrup or another sweetener suitable for your diet.

    5. Vanilla Extract (2 teaspoons): Enhances the flavors; use pure vanilla for the best quality.

    6. Salt (¼ teaspoon): Just a pinch brings out the sweetness of butterscotch.

    7. Egg Yolks (4): Essential for a custard-style ice cream. If you want an egg-free alternative, look for a vegan egg replacer or simply skip this step—though the texture may differ slightly.

    8. Butter (½ cup): The key to that luscious, buttery flavor. For a healthier twist, use coconut oil or a vegan butter substitute.

    Dietary Substitutions to Customize Your The Best Butterscotch Ice Cream Recipe

    Tailoring the best butterscotch ice cream recipe to suit various dietary needs is easier than you might think! Here are some suggested substitutions:

    • Dairy-Free: Use coconut cream instead of heavy cream, and choose almond or cashew milk in place of whole milk.

    • Lower-Calorie: Replace brown sugar with a sugar substitute like erythritol or stevia, making this a guilt-free dessert option.

    • Egg-Free: Skip the egg yolks and opt for a store-bought egg substitute or simply thicken your ice cream base with cornstarch or arrowroot powder.

    • Gluten-Free: This recipe is naturally gluten-free, but ensure that any add-ins (like toppings) are certified gluten-free.

    By making these adjustments, you can enjoy a bowl of creamy butterscotch ice cream that fits perfectly into your lifestyle and dietary restrictions!

    How to Prepare the Perfect The Best Butterscotch Ice Cream Recipe: Step-by-Step Guide

    Creating the best butterscotch ice cream is an enjoyable and straightforward process. Here’s your step-by-step guide to crafting this indulgent dessert recipe:

    1. Prepare the Base: In a medium saucepan over low heat, combine the heavy cream, whole milk, and brown sugar. Stir gently until the sugar is fully dissolved.

    2. Melt the Butter: Add the butter to the mixture and continue stirring until it melts into the creamy base, enriching its flavor.

    3. Whisk Egg Yolks: In a separate bowl, whisk the egg yolks until they are light and frothy. This helps achieve that smooth texture you crave.

    4. Temper the Eggs: Slowly pour a small amount of the warm cream mixture into the egg yolks while continuously whisking. This step prevents the eggs from cooking too quickly. Gradually add the rest of the cream mixture to the yolks.

    5. Cook the Mixture: Return the entire mixture to the saucepan over medium heat. Stir constantly until the mixture thickens enough to coat the back of a spoon (about 10 minutes).

    6. Strain the Custard (Optional): If you prefer an ultra-smooth ice cream, strain the custard through a fine sieve into a clean bowl, eliminating any potential egg bits.

    7. Add Vanilla and Salt: Stir in the vanilla extract and salt, combining well.

    8. Cool the Base: Allow the base to cool at room temperature for about 30 minutes, then refrigerate until chilled (at least 4 hours or overnight for best results).

    9. Churn the Ice Cream: Pour the chilled base into an ice cream maker and churn according to your machine’s instructions until it reaches a soft-serve consistency.

    10. Freeze the Ice Cream: Transfer the churned ice cream into an air-tight container. Freeze for at least 4-6 hours to firm up before serving.

    11. Serve and Enjoy: Scoop the butterscotch ice cream into bowls and enjoy! It pairs wonderfully with chopped nuts, drizzles of chocolate sauce, or a sprinkle of sea salt for added flavor.

    Variations: You might also consider adding things like crushed graham crackers or caramel swirls during the churn for additional textures and flavors. Customizing the recipe can be a joyful endeavor!

    Mastering The Best Butterscotch Ice Cream Recipe: Advanced Tips and Variations

    To elevate the experience and help you perfect your best butterscotch ice cream, consider these advanced tips and variations:

    • Infuse Flavors: Add a pinch of cinnamon or nutmeg to give your butterscotch a unique twist. You can also infuse your cream mixture with flavors like espresso or orange zest to create a surprising depth of taste.

    • Experiment with Mix-ins: Chopped nuts, crushed cookies, or even pieces of your favorite candy can add delightful textures. Consider folding these in just before you transfer the mixture to the freezer.

    • Garnish Creatively: Serve your ice cream with toppings like hot fudge, extra butterscotch sauce, or caramelized bananas to impress your guests further.

    • Make Ice Cream Sandwiches: Use this butterscotch ice cream as a filling between cookies for a fun, nostalgic treat.

    These tips will not only enhance your ice cream but inspire you to get creative in the kitchen.

    How to Store The Best Butterscotch Ice Cream Recipe: Best Practices

    To enjoy your best butterscotch ice cream at its finest, proper storage is key. After churning, transfer the ice cream into a sturdy, airtight container. Make sure to press a piece of wax paper or parchment paper directly onto the surface of the ice cream before securing the lid. This helps prevent ice crystals from forming and keeps it creamy.

    Store your ice cream in the freezer, where it will last for about 2-3 weeks. However, for the best texture and flavor, consume it within the first week. If it hardens too much, let it thaw for a few minutes at room temperature before scooping to enjoy its creamy goodness.

    Nutritional Value of The Best Butterscotch Ice Cream Recipe

    Understanding the nutritional profile of your dessert can help you enjoy it more mindfully. Here’s a breakdown of the approximate nutritional values per serving (1/2 cup) of butterscotch ice cream, based on the traditional recipe:

    • Calories: 250
    • Total Fat: 15g
    • Saturated Fat: 9g
    • Cholesterol: 90mg
    • Sodium: 50mg
    • Carbohydrates: 30g
    • Sugar: 24g
    • Protein: 3g

    By substituting with lower-calorie options or using alternative ingredients, you can substantially lower these values. For example, using coconut cream instead of heavy cream will reduce calories and fat content, while maintaining that creamy texture you love.

    FAQs: Frequently Asked Questions About The Best Butterscotch Ice Cream Recipe

    Q1: Can I make this butterscotch ice cream without an ice cream maker?
    A1: Yes! If you don’t have an ice cream maker, pour the mixture into a shallow dish and freeze it. Stir every 30 minutes until it’s adequately frozen and creamy (about 3-4 hours).

    Q2: How do I adjust the sweetness?
    A2: You can easily modify the sweetness by using less sugar or replacing sugar with a healthier sweetener like honey or agave.

    Q3: Can I add mix-ins to the ice cream?
    A3: Absolutely! Add your favorite mix-ins, like crushed cookies, chocolate chips, or chopped nuts, during the last few minutes of churning.

    Q4: How can I make this recipe vegan?
    A4: Substitute the heavy cream and milk with coconut cream and almond milk, and replace the egg yolks with a vegan egg substitute or just omit them for a lighter version.

    Q5: What goes well with butterscotch ice cream?
    A5: Serve your butterscotch ice cream with chocolate sauce, caramel drizzle, or alongside pies and cakes for a delightful combination.

    With this comprehensive guide to the best butterscotch ice cream recipe, you’re all set to create a delicious treat that can impress your friends, family, or even just yourself on a warm day. Enjoy experimenting with flavors and toppings, and most importantly, delight in the sweet results!

  • Easy Kiwi Sorbet Refreshing Dessert

    Easy Kiwi Sorbet Refreshing Dessert

    Easy Kiwi Sorbet Refreshing Dessert: A Tropical Delight

    Introduction to Easy Kiwi Sorbet Refreshing Dessert

    Are you on the lookout for a simple yet delicious treat to satisfy your sweet tooth? Look no further! This Easy Kiwi Sorbet is not just a dessert; it’s a refreshing dessert recipe that brings a taste of the tropics right to your kitchen. Made with ripe kiwis, this sorbet is an ideal blend of sweetness and tanginess, offering a delightful escape from hot summer days or a perfect palate cleanser after a hearty meal.

    What makes this dessert truly exceptional is its simplicity and health benefits. It requires minimal ingredients, is easy to prepare, and is naturally vegan and gluten-free. The vibrant green color, which comes from pureed fresh kiwi, adds a beautiful aesthetic touch to any dessert table, making it perfect for family gatherings, dinner parties, or just a comforting treat at home. Plus, with no refined sugars or artificial additives, this kiwi sorbet emerges as a guilt-free indulgence.

    In addition to being delicious and versatile, this recipe caters to diverse dietary needs. Whether you’re a busy parent seeking quick dessert recipes, a health-conscious individual looking for low-calorie options, or someone simply craving a refreshing treat, this Easy Kiwi Sorbet fits the bill! In this article, we’ll delve deeper into its benefits, ingredients, and step-by-step preparation, ensuring you can whip up this tropical delight easily and effectively.

    Benefits and Advantages of Easy Kiwi Sorbet Refreshing Dessert

    When it comes to dessert recipes, few can claim the same array of benefits as the Easy Kiwi Sorbet. Here are several reasons why you should try making this delectable dessert:

    1. Simplicity in Preparation

    One of the greatest advantages of this sorbet is how easy it is to prepare. With just a handful of ingredients and no elaborate equipment required, even novice cooks can create something that looks and tastes impressive. Simply blend, freeze, and enjoy! This makes it a perfect project for busy parents in need of a quick, satisfying dessert or for students looking to impress friends with minimal effort.

    2. Health Benefits

    Kiwi is a powerhouse of nutrients! Packed with Vitamin C, dietary fiber, and antioxidants, kiwis can support the immune system and digestion while providing essential vitamins. This dessert is a wonderful way to incorporate this nutrient-rich fruit into your diet. Moreover, because this sorbet relies on the natural sweetness of fruit, you can enjoy a satisfying treat without the added sugars found in many processed desserts.

    3. Versatility for Dietary Needs

    The Easy Kiwi Sorbet isn’t just for one dietary lifestyle; it caters to many. It’s inherently gluten-free and can easily become vegan if you avoid using any dairy-based stabilizers. For those watching their sugar intake, you can adapt the recipe by using a natural sweetener such as agave or honey. Additionally, if you have allergies or ingredient availability concerns, the recipe offers flexibility, allowing substitutions that still let the fresh kiwi flavor shine through.

    4. Satisfying and Refreshing Taste

    There’s something about the tangy yet sweet flavor of fresh kiwi that is undeniably refreshing. In sorbet form, each spoonful is like a mini-vacation, transporting you to a warm, sunny beach. This dessert is not just about taste; it’s an experience – the smooth texture and icy chill create a delightful contrast, making it an ideal treat for those hot summer days, or even as a light dessert option year-round.

    5. Impressive Presentation

    Finally, let’s not forget the visual appeal. The vibrant green hue of the sorbet is striking and will undoubtedly become the centerpiece of your dessert table. Serve it in chic bowls and garnish with fresh mint or slices of kiwi to elevate its presentation further. Your guests will be impressed, and you’ll feel accomplished for mastering an impressive dessert recipe effortlessly.

    Ingredients Overview

    Essential Ingredients for Easy Kiwi Sorbet Refreshing Dessert

    To whip up a batch of Easy Kiwi Sorbet, you’ll need the following ingredients:

    • 6 ripe kiwis (about 2 cups, peeled and chopped): Opt for ripe kiwis for the best flavor and sweetness. They are the star of this refreshing dessert recipe!
    • 1/4 cup sugar or a natural sweetener (agave syrup, honey, etc.): This depends on your dietary preference; you can adjust the sweetness based on how ripe your kiwis are.
    • 1 tablespoon lemon juice: Freshly squeezed lemon juice enhances the sorbet’s tartness and freshness, balancing out the sweetness.
    • 1/2 cup water: Used to dissolve the sugar and help create a smooth texture in the sorbet.

    Note: For a vegan-friendly recipe, use agave syrup instead of honey.

    Dietary Substitutions to Customize Your Easy Kiwi Sorbet Refreshing Dessert

    Customizing this refresher dessert recipe is not only simple but also enhances its inclusivity. Here are some dietary substitutions:

    • Sugar-Free Option: If you’re watching your sugar intake, consider using stevia or erythritol in place of regular sugar. The sweetness can be adjusted based on taste.
    • Additional Flavors: For an extra twist, try adding fresh mint leaves or a hint of coconut milk to introduce a tropical essence.
    • Fruit Variations: Don’t limit yourself to kiwi! You can mix in or substitute other fruits like mangoes or strawberries for a delightful fruit medley, keeping the proportions of sugar and liquid the same.

    By incorporating these alternatives, this Easy Kiwi Sorbet can adapt seamlessly to fit various dietary preferences, making it an even more versatile addition to your repertoire of dessert recipes.

    How to Prepare the Perfect Easy Kiwi Sorbet Refreshing Dessert: Step-by-Step Guide

    Creating the perfect Easy Kiwi Sorbet is a breeze. Follow these simple steps to enjoy your refreshing sorbet in no time:

    1. Prepare the Kiwis: Begin by peeling the kiwis. Cut them into halves and use a spoon to scoop out the flesh. Place the kiwi pulp into a blender or food processor.

    2. Add Sweetener and Lemon Juice: Add 1/4 cup of sugar (or your preferred sweetener) to the kiwi in the blender along with 1 tablespoon of freshly squeezed lemon juice. This step infuses your sorbet with zesty flavors.

    3. Blend Until Smooth: Blitz the mixture until you reach a smooth consistency. It’s essential to taste the mixture at this point; if you want it sweeter, you can add more sweetener as needed.

    4. Prepare the Sugar Syrup (optional): If you’re using granulated sugar, dissolve it in 1/2 cup of water in a small saucepan over medium heat until it gets fully combined, creating a simple syrup. This step enhances the texture of your sorbet.

    5. Combine with Kiwi Mixture: Pour the simple syrup into the blender with the kiwi puree and blend again until fully integrated. If you prefer an ultra-smooth texture, strain the mixture through a fine-mesh sieve to remove any seeds.

    6. Transfer to Freezer Container: Pour the sorbet base into an airtight container, spreading it evenly. Seal the container to prevent ice crystals from forming.

    7. Freeze: Place the container in the freezer for at least 4 hours or until firm. For best results, stir every hour to ensure an even consistency and prevent ice crystals from forming.

    8. Scoop and Serve: Your Easy Kiwi Sorbet is now ready to enjoy! Before serving, let it sit at room temperature for about 5–10 minutes to soften slightly for easier scooping. Using a melon baller or a standard ice cream scoop, serve the sorbet in bowls and garnish with fresh kiwi slices or mint leaves for that beautiful presentation.

    9. Store Any Leftovers: If you have leftovers, simply cover the container tightly and store it back in the freezer. The sorbet can typically last up to 1 month, although the fresher the better!

    By following these straightforward steps, you can master this easy kiwi dessert recipe and treat yourself to an invigorating dessert anytime hunger strikes!

    Mastering Easy Kiwi Sorbet Refreshing Dessert: Advanced Tips and Variations

    To derive the most out of your Easy Kiwi Sorbet experience, consider these additional tips and delightful variations:

    Tip for Texture

    A secret to achieving a perfectly smooth serve is to use ripened kiwis. The riper the fruit, the softer the flesh, which results in a creamier sorbet. You can test the ripeness by gently pressing on the fruit; it should yield slightly.

    Freeze in Advance

    If you’re planning a gathering or special event, making the sorbet a day or two in advance ensures you won’t need to scramble before guests arrive. The flavors meld beautifully over time, enhancing the overall taste.

    Flavor Variations

    Want to switch things up? Try mixing in:

    • Coconut: Add a splash of coconut milk to the mixture for a tropical vibe.
    • Berry Blend: Combine kiwi with berries such as strawberries or blueberries. Just keep the proportion of sugar and liquid consistent with the original recipe.
    • Herbal Infusion: Infuse mint or basil while blending for a unique twist on flavor profile.

    Serving Suggestions

    Serve the sorbet alongside complementary desserts like cake, pie, or meringue for an elegant dessert platter. Alternatively, use it to top yogurt parfaits or blend it into smoothies for a tropical kick.

    By keeping these advanced tips and variations in mind, you ensure that your Easy Kiwi Sorbet remains a staple in your list of delightful dessert recipes, making it perfectly suited for entertaining or satisfying cravings.

    How to Store Easy Kiwi Sorbet Refreshing Dessert: Best Practices

    To prolong the life of your Easy Kiwi Sorbet and maintain its delicious flavor and texture, follow these storage best practices:

    • Freezing: Store the sorbet in an airtight container or a heavy-duty freezer bag. This helps prevent freezer burn and keeps the sorbet fresh without absorbing odors.

    • Covering: If using a container, ensure that you press plastic wrap directly against the surface of the sorbet before sealing it with a lid. This will minimize air exposure and ice crystal formation.

    • Shelf Life: For the best taste and texture, consume within one month. Although it may remain safe to eat beyond that timeframe, the flavor and quality can diminish.

    • Re-freezing: If the sorbet partially melts, you can freeze it again, but do note that repeated thawing and freezing can lead to a grainy texture. Stirring it during the refreezing process (every half-hour for the first two hours) helps.

    Proper storage allows this refreshing dessert recipe to shine as a go-to treat whenever you desire a light and tangy dessert!

    Nutritional Value of Easy Kiwi Sorbet Refreshing Dessert

    To give you a better understanding of what you’re indulging in with this Easy Kiwi Sorbet, here’s a breakdown of its nutritional value per serving (about 1/2 cup):

    • Calories: 97
    • Total Fat: 0.4g
    • Saturated Fat: 0g
    • Cholesterol: 0mg
    • Sodium: 1mg
    • Total Carbohydrates: 25g
    • Dietary Fiber: 2.1g
    • Sugars: 20g (depending on the sweetness of the kiwis and any added sweetener)
    • Protein: 0.8g
    • Vitamin C: 45% DV
    • Calcium: 3% DV
    • Iron: 2% DV

    With its low-calorie content and high vitamin C levels, the Easy Kiwi Sorbet stands out as a deliciously guilt-free alternative to traditional high-calorie desserts while still delivering a satisfying sweetness.

    FAQs: Frequently Asked Questions About Easy Kiwi Sorbet Refreshing Dessert

    Can I use frozen kiwis instead of fresh?

    While fresh kiwis offer the best flavor, you can absolutely use frozen ones when they’re available. Just allow them to thaw slightly before blending, and you may need to adjust the amount of sweetener based on their ripeness at the time of freezing.

    How can I adjust the sweetness of the sorbet?

    Simply taste the mixture before freezing. If it isn’t sweet enough, add more sugar or sweetener to your preference. Remember that the sweetness may diminish slightly upon freezing.

    Is this sorbet suitable for kids?

    Yes, this Easy Kiwi Sorbet is a fantastic and healthy option for kids. It’s a great way to introduce them to kiwi, and they’ll love the refreshing taste!

    Can I use other fruit for this recipe?

    Indeed! You can substitute kiwis with other fruits like strawberries, peaches, or mangoes. Just keep the overall proportions of sugar and liquid to maintain the desired texture.

    How do I make this recipe sugar-free?

    To create a sugar-free version, replace sugar with a low-calorie sweetener such as stevia or erythritol. Make sure to adjust the amount according to the products’ specific sweetness levels.

    What should I do if my sorbet is too hard?

    If your sorbet is too hard after freezing, let it sit at room temperature for 10-15 minutes before serving. Stirring can also help loosen the sorbet, making it easier to scoop.

    This dessert is an excellent palate-pleaser that anyone can enjoy. With these insights, you’re well on your way to making the ultimate Easy Kiwi Sorbet for any time of the year! Prepare to unveil your new favorite recipe while impressing everyone with its delightful taste and refreshing essence.

  • Easy Fresh Blackberry Ice Cream Recipe

    Easy Fresh Blackberry Ice Cream Recipe

    Easy Fresh Blackberry Ice Cream Recipe: A Tropical Delight

    Introduction to Easy Fresh Blackberry Ice Cream Recipe

    When it comes to crafting delightful dessert recipes, few treats beat the fresh, creamy goodness of homemade ice cream. This Easy Fresh Blackberry Ice Cream Recipe is the perfect way to indulge your sweet tooth while enjoying the vibrant flavors of seasonal blackberries. Not only is this dessert a breeze to prepare, but it’s also versatile enough to suit various dietary needs, making it an excellent choice for everyone in your family.

    Imagine a warm summer day, and you’re craving something refreshing yet satisfying. This recipe stands out as it combines the luscious taste of blackberries with a velvety ice cream texture that is simply irresistible. Plus, it’s made with natural ingredients, allowing you to control the sweetness and adhere to healthy eating habits. With no artificial additives or preservatives, you can feel great about what you serve.

    If you’re a busy parent searching for quick and effective dessert recipes, a student needing a late-night treat, or someone who just loves to experiment in the kitchen, this blackberry ice cream recipe promises to be a hit. It is also vegan-friendly and gluten-free, catering to various dietary preferences without compromising on flavor. So, gather your ingredients, grab your blender, and let’s dive into this tropical delight!

    Benefits and Advantages of Easy Fresh Blackberry Ice Cream Recipe

    The Easy Fresh Blackberry Ice Cream Recipe offers a myriad of benefits that make it an enticing option for any dessert lover. Here’s why you should absolutely consider adding this to your repertoire of dessert recipes.

    1. Simplicity and Convenience: The recipe is straightforward and requires minimal skills. Even if you are just starting in the kitchen, you can whip up this ice cream without any hassle. You’ll be delighted to see how easily you can transform fresh fruit into a rich and creamy dessert.

    2. Health Benefits: By using blackberries, a nutrient-rich fruit, this ice cream is packed with antioxidants, vitamins, and fiber. Blackberries are known for their anti-inflammatory properties, and using them in a homemade dessert ultimately boosts the nutritional value. Additionally, this recipe allows you to control the sugar content, making it a healthier alternative to store-bought options laden with added sugars.

    3. Diet-Friendly Adaptability: One of the key advantages of this blackberry ice cream is its versatility. You can create variations that cater to vegan, gluten-free, and low-calorie diets. By substituting ingredients such as using non-dairy milk or natural sweeteners, you can tailor the recipe to fit your specific dietary guidelines without sacrificing flavor.

    4. Customizable Flavor Profile: While blackberries shine in this recipe, you can experiment with additional flavorings like vanilla, mint, or other summer fruits, tailoring the taste to your preference. This feature makes this ice cream not just a simple dessert but a canvas for culinary creativity.

    5. Ultimate Refreshment: There’s nothing quite like homemade ice cream on a hot day. It serves as a refreshing treat for family gatherings, parties, or just a quiet evening at home. The crowd-pleasing flavor is sure to leave everyone wanting more!

    In summary, the Easy Fresh Blackberry Ice Cream Recipe is simple to make, healthy, and adaptable for anyone looking to satisfy their sweet tooth with a nutritious spin.

    Ingredients Overview

    Essential Ingredients for Easy Fresh Blackberry Ice Cream Recipe

    To create this delightful treat, you’ll need the following ingredients:

    1. 2 cups Fresh Blackberries: The star of our recipe, blackberries provide a burst of flavor and vibrant color.
    2. 1 cup Coconut Milk (full-fat or light): This ingredient adds creaminess and a hint of tropical flavor. It also works well for vegan diets.
    3. 1/2 cup Maple Syrup or Agave Nectar: A natural sweetener that enhances the overall flavor while keeping the recipe vegan-friendly.
    4. 1 tsp Vanilla Extract: For that extra layer of sweetness and depth.
    5. 1-2 tbsp Lemon Juice: This will balance the sweetness and enhance the flavor profile.
    6. Pinch of Sea Salt: To heighten flavors and add a nuanced taste.

    Dietary Substitutions to Customize Your Easy Fresh Blackberry Ice Cream Recipe

    This Easy Fresh Blackberry Ice Cream Recipe can be easily modified based on different dietary needs. Consider these substitutions:

    1. For a Dairy-Free Option: Stick with coconut milk, or try almond milk, cashew milk, or oat milk as your base instead of dairy cream.

    2. Sugar Alternatives: If you prefer to reduce your sugar intake, substitute the maple syrup with stevia or monk fruit sweetener, adjusting according to your taste.

    3. Nut-Free Version: If you have nut allergies, simply use oat milk or soy milk for a creamy texture without nuts.

    4. Flavor Variations: You can experiment with different fruits such as strawberries, raspberries, or even mangoes instead of blackberries for a tropical twist.

    This flexibility not only adds variety to your dessert repertoire but also makes it easy to cater to various dietary restrictions.

    How to Prepare the Perfect Easy Fresh Blackberry Ice Cream Recipe: Step-by-Step Guide

    Now that you have gathered your ingredients, it’s time to make your Easy Fresh Blackberry Ice Cream! Follow these steps for a perfect batch:

    1. Prepare the Blackberries: Rinse the blackberries under cold water and pat them dry with a clean kitchen towel. Set aside a few whole berries for garnish.

    2. Blend the Base: In a blender or food processor, combine the fresh blackberries, coconut milk, maple syrup, vanilla extract, lemon juice, and sea salt. Blend until smooth and creamy. You want to ensure there are no chunks of blackberry left.

    3. Taste and Adjust: Taste the mixture. If you want more sweetness, feel free to add more maple syrup or sweetener and blend again.

    4. Chill the Mixture: Transfer the blended mixture into a bowl and refrigerate for 30 minutes to 1 hour. This step is essential as it helps improve the texture.

    5. Churn the Ice Cream: If you have an ice cream maker, pour the chilled mixture into it and churn according to the manufacturer’s instructions until you reach a soft-serve consistency. This usually takes around 20-25 minutes. If you don’t have an ice cream maker, skip to the next step.

    6. Freeze the Ice Cream: Pour the churned ice cream into an airtight container. Smooth the top with a spatula and press a piece of parchment paper directly onto the surface to prevent ice crystals from forming. Freeze for at least 4 hours or until firm.

    7. Serve: Once ready, scoop out your Easy Fresh Blackberry Ice Cream into bowls and garnish with the reserved blackberries.

    8. Enjoy: Relish the fresh, creamy taste of your homemade ice cream!

    This recipe is infinitely flexible, so adapt it to fit your lifestyle and dietary preferences, while enjoying every delicious scoop.

    Mastering Easy Fresh Blackberry Ice Cream Recipe: Advanced Tips and Variations

    To elevate your Easy Fresh Blackberry Ice Cream, here are some tips and variations to consider:

    • Add-In Options: You can stir in some dark chocolate chips, crushed nuts, or even a swirl of fruit purée for an added touch of flavor and texture.

    • Creamier Texture: If you want a richer ice cream, consider replacing some of the coconut milk with coconut cream. This will enhance the creaminess significantly.

    • Experiment with Herbs: For a unique flavor twist, infuse the coconut milk with fresh herbs like mint or basil. Simply heat the coconut milk slightly with the herbs, let them steep, and then blend. This will provide an aromatic touch to your ice cream.

    • Lower Calorie Version: Use unsweetened almond milk instead of coconut milk for a lower-calorie alternative.

    Remember, the key to mastering your ice cream lies in customization. Feel free to play with ingredients to find your perfect flavor profile!

    How to Store Easy Fresh Blackberry Ice Cream Recipe: Best Practices

    To keep your Easy Fresh Blackberry Ice Cream fresh and maintain its delightful flavor, adhere to these storage practices:

    1. Airtight Containers: Always store your ice cream in an airtight, freezer-safe container. This will prevent ice crystal formation and maintain the creamy texture.

    2. Wrap it Up: Simply placing the lid on the container might not be enough. Cover the surface of the ice cream with plastic wrap before sealing the lid to create an extra barrier against freezer burn.

    3. Freezing Duration: Your delicious blackberry ice cream can stay fresh in the freezer for up to two weeks. However, it’s best enjoyed within the first week for optimal taste and texture.

    4. Serving Tip: When ready to serve, let your ice cream sit at room temperature for about 5–10 minutes before scooping. This will make it easier to scoop and serve.

    By following these best practices, you’ll ensure that every scoop of your Easy Fresh Blackberry Ice Cream remains just as delightful as the first!

    Nutritional Value of Easy Fresh Blackberry Ice Cream Recipe

    Understanding the nutritional content of your homemade treats is just as important as the enjoyment they bring. Here is an overview of the estimated nutritional values per serving (1/2 cup):

    • Calories: Approximately 150-200 depending on ingredients used.
    • Total Fat: 7-10g (primarily from coconut milk)
    • Saturated Fat: 5-7g
    • Carbohydrates: 20-25g
    • Sugars: 10-15g (natural sugars from blackberries and maple syrup)
    • Fiber: 3g
    • Protein: 1-2g

    Blackberries are not only low in calories but high in fiber, which supports digestive health. This ice cream recipe is a delicious way to include these nutrient-dense berries into your diet while still satisfying your cravings for something sweet!

    FAQs: Frequently Asked Questions About Easy Fresh Blackberry Ice Cream Recipe

    Q1: Can I use frozen blackberries for this recipe?
    A1: Yes! If fresh blackberries are unavailable, frozen blackberries can be used. Just thaw them before blending for the best results.

    Q2: Is this recipe suitable for kids?
    A2: Absolutely! This blackberry ice cream is a fun and healthy treat that kids will love. It’s made from natural ingredients, making it a guilt-free dessert for children.

    Q3: How can I make this recipe lower in calories?
    A3: Opt for a low-calorie sweetener like stevia instead of maple syrup, and substitute full-fat coconut milk for a low-calorie milk alternative like almond or skim milk.

    Q4: Can I make this without an ice cream maker?
    A4: Yes! After blending the ingredients, pour them into a container and freeze. Stir the mixture every 30 minutes for the first 2 hours to break up any ice crystals and ensure a creamy texture.

    Q5: How can I enhance the flavor?
    A5: Adding in ingredients like vanilla extract, mint, or even a swirl of peanut butter can elevate the flavor of your ice cream. Experimenting with these can make your dessert unique!

    This Easy Fresh Blackberry Ice Cream Recipe not only makes for a super delicious treat but also showcases how simple and healthy making ice cream can be. Let your creativity and palate guide you as you craft this delightful dessert!

  • Homemade Vegan Rhubarb Crisp

    Homemade Vegan Rhubarb Crisp

    Homemade Vegan Rhubarb Crisp: A Tropical Delight

    Introduction to Homemade Vegan Rhubarb Crisp

    Welcome to the delightful world of Homemade Vegan Rhubarb Crisp! This recipe embodies simplicity, health, and flavor, all wrapped in a warm, comforting dessert, making it an ideal choice for varied diets. Among the plethora of dessert recipes out there, this crisp stands out due to its ease of preparation and vibrant ingredients.

    As the rhubarb season rolls in, it’s the perfect time to harness its tartness balanced with a sweet, crumbly topping. Not only is this vegan version completely plant-based, but it’s also gluten-free and low in calories, ensuring that it fits seamlessly into wellness-conscious lifestyles. Whether you are a busy parent looking for a quick, healthy dessert for your family, a student needing a budget-friendly recipe, or a baking enthusiast wanting to impress friends, this rhubarb crisp is for you.

    What makes this homemade treat even more appealing is its adaptability. You can modify it based on your ingredient availability or dietary requirements. With each bite, you’ll savor a delicate balance that highlights the natural flavor of rhubarb while enjoying the wholesome ingredients used in the An irresistible twist, this vegan rhubarb crisp is not just a treat—it’s a celebration of health and deliciousness!

    Benefits and Advantages of Homemade Vegan Rhubarb Crisp

    This vegan rhubarb crisp boasts a range of benefits that make it not only an enjoyable dessert but also a valuable addition to your culinary repertoire:

    1. Simplicity: One of the best attributes of this recipe is how easy it is to whip up. With minimal ingredients typically found in your pantry and straightforward steps, even novice cooks will feel confident making this dessert.

    2. Health Benefits: Rhubarb is a powerhouse of nutrition, packed with antioxidants and fiber while remaining low in calories. This recipe utilizes oats, which contribute to whole grain goodness and heart health. By using natural sweeteners and plant-based ingredients, you’ll create a dessert that is kind to your body, making it a great option for health-conscious diners.

    3. Versatile for Diets: This recipe caters to various dietary needs, whether you are vegan, gluten-free, or looking to monitor sugar intake. The ingredients can easily be substituted without compromising flavor or texture, making it ideal for those with food sensitivities or preferences.

    4. Enjoyable for All Occasions: Whether it’s a regular family dinner, a special event, or simply a treat at the end of a busy week, this crisp fits all occasions. Plus, it’s a wonderful dessert to share with guests, making it versatile for everything from casual gatherings to holiday feasts.

    5. Ingredients You Can Feel Good About: This homemade rhubarb crisp contains wholesome ingredients that are nutrient-dense, making it a dessert that you can enjoy without guilt.

    With its healthy profile, ease of preparation, and suitability for many dietary restrictions, it is no wonder this recipe is a favorite among those searching for delightful dessert recipes.

    Ingredients Overview

    Essential Ingredients for Homemade Vegan Rhubarb Crisp

    To create this scrumptious dessert, you will need the following ingredients:

    • Rhubarb (4 cups, chopped): Fresh rhubarb stalks are the star of this dessert. They provide a wonderful tart flavor and are packed with vitamins and minerals.
    • Oats (1 cup): Rolled oats give the crisp its texture. They’re heart-healthy and gluten-free when certified.
    • Almond flour (1/2 cup): This adds a nutty flavor and improves the nutritional profile, offering healthy fats without gluten.
    • Coconut oil (1/2 cup, melted): It serves as a dairy-free substitute for butter, giving the crisp a luscious texture and rich flavor.
    • Maple syrup (1/4 cup): A natural sweetener that enhances flavor while keeping the dish vegan.
    • Cinnamon (1 teaspoon): This spice adds warmth and a lovely aroma to the overall flavor.
    • Salt (1/4 teaspoon): A pinch of salt will enhance the natural sweetness of the rhubarb and balance the flavors.

    Note: The above ingredients can easily be modified if needed! For example, you can substitute almond flour for another gluten-free flour or replace coconut oil with vegan butter.

    Dietary Substitutions to Customize Your Homemade Vegan Rhubarb Crisp

    This recipe is inherently vegan and gluten-free, but it can be further customized:

    • Sugar Alternatives: If you’re looking to further reduce sugar intake, try substituting maple syrup with stevia or another low-calorie sweetener.
    • Nut-Free Options: If you have nut allergies, use sunflower seed flour in place of almond flour.
    • Different Fruits: If you can’t find rhubarb or would like to mix it up, feel free to include other fruits like strawberries or blueberries in a 50-50 ratio with rhubarb for added sweetness and flavor.
    • Higher Protein Option: For a protein boost, consider adding a scoop of plant-based protein powder to the oats mixture.

    With these substitutions, you can tailor your rhubarb crisp to fit your dietary preferences perfectly!

    How to Prepare the Perfect Homemade Vegan Rhubarb Crisp: Step-by-Step Guide

    Step-by-Step Instructions

    Preparing your homemade vegan rhubarb crisp is straightforward. Follow these steps to create this delightful dessert:

    1. Prepare the Rhubarb: Start by rinsing four cups of fresh rhubarb stalks. Chop them into 1-inch pieces and place them in a large bowl. The vibrant pink and green colors of rhubarb alone are a feast for the eyes!

    2. Sweeten the Rhubarb: Add 1/4 cup of maple syrup to the chopped rhubarb, then sprinkle 1 teaspoon of cinnamon over the top. Stir the mixture gently until the rhubarb is coated evenly. Allow it to sit while you prepare the crumble—this will help draw out the rhubarb’s juices.

    3. Preheat Your Oven: While the rhubarb releases its juices, preheat your oven to 350°F (175°C). The anticipation of a hot oven will have your kitchen smelling amazing in no time!

    4. Create the Crisp Topping: In another large bowl, combine 1 cup of rolled oats, 1/2 cup of almond flour, 1/4 teaspoon of salt, and 1/2 cup of melted coconut oil. Mix until the dry ingredients are moistened and crumbly.

    5. Assemble the Crisp: Grease an 8×8 inch baking dish lightly if you prefer. Spread the rhubarb mixture evenly over the base of the dish. Next, crumble the oat mixture on top so that it evenly covers the rhubarb.

    6. Bake the Crisp: Place the dish in the preheated oven and bake for 35-40 minutes or until the topping is golden brown and the rhubarb is bubbling underneath.

    7. Cool and Serve: Once baked, remove the crisp from the oven and let it cool for about 10-15 minutes. This cooling time helps the juices to thicken slightly. Serve warm on its own or with a scoop of vegan ice cream or whipped coconut cream for an indulgent treat.

    8. Enjoy! Savor each bite and relish the beautiful balance of tart and sweet—the hallmark of an excellent dessert recipe!

    Mastering Homemade Vegan Rhubarb Crisp: Advanced Tips and Variations

    To elevate your homemade vegan rhubarb crisp, consider these advanced tips and creative variations:

    • Add Nuts for Crunch: For an extra layer of texture, sprinkle chopped walnuts or pecans into the oat mixture for added crunch and healthy fats.
    • Experiment with Spices: Consider adding ginger, nutmeg, or cardamom to the filling for a more complex flavor profile.
    • Gluten-Free Oats: Always use certified gluten-free oats if you’re preparing this crisp for someone with a gluten sensitivity.

    Additionally, here are some variations to try:

    • Berry Fusion: Mix rhubarb with fresh strawberries or blueberries to add sweetness and create a beautiful array of flavors.
    • Tropical Touch: Add shredded coconut or pineapple chunks for a tropical flair.
    • Mini Hand Pies: For a fun twist, try making mini hand pies using vegan puff pastry filled with the rhubarb mixture, perfect for on-the-go sweets.

    By incorporating these variations and advanced tips, you can customize your homemade vegan rhubarb crisp to match seasonal ingredients or family preferences!

    How to Store Homemade Vegan Rhubarb Crisp: Best Practices

    To enjoy your homemade vegan rhubarb crisp even days after making it, proper storage is key:

    • Refrigeration: Let the crisp cool completely before covering it with plastic wrap or transferring it to an airtight container. It can be stored in the refrigerator for up to 5 days.

    • Freezing: If you wish to keep it for a longer period, you can freeze the crisp. Wrap it tightly in plastic wrap and then in aluminum foil to prevent freezer burn. It can last in the freezer for up to 3 months. When you’re ready to enjoy it, simply thaw it in the fridge overnight before reheating!

    • Reheating: To reheat, warm covered in the oven at 350°F (175°C) for about 15-20 minutes, or until heated through. Enjoy it warm to experience that delightful contrast of textures!

    By storing your rhubarb crisp correctly, you can enjoy this dessert without the stress of spoilage!

    Nutritional Value of Homemade Vegan Rhubarb Crisp

    Understanding the nutritional value of this delicious dessert can help you make mindful choices. Here’s a breakdown of the approximate nutrition per serving (1/8 of the dish):

    • Calories: 180-220
    • Total Fat: 8g
    • Saturated Fat: 7g
    • Cholesterol: 0mg
    • Sodium: 50mg
    • Total Carbohydrates: 30g
    • Dietary Fiber: 4g
    • Sugars: 6g
    • Protein: 3g

    The breakdown shows you get a great balance of carbs, fats, and proteins—all while keeping sugar relatively low. With a good amount of dietary fiber, this dessert not only satisfies your sweet tooth but also supports digestive health.

    This balance makes it a wonderful option for those enjoying a variety of dessert recipes, with the assurance that it’s a nourishing choice!

    FAQs: Frequently Asked Questions About Homemade Vegan Rhubarb Crisp

    Q1: Can I use frozen rhubarb for this recipe?

    Yes! Frozen rhubarb is a great option if you can’t find fresh rhubarb. Just make sure to thaw it and drain excess liquid before using it in your crisp.

    Q2: How can I make this recipe lower in calories?

    You can use a sugar substitute instead of maple syrup and reduce the amount of coconut oil in the topping. Additionally, using a lower-calorie sweetener can help lighten the dish.

    Q3: What can I serve with rhubarb crisp?

    Pair your homemade vegan rhubarb crisp with plant-based ice cream, coconut whipped cream, or even a dollop of vegan yogurt for added creaminess.

    Q4: How do I prevent the topping from becoming too soggy?

    To avoid a soggy topping, ensure to bake your crisp until the topping is golden brown and firm. Also, allow the crisp to cool slightly before serving; this helps the juices thicken and set!

    With this comprehensive guide to making and enjoying homemade vegan rhubarb crisp, you’re sure to create a dish that delights everyone around your table! Whether you’re gathering friends for an evening treat or simply indulging in a form of self-care, this crisp is a perfect choice. Enjoy your cooking adventure!

  • The Best Caramel Cottage Ice Cream

    The Best Caramel Cottage Ice Cream

    The Best Caramel Cottage Ice Cream: A Tropical Delight

    Introduction to The Best Caramel Cottage Ice Cream

    Searching for dessert recipes that are both simple and incredibly gratifying? Look no further! The Best Caramel Cottage Ice Cream is a delectable treat that promises to delight your taste buds while being surprisingly easy to make at home. This creamy concoction blends the rich flavors of caramel with the fresh, light essence of cottage cheese, resulting in a unique ice cream that’s not only satisfying but also comes with health benefits.

    This dessert is incredibly versatile, catering to diverse dietary needs. Whether you’re a busy parent looking for a quick treat for the kids, a diet-conscious individual focusing on low-calorie alternatives, or someone following a vegan lifestyle, this ice cream recipe can adapt to your preferences. Plus, you can indulge yourself guilt-free!

    More than just your average dessert, this Caramel Cottage Ice Cream ticks all the boxes: it’s healthy, gluten-free, and easy to prepare. Rich in protein and free from artificial additives, it stands out as a smart choice for anyone looking to enjoy delicious dessert recipes without sacrificing their health goals. Let’s dive into the delightful world of homemade ice cream that’s bound to impress family and friends alike!

    Benefits and Advantages of The Best Caramel Cottage Ice Cream

    The Best Caramel Cottage Ice Cream brings together a host of advantages that make it a standout amongst dessert recipes.

    Ease of Preparation

    One of the most significant benefits of this recipe is its simplicity. You don’t need to be a culinary expert to whip this up! The method requires minimal effort and time, making it perfect for home cooks of all experience levels. With just a few ingredients and a blender or mixer, you can achieve a creamy, smooth texture that rivals store-bought varieties.

    Health Benefits

    While many ice creams are loaded with unhealthy sugars and saturated fats, this recipe utilizes cottage cheese as a primary ingredient, introducing a healthy dose of protein and calcium into your diet. This makes the ice cream more filling and potentially lowers the risk of overindulgence. Furthermore, using natural sweeteners or making the caramel from scratch without preservatives can elevate the health profile even further, creating a dessert that you can feel good about eating.

    Versatility

    This ice cream caters to a variety of dietary preferences and restrictions. It offers a base recipe that can easily be adapted to gluten-free or vegan diets by simply substituting a few ingredients. This allows you to customize flavors based on your tastes and dietary needs without sacrificing the deliciousness that a great dessert should provide.

    This combination of easy preparation, health benefits, and versatility sets The Best Caramel Cottage Ice Cream apart from typical dessert recipes. Whether you’re serving it on a hot summer day or a cozy winter evening, this treat is sure to please everyone!

    Ingredients Overview

    Essential Ingredients for The Best Caramel Cottage Ice Cream

    Here’s your must-have list for creating The Best Caramel Cottage Ice Cream. You’ll find that all the components come together to create a harmony of flavors!

    • 2 cups of cottage cheese (provides a creamy texture and protein)
    • Tip: For vegan alternatives, you can use a plant-based cottage cheese.

    • 1/2 cup of caramel sauce (adds sweetness and richness)

    • Tip: Opt for homemade caramel for a healthier option, or choose a vegan caramel sauce.

    • 1/4 cup honey or maple syrup (natural sweeteners)

    • Tip: Adjust based on your preferred sweetness level; you can also skip this if you prefer a lower-sugar recipe.

    • 1 teaspoon vanilla extract (enhances flavor)

    • 1/2 cup of milk (can be dairy or plant-based)

    • Tip: Almond milk or oat milk works wonderfully for a vegan alternative.

    • Pinch of salt (balances sweetness)

    • Optional toppings: crushed nuts, chocolate chips, or fresh fruit (for added texture and flavor)

    Dietary Substitutions to Customize Your The Best Caramel Cottage Ice Cream

    This recipe is flexible and allows for substitutions based on what you have available or your dietary needs:

    1. Cottage Cheese: If you’re vegan, consider using silken tofu or a soy-based cottage cheese alternative. These options maintain a similar texture and creamy richness.

    2. Sweeteners: Instead of honey, use agave syrup or coconut sugar for a different flavor profile. For a low-carb version, you might use erythritol or monk fruit sweetener.

    3. Milk: To keep it dairy-free, any plant-based milk works perfectly. Almond milk and soy milk not only provide a great texture but also enhance the flavor experience.

    By making these simple substitutions, you can create The Best Caramel Cottage Ice Cream that suits almost any dietary requirement while ensuring it remains a delightful treat!

    How to Prepare the Perfect The Best Caramel Cottage Ice Cream: Step-by-Step Guide

    Making The Best Caramel Cottage Ice Cream is an enjoyable process, and with these easy-to-follow steps, you’ll have a luscious treat ready in no time.

    Step-by-Step Instructions

    1. Prepare the Base:
    2. In a high-speed blender or food processor, add 2 cups of cottage cheese. Blend until smooth and creamy, ensuring there are no lumps left. This step is essential for that dreamy ice cream texture.

    3. Mix Ingredients:

    4. Add 1/2 cup of caramel sauce, 1/4 cup of honey or maple syrup, and 1 teaspoon of vanilla extract to the blended cottage cheese. Blend again until everything is well combined, and you achieve a consistent mixture.

    5. Adjust Sweetness:

    6. Taste your mixture and adjust the sweetness as needed. If you like it sweeter, add a little more of your chosen sweetener.

    7. Incorporate Milk:

    8. Gradually pour in 1/2 cup of milk (dairy or plant-based) while blending to achieve a soft serve-like consistency. This adds richness and improves fluffiness.

    9. Chill the Mixture:

    10. Once your mixture is well-combined, transfer it to an airtight container and refrigerate for at least 30 minutes. This cooling process ensures the flavors meld perfectly.

    11. Churn the Ice Cream:

    12. If you have an ice cream maker, pour the chilled mixture into it and churn according to the manufacturer’s instructions. This process incorporates air, giving you a lighter, fluffier ice cream.

    13. No Ice Cream Maker? No Problem!

    14. If you don’t have an ice cream maker, pour the mixture into a shallow dish and place it in the freezer. Stir with a fork every 30 minutes for 2 to 3 hours to break up ice crystals, making the texture smooth.

    15. Final Freeze:

    16. Once churned or stirred, keep the ice cream in the freezer for an additional 2-4 hours until firm. This is the time for flavors to develop further.

    17. Serve and Enjoy:

    18. Scoop the finished ice cream into bowls or cones. Top with your choice of crushed nuts, chocolate chips, or fresh fruit if desired. Serve immediately, or store it back in the freezer for later enjoyment.

    Each step is designed to guide you through the process seamlessly, ensuring you achieve a delightful end result every time.

    Mastering The Best Caramel Cottage Ice Cream: Advanced Tips and Variations

    To take your ice cream experience up a notch, consider these advanced tips and variations:

    • Flavor Infusions: Experiment with flavors like chocolate, coffee, or spices. Add cocoa powder or espresso powder during the blending process for a mocha version, or try a pinch of cinnamon for a warm touch.

    • Salty Caramel Twist: For those who love the salt-sweet combination, add a pinch of sea salt to your mixture. It enhances the caramel flavor and provides an intriguing depth.

    • Mix-in Madness: Add fun textures by incorporating crushed cookies, nuts, or dried fruits in your churned ice cream before it completely sets. This way, you can create an exciting texture contrast.

    • Vegan Caramel Cottage Ice Cream: For a fully plant-based version, make your caramel sauce using coconut sugar, coconut milk, and maple syrup! Blend it all until you have a rich and thick caramel.

    These tips will give you the chance to personalize various iterations of The Best Caramel Cottage Ice Cream, keeping it fresh and exciting for every taste preference!

    How to Store The Best Caramel Cottage Ice Cream: Best Practices

    To preserve the quality and taste of The Best Caramel Cottage Ice Cream, proper storage is crucial. Here’s how to keep it at its best:

    • Freezing: Ensure your ice cream is transferred into an airtight container. This prevents ice crystals from forming and keeps your ice cream smooth and creamy.

    • Storage Duration: Properly stored, The Best Caramel Cottage Ice Cream can last for up to 2-3 weeks in the freezer. However, for optimal quality, consume it within the first week.

    • Serving Tip: When you’re ready to enjoy it, take the container out of the freezer and let it sit at room temperature for about 5-10 minutes before serving. This softens the ice cream slightly, making it easier to scoop.

    With these simple storage practices, you can extend the life of your ice cream while ensuring it remains just as delicious as the day you made it!

    Nutritional Value of The Best Caramel Cottage Ice Cream

    Understanding the nutritional content of The Best Caramel Cottage Ice Cream can help you enjoy it guilt-free while aligning with your dietary goals.

    Nutritional Breakdown (per serving, estimated)

    • Calories: 150
    • Total Fat: 5g
    • Saturated Fat: 2g
    • Cholesterol: 15mg
    • Sodium: 50mg
    • Total Carbohydrates: 20g
    • Dietary Fiber: 1g
    • Sugars: 10g
    • Protein: 5g

    This nutritional profile reflects the importance of ingredients like cottage cheese, which packs a protein punch and keeps you satisfied longer. The use of natural sweeteners helps lower the sugar compared to typical ice creams, making it a smart choice if you’re watching your sugar intake.

    While calories might depend on your chosen ingredients and serving sizes, this ice cream allows you to indulge without straying from your health goals.

    FAQs: Frequently Asked Questions About The Best Caramel Cottage Ice Cream

    1. Can I use Greek yogurt instead of cottage cheese?

    Absolutely! Greek yogurt can be a great substitute, offering a similar texture and tanginess. It will provide protein and a creamy consistency.

    2. How can I make it sugar-free?

    You can use sugar-free sweeteners like erythritol or monk fruit instead of honey or maple syrup. Just ensure you balance the flavor profile.

    3. Is this recipe suitable for lactose-intolerant individuals?

    If you use lactose-free cottage cheese and a dairy-free milk alternative, this recipe can work well for those with lactose intolerance.

    4. Can I make a chocolate version?

    Yes! Simply add cocoa powder or melted dark chocolate to the mixture when blending to create a rich chocolate flavor.

    5. How long does it take to churn the ice cream if using an ice cream maker?

    Typically, it takes about 20 to 30 minutes to churn in an ice cream maker. However, always refer to your machine’s manual for best results.

    6. What are some fun mix-ins I can try?

    You can add crushed cookies, chocolate chips, fresh berries, or even pieces of your favorite candy bars for a fun, textured experience!

    With these FAQs, you can clarify your doubts while ensuring a delightful ice cream-making experience. Embrace the joy of making The Best Caramel Cottage Ice Cream, and enjoy a dessert that’s worth savoring!

  • Tasty Greek Yogurt Jello Fluff

    Tasty Greek Yogurt Jello Fluff

    Tasty Greek Yogurt Jello Fluff: A Tropical Delight

    Introduction to Tasty Greek Yogurt Jello Fluff

    If you’re searching for a delightful addition to your dessert recipes collection, look no further! Introducing Tasty Greek Yogurt Jello Fluff—a light, fluffy, and flavorful treat that’s perfect for anyone looking to indulge without the guilt. This dessert combines the rich creaminess of Greek yogurt with the vibrant taste of Jello, resulting in a dish that’s both refreshing and satisfying.

    Not only is this recipe simplicity itself, but it is also incredibly healthy. Greek yogurt is a fantastic source of protein, calcium, and probiotics, making it a smart choice for anyone, from busy parents to active students and health-conscious individuals. Furthermore, this dish can be customized to fit various dietary needs, being easily made vegan, gluten-free, and low-calorie without compromising on taste.

    The Tasty Greek Yogurt Jello Fluff is not just a treat; it’s an experience. Whether you’re hosting a dinner party or simply enjoying a quiet evening at home, this recipe will impress guests and family alike. So get ready to mix up a tropical delight that everyone can enjoy!

    Benefits and Advantages of Tasty Greek Yogurt Jello Fluff

    When it comes to dessert recipes, Tasty Greek Yogurt Jello Fluff stands out for numerous reasons. First and foremost, simplicity is key. This recipe requires minimal ingredients and straightforward steps, making it perfect for busy individuals or novice home cooks. With an easy preparation process, taking just about 30 minutes from start to finish, this fluffy dessert can fit seamlessly into your culinary routine.

    Next, let’s talk about health benefits. The primary ingredient, Greek yogurt, is low in sugar yet packed with protein. This makes it an excellent choice for those who want to indulge without overloading on calories. Probiotics found in Greek yogurt also contribute to digestive health, which is a bonus for anyone looking to improve their gut health.

    Moreover, the addition of Jello provides a burst of fruity flavors and beautiful colors, enhancing the visual appeal of your dessert. This versatility allows you to experiment with different flavors and colors of Jello, making it a great fit for seasonal occasions or personal preferences.

    Lastly, this recipe can cater to various dietary restrictions. With easy substitutions such as dairy-free yogurt and sugar-free Jello, everyone, from vegan friends to those with gluten sensitivities, can enjoy Tasty Greek Yogurt Jello Fluff without a worry.

    Ingredients Overview

    Essential Ingredients for Tasty Greek Yogurt Jello Fluff

    Here’s a detailed list of the ingredients you’ll need for this delightful dessert:

    • 2 cups Greek yogurt (plain or vanilla): Adds creaminess and protein to the fluff. Look for low-fat or non-dairy alternatives for lighter versions.
    • 1 cup Jello powder (any flavor): This will determine the flavor of your fluff. Choose from popular flavors like strawberry, cherry, or orange for a vibrant dessert.
    • 1 cup hot water: Helps dissolve the Jello powder, creating a smooth texture.
    • 1-2 tablespoons honey or agave syrup (optional): For those with a sweet tooth, these natural sweeteners can enhance the dessert’s taste. Adjust for taste preferences.
    • ½ cup whipped topping or whipped coconut cream (for a dairy-free option): This lightens the mixture and adds airiness.
    • Fresh fruit (optional, for garnish): Berries, sliced bananas, or diced mango make excellent toppings.

    Dietary Substitutions to Customize Your Tasty Greek Yogurt Jello Fluff

    1. Vegan Option:
    2. Use coconut yogurt or almond yogurt instead of Greek yogurt.
    3. Opt for agar-agar or plant-based Jello alternatives to create a vegan-friendly version.

    4. Gluten-Free Option:

    5. Ensure that the Jello you select is gluten-free. Most Jello brands are, but always check the labels to be safe.

    6. Sugar-Free Option:

    7. Use sugar-free Jello mix and substitute honey/agave syrup with a sugar-free sweetener like stevia or monk fruit sweetener.

    8. Low-Calorie Option:

    9. Low-fat Greek yogurt and light whipped topping can significantly reduce calories without sacrificing flavor.

    With these substitutions, anyone can enjoy the deliciousness of Tasty Greek Yogurt Jello Fluff, regardless of dietary preferences!

    How to Prepare the Perfect Tasty Greek Yogurt Jello Fluff: Step-by-Step Guide

    Creating your Tasty Greek Yogurt Jello Fluff is an enjoyable and straightforward endeavor. Follow these step-by-step instructions for a foolproof dessert:

    1. Prepare the Base: In a mixing bowl, combine 1 cup of hot water with 1 cup of Jello powder. Stir thoroughly until the Jello dissolves completely. The mixture should be smooth with no lumps.

    2. Cool the Mixture: Let the Jello mixture cool for about 10-15 minutes at room temperature. This will avoid curdling the yogurt when mixed together.

    3. Combine Yogurt and Jello: In another bowl, add 2 cups of Greek yogurt. Slowly pour the cooled Jello mixture into the yogurt while stirring gently. This step is crucial for achieving a smooth and fluffy texture.

    4. Add Sweetener: If you wish, stir in honey or agave syrup to sweeten the mixture. Adjust according to taste, keeping in mind that the Jello adds sweetness as well.

    5. Fold in Whipped Topping: For extra fluffiness, use a spatula to fold in ½ cup of whipped topping or whipped coconut cream. This adds volume and lightens the mix, creating that cloud-like texture.

    6. Chill the Fluff: Once well combined, pour the mixture into individual serving cups or a large bowl. Cover with plastic wrap and refrigerate for at least 2-3 hours, or until set.

    7. Garnish and Serve: After chilling, take the Tasty Greek Yogurt Jello Fluff out of the fridge. Garnish with fresh fruit or additional whipped topping before serving. Enjoy this refreshing treat on a warm day!

    These instructions ensure that your fluff turns out perfectly every time. Each step may also be tailored for various dietary requirements, so feel free to substitute ingredients as necessary.

    Mastering Tasty Greek Yogurt Jello Fluff: Advanced Tips and Variations

    Now that you’ve mastered the basic Tasty Greek Yogurt Jello Fluff, here are some advanced tips and exciting variations to try:

    • Flavors Galore: Experiment with different Jello flavors to create a rainbow of fluffs. Mixing two flavors can also yield beautiful marbled effects—think strawberry and blueberry for a summer vibe!

    • Layering Technique: For an attractive presentation, layer the Greek yogurt mixture with fruit purees or additional Jello in clear cups. This will not only make it visually appealing but also delicious.

    • Add-ins: Consider folding in some finely diced fruits or nuts into the fluff for added texture. Chopped strawberries, blueberries, or even shavings of coconut can enhance the eating experience.

    • Make it a Parfait: Layer the Jello fluff with granola or nut clusters to create a parfait that can be enjoyed as breakfast or a nutritious snack.

    Incorporating these suggestions can turn your Tasty Greek Yogurt Jello Fluff into a versatile dish that caters to various occasions!

    How to Store Tasty Greek Yogurt Jello Fluff: Best Practices

    To keep your Tasty Greek Yogurt Jello Fluff fresh, follow these storage guidelines:

    • Refrigeration: Store leftovers in an airtight container in the refrigerator for up to 5 days. This will maintain the fluff’s texture and flavor, so you can enjoy this treat throughout the week.

    • Freezing: While this dessert is best enjoyed fresh, you can freeze the Jello fluff for up to 2 weeks. Place it in a suitable airtight container or freezer bag. To enjoy it later, thaw in the fridge overnight before serving.

    • Reheating: If you’ve frozen the fluff and wish to have it served at room temperature, allow it to thaw naturally in the fridge rather than using a microwave.

    These practices will ensure that your fluffy dessert remains delicious for as long as possible!

    Nutritional Value of Tasty Greek Yogurt Jello Fluff

    Curious about how this delightful treat fits into your daily nutrition? Here’s a breakdown of the estimated nutritional values per serving (based on standard ingredients):

    • Calories: Approximately 120-150 calories
    • Total Fat: 3-5g
    • Protein: 8-10g
    • Carbohydrates: 25-30g
    • Fiber: 0g
    • Sugars: 8-12g (depending on the sweetness of Jello)
    • Calcium: 10% Daily Value (DV)
    • Vitamin C: 5% Daily Value (DV)

    The nutritional values may vary based on your ingredient choices—such as using low-fat or full-fat yogurt, and sweetener options. This dessert is a wholesome treat providing essential nutrients, making it a great addition to your dessert recipes collection.

    FAQs: Frequently Asked Questions About Tasty Greek Yogurt Jello Fluff

    Can I use non-flavored yogurt instead of Greek yogurt?

    Yes! If you prefer a different flavor or don’t have Greek yogurt on hand, regular non-flavored yogurt will also work. However, you might want to adjust the sweetness accordingly since Greek yogurt typically has a thicker consistency.

    Is it possible to prepare this recipe without Jello?

    Absolutely! Instead of using Jello, you can incorporate fruit purees for a natural sweetness and flavor. Just blend your desired fruits and sweeten to taste.

    How can I make this recipe more portable?

    Consider using individual cups with lids for easy transportation, making it a perfect on-the-go snack or dessert option!

    Can I prepare this dish in advance?

    Yes! Tasty Greek Yogurt Jello Fluff can be made one day in advance, and it tastes even better after chilling overnight.

    What if I can’t find a certain Jello flavor?

    Feel free to get creative! You can explore your local grocery store for seasonal flavors or even create your own homemade fruit gelatin if you’re feeling adventurous.

    By providing straightforward answers, we hope to assist readers in creating their Tasty Greek Yogurt Jello Fluff according to their preferences and needs.

    Now that you have all the tips, tricks, and detailed instructions, you’re ready to embark on your cooking adventure. Enjoy the delicious Tasty Greek Yogurt Jello Fluff!

  • Best Vegan Rhubarb Crisp

    Best Vegan Rhubarb Crisp

    Best Vegan Rhubarb Crisp: A Tropical Delight

    Introduction to Best Vegan Rhubarb Crisp

    Are you looking for the perfect addition to your collection of dessert recipes? Look no further than the delightful Best Vegan Rhubarb Crisp! This simple yet oh-so-delicious treat is a fantastic option for anyone seeking a warm, comforting dessert. Combining the tartness of rhubarb with a crunchy, sweet topping, this rhubarb crisp offers a unique twist that’s sure to please your palate.

    What sets this recipe apart is its emphasis on healthy, plant-based ingredients that cater to various dietary needs. Whether you’re vegan, gluten-free, or even watching your calorie intake, this recipe has got you covered. Not only is it easy to prepare, but it also provides an excellent way to enjoy the taste of fresh rhubarb, making it an ideal option for busy parents or anyone craving a quick yet satisfying dessert.

    With its layers of flavor and texture, the Best Vegan Rhubarb Crisp invites you to gather around the table and indulge without guilt. Perfect for any occasion—be it a family dinner, a summer potluck, or a cozy night in—this dessert will warm your heart and fill your home with irresistible aromas. Get ready to embrace a dessert that not only satisfies your cravings but also promotes a healthier lifestyle!


    Benefits and Advantages of Best Vegan Rhubarb Crisp

    When it comes to dessert recipes, the Best Vegan Rhubarb Crisp really shines, thanks to its remarkable attributes. Here’s why you should consider adding this delectable dish to your dessert arsenal:

    1. Easy Preparation

    One of the biggest advantages of this recipe is its simplicity. With just a handful of ingredients, you can whip up a delightful dessert in under an hour! The straightforward instructions make it accessible for cooks at every level, from beginners to seasoned bakers. Whether you’re short on time or just want a fuss-free dessert, this rhubarb crisp fits the bill perfectly.

    2. Health Benefits

    Unlike many traditional dessert recipes that are loaded with sugar and fat, the Best Vegan Rhubarb Crisp is a healthier alternative. Rhubarb is known for its rich nutritional profile, offering vitamins C and K, as well as antioxidants. By opting for natural sweeteners like maple syrup and using oats for the topping, you’ll create a dessert that satisfies your sweet tooth without the guilt. It’s a great choice for those conscious about their health or looking to maintain a balanced diet.

    3. Versatility

    This vegan rhubarb crisp is incredibly versatile. Not only can it be enjoyed warm straight from the oven, but it’s also delightful served cold or at room temperature. You can pair it with a scoop of dairy-free ice cream or a dollop of coconut yogurt for an extra touch. This flexibility makes it perfect for any occasion—whether you’re hosting a dinner party or simply enjoying a quiet evening at home.

    4. Suitable for Various Dietary Needs

    If you’re entertaining guests or feeding a family, having a dessert that caters to various dietary requirements can be a challenge. Fortunately, this Best Vegan Rhubarb Crisp is not only vegan but can also be easily made gluten-free by choosing certified gluten-free oats. It accommodates different dietary lifestyles without sacrificing flavor, making it an excellent option for gatherings or celebrations.

    In conclusion, the Best Vegan Rhubarb Crisp isn’t just a treat; it’s a friendly addition to your collection of dessert recipes that prioritizes health and inclusivity. Its ease of preparation, health benefits, versatility, and suitability for various diets make it a standout recipe that you’ll want to make again and again.


    Ingredients Overview

    Essential Ingredients for Best Vegan Rhubarb Crisp

    To create a scrumptious Best Vegan Rhubarb Crisp, you’ll need the following ingredients:

    For the Rhubarb Filling:

    • 4 cups of fresh rhubarb, chopped: Offers a tangy flavor and dense texture.
    • ¾ cup of maple syrup or agave nectar: A natural sweetener that complements the tartness of rhubarb while keeping it vegan.
    • 1 tablespoon of cornstarch: Acts as a thickener, creating a perfect filling consistency.
    • 1 teaspoon of vanilla extract: Enhances the flavor profile.
    • 1 teaspoon of cinnamon: Adds warmth and sweetness.

    For the Crisp Topping:

    • 1 cup of rolled oats: Provides crunch and health benefits; choose certified gluten-free if needed.
    • ½ cup of almond flour or oat flour: Contributes to a crumbly texture while remaining gluten-free.
    • ½ cup of coconut oil or vegan butter, melted: Binds the topping ingredients together while adding richness.
    • ¼ cup of brown sugar or coconut sugar: Adds sweetness to the topping.
    • 1 teaspoon of salt: Balances flavors and enhances the overall taste.

    This straightforward list ensures your Best Vegan Rhubarb Crisp is as healthy as it is delicious, making it one of the most enjoyable dessert recipes you can try!

    Dietary Substitutions to Customize Your Best Vegan Rhubarb Crisp

    Customization is key in making this recipe work for your specific dietary needs or preferences. Here are some substitutions you can consider:

    • Rhubarb Substitute: If fresh rhubarb isn’t available, consider using frozen rhubarb. Just remember to thaw and drain excess moisture to avoid a soggy filling.
    • Sweeteners: If you prefer a lower-glycemic option, swap out the maple syrup for monk fruit sweetener or stevia, adjusting to taste.
    • Gluten-Free Options: Use certified gluten-free oats and almond flour to ensure the crisp is suitable for those sensitive to gluten.
    • Nut-Free Options: Replace almond flour with sunflower seed flour to accommodate nut allergies while maintaining a delightful texture.
    • Oil-Free Version: To make the dish oil-free, use applesauce instead of coconut oil or vegan butter in the topping. Just remember to adjust the texture accordingly.

    With these substitutions, the Best Vegan Rhubarb Crisp can easily be tailored to meet the needs of anyone at your table, making it a universally loved dessert!


    How to Prepare the Perfect Best Vegan Rhubarb Crisp: Step-by-Step Guide

    Creating a delicious Best Vegan Rhubarb Crisp involves a few easy steps. Follow this step-by-step guide to ensure a successful bake:

    1. Prepare the Oven: Preheat your oven to 350°F (175°C). This will ensure your rhubarb crisp bakes evenly and reaches the perfect consistency.

    2. Prepare the Filling: In a large mixing bowl, combine the chopped rhubarb, maple syrup, cornstarch, vanilla extract, and cinnamon. Stir the mixture until the rhubarb is evenly coated. Pour this filling into a greased 9×13-inch baking dish.

    3. Make the Crisp Topping: In a separate bowl, combine the rolled oats, almond flour (or oat flour), melted coconut oil (or vegan butter), brown sugar, and salt. Mix thoroughly until all ingredients are combined.

    4. Assemble the Crisp: Evenly spread the oat topping over the rhubarb filling in the baking dish. Ensure that the topping covers the filling completely for a delightful crunch.

    5. Bake: Place the baking dish in the preheated oven and bake for 35-40 minutes, or until the filling is bubbling and the topping is golden brown.

    6. Cool and Serve: Once baked, remove the crisp from the oven. Let it cool for about 10-15 minutes to allow the filling to set. Then, serve warm with your favorite vegan ice cream or coconut yogurt.

    7. Storing Leftovers: If you have any leftovers, ensure they are stored in an airtight container in the refrigerator. They’ll stay fresh for a few days.

    8. Making It Ahead: Feel free to prep the rhubarb filling and the crisp topping separately a day in advance for an even quicker assembly on serving day.

    This clear guide to making the Best Vegan Rhubarb Crisp is crafted so that you’ll succeed on your first try! It’s a gem among dessert recipes, perfect for sharing with family and friends while enjoying the wholesome taste of rhubarb.


    Mastering Best Vegan Rhubarb Crisp: Advanced Tips and Variations

    Now that you have the foundational recipe, it’s time to explore some advanced tips and variations to elevate your Best Vegan Rhubarb Crisp:

    1. Blend of Fruits:

    For a unique fruit medley, consider mixing rhubarb with other fruits such as strawberries, blueberries, or apples. Each addition will introduce new flavors and textures, enhancing your crisp.

    2. Add Nuts or Seeds:

    Incorporate chopped nuts such as walnuts, pecans, or even sunflower seeds into the topping. They will add an extra crunch and richness while providing additional nutrients.

    3. Spice It Up:

    Enhance the flavor by experimenting with spices. Try adding nutmeg or ginger, which can complement the tangy rhubarb beautifully.

    4. Top with Coconut Cream:

    For a delightful finish, serve your rhubarb crisp warm with a dollop of whipped coconut cream. The creaminess adds a luxurious touch that pairs beautifully with the crisp.

    5. Make Mini Crisps:

    For individual servings, consider preparing mini crisps by layering the rhubarb and topping in ramekins. This is not only a fun presentation but also makes for easier portion control.

    6. Vegan Cheese Option:

    For a savory twist, add a layer of nut-based vegan cheese under your topping for a unique contrast to the tart rhubarb.

    Each of these tips and variations will allow you to create a customized version of the Best Vegan Rhubarb Crisp that reflects your personal taste while keeping it healthy and delicious. Embrace the creativity in your kitchen and turn this recipe from basic into extraordinary!


    How to Store Best Vegan Rhubarb Crisp: Best Practices

    If you end up with leftovers—though it’s unlikely—you want to make sure your Best Vegan Rhubarb Crisp stays fresh for as long as possible. Use these best storage practices:

    1. Refrigeration: Allow the crisp to cool completely before covering it with plastic wrap or transferring it to an airtight container. Store it in the refrigerator for up to five days.

    2. Freezing: For longer storage, the rhubarb crisp can be frozen. Make sure to wrap it tightly in plastic wrap and then foil to prevent freezer burn. This dessert can last for up to three months in the freezer.

    3. Reheating: To reheat, simply place the crisp in a preheated oven at 350°F (175°C) for about 15-20 minutes, or until warmed through. Alternatively, individual servings can be reheated in the microwave for about 30-60 seconds.

    Utilizing these best practices ensures that your Best Vegan Rhubarb Crisp remains delicious and flavorful, making it one of the more practical dessert recipes to store and enjoy later!


    Nutritional Value of Best Vegan Rhubarb Crisp

    Understanding the nutritional value of the Best Vegan Rhubarb Crisp allows you to enjoy it as part of a balanced diet. Here is a breakdown of the nutritional values you can expect per serving (approximately 1/8 of the recipe):

    • Calories: 180
    • Total Fat: 8g
    • Saturated Fat: 4g
    • Cholesterol: 0mg
    • Sodium: 75mg
    • Total Carbohydrates: 27g
    • Dietary Fiber: 3g
    • Sugar: 7g
    • Protein: 3g
    • Vitamin A: 2% DV
    • Vitamin C: 6% DV
    • Calcium: 4% DV
    • Iron: 6% DV

    This nutritional profile showcases the health benefits of this delightful dessert while remaining mindful of calories, fats, and sugars. The combination of rhubarb and other wholesome ingredients contributes to a dessert that fits nicely into many dietary frameworks, making it a top contender among healthy dessert recipes.


    FAQs: Frequently Asked Questions About Best Vegan Rhubarb Crisp

    Q: Can I use frozen rhubarb?
    A: Yes, you can substitute frozen rhubarb for fresh! Just remember to thaw and drain any excess liquid to avoid a watery filling.

    Q: What can I use instead of maple syrup?
    A: Agave nectar, brown sugar, or a sugar-free sweetener can be used as a substitute; however, taste and texture may vary slightly.

    Q: How do I store the rhubarb crisp?
    A: Store any leftovers in an airtight container in the refrigerator for up to five days. For longer storage, wrap tightly and freeze for up to three months.

    Q: Is it possible to make this crisp gluten-free?
    A: Absolutely! Just make sure to choose certified gluten-free oats and flour types for the topping to keep it gluten-free.

    Q: Can I make this ahead of time?
    A: Yes, you can prep the filling and the topping separately in advance. Just assemble and bake when you’re ready to serve!

    Q: Can I add other fruits to the filling?
    A: Yes, mixing in strawberries, apples, or blueberries works wonderfully and can enhance the flavor palette of your crisp!

    These FAQs cover common queries related to the Best Vegan Rhubarb Crisp, making this recipe easy to approach for everyone. It stands as a delicious addition to your favorite dessert recipes that delights both the palate and the body. Happy baking!