Tag: desserts

  • I Cant Stop Eating This Sweet Grilled Pineapple

    I Cant Stop Eating This Sweet Grilled Pineapple

    I Can’t Stop Eating This Sweet Grilled Pineapple!: A Tropical Delight

    Introduction to I Can’t Stop Eating This Sweet Grilled Pineapple!

    If you’re looking for a deliciously sweet and healthy addition to your dessert recipes, look no further! This Sweet Grilled Pineapple recipe is not only an absolute treat for your taste buds but also an incredibly simple and versatile option that can cater to various dietary needs. With just a handful of ingredients, you can create a stunning dish that captures the essence of summer in every bite.

    The process is straightforward, making it perfect for busy parents, students, or anyone who loves quick, delicious meals. This recipe shines in its simplicity, requiring minimal preparation while delivering maximum flavor. Plus, it’s naturally gluten-free and vegan, catering to health-conscious individuals looking to indulge without the guilt.

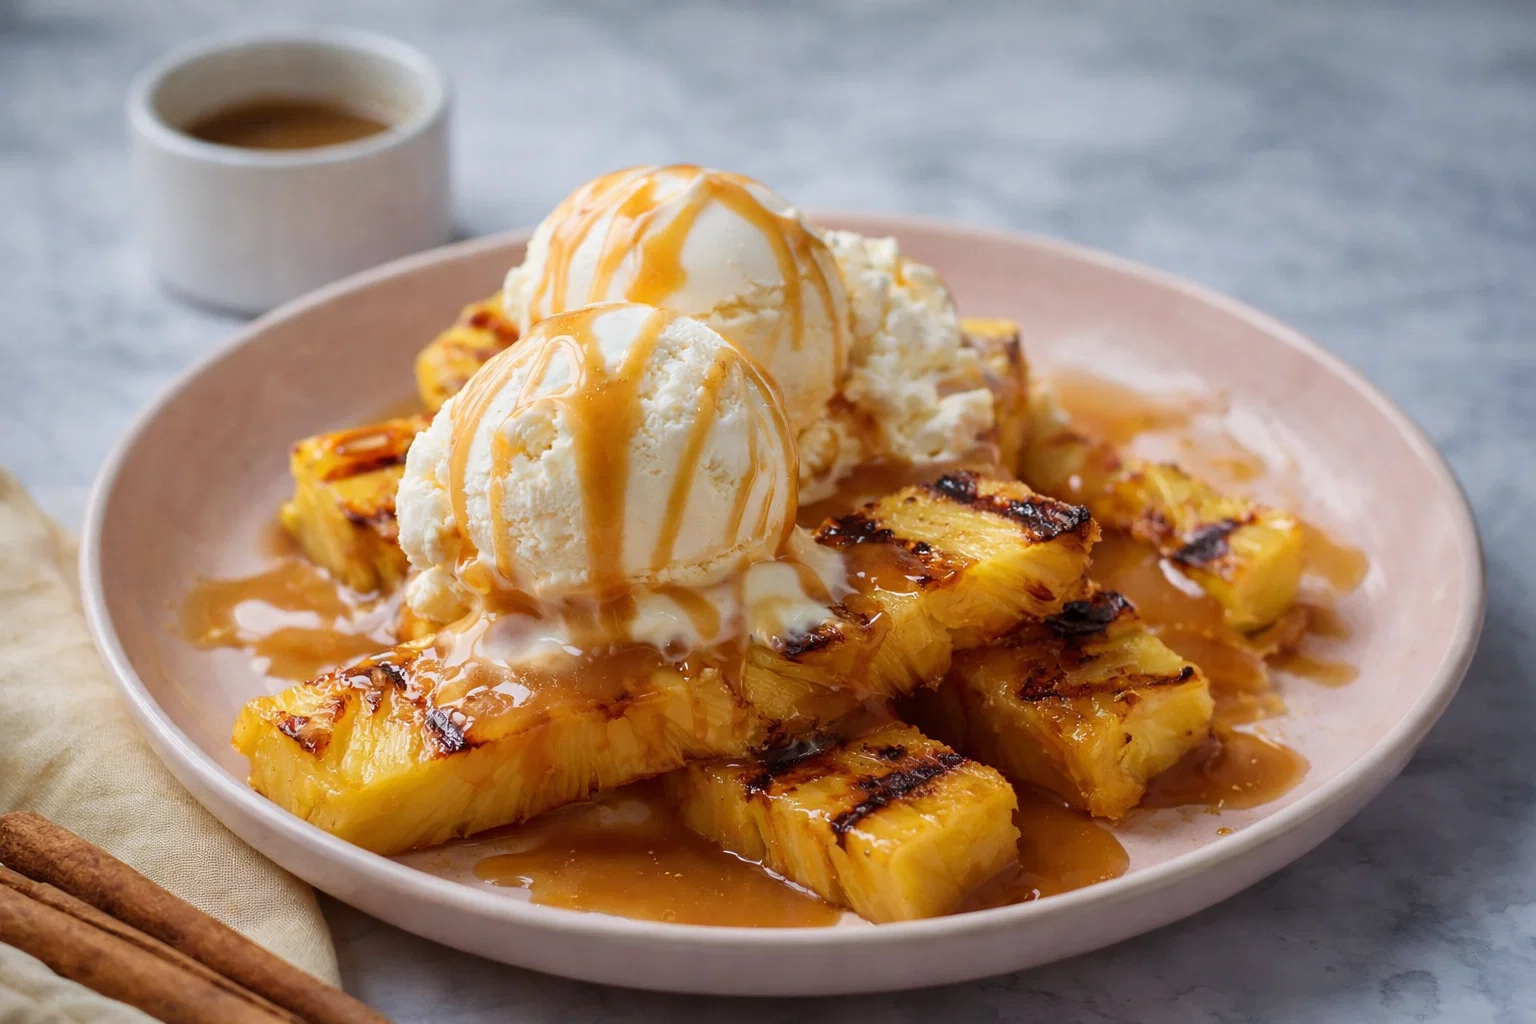
    Grilling pineapple brings out its natural sweetness and creates a caramelized finish, perfect for serving on its own, as a side dish, or even as a unique topping for other dessert recipes. Whether you’re hosting a barbecue or just looking for a juicy snack, this Sweet Grilled Pineapple will surely become a go-to favorite.

    Benefits and Advantages of I Can’t Stop Eating This Sweet Grilled Pineapple!

    This Sweet Grilled Pineapple is a dessert that stands out in numerous ways. First and foremost, it’s incredibly easy to make. You can have it ready in under 15 minutes, making it ideal for those who may not have a lot of time to spare. Imagine coming home after a long day, winding down with a sweet treat that requires minimal effort. This dish is the epitome of convenience!

    In addition to its simplicity, this recipe showcases a multitude of health benefits. Pineapple is rich in vitamins C and B6, manganese, and dietary fiber, making it a great choice for a nutritious dessert option. The antioxidants found in pineapple can help to boost your immune system and fight inflammation. Meanwhile, grilling this tropical fruit caramelizes its natural sugars, enhancing the flavor without the need for extra sweeteners, making it an even healthier choice compared to many traditional dessert recipes.

    Another significant advantage is its versatility. You can serve the grilled pineapple as a refreshing side to various dishes. Pair it with a scoop of dairy or plant-based ice cream for a luscious dessert or enjoy it with grilled meats for a tropical twist to your meal. With this Sweet Grilled Pineapple recipe, the possibilities are endless, allowing you to experiment and find combinations that suit your taste preferences.

    Moreover, accommodating dietary restrictions is easy with this recipe. Being naturally vegan and gluten-free means it fits well into a variety of meal plans. This Sweet Grilled Pineapple can also be enjoyed by those watching their calorie intake, making it a guilt-free indulgence that won’t compromise your dietary goals.

    Overall, this dessert offers remarkable benefits and advantages, making it a delightful addition to any recipe collection.

    Ingredients Overview

    Essential Ingredients for I Can’t Stop Eating This Sweet Grilled Pineapple!

    To make this Sweet Grilled Pineapple, you’ll need the following ingredients:

    • 1 ripe pineapple (about 3-4 pounds) – The star of this dessert! A ripe pineapple is key to unlocking the fruit’s natural sweetness. Look for one with a sweet aroma and slightly soft skin when pressed.

    • 3 tablespoons brown sugar – This adds a beautiful caramelization when grilled. Feel free to use coconut sugar for a healthier, low-glycemic option.

    • 1 teaspoon cinnamon – Cinnamon adds warmth and a hint of spice, elevating the dessert to another level.

    • 2 tablespoons coconut oil (melted) – This helps the brown sugar adhere to the pineapple and adds a subtle coconut flavor. For a low-calorie option, you can use a cooking spray.

    For those looking for tailored options, this recipe is adaptable. You can use honey or maple syrup as a natural sweetener if you prefer a liquid form.

    Dietary Substitutions to Customize Your I Can’t Stop Eating This Sweet Grilled Pineapple!

    Customization is key! Here are some suggested substitutions to cater to different dietary needs:

    • Sugar-Free Option: For those watching their sugar intake, consider using a sugar replacement like erythritol or stevia in place of brown sugar.

    • Other Flavorings: If cinnamon isn’t to your liking, try nutmeg or ginger for a different spice profile. You can also consider adding a splash of vanilla extract for extra flavor.

    • Nut-Free Variation: This recipe is already nut-free, but you can sprinkle toasted coconut flakes on top for added texture, ensuring you avoid any nuts if allergies are a concern.

    With these substitutions, you can easily create a personal touch to the Sweet Grilled Pineapple suited to your dietary preferences.

    How to Prepare the Perfect I Can’t Stop Eating This Sweet Grilled Pineapple!: Step-by-Step Guide

    Feeling inspired? Let’s dive into the simple steps to prepare this delicious dessert. Follow this step-by-step guide to whip up your Sweet Grilled Pineapple!

    1. Prepare the Pineapple:
    2. Start by slicing off the top and bottom of the pineapple. Then, stand it upright and carefully cut off the skin, making sure to remove the “eyes” (the small brown spots). Once done, slice the pineapple into ½-inch thick rings, removing the core.

    3. Mix Ingredients:

    4. In a mixing bowl, combine the brown sugar and cinnamon. This sweet mixture will crust on the pineapple, enhancing its flavor. If you’re using coconut sugar, just mix until evenly combined, and set aside.

    5. Coat the Pineapple:

    6. Brush each pineapple ring with melted coconut oil to ensure the sugar mixture sticks. Then, sprinkle the brown sugar-cinnamon blend generously on both sides of each ring, ensuring an even coating.

    7. Preheat the Grill:

    8. Heat your grill to medium heat. If you’re using a grill pan, preheat it over medium heat as well. You can use charcoal, gas, or even an indoor grill; all work wonderfully for this recipe.

    9. Grill the Pineapple:

    10. Once your grill is hot, lightly grease the grates with some oil to prevent sticking. Place the pineapple rings on the grill and cook for about 3-4 minutes on one side until you see beautiful grill marks.

    11. Flip and Grill Again:

    12. Carefully flip each ring and grill for another 3-4 minutes. The sugar will caramelize, creating a golden brown crust that’s tantalizingly sweet.

    13. Remove from Grill:

    14. Once both sides are caramelized and slightly softened, remove the pineapple from the grill and let it cool for a minute.

    15. Serve and Enjoy:

    16. Serve the grilled pineapple warm as is, or top with dairy-free ice cream, fresh mint leaves, or a drizzle of honey for added sweetness.

    Now, there you have it! A step-by-step guide to mastering your Sweet Grilled Pineapple. Adjust the grilling time depending on how caramelized you prefer the fruit. Enjoy your tropical dessert!

    Mastering I Can’t Stop Eating This Sweet Grilled Pineapple!: Advanced Tips and Variations

    While the base recipe is delicious on its own, here are some advanced tips and exciting variations to explore with your Sweet Grilled Pineapple.

    • Marinade Infusion: For an added depth of flavor, consider marinating the pineapple rings in a mixture of rum and lime juice for about 30 minutes before grilling. This enhances the tropical essence and adds another layer of deliciousness.

    • Spice it up: Spice lovers might enjoy sprinkling cayenne or chili powder on the pineapple before grilling. This spicy-sweet twist can mesmerize your taste buds and is perfect for adventurous eaters.

    • Fruit Skewers: For a fun twist, alternate grilling pineapple with other fruits like strawberries, peaches, or bananas on skewers. These colorful skewers are not only visually appealing but also a delightful mix of flavors.

    • Serving Ideas: Top your grilled pineapple with some whipped coconut cream or serve it alongside a tropical fruit salad for a refreshing touch. Drizzling with a balsamic glaze adds a sophisticated twist that elevates the dish.

    These advanced tips prepare you to create a remarkable dish and introduce various flavors. The Sweet Grilled Pineapple is not just a recipe; it’s a platform for culinary creativity!

    How to Store I Can’t Stop Eating This Sweet Grilled Pineapple!: Best Practices

    If you find yourself with leftovers (which is rare!), knowing how to store them properly ensures you can enjoy your Sweet Grilled Pineapple later on.

    Refrigeration

    • Allow the grilled pineapple to cool completely before placing it in an airtight container. In the fridge, it will be good for about 3-4 days. Simply reheat it in a skillet or the microwave when ready to eat.

    Freezing

    • For longer storage, consider freezing grilled pineapple slices. Spread them on a baking sheet to freeze individually for 1-2 hours. Once frozen, transfer them to a freezer-safe bag and store for up to 3 months. To use, thaw in the refrigerator overnight or microwave briefly.

    Reheating

    • Reheat the grilled pineapple gently in a skillet over low heat to retain its deliciousness. Grilling it briefly again can refresh its flavor and texture before serving.

    By following these storage practices, you can extend the enjoyment of your Sweet Grilled Pineapple, keeping it ready for your next craving or dessert moment!

    Nutritional Value of I Can’t Stop Eating This Sweet Grilled Pineapple!

    Let’s break down the nutritional value of this delightful dessert! Each serving of Sweet Grilled Pineapple (based on approximately 1 ring) offers:

    • Calories: 70
    • Total Fat: 3g
    • Saturated Fat: 2g (from coconut oil)
    • Cholesterol: 0mg
    • Sodium: 0mg
    • Total Carbohydrates: 15g
    • Dietary Fiber: 1g
    • Sugars: 12g
    • Protein: 1g

    The health benefits don’t stop here! The juicy pineapple provides an excellent source of vitamin C and manganese, supporting your immune system and bone health. When you choose coconut oil, you also receive healthy fats that can benefit heart health.

    This recipe shines as one of those dessert recipes that feel indulgent while still being packed with nutrients and flavor. Enjoy it guilt-free, knowing that you’re treating yourself to something both delicious and nutritious!

    FAQs: Frequently Asked Questions About I Can’t Stop Eating This Sweet Grilled Pineapple!

    Q: Can I replace the brown sugar with a sugar substitute?
    A: Absolutely! You can use coconut sugar, stevia, or erythritol as a sweetener. Each alternative will offer various flavors and keep your dessert healthy.

    Q: Is this Sweet Grilled Pineapple suitable for vegans?
    A: Yes! The recipe is naturally vegan, as it solely uses plant-based ingredients.

    Q: How do I know if my pineapple is ripe?
    A: A ripe pineapple will have a sweet smell at the base, a slight softness when pressed, and vibrant, golden skin.

    Q: What are ways to serve grilled pineapple?
    A: Grilled pineapple is delicious on its own, but you can enhance it with vanilla ice cream, yogurt, or as a companion to grilled meats for a unique flavor pair.

    Q: Can I use other fruits in this recipe?
    A: Definitely! Fruits like peaches, bananas, and mangoes can be grilled similarly for a delightful tropical mix.

    Enjoy making and sharing this Sweet Grilled Pineapple with friends and family. It’s bound to be a crowd-pleaser in your collection of dessert recipes!

  • Tasty Tajin Grilled Pineapple

    Tasty Tajin Grilled Pineapple

    Tasty Tajin Grilled Pineapple: A Tropical Delight

    Introduction to Tasty Tajin Grilled Pineapple

    When it comes to summertime snacks or desserts, Tasty Tajin Grilled Pineapple is a standout recipe that delivers vibrant flavors and delightful textures. This dish combines the sweetness of fresh pineapple with the zesty kick of Tajin seasoning, making it a perfect addition to any meal or gathering. It’s one of those recipe ideas that is not only simple to make but also caters to various dietary needs, including vegan and gluten-free diets.

    Grilling the pineapple caramelizes its natural sugars, enhancing its sweetness and creating a wonderfully smoky flavor that is utterly irresistible. This grilled fruit dish offers a healthy alternative to traditional dessert options and is packed with vitamins and minerals. For busy parents, students, and working professionals, this recipe is a lifesaver; it requires minimal prep time and can be made in just a few minutes. Whether you’re hosting a summer barbecue, enjoying a picnic in the park, or simply craving a refreshing treat, Tasty Tajin Grilled Pineapple makes for an unforgettable experience.

    Incorporating this recipe into your routine inspires creativity in the kitchen while ensuring that you’re serving something delicious and nutritious. Let’s dive deeper into the benefits of this scrumptious dish and explore how you can easily prepare it at home.

    Benefits and Advantages of Tasty Tajin Grilled Pineapple

    The Tasty Tajin Grilled Pineapple recipe stands out for multiple reasons, making it an ideal choice for anyone looking for simple yet flavorful recipe ideas. First and foremost, this dish is incredibly easy to prepare. With just a few ingredients and steps, you can have a gourmet-worthy dish ready to impress your friends and family.

    Health Benefits

    Pineapple is a nutritional powerhouse. Rich in vitamin C, manganese, and dietary fiber, it promotes healthy digestion and supports the immune system. Additionally, the Tajin seasoning—a blend of lime, chili pepper, and salt—adds a unique zest and slight heat that not only enhances the flavor but may also offer digestive benefits. This makes the grilled pineapple a light yet satisfying choice, ideal for weight-conscious individuals.

    Versatile and Customizable

    Another advantage of this recipe is its versatility. You can enjoy it as a standalone dish, add it to a fruit salad, or use it as a topping for ice cream or yogurt. This adaptability positions it among the best recipe ideas for varying occasions, whether it’s a casual snack or a fancy dessert. Furthermore, those with dietary restrictions can feel confident enjoying this dish, as it contains no gluten and is vegan-friendly.

    Quick and Satisfying

    For those with a busy lifestyle, this recipe allows for quick preparation. The grilling process takes only a few minutes, making it a suitable option for those last-minute guests or when you want a healthy treat but are short on time. Moreover, this dish can be served warm or cold, making it an enjoyable entry year-round.

    In summary, Tasty Tajin Grilled Pineapple is a delicious, healthy, and versatile choice that suits a wide range of dietary needs and preferences. Whether you want to impress guests or simply satisfy your sweet tooth without the guilt, this dish is a delicious culinary adventure waiting to happen.

    Ingredients Overview

    Essential Ingredients for Tasty Tajin Grilled Pineapple

    Here is a detailed list of ingredients you’ll need to create your Tasty Tajin Grilled Pineapple, complete with precise measurements and notes on their purpose:

    1. Fresh Pineapple – 1 medium-sized, peeled, cored, and cut into rings or spears.
    2. The star of the dish! Fresh pineapple brings sweetness and juiciness to this recipe. Opt for ripe, golden pineapples for the best flavor.

    3. Tajin Seasoning – 2 tablespoons (or to taste).

    4. A unique blend of chili powder, lime, and salt, which provides a tangy flavor and slight heat.

    5. Lime Juice – 1 tablespoon, freshly squeezed.

    6. Enhances the overall flavor and adds a refreshing citrus zing.

    7. Honey or Agave Syrup (optional) – 1 tablespoon.

    8. For those seeking extra sweetness. Use agave syrup to keep it vegan-friendly.

    9. Cilantro or Mint (for garnish) – A handful, chopped.

    10. Adds a pop of color and freshness.

    This lineup of simple yet effective ingredients ensures that your Tasty Tajin Grilled Pineapple is both delicious and healthy, fitting perfectly into any dietary regimen.

    Dietary Substitutions to Customize Your Tasty Tajin Grilled Pineapple

    One of the great things about this dish is its adaptability—feel free to customize it to fit different dietary needs or ingredient availability. Here are some substitution ideas:

    • For a Sugar-Free Option: Skip the honey or agave syrup altogether. The natural sweetness of the grilled pineapple may be enough for your preference.

    • For a Different Flavor Profile: If Tajin is unavailable, you can create a similar mixture using chili powder, lime zest, and a pinch of salt.

    • Experiment with Additional Toppings: For those who enjoy more complexity, consider adding a sprinkle of coconut flakes or nuts post-grilling. These toppings can enhance both flavor and texture, making your dish one of a kind.

    • Vegan-Friendly Alternative: Ensure all components, such as syrups, are certified vegan if you are catering to vegan friends.

    In essence, these dietary substitutions make the Tasty Tajin Grilled Pineapple an excellent choice for all, proving that simple ingredients can be tailored to create something truly delightful and inclusive.

    How to Prepare the Perfect Tasty Tajin Grilled Pineapple: Step-by-Step Guide

    Now that we have an understanding of the benefits and ingredients, let’s get into the nitty-gritty of how to prepare your very own Tasty Tajin Grilled Pineapple. This straightforward, step-by-step guide will enable even novice cooks to whip up this tropical treat without a hitch.

    Step 1: Prepare Your Grill

    1. Preheat the Grill: Start by preheating your grill to medium-high heat (about 400°F or 200°C). If using a grill pan, place it over medium heat on your stovetop.

    2. Grease the Grill: Lightly oil the grill grates using a paper towel dipped in cooking oil. This prevents the pineapple from sticking and ensures perfect grill marks.

    Step 2: Prep the Pineapple

    1. Slice the Pineapple: If you haven’t already, peel, core, and cut your fresh pineapple into rings or spears about ½ inch thick. Ensure they are thick enough to hold their shape on the grill.

    2. Marinate (if desired): In a large bowl, combine pineapple slices with lime juice and honey or agave syrup. Allow the pineapple to sit for about 10-15 minutes to soak in those delicious flavors.

    Step 3: Season the Pineapple

    1. Coat with Tajin: Sprinkle Tajin evenly on both sides of the pineapple pieces, making sure they are coated well. The seasoning is what brings out the tropical flair and piquant flavors.

    Step 4: Grill the Pineapple

    1. Place Pineapple on Grill: Carefully place the pineapple slices directly on the preheated grill.

    2. Grill Time: Grill the pineapple for about 3-4 minutes on one side, then carefully turn them over using tongs. Aim for those beautiful grill marks.

    3. Finish Grilling: Grill for an additional 3-4 minutes on the other side, until they are caramelized and heated through. The goal is to achieve that sweet char without burning.

    Step 5: Serve and Garnish

    1. Remove from Grill: Once grilled to perfection, carefully remove the pineapple from the grill using tongs.

    2. Garnish: Transfer the grilled pineapple to a serving platter and sprinkle with fresh cilantro or mint for a pop of color and freshness.

    3. Serve Warm or Cold: Tasty Tajin Grilled Pineapple can be enjoyed warm as a dessert or cold as a refreshing snack. It also pairs beautifully with yogurt or ice cream, making it a versatile addition to your sweet repertoire.

    By following these straightforward steps, you’ll be able to enjoy one of the most exciting recipe ideas for summer gatherings or a simple weeknight treat.

    Mastering Tasty Tajin Grilled Pineapple: Advanced Tips and Variations

    Elevating your Tasty Tajin Grilled Pineapple beyond the basic recipe can introduce exciting new flavor dimensions. Here are some advanced tips and variations to consider:

    Experiment with Compound Butters

    • Create a citrus-herb butter to slather over your grilled pineapple. Simply mix softened vegan butter with lime zest, finely chopped mint or cilantro, and a dash of salt. This adds an extra layer of richness and enhances the tropical theme.

    Add a Sweet and Spicy Sauce

    • Make a quick sauce by combining sriracha and honey (or agave for a vegan option). Drizzle this over the grilled pineapple for a sweet-spicy kick that tantalizes the taste buds.

    Try Different Fruits

    • Don’t just stop at pineapple! Experiment with mango, peaches, or figs. The same grilling technique lends itself beautifully to other fruits, providing you with more options for fresh recipe ideas.

    Create Mini Skewers

    • For a fun twist, thread grilled pineapple chunks onto skewers with marinated shrimp or chicken pieces. This creates a delightful Surf and Turf dish that is not only exciting to serve but also visually appealing.

    By incorporating these tips and variations, you not only master the basic recipe but also explore creative culinary avenues, ensuring that Tasty Tajin Grilled Pineapple stays a favorite in your household for years to come.

    How to Store Tasty Tajin Grilled Pineapple: Best Practices

    Storing your Tasty Tajin Grilled Pineapple correctly ensures that you can enjoy leftovers without losing any flavor or texture. Here’s how to keep your delicious creation fresh:

    Refrigeration

    • Cool Down: Allow the grilled pineapple to cool to room temperature before storing.
    • Use an Airtight Container: Transfer the pineapple into an airtight container to prevent it from absorbing other odors in the refrigerator.
    • Storage Duration: It will last in the fridge for up to 3-5 days, making it perfect for meal prep or snacks throughout the week.

    Freezing

    • Prepare for Freezing: If you wish to store it longer, freezing is an option. Place the pineapple pieces on a baking sheet in a single layer and freeze until hard.
    • Transfer to Freezer Bags: Once frozen, transfer the pineapple chunks into resealable freezer bags, removing as much air as possible. This will help preserve their quality.
    • Storage Duration: Frozen grilled pineapple can last for about 2-3 months.

    Reheating

    • Quick Reheat: For best results, reheat grilled pineapple in a skillet over medium heat for a couple of minutes or use a microwave, but be cautious about overheating, which can lead to a mushy texture.
    • Serve Cold: Alternatively, you can enjoy it straight from the fridge as a refreshing snack.

    With these storage tips, you can prolong the life of your Tasty Tajin Grilled Pineapple, ensuring that every bite tastes just as good as when it was first made.

    Nutritional Value of Tasty Tajin Grilled Pineapple

    Understanding the nutritional profile of Tasty Tajin Grilled Pineapple helps you appreciate its health benefits even more. Here’s a breakdown of the approximate nutritional value per serving (about one slice of grilled pineapple, assuming no optional ingredients):

    • Calories: 60
    • Total Fat: 0g
    • Saturated Fat: 0g
    • Cholesterol: 0mg
    • Sodium: 50mg (from Tajin)
    • Total Carbohydrates: 16g
    • Dietary Fiber: 1g
    • Sugars: 12g
    • Protein: 1g
    • Vitamin C: 79% of the Daily Value (DV)
    • Manganese: 76% of the DV

    The Tasty Tajin Grilled Pineapple provides a noteworthy source of vitamins and antioxidants, particularly vitamin C, which can enhance your immune system. Additionally, this snack is low in calories and fat, making it a guilt-free option for those trying to maintain a healthy lifestyle.

    This nutrient-rich treat makes it one of the most enjoyable recipe ideas for desserts that can satisfy your sweet tooth without compromising your diet.

    FAQs: Frequently Asked Questions About Tasty Tajin Grilled Pineapple

    Q1: Can I use canned pineapple for this recipe?

    Absolutely! While fresh pineapple yields the best results, you can use canned pineapple. Just make sure it is packed in juice or water and thoroughly drained to avoid excess moisture that may prevent ideal grilling.

    Q2: How can I make the dish spicier?

    To add extra heat, consider increasing the amount of Tajin or using a spicier chili powder blend. You can also drizzle the grilled pineapple with a spicy sauce after grilling, like sriracha or chili oil.

    Q3: What should I serve with Tasty Tajin Grilled Pineapple?

    This dish pairs wonderfully with grilled meats, seafood, or can be served alongside yogurt, ice cream, or even in a fruit salad. Feel free to get creative with your pairings!

    Q4: Is it possible to use the grill in an oven?

    Yes, if you don’t have access to an outdoor grill, you can use a grill pan or broiler in your oven. Preheat your broiler and place the pineapple slices on a baking sheet lined with foil before grilling them for 3-4 minutes on each side.

    Q5: Can I prepare the pineapple ahead of time?

    For best results, prepare the pineapple fresh just before grilling. However, you can slice and season it a couple of hours in advance and store it in the refrigerator until you’re ready to grill.

    With these answers, we hope to have clarified any uncertainties and inspired you to try the Tasty Tajin Grilled Pineapple recipe. It’s a delightful addition to your summer plans or a fun twist on healthy snacking any time of the year!

    In conclusion, the Tasty Tajin Grilled Pineapple embodies the essence of tropical flavors, combining health benefits with versatility and ease. This recipe is among the best recipe ideas, allowing you to enjoy a gourmet treat that everyone can appreciate—no matter their dietary restrictions. Grab your grill, selection of fresh pineapples, and a dash of Tajin, and get ready to indulge in a sensational culinary experience!

  • Irresistible Cast Iron Skillet Rhubarb Crisp

    Irresistible Cast Iron Skillet Rhubarb Crisp

    Irresistible Cast Iron Skillet Rhubarb Crisp: A Tropical Delight

    Introduction to Irresistible Cast Iron Skillet Rhubarb Crisp

    Welcome to your next baking adventure with the Irresistible Cast Iron Skillet Rhubarb Crisp! This delightful dish embodies the essence of comfort food, transforming fresh rhubarb into a sweet, tangy treat that is truly irresistible. When it comes to dessert recipes, this gem stands out not only for its phenomenal taste but also for its incredible simplicity and versatility.

    Whether you’re a busy parent, a student on the go, a health-conscious individual, or simply a food enthusiast seeking something delicious, this rhubarb crisp is a fantastic choice. It requires minimal ingredients, allowing even novice bakers to whip it up in no time. Plus, it’s naturally gluten-free and can be easily adapted to suit vegan diets, making it an appealing option for anyone with dietary restrictions.

    The freshness of rhubarb pairs wonderfully with a crispy, oat topping that brings texture and flavor in every bite. Serve it warm from the skillet, topped with a scoop of vanilla ice cream or a dollop of coconut whipped cream, and you’ll have the ultimate dessert experience that everyone will love. Get ready to gather your ingredients and create a dish that will leave your loved ones asking for seconds!

    Benefits and Advantages of Irresistible Cast Iron Skillet Rhubarb Crisp

    The Irresistible Cast Iron Skillet Rhubarb Crisp offers a myriad of benefits, chief among them being its ease of preparation. Unlike many complex dessert recipes that require intricate techniques and extensive ingredient lists, this crisp is straightforward, making it perfect for home cooks of all skill levels.

    Health Benefits

    Rhubarb is an underappreciated vegetable (often treated like a fruit) packed with numerous health benefits. It is low in calories and high in dietary fiber, making it an excellent choice for those looking to maintain a healthy lifestyle. Additionally, it contains vitamins K and C, potassium, and antioxidants that can help boost your immune system. By pairing rhubarb with wholesome oats and natural sweeteners, this recipe provides not only delightful flavor but also nutritional benefits.

    Customizable and Versatile

    This recipe also stands out due to its adaptability. For busy parents, students, or anyone with dietary restrictions, the Irresistible Cast Iron Skillet Rhubarb Crisp can be modified to fit vegan, gluten-free, or low-calorie requirements without sacrificing flavor. You can use maple syrup, agave nectar, or coconut sugar for sweetness, catering to individual preferences and dietary needs. Plus, it can serve as an impressive centerpiece at gatherings, picnics, or even casual dinners—everyone loves a delicious dessert!

    Overall, this rhubarb crisp marries flavor with health in a way that few dessert recipes can, making it an excellent choice for anyone looking to indulge in a bit of sweetness while still being mindful of their health.

    Ingredients Overview

    Essential Ingredients for Irresistible Cast Iron Skillet Rhubarb Crisp

    Here’s what you’ll need to create your very own Irresistible Cast Iron Skillet Rhubarb Crisp:

    • Fresh Rhubarb (4 cups): Use fresh rhubarb stalks, chopped into 1-inch pieces. Rhubarb is the star of the show, providing that signature tart flavor.
    • Granulated Sugar (1 cup): Adjust this depending on sweetness preference; feel free to substitute with coconut sugar for a lower glycemic option.
    • Oats (1 cup): Old-fashioned rolled oats are ideal for a chewy topping. These can be gluten-free if needed.
    • All-Purpose Flour (1/2 cup): You can substitute this with almond flour or gluten-free flour for a gluten-sensitive version.
    • Brown Sugar (1/2 cup): Adds a rich, caramel-like sweetness to the topping.
    • Cinnamon (1 teaspoon): This spice enhances the flavor of the crisp and provides warmth.
    • Salt (1/4 teaspoon): Balances sweetness and enhances all flavors.
    • Unsalted Butter (1/2 cup): For a dairy-free option, replace this with coconut oil or a vegan butter alternative.

    Dietary Substitutions to Customize Your Irresistible Cast Iron Skillet Rhubarb Crisp

    • Vegan Alternative: Instead of using butter, replace it with coconut oil or any plant-based butter. You can also substitute honey with maple syrup for a vegan-friendly sweetener.
    • Gluten-Free Option: Use gluten-free oats and a gluten-free flour alternative (such as almond flour or a gluten-free all-purpose blend) in place of regular flour.
    • Low-Calorie Version: Cut down the sugar by using a natural sweetener like stevia or erythritol; adjust quantities according to packaging instructions.
    • Additions: For a flavor twist, consider adding nuts like walnuts or pecans to the topping, or mix in some berries for a fruity medley.

    These substitutions enable this recipe to meet diverse dietary needs while fostering creativity in the kitchen!

    How to Prepare the Perfect Irresistible Cast Iron Skillet Rhubarb Crisp: Step-by-Step Guide

    Creating your own Irresistible Cast Iron Skillet Rhubarb Crisp is an enjoyable and straightforward process. Follow these easy steps to ensure success!

    1. Prepare the Base:
    2. Preheat your oven to 375°F (190°C).
    3. In a large bowl, combine the chopped rhubarb and granulated sugar. Set aside for about 10 minutes, allowing the rhubarb to release some of its juices.

    4. Mix Ingredients:

    5. In another bowl, create the topping by combining the oats, all-purpose flour, brown sugar, cinnamon, and salt. Mix until evenly combined.
    6. Melt the unsalted butter (or coconut oil) and add it to the oat mixture. Stir with a fork until the mixture becomes crumbly.

    7. Assemble the Crisp:

    8. Pour the rhubarb mixture into a cast iron skillet or a greased baking dish. Spread it evenly.
    9. Evenly sprinkle the oat topping over the rhubarb, ensuring all the fruit is covered.

    10. Bake the Crisp:

    11. Place the skillet in the preheated oven. Bake for 30-35 minutes or until the topping is golden brown and the rhubarb is bubbly.

    12. Cool and Serve:

    13. Remove from the oven and let the crisp cool for about 10-15 minutes before serving. This helps the juices thicken slightly.

    14. Garnish (Optional):

    15. Serve warm, topped with a scoop of vanilla ice cream or coconut whipped cream for that extra touch of delight!

    By following these straightforward steps, you’ll have a delicious rhubarb crisp that can be enjoyed by everyone, regardless of dietary preferences.

    Mastering Irresistible Cast Iron Skillet Rhubarb Crisp: Advanced Tips and Variations

    Now that you have the basics down, let’s explore some advanced tips and exciting variations to master your Irresistible Cast Iron Skillet Rhubarb Crisp:

    Tips for Success

    • Use Fresh Ingredients: For the best flavor, always opt for fresh rhubarb and quality oats.
    • Texture Addition: Incorporate nuts or seeds into the topping for added crunch. It also enhances the nutritional profile.
    • Layering Flavors: Consider adding other fruits like strawberries, apples, or blueberries to complement the tartness of rhubarb.
    • Check for Doneness: Ovens vary, so keep an eye on the crisp during baking. The topping should be golden, and the filling should be bubbling.

    Variations to Consider

    • Spiced Rhubarb Crisp: Add nutmeg or ginger for a spiced flavor twist.
    • Tropical Influence: Mix in shredded coconut to your topping for a tropical flare that pairs beautifully with rhubarb.
    • Seasonal Fruit Blends: Feel free to change up the type of fruit used based on the season; peaches or cherries would be fantastic additions in summer.
    • Tart and Tangy: Add a touch of lemon juice to the rhubarb mixture to enhance its tang and brightness.

    If you play around with these variations, you’ll discover an array of flavors that make your Rhubarb Crisp a new creation every time!

    How to Store Irresistible Cast Iron Skillet Rhubarb Crisp: Best Practices

    After making your Irresistible Cast Iron Skillet Rhubarb Crisp, you may want to save some for later. Here’s how to best store it:

    • Refrigeration: Allow the crisp to cool completely, then cover the dish tightly with plastic wrap or foil. It can be stored in the refrigerator for up to 3 days. The texture may soften slightly, but it will still taste delicious upon reheating.

    • Freezing: For longer storage, you can freeze the crisp. First, let it cool completely. Wrap it tightly in plastic wrap and then in aluminum foil, or place it in an airtight container. Properly stored, it can last in the freezer for about 2-3 months. To enjoy, simply thaw in the refrigerator overnight and reheat in the oven at 350°F (175°C) until heated through.

    • Reheating: For the best texture, reheat in an oven. This will restore the crunchiness of the topping. Microwaving is quick but may soften the topping.

    By following these storage tips, you can enjoy your Irresistible Cast Iron Skillet Rhubarb Crisp even after the first serving!

    Nutritional Value of Irresistible Cast Iron Skillet Rhubarb Crisp

    When it comes to dessert recipes, nutritional value is often a concern. Here’s a general breakdown for a serving (one-eighth of the recipe):

    • Calories: Approximately 200
    • Total Fat: 8g
    • Saturated Fat: 4g
    • Cholesterol: 20mg
    • Sodium: 90mg
    • Total Carbohydrates: 32g
    • Dietary Fiber: 3g
    • Sugars: 10g
    • Protein: 3g

    Health Considerations

    • Using less sugar or low-calorie sweeteners can significantly reduce the calorie content further.
    • The oats provide a good source of fiber, while rhubarb adds vitamins and minerals such as vitamin K and C.

    This crisp provides a balanced dessert option, allowing you to indulge without feeling guilty.

    FAQs: Frequently Asked Questions About Irresistible Cast Iron Skillet Rhubarb Crisp

    Here are answers to some common questions about making and enjoying the Irresistible Cast Iron Skillet Rhubarb Crisp:

    Can I use frozen rhubarb?

    Yes, frozen rhubarb can be used if fresh isn’t available. Just make sure to thaw and drain excess water before using it in the recipe.

    How can I make this recipe gluten-free?

    To create a gluten-free version of the crisp, simply substitute all-purpose flour with your preferred gluten-free flour and ensure your oats are certified gluten-free.

    Is it possible to prepare the filling in advance?

    Definitely! You can prepare the rhubarb filling a day in advance, store it in the refrigerator, and then assemble and bake it when ready to serve.

    Can I add different fruits to the crisp?

    Absolutely! Mixing in other fruits such as strawberries, apples, or blueberries will give additional layers of flavor and texture.

    How do I store leftover rhubarb crisp?

    Once cooled, store leftovers in an airtight container in the refrigerator for up to 3 days, or freeze for longer storage.

    What can I serve with the rhubarb crisp?

    It pairs beautifully with vanilla ice cream, whipped cream, or a dollop of yogurt. For a healthier option, coconut whipped cream is a delightful alternative!

    By addressing these FAQs, home cooks can feel confident as they embark on their journey to create this delectable dessert.


    In conclusion, the Irresistible Cast Iron Skillet Rhubarb Crisp is the perfect choice for impressive yet simple dessert recipes. Whether you’re cooking for a crowd or just indulging yourself, its health benefits, simplicity, and versatility make it a must-try. Gather your ingredients, follow the steps, and enjoy a warm slice of this delicious crisp today!

  • I CanT Stop Making This Sweet Strawberry Rhubarb Crisp

    I CanT Stop Making This Sweet Strawberry Rhubarb Crisp

    I Can’T Stop Making This Sweet Strawberry Rhubarb Crisp: A Tropical Delight

    Introduction to I Can’T Stop Making This Sweet Strawberry Rhubarb Crisp

    If you’re looking for a delightful dessert that combines simplicity, flavor, and health benefits, look no further than this Sweet Strawberry Rhubarb Crisp. This recipe seamlessly integrates strawberries and rhubarb, producing a dish that’s not only satisfying but also deliciously sweet and tangy. Strawberry recipes often highlight fresh fruit’s vibrant flavor, and this crisp elevates it to new heights with a lovely, golden topping.

    What makes this Sweet Strawberry Rhubarb Crisp truly special is its versatility. Whether you are a busy parent seeking a quick dessert, a student needing an easy recipe for a potluck, or a health-conscious individual wanting a guilt-free indulgence, this dish is bound to impress. It can be made vegan and gluten-free, making it suitable for various dietary preferences without sacrificing taste. Plus, the preparation takes less than an hour, allowing you to whip up a homemade dessert in no time.

    With the perfect balance of sweetness and tartness, this crisp is fantastic for sharing with friends and family or savoring on your own. So grab your favorite baking dish and let’s dive into the sweet world of strawberry rhubarb bliss!

    Benefits and Advantages of I Can’T Stop Making This Sweet Strawberry Rhubarb Crisp

    This Sweet Strawberry Rhubarb Crisp offers numerous benefits that make it a stellar addition to your dessert repertoire. First, its preparation is incredibly straightforward. Suitable for both novice and experienced cooks, the ingredients are easy to find, and the steps are simple to follow. You won’t need any elaborate equipment or techniques to create this delicious treat.

    From a health perspective, the dish utilizes fresh strawberries and rhubarb, both of which are packed with nutrients. Strawberries are rich in vitamin C, fiber, and antioxidants, offering significant health benefits, including improved heart health and enhanced skin health. Rhubarb, while often overlooked, is an excellent source of vitamins K and C, calcium, and magnesium. Pairing these two fruits creates a dynamic flavor profile and nutrient-rich dessert option.

    Moreover, this recipe can be customized to meet various dietary needs. For those who are vegan, it’s easy to replace dairy and eggs with almond or coconut milk and flaxseed for binding. Gluten-free bakers can substitute regular flour with almond flour or a gluten-free blend. Furthermore, if you’re watching your calorie intake, lowering the sugar quantity or using natural sweeteners like maple syrup will yield a similarly delicious result without compromising flavor.

    In short, this strawberry rhubarb crisp is not just delicious but also a wonderful guilt-free dessert that the entire family can enjoy. With its ease of preparation and the ability to cater to various dietary needs, this recipe deserves a spot in your collection of strawberry recipes.

    Ingredients Overview

    Essential Ingredients for I Can’T Stop Making This Sweet Strawberry Rhubarb Crisp

    1. Fresh Strawberries (4 cups, sliced) – The star of the dish, strawberries provide natural sweetness and vibrant flavor.

    2. Rhubarb (2 cups, chopped) – Adds a tangy contrast to the sweet strawberries.

    3. Granulated Sugar (1 cup) – Sweetens the fruit. For a lower-calorie option, consider using coconut sugar or monk fruit sweetener.

    4. Lemon Juice (2 tablespoons) – Enhances the flavor by providing acidity and balancing the sweetness.

    5. All-Purpose Flour (1 cup) – Creates a crisp topping. For gluten-free variations, use almond flour or gluten-free baking blend.

    6. Oats (1 cup) – Adds texture and heartiness to the topping.

    7. Butter (1/2 cup, melted) – Provides richness. Use coconut oil or vegan butter for a dairy-free option.

    8. Ground Cinnamon (1 teaspoon) – Adds warmth and depth to the flavor.

    9. Salt (1/4 teaspoon) – Balances the sweetness and enhances flavors.

    Dietary Substitutions to Customize Your I Can’T Stop Making This Sweet Strawberry Rhubarb Crisp

    This recipe is inherently adaptable. Here are a few substitution ideas to cater to dietary preferences:

    • Vegan Option: Replace butter with coconut oil or a vegan butter substitute. Use flaxseed meal mixed with water as an egg replacement if you decide to include any eggs for binding.

    • Gluten-Free Option: Swap all-purpose flour for almond flour or a gluten-free flour blend to make this dish accessible for those with gluten sensitivities.

    • Low-Sugar Option: Using stevia or erythritol can drastically cut down on calories while still delivering the sweetness that makes this dessert enjoyable.

    • Nut-Free Option: Ensure your oats are certified gluten-free and avoid almond flour if cooking for someone with nut allergies.

    By implementing these substitutions, you can still create an incredibly delicious Sweet Strawberry Rhubarb Crisp that’s tailored to fit your dietary needs without losing any flavor.

    How to Prepare the Perfect I Can’T Stop Making This Sweet Strawberry Rhubarb Crisp: Step-by-Step Guide

    Creating your Sweet Strawberry Rhubarb Crisp is a breeze with this easy-to-follow step-by-step guide. Let’s get started!

    1. Preheat the Oven: Begin by preheating your oven to 350°F (175°C) so it’s hot and ready when your crisp is assembled.

    2. Prepare the Fruit Filling: In a large mixing bowl, combine the sliced strawberries and chopped rhubarb. Sprinkle with 1 cup of granulated sugar and 2 tablespoons of lemon juice. Gently toss the mixture until the fruit is well-coated.

    3. Let It Rest: Allow the fruit to sit for about 10 minutes. This will let the sugars draw out the natural juices from the fruits, creating a delightful syrupy filling.

    4. Make the Crisp Topping: In another bowl, combine 1 cup of oats, 1 cup of flour, 1 teaspoon of ground cinnamon, and 1/4 teaspoon of salt. Stir in the melted butter (or coconut oil for a vegan version) until the mixture resembles coarse crumbs.

    5. Assemble the Crisp: Grease a baking dish (9×13 inches works well) with a little butter or oil. Pour the strawberry-rhubarb mixture into the dish, spreading it evenly. Evenly distribute the crisp topping over the fruit layer.

    6. Bake the Crisp: Place the dish in the preheated oven and bake for 35-40 minutes, or until the top is golden brown and the fruit is bubbling.

    7. Cool and Serve: Allow the crisp to cool for at least 15 minutes before serving. This will help the juices thicken slightly, making it easier to serve.

    8. Optional Serving Suggestions: Serve your Sweet Strawberry Rhubarb Crisp with a scoop of vanilla ice cream, whipped cream, or a sprinkle of crushed nuts for added crunch.

    As you can see, this recipe for Sweet Strawberry Rhubarb Crisp is straightforward and allows for various customizations. You can easily adapt steps based on dietary preferences, making it a fantastic choice for an inclusive gathering.

    Mastering I Can’T Stop Making This Sweet Strawberry Rhubarb Crisp: Advanced Tips and Variations

    To take your Sweet Strawberry Rhubarb Crisp to an elevated level, consider these advanced tips and delightful variations:

    • Add Spice: Experiment with flavor by adding a pinch of nutmeg or ginger to your fruit mixture. These spices can enhance the overall taste profile, making it more intriguing.

    • Change Up the Fruit: While strawberries and rhubarb are a classic combination, feel free to mix in other fruits such as blueberries, cherries, or peaches for a different twist. Each combination offers a unique flavor and nutritional profile.

    • Layer the Crisp: For a more visually appealing dish, prepare individual crisps in mason jars or small baking dishes. Layer the fruit mixture and crisp topping for a stunning presentation, perfect for parties!

    • Make Ahead: Prepare the fruit filling and crisp topping a day in advance. Assemble them just before baking to save time on busy days or when entertaining guests.

    • Try Different Oat Types: Use steel-cut oats or rolled oats for varying textures in the topping. Steel-cut oats add a chewy texture, whereas rolled oats provide a more traditional finish.

    These tips can enhance your Sweet Strawberry Rhubarb Crisp and make the experience even more enjoyable, offering creativity in the kitchen while staying true to the essence of sweet strawberry recipes.

    How to Store I Can’T Stop Making This Sweet Strawberry Rhubarb Crisp: Best Practices

    Storing your Sweet Strawberry Rhubarb Crisp properly ensures it maintains taste and texture for as long as possible. Here are the best practices for storage:

    • Refrigeration: After your crisp has cooled completely, cover it with plastic wrap or aluminum foil. Store it in the refrigerator for up to 5 days. Reheat in the oven at 350°F (175°C) for about 15-20 minutes, or until warmed through.

    • Freezing: If you want to store your crisp for an extended period, consider freezing it. After baking, allow the crisp to cool completely. Wrap it tightly in plastic wrap, then in aluminum foil to prevent freezer burn. It can be stored in the freezer for up to three months. When you’re ready to enjoy it, let it thaw overnight in the refrigerator before baking at 350°F (175°C) for about 30 minutes or until heated through.

    • Serving Leftovers: When reheating, serving the crisp warm helps retain its delightful texture. Pair with yogurt or ice cream for a comforting dessert experience.

    By following these storage methods, you can enjoy your Sweet Strawberry Rhubarb Crisp for days to come, ensuring you never miss out on this delightful treat.

    Nutritional Value of I Can’T Stop Making This Sweet Strawberry Rhubarb Crisp

    Understanding the nutritional content of your Sweet Strawberry Rhubarb Crisp can help you make informed decisions while enjoying this delightful dessert. Here’s a basic breakdown of the nutritional value per serving (using standard ingredients):

    • Calories: Approximately 250-350 depending on ingredients used (sugar alternatives, butter, etc.)

    • Total Fat: 10-15g

    • Saturated Fat: 5-7g

    • Carbohydrates: 40-50g

    • Sugars: 15-20g
    • Dietary Fiber: 3-5g

    • Protein: 2-4g

    • Vitamin A: 5-10% of daily value

    • Vitamin C: 10-15% of daily value (due to strawberries)

    • Calcium: 3-5% of daily value (rhubarb)

    • Iron: 4-6% of daily value

    These values can vary based on specific ingredients and their quantities. Keeping this in mind, the Sweet Strawberry Rhubarb Crisp remains an enjoyable treat that contributes nutrients beneficial to your health, making it a perfect choice among strawberry recipes.

    FAQs: Frequently Asked Questions About I Can’T Stop Making This Sweet Strawberry Rhubarb Crisp

    Q1: Can I use frozen fruit instead of fresh?
    Absolutely! While fresh strawberries and rhubarb offer better texture, you can use frozen fruit. Just be sure to thaw and drain excess liquid before mixing it with sugar.

    Q2: Can I reduce the sugar in the recipe?
    Yes, you can certainly reduce the sugar quantity used in this recipe. Experiment with 3/4 cup or use sugar alternatives to suit your taste preference.

    Q3: How can I make this recipe low-calorie?
    Substituting regular butter with unsweetened applesauce or coconut oil can help reduce calories. Additionally, consider using sugar alternatives for a healthier option.

    Q4: Is there a way to make this crisp gluten-free?
    Yes! Substitute regular flour with almond flour, coconut flour, or a gluten-free baking blend to make this recipe suitable for those needing gluten-free options.

    Q5: How long can I store this crisp?
    When refrigerated, the Sweet Strawberry Rhubarb Crisp can be stored for about five days. If frozen, it can last for up to three months when properly wrapped.

    By addressing these common questions, readers can feel confident in their ability to create and adapt the Sweet Strawberry Rhubarb Crisp to their individual needs, ensuring everyone can enjoy this delightful dessert.

    In conclusion, I Can’T Stop Making This Sweet Strawberry Rhubarb Crisp is not only a quick and easy dessert option but also a versatile one that caters to a variety of dietary preferences. Its delicious flavor highlights the tangy sweetness of strawberries and rhubarb, making it a true crowd-pleaser. Whether for a family dinner, a potluck contribution, or a simple home indulgence, this strawberry recipe will never disappoint. Happy baking!

  • The Best Banana Pudding Greek Yogurt Dessert

    The Best Banana Pudding Greek Yogurt Dessert

    The Best Banana Pudding Greek Yogurt Dessert: A Tropical Delight

    Introduction to The Best Banana Pudding Greek Yogurt Dessert

    If you’re on the lookout for delicious dessert recipes that cater to a variety of dietary needs while being easy to prepare, look no further than The Best Banana Pudding Greek Yogurt Dessert. This delightful dish marries the creamy goodness of Greek yogurt with the classic flavors of banana pudding, creating a treat that is not only indulgent but also relatively healthy. Packed with protein, low in sugar, and easily adaptable for vegan or gluten-free lifestyles, this dessert can satisfy your sweet tooth without the guilt. Whether you’re a busy parent seeking quick recipe ideas, a student in need of an affordable yet delightful treat, or a health-conscious individual wanting a sweet escape, this banana pudding yogurt will fit seamlessly into your life.

    Imagine a dessert that’s uncomplicated to whip up, yet provides the nostalgic comfort of classic banana pudding. With minimal cooking required, it’s ideal for those who want to avoid complicated baking routines. Plus, it’s an excellent way to impress guests or bring a smile to someone’s face without breaking a sweat! Let’s dive into why this will quickly become one of your favorite dessert recipes.

    Benefits and Advantages of The Best Banana Pudding Greek Yogurt Dessert

    This Banana Pudding Greek Yogurt Dessert isn’t just a joy to eat, but it also champions numerous health benefits that make it a standout choice among dessert options. Firstly, it is incredibly simple to prepare, requiring only a handful of easily accessible ingredients. The nature of this dish allows for flexibility; you can make a single serving or a large batch for gatherings without complication.

    Health Benefits

    Greek yogurt is the star ingredient in this recipe, providing a rich source of protein that aids in muscle repair and keeps you feeling full longer. Unlike traditional puddings that are heavy in sugar and dairy, Greek yogurt offers a creamy texture with a fraction of the calories, which is appealing for individuals seeking to eat healthier. Moreover, bananas are filled with potassium and essential vitamins, making them a nutritious counterpart in this dessert.

    This recipe can also easily accommodate various dietary preferences, whether you’re vegan, gluten-free, or monitoring your caloric intake. By simply swapping out a few ingredients, you can enjoy this treat guilt-free, tailored to your personal dietary requirements.

    Why It Stands Out

    What makes this dessert stand out from other dessert recipes is its versatility. It caters to everyone—from busy families looking to satisfy picky eaters to health aficionados using it as a post-workout snack. This dessert can easily be transformed into a parfait, layered with your favorite fruits or granola, or even topped with nuts for added crunch and flavor. The options are endless, making it a fantastic choice for any occasion.

    Ingredients Overview

    Essential Ingredients for The Best Banana Pudding Greek Yogurt Dessert

    To create the perfect Banana Pudding Greek Yogurt Dessert, you’ll need the following ingredients:

    • 2 cups of Greek yogurt (Can use low-fat or non-dairy yogurt)
    • 2 ripe bananas (Fresh for optimal sweetness)
    • 1/4 cup of honey or maple syrup (Adjust based on preference; maple syrup is a vegan option)
    • 1 teaspoon of vanilla extract (Enhances flavor)
    • 1 tablespoon of lemon juice (Prevents bananas from browning)
    • 1/2 teaspoon of cinnamon (Optional, for a hint of spice)
    • Graham cracker or gluten-free cookie crumbs (For topping)

    These ingredients combine to deliver not just fantastic flavor but also pack in nutritional benefits that make this dessert an appealing choice.

    Dietary Substitutions to Customize Your The Best Banana Pudding Greek Yogurt Dessert

    To cater to varied dietary needs, consider the following substitutions:

    • Greek Yogurt: If you’re vegan, you can replace Greek yogurt with coconut yogurt or a blend of cashew cream for a creamy texture.
    • Sweetener: Use stevia or monk fruit for a lower-calorie option instead of honey or maple syrup.
    • Graham Cracker: Substitute standard graham crackers with gluten-free options or crush up gluten-free cookies for the same delightful crunch.
    • Bananas: If you or someone you know is allergic to bananas, you can try using applesauce as a base instead, though the flavors will be notably different.

    These adaptations ensure that your dessert is inclusive and accommodates not just dietary restrictions but also personal taste preferences.

    How to Prepare the Perfect The Best Banana Pudding Greek Yogurt Dessert: Step-by-Step Guide

    Follow this easy step-by-step guide to create your Banana Pudding Greek Yogurt Dessert:

    1. Prepare the Base: In a mixing bowl, add the Greek yogurt, honey (or maple syrup), vanilla extract, and lemon juice. Mix well until all ingredients are combined smoothly.

    2. Mash the Bananas: In a separate bowl, mash one ripe banana with a fork until smooth. This will create a banana-flavored layer, enhancing the dessert’s taste.

    3. Add Banana to Yogurt: Fold the mashed banana into the yogurt mixture, ensuring to retain some small chunks for texture.

    4. Incorporate Cinnamon: If you’re using cinnamon, add it now, mixing it gently to distribute the spice throughout the yogurt mixture.

    5. Layer the Ingredients: Begin layering the dessert in serving glasses or bowls. Start with a generous spoonful of the yogurt and banana mixture, followed by a layer of graham cracker crumbs.

    6. Repeat Layers: Continue layering until the glasses are full, ending with a yogurt layer on top for presentation.

    7. Top It Off: Slice the remaining banana and decorate the top of your dessert with banana slices and additional crumbs or nuts, depending on your choice.

    8. Chill: Place the layered dessert in the refrigerator for at least 30 minutes. This allows the flavors to meld beautifully and ensures it’s chilled when served.

    9. Serve: Enjoy your delightful Banana Pudding Greek Yogurt Dessert straight from the fridge, and revel in its deliciousness!

    These straightforward steps guarantee that you’ll result in a delectable dish that can cater to your cravings and impress at gatherings.

    Mastering The Best Banana Pudding Greek Yogurt Dessert: Advanced Tips and Variations

    Advanced Tips for Success

    • Banana Ripeness: Ensure your bananas are ripe. Their natural sweetness and flavor will significantly enhance the dish. Always opt for organic if possible, to avoid pesticides.
    • Texture Control: If you prefer a silkier texture, blend the entire yogurt mixture in a food processor instead of mashing the banana separately.
    • Flavoring Alternatives: Experiment with other flavors by adding ingredients such as nutmeg or swapping bananas for other fruits like strawberries or blueberries.

    Variations to Try

    • Chocolate Twist: Add cocoa powder to the yogurt layer for a chocolate banana flavor explosion.
    • Tropical Delight: Include coconut flakes between layers for a tropical flair or top with fresh pineapple.
    • Nutty Layering: Incorporate chopped nuts such as pecans or almonds for added crunch and nutrition in your layers.

    These variations and tips can elevate your dessert beyond the ordinary, making it a delightful option for regular enjoyment or special occasions.

    How to Store The Best Banana Pudding Greek Yogurt Dessert: Best Practices

    To keep your Banana Pudding Greek Yogurt Dessert fresh, consider these storage methods:

    • Refrigeration: Store the dessert in an airtight container in the refrigerator. This will keep it fresh for up to three days. If possible, wait to add the topping (like crumbs or fruit) until you’re ready to serve to maintain texture.

    • Freezing: While this dessert can be frozen, keep in mind that the texture may change upon thawing. If you’re going this route, store the yogurt layer separately from the topping. It’s best eaten fresh but can last about a month in the freezer.

    • Reheating: This dessert is best enjoyed cold, so reheating isn’t recommended. If desired, you can let it sit at room temperature for a few minutes before serving to soften slightly.

    Following these storage instructions will help you enjoy your delicious dessert recipes even longer!

    Nutritional Value of The Best Banana Pudding Greek Yogurt Dessert

    When it comes to nutrition, this dessert packs a delightful punch. Below are the estimated nutritional values for one serving (approx. 1 cup):

    • Calories: 220 kcal
    • Total Fat: 5g
    • Saturated Fat: 2g
    • Cholesterol: 10mg
    • Sodium: 52mg
    • Carbohydrates: 36g
    • Fiber: 3g
    • Sugars: 12g
    • Protein: 9g

    The nutritional content can vary based on ingredient choices (i.e., using non-fat yogurt vs. full-fat options). Regardless, this dessert stands out with its balance of macronutrients and wholesome ingredients. It can serve as a healthy option in your collection of dessert recipes, fitting perfectly into a broader dietary plan.

    FAQs: Frequently Asked Questions About The Best Banana Pudding Greek Yogurt Dessert

    1. Can I prepare this dessert in advance?
    Absolutely! You can prepare this dessert up to a day ahead of time. Just ensure to keep it refrigerated until serving.

    2. What can I substitute for Greek yogurt?
    If you’re not a fan of Greek yogurt or want a non-dairy option, coconut yogurt or cashew cream works wonderfully as a substitute.

    3. Can I make this dessert gluten-free?
    Yes, simply use gluten-free graham crackers or cookies when layering, and you have a delightful gluten-free treat!

    4. How can I reduce the sugar content?
    Opt for unsweetened yogurt and adjust honey or syrup to your taste, or replace it with a non-caloric sweetener such as stevia or monk fruit.

    5. How long can I store this dessert?
    When properly stored in an airtight container, it can last for about three days in the refrigerator.

    6. Could I use other fruits?
    Definitely! This recipe is adaptable. You can substitute bananas with other fruits like strawberries, blueberries, or even peaches for a twist.

    With this comprehensive guide, you’ll find that The Best Banana Pudding Greek Yogurt Dessert is not just a delightful treat but also an excellent addition to your repertoire of dessert recipes. It’s time to bring this tropical delight into your kitchen and indulge guilt-free!

  • Tasty Tiramisu Chia Pudding With Greek Yogurt

    Tasty Tiramisu Chia Pudding With Greek Yogurt

    Tasty Tiramisu Chia Pudding With Greek Yogurt: A Tropical Delight

    Introduction to Tasty Tiramisu Chia Pudding With Greek Yogurt

    If you’re on the lookout for easy-to-make dessert recipes that blend indulgence with healthiness, look no further than this Tasty Tiramisu Chia Pudding with Greek Yogurt! This delightful treat is not just a feast for the eyes but also a wholesome choice for all dietary needs. Picture creamy layers of rich Greek yogurt, luxurious coffee, and the unique texture of chia seeds that transform your ordinary dessert into a tropical sensation.

    What sets this recipe apart is its simplicity. It comes together in a matter of minutes yet packs a delightful punch of flavor that will impress your family, friends, and guests alike. As a bonus, this pudding is gluten-free, making it suitable for those with dietary restrictions. All in all, it’s an excellent choice for busy parents looking for a quick dessert, diet-conscious individuals wanting something sweet yet healthy, and anyone who simply loves a good dessert.

    Furthermore, chia seeds are fiber-rich and packed with omega-3 fatty acids. The Greek yogurt adds a protein boost, making this dessert not just delicious but also nutritious. Whether you’re a student short on time, a senior looking for a light and healthy treat, or a food enthusiast eager to try your hand in the kitchen, this Tasty Tiramisu Chia Pudding with Greek Yogurt is a must-try recipe that fits into any lifestyle.

    Benefits and Advantages of Tasty Tiramisu Chia Pudding With Greek Yogurt

    When it comes to dessert recipes, this Tasty Tiramisu Chia Pudding with Greek Yogurt shines brightly for several reasons. First and foremost, preparation is incredibly straightforward, making it accessible to cooks of all skill levels. Whether you’re a beginner or a seasoned baker, you’ll find the simplicity of this recipe refreshing.

    One of the standout benefits of this recipe is its health-conscious nature. Chia seeds are known for various health benefits; they’re high in fiber, which aids digestion and promotes a sense of fullness. Additionally, Greek yogurt provides a creamy texture while being rich in protein and calcium. Thus, this dessert not only satisfies your sweet tooth but also supports your overall wellness goals.

    Moreover, this pudding is versatile and can cater to various dietary needs. For those who are vegan, you can easily substitute Greek yogurt with a plant-based alternative. Similarly, if gluten is a concern, you can be assured that this recipe is naturally gluten-free, making it a guilt-free delight to enjoy.

    It’s also a fantastic option for meal prep! You can whip up a batch at the beginning of the week, store it in the refrigerator, and enjoy a healthy dessert whenever cravings hit. Whether it’s for a casual weeknight or a fancy dinner gathering, this Tasty Tiramisu Chia Pudding is sure to please.

    Ingredients Overview

    Essential Ingredients for Tasty Tiramisu Chia Pudding With Greek Yogurt

    To create your own Tasty Tiramisu Chia Pudding with Greek Yogurt, you will need the following ingredients:

    • Chia Seeds (1/4 cup): These tiny seeds are the main ingredient, making up the pudding’s unique texture and providing a boost of fiber and omega-3 fatty acids.

    • Greek Yogurt (2 cups): Choose your favorite plain or flavored Greek yogurt. This ingredient adds creaminess and a protein kick.

    • Almond Milk (1 cup): Use unsweetened almond milk or any milk of your choice. This makes the chia seeds swell and creates the pudding-like consistency.

    • Coffee (1/2 cup): Brewed espresso or cold brew works well. It contributes to the signature tiramisu flavor while giving you that morning boost.

    • Maple Syrup or Honey (2 tablespoons): This natural sweetener balances the bitterness of the coffee and complements the yogurt.

    • Cocoa Powder (2 tablespoons): Use unsweetened cocoa powder for a rich chocolate flavor that enhances the tiramisu essence.

    • Vanilla Extract (1 teaspoon): This adds warmth and depth to the flavor profile.

    • Dark Chocolate Shavings or Cocoa Nibs (for garnish): Optional but recommended for a crunchy and delicious finishing touch.

    Dietary Note: For a dairy-free version, substitute with coconut yogurt or any plant-based yogurt. For a low-calorie option, consider using a sugar substitute for the maple syrup or honey.

    Dietary Substitutions to Customize Your Tasty Tiramisu Chia Pudding With Greek Yogurt

    To tailor this Tasty Tiramisu Chia Pudding to your specific dietary needs, consider these substitutes:

    • Non-Dairy Yogurt: For vegans or those with lactose intolerance, coconut yogurt or soy yogurt are excellent alternatives to Greek yogurt.

    • Milk Alternatives: If you require nut-free options or prefer a different flavor, oat milk, soy milk, or even rice milk can be used instead of almond milk.

    • Sweeteners: Instead of maple syrup or honey, feel free to opt for agave syrup, stevia, or erythritol for a low-calorie alternative.

    • Flavor Variations: To add some fruity notes, consider adding pureed fruits like bananas or strawberries to the pudding base for an extra nutritional boost and flavor.

    By making these simple ingredient swaps, you can customize the Tasty Tiramisu Chia Pudding to suit nearly any dietary requirement, allowing everyone to share in this tasty treat.

    How to Prepare the Perfect Tasty Tiramisu Chia Pudding With Greek Yogurt: Step-by-Step Guide

    Follow these detailed steps to prepare your Tasty Tiramisu Chia Pudding with Greek Yogurt and impress your family and friends with this delectable dessert.

    1. Prepare the Coffee Base: Brew the coffee or espresso using your preferred method. Once brewed, set it aside to cool slightly.

    2. Combine Chia Seeds and Milk: In a mixing bowl, combine the chia seeds and almond milk. Stir well to ensure no clumps remain. Let this mixture sit for about 10 minutes for the chia seeds to start expanding.

    3. Mix the Yogurt: In another bowl, combine the Greek yogurt, maple syrup (or honey), vanilla extract, and cocoa powder. Use a whisk to mix thoroughly until smooth and creamy. Taste to adjust sweetness if necessary.

    4. Combine the Mixtures: Once the chia seeds have thickened and absorbed some liquid, fold them into the yogurt mixture gently. Ensure everything is well combined.

    5. Layer in Serving Glasses: Start layering your pudding in serving glasses. Begin with a layer of the chia-yogurt mixture at the bottom, followed by a drizzle of coffee. Then add another layer of the chia-yogurt mixture and repeat the process until all ingredients are used.

    6. Chill: Place the layered pudding in the refrigerator for at least 30 minutes or preferably for a few hours to allow the flavors to meld and the texture to set.

    7. Garnish and Serve: Before serving, garnish your pudding with dark chocolate shavings or cocoa nibs to add texture and visual appeal.

    8. Enjoy! Dive into this delightful treat and savor every bite of your Tasty Tiramisu Chia Pudding with Greek Yogurt!

    This detailed guide allows you to adapt each step as necessary based on dietary restrictions or personal preferences, making it an achievable and adaptable recipe for all.

    Mastering Tasty Tiramisu Chia Pudding With Greek Yogurt: Advanced Tips and Variations

    Ready to take your Tasty Tiramisu Chia Pudding with Greek Yogurt to the next level? Here are some advanced tips and variations to explore:

    • Flavor Boosts: Experiment with adding different extracts like almond or hazelnut to enhance the flavor profile. A pinch of cinnamon can provide a warm and inviting touch.

    • Nutty Touch: For an added crunch, layer in some toasted nuts like almonds or walnuts in between the pudding layers.

    • Fruity Twists: Consider introducing other flavors such as adding a layer of blended bananas or berries for a sweet surprise in the middle of the pudding.

    • Make it a Parfait: Create a parfait-style dessert by layering with granola, fruits, and the pudding for a delightful breakfast option or a dessert with crunch.

    • Mini Dessert Jars: Serve them in mini mason jars for a fun presentation. They are perfect for parties or gatherings and can double as a beautiful food gift.

    • Freezer Option: If you want to enjoy this pudding for longer, consider finishing up the preparation and freezing the pudding (without garnishing). To serve, simply thaw in the refrigerator overnight before adding toppings.

    By incorporating these tips and variations, you’ll yield a personalized version of Tasty Tiramisu Chia Pudding that fits your culinary creativity and allows everyone to enjoy this irresistible dessert.

    How to Store Tasty Tiramisu Chia Pudding With Greek Yogurt: Best Practices

    Storing your Tasty Tiramisu Chia Pudding is simple and ensures you can enjoy it for days to come! Follow these best practices:

    • Refrigeration: Store your pudding in an airtight container in the refrigerator. It will keep well for about 3 to 5 days. Just remember to keep any toppings separate until you’re ready to serve to maintain the texture.

    • Freezing: If you’ve made a larger batch and want to save some for later, place your pudding in freezer-safe containers. It can last for about 2 to 3 months in the freezer. However, be aware that the texture may change slightly once thawed.

    • Thawing: When you’re ready to enjoy frozen pudding, thaw it in the refrigerator for several hours or overnight before serving. You can also stir in additional fresh yogurt or milk to restore creaminess if needed.

    These storage tips ensure your Tasty Tiramisu Chia Pudding stays fresh and delicious, allowing you to indulge in this delightful dessert whenever you desire!

    Nutritional Value of Tasty Tiramisu Chia Pudding With Greek Yogurt

    One of the biggest advantages of the Tasty Tiramisu Chia Pudding with Greek Yogurt is its excellent nutritional profile. Here’s a breakdown of the estimated nutritional value per serving (based on the entire recipe serving 4 people):

    • Calories: 240
    • Protein: 12 g
    • Fat: 7 g
    • Carbohydrates: 30 g
    • Fiber: 12 g
    • Sugar: 10 g

    The chia seeds packed in this recipe provide a whopping amount of fiber and essential fatty acids, which are beneficial for heart health. Meanwhile, the Greek yogurt brings forth a healthy dose of protein and probiotics, positively impacting digestion and overall wellness.

    For those looking to decrease calorie intake, considering natural sweeteners, as well as monitoring portion sizes, can effectively reduce the overall caloric value while still enjoying this delicious treat. This pudding is not only a tasty dessert but also a healthful option, proving that indulgence and health can coexist beautifully.

    FAQs: Frequently Asked Questions About Tasty Tiramisu Chia Pudding With Greek Yogurt

    1. Can I make this pudding in advance?

    Absolutely! You can prepare the Tasty Tiramisu Chia Pudding a couple of days ahead of time and let it chill in the refrigerator. Just keep the toppings separate until you’re ready to serve.

    2. Is this recipe vegan-friendly?

    Yes! You can make a vegan version of this pudding by substituting Greek yogurt with coconut yogurt and honey with maple syrup or agave.

    3. How long can I store the pudding in the refrigerator?

    The pudding can be stored in an airtight container in the refrigerator for about 3 to 5 days. However, for the best flavor and texture, consuming it within the first few days is recommended.

    4. Can I use different types of milk?

    Certainly! This recipe is flexible. You can use almond milk, soy milk, oat milk, or any milk alternative that you prefer.

    5. How can I adapt this recipe for kids?

    To make it more appealing to kids, consider adding a layer of their favorite fruit or using a flavored yogurt. This will enhance the visual appeal and introduce delightful flavors!

    In conclusion, this Tasty Tiramisu Chia Pudding With Greek Yogurt is a versatile, healthy, and simple dessert that fits perfectly into various lifestyles. With the right substitutions and advanced tips, it becomes a go-to recipe for any occasion. Enjoy breaking bread with loved ones while savoring this delicious treat!

  • Easy Ninja Creami Watermelon Sorbet Recipe

    Easy Ninja Creami Watermelon Sorbet Recipe

    Easy Ninja Creami Watermelon Sorbet Recipe: A Tropical Delight

    Introduction to Easy Ninja Creami Watermelon Sorbet Recipe

    If you’re on the lookout for the perfect summer treat, the Easy Ninja Creami Watermelon Sorbet Recipe is your answer! This refreshing dessert is not only vibrant and delicious but also packs a punch of health benefits, making it a standout among dessert recipes. Imagine indulging in a bowl of sweet, icy watermelon sorbet on a hot day—it’s the ultimate way to cool down while satisfying your sweet tooth.

    This recipe is incredibly simple and requires just a few ingredients, which means you can whip it up in no time, even on the busiest of days. It’s suitable for a myriad of dietary preferences as it’s entirely vegan and gluten-free. Furthermore, watermelon, the star ingredient, is low in calories yet high in hydration, amino acids, and vitamins A and C, making it a nourishing choice for everyone from busy parents to health-conscious individuals.

    Whether you’re a novice in the kitchen or a culinary enthusiast, this watermelon sorbet will prove to be an accessible and rewarding dish to create. Ideal for casual gatherings, barbecues, or simply to enjoy as an everyday treat, this recipe is bound to impress friends and family alike. Read on to discover the ease and joy of making this delightful sorbet!

    Benefits and Advantages of Easy Ninja Creami Watermelon Sorbet Recipe

    One of the primary reasons to love the Easy Ninja Creami Watermelon Sorbet Recipe is its ease of preparation. With minimal effort and time, you can achieve a refreshing and healthy dessert that delights the taste buds. It does not require any elaborate cooking techniques or prolonged cooling times, making it an excellent choice for both seasoned cooks and novices.

    Another key advantage of this recipe is its health benefits. Watermelon is often considered a superfood; it is rich in antioxidants, vitamins, and electrolytes. Including watermelon in your regular diet can enhance hydration, improve skin health, and contribute to weight management, thanks to its low-calorie content. What’s not to love in a dessert that not only satisfies cravings but also nourishes your body?

    Moreover, this watermelon sorbet caters to diverse dietary needs, as it’s both vegan and gluten-free. By avoiding dairy and gluten, it becomes an inclusive dessert option for those with specific dietary restrictions or preferences. Busy parents can feel relieved offering their children a wholesome treat without worrying about unhealthy additives.

    In addition, the versatility of this sorbet unlocks room for creativity. You can add extra fruits or even mint to elevate the flavors, customizing it to your liking. Overall, these attributes make the Easy Ninja Creami Watermelon Sorbet not just a treat, but a healthy dessert solution that stands out among traditional dessert recipes.

    Ingredients Overview

    Essential Ingredients for Easy Ninja Creami Watermelon Sorbet Recipe

    To create the Easy Ninja Creami Watermelon Sorbet, you will need the following key ingredients:

    • Watermelon: 4 cups, cubed and frozen. This is the star ingredient that provides sweetness and a refreshing flavor. Choose ripe and juicy watermelon for the best results.

    • Agave Syrup or Honey: 1/4 cup. This natural sweetener complements the watermelon while adding a hint of caramel notes. For a vegan option, stick with agave. For a low-calorie option, reduce the amount to taste.

    • Lemon Juice: 1 tablespoon. Freshly squeezed lemon juice enhances the flavor profile and balances the sweetness of the watermelon.

    • Salt: A pinch. This elevates the flavor and brings out the natural sweetness.

    Feel free to adjust ingredient measurements based on your preferences. The beauty of this recipe lies in its flexibility.

    Dietary Substitutions to Customize Your Easy Ninja Creami Watermelon Sorbet Recipe

    • Sweetener Alternatives: If you’re looking to avoid added sugars, you can opt for stevia or monk fruit as a low-calorie alternative to agave or honey. Just remember to adjust the quantity since these sweeteners are typically much sweeter.

    • Citrus Variations: Instead of lemon juice, you can use lime juice or even orange juice for a different citrus twist.

    • Add-In Options: Enhance your watermelon sorbet by adding other fruits such as strawberries, mangoes, or even some mint leaves for a refreshing twist. You can blend them with the watermelon before freezing to create a fruit medley.

    These substitutions allow you to adapt the recipe further to suit dietary restrictions and ingredient availability, making it a truly versatile addition to your collection of dessert recipes.

    How to Prepare the Perfect Easy Ninja Creami Watermelon Sorbet Recipe: Step-by-Step Guide

    Creating the Easy Ninja Creami Watermelon Sorbet is as simple as 1, 2, 3. Follow this step-by-step guide to achieve the perfect sorbet:

    1. Prepare the Watermelon: Start by cutting the watermelon into cubes. Spread the cubes on a baking sheet and freeze them for at least 4 hours or until solid. This step is crucial for achieving a smooth sorbet consistency.

    2. Blend the Ingredients: Once the watermelon is fully frozen, add it to a high-speed blender or food processor. Then, pour in the agave syrup (or honey), lemon juice, and a pinch of salt. Blend on high speed until the mixture is smooth and creamy, stopping to scrape down the sides if necessary. This process should take about 1-2 minutes.

    3. Transfer to Ninja Creami: Once blended, transfer the mixture into your Ninja Creami pint. Secure the lid and freeze for an additional 24 hours to allow it to firm up to a sorbet-like consistency.

    4. Process in the Ninja Creami: After the freezing period, place the pint back in the Ninja Creami machine. Select the ‘Sorbet’ function and process until you achieve a light and fluffy texture. This typically takes a minute or so.

    5. Serve and Enjoy: Spoon your soft sorbet into bowls or glasses. For an added touch, garnish with fresh mint leaves or enjoy it alongside fresh fruit for a pop of color. Relish in the sweetness and refreshing taste of your homemade watermelon sorbet!

    6. Storage: If you have leftovers, store the sorbet in an airtight container in the freezer. Remember to let it sit at room temperature for a few minutes before scooping out the portions on your next serving!

    This method ensures a delicious, healthy dessert option that suits various dietary needs. As you follow these easy steps, you’ll discover just how enjoyable the process of creating your own watermelon sorbet can be!

    Mastering Easy Ninja Creami Watermelon Sorbet Recipe: Advanced Tips and Variations

    To elevate your Easy Ninja Creami Watermelon Sorbet to the next level, here are some expert tips and variations to consider:

    • Infuse Flavor: Try infusing unique flavors by adding herbs or spices. Fresh basil or mint gives the sorbet a refreshing twist, while a touch of cayenne pepper can add a subtle heat.

    • Creamy Version: For a creamier consistency, you can substitute a portion of the watermelon with canned coconut milk or almond milk. This change can help create a richer mouthfeel while keeping the recipe vegan).

    • Layered Sorbet: Get creative by layering this watermelon sorbet with other fruit sorbets. Strawberry or kiwi sorbets pair beautifully and create a vibrant dessert presentation.

    • Frozen Fruit Alternatives: If watermelon isn’t in season, you can use frozen mango or pineapple as a base for a similarly delightful tropical sorbet.

    Implementing these tips ensures that your dessert not only looks beautiful but also tastes fantastic. Whether you choose to stick with the classic version or mix it up with variations, you’ll have a treat that stands out and delights any palate!

    How to Store Easy Ninja Creami Watermelon Sorbet Recipe: Best Practices

    Storing your Easy Ninja Creami Watermelon Sorbet correctly ensures that it maintains its flavor and texture. Here are some best practices for refrigeration, freezing, and serving:

    • Airtight Container: Transfer the watermelon sorbet to an airtight container after you’ve finished processing it in the Ninja Creami. This helps prevent ice crystals from forming and keeps the sorbet smooth.

    • Freezing: Store the sorbet in the freezer for long-term storage. It can keep for up to two weeks without significant loss in quality. However, for the best taste, try to consume it within the first week.

    • Serving Suggestions: If the sorbet becomes too hard to scoop after prolonged freezing, let it sit out at room temperature for about 10-15 minutes before serving. This makes scooping much easier, ensuring that your dessert is ready to enjoy at a moment’s notice.

    Following these storage tips allows you to savor your watermelon sorbet whenever you, your family, or guests crave a refreshing treat, making it a reliable addition to your go-to dessert recipes!

    Nutritional Value of Easy Ninja Creami Watermelon Sorbet Recipe

    Understanding the nutritional value of your Easy Ninja Creami Watermelon Sorbet Recipe is essential, especially for those mindful of their dietary choices. Here’s a breakdown of the approximate nutritional content per serving (1/2 cup):

    • Calories: 70 (varies based on sweetener used)
    • Total Fat: 0g
    • Saturated Fat: 0g
    • Sodium: 5mg
    • Total Carbohydrates: 17g
    • Dietary Fiber: 1g
    • Sugars: 15g (naturally occurring)
    • Protein: 1g
    • Vitamin A: 6% DV
    • Vitamin C: 15% DV

    The nutritional benefits of this watermelon sorbet are impressive. Besides being low-calorie, it is primarily made up of hydrating watermelon, providing you with essential vitamins and antioxidants while staying light on sugar. Creating a dessert that allows you to indulge without guilt is precisely what the Easy Ninja Creami Watermelon Sorbet delivers, making it an ideal choice for health-conscious individuals.

    FAQs: Frequently Asked Questions About Easy Ninja Creami Watermelon Sorbet Recipe

    Can I make this watermelon sorbet without a Ninja Creami?

    Absolutely! If you don’t have a Ninja Creami, you can still make watermelon sorbet using a traditional blender or food processor. After blending the mixture, transfer it to a container and freeze it. Stir every 30 minutes for the first few hours to prevent ice crystals from forming until it reaches a creamy consistency.

    How can I adjust the sweetness of the sorbet?

    Since taste preferences vary, you can easily adjust the sweetness by adding more or less sweetener. Taste the mixture before freezing and adjust the sweetener as needed, remembering that flavors may intensify upon freezing.

    What’s the best way to serve the sorbet?

    This sorbet is best served scooped into bowls or glasses. You can also garnish with fresh herbs, edible flowers, or chunks of fresh fruit for extra visual appeal. For a fun touch, consider making sorbet popsicles by pouring the mixture into molds instead of a container.

    Is it possible to make this sorbet in bulk and store it?

    Yes, you can double or triple the recipe! Just ensure to store it in multiple airtight containers to prevent excessive exposure to air and moisture that can affect texture and flavor.

    Can I use other fruits in this recipe?

    Certainly! Variations can include berries, mangoes, or other summer fruits. Just make sure to maintain a similar ratio for freezing purposes to achieve the desired sorbet consistency.

    By answering these questions, readers gain a better understanding of how to customize the Easy Ninja Creami Watermelon Sorbet Recipe and enjoy a delicious, refreshing treat tailored to their preferences!

    Embark on your culinary journey today and discover just how delightful homemade sorbet can be! Enjoy every scoop!

  • I CanT Stop Making This Perfect Rhubarb Crisp Recipe

    I CanT Stop Making This Perfect Rhubarb Crisp Recipe

    I Can’t Stop Making This Perfect Rhubarb Crisp Recipe: A Tropical Delight

    Introduction to I Can’t Stop Making This Perfect Rhubarb Crisp Recipe

    If you’re on the lookout for irresistible dessert recipes that are also simple and healthy, look no further! This Perfect Rhubarb Crisp is not only delicious but also versatile enough to cater to various dietary requirements. Whether you are a busy parent, student, or a food enthusiast, you’ll find this recipe a delightful addition to your baking repertoire.

    Rhubarb is a unique vegetable often treated as a fruit in desserts. It’s packed with vitamins like C and K, as well as fiber, making it a healthier choice for those sweet tooth cravings. This rhubarb crisp recipe brings out the tartness of the rhubarb, perfectly complemented by a crisp, buttery topping that will have everyone at the table asking for more.

    Moreover, this recipe is impressively easy to make. With minimal prep time and cooking required, you can whip it up in no time—perfect for those with busy lifestyles. Plus, it’s adaptable. You can swiftly modify it to cater to vegan or gluten-free diets, ensuring that anyone can enjoy this tantalizing dish. Dive into this tropical delight, and enjoy simple yet delectable flavors that balance health and indulgence!

    Benefits and Advantages of I Can’t Stop Making This Perfect Rhubarb Crisp Recipe

    This Perfect Rhubarb Crisp recipe stands out for its ease of preparation and health benefits. Let’s explore the reasons why this dish is a must-try.

    Simplicity in Preparation

    One of the greatest advantages of this recipe is its simplicity. It requires just a few household ingredients, and the process is straightforward, making it an excellent choice for novice bakers. You won’t need any specialized skills or equipment. A basic set of measuring cups and a baking dish is all you need.

    Health Benefits

    Rhubarb is inherently low in calories but full of flavor and nutrients. It boasts high fiber content; this not only promotes a healthy digestive system but also keeps you feeling full. Unlike many traditional dessert recipes laden with sugar, our rhubarb crisp can be sweetened according to your taste. You can easily adjust the sweetness by reducing sugar and enhancing natural sweeteners.

    Additionally, this recipe can be tailored to be gluten-free and vegan. Substitute butter with coconut oil or a vegan butter alternative, and use gluten-free oats in the topping. This flexibility ensures that everyone in your household, including those with dietary restrictions, can enjoy it.

    Versatility

    This dessert is not seasonal! Although rhubarb is typically available in spring, you can use frozen rhubarb any time of year. Plus, feel free to mix in other fruits like strawberries or apples for a unique twist. The combination of flavors can elevate your dessert experience, making it suitable for every palate and occasion.

    In summary, this Perfect Rhubarb Crisp is a fantastic way to add a delicious yet healthy dessert to your table. Its ease of preparation, adaptability, and health benefits make it a go-to recipe for all seasons and occasions.

    Ingredients Overview

    Essential Ingredients for I Can’t Stop Making This Perfect Rhubarb Crisp Recipe

    Here’s a detailed list of the essential ingredients you’ll need:

    • 4 cups of fresh rhubarb (chopped) – Rich in vitamins, giving the crisp its signature tart flavor.
    • 1 cup of granulated sugar (or maple syrup for a healthier option) – Sweetens the tartness of the rhubarb; feel free to adjust according to your taste preference.
    • 1 tablespoon of cornstarch – Helps to thicken the rhubarb filling, giving it a nice consistency.
    • 1 tablespoon of lemon juice – Enhances flavor and balances the sweetness.
    • 1 ½ cups of rolled oats (gluten-free if needed) – Forms the base of the crisp topping, providing texture.
    • 1 cup of all-purpose flour (or almond flour for gluten-free) – Creates the perfect crumble; almond flour offers a nutty flavor.
    • ½ cup of brown sugar – Deepens the sweetness and adds richness.
    • 1 teaspoon of cinnamon – Brings warmth and enhances the overall aroma of the dish.
    • ½ cup of unsalted butter (or coconut oil for vegan) – Binds the topping together and adds rich flavor.

    Dietary Substitutions to Customize Your I Can’t Stop Making This Perfect Rhubarb Crisp Recipe

    Consider these substitutions based on your dietary needs:

    • For Vegan Option: Substitute the butter with coconut oil or a vegan alternative. The result will be equally delicious and maintain the crisp texture.
    • For Gluten-Free Option: Use certified gluten-free oats and replace all-purpose flour with almond flour or a gluten-free baking blend.
    • For Low-Sugar Option: Experiment with natural sweeteners such as honey, agave, or simply reduce the quantity of sugar.
    • Mix In Fruits: Add berries like strawberries or blueberries to the rhubarb filling for extra flavor and nutrients.

    With these substitutions, you can personalize your dessert to fit various dietary requirements without compromising on taste or quality.

    How to Prepare the Perfect I Can’t Stop Making This Perfect Rhubarb Crisp Recipe: Step-by-Step Guide

    Now that you have your ingredients ready, it’s time to dive into the detailed preparation of the Perfect Rhubarb Crisp. Follow these steps carefully:

    1. Preheat the Oven: Preheat your oven to 375°F (190°C). This ensures that your crisp bakes evenly.

    2. Prepare the Rhubarb Filling:

    3. In a large mixing bowl, combine the chopped rhubarb, granulated sugar, cornstarch, and lemon juice.
    4. Mix gently until the rhubarb is evenly coated with the sugar and cornstarch.

    5. Transfer to Baking Dish:

    6. Take a greased baking dish (9×13 inches is ideal).
    7. Pour the rhubarb mixture into the dish, spreading it out evenly.

    8. Make the Crisp Topping:

    9. In another bowl, combine rolled oats, all-purpose flour, brown sugar, cinnamon, and salt.
    10. Add the melted butter (or coconut oil) and mix until the mixture resembles coarse crumbs.

    11. Top the Rhubarb Filling:

    12. Sprinkle the crisp topping evenly over the rhubarb filling, ensuring complete coverage.

    13. Bake in the Oven:

    14. Place the baking dish in the preheated oven and bake for about 35-40 minutes or until the topping is golden brown and the rhubarb is bubbly.

    15. Cool and Serve:

    16. Once baked, remove the dish from the oven and let it cool for about 10-15 minutes.
    17. Serve warm with a scoop of vanilla ice cream or whipped cream on top for an unforgettable experience!

    This Perfect Rhubarb Crisp is more than just a dessert; it’s a celebration of flavors, textures, and nutritional goodness. You can easily adjust certain ingredients or portions to cater to dietary preferences, making it a fantastic choice for gatherings or a cozy family dinner.

    Mastering I Can’t Stop Making This Perfect Rhubarb Crisp Recipe: Advanced Tips and Variations

    To elevate your Perfect Rhubarb Crisp further, consider these advanced tips and variations:

    1. Spice it Up: Enhance flavor by adding spices like nutmeg, ginger, or allspice to the crisp topping or filling. This will introduce a warm, fragrant aroma, especially appealing during cooler months.

    2. Mix with Other Fruits: Combine rhubarb with fruits like strawberries or cherries for a mixed fruit crisp. The sweet juices from other fruits will balance the tartness of rhubarb.

    3. Add Nuts or Seeds: Incorporate chopped almonds, walnuts, or pumpkin seeds into the topping for added crunch and nutrients. This will transform your dessert into a more filling option, ideal for brunch.

    4. Serving Suggestions: Serve with a dollop of fresh whipped cream or a scoop of vanilla ice cream. For a fun twist, consider adding a drizzle of chocolate or caramel sauce for a rich indulgence.

    5. Personalize the Sweetness: Adjust the sugar levels based on personal preference. You might find that less sugar highlights the natural tartness of the rhubarb even more delightfully.

    By implementing these tips and variations, you can consistently create a Perfect Rhubarb Crisp that’ll keep your love for this classic dessert alive!

    How to Store I Can’t Stop Making This Perfect Rhubarb Crisp Recipe: Best Practices

    To store your Perfect Rhubarb Crisp and keep it fresh for longer, here are some recommended methods:

    • Refrigeration: After baking, allow your rhubarb crisp to cool completely. Cover it with plastic wrap or transfer it to an airtight container. It can be stored in the refrigerator for up to 3-4 days.

    • Freezing: For longer storage, consider freezing the crisp. Prepare the dish, allow it to cool, and cover it tightly with plastic wrap, followed by aluminum foil. Properly stored, it can last in the freezer for up to 3 months.

    • Reheating: To reheat, thaw the crisp overnight in the refrigerator, then bake at 350°F (175°C) until warmed through, about 20-25 minutes. If reheating from frozen, increase the time to 40-50 minutes.

    By following these storage best practices, you ensure that your Perfect Rhubarb Crisp remains delicious and ready to enjoy at a moment’s notice!

    Nutritional Value of I Can’t Stop Making This Perfect Rhubarb Crisp Recipe

    Understanding the nutritional value of your food is vital for health-conscious cooks. Below is an estimated breakdown of the nutrients per serving (assuming about 12 servings):

    • Calories: 180-210
    • Total Fat: 6-8g
    • Saturated Fat: 3-4g (if using butter)
    • Cholesterol: 20mg (using butter)
    • Sodium: 50-90mg
    • Total Carbohydrates: 32-35g
    • Dietary Fiber: 3g
    • Sugars: 10-15g
    • Protein: 2-3g

    Health Highlights:
    – Rhubarb provides essential vitamins and minerals while being low in calories.
    – The fiber content supports digestion and contributes to feeling full.
    – Using alternatives like reduced sugar and coconut oil can enhance the health profile significantly.

    Remember, the nutritional content may vary based onIngredient substitution or portion sizes, so it’s a good idea to tailor these to your dietary goals.

    FAQs: Frequently Asked Questions About I Can’t Stop Making This Perfect Rhubarb Crisp Recipe

    Can I use frozen rhubarb for this recipe?

    Yes! Frozen rhubarb works perfectly in this recipe. Just make sure to thaw and drain it slightly to remove excess moisture before mixing it with the other ingredients.

    Is this recipe suitable for a gluten-free diet?

    Absolutely! Simply substitute the all-purpose flour with gluten-free alternatives, and ensure that your oats are certified gluten-free.

    How can I adjust the sweetness of this crisp?

    You can easily reduce the sugar or use natural sweeteners like maple syrup or honey. Start with less sugar and taste the filling before baking; you can always add more if necessary.

    Can I make this dessert ahead of time?

    Yes! You can prepare the rhubarb filling and topping separately, then assemble and bake it right before serving. Alternatively, make it a day in advance and simply reheat it in the oven.

    What are some good toppings for this rhubarb crisp?

    Top it off with vanilla ice cream, whipped cream, or a decadent caramel sauce. You can also sprinkle some coconut flakes or chopped nuts for added texture.


    With this comprehensive guide, you’re now ready to create your own Perfect Rhubarb Crisp that everyone will love! Whether for a special occasion, a cozy family dinner, or a simple weeknight treat, you can’t go wrong with this delicious recipe. Happy baking!

  • Mouthwatering Rhubarb Crisp With Yellow Cake Mix

    Mouthwatering Rhubarb Crisp With Yellow Cake Mix

    Mouthwatering Rhubarb Crisp With Yellow Cake Mix: A Tropical Delight

    Introduction to Mouthwatering Rhubarb Crisp With Yellow Cake Mix

    Are you searching for delectable dessert recipes that combine simplicity with a burst of flavor? Look no further! This Mouthwatering Rhubarb Crisp With Yellow Cake Mix is a delightful twist on a classic treat that requires minimal effort while delivering maximum taste. Whether you’re a busy parent looking to whip up a quick dessert after dinner, a college student needing an easy yet delightful treat, or even a baking enthusiast wanting to impress guests, this recipe fits all profiles.

    Rhubarb, often overlooked in the world of desserts, brings a tartness that complements the sweetness of the yellow cake mix perfectly. The result? A perfectly balanced dish that’s both hearty and refreshing. Plus, this recipe can be adapted for various dietary needs, making it a fantastic option for vegans, those following a gluten-free diet, or anyone keen on enjoying a healthier dessert.

    Where health benefits and indulgence coexist, this rhubarb crisp stands out. The rhubarb is a rich source of vitamins K and C, while the transition with yellow cake mix adds a comforting texture. So, gather your ingredients and prepare yourself for a mouthwatering experience that will delight your taste buds and leave your kitchen aglow with warm, inviting aromas!

    Benefits and Advantages of Mouthwatering Rhubarb Crisp With Yellow Cake Mix

    The Mouthwatering Rhubarb Crisp With Yellow Cake Mix is not just a dessert; it’s a celebration of flavors and convenience rolled into one. Here are some benefits and advantages of this scrumptious recipe that make it a hit in any kitchen:

    1. Simplicity in Preparation: With only a handful of ingredients and easy-to-follow steps, even novice cooks can successfully create this sweet, fruity dessert. No complex techniques or specialized tools are required—just mix, bake, and enjoy!

    2. Versatility: This dessert can easily adapt to various dietary preferences. Want to make it vegan? Swap out butter for coconut oil or vegan margarine. Gluten-free? Use a suitable cake mix or a homemade version. The options are endless!

    3. Health-Conscious Appeal: With rhubarb at its heart, this recipe carries delightful health benefits. Rhubarb is low in calories and rich in antioxidants, vitamins A, C, and K. By preparing your crisp with less sugar or opting for a gluten-free cake mix, you can even cater to dietary restrictions while still indulging in a delicious dessert.

    4. Universal Appeal: This is a dessert that caters to everyone—from seniors reminiscing about their childhood favorites to busy working professionals looking for a quick and satisfying treat. The fusion of textures in this recipe is sure to delight all age groups.

    5. Perfect for Gatherings: Whether you’re hosting a family gathering or a casual get-together with friends, this rhubarb crisp makes a stunning dessert that can feed a crowd while still being simple to prepare. Everyone will be impressed, and the recipe is bound to become a staple in your dessert repertoire.

    By choosing to whip up this wonderful rhubarb crisp, you’re not just creating a dessert, but also memories with family and friends. So, embrace its benefits and enjoy the ride into the world of easy and delicious dessert recipes!

    Ingredients Overview

    Essential Ingredients for Mouthwatering Rhubarb Crisp With Yellow Cake Mix

    To create the perfect Mouthwatering Rhubarb Crisp With Yellow Cake Mix, you will need the following ingredients. Below is a detailed list along with precise measurements and the purpose or benefits each ingredient adds to the dish.

    • 3 cups of fresh rhubarb, chopped (can substitute with frozen rhubarb)
      Purpose: Rhubarb is rich in fiber, vitamins, and antioxidants. It provides the tart flavor that balances the sweetness.

    • 1 cup granulated sugar (adjust to taste)
      Purpose: Acts as a sweetener and balances out the tartness of the rhubarb. You can substitute with coconut sugar or a sugar alternative for a healthier version.

    • 1 teaspoon vanilla extract
      Purpose: Enhances overall flavor and aroma of the dessert.

    • 1 box of yellow cake mix (approx. 15.25 oz)
      Purpose: This is the cornerstone of the crisp, providing a sweet, cake-like topping that contrasts beautifully with the tangy filling.

    • 1/2 cup unsalted butter (melted; or use coconut oil for vegan option)
      Purpose: Helps to bind the cake mix together and adds richness to the topping.

    • 1 teaspoon ground cinnamon (optional)
      Purpose: Adds warmth and depth to the flavors, complementing the rhubarb.

    • 1/2 cup chopped nuts (such as pecans or walnuts; optional)
      Purpose: Adds a crunch factor and enhances nutritional value. For gluten-free, choose nuts that are labeled gluten-free.

    Dietary Substitutions to Customize Your Mouthwatering Rhubarb Crisp With Yellow Cake Mix

    One of the best aspects of this rhubarb crisp recipe is its flexibility. Here are some suggested dietary substitutions to cater to different needs:

    • For a Vegan Version: Substitute the unsalted butter with melted coconut oil or a vegan butter alternative. Ensure the yellow cake mix is also vegan-friendly (there are several brands available that comply).

    • Gluten-Free Adaptation: Many stores offer gluten-free cake mixes. Choose one that suits your taste and dietary requirements to make this dessert accessible to everyone.

    • Low-Calorie Option: Replace granulated sugar with stevia or monk fruit sweetener to cut down on calories while still maintaining sweetness.

    • Nut-Free: If you or your guests have nut allergies, simply omit the chopped nuts or replace them with seeds like sunflower or pumpkin seeds for added crunch and nutrition.

    These substitutions allow you to fully enjoy the benefits of this wonderful rhubarb crisp while catering to various dietary preferences, ensuring everyone can indulge in a slice!

    How to Prepare the Perfect Mouthwatering Rhubarb Crisp With Yellow Cake Mix: Step-by-Step Guide

    Follow these straightforward steps to prepare your delicious rhubarb crisp. This recipe is perfect for anyone looking for quick and tasty dessert recipes that don’t compromise on flavor!

    1. Preheat the Oven: Begin by preheating your oven to 350°F (175°C). This prepares your oven for the crisp, ensuring even baking.

    2. Prepare the Rhubarb Filling: In a medium-sized bowl, combine the chopped rhubarb with the granulated sugar and vanilla extract. Toss them until the rhubarb is well-coated. Place this mixture in a greased 9×13-inch baking dish, spreading it evenly.

    3. Mix the Yellow Cake Layer: In another bowl, mix the yellow cake mix with melted butter. Stir until the mixture is crumbly. This texture is essential for creating a topping that crisps up beautifully in the oven.

    4. Add Cinnamon: If you choose to include ground cinnamon, sprinkle it over the cake mixture and toss it in for an extra layer of flavor.

    5. Top the Rhubarb: Evenly sprinkle the cake mixture over the rhubarb layer in the baking dish. Do not press down; allow the cake mix to sit as a crumbled topping.

    6. Add Nuts (Optional): If you opted for nuts, sprinkle them evenly over the top of the cake mixture for added crunch.

    7. Bake Your Crisp: Place the baking dish in the preheated oven and bake for 40-45 minutes, or until the top is golden brown and the rhubarb is bubbly. You can check for doneness by inserting a toothpick into the top; it should come out clean or slightly moist.

    8. Cool and Serve: Once baked, remove the dish from the oven and let your rhubarb crisp cool for about 15 minutes. This cooling time allows the filling to set slightly, making it easier to serve.

    9. Serve with Ice Cream (Optional): For a delightful twist, serve slices of the crisp warm with a scoop of vanilla or dairy-free ice cream. The cold creaminess balances the warm, tangy filling perfectly!

    Feel free to experiment with the quantities or additional ingredients as you like. Adapting the recipe according to dietary needs and personal preferences will make it even more special.

    Mastering Mouthwatering Rhubarb Crisp With Yellow Cake Mix: Advanced Tips and Variations

    To elevate your rhubarb crisp experience, consider these advanced tips and variations:

    1. Layered Flavors: Add sliced strawberries or blueberries along with the rhubarb to create a mixed berry crisp. This addition enhances both the flavor and nutrition while making the dessert visually stunning.

    2. Change the Topping: Instead of sticking with the traditional crumble, try mixing oats and brown sugar with the cake mix for a more textured topping. Oats will add crunch and heartiness to the dish.

    3. Flavor Enhancements: For an adult version, try adding a splash of your favorite liqueur (like amaretto or peach schnapps) to the rhubarb mixture for depth and complexity.

    4. Seasonal Twist: Celebrate various seasons with this recipe. In the fall, add chopped apples alongside the rhubarb, or incorporate peaches in the summer for a refreshing twist.

    5. Serve with Sauce: Drizzle caramel or chocolate sauce over individual servings for a luxurious dessert that’ll delight everyone.

    Trying out different combinations and approaches will help you master this crisp recipe, leaving guests raving about your creativity and flavor choices while you enjoy delicious dessert recipes!

    How to Store Mouthwatering Rhubarb Crisp With Yellow Cake Mix: Best Practices

    To maintain the freshness of your Mouthwatering Rhubarb Crisp, consider these storage techniques:

    • Refrigeration: Once the dessert has cooled completely, cover it with plastic wrap or aluminum foil, or transfer it to an airtight container. You can store it in the refrigerator for up to 5 days, making it easy to enjoy leftovers without sacrificing flavor.

    • Freezing: If you plan to save your crisp for a more extended period, you can freeze it. Wrap it tightly in plastic wrap and aluminum foil, or use a freezer-safe container. It can be stored in the freezer for up to 3 months. To serve, simply thaw it in the fridge overnight and reheat in the oven at 350°F (175°C) until warmed through.

    • Reheating: To reheat your rhubarb crisp, place it in a preheated oven until it’s heated thoroughly—about 15-20 minutes. The goal is to restore its delightful texture and warmth.

    By following these best practices, you can enjoy this irresistible dessert recipe for days on end without losing any of its delicious charm.

    Nutritional Value of Mouthwatering Rhubarb Crisp With Yellow Cake Mix

    Understanding the nutritional content of your dessert is vital for healthy eating. Below is the approximate nutritional information per serving (based on an 8 servings) for the Mouthwatering Rhubarb Crisp With Yellow Cake Mix recipe.

    • Calories: 220
    • Total Fat: 9g
    • Saturated Fat: 4g
    • Trans Fat: 0g
    • Cholesterol: 30mg
    • Sodium: 150mg
    • Total Carbohydrates: 34g
    • Dietary Fiber: 1g
    • Sugars: 14g
    • Protein: 2g

    Health Benefits:

    • Rhubarb: High in water and fiber, low in calories. It helps promote digestive health, and its antioxidant properties boost your immune system.
    • Nuts (if added): Provide healthy fats and protein, essential for a balanced diet.
    • Reduced Sugar Options: Substituting with lower-sugar alternatives can help meet dietary needs, lower calorie count, and still provide satisfaction.

    While it’s essential to enjoy your sweet treats in moderation, knowing the nutritional benefits can help you make informed choices without guilt.

    FAQs: Frequently Asked Questions About Mouthwatering Rhubarb Crisp With Yellow Cake Mix

    Q: Can I use frozen rhubarb for this recipe?
    A: Absolutely! Frozen rhubarb works perfectly in this recipe. Just thaw and drain any excess liquid before using it in your filling.

    Q: How can I make this rhubarb crisp gluten-free?
    A: To make the recipe gluten-free, substitute the regular yellow cake mix with a gluten-free version, as many brands offer cake mixes free from gluten.

    Q: Can I replace the granulated sugar with a sugar alternative?
    A: Yes! Feel free to use coconut sugar, stevia, or any preferred sweetener. Adjust the quantity to suit your taste, as different sweeteners have varying levels of sweetness.

    Q: How do I know when it’s done baking?
    A: The top should be golden brown, and the filling should be bubbling around the edges. Inserting a toothpick into the topping should come out clean or with a few moist crumbs.

    Q: Can I prepare the crisp ahead of time?
    A: Yes, you can prepare the filling and topping separately and refrigerate them. Assemble and bake just before serving for the best flavor and texture.

    By addressing these common questions, you can navigate ingredient adjustments and cooking methods with confidence, allowing your dessert experience to be enjoyable and seamless!


    The Mouthwatering Rhubarb Crisp With Yellow Cake Mix stands as a perfect blend of ease, flavor, and nutritional benefits. Not only will it leave your taste buds delighted, but it will also align seamlessly with various dietary preferences. So go ahead, try this recipe, and share the joy of simple, wholesome, and delicious dessert recipes with your loved ones!

  • IM Officially Addicted To These Sweet Rhubarb Treats

    IM Officially Addicted To These Sweet Rhubarb Treats

    I’M Officially Addicted To These Sweet Rhubarb Treats!: A Tropical Delight

    Introduction to I’M Officially Addicted To These Sweet Rhubarb Treats!

    Welcome to a delightful journey into the world of sweet rhubarb treats! If you’re on the lookout for exceptional dessert recipes, then you’re in for a real treat with this recipe that perfectly balances sweetness and tartness. Rhubarb has long been a beloved ingredient in desserts, and for a good reason. Its vibrant color and unique flavor bring a delightful twist to traditional sweets.

    These sweet rhubarb treats are not only simple to prepare but also cater to a variety of dietary needs, making it an excellent choice for everyone from busy parents to health-conscious individuals. Whether you’re vegan, gluten-free, or simply seeking a healthier twist on your favorite dessert, this recipe has got you covered. Plus, its ease of preparation means it’s perfect for home cooks of all skill levels. With just a handful of ingredients, you can whip up a tasty, colorful dessert that everyone will love without spending hours in the kitchen.

    Moreover, rhubarb is rich in vitamins and antioxidants, making this sweet treat not only delicious but also somewhat healthful. It’s often regarded as a spring-time favorite, which means it’s a great way to work with seasonal produce. Now, let’s get started with the recipe that will quickly become a staple in your dessert repertoire!

    Benefits and Advantages of I’M Officially Addicted To These Sweet Rhubarb Treats!

    When considering dessert recipes, it’s vital to evaluate the benefits they offer, and these sweet rhubarb treats stand out for several reasons.

    Ease of Preparation

    One of the most appealing attributes of this recipe is its simplicity. You don’t need any professional baking skills or fancy tools to create this delectable dish. The ingredients are easily accessible, and the method requires minimal fuss. Perfect for those chaotic weeknights when you crave a sweet finish to your meal with limited time.

    Health Benefits

    But it’s not just about convenience; the health benefits of rhubarb add another layer of allure to this dish. Rhubarb is low in calories and high in fiber, which makes it great for digestion and overall gut health. Additionally, it contains Vitamin C and K, manganese, and antioxidants, which can bolster your immune system and support skin health.

    This recipe can be adapted to fit various dietary preferences, too. For instance, you can easily swap out sugar for natural sweeteners like honey or maple syrup, catering to those who are looking for lower glycemic options.

    Versatility

    These sweet rhubarb treats are also gloriously versatile. You can enjoy them as a standalone dessert, pair them with yogurt for breakfast, or serve them with ice cream for a classic sundae twist. This adaptability makes it a favorite for gatherings, potlucks, and family dinners.

    Suitability

    Lastly, no matter your dietary restrictions, this recipe offers something for everyone. It can be made vegan by substituting traditional dairy products with plant-based alternatives. With a few minor adjustments, you can prepare gluten-free options too—appealing to those with wheat allergies. Overall, these sweet rhubarb treats are not just a dish; they represent a delicious opportunity to cater to your loved ones’ tastes and preferences while maintaining a focus on health.

    Ingredients Overview

    Essential Ingredients for I’M Officially Addicted To These Sweet Rhubarb Treats!

    Here’s a detailed look at the essential ingredients required to create the most delightful sweet rhubarb treats:

    • Fresh Rhubarb (2 cups, chopped): The star of our dessert, rhubarb provides that signature tartness and bright color.

    • Granulated Sugar (1 cup) or Coconut Sugar (for a lower glycemic option): This sweetener balances the tartness of rhubarb perfectly. For healthier options, honey or maple syrup can be used instead.

    • All-Purpose Flour (1 cup) or Almond Flour: The base of our treat. Almond flour doesn’t just make it gluten-free, but it also adds a nutty flavor.

    • Baking Powder (1 teaspoon): This helps to give our dessert a light and fluffy texture.

    • Coconut Oil (1/2 cup): A great vegan alternative to butter, providing moisture and richness.

    • Plant-Based Milk (1/2 cup): Almond milk or oat milk works well; both keep the recipe dairy-free while adding moisture.

    • Vanilla Extract (1 teaspoon): Adds a depth of flavor.

    • Pinch of Salt: Enhances the sweetness of the treats.

    Dietary Substitutions to Customize Your I’M Officially Addicted To These Sweet Rhubarb Treats!

    While the given ingredients create a flavorful base, don’t hesitate to customize according to your taste or dietary needs. Here are some substitutions that you can consider:

    • Sweeteners: If you are aiming for a low-sugar option, substitutes like stevia or monk fruit sweetener can be used in the same quantity as sugar for an even healthier treat.

    • Flours: For gluten-free enthusiasts, almond flour works beautifully; however, if you have nut allergies, gluten-free all-purpose flour is an excellent alternative.

    • Egg Replacement: If you want this recipe to be vegan, consider using a flax egg (1 tablespoon of ground flaxseed mixed with 2.5 tablespoons of water) in place of a conventional egg in recipes calling for eggs.

    • Oil Options: If coconut oil isn’t available, you can also opt for vegetable oil or avocado oil without compromising flavor.

    • Flavor Additions: Add a teaspoon of cinnamon for warmth, or some grated lemon zest for an invigorating citrus zing.

    By tweaking these ingredients, you can create a variation of the sweet rhubarb treats that caters to various palates, making them even more enjoyable for all.

    How to Prepare the Perfect I’M Officially Addicted To These Sweet Rhubarb Treats!: Step-by-Step Guide

    Now, let’s dive into the step-by-step process of how to prepare these delightful sweet rhubarb treats. This guide ensures that everything is laid out simply, allowing you to effortlessly whip them up in your own home.

    1. Prepare the Oven: Preheat your oven to 350°F (175°C). An adequately preheated oven ensures that your sweet rhubarb treats bake evenly.

    2. Chop the Rhubarb: Clean and chop your fresh rhubarb into small, bite-sized pieces. This will distribute the tartness throughout the treat.

    3. Mix Dry Ingredients: In a large bowl, combine 1 cup of all-purpose flour, 1 cup of granulated sugar, 1 teaspoon of baking powder, and a pinch of salt. Use a whisk to combine them thoroughly to prevent any lumps.

    4. Incorporate Wet Ingredients: In a separate bowl, combine 1/2 cup of melted coconut oil, 1/2 cup of plant-based milk, and 1 teaspoon of vanilla extract. Whisk the mixture until it’s smooth.

    5. Combine Mixtures: Gradually add the wet ingredients into the dry ingredients, stirring gently. Be careful not to over-mix; just combine until it becomes one cohesive mixture.

    6. Fold in the Rhubarb: Carefully fold the chopped rhubarb into the batter, ensuring it’s evenly distributed. Each bite should offer a delightful tart burst of flavor.

    7. Prepare the Baking Dish: Grease a baking pan (8×8 inches) with a bit of coconut oil or line it with parchment paper for easy removal.

    8. Pour the Mixture: Transfer the batter into the prepared baking pan, smoothing the top with a spatula.

    9. Bake: Place the pan in the oven and bake for about 30-35 minutes, or until the edges turn golden brown, and a toothpick inserted into the center comes out clean.

    10. Cool Down: Once baked to perfection, remove the pan from the oven. Allow it to cool for about 10 minutes in the pan before transferring it to a cooling rack.

    11. Slice and Serve: After cooling completely, slice your sweet rhubarb treats into squares. Serve them warm or at room temperature, topped with a dollop of whipped coconut cream if desired.

    This straightforward process highlights flexibility with options catering to various dietary preferences.

    Mastering I’M Officially Addicted To These Sweet Rhubarb Treats!: Advanced Tips and Variations

    To bring out the best in your sweet rhubarb treats, consider the following tips and variations:

    • Add Spices: Adding spices like cinnamon or nutmeg can enhance the flavor profile of your dessert and give it an aromatic touch.

    • Experiment with Nuts: Consider folding in some walnuts or pecans for added texture; they can complement the soft rhubarb beautifully.

    • Glaze Options: For those who like a little extra sweetness on top, a light glaze made from powdered sugar and plant-based milk can be drizzled over the cooled treats.

    • Fruit Pairings: Enhance the flavor by adding other fruits like strawberries or blueberries for an additional layer of flavor, making this recipe even more vibrant.

    • Perfect For Events: This dessert can be made ahead of gatherings or potlucks. Just double the recipe, and bake in a large dish for a crowd-pleasing abundance.

    These tips and variations encourage creativity and personalization, making your sweet rhubarb treats uniquely yours!

    How to Store I’M Officially Addicted To These Sweet Rhubarb Treats!: Best Practices

    Proper storage ensures that your sweet rhubarb treats remain delicious even after a few days. Here are the best practices for storing them:

    • Room Temperature Storage: If you plan to consume them within a couple of days, simply store the treats in an airtight container at room temperature.

    • Refrigeration: If you want to keep them fresh longer, they can be stored in the refrigerator for up to a week. Make sure they are in a sealed container to prevent them from drying out.

    • Freezing: To extend their shelf life even further, these treats freeze beautifully! Cut them into squares, place parchment paper between layers, and store in a freezer-safe container or bag. They can last for up to 3 months.

    • Reheating: When you’re ready to enjoy those frozen delights, allow them to thaw in the refrigerator overnight. For a quick fix, pop them in the microwave for 20-30 seconds or heat them in the oven at 350°F (175°C) for about 10 minutes until warmed through.

    This way, you can enjoy these delectable sweet rhubarb treats whenever you feel the urge!

    Nutritional Value of I’M Officially Addicted To These Sweet Rhubarb Treats!

    Understanding the nutritional content of your sweet creation can help you enjoy them guilt-free. Here’s a breakdown of the estimated nutritional information for one serving (assuming a total of 16 servings from the full recipe):

    • Calories: Approximately 150
    • Fat: 5g (Healthy fats from coconut oil)
    • Carbohydrates: 24g (Includes natural sugars from rhubarb and added sweeteners)
    • Fiber: 1g (Contributes to digestion and fullness)
    • Proteins: 2g (Plant-based proteins from flour and optional nuts)
    • Vitamins: High in Vitamin C from rhubarb, promoting immune function.

    This information proves that while these sweet rhubarb treats make for a delicious dessert, they also carry some health benefits, making them a great addition to your dessert recipes collection!

    FAQs: Frequently Asked Questions About I’M Officially Addicted To These Sweet Rhubarb Treats!

    Can I use frozen rhubarb for this recipe?

    Absolutely! Just ensure the frozen rhubarb is thawed and drained of excess water to avoid a soggy texture.

    How can I make this recipe gluten-free?

    Simply replace the all-purpose flour with almond flour or a gluten-free all-purpose mix to create a gluten-free version.

    What should I serve with these sweet rhubarb treats?

    These treats pair exquisitely with vanilla ice cream or coconut yogurt for topping. You can also serve them plain or with a dusting of powdered sugar.

    Can this dessert be made ahead of time?

    Yes, as mentioned above, these treats store well in the refrigerator or freezer, making them perfect for meal prep or gatherings.

    Can I add other fruits to this recipe?

    Definitely! Berries like strawberries or blueberries work wonderfully with rhubarb and can add an extra burst of flavor.

    These FAQs address common queries and can assist your audience in navigating the unique aspects of your sweet rhubarb treats!

    By preparing these dessert recipes, you’re not only creating a wonderful treat but also opening the door to culinary creativity that caters to various tastes and dietary needs. This delightful journey into sweet rhubarb treats is sure to become a favorite among both novice and seasoned bakers alike!