Blog

  • The Best Korean BBQ Steak Bowls Recipe

    The Best Korean BBQ Steak Bowls Recipe

    The Best Korean BBQ Steak Bowls Recipe: A Tropical Delight

    Introduction to The Best Korean BBQ Steak Bowls Recipe

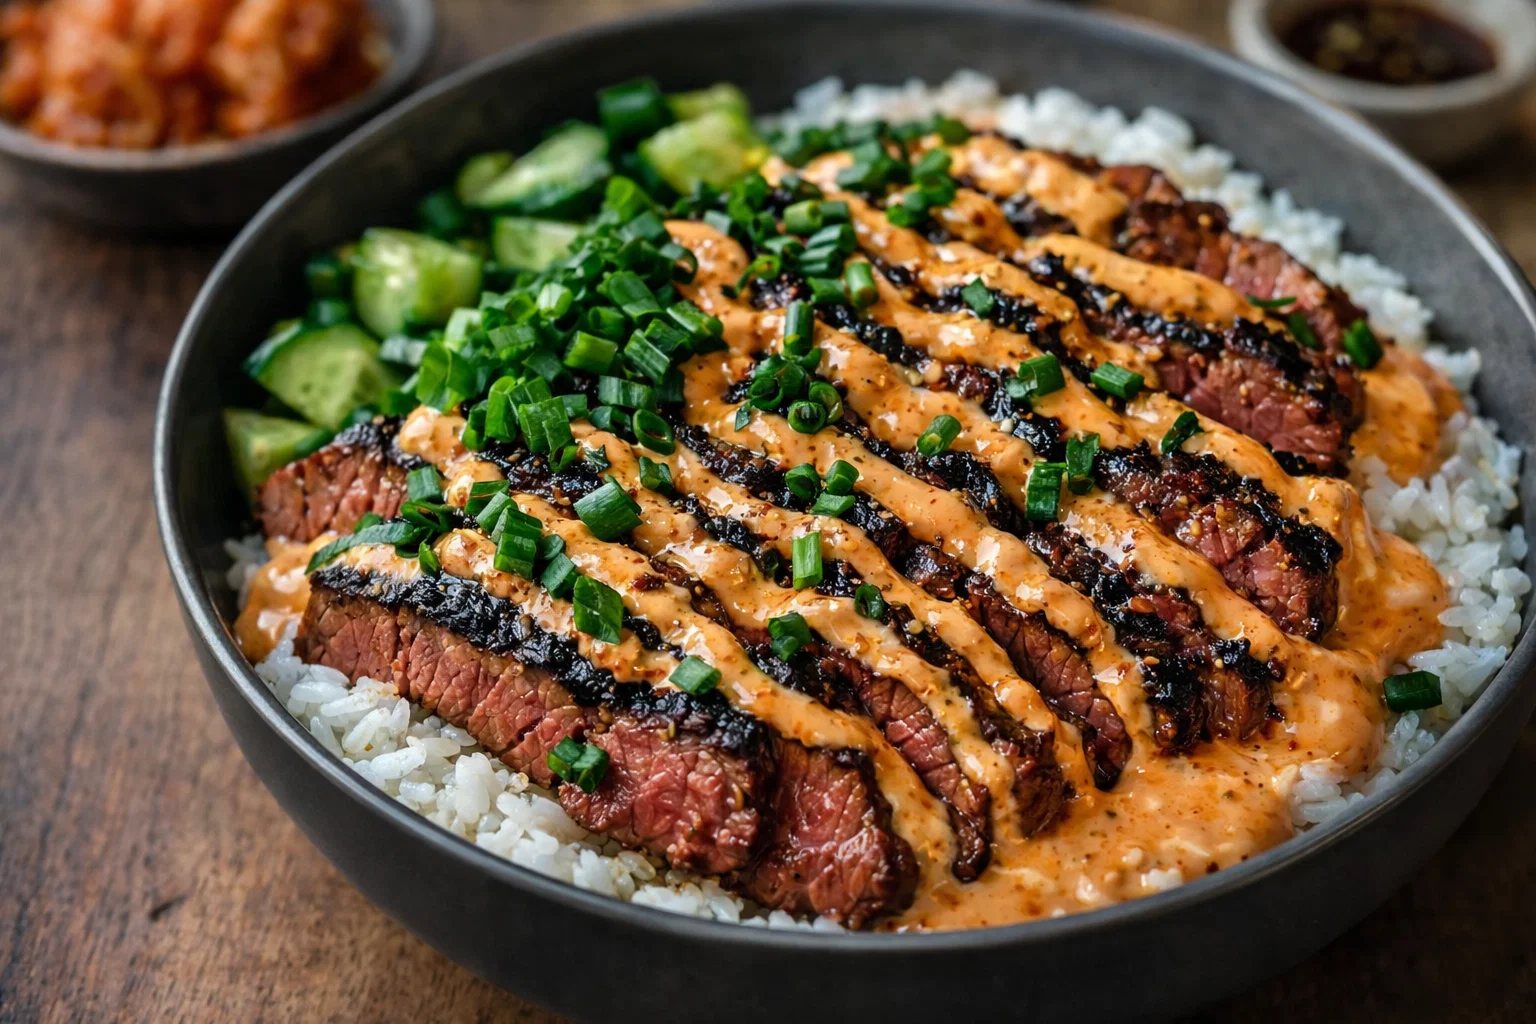
    When it comes to satisfying dinner recipes, few dishes can match the bold flavors and vibrant colors of Korean BBQ steak bowls. This recipe is not only a feast for the eyes but also a delightful journey for your taste buds, bringing together the rich umami of marinated steak, the crunchy freshness of veggies, and the nutty flavor of sesame. With its simplicity and health benefits, this dish is perfect for busy parents, health-conscious eaters, and culinary enthusiasts alike.

    The beauty of this Korean BBQ steak bowl is in its versatility. Easily customizable, it caters to various dietary needs, allowing for vegan, gluten-free, and low-carb options. Cooking at home can often seem daunting, but this recipe breaks down the process into easy-to-follow steps, making it accessible to both novice cooks and established chefs.

    Prepare to be wowed by the goodness packed into each bowl. Inspired by the vibrant flavors of traditional Korean cuisine, you can whip up a meal that is not only quick and convenient but also packed with nutrients and flavor. As you dive into this recipe, you’ll find yourself gravitating towards it time and again for both casual dinners and special occasions.

    Benefits and Advantages of The Best Korean BBQ Steak Bowls Recipe

    The allure of Korean BBQ steak bowls goes beyond their mouthwatering taste. Here are some standout benefits that make this dish an excellent choice for any mealtime:

    Ease of Preparation

    One of the major advantages of this recipe is its simplicity. The preparation requires minimal cooking techniques, which means that even beginner cooks can manage it confidently. It allows you to create a comforting, flavorful meal without spending hours in the kitchen. The marinade can be prepared in advance, and the cooking process is swift, letting you enjoy a homemade feast in less than 30 minutes.

    Health Benefits

    Korean BBQ steak bowls are not just delicious; they’re also healthy! Packed with protein from the beef, essential vitamins from the fresh vegetables, and healthy fats from the sesame oil, this dish provides a balanced diet. You control the ingredients, making it easy to omit anything that doesn’t fit your dietary restrictions. Additionally, it encourages the use of whole ingredients, moving away from processed foods.

    Customizable Options

    This recipe shines for its adaptability. You can tailor the ingredient list to match your taste preferences or dietary needs. Whether you’re looking for a gluten-free option, vegan alternatives, or simply aiming for a lower-calorie meal, this dish offers something for everyone. Customers can enjoy building their bowl with various toppings, creating a unique, personalized experience at each serving.

    Family-Friendly and Shareable

    Korean BBQ steak bowls can easily serve as a fantastic centerpiece for family dinner. Kids appreciate colorful and interactive meals, and these bowls offer just that—everyone gets to build their own unique creation. This can encourage better eating habits amongst children and promote family bonding during meals.

    The combination of ease, health benefits, versatility, and family-friendliness makes the Korean BBQ steak bowl not just another dish—it’s an enriching experience that will appeal to many different palates and preferences, making it a top contender in your collection of go-to dinner recipes.

    Ingredients Overview

    Essential Ingredients for The Best Korean BBQ Steak Bowls Recipe

    For the Marinade:
    Soy Sauce (½ cup): Opt for low-sodium if you’re watching your salt intake. This adds umami and flavor.
    Brown Sugar (2 tablespoons): Provides sweetness to balance the savory components.
    Sesame Oil (2 tablespoons): Adds a nutty flavor characteristic of Korean cuisine.
    Garlic (3 cloves, minced): A must for depth of flavor.
    Ginger (1-inch piece, grated): Imparts a zingy freshness.
    Black Pepper (1 teaspoon): Complementary spice to enhance flavors.

    For the Steak:
    Flank Steak (1 pound): Tender and perfect for marinating. Can be substituted with chicken breast or tofu for a vegetarian option.

    For the Bowl:
    Cooked Rice (2 cups): Traditional white rice or brown rice, quinoa, or cauliflower rice for a low-carb version.
    Cucumber (1, thinly sliced): Adds a refreshing crunch.
    Carrots (1, julienned): Sweet and colorful garnish.
    Red Cabbage (1 cup, finely shredded): Adds vibrant color and nutrients.
    Green Onions (2, chopped): For garnish and extra flavor.
    Sesame Seeds (1 tablespoon): To sprinkle on top for added texture.

    Dietary Substitutions to Customize Your The Best Korean BBQ Steak Bowls Recipe

    • Protein Alternatives: If you need a vegan option, swap the flank steak for tempeh or marinated tofu. If you’re avoiding gluten, utilize tamari in place of soy sauce.
    • Rice Alternatives: If you’re on a keto diet, consider cauliflower rice, zucchini noodles, or shirataki rice instead of traditional rice.
    • Veggie Variations: Incorporate other vegetables such as bell peppers, snow peas, or shredded spinach for extra nutrition and color.
    • Spice it Up: For those who enjoy heat, adding some gochujang (Korean chili paste) to the marinade can provide that extra kick.

    This ingredient overview is designed to ensure that everyone can enjoy a delightful bowl tailored to their dietary preferences!

    How to Prepare the Perfect The Best Korean BBQ Steak Bowls Recipe: Step-by-Step Guide

    1. Prepare the Marinade: In a bowl, combine soy sauce, brown sugar, sesame oil, minced garlic, grated ginger, and black pepper. Whisk until the sugar dissolves. This will infuse the steak with rich flavors.

    2. Marinate the Steak: Place your flank steak in a resealable bag or shallow dish and pour the marinade over. Ensure it’s well-coated. Marinate for at least 30 minutes or, for best results, refrigerate for up to 4 hours.

    3. Cook the Rice: While the steak marinates, cook your rice according to the package instructions. Allow it to cool slightly before serving.

    4. Prep the Veggies: During the cooking of the rice, thinly slice the cucumber, julienne the carrot, and shred the red cabbage. Chop the green onions for garnish. Organize them on a serving platter for an appealing presentation.

    5. Grill the Steak: Heat a grill or grill pan over medium-high heat. Remove the steak from the marinade and discard the excess marinade. Grill the steak for about 4–5 minutes per side for medium-rare, depending on thickness. Adjust cooking time for your preferred doneness.

    6. Slice the Steak: Once cooked, let the steak rest for about 5 minutes to retain juices. Then, slice it thinly against the grain to maximize tenderness.

    7. Assemble the Bowls: In each bowl, place a generous portion of rice as the base. Add sliced steak on top, followed by your prepared veggies—cucumbers, carrots, red cabbage.

    8. Final Touches: Drizzle with additional sesame oil if desired, sprinkle sesame seeds and chopped green onions on top for garnish.

    9. Serve Immediately: Enjoy your luscious Korean BBQ steak bowls hot!

    10. Customize: Encourage guests to customize their bowls with spicy sauce or additional toppings as desired.

    This step-by-step guide ensures that you can create a visually striking and delicious dish that embodies the essence of Korean cuisine! Perfectly suited for any occasion or family gathering, it pairs effortlessly with various sides, making it one of those go-to dinner recipes!

    Mastering The Best Korean BBQ Steak Bowls Recipe: Advanced Tips and Variations

    To take your Korean BBQ steak bowls from good to exceptional, consider these advanced tips and variations:

    Experiment with Marinades

    While the classic marinade is mouthwatering as is, you can explore flavors by adding ingredients such as apple cider vinegar for tanginess, or pineapple juice for sweetness and tenderness. Feel free to experiment with different herbs like cilantro for a refreshing kick.

    Try Different Cooking Methods

    If you’re without a grill, try pan-searing your steak in a cast-iron skillet for a gorgeous sear. Alternately, you could broil the steak in the oven for a flavorful crust. Each method introduces a different taste and texture to the dish.

    Play with Textures

    Adding nuts like crushed peanuts or almonds can add a delightful crunch to your bowls. Incorporating crispy shallots or fried garlic will enhance the textural contrast, making each bite delightful.

    Vegetable Medley

    Rotating seasonal vegetables not only keeps the recipe fresh but also ensures you’re getting a variety of nutrients. Think about roasting or stir-frying the vegetables lightly with a splash of soy sauce before adding them to the bowl.

    Sauce Savvy

    Different sauces can help elevate your bowls. Drizzle with a spicy gochujang sauce for a fusion twist or a tangy yogurt-based sauce to balance the flavors.

    Build a Feast

    Consider preparing a Korean-themed dinner spread with complementary side dishes such as kimchi, pickled vegetables, or steamed dumplings. This enhances the culinary experience and brings a touch of traditional Korean dining to your table.

    With these tips and variations, you’ll not only master the Korean BBQ steak bowl but also adapt it to suit any occasion and crowd, solidifying its status as a go-to dinner recipe.

    How to Store The Best Korean BBQ Steak Bowls Recipe: Best Practices

    Refrigeration

    To store your leftover Korean BBQ steak bowls, place the components (rice, steak, and veggies) in separate airtight containers. This methodology helps retain freshness. Refrigerated leftovers can last for 3 to 4 days.

    Freezing

    If you want to store your dish for an extended time, consider freezing the marinated steak before cooking. Wrap the steak tightly in plastic wrap followed by aluminum foil and freeze for up to 2 months. Cooked components do not freeze as well and are best consumed fresh.

    Reheating

    To reheat, use the microwave for convenience, heating separate components to avoid overcooking. Alternatively, you could rewarm the steak in a skillet over medium heat. Add a sprinkle of water and cover to steam and retain moisture.

    Whenever possible, assemble your new bowls fresh before serving, as this will preserve the delightful crunch of your vegetables.

    Utilizing these storage tips ensures that your Korean BBQ steak bowls stay just as delicious even days after preparation, maintaining their position among your favorite quick dinner recipes!

    Nutritional Value of The Best Korean BBQ Steak Bowls Recipe

    To make informed choices, understanding the nutritional value of your meals is crucial. Here’s a breakdown of the nutrition facts per serving (based on the recipe serving four):

    • Calories: 550
    • Protein: 28g
    • Fat: 18g
    • Carbohydrates: 65g
    • Fiber: 5g
    • Sugars: 8g
    • Sodium: 680mg (if using low-sodium soy sauce, adjust accordingly)

    Health Benefits Review

    This recipe offers a well-rounded meal rich in protein, vitamins, and minerals. The lean beef provides essential amino acids that promote muscle health, while the fresh vegetables contribute fiber, aiding digestion. Using brown rice as a base adds complexity with whole grains for sustained energy.

    Incorporating this dish into your weekly dinner repertoire delivers not only a feast for the senses but also nutritious ingredients—a balance many look for in modern dinner recipes.

    FAQs: Frequently Asked Questions About The Best Korean BBQ Steak Bowls Recipe

    Can I prepare the marinade in advance?

    Absolutely! You can prepare the marinade a day ahead, allowing the flavors to meld beautifully. Just store it in an airtight container in the refrigerator.

    What can I substitute for flank steak?

    If you’re looking for alternatives, sirloin, skirt steak, or even chicken breast are excellent choices. For a vegetarian option, marinated tofu or tempeh will provide that satisfying texture.

    Can I make this dish gluten-free?

    Yes! Simply use tamari in place of regular soy sauce, and ensure that your rice and other ingredients are certified gluten-free.

    Are there low-carb options available for this recipe?

    Certainly! You can replace traditional rice with cauliflower rice or zoodles (zucchini noodles) to keep it low-carb.

    How spicy is this recipe?

    This recipe allows for customization, so you can always adjust the spice level by adding gochujang to the marinade or swapping out for milder vegetables.

    How long can I store leftovers?

    Leftovers can be refrigerated for up to 3-4 days. It’s best to store components separately to maintain the freshness of each ingredient.

    This FAQ section should help address common concerns, making your cooking experience smoother and more enjoyable. Providing this information helps demystify the recipe, empowering even novice cooks to enjoy delightfully interactive dinner recipes that tantalize with Korean flavors.

    By following this guide, you can confidently prepare The Best Korean BBQ Steak Bowls for yourself, your family, and friends, exploring the rich tapestry of flavors that Korean cuisine offers, all while enjoying delicious and satisfying meal options. Enjoy your flavorful journey!

  • Easy Lobster Sauce Recipe

    Easy Lobster Sauce Recipe

    Easy Lobster Sauce Recipe: A Tropical Delight

    Introduction to Easy Lobster Sauce Recipe

    If you’re searching for easy dinner recipes that impress without overwhelming you in the kitchen, then look no further than this Easy Lobster Sauce Recipe. This delectable sauce takes the marine bounty of lobster and transforms it into a rich, creamy, and luxurious addition to your meals. Not only is it incredibly simple to make, but it also offers numerous health benefits—a true standout in the realm of seafood.

    The beauty of this lobster sauce lies in its simplicity. With just a few quality ingredients, you can create a dish that feels elevated and gourmet yet fits seamlessly into a busy weekday dinner or a romantic date night. Ideal for home cooks and busy parents alike, this sauce pairs beautifully with pasta, rice, or even as a topping for seafood dishes.

    Moreover, it caters to various dietary needs. With gluten-free and reduced-calorie options available, this dish invites everyone to indulge guilt-free. Imagine sitting down to a lovely plate of spaghetti topped with this buttery lobster sauce, savoring its rich flavors without any dietary restrictions holding you back.

    In the following sections, we’ll explore the well-rounded benefits of this recipe, detail the essential ingredients, and guide you through the preparation process so you can confidently whip up this tropical delight in your own kitchen.

    Benefits and Advantages of Easy Lobster Sauce Recipe

    When seeking easy dinner recipes, it’s crucial to consider not just the taste but also the preparation and health benefits. This Easy Lobster Sauce Recipe brings a plethora of advantages to the table.

    1. Simplicity in Preparation

    One of the standout attributes of this recipe is its ease of preparation. Unlike traditional complex sauces that require hours of simmering, our lobster sauce can be whipped up in under 30 minutes. The uncomplicated step-by-step approach means you don’t have to be a culinary expert to get it right, making it a perfect choice for novice cooks and experienced chefs alike.

    2. Health Benefits

    Lobster is not only delicious but also packed with nutrients. Rich in protein, low in calories, and loaded with essential vitamins and minerals, it supports a healthy lifestyle. This easy lobster sauce recipe utilizes cream, which can be substituted with lower-calorie alternatives or plant-based options for those watching their diet. The incorporation of fresh herbs and spices provides additional health benefits without overwhelming the palate.

    3. Versatility

    This recipe isn’t just confined to one cuisine; its versatile nature allows it to elevate a variety of dishes. Whether you pair it with pasta, drizzle it over grilled chicken, or use it as a base for seafood dishes, your options are limitless. It could easily fit into various culinary themes—from casual weeknight dinners to elegant weekend gatherings—making it a valuable addition to your recipe repertoire.

    4. Dietary Adaptations

    For health-conscious individuals, this sauce can be tailored to fit diverse dietary needs. It can easily be turned vegan by using plant-based cream substitutes, and gluten-free by selecting appropriate pasta or thickening agents. This flexibility ensures that it can be enjoyed by everyone, regardless of dietary restrictions.

    To sum it up, this Easy Lobster Sauce is not merely a recipe—it’s a holistic dish that combines simplicity, health benefits, and adaptability. It brings a sense of luxury to everyone’s table while remaining grounded in easy dinner recipes that don’t compromise on flavor or convenience.

    Ingredients Overview

    Essential Ingredients for Easy Lobster Sauce Recipe

    Creating the perfect Easy Lobster Sauce requires some carefully selected ingredients:

    • 2 cups cooked lobster meat: Fresh or leftover lobster can be used. It provides the rich flavor that characterizes the sauce.

    • 1 cup heavy cream (or coconut cream for a dairy-free option): This ingredient lends a luxurious texture and richness to the sauce.

    • 2 tablespoons unsalted butter: Adds creaminess and enhances flavor. For a vegan option, you can use olive oil or vegan butter.

    • 2 cloves garlic, minced: Infuses the sauce with aromatic essence.

    • 1/4 cup finely chopped shallots: Provides a slight sweetness that balances the seafood.

    • 1/4 cup white wine (optional): Enhances the depth of flavor, but can be substituted with vegetable broth for a non-alcoholic version.

    • Salt and black pepper to taste: Essential for enhancing flavors.

    • Fresh parsley or chives for garnish: Offers color and freshness.

    These ingredients encapsulate the essence of our Easy Lobster Sauce. They can be easily swapped or modified based on availability or personal preference.

    Dietary Substitutions to Customize Your Easy Lobster Sauce Recipe

    • Vegan Option: Substitute heavy cream with coconut milk and the unsalted butter with olive oil or vegan butter. The flavor will remain rich, while catering to vegan diets.

    • Gluten-Free Option: Ensure that the pasta used (if any) and any thickening agents (if needed) are certified gluten-free.

    • Low-Calorie Version: Use light cream or milk instead of heavy cream for a lower-fat option. Alternatively, a blend of vegetable broth and a small amount of cornstarch can offer a lighter sauce without sacrificing flavor.

    These substitutions allow this recipe to cater to a wider audience, demonstrating that easy dinner recipes can be adaptable and accommodating.

    How to Prepare the Perfect Easy Lobster Sauce Recipe: Step-by-Step Guide

    Creating this Easy Lobster Sauce is a breeze, thanks to its straightforward preparation. Follow these simple steps to achieve a restaurant-quality sauce at home:

    1. Prepare the Base: Start by melting the butter in a medium saucepan over medium heat. Ensure your pan is hot enough to heat the butter without burning it.

    2. Sauté the Aromatics: Once the butter melts, add the minced garlic and chopped shallots. Sauté for about 2-3 minutes until they are fragrant and translucent. This step enhances the base flavor of your sauce.

    3. Add White Wine: If using white wine, pour it into the pan now. Scrape any browned bits off the bottom—this is where the concentrated flavor lies. Allow the wine to reduce by half, which will take about 3-4 minutes.

    4. Incorporate Cream: Lower the heat and slowly stir in the heavy cream (or coconut cream for a vegan option). Allow the mixture to simmer for about 5 minutes, stirring continuously to prevent it from thickening too much.

    5. Add Lobster and Season: Gently fold the cooked lobster meat into the cream mixture and season with salt and black pepper. Allow it to heat through for another 3-4 minutes.

    6. Thicken the Sauce (Optional): If desired, you could thicken the sauce further by mixing 1 tablespoon of cornstarch with 2 tablespoons of water and adding it to the sauce. Stir until thickened.

    7. Garnish and Serve: Once heated through, taste and adjust seasoning if necessary. Serve over your choice of pasta, rice, or grilled meat, and garnish with fresh parsley or chives for a pop of color.

    8. Pairing Options: This sauce goes exceptionally well with fettuccine or linguine, but any pasta of your choice will suffice. For a lighter option, serve over steamed vegetables or in a seafood stew.

    This step-by-step guide ensures that your Easy Lobster Sauce comes out perfect every time. The adaptability of this recipe highlights its appeal as one of your go-to easy dinner recipes.

    Mastering Easy Lobster Sauce Recipe: Advanced Tips and Variations

    To elevate your Easy Lobster Sauce further, consider these advanced tips and variations:

    • Add a Kick of Spice: For those who enjoy a bit of heat, consider adding a pinch of red pepper flakes or a splash of hot sauce while sautéing the garlic to give the sauce a fiery twist.

    • Experiment with Cheeses: A sprinkle of grated Parmesan or Pecorino Romano cheese can add an extra layer of flavor. Just be cautious of cheese’s salt content when seasoning.

    • Use Different Shellfish: If you can’t find lobster or prefer a different flavor profile, shrimp or scallops can create equally delightful variations. Simply substitute the lobster with an equal amount of your chosen shellfish.

    • Herbal Infusion: Fresh basil or tarragon can add a unique twist to the classic recipe. Simply chop and add them in at the end of the cooking process for a burst of flavor.

    • Serving Suggestions: Serve your sauce over a bed of zucchini noodles for a low-carb option or accompany it with crusty bread to soak up the wonderful flavors.

    These tips and tweaks can transform this Easy Lobster Sauce into a signature dish that never feels stale or repetitive.

    How to Store Easy Lobster Sauce Recipe: Best Practices

    Storing your Easy Lobster Sauce properly is essential for maintaining its delicious flavor and texture. Here are the best practices for refrigeration and freezing:

    • Refrigeration: Allow the sauce to cool completely before transferring it to an airtight container. It can be kept in the refrigerator for up to 3 days. Make sure to reheat it gently on the stove, adding a splash of cream to bring it back to life.

    • Freezing: If you want to extend the shelf life, consider freezing the sauce. Divide it into portions in freezer-safe containers and label them with the date. It can stay fresh for up to 3 months. To thaw, simply move the container to the refrigerator overnight or reheat directly from frozen on low heat.

    Using these storage tips will ensure that your Easy Lobster Sauce remains an easy dinner recipe that’s ready to please whenever cravings strike.

    Nutritional Value of Easy Lobster Sauce Recipe

    Understanding the nutritional content of your Easy Lobster Sauce can help you make informed choices, especially if you’re watching your diet. Here’s a general overview based on a serving size of approximately 1/4 cup of the sauce:

    • Calories: Approximately 210
    • Total Fat: 14g (Saturated Fat: 8g)
    • Cholesterol: 50mg
    • Sodium: 280mg
    • Total Carbohydrates: 4g
    • Dietary Fiber: 0g
    • Sugars: 0g
    • Protein: 17g

    This sauce delivers a healthy dose of protein thanks to the lobster, alongside beneficial fats from cream and butter. Adjusting the recipe by opting for low-fat ingredients can further reduce the calorie count, making it an adaptable choice for health-conscious individuals.

    Including easy dinner recipes in your meal rotation doesn’t have to mean sacrificing nutrition. With this lobster sauce, deliciousness is guaranteed.

    FAQs: Frequently Asked Questions About Easy Lobster Sauce Recipe

    1. Can I use frozen lobster for this sauce?

    Absolutely! If fresh lobster is unavailable, frozen lobster can work well. Thaw it completely in the refrigerator before cooking.

    2. How can I make this sauce spicier?

    To add heat, you can include red pepper flakes or diced jalapeños while sautéing the garlic. Adjust to your desired heat level.

    3. What should I serve with lobster sauce?

    This sauce pairs excellently with pasta, rice, grilled chicken, or even as part of a seafood stew. The options are versatile.

    4. Can I substitute the cream for a non-dairy option?

    Yes, coconut cream or cashew cream are excellent substitutes for a vegan or dairy-free adaptation.

    5. How do I store leftovers?

    Refrigerate in an airtight container for up to 3 days or freeze for longer storage. Reheat gently on the stove, adding a splash of cream to restore consistency.

    6. Is it possible to make this recipe ahead of time?

    Yes, you can prepare the sauce a day in advance. Store it in the refrigerator and reheat before serving.

    In summary, the Easy Lobster Sauce Recipe is a culinary delight that promises to elevate your dining experience. With its health-conscious alternatives, simplicity, and versatility, it’s one of those easy dinner recipes that will quickly become a staple in your kitchen. Enjoy the tropical richness and creamy flavor this sauce brings, and don’t hesitate to get creative with variations to suit your tastes!

  • Cozy 20-Minute Marry Me Chickpeas

    Cozy 20-Minute Marry Me Chickpeas

    Cozy 20-Minute Marry Me Chickpeas: A Tropical Delight

    Introduction to Cozy 20-Minute Marry Me Chickpeas

    Looking for easy dinner recipes that not only delight your palate but also offer a myriad of health benefits? Look no further! Cozy 20-Minute Marry Me Chickpeas is the perfect dish to whip up on a busy weeknight. This wholesome meal is packed with protein, fiber, and vibrant flavors, appealing to everyone from busy parents to students seeking quick and satisfying meals.

    Imagine a dish that caters to diverse dietary preferences. Whether you’re vegan, gluten-free, or simply looking to enjoy a healthy meal, this recipe has you covered. In just 20 minutes, you can create a delicious stew of chickpeas, tomatoes, and spices that will warm your heart and soul. Not only is it quick and easy to prepare, but it’s also an excellent choice for those on a budget or anyone who wants to eat well without spending hours in the kitchen.

    This Marry Me Chickpeas recipe stands out because it’s not only meal-friendly but also love-friendly—it’s rumored that anyone who tries it might just fall in love with the dish! With enticing flavors and colors, this dish brightens up any dinner table and surely impresses friends and family alike.

    Benefits and Advantages of Cozy 20-Minute Marry Me Chickpeas

    Cozy 20-Minute Marry Me Chickpeas brings a plethora of benefits to the table, making it a quintessential choice for those searching for easy dinner recipes. Here’s why this delightful chickpea dish excels:

    1. Simplicity: In today’s fast-paced world, quick and straightforward cooking is essential. This recipe contains fewer ingredients and requires minimal prep time, making it ideal for those who are busy yet wish to eat healthily.

    2. Nutritional Powerhouse: Chickpeas are rich in protein and fiber, contributing to satiety and energy levels. This dish helps keep you feeling full longer, making it a great option for weight watchers or health-conscious individuals.

    3. Customizable Ingredients: The recipe’s ingredients can easily be adjusted based on personal preferences or dietary restrictions. Whether you’re vegan, vegetarian, or just looking to reduce meat intake, the versatility of this dish sets it apart.

    4. Health Benefits: Incorporating legumes like chickpeas supports digestion and helps stabilize blood sugar levels. Additionally, they contain essential vitamins and minerals such as iron, magnesium, and potassium, which are crucial for overall health.

    5. Family-Friendly: With its delightful combination of flavors, this recipe appeals to kids and adults alike. It’s a great way to introduce more plant-based meals into your family’s diet while ensuring they enjoy it at the same time.

    6. Budget-Friendly: Chickpeas are economical and can stretch further when combined with other pantry staples. This makes Cozy 20-Minute Marry Me Chickpeas a perfect option for students or anyone looking to save on their grocery bills.

    In summary, whether you’re exploring meal prepping or simply need new easy dinner recipes that the entire family can enjoy, Cozy 20-Minute Marry Me Chickpeas ticks all the boxes. With its easy preparation and numerous health benefits, you’ll want to make this dish a staple in your kitchen.

    Ingredients Overview

    Essential Ingredients for Cozy 20-Minute Marry Me Chickpeas

    To make Cozy 20-Minute Marry Me Chickpeas, gather the following ingredients:

    • 1 can (15 oz.) chickpeas, drained and rinsed
    • Purpose: Provides a high-protein base and adds fiber to the dish.

    • 1 can (14 oz.) diced tomatoes (preferably organic)

    • Purpose: Adds flavor and moisture, while offering vitamins C and A.

    • 2 tablespoons olive oil

    • Purpose: Healthy fat that enhances flavor and supports heart health. For a lower-calorie option, use less oil.

    • 1 small onion, diced

    • Purpose: Adds sweetness and depth to the dish.

    • 3 cloves garlic, minced

    • Purpose: Infuses the dish with rich flavor while providing numerous health benefits.

    • 1 teaspoon ground cumin

    • Purpose: Offers a warm aroma and helps with digestion.

    • 1 teaspoon smoked paprika

    • Purpose: Imparts a lovely smokiness and enhances the overall taste.

    • Salt and pepper, to taste

    • Purpose: Essential for balancing flavors.

    • Fresh cilantro or parsley, for garnish (optional)

    • Purpose: Adds freshness and enhances presentation.

    This ingredients list contains vegan, gluten-free, and low-calorie options, making it ideal for diverse dietary needs. Feel free to swap out any ingredients based on availability or preference, ensuring this dish fits perfectly into your lifestyle.

    Dietary Substitutions to Customize Your Cozy 20-Minute Marry Me Chickpeas

    Customization is key when striving for easy dinner recipes that cater to everyone. Here are potential substitutions to create the perfect Cozy 20-Minute Marry Me Chickpeas:

    • To make it a heartier meal: Add cooked quinoa or brown rice to enhance the protein and provide additional textures.

    • For extra greens: Incorporate spinach or kale during the cooking process for added nutrients.

    • If avoiding tomatoes: Substitute with coconut milk for a creamy alternative while still preserving moisture.

    • If you like heat: Add diced jalapeños or a pinch of red pepper flakes for a spicy kick.

    • Herbal alternatives: If you don’t have cilantro or parsley, use fresh basil or mint for a different but refreshing flavor profile.

    By allowing yourself to experiment with these substitutions, you open the door to an array of delicious variations while making sure everyone at the table finds something they love.

    How to Prepare the Perfect Cozy 20-Minute Marry Me Chickpeas: Step-by-Step Guide

    Preparing Cozy 20-Minute Marry Me Chickpeas is incredibly simple, making it a prime choice for busy weeknights. Follow the steps below for a perfect dish:

    1. Prepare the Base: In a large skillet, heat the olive oil over medium heat. Add the diced onion and sauté for about 3-4 minutes until translucent.

    2. Mix in Garlic: Once the onion is softened, add the minced garlic and sauté for an additional minute until fragrant. This step intensifies the dish’s flavor profile.

    3. Cook the Tomatoes: Pour in the canned diced tomatoes with their juices. Stir to combine and allow the mixture to simmer for about 2-3 minutes, letting the flavors meld together.

    4. Add Chickpeas: Stir in the drained chickpeas, mixing well until they are fully incorporated with the tomato mixture. Allow them to cook for an additional 3-4 minutes, heating through.

    5. Season Generously: Add ground cumin, smoked paprika, salt, and pepper to taste. Mix well, ensuring that spices coat the chickpeas and tomatoes evenly.

    6. Let It Simmer: Reduce the heat to low and let the mixture simmer for another 2-3 minutes. This allows the flavors to deepen and enhances the overall taste of the dish.

    7. Garnish and Serve: Once cooked, remove the skillet from heat. Garnish with chopped cilantro or parsley before serving for an extra touch of freshness.

    8. Pair with Your Favorite Side: Serve the chickpeas with crusty bread, over rice, or with a green salad for a complete meal.

    And there you have it! A simple yet delectable way to create a cozy evening meal. Feel free to adapt any step to suit your taste or dietary needs.

    Mastering Cozy 20-Minute Marry Me Chickpeas: Advanced Tips and Variations

    While the base recipe for Cozy 20-Minute Marry Me Chickpeas is absolutely divine on its own, mastering this dish can open up a world of culinary opportunities. Here are some advanced tips and variations to elevate your cozy dinner experience:

    • Experiment with Spices: Don’t hesitate to explore different spice combinations like curry powder or Moroccan spices for a unique twist. Adjust the quantities according to your heat preference.

    • Incorporate Seasonal Vegetables: Add seasonal veggies such as bell peppers or zucchini to bulk up the dish and add diversity to the flavors and textures.

    • Protein Boost: For those who consume meat, consider adding grilled chicken or shrimp towards the end of cooking for a non-vegan version that offers more protein.

    • Creamy Twist: To make the dish creamier, stir in a dollop of coconut yogurt or a splash of coconut cream just before serving.

    • Meal Prep for Busy Nights: Double the recipe and store leftovers in an airtight container for quick meals on the go. The dish holds up well in the refrigerator for 3-4 days.

    • Make It a One-Pot Meal: Cook everything in a Dutch oven or heavy bottom pot for an even simpler cleanup process, making it even more suitable for busy weeknights.

    With these advanced tips and variations, you can keep this recipe fresh and exciting, ensuring it remains a staple in your quick dinner rotation.

    How to Store Cozy 20-Minute Marry Me Chickpeas: Best Practices

    Storing Cozy 20-Minute Marry Me Chickpeas properly ensures you get the most out of your meal without waste. Here are some best practices for refrigeration, freezing, and reheating:

    • Refrigeration: Allow the chickpeas to cool completely before placing them in an airtight container. Store in the refrigerator for up to 3-4 days. This makes it an excellent choice for easy meal prep.

    • Freezing: If you want to store them for longer, transfer the cooled chickpeas into freezer-safe bags or containers. They can be frozen for up to 3 months. Be sure to label the bags with the date to keep track.

    • Reheating: When ready to enjoy leftovers, reheat on the stovetop over medium heat. Add a few tablespoons of water or broth to rehydrate the dish as it heats. Alternatively, you can use the microwave, heating in short intervals to ensure even warming.

    By following these storage tips, you can enjoy your Cozy 20-Minute Marry Me Chickpeas multiple times with the flavors intact.

    Nutritional Value of Cozy 20-Minute Marry Me Chickpeas

    Understanding the nutritional value of Cozy 20-Minute Marry Me Chickpeas adds to its allure as a healthy meal choice. Here’s a breakdown of the nutrition information per serving (approximately 1 cup):

    • Calories: 280
    • Total Fat: 10g
    • Saturated Fat: 1.5g
    • Cholesterol: 0mg
    • Sodium: 350mg
    • Carbohydrates: 36g
    • Dietary Fiber: 9g
    • Sugars: 5g
    • Protein: 12g
    • Vitamin A: 8% of the Daily Value (DV)
    • Vitamin C: 15% of the DV
    • Calcium: 6% of the DV
    • Iron: 18% of the DV

    This recipe not only fits well into plant-based diets but also offers a hearty serving of vital nutrients. These numbers can vary based on extra added ingredients but give a general idea of how nutritious this delightful dish is. Making Cozy 20-Minute Marry Me Chickpeas a regular in your weekly meal rotation can contribute to a balanced, healthy diet while indulging in delicious flavors.

    FAQs: Frequently Asked Questions About Cozy 20-Minute Marry Me Chickpeas

    1. Can I use dried chickpeas instead of canned ones?

    Yes, you can use dried chickpeas, but you must soak and cook them beforehand. This will take more time than the original recipe, so ensure you plan ahead.

    2. What can I serve with Marry Me Chickpeas?

    Serve Cozy 20-Minute Marry Me Chickpeas with rice, quinoa, pita bread, or a fresh salad to create a well-rounded meal.

    3. Is it suitable for meal prep?

    Absolutely! This dish reheats beautifully, making it an excellent choice for meal prepping for your busy week.

    4. Can I make it spicy?

    Certainly! Adjust the spice level by adding jalapeños or red pepper flakes during cooking to cater to your heat preference.

    5. How long can I store leftovers?

    Store leftovers in an airtight container in the refrigerator for up to 3-4 days or freezing for up to 3 months for best flavor preservation.

    With these answers to common queries, you are well-equipped to tackle the Cozy 20-Minute Marry Me Chickpeas recipe and enjoy a delightful, fuss-free dinner experience. Dive into this recipe today, and you’ll see why it’s become a favorite for so many home cooks!


    In conclusion, Cozy 20-Minute Marry Me Chickpeas is not just a meal; it’s a culinary embrace that invites everyone to the table. Simplistic ingredients, health benefits, and an easy-to-follow recipe make it the quintessential option for anyone searching for easy dinner recipes. Whether you’re a culinary novice or seasoned chef, this dish is sure to captivate you and your loved ones!

  • Tasty Honey-Lime Garlic Butter Salmon

    Tasty Honey-Lime Garlic Butter Salmon

    Tasty Honey-Lime Garlic Butter Salmon: A Tropical Delight

    Introduction to Tasty Honey-Lime Garlic Butter Salmon

    If you’re on the hunt for an exceptional dish that marries the sweet and tangy flavors of honey and lime with the rich, buttery essence of salmon, look no further than Tasty Honey-Lime Garlic Butter Salmon. This dish epitomizes the term “salmon recipes,” bringing a tropical flair to your dinner table while being simple enough for any home cook to whip up in no time.

    Salmon is renowned for its health benefits, packed with omega-3 fatty acids, high-quality proteins, and essential vitamins and minerals. This meal not only pleases the palate but also nourishes the body, making it perfect for busy parents looking to prepare healthy meals, students who want delicious, easy options, or anyone health-conscious who still wants to savor food. Plus, the ingredients are versatile enough to fit into various dietary needs including gluten-free, low-carb, and even vegan adaptations.

    With this recipe, you’ll discover how easy it is to create a gourmet experience right in your own kitchen. Whether you’re a newlywed trying to impress your partner, a working professional in need of quick yet impressive meals, or a baking enthusiast eager to explore new flavors, this salmon dish promises to deliver satisfaction and delight. Let’s dive into the specifics of making this delicious culinary creation!


    Benefits and Advantages of Tasty Honey-Lime Garlic Butter Salmon

    The Tasty Honey-Lime Garlic Butter Salmon recipe stands out among numerous salmon recipes for several important reasons. First and foremost, its preparation is exceptionally straightforward. With only a handful of ingredients and a cooking time of roughly 30 minutes, busy cooks can easily fit this dish into their evening routines without compromising flavor or nutrition. This simplicity makes it ideal for families striving to maintain healthy eating habits amidst a hectic lifestyle.

    Moreover, the health benefits that salmon offers are myriad. This fish is not only rich in omega-3 fatty acids, which support heart health and brain function, but it also provides an excellent source of high-quality protein. In addition to calcium and vitamin D, salmon contributes important nutrients necessary for maintaining strong bones and optimal immune function. The incorporation of honey and lime not only enhances the flavor profile but also adds a host of antioxidants and vitamins, making the dish even healthier.

    Another noteworthy advantage of this recipe is its adaptability. Whether you’re adhering to a gluten-free diet or are looking for ways to reduce caloric intake, the Tasty Honey-Lime Garlic Butter Salmon can be modified to meet various dietary requirements. For those following a vegan diet, alternatives to the butter and fish can be effortlessly paired with the same created sauce for a delectable vegetable dish.

    Lastly, the combination of savory, sweet, and tangy flavors makes this dish an extraordinary option for diverse palates. It’s perfect for entertaining guests or simply enjoying as a weekday family dinner. With its crowd-pleasing ingredients, this dish is a versatile favorite that you can confidently present at any gathering—or savor all to yourself!


    Ingredients Overview

    Essential Ingredients for Tasty Honey-Lime Garlic Butter Salmon

    Here’s what you’ll need for this delightful dish:

    • Salmon Fillets (4 pieces – around 6 ounces each): Opt for fresh or wild-caught salmon to attain the best flavor and health benefits.
    • Honey (1/4 cup): This natural sweetener adds a delicious caramelization when cooked while contributing antioxidants.
    • Lime Juice (from 2 limes): Provides a refreshing citrusy tang that balances the richness of the salmon and butter.
    • Garlic (4 cloves, minced): The aromatic quality of garlic adds depth to the dish.
    • Unsalted Butter (5 tablespoons): Use this for its rich flavor; opt for vegan butter to make it vegan-friendly.
    • Fresh Cilantro (for garnish): Enhances visual appeal while contributing a fresh flavor that pairs wonderfully with our sauce.
    • Salt and Pepper (to taste): Essential for seasoning.

    Vegan Option: Substitute the salmon with tofu or chickpeas, and use vegan butter instead of regular butter.

    Dietary Substitutions to Customize Your Tasty Honey-Lime Garlic Butter Salmon

    This recipe allows for several substitutions to cater to various dietary needs:

    • Low-Calorie Alternatives: Use a light butter or a plant-based oil to cut down on fat and calories.
    • Gluten-Free Option: Ensure your butter is gluten-free; all other ingredients should already be suitable for gluten-sensitive diets.
    • Dairy-Free Alternative: Consider using coconut oil or a dairy-free spread in lieu of butter for those sensitive to dairy.
    • Spicy Kick: Add a pinch of red pepper flakes or a dash of sriracha for heat if you’re looking for extra flavor.

    With these substitutions in mind, Tasty Honey-Lime Garlic Butter Salmon can be enjoyed by everyone, regardless of their dietary preferences!


    How to Prepare the Perfect Tasty Honey-Lime Garlic Butter Salmon: Step-by-Step Guide

    Follow these easy steps to prepare Tasty Honey-Lime Garlic Butter Salmon that your friends and family will rave about.

    1. Preheat the Oven: Start by preheating your oven to 350°F (175°C). This ensures the salmon cooks evenly and achieves that wonderful, flaky texture.

    2. Prepare the Baking Dish: Lightly grease a baking dish with cooking spray or a tablespoon of oil to prevent sticking.

    3. Mix Garlic Butter Sauce: In a medium bowl, combine the softened unsalted butter, minced garlic, honey, freshly squeezed lime juice, and a pinch of salt. Whisk until well blended, creating a luscious glaze.

    4. Season the Salmon: Place the salmon fillets in the prepared baking dish. Season the fillets with salt and pepper to taste.

    5. Pour the Sauce: Drizzle half of the honey-lime garlic butter sauce over the salmon fillets. Reserve the other half for later use.

    6. Bake the Salmon: Transfer the baking dish to the preheated oven. Bake for 15-20 minutes, or until the salmon easily flakes with a fork. Adjust baking time according to fillet thickness.

    7. Broil for Extra Flavor (Optional): If you desire a caramelized crust, switch the oven to broil mode for the last 2-3 minutes. Keep a close eye on it to prevent burning!

    8. Garnish and Serve: Remove the baking dish from the oven. Drizzle the remaining garlic butter sauce over the salmon and sprinkle with fresh cilantro for an aromatic finish.

    9. Plate and Enjoy: Serve the Tasty Honey-Lime Garlic Butter Salmon with a side of roasted vegetables, rice, or a fresh salad. Indulge in the tropical flavors!

    For those interested in variations, consider cooking the salmon on the grill or in a skillet. The keyphrase “salmon recipes” comes into play here as you explore contemporary cooking methods that bring new textures and flavors.


    Mastering Tasty Honey-Lime Garlic Butter Salmon: Advanced Tips and Variations

    To elevate your culinary experience with Tasty Honey-Lime Garlic Butter Salmon, keep these advanced tips in mind:

    • Marinate for Enhanced Flavor: For an even more robust taste, marinate the salmon in the honey-lime garlic butter sauce for at least 30 minutes before cooking. This allows the flavors to penetrate the fish, making every bite bursting with deliciousness.

    • Experiment with Herbs: While cilantro is a fantastic garnish, don’t hesitate to try other fresh herbs such as parsley or basil. They each bring a unique and refreshing note to the dish.

    • Try Different Sauces: If you want to mix things up, you can create a miso glaze by replacing honey with miso paste and adding a dash of sesame oil. This variation creates a different flavor profile while staying true to the essence of salmon recipes.

    • Explore Cooking Methods: Besides baking, this recipe works wonderfully on the grill, where the honey caramelizes beautifully and adds a smoky depth to the salmon. Alternatively, pan-sear the salmon for a crispy skin texture.

    Implementing these tips will ensure that your Tasty Honey-Lime Garlic Butter Salmon becomes a signature dish you’ll come back to time and again.


    How to Store Tasty Honey-Lime Garlic Butter Salmon: Best Practices

    Storing your leftover Tasty Honey-Lime Garlic Butter Salmon is essential to retaining its flavorful essence. Here’s how to do it correctly:

    1. Refrigeration: Allow the salmon to cool down to room temperature before placing it in an airtight container. It can be stored in the refrigerator for up to 3 days.

    2. Freezing: If you want to keep it longer, vacuum seal the salmon or place it in a freezer-safe bag after cooling. It can be frozen for up to 3 months. Make sure to label it with the date for your reference.

    3. Reheating: When you’re ready to indulge in your leftovers, gently reheat the salmon in the oven or on the stove over medium-low heat to maintain tenderness. Avoid using the microwave, as this can dry out the fish.

    Even after storing, the essence of Tasty Honey-Lime Garlic Butter Salmon remains well-preserved when done correctly—ensuring the flavors stay intact for future enjoyment.


    Nutritional Value of Tasty Honey-Lime Garlic Butter Salmon

    One of the many reasons Tasty Honey-Lime Garlic Butter Salmon is a favorite among salmon recipes is its impressive nutritional profile. Here’s a breakdown of the key nutrients found in one serving (approximately 6 oz of salmon with sauce):

    • Calories: 350–400 calories, depending on the amount of butter used.
    • Protein: 34 g – an excellent source of lean protein vital for muscle health.
    • Fat: 20 g – includes healthy fats from salmon and butter.
    • Carbohydrates: 16 g – primarily from honey.
    • Omega-3 Fatty Acids: 2.5 g – supports cardiovascular health.
    • Vitamin D: 570 IU – crucial for bone health and immune function.
    • Calcium: 20% of the Daily Value – essential for strong bones and teeth.

    This dish not only fulfills dietary requirements but does so deliciously. The variety of health benefits from salmon combined with tangy lime and sweet honey makes this a wholesome and satisfying meal. Whether you’re meal prepping for the week or looking to impress at dinner parties, the nutritional value will always stand out!


    FAQs: Frequently Asked Questions About Tasty Honey-Lime Garlic Butter Salmon

    1. Can I use frozen salmon for this recipe?

    Yes, frozen salmon can work; however, ensure it’s thoroughly thawed before cooking for best results.

    2. What can I serve with Tasty Honey-Lime Garlic Butter Salmon?

    This dish pairs well with steamed vegetables, jasmine rice, quinoa, or a fresh salad for a complete meal.

    3. Can I substitute honey with a different sweetener?

    Absolutely! Maple syrup or agave nectar can be good alternatives for those avoiding honey.

    4. How do I know when the salmon is fully cooked?

    Salmon is usually done when its internal temperature reaches 145°F (63°C) and flakes easily with a fork.

    5. Is this dish suitable for meal prep?

    Yes, Tasty Honey-Lime Garlic Butter Salmon makes a fantastic meal prep option since it stays fresh for a few days when stored properly.


    The Tasty Honey-Lime Garlic Butter Salmon recipe not only captures the simplicity and health benefits of salmon but also serves as a delightful canvas for culinary creativity. As you embrace this easy dish, you’ll discover why it ranks among the best salmon recipes available. So, roll up your sleeves, gather your ingredients, and bring a taste of the tropics to your kitchen!

  • Easy Breakfast Protein Biscuits

    Easy Breakfast Protein Biscuits

    Easy Breakfast Protein Biscuits: A Tropical Delight

    Introduction to Easy Breakfast Protein Biscuits

    Breakfast is often dubbed the most important meal of the day, yet busy schedules can make it a challenge to whip up something nutritious. That’s where our Easy Breakfast Protein Biscuits shine as the perfect solution for anyone looking for quick and healthy breakfast ideas. These delightful biscuits aren’t just simple to prepare; they are also a powerhouse of nutrition—packed with protein to fuel your day right.

    Imagine a biscuit that’s not only fluffy and satisfying but also light on calories, gluten-free, and even vegan—ideal for health-conscious friends and family members. Moreover, these biscuits cater to a variety of dietary needs without compromising on taste or texture. Say goodbye to long, tedious mornings spent slaving away over a hot stove. With our Easy Breakfast Protein Biscuits, you can bake ahead and enjoy a delightful meal with minimal effort.

    These tasty treats can be customized with ingredients of your choice, making them a versatile option for everyone—all while providing a great balance of macronutrients. Whether you’re a busy parent rushing off to work, a student cramming for exams, a health enthusiast counting those macros, or a newbie in the kitchen, this recipe allows you to create delicious morning meals that keep you energized. Let’s dive into the details of this wonderful recipe that elevates ordinary breakfast ideas to extraordinary!

    Benefits and Advantages of Easy Breakfast Protein Biscuits

    What makes these Easy Breakfast Protein Biscuits so special? Apart from their scrumptious flavor and appealing texture, they offer several benefits that make them a top choice for anyone seeking healthy breakfast ideas.

    Convenience and Simplicity

    First and foremost, ease of preparation sets this recipe apart. With just a handful of ingredients and straightforward instructions, you can whip up a batch in no time. This is particularly beneficial for busy parents or professionals who find themselves pressed for time. You can easily make a double batch during your weekend and store them for busy weekdays ahead.

    Health Benefits

    Each biscuit is loaded with protein, which is essential for building and repairing tissues in the body. The high protein content also keeps you feeling fuller for longer, thereby helping you avoid mid-morning snacks. Additionally, these biscuits can be made with healthy fats, such as nut butter or coconut oil, rather than conventional butter, making them heart-friendly.

    This recipe is also adaptable; you can create gluten-free variations using alternatives like almond flour or oat flour, addressing dietary restrictions while keeping taste intact. Furthermore, cutting down on refined sugars ensures that these biscuits are not only nutritious but also provide sustained energy without the sugar crash.

    Versatility

    The versatility of these biscuits equals their attractiveness. Whether you enjoy them plain, or choose to add fruits, nuts, or even chocolate chips, the flavor combinations are endless! They can align with various dietary needs, making them suitable for individuals following vegan, gluten-free, or low-carb diets.

    In summary, these Easy Breakfast Protein Biscuits offer an unmatched combination of convenience, health benefits, and culinary freedom, making them a unique option among breakfast ideas that everyone can enjoy!

    Ingredients Overview

    Essential Ingredients for Easy Breakfast Protein Biscuits

    To create the delightful Easy Breakfast Protein Biscuits, you’ll need the following essential ingredients:

    • 1 cup almond flour (gluten-free, high in healthy fats)
    • 1/2 cup oat flour (gluten-free option available)
    • 1/4 cup protein powder (whey, pea protein, or any preferred type)
    • 1/4 cup natural sweetener (e.g., honey, maple syrup, or a no-calorie option like stevia)
    • 1/2 cup unsweetened almond milk (or any nut milk; helps add moisture)
    • 1/4 cup coconut oil (melted; provides healthy fats and moisture)
    • 1/2 teaspoon baking powder (helps the biscuits rise)
    • 1 teaspoon vanilla extract (adds flavor)
    • A pinch of salt (enhances all other flavors)

    Each of these ingredients serves a specific purpose. Almond flour provides a nutty flavor and is gluten-free, while oat flour contributes to a fluffy texture. The protein powder boosts the nutritional content significantly. Sweeteners like honey and maple syrup provide natural sugars, making the biscuits enjoyable without refined sugars.

    Feel free to experiment! If you follow a vegan diet, replace honey with agave syrup, or use a plant-based protein powder. For those on a low-calorie diet, use an alternative natural sweetener like stevia, reducing the overall calorie content.

    Dietary Substitutions to Customize Your Easy Breakfast Protein Biscuits

    This recipe is highly adaptable, and here are some substitutions to cater to different dietary needs:

    1. Flour Substitutions:
    2. Gluten-Free: Use a combination of almond flour and coconut flour for a rich flavor and gluten-free option.
    3. Low-Carb: Substitute almond flour with a low-carb flour alternative like coconut flour in limited amounts (as it absorbs moisture differently).

    4. Sweetener Options:

    5. Replace honey or maple syrup with monk fruit sweetener or erythritol for a calorie-free option.
    6. Use mashed bananas instead of sweeteners for natural sweetness.

    7. Milk Variations:

    8. Substitute almond milk with oat milk, soy milk, or coconut milk depending on allergies and personal preferences.

    9. Butter Alternatives:

    10. For those on a vegan diet, replace coconut oil with shea butter or any vegan-friendly oil.

    As you prepare your biscuits, don’t hesitate to let your creativity shine! The beauty of these protein biscuits lies in their versatility.

    How to Prepare the Perfect Easy Breakfast Protein Biscuits: Step-by-Step Guide

    Now that you know about the ingredients and how to customize them, let’s get into the step-by-step preparation of these delightful Easy Breakfast Protein Biscuits. Follow along closely to maximize your success!

    1. Preheat the Oven: Preheat your oven to 350°F (175°C). This step is crucial as it ensures that your biscuits cook perfectly without being dense or soggy.

    2. Prepare the Baking Sheet: Line a baking sheet with parchment paper for easy cleanup and to prevent the biscuits from sticking.

    3. Combine Dry Ingredients: In a large mixing bowl, combine the almond flour, oat flour, protein powder, baking powder, and salt. Mix well to ensure that the baking powder is evenly distributed throughout the dry ingredients.

    4. Mix Wet Ingredients: In another bowl, whisk together the almond milk, melted coconut oil, natural sweetener, and vanilla extract. Ensure that the coconut oil is not too hot to prevent it from curdling the almond milk when mixed.

    5. Combine Wet and Dry Ingredients: Slowly incorporate the wet mixture into the bowl with dry ingredients. Gently fold the mixture together until just combined. Avoid overmixing, as it can lead to tough biscuits.

    6. Add Optional Mix-Ins: If you want to add additional flavors, throw in dried fruits like raisins, nuts like walnuts or almonds, or chocolate chips at this stage. Stir gently to combine.

    7. Scoop the Dough: Using a spoon or cookie scoop, portion out the dough onto the prepared baking sheet, leaving enough space between each biscuit for spreading.

    8. Bake: Place the tray in the preheated oven and let the biscuits bake for about 15-20 minutes, or until the tops are lightly golden brown and a toothpick inserted comes out clean.

    9. Cool: Once baked, remove the biscuits from the oven and let them cool on the baking sheet for 5 minutes before transferring them to a wire rack to cool completely.

    10. Serve and Enjoy: These Easy Breakfast Protein Biscuits can be enjoyed warm or at room temperature. Pair them with a spoonful of almond butter or a drizzle of honey for added flavor.

    With these steps, you’ll achieve healthier breakfast ideas that are easy to make and delightful to consume. And the best part? They can be customized to suit any taste and dietary preference!

    Mastering Easy Breakfast Protein Biscuits: Advanced Tips and Variations

    Once you’ve mastered the basic recipe, you can take your Easy Breakfast Protein Biscuits to the next level with a few advanced tips and creative variations:

    Tips for Success:

    • Don’t Overmix: Gently fold the ingredients together to keep the biscuits light and fluffy. Overmixing can lead to a denser texture.

    • Don’t Skip the Baking Powder: This raising agent is critical for achieving that fluffy, biscuit-like consistency.

    Flavor Variations:

    • Apple Cinnamon: Add in 1 cup of grated apple and 1 teaspoon of cinnamon for a fall-inspired twist.
    • Berry Blast: Mix in 1 cup of fresh blueberries or raspberries to give your biscuits a fruity flavor profile.
    • Chocolate Delight: For a sweeter option, consider adding chocolate chips or cacao nibs into the mixture.

    Serving Suggestions:

    • Top your biscuits with almond butter or peanut butter for a protein-packed meal.
    • Serve alongside a smoothie or yogurt bowl for a more complete breakfast.

    These advanced tips not only help to vary the taste and enhance the dining experience but align seamlessly with the focus on nutritious breakfast ideas that cater to various preferences.

    How to Store Easy Breakfast Protein Biscuits: Best Practices

    Proper storage methods are essential to maintaining the freshness and taste of your Easy Breakfast Protein Biscuits. Here are the best practices for refrigerating, freezing, and reheating them:

    Refrigeration

    If you plan on consuming the biscuits within the week, simply store them in an airtight container in the refrigerator. They should last for about 5-7 days. For best results, place parchment paper between layers to prevent sticking.

    Freezing

    These biscuits are perfect for freezing! To maximize their shelf life, allow them to cool completely before wrapping each one individually in plastic wrap or aluminum foil. Then, place them in a freezer-safe bag or container. This method preserves their flavor and texture for up to 3 months.

    Reheating

    To reheat frozen biscuits, remove them from the freezer and let them thaw at room temperature for about 1 hour. Then, warm them in the oven at 350°F (175°C) for approximately 5-7 minutes before serving. This brings back their freshly baked flavor!

    By following these storage tips, you ensure that your Easy Breakfast Protein Biscuits remain tasty and ready for enjoyment for days to come—further supporting your search for quick and health-focused breakfast ideas!

    Nutritional Value of Easy Breakfast Protein Biscuits

    Understanding the nutritional information of your meals is an essential step towards healthier eating, especially when seeking nutritious breakfast ideas. Here’s a breakdown of the nutritional value of our Easy Breakfast Protein Biscuits:

    Estimated Nutritional Values (per biscuit)

    • Calories: 120
    • Protein: 6g
    • Carbohydrates: 13g
    • Fat: 6g
    • Fiber: 2g
    • Sugar: 3g

    Nutritional Highlights:

    1. High in Protein: With around 6 grams of protein, these biscuits can help you meet your daily protein needs while delivering a satisfying meal.
    2. Healthy Fats: The use of almond flour and coconut oil ensures that you’re consuming heart-healthy fats, beneficial for cardiovascular health.
    3. Low Sugar Content: With balanced sweetness, these biscuits keep sugar levels low, focusing on natural sources for flavor.

    These nutritional highlights emphasize why Easy Breakfast Protein Biscuits are not just delectable but also provide a balanced macronutrient profile. By choosing these biscuits as your go-to breakfast option, you’re making a smart choice that aligns with your wellness goals!

    FAQs: Frequently Asked Questions About Easy Breakfast Protein Biscuits

    Q1: Can I use different types of protein powder in this recipe?

    A1: Absolutely! You can use whey, casein, or plant-based protein powder. Just be aware that different protein powders may alter the taste and texture slightly.

    Q2: Can I substitute the almond flour for regular flour?

    A2: While you could use all-purpose flour, this would no longer be gluten-free. Almond flour and oat flour work best for flavor and texture in this recipe.

    Q3: How do I store these biscuits, and how long do they last?

    A3: Store in an airtight container in the refrigerator for up to 5-7 days, or freeze individually wrapped for up to 3 months.

    Q4: Can I make these biscuits without added sugar?

    A4: Yes, you can omit sugar entirely or use mashed bananas or applesauce for natural sweetness if preferred.

    Q5: Is this a suitable recipe for meal prep?

    A5: Definitely! These biscuits are ideal for meal prep, making a delicious and nutritious addition to your weekly breakfast ideas.

    By addressing these commonly asked questions, readers will feel more confident in their ability to customize and prepare these Easy Breakfast Protein Biscuits, ensuring they enjoy every bite while exploring varied breakfast ideas.

    With the knowledge of benefits, preparation, storage, and nutritional value at hand, you’re all set to enjoy your Easy Breakfast Protein Biscuits! Happy baking!

  • The Best Jalapeño Popper Enchiladas

    The Best Jalapeño Popper Enchiladas

    The Best Jalapeño Popper Enchiladas: A Tropical Delight

    Introduction to The Best Jalapeño Popper Enchiladas

    Are you on the lookout for dinner recipes that bring a burst of flavor and creativity to your table? Look no further than The Best Jalapeño Popper Enchiladas! This delightful dish merges the creamy, spicy taste of jalapeño poppers with the comforting, hearty goodness of enchiladas. Perfect for busy families, adventurous eaters, or anyone seeking a unique twist on classic comfort food, this recipe is both simple and healthy.

    Not only does this meal cater to various dietary needs — whether you’re seeking vegan or gluten-free options — it also offers versatility for those watching their calorie intake. The layers of flavor, from the zesty jalapeños to the rich cheese and savory sauce, create an unforgettable dining experience. You’ll find that preparing these enchiladas isn’t just quick and easy, but they also make excellent leftovers, providing satisfied smiles for days.

    Join the adventure of cooking with these vibrant enchiladas that are as fun to prepare as they are to eat — perfect for everyone, including busy parents, students, food enthusiasts, and even newlyweds looking to impress. Let’s dive into the benefits of this incredible recipe to see why it deserves a spot on your dinner rotation.

    Benefits and Advantages of The Best Jalapeño Popper Enchiladas

    In today’s fast-paced world, finding dinner recipes that are not only delicious but also straightforward and nourishing is essential. The Best Jalapeño Popper Enchiladas stand out for several reasons:

    1. Simplicity in Preparation

    These enchiladas can be assembled in just a few simple steps, making them an ideal choice for those who have limited time to cook. Whether you’re a novice in the kitchen or a seasoned chef, you’ll appreciate how quickly you can put this dish together. You can have a decadent meal ready for your family or friends in under an hour!

    2. Health Benefits

    Packed with nutrients from fresh ingredients like jalapeños and cilantro, these enchiladas can contribute to a well-balanced diet. Jalapeños are rich in vitamins A and C, while the beans provide protein and fiber. With the option for whole grain tortillas, this dish caters to health-conscious individuals looking for wholesome dinner recipes that don’t compromise on taste.

    3. Dietary Flexibility

    The versatility of The Best Jalapeño Popper Enchiladas makes it an excellent option for various dietary needs. They can easily be tailored to be vegan by using plant-based cheese and tortillas, or gluten-free by selecting the appropriate tortilla varieties. This inclusiveness ensures that everyone at the table can enjoy a satisfying meal without feeling left out.

    4. Fancy Yet Casual

    Whether you’re planning a laid-back dinner with family or an elegant gathering with friends, these enchiladas fit the bill. They take on an elevated presentation while remaining accessible and fun, making them perfect for entertaining or a cozy family meal.

    5. Leftover Friendly

    Not only do these enchiladas taste incredible fresh out of the oven, but leftovers stay tasty for days. They can be packed for lunch or enjoyed straight from the fridge, providing an effortless meal solution for busy days.

    6. Culinary Adventure

    For those looking to spice up their usual weeknight routine, these enchiladas invite you to explore new flavors. Once you master the basic recipe, consider experimenting with various peppers or adding additional toppings to make it your own!

    In summary, The Best Jalapeño Popper Enchiladas are not just another dish to add to your collection of dinner recipes; they represent a delicious mingling of flavors and choices suitable for everyone in your life. Let’s explore the ingredients that make this dish come alive!

    Ingredients Overview

    Essential Ingredients for The Best Jalapeño Popper Enchiladas

    This recipe is designed to be straightforward yet flavorful. Here’s what you’ll need:

    • 8 Corn Tortillas (Vegan & Gluten-Free): They serve as the base for the enchiladas, providing structure.
    • 1 cup Cream Cheese (or Vegan Cream Cheese): Adds creaminess; feel free to use a low-fat option for fewer calories.
    • 1 cup Shredded Cheese (Cheddar or Vegan Cheese): A topping that melts beautifully to enhance flavor.
    • 2-3 Fresh Jalapeños (Sliced Thin): The heart of the dish; adjust the quantity based on your spice preference.
    • 1 can Black Beans (Drained and Rinsed): For additional protein and fiber; you could substitute with pinto beans if preferred.
    • 1 cup Salsa Verde or Enchilada Sauce: Choose a low-sugar option to reduce calories; it serves as the sauce for the dish.
    • 1/2 cup Fresh Cilantro (Chopped): Adds freshness; can be omitted for anyone allergic or disliking it.
    • 1 tsp Cumin and 1 tsp Garlic Powder: Enhance the overall flavor.
    • Salt and Pepper to Taste: Essential seasonings for balance.

    Dietary Substitutions to Customize Your The Best Jalapeño Popper Enchiladas

    No two kitchens are alike, and ingredient availability can vary. Here are some handy substitutions to help you personalize your enchiladas:

    • Tortillas: If corn tortillas aren’t available, whole wheat or spinach tortillas can add a different flavor and nutritional profile.
    • Cream Cheese: For a completely dairy-free dish, swap the cream cheese with soaked cashews blended until creamy.
    • Cheese: Nutritional yeast can be a great vegan substitute for cheese; it adds a cheesy flavor without the dairy.
    • Beans: Substitute black beans with lentils for a different texture or chickpeas for a protein boost!
    • Green Sauce: If you can’t find salsa verde, green enchilada sauce can be used; alternatively, homemade versions with tomatillos and herbs are a fantastic choice.

    By integrating these substitutes into The Best Jalapeño Popper Enchiladas, everyone can enjoy a dish that suits their taste and dietary preferences. Now, let’s move on to the preparation process for making this stunning meal!

    How to Prepare the Perfect The Best Jalapeño Popper Enchiladas: Step-by-Step Guide

    Preparing The Best Jalapeño Popper Enchiladas is an adventure in flavor and fun. Follow these steps to assemble a dish that’s sure to impress:

    1. Preheat the Oven

    Preheat your oven to 375°F (190°C). This ensures your dish bakes evenly and the cheese melts beautifully.

    2. Prepare the Filling

    In a mixing bowl, combine the cream cheese, shredded cheese, sliced jalapeños, black beans, cumin, garlic powder, salt, and pepper. Mix until smooth. This creamy filling is what makes these enchiladas irresistible!

    3. Soften the Tortillas

    Heat a skillet over medium heat and warm each tortilla for about 30 seconds on each side, until pliable. This step prevents the tortillas from cracking when you roll them.

    4. Assemble the Enchiladas

    For each tortilla, spoon about two tablespoons of the filling onto the center. Roll it tightly and place seam-side down in a greased baking dish. Repeat this until all tortillas are filled.

    5. Add the Sauce

    Pour the salsa verde or enchilada sauce evenly over the rolled enchiladas. Ensure they are well-coated for maximum flavor and moisture.

    6. Top with Cheese

    Sprinkle any remaining shredded cheese on top. This melting layer will create a gooey texture and a beautiful finish.

    7. Bake

    Place the baking dish in the preheated oven and bake for 20-25 minutes, until the cheese is bubbly and slightly golden.

    8. Garnish

    Remove from the oven and let it cool for a few minutes. Top with fresh cilantro for a pop of color and flavor before serving.

    9. Serve

    Serve your enchiladas warm with extra salsa, avocado slices, or a dollop of sour cream or vegan sour cream for those looking to elevate their meal even further.

    This step-by-step guide creates a comforting dinner that’s not only delicious but will also leave your kitchen filled with enticing aromas. With easy-to-follow directions, preparing these enchiladas can be enjoyable for anyone in the family, whether you’re a home cook or a baking enthusiast. Now that you’ve mastered the basics, let’s discuss advanced tips and variations!

    Mastering The Best Jalapeño Popper Enchiladas: Advanced Tips and Variations

    Elevate your culinary skills with some advanced tips and interesting variations for The Best Jalapeño Popper Enchiladas. Here are some ideas to enhance your experience:

    1. Spice Up the Filling

    For those who crave heat, add diced green chiles or crushed red pepper flakes to the filling to increase the spice level. Conversely, for a milder dish, consider omitting the jalapeños entirely or using a sweet pepper.

    2. Experiment with Proteins

    Introducing shredded chicken, turkey, or even sautéed shrimp can transform the dish into a heartier meal. Just ensure to adjust seasoning if adding proteins with their flavors.

    3. Create a Green Sauce

    For a homemade twist, blend fresh herbs like cilantro, parsley, and lime juice into a green sauce to drizzle over the enchiladas before baking for an added layer of flavor.

    4. Add Veggies

    Sautéed onions, bell peppers, or even zucchini can be mixed into the filling for extra nutrition and texture. Veggies not only boost health benefits but also enhance overall flavor.

    5. Toppings Galore

    Get creative with toppings! Consider a crunchy topping made from crushed tortilla chips, or add freshness with sliced radishes, diced tomatoes, or lime wedges to serve.

    6. Meal Prep Friendly

    To save time, consider preparing your filling in advance or making a double batch to freeze. Simply assemble before baking, and you’ll have a quick and satisfying meal on hand for those busy weeknights.

    With these tips, you can tailor The Best Jalapeño Popper Enchiladas to suit your family’s unique tastes and preferences. The opportunities are endless! Now let’s move on to proper storage methods to keep your enchiladas fresh and delicious.

    How to Store The Best Jalapeño Popper Enchiladas: Best Practices

    To maximize freshness and flavor in The Best Jalapeño Popper Enchiladas, it’s important to follow proper storage guidelines. Here’s how to best store any leftovers:

    1. Refrigeration

    Allow the enchiladas to cool completely before storing. Place them in an airtight container to prevent any odorous mixing or spoilage. They can be refrigerated for up to 3-5 days.

    2. Freezing

    For longer storage, freezing is an excellent option. Wrap the cooled enchiladas tightly in plastic wrap and then place them in a freezer-safe container or bag. They can be frozen for up to 3 months. This method allows you to enjoy your delicious meal anytime!

    3. Reheating

    When it comes time to savor your leftovers, reheating them correctly is crucial. Preheat your oven to 350°F (175°C), then place the enchiladas in an oven-safe dish and cover with foil. Bake for 20-25 minutes or until heated through. For quicker results, use the microwave, but keep in mind they may be less crispy.

    With these storage practices, The Best Jalapeño Popper Enchiladas can remain flavorful and enjoyable for days or months to come. Now, let’s check the nutritional value of this delectable dish!

    Nutritional Value of The Best Jalapeño Popper Enchiladas

    Understanding the nutritional aspect of your meals is vital! Here’s a detailed breakdown of the estimated nutritional value per serving of The Best Jalapeño Popper Enchiladas:

    Estimated Nutritional Information (per serving)

    • Calories: 350-400 kcal
    • Protein: 15-20 g
    • Fat: 20-25 g
    • Carbohydrates: 35-40 g
    • Fiber: 6-7 g
    • Sugar: 3-4 g
    • Sodium: 400-500 mg

    (Note: Nutritional values may vary based on specific brands of ingredients, portion sizes, and dietary adjustments. Consider calculating precise values based on the exact ingredients used.)

    These enchiladas provide a balanced meal with healthy fats, proteins, and carbohydrates, making it suitable for a range of dietary goals. Enjoying them in moderation will complement any healthy eating plan, making them the perfect contender for your collection of unique dinner recipes!

    FAQs: Frequently Asked Questions About The Best Jalapeño Popper Enchiladas

    Q: Can I make The Best Jalapeño Popper Enchiladas ahead of time?
    A: Absolutely! You can prepare the filling and assemble the enchiladas ahead of time, storing them in the fridge until you’re ready to bake.

    Q: Are there any gluten-free alternatives for this recipe?
    A: Yes! Simply use gluten-free tortillas, and ensure that your salsa and any other condiments are labeled gluten-free.

    Q: How spicy are these enchiladas?
    A: The spice level depends largely on the number of jalapeños you use. You can control the heat by adjusting the jalapeño amount or using milder peppers if necessary.

    Q: What can I serve with these enchiladas?
    A: They pair wonderfully with a side of Mexican rice, black beans, or a fresh salad. Additional toppings like sour cream or avocado can also enhance the meal.

    Q: Can I freeze The Best Jalapeño Popper Enchiladas?
    A: Yes! They freeze beautifully. Just wrap them tightly in plastic wrap before placing them in a freezer-safe container. Reheat in the oven when you’re ready to enjoy.

    Q: How can I make these enchiladas low-calorie?
    A: Opt for low-fat cheese, use less cream cheese, and select whole wheat tortillas or low-calorie tortillas. Incorporating more veggies can also help reduce calorie content.

    Now that you have answered common questions about The Best Jalapeño Popper Enchiladas, you are ready to embark on your cooking adventure. Enjoy the process, the flavors, and the smiles that come along with serving this exceptional dish! Happy cooking!

  • Hello world!

    Welcome to WordPress. This is your first post. Edit or delete it, then start writing!