Blog

  • Tasty Maple Dijon Chicken Bowls

    Tasty Maple Dijon Chicken Bowls

    Tasty Maple Dijon Chicken Bowls: A Tropical Delight

    Introduction to Tasty Maple Dijon Chicken Bowls

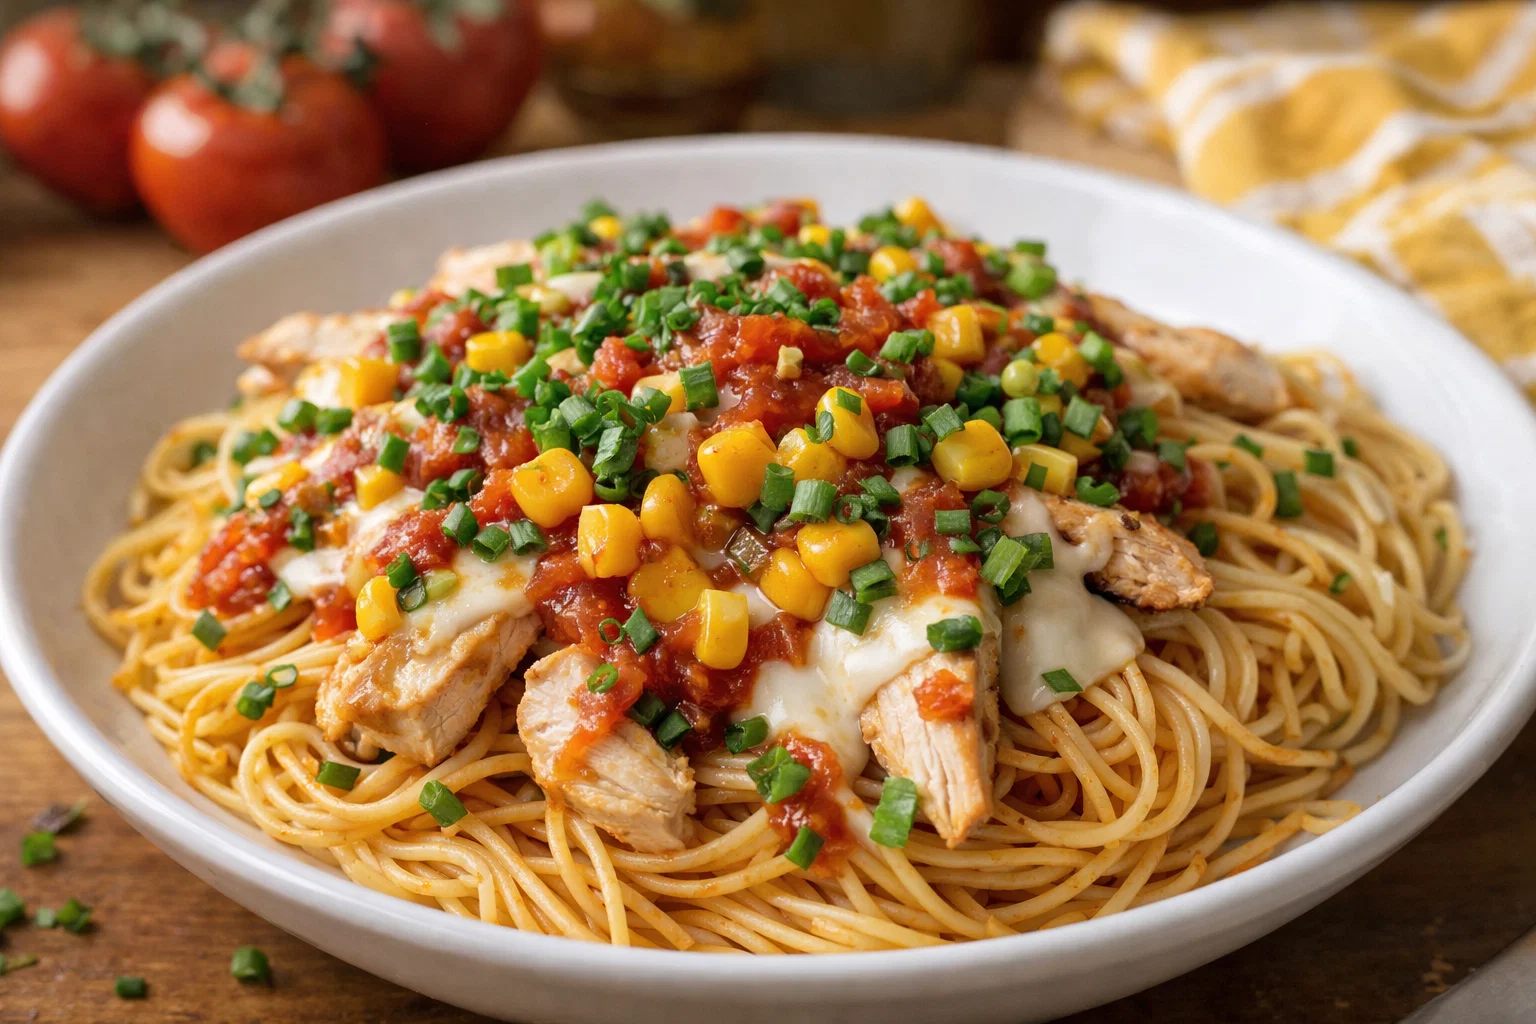
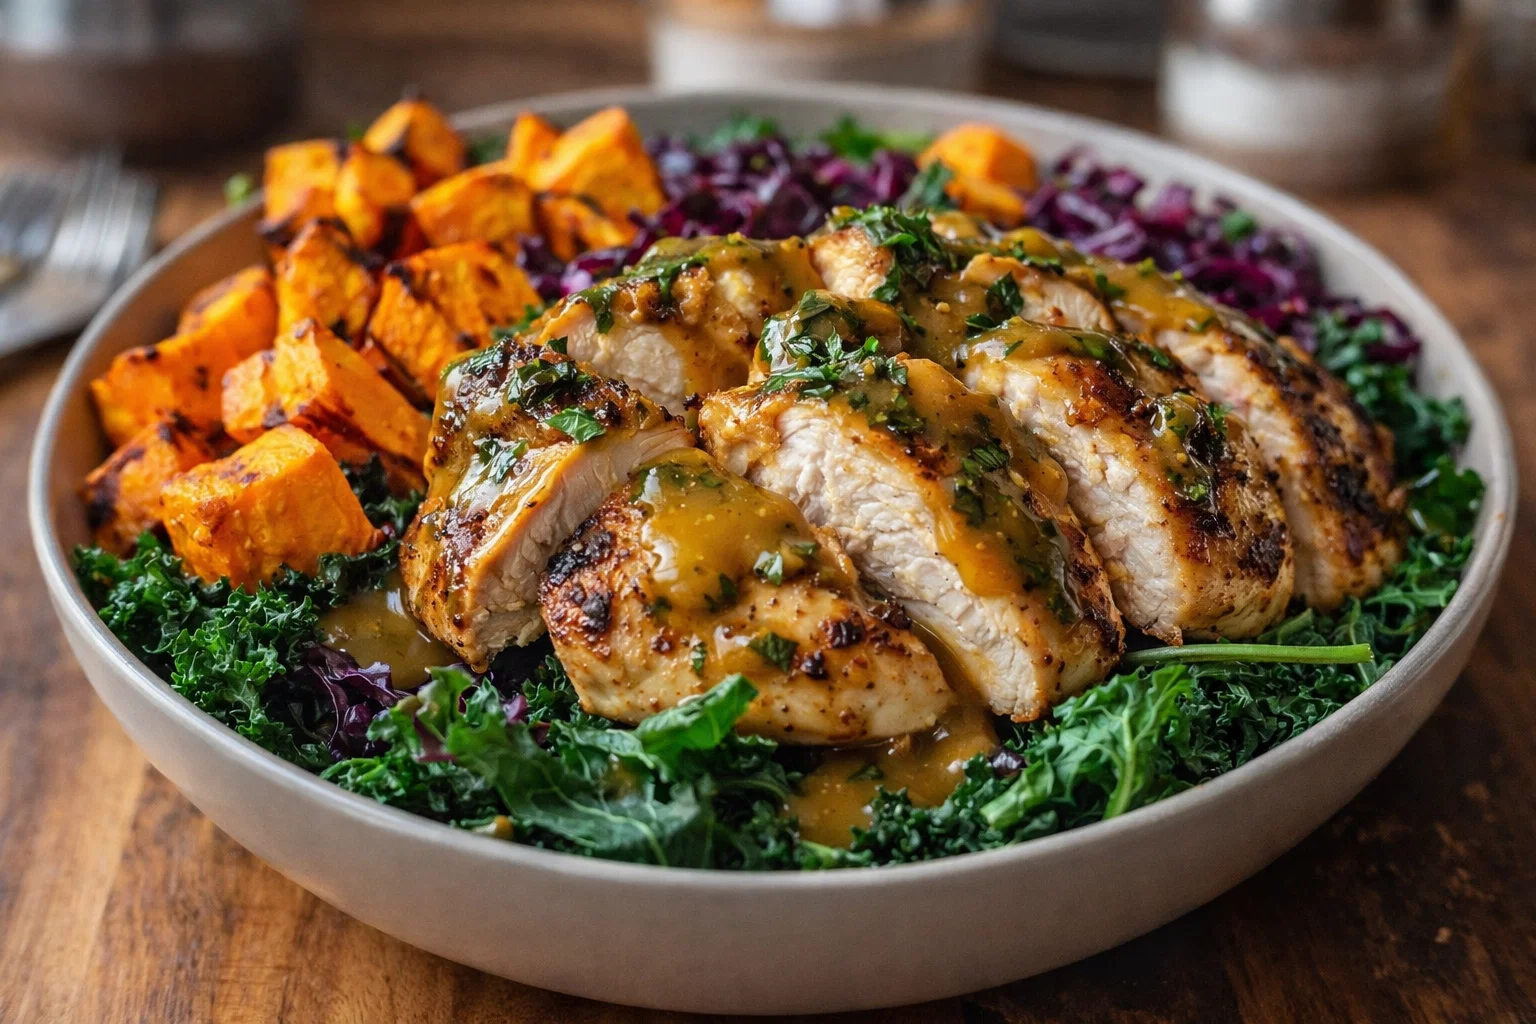
    Tasty Maple Dijon Chicken Bowls are a culinary masterpiece that beautifully combines flavors, health benefits, and ease of preparation. This dish features succulent chicken marinated in a delicious blend of maple syrup and Dijon mustard, making it a standout recipe amidst numerous chicken recipes available today. Perfect for busy parents, college students, working professionals, and culinary enthusiasts alike, this dish offers a nutritious and balanced meal ideal for various dietary needs.

    The simplicity of this recipe allows cooks of all skill levels to create a gourmet dish with minimal effort. Not only is this meal easy to whip up, but it is also packed with essential nutrients. Chicken, being a great source of protein, paired with wholesome vegetables and grains make this bowl an excellent option for those looking to maintain a healthy lifestyle.

    Moreover, the versatility of this recipe caters to various diets, whether you’re focusing on gluten-free, low-calorie, or even vegan options. With a tantalizing blend of sweet and tangy flavors, each bite delivers a delightful experience, making it not just a meal, but a celebration of good food. In this article, we’ll explore the benefits of Maple Dijon Chicken Bowls, discuss essential ingredients, provide a step-by-step preparation guide, and delve into ways to customize your dish for dietary preferences.

    Benefits and Advantages of Tasty Maple Dijon Chicken Bowls

    When it comes to choosing chicken recipes that are both delicious and nutritious, Tasty Maple Dijon Chicken Bowls exceeds expectations. Here are some compelling advantages of this delectable recipe:

    1. Simplicity in Preparation: One of the standout features of this dish is how simple it is to prepare. With straightforward instructions and easily available ingredients, even kitchen novices can create a gourmet experience.

    2. Healthy Ingredients: This recipe combines lean chicken with fresh vegetables, offering a high-protein and nutrient-dense meal. The inclusion of maple syrup not only adds a touch of sweetness but also provides antioxidants, while mustard contributes to a unique flavor profile along with several health benefits.

    3. Ideal for Meal Prep: These bowls are perfect for meal prepping, which is particularly beneficial for busy families or individuals. You can easily prepare multiple servings at once and store them for later meals, significantly reducing weeknight cooking time.

    4. Customizable to Various Diets: Tasty Maple Dijon Chicken Bowls can be adapted to meet various dietary requirements, including gluten-free, dairy-free, and low-carb options. This ensures that everyone can enjoy this delicious recipe without any concerns.

    5. Balanced Nutrition: Each bowl is a complete meal, combining protein, healthy fats, and carbohydrates with colorful veggies. This balance keeps you satisfied and nourished, making it a great option for diet-conscious individuals.

    In summary, Tasty Maple Dijon Chicken Bowls are not just another recipe; they represent a complete meal solution that is easy to prepare, health-conscious, and adaptable to different dietary needs. Whether you’re looking for a quick weeknight dinner or something to impress guests, these bowls check all the boxes.

    Ingredients Overview

    Essential Ingredients for Tasty Maple Dijon Chicken Bowls

    To prepare Tasty Maple Dijon Chicken Bowls, gather the following ingredients:

    • Chicken Breast (1.5 pounds): This lean protein source serves as the main star of your dish, providing energy and helping to build muscle.
    • Maple Syrup (1/4 cup): Adds sweetness and depth of flavor. Look for pure maple syrup without additives for maximum health benefits.
    • Dijon Mustard (1/4 cup): Provides a tangy kick and enhances the overall taste of the chicken.
    • Olive Oil (2 tablespoons): Used for marinating and cooking, this healthy fat is rich in monounsaturated fats and antioxidants.
    • Garlic (2 cloves, minced): Enhances flavor and adds nutritional benefits, such as anti-inflammatory properties.
    • Mixed Vegetables (2 cups – bell peppers, broccoli, carrots): These colorful veggies add crunch, flavor, and an extra boost of vitamins.
    • Cooked Quinoa or Brown Rice (2 cups): This serves as a nutritious base, offering fiber and complex carbohydrates.
    • Salt and Pepper (to taste): Essential seasonings that enhance the flavor profile of the dish.

    Dietary Options:
    Vegan: Substitute chicken with tofu or chickpeas and use maple syrup as the only sweetener.
    Gluten-Free: Ensure the Dijon mustard and other condiments are gluten-free certified.

    Dietary Substitutions to Customize Your Tasty Maple Dijon Chicken Bowls

    Creating a dish that fits various dietary preferences is straightforward with Tasty Maple Dijon Chicken Bowls. Here’s how you can customize your recipe:

    1. For a Vegan Option: Replace the chicken with tofu, tempeh, or chickpeas. Use the same marinade—just ensure to marinate for a shorter time to prevent over-seasoning.

    2. For Gluten-Free: Use tamari in place of regular soy sauce (if desired) and ensure that any packaged ingredients like mustard or quinoa are labeled gluten-free.

    3. Low-Carb Adaptations: Swap out quinoa or brown rice for cauliflower rice or zoodles (zucchini noodles) to keep the carb count low while enjoying a similar texture.

    4. Extra Flavor Boost: For an additional zing, consider adding spices like smoked paprika or cumin to the chicken marinade. They add depth without unnecessary calories.

    5. Lightened Up Version: For a lower-calorie option, use less maple syrup (or reduce it by half) and opt for skinless chicken.

    These substitutions make it easy to adapt the Tasty Maple Dijon Chicken Bowls to fit your lifestyle and dietary goals, ensuring that everyone at the table can enjoy a delicious meal.

    How to Prepare the Perfect Tasty Maple Dijon Chicken Bowls: Step-by-Step Guide

    Creating your own Tasty Maple Dijon Chicken Bowls is a simple yet rewarding process. Follow these detailed step-by-step instructions to prepare a dish that will impress family and friends alike, while also maintaining the essence of one of the best chicken recipes available.

    1. Marinate the Chicken:

      • In a large bowl, combine 1/4 cup of maple syrup, 1/4 cup of Dijon mustard, 2 tablespoons of olive oil, and 2 minced garlic cloves.
      • Mix well and then add 1.5 pounds of chicken breasts, ensuring they are fully coated in the marinade.
      • Cover the bowl and refrigerate for at least 30 minutes, allowing the flavors to seep into the meat.
    2. Prepare the Base:

      • While the chicken marinates, prepare your choice of base. Cook 2 cups of quinoa or brown rice according to the package instructions. This will provide a nutritious foundation for your bowl.
    3. Cook the Chicken:

      • Preheat a skillet over medium heat.
      • Once hot, add the marinated chicken breasts. Cook for 5-7 minutes per side or until the internal temperature reaches 165°F (75°C) and the chicken is golden brown. This ensures a juicy finish while still being safe to eat.
    4. Sauté the Vegetables:

      • In the same skillet, add your 2 cups of mixed vegetables (bell peppers, broccoli, and carrots).
      • Sauté for about 3-5 minutes until they are tender but still crispy. Season with a pinch of salt and pepper.
    5. Slice the Chicken:

      • After cooking the chicken, transfer it to a cutting board and allow it to rest for 5 minutes.
      • Slice the chicken into strips for easy layering in your bowl.
    6. Assemble the Bowls:

      • Start with a base of cooked quinoa or brown rice in each serving bowl.
      • Layer with sautéed vegetables and sliced chicken on top.
    7. Drizzle with Extra Sauce (Optional):

      • If desired, drizzle with any leftover marinade (that was cooked) or additional maple syrup for extra sweetness.
    8. Garnish:

      • Add fresh herbs like parsley or cilantro for a fresh touch. Alternatively, sprinkle with sesame seeds or chopped nuts for added crunch.
    9. Serve Immediately:

      • These bowls are best enjoyed immediately while the ingredients are fresh and warm. However, they can be stored for later, as detailed in the next section.

    By following these straightforward steps, you’ll have a delicious Tasty Maple Dijon Chicken Bowl that not only looks appealing but also serves up a rainbow of flavors and health benefits.

    Mastering Tasty Maple Dijon Chicken Bowls: Advanced Tips and Variations

    To truly master the art of making Tasty Maple Dijon Chicken Bowls, consider these advanced tips and variations that can elevate your dish:

    • Experiment with Protein: Instead of chicken, you can try proteins like grilled shrimp, steak, or even jerk chicken to create a unique spin on the flavor profile.

    • Ingredient Infusions: Add fruits like pineapple or mango for a tropical twist that complements the sweetness of maple syrup beautifully.

    • Sauce Variations: Experiment with adding flavors like ginger or sriracha to the marinade for a spicy kick or use orange juice for a tangy twist instead of syrup for a different taste.

    • Add Nuts or Seeds: A sprinkle of almonds, walnuts, or sunflower seeds on top of your bowl can give an added crunch and richness, enhancing the texture and nutrition.

    • Make It a Salad: Turn your recipe into a salad by tossing leafy greens like spinach or kale instead of using grains for a lighter, more refreshing option.

    • Flavorful Broths: Try adding low-sodium vegetable or chicken broth to the sautéed veggies for extra richness. This small addition can turn your dish into a wholesome soup bowl.

    These advanced tips and variations will not only enhance the flavor of your Tasty Maple Dijon Chicken Bowls but also allow for endless creativity in the kitchen, ensuring you can make this dish memorable every time.

    How to Store Tasty Maple Dijon Chicken Bowls: Best Practices

    Proper storage practices can increase the shelf life of your Tasty Maple Dijon Chicken Bowls and maintain their freshness. Here are some best practices for refrigerating, freezing, and reheating this dish:

    Refrigerating

    • Cool Before Storing: Allow the chicken bowls to cool to room temperature before placing them in refrigerator-safe containers to prevent condensation and moisture buildup.

    • Use Airtight Containers: Store individual portions in airtight containers. These can help maintain the freshness of the ingredients for up to 4 days.

    Freezing

    • Freezing for Longer Storage: If you wish to store your bowls for an extended period, consider freezing them. Use freezer-safe bags or containers and ensure to label them with dates.

    • Storage Duration: Frozen chicken bowls can typically last for about 2-3 months without losing quality. When ready to enjoy, thaw overnight in the refrigerator.

    Reheating

    • Microwave: For quick reheating, place the chicken bowl in the microwave-safe dish and warm it in 30-second intervals until heated thoroughly.

    • Stovetop: Alternatively, reheat on the stovetop over medium heat. Add a splash of broth or water to prevent drying out while reheating.

    By following these storage and reheating practices, you’ll ensure that your Tasty Maple Dijon Chicken Bowls retain their delicious flavors and nutrients, making mealtime quick and easy.

    Nutritional Value of Tasty Maple Dijon Chicken Bowls

    Understanding the nutritional value of your meals is crucial for making informed dietary choices. Tasty Maple Dijon Chicken Bowls offer a well-rounded nutritional profile that supports a balanced diet. Here’s a breakdown of the approximate nutritional information per serving (based on a meal with chicken, veggies, and quinoa):

    • Calories: 450-500 calories (depending on portion sizes and ingredients)
    • Protein: 35-40 grams
    • Fat: 15-20 grams (healthy fats from olive oil and nuts)
    • Carbohydrates: 50-60 grams (from quinoa and vegetables)
    • Fiber: 7-8 grams
    • Sugars: 7-10 grams (natural sugars from maple syrup and veggies)
    • Iron: Varies (depending on the inclusion of quinoa and greens)
    • Vitamin C: Excellent source, especially from bell peppers and broccoli.

    Health Benefits

    • High in Protein: This dish provides a significant amount of lean protein, essential for muscle growth and repair.
    • Rich in Fiber: The combination of vegetables and quinoa offers dietary fiber, promoting healthy digestion and keeping you full longer.
    • Vitamins and Minerals: With various colorful vegetables, this dish is packed with essential vitamins and minerals, supporting overall health and immunity.

    These nutritional insights highlight why Tasty Maple Dijon Chicken Bowls make a wise choice for those focused on balancing taste and health, demonstrating its prowess amongst numerous chicken recipes.

    FAQs: Frequently Asked Questions About Tasty Maple Dijon Chicken Bowls

    1. Can I make Tasty Maple Dijon Chicken Bowls ahead of time?
    Absolutely! These bowls are perfect for meal prepping. You can prepare the chicken and vegetables in advance, store them in portions, and simply reheat when ready to serve.

    2. What can I substitute for maple syrup if I want a lower-sugar option?
    You can use stevia or monk fruit sweetener as a lower-sugar alternative. Just be mindful of the substitution ratio, as these sweeteners can be significantly sweeter than maple syrup.

    3. How can I make this dish dairy-free?
    This recipe is naturally dairy-free! Just ensure that any additional ingredients you choose, like condiments or toppings, do not contain dairy.

    4. Can I use a different protein?
    Definitely! This recipe is versatile. You can easily swap chicken for turkey, a different type of meat, or a plant-based protein like tofu or tempeh.

    5. Are there any cooking methods besides pan-frying?
    Yes! The chicken can also be grilled or oven-baked. If using an oven, preheat to 375°F (190°C) and bake for about 25-30 minutes.

    6. What’s the quickest way to marinate the chicken?
    If you’re short on time, marinating the chicken for just 15 minutes can still impart some flavor. However, for the best results, a longer marination is ideal.

    7. Can I freeze the leftovers?
    Yes, leftovers can be frozen. Just ensure they’re stored in airtight containers, and they can last up to 2-3 months in the freezer.

    By addressing these frequently asked questions, you can feel confident in your ability to make Tasty Maple Dijon Chicken Bowls according to your preferences, enhancing your chicken recipe repertoire.


    Now that you have explored the vibrant world of Tasty Maple Dijon Chicken Bowls, it’s time to roll up your sleeves and bring this delicious dish to your dinner table. With a balance of flavors, ease of preparation, and nutritional benefits, you’ll find that this recipe is not just satisfying but also a delightful addition to your collection of chicken recipes that can cater to every palate. Enjoy your culinary adventure!

  • Cozy Monterey Chicken Spaghetti Bake

    Cozy Monterey Chicken Spaghetti Bake

    Cozy Monterey Chicken Spaghetti Bake: A Tropical Delight

    Introduction to Cozy Monterey Chicken Spaghetti Bake

    Welcome to the delightful world of cozy cuisine! Today, we’re diving into the mouthwatering recipe for Cozy Monterey Chicken Spaghetti Bake. This dish is a shining example of how easy it can be to prepare a comforting meal that’s packed with flavor and nutrition. For those searching for inspiring chicken recipes that cater to diverse culinary needs, this one checks all the boxes.

    The Monterey Chicken Spaghetti Bake is a crowd-pleaser, perfect for busy families, college students, or anyone looking to whip up something simple yet delicious. With tender chicken, creamy sauce, and perfectly baked spaghetti, this dish stands out not just for its taste but also for its adaptability. Whether you’re following a low-calorie plan, seeking gluten-free options, or appeasing a vegan palate, you’ll find that this recipe is not only straightforward to follow but also healthy and satisfying.

    Incorporating nutrient-rich ingredients, this spaghetti bake offers an amalgamation of protein, fiber, and healthy fats, all while being delightful to the taste buds. Layered with love, this dish can become a staple in your home—ready to warm up your weekdays and bring everyone together for a hearty meal around the table. So, grab your apron, and let’s embark on this culinary adventure together!

    Benefits and Advantages of Cozy Monterey Chicken Spaghetti Bake

    The Cozy Monterey Chicken Spaghetti Bake isn’t just another pasta dish; it’s a well-rounded meal that brings numerous benefits to the table. First and foremost, let’s talk about ease of preparation. In just under an hour, you can have a hot and delicious meal ready to serve. This recipe is straightforward and doesn’t require elaborate cooking skills, making it a great choice for novice cooks or busy parents.

    Health-conscious individuals will appreciate that this dish is not only delicious but also quite nutritious. By using lean chicken breast, whole-grain pasta, and an array of colorful vegetables like bell peppers and spinach, you’re ensuring that your family gets a good dose of essential nutrients. Furthermore, you can easily modify the recipe to fit into a low-carb or a high-protein diet by substituting pasta with alternatives like zucchini noodles or spaghetti squash.

    Additionally, the Cozy Monterey Chicken Spaghetti Bake boasts impressive versatility. Whether you’re having friends over for dinner, meal-prepping for the week, or craving a comforting dish on a chilly evening, this recipe suits a multitude of scenarios. You can cater it to various dietary preferences, including gluten-free or dairy-free alternatives, without losing any flavor. Simply put, this dish stands out as a wholesome and hearty meal that can be tailored to meet the needs of all diners.

    Ingredients Overview

    Essential Ingredients for Cozy Monterey Chicken Spaghetti Bake

    To create this scrumptious Cozy Monterey Chicken Spaghetti Bake, gather the following ingredients:

    • 2 cups cooked spaghetti (gluten-free option available)
    • 1 pound of boneless, skinless chicken breast, cubed
    • 1 cup Monterey Jack cheese, shredded (dairy-free cheese as a substitute)
    • 1 cup marinara sauce (look for low-sugar varieties)
    • 1/2 cup low-fat sour cream or Greek yogurt (or dairy-free alternative for vegans)
    • 1 bell pepper, diced (colorful variety adds nutrients and aesthetics)
    • 1 small onion, diced
    • 2 cloves of garlic, minced
    • 1 teaspoon Italian seasoning
    • Salt and pepper to taste
    • Cooking spray or olive oil for greasing the baking dish

    This ingredient list not only ensures a flavorful dish but also allows for substitutions based on individual dietary preferences. The base ingredients, such as chicken and pasta, can easily be adjusted for vegan, gluten-free, or low-calorie options.

    Dietary Substitutions to Customize Your Cozy Monterey Chicken Spaghetti Bake

    The beauty of the Cozy Monterey Chicken Spaghetti Bake lies in its adaptability. Here are some substitutions you can explore:

    • Vegan/Plant-Based: Replace chicken with cubed tofu, tempeh, or chickpeas. Use a plant-based cheese alternative, and substitute sour cream with cashew cream or silken tofu.

    • Gluten-Free: Use gluten-free pasta varieties such as brown rice, quinoa, or chickpea pasta.

    • Low-Calorie: Trade regular spaghetti for spiralized zucchini or spaghetti squash for a lighter version. Opt for low-fat dairy products to reduce calories.

    • Dairy-Free: As mentioned, swap out dairy products with plant-based alternatives for an inclusive dish that can be enjoyed without dietary restrictions.

    By implementing these substitutions, you can ensure that everyone at your table can enjoy this delicious bake without compromising on taste or health benefits.

    How to Prepare the Perfect Cozy Monterey Chicken Spaghetti Bake: Step-by-Step Guide

    Ready to bring this delicious dish to life? Follow these clear, actionable steps to make your Cozy Monterey Chicken Spaghetti Bake:

    1. Preheat the Oven: Set your oven to 350°F (175°C) to prepare for baking.

    2. Cook the Spaghetti: Boil water in a large pot. Add spaghetti and cook according to package instructions until al dente. Drain and set aside.

    3. Sauté the Chicken: In a large skillet, heat a drizzle of olive oil over medium heat. Add the cubed chicken breast and season with salt and pepper. Cook until browned and fully cooked, about 5-7 minutes.

    4. Add Aromatics: Once the chicken is cooked, add diced onions, garlic, and bell peppers to the skillet. Sauté until vegetables are softened, about 3-4 minutes.

    5. Combine the Sauce: In a mixing bowl, combine the marinara sauce and sour cream (or yogurt). Mix until well blended. Pour this sauce over the chicken and vegetables, stirring until everything is nicely coated.

    6. Combine Pasta and Sauce Mixture: In a large mixing bowl, combine the cooked spaghetti with the chicken-sauce mixture. Gently toss until all the spaghetti is thoroughly coated.

    7. Add Cheese: Fold in half of the shredded Monterey Jack cheese (or its substitute) into the spaghetti mixture. Reserve the other half for topping later.

    8. Transfer to a Baking Dish: Lightly grease a 9×13 inch baking dish with cooking spray. Pour the spaghetti-bake mixture into the dish and spread it evenly.

    9. Top with Cheese: Sprinkle the remaining cheese evenly over the top of the casserole.

    10. Bake: Place the baking dish in the preheated oven and bake for about 20-25 minutes or until the cheese is melted and bubbly.

    11. Garnish and Serve: Once baked, take the dish out of the oven and let it cool for a few minutes. Garnish with fresh parsley or basil if desired. Serve warm and enjoy!

    This recipe can easily be adapted for various dietary needs, ensuring that the dish remains satisfying regardless of preferences.

    Mastering Cozy Monterey Chicken Spaghetti Bake: Advanced Tips and Variations

    Now that you’ve got the basic recipe down, here are some advanced tips and exciting variations to make your Cozy Monterey Chicken Spaghetti Bake even more special:

    • Spice it Up: Add a pinch of red pepper flakes for a spicy kick or include some diced jalapeños if you enjoy heat.

    • Veggie Boost: Mix in other vegetables like mushrooms, spinach, or broccoli for additional nutrition and flavor.

    • Herb Infusion: Fresh herbs like parsley, basil, or oregano can elevate the dish’s flavor profile. Add them right before serving for that fresh touch.

    • Breakfast Twist: Turn your spaghetti bake into a breakfast casserole by adding beaten eggs before baking. This variation can make it a hearty brunch option.

    Remember, cooking is an art! Feel free to experiment with these variations as you explore the realms of chicken recipes.

    How to Store Cozy Monterey Chicken Spaghetti Bake: Best Practices

    Storing your Cozy Monterey Chicken Spaghetti Bake properly can extend its freshness and deliciousness for later enjoyment. Here are some storage tips:

    • Refrigeration: After cooking, if you have leftovers, let the dish cool to room temperature. Store in an airtight container in the refrigerator for up to 4 days.

    • Freezing: For longer storage, you can freeze the baked spaghetti dish. Allow it to cool fully, then cover the dish tightly with a lid or aluminum foil. Label and store in the freezer for up to 3 months. When ready to eat, thaw in the refrigerator overnight and bake until heated through.

    • Reheating: To reheat, place the dish in a preheated oven at 350°F (175°C) for about 20-30 minutes or until heated thoroughly. You can cover it with foil to prevent the top from browning too much.

    By following these storing practices, you ensure your Cozy Monterey Chicken Spaghetti Bake tastes delicious even days after it’s initially prepared!

    Nutritional Value of Cozy Monterey Chicken Spaghetti Bake

    Understanding the nutritional value of the Cozy Monterey Chicken Spaghetti Bake can help you make informed choices about your meals. Here’s a general nutritional breakdown per serving, considering standard ingredients:

    • Calories: Approximately 420 kcal
    • Protein: 30 g
    • Carbohydrates: 45 g
    • Fat: 15 g
    • Fiber: 4 g
    • Sodium: 600 mg

    These values can vary based on substitutions made and portion sizes. This bake is a well-balanced dish that offers protein from the chicken, healthy fats from the cheese, and carbohydrates from the pasta, making it a wholesome meal option. For health-conscious eaters, modifying ingredients to lower calorie counts or boost protein can easily be achieved.

    FAQs: Frequently Asked Questions About Cozy Monterey Chicken Spaghetti Bake

    Can I use another type of pasta in this recipe?

    Absolutely! While spaghetti is the traditional choice, you can substitute it with any pasta shape you prefer— including gluten-free and whole-grain options.

    How can I make this dish dairy-free?

    Simply swap the cheese for a dairy-free alternative and use a plant-based sour cream or yogurt substitute. This makes it ideal for anyone avoiding dairy.

    How long can I store leftovers?

    Leftovers can be stored in an airtight container in the refrigerator for up to four days or in the freezer for three months.

    Is this dish suitable for meal prep?

    Definitely! The Cozy Monterey Chicken Spaghetti Bake is perfect for meal prepping. You can make it in bulk and portion it out for quick, convenient meals throughout the week.

    Can I skip the chicken and make it vegan?

    Yes, replace chicken with chickpeas or tofu, and ensure all other ingredients align with a vegan diet.

    By addressing these common queries, home cooks can feel more confident trying out this comforting recipe.

    With its ease of preparation, gratifying flavors, and flexible dietary options, the Cozy Monterey Chicken Spaghetti Bake can be a delightful addition to your recipe arsenal. Enjoy making and savoring this fantastic dish with friends and family!

  • The Best Deviled Eggs

    The Best Deviled Eggs

    The Best Deviled Eggs: A Tropical Delight

    Introduction to The Best Deviled Eggs

    Deviled eggs have held a special place among appetizer recipes for generations, becoming a staple at gatherings, parties, and picnics. As simple as they are delectable, they are not just a crowd-pleaser but a wholesome option for home cooks looking for a nutritious bite. This recipe for “The Best Deviled Eggs” adds a tropical twist, elevating the classic flavors with ingredients that enhance both taste and health benefits.

    Whether you’re a busy parent needing a quick snack for your kids, a student hoping for a nutrient-dense option between classes, or a health-conscious individual avoiding gluten and excess calories, this recipe is made for you. It’s quick to prepare, packed with protein, and easily customizable, making it a delightful choice for a variety of dietary preferences.

    Regardless of your cooking level, these deviled eggs promise to impress. With their creamy texture and zesty flavor profile, they can transform an ordinary gathering into a culinary experience. Plus, with their vegan and gluten-free options, they are suitable for nearly everyone. Let’s delve deeper into why this recipe is a must-try!

    Benefits and Advantages of The Best Deviled Eggs

    This recipe stands out among appetizer recipes due to its simplicity and versatility. First, the ease of preparation is unmatched; even novice cooks can whip up a batch in no time. Following a straightforward set of instructions ensures that the result is consistently delicious, making these eggs a reliable go-to for any occasion.

    From a health perspective, deviled eggs offer numerous benefits. They are an excellent source of high-quality protein, essential for muscle repair and growth. Additionally, eggs contain vital nutrients such as vitamin B12, which supports energy levels, and choline, important for brain function. This makes them not only a tasty treat but also a beneficial snack for your mind and body.

    One of the most appealing aspects of this recipe is its adaptability. Health-conscious readers can easily modify it to match their dietary needs. For instance, by swapping mayonnaise for avocado or Greek yogurt, you can create a creamy filling that’s lighter yet equally satisfying. Furthermore, the ability to incorporate various spices and ingredients allows you to tailor the flavors to your liking. Whether you prefer spicy, smoky, or sweet notes, there’s a variation of these deviled eggs for everyone.

    Finally, these deviled eggs can be enjoyed in multiple settings: as appetizers at a cocktail party, a packed lunch for school or work, or even as a light dinner option paired with a salad. Their versatility and nutritional profile make them an ideal choice for individuals with varying lifestyles.

    Ingredients Overview

    Essential Ingredients for The Best Deviled Eggs

    To craft The Best Deviled Eggs, you’ll need the following ingredients:

    • 6 large eggs (for a standard recipe; adjust as needed)
    • 1/4 cup mayonnaise (for creaminess; swap with vegan mayo for a plant-based version)
    • 1 tsp Dijon mustard (for a tangy kick; optional)
    • 1 tsp white vinegar (to brighten up the flavors)
    • Salt and pepper to taste (essential seasonings)
    • Paprika (for garnish; adds color and a hint of spice)
    • Chives or parsley (for an herby finish; optional)

    Vegan, Gluten-Free, and Low-Calorie Options

    • Vegan: Use 1/4 cup of mashed avocado combined with a splash of lime juice instead of mayonnaise for a creamy texture with added health benefits.
    • Gluten-Free: All the listed ingredients are gluten-free, making this recipe suitable for those with gluten sensitivities.
    • Low-Calorie: Substitute regular mayo with a low-fat version or Greek yogurt to cut down on calories while maintaining creaminess.

    Dietary Substitutions to Customize Your The Best Deviled Eggs

    Substitutions for Eggs: For those with egg allergies or sensitivities, consider using boiled potato or chickpeas blended with your choice of vegan mayo as a base. Mash the chickpeas until smooth, and mix in your seasonings to create a satisfying filling.

    Flavor Variations: Enhance your deviled eggs’ flavor profile by adding different spices or ingredients. Ideas include:

    • Tex-Mex: Mix in salsa and top with diced jalapeños.
    • Mediterranean: Stir in chopped olives and a sprinkle of feta cheese.
    • Curry Style: Add curry powder for a warm spice and a touch of sweetness.

    This flexibility empowers all readers, from health-focused individuals to food enthusiasts, to create a version of deviled eggs that suits their preferences and dietary requirements.

    How to Prepare the Perfect The Best Deviled Eggs: Step-by-Step Guide

    Creating The Best Deviled Eggs is a straightforward process. Follow this step-by-step guide to ensure a perfect result each time:

    1. Boil the Eggs: Place your eggs in a pot and cover them with water. Bring to a boil over medium-high heat. Once boiling, cover the pot, remove it from heat, and let it sit for 12-14 minutes.

    2. Cool and Peel: Transfer the eggs to a bowl of ice water to halt the cooking process. Let them cool for about 5-10 minutes. Once cooled, carefully peel the shells under running water for easier removal.

    3. Slice and Scoop: Slice the cooled eggs in half lengthwise. Gently remove the yolks and place them in a mixing bowl. Set the egg whites aside for later.

    4. Mix Ingredients: To the bowl with yolks, add mayonnaise, Dijon mustard, vinegar, salt, and pepper. Mash and mix the ingredients until smooth and creamy. Adjust seasonings to your taste.

    5. Fill the Egg Whites: Using a spoon or piping bag, fill the halved egg whites with the yolk mixture. You can add a decorative touch by sprinkling paprika or chopped chives on top.

    6. Chill and Serve: Refrigerate the filled deviled eggs for at least 30 minutes before serving. This enhances the flavor and allows the filling to firm up.

    7. Garnish and Enjoy: Before serving, garnish with additional herbs or spices if desired.

    The beauty of this recipe lies in its adaptability. Each step can be adjusted for varying diets or flavor preferences, ensuring everyone can enjoy these delightful treats!

    Mastering The Best Deviled Eggs: Advanced Tips and Variations

    To truly master The Best Deviled Eggs, consider these advanced tips and variations:

    • Presentation: Arrange your deviled eggs on a platter, garnishing with fresh herbs or edible flowers for an elegant look. Eye-catching presentation elevates the dish for gatherings.

    • Flavor Infusions: Add unique flavors to your filling. Try incorporating smoked paprika, sriracha for a spicy kick, or even bacon bits for a savory crunch.

    • Cooking Method: For a more rustic texture, use a fork to mash the yolk mixture instead of a blender. This will create a chunkier filling, enhancing the mouthfeel.

    • Experiment with Toppings: Think beyond paprika—consider using crispy fried onions, crushed pistachios, or even caviar for an upscale twist.

    These small touches can transform your deviled eggs from simple appetizers to gourmet delights that impress even the most discerning guests!

    How to Store The Best Deviled Eggs: Best Practices

    Storage is crucial to ensuring your appetizer recipes remain fresh. Here are some best practices for storing your prepared deviled eggs:

    • Refrigeration: Store your deviled eggs in an airtight container in the refrigerator. They can last for about 2-3 days. To prevent drying out, cover them with plastic wrap or place them in a container with a lid.

    • Freezing: While it’s not ideal to freeze deviled eggs, if necessary, you can freeze the yolk mixture separately. Store it in an airtight container for up to a month. When ready to serve, defrost and refill the egg whites, but note the texture may slightly change.

    • Reheating: It’s best to serve deviled eggs cold, but if you wish to serve them warm, do so gently—heat them in the microwave for just a few seconds, ensuring not to overheat.

    With these storage strategies, you can enjoy your tropical deviled eggs fresh and at their best for days to come!

    Nutritional Value of The Best Deviled Eggs

    Nutritional information is essential for understanding how this recipe fits into your dietary goals. Here’s a breakdown of the nutritional value per serving (2 halves):

    • Calories: Approximately 140-160
    • Protein: 6-8 grams
    • Fat: 10-12 grams (depends on mayonnaise used)
    • Carbohydrates: 1-2 grams
    • Fiber: 0 grams
    • Sugar: 0-1 gram
    • Cholesterol: 160-180 mg

    These values can vary based on ingredient choices, especially if you choose lower-fat or vegan substitutes. It’s important to remember that deviled eggs provide a wealth of nutrients, including proteins and vitamins, promoting a balanced diet.

    When enjoying deviled eggs, you’re not only treating yourself to a delicious appetizer but also fueling your body with essential nutrients.

    FAQs: Frequently Asked Questions About The Best Deviled Eggs

    Can I make deviled eggs ahead of time?

    Absolutely! You can prepare deviled eggs a day in advance. Just store them in the refrigerator until serving, but it’s best to keep the filling separate from the egg whites to prevent sogginess.

    What can I substitute for mayonnaise in deviled eggs?

    You can use Greek yogurt, mashed avocado, or a dairy-free mayo for a lighter and healthier option.

    Are deviled eggs gluten-free?

    Yes! All ingredients in this recipe can be gluten-free. Just check the mayonnaise or substitute to ensure it meets gluten-free standards.

    How can I make deviled eggs spicier?

    Incorporate diced jalapeños, sriracha, or cayenne pepper into your yolk filling for a spicy kick. Adjust based on your heat preference.

    What’s the best way to prevent overcooking the eggs?

    To avoid a greenish tint around the yolk, ensure you follow the boiling and cooling steps carefully. Ice water is critical for stopping the cooking process promptly.

    In conclusion, The Best Deviled Eggs are not just a simple snack; they are a rich, flavorful, and nutritious option for a variety of dietary preferences. By incorporating healthy ingredients, being mindful of dietary needs, and following clear steps, you can bring a delicious touch to any gathering or meal. So roll up your sleeves and give this delightful appetizer recipe a try — you won’t be disappointed!

  • Easy Buffalo Chickpea Wraps

    Easy Buffalo Chickpea Wraps

    Easy Buffalo Chickpea Wraps: A Tropical Delight

    Introduction to Easy Buffalo Chickpea Wraps

    When it comes to easy dinner recipes, the Easy Buffalo Chickpea Wraps stand out as a top contender. This vibrant, flavorful dish combines the spicy zest of buffalo sauce with the heartiness of chickpeas, offering an appealing meal that is not only scrumptious but also incredibly simple to prepare. Quick enough for a weeknight dinner yet impressive enough for entertaining, these wraps are an enticing option for everyone from busy parents to students and food enthusiasts alike.

    The beauty of Buffalo Chickpea Wraps lies in their simplicity—ready in about 30 minutes and requiring minimal cooking skills. Moreover, they cater to various dietary preferences, being both vegan and gluten-free. This recipe is packed with plant-based protein, fiber, and essential nutrients, making it a guilt-free treat that nourishes your body and tantalizes your taste buds. So whether you’re a newlywed looking to impress, a working professional in need of a swift meal, or a baking enthusiast seeking a savory balance, these wraps fit the bill perfectly! Let’s dive deeper and understand why they are a must-try.

    Benefits and Advantages of Easy Buffalo Chickpea Wraps

    Easy Buffalo Chickpea Wraps not only deliver on taste but also come loaded with numerous benefits that make them a favorite among easy dinner recipes.

    1. Simple Preparation

    You don’t need to be a culinary expert to whip up these wraps. The process is straightforward, requiring just a few essential ingredients and a few kitchen tools. This ease of preparation caters to those who may be cooking for one or the entire family, ensuring that cooking is approachable and free of stress.

    2. Health Benefits

    Packed with chickpeas, which are rich in plant-based protein, fiber, and a plethora of vitamins, these wraps are a smart nutritional choice. They help maintain a healthy digestive system and keep you feeling full longer, which is crucial for weight management. Likewise, using whole-grain tortillas or lettuce wraps enhances the fiber content, making them a wholesome meal option.

    3. Customizable Options

    One of the greatest features of these wraps is their adaptability. You can easily swap out ingredients based on your dietary needs or preferences. Whether you’re avoiding gluten, dairy, or other allergens, there are plenty of substitutes available. This versatility means that you can enjoy these wraps regardless of your dietary restrictions, making them an excellent option for potlucks or gatherings.

    4. Flavor Fusion

    The blend of spices and buffalo sauce provides a satisfying kick that elevates the taste profile of the dish. This flavor fusion makes it enjoyable for both young and mature palates, broadening its appeal. Who wouldn’t want to take a bite of a zesty, colorful wrap brimming with flavor?

    Overall, the Easy Buffalo Chickpea Wraps deliver health and flavor in one delightful package, making them an excellent choice for anyone seeking quick and satisfying easy dinner recipes.

    Ingredients Overview

    Essential Ingredients for Easy Buffalo Chickpea Wraps

    To create the ultimate Easy Buffalo Chickpea Wraps, you’ll need the following essential ingredients:

    1. Canned Chickpeas (2 cans, 15 oz each) – This is the base of the wrap and provides plant-based protein and fiber.
    2. Buffalo Sauce (1 cup) – Adds the signature spicy flavor. Brands vary; choose one that suits your spice tolerance.
    3. Whole Wheat Tortillas (4 large) – A healthy and hearty wrap option. For gluten-free alternatives, use rice or corn tortillas.
    4. Romaine Lettuce (1 cup, shredded) – Adds freshness and crunch; feel free to substitute with spinach or another leafy green.
    5. Avocado (1 medium) – Provides healthy fats, making the wrap creamier. You can replace it with a dollop of hummus if you prefer.
    6. Carrots (1 cup, grated) – Adds a slight sweetness and another layer of texture. If unavailable, you could use diced bell peppers.
    7. Green Onions (1/4 cup, chopped) – Enhances the flavor and color. Chives or red onions are good substitutes.
    8. Optional Toppings: Vegan sour cream, cilantro, or additional buffalo sauce for drizzling.

    With these ingredients, you’ll create a meal that not only tastes divine but addresses various dietary requirements, making it a perfect choice among easy dinner recipes.

    Dietary Substitutions to Customize Your Easy Buffalo Chickpea Wraps

    Whether you have specific dietary needs or simply wish to try something new, here are suggested substitutions to customize your Easy Buffalo Chickpea Wraps:

    • For a Low-Calorie Option: Instead of tortillas, consider using large lettuce leaves as a wrap, allowing you to enjoy the flavors with fewer calories.
    • For a Spicier Kick: Incorporate diced jalapeños or a bit of cayenne pepper into the chickpea mixture for those who crave extra heat.
    • For Added Protein: Throw in some quinoa or black beans along with the chickpeas. This not only boosts protein content but also adds varied textures.
    • For a Dairy-Free Creaminess: Substitute the avocado with tahini or cashew cream for a nutty twist while keeping it vegan.
    • For Gluten-Free Wraps: As mentioned earlier, use gluten-free tortillas or lettuce instead of wheat options.

    These variations allow you to cater to dietary restrictions while still enjoying the deliciousness of Easy Buffalo Chickpea Wraps, making them an inclusive entry in your collection of easy dinner recipes.

    How to Prepare the Perfect Easy Buffalo Chickpea Wraps: Step-by-Step Guide

    It’s time to roll up your sleeves and dive into the step-by-step process of making your Easy Buffalo Chickpea Wraps. With just a few easy actions, you’ll have a satisfying meal ready to serve in no time!

    1. Prepare the Chickpeas:
    2. Drain and rinse the canned chickpeas under cold water to remove excess sodium and preserve their natural flavor.

    3. Mash the Chickpeas:

    4. In a medium-sized bowl, roughly mash the chickpeas using a fork or potato masher. Aim for a chunky texture that retains a bit of whole chickpea for added bite.

    5. Mix Ingredients:

    6. Add the buffalo sauce to the mashed chickpeas, along with shredded carrots, chopped green onions, and diced avocado. Stir until well combined. Taste and adjust the spice level if necessary by adding more buffalo sauce.

    7. Warm the Tortillas (optional):

    8. If you prefer, warm the tortillas in a dry skillet over medium heat for about 30 seconds on each side. This makes them more pliable and improves their flavor.

    9. Assemble the Wraps:

    10. Lay a tortilla flat on a plate. Place a generous scoop of the chickpea mixture in the center, followed by a handful of shredded romaine lettuce.

    11. Wrap It Up:

    12. Fold in the sides of the tortilla first, then roll it up from the bottom to enclose the filling completely. Repeat with remaining tortillas and chickpea filling.

    13. Serve:

    14. Slice the wraps in half, serve with a side of extra buffalo sauce or dairy-free ranch for dipping, and enjoy your delightful meal!

    As you prepare these Easy Buffalo Chickpea Wraps, remember that this recipe is a canvas. You can modify and adapt it based on what you have on hand, allowing you to create a unique dish that suits your palate and dietary preferences. And there you have it—another contender added to your list of go-to easy dinner recipes!

    Mastering Easy Buffalo Chickpea Wraps: Advanced Tips and Variations

    Now that you know how to prepare the basic Easy Buffalo Chickpea Wraps, here are a few advanced tips and delicious variations to enhance your cooking experience:

    1. Flavor Boosters

    To take the wraps to the next level, consider marinating the chickpeas in buffalo sauce for a few hours or overnight prior to cooking. This amplifies the flavor and ensures each bite packs a punch.

    2. Experiment with Spices

    In addition to buffalo sauce, try adding cumin, smoked paprika, or garlic powder to your chickpea mixture. These spices will deepen the flavor profile, making the wraps even more irresistible.

    3. Create a Salad Variation

    Transform this recipe into a chilled salad by omitting the tortillas. Simply toss the chickpea mixture with mixed greens, additional vegetables, and a tangy vinaigrette for a refreshing dish.

    4. Make It a Meal Prep Favorite

    These wraps are perfect for meal prepping. Assemble them ahead of time, but consider keeping the wraps unassembled until you are ready to eat. Store the chickpea mixture and wraps separately to maintain freshness.

    By employing these tips and variations, you can keep your Easy Buffalo Chickpea Wraps interesting and versatile. With minor adjustments, you will have a range of meals inspired by this one delightful recipe, enhancing your collection of easy dinner recipes.

    How to Store Easy Buffalo Chickpea Wraps: Best Practices

    Understanding how to properly store your Easy Buffalo Chickpea Wraps can extend their life and maintain freshness, enabling you to enjoy your meal for days to come.

    Refrigeration

    • If you have leftovers, wrap each individual Chickpea Wrap in plastic wrap or place them in an airtight container. They can last in the refrigerator for up to 3 days. When ready to eat, reheat them in a microwave for 30-60 seconds, ensuring they’re warmed through.

    Freezing

    • For longer storage, consider freezing the chickpea filling separately from the tortillas. Place the chickpea mixture in a freezer-safe container, and it can last for up to 3 months. When ready to enjoy, thaw in the fridge overnight and then reheat as desired.

    Reheating

    • To reheat the wraps, if you prefer a toasted version, place them on a skillet over low heat for around 2-3 minutes on each side until warmed. This brings back some of the initial crispness of the tortilla while warming the filling effectively.

    By following these storage tips, you ensure that your Easy Buffalo Chickpea Wraps remain delicious and are ready for quick meals, proving to be an invaluable addition to your easy dinner recipes.

    Nutritional Value of Easy Buffalo Chickpea Wraps

    When it comes to nutrition, Easy Buffalo Chickpea Wraps are not only delectable but also packed with a wealth of beneficial nutrients. Here’s a breakdown of the nutritional value for one serving (1 wrap) based on standard ingredients:

    • Calories: 350
    • Protein: 14g
    • Fat: 10g
    • Carbohydrates: 54g
    • Fiber: 10g
    • Sugar: 3g
    • Sodium: 600mg (can be reduced by choosing low-sodium buffalo sauce)

    Health Benefits of Ingredients

    • Chickpeas are an excellent source of protein and fiber, helping to improve digestion and enhance satiety.
    • Avocados provide healthy fats essential for heart health.
    • Whole Wheat Tortillas boost fiber intake and are a healthier alternative to refined options.
    • Fresh Vegetables like romaine lettuce and carrots contribute essential vitamins and minerals, adding not just nutrition but also crunch.

    The nutritional profile makes these wraps suitable for various diets, including vegan, gluten-free, and low-calorie plans. As always, ingredients can be swapped to better suit individual dietary preferences while maintaining an impressive nutritional value. With these wraps, you’re not just enjoying great taste; you’re also nourishing your body with wholesome food that fits seamlessly into your list of easy dinner recipes.

    FAQs: Frequently Asked Questions About Easy Buffalo Chickpea Wraps

    1. Can I use dry chickpeas instead of canned?
      Yes, you can! Soak and cook dry chickpeas until tender, then proceed with the recipe as normal. Canned chickpeas save time, but dry can offer a fresher flavor.

    2. Is this recipe suitable for meal prep?
      Absolutely! The chickpea filling can be prepared ahead and stored separately from the tortillas to maintain freshness. Assemble when you’re ready to eat.

    3. Can I make these wraps gluten-free?
      Yes, just use gluten-free tortillas or switch to lettuce wraps. Many brands offer delicious gluten-free options that pair perfectly with the buffalo chickpea filling.

    4. How can I make these wraps spicier?
      If you enjoy heat, use a spicier buffalo sauce, sprinkle with red pepper flakes, or add diced jalapeños directly into the chickpea mixture.

    5. What can I substitute for avocado?
      If you’re not a fan of avocado, you can use hummus, tahini, or a vegan sour cream as a delicious creamy alternative.

    6. Are there any alternatives for buffalo sauce?
      If you prefer a milder flavor, you could mix your chickpeas with a BBQ sauce or a tangy vinaigrette instead. The taste will be different but still delightful!

    By addressing these common questions, I hope to enhance your cooking experience with Easy Buffalo Chickpea Wraps and inspire confidence in trying out this recipe. No matter your dietary preference, the wraps are a fantastic addition to your kitchen repertoire of easy dinner recipes.


    Final Thoughts

    With every flavorful bite, the Easy Buffalo Chickpea Wraps prove to be a fun, quick, and healthy meal that doesn’t compromise on texture or taste. Whether you’re enjoying them as part of a family dinner or as a nutritious lunch option, they are perfect for any occasion.

    By exploring the intricacies of preparation, nutritional value, and storage tips, you’re now equipped with everything needed to master these delightful wraps. So gather your ingredients, invite some friends, and enjoy the wonderful world of Easy Buffalo Chickpea Wraps! This recipe is bound to become a staple in your collection of easy dinner recipes. Happy cooking!

  • Crispy Parmesan Cauliflower Bites

    Crispy Parmesan Cauliflower Bites

    Crispy Parmesan Cauliflower Bites: A Tropical Delight

    Introduction to Crispy Parmesan Cauliflower Bites

    If you’re searching for healthy snacks that are simple, delicious, and perfect for any occasion, look no further than Crispy Parmesan Cauliflower Bites. This delightful recipe transforms a humble vegetable into a tasty treat that both adults and kids will love. By incorporating fresh cauliflower and the rich, nutty flavor of parmesan cheese, these bites deliver not just on taste but also on nutrition.

    Cauliflower is packed with essential vitamins, including Vitamin C, K, and B6, and is an excellent source of fiber. This makes Crispy Parmesan Cauliflower Bites a fantastic option for those who appreciate health-conscious eats, whether you’re a busy parent in need of a quick appetizer for the kids, a student looking for nutritious study snacks, or a work professional preparing healthy munchies for the office.

    Moreover, this recipe caters to a variety of dietary needs. With minimal ingredients and a straightforward preparation method, it fits well into gluten-free and low-carb diets, and it can easily be adapted to be vegan by substituting cheese. The fun and crispy texture of the bites offer a satisfying crunch that will make you forget you’re eating something healthy! So, grab your apron and prepare to be impressed by these delightful Cauliflower Bites.

    Benefits and Advantages of Crispy Parmesan Cauliflower Bites

    Crispy Parmesan Cauliflower Bites are not only a joy to eat; they also offer numerous health benefits that elevate them far beyond regular snacks. For starters, they are incredibly easy to prepare—perfect for those who may not have a lot of time for elaborate cooking. With just a handful of ingredients, you can create a dish that tastes gourmet and impresses everyone around your dining table.

    One of the standout advantages of this recipe is its versatility. You can customize it to suit your dietary requirements, making it an excellent choice for family gatherings, game nights, or even romantic dinners. It’s a fantastic way to sneak more vegetables into your diet, helping you and your loved ones consume essential nutrients without sacrificing flavor.

    Health-wise, cauliflower is truly a superfood, rich in antioxidants that help combat inflammation and support overall well-being. The addition of parmesan cheese boosts the flavor while also providing protein and calcium, rounding out the nutritional profile of these healthy snacks.

    Additionally, they are oven-baked rather than fried, significantly reducing the calorie count while keeping that satisfying crispy texture. This means you can enjoy a guilt-free indulgence. Moreover, since these bites are finger food, they are perfect for parties, allowing guests to mingle without worrying about utensils.

    Overall, Crispy Parmesan Cauliflower Bites stand out as not just a tasty treat, but a health-conscious option that you will want to keep in your culinary repertoire.

    Ingredients Overview

    Essential Ingredients for Crispy Parmesan Cauliflower Bites

    Creating perfect Crispy Parmesan Cauliflower Bites requires only a few essential ingredients, each serving a unique role in both flavor and texture. Here’s what you’ll need:

    • 1 medium cauliflower head (about 4 cups, broken into florets)
    • The star ingredient, cauliflower, is low in calories and packed with vitamins.

    • 1 cup grated parmesan cheese (or nutritional yeast for a vegan option)

    • Provides a rich, nutty flavor; nutritional yeast is perfect for creating a cheesy taste without dairy.

    • 1/2 cup breadcrumbs (gluten-free breadcrumbs optional)

    • Delivers a satisfying crunch; you can also use almond flour for a low-carb option.

    • 2 tablespoons olive oil

    • Helps to achieve that golden-brown color and crispy texture while adding healthy fats.

    • 1 teaspoon garlic powder

    • Adds depth and flavor to the bites, making them even more irresistible.

    • 1 teaspoon onion powder

    • Enhances the overall taste profile, complementing the garlic.

    • Salt and pepper to taste

    • Essential for seasoning.

    These ingredients come together to form crispy, cheesy bites that you won’t want to put down. They are also naturally gluten-free if you use the appropriate breadcrumbs, making them suitable for those with gluten sensitivities.

    Dietary Substitutions to Customize Your Crispy Parmesan Cauliflower Bites

    Customization is key for any recipe, and Crispy Parmesan Cauliflower Bites are no exception. Here are some adjustments you can make to cater to various dietary needs:

    • Vegan Variation
    • Substitute parmesan cheese with nutritional yeast. This will give you the cheesy flavor without any dairy. For binders, you might want to try flaxseed meal mixed with water to help hold your bites together.

    • Gluten-Free Option

    • Use gluten-free breadcrumbs instead of regular ones. Additionally, substituting almond flour for breadcrumbs is excellent for those on a low-carb or Paleo diet.

    • Spice it Up

    • If you enjoy a little heat, add cayenne pepper or chili flakes to the mix for an extra kick. You can also sprinkle paprika for a smoky flavor.

    • Herbs

    • Fresh herbs like parsley, rosemary, or thyme can elevate the flavor even further. Consider adding them into the mix for a fresh twist.

    These substitutions highlight the adaptability of the recipe, making it easy to accommodate various dietary preferences without compromising taste.

    How to Prepare the Perfect Crispy Parmesan Cauliflower Bites: Step-by-Step Guide

    Now that you’ve gathered your ingredients, it’s time to prepare your Crispy Parmesan Cauliflower Bites! Follow these straightforward steps to achieve that perfect crunch:

    1. Preheat the Oven:
      Preheat your oven to 425°F (220°C). This high temperature will help make your cauliflower bites crispy and golden.

    2. Prepare the Cauliflower:
      Wash the cauliflower and cut it into bite-sized florets. The more uniform your pieces, the better they will cook.

    3. Blanch the Florets (Optional):
      For extra crispiness, you can blanch the cauliflower in boiling water for about 2-3 minutes before proceeding. Drain and pat dry. This step is optional but can enhance the texture.

    4. Mix the Dry Ingredients:
      In a large bowl, combine the parmesan cheese, breadcrumbs, garlic powder, onion powder, salt, and pepper. Mix thoroughly to ensure an even distribution.

    5. Coat the Cauliflower:
      Drizzle the olive oil over the cauliflower florets. Toss to coat evenly. Next, add the dry mixture from the previous step, tossing again until each floret is well-covered with the cheesy mix.

    6. Arrange on a Baking Sheet:
      Line a baking sheet with parchment paper for easy cleanup. Spread the coated cauliflower evenly on the baking sheet, making sure they are not overcrowded. This will guarantee all sides bake up crispy.

    7. Bake:
      Place the baking sheet in the oven and bake for 25-30 minutes. Halfway through, flip the florets to ensure they become golden and crispy on all sides.

    8. Check for Doneness:
      The bites are done when they turn a beautiful golden brown and feel crispy to the touch. If you desire extra crunch, feel free to turn on the broiler for an additional 2-3 minutes, but watch closely to prevent burning.

    9. Serve Warm:
      Remove from the oven and allow to cool for a minute before serving. Enjoy your Crispy Parmesan Cauliflower Bites as a snack, appetizer, or side dish!

    This recipe is simple and adaptable. By following these steps, you can create a batch of delicious bites that cater to your dietary needs, ensuring everyone can enjoy them!

    Mastering Crispy Parmesan Cauliflower Bites: Advanced Tips and Variations

    Now that you’re well-acquainted with the base recipe, here are some advanced tips and variations to master your Crispy Parmesan Cauliflower Bites:

    • Experiment with Seasonings:
      Go beyond garlic and onion powder. Try spices like Italian seasoning, curry powder, or even smoked paprika for different flavor profiles.

    • Serve with Dips:
      Pair your bites with flavorful dips like homemade ranch, marinara sauce, or sriracha mayo. This not only adds flavor but also enhances the snacking experience.

    • Batch Cooking:
      Consider making larger batches and freezing them for future healthy snacks. This way, you have a nutritious option ready to go at any time.

    • Vegetable Mix:
      To introduce variety, you can mix in other vegetables like broccoli florets or zucchini. Just adjust the cooking time accordingly to ensure even cooking.

    • Cauliflower Puree:
      If you’re feeling adventurous, you can blend some of the cauliflower into a puree and fold it into the batter for a creamier texture without sacrificing crispness.

    These advanced tips will help you elevate your Crispy Parmesan Cauliflower Bites, adding endless possibilities and flavors to your snacking routine!

    How to Store Crispy Parmesan Cauliflower Bites: Best Practices

    Storing your Crispy Parmesan Cauliflower Bites properly is crucial to maintain their delightful crunch and flavor. Here’s how to do it effectively:

    • Refrigeration:
      Store any leftover bites in an airtight container in the refrigerator for up to 3 days. When you’re ready to enjoy them again, simply reheat them in the oven for about 10-15 minutes at 375°F (190°C) to bring back the crispiness.

    • Freezing:
      If you want to preserve them for a more extended period, you can freeze uncooked bites. Place them on a baking sheet in a single layer and freeze until solid, then transfer them to a freezer-safe bag. They can last up to 3 months in the freezer. To cook, bake straight from frozen, adding an extra 5-10 minutes to your baking time.

    • Re-heating:
      For the best results, reheat in an oven or air fryer rather than the microwave. Microwaving can make them soggy, while baking or air-frying will help retain that crispy exterior.

    By following these storage tips, your Crispy Parmesan Cauliflower Bites will remain one of your go-to healthy snacks, ready whenever the craving strikes.

    Nutritional Value of Crispy Parmesan Cauliflower Bites

    Understanding the nutritional value of your food is essential for maintaining a balanced diet. Each serving of Crispy Parmesan Cauliflower Bites provides a wholesome balance of macronutrients and important vitamins. Here is an approximate nutritional breakdown for one serving (which is about 4-5 bites):

    • Calories: 150
    • Total Fat: 9g
    • Saturated Fat: 3g
    • Cholesterol: 15mg
    • Sodium: 200mg
    • Total Carbohydrates: 12g
    • Dietary Fiber: 3g
    • Sugars: 1g
    • Protein: 8g

    Vitamin C: 50mg (about 60% of daily value)
    Calcium: 200mg (about 15% of daily value)
    Iron: 1.2mg (about 6% of daily value)

    Note: These values may vary based on specific ingredient choices and portion sizes. Adjustments such as using less cheese or replacing breadcrumbs with a lower-calorie alternative can alter the overall nutrition.

    Crispy Parmesan Cauliflower Bites offer a nutritious and delicious way to enjoy your veggies, making them a fantastic choice for those seeking healthy snacks that don’t compromise on flavor.

    FAQs: Frequently Asked Questions About Crispy Parmesan Cauliflower Bites

    1. Can I make these bites ahead of time?
    Yes, you can prepare the bites ahead of time and store them in the refrigerator for a day or freeze them for longer storage. Just reheat them before serving.

    2. Are these bites suitable for vegans?
    Absolutely! Simply replace the parmesan cheese with nutritional yeast and choose appropriate binders as necessary.

    3. How do I keep the bites crispy after cooking?
    To keep your bites crispy, store them in an airtight container and reheat in the oven instead of the microwave when ready to eat.

    4. Can I use frozen cauliflower?
    Yes, you can use frozen cauliflower florets, but make sure to thaw and pat them dry to prevent excess moisture, which can result in sogginess.

    5. What’s a good way to spice up the flavor?
    You can add spices like cayenne pepper, smoked paprika, or fresh herbs to the dry mixture for an extra flavor boost, tailoring the bites to your preferred taste.

    These frequently asked questions should help clarify any concerns you might have regarding making and enjoying your Crispy Parmesan Cauliflower Bites. Dive right in and experience the joy of a truly healthy snack option! Enjoy!

  • Refreshing Thai Cucumber Salad

    Refreshing Thai Cucumber Salad

    Refreshing Thai Cucumber Salad: A Tropical Delight

    Introduction to Refreshing Thai Cucumber Salad

    Are you in search of a dish that captures the essence of tropical flavors while remaining simple and healthy? Look no further than this vibrant, Refreshing Thai Cucumber Salad. This delightful cucumber salad is not just easy to whip up; it’s bursting with fresh herbs, crunchy vegetables, and a tangy dressing that will invigorate your palate.

    This cucumber salad is perfect for various dietary needs, appealing to vegans, gluten-free eaters, and anyone conscious of their calories. It’s an excellent side dish for any meal or a standalone snack that will leave you feeling light and satisfied. The recipe features hydrating cucumbers, zesty lime, and aromatic herbs, all working in harmony to create a dish that feels like summer on a plate. Plus, this salad can be tailored to suit busy schedules, making it an ideal choice for home cooks, parents juggling multiple tasks, students on-the-go, or anyone simply looking to enjoy a healthy lifestyle without sacrificing flavor.

    Let’s dive into the benefits of this tantalizing Thai salad!

    Benefits and Advantages of Refreshing Thai Cucumber Salad

    One of the primary attractions of this Refreshing Thai Cucumber Salad is its ease of preparation. With only a handful of ingredients and minimal effort required, you can enjoy a fresh, homemade dish in no time. What’s more, this cucumber salad is flexible; you can adjust the amount of dressing, spice, and ingredients to fit your personal preferences or dietary needs.

    Health Benefits

    From a nutritional standpoint, cucumbers are incredibly hydrating; they consist of about 95% water, making them ideal for maintaining hydration. They are low in calories, making this salad suitable for anyone looking to lose weight or simply eat healthier. Additionally, cucumbers are a great source of vitamins C and K, both essential for maintaining overall health.

    The addition of fresh herbs like cilantro and mint not only amplifies the flavors but also infuses the dish with antioxidants and anti-inflammatory properties. This cucumber salad is perfect for:

    • Busy parents seeking quick meal solutions.
    • Students and professionals aiming for nutritious meals that don’t require extended cooking times.
    • Health-conscious individuals wanting to indulge without the guilt.

    Whether you are hosting a summer BBQ, preparing a light lunch, or craving a refreshing snack, this Refreshing Thai Cucumber Salad checks all the boxes. It’s vegan, gluten-free, and incredibly versatile, making it suitable for a wide audience.

    Let’s explore the essential ingredients that make this delicious dish come alive.

    Ingredients Overview

    Essential Ingredients for Refreshing Thai Cucumber Salad

    To create the Refreshing Thai Cucumber Salad, gather the following ingredients:

    • 2 large cucumbers (peeled and sliced thinly) – The star of the show, providing crunch and hydration.
    • 1 red bell pepper (thinly sliced) – For color and sweetness.
    • 1/4 cup red onion (thinly sliced) – Adds a bit of sharpness and depth.
    • 1/2 cup cherry tomatoes (halved) – A burst of flavor and additional color.
    • 1/4 cup fresh cilantro (chopped) – Offers a fragrant note and vibrant color.
    • 1/4 cup fresh mint leaves (chopped) – Invigorating and aromatic.
    • 2 tbsp lime juice – The tang that ties it all together.
    • 1 tbsp fish sauce (or soy sauce for a vegan option) – Adds umami flavor.
    • 1 tbsp sugar (or honey for a natural sweetener) – Balances the acidity of the lime.
    • Salt and pepper to taste – Enhances flavor.

    This combination of ingredients not only results in a tantalizing salad but also offers a plethora of nutrients. To cater to different dietary needs, substitutions can be made easily.

    Dietary Substitutions to Customize Your Refreshing Thai Cucumber Salad

    Adapting the Refreshing Thai Cucumber Salad to your dietary preferences is simple. Here are some suggestions:

    • For a Vegan Version: Substitute fish sauce with soy sauce or tamari to keep the flavor profile intact.
    • Sugar Alternatives: If you prefer a low-glycemic index sweetener, consider using agave syrup or monk fruit sweetener.
    • Extra Protein: For a more filling meal, incorporate grilled chicken, shrimp, or tofu.
    • Add Extra Crunch: Toss in some toasted peanuts, sesame seeds, or edamame for a delightful texture contrast.

    These adjustments ensure that the cucumber salad remains delightful and healthy while catering to various dietary preferences. Now, let’s get your kitchen ready as we step into how to prepare this refreshing dish!

    How to Prepare the Perfect Refreshing Thai Cucumber Salad: Step-by-Step Guide

    1. Prepare the Base: Begin by washing the cucumbers thoroughly. Peel if desired, then slice them thinly using a sharp knife or mandoline slicer. Aim for even slices to ensure a harmonious texture throughout the salad.

    2. Chop Additional Veggies: Slice the red bell pepper, and cherry tomatoes in half. Thinly slice the red onion. Each component should be prepped before mixing for a smooth assembly.

    3. Herbs Prep: Finely chop the fresh cilantro and mint. Set aside as the fragrant herbs will give the salad a fresh burst of flavor and aroma.

    4. Make the Dressing: In a small bowl, combine lime juice, fish sauce (or soy sauce), and sugar (or your preferred sweetener). Whisk until well blended, and the sugar is dissolved. Taste the dressing and adjust as necessary, adding more lime for tanginess or sugar for sweetness.

    5. Combine Ingredients: In a large mixing bowl, add the sliced cucumbers, bell peppers, red onion, and cherry tomatoes. Pour the dressing over the veggies and gently toss to coat everything evenly.

    6. Fold in Fresh Herbs: At this stage, fold in the chopped cilantro and mint delicately. You want to maintain some of the herb leaves intact for aesthetic appeal and flavor.

    7. Season: Sprinkle with salt and pepper to taste. It’s crucial to adjust according to your dietary preferences – less for low-sodium diets.

    8. Chill and Serve: Let the Refreshing Thai Cucumber Salad chill in the refrigerator for at least 15 minutes. This allows the flavors to meld beautifully. Serve cool as a side dish or a light meal.

    Adaptation Tips

    Feel free to scale the recipe based on your needs. If you have a larger gathering, double the ingredients, but keep the dressing proportions balanced. Enjoying this cucumber salad fresh is critical, but you can prep it a few hours in advance.

    Mastering Refreshing Thai Cucumber Salad: Advanced Tips and Variations

    To elevate your Refreshing Thai Cucumber Salad, consider the following advanced tips and variations:

    • Seasonal Add-Ins: Incorporate seasonal veggies like radishes, carrots, or even mango for an added sweetness and crunch.
    • Spice It Up: If you prefer heat, add thinly sliced red chilies or a sprinkle of chili flakes into the dressing for a spicy twist.
    • Flavor with Nuts: Add crushed peanuts or sesame seeds not only for texture but also to enrich the overall flavor profile.
    • Different Dressings: Experiment with a peanut dressing for an Asian twist, or a coconut milk dressing for an extra creamy version.

    By trying different combinations, you can keep this cucumber salad fresh and exciting each time you make it.

    How to Store Refreshing Thai Cucumber Salad: Best Practices

    Storing your Refreshing Thai Cucumber Salad correctly is essential for maintaining its freshness. Follow these guidelines:

    • Refrigeration: Store your cucumber salad in an airtight container in the refrigerator. It’s best enjoyed fresh but can last up to 2 days. The dressing may make the cucumbers a bit limp over time, so consider keeping the dressing separate if you plan to store it.
    • Freezing: Freezing this salad is not recommended, as the cucumbers will lose their crisp texture once thawed.
    • Serving Leftovers: When reheating leftovers, avoid heating the salad itself. Instead, opt for a light refresh by adding fresh herbs or squeezing additional lime juice just before serving.

    These practices will help ensure your cucumber salad stays delicious for as long as possible.

    Nutritional Value of Refreshing Thai Cucumber Salad

    Understanding the nutritional profile of your dish is essential, especially for those monitoring their dietary intake. Here’s a breakdown of the Refreshing Thai Cucumber Salad:

    • Calories: Approximately 150 calories (per 1 cup serving)
    • Total Fat: 5g (includes healthy fats from olive oil, if used in the dressing)
    • Carbohydrates: 22g
    • Fiber: 3g (great for digestion)
    • Sugars: 4g (natural sugars from vegetables and sweetener)
    • Protein: 2g (enhanced with optional additions such as chicken or tofu)

    This low-calorie dish is rich in vitamins and minerals, making it an excellent option for anyone seeking a healthy lifestyle. The refreshing nature of this salad enables you to enjoy great flavor without guilt.

    FAQs: Frequently Asked Questions About Refreshing Thai Cucumber Salad

    How long can I keep the cucumber salad in the fridge?

    The Refreshing Thai Cucumber Salad can stay fresh in an airtight container for up to 2 days. However, it’s best enjoyed within 24 hours of preparation.

    Can I make this salad ahead of time?

    Absolutely! You can prep and mix the ingredients up to 4 hours ahead. Just keep the dressing separate until you are ready to serve to maintain the cucumbers’ crunch.

    What can I substitute for fish sauce?

    If you are looking for a vegan option, soy sauce or tamari works perfectly as a substitute, providing a similar umami flavor without the fish.

    How can I add protein to this salad?

    Incorporate grilled chicken, shrimp, or tofu mixed into the salad or serve it on the side as a protein-rich accompaniment.

    Can I use other vegetables?

    Definitely! Adding vegetables like shredded carrots, radishes, or even avocado can enhance both the flavor and texture of your cucumber salad. Get creative and customize it to your taste!

    In conclusion, this Refreshing Thai Cucumber Salad not only offers a delightful taste explosion but also serves as a versatile, healthy option for anyone’s meal plan. With its simple ingredients and easy preparation steps, you can whip this salad up in no time. So why not try it today and bring tropical delight to your dining table!

  • Crispy Parmesan Onion Ring Chips

    Crispy Parmesan Onion Ring Chips

    Crispy Parmesan Onion Ring Chips: A Tropical Delight

    Introduction to Crispy Parmesan Onion Ring Chips

    Are you ready to elevate your appetizer game? If so, our Crispy Parmesan Onion Ring Chips are a delightful way to do just that! Perfect as a snack, party starter, or even a side dish, these crispy treats offer a unique twist on traditional onion rings, transforming them into chip-like delights that are both flavorful and fun to eat. Not only are they easy to prepare, but they also cater to a variety of dietary preferences – making them the ideal choice for busy parents, college students, or anyone looking to impress their guests without spending hours in the kitchen.

    This recipe focuses on using wholesome ingredients, and if you’re health-conscious, you’ll love the fact that they can be made gluten-free and even vegan, depending on your choice of substitutions. Plus, they’re a wonderful source of fiber and antioxidants, thanks to the onions, while the Parmesan cheese adds a savory depth and richness that takes these chips to the next level.

    Perfect for gatherings or quiet nights in, these Crispy Parmesan Onion Ring Chips are a must-try. Gather your ingredients, set aside some time, and let’s dive into one of the most exciting appetizer recipes you’ll ever prepare!

    Benefits and Advantages of Crispy Parmesan Onion Ring Chips

    Creating dishes that are both enjoyable and healthy can sometimes feel like a daunting task, but our Crispy Parmesan Onion Ring Chips demonstrate that it doesn’t have to be! One of the significant advantages of this recipe lies in its simplicity. With just a handful of ingredients and minimal preparation time, you can whip up a snack that tastes gourmet without the fancy fuss.

    Health Benefits

    When compared to conventional fried onion rings, our recipe significantly reduces the oil content, making it a healthier option. By utilizing an oven instead of deep-frying, you keep calories in check while still achieving a satisfying crunch. Plus, onions, known for their various health benefits, provide nutrients such as vitamin C, dietary fiber, and antioxidants, contributing to heart health and potentially lowering the risk of chronic diseases.

    Dietary Amenities

    Versatility stands at the forefront of this recipe. Due to its customizable nature, you can easily tweak the ingredients to match dietary requirements, from gluten-free to vegan. This adaptability means that nearly anyone can enjoy these chips, regardless of their background or dietary restrictions. Whether you’re a busy parent wanting to whip up something nutritious for the kids or a health-conscious individual looking for low-calorie snack options, these chips fit the bill perfectly.

    A Delight for All Occasions

    Besides their health advantages, the Crispy Parmesan Onion Ring Chips promise to be a hit at any social gathering. Their appealing texture and flavor offer a departure from standard snack options. Whether served at a casual barbecue or a formal dinner party, these chips are sure to impress, creating a memorable culinary experience. Because they are easy to prepare, you can cater to spontaneous gatherings without stress.

    With these key benefits in mind, it’s clear why our Crispy Parmesan Onion Ring Chips stand out as an iconic addition to your collection of appetizer recipes.

    Ingredients Overview

    Essential Ingredients for Crispy Parmesan Onion Ring Chips

    Creating delicious Crispy Parmesan Onion Ring Chips requires a handful of essential ingredients. Below, you’ll find a detailed list with precise measurements along with explanations of how each component plays a significant role in the final result.

    • 2 large onions (preferably sweet onions, like Vidalia): The star ingredient, providing the foundational flavor. Their sweetness along with a slight tang makes them absolutely irresistible once baked.
    • 1 cup all-purpose flour (can substitute with gluten-free flour): This coats the onions, providing a crisp exterior.
    • 1 cup breadcrumbs (panko recommended for extra crunch): This adds texture and becomes the crunchy shell around the onion rings.
    • ½ cup grated Parmesan cheese (can use nutritional yeast for a vegan option): Adds a savory flavor and richness to each bite.
    • 2 large eggs (or flaxseed eggs for a vegan alternative): Binds the flour and breadcrumbs to the onions.
    • 1 teaspoon garlic powder: Compliments the sweetness of the onions and enhances flavor.
    • 1 teaspoon paprika: Adds a subtle smokiness and beautiful color.
    • Salt and black pepper to taste: Essential for seasoning and enhancing the flavors of all ingredients.
    • Olive oil or cooking spray: Helps achieve that perfect crispy texture, used lightly to coat the chips before baking.

    These ingredients combine to create a symphony of flavors, ensuring each bite of your Crispy Parmesan Onion Ring Chips is savory and satisfying.

    Dietary Substitutions to Customize Your Crispy Parmesan Onion Ring Chips

    Given the diverse dietary needs of today’s eaters, ensuring your Crispy Parmesan Onion Ring Chips are adaptable is key. Below are suggested substitutions that maintain the dish’s integrity while catering to various preferences:

    • Gluten-Free: Replace all-purpose flour with a gluten-free flour blend and use gluten-free breadcrumbs to accommodate those with gluten intolerance. Many brands offer delicious options that maintain crunch.

    • Vegan: Substitute eggs with a flaxseed egg (1 tablespoon flaxseed meal mixed with 3 tablespoons water, let sit until gelatinous) for binding. Additionally, replace Parmesan cheese with nutritional yeast or a store-bought vegan cheese alternative for a similar flavor profile.

    • Low-Calorie: To lower calories further, consider air frying them instead of baking and reduce oil usage. You can also monitor the amounts of the breadcrumbs and cheese to suit calorie goals.

    • Spicy Version: Add cayenne pepper or chili powder for those who enjoy a spicy kick. This variation adds zing and makes the snack even more exciting!

    This flexibility ensures that these Crispy Parmesan Onion Ring Chips can bring joy to a wider audience, allowing individuals with different dietary preferences to delight in this versatile dish.

    How to Prepare the Perfect Crispy Parmesan Onion Ring Chips: Step-by-Step Guide

    Now that you’ve gathered your ingredients, let’s dive into preparing these Crispy Parmesan Onion Ring Chips with a thorough, step-by-step guide. This detailed process ensures simplicity while highlighting how easy it is to create gourmet-style snacks at home.

    1. Preheat the Oven: Set your oven to 400°F (200°C), allowing it to reach the desired temperature for a perfect bake.

    2. Prepare the Onions: Peel and slice the onions into ¼-inch thick rings. Maintain a consistent thickness for even cooking.

    3. Set Up a Breading Station:

      • In one bowl, add the flour and season it with salt, pepper, garlic powder, and paprika.
      • In a second bowl, beat the eggs (or prepare your flaxseed egg).
      • In a third bowl, combine your breadcrumbs and Parmesan cheese. (If you’re making a vegan version, omit cheese and use nutritional yeast.)
    4. Dredge the Onion Rings:

      • Take an onion ring and coat it lightly in the flour mixture, ensuring it’s fully covered.
      • Tap off any excess flour and then dip it into the egg mixture (or flaxseed egg).
      • Finally, coat the onion ring in the breadcrumb mixture, pressing gently to adhere. Repeat this process for all onion rings.
    5. Arrange on a Baking Sheet: Line a baking sheet with parchment paper. Place the breaded onion rings in a single layer, ensuring they don’t touch. If desired, lightly spray or drizzle olive oil on top of the rings to enhance crispiness.

    6. Bake: Place the baking sheet in the preheated oven and bake for 15-20 minutes, or until they are golden brown and crispy. Flip the rings halfway through baking for even browning.

    7. Cool & Serve: Once cooked, remove the rings from the oven and allow them to cool slightly before serving. Pair them with your favorite dipping sauce for an even better experience!

    This step-by-step method emphasizes the ease of preparation. Plus, it allows you to tailor elements depending on dietary needs or taste preferences, ensuring everyone can enjoy these fantastic appetizer recipes.

    Mastering Crispy Parmesan Onion Ring Chips: Advanced Tips and Variations

    After perfecting your Crispy Parmesan Onion Ring Chips, why not take your endeavor a step further? Here are some advanced tips and variations that can add complexity and flavor to your dish:

    Tips for Success

    1. Choose the Right Onion: Experiment with different types of onions. Sweet yellow or red onions deliver varying flavor profiles, while white onions provide a sharper bite.

    2. Make it Extra Crispy: For even greater crunch, consider double-breading your onion rings. After the first coating, dip them back in the egg mixture, followed by a second coat of breadcrumbs.

    3. Season to Taste: Don’t hesitate to play with a variety of spices and herbs to create unique flavor combinations. A sprinkle of Italian herbs or a dash of lemon zest can elevate the dish significantly.

    4. Avoid Sogginess: Ensure the onion rings are thawed and patted dry before breading; wet onions may lead to sogginess.

    Flavor Variations

    • Cheesy Garlic Onion Rings: Add minced garlic to the breadcrumb mixture for a zesty kick.

    • Buffalo-Style Chips: Toss your crispy onion ring chips in buffalo sauce before serving for a tangy and spicy flair.

    • Herb-Infused: Use fresh herbs like thyme or rosemary mixed with the breadcrumb coating for more aromatic chips.

    These advanced techniques and variations can help you master your Crispy Parmesan Onion Ring Chips, allowing for endless exploration and flavor combinations well beyond standard appetizer recipes.

    How to Store Crispy Parmesan Onion Ring Chips: Best Practices

    If you happen to have leftover Crispy Parmesan Onion Ring Chips or want to prepare them ahead of time, knowing the best methods for storing them is essential to maintain their crispiness and taste. Here are some best practices for refrigeration, freezing, and reheating:

    Refrigeration

    Allow the chips to cool completely, then store them in an airtight container. Place parchment paper between layers to prevent sticking, and keep them in the refrigerator for up to 3 days. When ready to eat, reheat to restore their crunchiness.

    Freezing

    For longer storage, freeze the breaded but uncooked onion rings. Arrange them in a single layer on a baking sheet and place them in the freezer. Once they are solid, transfer them to airtight freezer bags and keep them frozen for up to a month. When ready to cook, you can bake them from frozen, adding an extra 5 minutes to the baking time.

    Reheating

    To reheat cooked onion rings, use the oven or air fryer rather than the microwave, which can make the chips soggy. Preheat your oven to 375°F (190°C) and bake for 5-10 minutes, or until hot and crispy again.

    Knowing these storage solutions ensures that your Crispy Parmesan Onion Ring Chips can be enjoyed fresh, even on a busy schedule. Accessible appetizer recipes can be made ahead of time without sacrificing quality or taste!

    Nutritional Value of Crispy Parmesan Onion Ring Chips

    Understanding the nutritional profile of your food can aid in making informed choices, especially when it comes to enjoying snacks. Here’s a breakdown of the approximate nutrition content of one serving (about 10 chips) of Crispy Parmesan Onion Ring Chips:

    • Calories: 220
    • Total Fat: 10g
    • Saturated Fat: 3g
    • Cholesterol: 50mg
    • Sodium: 350mg
    • Total Carbohydrates: 26g
    • Dietary Fiber: 3g
    • Sugars: 2g
    • Protein: 5g

    These values can vary based on ingredient substitutions (like cheese or types of flour), cooking methods, and serving sizes. For lower-calorie versions, consider using less cheese or opting for air frying instead of baking.

    By being aware of the nutritional aspects of your dish, you can enjoy your Crispy Parmesan Onion Ring Chips guilt-free and make choices aligned with your dietary goals. Providing healthy appetizer recipes allows everyone to savor delicious flavors without compromising their health!

    FAQs: Frequently Asked Questions About Crispy Parmesan Onion Ring Chips

    Can I make these onion ring chips ahead of time?

    Absolutely! You can prepare the onion rings ahead of time, either bread them and refrigerated or freeze them. They can be baked from frozen when needed for freshness.

    What can I serve with these crispy onion rings?

    These delicious chips pair wonderfully with various homemade dips such as marinara sauce, ranch dressing, or even creamy garlic sauce. They also complement burgers and can serve as a side with salads.

    Why are my onion rings soggy?

    If the onion rings end up soggy, consider two key factors: make sure they are fully dried before breading, and avoid overcrowding during baking, as this can trap steam and inhibit crispness.

    How do I store leftover onion rings?

    Once cooled, store any leftover onion rings in airtight containers in the refrigerator. For longer storage, they can be frozen before cooking, or they can be reheated in the oven for a crisp finish.

    Can I use a different cheese?

    Yes! Feel free to experiment with various cheese options. Cheddar, gouda, or even vegan cheese can work well if you’re seeking an alternative that aligns with your dietary preferences.

    Offering answers to these common queries helps enhance the cooking experience, making it easier for readers to dive into creating wonderful appetizer recipes like Crispy Parmesan Onion Ring Chips.


    With this blog post, you have a complete guide to preparing and enjoying Crispy Parmesan Onion Ring Chips. Its simplicity, health-conscious options, and delightful flavors will make this recipe a repeated favorite among your friends and family. Have fun cooking and inspiring others with your newfound appetizer recipe!

  • Crock Pot Angel Chicken

    Crock Pot Angel Chicken

    Crock Pot Angel Chicken: A Tropical Delight

    Introduction to Crock Pot Angel Chicken

    Crock Pot Angel Chicken is a tempting dish that brings a taste of the tropics right to your kitchen. This baked chicken recipe is quick and straightforward, making it perfect for those busy evenings when you want a delicious meal without spending hours in the kitchen. One of the highlights of this recipe is its simplicity—simply dump, set, and forget! With the ease of crockpot recipes, you can create a sumptuous meal that’s not just tasty but also healthy.

    This dish is not only a breeze to prepare; it caters to various dietary preferences, including gluten-free and low-calorie options. Plus, it’s packed with nutrients, making it a fantastic choice for families, seniors, and health-conscious individuals. The combination of succulent chicken with creamy goodness creates a flavor profile that appeals to food enthusiasts while remaining mindful of dietary restrictions. Whether you’re a busy parent, a newlywed looking to impress your partner, or just someone seeking delicious meals without the hassle, this recipe will surely inspire you to try your hand at creating Crock Pot Angel Chicken.

    Benefits and Advantages of Crock Pot Angel Chicken

    The key to a successful meal lies not just in flavor but also in preparation and health benefits. Crock Pot Angel Chicken shines in all these aspects. Here are some of the key advantages of this delightful dish:

    Ease of Preparation

    Crock Pot recipes in general are loved for their convenience, and Angel Chicken is no exception. The blended flavors simmer together gently, allowing you to continue with your day while the meal cooks itself. This no-fuss approach is perfect for busy families or working professionals who may not have ample time during meal prep hours. Simply layer the ingredients in the crockpot—no complicated steps required!

    Health Benefits

    This heavenly chicken recipe often incorporates wholesome ingredients that offer plenty of health benefits. Chicken is an excellent source of lean protein, making it an ideal choice for individuals looking to maintain a balanced diet. Additionally, if you opt for low-fat cream soups or nut-based alternatives, you can further reduce calories and boost the nutritional content of the dish. This makes Crock Pot Angel Chicken not only heart-healthy but also suitable for those on calorie-restricted diets.

    Versatility

    Another significant advantage is its versatility. The base recipe can be easily adjusted to accommodate various dietary needs. Whether you’re aiming for a gluten-free version or looking to add more veggies, the simple nature of crockpot cooking allows for endless customization. You can switch out the protein for tofu or chickpeas for a vegan option or add in seasonal vegetables for added nutrition.

    Time-Saving

    The set-it-and-forget-it nature of crockpot recipes means you can prepare meals ahead of time. You can throw everything together in the morning and return home to a warm, fragrant dinner. This makes it an excellent option for busy families or anyone constantly on the go.

    Family-Friendly

    Crock Pot Angel Chicken boasts a mild yet enticing flavor profile, ensuring even picky eaters will be satisfied. The creamy sauce can be served over rice or pasta, transforming the mealtime experience for everyone at the table. This dish not only fills bellies but also fosters family bonding over shared meals.

    In essence, the Crock Pot Angel Chicken recipe stands out due to its simplicity, health advantages, and ability to cater to a variety of dietary needs. It truly embodies the essence of convenient yet wholesome meals for all.

    Ingredients Overview

    Essential Ingredients for Crock Pot Angel Chicken

    To whip up this delightful dish, gather the following ingredients:

    • 4 boneless, skinless chicken breasts: This serves as the base of your meal, providing lean protein.
    • 1 can (10.5 oz) cream of chicken soup: Opt for low-fat for a healthier version. This ingredient adds richness and flavor.
    • 1 packet (1 oz) ranch dressing mix: This adds a zesty kick that elevates the taste profile.
    • 1 cup of low-sodium chicken broth: Helps prevent the dish from drying out while cooking. You can use vegetable broth for a vegetarian option.
    • 1 cup of shredded cheese (mozzarella or cheddar): Adds creaminess and flavor. For a lactose-free option, consider using a vegan cheese alternative.
    • 1 tablespoon of minced garlic: Brings a robust flavor that complements the chicken beautifully.
    • Salt and pepper: For seasoning, adjust these to your taste.
    • Optional vegetables: Add carrots, bell peppers, or broccoli if desired for an extra nutritional boost.

    Dietary Substitutions to Customize Your Crock Pot Angel Chicken

    This recipe is already inclined towards accommodating various dietary needs, but here are some substitutes you can consider:

    1. For a Gluten-Free Version:
    2. Use gluten-free cream of chicken soup.
    3. Ensure the ranch dressing mix is gluten-free or prepare your own seasoning blend from scratch.

    4. For a Dairy-Free Variant:

    5. Replace the cream of chicken soup with a dairy-free alternative, like coconut cream or cashew cream.
    6. Use nutritional yeast instead of cheese for a cheesy flavor without the dairy.

    7. Protein Alternatives:

    8. For a plant-based option, swap the chicken breast with cubed tofu or tempeh.
    9. Chickpeas can also be used to create a wholesome, vegan protein option.

    10. For a Low-Calorie Version:

    11. Choose skinless chicken thighs instead of breasts or reduce the cheese quantity.
    12. Swap traditional ranch dressing for a homemade vinaigrette or herb mix.

    With this flexibility, the Crock Pot Angel Chicken recipe can cater to a wide range of dietary preferences, ensuring everyone can enjoy a delightful meal.

    How to Prepare the Perfect Crock Pot Angel Chicken: Step-by-Step Guide

    Now that you’ve gathered your ingredients, let’s dive into how to prepare this scrumptious dish. Following this step-by-step guide will ensure that your Crock Pot Angel Chicken turns out perfectly every time:

    1. Prepare the Base:
    2. Lightly spray the interior of the crockpot with non-stick cooking spray. This helps prevent the ingredients from sticking and makes for easier cleanup.

    3. Layer the Chicken:

    4. Place the chicken breasts at the bottom of the crockpot. Ensure they are arranged evenly to allow for even cooking.

    5. Mix the Cream of Chicken Soup:

    6. In a separate bowl, combine the cream of chicken soup, chicken broth, and ranch dressing mix. Stir until well mixed and smooth.

    7. Pour over Chicken:

    8. Pour the soup mixture over the arranged chicken breasts in the crockpot, ensuring each piece is well covered.

    9. Add Garlic:

    10. Sprinkle minced garlic over the top. This not only enhances flavor but also adds significant health benefits.

    11. Add Optional Vegetables:

    12. If you’re including veggies, layer them on top of the chicken and soup mixture. This not only enhances nutrition but adds color to your dish.

    13. Cover and Cook:

    14. Cover the crockpot with the lid. Set to low heat and cook for about 6-7 hours, or on high for about 3-4 hours, until the chicken is cooked through and tender.

    15. Check for Doneness:

    16. Use a meat thermometer to ensure the chicken has reached an internal temperature of 165°F (75°C). This guarantees your meal is safe to eat.

    17. Shred the Chicken:

    18. Once cooked, carefully remove the chicken from the crockpot. Use two forks to shred the chicken into bite-sized pieces, ensuring they soak up the delicious creamy sauce.

    19. Add Cheese:

      • Return the shredded chicken to the crockpot. Sprinkle the cheese over the top and let it melt for about 10 minutes on low heat, adding extra creaminess to your dish.
    20. Final Touch:

      • Stir the ingredients one last time before serving. This will ensure all flavors are well-combined, and everything is evenly distributed.
    21. Serve:

      • Spoon the creamy chicken mixture over rice, pasta, or even mashed potatoes for a hearty and satisfying meal. Garnish with fresh parsley for a touch of color.

    Incorporating easy-to-follow steps makes this recipe accessible for all cooking skill levels. Whether you’re prepping for a weekend family meal or a quick weekday dinner, this angelic delight will surely please.

    Mastering Crock Pot Angel Chicken: Advanced Tips and Variations

    To elevate your Cork Pot Angel Chicken experience even further, consider the following advanced tips and variations:

    1. Spice It Up:
    2. For an added twist, try incorporating spices such as paprika, cayenne pepper, or a dash of hot sauce for a spicy kick.

    3. Herb Infusion:

    4. Fresh herbs such as rosemary, thyme, or even basil can be added alongside the garlic to enhance the aroma and flavor profile. Herbs can make the dish feel even more luxurious.

    5. Creamy Mushroom Addition:

    6. For mushroom lovers, consider adding sliced mushrooms to the crockpot. Their earthy flavor complements the creamy sauce beautifully.

    7. Tropical Variation:

    8. Incorporate pineapple chunks or coconut milk for a tropical angle that perfectly pairs with the chicken. This adds a bomb of flavors reminiscent of island cuisine.

    9. Meal Prep Ready:

    10. This recipe is excellent for meal prepping. Make a big batch on the weekend and divide it into containers for easy lunches throughout the week.

    11. Slow Cooker vs. Instant Pot:

    12. While this guide focuses on traditional crockpot recipes, know that you can use an Instant Pot for a faster version. Adjust the cooking time accordingly, usually around 25-30 minutes under pressure, to achieve tender chicken.

    Implementing these tips allows you to personalize your experience with Crock Pot Angel Chicken, whether you want to explore different flavor profiles or optimize convenience.

    How to Store Crock Pot Angel Chicken: Best Practices

    Proper storage methods will ensure the longevity and taste of your Crock Pot Angel Chicken. Here’s how to do it:

    Refrigeration

    • Allow the dish to cool down to room temperature before transferring it into an airtight container. This helps maintain freshness and prevents condensation.

    • Store it in the refrigerator for up to 3-4 days, ensuring you consume it within this time frame for maximum flavor and safety.

    Freezing

    • For longer storage, consider freezing. Portion out the chicken into freezer-safe bags or containers. Removing as much air as possible will help prevent freezer burn.

    • This dish can last up to 2-3 months in the freezer. When you’re ready to eat, simply thaw in the refrigerator overnight before reheating.

    Reheating

    • To reheat, place the chicken in a saucepan over low heat, adding a splash of chicken broth to keep it moist as you warm it.

    • Alternatively, you can microwave on medium heat in intervals, stirring occasionally until heated through. Ensure it reaches an internal temperature of 165°F (75°C) before consuming.

    Following these guidelines will help maintain the dish’s deliciousness and nutritional quality, making it ready for you when the craving strikes.

    Nutritional Value of Crock Pot Angel Chicken

    Understanding the nutritional profile of your meals can significantly contribute to healthier eating choices. Here’s what you can expect from a serving of Crock Pot Angel Chicken:

    • Calories: Approximately 350-400 calories per serving, depending on ingredient choices such as cheese and soup options.
    • Protein: Around 35-40 grams of protein, given the use of chicken breast, which is excellent for muscle maintenance and repair.
    • Fat: Roughly 15 grams, primarily from the cream of chicken soup and cheese. Opting for low-fat variations can help reduce this count.
    • Carbohydrates: Approximately 20-25 grams, depending on whether you serve it with rice or pasta.
    • Fiber: This meal can be made to contain fiber, especially when adding veggies or serving with whole grains.
    • Sodium: The sodium content varies based on broth and soup choices; low-sodium alternatives can help manage this.

    By customizing your ingredients, you can control the nutritional profile even further. Keep in mind any allergens or dietary restrictions as you calculate your dish’s values.

    FAQs: Frequently Asked Questions About Crock Pot Angel Chicken

    Here are some common questions regarding Crock Pot Angel Chicken, accompanied by concise answers:

    1. Can I use frozen chicken in this recipe?

    Yes! You can use frozen chicken, but cooking time may increase. It’s best to remove it from the freezer to thaw slightly before placing it in the crockpot.

    2. Is this recipe suitable for meal prep?

    Absolutely! Crock Pot Angel Chicken makes for an excellent meal prep option. Make a larger batch and enjoy it throughout the week.

    3. Can I add vegetables to the crockpot?

    Certainly! Adding chopped vegetables such as carrots, bell peppers, or broccoli not only enhances the dish’s nutrition but also its color.

    4. What can I serve with Crock Pot Angel Chicken?

    This dish pairs wonderfully with a variety of sides, including rice, mashed potatoes, or even over pasta. For a low-carb option, consider serving it over zucchini noodles.

    5. Is there a vegetarian alternative for this dish?

    You can substitute chicken with tofu or chickpeas and use vegetable broth and plant-based cream for a delicious vegetarian version.

    6. How long does the dish last in the fridge?

    When properly stored in an airtight container, your Crock Pot Angel Chicken will last in the refrigerator for around 3-4 days.

    7. Can I make this recipe in an Instant Pot?

    Yes, you can! Using an Instant Pot can significantly reduce cooking time, usually requiring about 25-30 minutes under pressure.

    8. Can I use other types of soup?

    Yes! Feel free to explore different soups, like cream of mushroom or a spicy soup, to add a unique twist to your dish.

    9. Is it possible to make this low in calories?

    Absolutely. Use low-fat soup, reduce the cheese, and serve it with whole grains or veggies for a healthier option.

    10. Does this recipe freeze well?

    Yes! You can freeze it in appropriate containers or bags for up to 2-3 months, ensuring flavor retention when properly stowed.

    Crock Pot Angel Chicken is filled with goodness, endless possibilities, and the spark of creativity in your kitchen. With easy preparation and a flexible recipe, it’s time to gather your ingredients and bring the essence of tropical delight home. Enjoy your cooking adventure!

  • Tasty Pineapple-Teriyaki Chicken Wings

    Tasty Pineapple-Teriyaki Chicken Wings

    Tasty Pineapple-Teriyaki Chicken Wings: A Tropical Delight

    Introduction to Tasty Pineapple-Teriyaki Chicken Wings

    If you’re on the hunt for mouthwatering chicken recipes that combine sweet and savory flavors, look no further! Tasty Pineapple-Teriyaki Chicken Wings are the perfect answer to all your culinary cravings. As a versatile dish, these wings are remarkably easy to prepare, making them a fantastic option for busy parents, students, or anyone with a packed schedule. Imagine tender chicken wings glazed with a luscious teriyaki sauce that’s enriched with the refreshing taste of pineapple—pure bliss!

    But wait, there’s more! Not only are these chicken wings a joy to eat, but they are also health-conscious, as they can be made with low-sodium soy sauce and natural sweeteners, catering to diet-conscious individuals. Furthermore, they can easily be adapted to fit vegan or gluten-free diets. With their colorful presentation and delicious flavor, these wings are ideal for gatherings, BBQs, or even a cozy family dinner at home.

    In addition, preparing Tasty Pineapple-Teriyaki Chicken Wings allows you to experiment with different flavor profiles—whether you prefer a hint of heat or a bolder sweet taste. So grab your apron and let’s dive into this delightful chicken recipe!

    Benefits and Advantages of Tasty Pineapple-Teriyaki Chicken Wings

    When it comes to chicken recipes, Tasty Pineapple-Teriyaki Chicken Wings stand out for numerous reasons. First and foremost is their simplicity in preparation. With just a handful of ingredients, you’ll have a restaurant-worthy dish ready in no time. This recipe eliminates the need for complicated cooking techniques or expensive ingredients. Instead, it focuses on fresh flavors and simple techniques that even novice cooks can master.

    The health benefits of these chicken wings are another major plus. Chicken is a great source of protein, essential for muscle building and repair. By using fresh pineapple, you add a layer of vitamins—like Vitamin C—along with natural enzymes that can aid digestion. If you’re concerned about dietary restrictions, modifying the sauce to be gluten-free and low in sugar is a simple yet impactful change, making them accessible to those on different diets.

    Additionally, these wings are versatile. You can serve them as an appetizer, a main dish, or even toss them into a salad for a protein-packed meal. In a world where everyone is busy, having a quick, nutritious meal like the Tasty Pineapple-Teriyaki Chicken Wings in your repertoire could make all the difference.

    Moreover, the flavor combination of teriyaki and pineapple is not only delicious but also reminiscent of tropical getaways, offering a moment of escape with every bite. Whether you’re hosting friends or treating yourself to a comforting meal, these wings ensure satisfaction without the guilt.

    Ingredients Overview

    Essential Ingredients for Tasty Pineapple-Teriyaki Chicken Wings

    To prepare Tasty Pineapple-Teriyaki Chicken Wings, you will need the following ingredients:

    • 2 pounds chicken wings: The base of the dish, offering protein and flavor.
    • ½ cup pineapple juice: Adds sweetness and acidity.
    • ⅓ cup soy sauce: Provides savory depth; opt for low-sodium if desired.
    • ¼ cup brown sugar or honey: Additional sweetness that balances out the savory elements.
    • 2 tablespoons rice vinegar: Introduces a tangy depth to the sauce.
    • 1 tablespoon minced garlic: For a flavor kick that’s aromatic and robust.
    • 1 tablespoon minced ginger: Enhances the tropical flavor profile.
    • 1 tablespoon sesame oil: Adds complexity and richness.
    • 1 teaspoon chili flakes (optional): Introduces heat for those who enjoy spicy flavors.

    Diet Options:
    Vegan: Substitute chicken with cauliflower wings or tofu and adjust cooking times accordingly.
    Gluten-Free: Use tamari instead of regular soy sauce to maintain a gluten-free diet.
    Low-Calorie: Replace brown sugar with a sugar substitute or opt to reduce the quantity for less sweetness.

    Dietary Substitutions to Customize Your Tasty Pineapple-Teriyaki Chicken Wings

    The beauty of these chicken recipes lies in their adaptability. Feel free to experiment with the following substitutions according to your dietary needs:

    1. Protein Base:
    2. Chicken Substitutes: Use turkey wings or drumsticks if you prefer a different flavor profile or protein source.
    3. Vegan Option: Swap the chicken with extra-firm tofu or jackfruit, which can mimic the texture of chicken.

    4. Sweeteners:

    5. If you want to reduce sugar intake, consider using stevia or monk fruit sweetener instead of brown sugar or honey.

    6. Sauce Variations:

    7. For a tropical twist, mix in some diced mango or use coconut aminos for a different savory profile that is also soy-free.
    8. To increase the kick, experiment with Sriracha or Korean gochujang paste, providing a spicy version of the standard recipe.

    By adopting these substitutions, you can create a version of Tasty Pineapple-Teriyaki Chicken Wings that aligns with your taste preferences and health goals.

    How to Prepare the Perfect Tasty Pineapple-Teriyaki Chicken Wings: Step-by-Step Guide

    Let’s get started with the step-by-step preparation for creating Tasty Pineapple-Teriyaki Chicken Wings that will impress anyone at your dining table!

    1. Prepare the Chicken Wings:
    2. Start by thoroughly rinsing the chicken wings under cold water. Pat them dry with paper towels to ensure the skin becomes crispy during cooking.

    3. Make the Marinade:

    4. In a large mixing bowl, combine the pineapple juice, soy sauce, brown sugar, rice vinegar, minced garlic, minced ginger, and sesame oil. Whisk these ingredients together until the sugar dissolves completely.

    5. Marinate the Wings:

    6. Place the chicken wings into the mixing bowl and toss them until they are well-coated with the marinade. Cover the bowl with plastic wrap and let the wings marinate for at least 30 minutes. For the best flavor, allow them to marinate in the fridge for 2-6 hours.

    7. Preheat the Oven:

    8. Preheat your oven to 400°F (200°C). This temperature will help the skin get crispy while roasting.

    9. Prepare the Baking Tray:

    10. Line a baking sheet with aluminum foil and place a cooling rack on top. This allows air to circulate around the wings for even cooking.

    11. Arrange the Wings:

    12. Take the chicken wings out of the marinade and place them in a single layer on the cooling rack. This helps to achieve a crispy texture.

    13. Bake the Wings:

    14. Bake the chicken wings in the preheated oven for 25-30 minutes. Halfway through cooking, flip them over and brush them with some of the leftover marinade for added flavor.

    15. Optional Broil for Finishing Touch:

    16. For extra crispiness, turn on the broiler for the last 5 minutes of cooking. Keep a close eye on them to avoid burning.

    17. Prepare Garnish:

    18. While the wings are baking, chop some fresh parsley or green onions for garnish.

    19. Serve the Wings:

      • Once they’re cooked and golden brown, remove the wings from the oven. Let them cool for a few minutes before garnishing with parsley or green onions. Serve with additional pineapple chunks for an extra tropical flair.

    This entire process is straightforward, making it perfect for both experienced cooks and novices alike. Feel free to modify this base recipe to create your own signature spin on the classic pineapple-teriyaki combination!

    Mastering Tasty Pineapple-Teriyaki Chicken Wings: Advanced Tips and Variations

    To truly master Tasty Pineapple-Teriyaki Chicken Wings, consider the following tips and variations that can elevate your dish even further:

    • Grilling Option:
    • If you have a grill, consider cooking these wings over medium heat for a smoky flavor. Brush them with the marinade while grilling for enhanced taste.

    • Slow Cooker Method:

    • For an easy, hands-off preparation, place the marinated wings in a slow cooker. Cook on low for 4-6 hours or on high for 2-3 hours. This method ensures the wings stay moist and tender.

    • Smoky Flavor:

    • For a deeper flavor, add a few drops of liquid smoke to your marinade. This creates a depth that complements the sweetness of pineapple beautifully.

    • Add Crunch:

    • For those who enjoy texture, toss roasted peanuts or sesame seeds on top before serving. They add a delightful crunch that pairs excellently with the tender wings.

    • Dippers and Sauces:

    • Serve with a side of dipping sauces like blue cheese or ranch dressing for a classic wing experience. Alternatively, a fruity salsa can complement the tropical elements of the dish!

    These advanced tips will not only enhance your Tasty Pineapple-Teriyaki Chicken Wings but also impress your guests, making your recipe a memorable one!

    How to Store Tasty Pineapple-Teriyaki Chicken Wings: Best Practices

    Proper storage of your Tasty Pineapple-Teriyaki Chicken Wings is essential for maintaining flavor and quality. Here’s how you can do it:

    • Refrigeration:
    • Allow the wings to cool completely before transferring them to an airtight container. They can be stored in the fridge for up to 3-4 days, making them great for meal prep or lunch leftovers.

    • Freezing:

    • If you want to keep them longer, freeze the wings in a single layer on a baking sheet first. Once they are frozen, transfer them to a freezer-safe bag or container. They can last up to 2-3 months in the freezer. When you’re ready to eat, simply thaw them in the fridge overnight before reheating.

    • Reheating:

    • To reheat, preheat your oven to 375°F (190°C) and place the wings on a baking sheet. Heat for about 10-15 minutes, or until warmed through and crispy again.

    By following these best practices, you’ll be able to enjoy your Tasty Pineapple-Teriyaki Chicken Wings for days to come without sacrificing their deliciousness.

    Nutritional Value of Tasty Pineapple-Teriyaki Chicken Wings

    Understanding the nutritional value of Tasty Pineapple-Teriyaki Chicken Wings empowers health-conscious diners to make informed choices. Here is the breakdown based on a serving of about four wings:

    • Calories: Approximately 250 calories
    • Protein: 20 grams
    • Fat: 14 grams (with the option to lower this by baking instead of frying)
    • Carbohydrates: 15 grams
    • Fiber: 0.5 grams
    • Sugars: 10 grams (due to the brown sugar or honey)
    • Sodium: 600 mg (can be reduced by using low-sodium soy sauce)

    These figures can vary based on the specific ingredients used, such as sugar type and portion sizes. By choosing low-sodium soy sauce and reducing sugar, you can create a healthier alternative while still enjoying the rich flavors of this chicken recipe.

    FAQs: Frequently Asked Questions About Tasty Pineapple-Teriyaki Chicken Wings

    1. Can I use frozen chicken wings for this recipe?

    Yes, you can use frozen wings. Just ensure they’re fully thawed before marinating. This ensures better absorption of flavors.

    2. What can I use if I don’t have pineapple juice?

    If you don’t have pineapple juice, orange juice or even apple juice can work as an alternative. Keep in mind that this will slightly change the flavor profile but can still be delicious.

    3. How can I make this recipe spicier?

    To add heat, incorporate more chili flakes, sriracha, or even jalapeño slices into the marinade.

    4. Are these chicken wings gluten-free?

    You can make these gluten-free by using tamari instead of traditional soy sauce. Always check labels to ensure that other ingredients are gluten-free as well.

    5. How long can I store the leftovers?

    Tasty Pineapple-Teriyaki Chicken Wings can be stored in the refrigerator for up to 4 days in an airtight container or frozen for up to 3 months.

    6. Is it possible to make this dish in advance for a gathering?

    Absolutely! You can marinate the chicken wings a day ahead and store them in the fridge. Cook them the day of the event for optimal freshness.

    With these FAQs, you should feel comfortable and prepared to create and enjoy Tasty Pineapple-Teriyaki Chicken Wings at any gathering or meal. Dive into this delicious chicken recipe, and watch your family and friends be amazed by the tropical delight you’ve crafted!

  • Cozy Creamy Keto Chicken Pot Pie Soup

    Cozy Creamy Keto Chicken Pot Pie Soup

    Cozy Creamy Keto Chicken Pot Pie Soup: A Tropical Delight

    Introduction to Cozy Creamy Keto Chicken Pot Pie Soup

    Welcome to a flavorful culinary adventure with this Cozy Creamy Keto Chicken Pot Pie Soup. If you’re seeking a warm and comforting dish that seamlessly fits into your health-conscious lifestyle, then this recipe is perfect for you. Not only does it combine the familiar flavors of traditional chicken pot pie in a healthy, creamy soup format, but it also caters to various dietary needs, making it ideal for busy parents, health enthusiasts, and food lovers alike.

    Imagine the rich and savory taste of tender chicken, vibrant vegetables, and a luscious creamy broth – all coming together in less than 30 minutes! As one of the most effortless soup recipes you can try, this dish makes cozy weeknight dinners a breeze. The ingredients are simple and uncomplicated, ensuring that even novice cooks can effortlessly whip up a delightful meal. Plus, it’s a great option for keto dieters or anyone wanting to reduce their carb intake.

    What’s more, this soup is packed with nutrients from fresh ingredients, making it a healthier alternative to the classic pot pie. You can feel good about serving it to your family while also experimenting with numerous variations to match personal preferences. With options for gluten-free, low-calorie, or even vegan diets, this recipe stands out as a versatile powerhouse in your kitchen.

    Don’t wait any longer; let’s dive into the world of Cozy Creamy Keto Chicken Pot Pie Soup and discover how effortless and delicious cooking can be!

    Benefits and Advantages of Cozy Creamy Keto Chicken Pot Pie Soup

    When it comes to soup recipes, few can compete with the multitude of benefits offered by this Cozy Creamy Keto Chicken Pot Pie Soup. Here are just a few reasons why you’ll love making this dish:

    1. Ease of Preparation: One of the biggest advantages of this recipe is how incredibly simple it is to prepare. With minimal time spent on prep and cooking, you can enjoy a hearty meal ready in under 30 minutes. This makes it an excellent option for busy nights when you don’t want to compromise on flavor or nutrition.

    2. Health Benefits: This soup boasts a range of health benefits. Loaded with protein from the chicken and packed with nutrients from the vegetables, it can help support your immune system and overall well-being. The creamy base, made with healthy fats, ensures that it is satisfying while adhering to keto-friendly guidelines.

    3. Flexible for Dietary Needs: The beauty of this soup lies in its adaptability. Whether you’re looking for options that are gluten-free, vegan, or low-calorie, this recipe can easily be modified to meet dietary requirements, ensuring everyone at your table can enjoy it.

    4. Flavorful Comfort: Who doesn’t love comfort food? This chicken pot pie soup captures all the rich, savory flavors typically found in classic pot pie, yet with a refreshing twist. Each spoonful is rich, creamy, and bursting with flavor, providing the ultimate cozy dining experience.

    5. Perfect for Meal Prep: If you’re someone who enjoys preparing meals for the week, this soup can be made in larger batches, stored easily, and reheated without losing its flavor or texture. The convenience of having a healthy meal on hand is a major plus for anyone with a busy lifestyle.

    These benefits make Cozy Creamy Keto Chicken Pot Pie Soup not just another soup recipe, but a tool for healthy living. With its blend of nutrition, convenience, and flavor, this dish deserves a spot in your regular meal rotation.

    Ingredients Overview

    Essential Ingredients for Cozy Creamy Keto Chicken Pot Pie Soup

    To prepare your Cozy Creamy Keto Chicken Pot Pie Soup, you will need the following essential ingredients:

    • 2 cups cooked chicken (shredded or diced): Adds protein and heartiness to the soup.
    • 1 tablespoon olive oil: Healthy fat for sautéing vegetables.
    • 1 small onion (diced): Offers flavor and depth.
    • 2 cloves garlic (minced): Enhances the overall taste with a fragrant aroma.
    • 1 medium carrot (diced): Adds a touch of sweetness and color; optional for the keto diet.
    • 1 cup celery (diced): Contributes crunch and flavor.
    • 2 cups cauliflower florets: Provides a low-carb base and thickens the soup.
    • 4 cups chicken broth: A flavorful foundation; ensure it’s low-sodium if desired.
    • 1 cup heavy cream: For creaminess without the carbs. Use coconut cream for a dairy-free option.
    • 1 teaspoon dried thyme: Introduces a subtle herb flavor.
    • Salt and black pepper to taste: Enhances all the flavors.
    • Parsley (for garnish, optional): Offers color and a fresh flavor.

    Make sure to read through this ingredient list and gather everything you’ll need. If you’re following a specific diet, I’ll cover substitutions in the next section.

    Dietary Substitutions to Customize Your Cozy Creamy Keto Chicken Pot Pie Soup

    You can easily adjust this recipe according to various dietary preferences. Here are some suggestions for substitutions:

    • For Vegan Option: Swap the chicken for chickpeas or tofu. Use vegetable broth instead of chicken broth and replace the heavy cream with coconut milk or cashew cream for a rich texture.

    • For Dairy-Free Option: Utilize coconut cream or almond milk instead of heavy cream, which will keep the soup creamy without dairy.

    • Low-Carb Alternative: If you’re looking for an even lower carbohydrate option, exclude the carrots and replace them with more celery or zucchini to add volume without the extra carbs.

    • Gluten-Free Alternative: Ensure that all packaged ingredients like broth or spices are labeled gluten-free.

    By incorporating these substitutions, you can create a personalized soup recipe that meets your dietary needs without sacrificing taste or texture!

    How to Prepare the Perfect Cozy Creamy Keto Chicken Pot Pie Soup: Step-by-Step Guide

    Let’s dive into how to prepare this delightful soup recipe! Follow these simple steps to bring your Cozy Creamy Keto Chicken Pot Pie Soup to life:

    1. Prepare the Base: In a large pot over medium heat, add the olive oil. Once heated, sauté the diced onion for about 2-3 minutes until it becomes translucent. Add the minced garlic and sauté for another minute until fragrant.

    2. Add Vegetables: Incorporate the diced carrots and celery into the pot. Cook for approximately 4-5 minutes, stirring occasionally until they soften slightly.

    3. Include Cauliflower: Add the cauliflower florets to the pot and stir everything together. Cook for another 5 minutes, allowing the cauliflower to soften.

    4. Pour in Broth: Gradually pour 4 cups of chicken broth into the pot, stirring well to combine all ingredients. Bring the mixture to a low simmer, allowing it to cook for about 10 minutes.

    5. Add Chicken: Once the vegetables are tender, introduce the cooked chicken into the mixture, stirring thoroughly. This ensures that the chicken heats up and absorbs some of the broth’s flavors.

    6. Stir in Cream: Reduce heat to low and pour in the heavy cream. Stir well to blend all components, creating a rich and creamy texture.

    7. Seasoning: Sprinkle in the dried thyme, salt, and pepper to taste. Adjust seasonings as necessary based on your preference.

    8. Final Simmer: Allow the soup to cook for an additional 5 minutes on low heat, letting all flavors meld together beautifully.

    9. Garnish and Serve: Once the soup is ready, ladle it into bowls and garnish with fresh parsley if desired. Serve warm and enjoy the comforting flavors of your Cozy Creamy Keto Chicken Pot Pie Soup!

    Make sure to adjust any steps as needed for specific dietary requirements – the beauty of this soup recipe is its versatility.

    Mastering Cozy Creamy Keto Chicken Pot Pie Soup: Advanced Tips and Variations

    To elevate your Cozy Creamy Keto Chicken Pot Pie Soup experience, here are some advanced tips and variations:

    1. Herbs and Spices: Consider adding other herbs like rosemary or bay leaves while simmering. Finish with a fresh squeeze of lemon for a hint of brightness.

    2. Extra Vegetables: Get creative with your vegetables! Add green beans, peas, or mushrooms for additional texture. Just be mindful of the carb content based on your dietary goals.

    3. Thickening the Soup: For a thicker consistency, you can gently blend a portion of the soup using an immersion blender. This will create a creamier base while leaving chunks of vegetables intact.

    4. Serving Options: This soup can be served on its own or accompanied by a low-carb bread or salad for a balanced meal.

    5. Storage Variations: If you love versatility, prepare double batches of this soup and freeze portions for later. It makes an ideal quick meal solution for busy days.

    By experimenting with these variations, you can create a new, exciting rendition of this cozy dish every time, ensuring that it never gets boring!

    How to Store Cozy Creamy Keto Chicken Pot Pie Soup: Best Practices

    Storing your Cozy Creamy Keto Chicken Pot Pie Soup properly ensures that it retains its delicious flavors and textures for future meals. Here are some best practices:

    1. Refrigeration: Allow the soup to cool to room temperature before transferring it to an airtight container. It can be stored in the refrigerator for up to 3-4 days.

    2. Freezing: For longer storage, soup recipes like this one freeze well. Transfer cooled portions into freezer-safe containers or bags, leaving some space at the top as the soup will expand when frozen. It can be kept in the freezer for up to 2-3 months.

    3. Reheating: When ready to enjoy, thaw your soup overnight in the refrigerator if frozen. Reheat gently on the stove over medium heat, stirring occasionally to prevent it from sticking. Adding a splash of broth can help restore creaminess if the soup has thickened during storage.

    With these storage methods, your Cozy Creamy Keto Chicken Pot Pie Soup will always be ready and waiting when you desire a comforting bowl of goodness!

    Nutritional Value of Cozy Creamy Keto Chicken Pot Pie Soup

    Understanding the nutritional value of your meals is important for maintaining a balanced diet. Here’s a breakdown of the estimated nutritional information for Cozy Creamy Keto Chicken Pot Pie Soup per serving:

    • Calories: 320
    • Protein: 30g
    • Fat: 20g
    • Carbohydrates: 8g (with low-carb adjustments)
    • Dietary Fiber: 2g
    • Net Carbs: 6g

    The high protein content makes this meal particularly satisfying, while the combination of healthy fats and low net carbs makes it suitable for a keto-friendly diet. Adjust the ingredients based on your specific dietary needs and enjoy a delicious meal that aligns with your health goals.

    FAQs: Frequently Asked Questions About Cozy Creamy Keto Chicken Pot Pie Soup

    1. Can I use rotisserie chicken for this recipe?

    Absolutely! Using rotisserie chicken can save time and adds great flavor to your soup.

    2. How do I make this soup dairy-free?

    To make it dairy-free, substitute heavy cream with coconut cream or almond milk, and ensure that chicken broth is also dairy-free.

    3. Can I make this soup vegetarian?

    Yes, to make it vegetarian, substitute chicken with chickpeas or tofu and use vegetable broth.

    4. How do I thicken the soup if it is too thin?

    You can thicken the soup by blending a portion of it to create a creamier texture or adding more vegetables like cauliflower.

    5. How long can I store the soup in the refrigerator?

    The soup can be stored in the refrigerator for up to 3-4 days.

    With this guidance, you can confidently navigate your cooking journey and adapt this soup recipe to suit your preferences. Enjoy the delicious comfort of Cozy Creamy Keto Chicken Pot Pie Soup!