Blog

  • Easy Brown Butter Espresso Brownies

    Easy Brown Butter Espresso Brownies

    Easy Brown Butter Espresso Brownies: A Tropical Delight

    Introduction to Easy Brown Butter Espresso Brownies

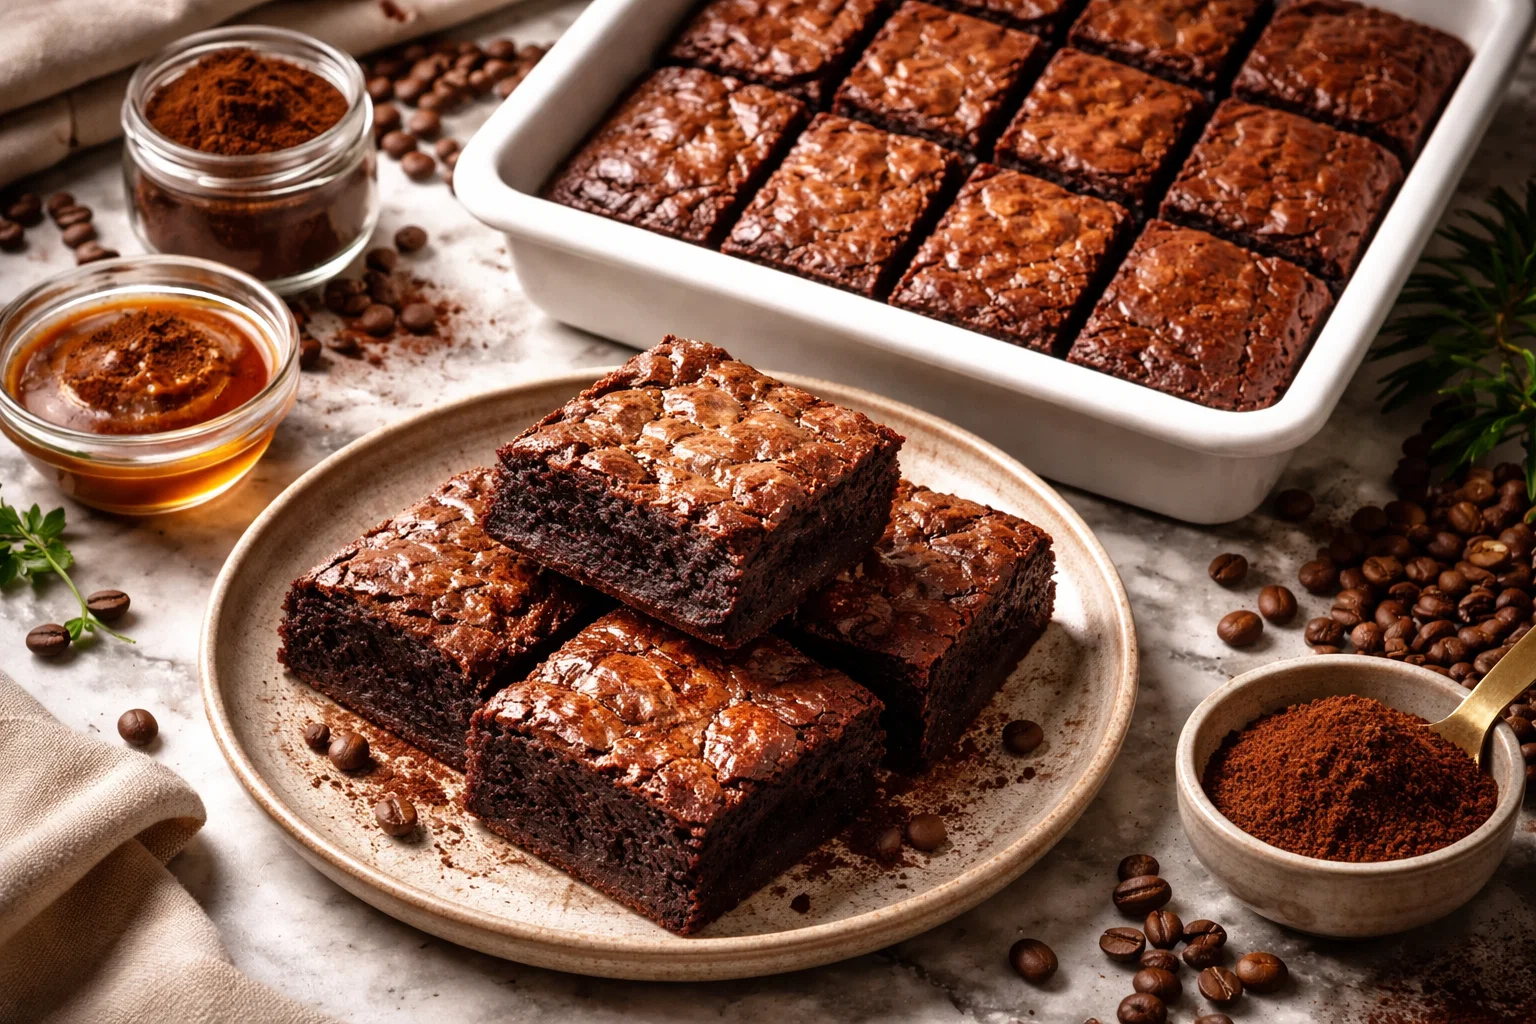
    Welcome to the world of delectable dessert recipes, where flavor meets simplicity! These Easy Brown Butter Espresso Brownies are not just another brownie; they are a rich, indulgent treat perfect for any occasion. The warm, nutty flavor of browned butter combined with a kick of espresso creates a delightful experience that transcends ordinary brownie recipes.

    What makes these brownies a must-try for busy home cooks, diet-conscious individuals, students, and even busy parents? Their simplicity! With minimal ingredients and straightforward steps, almost anyone can whip up a batch of these coffee-infused delights. Moreover, these brownies can be easily made vegan or gluten-free without sacrificing flavor, making them ideal for anyone with dietary restrictions. Each bite is a heavenly journey into chocolatey goodness, perfect for sharing with friends or enjoying on a quiet evening.

    But that’s not all! The combination of brown butter and espresso elevates these brownies to new heights, making them not just a dessert but also a delightful pick-me-up. Whether you’re a seasoned baker or someone who rarely steps into the kitchen, these brownies are sure to impress your family and friends. So, let’s get started and bring a slice of tropical delight into your home with these Easy Brown Butter Espresso Brownies!


    Benefits and Advantages of Easy Brown Butter Espresso Brownies

    When it comes to dessert recipes, few can compete with the ease and deliciousness of Easy Brown Butter Espresso Brownies. Here’s why you should consider making them:

    Simplicity

    One of the biggest advantages of this brownie recipe is its simplicity. You don’t need to be a professional baker to create something extraordinary. With just a handful of ingredients, you can enjoy a rich, fudgy treat that looks and tastes amazing.

    Health Benefits

    While brownies are often considered a guilty pleasure, these brownies are inherently a bit more wholesome. Using brown butter adds a depth of flavor, enhancing your enjoyment without the need for excess sugar. You can even swap regular flour for almond or coconut flour for a low-carb option. Plus, with the addition of espresso, you’re not just indulging your sweet tooth; you’re also giving yourself a caffeine boost, perfect for those late-night study sessions or morning pick-me-ups.

    Customizable

    This recipe offers incredible flexibility. You can easily adapt it to meet various dietary needs – vegan? No problem! Gluten-free? Absolutely! This adaptability makes it an ideal choice for gatherings where you may have guests with different dietary preferences.

    Gourmet Experience

    Brown butter brings a sophisticated touch to these brownies. It’s the secret ingredient that transforms ordinary brownies into a gourmet experience. Combined with the rich flavor of espresso, it creates an irresistible allure that will have everyone asking for seconds.

    Overall, Easy Brown Butter Espresso Brownies stand out in the world of dessert recipes not just for their taste but also for their health benefits and versatility. They cater to a range of dietary needs while delivering a scrumptious dessert that can be enjoyed by all.


    Ingredients Overview

    Essential Ingredients for Easy Brown Butter Espresso Brownies

    To create these delightful brownies, you’ll need a few simple ingredients. Each component plays a crucial role, ensuring the perfect texture and flavor. Here’s what you’ll need:

    • Unsalted Butter (1/2 cup / 115g): Provides the base for the brownie batter; browning this butter adds a nutty flavor.
    • Espresso Powder (1 tablespoon): Intensifies the chocolate flavor and adds a rich coffee kick.
    • Brown Sugar (1 cup / 200g): For sweetness along with moisture; it creates a chewy texture.
    • Granulated Sugar (1/2 cup / 100g): Balances the sweetness and helps achieve a perfect crust on top.
    • Large Eggs (2): Binds the ingredients together and adds richness.
    • Vanilla Extract (1 teaspoon): Enhances the flavor profile.
    • All-Purpose Flour (1 cup / 120g): Provides structure; for a gluten-free option, use almond or coconut flour.
    • Unsweetened Cocoa Powder (1/3 cup / 40g): Delivers that chocolatey goodness; dark cocoa can be used for a richer taste.
    • Salt (1/2 teaspoon): Balances the sweetness and enhances flavors.

    Dietary Substitutions to Customize Your Easy Brown Butter Espresso Brownies

    Adapting this recipe for dietary restrictions is simple, making it a versatile choice for different lifestyles:

    • Gluten-Free Option: Replace the all-purpose flour with a gluten-free flour blend or almond flour to keep it gluten-free without impacting flavor much.
    • Vegan Option: Substitute the eggs with flaxseed meal or unsweetened applesauce. For the butter, use vegan butter or coconut oil.
    • Lower Sugar Option: Substitute brown sugar with coconut sugar or a sugar alternative like monk fruit sweetener. Adjust the ratios based on the specific sweetener used.

    No matter the dietary choice, Easy Brown Butter Espresso Brownies can be easily tailored to meet individual needs, ensuring everyone can indulge in these heavenly treats.


    How to Prepare the Perfect Easy Brown Butter Espresso Brownies: Step-by-Step Guide

    Making Easy Brown Butter Espresso Brownies is a straightforward process. Follow these step-by-step instructions to create a batch of delicious brownies that everyone will adore!

    1. Preheat the Oven: Preheat your oven to 350°F (175°C). Grease an 8×8-inch baking pan or line it with parchment paper for easy removal.

    2. Brown the Butter: In a medium saucepan, melt the unsalted butter over medium heat. Swirl the pan occasionally until the butter foams and turns golden brown. Remove it from heat and let it cool slightly.

    3. Mix Espresso with Butter: In a large mixing bowl, combine the brown butter with espresso powder. Stir until the espresso has dissolved completely—this infusion brings incredible flavor to the brownies.

    4. Add Sugars: Add the brown sugar and granulated sugar to the butter mixture. Mix on medium speed or whisk vigorously until well combined, resulting in a smooth and creamy texture.

    5. Incorporate Eggs and Vanilla: Add the eggs, one at a time, mixing well after each addition. Finally, stir in the vanilla extract. This step ensures the eggs are well incorporated into the batter which helps to create a nice structure.

    6. Combine Dry Ingredients: In a separate bowl, whisk together the all-purpose flour, cocoa powder, and salt. This helps break up any lumps in the dry ingredients and ensures an even distribution of flavors throughout the brownies.

    7. Fold Dry Ingredients into Wet Ingredients: Slowly add the dry mixture to the wet mixture, folding gently until just combined. Be careful not to overmix, as this can lead to dense brownies.

    8. Pour and Smooth the Batter: Pour the brownie batter into the prepared pan. Use a spatula to smooth the top evenly, making sure to reach all corners of the pan.

    9. Bake the Brownies: Place the pan in the preheated oven and bake for about 20-25 minutes. Check for doneness by inserting a toothpick in the center; it should come out with a few moist crumbs but not wet batter.

    10. Cool the Brownies: Once baked, remove the brownies from the oven and let them cool in the pan for about 15 minutes. Afterward, transfer to a wire rack to cool completely.

    11. Cut and Serve: Once cooled, cut the brownies into squares. Enjoy them warm with a scoop of ice cream or fresh berries for an elevated dessert experience!

    These Easy Brown Butter Espresso Brownies are designed to be adaptable. Feel free to experiment with the baking time depending on your texture preference; for fudgier brownies, take them out a bit earlier.


    Mastering Easy Brown Butter Espresso Brownies: Advanced Tips and Variations

    Perfecting these dessert recipes can be fun and rewarding! Here are some advanced tips and variations to make these brownies even more exciting:

    Add Mix-ins

    Consider adding chocolate chunks, nuts, or even caramel swirls to your brownie batter. Chopped walnuts or pecans can give an added crunch. Dark chocolate chips can intensify the brownie’s richness, creating an even more luxurious dessert!

    Experiment with Flavors

    Try incorporating different flavor extracts like almond or hazelnut for a unique twist. Spice it up with a touch of cinnamon or cayenne pepper for a slight heat that can elevate the coffee flavors.

    Don’t Skip Cooling

    Letting the brownies cool completely before cutting is essential for achieving clean, neat edges. Warmer brownies can be more difficult to cut without falling apart.

    Make It a Sundae

    Transform your brownies into a decadent sundae by topping them with vanilla ice cream, whipped cream, and drizzling warm fudge or caramel sauce over the top.

    Gluten-Free Game Plan

    If you’re using gluten-free flour, be aware that it sometimes reacts differently. To achieve the right density, consider adding an extra tablespoon of flour for a perfect texture.

    By following these tips and suggestions, you can customize your Easy Brown Butter Espresso Brownies to reflect your tastes and preferences, making them even more enjoyable!


    How to Store Easy Brown Butter Espresso Brownies: Best Practices

    Storing your Easy Brown Butter Espresso Brownies properly ensures they remained delicious and fresh for as long as possible. Here are some best practices:

    Refrigeration

    If you have leftovers, place them in an airtight container and store them in the refrigerator. They will generally last for up to one week. Reheating them briefly in the microwave for a few seconds can bring back some of their warm, gooey goodness.

    Freezing

    To freeze these brownies, cut them into squares and wrap each piece individually in plastic wrap. Then, place them in a zip-top freezer bag or airtight container. They can be frozen for up to three months. When you’re ready to enjoy, simply thaw them in the refrigerator overnight or at room temperature for an hour or two.

    Reheating

    To reheat, you can use the microwave for about 10-15 seconds. If you prefer them warm, you can place them in a conventional oven at 350°F (175°C) for about 5-7 minutes. This will help to restore that freshly baked texture.

    Storing your Easy Brown Butter Espresso Brownies properly will allow you to indulge in their rich flavors long after they are made!


    Nutritional Value of Easy Brown Butter Espresso Brownies

    Understanding the nutritional value of your favorite dessert recipes can help you make informed choices. Here’s a breakdown of the basic nutritional information for one brownie, based on standard ingredients:

    • Calories: 180
    • Total Fat: 8g (Saturated Fat: 5g)
    • Cholesterol: 45mg
    • Sodium: 60mg
    • Total Carbohydrates: 25g
    • Dietary Fiber: 1g
    • Sugars: 12g
    • Protein: 2g

    Nutritional Highlights

    • Energy Boost: The combination of brown sugar and espresso gives you a quick energy boost, making these brownies a perfect midday snack.
    • Control Your Portions: While delicious, keep in mind that moderation is key. Enjoying a small brownie can satisfy your sweet tooth while being mindful of nutritional intake.
    • Customizable Nutrition: By swapping ingredients to make them vegan or gluten-free, you can also tweak the nutritional values to fit your dietary needs.

    Adjusting your serving sizes can help you better balance your enjoyment of these brownies with your nutritional goals. Remember that everything is okay in moderation!


    FAQs: Frequently Asked Questions About Easy Brown Butter Espresso Brownies

    1. Can I make these brownies gluten-free?
    2. Absolutely! Replace the all-purpose flour with a gluten-free flour blend or almond flour to enjoy a gluten-free version of these delicious brownies.

    3. How can I make these brownies vegan?

    4. Substitute the eggs with flaxseed meal or applesauce and use vegan butter in place of regular butter. This will ensure you have a tasty vegan treat.

    5. How do I store leftover brownies?

    6. Store leftovers in an airtight container in the refrigerator for up to a week or freeze them wrapped individually for up to three months.

    7. Can I substitute espresso powder for regular coffee?

    8. While espresso powder enhances flavor, ground coffee can be used in a pinch, but the result may differ in intensity. For a stronger flavor, stick with espresso powder.

    9. What can I add to the brownies?

    10. Feel free to experiment! Adding chocolate chips, walnuts, or even a swirl of peanut butter can take these brownies to another level.

    11. How do I know when the brownies are done?

    12. The brownies are ready when a toothpick comes out with a few moist crumbs. If the toothpick comes out wet, they need additional baking time.

    13. Can I make these brownies ahead of time for an event?

    14. Yes! These brownies store very well, making them ideal for prepping ahead of special occasions.

    15. What toppings work well with these brownies?

    16. These brownies pair beautifully with a scoop of ice cream, a drizzle of caramel sauce, or even a dollop of whipped cream for an extra indulgent dessert.

    By addressing these common questions, you can feel confident in your baking and make informed modifications to suit your preferences. Enjoy your time in the kitchen, and happy baking!


    With the Easy Brown Butter Espresso Brownies recipe, you’re all set to create a delicious, flexible, and memorable dessert that can appeal to a variety of tastes. Whether for a special celebration or a casual treat, this recipe brings joy to the table. Happy baking!

  • The Most Addictive Chicken Pasta YouLl Ever Make

    The Most Addictive Chicken Pasta YouLl Ever Make

    The Most Addictive Chicken Pasta You’ll Ever Make!: A Tropical Delight

    Introduction to The Most Addictive Chicken Pasta You’ll Ever Make!

    Are you ready to elevate your dinner table with a recipe that combines flavor, convenience, and health benefits? Look no further, as I introduce you to the most addictive chicken pasta you’ll ever make! This dish is not just another one of those ordinary chicken recipes; it’s a true crowd-pleaser that’s perfect for any occasion—from busy weeknights to casual get-togethers.

    What makes this recipe particularly special? First, it’s incredibly simple to prepare, making it ideal for home cooks and busy parents alike. In just about 30 minutes, you can have a delicious, mouthwatering meal ready on the table, ensuring you spend less time cooking and more time enjoying with your loved ones.

    Furthermore, this chicken pasta is packed with fresh ingredients, providing you with a healthy option that meets various dietary needs. It’s easily customizable for those who prefer gluten-free pasta or want to enjoy a low-calorie variant. Whether you’re a student on a budget, newlyweds trying to impress each other with culinary skills, or a working professional looking for quick meals, this addictive chicken pasta is sure to become a staple in your kitchen.

    Beyond its convenience and health benefits, this dish also flaunts a unique blend of tropical flavors, making it a delightful addition to your culinary repertoire. So, let’s get cooking!

    Benefits and Advantages of The Most Addictive Chicken Pasta You’ll Ever Make!

    The most addictive chicken pasta you’ll ever make stands out thanks to multiple benefits and advantages that cater to a diverse audience. Here’s why this recipe is your best choice:

    1. Ease of Preparation: In our fast-paced lives, convenience matters. This dish can be prepared in under 30 minutes, which means it’s perfect for those rushed weekdays when cooking can feel like a chore. With minimal prep time, you can quickly sauté some chicken, toss in vibrant vegetables, and combine everything with your favorite pasta.

    2. Health Benefits: Unlike many other chicken recipes that may be high in calories and saturated fats, this chicken pasta is a healthier alternative. By opting for whole-grain or gluten-free pasta, along with an array of fresh vegetables like bell peppers, spinach, and tomatoes, you get a wholesome meal packed with essential nutrients, dietary fiber, and antioxidants.

    3. Versatility: This chicken pasta recipe can be tailored to fit numerous dietary needs. It works well as a gluten-free dish by simply substituting regular pasta with gluten-free options. For a low-calorie version, you can reduce the amount of olive oil or use zoodles (zucchini noodles) for a lighter take. There are also vegan choices available—just swap the chicken for a combination of chickpeas and your favorite vegetables!

    4. Family-Friendly and Crowd-Pleasing: This dish’s vibrant colors and tropical flavors make it appealing to all, from the kids who refuse vegetables, to guests who are discerning eaters. With all the flavors mingling together, even picky eaters can’t resist going back for seconds!

    In summary, this chicken pasta is not only addictive but also a versatile dish that supports various dietary preferences and needs, making it a great fit for all home cooks. Let’s explore the ingredients that make this dish so compelling!

    Ingredients Overview

    Essential Ingredients for The Most Addictive Chicken Pasta You’ll Ever Make!

    Before diving into the preparation, here’s a detailed list of the ingredients you’ll need. Each ingredient plays a unique role, enhancing flavors and texture while delivering health benefits.

    • 2 chicken breasts (about 1 lb): Boneless, skinless chicken breasts make for a lean protein base.
    • 8 oz whole grain or gluten-free pasta: Adds fiber, supporting digestive health.
    • 1 cup cherry tomatoes: A burst of sweetness and antioxidants.
    • 1 bell pepper (red or yellow): Provides a crunchy texture and is rich in vitamins.
    • 2 cups fresh spinach: Packed with iron, vitamins, and minerals.
    • 3 cloves garlic: For flavor and its health benefits, promoting good immune function.
    • 1/4 cup olive oil: A source of healthy fats.
    • 1/2 teaspoon red pepper flakes: Adds heat and boosts metabolism.
    • 1 teaspoon Italian seasoning: A blend of herbs that enhances flavor.
    • Salt and pepper to taste.

    These ingredients combine to form a beautiful dish that’s not only vibrant but also healthy and satisfying. Now let’s explore how we can modify the ingredients to suit various diets!

    Dietary Substitutions to Customize Your The Most Addictive Chicken Pasta You’ll Ever Make!

    When it comes to crafting a dish that accommodates everyone’s dietary needs, substitutions are key! Here are some fantastic alternatives you can consider:

    • For a Vegan Option: Replace chicken breasts with 1 can of chickpeas (drained and rinsed) or grilled tofu for added protein. Sauté until browned for a tasty substitute.

    • For Gluten-Free Variations: Use gluten-free pasta made from quinoa or brown rice. These options maintain flavor and texture while accommodating gluten sensitivities.

    • For a Low-Carb Version: Substitute pasta with zucchini noodles, which provides a fresh and light dish while keeping carb counts low.

    • Add More Veggies: Feel free to toss in additional vegetables! Mushrooms, broccoli, or even carrots can enhance the dish further while providing essential nutrients.

    With these substitutions, everyone can enjoy the most addictive chicken pasta, tailored to their specific dietary needs and preferences!

    How to Prepare the Perfect The Most Addictive Chicken Pasta You’ll Ever Make!: Step-by-Step Guide

    Ready to make your own tropical chicken pasta? Follow this simple yet detailed step-by-step guide for a seamless cooking experience:

    1. Prepare the Ingredients: Start by dicing the chicken breasts into bite-sized pieces. Rinse the cherry tomatoes and halved them, chop the bell pepper, and mince the garlic.

    2. Cook the Pasta: In a large pot of salted boiling water, add the whole-grain or gluten-free pasta. Cook according to package instructions until al dente. Drain and set aside.

    3. Heat the Olive Oil: In a large skillet or frying pan, heat the olive oil over medium heat. Adding olive oil gives your dish richness without excessive calories.

    4. Sauté the Chicken: Once the oil is hot, add the diced chicken pieces. Season them with salt, pepper, and red pepper flakes. Sauté until the chicken is golden brown and cooked thoroughly (about 5-7 minutes).

    5. Add Garlic and Vegetables: Toss in the minced garlic, tomatoes, and bell pepper, sautéing for an additional 2-3 minutes until the veggies begin to soften.

    6. Mix in Spinach: Add the fresh spinach and Italian seasoning to the skillet. Stir everything together until the spinach wilt and mixes well (approx. 2 minutes).

    7. Combine Pasta and Sauce: Add the cooked pasta to the skillet, gently tossing everything together to ensure the pasta is well-coated. If it seems dry, you can drizzle a bit more olive oil or a splash of pasta water.

    8. Final Seasoning: Taste and adjust the seasoning if necessary. Sprinkle extra salt, pepper, or red pepper flakes for heat!

    9. Serve Immediately: Plate your pasta and enjoy a tropical feast! Drizzle some extra virgin olive oil on top for added richness and flavor if desired.

    This chicken pasta is not only tasty but will have your family asking for seconds. And remember, feel free to adjust the cooking techniques based on your dietary preferences!

    Mastering The Most Addictive Chicken Pasta You’ll Ever Make!: Advanced Tips and Variations

    To take your chicken pasta to the next level, here are some advanced tips and variations:

    • Protein Variations: Swap chicken for shrimp, salmon, or even a plant-based protein like lentils. They all infuse the dish with different flavors and nutritional profiles.

    • Cheesy Delight: For a cheesy variation, consider adding a sprinkle of parmesan cheese or a vegan substitute just before serving. This enhances the dish and introduces a rich, creamy texture.

    • Herb Infusion: Experiment with fresh herbs such as basil, parsley, or cilantro for a unique twist. Sprinkling fresh herbs on top not only enhances flavor but also adds aesthetic appeal.

    • Make it Creamy: If you’re looking for a richer dish, stir in a small amount of cream or a dairy-free alternative just before serving. The creamy consistency will elevate your pasta and leave everyone raving about it.

    With these tips, you can create various versions of the most addictive chicken pasta, appealing to a wide range of tastes and diets!

    How to Store The Most Addictive Chicken Pasta You’ll Ever Make!: Best Practices

    If you find yourself with leftovers after enjoying this fabulous pasta, you can store it to enjoy later. Here’s how to do it:

    • Refrigeration: Allow your chicken pasta to cool down completely. Store it in an airtight container in the refrigerator for up to 3-4 days. When you’re ready to enjoy it again, simply reheat it on the stove with a splash of water or broth to revitalize the flavors.

    • Freezing: For longer storage, the pasta can be frozen. Transfer it into freezer-safe bags or containers, removing as much air as possible. This way, your pasta can last for up to 3 months!

    • Reheating: To reheat frozen pasta, let it thaw overnight in the refrigerator. Then reheat it in a pan over low heat or in the microwave, ensuring it remains moist by adding a tiny splash of water.

    These best practices will ensure your most addictive chicken pasta remains delicious, fresh, and ready for your next craving!

    Nutritional Value of The Most Addictive Chicken Pasta You’ll Ever Make!

    Understanding the nutritional value of your meals is essential, especially if you’re conscious of your diet. Here’s a breakdown of the nutritional information for one serving of the most addictive chicken pasta, estimated to yield about four servings:

    • Calories: 450
    • Protein: 30g
    • Total Fat: 15g
    • Saturated Fat: 2g
    • Cholesterol: 70mg
    • Carbohydrates: 50g
    • Dietary Fiber: 7g
    • Sugars: 4g
    • Vitamin A: 20% of Daily Value (DV)
    • Vitamin C: 40% of DV
    • Calcium: 6% of DV
    • Iron: 15% of DV

    This nutritious profile makes the most addictive chicken pasta not just a treat for the taste buds but also a wholesome, heart-healthy meal option. Feel free to adjust the ingredients to further cater to your health goals!

    FAQs: Frequently Asked Questions About The Most Addictive Chicken Pasta You’ll Ever Make!

    Here are some of the most common questions regarding this tantalizing chicken pasta and their concise answers:

    1. Can I use frozen chicken instead of fresh?
    Yes! You can use frozen chicken; just make sure to thaw it thoroughly before cooking. This ensures even cooking and best results.

    2. Can I replace chicken with other meats?
    Absolutely! Feel free to swap chicken for shrimp, turkey, or even a vegetarian protein like tofu.

    3. How can I make this dish spicy?
    To add spice, increase the amount of red pepper flakes or incorporate diced jalapeños or any other hot pepper for an extra kick!

    4. Is it possible to make this dish in advance?
    Yes! You can prepare the pasta and sauce ahead of time. Store them separately in the refrigerator, and then combine them just before serving.

    5. Can this be a low-carb meal?
    Yes! By substituting regular pasta with zoodles or any other low-carb option, you can significantly reduce the carbohydrate content.

    Feel free to explore this tropical delight further, and remember that cooking is all about enjoying the journey—get creative in the kitchen!

    In conclusion, the most addictive chicken pasta you’ll ever make is more than just a meal; it’s a versatile, health-conscious dish that fits into any lifestyle. Whether you’re catering to family, friends, or just yourself, this recipe will inspire you to bring flavors to your plate like never before. So gather your ingredients, and let’s create moments that are not just delicious but also memorable!

  • Tasty Soy Garlic Chicken Rice Bowl

    Tasty Soy Garlic Chicken Rice Bowl

    Tasty Soy Garlic Chicken Rice Bowl: A Tropical Delight

    Introduction to Tasty Soy Garlic Chicken Rice Bowl

    Welcome to your next culinary adventure with the Tasty Soy Garlic Chicken Rice Bowl! This delightful dish not only satisfies your cravings but also ticks all the boxes when it comes to healthiness, simplicity, and versatility. In the realm of chicken recipes, this one stands out for its flavorful combination of soy sauce, garlic, and succulent chicken, served over a bed of fluffy rice.

    Whether you’re a busy parent juggling work and family, a student on a budget, or someone simply seeking a quick yet nutritious meal, this recipe is perfect for you. With an uncomplicated preparation process, it fits seamlessly into your hectic lifestyle. Packed with protein and essential nutrients, the Tasty Soy Garlic Chicken Rice Bowl is a fantastic option for health-conscious individuals. Moreover, it can easily be adapted for vegan or gluten-free diets, offering something for everyone!

    So, why should you give this recipe a try? Imagine succulent pieces of chicken marinated in a delectable soy-garlic sauce, paired with tender rice and crisp vegetables. Not only does this bowl provide a burst of flavors, but it also delivers a comforting meal that warms the soul. Let’s dive into the benefits and advantages of this flavorful creation, ensuring it finds a cherished spot in your weekly meal rotation!

    Benefits and Advantages of Tasty Soy Garlic Chicken Rice Bowl

    The Tasty Soy Garlic Chicken Rice Bowl is more than just a meal; it’s a wholesome culinary delight with numerous advantages. One of the most compelling reasons to whip up this dish is its ease of preparation. You don’t need to be a master chef to create this flavorful bowl; it’s simple enough for novice cooks and busy individuals alike. In just under 30 minutes, you can serve a satisfying meal that rivals those from your favorite restaurant.

    Health benefits abound in this delicious dish. Chicken, as a lean protein source, provides essential amino acids necessary for muscle building and recovery. The addition of garlic not only enriches the flavor but also offers anti-inflammatory and immune-boosting properties. This recipe allows for a customization of vegetables, meaning you can pack in additional vitamins and minerals from fresh produce.

    Moreover, the Tasty Soy Garlic Chicken Rice Bowl is both appealing and adaptable! Whether you’re following a specific diet or just using what you have on hand, this recipe can easily accommodate. It serves well as a base, allowing you to modify it for vegan or gluten-free options by substituting chicken with tofu or using gluten-free soy sauce.

    Additionally, as many chicken recipes often call for complicated steps, this one simplifies the cooking process. The straightforward steps make it an excellent option for busy parents who want to serve home-cooked meals without spending hours in the kitchen. The Tasty Soy Garlic Chicken Rice Bowl packs a flavorful punch while keeping things uncomplicated, making it a great choice for novices and seasoned cooks alike.

    Ingredients Overview

    Essential Ingredients for Tasty Soy Garlic Chicken Rice Bowl

    To create your own Tasty Soy Garlic Chicken Rice Bowl, gather the following ingredients:

    • For the Marinade:
    • 1 lb (450g) chicken breast, cut into bite-sized pieces (or tofu for a vegan option)
    • 1/4 cup soy sauce (use gluten-free soy sauce for a gluten-free option)
    • 2 tablespoons honey or maple syrup (for vegan)
    • 4 cloves garlic, minced
    • 1 tablespoon sesame oil
    • 1 tablespoon rice vinegar

    • For the Rice:

    • 2 cups cooked white or brown rice (or cauliflower rice for a low-calorie option)

    • For the Vegetables:

    • 1 bell pepper, sliced
    • 1 cup broccoli florets
    • 1 carrot, julienned
    • 2 green onions, chopped
    • 1 tablespoon sesame seeds (for garnish)

    Each ingredient serves a specific purpose: while chicken provides protein, garlic enhances flavor and offers health benefits. The rice serves as a hearty base, absorbing all the lovely flavors from the chicken and sauce. Feel free to mix in your favorite vegetables, as they add color, texture, and additional nutritional value to your meal.

    Dietary Substitutions to Customize Your Tasty Soy Garlic Chicken Rice Bowl

    To cater to various dietary preferences and needs, here are some suggested substitutions:

    • For Vegan Options:
    • Replace chicken with firm tofu, tempeh, or chickpeas.
    • Use maple syrup or agave nectar instead of honey.

    • For Gluten-Free Needs:

    • Opt for gluten-free soy sauce or tamari.
    • Ensure any added sauces or condiments are gluten-free.

    • For Low-Calorie Versions:

    • Substitute white rice with cauliflower rice, reducing the calorie content while maintaining volume and flavor.
    • Use a leaner cut of chicken or opt for skinless chicken thighs.

    These adaptations make it easier for anyone to enjoy this delicious bowl, allowing you to create a meal that aligns perfectly with your dietary needs.

    How to Prepare the Perfect Tasty Soy Garlic Chicken Rice Bowl: Step-by-Step Guide

    Creating the Tasty Soy Garlic Chicken Rice Bowl doesn’t have to be complicated. Follow these straightforward steps for a delicious outcome:

    1. Prepare the Marinade: In a medium-sized bowl, whisk together soy sauce, honey or maple syrup, minced garlic, sesame oil, and rice vinegar. Add chicken pieces (or tofu), ensuring they are well-coated. Let them marinate for at least 15 minutes to absorb the flavors.

    2. Cook the Rice: While the chicken marinates, prepare rice according to package instructions. For a quicker base, consider using leftover rice or pre-cooked options. If using cauliflower rice, sauté it lightly in olive oil for 3-5 minutes until tender.

    3. Sauté the Vegetables: In a large skillet or wok, heat a tablespoon of sesame oil over medium heat. Add the sliced bell pepper, broccoli florets, and carrots. Stir-fry for 5-7 minutes until they start to get tender but remain slightly crisp.

    4. Cook the Chicken: Push the vegetables to one side of the skillet. In the same pan, add the marinated chicken (or tofu). Sauté for about 6-8 minutes, stirring frequently, until the chicken is fully cooked and no longer pink in the middle.

    5. Combine Ingredients: Once the chicken is cooked, mix it with the sautéed vegetables. Cook together for an additional 2 minutes, allowing the flavors to meld. Adjust seasoning to taste.

    6. Serve: To assemble your rice bowl, scoop a generous portion of rice into each serving bowl. Top with the chicken and vegetable mixture, ensuring an even distribution.

    7. Garnish: Sprinkle with chopped green onions and sesame seeds for added texture and flavor.

    8. Enjoy: Serve your Tasty Soy Garlic Chicken Rice Bowl immediately for the best experience.

    This meal doesn’t just taste wonderful; it also looks visually appealing and enticing!

    Mastering Tasty Soy Garlic Chicken Rice Bowl: Advanced Tips and Variations

    To truly master the Tasty Soy Garlic Chicken Rice Bowl, consider these advanced tips and variations to elevate your experience:

    • Flavor Enhancements: Add freshly grated ginger to the marinade for an extra layer of flavor. A splash of chili sauce can spice things up for those who enjoy heat.

    • Try Different Proteins: Experiment with different proteins such as shrimp, beef, or plant-based meat substitutes for a unique twist on this classic.

    • Explore Grain Options: Don’t limit yourself to rice! Quinoa, farro, or even wild rice can serve as flavorful alternatives that enhance the nutritional profile.

    • Swap out the Veggies: Feel free to customize the vegetables based on what’s in season or available. Zucchini, snap peas, or edamame also work well in this dish.

    • Meal Prep: This recipe is perfect for meal prepping! Cook a larger batch and store it in individual containers for easy lunches or dinners throughout the week.

    With these variations and enhancements, you can turn a simple rice bowl into a dynamic meal that never gets monotonous!

    How to Store Tasty Soy Garlic Chicken Rice Bowl: Best Practices

    To ensure your Tasty Soy Garlic Chicken Rice Bowl remains fresh and delicious, follow these best practices for storage:

    • Refrigeration: Store any leftovers in an airtight container in the refrigerator. Properly stored, it should last for about 3-4 days.

    • Freezing: If you want to store the dish for a longer period, consider freezing it. Allow the bowl to cool down completely, then transfer it to a freezer-safe container. It can be kept frozen for up to 3 months.

    • Reheating: When reheating, do so in the microwave or on the stovetop until heated through. If the sauce appears thick, add a splash of water or broth to loosen it up.

    Following these guidelines will help maintain the flavor and texture of your Tasty Soy Garlic Chicken Rice Bowl, allowing for an enjoyable experience each time.

    Nutritional Value of Tasty Soy Garlic Chicken Rice Bowl

    Understanding the nutritional value of your meals is essential, especially when following specific dietary guidelines. Here’s a breakdown of the key nutritional components for the Tasty Soy Garlic Chicken Rice Bowl:

    • Serving Size: 1 bowl (with chicken)
    • Calories: Approximately 450-550 (depending on rice and additional ingredients)
    • Protein: 35g (high protein source from chicken)
    • Fat: 10g (includes healthy fats from sesame oil)
    • Carbohydrates: 60g (includes fiber from rice and vegetables)
    • Fiber: 3g (based on vegetables used)
    • Vitamins and Minerals: Rich in vitamins A, C, and iron from vegetables alongside protein from chicken.

    By customizing the ingredients, like opting for brown rice and more veggies, you can further increase the fiber and nutrient content and decrease the calorie count. This versatility makes the Tasty Soy Garlic Chicken Rice Bowl a fantastic addition to any meal plan!

    FAQs: Frequently Asked Questions About Tasty Soy Garlic Chicken Rice Bowl

    Q1: Can I make this dish in advance?
    A1: Yes! You can prep the chicken and marinade in advance. However, for the best flavor and texture, cook the vegetables and rice closer to serving time.

    Q2: Is this recipe suitable for meal prep?
    A2: Certainly! It stores well in an airtight container in the refrigerator. Reheat it for easy weekday meals.

    Q3: Can I use other proteins for this dish?
    A3: Absolutely! Feel free to replace chicken with tofu, shrimp, or even beef. Just adjust the cooking times accordingly.

    Q4: How can I make this recipe gluten-free?
    A4: Simply use gluten-free soy sauce or tamari. Ensure that any additional sauces used are also gluten-free.

    Q5: Is it easy to customize the ingredients?
    A5: Yes! You can easily swap vegetables or grains to suit your taste or dietary needs. This dish is very versatile!

    With its delicious flavor, nutritional benefits, and customizable options, the Tasty Soy Garlic Chicken Rice Bowl is a fantastic recipe to try. It’s perfect for anyone looking to simplify their weeknight dinners, delight their family, or experiment with new flavors. So, get cooking and enjoy the tropical flavors in every spoonful!

  • Easy Healthy Sticky Chicken Rice Bowl

    Easy Healthy Sticky Chicken Rice Bowl

    Easy Healthy Sticky Chicken Rice Bowl: A Tropical Delight

    Introduction to Easy Healthy Sticky Chicken Rice Bowl

    Are you searching for quick and nutritious healthy dinner recipes that the whole family will love? Look no further than the Easy Healthy Sticky Chicken Rice Bowl! This delightful dish is not just wholesome but also incredibly easy to prepare. Featuring tender chicken, glistening with a savory and slightly sweet sticky glaze, this recipe brings together a medley of flavors that transport you to a tropical paradise.

    The beauty of this chicken rice bowl lies in its simplicity. In under 30 minutes, you can whip up a colorful and filling meal that is both satisfying and good for your body. Plus, it’s versatile for various dietary preferences—whether you’re looking for gluten-free options, vegetarian substitutions, or a low-calorie profile, this recipe adapts effortlessly to meet your needs.

    Packed with protein, fiber, and essential nutrients, this bowl is suitable for busy parents who need a quick dinner solution, students on a budget, diet-conscious individuals, and anyone else looking for a delicious, guilt-free meal. As you follow this recipe, discover how easy it can be to make healthy eating enjoyable and accessible for everyone.

    Benefits and Advantages of Easy Healthy Sticky Chicken Rice Bowl

    This Easy Healthy Sticky Chicken Rice Bowl is not just a meal; it’s an experience filled with benefits that cater to a multitude of lifestyles and dietary requirements. Here are just a few reasons why this dish stands out among healthy dinner recipes.

    1. Quick and Easy Preparation: With basic ingredients and minimal cooking techniques, anyone can master this dish. As a busy parent or working professional, you’ll appreciate how little time it takes to prepare a nutritious meal that pleases the palate and fills hungry stomachs.

    2. Health Benefits: Each bowl is brimming with lean protein from the chicken, which helps in muscle repair and boosts immunity. The accompanying vegetables provide a wealth of vitamins and minerals, and the rice base offers complex carbohydrates, keeping you satiated for longer without the crash.

    3. Customizable: This recipe accommodates a variety of dietary preferences. Whether you’re vegan, gluten-free, or need to reduce calories, you can easily swap out ingredients to suit your needs while retaining the deliciousness of this dish.

    4. Appealing Aesthetic: The colorful presentation is visually enticing, making it appealing for both adults and children. This is particularly important for families, as a well-plated meal can entice picky eaters to try new foods.

    5. Suitable for Meal Prep: Making this dish in bulk allows for seamless lunch or dinner solutions throughout the week. Just divide it into portions, and you’ll have healthy options ready at your fingertips!

    With all these advantages, the Easy Healthy Sticky Chicken Rice Bowl is sure to become a staple in your rotation of healthy dinner recipes.

    Ingredients Overview

    Essential Ingredients for Easy Healthy Sticky Chicken Rice Bowl

    Here’s a detailed list of the ingredients you’ll need to make the Easy Healthy Sticky Chicken Rice Bowl, along with their benefits:

    • Chicken Breast (500g): High in protein and low in fat, chicken breast is the perfect lean meat to use. It provides the energy you need without excess calories.
    • Brown Rice (1 cup): A fiber-rich alternative to white rice, brown rice supports digestion and keeps you feeling full longer. It also helps maintain stable blood sugar levels.
    • Soy Sauce (¼ cup): Adds a savory umami flavor. Use low-sodium soy sauce to keep the sodium content in check.
    • Honey or Maple Syrup (2 tablespoons): Provides natural sweetness that balances the salty flavors. Use maple syrup for a vegan option.
    • Garlic (3 cloves, minced): Packed with antioxidants and known for its immune-boosting properties, garlic adds depth to the dish.
    • Ginger (1 tablespoon, grated): This aromatic adds a warm spice and has anti-inflammatory benefits.
    • Vegetable Oil (1 tablespoon): A small amount is needed to cook the chicken. Use olive oil for added health benefits.
    • Mixed Vegetables (2 cups): Use fresh or frozen options like bell peppers, broccoli, and carrots for color and nutrients.
    • Sesame Seeds (for garnish): Rich in healthy fats, these seeds add crunch to your dish.

    Dietary Substitutions to Customize Your Easy Healthy Sticky Chicken Rice Bowl

    This recipe can be effortlessly customized to cater to various dietary needs:

    • For vegan options: Substitute the chicken with firm tofu or chickpeas—both options provide a protein boost. Ensure you use maple syrup instead of honey.
    • For gluten-free purposes: Use tamari sauce in place of soy sauce to avoid gluten while enjoying the same delicious flavor.
    • Low-calorie options: Reduce the amount of honey or syrup, and opt for sprouted brown rice, which is lower in calories and has a higher fiber content.

    These substitutions ensure that everyone can enjoy the Easy Healthy Sticky Chicken Rice Bowl, regardless of dietary restrictions.

    How to Prepare the Perfect Easy Healthy Sticky Chicken Rice Bowl: Step-by-Step Guide

    Ready to create your own Easy Healthy Sticky Chicken Rice Bowl? Follow these simple steps:

    1. Prepare the Rice: Rinse 1 cup of brown rice under cold water. In a pot, combine the rice with 2 cups of water. Bring to a boil, then reduce heat, cover, and simmer for about 45 minutes until tender.

    2. Marinate the Chicken: While the rice is cooking, cut 500g of chicken breast into bite-sized pieces. In a bowl, mix ¼ cup of low-sodium soy sauce, 2 tablespoons of honey (or maple syrup), 3 minced garlic cloves, and 1 tablespoon of grated ginger. Toss the chicken pieces in the marinade and let them sit for 10 minutes to absorb the flavors.

    3. Prepare the Vegetables: While the chicken is marinating, chop your mixed vegetables (2 cups). You can use a mix of bell peppers, broccoli, and carrots for crunch and color.

    4. Cook the Chicken: In a large skillet or wok, heat 1 tablespoon of vegetable oil over medium-high heat. Add the marinated chicken along with the marinade and sauté for about 5-7 minutes, or until the chicken is cooked through and golden brown.

    5. Add the Vegetables: Stir in the mixed vegetables and sauté for another 3-5 minutes until they are tender but still crisp. This step not only adds flavor but also enriches your dish with vitamins and minerals.

    6. Combine the Ingredients: Once the rice is cooked, fluff it with a fork. In serving bowls, layer the rice on the bottom and top it with the sticky chicken and vegetables mixture.

    7. Garnish: Sprinkle sesame seeds over each bowl for an added layer of flavor and texture. Optionally, add a drizzle of your favorite hot sauce for a spicy kick.

    8. Serve and Enjoy: Your Easy Healthy Sticky Chicken Rice Bowl is ready! This recipe is impressive enough for guests yet easy enough for a quick weeknight dinner.

    By following these clear steps, you’ll successfully create a meal that is not only delicious but also fits within your list of healthy dinner recipes.

    Mastering Easy Healthy Sticky Chicken Rice Bowl: Advanced Tips and Variations

    Now that you know how to prepare the Easy Healthy Sticky Chicken Rice Bowl, consider these advanced tips and variations to elevate your dish even further:

    • Flavor Infusion: For added complexity, marinate your chicken overnight. This enhances the flavor, ensuring that each bite is savory and satisfying.

    • Add Fresh Herbs: Incorporate fresh cilantro or green onions as garnishes. These herbs not only brighten up the dish but also add unique flavors.

    • Different Grain Bases: Instead of brown rice, consider quinoa, cauliflower rice, or even whole wheat noodles to add variety and texture to your bowl.

    • Experiment with Sauces: If you like experimenting, try adding a touch of sriracha or peanut sauce for a different flavor profile.

    • Make it a Salad Bowl: For a lighter option, turn it into a salad by using leafy greens like spinach or kale as the base instead of rice.

    These tips and variations can help keep your meals exciting while maintaining the health benefits you seek in healthy dinner recipes.

    How to Store Easy Healthy Sticky Chicken Rice Bowl: Best Practices

    To ensure your Easy Healthy Sticky Chicken Rice Bowl maintains its freshness and quality, follow these storage tips:

    • Refrigeration: Store leftover chicken rice bowls in airtight containers in the refrigerator for up to 4 days. This is perfect for meal prep, allowing you to grab and go!

    • Freezing: If you’d like to keep it for a longer time, you can freeze individual portions. Just make sure the containers are freezer-safe. When properly stored, it can last up to 2-3 months.

    • Reheating: To reheat, simply microwave your thawed bowl until heated through. If frozen, it’s best to thaw in the refrigerator overnight before reheating. You can also reheat it in a skillet over medium heat for a few minutes, adding a splash of water to steam the rice if needed.

    Using these methods, you can enjoy your Easy Healthy Sticky Chicken Rice Bowl throughout the week without sacrificing taste or quality—just another way to incorporate healthy dinner recipes into your life effortlessly.

    Nutritional Value of Easy Healthy Sticky Chicken Rice Bowl

    Understanding the nutritional profile of your meals helps you make better dietary choices. Here’s a breakdown of the nutritional values for one serving of the Easy Healthy Sticky Chicken Rice Bowl:

    • Calories: 450
    • Protein: 35g
    • Carbohydrates: 55g
    • Fiber: 5g
    • Sugars: 5g
    • Fat: 10g (with olive oil)
    • Sodium: 550mg (using low-sodium soy sauce)

    This nutrient-dense meal provides an excellent balance of macronutrients and is low in unhealthy fats, making it a superstar among healthy dinner recipes. It supports an active lifestyle while providing essential vitamins and minerals through the vegetables contained in each bowl.

    FAQs: Frequently Asked Questions About Easy Healthy Sticky Chicken Rice Bowl

    1. Can I use another protein besides chicken?

    Absolutely! You can substitute chicken with tofu, shrimp, or even lean pork. Adjust cooking times accordingly based on your chosen protein to ensure it’s cooked through.

    2. How spicy is this dish?

    This recipe is relatively mild, but if you enjoy heat, consider adding sriracha or chopped jalapeños. You can also serve hot sauce on the side for those who want an extra kick!

    3. Is this recipe suitable for meal prepping?

    Yes, this bowl is perfect for meal prepping! Just follow the storage tips mentioned and enjoy a healthy meal throughout the week.

    4. How can I reduce the calories in this dish?

    You can decrease the amount of honey used, opt for a smaller serving of rice, or substitute brown rice with cauliflower rice for a low-calorie option.

    5. Are there any gluten-free substitutes for soy sauce?

    Yes, tamari sauce is an excellent gluten-free alternative to conventional soy sauce, allowing you to enjoy the same great flavor without the gluten.

    6. Can I make this dish vegetarian?

    Yes! Replace chicken with firm tofu and use vegetable broth instead of soy sauce if you’re looking for an additional layer of flavor. This way, you can enjoy a vegetarian version of this fantastic meal.

    By addressing these frequently asked questions, I hope to clarify any doubts and inspire you to try the Easy Healthy Sticky Chicken Rice Bowl, a shining example among healthy dinner recipes.

    In conclusion, the Easy Healthy Sticky Chicken Rice Bowl combines simplicity, flavor, and health in a way that is appealing to everyone, regardless of dietary needs. It’s time for you to try making your own—bring a taste of the tropics to your kitchen while enjoying a nourishing meal that’s as easy to make as it is delicious!

  • The Best Pecan Pie Dump Cake Dessert

    The Best Pecan Pie Dump Cake Dessert

    The Best Pecan Pie Dump Cake Dessert: A Tropical Delight

    Introduction to The Best Pecan Pie Dump Cake Dessert

    If you’re on the lookout for delightful dessert recipes that are not only easy to prepare but also cater to various dietary needs, then look no further than The Best Pecan Pie Dump Cake Dessert. This decadent dessert combines the rich flavors of traditional pecan pie with the convenience of a dump cake, creating a sweet sensation that’s perfect for holidays, family gatherings, or simply when you need a quick indulgence.

    What makes this recipe stand out is its effortless preparation process. With minimal steps and ingredients, even novice bakers can whip up this treat in no time. It is also customizable for health-conscious individuals, offering options that can be vegan, gluten-free, or low-calorie. The beautiful, nutty taste of pecans pairs perfectly with a warm, gooey texture that will leave everyone wanting more.

    Not only does this dessert cater to those with dietary restrictions, but it also packs a nutritional punch. Pecans are rich in healthy fats and proteins, making them a filling addition to your dessert repertoire. This dump cake serves as a wonderful end to any meal, providing a sweet treat that balances indulgence and health. Join me on this culinary journey to discover how you can create The Best Pecan Pie Dump Cake Dessert in your kitchen!

    Benefits and Advantages of The Best Pecan Pie Dump Cake Dessert

    When it comes to dessert-making, convenience is key, and this Pecan Pie Dump Cake excels in this area. Here are some reasons why this recipe has captured the hearts of many home cooks and food enthusiasts alike:

    1. Simplicity: One of the foremost advantages of this dump cake is its straightforward process. There’s no need for complex baking techniques; simply layer the ingredients and let the oven do the magic. This makes it ideal for busy parents and working professionals who are short on time but still want to create something special.

    2. Flexibility: The Best Pecan Pie Dump Cake Dessert is incredibly adaptable, allowing for various substitutions to fit different dietary requirements. Whether you’re gluten-sensitive or vegan, there’s a way to modify this recipe without sacrificing taste.

    3. Nutritional Benefits: Pecans are not only delicious but also packed with nutrients. They are a source of healthy fats, protein, and fiber, which can help keep you satiated. Additionally, they contain antioxidants that can provide various health benefits. By incorporating these nuts into your desserts, you’re making a more health-conscious choice that doesn’t compromise on flavor.

    4. Flavor Explosion: The combination of sweet and nutty flavors delivers a unique experience that rivals many store-bought options. The gooey filling inspired by traditional pecan pie, paired with a slightly crisp topping, makes this dessert incredibly satisfying.

    5. Great for Any Occasion: This dessert is versatile enough to be a hit at family dinners, holiday parties, or even casual weekday meals. Its appealing presentation and delightful taste can elevate any gathering.

    In summary, The Best Pecan Pie Dump Cake Dessert is a winning choice among dessert recipes because of its ease of preparation, health benefits, and unique flavor profile. Whether you’re a novice baker or a seasoned pro, this cake promises to excite your palate and impress your guests.

    Ingredients Overview

    Essential Ingredients for The Best Pecan Pie Dump Cake Dessert

    To create this delicious dessert, you’ll need the following ingredients. I have also included options for various dietary needs where applicable.

    • 1 cup pecan halves: These nuts provide the signature flavor and crunch of pecan pie. [Health Benefit: Rich in healthy fats and protein]
    • 1 box yellow cake mix (gluten-free if needed): This forms the base layer of the cake; for a gluten-free version, choose a gluten-free cake mix. [Health Consideration: Opt for a low-sugar mix if calorie conscious]
    • 1 cup unsalted butter, melted: This ingredient adds richness and helps bind the cake together. [Substitution: Coconut oil for vegan options]
    • 4 large eggs: Eggs help create a rich and custardy filling. [Substitution: Flaxseed meal mixed with water as a vegan replacement]
    • 1 cup light corn syrup: This sweet syrup gives the dessert its gooey texture. [Substitution: Agave syrup for a healthier alternative]
    • 1 cup brown sugar: This brings moisture and adds a deep caramel flavor. [Substitution: Coconut sugar for a low-calorie option]
    • 1 teaspoon vanilla extract: Enhances the overall flavor profile. [No substitutions needed here]
    • 1/2 teaspoon salt: Balances the sweetness.

    These ingredients come together to create a perfect juxtaposition of flavors that results in a truly memorable dessert experience.

    Dietary Substitutions to Customize Your The Best Pecan Pie Dump Cake Dessert

    When making The Best Pecan Pie Dump Cake Dessert, there are several substitutions you can consider based on dietary preferences or ingredient availability.

    1. Vegan Options:
    2. Egg Substitute: Instead of eggs, use 1 tablespoon of flaxseed meal mixed with 2.5 tablespoons of water per egg. Let it sit for about 5 minutes until it thickens.
    3. Butter Substitute: Replace unsalted butter with melted coconut oil or a plant-based butter alternative.

    4. Gluten-Free Options:

    5. For those avoiding gluten, simply opt for a gluten-free yellow cake mix. There are many brands available that taste just as good as traditional mixes.

    6. Lower-Calorie Variants:

    7. To cut down on sugar, consider using a sugar substitute in place of brown sugar and light corn syrup. Alternatives like stevia or monk fruit may work, but ensure you follow the conversion ratios as needed.

    These dietary substitutions allow anyone to enjoy this wonderful dessert while accommodating specific dietary preferences. The best part is that they don’t compromise the taste or overall enjoyment of the cake.

    How to Prepare the Perfect The Best Pecan Pie Dump Cake Dessert: Step-by-Step Guide

    Follow this simple step-by-step guide to create The Best Pecan Pie Dump Cake Dessert in your home.

    1. Preheat the Oven: Preheat your oven to 350°F (175°C) to ensure it’s hot when you’re ready to bake.

    2. Prepare the Baking Dish: Grease a 9×13-inch baking dish with non-stick spray or butter. This helps prevent sticking and makes cleanup easier.

    3. Mix the Base: In a large mixing bowl, combine the melted butter and brown sugar. Whisk together until smooth, followed by the corn syrup and vanilla extract. Then, beat in the eggs one at a time, mixing well after each addition.

    4. Add Pecans: Stir in the pecan halves until they are fully coated in the mixture. This will help distribute their flavor throughout the dump cake.

    5. Layer the Ingredients:

    6. Evenly pour the pecan mixture into the bottom of the prepared baking dish.
    7. Note for Gluten-Free Bakers: If using gluten-free cake mix, make sure to sift it before adding.
    8. Next, sprinkle the yellow cake mix evenly over the pecan layer. Do not mix; this creates the unique dump cake effect.

    9. Melt Butter for Top Layer: Drizzle the remaining melted butter evenly over the dry cake mix. This helps create a golden and crispy topping when baked.

    10. Bake the Cake: Place the dish in the preheated oven and bake for 35-40 minutes. The top should be golden brown. A toothpick inserted should come out clean, though it may be slightly sticky due to the pecan filling.

    11. Cool and Serve: Once baked, let the cake cool for at least 10 minutes before serving. This allows the filling to set slightly, making it easier to cut into squares.

    12. Garnish (optional): If desired, serve with whipped cream or vanilla ice cream for an added treat.

    Your Pecan Pie Dump Cake is ready to delight everyone around the table. It pairs well with coffee for an after-dinner treat or can be enjoyed on its own.

    Mastering The Best Pecan Pie Dump Cake Dessert: Advanced Tips and Variations

    To elevate The Best Pecan Pie Dump Cake Dessert and tailor it to your tastes, consider the following advanced tips and variations:

    1. Flavor Enhancements: Experiment with spices such as cinnamon or nutmeg for an extra depth of flavor. A dash of bourbon can also elevate the taste profile significantly, bringing a delicious twist reminiscent of classic pecan pie.

    2. Nut Variations: While pecans are traditional, you can also use walnuts or a combination of nuts for added complexity. Almonds provide a pleasing crunch and unique flavor if you’re looking for something a bit different.

    3. Chocolate Lovers Delight: For those who adore chocolate, add chocolate chips before baking. They melt into the cake, creating a rich, chocolatey contrast to the sweetness of the pecans and caramel.

    4. Dairy-free Options: If you’re making this dessert for someone with a dairy allergy or preference, ensure all ingredients used, including the butter and whipped cream, are dairy-free.

    5. Storage Tip: Before serving, consider allowing the cake to cool completely. It can be stored in the refrigerator for a couple of days, intensifying the flavors.

    The versatility of The Best Pecan Pie Dump Cake Dessert means that you can truly make it your own. Feel free to experiment with these variations until you find your perfect version!

    How to Store The Best Pecan Pie Dump Cake Dessert: Best Practices

    Storing The Best Pecan Pie Dump Cake Dessert correctly is vital to maintaining its deliciousness. Here are some best practices for refrigeration, freezing, and reheating:

    1. Refrigeration: If you have leftovers (which can be rare given how tasty this dessert is), store the cake in an airtight container in the refrigerator. It should keep well for 3-4 days. Always ensure that the cake is covered to prevent it from drying out or absorbing any odors from the fridge.

    2. Freezing: If you want to make a double batch or save some for later, you can freeze the cake. To do this, wrap it tightly in plastic wrap, then foil, before placing it in the freezer. It can be frozen for up to 2-3 months. To reheat, allow it to thaw in the refrigerator overnight.

    3. Reheating: When you’re ready to enjoy leftover cake, reheat individual servings in the microwave for about 15-30 seconds or until warmed through. Alternatively, you can place the whole cake in a preheated oven at 350°F (175°C) for about 10-15 minutes.

    These storage methods ensure that The Best Pecan Pie Dump Cake Dessert retains its flavor and texture, ready for any occasion.

    Nutritional Value of The Best Pecan Pie Dump Cake Dessert

    Understanding the nutritional value of The Best Pecan Pie Dump Cake Dessert helps you enjoy it while being mindful of your dietary choices. Below is a breakdown of approximate nutritional information per serving (assuming the recipe makes 12 servings):

    • Calories: 320 kcal
    • Total Fat: 20 g
    • Saturated Fat: 6 g
    • Cholesterol: 70 mg
    • Sodium: 150 mg
    • Total Carbohydrates: 33 g
    • Dietary Fiber: 2 g
    • Sugars: 18 g
    • Protein: 4 g

    Key Nutritional Highlights

    • Healthy Fats: Pecans provide beneficial monounsaturated fats which are good for heart health.
    • Protein Source: Eggs and pecans contribute to an increase in protein intake.
    • Fiber: The dessert includes pecans, which can help support digestive health due to their fiber content.

    As an indulgent treat, The Best Pecan Pie Dump Cake Dessert balances flavor with nutritional benefits. When you enjoy it in moderation, it can certainly fit into a balanced diet.

    FAQs: Frequently Asked Questions About The Best Pecan Pie Dump Cake Dessert

    1. Can I make The Best Pecan Pie Dump Cake Dessert in advance?

    Absolutely! It can be prepared a day in advance. Just store it in the fridge and reheat before serving for the best taste.

    2. How do I know when the cake is done baking?

    The cake is done when the top is golden brown, and a toothpick or knife inserted in the center comes out clean or with a few moist crumbs, not wet batter.

    3. Can I replace the pecans with another nut?

    Yes! While pecans are traditional, you can absolutely swap them for walnuts or almonds depending on your preference.

    4. Is it possible to make this recipe gluten-free?

    Yes! Simply use a gluten-free yellow cake mix and ensure your other ingredients are gluten-free.

    5. Can I use a sugar substitute in place of brown sugar?

    Yes! You can use coconut sugar or a suitable sugar alternative, like stevia or monk fruit, to lower the sugar content without losing flavor.

    By addressing these common inquiries, you can feel more confident in your baking journey with The Best Pecan Pie Dump Cake Dessert. Whether you’re a novice or an experienced baker, this recipe is sure to delight everyone who tries it!

  • Easy High Protein Sesame Chicken Dinner

    Easy High Protein Sesame Chicken Dinner

    Easy High Protein Sesame Chicken Dinner: A Tropical Delight

    Introduction to Easy High Protein Sesame Chicken Dinner

    Are you tired of the same old chicken recipes and looking for something fresh, healthy, and simple to prepare? Look no further than our Easy High Protein Sesame Chicken Dinner! This dish not only delights your taste buds but also offers a healthy balance of nutrients, making it an ideal choice for diverse diets. Perfect for busy weeknights or a leisurely weekend dinner, this recipe is quick enough for novices while still impressive for seasoned cooks.

    Imagine succulent chicken pieces coated in a fragrant sesame sauce, served over a bed of fluffy, fragrant rice and accompanied by vibrant steamed vegetables. Not only is it loaded with protein, but it also incorporates the wholesome goodness of sesame seeds. As a bonus, this Easy High Protein Sesame Chicken Dinner is adaptable for vegan and gluten-free diets. Flexibility is key!

    This recipe provides a nutritious meal that fits perfectly into your health-conscious lifestyle. Each bite is packed with flavor and health benefits, making it a fantastic choice for families, students, or anyone looking to maintain a balanced diet without sacrificing taste. An easy, straightforward recipe like this ensures you can prepare a weeknight dinner that pleases the entire household, catering to dietary preferences while being absolutely delightful.

    Benefits and Advantages of Easy High Protein Sesame Chicken Dinner

    The advantages of our Easy High Protein Sesame Chicken Dinner extend well beyond its stellar flavor profile. First, it speaks to the modern cooks’ desire for quick meal solutions without compromising health. In today’s fast-paced world, meal prep can often feel like a chore; however, this recipe offers a straightforward cooking process that minimizes time spent in the kitchen.

    Health Benefits

    1. High Protein Content: Chicken is an excellent source of lean protein that supports muscle growth, repair, and overall health. For those striving to maintain or build muscle mass, this dish serves as a great addition to your diet. Each serving of our sesame chicken provides a significant amount of protein while keeping fat content low.

    2. Incorporation of Healthy Fats: Sesame seeds, featured prominently in this recipe, contain healthy fats and are rich in antioxidants, vitamins, and minerals. They boost the nutritional value of the meal and contribute to heart health.

    3. Balanced Meal: With the combined offering of veggies, protein, and carbs (from rice or quinoa), you’ll have a well-rounded meal in one dish, keeping you satisfied and full for longer.

    4. Customizable: Whether you are looking for a gluten-free option or you prefer plant-based ingredients, this chicken recipe allows for flexibility. You can easily swap chicken for tofu or tempeh, and adapt the sauce to meet specific dietary needs.

    5. Time-Saving: The entire dish can be prepared in under 30 minutes, making it a perfect option for busy individuals, students, and families. You’ll impress your guests and family with a gourmet dinner without the fuss!

    In essence, Easy High Protein Sesame Chicken Dinner is an all-in-one solution for your culinary needs. It’s not only flavorful but also healthy and customizable for various dietary options.

    Ingredients Overview

    Essential Ingredients for Easy High Protein Sesame Chicken Dinner

    To whip up your Easy High Protein Sesame Chicken Dinner, you will need the following ingredients:

    • Chicken Breast (500g): Boneless, skinless chicken breast for lean protein. Alternatively, use tofu or tempeh for a plant-based option.
    • Sesame Oil (2 tbsp): This gives the dish a distinct flavor. For a lighter version, use a neutral oil such as olive oil or avocado oil.
    • Soy Sauce (1/4 cup): A key ingredient for that Asian-inspired flavor. For gluten-free, use tamari or coconut aminos.
    • Honey or Maple Syrup (2 tbsp): Adds a touch of sweetness; use agave syrup for a vegan version.
    • Sesame Seeds (3 tbsp): Roasted for extra nuttiness and health benefits. They’re packed with protein and healthy fats!
    • Garlic (3 cloves, minced): Fresh garlic enhances the overall taste and provides anti-inflammatory benefits.
    • Ginger (1 tbsp, grated): A fantastic digestive aid that brings warmth and spice to the dish.
    • Red Pepper Flakes (1/2 tsp): Optional, for a kick of heat.
    • Vegetables (e.g., broccoli, bell peppers, carrots): Choose your favorites; they add fiber, vitamins, and minerals. Feel free to use frozen mixed vegetables for convenience.
    • Rice or Quinoa (1 cup): Provides carbohydrates; use cauliflower rice for a low-carb option.

    This ingredient list packs a nutritional punch, ensuring your meal is healthy while not skimping on flavor!

    Dietary Substitutions to Customize Your Easy High Protein Sesame Chicken Dinner

    • For Gluten-Free: Replace soy sauce with tamari or coconut aminos. All other ingredients are generally gluten-free.

    • For Vegan: Replace chicken with firm tofu or tempeh, use maple syrup instead of honey, and ensure you are using vegan-friendly sauces.

    • For Low-Carb: Substitute rice with cauliflower rice or greens like spinach and kale to keep carbs in check.

    • For Lower Calorie: Use less honey or syrup and opt for more vegetables; reduce the amount of sesame oil and use low-sodium soy sauce.

    This way, you create a meal that is tailored to your specific dietary needs without losing its signature taste and satisfaction!

    How to Prepare the Perfect Easy High Protein Sesame Chicken Dinner: Step-by-Step Guide

    Ready to dive into cooking? Follow these step-by-step instructions to prepare your Easy High Protein Sesame Chicken Dinner.

    1. Prepare the Base: Start by cooking your choice of rice or quinoa according to package instructions. This usually takes about 15-20 minutes. For extra flavor, cook it with a dash of salt and a teaspoon of sesame oil.

    2. Marinate the Chicken: While your base is cooking, cut the chicken breast into bite-sized pieces. In a bowl, mix together the soy sauce, honey, sesame oil, minced garlic, grated ginger, and red pepper flakes if you’re using them. Add the chicken pieces and let them marinate for at least 10-15 minutes. If you’re using tofu, use the same marinade to enhance flavor.

    3. Sauté the Chicken: Heat a skillet or wok over medium-high heat. Add a tablespoon of oil and once it’s hot, add the marinated chicken (or tofu). Cook for about 5-7 minutes, stirring occasionally, until the chicken is golden brown and cooked through.

    4. Add the Vegetables: Once the chicken is cooked, add your choice of chopped vegetables to the skillet. Sauté alongside the chicken. You can use a variety of colorful veggies, such as broccoli, bell peppers, or snap peas. Cook them for about 3-5 minutes until they’re tender but still crisp.

    5. Glaze and Add Sesame Seeds: Add the leftover marinade to the skillet and allow the mixture to simmer for another 2-3 minutes until it thickens slightly. Toss in sesame seeds and stir well to combine.

    6. Serve it Up: To serve, dish out the rice or quinoa first, then layer the chicken and vegetable mixture on top. Sprinkle additional sesame seeds for presentation if desired, and enjoy your delicious, nutrient-packed meal!

    7. Adapt the Cooking: If you prefer baked chicken, you can marinate it and place it in the oven at 375°F (190°C) for about 25 minutes or until fully cooked.

    As you can see, this recipe is not only quick but also versatile! Feel free to make adjustments based on your dietary preferences and family tastes.

    Mastering Easy High Protein Sesame Chicken Dinner: Advanced Tips and Variations

    Here are some advanced tips and variations to elevate your Easy High Protein Sesame Chicken Dinner:

    • For a Crunchier Texture: Consider breading the chicken or tofu with panko breadcrumbs before cooking for a delightful crunch.

    • Switch Up the Sauce: For an Asian twist, add some hoisin sauce, or for a spicy kick, incorporate Sriracha into the marinade.

    • Experiment with Grains: Swap out standard rice or quinoa for farro or barley for different textures and added nutrients.

    • Make It a Stir-Fry: Try adding more diverse ingredients to make a complete stir-fry, such as cashews, water chestnuts, or baby corn for extra depth.

    • Meal Prep: This dish is great for meal prep! Prepare a larger batch and store it in airtight containers for quick meals throughout the week.

    These tips help you personalize your sesame chicken dinner to your preference, ensuring that it remains a wholesome favorite.

    How to Store Easy High Protein Sesame Chicken Dinner: Best Practices

    Storing your Easy High Protein Sesame Chicken Dinner correctly ensures you can enjoy it later without compromising its freshness. Here are the best practices:

    • Refrigeration: Allow the chicken and vegetables to cool to room temperature. Transfer the leftovers into an airtight container. This dish can be refrigerated for up to 3-4 days.

    • Freezing: If you want to store it for a longer period, consider freezing. Place the cooled chicken and vegetable mix in a freezer-safe container or bag. It will maintain its quality for up to 3 months.

    • Reheating: To reheat, microwave until heated thoroughly, or reheat in a skillet over low heat to maintain the integrity of the texture. You may need to add a splash of water or oil to keep things moist.

    Proper storage will ensure that your Easy High Protein Sesame Chicken Dinner remains delicious and nutritious, allowing you to have a quick, healthy meal ready to go!

    Nutritional Value of Easy High Protein Sesame Chicken Dinner

    When it comes to nutrition, our Easy High Protein Sesame Chicken Dinner is a powerhouse! Here’s a breakdown of a typical serving (approximately 1 cup, assuming it’s made with chicken and regular rice):

    • Calories: Approximately 450
    • Protein: 35g
    • Fat: 18g
    • Carbohydrates: 45g
    • Fiber: 4g
    • Sugar: 6g
    • Sodium: 800mg (can be reduced with low-sodium soy sauce)
    • Vitamins: Rich in Vitamin A & C, thanks to the vegetables.

    The nutritional content can vary based on ingredient substitutions, so you can tailor the recipe to meet your dietary goals. This dish delivers a healthy balance of macronutrients while being flavorful and satisfying!

    FAQs: Frequently Asked Questions About Easy High Protein Sesame Chicken Dinner

    1. Can I use chicken thighs instead of breasts?

    Absolutely! Chicken thighs will yield a juicier texture if you prefer dark meat. Just ensure to adjust the cooking time slightly since thighs take longer to cook through.

    2. Is it possible to make this recipe ahead of time?

    Yes! You can prepare the chicken and sauce in advance and store them separately until ready to cook. Just add the vegetables and any fresh ingredients shortly before serving.

    3. What can I substitute for soy sauce?

    If you’re looking for a soy-free option, try coconut aminos or a homemade soy sauce alternative using miso paste diluted with water.

    4. How spicy is this dish?

    The spiciness depends on the amount of red pepper flakes you add. For a milder version, simply reduce or omit the red pepper flakes.

    5. Can I make it in the oven?

    Definitely! Marinate the chicken and bake at 375°F (190°C) for about 25-30 minutes until fully cooked through. This method yields a tender result.

    By addressing these common questions, we enhance your cooking experience, ensuring that your Easy High Protein Sesame Chicken Dinner meets personal preferences and dietary needs.


    This Easy High Protein Sesame Chicken Dinner is sure to become a staple in your home cooking repertoire, satisfying both taste and nutrition! With its versatility and healthy ingredients, it’s a fabulous choice for anyone looking to elevate their dining experience. Happy cooking!

  • Easy Cucumber Avocado Salad Healthy Side

    Easy Cucumber Avocado Salad Healthy Side

    Easy Cucumber Avocado Salad Healthy Side: A Tropical Delight

    Introduction to Easy Cucumber Avocado Salad Healthy Side

    Discover a refreshing and versatile dish that takes advantage of the vibrant flavors of fresh cucumbers and creamy avocados—the Easy Cucumber Avocado Salad. This healthy side is not just designed for summer picnics but is a year-round delight that appeals to busy parents, health enthusiasts, and everyone in between. With the ever-growing demand for simple and nutritious recipes, this cucumber salad stands out as an accessible dish that anyone can master.

    One of the best parts about this salad is its simplicity. You don’t need cooking skills or time-consuming techniques to create a delicious meal. Whether you’re feeding a family, looking for a quick lunch, or prepping a healthy snack, this cucumber avocado combo is perfect. Additionally, it’s a vegan and gluten-free option, making it a suitable choice for various dietary preferences.

    By combining crisp cucumbers and buttery avocados, this salad offers a palette of taste that is both satisfying and nutrient-dense. Rich in vitamins, healthy fats, and antioxidants, it supports overall well-being while being low in calories. Easy to prepare, this cucumber salad can be customized with a variety of dressings, toppings, or additional ingredients to suit your palate. Join in on the culinary trend and serve this enticing salad at your next gathering or enjoy it as a quick, nutritious meal at home.

    Benefits and Advantages of Easy Cucumber Avocado Salad Healthy Side

    The advantages of making an Easy Cucumber Avocado Salad go beyond its delightful taste. This dish is a powerhouse of health benefits, nutritional content, and simplicity, which makes it appealing to a broad audience. Here are several reasons why this cucumber salad deserves a spot in your meal rotation:

    1. Simplicity and Speed: In today’s fast-paced world, finding the time to prepare a healthy meal can be challenging. Fortunately, this cucumber salad is made in under 15 minutes and requires only a handful of ingredients. Busy professionals, students, and parents will appreciate how easy it is to whip up this dish without sacrificing nutrition.

    2. Health Benefits: Cucumbers are hydrating and low in calories, while avocados are rich in healthy fats, particularly oleic acid, which can help reduce inflammation. Together, they form a nutrient-dense meal that keeps you energized and satisfied. This salad is loaded with vitamins C and K, potassium, and several essential phytonutrients.

    3. Versatile and Customizable: One of the standout features of this cucumber salad is its versatility. You can easily adjust the ingredients or dressings to suit your specific taste or dietary needs. Want to add some protein? Throw in some chickpeas or grilled chicken. Prefer a zesty twist? Incorporate lime juice or a sprinkle of chili flakes.

    4. Suitable for Various Diets: Whether you’re following a vegan, vegetarian, low-carb, or gluten-free diet, this salad checks all the boxes. It caters to various lifestyle choices and ensures that everyone can enjoy a healthy side without feeling limited by dietary restrictions.

    5. Perfect for Any Occasion: This cucumber salad is ideal for numerous events. It can be served as a side dish for barbecues, dinners, or picnics. You can also incorporate it into your meal prep, making it a convenient option for lunches throughout the week.

    In summary, the Easy Cucumber Avocado Salad combines health, simplicity, and flavor in a way that appeals to a wide range of individuals. Not only does it offer significant health benefits, but it also leaves room for creativity in the kitchen, making it a delightful dish that you simply have to try.

    Ingredients Overview

    Essential Ingredients for Easy Cucumber Avocado Salad Healthy Side

    Creating the Easy Cucumber Avocado Salad is as simple as gathering the right ingredients. Here’s a detailed list of what you’ll need along with their benefits:

    • 2 Medium Cucumbers (peeled and diced): High in water content, cucumbers keep you hydrated and are great for skin health.
    • 2 Ripe Avocados (diced): Packed with healthy fats and fiber, avocados are perfect for sustaining energy and helping with nutrient absorption.
    • 1/2 Red Onion (finely chopped): Adds a punch of flavor and is rich in antioxidants.
    • 1 Cup Cherry Tomatoes (halved): A great source of vitamins C and K, tomatoes bring a burst of color and flavor.
    • 1/4 Cup Fresh Cilantro (chopped): Adds a fresh herbaceous taste, and cilantro is known for its detoxifying properties.
    • Juice of 1 Lime: Brightens up the dish and provides vitamin C.
    • Salt and Pepper (to taste): Enhances the flavors of the salad.

    This combination of ingredients creates a refreshing and nutrient-rich salad that fits well into any diet.

    Dietary Substitutions to Customize Your Easy Cucumber Avocado Salad Healthy Side

    Flexibility is one of the best features of the Easy Cucumber Avocado Salad. Here are some suggested substitutions that can cater to different dietary needs or ingredient availability:

    • Cucumbers: If cucumbers aren’t available, try zucchini or even spinach for a different twist.
    • Avocados: For those who might have an avocado allergy or want a different flavor, use mashed banana or silken tofu for a creamy texture.
    • Red Onion: Substitute with green onions for a milder flavor or radishes for a crunchy bite.
    • Cherry Tomatoes: Any small tomato variety works, including grape or heirloom. If you prefer sweetness, try adding diced strawberries instead.
    • Cilantro: If you are not a fan of cilantro, fresh parsley or basil can be an excellent alternative.
    • Lime Juice: Replace lime juice with lemon juice or apple cider vinegar for a tangy flavor.
    • For Added Protein: Consider adding chickpeas, cooked quinoa, or grilled chicken, which can turn this salad into a full meal.

    By incorporating these substitutions, your cucumber salad will not only retain its deliciousness but also adapt to various preferences and dietary restrictions.

    How to Prepare the Perfect Easy Cucumber Avocado Salad Healthy Side: Step-by-Step Guide

    Now that you have your ingredients ready, it’s time to make the Easy Cucumber Avocado Salad. Follow this step-by-step guide for the best results. This recipe is designed to be straightforward and adaptable to different tastes or dietary requirements.

    1. Prepare the Base: Start by thoroughly washing all fresh ingredients. Use a vegetable brush if necessary to clean your cucumbers and tomatoes.

    2. Dice the Cucumbers: Peel the cucumbers if desired and then cut them into bite-sized cubes. Place them in a large mixing bowl.

    3. Add Avocados: Halve the avocados, remove the pits, and scoop the flesh into the bowl with cucumbers. Be gentle to maintain the avocado’s soft texture.

    4. Chop the Red Onion: Finely chop the red onion and add it to the mixing bowl. The red onion provides a flavorful kick that complements the creamy texture of avocados.

    5. Halve the Cherry Tomatoes: Cut the cherry tomatoes in half and add them to the mix. Their sweet, juicy flavor will balance the other ingredients.

    6. Incorporate Fresh Herbs: Chop the cilantro (or choose your substitute) and mix it into the bowl. Fresh herbs add a vibrant color and refreshing taste.

    7. Dress with Lime Juice: Squeeze the juice of one lime over the salad. This will enhance all the flavors while providing a zesty twist.

    8. Season to Taste: Sprinkle salt and pepper over the ingredients and toss gently to combine, ensuring all elements are well mixed.

    9. Taste and Adjust: Before serving, taste the salad and adjust the seasoning or acidity as necessary. Add more lime juice or salt if desired.

    10. Serve Immediately or Chill: This salad can be enjoyed right away, but for best flavor, let it chill in the fridge for 30 minutes before serving. The flavors meld beautifully that way.

    11. Presentation: When serving, consider placing the salad on a bed of mixed greens or garnishing with additional cilantro for a beautiful presentation.

    This step-by-step guide ensures that everyone can make the Easy Cucumber Avocado Salad at home, maintaining a delicious flavor and satisfying texture. Feel free to adapt any step based on your taste or dietary requirements.

    Mastering Easy Cucumber Avocado Salad Healthy Side: Advanced Tips and Variations

    To elevate your Easy Cucumber Avocado Salad, consider these advanced tips and variations:

    • Spice It Up: For those who enjoy a kick, add diced jalapeños or a sprinkle of chili powder. This can transform your salad into a spicy dish that ignites the palate.

    • Creamy Dressing: For a creamy version, blend Greek yogurt with lime juice, a pinch of salt, and garlic powder for an added layer of flavor. This dressing pairs excellently with the salad’s fresh ingredients.

    • Cheese Additions: If you are not lactose intolerant, sprinkle some feta or goat cheese on top. The creaminess of the cheese complements the salad beautifully.

    • Experiment with Nuts: Add a handful of nuts such as chopped almonds or walnuts. They provide an extra crunch and boost the flavor profile of the salad.

    • Make it a Full Meal: By adding cooked quinoa or lentils, you can turn the salad into a complete meal. This is especially ideal for lunch boxes or quick dinners.

    • Regional Variations: Try adding ingredients common in various cuisines. Asian-inspired versions might include sesame oil and sesame seeds, while Mediterranean styles might feature olives and oregano.

    By exploring these tips and variations, your Easy Cucumber Avocado Salad can become a signature dish that reflects your unique taste!

    How to Store Easy Cucumber Avocado Salad Healthy Side: Best Practices

    Storing your Easy Cucumber Avocado Salad properly ensures that it stays fresh and delicious. Here are the best practices:

    • Refrigeration: If you have leftover salad, keep it in an airtight container in the refrigerator. It can last for about 1-2 days. However, note that avocados may brown slightly due to oxidation, so consume within a day for the best visual appeal.

    • Freezing: Unfortunately, you shouldn’t freeze this cucumber salad because cucumbers and avocados have high water content. Freezing changes the texture, making them mushy when thawed. However, if you’re preparing ingredients separately for meal prep, consider freezing chopped cucumbers or avocados alone instead.

    • Reheating: There’s usually no need to reheat the salad, but if you’ve added proteins and stored the salad with these ingredients, make sure to heat only those portions thoroughly before serving.

    Following these storage guidelines will help maintain the freshness and taste of your delicious cucumber salad.

    Nutritional Value of Easy Cucumber Avocado Salad Healthy Side

    The Easy Cucumber Avocado Salad is not just appealing to the taste buds; it also packs a nutritional punch! Here’s a breakdown of its nutritional value per serving (based on a standard serving size):

    • Calories: 150 kcal
    • Total Fat: 12 g
    • Saturated Fat: 2 g
    • Cholesterol: 0 mg
    • Sodium: 120 mg
    • Total Carbohydrates: 14 g
    • Dietary Fiber: 7 g
    • Sugars: 3 g
    • Protein: 2 g

    Vitamins and Minerals:

    • Vitamin A: 8% of the DV (Daily Value)
    • Vitamin C: 20% of the DV
    • Vitamin K: 35% of the DV
    • Potassium: 10% of the DV

    This salad provides healthy fats from avocados and is rich in dietary fiber, making it a filling side dish without the extra calories. The various vitamins and minerals it contains support not only gut health but also boosts the immune system and aids in hydration, making this cucumber salad an excellent addition to your diet.

    FAQs: Frequently Asked Questions About Easy Cucumber Avocado Salad Healthy Side

    Here’s a compiled list of frequently asked questions regarding the Easy Cucumber Avocado Salad, aimed at helping you make this dish with confidence.

    1. Can I make this salad ahead of time?

    Yes, but it’s best to prepare the cucumber salad a few hours ahead rather than a day. To prevent the avocado from browning, add lime juice just before serving.

    2. Can I use frozen ingredients?

    While you can cook quinoa or lentils beforehand and freeze them for this salad, avoid using frozen cucumber or avocado; they do not hold up well once thawed.

    3. What can I replace the avocado with if I’m allergic?

    You can substitute avocado with mashed banana or a dollop of Greek yogurt for creaminess without allergens.

    4. How long does the salad last in the fridge?

    The salad keeps well for about 1 to 2 days, but for the best texture, consume it within one day.

    5. Can I add other ingredients?

    Absolutely! Feel free to add proteins like chicken or chickpeas or additional vegetables like bell peppers or carrots as per your preference.

    6. Is this recipe gluten-free?

    Yes, all the ingredients used in the Easy Cucumber Avocado Salad are naturally gluten-free, making it a great option for those with gluten sensitivities.

    By addressing these common questions, you’ll find that making this delicious salad is both easy and accommodating to various dietary preferences.

    In conclusion, the Easy Cucumber Avocado Salad is an inviting, nutrient-packed dish that’s sure to satisfy any palate. With its simple preparation and versatile nature, it fits seamlessly into a healthy lifestyle, serving as the perfect side dish or light meal. Enjoy crafting this tropical delight with family and friends, and let its refreshing flavors transport you to a warm, inviting culinary oasis!

  • The Best Better Than Anything Bars

    The Best Better Than Anything Bars

    The Best Better Than Anything Bars: A Tropical Delight

    Introduction to The Best Better Than Anything Bars

    Are you in search of a delightful dessert that embodies both simplicity and rich flavor? Look no further! The Best Better Than Anything Bars are here to satisfy your sweet cravings while also offering a healthy twist. These bars combine the flavors of tropical ingredients, making them an exciting option for those looking to explore new dessert recipes.

    Crafting these bars is not only straightforward but also adaptable for various dietary needs, including vegan and gluten-free options. They are perfect for busy parents wanting a nutritious treat for their kids, students needing quick snacks between classes, or anyone who enjoys a bit of indulgence without the guilt. The simplicity in preparation allows even novice cooks to bring this decadent dessert to life.

    This recipe capitalizes on wholesome ingredients, meaning you can enjoy the satisfying sweetness without straying from your health goals. Imagine biting into a rich, creamy layer topped with fresh fruits, all nestled in a buttery crust. That’s the experience The Best Better Than Anything Bars deliver! With a balance of taste and nutrition, these bars stand out as a versatile dessert that can cater to gatherings, lunchboxes, or evenings at home. Let’s dive deeper into why this recipe is worth trying!

    Benefits and Advantages of The Best Better Than Anything Bars

    When it comes to dessert recipes, The Best Better Than Anything Bars excel in multiple facets. For starters, their ease of preparation makes them incredibly appealing. With just a handful of easily accessible ingredients, you can whip up a luscious delight in no time. Unlike many elaborate dessert recipes that require extensive skill and time, these bars are an accessible option for everyone, whether you’re a seasoned baker or a beginner in the kitchen.

    Health Benefits

    What truly sets this recipe apart is its focus on health without sacrificing flavor. Let’s explore some of the compelling health benefits:

    1. Nutrient-Dense Ingredients: The foundation of these bars includes wholesome ingredients like nuts, oats, and natural sweeteners that provide essential nutrients, such as healthy fats, fiber, and vitamins.

    2. Customizable for Dietary Needs: This recipe can easily be adapted to fit various diets, including vegan, gluten-free, and low-calorie versions. This flexibility means that you can enjoy a delicious dessert while catering to different dietary preferences or restrictions.

    3. Satisfies Sweet Cravings Guilt-Free: With reduced sugar options and use of natural ingredients, these bars quench your sweet tooth without leading to an energy crash later.

    4. Perfect for Meal Prep: You can prepare these bars in advance, making them convenient for busy schedules. Enjoying a homemade dessert can be a healthier option than grabbing store-bought sweets on the go.

    In conclusion, The Best Better Than Anything Bars are not only a delight to your taste buds, but they also embody a healthier approach to dessert recipes. Their ease of preparation and flexible nature make them a favorite among various demographics, ensuring that they can be enjoyed by everyone, regardless of dietary restrictions or skill levels in the kitchen.

    Ingredients Overview

    Essential Ingredients for The Best Better Than Anything Bars

    Let’s break down the essential ingredients for The Best Better Than Anything Bars. Below, you’ll find each ingredient, its purpose, and how it contributes to creating an irresistible snack.

    • 1 ½ cups graham cracker crumbs (or gluten-free alternative): This creates the bar’s crust, providing a nice crunch and a sweet base.
    • ½ cup unsalted butter (or coconut oil for vegan option): The fat helps bind everything together and gives richness to the bars.
    • 1 can (14 oz) sweetened condensed milk (or coconut cream for vegan): This acts as the binding agent, adding sweetness and creaminess.
    • 1 cup semi-sweet chocolate chips (or dairy-free for vegan): Adds the classic chocolate flavor that’s a must in dessert recipes.
    • 1 cup shredded coconut (unsweetened or sweetened as desired): Contributes to texture and a hint of tropical flavor.
    • 1 cup chopped nuts (walnuts or pecans): Provides a crunchy texture and adds to the nutritional profile.
    • Fresh fruit topping (like bananas or berries): This not only enhances the presentation but also provides vitamins and antioxidants.

    Dietary Substitutions to Customize Your The Best Better Than Anything Bars

    If you need to adjust The Best Better Than Anything Bars to meet specific dietary requirements or personal preferences, here are a few recommended substitutions:

    • For vegan options: Instead of sweetened condensed milk, try using coconut cream or a homemade cashew cream. Substitute unsalted butter with coconut oil, which works well in creating the crust.
    • For gluten-free versions: Use gluten-free graham crackers or oatmeal for the crust, ensuring every bite is safe for those with gluten sensitivities.
    • For low-calorie alternatives: You can replace the sugar in the recipe with a natural sweetener like stevia or monk fruit sweetener to reduce calorie content while still keeping the sweetness.
    • For nut-free variations: Simply omit the nuts or use seeds like sunflower or pumpkin seeds to maintain a crunch without allergens.

    By customizing these ingredients, you can make The Best Better Than Anything Bars fit perfectly into any dietary lifestyle.

    How to Prepare the Perfect The Best Better Than Anything Bars: Step-by-Step Guide

    Creating The Best Better Than Anything Bars is a fun and satisfying process. Follow these clear, step-by-step instructions for a delightful treat that will impress family and friends.

    1. Prepare the Base:
    2. In a mixing bowl, combine 1 ½ cups of graham cracker crumbs, ½ cup of melted unsalted butter (or coconut oil for a vegan version), and stir until well mixed. It should resemble wet sand.

    3. Press Into Pan:

    4. Firmly press the mixture into the bottom of a greased 9×13 inch baking dish to form a solid base. Make sure it’s compact to ensure a good texture.

    5. Bake the Crust:

    6. Preheat your oven to 350°F (about 175°C), then bake the crust for approximately 10 minutes or until lightly golden. This step gives the crust a crunchy texture.

    7. Prepare the Filling:

    8. In a separate bowl, mix 1 can of sweetened condensed milk (or coconut cream), 1 cup of chocolate chips, and 1 cup of shredded coconut. Stir until the mixture is well combined.

    9. Pour Over Crust:

    10. Once the crust has cooled slightly, pour the filling mixture evenly over the crust. Use a spatula to spread it out evenly.

    11. Add Nuts:

    12. Sprinkle 1 cup of chopped nuts (e.g., walnuts or pecans) over the top of the filling, gently pressing them in.

    13. Bake Again:

    14. Return the baking dish to the oven, baking for an additional 20-25 minutes, or until the filling is set and slightly golden.

    15. Cool:

    16. Once baked, remove from the oven and allow to cool completely in the pan. For best results, refrigerate for at least 2 hours to help it set.

    17. Time for Toppings:

    18. After chilling, slice into squares and top with fresh sliced bananas or berries. Optionally, drizzle with chocolate or a yogurt-based frosting for an extra layer of flavor.

    19. Serve and Enjoy:

      • Plate your sections, serve, and watch them disappear! These bars are delightful on their own or served with a scoop of ice cream or yogurt.

    Each step in this guide has been carefully crafted to ensure the process is straightforward while allowing for flexibility for different diets. You’ll find this recipe provides satisfying, crave-worthy dessert recipes for everyone!

    Mastering The Best Better Than Anything Bars: Advanced Tips and Variations

    To truly master The Best Better Than Anything Bars, consider these advanced tips and creative variations that can elevate your baking game:

    1. Add Flavor Variations: Introduce unique flavors by adding spices like cinnamon or vanilla extract to the base for an aromatic twist, widening the flavor profile beyond traditional dessert recipes.

    2. Experiment with Toppings: While fresh fruits work perfectly, consider adding crushed pretzels for a salty crunch or using different nut butters (like almond or cashew) to change the entire taste of the bars.

    3. Try Different Chocolate Types: Swap semi-sweet chocolate chips for dark chocolate or even white chocolate, depending on your preference. Each variation brings a unique flavor that can keep this recipe fresh every time.

    4. Create Individual Portions: For a fun twist, consider making mini versions of these bars in muffin trays. Just adjust the baking time accordingly, and you’ve got perfectly portioned treats for parties or lunches.

    5. Store in Harmony: When preparing in batches, utilize various storage methods like airtight containers to maintain freshness, or even wrap them individually for grab-and-go options.

    These tips and variations cater to a wide array of tastes, ensuring that The Best Better Than Anything Bars can always be adapted to create something exciting.

    How to Store The Best Better Than Anything Bars: Best Practices

    Knowing how to store The Best Better Than Anything Bars properly can extend their shelf life and keep them fresh for longer. Here are the best practices for refrigeration, freezing, and reheating:

    1. Refrigeration:
    2. Store the bars in an airtight container in the refrigerator if you plan to enjoy them within a week. Refrigeration keeps them fresh and safe, preserving flavors and textures.

    3. Freezing:

    4. If you want to store them for a more extended period, these bars freeze beautifully. Wrap sections tightly in plastic wrap, then place them in a freezer-safe container or bag. They can be frozen for up to 3 months.

    5. Reheating:

    6. When ready to enjoy, simply bring them to room temperature. Alternatively, you can microwave a serving for 10-15 seconds for a warm, gooey experience.

    Storing these dessert recipes for longer ensures you have delightful treats on hand whenever that sweet tooth strikes!

    Nutritional Value of The Best Better Than Anything Bars

    In addition to being delicious, knowing the nutritional value of The Best Better Than Anything Bars can help you feel good about indulging. Each serving provides a satisfying balance of macronutrients, making these bars a nutritious pick:

    • Calories: Approximately 180-220 per serving (depending on ingredients and portion size).
    • Total Fat: 10-12 grams (with healthy fats from nuts and coconut).
    • Carbohydrates: 24-30 grams (mostly from the crust and sweetened condensed milk).
    • Protein: 3-5 grams (from nuts and chocolate).
    • Fiber: 2-4 grams (due to the graham cracker and coconut).

    Focusing on nutrient-dense ingredients makes these bars a fulfilling dessert option. You can even adjust the ingredients to cater to specific dietary requirements without sacrificing any of the deliciousness!

    FAQs: Frequently Asked Questions About The Best Better Than Anything Bars

    What can I substitute for sweetened condensed milk if I’m looking for a lower-calorie option?

    You can use coconut cream or a cashew cream blend sweetened with natural sweeteners like honey or maple syrup as a healthier alternative while retaining that creamy texture.

    Can I make The Best Better Than Anything Bars ahead of time?

    Absolutely! These bars can be made up to a week in advance and stored in the refrigerator. They tend to taste even better after a day or two as the flavors meld.

    Are these bars vegan if I use the suggested substitutions?

    Yes! By substituting sweetened condensed milk with coconut cream and using coconut oil instead of butter, you can create a fully vegan version of these bars that still packs a punch in flavor.

    How do I know when the bars are fully baked?

    When the top is golden brown and has set (not jiggly), that’s a good sign they are ready. Additionally, you can insert a toothpick into the center; it should come out clean.

    Questions like these arise when attempting new dessert recipes. Addressing common concerns helps to demystify the baking process, ensuring a successful outcome every time.

    The Best Better Than Anything Bars offer a vibrant, delicious touch to your dessert lineup. With their adaptability to various diets, ease of preparation, and delightful flavor, you’ll find this versatile recipe becomes a favorite for everyone. Happy baking!

  • Tasty Cajun Chicken With Bell Peppers

    Tasty Cajun Chicken With Bell Peppers

    Tasty Cajun Chicken With Bell Peppers: A Tropical Delight

    Introduction to Tasty Cajun Chicken With Bell Peppers

    If you’re looking for an irresistible dish that brings the vibrant flavors of the South right to your kitchen, then Tasty Cajun Chicken With Bell Peppers is for you. This recipe not only delivers a punch of spices and colors through juicy chicken thighs and crisp bell peppers, but it also embodies a simplicity that busy home cooks crave. It’s one of those chicken recipes that require minimal time and effort but yield maximum satisfaction for the whole family.

    What sets this dish apart is its adaptability; it’s easy to modify the recipe for different dietary preferences, making it perfect for vegetarians or gluten-free diets. It’s packed with protein and contains nutrient-dense vegetables, ensuring you’re not just indulging in deliciousness but also supporting your health. Whether you’re a working professional with little time to cook, a student looking for quick meal solutions, or even a new parent trying to whip up something nutritious, this recipe meets your needs.

    Tasty Cajun Chicken With Bell Peppers also offers a fantastic way to get kids involved in cooking. The colorful presentation grabs their attention while making it fun to learn how to prepare a delightful dinner. This dish is more than just a meal; it’s an experience designed to bring family and friends together. Read on to discover how incredibly easy this dish is to make and dive into its wonderful world of flavors!

    Benefits and Advantages of Tasty Cajun Chicken With Bell Peppers

    One of the standout features of Tasty Cajun Chicken With Bell Peppers is its ease of preparation. Within just 30 minutes, you can create a flavorful dish that tantalizes taste buds and warms hearts. For busy parents or working professionals, this is a huge plus, ensuring that you can serve a home-cooked meal even on the busiest of weeknights.

    Additionally, this recipe shines in the health department. With lean chicken as a protein source, it offers essential nutrients while being low in saturated fats. The vibrant bell peppers contribute not only textures and flavors but also an array of vital vitamins such as A and C, making this a colorful addition to your diet. This dish stands out among countless chicken recipes due to its ability to support a balanced diet without sacrificing taste.

    Furthermore, Tasty Cajun Chicken With Bell Peppers is perfect for those with varying dietary needs. By opting for gluten-free or low-calorie ingredients, this dish can easily transform to suit everyone at the table. Vegan alternatives, such as chickpeas or tofu, can replace chicken, ensuring that even plant-based diners can enjoy this fantastic flavor profile.

    Finally, its suitability for meal prep makes it an excellent choice for anyone looking to save time. Make a double batch on Sundays, store individual portions in the fridge, and you’ll have a ready-to-eat meal throughout the week. There isn’t just one reason to try this recipe; there are countless!

    Ingredients Overview

    Essential Ingredients for Tasty Cajun Chicken With Bell Peppers

    To whip up your Tasty Cajun Chicken With Bell Peppers, you’ll need the following ingredients:

    • Chicken thighs (1.5 lbs): Juicy and full of flavor, they are less prone to drying out compared to chicken breasts.
    • Bell peppers (2, mixed colors): Provides a beautiful pop of color and important nutrients.
    • Onion (1 medium): Adds depth and sweetness to the dish.
    • Garlic (2 cloves): Enhances the overall flavor.
    • Cajun seasoning (2 tablespoons): The key ingredient that packs this recipe with authentic flavor.
    • Olive oil (2 tablespoons): For sautéing your ingredients.
    • Salt and pepper (to taste): Essential for balancing the flavors.
    • Fresh parsley (for garnish): Provides a fresh touch and enhances visual appeal.

    Note: For those requiring dietary modifications:
    – Substitute chicken with tofu or chickpeas for a vegan option.
    – Use gluten-free seasoning and ensure that the bell peppers are fresh to maintain a gluten-free status.
    – Opt for low-sodium chicken broth for a lower salt version.

    Dietary Substitutions to Customize Your Tasty Cajun Chicken With Bell Peppers

    Whether you’re cooking for specific dietary needs or simply want to experiment with flavors, there are numerous substitutions for this recipe.

    1. Protein Alternatives:

      • Vegan Option: Swap chicken thighs for chickpeas or firm tofu. For tofu, make sure to press it beforehand for better texture and flavor.
      • Other Meats: Turkey thighs or breast can be used for a leaner alternative while still retaining the rich flavor.
    2. Gluten-Free Adjustments:

      • Use gluten-free seasonings and ensure that all ingredients, including canned goods or pre-packaged items, are verified gluten-free.
    3. Spice Level:

      • If you’re sensitive to heat, replace Cajun seasoning with mild paprika, or create a custom blend using dried herbs like oregano, thyme, and a hint of black pepper.

    Feel free to get creative with the recipe! Cooking should be a fun and adaptable experience, and this dish lends itself beautifully to various modifications.

    How to Prepare the Perfect Tasty Cajun Chicken With Bell Peppers: Step-by-Step Guide

    Ready to dive into cooking? Follow these easy steps to prepare your Tasty Cajun Chicken With Bell Peppers:

    1. Prepare the Base: Begin by washing the chicken thighs under cold water and patting them dry with paper towels to ensure they sear properly. Cut them into bite-sized pieces for even cooking.

    2. Chop the Vegetables: Dice the onion and slice the bell peppers into strips. Ensure everything is uniform in size for even cooking and to create an appealing presentation.

    3. Season the Chicken: In a large bowl, combine the chicken pieces with Cajun seasoning, salt, and pepper. Toss well to coat every piece evenly, allowing it to marinate for about 10 minutes while you prepare your cooking surface.

    4. Heat the Olive Oil: In a large skillet, heat olive oil over medium-high heat. Ensure the oil is hot enough before adding the chicken, as this will help achieve a golden sear.

    5. Cook the Chicken: Carefully add the seasoned chicken to the skillet. Sauté for about 5-7 minutes, stirring occasionally, until the chicken is cooked through and reaches an internal temperature of 165°F (75°C).

    6. Add the Vegetables: Once the chicken is nicely browned, add the chopped onion and bell peppers to the skillet. Cook for an additional 5-7 minutes until the vegetables soften but retain some crispness.

    7. Incorporate Garlic: Add minced garlic and sauté for another 1-2 minutes until fragrant. This step is key for enhancing the overall flavor profile.

    8. Adjust Seasoning: Taste the dish and adjust the seasoning if needed. This is the perfect time to add more spice or a dash of salt according to your preference.

    9. Garnish and Serve: Once everything is cooked through, remove the skillet from heat. Transfer your dish to a serving plate and garnish with freshly chopped parsley for an added touch of freshness.

    10. Optional Side Pairing: Serve your Tasty Cajun Chicken With Bell Peppers with steamed rice, quinoa, or in lettuce wraps for a low-carb option.

    Enjoy your delectable, homemade dish! You can savor this meal with family for dinner or even save leftovers for quick lunches throughout the week.

    Mastering Tasty Cajun Chicken With Bell Peppers: Advanced Tips and Variations

    Elevating your Tasty Cajun Chicken With Bell Peppers is simple. Here are some advanced tips and variations to consider:

    • Marinate for Extra Flavor: For enhanced depth, marinate the chicken in the Cajun seasoning concoction for an hour (or overnight) in the refrigerator. This ensures that every bite of chicken is infused with flavor.

    • Add more Veggies: Feel free to add additional vegetables, such as zucchini, squash, or even spinach, to make the dish heartier and more nutritious.

    • Cajun Cream Sauce: For a creamier twist, stir in some heavy cream or coconut milk after cooking the chicken and before adding the vegetables. This tiny tweak will create a rich, savory sauce to spoon over your dish.

    • Herbed Flavors: Introduce fresh herbs, such as thyme or cilantro, along with the parsley for an aromatic accent that enhances the dish further.

    • Serving Variation: For a lively party platter, serve Cajun chicken and peppers in tortilla wraps with guacamole or sour cream for a creative appetizer.

    Experiment with these variations to make the dish uniquely yours.

    How to Store Tasty Cajun Chicken With Bell Peppers: Best Practices

    Storing your Tasty Cajun Chicken With Bell Peppers properly will help maintain its flavor and texture for your future meals. Here are some best practices:

    • Refrigeration: Allow the leftovers to cool before transferring them to an airtight container. Stored properly, this dish can last in the fridge for 3-4 days.

    • Freezing: For longer storage, freeze the cooked chicken and bell peppers in a freezer-safe container. It’s best to do this within 2 days of cooking for the best preservation of flavor. Properly stored, it can last for up to 3 months.

    • Reheating: When you’re ready to enjoy your stored meal, simply thaw it in the refrigerator overnight. Reheat on the stove over low heat, adding a splash of water or broth to keep it juicy. You can also microwave it, covered, for convenience.

    Following these storage tips will allow you to savor the vibrant flavors of this dish well into the week!

    Nutritional Value of Tasty Cajun Chicken With Bell Peppers

    Understanding the nutritional profile of your Tasty Cajun Chicken With Bell Peppers can help you make informed choices while enjoying this delicious dish. Here’s a breakdown of key nutritional information per serving (based on a serving size of one cup):

    • Calories: Approximately 320
    • Protein: 28g
    • Fat: 16g
    • Saturated Fat: 3g
    • Carbohydrates: 12g
    • Dietary Fiber: 2g
    • Sugars: 3g
    • Vitamins: Excellent source of Vitamin A and C due to the bell peppers and onions.
    • Minerals: Rich in iron and potassium, essential for many bodily functions.

    This dish is a great choice for those looking to consume a balanced meal rich in key nutrients while enjoying comforting flavors. It fits within a low-carb, high-protein dietary framework and satisfies cravings without excessive calories.

    FAQs: Frequently Asked Questions About Tasty Cajun Chicken With Bell Peppers

    1. Can I use chicken breasts instead of thighs?
    2. Yes, you can substitute chicken thighs with boneless, skinless chicken breasts. Just be mindful to not overcook them to avoid dryness.

    3. Is this dish gluten-free?

    4. If you ensure your Cajun seasoning and other mixed ingredients are gluten-free, then yes, this dish can be gluten-free.

    5. How spicy is this dish?

    6. The spice level can be adjusted depending on the amount of Cajun seasoning you choose to use. Feel free to start with less and gradually add more to meet your heat preference.

    7. Can I make this dish in advance?

    8. Absolutely! You can prepare and cook this dish in advance. Store leftovers in the refrigerator or freezer for easy reheating throughout the week.

    9. What if I’m a vegan?

    10. For a vegan version, easily substitute chicken with chickpeas or tofu and adjust the seasoning accordingly to suit your taste.

    This Tasty Cajun Chicken With Bell Peppers is not just a meal; it’s a celebration of flavors, health, and ease of preparation. It’s a dish designed to bring joy to busy lives while providing a nutritious, delicious dinner option. Enjoy the cooking adventure!

  • Easy Honey Garlic Chicken Bites Recipe

    Easy Honey Garlic Chicken Bites Recipe

    Easy Honey Garlic Chicken Bites Recipe: A Tropical Delight

    Introduction to Easy Honey Garlic Chicken Bites Recipe

    Welcome to our delightful culinary adventure with the Easy Honey Garlic Chicken Bites Recipe, a dish that transforms simple ingredients into a tropical sensation. If you’re searching for delicious and effortless chicken recipes, you’ve landed in the right place. This delightful recipe harnesses the natural sweetness of honey and the savory touch of garlic, creating a dish that is perfect for any occasion.

    These chicken bites not only make for an excellent appetizer but can also serve as a main dish alongside rice, vegetables, or even a fresh salad. What makes this recipe truly special is that it reflects the balance of flavors while being incredibly easy to prepare—ideal for busy weeknights or a relaxing weekend meal prep session. Additionally, the ingredients are easily accessible, making it a perfect fit for even the most novice of home cooks.

    Moreover, this dish boasts numerous health benefits. Chicken is a fantastic source of lean protein, while the honey adds natural sweetness without excessive processed sugars, and garlic enriches the dish with antioxidants and anti-inflammatory properties. This recipe can also be easily adapted to be gluten-free or made with alternative sweeteners, making it suitable for various dietary needs. So, whether you’re a busy parent looking for a quick dinner option, a newlywed seeking out sensational dishes to impress your partner, or a food enthusiast ready to explore new flavors, Easy Honey Garlic Chicken Bites is a must-try. Let’s dive into its fantastic benefits!

    Benefits and Advantages of Easy Honey Garlic Chicken Bites Recipe

    When it comes to ease of preparation, the Easy Honey Garlic Chicken Bites Recipe shines like a beacon among various chicken recipes available. In just under 30 minutes, you can serve a tasty, finger-licking dish that pleases both the palate and the mind. The combination of marinades used here not only enhances the flavor but also tenderizes the chicken, ensuring each bite is juicy and satisfying.

    Health Benefits

    In addition to being a quick preparation, this dish is incredibly healthy. Using lean chicken breast allows you to benefit from protein without the excess fats found in other meats. Plus, the glaze made from honey and garlic is not just a flavorful coating; it comes with significant health boosts. Honey contains antioxidants that can help boost the immune system, while garlic has been linked to numerous health benefits, including heart health and improved cholesterol levels.

    Versatility

    This recipe adapts beautifully for different dietary needs. If you are catering to vegan guests, swapping the chicken for tofu or jackfruit can yield fabulous results. Likewise, gluten-free diners can enjoy the dish simply by using gluten-free soy sauce. For those conscious about calories, using a sugar alternative in place of honey can help reduce caloric intake while still maintaining flavor integrity.

    Meal Prepping

    Lastly, the Easy Honey Garlic Chicken Bites make an excellent choice for meal prepping. You can cook a larger batch and store them in the fridge or freezer for an easy-to-reheat meal during the week. Not only will this save time, but it encourages healthier eating habits as you’ll have quick and delicious options at your fingertips.

    Ingredients Overview

    Essential Ingredients for Easy Honey Garlic Chicken Bites Recipe

    A stellar dish starts with quality ingredients. Here is a detailed list of what you will need to craft these delightful bites, along with their benefits:

    Main Ingredients

    • 500g Chicken Breast (cut into bite-sized pieces)
    • Lean protein source, excellent for muscle building and repair.

    • 1/4 cup Honey (or maple syrup for a vegan option)

    • Natural sweetener providing flavor and health benefits.

    • 1/4 cup Soy Sauce (use gluten-free if needed)

    • Adds saltiness and umami flavor, enhancing the overall taste.

    • 3 cloves Garlic (minced)

    • Packed with health benefits and flavor depth.

    • 2 tablespoons Olive Oil

    • Healthy fat that ensures moisture and improves texture.

    • 1 teaspoon Ginger (freshly grated, optional)

    • Adds warmth and flavor complexity while offering digestion support.

    • Sesame Seeds (for garnish, optional)

    • Provides crunch and visual appeal, as well as additional nutrients.

    Dietary Substitutions to Customize Your Easy Honey Garlic Chicken Bites Recipe

    To cater to various diets, consider the following substitutions:

    • Vegan Version:
    • Swap out the chicken for tofu cubes or jackfruit. You can follow the same marination and cooking process for delicious results.

    • Gluten-Free:

    • Use tamari instead of soy sauce and confirm any other pre-packaged ingredients are certified gluten-free.

    • Low-Calorie:

    • Use a sugar substitute like erythritol instead of honey while slightly reducing the amount to prevent excessive sweetness.

    • Low-Carb:

    • Serve the chicken bites in lettuce wraps rather than with rice or bread. This keeps the dish light while retaining the incredible flavors.

    Remember, these swaps do not sacrifice taste while being mindful of dietary restrictions, paving the way for everyone to enjoy!

    How to Prepare the Perfect Easy Honey Garlic Chicken Bites Recipe: Step-by-Step Guide

    Now that you’ve gathered all the essential ingredients, let’s dive into the preparation of these fantastic chicken recipes. Follow these simple, numbered steps for success:

    1. Prepare the Marinade:
      In a medium bowl, combine honey, soy sauce, minced garlic, and grated ginger. Whisk until fully blended. This marinade brings together contrasting flavors—sweet and savory.

    2. Marinate the Chicken:
      Add your chicken breast pieces to the marinade. Toss them to ensure a thorough coating, then let them marinate for at least 15 minutes; longer if you have time, as this enhances the flavor significantly.

    3. Heat the Pan:
      Heat 2 tablespoons of olive oil in a large skillet over medium heat. This helps create a beautiful sear on the chicken.

    4. Cook the Chicken:
      Once the oil is hot, add the marinated chicken pieces, ensuring they’re spread out in a single layer. This allows them to cook evenly, achieving that golden-brown color we all love.

    5. Sauté Until Cooked:
      Sauté the chicken for about 5-7 minutes on each side or until cooked through and the internal temperature reaches 165°F (75°C). Watch for the tender, caramelized pieces that develop from the marinade.

    6. Reduce the Marinade:
      If desired, pour the leftover marinade into the pan after the chicken is done cooking. Allow it to simmer for a few minutes until slightly thickened, creating a luscious sauce.

    7. Finish with Garnish:
      Sprinkle sesame seeds over the chicken bites for added texture and visual appeal. This final touch elevates the dish both in flavor and presentation.

    8. Serve Your Dish:
      Serve hot as an appetizer or over a bed of rice or salad for a complete meal. Enjoy the tropical fusion of flavors!

    Tips for Easy Customization

    • For a spicier version, add a pinch of red pepper flakes to the marinade.
    • For extra veggies, toss in some bell peppers and snap peas when cooking the chicken to create a one-pan dish.
    • If you’re meal prepping, consider cooking a large batch to use throughout the week in various dishes.

    By following these steps, you ensure a scrumptious and appealing dish that everyone will rave about!

    Mastering Easy Honey Garlic Chicken Bites Recipe: Advanced Tips and Variations

    Having covered the basics, here are some advanced tips and variations to elevate your Easy Honey Garlic Chicken Bites:

    Enhance with More Flavors

    • Citrus Kick: For a refreshing twist, add the zest of a lime or orange to the marinade for a fruity note that balances sweetness.
    • Herb Infusion: Add fresh herbs—such as parsley, cilantro, or green onions—for a burst of color and freshness.

    Explore Variations

    • Honey Garlic Cauliflower Bites: For a delightful vegetarian option, swap chicken for cauliflower florets. Follow the same marinade and cooking method, and brace for a new favorite.
    • Honey Garlic Shrimp: Those who enjoy seafood can also use shrimp instead of chicken. Shrimp cooks quickly, so reduce your sautéing time to ensure they remain tender.

    Experiment with Cooking Methods

    • Oven-Baked: If you prefer a healthier take, baking the chicken bites until golden brown works wonderfully. Set your oven to 400°F (200°C), arrange the marinated chicken on a baking sheet, and cook for about 15-20 minutes, flipping halfway through.
    • Air Fryer: For a crispier bite with less oil, use an air fryer. Cook at 375°F (190°C) for approximately 12-15 minutes, shaking the basket halfway for even cooking.

    These tips and variations will help keep the Easy Honey Garlic Chicken Bites Recipe fresh and exciting, making it a staple in your home!

    How to Store Easy Honey Garlic Chicken Bites Recipe: Best Practices

    Understanding how to correctly store your Easy Honey Garlic Chicken Bites will ensure they taste just as delicious when reheated.

    Refrigerating

    Once prepared, allow the chicken bites to cool completely before transferring them to an airtight container. They can be stored in the refrigerator for about 3-4 days. This makes for a quick meal throughout the week, simplifying dinner decisions.

    Freezing

    If you prefer to make a larger batch, you can freeze the chicken bites. Make sure they’re cooled and stored in a freezer-safe container. They should last for up to 3 months. To reheat, simply allow them to defrost in the refrigerator overnight or use the microwave.

    Reheating

    To reheat, place in the oven at 350°F (175°C) for about 15-20 minutes until warmed through. If reheating from frozen, it may take a little longer; always check to ensure they reach the proper internal temperature.

    These methods will preserve the deliciousness of your chicken bites while providing options for future meals!

    Nutritional Value of Easy Honey Garlic Chicken Bites Recipe

    Understanding the nutritional aspects of your meals can enhance your dining experiences. Here’s a breakdown of the estimated nutrition for one serving of the Easy Honey Garlic Chicken Bites Recipe (calculated based on standard ingredients for four servings):

    • Calories: Approximately 220
    • Protein: 30g
    • Fat: 7g
    • Carbohydrates: 15g
    • Fiber: 0.5g
    • Sugars: 10g

    These nutrition values can vary based on ingredient choices and portion sizes, especially if you choose substitutes. However, generally speaking, this dish provides a balanced profile of protein, healthy fats, and complex carbohydrates, making it a great addition to your culinary repertoire.

    FAQs: Frequently Asked Questions About Easy Honey Garlic Chicken Bites Recipe

    1. Can I use frozen chicken for this recipe?

    Yes! Just ensure to thaw the chicken completely before marinating and cooking for the best results.

    2. What if I don’t have honey?

    You can substitute the honey with maple syrup or agave nectar for a similar flavor profile while keeping it vegan-friendly.

    3. How do I make this recipe spicier?

    To add heat, incorporate red pepper flakes into the marinade or serve with a spicy dipping sauce.

    4. Can I use chicken thighs instead of breasts?

    Absolutely! Chicken thighs can lend a rich flavor and are slightly juicier. Just ensure to cook them thoroughly.

    5. Is this dish suitable for meal prep?

    Yes! These chicken bites are perfect for meal prepping and can be stored in the refrigerator or freezer for easy reheating.

    Using these Q&A insights, readers are empowered to explore the recipe confidently, catering to their preferences while embarking on a delicious cooking journey.

    In summary, the Easy Honey Garlic Chicken Bites Recipe is a testament to the joy of cooking, emphasizing health, simplicity, and versatility. Whether you’re preparing a weeknight dinner or a festive celebration, this dish promises to delight both the cook and those who gather around the table. Enjoy your culinary journey!