Blog

  • Golden Roasted Potatoes And Carrots

    Golden Roasted Potatoes And Carrots

    Golden Roasted Potatoes And Carrots: A Tropical Delight

    Introduction to Golden Roasted Potatoes And Carrots

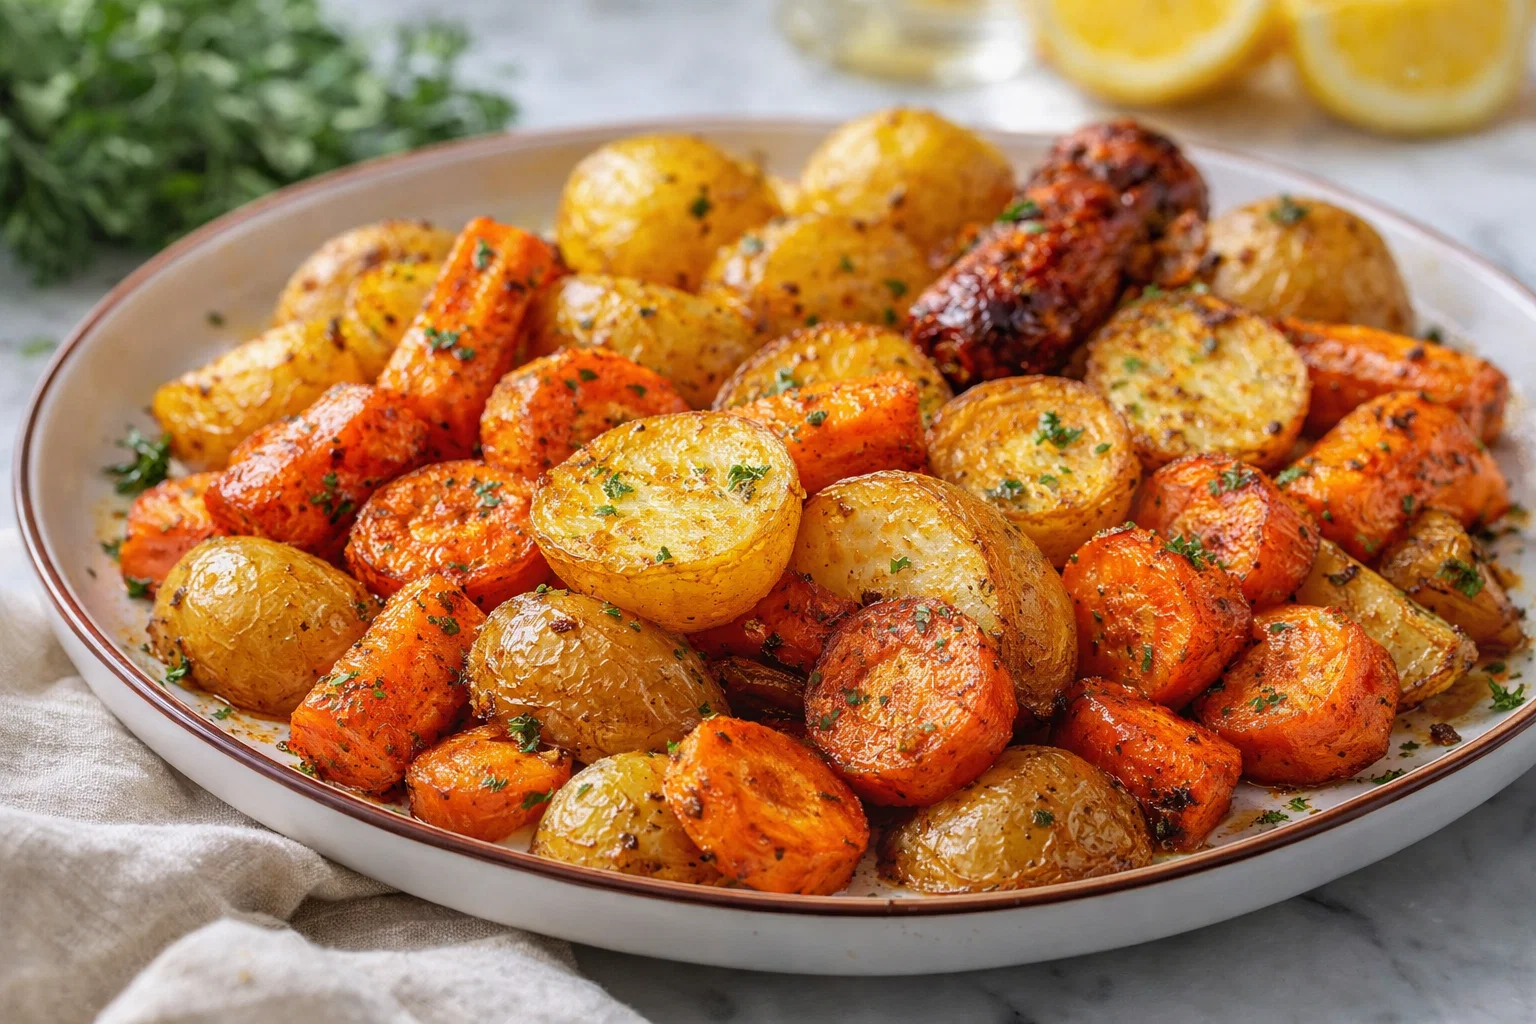
    If you’re on the lookout for delightful dinner recipes that combine simplicity, health benefits, and compatibility with various dietary needs, look no further than Golden Roasted Potatoes and Carrots. This hearty, colorful dish is not only visually appealing but incredibly satisfying to taste.

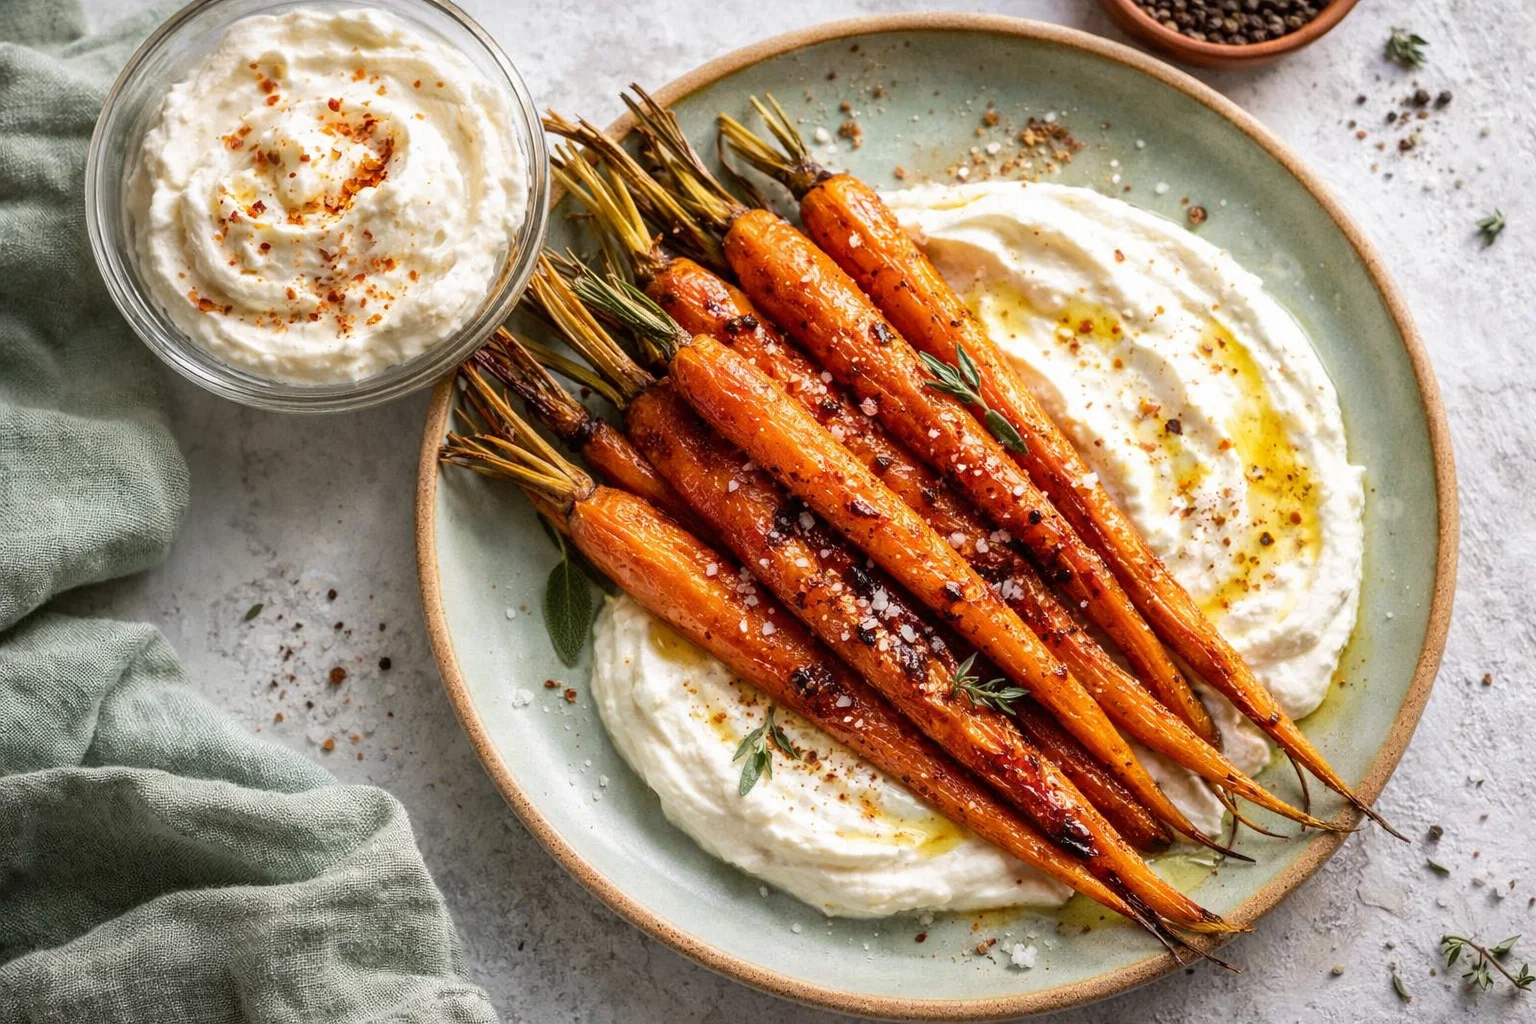
    Imagine golden-brown potatoes and vibrant carrots roasted to perfection, enhanced with aromatic herbs and spices. This Vegan and Gluten-Free recipe serves as a wonderful side dish or a light meal in and of itself, making it suitable for all culinary adventures—whether you’re feeding the family, prepping for a cozy dinner with friends, or need a quick weeknight meal after a long day.

    The beauty of this recipe lies in its uncomplicated preparation, using ingredients found in any kitchen pantry. It’s healthy, packed with nutrients, and naturally low in calories, appealing to anyone seeking to maintain a balanced diet. With its mouthwatering aroma wafting through your home, it invites everyone to gather around the table. Regardless of your cooking skills, you’ll impress loved ones and satisfy your own cravings. Dive into the world of these golden roasted delights, and let’s embark on this culinary journey together!

    Benefits and Advantages of Golden Roasted Potatoes And Carrots

    What makes Golden Roasted Potatoes and Carrots stand out among other dinner recipes? Here are some compelling benefits and advantages that will inspire you to try this recipe.

    1. Simplicity and Convenience

    One of the predominant advantages of this recipe is its simplicity. With just a handful of ingredients and minimal prep time, you can have a delicious side dish ready in no time. The roasting process is mostly hands-off, allowing you to focus on preparing your main dish or spending time with your family. This ease makes it a fantastic option for busy parents, students, or anyone leading a hectic lifestyle.

    2. Nutritional Powerhouse

    Both potatoes and carrots are highly nutritious root vegetables. They are high in vitamins, minerals, and antioxidants while being low in calories. Potatoes are an excellent source of Vitamin C, Vitamin B6, and potassium, which supports heart health and overall wellbeing. Carrots, on the other hand, are famously known for their beta-carotene content, which is vital for vision health and boosting your immune system.

    3. Versatile and Adaptable

    This recipe is incredibly versatile. You can enjoy it as a stand-alone vegan dish or pair it with grilled chicken, fish, or other proteins for a well-rounded meal. It is inherently gluten-free and low-calorie, which accommodates various dietary restrictions, making it a perfect pick for guests with different preferences.

    4. Flavor Enhancements

    Golden Roasted Potatoes and Carrots can be easily customized to suit your flavor preferences. Whether you prefer a hint of garlic, a sprinkle of herbs, or a touch of spice, these vegetables absorb flavors beautifully, ensuring your dish is anything but bland. Plus, experimenting with different spices can transform this dish into a global sensation every time you make it!

    5. Great for Leftovers

    Leftovers from this dish can easily be repurposed. Use them in a salad, integrate them into a breakfast hash, or blend them into a soup for a hearty meal the next day. This no-waste aspect is perfect for those who seek to maximize their food resources.

    In summary, Golden Roasted Potatoes and Carrots combine convenience, health benefits, adaptability, and delicious flavor in an appealing way. These factors make it a must-try among dinner recipes, suitable for a variety of tastes and occasions.

    Ingredients Overview

    Essential Ingredients for Golden Roasted Potatoes And Carrots

    To craft this mouthwatering dish, you’ll need the following ingredients:

    1. Potatoes: 1.5 lbs (Yukon gold or red potatoes work best)
    2. Purpose: The star of the dish, providing a creamy texture when roasted.

    3. Carrots: 1 lb, peeled and cut into even-sized pieces

    4. Purpose: Adds vibrant color, sweetness, and crunch while delivering vital nutrients.

    5. Olive Oil: 2-3 tablespoons

    6. Purpose: Enhances roasting while ensuring a crispy texture, and provides healthy fats.

    7. Garlic Powder: 1 teaspoon (or fresh cloves)

    8. Purpose: Brings a punch of flavor that elevates the dish.

    9. Dried Herbs: 1 tablespoon (thyme, rosemary, or Italian seasoning)

    10. Purpose: Infuses fragrant notes, making the dish more aromatic and inviting.

    11. Salt and Pepper: To taste

    12. Purpose: Essential seasonings that enhance all other flavors.

    13. Fresh Parsley (optional): For garnish

    14. Purpose: A touch of freshness on top, elevating the presentation.

    These ingredients are not only essential for achieving the dish’s signature flavor but also offer a plethora of nutrients that complement a balanced meal.

    Dietary Substitutions to Customize Your Golden Roasted Potatoes And Carrots

    1. Oil Alternatives: Instead of olive oil, you can use avocado oil or even vegetable broth for a lighter version.

    2. Potato Varieties: Sweet potatoes can be used for a different flavor profile and added sweetness, making the dish a bit more colorful and offering additional nutrients.

    3. Herb Alternatives: Fresh herbs can replace dried ones if you have them on hand. Just remember that dry herbs are generally more concentrated, so use about three times less.

    4. Seasoning Varieties: Play with spices such as paprika, cumin, or even chili flakes for added heat and variety to suit your taste buds.

    5. Agar or Cashew Cream: For a rich, creamy texture without dairy, consider adding a dollop of vegan cashew cream before serving.

    Using these substitutions ensures that everyone’s dietary preferences are accounted for, making Golden Roasted Potatoes and Carrots an inclusive dish.

    How to Prepare the Perfect Golden Roasted Potatoes And Carrots: Step-by-Step Guide

    Ready to whip up your Golden Roasted Potatoes and Carrots? Follow this detailed step-by-step guide.

    Step 1: Preheat the Oven

    Before anything else, preheat your oven to 425°F (220°C). This temperature is crucial for achieving that perfect crispiness on the outside while keeping the inside tender.

    Step 2: Prepare the Vegetables

    Wash and peel the potatoes and carrots. Cut your potatoes into even-sized chunks to allow for uniform cooking. For the carrots, aim for pieces similar in size to the potatoes to ensure even roasting.

    Step 3: Drizzle with Oil

    In a large mixing bowl, add the cut potatoes and carrots. Drizzle with olive oil—approximately 2-3 tablespoons should suffice. Toss to ensure every piece is lightly coated.

    Step 4: Season the Mix

    Add in the garlic powder, salt, pepper, and your choice of dried herbs. Toss the vegetables again until they are evenly coated with the seasoning mix.

    Step 5: Spread on a Baking Sheet

    Transfer the seasoned potatoes and carrots to a baking sheet lined with parchment paper. Make sure they’re spread out in a single layer to avoid steaming, which counteracts that lovely crispy finish.

    Step 6: Roast

    Place the baking sheet in the preheated oven and roast for about 25-30 minutes. After 15 minutes, stir the vegetables to ensure they brown evenly.

    Step 7: Check for Doneness

    After 30 minutes, poke a potato piece with a fork. It should be tender on the inside and golden brown on the outside. If necessary, roast for an additional 5-10 minutes.

    Step 8: Garnish and Serve

    After removing from the oven, let it cool for a minute. Garnish with fresh parsley for a touch of color and flavor, and serve them warm.

    Feel free to customize your meal by serving it alongside proteins or your favorite dipping sauce, allowing for versatile dining experiences!

    Mastering Golden Roasted Potatoes And Carrots: Advanced Tips and Variations

    To elevate your Golden Roasted Potatoes and Carrots experience, here are some advanced tips and interesting variations to try:

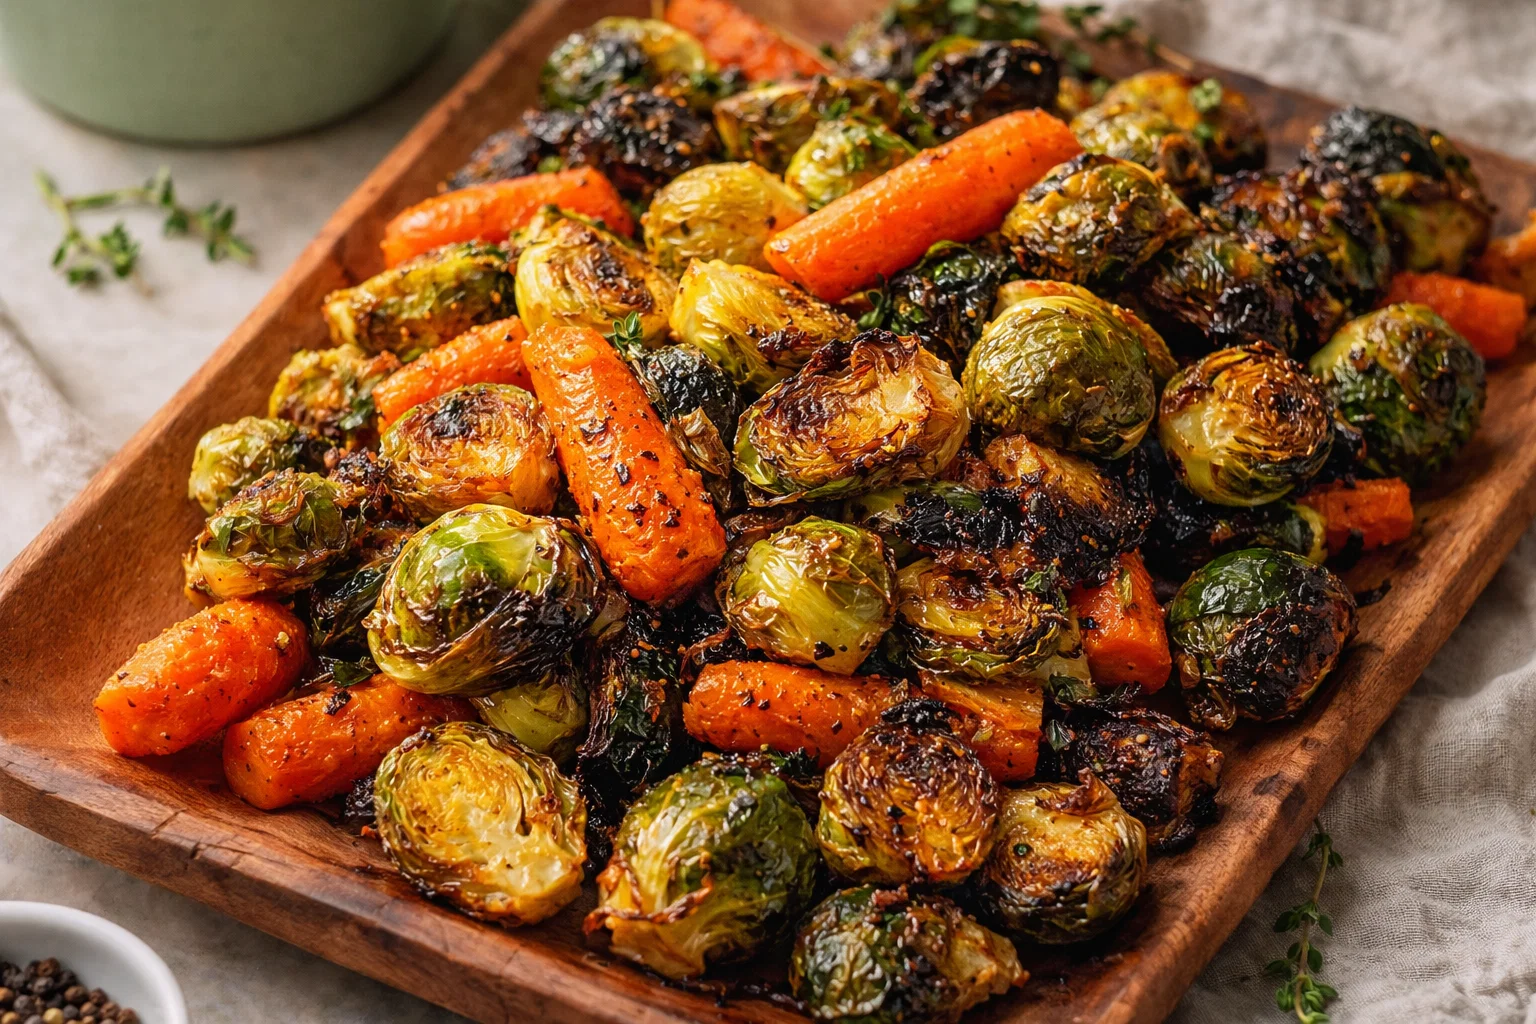
    1. Add Other Vegetables: Consider including bell peppers, onions, or Brussels sprouts for added texture and flavors. Just remember to chop everything into similar sizes to ensure even cooking.

    2. Seasoning Variations: Explore various seasoning blends depending on the cuisine you’re aiming for. Try using smoked paprika and cumin for a Mexican twist or curry powder for an Indian flair.

    3. Herb Infused Oil: Enhance the flavor profile by mixing your olive oil with fresh herbs, garlic, or even zesty lemon rind before drizzling it over the vegetables.

    4. Cheesy Finish (for non-vegan diets): Right before you take the dish out of the oven, sprinkle some grated Parmesan or nutritional yeast for a cheesy flavor. This will create a deliciously savory crust on top.

    5. Skillet Method: If you prefer stovetop cooking, consider using a cast-iron skillet. Sauté the potatoes and carrots in the pan with the olive oil until they begin to brown, then cover with a lid and let them steam until cooked through.

    Exploring these variations adds a personal touch, ensuring your roasted dish never gets repetitive. Discovering new flavor profiles never fails to entice, making it a fun option for family meals or gatherings.

    How to Store Golden Roasted Potatoes And Carrots: Best Practices

    Storing your Golden Roasted Potatoes and Carrots properly is essential to maintain their deliciousness and nutritional value. Here are some best practices for refrigeration, freezing, and reheating:

    1. Refrigeration:
    2. Once your dish has cooled to room temperature, transfer it to an airtight container. Store it in the refrigerator for up to 4-5 days.

    3. Freezing:

    4. While freezing can alter the texture slightly, you can still freeze the roasted vegetables. Spread them out on a baking sheet to flash freeze, then transfer to a freezer-safe bag or container once frozen. They will last for up to three months.

    5. Reheating:

    6. To enjoy leftovers, reheat them in the oven at 350°F (175°C) until warmed through (about 10-15 minutes). This step helps retain their crispness. Alternatively, you can use a microwave, but be aware this method may make the vegetables softer.

    Following these guidelines allows you to enjoy your Golden Roasted Potatoes and Carrots at their best, even when storing leftovers!

    Nutritional Value of Golden Roasted Potatoes And Carrots

    Understanding the nutritional profile of Golden Roasted Potatoes and Carrots makes this dish an even more attractive option among dinner recipes. Here’s a breakdown of the estimated nutritional values for a serving of this dish (roughly 1 cup):

    • Calories: 180
    • Total Fat: 7g
    • Saturated Fat: 1g
    • Carbohydrates: 30g
    • Dietary Fiber: 4g
    • Sugars: 3g
    • Protein: 4g
    • Vitamin A: 170% DV
    • Vitamin C: 40% DV
    • Potassium: 620mg

    This dish is not only satisfying but also packed with nutrients. The large amount of Vitamin A is especially beneficial for eye health, while the fiber content assists in digestion. Healthy fats from olive oil contribute to heart health, making it a well-rounded meal option.

    FAQs: Frequently Asked Questions About Golden Roasted Potatoes And Carrots

    1. Can I make Golden Roasted Potatoes and Carrots in advance?

    Absolutely! You can prepare these veggies a day in advance. Store them in the refrigerator and reheat before serving for easy meal preparation.

    2. What are some good side dishes for Golden Roasted Potatoes and Carrots?

    These roasted vegetables pair perfectly with a variety of proteins. Try serving them alongside grilled chicken, fish, or even veggie burgers for a complete meal.

    3. Can I use different types of potatoes?

    Yes! Feel free to experiment with different potato varieties, such as red, Yukon gold, or even sweet potatoes, for varying flavors and textures.

    4. Is this recipe suitable for meal prep?

    Definitely! Golden Roasted Potatoes and Carrots are excellent for meal prep. Make a big batch and portion it out for lunches or dinners throughout the week.

    5. Is this recipe easy to modify for dietary needs?

    Yes, this recipe is highly adaptable. You can easily adjust the seasonings, use low-calorie alternatives, and even substitute vegetables based on your dietary preferences or restrictions.

    In conclusion, Golden Roasted Potatoes and Carrots not only take center stage among dinner recipes, but they also provide nutritional benefits, versatility, and convenience. So gather your ingredients, rally your loved ones, and get ready to enjoy a fulfilling culinary experience!

  • Creamy Roasted Carrots With Whipped Ricotta

    Creamy Roasted Carrots With Whipped Ricotta

    Creamy Roasted Carrots With Whipped Ricotta: A Tropical Delight

    Introduction to Creamy Roasted Carrots With Whipped Ricotta

    If you’re in search of effortless and exquisite dinner recipes, look no further than the delightful Creamy Roasted Carrots With Whipped Ricotta. This dish tantalizes the taste buds with its vibrant flavors and creamy texture, making it an ideal accompaniment or appetizer that fits seamlessly into a variety of culinary contexts.

    The beauty of this recipe lies in its simplicity and health benefits. Roasting brings out the natural sweetness of the carrots while enhancing their nutritious value, making this dish not only delicious but also soul-nourishing. Paired with the light, airy whipped ricotta, it strikes a perfect balance between rich and refreshing. Moreover, this recipe is vegan, gluten-free, and low-calorie, accommodating various dietary needs, including those of busy parents, diet-conscious individuals, or anyone exploring healthier choices in their meals.

    By incorporating seasonal produce, Creamy Roasted Carrots With Whipped Ricotta proves to be a delightful dish from farm to table. This elegant dish can make even a casual dinner feel special and is perfect for entertaining guests or enjoying a quiet night in. With just a handful of ingredients and simple preparation steps, it’s an approachable yet flavorful addition to your repertoire of dinner recipes.


    Benefits and Advantages of Creamy Roasted Carrots With Whipped Ricotta

    Creamy Roasted Carrots With Whipped Ricotta is not only a feast for the senses but also an incredibly practical choice for anyone seeking efficient yet satisfying meal solutions.

    Ease of Preparation: This recipe requires minimal cooking technique, making it accessible even for novice cooks. With just roasting and mixing involved, it doesn’t demand hours spent in the kitchen. While other dinner recipes might require intricate techniques, this dish shines with its straightforward actions, allowing you more time to relax and enjoy your meal or attend to family needs.

    Health Benefits: Carrots are rich in vitamins A, C, and K, which contribute to eye health, immune function, and overall well-being. They also provide fiber, which aids in digestion. Paired with wholesome ricotta—which is a good source of protein and calcium—this dish offers a balanced serving of nutrients while remaining low in calories.

    Versatility: This recipe stands out due to its flexibility. You can serve it warm or at room temperature, making it an excellent choice for potlucks or picnics. Moreover, it adapts to various occasions, whether it’s a weeknight dinner or a special celebration.

    Taste: The sweet, caramelized flavor of roasted carrots combined with the creamy texture of whipped ricotta creates a harmonious duet that will impress your family and friends. Enhanced with herbs or spices, you can easily customize the flavors to suit your preferences or seasonal ingredients.

    By exploring the advantages of Creamy Roasted Carrots With Whipped Ricotta, you open the door to a world of fulfilling and nutritious dinner recipes that cater to diverse lifestyles and dietary preferences.


    Ingredients Overview

    Essential Ingredients for Creamy Roasted Carrots With Whipped Ricotta

    The following simple ingredients will guide you in creating a delicious dish that everyone will love. Each ingredient can be tailored for dietary preferences, ensuring inclusivity.

    • Carrots (2 lbs): The star of the dish, they should be organic if possible. Rich in antioxidants and vitamins, they provide a sweet base for the recipe.
    • Olive Oil (2 tablespoons): Used for roasting the carrots, it adds healthy fats and enhances the flavors. A great source of monounsaturated fats.
    • Salt (to taste): Essential for seasoning, it enhances the natural sweetness of the carrots.
    • Black Pepper (to taste): Adds a hint of spice, complementing the sweetness of the carrots.
    • Ricotta Cheese (1 cup): This creamy cheese not only brings richness to the dish but is also a great source of protein. For a vegan substitute, use an almond or soy-based ricotta available in stores.
    • Fresh Herbs (optional; e.g., thyme or parsley): These add freshness and complexity to the flavors.

    Diet-Conscious Options: By using a vegan ricotta alternative and ensuring all ingredients are gluten-free, this dish becomes suitable for a wide range of diets.

    Dietary Substitutions to Customize Your Creamy Roasted Carrots With Whipped Ricotta

    • Ricotta Alternatives: Use cottage cheese for a lower-fat option or tofu for a vegan alternative. Blending silken tofu with nutritional yeast, lemon juice, and a pinch of salt replicates a similar texture and taste.
    • Herbal Additions: Explore different herbs like rosemary or basil for a unique twist. You may also drizzle some infused olive oil to add complexity to the flavor.
    • Spice Variations: Consider adding cayenne or paprika for a kick of heat. Alternatively, a sprinkle of cinnamon can complement the sweetness of the carrots.
    • Nutty Crunch: Add toasted nuts, such as walnuts or hazelnuts, for extra texture and a nutritious boost.

    Through these substitutions and enhancements, you can adjust the Creamy Roasted Carrots With Whipped Ricotta to better fit your unique preferences or dietary restrictions.


    How to Prepare the Perfect Creamy Roasted Carrots With Whipped Ricotta: Step-by-Step Guide

    Follow this clear and concise guide for preparing Creamy Roasted Carrots With Whipped Ricotta, ensuring delightful results every time.

    1. Prepare the Carrots: Begin by washing and peeling the carrots. Cut them into uniform sticks for even roasting. This not only improves aesthetics but also ensures that they cook through at the same rate.

    2. Seasoning: In a mixing bowl, toss the carrot sticks with olive oil, salt, and black pepper. Make sure they are evenly coated to achieve that perfect caramelization during roasting.

    3. Roasting: Preheat your oven to 425°F (220°C). Spread the seasoned carrots evenly on a baking sheet lined with parchment paper. Roast in the hot oven for about 25-30 minutes, flipping them halfway through. Look for a golden-brown exterior and tender interior.

    4. Preparing the Whipped Ricotta: While the carrots are roasting, take a mixing bowl and add the ricotta cheese. Use an electric mixer or a whisk to beat it until it’s smooth and creamy. If using, consider adding some herbs or spices to enhance the flavor.

    5. Combining Flavors: Once the carrots are fully roasted, remove them from the oven and let them cool slightly. Serve them warm alongside a generous dollop of whipped ricotta.

    6. Garnishing: Sprinkle with fresh herbs, zest of lemon, or a drizzle of balsamic glaze if desired. For an extra touch, you can sprinkle some crushed nuts on top for added texture.

    7. Serving Suggestion: Present this dish on a comfy platter as a vibrant centerpiece for your dinner table, enhancing any gathering with a healthful, visually appealing option among your dinner recipes.

    By following these straightforward steps, you’re guaranteed to create a flavorful, eye-catching dish that will delight all who partake in your meal.


    Mastering Creamy Roasted Carrots With Whipped Ricotta: Advanced Tips and Variations

    To elevate your cooking experience and create a dish that impresses, consider these advanced tips and variations.

    • Marinating Carrots: For enhanced flavor, marinate the carrot sticks in olive oil, honey, and herbs for up to an hour before roasting. This will infuse deep flavors into the carrots.

    • Roasting Techniques: Try roasting the carrots with different cooking techniques—such as grilling or air frying—for a unique appeal. Each method provides flavor differences worth exploring.

    • Infused Ricotta: Experiment with different flavor profiles by infusing your ricotta with garlic, lemon zest, or dill. This can create a full-bodied flavor that complements the sweetness of the roasted carrots.

    • Serving Variations: Incorporate the roasted carrots and ricotta into a mixed greens salad or use them as a vibrant topping on a grain bowl. They can be the star of your dish or a perfect side companion.

    By utilizing these advanced techniques and variations, you will not only create the original dish but also encourage culinary creativity that can transform simple ingredients into satisfying meals.


    How to Store Creamy Roasted Carrots With Whipped Ricotta: Best Practices

    Proper storage of your Creamy Roasted Carrots With Whipped Ricotta ensures that they maintain their flavor and texture for later enjoyment.

    • Refrigeration: If you have leftovers, place the roasted carrots in an airtight container and refrigerate them. They should be consumed within 3-4 days for the best taste.

    • Freezing: To freeze, allow the carrots to cool completely. Next, place them in a freezer-safe bag, removing as much air as possible to avoid freezer burn. These can be stored for up to 2 months. However, note that the texture may change post-thawing.

    • Reheating: When ready to enjoy, reheat in the oven at a low temperature or microwave for a quick warm-up. If you store the whipped ricotta separately, stir it well after the refrigerator time, and consider adding a splash of olive oil to revive its creamy texture.

    These best practices ensure that your Creamy Roasted Carrots With Whipped Ricotta remains a viable and delightful dish even days after initial preparation, perfect for those busy weeks filled with dinner recipes.


    Nutritional Value of Creamy Roasted Carrots With Whipped Ricotta

    Understanding the nutritional value of your meals aids in making informed dietary choices. Here’s a brief overview of the nutrition facts:

    • Calories: Approximately 200-250 calories per serving (based on standard ingredients).
    • Fat: 10-15 grams; primarily from olive oil and ricotta—choose a low-fat ricotta for lower calories.
    • Protein: 6-10 grams, depending on the type of ricotta used—vegan alternatives may vary.
    • Carbohydrates: 25-30 grams; these mainly come from the natural sugars in carrots, perfect for energy.
    • Fiber: 5-6 grams; beneficial for digestion, derived from the carrots.

    By being mindful about the nutritional makeup of your Creamy Roasted Carrots With Whipped Ricotta, you can enjoy the health benefits of this vibrant dish while managing your dietary needs effectively.


    FAQs: Frequently Asked Questions About Creamy Roasted Carrots With Whipped Ricotta

    1. Can I make this dish in advance?

    Yes! You can roast the carrots a day prior and store them in the refrigerator. Make the whipped ricotta fresh just before serving to maintain its creamy texture.

    2. What can I substitute for ricotta cheese to make this dish vegan?

    Silken tofu blended with lemon juice and nutritional yeast replicates ricotta’s creamy texture while keeping it vegan.

    3. How can I adjust the seasonings for different taste preferences?

    Feel free to add spices like cumin, paprika, or mixed herbs to adapt the flavors of the dish. It’s all about experimenting with what suits your palate!

    4. Can I use baby carrots for this recipe?

    Absolutely! If using baby carrots, roasting time will decrease, so keep a close watch to prevent them from becoming mushy.

    5. How long does the dish last in the refrigerator?

    When stored properly in an airtight container, Creamy Roasted Carrots With Whipped Ricotta can last for about 3-4 days.

    Exploring these frequently asked questions provides guidance and clarity about Creamy Roasted Carrots With Whipped Ricotta, ensuring that your cooking experience is as enjoyable and successful as possible.


    Embrace the flavorful journey of mastering Creamy Roasted Carrots With Whipped Ricotta. This satisfying dish not only fulfills cravings for comfort food but also aligns with healthier eating habits. So gather your ingredients, unleash your creativity, and let this delightful dish take center stage in your dinner recipes tonight!

  • Tasty Roasted Brussels Sprouts And Carrots

    Tasty Roasted Brussels Sprouts And Carrots

    Tasty Roasted Brussels Sprouts And Carrots: A Tropical Delight

    Introduction to Tasty Roasted Brussels Sprouts And Carrots

    If you’re looking for healthy dinner recipes that are simple, nutritious, and bursting with flavor, you’ve landed in the right place! This Tasty Roasted Brussels Sprouts And Carrots recipe perfectly embodies what modern home cooks crave: a dish that’s easy to prepare, caters to various dietary needs, and packed with vibrant flavors. The combination of crispy Brussels sprouts and sweet carrots creates a delightful contrast that is undeniably delicious.

    In addition to being vegan and gluten-free, this recipe is also rich in vitamins, minerals, and fiber, making it an excellent choice for health-conscious individuals. Whether you’re a busy parent juggling meals, a student navigating your first kitchen, or a food enthusiast exploring new flavors, roasting these colorful vegetables provides a simple yet satisfying culinary experience. Not to mention, it brings warmth and comfort to any table.

    This recipe also stands out because of its versatility. You can easily pair it with your favorite protein for a complete meal. Plus, it offers endless possibilities for customization with different herbs and spices. With straightforward steps and minimal ingredients, this wholesome dish is perfect for those who want to eat well without spending hours in the kitchen.

    So, grab your apron, and let’s dive into this delicious and healthy culinary journey!

    Benefits and Advantages of Tasty Roasted Brussels Sprouts And Carrots

    Tasty Roasted Brussels Sprouts And Carrots not only taste great but also offer numerous benefits that make them a fantastic addition to your repertoire of healthy dinner recipes. One of the primary advantages is the ease of preparation. This dish involves simple chopping and tossing, requiring minimal kitchen skill. You can have a nutritious side dish ready in under 30 minutes — perfect for busy weeknights.

    In terms of health benefits, Brussels sprouts are a powerhouse of nutrients. They are high in vitamins C and K, which support immune function and bone health. Carrots are equally impressive; they provide an excellent source of beta-carotene, promoting good vision and skin health. Together, they create a nutrient-dense dish that supports a balanced diet and contributes to overall wellness.

    Another standout feature is the fiber content, which aids digestion and promotes a feeling of fullness. This makes it an excellent choice for those watching their weight or looking to incorporate more plant-based meals into their diet. The fact that this recipe is vegan and gluten-free increases its appeal, allowing it to accommodate various dietary restrictions and preferences.

    Moreover, roasted Brussels sprouts and carrots are incredibly versatile. You can experiment with different spices such as garlic powder, paprika, or even a hint of maple syrup for an unexpected twist. This adaptability helps keep your meals exciting and flavorful while still falling under the umbrella of healthy dinner recipes.

    Finally, sharing this dish with family and friends is a joy. The vibrant colors and enticing aroma will surely impress your guests, making it a perfect addition to holiday dinners and gatherings. Whether served as a side or a main dish, these roasted vegetables can truly elevate your meal and make your dinner experience more enjoyable.

    Ingredients Overview

    Essential Ingredients for Tasty Roasted Brussels Sprouts And Carrots

    To prepare Tasty Roasted Brussels Sprouts And Carrots, you will need the following essential ingredients:

    • 1 pound Brussels sprouts – Trimmed and halved; these cruciferous vegetables are high in nutrients and provide a delicious crispy texture once roasted.
    • 1 pound carrots – Peeled and cut into 1-inch pieces; carrots add a natural sweetness and vibrant color to the dish.
    • 3 tablespoons olive oil – This healthy fat helps to caramelize the vegetables, enhancing the flavors. You can also substitute with avocado oil for a different taste.
    • Salt and pepper – To taste; basic seasonings that enhance the overall flavor of the dish.
    • 1 teaspoon garlic powder – Optional; adds a lovely aromatic flavor that complements the vegetables.
    • Fresh herbs (e.g., thyme or rosemary) – Optional but recommended; these can add an earthy aroma and depth of flavor.

    This recipe is inherently vegan, gluten-free, and low in calories, making it suitable for a wide audience looking for healthy dinner recipes.

    Dietary Substitutions to Customize Your Tasty Roasted Brussels Sprouts And Carrots

    While the above ingredients create a delicious base for this recipe, there are numerous ways to customize it according to dietary preferences or ingredient availability:

    • Oil Alternatives: If you want to reduce calories further, consider using vegetable broth for sautéing the vegetables instead of olive oil. For a creamier texture, you can experiment with coconut oil.

    • Spice Variations: Feel free to experiment with spices to suit your taste. Smoked paprika, cumin, or even curry powder can bring unique profiles to the dish while still being healthy.

    • Sweeteners: If you’d like to add a hint of sweetness, consider drizzling a tablespoon of honey or maple syrup before roasting. Both options keep the recipe vegan if using maple syrup.

    • Veggie Mix: To add more color and nutrition, incorporate other vegetables such as bell peppers, sweet potatoes, or zucchini, depending on what you have at hand.

    By playing with substitutions, you can tailor this dish to meet various dietary needs, making it not just a simple recipe but a canvas for creativity.

    How to Prepare the Perfect Tasty Roasted Brussels Sprouts And Carrots: Step-by-Step Guide

    Roasting is one of the easiest and most rewarding cooking techniques, especially for Brussels sprouts and carrots. Follow this step-by-step guide to create perfectly Tasty Roasted Brussels Sprouts And Carrots:

    1. Preheat the Oven: Set your oven to 425°F (220°C). A hot oven ensures that the vegetables get beautifully caramelized, enhancing their natural sweetness.

    2. Prep Your Vegetables: Rinse and trim the Brussels sprouts, cutting them in half. Peel the carrots and chop them into 1-inch pieces. The even size helps them cook uniformly.

    3. Mix Ingredients: In a large bowl, combine the prepared Brussels sprouts and carrots. Drizzle with olive oil, and sprinkle salt, pepper, and garlic powder. Toss well to ensure everything is evenly coated in the oil and seasonings.

    4. Spread on Baking Sheet: Line a baking sheet with parchment paper for easy cleanup. Spread the seasoned vegetables in a single layer, making sure they have some space between them. Overcrowding can lead to steaming rather than roasting.

    5. Roast the Vegetables: Place the baking sheet in the preheated oven and roast for about 25-30 minutes. Halfway through cooking, stir the vegetables to promote even browning.

    6. Check for Doneness: The Brussels sprouts should be crispy on the outside and tender on the inside, while the carrots should caramelize beautifully. A fork should easily pierce through the vegetables.

    7. Add Fresh Herbs: If using fresh herbs, sprinkle them over the vegetables during the last five minutes of roasting for a fresh flavor boost.

    8. Serve Hot: Once roasted to perfection, remove the baking sheet from the oven. Transfer the vegetables to a serving dish and enjoy them warm as a side or over a bed of greens for a nutritious main course.

    This recipe for Tasty Roasted Brussels Sprouts And Carrots is designed to be adaptable, making it an ideal choice for those exploring healthy dinner recipes. You can customize it based on your preferences and target dietary needs, ensuring everyone at the table finds something they love.

    Mastering Tasty Roasted Brussels Sprouts And Carrots: Advanced Tips and Variations

    To elevate your Tasty Roasted Brussels Sprouts And Carrots, consider these advanced tips and variations:

    • Experiment with Different Ovens: If you have a convection setting, use it! Convection ovens circulate air, leading to a perfectly roasted texture. Keep in mind to reduce the roasting time by a few minutes.

    • Add a Crunch: For an added layer of texture, toss in some chopped nuts like almonds or walnuts during the last five minutes of roasting. They will get golden and crunchy, complementing the softness of the vegetables beautifully.

    • Cheesy Variation: If dairy is not a concern for you, sprinkle some grated Parmesan cheese in the last few minutes of roasting. The cheese will melt and form a delicious crust.

    • Serving Suggestions: Try serving the roasted vegetables over a quinoa or brown rice base. You could also toss them with a light vinaigrette or a squeeze of fresh lemon juice right before serving for an extra flavor boost.

    • Layer with Proteins: Consider pairing this dish with grilled chicken, tofu, or tempeh for a complete meal. The roasted vegetables will complement the protein wonderfully, enhancing both flavor and nutrition.

    These tips not only guarantee a delicious outcome but also allow you to personalize the dish to your taste preferences, making it a standout choice among healthy dinner recipes.

    How to Store Tasty Roasted Brussels Sprouts And Carrots: Best Practices

    If you’ve made a large batch of Tasty Roasted Brussels Sprouts And Carrots, proper storage will help maintain their taste and texture:

    • Refrigerating Leftovers: Allow the vegetables to cool completely before placing them in an airtight container. They can be stored in the refrigerator for up to 3-4 days. To reheat, simply warm them in the oven at 350°F (175°C) for about 10-15 minutes for the best results.

    • Freezing: If you want to keep these vegetables longer, freezing is a viable option. Spread the cooled roasted veggies on a baking sheet in a single layer and freeze them for a couple of hours. Once solid, transfer them to a freezer-safe bag, squeezing out as much air as possible. They can last for up to 3 months in the freezer.

    • Reheating Frozen Vegetables: When you’re ready to eat, there’s no need to thaw. Simply bake from frozen at 400°F (200°C) for 20-25 minutes, or until hot and crisp.

    Remember, proper storage practices not only extend the life of your meal but also maintain its flavor, ensuring that you enjoy this delightful dish even on your busiest nights.

    Nutritional Value of Tasty Roasted Brussels Sprouts And Carrots

    Understanding the nutritional value of Tasty Roasted Brussels Sprouts And Carrots can help you appreciate this dish even more. Here’s a breakdown of the approximate nutritional values per serving, assuming the recipe serves four:

    • Calories: 135
    • Total Fat: 6g
    • Saturated Fat: 1g
    • Sodium: 150mg
    • Total Carbohydrates: 20g
    • Dietary Fiber: 6g
    • Sugars: 5g
    • Protein: 4g
    • Vitamin A: 130% DV
    • Vitamin C: 150% DV
    • Calcium: 4% DV
    • Iron: 6% DV

    As you can see, this dish is not only low in calories but also rich in vitamins, particularly vitamins A and C, which are essential for maintaining a strong immune system and healthy skin. The fiber content helps with digestion and contributes to feeling full, which is beneficial for those looking to maintain a healthy weight.

    By incorporating Tasty Roasted Brussels Sprouts And Carrots into your meal plans, you’re making a nutritious choice that aligns seamlessly with your healthy dinner recipes goal.

    FAQs: Frequently Asked Questions About Tasty Roasted Brussels Sprouts And Carrots

    Can I make this recipe ahead of time?

    Yes, you can prepare the Brussels sprouts and carrots ahead of time by cleaning and cutting them. Store them in the refrigerator until you’re ready to roast them.

    Can I use frozen Brussels sprouts or carrots?

    While fresh vegetables yield better texture when roasted, you can use frozen ones. However, their water content is higher, which may result in a softer texture.

    What can I serve with Tasty Roasted Brussels Sprouts And Carrots?

    This dish pairs well with a variety of proteins, including grilled chicken, fish, or plant-based options like tofu or lentils.

    How can I enhance the flavor?

    Consider adding spices like cumin or herbs such as basil and dill for a flavor boost. You can also drizzle balsamic glaze or lemon juice before serving for extra zing.

    What if I don’t have olive oil?

    Feel free to substitute with other oils like avocado oil or coconut oil. Butter also works if you’re not avoiding dairy.

    By addressing these common questions, you can prepare your Tasty Roasted Brussels Sprouts And Carrots with confidence, ensuring an enjoyable and satisfying meal experience.

    In conclusion, this recipe showcases the beauty of simplicity and healthfulness, aligning perfectly with your quest for healthy dinner recipes. Happy cooking!

  • Tasty Greek Broccoli Salad

    Tasty Greek Broccoli Salad

    Tasty Greek Broccoli Salad: A Tropical Delight

    Introduction to Tasty Greek Broccoli Salad

    Are you on the lookout for healthy recipes that are not only nutritious but also easy to prepare? Look no further than the Tasty Greek Broccoli Salad, a vibrant dish that marries the earthy crunch of broccoli with the zesty tang of Greek flavors. This salad is incredibly simple to make, making it a perfect choice for busy parents, diet-conscious individuals, and anyone aiming to add a burst of health to their meals.

    This delightful recipe is vegan and gluten-free, catering to various dietary needs while ensuring you don’t have to compromise on flavor. The Tasty Greek Broccoli Salad is packed with vitamins, minerals, and antioxidants, offering benefits such as improved digestion, enhanced immunity, and a boost of energy—all in one colorful bowl. The combination of fresh ingredients creates a burst of flavor that is both refreshing and satisfying.

    Not only is this salad a perfect side dish for family dinners or potlucks, but it also shines as a standalone meal ideal for lunch boxes or quick snacks. So whether you’re a student, working professional, or simply someone who loves delicious food, this easy-to-make salad will inspire you to embrace healthy eating without sacrificing taste. Ready to dive in? Let’s create a dish that’s not just good for you, but truly tantalizing!

    Benefits and Advantages of Tasty Greek Broccoli Salad

    This remarkable Tasty Greek Broccoli Salad serves up multiple benefits, making it a standout choice among healthy recipes. First and foremost, the preparation is uncomplicated. With just a handful of ingredients and minimal cooking involved, you can have this salad ready in no time. This is especially beneficial for busy individuals or parents juggling various responsibilities.

    Moreover, the salad is rich in health benefits. Broccoli is a nutritional powerhouse, loaded with vitamins C and K, as well as fiber and folate. These nutrients contribute to improved heart health, better digestion, and reduced inflammation. Pairing broccoli with other ingredients such as olives, tomatoes, and a tangy dressing not only enhances the flavor but also boosts the nutritional profile of your meal.

    In addition to these health advantages, this Tasty Greek Broccoli Salad is versatile. It can be altered to suit various dietary restrictions, such as vegan, gluten-free, and low-calorie diets. You can easily swap ingredients for whatever suits your taste preferences or available ingredients, showcasing its adaptability.

    One of the most compelling aspects of this salad is its flavor. The combination of crunchy broccoli, savory olives, and fresh herbs creates a medley of tastes that is energizing. Whether you’re preparing it for a family gathering, to please picky eaters, or as a nutritious meal prep option, this dish ticks all the boxes. Don’t miss out on this exceptional recipe that offers ease, health benefits, and versatility in one delicious package.

    Ingredients Overview

    Essential Ingredients for Tasty Greek Broccoli Salad

    For the Tasty Greek Broccoli Salad, you will need the following essential ingredients:

    • 2 cups of fresh broccoli florets (health benefits: rich in vitamins K and C)
    • 1 cup of cherry tomatoes, halved (adds a burst of vitamins A and C)
    • 1 cup of Kalamata olives, pitted and sliced (provides healthy fats and antioxidants)
    • 1/2 cup of red onion, finely chopped (adds flavor and nutrients)
    • 1/2 cup of feta cheese, crumbled (optional for non-vegan diets; delivers calcium and protein)
    • 1/4 cup of fresh parsley, chopped (aids digestion and adds freshness)
    • 1/4 cup of olive oil (source of healthy fats)
    • 2 tablespoons of red wine vinegar (adds acidity and tang)
    • 1 teaspoon of dried oregano (provides flavor and health benefits)
    • Salt and pepper to taste (adjust to preference)

    Diet-conscious options:
    Vegan: Omit feta cheese or replace it with a vegan cheese alternative.
    Gluten-free: This recipe is inherently gluten-free, just ensure any substitutes used are also gluten-free.

    Dietary Substitutions to Customize Your Tasty Greek Broccoli Salad

    One of the appealing aspects of Tasty Greek Broccoli Salad is its adaptability. Here are some suggested substitutions you can make to cater to different dietary needs or ingredient availability:

    • For a protein boost: Add chickpeas or grilled chicken for non-vegetarian versions.
    • Nut-free option: If you’re allergic to peanuts or tree nuts, simply skip any nuts or nut-based substitutions.
    • Low-carb option: Replace cherry tomatoes with sliced cucumbers for a lighter, low-carb portrayal while still retaining texture.
    • Dairy-free: Use plant-based feta cheese or nutritional yeast to maintain a cheesy flavor without dairy.

    These substitutions allow you to personalize the salad to suit your taste preferences or dietary requirements without sacrificing flavor or nutrition. The versatility of this dish makes it a fantastic addition to your repertoire of healthy recipes.

    How to Prepare the Perfect Tasty Greek Broccoli Salad: Step-by-Step Guide

    Creating the Tasty Greek Broccoli Salad is an effort-free process that even beginner cooks can master. Follow this easy step-by-step guide to ensure a delightful dish that you can serve with pride!

    1. Prepare the Broccoli: Rinse the fresh broccoli florets under cold water. Trim any stem pieces to ensure only the freshest parts enter the salad. Then, cut them into bite-sized pieces for easy eating.

    2. Chop the Vegetables: Next, halve the cherry tomatoes and finely chop the red onion. A sharp knife will make this task quicker and safer. If you’re keen on a milder onion flavor, soak the chopped red onion in cold water for a few minutes before adding to your salad.

    3. Slice the Olives: Using a cutting board, slice the Kalamata olives. These savory additions will introduce healthy fats and support digestive health.

    4. Make the Dressing: In a small bowl, whisk together the olive oil, red wine vinegar, dried oregano, salt, and pepper. This dressing is where much of the flavor will come from, so mix it well until it’s emulsified and creamy.

    5. Combine Ingredients: In a large mixing bowl, add the broccoli, chopped tomatoes, sliced olives, chopped red onion, and parsley. Gently toss the ingredients together until they’re evenly dispersed.

    6. Add Cheese: If you are including feta cheese, sprinkle it on top of the tossed salad, then gently fold it into the mixture, ensuring there’s a bit of cheese in every bite.

    7. Dress the Salad: Pour the prepared dressing over the salad, and toss gently until everything is well-coated. Take care to not overmix so that the vegetables don’t get bruised.

    8. Taste and Adjust: Sample a spoonful of your salad. Adjust salt and pepper as necessary, perhaps adding more lemon juice or vinegar to boost the acidity if desired.

    9. Chill: For the best flavor experience, let the salad chill in the fridge for at least 15 minutes before serving. The resting time allows the flavors to meld beautifully.

    10. Serving: Spoon the Tasty Greek Broccoli Salad into serving bowls. You can garnish it with additional parsley or an extra sprinkle of feta for visual appeal.

    With this step-by-step guide, making a Tasty Greek Broccoli Salad will be hassle-free. Each step has suggestions for customization, allowing everyone to enjoy this dish aligned with their dietary needs.

    Mastering Tasty Greek Broccoli Salad: Advanced Tips and Variations

    To elevate your Tasty Greek Broccoli Salad experience, consider these advanced tips and variations:

    • Incorporate Grains: You can add cooked quinoa or farro for a heartier version that’s still nutritious. These grains provide additional fiber and energy, perfect for post-workout meals.

    • Flavor Infusions: Infuse your dressing with fresh garlic or lemon zest for a richer flavor. Just a small amount can go a long way in enhancing the freshness of your salad.

    • Herb Variations: Experiment with different herbs like dill or basil to give the salad a distinct regional flair. Each herb brings a unique set of flavors.

    • Add Seasonal Veggies: If you have vegetables available in your garden or market, consider adding additional seasonal veggies like bell peppers, cucumbers, or even avocado for a creamy texture.

    • Presentation Matters: Present your Tasty Greek Broccoli Salad in a beautiful serving bowl and consider garnishing it with toasted pine nuts for an added crunch and flavor.

    • Make it a Meal: To transform this salad into a main dish, add grilled chicken or baked tofu, which provides high protein content to keep you satisfied longer.

    By incorporating these advanced tips and variations, you will master the Tasty Greek Broccoli Salad, allowing you to impress family and friends while also maintaining a selection of healthy recipes.

    How to Store Tasty Greek Broccoli Salad: Best Practices

    Proper storage is vital to keep your Tasty Greek Broccoli Salad fresh and delicious. Here are the best practices:

    • Refrigeration: Store any leftover salad in an airtight container in the refrigerator. It should stay fresh for about 3 to 5 days. Keep in mind that the broccoli might become slightly softer over time, so it’s best enjoyed fresh.

    • Freezing: While freezing is not recommended for salads with fresh vegetables that contains dressing, you can freeze components like the dressing separately. This allows you to make a fresh salad later by just adding new veggies.

    • Reheating: If you want to enjoy the salad warm, it’s best to cook or bake it lightly instead of microwaving, as this can lead to a mushy texture. Sauté it briefly in a non-stick pan if you prefer warm salads.

    By understanding these storage tips, you can enjoy your Tasty Greek Broccoli Salad over several days without compromising its taste or quality, aligning it with the principles of healthy recipes.

    Nutritional Value of Tasty Greek Broccoli Salad

    The nutritional profile of the Tasty Greek Broccoli Salad is impressive and makes it a standout option among healthy recipes. Below is an approximate breakdown of the nutrients per serving, assuming 4 servings:

    • Calories: 180
    • Total Fat: 12g
    • Saturated Fat: 3g
    • Cholesterol: 10mg (if feta is included)
    • Sodium: 320mg
    • Total Carbohydrates: 15g
    • Dietary Fiber: 4g
    • Sugars: 2g
    • Protein: 5g

    Vitamins and Minerals:
    – Vitamin C: Provides over 100% Daily Value (DV) from broccoli and tomatoes.
    – Vitamin K: Essential for bone health, abundant in broccoli.
    – Calcium: Present from feta cheese, managing bone health.
    – Iron: Vital for red blood cell formation, in part from broccoli.

    This nutritious salad gives you a healthy dose of vital nutrients while keeping calorie counts manageable. These factors will appeal to diet-conscious individuals who seek to boost their health without sacrificing satisfaction.

    FAQs: Frequently Asked Questions About Tasty Greek Broccoli Salad

    Here are some frequently asked questions about Tasty Greek Broccoli Salad, along with clear and concise answers:

    Q: Can I make Tasty Greek Broccoli Salad ahead of time?
    A: Yes! This salad can be prepared up to two days in advance. Just hold off on adding the dressing until you’re ready to serve to keep ingredients fresh and crunchy.

    Q: Is it possible to customize the salad for specific dietary needs?
    A: Absolutely! You can easily make it vegan by omitting the cheese or using a dairy-free alternative. For gluten-free needs, ensure all products used, including dressings and toppings, are certified gluten-free.

    Q: How long should I let it chill before serving?
    A: A chill time of at least 15 minutes allows flavors to meld beautifully, but you can also store it overnight for even more enhanced flavors.

    Q: Can I use frozen broccoli instead of fresh?
    A: While fresh broccoli is recommended for optimal texture, you can use frozen broccoli. Just be sure to thaw and drain it thoroughly before adding it to the salad.

    Q: What are some good additions to the salad?
    A: You could include roasted red peppers, chickpeas, or even small pasta shapes. This enhances both taste and texture, making the salad more filling.

    This FAQ section aims to address common questions, providing clarity and actionable information. Whether you are looking for substitutions, storage tips, or modifications, you’ll find helpful insights focused on maintaining the integrity of this Tasty Greek Broccoli Salad and aligning it with healthy recipes.


    By following the detailed instructions and tips found in this extensive guide to Tasty Greek Broccoli Salad, you will inspire others to embrace healthy eating without sacrificing flavor. With its multitude of customization options and straightforward preparation, this salad truly stands out as a versatile addition to your collection of healthy recipes. Now, gather your ingredients, follow these steps, and enjoy a delicious, nutritious meal that will have everyone asking for seconds!

  • Easy Broccoli Salad With Honey Mustard Dressing

    Easy Broccoli Salad With Honey Mustard Dressing

    Easy Broccoli Salad With Honey Mustard Dressing: A Tropical Delight

    Introduction to Easy Broccoli Salad With Honey Mustard Dressing

    Looking for a delightful addition to your meal prep repertoire that perfectly embodies the essence of healthy recipes? Look no further than our Easy Broccoli Salad With Honey Mustard Dressing! This vibrant salad not only boasts an array of colors and textures but also packs a nutritional punch. Perfect for busy weeknights, this dish offers a quick and satisfying way to enjoy cruciferous vegetables.

    Packed with antioxidants from fresh broccoli and enriched with the sweetness of honey, this salad is both healthy and delicious. Whether you’re a savvy home cook, a student on the go, or a health-conscious parent seeking a tasty meal option for your family, this recipe caters to varied dietary needs. Not only is it vegan-friendly (with a simple adjustment for the dressing) and gluten-free, but it is also a low-calorie option that won’t compromise your dietary goals.

    The combination of crisp broccoli, crunchy nuts, and a creamy yet tangy honey mustard dressing elevates this salad from ordinary to extraordinary. The best part? It requires minimal preparation yet results in a dish that will impress your guests. So, gather your ingredients and discover this refreshing, flavorful recipe that can brighten your plate and nourish your body.

    Benefits and Advantages of Easy Broccoli Salad With Honey Mustard Dressing

    One of the standout features of our Easy Broccoli Salad With Honey Mustard Dressing is its remarkable ease of preparation. Specifically designed for individuals with busy lifestyles, the salad comes together in under 20 minutes. This means that you can enjoy a gourmet-quality dish even on the tightest of schedules. Whatever your situation—be it a last-minute family gathering or a simple weeknight dinner—this salad is your go-to option.

    From a health perspective, broccoli is an excellent source of vitamins C and K, fiber, and various antioxidants, making it a star component of many healthy recipes. This salad utilizes the vegetable’s natural flavors while ensuring maximum nutrition. The honey mustard dressing, made with wholesome ingredients, compliments the broccoli without overwhelming it, offering a perfect balance between sweetness and tanginess.

    Additionally, this nutritious dish is versatile. It can serve as a light meal, a filling side, or even as a potluck favorite. Given that it can be easily adapted for various dietary preferences, including vegan or gluten-free diets, this salad is universally appealing. You can customize it with other ingredients like fresh fruits or different nuts to keep it interesting and aligned with your health goals.

    Ultimately, our Easy Broccoli Salad With Honey Mustard Dressing not only provides intricate flavors and textures but also brings a plethora of benefits that make it a must-try for anyone interested in nourishing their body while enjoying delicious meals.

    Ingredients Overview

    Essential Ingredients for Easy Broccoli Salad With Honey Mustard Dressing

    To prepare this delicious salad, you’ll need a few essential ingredients. Here’s the detailed list along with precise measurements:

    • Fresh Broccoli: 2 cups, washed and chopped (provides essential vitamins and fiber)
    • Red Bell Pepper: 1, diced (adds color and vitamin C)
    • Carrots: ½ cup, shredded (for sweetness and crunch)
    • Red Onion: ¼ cup, finely chopped (adds flavor and aroma)
    • Sunflower Seeds: ¼ cup (healthy fats and crunch)
    • Dried Cranberries: ½ cup (provides a sweet-tart flavor)
    • Olive Oil: 2 tablespoons (heart-healthy fat)
    • Dijon Mustard: 1 tablespoon (for a zesty twist)
    • Honey: 2 tablespoons (natural sweetness; can be substituted with agave syrup for vegan diets)
    • Apple Cider Vinegar: 2 tablespoons (adds acidity and depth of flavor)

    This combination of ingredients not only creates a colorful and appetizing salad but also ensures a nutritious meal that aligns with various dietary restrictions including vegan and gluten-free options.

    Dietary Substitutions to Customize Your Easy Broccoli Salad With Honey Mustard Dressing

    Adapting recipes to meet your dietary needs is easy with this Easy Broccoli Salad. Here are some substitutions to cater to different preferences:

    • Nut-Free Option: If you have nut allergies, you can easily replace sunflower seeds with pumpkin seeds or omit them entirely.
    • Vegan Alternative: If you’d like to transform the dressing into a fully vegan option, substitute honey with maple syrup or agave nectar.
    • Low-Carb Version: To make the salad lower in carbohydrates, consider replacing dried cranberries with fresh berries or skipping the dried fruits altogether.
    • Adding Protein: Feel free to toss in grilled chicken, chickpeas, or edamame for an extra protein boost, making the salad more filling.

    These substitutions ensure that your Easy Broccoli Salad With Honey Mustard Dressing not only meets diverse dietary needs but also maintains its delicious flavor profile.

    How to Prepare the Perfect Easy Broccoli Salad With Honey Mustard Dressing: Step-by-Step Guide

    Preparing the Easy Broccoli Salad With Honey Mustard Dressing is a breeze! Follow these straightforward steps for a delicious, nourishing dish.

    1. Prepare the Base: Start by washing your fresh broccoli thoroughly. Chop it into bite-sized florets and set aside in a large mixing bowl.
    2. Add Vegetables: Next, add the diced red bell pepper, shredded carrots, and finely chopped red onion to the bowl. These colorful veggies will provide a variety of nutrients and textures.
    3. Incorporate Seeds and Fruits: Toss in the sunflower seeds for crunch and the dried cranberries for a touch of sweetness. These elements not only enhance the flavor but also add nutritional benefits.
    4. Make the Dressing: In a separate mixing bowl, combine 2 tablespoons of olive oil, 1 tablespoon of Dijon mustard, 2 tablespoons of honey (or maple syrup for a vegan option), and 2 tablespoons of apple cider vinegar. Whisk well until the mixture emulsifies into a creamy dressing.
    5. Combine Ingredients: Once the dressing is ready, pour it over the salad ingredients. Using salad tongs, gently toss everything together until evenly coated. This step is crucial, as the dressing should lightly dress the salad without overpowering it.
    6. Refrigerate for Flavor: For best results, consider refrigerating the salad for at least 15-30 minutes to allow the flavors to meld. This step enhances the taste and makes it even more refreshing.
    7. Serve and Enjoy: Finally, serve the salad cold or at room temperature. Garnish with a sprinkle of additional sunflower seeds or fresh herbs if desired.

    And there you have it! A simple yet delightful Easy Broccoli Salad With Honey Mustard Dressing that is a standout example of healthy recipes.

    Mastering Easy Broccoli Salad With Honey Mustard Dressing: Advanced Tips and Variations

    While the basic recipe is already fantastic, there are a few advanced tips and variations to elevate your Easy Broccoli Salad With Honey Mustard Dressing:

    • Add Fresh Herbs: Introducing fresh herbs like parsley, cilantro, or mint can bring a vibrant flavor to your salad. They not only enhance the taste but also add a fresh aroma.
    • Citrus Twist: Consider adding a splash of lemon or lime juice to the dressing. This can brighten the overall flavor profile, making it even more refreshing.
    • Additional Ingredients: If you enjoy experimenting, consider adding chopped apples, pears, or even feta cheese for a tangy kick. These additions can provide interesting contrasts and deepen the flavor complexity.
    • Meal Prep Delight: This salad stores wonderfully, making it an ideal candidate for meal prep. Simply double the recipe and store in airtight containers for an easy grab-and-go lunch throughout the week.

    With these tips and variations, you can customize and perfect your Easy Broccoli Salad With Honey Mustard Dressing to match your taste preferences or dietary needs!

    How to Store Easy Broccoli Salad With Honey Mustard Dressing: Best Practices

    Proper storage of the Easy Broccoli Salad With Honey Mustard Dressing ensures that you can enjoy its great taste and fresh ingredients for a longer period. Here are some best practices:

    • Refrigeration: Store the salad in an airtight container in the refrigerator. When properly sealed, it can last for about 3-5 days. Be sure to give it a gentle toss before serving to redistribute the dressing.
    • Short-term Storage: If you plan to enjoy the salad within a couple of days, no need to separate the dressing. However, if you want to keep it for a longer duration, consider storing the dressing separately and combining it just before serving.
    • Freezing: Although it’s not recommended to freeze this salad due to the texture of the broccoli, you can freeze any leftovers of the dressing in small ice cube trays. Just thaw as needed for a quick addition to new salads later.

    By following these storage tips, you can enjoy your vibrant Easy Broccoli Salad With Honey Mustard Dressing, ensuring it remains a delicious part of your meals throughout the week!

    Nutritional Value of Easy Broccoli Salad With Honey Mustard Dressing

    Understanding the nutritional value of dishes is essential for maintaining a balanced diet, especially when looking for healthy recipes. Here’s the breakdown of the nutrition obtained from one serving of this Easy Broccoli Salad With Honey Mustard Dressing, assuming 6 servings in total:

    • Calories: 150
    • Total Fat: 8g (of which only 1g is saturated fat)
    • Cholesterol: 0mg
    • Sodium: 150mg
    • Total Carbohydrates: 15g
    • Dietary Fiber: 3g
    • Sugars: 6g (includes natural sugar from honey and dried cranberries)
    • Protein: 4g

    This salad is low in calories yet packed with essential vitamins and minerals, making it an excellent option for those who are health-conscious or on specialized diets. It provides 200% of your daily value of Vitamin C per serving and is rich in dietary fiber, contributing to improved digestion and overall gut health.

    FAQs: Frequently Asked Questions About Easy Broccoli Salad With Honey Mustard Dressing

    Can I make this salad in advance?

    Absolutely! This salad can be prepared a day in advance. Just keep it refrigerated in an airtight container. If you’re concerned about sogginess, consider storing the dressing separately and mixing it in just before serving.

    Is this salad keto-friendly?

    If you’re following a ketogenic diet, you can modify the recipe to reduce the carb count. Try using fewer dried cranberries or substituting them for fresh berries. This will keep the sugar content low.

    How can I make this salad vegan-friendly?

    To make this Easy Broccoli Salad vegan, simply replace the honey in the dressing with maple syrup or agave nectar. Rest assured, it will still provide that delightful sweetness!

    What other vegetables can I add to this salad?

    Feel free to experiment with various vegetables! Options like cauliflower, snap peas, or celery can complement the existing ingredients and add additional crunch and flavor.

    Can I substitute broccoli with another vegetable?

    While broccoli is the star of this recipe, you can use other vegetables such as cauliflower or even Brussels sprouts. Just remember to adjust the cooking or preparation time accordingly.

    Creating a crisp and refreshing Easy Broccoli Salad With Honey Mustard Dressing is a blend of nutritious ingredients and effortless preparation. Packed with health benefits and flexible in terms of dietary considerations, this recipe is bound to impress a variety of palates. Give it a try, and enjoy the vibrant explosion of flavors in your kitchen!

  • Quick Broccoli Salad With Italian Dressing

    Quick Broccoli Salad With Italian Dressing

    Quick Broccoli Salad With Italian Dressing: A Tropical Delight

    Introduction to Quick Broccoli Salad With Italian Dressing

    If you’re searching for a scrumptious yet quick dish to brighten your meals, look no further. Our Quick Broccoli Salad With Italian Dressing encapsulates everything you love about vibrant, healthy recipes. This salad not only offers a delightful crunch but is also packed with essential nutrients, making it the ideal dish for health-conscious individuals and busy families alike.

    Creating a perfect blend of refreshing broccoli, colorful vegetables, and a zesty Italian dressing takes minimal time, allowing you to whip up a wholesome dish even on the busiest of days. Whether you’re a student juggling classes, a busy parent managing family meals, or someone looking to indulge in a guilt-free delicacy, this salad promises to be your go-to recipe.

    What makes this dish exceptionally remarkable is its versatility. It’s a vibrant salad that caters to various dietary preferences: whether you’re vegan, gluten-free, or just looking for low-calorie options, this recipe accommodates them all. Additionally, you can easily customize the ingredients based on your taste preferences or what you have on hand. Why not treat yourself and your loved ones to this bright, flavorful salad today? Your journey into healthy cooking starts here!

    Benefits and Advantages of Quick Broccoli Salad With Italian Dressing

    The Quick Broccoli Salad With Italian Dressing doesn’t just taste great; it offers a myriad of health benefits that can fit seamlessly into any lifestyle. First and foremost, broccoli is a nutritional powerhouse. It is rich in dietary fiber, vitamins C and K, and several antioxidants. Eating broccoli regularly can support heart health, enhance digestion, and provide an anti-inflammatory effect, all of which contribute to overall well-being.

    One of the standout features of this recipe is its ease of preparation. With just a handful of ingredients combined in under 15 minutes, this dish is perfect for those enthusiastic home cooks and busy professionals. From preparing a quick lunch to serving as a side dish during family gatherings, its straightforward recipe makes it an inviting choice for anyone.

    This salad stands out for its adaptability as well. If you’re vegan, simply substitute the cheese with nutritional yeast or avocado to keep the creaminess while avoiding animal products. For those who are gluten-sensitive, the Italian dressing can be easily prepared gluten-free, while someone on a low-calorie diet can reduce the oil for a lighter dressing.

    Moreover, as the seasonal vegetables change, you can modify the recipe through substitutions, ensuring you’re always using the freshest ingredients. All these factors combined make this broccoli salad a reliable part of your repertoire of healthy recipes.

    Ingredients Overview

    Essential Ingredients for Quick Broccoli Salad With Italian Dressing

    To create a delightful Quick Broccoli Salad With Italian Dressing, here’s what you will need:

    • Fresh Broccoli Florets (3 cups): This will be the base of your salad, offering a crunchy texture and plenty of nutrients.
    • Cherry Tomatoes (1 cup, halved): These provide sweetness and vibrant color.
    • Red Onion (1 small, thinly sliced): For a hint of sharpness that balances the flavors.
    • Bell Pepper (1 cup, diced): You may use any color for extra vibrancy; they are high in vitamins A and C.
    • Olives (½ cup, pitted and sliced): Adds a briny contrast to the salad. Choose green for a milder taste or black for a stronger flavor.
    • Italian Dressing (½ cup): You can use store-bought or homemade. A simple blend of olive oil, vinegar, and Italian herbs will suffice.
    • Feta Cheese (optional, ½ cup): Adds creaminess and saltiness. If you’re vegan, consider using a plant-based alternative or simply omit this for a lighter salad.

    Diet-Conscious Note: All ingredients above are naturally gluten-free, and the entire recipe can be made vegan by omitting the feta cheese.

    Dietary Substitutions to Customize Your Quick Broccoli Salad With Italian Dressing

    Adaptations are key in making this Quick Broccoli Salad With Italian Dressing cater to various dietary needs or preferences:

    • Broccoli: If you’re looking for a milder flavor, you can substitute broccoli with cauliflower or Brussels sprouts. Lightly steam these options to retain some crunch.
    • Cherry Tomatoes: Substitute with diced cucumber or carrots for a different texture and taste profile while maintaining freshness.
    • Onion: For those who prefer milder flavors, green onions or shallots can take the place of red onion.
    • Olives: Feel free to swap olives for toasted nuts like almonds or walnuts for an extra crunch.
    • Vegan Option: To veganize the dressing, replace regular vinegar with apple cider vinegar and add a bit of agave syrup for sweetness.
    • Gluten-Free: Ensure the dressing is made with gluten-free ingredients, as many store-bought options may contain gluten.

    These substitutions not only maintain the delicious flavor and appeal of the salad but also ensure that everyone at the table can enjoy it!

    How to Prepare the Perfect Quick Broccoli Salad With Italian Dressing: Step-by-Step Guide

    Are you ready to create the Quick Broccoli Salad With Italian Dressing? Follow these simple steps to achieve a stunning salad that’s not only nutritious but visually appealing.

    1. Prepare the Base:
    2. Begin by washing 3 cups of fresh broccoli florets thoroughly under running water. Pat them dry with a clean kitchen towel. Cut the florets into bite-sized pieces to facilitate easy consumption.

    3. Chop the Vegetables:

    4. Next, chop 1 cup of cherry tomatoes in half. Thinly slice 1 small red onion and dice 1 cup of bell peppers of your choice (red, yellow, or green). Ensure they’re uniformly sized for consistent flavor throughout.

    5. Prepare the Olives:

    6. Take ½ cup of pitted olives and slice them into circles. Choose green or black olives based on your preference. Set aside for later incorporation into the salad.

    7. Combine the Vegetables:

    8. In a large mixing bowl, combine the prepared broccoli, cherry tomatoes, red onion, bell pepper, and olives. Gently toss with your hands to mix these vibrant vegetables, ensuring an even distribution of colors.

    9. Make the Dressing:

    10. In a small bowl, whisk together ½ cup of Italian dressing. For a homemade option, blend ⅓ cup of extra-virgin olive oil, 2 tablespoons of red wine vinegar, and your favorite Italian seasonings (like oregano, basil, and garlic powder).

    11. Dress the Salad:

    12. Pour the Italian dressing over the mixed vegetables in the large bowl. Toss gently to coat all the ingredients evenly. This is where the magic happens—the dressing adds flavor and brings all the ingredients together.

    13. Add Cheese (Optional):

    14. If you’re including feta cheese, crumble ½ cup of it over the salad. Again, if you’re vegan, skip this step or use a dairy-free alternative.

    15. Garnish:

    16. For an extra touch, sprinkle some fresh herbs like parsley or basil on top just before serving. This not only enhances the beauty but elevates the flavor profile as well.

    17. Taste and Adjust:

    18. Before serving, taste the salad. If necessary, adjust seasoning by adding a pinch of salt and pepper to enhance the flavors.

    19. Chill:

    20. For best results, let the salad chill in the fridge for about 10-20 minutes. Chilling allows the flavors to meld beautifully.

    21. Serve:

    22. Finally, transfer the salad to a serving dish or bowl. Garnish with additional herbs if desired, and serve it to your guests or save it for a delicious healthy meal later in the week.

    By following these simple steps, you’re guaranteed to create a flavorful, refreshing salad that can become a star attraction at any meal.

    Mastering Quick Broccoli Salad With Italian Dressing: Advanced Tips and Variations

    To truly master the Quick Broccoli Salad With Italian Dressing, here are some pro tips and different variations you can explore to tailor this dish to your preferences:

    • Experiment with Dressings: While the Italian dressing is delicious, feel free to try other dressings like balsamic vinaigrette or lemon-tahini for a distinctive flavor twist. Each dressing can dramatically change the salad’s taste profile.

    • Incorporate Nuts and Seeds: Adding toasted pine nuts, sunflower seeds, or pumpkin seeds can enhance the salad’s texture and provide added nutrition. Nuts also contribute healthy fats and proteins.

    • Include Grains: For a heartier version, consider adding cooked grains such as quinoa, farro, or bulgur wheat. They will make the salad more filling and provide additional fiber.

    • Add Protein: To convert this salad into a complete meal, toss in some cooked chickpeas, kidney beans, or grilled chicken. These additions boost the protein content, making it perfect for athletes or anyone needing extra sustenance.

    • Seasonal Variations: As new fruits and vegetables come into season, feel free to incorporate them. For instance, diced apples or pears can add sweetness during the fall, while fresh strawberries can create a refreshingly summery twist.

    • Presentation: Make your salad visually appealing by layering ingredients in a clear bowl. This will showcase the range of colors and textures, capturing the attention of your guests.

    By integrating these advanced tips and variations, you’ll not only create a unique dish but also explore new flavor profiles and textures, enriching your culinary journey with healthy recipes.

    How to Store Quick Broccoli Salad With Italian Dressing: Best Practices

    Storing your Quick Broccoli Salad With Italian Dressing properly ensures that it remains refreshing and delicious for days to come. Here’s how to do it:

    • Refrigeration: After preparing your salad, store it in an airtight container. Ensure the salad is completely chilled before sealing the container. It will keep well in the fridge for up to 3 days. However, for best flavor and texture, try to consume it within the first day or two.

    • Freezing: Freezing this salad isn’t recommended due to the change in texture of the vegetables once thawed. However, if you have leftover dressing, you can freeze it in ice cube trays for future use.

    • Separation of Ingredients: If you anticipate having leftovers, consider storing the dressing separately. Combine the vegetables, and store them in a different container. This will prevent the broccoli from becoming soggy, maintaining the salad’s crunchy texture.

    By following these best practices for storing the salad, you can enjoy healthy recipes without compromising on taste or freshness.

    Nutritional Value of Quick Broccoli Salad With Italian Dressing

    Understanding the nutritional value of your meals is essential for maintaining a balanced diet. Here is a breakdown of the nutritional profile for one serving (about 1 cup) of the Quick Broccoli Salad With Italian Dressing:

    • Calories: Approximately 150-200 calories, depending on the amount of dressing used and whether cheese is included.
    • Protein: 4-6 grams, with the potential to increase when additional beans or chicken are added.
    • Fat: 8-12 grams, primarily from the olive oil and the optional cheese.
    • Carbohydrates: 10-15 grams, mostly from the vegetables.
    • Fiber: 4-5 grams, thanks to the broccoli and other vegetables, promoting digestive health.
    • Vitamins and Minerals: Rich in Vitamin C, Vitamin A, and Vitamin K, along with essential minerals like potassium and calcium.

    This Quick Broccoli Salad With Italian Dressing not only supports healthy living but also aligns well with diverse dietary preferences. By being mindful of the ingredients, you can adjust portions or opt for more substantial additions to meet your particular nutritional requirements.

    FAQs: Frequently Asked Questions About Quick Broccoli Salad With Italian Dressing

    Here are some common questions people often ask about the Quick Broccoli Salad With Italian Dressing, along with clear and concise answers:

    1. Can I make this salad ahead of time?
    2. Yes! You can prepare the salad a few hours in advance. Just store it in the refrigerator in an airtight container until serving. For optimal freshness, consider adding the dressing just before serving.

    3. Can I substitute the broccoli with another vegetable?

    4. Absolutely! Cauliflower, Brussels sprouts, or even cooked green beans can work well. Just ensure the substituted vegetable maintains a similar texture and flavor profile.

    5. Is this salad suitable for meal prep?

    6. Yes, it’s perfect for meal prep! Portion it out into individual containers for easy grabbing throughout the week. As mentioned, store the dressing separately if you want to keep the salad crisp.

    7. How can I make this salad even healthier?

    8. Consider adding extra veggies like spinach or kale, or incorporating superfoods like quinoa or legumes for added protein and fiber.

    9. What can I use instead of Italian dressing?

    10. A homemade vinaigrette made from balsamic vinegar, olive oil, and your choice of herbs can serve as a delicious alternative.

    11. Can I add fruits to this salad?

    12. Yes! Adding fruits like sliced apples, oranges, or berries can provide contrasting flavors and sweetness to balance the salad.

    By addressing these FAQs, you can anticipate and resolve common concerns about preparing and enjoying the Quick Broccoli Salad With Italian Dressing, ensuring a stress-free cooking experience.


    With its vibrant colors, numerous health benefits, and impressive versatility, the Quick Broccoli Salad With Italian Dressing is a must-try recipe. Whether you’re a seasoned cook or a culinary novice, this dish will enhance your collection of healthy recipes. Embrace the joy of cooking and treat your loved ones to delicious, nutritious meals that are simple to prepare. Happy cooking!

  • IM Officially Addicted To This Citrus Celery Salad

    IM Officially Addicted To This Citrus Celery Salad

    I’M Officially Addicted To This Citrus Celery Salad!: A Tropical Delight

    Introduction to I’M Officially Addicted To This Citrus Celery Salad!

    Spring is the perfect time to refresh your palate and embrace the vibrant flavors of the season with light, nutritious meals. One recipe that truly embodies the essence of spring meals is the Citrus Celery Salad. This delightful dish combines the crispness of celery with the zing of citrus, creating a fantastic medley that is not only refreshing but also packed with health benefits.

    Imagine the bright colors and fresh flavors all coming together in one bowl! This salad is ideal for busy parents looking for a quick, healthy meal, diet-conscious individuals wanting a low-calorie option, as well as food enthusiasts eager to explore new culinary creations. Whether enjoyed as a standalone dish, a side for your favorite protein, or packed for a picnic, this Citrus Celery Salad is versatile enough to fit any occasion.

    What makes this salad even better? It’s simple to make, entirely vegan, and gluten-free, catering to various dietary needs. If you’re in search of a quick recipe that’s as nutritious as it is delicious, look no further. This dish will elevate your spring meals and leave you feeling energized and satisfied!

    Benefits and Advantages of I’M Officially Addicted To This Citrus Celery Salad!

    One of the most appealing aspects of this Citrus Celery Salad is its ease of preparation. Whether you’re a novice home cook or an experienced chef, this recipe allows you to whip up a healthy meal in no time. You can combine all ingredients in a matter of minutes, making it one of the most convenient options for those busy weeknights or spring picnics.

    From a health perspective, this salad is brimming with advantages. Celery is known for its hydrating properties and is low in calories while being rich in fibers, helping promote digestive health. Citrus fruits, such as oranges and grapefruits, add a dose of Vitamin C and antioxidants, which are essential for immunity during the changing seasons. As a bonus, they lend a burst of flavor that brightens the otherwise earthy notes of celery.

    Moreover, this salad is highly adaptable to suit various dietary preferences. It is not only vegan and gluten-free but also low-calorie and can be made without added sugars for those watching their intake. This makes it a fantastic option for seniors looking for easy-to-digest options, students needing healthy meals on a budget, and newlyweds aiming to impress with a simple yet exquisite dish.

    In summary, the Citrus Celery Salad stands out as a nutritious choice for your spring meals, ensuring you enjoy delightful flavors while nourishing your body.

    Ingredients Overview

    Essential Ingredients for I’M Officially Addicted To This Citrus Celery Salad!

    Here’s a detailed list of the fresh ingredients you’ll need to create this vibrant Citrus Celery Salad:

    • 4 cups of celery, chopped (about 4 large stalks): Adds crunch and nutrition.
    • 1 large orange, segmented (or 2 small oranges): Provides sweetness and vitamin C.
    • 1 pink grapefruit, segmented: Grants a tangy punch and is rich in antioxidants.
    • 1/4 cup of red onion, thinly sliced: Offers depth and sharpness to the flavors.
    • 1/2 cup of walnuts, chopped (optional): For healthy omega-3 fatty acids and crunch.
    • 2 tablespoons of olive oil: Enhances flavor and contributes healthy fats.
    • Juice of 1 lemon: Brightens the dish and adds a refreshing tang.
    • Salt and pepper (to taste): To season and elevate the flavors.

    Vegan & Gluten-Free Options: Every ingredient is vegan and gluten-free, making it suitable for those with dietary restrictions. The addition of walnuts is optional, so you can easily make a nut-free version if needed.

    Dietary Substitutions to Customize Your I’M Officially Addicted To This Citrus Celery Salad!

    If you’re looking for alternatives to customize your Citrus Celery Salad, here are some suggested substitutions:

    1. For Nuts: If you have a nut allergy or prefer not to include walnuts, sunflower seeds or pumpkin seeds can provide a similar crunch without compromising nutrition.
    2. For Oil: Replace olive oil with avocado oil for a different flavor profile while retaining healthy fats. Additionally, you can use vegetable broth for a lower-calorie, oil-free version.
    3. For Sweetness: If you desire extra sweetness, consider adding a drizzle of agave syrup or maple syrup. Conversely, for a less sweet version, you can exclude citrus and use diced apples for a subtle taste.
    4. For Citrus: Feel free to mix and match citrus fruits based on your preference—meyer lemons or blood oranges can add unique flavors.
    5. For Additional Flavor: Try adding herbs like cilantro or mint to enhance the freshness of the salad.

    With these substitutions, you can tailor the Citrus Celery Salad to fit any dietary need while retaining its refreshing essence.

    How to Prepare the Perfect I’M Officially Addicted To This Citrus Celery Salad!: Step-by-Step Guide

    Creating the Citrus Celery Salad is a breeze. Follow these detailed steps to prepare a dish that will surely become one of your favorite spring meals:

    1. Prepare the Base: Start by washing and chopping 4 cups of celery into bite-sized pieces. This crunchy vegetable forms the foundation of your salad.

    2. Segment the Citrus: Next, take 1 large orange and 1 pink grapefruit. Carefully peel and segment them, extracting the juicy flesh while discarding any pith. You can achieve this by slicing between the membranes of the fruit. This method ensures maximum juice and flavor.

    3. Slice the Red Onions: Thinly slice 1/4 cup of red onion. If you prefer a milder flavor, soak the slices in cold water for about 10 minutes before adding them to the salad to reduce sharpness.

    4. Mix the Ingredients: In a large bowl, combine the chopped celery, orange segments, grapefruit segments, and red onion slices. Toss them gently to ensure even distribution of flavors.

    5. Add the Walnuts: If you choose to include nuts, add 1/2 cup of chopped walnuts to the mixture. Not only do they boost the nutritional value, but they also add a delightful crunch.

    6. Prepare the Dressing: In a separate small bowl, whisk together 2 tablespoons of olive oil, the juice of 1 lemon, and salt and pepper to taste. This dressing will enhance the flavors of all the ingredients.

    7. Dress the Salad: Drizzle the dressing over the salad mixture and toss everything gently until well-coated. Make sure every ingredient is mingling harmoniously.

    8. Chill and Serve: For an even more refreshing experience, chill the salad in the refrigerator for about 30 minutes before serving. This allows the flavors to meld beautifully.

    This Citrus Celery Salad can be customized for various dietary needs, making it a perfect option for spring meals that cater to everyone at the table.

    Mastering I’M Officially Addicted To This Citrus Celery Salad!: Advanced Tips and Variations

    To elevate your Citrus Celery Salad experience further, consider these advanced tips and delicious variations:

    1. Herbs Galore: Experiment with fresh herbs according to your tastes. Basil, cilantro, or dill can add a burst of freshness that will make your salad unforgettable.

    2. Spice it Up: Add a pinch of red pepper flakes for a touch of heat or sprinkle some smoked paprika for a deeper flavor.

    3. Cheese Options: If dairy is not an issue for you, consider crumbling some feta or goat cheese on top for a creamy contrast.

    4. Different Salads: Try using different bases like mixed greens or quinoa to create a heartier version of the salad. Combining grains with vegetables offers unique textures and flavors.

    5. Tropical Twist: To add more tropical flavors, include diced mango or pineapple, which will enhance the salad’s sweetness and provide a fresh, vibrant note.

    By incorporating these tips, you can create a personalized version of the Citrus Celery Salad that will impress guests at any gathering or meal.

    How to Store I’M Officially Addicted To This Citrus Celery Salad!: Best Practices

    Properly storing your Citrus Celery Salad can help retain its freshness and flavor. Here are the best practices for storing your delicious dish:

    • Refrigeration: If you have leftover salad, store it in an airtight container in the refrigerator. It’s best consumed within 2-3 days for optimal freshness and crunchiness. To keep the salad from wilting, store the dressing separately until you’re ready to serve.

    • Freezing: While it’s not recommended to freeze this salad due to its water content, you can freeze the precut ingredients (like celery or citrus) separately in freezer-safe bags. However, salad preparation is best enjoyed fresh.

    • Reheating: If you prefer to enjoy the salad warm—though it’s generally served cold—briefly toss it in a pan over low heat. Add a bit of olive oil to enhance flavor.

    Implementing these storage methods will ensure your Citrus Celery Salad stays fresh and delicious for your spring meals.

    Nutritional Value of I’M Officially Addicted To This Citrus Celery Salad!

    Understanding the nutritional value of your meals can help you make healthier choices. Here’s a breakdown of the nutrients found in the Citrus Celery Salad:

    • Calories: Approximately 180 calories per serving, depending on the addition of walnuts and cheese.
    • Fat: About 12g (with walnuts) primarily from healthy fats found in olive oil and walnuts—great for heart health.
    • Carbohydrates: Roughly 18g, mainly from the natural sugars in fruits and veggies.
    • Fiber: Around 5g, which promotes digestive health and helps keep you feeling full.
    • Protein: Approximately 3g, mainly from walnuts and celery, making it less than a traditional protein-rich meal but excellent for a light side dish.
    • Vitamins: Contains high levels of Vitamin C, calcium, and potassium—all beneficial for immune function and overall health.

    Including this salad in your rotation of spring meals provides refreshing nutrition that complements a well-rounded diet.

    FAQs: Frequently Asked Questions About I’M Officially Addicted To This Citrus Celery Salad!

    Q: Can I make this salad ahead of time?
    A: Yes! However, it’s best when eaten fresh. If you need to prepare it ahead, store the dressing separately from the salad ingredients to prevent wilting.

    Q: Is this salad good for meal prep?
    A: Absolutely! Just remember to keep the dressing separate until you’re ready to serve for the best texture.

    Q: Can I eat this salad if I’m on a low-carb diet?
    A: While it contains some carbohydrates mainly from fruits, you can make it lower in carbs by reducing or eliminating the citrus portions and focusing on the celery.

    Q: What can I substitute for citrus if allergic?
    A: You can use apple cider vinegar mixed with a little honey for sweetness, or opt for mild, crunchy vegetables like cucumbers and bell peppers to replace citrus.

    Q: How can I make this salad more filling?
    A: Adding protein sources such as chickpeas, grilled chicken, or tofu can turn this salad into a hearty meal.

    By addressing these common questions, you’ll feel more equipped to prepare and enjoy your Citrus Celery Salad. It’s time to be officially addicted to this refreshing delight!

  • IM Obsessed With This Easy Hot Cross Bun Hack

    IM Obsessed With This Easy Hot Cross Bun Hack

    I’M Obsessed With This Easy Hot Cross Bun Hack!: A Tropical Delight

    Introduction to I’M Obsessed With This Easy Hot Cross Bun Hack!

    Looking for a delightful twist on a classic recipe? Look no further! This Easy Hot Cross Bun Hack is redefining breakfast ideas for busy mornings and festive gatherings. These tropical-inspired hot cross buns are not only mouthwatering but also incredibly simple and versatile. By using a few basic ingredients and incorporating banana and coconut, you can create a treat that’s naturally sweet, nourishing, and appealing to a diverse audience, including vegans and those who are gluten intolerant.

    This hot cross bun hack is perfect for home cooks, busy parents, students, and even senior citizens who enjoy a gentle culinary adventure. Prepare these delightful buns ahead of time and store them for a quick breakfast or snack fit for any occasion. They are great for indulging while still maintaining a healthy lifestyle. You’ll love the delightful aroma that fills your kitchen, making breakfast time a joyful occasion. So, roll up your sleeves and get ready to embark on this exciting baking journey – your taste buds will thank you!

    Benefits and Advantages of I’M Obsessed With This Easy Hot Cross Bun Hack!

    Why choose this Easy Hot Cross Bun Hack over traditional recipes? First and foremost, its ease of preparation is a game-changer. With a straightforward approach that requires minimal time and effort, even novice bakers can jump right in. This recipe simplifies the classic hot cross bun approach by minimizing rising times and intricate kneading—a true boon for busy families and individuals on tight schedules.

    Health benefits abound too! This recipe can be easily adapted for various dietary needs. By swapping traditional ingredients like dairy and refined flour for healthier alternatives, you can create a delicious yet wholesome treat. For instance, using whole wheat flour instead of all-purpose flour adds fiber, while incorporating ripe bananas provides natural sweetness and moisture without added sugars.

    Additionally, these hot cross buns cater to various dietary preferences. Are you a vegan? Use plant-based milk and egg replacements. Gluten-free? A simple flour substitution will maintain the flavors while accommodating those limitations. Impress your friends and family by offering a rich culinary experience that won’t hinder anyone’s dietary choices.

    In short, this easy hot cross bun hack offers time-saving benefits, tremendous versatility for various diets, and nutritional advantages without sacrificing taste. So if you’re seeking innovative breakfast ideas that fit into different lifestyles while still delivering on flavor, this is the recipe you must try!

    Ingredients Overview

    Essential Ingredients for I’M Obsessed With This Easy Hot Cross Bun Hack!

    To create these luscious hot cross buns, gather the following ingredients:

    • 3 cups whole wheat flour (or gluten-free flour blend)
    • 1 cup ripe bananas, mashed (about 2 medium bananas)
    • 1/2 cup coconut milk (or any plant-based milk)
    • 1/4 cup coconut sugar (or any sweetener of choice)
    • 1/4 cup melted coconut oil (or any neutral oil)
    • 2 teaspoons active dry yeast
    • 1 teaspoon vanilla extract
    • 1 teaspoon cinnamon
    • 1/2 teaspoon nutmeg
    • 1/4 teaspoon salt
    • 1/2 cup raisins or currants (optional)
    • For the cross: ½ cup flour and water (to make a paste)
    • Optional glaze: 2 tablespoons maple syrup mixed with a splash of water for a shiny finish

    Dietary Options:
    Vegan: Ensure your plant-based milk and sweeteners are vegan-friendly.
    Gluten-Free: Use a gluten-free flour blend.
    Low-Calorie: Substitute coconut sugar with a calorie-free sweetener.

    These ingredients come together to create soft, fluffy, and flavorful buns that will brighten anyone’s breakfast table!

    Dietary Substitutions to Customize Your I’M Obsessed With This Easy Hot Cross Bun Hack!

    Not everyone has the same pantry stocked! Here are some wonderful substitutions to make this hot cross bun hack adaptable to your needs:

    • Flour Swap:
    • If you don’t have whole wheat flour on hand, consider using spelt flour or oat flour for a unique texture. Alternatively, for a gluten-free option, a blend of almond flour and coconut flour can deliver excellent results.

    • Sweeteners:

    • Coconut sugar can be replaced with brown sugar or even honey (for non-vegans) if you prefer a more traditional sweetness. Just keep in mind the sweetness levels may vary, so adjust according to your taste preferences.

    • Liquid Component:

    • If you don’t have coconut milk, almond milk, or soy milk can work just as well. You may even use regular milk for non-vegans.

    • Fruit Variations:

    • Besides raisins or currants, feel free to experiment with dried cranberries, apricots, or even chocolate chips for a fun twist! For those who want to boost the nutritional profile, consider adding in fresh fruit like blueberries before baking.

    These easy substitutions not only make the recipe accessible but also allow everyone to enjoy these delightful hot cross buns regardless of dietary restrictions.

    How to Prepare the Perfect I’M Obsessed With This Easy Hot Cross Bun Hack!: Step-by-Step Guide

    Ready to dive in and create your tropical hot cross buns? Follow these simple steps:

    1. Prep the Yeast:
    2. In a small bowl, combine 1/4 cup of warm coconut milk and 2 teaspoons of active dry yeast. Let it sit for about 5-10 minutes until it becomes frothy. This indicates that the yeast is activated.

    3. Mix Dry Ingredients:

    4. In a large mixing bowl, whisk together 3 cups of whole wheat flour, 1/4 cup of coconut sugar, 1 teaspoon of cinnamon, 1/2 teaspoon of nutmeg, and 1/4 teaspoon of salt until well combined.

    5. Combine Wet Ingredients:

    6. In a separate bowl, mash the ripe bananas until smooth. Add the melted coconut oil, vanilla extract, and the activated yeast mixture. Stir until everything is well combined.

    7. Combine Wet and Dry:

    8. Gradually add the wet mixture into the dry ingredients. Stir gently until a soft dough forms. If the dough is too sticky, you can add a little more flour, especially if you’re adjusting it for gluten-free.

    9. Add the Fruit:

    10. Gently fold in the raisins or currants into the dough, ensuring they are evenly distributed.

    11. Knead the Dough:

    12. On a lightly floured surface, knead the dough for about 5 minutes until it’s smooth and elastic. If using gluten-free flour, kneading may take less time.

    13. Let the Dough Rise:

    14. Lightly grease a mixing bowl and place the dough inside. Cover the bowl with a clean cloth and let it rise in a warm area for about 1 hour, or until it doubles in size.

    15. Shape the Buns:

    16. Once the dough has risen, punch it down to release the air. Divide the dough into 12 equal pieces, rolling each into a smooth ball. Place them onto a baking tray lined with parchment paper, close enough that they touch slightly.

    17. Prepare the Cross:

    18. In a small bowl, mix 1/2 cup of flour with enough water to create a thick paste. Use a piping bag or a zip-lock bag with a small hole cut in the corner to pipe crosses onto the top of the buns.

    19. Second Rise:

      • Cover the shaped buns with a towel and let them rise again for about 30 minutes until they puff up.
    20. Bake:

      • Preheat your oven to 375°F (190°C). Bake the buns for 25-30 minutes or until they turn golden brown.
    21. Glaze (Optional):

      • While buns are still hot, brush them with a mixture of maple syrup and water for a glossy finish.
    22. Serve and Enjoy:

      • Let the buns cool slightly before serving warm. Enjoy them straight out of the oven or with your favorite spread!

    This step-by-step guide ensures clear actions throughout the process, making it easy for anyone to replicate this delightful recipe!

    Mastering I’M Obsessed With This Easy Hot Cross Bun Hack!: Advanced Tips and Variations

    To take your breakfast ideas to the next level, consider these advanced tips and variations for your hot cross bun hack:

    • Flavored Buns:
    • Infuse your dough with additional spices like cardamom, or throw in some citrus zest for a refreshing twist. Orange or lemon zest can brighten your buns and enhance their flavor.

    • Chocolate Chip Version:

    • A chocolate chip addition can create an indulgent treat perfect for dessert or a special breakfast occasion. Replace the dried fruits with semi-sweet chocolate chips.

    • Herbed Version:

    • For a savory take, add fresh herbs like rosemary or thyme to the dough before baking. Pair them with a savory spread or cheese for a unique dish.

    • Freezing Tips:

    • If you decide to make a bulk batch, hot cross buns freeze remarkably well! Allow them to cool completely before wrapping them tightly in plastic wrap and placing them in a freezer bag. They can last up to 3 months!

    By embracing these tips and variations, you can enhance and personalize your hot cross bun experience, keeping your breakfast ideas fresh and exciting. The possibilities are truly endless!

    How to Store I’M Obsessed With This Easy Hot Cross Bun Hack!: Best Practices

    To keep your hot cross buns fresh and delicious for days, follow these best practices for storage:

    • Room Temperature:
    • Store the cooled buns in an airtight container at room temperature for up to 3 days. This helps them maintain their softness.

    • Refrigeration:

    • While refrigeration can prolong the shelf life, it may cause the buns to dry out. If you must refrigerate, place them in an airtight container and consume them within 5-7 days.

    • Freezing:

    • For long-term storage, freeze the buns after they cool completely. Place them in a plastic freezer bag or wrap them tightly in aluminum foil. They can be reheated directly from frozen; just pop them in the oven for a few minutes until warmed through.

    • Reheating:

    • For the best results, reheat buns in the oven at 350°F (175°C) for about 5-10 minutes. You can also use a microwave for 10-15 seconds, but keep in mind that it may make them slightly chewy.

    By keeping these storage methods in mind, you can enjoy your delightful hot cross buns anytime, making them a go-to option for breakfast ideas that satisfy the whole family.

    Nutritional Value of I’M Obsessed With This Easy Hot Cross Bun Hack!

    Understanding the nutritional profile of your meals is crucial, especially when looking for balanced breakfast ideas. Here’s a general overview of the nutritional value of one hot cross bun made with the listed ingredients:

    • Calories: Approximately 150-180 calories (depending on the ingredients used)
    • Carbohydrates: 28g
    • Protein: 3g
    • Fat: 4g
    • Fiber: 3g
    • Sugars: 5g

    Health Benefits:
    – Whole wheat flour provides a good amount of dietary fiber which aids in digestion and supports heart health.
    – Bananas enhance the bun’s natural sweetness and contribute potassium, an essential nutrient for maintaining healthy blood pressure levels.
    – Coconut milk and oil offer healthy fats which can be beneficial for maintaining energy levels.

    Feel free to adapt and customize the recipe to meet your dietary needs, and don’t forget to track the nutritional elements to ensure you’re munching wisely!

    FAQs: Frequently Asked Questions About I’M Obsessed With This Easy Hot Cross Bun Hack!

    Can I make these hot cross buns ahead of time?

    Yes, absolutely! You can prepare the dough in advance and store it in the refrigerator overnight. Allow it to rise at room temperature before baking the next morning.

    How do I make these buns gluten-free?

    Replace the whole wheat flour with a high-quality gluten-free flour blend. Ensure the blend contains xanthan gum to help achieve the right texture.

    Can I substitute the bananas?

    Yes, if bananas are unavailable or if you’re looking for a different flavor, applesauce or pumpkin puree make great substitutes while still keeping the batter moist.

    Are these hot cross buns suitable for freezing?

    Yes! Allow them to cool completely before wrapping them tightly and storing them in the freezer. They can last for up to three months in the freezer.

    What should I pair with these hot cross buns?

    These buns are delightful on their own, but for a rich experience, try them with your favorite spreads, such as almond butter, coconut cream, or even homemade jams.

    How can I make these buns more festive?

    Consider adding dried fruits like candied orange peel or pistachios to the dough for a holiday twist. You can also glaze them with a mixture of powdered sugar and almond milk for a sweeter finish.

    This Easy Hot Cross Bun Hack will quickly become a go-to recipe in your household, offering delightful flavors and serving as a heartwarming addition to your breakfast ideas. Embrace your passion for baking and enjoy the scrumptious rewards that come from making these tropical-inspired treats! Happy baking!

  • My GrandmaS Secret Recipe For The Best Celery Salad

    My GrandmaS Secret Recipe For The Best Celery Salad

    My Grandma’S Secret Recipe For The Best Celery Salad!: A Tropical Delight

    Introduction to My Grandma’S Secret Recipe For The Best Celery Salad!

    Welcome to the culinary journey of discovering “My Grandma’s Secret Recipe for the Best Celery Salad!” This delightful dish isn’t just a side—it’s a refreshing treat that combines vibrant flavors and crunchy textures, making it an ideal addition to any meal. Imagine a salad that brings together crisp celery, juicy cucumbers, and a medley of herbs and spices—the perfect cucumber salad for a hot day.

    This recipe stands out for its simplicity and health benefits. Not only is it easy to prepare, but it’s also packed with vitamins, minerals, and fiber. Whether you’re a busy parent looking for a quick lunch, a health-conscious student, or a newlywed eager to impress your partner, this salad has something for everyone. Moreover, it’s vegan and gluten-free, making it suitable for a wide array of dietary preferences.

    With just a bit of preparation, you can have a refreshing dish that bursts with flavor and is perfect for any occasion—from picnics to potlucks. So, get ready to discover how to make the best celery salad that will not only satisfy your taste buds but also promote your overall well-being.

    Benefits and Advantages of My Grandma’S Secret Recipe For The Best Celery Salad!

    This recipe for celery salad offers a wealth of benefits that go beyond its delicious taste. Here are a few reasons why you should whip up this delightful dish:

    1. Ease of Preparation: One of the most significant advantages of this recipe is how easy it is to prepare. With minimal ingredients, you can have a refreshing dish ready in just a matter of minutes. It’s a perfect solution for those busy weeknights or impromptu gatherings where you want to serve something healthy without spending hours in the kitchen.

    2. Health Benefits: The star ingredient—celery—is low in calories but high in essential vitamins and minerals like vitamin K, folate, and potassium. Combined with cucumbers, which are hydrating and rich in antioxidants, and fresh herbs, this salad becomes a nutrient powerhouse. It’s an excellent choice for anyone looking to increase their vegetable intake or maintain a healthy lifestyle.

    3. Dietary Versatility: This salad speaks to a diverse audience. It is not only vegan and gluten-free but can also easily be made low-carb. Whether you are a busy professional trying to eat healthier while on the go or a student managing dietary restrictions, this celery salad meets multiple needs.

    4. Customizable Options: The beauty of this recipe is its adaptability. You can mix and match ingredients based on your preferences or what you have on hand. Whether you want to add a handful of nuts for extra crunch or a splash of your favorite dressing, the possibilities are endless.

    5. Refreshing Addition: As temperatures rise, nothing beats a light, refreshing salad. This celery salad is not only delicious but also revitalizing, making it a fantastic choice for summer barbecues, brunches, or even as a light starter for dinner parties.

    By adopting this recipe into your cooking repertoire, you not only get to enjoy a delicious meal but also enhance your health and culinary skills.

    Ingredients Overview

    Essential Ingredients for My Grandma’S Secret Recipe For The Best Celery Salad!

    • 4 cups celery, chopped – Celery is low in calories and high in fiber, making it a great base for any salad.
    • 1 cucumber, diced – Cucumbers add a refreshing crunch and hydration.
    • 1 cup cherry tomatoes, halved – Tomatoes add sweetness and essential vitamins.
    • 1/4 cup red onion, finely chopped – Red onions provide a zesty flavor and beneficial nutrients.
    • 1/4 cup fresh parsley, chopped – This herb adds flavor and is packed with antioxidants.
    • 2 tablespoons olive oil – A healthy fat that enhances flavor and promotes heart health.
    • 1 tablespoon lemon juice – Fresh lemon juice brightens the dish and provides vitamin C.
    • Salt and pepper, to taste – Simple seasonings that enhance the natural flavors of the vegetables.

    Dietary Note: All ingredients listed above are vegan, gluten-free, and low in calories, making this a perfect choice for health-conscious eaters.

    Dietary Substitutions to Customize Your My Grandma’S Secret Recipe For The Best Celery Salad!

    Feel free to get creative with this salad! Here are some substitutions and additions you might consider based on dietary needs or ingredient availability:

    1. Proteins: Add chickpeas or black beans for a protein boost.
    2. Nuts & Seeds: Toss in sunflower seeds or walnuts for additional crunch and healthy fats.
    3. Alternative Dressings: Swap olive oil for avocado oil or a favorite vinaigrette if you prefer a different flavor profile.
    4. Herbs: Experiment with basil or mint instead of parsley for a different twist.
    5. Spicy Kick: If you like some heat, consider adding diced jalapeños or a dash of hot sauce.

    The customizable nature of this recipe allows you to enjoy a fresh, satisfying dish that meets your taste preferences while accommodating different dietary requirements.

    How to Prepare the Perfect My Grandma’S Secret Recipe For The Best Celery Salad!: Step-by-Step Guide

    Follow these easy steps to create “My Grandma’s Secret Recipe for the Best Celery Salad!” You’ll find that with each step, you’ll be one step closer to enjoying this delightful cucumber salad.

    1. Prepare the Base:
    2. Start by thoroughly washing all vegetables. The freshness of your ingredients is key, so ensure your celery and cucumbers are fresh and unblemished.

    3. Chop the Celery:

    4. Using a sharp knife, chop the celery into bite-sized pieces. Aim for about 1/2-inch thickness for perfect crunch.

    5. Dice the Cucumber:

    6. Slice the cucumber in half lengthwise and scoop out the seeds if they are particularly watery. Then, slice again into half-moons.

    7. Halve the Cherry Tomatoes:

    8. Cut the cherry tomatoes in half, which will help their juices mix well with the other ingredients.

    9. Finely Chop Red Onion:

    10. Take a small onion and chop it finely. If you find the flavor too strong, soak the diced onions in cold water for 10 minutes to mellow the taste, then drain.

    11. Chop Fresh Parsley:

    12. Using a knife, carefully chop the parsley until it is finely minced.

    13. Combine Vegetables:

    14. In a large mixing bowl, combine the chopped celery, cucumber, cherry tomatoes, red onion, and parsley.

    15. Make the Dressing:

    16. In a separate small bowl, whisk together the olive oil and lemon juice. Add salt and pepper to taste. This dressing complements the cucumber salad beautifully and enlivens its flavors.

    17. Dress the Salad:

    18. Pour the dressing over the salad mixture. Gently toss everything together until well combined. Be careful not to over-mix; the goal is for the vegetables to remain crisp.

    19. Let it Rest:

      • Allow the salad to sit for about 10-15 minutes before serving. This lets all the flavors blend beautifully.
    20. Serve and Enjoy:

      • Transfer the salad to a serving dish. Garnish with additional parsley or even some feta cheese if desired.

    By following these steps, you will create a colorful and wholesome cucumber salad that appeals to both the eye and the palate!

    Mastering My Grandma’S Secret Recipe For The Best Celery Salad!: Advanced Tips and Variations

    To truly make “My Grandma’s Secret Recipe for the Best Celery Salad!” your own, consider these advanced tips and variations:

    1. Flavorful Additions:
    2. For an extra depth of flavor, try adding a tablespoon of Dijon mustard into the dressing. This will add a tangy punch that complements the fresh vegetables.

    3. Herb Infusion:

    4. Infuse the olive oil by letting it sit with herbs like rosemary or thyme for a couple of hours. This imbues a lovely fragrance into your salad.

    5. Fruit Addition:

    6. Add diced apples or pears for a sweet contrast to the crisp vegetables. Their subtle sweetness can elevate the dish.

    7. Experiment with Textures:

    8. Roasted nuts can be included for a crunchy contrast; consider almonds or pistachios for an interesting flavor profile.

    9. Make it a Meal:

    10. Transform this refreshing salad into a complete meal by serving it over a bed of quinoa or alongside grilled chicken or shrimp.

    11. Layering Flavors:

    12. Let the salad chill in the refrigerator prior to serving. The cold will enhance the freshness and allow the flavors to marry beautifully.

    Using these advanced tips, you can tweak and modify your salad to match the season or your mood, making it versatile and always exciting.

    How to Store My Grandma’S Secret Recipe For The Best Celery Salad!: Best Practices

    To keep your celery salad fresh and enjoyable, proper storage techniques are essential. Here are some best practices:

    1. Refrigeration:
    2. Store leftover cucumber salad in an airtight container in the refrigerator. It will hold up well for about 2-3 days.

    3. Avoiding Sliminess:

    4. If you determine that you have extra liquid pooling at the bottom of the container after a day, simply drain it before serving again. This practice helps maintain the salad’s crispiness.

    5. Freezing:

    6. Freezing is not recommended for this salad due to its fresh ingredients, which may lose their texture. However, you may freeze the dressing separately for later use.

    7. Serving Cold:

    8. This salad is best enjoyed cold. Serve it directly from the refrigerator to enhance the refreshing qualities of the veggies.

    Follow these storage tips to maximize freshness and enjoy your celery salad for days to come!

    Nutritional Value of My Grandma’S Secret Recipe For The Best Celery Salad!

    Understanding the nutritional value of “My Grandma’s Secret Recipe for the Best Celery Salad!” is essential, especially for diet-conscious individuals. Here’s a breakdown of what you can typically expect in a serving:

    • Calories: Approximately 100 calories
    • Protein: 2 grams
    • Carbohydrates: 12 grams
    • Dietary Fiber: 4 grams
    • Fats: 5 grams (largely from olive oil, a healthy fat source)

    Vitamins and Minerals:

    • Vitamin K: Essential for bone health
    • Vitamin C: Boosts immunity and skin health
    • Potassium: Important for heart health and muscle function
    • Folate: Supports healthy cell division and is essential for pregnant women

    This salad is nutrient-dense while being low in calories, making it a fantastic option for those looking to maintain their weight or increase their vegetable intake.

    FAQs: Frequently Asked Questions About My Grandma’S Secret Recipe For The Best Celery Salad!

    1. Can I make the salad a day ahead?

    Yes, you can prepare this cucumber salad a day in advance. Just make sure to store it in the refrigerator in an airtight container.

    2. What can I use instead of celery?

    If celery isn’t your thing, you can replace it with jicama or even shredded carrots for a different crunch.

    3. Is this salad suitable for meal prep?

    Absolutely! This salad holds well in the refrigerator for a few days and is perfect for meal prepping.

    4. How can I make this salad spicier?

    Consider adding some diced jalapeños or a sprinkle of red pepper flakes to give your salad a kick.

    5. What’s the best way to serve this salad?

    This celery salad is best served cold. Pair it as a refreshing side with grilled meats, sandwiches, or enjoy it on its own for a light snack.

    6. Can I add cheese to this salad?

    Yes! Adding feta or goat cheese can enhance the flavor and texture, making this cucumber salad even more delicious.

    Now that you’re equipped with all the knowledge to make “My Grandma’s Secret Recipe for the Best Celery Salad!” a hit in your kitchen, it’s time to roll up your sleeves and get cooking. This refreshing salad is not only a delight to make but also a pleasure to eat. Enjoy the flavors and the health benefits that come along with it!

  • I CanT Stop Making This Traditional Potato Salad

    I CanT Stop Making This Traditional Potato Salad

    I Can’t Stop Making This Traditional Potato Salad: A Tropical Delight

    Introduction to I Can’t Stop Making This Traditional Potato Salad

    Are you looking for scrumptious recipe ideas that are equally easy to make and health-conscious? Say hello to my favorite culinary masterpiece: Traditional Potato Salad! This delightful blend of creamy potatoes, crunchy veggies, and zesty dressing creates the perfect dish for any occasion. Whether you’re throwing a summer barbecue, enjoying a picnic, or simply craving a hearty side, this potato salad is the answer.

    What makes this potato salad a must-try? First off, it’s incredibly simple to prepare with minimal ingredients. Perfect for busy parents or students, you can whip it up in no time. As a bonus, the recipe is versatile and can easily cater to dietary needs, making it vegan, gluten-free, or low-calorie with just a few tweaks. The fresh veggies provide a nutrient boost, while the creamy dressing contributes to a satisfying mouthfeel without unnecessary guilt.

    It’s the kind of recipe that invites personalization, encouraging you to experiment with flavors and ingredients. So grab your apron and let’s dive into this traditional potato salad recipe that’s destined to become a staple in your kitchen!

    Benefits and Advantages of I Can’t Stop Making This Traditional Potato Salad

    This Traditional Potato Salad recipe comes with a myriad of benefits, making it an indispensable addition to your recipe ideas repertoire. Let’s break down why this delicious dish stands out.

    1. Easy Preparation:
    The simplicity of this potato salad is one of its most appealing attributes. All you need are some easily accessible ingredients and a little time to prepare. Most cooking novices can master this dish after just one try, making it an ideal choice for busy parents or students who are learning the ropes of the kitchen.

    2. Health Benefits:
    Potatoes are often underrated in the healthy eating world. They are high in vitamins C and B6, potassium, and dietary fiber, which contribute to overall health and wellbeing. When paired with fresh vegetables such as celery, onions, and bell peppers, this salad transforms into a compact nutritional powerhouse that complements any meal.

    3. Dietary Versatility:
    This potato salad recipe is not just limited to one dietary preference. By utilizing variations in the ingredients and dressings, you can easily create a vegan, gluten-free, or low-calorie option. Whether you’re preparing for a crowd with diverse eating habits or just want to personalize your dish, the adaptable nature of this recipe is its crowning glory.

    4. Ideal for Meal Prep:
    Make this potato salad at the beginning of the week and enjoy it for lunch, dinner, or as a snack throughout. It stores well in the refrigerator and tastes even better the next day, allowing the flavors to meld beautifully.

    5. Crowdsourcing Favorites:
    Whether you’re attending a potluck or hosting a family gathering, this traditional potato salad never fails to be a hit with everyone, including food enthusiasts and newlyweds. Therefore, you can confidently serve it at any occasion, knowing that it will be well-received.

    With numerous benefits, this Traditional Potato Salad is more than just a dish; it transforms mundane moments into delightful culinary experiences.

    Ingredients Overview

    Essential Ingredients for I Can’t Stop Making This Traditional Potato Salad

    Here’s a detailed breakdown of the essential ingredients you’ll need for this delectable dish:

    • 2 pounds of Yukon Gold Potatoes – Creamy and naturally buttery, they’re the go-to potato for salads.
    • 1 cup of celery, diced – Adds a lovely crunch and vibrant color.
    • 1/2 cup of red onion, finely chopped – Imparts a zesty kick. You may also use green onions for a milder taste.
    • 1 red bell pepper, diced – Beautifully colorful and rich in antioxidants.
    • 1 cup of mayonnaise – Provides creaminess. For a lighter version, consider Greek yogurt or a vegan mayo alternative.
    • 2 tablespoons of apple cider vinegar – Offers a tangy zip.
    • 1 teaspoon of Dijon mustard – Brings a complex flavor profile.
    • Salt and pepper to taste – Essential seasonings to elevate the dish.

    Dietary Note: This recipe can easily be modified to be gluten-free and vegan. For gluten-free, ensure your mayo is free from gluten ingredients. To make it vegan, replace the mayonnaise with a plant-based alternative.

    Dietary Substitutions to Customize Your I Can’t Stop Making This Traditional Potato Salad

    The beauty of this Traditional Potato Salad is its adaptability to cater to a variety of dietary requirements. Here are some suggested substitutions:

    • For Creaminess: Substitute mayonnaise with avocado or cashew cream for a healthier, dairy-free option. For those preferring low-fat, use Greek yogurt mixed with a splash of lime juice.

    • For a Flavorful Kick: Swap out the Dijon mustard for a spicy condiment like sriracha or hot sauce for those who enjoy a bit of heat.

    • Vegetarian and Vegan Options: As mentioned, use vegan mayo instead of regular mayo.

    • Herbal Variations: Elevate your salad by incorporating fresh herbs like dill, parsley, or chives.

    • Add Protein: Toss in chickpeas or diced hard-boiled eggs for a filling protein boost, suitable for those looking for more sustenance.

    These substitutions ensure that everyone can enjoy this Traditional Potato Salad without sacrificing taste or nutritional value.

    How to Prepare the Perfect I Can’t Stop Making This Traditional Potato Salad: Step-by-Step Guide

    Let’s get to the heart of the matter: preparing this delicious Traditional Potato Salad. Follow these easy steps for an unforgettable dish!

    1. Prepare the Base: Begin by scrubbing the Yukon Gold potatoes under cold water to remove any dirt. Cut them into evenly-sized cubes (about 1-inch) to ensure they cook evenly.

    2. Cook the Potatoes: Place the chopped potatoes in a large pot and cover them with cold water. Bring the water to a boil over medium-high heat, then reduce the heat and simmer for about 15-20 minutes or until tender but not mushy.

    3. Drain and Cool: Once cooked, drain the potatoes in a colander and run them under cold water to stop the cooking process. Allow them to cool completely before proceeding.

    4. Prep the Vegetables: While the potatoes cool, prepare your vegetables. Dice the celery, red onion, and red bell pepper, and place them in a large mixing bowl.

    5. Make the Dressing: In a separate bowl, whisk together the mayonnaise, apple cider vinegar, Dijon mustard, salt, and pepper. Adjust to taste based on your preferences.

    6. Mix Ingredients: Once the potatoes are cool, add them to the vegetable mixture. Pour the dressing over the potato and vegetable mix, gently folding to combine without mashing the potatoes.

    7. Taste and Adjust: Taste your potato salad, making adjustments if necessary. You can add more salt, pepper, or even a splash of vinegar depending on your flavor preference.

    8. Chill and Serve: Cover the salad with plastic wrap and refrigerate for at least 30 minutes to let the flavors meld. Serve chilled, garnished with herbs if desired.

    This Traditional Potato Salad serves brilliantly as a side dish, and you can easily modify it to accommodate various dietary needs!

    Mastering I Can’t Stop Making This Traditional Potato Salad: Advanced Tips and Variations

    Once you’ve mastered the basic Traditional Potato Salad, consider these additional tips and variations to take your dish to the next level and add even more unique recipe ideas to your culinary collection.

    • Herb Infusion: For a fresher taste, try adding fresh dill or basil to your salad. Herbs add an aromatic flavor that can elevate the overall experience.

    • Texture Play: Consider including crunchy elements like toasted pine nuts or radishes for added texture. These additions will also introduce new levels of flavor.

    • Flavor Twists: Want to change things up? Add cooked crispy bacon bits for an irresistible smoky flavor or switch up the dressing to a yogurt-based ranch for a different profile.

    • Themed Variants: Take inspiration from other cuisines. Try a Southwest twist with black beans, corn, and cilantro, or a Mediterranean flair with feta cheese, Kalamata olives, and oregano.

    • Serving Style: For an impressive presentation, serve the potato salad in a hollowed-out bell pepper or on a bed of mixed greens.

    These advanced tips and creative variations will not only ensure your Traditional Potato Salad stands out but also keep your dining experience exciting!

    How to Store I Can’t Stop Making This Traditional Potato Salad: Best Practices

    Proper storage is key to maintaining the freshness and flavor of your Traditional Potato Salad. Here are some best practices for storing this dish:

    • In the Refrigerator: Place your potato salad in an airtight container. Properly stored in the fridge, it can last 3–5 days. Just remember to give it a good stir before serving again, as the ingredients may settle.

    • Freezing: While it’s not the best option due to the texture of potatoes after thawing, you can freeze leftover portions. Store in a freezer-safe container for up to a month. For best results, consider freezing only dressing separately, so you can stir freshly made dressing into defrosted potatoes.

    • Reheating: If you decide to reheat the salad, place it in the fridge overnight to thaw and serve cold. Avoid microwaving, as it alters the texture of the potatoes.

    Following these storage guidelines ensures that you always have a delicious potato salad at hand, ready to accompany any meal!

    Nutritional Value of I Can’t Stop Making This Traditional Potato Salad

    Understanding the nutritional content of your meals is vital, especially when surrounded by health-conscious individuals or when exploring various recipe ideas. Here’s an overview of the nutritional value of the Traditional Potato Salad (per serving, approximately 1 cup):

    • Calories: 210
    • Fat: 12g (Saturated Fat: 2g)
    • Cholesterol: 20mg
    • Sodium: 420mg
    • Carbohydrates: 24g
    • Fiber: 3g
    • Sugars: 2g
    • Protein: 3g

    Nutritional Highlights

    • Vitamin C and B6: Potatoes offer a great source of these essential vitamins, beneficial for immune health and energy production.
    • Fiber: The addition of veggies not only adds nutrition but also valuable dietary fiber, promoting digestive health.
    • Healthy Fats: Depending on your dressing choice, you can increase the dish’s healthy fat content, which keeps you satiated longer.

    Knowing the nutritional value empowers you to enjoy this Traditional Potato Salad without compromising on your health goals.

    FAQs: Frequently Asked Questions About I Can’t Stop Making This Traditional Potato Salad

    Q: Can I make this potato salad ahead of time?
    A: Absolutely! The flavors meld beautifully when you make it a day in advance. Just be sure to refrigerate it in an airtight container.

    Q: What can I substitute if I don’t have mayonnaise?
    A: You can use Greek yogurt, vegan mayo, or even avocado mash for a creamy consistency. Each option contributes its unique flavor while maintaining that creamy texture.

    Q: Can I add protein to this potato salad?
    A: Yes! Feel free to add hard-boiled eggs, chickpeas, or even diced cooked chicken for a protein boost.

    Q: Is this potato salad gluten-free?
    A: Yes, this potato salad is gluten-free as long as you use gluten-free mayonnaise. Check labels to be certain.

    Q: Can I use other types of potatoes besides Yukon Gold?
    A: While Yukon Golds are preferred for their creamy texture, you can use russet or red potatoes. Keep in mind that they may alter the texture slightly.

    Q: How long does this potato salad last?
    A: When stored properly in the refrigerator, the potato salad can last about 3-5 days.

    Conclusion

    Now that you have an inside look at the making and storing of a delightful Traditional Potato Salad, I hope you’re inspired to try this recipe at home. The balance of flavors, the creamy texture, and the numerous health benefits make it an ideal addition to any meal. Plus, with its versatility, you can easily adjust the recipe to suit your dietary preferences. So go ahead, join the ranks of those who can’t stop making this delicious dish! Start experimenting, enjoy the process, and let this potato salad become a staple in your collection of recipe ideas. Happy cooking!