Blog

  • Homemade Vegan Rhubarb Crisp

    Homemade Vegan Rhubarb Crisp

    Homemade Vegan Rhubarb Crisp: A Tropical Delight

    Introduction to Homemade Vegan Rhubarb Crisp

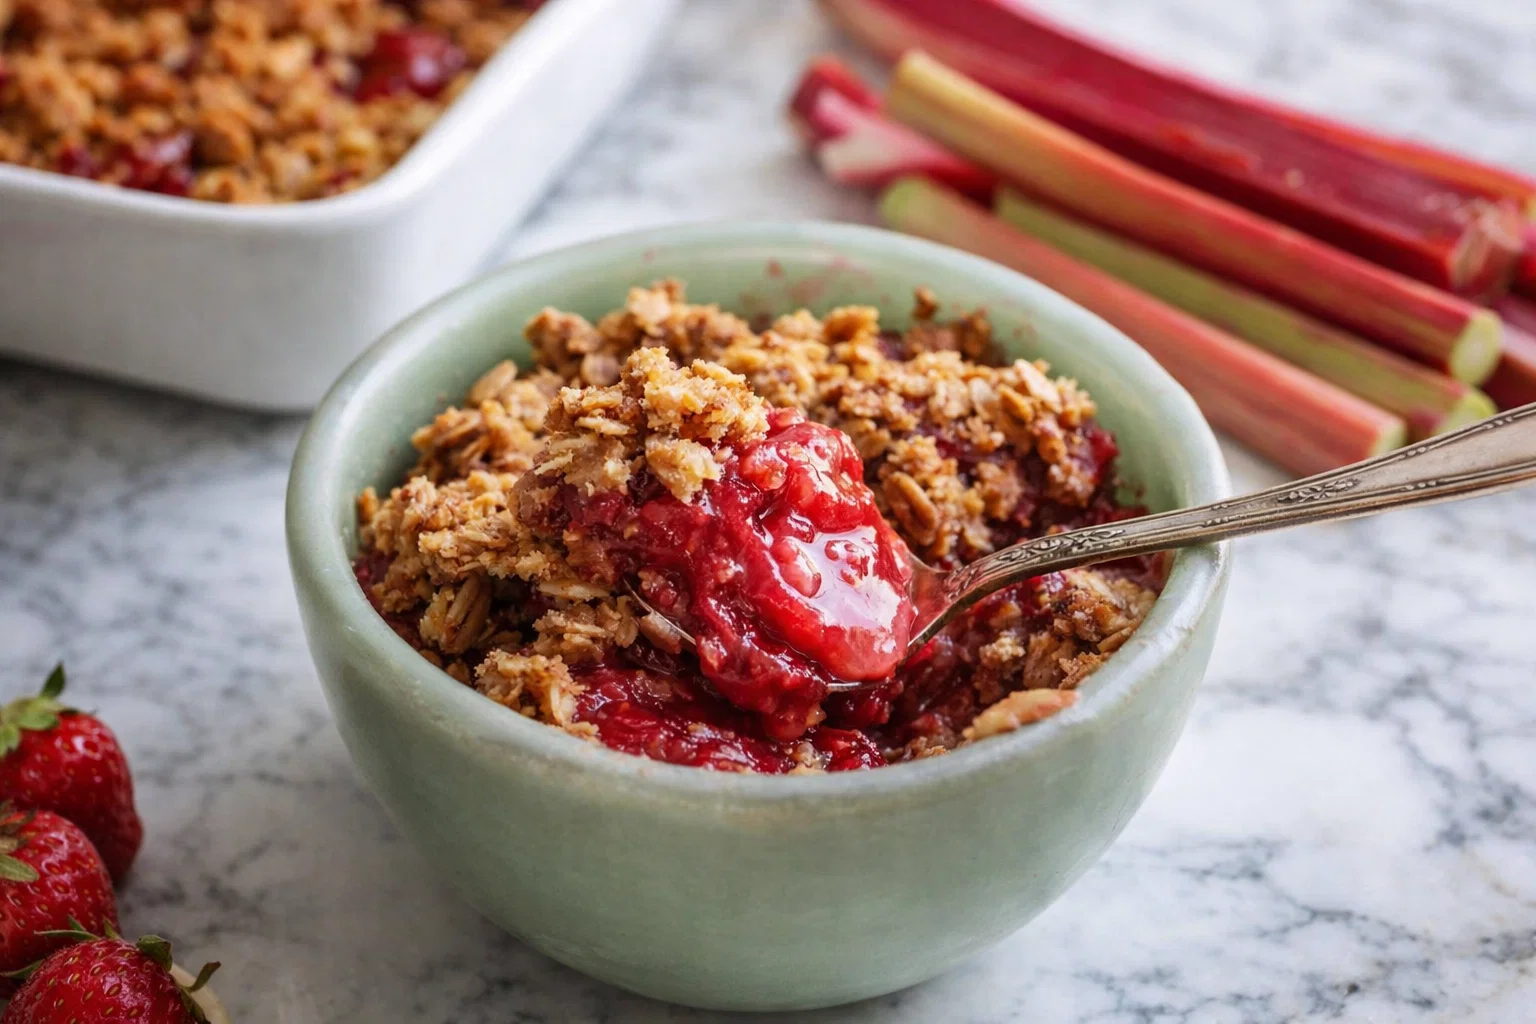
    Welcome to the delightful world of Homemade Vegan Rhubarb Crisp! This recipe embodies simplicity, health, and flavor, all wrapped in a warm, comforting dessert, making it an ideal choice for varied diets. Among the plethora of dessert recipes out there, this crisp stands out due to its ease of preparation and vibrant ingredients.

    As the rhubarb season rolls in, it’s the perfect time to harness its tartness balanced with a sweet, crumbly topping. Not only is this vegan version completely plant-based, but it’s also gluten-free and low in calories, ensuring that it fits seamlessly into wellness-conscious lifestyles. Whether you are a busy parent looking for a quick, healthy dessert for your family, a student needing a budget-friendly recipe, or a baking enthusiast wanting to impress friends, this rhubarb crisp is for you.

    What makes this homemade treat even more appealing is its adaptability. You can modify it based on your ingredient availability or dietary requirements. With each bite, you’ll savor a delicate balance that highlights the natural flavor of rhubarb while enjoying the wholesome ingredients used in the An irresistible twist, this vegan rhubarb crisp is not just a treat—it’s a celebration of health and deliciousness!

    Benefits and Advantages of Homemade Vegan Rhubarb Crisp

    This vegan rhubarb crisp boasts a range of benefits that make it not only an enjoyable dessert but also a valuable addition to your culinary repertoire:

    1. Simplicity: One of the best attributes of this recipe is how easy it is to whip up. With minimal ingredients typically found in your pantry and straightforward steps, even novice cooks will feel confident making this dessert.

    2. Health Benefits: Rhubarb is a powerhouse of nutrition, packed with antioxidants and fiber while remaining low in calories. This recipe utilizes oats, which contribute to whole grain goodness and heart health. By using natural sweeteners and plant-based ingredients, you’ll create a dessert that is kind to your body, making it a great option for health-conscious diners.

    3. Versatile for Diets: This recipe caters to various dietary needs, whether you are vegan, gluten-free, or looking to monitor sugar intake. The ingredients can easily be substituted without compromising flavor or texture, making it ideal for those with food sensitivities or preferences.

    4. Enjoyable for All Occasions: Whether it’s a regular family dinner, a special event, or simply a treat at the end of a busy week, this crisp fits all occasions. Plus, it’s a wonderful dessert to share with guests, making it versatile for everything from casual gatherings to holiday feasts.

    5. Ingredients You Can Feel Good About: This homemade rhubarb crisp contains wholesome ingredients that are nutrient-dense, making it a dessert that you can enjoy without guilt.

    With its healthy profile, ease of preparation, and suitability for many dietary restrictions, it is no wonder this recipe is a favorite among those searching for delightful dessert recipes.

    Ingredients Overview

    Essential Ingredients for Homemade Vegan Rhubarb Crisp

    To create this scrumptious dessert, you will need the following ingredients:

    • Rhubarb (4 cups, chopped): Fresh rhubarb stalks are the star of this dessert. They provide a wonderful tart flavor and are packed with vitamins and minerals.
    • Oats (1 cup): Rolled oats give the crisp its texture. They’re heart-healthy and gluten-free when certified.
    • Almond flour (1/2 cup): This adds a nutty flavor and improves the nutritional profile, offering healthy fats without gluten.
    • Coconut oil (1/2 cup, melted): It serves as a dairy-free substitute for butter, giving the crisp a luscious texture and rich flavor.
    • Maple syrup (1/4 cup): A natural sweetener that enhances flavor while keeping the dish vegan.
    • Cinnamon (1 teaspoon): This spice adds warmth and a lovely aroma to the overall flavor.
    • Salt (1/4 teaspoon): A pinch of salt will enhance the natural sweetness of the rhubarb and balance the flavors.

    Note: The above ingredients can easily be modified if needed! For example, you can substitute almond flour for another gluten-free flour or replace coconut oil with vegan butter.

    Dietary Substitutions to Customize Your Homemade Vegan Rhubarb Crisp

    This recipe is inherently vegan and gluten-free, but it can be further customized:

    • Sugar Alternatives: If you’re looking to further reduce sugar intake, try substituting maple syrup with stevia or another low-calorie sweetener.
    • Nut-Free Options: If you have nut allergies, use sunflower seed flour in place of almond flour.
    • Different Fruits: If you can’t find rhubarb or would like to mix it up, feel free to include other fruits like strawberries or blueberries in a 50-50 ratio with rhubarb for added sweetness and flavor.
    • Higher Protein Option: For a protein boost, consider adding a scoop of plant-based protein powder to the oats mixture.

    With these substitutions, you can tailor your rhubarb crisp to fit your dietary preferences perfectly!

    How to Prepare the Perfect Homemade Vegan Rhubarb Crisp: Step-by-Step Guide

    Step-by-Step Instructions

    Preparing your homemade vegan rhubarb crisp is straightforward. Follow these steps to create this delightful dessert:

    1. Prepare the Rhubarb: Start by rinsing four cups of fresh rhubarb stalks. Chop them into 1-inch pieces and place them in a large bowl. The vibrant pink and green colors of rhubarb alone are a feast for the eyes!

    2. Sweeten the Rhubarb: Add 1/4 cup of maple syrup to the chopped rhubarb, then sprinkle 1 teaspoon of cinnamon over the top. Stir the mixture gently until the rhubarb is coated evenly. Allow it to sit while you prepare the crumble—this will help draw out the rhubarb’s juices.

    3. Preheat Your Oven: While the rhubarb releases its juices, preheat your oven to 350°F (175°C). The anticipation of a hot oven will have your kitchen smelling amazing in no time!

    4. Create the Crisp Topping: In another large bowl, combine 1 cup of rolled oats, 1/2 cup of almond flour, 1/4 teaspoon of salt, and 1/2 cup of melted coconut oil. Mix until the dry ingredients are moistened and crumbly.

    5. Assemble the Crisp: Grease an 8×8 inch baking dish lightly if you prefer. Spread the rhubarb mixture evenly over the base of the dish. Next, crumble the oat mixture on top so that it evenly covers the rhubarb.

    6. Bake the Crisp: Place the dish in the preheated oven and bake for 35-40 minutes or until the topping is golden brown and the rhubarb is bubbling underneath.

    7. Cool and Serve: Once baked, remove the crisp from the oven and let it cool for about 10-15 minutes. This cooling time helps the juices to thicken slightly. Serve warm on its own or with a scoop of vegan ice cream or whipped coconut cream for an indulgent treat.

    8. Enjoy! Savor each bite and relish the beautiful balance of tart and sweet—the hallmark of an excellent dessert recipe!

    Mastering Homemade Vegan Rhubarb Crisp: Advanced Tips and Variations

    To elevate your homemade vegan rhubarb crisp, consider these advanced tips and creative variations:

    • Add Nuts for Crunch: For an extra layer of texture, sprinkle chopped walnuts or pecans into the oat mixture for added crunch and healthy fats.
    • Experiment with Spices: Consider adding ginger, nutmeg, or cardamom to the filling for a more complex flavor profile.
    • Gluten-Free Oats: Always use certified gluten-free oats if you’re preparing this crisp for someone with a gluten sensitivity.

    Additionally, here are some variations to try:

    • Berry Fusion: Mix rhubarb with fresh strawberries or blueberries to add sweetness and create a beautiful array of flavors.
    • Tropical Touch: Add shredded coconut or pineapple chunks for a tropical flair.
    • Mini Hand Pies: For a fun twist, try making mini hand pies using vegan puff pastry filled with the rhubarb mixture, perfect for on-the-go sweets.

    By incorporating these variations and advanced tips, you can customize your homemade vegan rhubarb crisp to match seasonal ingredients or family preferences!

    How to Store Homemade Vegan Rhubarb Crisp: Best Practices

    To enjoy your homemade vegan rhubarb crisp even days after making it, proper storage is key:

    • Refrigeration: Let the crisp cool completely before covering it with plastic wrap or transferring it to an airtight container. It can be stored in the refrigerator for up to 5 days.

    • Freezing: If you wish to keep it for a longer period, you can freeze the crisp. Wrap it tightly in plastic wrap and then in aluminum foil to prevent freezer burn. It can last in the freezer for up to 3 months. When you’re ready to enjoy it, simply thaw it in the fridge overnight before reheating!

    • Reheating: To reheat, warm covered in the oven at 350°F (175°C) for about 15-20 minutes, or until heated through. Enjoy it warm to experience that delightful contrast of textures!

    By storing your rhubarb crisp correctly, you can enjoy this dessert without the stress of spoilage!

    Nutritional Value of Homemade Vegan Rhubarb Crisp

    Understanding the nutritional value of this delicious dessert can help you make mindful choices. Here’s a breakdown of the approximate nutrition per serving (1/8 of the dish):

    • Calories: 180-220
    • Total Fat: 8g
    • Saturated Fat: 7g
    • Cholesterol: 0mg
    • Sodium: 50mg
    • Total Carbohydrates: 30g
    • Dietary Fiber: 4g
    • Sugars: 6g
    • Protein: 3g

    The breakdown shows you get a great balance of carbs, fats, and proteins—all while keeping sugar relatively low. With a good amount of dietary fiber, this dessert not only satisfies your sweet tooth but also supports digestive health.

    This balance makes it a wonderful option for those enjoying a variety of dessert recipes, with the assurance that it’s a nourishing choice!

    FAQs: Frequently Asked Questions About Homemade Vegan Rhubarb Crisp

    Q1: Can I use frozen rhubarb for this recipe?

    Yes! Frozen rhubarb is a great option if you can’t find fresh rhubarb. Just make sure to thaw it and drain excess liquid before using it in your crisp.

    Q2: How can I make this recipe lower in calories?

    You can use a sugar substitute instead of maple syrup and reduce the amount of coconut oil in the topping. Additionally, using a lower-calorie sweetener can help lighten the dish.

    Q3: What can I serve with rhubarb crisp?

    Pair your homemade vegan rhubarb crisp with plant-based ice cream, coconut whipped cream, or even a dollop of vegan yogurt for added creaminess.

    Q4: How do I prevent the topping from becoming too soggy?

    To avoid a soggy topping, ensure to bake your crisp until the topping is golden brown and firm. Also, allow the crisp to cool slightly before serving; this helps the juices thicken and set!

    With this comprehensive guide to making and enjoying homemade vegan rhubarb crisp, you’re sure to create a dish that delights everyone around your table! Whether you’re gathering friends for an evening treat or simply indulging in a form of self-care, this crisp is a perfect choice. Enjoy your cooking adventure!

  • Easy Sauteed Zucchini Mushroom Onion

    Easy Sauteed Zucchini Mushroom Onion

    Easy Sauteed Zucchini Mushroom Onion: A Tropical Delight

    Introduction to Easy Sauteed Zucchini Mushroom Onion

    Are you searching for easy dinner recipes that can be whipped up in no time, yet are packed with flavor and nutrition? Look no further than Easy Sauteed Zucchini Mushroom Onion! This vibrant dish is a delightful medley of fresh vegetables that not only excites your taste buds but also nourishes your body. Whether you’re a busy parent juggling multiple tasks, a student on a budget, or just someone who appreciates simplicity in the kitchen, this recipe is for you.

    The dish showcases zucchini, mushrooms, and onions, which come together to create a delicious sauté that’s as versatile as it is wholesome. It’s naturally vegan and gluten-free, making it an excellent choice for those who follow specialized diets. The ingredients are not only easily accessible in any grocery store, but they are also low in calories yet high in essential nutrients. You can enjoy this dish as a side or pair it with a protein for a complete meal—making it the perfect solution for those who are health-conscious but short on time.

    By choosing to prepare this recipe, you embrace a quick-cook method that enhances not only the vegetables’ flavor but also their nutritional value. Join the ranks of home cooks who’ve made this dish an essential part of their meal rotation. Let’s dive into why Easy Sauteed Zucchini Mushroom Onion should be your next easy dinner recipe!

    Benefits and Advantages of Easy Sauteed Zucchini Mushroom Onion

    Easy Sauteed Zucchini Mushroom Onion shines brightly among easy dinner recipes for numerous reasons. First, its preparation is incredibly simple, allowing even novice cooks to showcase their culinary skills. With just a handful of ingredients and a quick cooking time, this dish offers convenience without sacrificing taste.

    Health Benefits

    This dish is brimming with nutritional benefits. Zucchini is a fantastic source of vitamins A and C, as well as potassium, which can help regulate blood pressure. Meanwhile, mushrooms are low in calories but high in antioxidants, vitamins, and minerals, including vitamin D, which is especially beneficial during the colder months. Onions bring additional health advantages; they contain compounds that can help lower cholesterol and promote heart health.

    Versatile and Customizable

    Moreover, Easy Sauteed Zucchini Mushroom Onion is incredibly versatile. You can easily adapt it based on seasonal vegetables or personal preferences. Want to throw in some bell peppers for added color and flavor? Or perhaps you’d like to throw in some spinach or kale for an extra nutrient boost? The possibilities are endless!

    Quick Cooking Time

    For those who lead busy lives—college students, working professionals, or even families managing hectic schedules—this recipe can be ready in less than 20 minutes. Just sauté, season, and serve! Not only does this dish cater to busy lifestyles, but it also aligns seamlessly with the needs of those who are diet-conscious.

    In conclusion, this dish is a remarkable addition to your culinary arsenal. Its nutritional assets, ease of preparation, and versatility make it stand out from other easy dinner recipes, appealing to a wide range of audiences from health enthusiasts to busy parents.

    Ingredients Overview

    Essential Ingredients for Easy Sauteed Zucchini Mushroom Onion

    Creating the perfect Easy Sauteed Zucchini Mushroom Onion involves selecting the right ingredients. Here’s a list of everything you’ll need:

    • 2 Medium Zucchini (sliced): Zucchini serves as the foundation of the dish, offering a mild flavor and a satisfying texture.
    • 1 Cup Mushrooms (sliced): Any variety will do! Button, cremini, or portobello mushrooms add earthy notes while being low in calories.
    • 1 Medium Onion (sliced): Onions add a sweet and savory flavor that elevates the sauté.
    • 2 Tablespoons Olive Oil: A heart-healthy fat that enhances flavor while keeping the dish vegan and gluten-free.
    • 1-2 Cloves Garlic (minced, optional): For those who enjoy extra flavor, garlic packs a punch and boasts numerous health benefits.
    • Salt and Pepper to taste: Simple seasonings that can be adjusted according to your palate.
    • Fresh Herbs (basil or thyme, optional): These can be added for an aromatic finishing touch.

    Dietary Substitutions to Customize Your Easy Sauteed Zucchini Mushroom Onion

    This easy sauté can be customized further to meet various dietary needs:

    • Oil-Free Version: Skip the olive oil and use vegetable broth for sautéing to make it completely oil-free.
    • Herb Variations: Fresh herbs like dill or parsley instead of basil or thyme can offer a different flavor profile and enhance nutrition.
    • Protein Boost: For those following a vegetarian or vegan lifestyle, add chickpeas or lentils to increase protein content.
    • Spicy Twist: Love a little heat? Adding red pepper flakes or a diced jalapeño can spice things up remarkably.

    From gluten-free to oil-free, the flexibility of this dish allows you to create a version that suits everyone at your table, reinforcing its status as one of the top easy dinner recipes.

    How to Prepare the Perfect Easy Sauteed Zucchini Mushroom Onion: Step-by-Step Guide

    Ready to bring this vibrant dish to life? Follow these simple, clear steps to create your Easy Sauteed Zucchini Mushroom Onion:

    1. Prepare the Ingredients: Start by washing and slicing your zucchini, mushrooms, and onion. Make sure to slice them evenly for consistent cooking.

    2. Heat the Oil: In a large skillet, add olive oil and heat it over medium-high heat. Allow it to warm up for about 1-2 minutes.

    3. Sauté the Onions: Add the sliced onions to the heated oil. Cook for about 3-4 minutes or until they become translucent and fragrant, stirring occasionally.

    4. Add Garlic: If you are using garlic, now is the time to add it. Stir it in and cook for an additional 30 seconds—just until it becomes aromatic.

    5. Incorporate Mushrooms: Add the sliced mushrooms to the pan. Because mushrooms release moisture, allow them to cook down for around 4-5 minutes, stirring occasionally.

    6. Mix in Zucchini: Once the mushrooms have cooked down, add your zucchini slices to the skillet. Stir well to combine all the ingredients.

    7. Season the Mix: Sprinkle salt, pepper, and any fresh herbs you like over the vegetable mixture. Stir well and cook for another 5-7 minutes. You’ll want the zucchini to become tender but not mushy.

    8. Taste and Adjust: After cooking, taste your dish and adjust the seasonings as needed, adding more salt, pepper, or herbs.

    9. Serve Hot: Once everything is cooked and well-seasoned, remove from heat. Serve it immediately as a side dish or over a bed of grains for a wholesome meal.

    10. Optional Toppings: If desired, sprinkle with nutritional yeast or a squeeze of lemon juice to add an extra layer of flavor.

    Thus, this straightforward preparation process allows it to qualify comfortably as one of the simplest easy dinner recipes around. Enjoy the delightful medley of flavors that brings freshness to your table!

    Mastering Easy Sauteed Zucchini Mushroom Onion: Advanced Tips and Variations

    To elevate your Easy Sauteed Zucchini Mushroom Onion to the next level, consider the following tips and variations:

    • Experiment with Seasonings: Beyond salt and pepper, try adding balsamic vinegar for a tangy depth or soy sauce for an umami boost. Smoky paprika adds a delightful twist, too.

    • Add Nuts or Seeds: For added texture and healthy fats, consider tossing in toasted pine nuts or sunflower seeds right before serving. They both offer crunch and added flavor.

    • Substitute with Other Vegetables: While zucchini, mushrooms, and onions are a fantastic trio, feel free to incorporate other vegetables such as bell peppers, asparagus, or snap peas for added variety.

    • Make it a Main Course: To transform this dish into a complete meal, serve it over cooked quinoa or brown rice, factor in some beans, or pair with your protein of choice.

    By integrating these advanced tips into your cooking session, you’ll further enhance the flavors and nutritional value of this remarkably easy dinner recipe.

    How to Store Easy Sauteed Zucchini Mushroom Onion: Best Practices

    If you find yourself with leftovers or want to prepare this dish ahead of time, proper storage is key. Here’s how to keep your Easy Sauteed Zucchini Mushroom Onion fresh:

    • Refrigeration: Store the sautéed vegetables in an airtight container in the refrigerator. They should keep well for up to 3 days. When reheating, do it gently over low heat on the stovetop to avoid overcooking the veggies.

    • Freezing: If you have more than what can be consumed within a few days, feel free to freeze the dish. While the texture might change slightly when thawed, it still remains delicious. Cool the sauté completely, transfer it into freezer-safe bags or containers, and store for up to 3 months.

    • Reheating: For reheating, take the desired portion out of the freezer, thaw in the refrigerator overnight, and reheat in the skillet over medium heat, adding a splash of oil/broth to prevent sticking.

    These storage practices ensure your easy dinner recipes are accessible whenever you need a quick meal option!

    Nutritional Value of Easy Sauteed Zucchini Mushroom Onion

    Understanding the nutritional value of your meals is essential for maintaining a balanced diet. Here’s a breakdown of the key nutrition information for Easy Sauteed Zucchini Mushroom Onion:

    • Calories: Approximately 150 calories per serving (1 cup), making it a low-calorie choice for any meal.
    • Total Fat: About 8 grams, primarily from olive oil, beneficial for heart health.
    • Protein: Roughly 4 grams, a fair amount given its vegetable base. You can boost this by adding legumes, quinoa, or nuts.
    • Carbohydrates: Contains around 10 grams of carbohydrates, offering plenty of fiber—about 3 grams—supporting healthy digestion.
    • Vitamins and Minerals: High in vitamins A, C, potassium, and magnesium.

    This nutritional profile positions Easy Sauteed Zucchini Mushroom Onion as an excellent choice for those looking to eat healthy, assisting in maintaining weight while delivering essential nutrients.

    FAQs: Frequently Asked Questions About Easy Sauteed Zucchini Mushroom Onion

    Q1: Can I make this dish ahead of time?

    Absolutely! You can prepare it a day in advance and store it in the refrigerator. Just reheat it on the stovetop before serving.

    Q2: Are there any low-carb substitutions I can make?

    If you’re looking to reduce carbohydrates, consider using shredded cabbage in place of zucchini. It will still sauté well and provide a nice crunch.

    Q3: Can I add protein to this dish?

    Definitely! For a heartier meal, add cooked chicken, tofu, or legumes like chickpeas right before serving.

    Q4: How can I make this dish spicier?

    If you enjoy some spice, you can add red pepper flakes or chopped jalapeño peppers while sautéing the vegetables.

    Q5: Is this dish suitable for meal prep?

    Yes! This recipe stores well, making it an excellent option for meal prep. You can portion it out for lunches or dinners throughout the week.

    By addressing these common questions, you’ll have a better understanding of the versatility and convenience Easy Sauteed Zucchini Mushroom Onion brings to your kitchen.

    In conclusion, the simplicity and health benefits of this dish make it an essential part of your easy dinner recipes collection. Whether you are a seasoned chef or a novice, this dish can fill your table with flavor, nutrition, and joy—making meals stress-free while keeping your health in check. Now, go ahead and give this delightful recipe a try!

  • Tasty Cheesy Zucchini Tomato Bake Recipe

    Tasty Cheesy Zucchini Tomato Bake Recipe

    Tasty Cheesy Zucchini Tomato Bake Recipe: A Tropical Delight

    Introduction to Tasty Cheesy Zucchini Tomato Bake Recipe

    Looking for a delicious yet simple dish to add to your dinner recipes rotation? The Tasty Cheesy Zucchini Tomato Bake is the perfect solution! This dish combines the rich flavors of sweet zucchini and ripe tomatoes with a delightful cheesy topping that simply melts in your mouth. Whether you’re a busy parent looking for a quick weeknight meal or a food enthusiast searching for something healthy and comforting, this recipe caters to a wide range of dietary needs, including vegetarian and gluten-free options.

    In addition to being easy to prepare, this dish is packed with nutrients. Zucchini is low in calories, high in fiber, and packed with vitamins, making it a great addition to any meal. Tomatoes are rich in antioxidants, particularly lycopene, which has numerous health benefits. The combination of these ingredients not only creates a delicious meal but also offers a healthy alternative for those conscious of their diet.

    What’s more, this recipe can easily be customized to fit your personal preferences or dietary restrictions. Whether you prefer extra herbs for added flavor or vegan cheese for a plant-based twist, the Tasty Cheesy Zucchini Tomato Bake is versatile and forgiving. Allowing you to experiment makes it a delightful experience for all home cooks.

    Benefits and Advantages of Tasty Cheesy Zucchini Tomato Bake Recipe

    There are countless reasons why the Tasty Cheesy Zucchini Tomato Bake recipe stands out among other dinner recipes, starting with its remarkable simplicity. With just a handful of fresh ingredients and minimal preparation time, this dish is perfect for those bustling weeknight meals or casual gatherings. In just under an hour, you can have a colorful, hearty meal that everyone will rave about.

    Health Benefits

    When it comes to the health benefits of this dish, it shines brightly!

    • Low-Calorie: Zucchini is low in calories but high in water content, making this dish an excellent choice for anyone watching their caloric intake.
    • Rich in Nutrients: Packed with vitamins, minerals, and antioxidants, this bake supports overall health.
    • Fiber-Rich: The combination of zucchini and tomatoes provides dietary fiber, which aids digestion.
    • Customizable: As mentioned earlier, you can modify the ingredients to meet various dietary needs. For instance, you can substitute traditional cheese with a dairy-free alternative or choose whole-grain breadcrumbs for added fiber.

    Versatility

    The Tasty Cheesy Zucchini Tomato Bake recipe is incredibly versatile, which makes it suitable for everyone:

    • Families: Busy parents can easily whip this up in under an hour, serving it as a nutritious meal option that everyone will enjoy.
    • Vegetarians and Vegans: With simple substitutions, this dish can easily become a flavorful vegan option.
    • Health-Conscious Individuals: This recipe supports low-carb and gluten-free diets, accommodating diverse eating habits.

    Satisfying Comfort Food

    Lastly, comfort food should be satisfying, and this delightful bake is no exception. The melty cheese combined with the natural sweetness of zucchini and tangy tomatoes creates a cozy, comforting dish that warms the soul.

    Ingredients Overview

    Essential Ingredients for Tasty Cheesy Zucchini Tomato Bake Recipe

    Below is a list of ingredients you will need for this Tasty Cheesy Zucchini Tomato Bake, along with their approximate measurements:

    • Zucchini (3 medium-sized): Thinly sliced. Zucchini adds volume and nutrients without excess calories.
    • Tomatoes (2 large): Sliced. Fresh tomatoes contribute moisture and flavor.
    • Cheese (1 cup shredded, mozzarella or your choice): Provides that cheesy goodness; vegan cheese works well too.
    • Parmesan cheese (1/2 cup, grated): Adds richness and additional flavor.
    • Fresh basil (1/4 cup, chopped): For a fragrant aroma and an infusion of fresh flavor.
    • Olive oil (2 tbsp): Used for drizzling, enriching the bake with healthy fats.
    • Garlic (3 cloves, minced): For depth of flavor—feel free to reduce it if you prefer a milder taste.
    • Salt and pepper (to taste): Essential for balancing flavors.
    • Breadcrumbs (1/2 cup): Optional for a crunchy topping. Use gluten-free breadcrumbs for a gluten-free option.
    • Red pepper flakes (1 tsp, optional): Adds a bit of heat.

    Dietary Substitutions to Customize Your Tasty Cheesy Zucchini Tomato Bake Recipe

    This recipe is naturally adaptable to meet various dietary requirements:

    • Vegan Option: Substitute dairy cheese with your favorite plant-based cheese, or be creative with cashew cheese.
    • Gluten-Free Option: Ensure that your breadcrumbs are gluten-free and consider using almond flour as a topping.
    • Low-Carb Option: Skip the breadcrumbs entirely or use a nut-based crust to lower carbohydrates.
    • Herb Variations: If you don’t have fresh basil, consider using dried Italian herbs or oregano for additional flavor.

    Incorporating these substitutions allows you to enjoy the Tasty Cheesy Zucchini Tomato Bake no matter your dietary preferences or ingredient availability.

    How to Prepare the Perfect Tasty Cheesy Zucchini Tomato Bake Recipe: Step-by-Step Guide

    Cooking is an art, and each step should be approached with care. Here’s a detailed, step-by-step guide to preparing the Tasty Cheesy Zucchini Tomato Bake, ensuring it’s simple and enjoyable.

    1. Preheat the Oven: Start by preheating your oven to 375°F (190°C). This step is crucial as a properly heated oven guarantees even cooking.
    2. Prepare the Baking Dish: Lightly grease a 9×13 inch baking dish with olive oil or non-stick spray. This helps prevent sticking and allows for easy serving.
    3. Slice the Vegetables: Wash and thinly slice your zucchini and tomatoes. Aim for uniform slices to ensure even cooking.
    4. Season the Zucchini: Place the sliced zucchini in a bowl and drizzle a tablespoon of olive oil, sprinkle with salt, pepper, and minced garlic. Toss until well coated. Let it sit for about 10 minutes to allow the salt to draw out excess moisture.
    5. Layer the Ingredients: Start layering in the baking dish as follows:
      • First Layer: Use half of the zucchini slices on the bottom of the dish.
      • Second Layer: Follow with a layer of sliced tomatoes, making sure they slightly overlap for a beautiful presentation.
      • Third Layer: Add half of the shredded cheese—this will add creaminess and flavor to the bake.
    6. Repeat the Layers: Add the remaining zucchini and another layer of tomatoes. Top it with more cheese and the grated parmesan for that golden crust.
    7. Add Breadcrumbs: If you’re using breadcrumbs, sprinkle them on top for added crunch. Dust with red pepper flakes for a hint of spice.
    8. Bake: Place the baking dish in the preheated oven. Bake for 30-40 minutes or until the vegetables are tender and the top is golden and bubbly. Rotate the dish halfway through to ensure even cooking.
    9. Add Fresh Basil: Once out of the oven, sprinkle freshly chopped basil over the top for an aromatic finish.
    10. Serve: Allow the bake to cool for a few minutes before slicing. Serve warm as a main dish or a delightful side.

    By following these straightforward steps, you will create a mouthwatering Tasty Cheesy Zucchini Tomato Bake. Feel free to experiment with the seasoning and layers to make the dish uniquely yours!

    Mastering Tasty Cheesy Zucchini Tomato Bake Recipe: Advanced Tips and Variations

    To make the most out of your Tasty Cheesy Zucchini Tomato Bake and further delight your taste buds, consider these advanced tips and variations:

    • Zucchini Swaps: While zucchini is the star here, you can mix other vegetables into the bake, such as eggplant, bell peppers, or even mushrooms for an earthy undertone.
    • Herb Infusion: Add herbs like thyme, oregano, or dill for a different flavor profile. Fresh herbs elevate the dish while promoting health benefits!
    • Meat Lovers’ Variation: Consider adding cooked ground turkey or Italian sausage for a meaty twist. Layer it between the vegetables for added protein.
    • Spice Level: If you enjoy spiciness, try adding a diced jalapeño to the mix or substitute with a spicier cheese.
    • Cheese Combinations: Don’t limit yourself to just mozzarella! Blend three cheeses for a more complex flavor.
    • Presentation: For serving, try garnishing with a balsamic glaze or a dollop of yogurt to impress guests.

    These tips will not only help enhance your Tasty Cheesy Zucchini Tomato Bake but also allow you to personalize it to your family’s tastes and preferences.

    How to Store Tasty Cheesy Zucchini Tomato Bake Recipe: Best Practices

    Storing leftovers properly ensures that you can enjoy your delicious Tasty Cheesy Zucchini Tomato Bake for days to come. Here are the best storage practices:

    • Refrigeration: After your bake has cooled completely, cover it tightly with plastic wrap or transfer it to an airtight container. It will last in the fridge for up to 4 days.
    • Freezing: If you want to store it for a longer period, you can freeze the Tasty Cheesy Zucchini Tomato Bake. Cut it into individual portions, wrap each piece in foil, and place them in a freezer-safe container. It can be stored for up to 3 months.
    • Reheating: When you’re ready to enjoy leftovers, reheat them in the oven at 350°F (175°C) for about 20 minutes or until heated through. For a quick option, you can use the microwave, but the oven will help maintain the dish’s crispy topping.

    By following these storage tips, you can enjoy this fantastic recipe multiple times!

    Nutritional Value of Tasty Cheesy Zucchini Tomato Bake Recipe

    Understanding the nutritional value of your meal is essential, especially with the focus on health. Here’s a breakdown of the approximate nutritional information for one serving of Tasty Cheesy Zucchini Tomato Bake (based on 8 servings, excluding optional ingredients):

    • Calories: 180
    • Total Fat: 10g
    • Saturated Fat: 4g
    • Cholesterol: 20mg
    • Sodium: 250mg
    • Total Carbohydrates: 15g
    • Dietary Fiber: 3g
    • Sugars: 5g
    • Protein: 8g

    This nutritional breakdown shows that the Tasty Cheesy Zucchini Tomato Bake is a balanced dish full of good ingredients. The fiber from the vegetables promotes hunger satisfaction while keeping overall calories in check. Adjusting the portions and cheese types can heavily influence nutritional value, making it easy to cater to various dietary needs.

    FAQs: Frequently Asked Questions About Tasty Cheesy Zucchini Tomato Bake Recipe

    1. Can I make this dish ahead of time?

    Yes! You can prepare this bake a day in advance. Store it in the refrigerator before baking, and simply pop it in the oven when you’re ready to serve.

    2. Can I use frozen zucchini or tomatoes?

    While fresh ingredients yield the best results, you can use frozen zucchini or tomatoes. However, be sure to thaw and drain excess moisture to prevent the dish from becoming watery.

    3. What’s a good substitute for cheese?

    If you’re looking for a dairy-free option, consider using nutritional yeast, cashew cheese, or a store-bought vegan cheese.

    4. How can I make it spicy?

    To add heat, mix in diced jalapeños, crushed red pepper flakes, or opt for a spicy cheese variety.

    5. Is it okay to add meat?

    Absolutely! Incorporate cooked ground meat, such as turkey or chicken, for a heartier meal. Layer it with the vegetables for balanced deliciousness.

    6. What should I serve with this dish?

    Tasty Cheesy Zucchini Tomato Bake pairs well with a side salad, garlic bread, or simply enjoyed on its own as a filling, wholesome meal.

    In conclusion, the Tasty Cheesy Zucchini Tomato Bake is a flavorful and nutritious addition to your collection of dinner recipes. Its simplicity, health benefits, versatility, and deliciousness make it an ideal choice for all occasions. We hope you are inspired to try this delightful dish and encourage your friends and family to join you in the kitchen. Happy cooking!

  • Tasty Strawberry Milkshake Cupcakes Dessert

    Tasty Strawberry Milkshake Cupcakes Dessert

    Tasty Strawberry Milkshake Cupcakes Dessert: A Tropical Delight

    Introduction to Tasty Strawberry Milkshake Cupcakes Dessert

    Are you on the hunt for a delightful treat that encapsulates the sweet essence of summer? Look no further than our Tasty Strawberry Milkshake Cupcakes Dessert! This scrumptious recipe combines the nostalgia of your childhood milkshake with the light and fluffy delight of cupcakes, making it a playful dessert perfect for any occasion. Whether you’re planning a birthday party, a casual family gathering, or simply want to surprise yourself with a homemade sweet, these cupcakes will undoubtedly capture your heart and palate.

    What sets this recipe apart is its simplicity and versatility. You can indulge in this delectable strawberry treat while catering to various dietary needs. The best part? These cupcakes can easily be made vegan, gluten-free, or low-calorie without losing any of their mouthwatering flavor. Imagine biting into a fluffy cupcake topped with rich strawberry frosting that reminds you of your favorite milkshake! It not only satisfies your sweet tooth but also encourages creativity in the kitchen.

    In this article, we will explore everything you need to know about making Tasty Strawberry Milkshake Cupcakes, from understanding the benefits to step-by-step instructions. As you delve deeper, we will guide you through tips and variations, ensuring this recipe becomes a staple in your collection of strawberry recipes.

    Benefits and Advantages of Tasty Strawberry Milkshake Cupcakes Dessert

    The Tasty Strawberry Milkshake Cupcakes Dessert carries numerous benefits that make it a favorite among home cooks and dessert enthusiasts alike. Let’s dive into the reasons why this recipe stands out.

    Simplicity in Preparation

    For busy parents, students, and working professionals, time often dictates meal and dessert prep. With just a handful of ingredients, this cupcake recipe is easy to whip up in under an hour. You’ll be surprised at how quickly you can prepare delicious strawberry treats that can serve multiple guests or satisfy your sweet cravings.

    Healthy Indulgence

    Typically, desserts can feel like guilty pleasures, but not these cupcakes! By utilizing fresh strawberries packed with vitamins and antioxidants, you’re not just indulging; you’re treating your body to something beneficial. Additionally, when prepared with healthy substitutes, these cupcakes can fit seamlessly into a balanced diet without compromising on flavor. Families with diet-conscious individuals can rest easy knowing their treats can be both delicious and nutritious.

    Versatility for Various Dietary Needs

    Catering to different dietary preferences is a breeze with this recipe. Whether you’re gluten-sensitive, vegan, or simply aiming to cut calories, the Tasty Strawberry Milkshake Cupcakes Dessert accommodates nearly everyone.

    By offering alternative ingredients, this dessert can cater to:
    Vegans: Use almond milk and coconut oil as base ingredients for that classic milkshake taste.
    Gluten-Free: Substitute regular flour with almond or coconut flour for a gluten-free treat.
    Low-Calorie: Replace sugar with natural sweeteners such as stevia or honey for a healthier alternative.

    This flexibility within the recipe ensures that you can serve this delightful dessert to all your guests with confidence.

    Ingredients Overview

    Essential Ingredients for Tasty Strawberry Milkshake Cupcakes Dessert

    Before you set out to make your Tasty Strawberry Milkshake Cupcakes, let’s ensure you have all the necessary ingredients. Below is a detailed list along with their measurements and purposes:

    • 1 ½ cups all-purpose flour (or gluten-free flour): This forms the cupcake base, providing structure.
    • 1 cup fresh strawberries, pureed: Essential for that classic strawberry flavor and adds natural sweetness.
    • 1 cup granulated sugar (or coconut sugar for a healthier option): Sweetens the cupcakes.
    • ½ cup milk (or plant-based milk for vegan option): Adds moisture and richness.
    • ½ cup unsalted butter (or coconut oil for vegan): Contributes to the cupcake’s tender texture.
    • 2 large eggs (or flaxseed meal for vegan option): Binds the ingredients and contributes to the structure.
    • 2 tsp baking powder: Helps cupcakes rise.
    • ½ tsp vanilla extract: Enhances flavor.
    • A pinch of salt: Balances sweetness.

    Dietary Substitutions to Customize Your Tasty Strawberry Milkshake Cupcakes Dessert

    To cater to various dietary needs, consider the following substitutions:

    1. Gluten-Free Option: Use almond flour or a gluten-free all-purpose baking mix in place of regular flour.
    2. Vegan Replacement: For the butter, opt for coconut oil or any dairy-free alternative; use almond milk instead of regular milk. Substitute eggs with flaxseed or chia seeds mixed with water (2 tbsp of flaxseed meal + 6 tbsp water = 1 egg).
    3. Low-Calorie Sweetener: If you are looking for a guilt-free option, replace granulated sugar with organic stevia, erythritol, or honey.

    These simple substitutions allow you to create a delightful treat while accommodating dietary preferences without sacrificing taste or texture.

    How to Prepare the Perfect Tasty Strawberry Milkshake Cupcakes Dessert: Step-by-Step Guide

    Now that you’ve gathered all the ingredients and made your substitutions, it’s time to bring your Tasty Strawberry Milkshake Cupcakes to life. Follow these clear, actionable steps to create a delightful dessert:

    1. Preheat the Oven: Start by preheating your oven to 350°F (175°C). This ensures your cupcakes bake evenly.

    2. Prepare the Baking Tray: Line a muffin tin with cupcake liners. This makes serving and cleanup easier.

    3. Mix Dry Ingredients: In a large bowl, whisk together the flour, baking powder, and salt. These are your dry ingredients, which will help ensure your cupcakes rise perfectly.

    4. Cream Butter and Sugar: In another bowl, cream the softened butter (or coconut oil) with the sugar until the mixture is light and fluffy. This process incorporates air and helps with the texture.

    5. Add Eggs (or Flaxseed Mixture): Beat in the eggs one at a time (or your flaxseed mixture if vegan), ensuring thorough mixing after each addition.

    6. Incorporate Milk and Vanilla: Gradually add in the milk and vanilla extract, mixing until fully combined.

    7. Combine Strawberry Puree: Gently fold in the pureed strawberries, ensuring that the fruit is evenly distributed throughout the batter.

    8. Combine Dry and Wet Ingredients: Gradually add your dry mixture to the wet ingredients, stirring until just combined. Be careful not to overmix, as this could result in dense cupcakes.

    9. Fill Muffin Tin: Spoon the batter evenly into the prepared muffin tins, filling each liner about two-thirds full to allow for rising.

    10. Bake: Place the muffin tin in the preheated oven, baking for 18-20 minutes or until a toothpick inserted into the center comes out clean.

    11. Cool the Cupcakes: Once baked, remove from the oven and let the cupcakes cool in the tin for 5 minutes before transferring them to a wire rack to cool completely.

    12. Prepare Frosting (Optional): While the cupcakes cool, consider whipping up a simple strawberry frosting using whipped cream, powdered sugar, and fresh strawberry puree.

    13. Frost the Cupcakes: Once cool, generously frost each cupcake with your strawberry frosting, using a piping bag or a knife.

    14. Garnish (Optional): For an extra touch, garnish your cupcakes with fresh strawberries or sprinkles. This adds visual appeal for special occasions.

    15. Serve and Enjoy: Your Tasty Strawberry Milkshake Cupcakes Dessert is now ready to be enjoyed! Serve them fresh to your friends and family for a delightful treat.

    Mastering Tasty Strawberry Milkshake Cupcakes Dessert: Advanced Tips and Variations

    To enhance your experience with the Tasty Strawberry Milkshake Cupcakes, consider these advanced tips and variations:

    • Frosting Innovations: While a classic frosting is great, try variations like cream cheese frosting or chocolate ganache for a richer flavor. You can even blend in extra strawberry puree for a more intense strawberry flavor.

    • Cupcake Fillings: Add an exciting twist by filling your cupcakes with strawberry jam or whipped cream. This will surprise your guests with an extra layer of flavor.

    • Texture Play: For a crunchy topping, experiment with crushed graham crackers or crushed nuts before frosting. This adds a delightful texture contrast to the soft cupcake.

    • Flavor Infusions: Don’t hesitate to infuse your cupcakes with lemon zest or mint for a refreshing twist on the traditional strawberry flavor. These herbs complement strawberries wonderfully.

    • Miniature Versions: For a bite-sized treat, make mini cupcakes by following the same recipe but baking them for a shorter duration. These miniature delights are perfect for events and encapsulate all the goodness in smaller portions.

    These tips and variations allow you to customize your Tasty Strawberry Milkshake Cupcakes according to your taste and the occasion.

    How to Store Tasty Strawberry Milkshake Cupcakes Dessert: Best Practices

    Storing your Tasty Strawberry Milkshake Cupcakes correctly is crucial for retaining their softness and flavor. Here are the best practices for refrigeration and freezing:

    Refrigeration:

    If you have leftover cupcakes, place them in an airtight container and store them in the refrigerator for up to 5 days. This storage method keeps them moist and prevents them from drying out. It’s best to store cupcakes without frosting to maintain freshness, adding frosting just before serving.

    Freezing:

    For longer storage, you can freeze the un-frosted cupcakes. Place them on a baking sheet to freeze individually for a couple of hours, then transfer them to an airtight container or a freezer bag for up to 3 months. When you’re ready to enjoy them, simply thaw them in the refrigerator overnight and frost them with fresh icing before serving.

    Nutritional Value of Tasty Strawberry Milkshake Cupcakes Dessert

    Understanding the nutritional value of your Tasty Strawberry Milkshake Cupcakes helps you make informed decisions. Here’s a breakdown of the approximate nutritional content per cupcake (without frosting):

    • Calories: 160-180 (dependent on substitutes)
    • Fat: 6-8g
    • Saturated Fat: 3-4g
    • Carbohydrates: 25-30g
    • Fiber: 1g
    • Sugar: 10-12g
    • Protein: 2-3g

    When opting for healthy substitutes, these values can shift significantly, especially regarding sugar and fat content. Always adjust the nutritional breakdown according to the specific ingredients you use.

    FAQs: Frequently Asked Questions About Tasty Strawberry Milkshake Cupcakes Dessert

    1. Can I make these cupcakes ahead of time?
    Absolutely! You can prepare the batter ahead and store it in the fridge for up to 24 hours. Just remember to bake them fresh for optimal taste.

    2. Can I replace strawberries with other fruits?
    Yes! While this recipe highlights strawberries, you can use bananas, blueberries, or raspberries for delightful fruit-inspired cupcakes.

    3. Is there a vegan option for these cupcakes?
    Certainly! Use almond milk, coconut oil, and a flaxseed substitute for the eggs. These replacements yield equally delicious results.

    4. How can I adjust the sweetness?
    You can choose to lower the sugar content by using natural sweeteners or even reduce the amount as per your taste.

    5. What’s the best way to frost these cupcakes?
    A piping bag works well for frosted cupcakes, but a simple spatula can achieve a more rustic look. Just ensure the cupcakes are completely cooled before frosting.

    6. How do I ensure my cupcakes come out moist?
    Avoid overmixing the batter and check for doneness earlier than the suggested baking time using a toothpick. This helps prevent dry cupcakes.

    Indulging in Tasty Strawberry Milkshake Cupcakes Dessert is not just about enjoying a sweet treat; it’s about creating delightful memories shared with family and friends. With this comprehensive guide, you’re now equipped to create a dessert that’s perfect for any occasion, particularly for those who love strawberry recipes. Try it today, and enjoy each delicious bite!

  • The Best Crispy Asian Brussel Sprouts

    The Best Crispy Asian Brussel Sprouts

    The Best Crispy Asian Brussel Sprouts: A Tropical Delight

    Introduction to The Best Crispy Asian Brussel Sprouts

    In the quest for healthy dinner recipes, one dish stands out for its simplicity, taste, and nutritional benefits—Crispy Asian Brussel Sprouts. This delightful recipe marries the earthy crunch of roasted brussel sprouts with a tangy, umami-laden Asian-inspired glaze. Perfect for busy parents, students, and food enthusiasts alike, this dish appeals to various dietary preferences, including vegan and gluten-free diets, making it a versatile addition to your meal repertoire.

    Imagine serving a vibrant dish that not only pleases the palate but also fuels your body with essential nutrients. Each bite of these crispy brussel sprouts bursts with flavor, while the preparation remains beautifully uncomplicated. In just a short time, you can whip up a crowd-pleaser that fits seamlessly into a healthy lifestyle. Whether you’re entertaining guests or seeking a quick weeknight meal, these brussel sprouts promise to deliver satisfaction on every level.

    Delve into this brilliant recipe that encourages you to explore new flavors. Discover how easy it is to elevate your cooking game while maintaining a focus on health and well-being. Let’s dive in and explore this delectable recipe—a true testament to the joys of preparing healthy, delicious meals that everyone will love!

    Benefits and Advantages of The Best Crispy Asian Brussel Sprouts

    When it comes to healthy dinner recipes, the benefits of preparing The Best Crispy Asian Brussel Sprouts are plentiful. Firstly, the dish is straightforward to make, allowing even novice cooks to impress their friends and family. The roasting process captivates the natural sweetness of brussel sprouts while delivering that desired crispy texture.

    Additionally, brussel sprouts are a nutritional powerhouse. They are rich in vitamins K and C, which contribute to bone health and immune function. Furthermore, they’re high in dietary fiber, which aids digestion and keeps you feeling full longer. This dish stands out precisely because it manages to be both indulgent and nutritious, making it an excellent choice for anyone seeking healthy eating options without sacrificing flavor.

    Moreover, this recipe caters to a variety of dietary needs. It’s naturally gluten-free and vegan, making it a hit among health-conscious individuals and those with dietary restrictions. By substituting a few ingredients, one can easily adapt the recipe for various preferences—whether you’re avoiding gluten, looking for low-calorie options, or indulging in a refined sugar-free treat.

    Ultimately, The Best Crispy Asian Brussel Sprouts transform a simple vegetable into a delightful culinary experience. The balance of textures and flavors leaves you craving more while staying committed to wholesome, nutritious eating. As a flexible and appealing dish, it encourages everyone to enjoy a vibrant, healthful meal.

    Ingredients Overview

    Essential Ingredients for The Best Crispy Asian Brussel Sprouts

    To prepare delicious and perfectly crispy Asian brussel sprouts, you’ll need the following ingredients:

    • 1 pound brussel sprouts (trimmed and halved): The main ingredient, brussel sprouts, are low in calories and high in vitamins and minerals.
    • 2 tablespoons olive oil: For roasting, this oil adds flavor and helps create a crispy texture.
    • 2 tablespoons soy sauce (or tamari for gluten-free): Adds an umami flavor, with tamari ensuring it remains gluten-free.
    • 1 tablespoon maple syrup: A natural sweetener that balances out the savory elements.
    • 1 teaspoon sesame oil: Provides a delicious nutty flavor, perfect for an Asian-style dish.
    • 2 cloves garlic (minced): Adds aromatic depth and complements the brussel sprouts beautifully.
    • 1 teaspoon fresh ginger (grated): Provides a spicy kick and contributes to the overall flavor profile.
    • 1 tablespoon rice vinegar: Adds acidity and brightness, enhancing the dish’s flavors.
    • Sesame seeds (for garnish): A nutritious topping, adding a crunchy finish.
    • Chopped green onions (for garnish): Brightens the dish and adds freshness.

    These ingredients collectively make for an exceptional combination of flavors, texture, and nutrition, ensuring that your brussel sprouts shine on any dinner table.

    Dietary Substitutions to Customize Your The Best Crispy Asian Brussel Sprouts

    Flexible and adaptable, this recipe allows you to cater to various dietary preferences. Here are some substitutions and adjustments you can employ:

    • Soy Sauce Substitution: For those avoiding soy, coconut aminos are an excellent alternative with a similar taste.
    • Vegan Option: This recipe is already vegan but can be customized further by omitting the honey/maple syrup for a completely sugar-free version.
    • Sweetener Alternatives: Use agave nectar or a sugar substitute like stevia to maintain sweetness for low-calorie diets.
    • Oils: If you want a higher aroma of toasted flavor, replace olive oil with avocado oil or sesame oil.
    • Low-Sodium Adaptation: To manage salt intake, utilize low-sodium soy sauce or adjust the quantity to suit your dietary needs.
    • Gluten-Free Options: Ensure that all sauces used are certified gluten-free to accommodate gluten sensitivities.

    Utilizing these substitutions allows you to make The Best Crispy Asian Brussel Sprouts fit into various lifestyles while preserving the deliciousness of the original recipe. Embrace creativity in the kitchen and enjoy customizing according to your preferences!

    How to Prepare the Perfect The Best Crispy Asian Brussel Sprouts: Step-by-Step Guide

    Now that you have a grasp of the ingredients and their purposes, it’s time to bring everything together. Follow this step-by-step guide to prepare The Best Crispy Asian Brussel Sprouts:

    1. Preheat the Oven: Begin by preheating your oven to 425°F (220°C). This hot environment will ensure that your brussel sprouts get that perfect crispy texture.

    2. Prepare the Brussel Sprouts: Rinse the brussel sprouts under cold water to remove any dirt or impurities. Trim the ends and slice each sprout in half. This not only helps them cook evenly but exposes more surface area to get crispy.

    3. Make the Marinade: In a large bowl, combine olive oil, soy sauce, maple syrup, sesame oil, garlic, ginger, and rice vinegar. Whisk the ingredients together until you achieve a smooth and cohesive mixture. The aroma should be delightful!

    4. Toss the Brussel Sprouts: Add the halved brussel sprouts to the bowl with the marinade. Toss them gently, ensuring that each piece is fully coated in the flavorful mixture.

    5. Spread on a Baking Sheet: Line a baking sheet with parchment paper for easier cleanup and spread the brussel sprouts in a single layer, cut side down. Avoid overcrowding as this will allow them to roast instead of steam.

    6. Roast in the Oven: Place the baking sheet in the preheated oven and roast for about 20-25 minutes. Halfway through, give them a good stir to ensure even cooking and browning.

    7. Check for Crispiness: After 25 minutes, check to see if the brussel sprouts are golden brown and crispy. If desired, let them roast for an additional 5 minutes for extra crunch.

    8. Garnish and Serve: Once they are done roasting, remove them from the oven, sprinkle with sesame seeds and chopped green onions for added flavor and presentation.

    9. Enjoy: Serve your crispy Asian brussel sprouts hot as a side dish, or toss them into salads or Buddha bowls for added texture and flavor.

    This step-by-step recipe is designed for anyone, from newlyweds cooking together to busy professionals seeking healthy meals. With just a few simple steps, you can enjoy a nutritious dish that emphasizes freshness and flavor while holding true to your dietary preferences.

    Mastering The Best Crispy Asian Brussel Sprouts: Advanced Tips and Variations

    To elevate your experience with The Best Crispy Asian Brussel Sprouts, it’s helpful to implement a few advanced tips and explore variations:

    • Add Protein: For a heartier meal, consider adding roasted chickpeas or tofu tossed in the same marinade. This addition provides a great protein boost while maintaining the dish’s vegetarian nature.
    • Experiment with Spices: Spice lovers can add a touch of red pepper flakes or cayenne pepper to the marinade for a spicy kick.
    • Nuts and Seeds: Incorporate toasted nuts such as crushed cashews or almonds for added texture and flavor.
    • Use Fresh Herbs: Top your sprouts with fresh cilantro or mint for an herbaceous twist that enhances their appeal.
    • Tropical Touch: For an unexpected twist, add segments of orange or pineapple towards the end of roasting for a refreshing and fruity element.
    • Make it Saucy: Drizzle with a dash of sriracha or chili garlic sauce for an exciting heat and delicious sauce.

    These advanced tips and variations not only enhance the flavor profile but also keep the dish interesting. Feel free to get creative in the kitchen and make The Best Crispy Asian Brussel Sprouts a signature dish that you can modify to suit your taste and preferences!

    How to Store The Best Crispy Asian Brussel Sprouts: Best Practices

    After enjoying your crispy Asian brussel sprouts, you may find yourself with leftovers or want to prep for future meals. Here’s how to store and maintain their quality:

    • Refrigeration: Allow the brussel sprouts to cool completely before transferring them to an airtight container. They can last in the fridge for up to 4 days. When reheating, consider doing so in a skillet for optimal crispiness.

    • Freezing: Although it’s best to consume them fresh, you can freeze cooked sprouts. Place them in a freezer-safe bag after they cool and try to remove as much air as possible. They will maintain quality for up to 3 months.

    • Reheating: To revive your leftover brussel sprouts, heat a small amount of oil in a pan and lightly fry until heated through. This process enhances their crispness, making them just as delightful as when first made.

    For those who prioritize health and flavor, knowing how to properly store your brussel sprouts ensures that your healthy dinner recipes can be enjoyed over time. By following these simple steps, you can reduce food waste and savor every delicious moment!

    Nutritional Value of The Best Crispy Asian Brussel Sprouts

    For those of you who are health-conscious, knowing the nutritional profile of your meals is essential. Here’s a breakdown of the primary nutrients found in The Best Crispy Asian Brussel Sprouts:

    Nutritional Information (Per Serving, Approximate)

    • Calories: 150
    • Total Fat: 10g (Saturated Fat: 1g)
    • Cholesterol: 0mg
    • Sodium: 200mg
    • Total Carbohydrates: 14g (Dietary Fiber: 5g)
    • Sugars: 3g
    • Protein: 4g

    Key Nutritional Benefits

    • Vitamins: Rich in vitamins C and K, supporting immune function and healthy bones.
    • Dietary Fiber: High fiber content aids digestion and helps maintain healthy cholesterol levels.
    • Low-Calorie: With fewer calories than traditional sides, they’re an excellent choice for anyone watching their weight.

    Integrating The Best Crispy Asian Brussel Sprouts into your diet is not only a smart culinary choice but also a commitment to your health. This recipe embodies the essence of healthy dinner recipes—delicious, satisfying, and nutritionally sound.

    FAQs: Frequently Asked Questions About The Best Crispy Asian Brussel Sprouts

    1. Can I make this recipe ahead of time?

    Absolutely! You can prepare the brussel sprouts and store them in the fridge for up to a day before roasting. Just remember to toss them in the marinade right before cooking.

    2. Are brussel sprouts good for you?

    Yes! Brussel sprouts are packed with essential vitamins, minerals, and fiber, making them an excellent choice for a health-conscious diet.

    3. What can I serve with The Best Crispy Asian Brussel Sprouts?

    These brussel sprouts make excellent companions for various dishes, including grilled chicken, tofu, or over a bed of rice or quinoa.

    4. Can I use frozen brussel sprouts for this recipe?

    While fresh brussel sprouts are recommended for the best texture, frozen sprouts can be used in a pinch. Just ensure to thaw them thoroughly before cooking.

    5. How can I make this recipe spicier?

    If you enjoy heat, add red pepper flakes or a drizzle of sriracha in the marinade, or serve with a spicy dipping sauce.

    6. Is there a way to make this dish more suited for meal prepping?

    For meal prepping, roast a large batch and store them in individual containers. They also pair well with grains and proteins for a balanced meal.

    7. Can I substitute the maple syrup for something else?

    Yes, you can use honey, agave syrup, or your preferred sweetener in place of maple syrup to suit your taste preferences.

    This FAQ section addresses common questions about The Best Crispy Asian Brussel Sprouts while subtly reinforcing the recipe’s appeal as part of healthy dinner recipes. They appeal to a wide audience and guide readers toward successfully preparing and enjoying this dish.


    Incorporating The Best Crispy Asian Brussel Sprouts into your weekly meals will not only delight your taste buds but also nourish your body. Embrace the flavors, textures, and health benefits that come from trying new recipes—and watch as this dish quickly becomes a favorite in your household!

  • Easy Dill Pickle Bacon Ranch Pasta Recipe

    Easy Dill Pickle Bacon Ranch Pasta Recipe

    Easy Dill Pickle Bacon Ranch Pasta Recipe: A Tropical Delight

    Introduction to Easy Dill Pickle Bacon Ranch Pasta Recipe

    Welcome to a delicious twist on traditional pasta recipes! The Easy Dill Pickle Bacon Ranch Pasta Recipe is a remarkable blend of flavors that takes a classic dish to a new level. In just one pot, you can create a delightful meal that captures the tanginess of dill pickles, the savory crunch of bacon, and the creamy smoothness of ranch dressing. This dish is perfect for home cooks of all skill levels, and its simple preparation makes it ideal for busy parents, students, and working professionals alike.

    What makes this recipe stand out is its versatility. Whether you’re looking for a quick weeknight dinner, a satisfying meal for your family, or a dish that will impress guests at a cookout, this recipe ticks all the boxes. Additionally, it accommodates various dietary preferences; you can easily adapt it to be gluten-free, low-calorie, or even vegan by swapping out certain ingredients.

    Moreover, this pasta dish is not just about pleasing the palate; it also brings some health benefits. The dill pickles provide essential vitamins and minerals, while the ranch dressing can be made with low-fat ingredients to lighten the meal. By incorporating this recipe into your weekly meal rotation, you’ll enjoy a hearty, flavorful dish that pleases and nourishes the whole family.

    Join us as we dive deep into this delightful pasta recipe, ensuring you have everything you need to whip up a delicious dinner in no time!

    Benefits and Advantages of Easy Dill Pickle Bacon Ranch Pasta Recipe

    When it comes to pasta recipes, few meals offer the same combination of flavor, simplicity, and adaptability as the Easy Dill Pickle Bacon Ranch Pasta. Here are several reasons why this dish stands out among the crowd:

    1. Simplicity: One of the biggest advantages of this recipe is its straightforward preparation. With just a few ingredients and minimal cooking time, you can create a mouthwatering dish that requires no complicated techniques or extensive knowledge of culinary practices. This makes it ideal for beginners, busy parents, or anyone looking for a fast meal solution.

    2. Flavor Explosion: The combination of dill pickles, bacon, and ranch dressing creates a flavor profile that tantalizes the taste buds. The pop of acidity from the pickles complements the richness of the bacon, while the ranch dressing brings everything together with its smooth and creamy texture. It’s a delightful party for your palate!

    3. Health Considerations: This dish offers numerous health benefits. While it may seem indulgent, you can make healthy choices without sacrificing flavor. For instance, using whole-grain pasta boosts fiber content, and opting for low-fat or Greek yogurt-based ranch dressing can cut calories. Dill pickles are low in calories and contribute healthy probiotics. Adjust the ingredients to suit your dietary needs, making the dish truly health-conscious.

    4. Customizable for Various Diets: Whether you’re vegan, vegetarian, gluten-free, or following a low-carb plan, this pasta recipe can easily adapt. Swap out traditional bacon for turkey bacon or tempeh, choose gluten-free pasta or zoodles (zucchini noodles) for a low-carb option, and create a creamy dressing that’s dairy-free.

    5. Perfect for Meal Prep: This dish stores well in the fridge and can be made in advance—ideal for meal prepping or for leftovers. You can prepare a large batch to enjoy throughout the week, making it a convenient option for those with busy schedules.

    Overall, the Easy Dill Pickle Bacon Ranch Pasta Recipe shines for its delicious taste, quick prep time, and adaptability. Why not give it a try and experience these benefits yourself?

    Ingredients Overview

    Essential Ingredients for Easy Dill Pickle Bacon Ranch Pasta Recipe

    To make the Easy Dill Pickle Bacon Ranch Pasta, you’ll need the following ingredients:

    • 8 ounces of pasta: (e.g., penne, rotini, or gluten-free pasta) – This forms the base of your dish. Choose whole grain for a healthier option.

    • 6 strips of bacon: (or turkey bacon for a lower-fat version) – Adds a savory, crunchy element to the pasta.

    • 1 cup of dill pickles, chopped: – Provides a zesty, tangy flavor to the pasta, along with health benefits like vitamins and probiotics.

    • 1 cup of ranch dressing: (store-bought or homemade) – The creamy consistency of ranch dressing adds richness and ties all the flavors together.

    • 1/2 cup of sour cream: (or Greek yogurt for a lighter option) – This enhances creaminess and adds a tangy flavor.

    • 1/2 cup of cheese: (e.g., shredded cheddar or dairy-free option) – Cheese adds melty goodness and pairs perfectly with the dish.

    • Salt and pepper to taste: – Vital for seasoning to enhance the overall flavor profile.

    Optional Garnish:

    • Chopped fresh dill or chives: – For a fresh herbal touch that complements the pickle flavor.

    Dietary Substitutions to Customize Your Easy Dill Pickle Bacon Ranch Pasta Recipe

    1. For Gluten-Free Eaters: Use gluten-free pasta made from rice, corn, or quinoa. There are many excellent options on the market that release a similar taste and texture.

    2. For Low-Calorie Options: Substitute the bacon with cooked turkey bacon or crumbled tempeh; these alternatives maintain flavor while reducing fat and calories. You can also choose low-fat or homemade ranch dressing using Greek yogurt to cut down calories.

    3. For Vegan Diners: Use plant-based bacon alternatives or smoked tempeh to achieve a savory flavor profile. Instead of ranch dressing, mix vegan mayo and spices like garlic powder and dill for a creamy dressing that is free from animal products.

    4. For Creaminess Without Dairy: As mentioned, Greek yogurt works wonderfully as a substitute for sour cream. Likewise, you can use cashew cream or coconut yogurt for a dairy-free option.

    5. For Extra Protein: Toss in cooked shredded chicken, chickpeas, or tofu for additional protein content, making it a heartier meal.

    The beauty of this Easy Dill Pickle Bacon Ranch Pasta Recipe is its versatility. Whether you follow specific dietary restrictions or simply want to try something different, you can tweak the ingredients easily to suit your needs.

    How to Prepare the Perfect Easy Dill Pickle Bacon Ranch Pasta Recipe: Step-by-Step Guide

    Ready to prepare this exciting dish? Follow this detailed step-by-step guide to create your Easy Dill Pickle Bacon Ranch Pasta:

    1. Cook the Pasta: Begin by boiling a large pot of salted water over medium heat. Add 8 ounces of your chosen pasta. Cook according to package instructions until al dente, usually around 8-10 minutes. Stir occasionally to prevent sticking.

    2. Cook the Bacon: While the pasta cooks, heat a large skillet over medium-high heat. Add the bacon strips and cook until crispy, about 5-7 minutes, flipping occasionally. Once cooked, transfer the bacon to a plate lined with paper towels to drain excess grease. Once cooled, crumble the bacon into bite-sized pieces.

    3. Sauté Diced Pickles: In the same skillet (with the bacon grease still in it), add your chopped dill pickles and sauté them for 2-3 minutes over medium heat. This step enhances the flavor and texture of the pickles.

    4. Mix the Dressing: In a mixed bowl, combine 1 cup of ranch dressing and 1/2 cup of sour cream (or Greek yogurt). Stir until fully blended. This mixture will coat the pasta and infuse it with flavor.

    5. Combine Ingredients: Once the pasta is cooked, drain the water and add the pasta directly to the skillet with the sautéed pickles. Pour the ranch dressing mixture over the pasta and toss to combine evenly.

    6. Add Bacon and Cheese: Sprinkle the crumbled bacon and 1/2 cup of shredded cheese (if using) into the pasta. Stir everything together until all ingredients are well incorporated.

    7. Season to Taste: Taste your pasta dish and add salt and pepper as needed. For an extra kick, feel free to include a dash of garlic powder or onion powder.

    8. Garnish and Serve: Serve the Easy Dill Pickle Bacon Ranch Pasta warm. Garnish with chopped dill or chives for a fresh herbal touch, creating an inviting aesthetic.

    By following these steps, you’ll create a delightful pasta dish that’s not only easy but also customizable to suit various dietary preferences. Enjoy!

    Mastering Easy Dill Pickle Bacon Ranch Pasta Recipe: Advanced Tips and Variations

    Once you’ve mastered the basic Easy Dill Pickle Bacon Ranch Pasta, you can take it to the next level with additional tips and variations:

    1. Add Veggies: For increased nutrition, consider adding vegetables. Cherry tomatoes, corn, or bell peppers complement the flavors well. You can sauté them with the pickles or mix them in raw for a crunchy texture.

    2. Spice It Up: If you love a bit of heat, add diced jalapeños or a sprinkle of crushed red pepper flakes during the mixing phase. This addition enhances the overall taste and elevates the dish to new flavor heights.

    3. Herbal Infusion: Experiment with different herbs. Fresh parsley, basil, or even cilantro can bring unique flavors to the dish while refreshing the overall palate.

    4. Creamy Variations: For an ultra-creamy pasta experience, consider mixing in a dollop of cream cheese or mascarpone for extra indulgence. This variation pairs perfectly with any of the dietary adaptations.

    5. Serving Suggestions: Though this pasta dish is delightful on its own, it pairs wonderfully with a crisp salad or some garlic bread on the side.

    Your options are nearly limitless with this versatile recipe! Adapting the Easy Dill Pickle Bacon Ranch Pasta opens even more exciting avenues for creativity and experimentation in your kitchen.

    How to Store Easy Dill Pickle Bacon Ranch Pasta Recipe: Best Practices

    Storing your Easy Dill Pickle Bacon Ranch Pasta properly ensures that it retains its flavor and freshness. Here’s how to do it right:

    1. Refrigeration: Allow any leftover pasta to cool to room temperature before transferring it to an airtight container. Store it in the refrigerator for up to 3-5 days. Before reheating, consider adding a splash of milk or extra ranch dressing to keep it creamy.

    2. Freezing: If you want to save meals for the long term, you can freeze this pasta. Place cooled pasta in freezer-safe bags or containers, ensuring no excess air remains. It can be stored in the freezer for up to 3 months. When you’re ready to enjoy it again, thaw overnight in the refrigerator before reheating.

    3. Reheating: To reheat, place your pasta in a skillet over low-medium heat, stirring continually. Add a touch of water or additional ranch dressing to ensure it doesn’t dry out. You can also heat it in the microwave, covered, for 1-2 minutes until warm.

    Proper storage allows you to enjoy this delicious dish over multiple meals, making it highly approachable for busy lifestyles!

    Nutritional Value of Easy Dill Pickle Bacon Ranch Pasta Recipe

    Understanding the nutritional value of your meals can be crucial in making informed dietary choices. Here’s a breakdown of the nutritional information for Easy Dill Pickle Bacon Ranch Pasta:

    Approximate Nutritional Information per Serving:

    • Calories: 400-500 (based on ingredients used)
    • Protein: 15-20g (with adjustments based on bacon, cheese, and optional protein additions)
    • Fat: 25-30g (can be lower with reduced fat dressing and bacon)
    • Carbohydrates: 40-50g (varies with type of pasta)
    • Fiber: 3-5g (higher with whole grain or veggie pasta options)
    • Sugars: 2-4g
    • Sodium: 800-1000mg (can be reduced with low-sodium bacon and dressings)

    Health Benefits:

    • Dill Pickles: Provide probiotics which are beneficial for gut health.
    • Whole Grain Pasta: Offers more fiber and essential nutrients.
    • Bacon (or Alternatives): Provides flavor and satisfaction, and turkey bacon can make it healthier.
    • Ranch Dressing: Can be tailored to be low-fat for fewer calories.

    To tailor the meal to your nutritional needs, opt for whole-grain pasta, lower-fat options, and consider the dietary modifications mentioned earlier. Understanding the nutritional value helps you enjoy your meal while making informed choices.

    FAQs: Frequently Asked Questions About Easy Dill Pickle Bacon Ranch Pasta Recipe

    Q: Can I make this recipe vegan?
    A: Yes! You can substitute bacon with plant-based bacon or tempeh. For the ranch dressing, mix vegan mayo with herbs and use cashew cream or coconut yogurt as a base for a dairy-free version.

    Q: How do I store leftovers?
    A: Store leftover pasta in an airtight container in the refrigerator for up to 3-5 days. For longer storage, freeze the pasta for up to 3 months.

    Q: Can I use a different type of pasta?
    A: Absolutely! Any pasta works well, whether it’s traditional or gluten-free. For a low-carb option, try zucchini noodles (zoodles).

    Q: How can I add more protein to this dish?
    A: You can increase protein by adding cooked shredded chicken, chickpeas, or even a scoop of protein powder in the dressing.

    Q: How do I reheat leftovers without drying them out?
    A: Add a splash of milk or a bit of ranch dressing when reheating to keep it creamy. You can reheat on the stove or in the microwave.

    Q: What’s the best way to customize this recipe for guests?
    A: Offer toppings on the side so guests can customize their dishes. Provide additional dill pickles, various cheeses, or hot sauce to let everyone personalize their pasta to their liking!

    By addressing these frequently asked questions, we hope to clear any uncertainties you might have while preparing your Easy Dill Pickle Bacon Ranch Pasta. Enjoy cooking and experimenting with this delectable dish that fits perfectly into a variety of lifestyles and diets!

  • Easy Easter Poke Cake Colorful Dessert

    Easy Easter Poke Cake Colorful Dessert

    Easy Easter Poke Cake Colorful Dessert: A Tropical Delight

    Introduction to Easy Easter Poke Cake Colorful Dessert

    Spring is a time of renewal, blossoming flowers, and joyous celebrations, making it the perfect opportunity to explore delightful dessert recipes that capture the spirit of the season. Introducing the Easy Easter Poke Cake Colorful Dessert, a vibrant and flavorful treat that appeals to all ages and preferences. This recipe stands out not only for its eye-catching appearance but also for its delicious taste and simple preparation.

    Imagine a cake soaked in a medley of colorful jello, topped with whipped cream and sprinkles that evoke the spirit of Easter. This dessert is not just visually stunning; it’s also a hit among busy parents and home cooks because it requires minimal effort and ingredients. What makes it even more appealing is its versatility; it can be easily adapted to be gluten-free, vegan, or lower in calories, catering to various dietary needs without compromising on flavor.

    The Easy Easter Poke Cake is an excellent choice for gatherings with family and friends, brunches, or as a festive centerpiece for your Easter table. Its light, refreshing taste makes it a perfect finish to any meal. So, why not treat yourself and your loved ones to this joyful springtime dessert? Your culinary adventures will flourish as you celebrate the beauty of the season!

    Benefits and Advantages of Easy Easter Poke Cake Colorful Dessert

    One of the most significant advantages of the Easy Easter Poke Cake is its simplicity in preparation. This recipe is designed to save you time, making it a perfect choice for busy workdays or family gatherings. With minimal ingredients, the process becomes straightforward: you bake, poke, and pour! This uncomplicated approach ensures that even novice bakers can create a masterpiece without stress.

    Health Benefits
    This colorful dessert offers more than just visual appeal—it also boasts some positive health aspects. By using lighter and healthier ingredients, you can make adjustments that suit your lifestyle while still creating a delicious treat. For instance, opting for reduced-sugar jello and part-skim ricotta or Greek yogurt can cut down calories and enhance the nutritional profile, providing a dessert that’s not only indulgent but also satisfying.

    Customizable Nature
    Another exciting feature of this recipe is its personalized versatility. The Easy Easter Poke Cake can easily align with various dietary preferences, including gluten-free, vegan, and dairy-free options. By swapping out traditional ingredients for alternatives, you’ll be able to create a cake that meets everyone’s needs, allowing everyone at the table to partake in the fun.

    Furthermore, with its colorful layers and eye-catching presentation, this cake is bound to be the show-stopping dessert at any celebration. Kids and adults alike will be drawn to its playful colors and light flavors, making it a hit at parties, celebrations, or simply as a sweet treat after dinner.

    In summary, the Easy Easter Poke Cake not only simplifies your baking endeavors but also brings a healthy, beautiful, and adaptable dessert that everyone can enjoy. So gather your ingredients, roll up your sleeves, and get ready to impress your guests with this seasonal favorite!

    Ingredients Overview

    Essential Ingredients for Easy Easter Poke Cake Colorful Dessert

    To craft this delightful Easter dessert, you’ll need the following ingredients:

    • 1 box of yellow cake mix (or gluten-free cake mix for a gluten-free option)
    • 3 large eggs
    • 1 cup water
    • 1 cup milk (or almond milk for a dairy-free version)
    • 1 cup colorful jello (your choice of flavor; ensure it’s gluten-free if needed)
    • 1 cup whipped topping (either homemade or store-bought; use coconut cream for vegan)
    • 1/2 cup sprinkles (look for gluten-free options if necessary)
    • Optional: fresh fruit for garnish (berries, slices of kiwi, etc.)

    These ingredients combine to create a moist and flavorsome cake that captures the essence of Easter celebrations.

    Dietary Substitutions to Customize Your Easy Easter Poke Cake Colorful Dessert

    Feel free to adapt the ingredients to meet specific dietary needs:

    • Gluten-Free: Simply swap the yellow cake mix for a certified gluten-free version.
    • Vegan: Use a plant-based milk alternative, like almond or oat milk, and substitute the eggs with a combination of 1 tablespoon of chia seeds mixed with 3 tablespoons of water, letting it sit for a few minutes to thicken.
    • Low-Calorie: Opt for sugar-free jello and a lighter whipped topping, which will provide a touch of sweetness without sacrificing flavor.

    By making these simple substitutions, you can ensure that this colorful dessert can be enjoyed by everyone at your gathering while keeping health considerations in mind.

    How to Prepare the Perfect Easy Easter Poke Cake Colorful Dessert: Step-by-Step Guide

    Creating your Easy Easter Poke Cake Colorful Dessert is a straightforward process. Just follow these simple steps to create a dessert that sings with vibrant flavor:

    1. Preheat the Oven: Set your oven temperature to 350°F (175°C) to prepare for baking your cake.

    2. Prepare the Cake Batter: In a mixing bowl, combine the yellow cake mix, large eggs, and water. Mix until well combined and no lumps remain.

    3. Pour into a Pan: Grease a 9×13-inch baking dish with cooking spray. Pour the cake batter evenly into the pan and smooth the top with a spatula.

    4. Bake the Cake: Place the baking dish in the preheated oven and bake for about 30-35 minutes or until a toothpick inserted in the center comes out clean.

    5. Cool the Cake: Once baked, remove the cake from the oven and let it cool in the pan for about 10 minutes. Then, use a fork to poke holes all over the surface of the cake (about 1-inch apart) to allow the jello to seep in later.

    6. Prepare the Jello: While the cake cools, prepare the jello according to the package instructions, but use only 1 cup of cold water instead of 2 cups to ensure a more concentrated flavor.

    7. Pour the Jello Over the Cake: Carefully pour the prepared jello over the poked cake, ensuring it seeps into the holes for maximum flavor. Refrigerate the cake for at least 2 hours to allow the jello to set.

    8. Prepare Whipped Topping: After the cake has set, spread the whipped topping evenly over the surface of the cake.

    9. Add Sprinkles and Garnish: Sprinkle the colorful jimmies and options for garnishing with fresh fruit on top before serving.

    10. Slice and Serve: Cut the cake into squares and serve chilled. Enjoy the delightful burst of flavors in each bite as you celebrate Easter!

    By following these clear steps, you’ll ensure a successful baking experience that caters to various dietary preferences, resulting in a beautiful centerpiece for your table.

    Mastering Easy Easter Poke Cake Colorful Dessert: Advanced Tips and Variations

    To elevate your dessert-making experience, consider these advanced tips and variations for your Easy Easter Poke Cake:

    • Layering Flavors: Try using different flavors of jello for each layer. For instance, you could create layers of strawberry, lime, and blueberry jello to create a stunning rainbow effect.

    • Infuse with Juice: For added flavor, consider replacing some of the water in the jello preparation with fruit juice. This small change can deepen the flavors and add natural sweetness.

    • Add Coconut: For a tropical twist, sprinkle shredded coconut atop the whipped topping before garnishing with sprinkles. This addition introduces a new texture and flavor that complements fruity jello beautifully.

    • Personal Touch: Encourage your guests or family to customize their own pieces with additional toppings like toasted nuts, chocolate chips, or fresh fruit. Creating a “build-your-own” poke cake can be a fun twist that engages everyone.

    With these tips and variations, you can not only master the basic recipe but also personalize it to suit your preferences and make your gathering memorable.

    How to Store Easy Easter Poke Cake Colorful Dessert: Best Practices

    Proper storage is essential to maintain the freshness and integrity of your Easy Easter Poke Cake. Here are some best practices to ensure your cake stays delicious:

    • Refrigeration: Store the cake in the refrigerator covered with plastic wrap or in an airtight container. This helps maintain moisture while preventing any odors from the fridge from affecting the cake’s flavor.

    • Freezing Options: If you want to freeze the cake for later enjoyment, slice it into individual servings and place each piece in a freezer-safe container with parchment paper between layers to prevent sticking. This allows for easy thawing later.

    • Reheating Tips: To enjoy the cake warm, lightly microwave individual pieces for about 15-20 seconds or until just warmed through. This can revive the flavors, especially if enjoyed after thawing.

    By following these storage methods, you can extend the life of your Easy Easter Poke Cake and ensure it remains as delightful as the first day it was made!

    Nutritional Value of Easy Easter Poke Cake Colorful Dessert

    It’s essential to know the nutritional value of the Easy Easter Poke Cake so you can educate guests on your delicious creation. This cake is light yet indulgent, making it perfect for those who want a sweet treat without overindulging. Here’s an approximate breakdown of the nutritional value per serving:

    • Calories: 180
    • Total Fat: 5g
    • Saturated Fat: 2g
    • Cholesterol: 40mg
    • Sodium: 210mg
    • Total Carbohydrates: 28g
    • Dietary Fiber: 1g
    • Sugars: 14g
    • Protein: 3g

    Keep in mind that these values can vary based on specific ingredients used or substitutions made. By monitoring the nutritional content, you can confidently serve this cake to diet-conscious friends and family without sacrificing flavor or joy.

    FAQs: Frequently Asked Questions About Easy Easter Poke Cake Colorful Dessert

    Here are some common questions related to the Easy Easter Poke Cake, along with clear and concise answers:

    What types of jello can I use for the cake?

    You can use any flavor of jello you enjoy! Popular choices include strawberry, lime, blueberry, or even mixed berry for a fruit medley. Just ensure any flavor aligns with your dietary restrictions, particularly if catering to gluten-free needs.

    Can I make this cake in advance?

    Absolutely! The Easy Easter Poke Cake can be prepared a day in advance. Just be sure to keep it refrigerated until serving to maintain freshness. This makes it perfect for busy schedules or gatherings.

    How can I make this dessert vegan-friendly?

    To ensure a vegan version, simply swap out eggs for chia seeds or mashed bananas, use almond or oat milk, and choose a non-dairy whipped topping like coconut cream.

    Is it necessary to chill the cake after pouring the jello?

    Yes, chilling the cake is vital for the jello to properly set and absorb into the cake, allowing for that burst of flavor when you take a bite. The recommended chilling time is at least 2 hours.

    Can I freeze leftover cake?

    Yes, you can freeze slices of the cake. Just ensure they are properly wrapped and stored in an airtight container to prevent freezer burn.

    With these FAQs, you’ll have a broader understanding of the Easy Easter Poke Cake Colorful Dessert and be ready to impress your guests with your knowledge as well as your baking prowess!


    As you embarking on creating this Easy Easter Poke Cake Colorful Dessert, may you find joy in the process and delight in sharing it with those you cherish. Happy baking, and enjoy the colorful journey of flavors you’re about to savor!

  • Easy Cucumber Salad With Crab Meat

    Easy Cucumber Salad With Crab Meat

    Easy Cucumber Salad With Crab Meat: A Tropical Delight

    Introduction to Easy Cucumber Salad With Crab Meat

    If you’re in search of a refreshing and nutritious dish, look no further than this Easy Cucumber Salad With Crab Meat. This salad combines the crisp texture of cucumber with the succulent flavors of crab meat, creating a light and vibrant meal or side dish. Easy to prepare and perfect for any occasion, this cucumber salad is not just a feast for the eyes but also offers a wealth of health benefits.

    Imagine enjoying a dish that’s not only delicious but also quick to whip up, making it ideal for your busy life. Whether you’re a working professional, a student juggling classes, or a parent managing a household, this cucumber salad is here to simplify your culinary experience. Packed with vitamins and minerals from fresh cucumbers, along with the lean protein from crab, this recipe is perfect for those who want to maintain a healthy lifestyle without compromising on flavor.

    Moreover, this salad caters to various dietary needs. It can easily be modified to accommodate gluten-free and low-calorie diets, making it a versatile choice for everyone. Its vibrant colors and tropical flavors will transport your taste buds straight to a sunny beach, making each bite a delightful experience. With the easy steps provided, you’ll find yourself creating a dish that’s bound to impress your family and friends.

    Benefits and Advantages of Easy Cucumber Salad With Crab Meat

    There are countless reasons why this cucumber salad stands out from the rest. To begin with, it’s incredibly simple to prepare. With just a handful of fresh ingredients and minimal cooking required, even those who are new to the kitchen will find it easy to tackle. In about 20 minutes, you can create a dish that looks like it took hours to prepare!

    Health Benefits

    This salad is brimming with health benefits. Cucumbers, the star ingredient, are low in calories yet high in essential nutrients. They are hydrating and provide a refreshing crunch. Rich in antioxidants and vitamins C and K, cucumbers can enhance your skin’s appearance and support bone health.

    Crab meat, on the other hand, is an excellent source of lean protein and contains essential omega-3 fatty acids. These fats are known to promote heart health and reduce inflammation. The combination of these ingredients means you’re getting a meal that is not only satisfying but also nourishing.

    Dietary Flexibility

    Another fantastic aspect of this Easy Cucumber Salad With Crab Meat is its adaptability. You can easily make it vegan by substituting crab meat with artichoke hearts or chickpeas for added protein. Additionally, the salad can be transformed into a gluten-free option simply by ensuring that all your dressings and sauces are free from gluten. This flexibility is ideal for potlucks, gatherings, or family dinners, making it a universally appealing side dish.

    Ultimately, this salad is a modern, health-conscious choice that’s perfect for any meal, be it a casual lunch or an elegant dinner party. The fresh flavors combined with health benefits make it an exceptional dish to include in your recipe rotation.

    Ingredients Overview

    Essential Ingredients for Easy Cucumber Salad With Crab Meat

    For the Easy Cucumber Salad With Crab Meat, you’ll need the following ingredients:

    • 2 large cucumbers, sliced
    • 1 cup of crab meat, preferably lump
    • 1/4 cup finely chopped red onion
    • 1/4 cup diced red bell pepper
    • 1 cup cherry tomatoes, halved
    • 1/2 cup mayonnaise (light or vegan substitutes can be used)
    • 1 tablespoon lemon juice
    • Salt and pepper to taste
    • Fresh dill or parsley for garnish

    These ingredients combine to create a delightful medley of flavors and textures.

    • Cucumbers: Not only low-calorie but also rich in water, this ingredient keeps you hydrated.
    • Crab Meat: Provides lean protein and essential nutrients.
    • Red Onion & Bell Pepper: Introduces a crunch while adding vitamin C, increasing the immune-boosting quality of the dish.

    Dietary Substitutions to Customize Your Easy Cucumber Salad With Crab Meat

    If you or your dining companions have specific dietary preferences or restrictions, here are some substitutions to consider:

    • Mayo Alternatives: Use Greek yogurt for a tangy twist and added protein, or try avocado for a creamy, healthy fat option.
    • Protein Options: Swap out crab meat for firm tofu or cooked chickpeas for a plant-based protein alternative.
    • Gluten-Free Options: Ensure all your dressings are gluten-free, and replace any ingredients with gluten-containing ones with fresh herbs or gluten-free grains like quinoa.

    This adaptability allows everyone to enjoy the deliciousness of a cucumber salad while aligning with their dietary needs.

    How to Prepare the Perfect Easy Cucumber Salad With Crab Meat: Step-by-Step Guide

    Creating your own Easy Cucumber Salad With Crab Meat is simple and straightforward. Just follow these easy steps for a delightful culinary experience:

    1. Gather Your Ingredients: Start by collecting all your ingredients. Make sure your cucumbers are fresh and your crab meat is lump and free from shells.

    2. Prepare the Cucumbers: Wash the cucumbers thoroughly. Slice them thinly (about 1/4 inch thick) to ensure they mix well with the other ingredients.

    3. Chop the Vegetables: Finely chop the red onion and dice the red bell pepper. Halve the cherry tomatoes. This adds vibrant color and crunch to your salad.

    4. Prepare the Crab Meat: If using canned crab meat, drain it and check for any shell pieces. If using fresh crab, cook it until it’s done, then shred it into bite-sized pieces.

    5. Mix Ingredients: In a large mixing bowl, combine the sliced cucumbers, crab meat, red onion, red bell pepper, and cherry tomatoes.

    6. Make the Dressing: In a separate bowl, whisk together the mayonnaise, lemon juice, salt, and pepper. Adjust the seasoning according to your taste. If preferred, you can add chopped fresh dill or parsley for extra flavor.

    7. Combine: Pour the dressing over the cucumber salad mixture and gently toss until everything is evenly coated. Take care not to mash the ingredients.

    8. Chill: For the best flavor, cover the salad and refrigerate it for at least 30 minutes. This allows the flavors to meld beautifully.

    9. Serve: Once chilled, give the salad a final toss. Garnish with additional fresh herbs, if desired, before serving.

    10. Enjoy: Serve your Easy Cucumber Salad With Crab Meat as a refreshing side dish or a light meal.

    These straightforward instructions make this salad approachable for cooks of any skill level. Adjust the ingredients and steps to suit your preferences, keeping in mind any dietary restrictions.

    Mastering Easy Cucumber Salad With Crab Meat: Advanced Tips and Variations

    When mastering your Easy Cucumber Salad With Crab Meat, consider these advanced tips and variations for an enriched experience:

    Tips for Success

    1. Choose Quality Ingredients: Opt for fresh, high-quality crab meat as it significantly enhances the dish’s flavor.
    2. Texture Matters: Slice your cucumbers evenly to ensure a consistent texture throughout the salad.
    3. Chill for Flavor: Allow the salad to chill; this can improve the taste and texture. The longer it sits, the more flavors will develop.

    Variations to Consider

    1. Tropical Twist: Add diced mango or pineapple for a sweet and tropical variation that pairs beautifully with crab.
    2. Spicy Variation: Introduce diced jalapeños for a spicy kick, balancing the coolness of the cucumbers.
    3. Herb Garden: Experiment with different herbs, like basil or mint, for unique depth and flair.

    These tips and variations serve to elevate your dish, making it versatile enough to suit any occasion, from casual family dinners to classy get-togethers.

    How to Store Easy Cucumber Salad With Crab Meat: Best Practices

    Storing your Easy Cucumber Salad With Crab Meat correctly ensures it remains fresh and delicious for longer. Here are some best practices:

    Refrigeration

    • Short-Term Storage: If you plan to eat your salad within a few days, store it in an airtight container in the refrigerator. It can last up to 3 days, though it’s best enjoyed within the first day or two.
    • Preventing Wilt: To prevent cucumbers from getting too soggy, add the dressing right before serving if you plan to store it for longer.

    Freezing

    Freezing this salad is not recommended. The cucumbers will lose their crispness after thawing, and the texture will not be enjoyable. Therefore, prepare only what you plan to consume, leaving out the dressing until serving for optimal freshness.

    By following these storage tips, you can make the most of your cucumber salad’s refreshing flavors, helping you enjoy it over time.

    Nutritional Value of Easy Cucumber Salad With Crab Meat

    Understanding the nutritional composition of your Easy Cucumber Salad With Crab Meat can help you make informed dietary choices. Here’s a breakdown based on typical ingredients:

    Nutritional Information (per serving)

    • Calories: Approximately 200 calories
    • Protein: 15 grams
    • Fat: 10 grams (mainly from the mayonnaise and crab meat)
    • Carbohydrates: 10 grams
    • Fiber: 2 grams
    • Sugars: 3 grams
    • Vitamin C: 25% of the Daily Value (DV)
    • Calcium: 4% of the DV

    This nutritional profile highlights the meal as a excellent source of protein and low in calories, making it a fulfilling choice for various dietary preferences.

    FAQs: Frequently Asked Questions About Easy Cucumber Salad With Crab Meat

    Q1: What type of crab meat is best to use for this salad?

    A1: Lump crab meat is ideal for this recipe as it offers the best texture and flavor. However, you can substitute with imitation crab meat or even other proteins based on your preferences.

    Q2: Can I make this cucumber salad in advance?

    A2: Yes, you can prepare the cucumber salad in advance, but it’s best to avoid adding the dressing until you’re ready to serve to prevent the ingredients from wilting.

    Q3: What can I substitute for mayonnaise?

    A3: You may opt for Greek yogurt for a healthier twist, or use mashed avocado for a creamier, dairy-free alternative.

    Q4: How many servings does this recipe yield?

    A4: This recipe typically serves 4 to 6 people, depending on whether it is served as a side or a main dish.

    Q5: Can I add other vegetables to this salad?

    A5: Absolutely! Feel free to get creative by adding your favorite vegetables, such as radishes, celery, or even a handful of mixed greens for added fiber.

    With these answers, you’ll be better prepared to explore the full potential of your Easy Cucumber Salad With Crab Meat. This delightful dish invites versatility, perfect for any cooking enthusiast’s repertoire.

  • Tasty Rainbow Jello Poke Cake Dessert

    Tasty Rainbow Jello Poke Cake Dessert

    Tasty Rainbow Jello Poke Cake Dessert: A Tropical Delight

    Introduction to Tasty Rainbow Jello Poke Cake Dessert

    In the world of dessert recipes, few things can compare to the sheer joy and vibrant presentation of a Tasty Rainbow Jello Poke Cake. This delightful dessert combines fluffy vanilla cake with bright, flavorful jello in a stunning array of colors that is sure to captivate anyone who lays eyes on it. Whether you’re a busy parent looking for a simple weeknight dessert or a food enthusiast seeking the perfect treat for a gathering, this recipe is designed for you.

    The beauty of the Rainbow Jello Poke Cake lies not only in its aesthetic appeal. It’s incredibly simple to prepare, requiring minimal baking skills. With just a few ingredients, you can whip up a dessert that should impress anyone. Additionally, the recipe can be easily tailored to accommodate vegan, gluten-free, or low-calorie preferences, making it a truly versatile option for a wide range of dietary needs.

    Imagine a moist cake infused with layers of fruity jello and topped with a creamy frosting. This dessert isn’t merely pleasing to the palate; it brings joy and color to any celebration, from birthday parties to family reunions. So roll up your sleeves and get ready to create a dessert masterpiece that’s as delightful to make as it is to eat!

    Benefits and Advantages of Tasty Rainbow Jello Poke Cake Dessert

    The Tasty Rainbow Jello Poke Cake is more than just a feast for the eyes; it brings numerous benefits and advantages that are perfect for home cooks of all skill levels.

    1. Easy Preparation

    The first benefit is the simplicity of preparation. This cake doesn’t require extensive baking expertise or fancy equipment. With only a few crucial steps, you can create a stunning masterpiece that rivals any bakery creation. Mixing the ingredients is quick, and even the baking time is relatively short! The straightforward process makes it ideal for busy parents looking for a fun dessert to surprise their family or for students who want to impress friends without spending all day in the kitchen.

    2. Health-Conscious Options

    Next up, let’s talk about health benefits. The flexibility in ingredient choices allows you to create a more health-conscious treat. You can substitute regular ingredients with alternatives that cater to various dietary preferences. For instance, using a gluten-free cake mix or opting for natural fruit jello can significantly cut down sugar and artificial ingredients, offering a fresher and lighter dessert option.

    3. Customizable Flavors and Colors

    One of the standout features of this dessert is its colorful presentation. Not only does it appeal to children and adults alike, but it also allows for creativity in choosing flavors and colors. Different flavor combinations can be experimented with by mixing various jello flavors, providing you a chance to create a unique cake that represents seasonal ingredients or personal tastes.

    4. Crowd-Pleaser

    Lastly, this dessert is a guaranteed crowd-pleaser. It’s perfect for potlucks, BBQs, or family gatherings, as the vibrant colors add an exciting dimension to your dessert table. Plus, the refreshing flavor is suitable for warm weather, making it an enviable addition to any summer event. Essentially, this cake checks all the boxes for a memorable dessert experience.

    Incorporating the Tasty Rainbow Jello Poke Cake into your collection of dessert recipes will not only elevate your culinary prowess but will also cater to various eating habits and flavors that are sure to delight your loved ones.

    Ingredients Overview

    Essential Ingredients for Tasty Rainbow Jello Poke Cake Dessert

    Here’s the complete list of ingredients you’ll need to craft your Tasty Rainbow Jello Poke Cake Dessert:

    • For the Cake:
    • 1 box of vanilla cake mix (gluten-free version optional)
    • 3 large eggs
    • 1 cup of water
    • 1/3 cup of vegetable oil (or melted coconut oil)

    • For the Jello Layers:

    • 3 packages of your preferred jello flavors (for example, strawberry, lime, blueberry)
    • 4 cups of boiling water (1 cup per jello package)

    • For the Topping:

    • 1 cup of heavy whipping cream (can substitute with coconut cream for vegan)
    • 1 cup of powdered sugar (or your choice of sweetener)
    • 1 teaspoon of vanilla extract

    Each ingredient in this recipe serves a purpose, providing texture and flavor. For example, the cake mix creates a soft and fluffy base, while the jello layers introduce both moisture and a delightful burst of fruity taste.

    Dietary Substitutions to Customize Your Tasty Rainbow Jello Poke Cake Dessert

    Vegan Option: Replace the eggs with flaxseed meal (1 tablespoon of flaxseed meal + 2.5 tablespoons of water per egg) and use a vegan-friendly cake mix. For the topping, use coconut cream or a non-dairy whipped topping for the frosting.

    Gluten-Free Option: Look for gluten-free cake mixes in your local store. Many brands offer quality mixes that taste just as good as traditional ones.

    Low-Calorie Option: If you’re counting calories, using sugar-free jello can be a great alternative. This switch allows you to enjoy the vibrancy and flavor without excessive sugar content.

    With these substitutions, the Tasty Rainbow Jello Poke Cake remains delicious while catering to various dietary restrictions. Let your creativity flow as you adjust the recipe to fit your needs, and watch it become a staple in your collection of dessert recipes.

    How to Prepare the Perfect Tasty Rainbow Jello Poke Cake Dessert: Step-by-Step Guide

    Now that you have your ingredients ready, let’s dive into the step-by-step instructions to create your Tasty Rainbow Jello Poke Cake Dessert.

    1. Prepare the Cake Base: Preheat your oven to 350°F (175°C). In a large mixing bowl, combine the cake mix, eggs, water, and vegetable oil. Mix until the batter is smooth and well combined—avoid overmixing. Grease a 9×13 inch baking pan and pour the batter evenly into the pan. Bake according to package instructions, usually for 25-30 minutes or until a toothpick inserted in the center comes out clean.

    2. Cool the Cake: Once the cake is baked, allow it to cool in the pan for about 10 minutes. After that, transfer it to a wire rack to cool completely. This step is crucial as it ensures the cake holds its shape.

    3. Prepare the Jello: While the cake is cooling, prepare your jello. In separate bowls, dissolve each jello package in one cup of boiling water. Stir well until completely dissolved, then let it cool down slightly.

    4. Poke Holes in the Cake: Once the cake is completely cooled, take a fork or a skewer and poke holes all over the surface of the cake. Space them about an inch apart. This will allow the jello to seep down into the cake.

    5. Pour the Jello Mixture: Starting with one flavor, slowly pour the cooled jello over the surface of the cake, allowing it to fill the holes. Continue this process with the remaining jello flavors, pouring each over its designated section of the cake to create a beautiful rainbow effect.

    6. Chill the Cake: Cover the cake with plastic wrap and refrigerate it for at least 2 hours or overnight. This allows the flavors to meld and bottom layers of the cake to absorb the jello.

    7. Prep the Frosting: In a clean bowl, whip the heavy whipping cream until soft peaks form. Gradually add in the powdered sugar and vanilla extract, continuing to whip until stiff peaks form.

    8. Frost the Cake: Once the cake has fully set, spread the whipped cream topping evenly over the cake. A spatula works best for a smooth finish.

    9. Serve and Enjoy: Slice your Tasty Rainbow Jello Poke Cake into squares and serve chilled. This dessert is refreshing, colorful, and a guaranteed hit at any gathering.

    Be sure to adapt the recipe as needed for your dietary preferences or restrictions. Each step of this preparation process can be modified to suit vegan, gluten-free, or lower-calorie options—ensuring everyone can enjoy this scrumptious dessert!

    Mastering Tasty Rainbow Jello Poke Cake Dessert: Advanced Tips and Variations

    To take your Tasty Rainbow Jello Poke Cake to the next level, consider these advanced tips and variations:

    1. Layering Techniques: To create even more color separation, allow each layer of jello to set slightly before pouring the next flavor over the cake. This can be done by pouring one flavor at a time and waiting for about 20 minutes in the refrigerator between layers.

    2. Add Fresh Fruits: Consider adding slices of fresh fruit such as strawberries, kiwi, or blueberries on top of the whipped cream frosting for added texture and natural sweetness. This not only enhances the visual appeal but also adds a nutritious element.

    3. Themed Colors: You can create themed rainbow cakes by using colors corresponding to holidays or events. For example, red, white, and blue jello for Independence Day, or green and pink for St. Patrick’s Day.

    4. Flavor Combinations: Think beyond the standard jello flavors. Experiment with combinations like peach-strawberry or grape-orange to create a unique taste profile that will intrigue your guests.

    5. Garnishes: Don’t shy away from garnishing your cake! Try adding shredded coconut, chocolate shavings, or colorful sprinkles on top of the whipped cream for an added touch of festive cheer.

    By integrating these tips and variations into your dessert-making process, you can truly master the Rainbow Jello Poke Cake and stand out in your baking endeavors. Creating stunning and delicious dessert recipes has never been so fun!

    How to Store Tasty Rainbow Jello Poke Cake Dessert: Best Practices

    To ensure your Tasty Rainbow Jello Poke Cake stays fresh and flavorful, proper storage is key. Here are the best practices for storing your delicious creation:

    1. Refrigeration: Cover the cake with plastic wrap or aluminum foil and place it in the refrigerator if you plan to store it for up to three days. Keeping it chilled will preserve its freshness and texture.

    2. Freezing: If you want to store the cake for a longer period, consider freezing it. First, cut the cake into individual portions and wrap them securely in plastic wrap, followed by aluminum foil. This prevents freezer burn and extends its shelf life to up to three months.

    3. Reheating Tips: If you are thawing a frozen slice, place it in the refrigerator overnight to defrost slowly. Refrain from reheating in the microwave as this can alter the texture of the cake and jello. Instead, enjoy it cold or at room temperature for the best experience.

    By following these storage practices, you ensure your Tasty Rainbow Jello Poke Cake remains as delightful as the day it was made, ready to be enjoyed whenever a dessert craving strikes!

    Nutritional Value of Tasty Rainbow Jello Poke Cake Dessert

    Understanding the nutritional value of the Tasty Rainbow Jello Poke Cake Dessert can help you make informed choices about your indulgences. Below is a general breakdown of the nutritional content per serving (assuming a total of 12 servings):

    • Calories: Approximately 260
    • Total Fat: 10g
    • Saturated Fat: 5g
    • Cholesterol: 40mg
    • Sodium: 220mg
    • Total Carbohydrates: 36g
    • Dietary Fiber: 1g
    • Sugars: 20g
    • Protein: 3g

    This nutritional profile is a pretty standard estimate and can vary greatly based on the specific ingredients used. For instance, switching to sugar-free jello or reducing the sugar in the whipped cream topping can considerably lower the calorie count.

    The cake also provides a moderate amount of protein while incorporating a variety of carbohydrates primarily from the cake base and jello. Additionally, by utilizing fruit in the frosting or as garnishes, you can further enhance the micronutrient profile, adding vitamins and minerals to your dessert.

    By keeping in mind the nutritional value, you can enjoy your Tasty Rainbow Jello Poke Cake with a better understanding of how it fits into your overall diet, making it one of many delightful dessert recipes you can cherish!

    FAQs: Frequently Asked Questions About Tasty Rainbow Jello Poke Cake Dessert

    1. Can I use sugar-free jello for my cake?

    Yes, using sugar-free jello is a great option for those watching their sugar intake. It allows you to enjoy the same colorful flavors without the extra calories.

    2. How do I make this cake gluten-free?

    To make the Tasty Rainbow Jello Poke Cake gluten-free, simply choose a gluten-free cake mix. Many brands are available that work wonderfully without compromising flavor or texture.

    3. Can I prepare this cake in advance?

    Absolutely! You can prepare your Tasty Rainbow Jello Poke Cake a day ahead of time. Just be sure to keep it refrigerated to maintain its freshness.

    4. What’s the best way to cut and serve the cake?

    For clean slices, use a sharp knife and dip it in hot water before cutting into the cake. Wipe the knife clean between cuts to maintain the cake’s beautiful layers.

    5. How long can I store the Tasty Rainbow Jello Poke Cake?

    When stored properly in the refrigerator, the cake can last up to three days. If frozen, it can hold its quality for about three months when wrapped securely.

    With these answers to common questions, you’ll be better prepared to embark on your Tasty Rainbow Jello Poke Cake journey. As part of your collection of creative dessert recipes, this beauty is sure to become a favorite among family and friends!

    In Conclusion, the Tasty Rainbow Jello Poke Cake Dessert combines ease of preparation, vibrant visual appeal, and customizable health benefits, making it a fantastic addition to any cook’s repertoire. Embrace this delightful creation and let it brighten up your celebrations!

  • The Best Strawberry Crunch Poke Cake

    The Best Strawberry Crunch Poke Cake

    The Best Strawberry Crunch Poke Cake: A Tropical Delight

    Introduction to The Best Strawberry Crunch Poke Cake

    Welcome to the world of The Best Strawberry Crunch Poke Cake! This delectable dessert captures the irresistible combination of flavors and textures that make strawberry recipes so popular among dessert lovers. Perfect for any occasion, from birthday parties to family dinners, this poke cake is not only simple to make but also bursting with vibrant strawberry goodness. Loaded with fresh strawberries, whipped cream, and a crunchy topping, this cake entices your taste buds while being largely adaptable to cater to various dietary needs.

    What makes this cake a fantastic choice for readers of all kinds—whether busy parents, health-conscious individuals, or baking enthusiasts—is its incredible ease of preparation. You do not need to be a baking expert to whip up this cake! Additionally, it can be made vegan or gluten-free, making it accessible for everyone at the table. Plus, the health benefits of strawberries are well documented; they are rich in antioxidants, vitamins, and minerals, providing you with a guilt-free indulgence. With its appealing aesthetic and delightful flavor, The Best Strawberry Crunch Poke Cake is sure to become a cherished favorite in your home.

    Let’s dive deeper into the delicious world of strawberry recipes and explore the incredible benefits of this easy-to-make dessert.

    Benefits and Advantages of The Best Strawberry Crunch Poke Cake

    When it comes to desserts, few options match the appeal of The Best Strawberry Crunch Poke Cake, thanks to its myriad benefits. Here, we’ll explore some of the reasons this cake stands out from the rest:

    1. Simplicity of Preparation: This recipe breaks down the baking process into straightforward steps, making it ideal for novice cooks and busy individuals. You will appreciate how quick it is to bring everything together. In less than an hour, you can have a stunning dessert ready for any gathering!

    2. Health Benefits of Strawberries: Strawberries are not only delicious but also a powerhouse of nutrients. These vibrant fruits are rich in vitamin C, fiber, and antioxidants, offering numerous health benefits. They may help reduce risks associated with heart disease and improve your overall well-being.

    3. Customizable for Dietary Restrictions: Whether you are looking for gluten-free options or want to make a vegan version, this poke cake recipe can be easily adjusted. Using alternative ingredients such as almond flour or coconut whipped cream allows those with dietary restrictions or preferences to indulge without worry.

    4. Suitable for Any Occasion: Whether it’s a summer BBQ, a family celebration, or just a cozy night in, this poke cake fits the bill. Its colorful appearance captures attention, and it serves well in individual portions, making it easy to serve guests.

    5. Creative Variations: Once you master the basic recipe, you can experiment with other flavors. Consider using different types of fruit or sauces, allowing you to create an extensive variety of poke cakes that can cater to all tastes.

    By varying the toppings, fillings, and even the cake mix, you can create a versatile dessert that appeals to different palates—making this one of the best strawberry recipes to have in your baking repertoire!

    Ingredients Overview

    Essential Ingredients for The Best Strawberry Crunch Poke Cake

    Understanding the ingredients is key to mastering this recipe. Here is a detailed list of everything you will need, along with their purposes:

    1. Cake Base:
    2. 1 Box (15.25 oz) Yellow Cake Mix (or almond flour for gluten-free)
    3. 3 Large Eggs (or 1 cup aquafaba for vegan)
    4. 1 cup Water

    The yellow cake mix provides a sweet base, while eggs help bind the ingredients. Options like almond flour or aquafaba for vegan replacements ensure everyone can enjoy the treat!

    1. Poke Mixture:
    2. 1 cup Strawberry Jello Powder (sugar-free if possible)
    3. 1 cup Boiling Water

    Strawberry jello brings delightful flavor and moisture to the cake, creating the “poke” effect as it seeps into the base.

    1. Filling:
    2. 2 cups Fresh Strawberries, sliced
    3. 8 oz Whipped Topping (use coconut whipped topping for vegan)

    The fresh strawberries add a juicy element, while the whipped topping creates a creamy layer that enhances the cake’s richness.

    1. Crunch Topping:
    2. 2 cups Graham Cracker Crumbs (or gluten-free equivalent)
    3. 1/2 cup Unsalted Butter, melted (use vegan butter for dairy-free)

    The graham cracker crumbs provide a satisfying crunch that contrasts beautifully with the soft cake layers.

    1. Final Touch:
    2. 1 cup Sliced Strawberries for Garnish

    Fresh strawberries on top make for an appetizing finish that showcases the freshness of the ingredients.

    Dietary Substitutions to Customize Your The Best Strawberry Crunch Poke Cake

    Customization is essential to ensure everyone can enjoy this delightful cake. Here are some suggested substitutions for dietary needs:

    • For Gluten-Free: Use certified gluten-free cake mix and substitute regular graham cracker crumbs for gluten-free options.
    • For Vegan: Switch eggs for flaxseed meal mixed with water or aquafaba, use coconut whipped cream instead of traditional whipped topping, and use vegan butter for the topping.
    • For Low-Calorie Options: Choose a sugar-free cake mix, sugar-free jello, and a light whipped topping to reduce the cake’s overall caloric content without sacrificing taste.

    By considering these substitutions, you can confidently offer this cake at gatherings knowing it fits a variety of diets. This flexibility keeps the spirit of strawberry recipes alive, making them accessible for everyone!

    How to Prepare the Perfect The Best Strawberry Crunch Poke Cake: Step-by-Step Guide

    Now, let’s roll up our sleeves and dive into the exciting process of creating The Best Strawberry Crunch Poke Cake! Follow these easy steps to impress friends and family:

    1. Prepare the Base: Preheat your oven to 350°F (175°C). Grease and flour a 9×13-inch baking pan. In a large mixing bowl, combine the yellow cake mix, eggs, and water, beating until the mixture is smooth and fluffy.

    2. Bake the Cake: Pour the batter into the prepared pan, spreading it evenly. Bake in the preheated oven for 25-30 minutes, or until a toothpick inserted in the center comes out clean. Once done, allow it to cool in the pan for about 10 minutes before inverting it onto a wire rack to cool completely.

    3. Poke the Cake: Once the cake is cool, use the handle of a wooden spoon to poke holes across the top of the cake, about an inch apart.

    4. Make the Jello Mixture: In a medium bowl, dissolve the strawberry jello powder in boiling water, stirring until fully dissolved.

    5. Pour Jello Over Cake: Carefully pour the prepared jello mixture over the top of the poked cake, allowing it to seep into the holes. Let the cake sit for about 30 minutes to absorb the jello.

    6. Add Strawberries: Take your sliced strawberries and evenly spread them across the top of the cake, pressing them gently so they stick to the jello.

    7. Spread Whipped Topping: In a separate bowl, whip the topping until it thickens (if using a nonwhipped version). Spread the whipped topping generously over the layer of strawberries.

    8. Prepare the Crunch Topping: In another bowl, mix the graham cracker crumbs and melted butter until fully combined. Sprinkle this crunchy topping generously over the whipped cream layer.

    9. Chill the Cake: Cover the cake with plastic wrap and place it in the refrigerator for at least 2 hours, or overnight, to allow the flavors to meld and the cake to set.

    10. Garnish and Serve: Before serving, add the final touch by decorating with additional sliced strawberries on top, making the cake visually stunning.

    By following these straightforward steps, you can create a beautifully layered poke cake that encapsulates the essence of strawberry recipes and brings smiles to everyone!

    Mastering The Best Strawberry Crunch Poke Cake: Advanced Tips and Variations

    To truly master The Best Strawberry Crunch Poke Cake, consider the following tips and variations:

    • Flavor Infusion: Experiment with different flavored jello, such as raspberry or peach, for a unique twist. You can also use fresh berries for different flavor profiles.
    • Add a Cream Cheese Layer: For an extra layer of flavor, spread a thin layer of sweetened cream cheese alongside the whipped topping. This will add richness and depth to the cake.
    • Infuse with Citrus: Consider adding a hint of lemon or lime juice to the whipped topping to enhance the fruitiness and provide a refreshing zing.
    • Crunch Alternatives: Swap out graham cracker crumbs for crushed nuts or toasted coconut to add a completely different texture that pairs well with strawberries.

    Implementing these advanced variations allows you to expand your baking repertoire while keeping your version of strawberry recipes fresh and exciting!

    How to Store The Best Strawberry Crunch Poke Cake: Best Practices

    Proper storage is essential to maintain the freshness and flavor of your poke cake. Here are some tips:

    • Refrigeration: Always store your poke cake in the refrigerator because of its whipped topping. Cover it loosely with plastic wrap or foil to prevent it from drying out. It will remain fresh for up to 4 days.

    • Freezing: You can freeze your poke cake if you need to store it for longer. Eliminate any garnishes, then wrap it tightly with plastic wrap and aluminum foil. It can remain in the freezer for up to 2 months. To serve, let it thaw overnight in the refrigerator and add fresh toppings before enjoying.

    • Reheating: Generally, poke cakes are best served cold or at room temperature. If you prefer a warm dessert, you can microwave a slice for 10-15 seconds; however, this may change the texture of the whipped topping.

    Using these storage practices, you can ensure that The Best Strawberry Crunch Poke Cake maintains its deliciousness for your gatherings, making it a go-to among your array of strawberry recipes.

    Nutritional Value of The Best Strawberry Crunch Poke Cake

    Understanding the nutritional profile of any recipe is crucial for those watching their caloric intake or seeking to maintain a balanced diet. Here is a breakdown of the estimated nutritional values per serving (assuming 12 servings):

    • Calories: 230
    • Total Fat: 9g
    • Saturated Fat: 4g
    • Cholesterol: 40mg
    • Sodium: 200mg
    • Total Carbohydrates: 34g
    • Dietary Fiber: 1g
    • Sugars: 15g
    • Protein: 3g

    Keep in mind that this nutritional information can vary based on the specific ingredients used, especially considering alternatives for dietary restrictions. Ensuring the use of low-calorie or sugar-free substitutes can modify these values, allowing health-conscious individuals to enjoy strawberry recipes without the worry.

    FAQs: Frequently Asked Questions About The Best Strawberry Crunch Poke Cake

    1. Can I make The Best Strawberry Crunch Poke Cake ahead of time?

    Absolutely! The cake can be prepared a day in advance. It tastes even better as the flavors meld overnight in the refrigerator.

    2. What can I use instead of strawberry jello?

    Feel free to use any flavor of jello, such as raspberry or cherry. For a natural approach, you can make a fruit purée using fresh strawberries, but note that it will require additional adjustments.

    3. Can I freeze the poke cake?

    Yes, you can freeze the cake for up to 2 months without toppings. Ensure you wrap it tightly. Add the toppings once thawed.

    4. How can I make this recipe lower in sugar?

    You can opt for sugar-free jello and use a sugar substitute in the whipped topping or use unsweetened coconut cream.

    5. Is there a way to make this cake vegan-friendly?

    Yes! Use aquafaba or flaxseed meal instead of eggs, coconut whipped cream for the topping, and vegan butter for the crunch topping.


    By answering these common questions, you can confidently navigate the nuances of baking The Best Strawberry Crunch Poke Cake while catering to your dietary preferences and needs.

    Conclusion

    To sum it up, The Best Strawberry Crunch Poke Cake perfectly embodies the essence of delightful strawberry recipes, blending simplicity, flavor, and health benefits together harmoniously. No matter your baking skill level or dietary needs, this cake invites everyone to come together at the table, making it a must-try! Let your culinary journey with this delicious dessert inspire you to create beautiful moments filled with joy and connection. Now, roll up your sleeves, gather your ingredients, and embark on the delightful adventure of baking this stunning poke cake! Enjoy!