Blog

  • The Best Pioneer Woman Potato Salad Recipe

    The Best Pioneer Woman Potato Salad Recipe

    The Best Pioneer Woman Potato Salad Recipe: A Tropical Delight

    Introduction to The Best Pioneer Woman Potato Salad Recipe

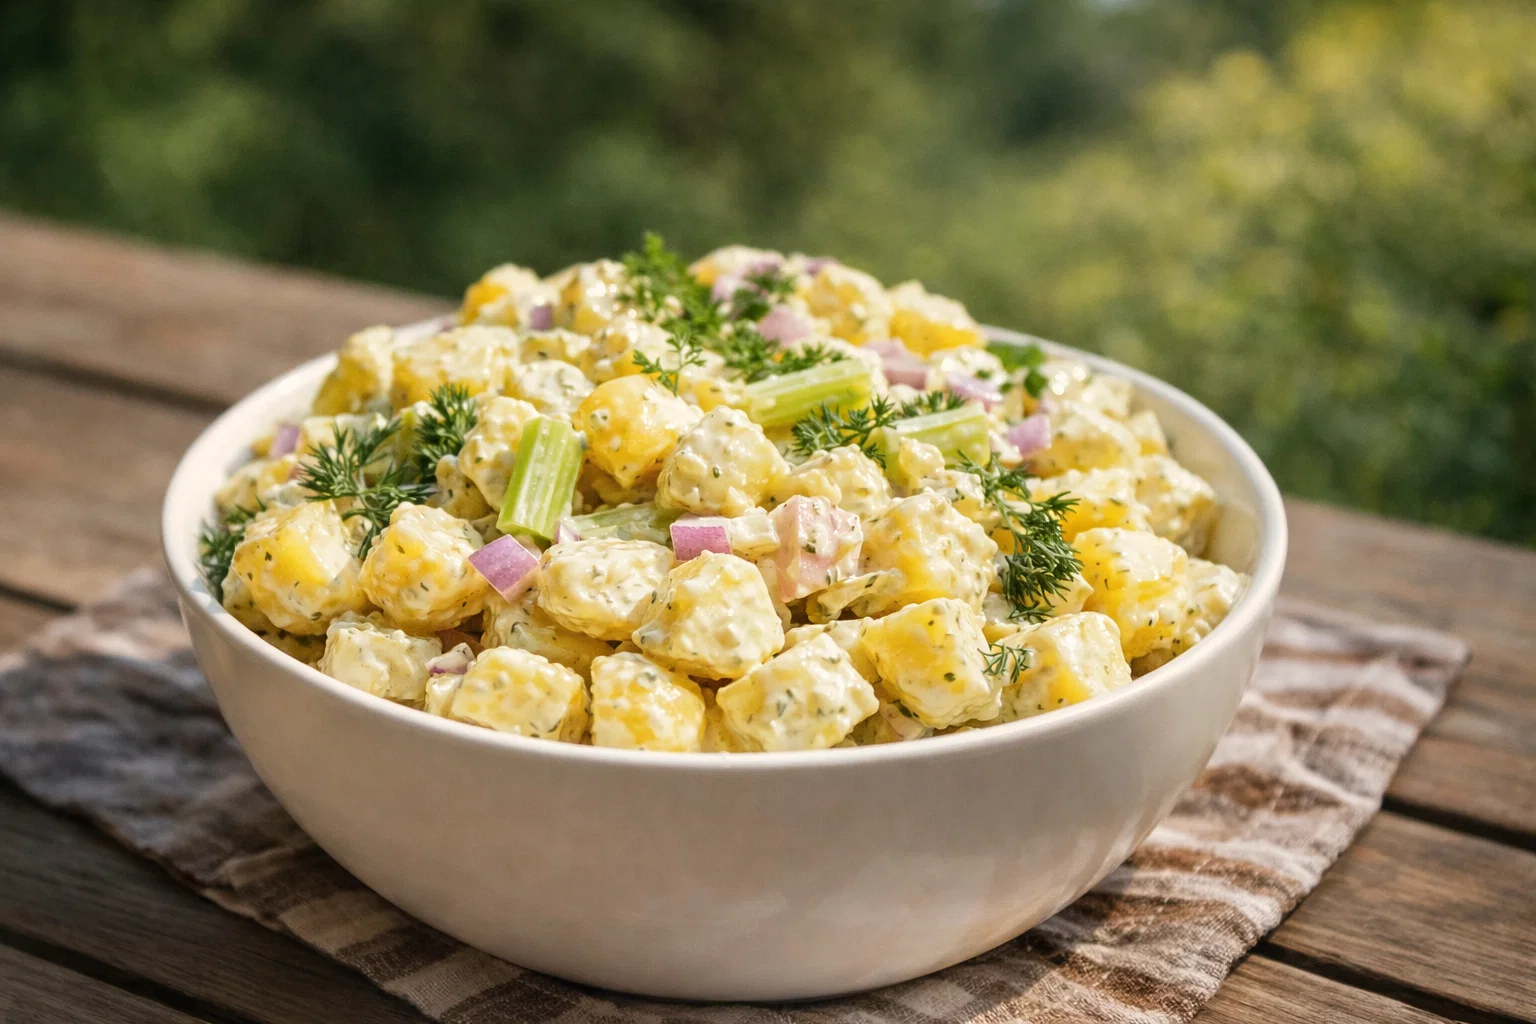
    When it comes to dinner recipes that evoke a sense of comfort and nostalgia, few can rival the charm of a classic potato salad. The Best Pioneer Woman Potato Salad Recipe elevates this traditional dish by infusing it with fresh ingredients and simple techniques, making it an ideal choice for any gathering, from casual family dinners to festive barbecues.

    What sets this potato salad apart is its blend of flavors: creamy dressing mingled with crisp vegetables and hearty potatoes. Not only is the recipe easy to prepare, but it also meets various dietary requirements—it’s gluten-free and can be adapted to be vegan. Moreover, this dish is suitable for busy parents looking for a quick yet nutritious side dish, students who want to impress their friends with their culinary skills, or any food enthusiasts eager to explore fresh and healthy options.

    In this article, we will guide you through the process of making this delectable salad, highlighting its numerous benefits and offering tips for customization to fit your dietary needs. With a delightful combination of textures, flavors, and colors, The Best Pioneer Woman Potato Salad Recipe isn’t just a side dish—it’s a culinary celebration!

    Benefits and Advantages of The Best Pioneer Woman Potato Salad Recipe

    There are countless reasons to love The Best Pioneer Woman Potato Salad Recipe, starting from its easy preparation. You can have this dish ready in just under an hour, making it perfect for those busy weeknights. The recipe combines simple ingredients that are easy to find at your local grocery store, meaning you don’t have to spend a lot of time or money gathering supplies.

    In addition to its convenience, this potato salad offers numerous health benefits. Potatoes are a great source of vitamins and minerals, such as vitamin C and potassium. They are also rich in dietary fiber, which can boost digestive health. Combining potatoes with fresh vegetables not only heightens the flavor but also adds essential nutrients that can benefit your overall health.

    Let’s not forget versatility; this dish is incredibly adaptable. Not only can you swap out ingredients based on seasonal availability, but you can also modify it to accommodate various dietary needs. For instance, by substituting traditional mayonnaise with a vegan alternative, you can cater to plant-based diets without sacrificing flavor. You can also readily adjust the seasoning and toppings to make it uniquely yours.

    Finally, The Best Pioneer Woman Potato Salad stands out among other dinner recipes because it can easily transition from a summer cookout dish to a comforting winter side. You can enjoy it year-round, given its ability to pair harmoniously with a variety of main courses—be it grilled meats, oven-roasted vegetables, or savory pies. With all these benefits, it’s easy to see why this recipe deserves a place in your culinary repertoire!

    Ingredients Overview

    Essential Ingredients for The Best Pioneer Woman Potato Salad Recipe

    To create this flavorful potato salad, gather the following essential ingredients:

    1. Potatoes (2 lbs): Choose Yukon Gold or red potatoes for a creamy texture. These potatoes help give the salad a rich and hearty base.
    2. Mayonnaise (1 cup): Use standard or light mayonnaise for creaminess. For a vegan version, opt for egg-free mayonnaise made from plant-based products.
    3. Dijon Mustard (2 tablespoons): This will add a tangy flavor that complements the creaminess of the mayonnaise.
    4. Celery (1 cup, diced): Offers a crunchy texture and fresh taste. Celery is also a low-calorie, nutrient-rich addition.
    5. Green Onions (½ cup, sliced): These provide a mild onion flavor and a pop of color.
    6. Hard-Boiled Eggs (4): Eggs bring protein and richness to the salad. For a vegan option, omit this ingredient or use vegan “egg” substitutes.
    7. Salt and Pepper (to taste): Essential for seasoning the dish.
    8. Paprika (for garnish): Adds color and a hint of smokiness.

    Dietary Substitutions to Customize Your The Best Pioneer Woman Potato Salad Recipe

    Adapting the recipe to meet various dietary needs is straightforward. Here are some suggested substitutions:

    • Vegan Option: Replace traditional mayonnaise with an egg-free alternative. You can make your own using blended silken tofu, lemon juice, and mustard for a creamy texture.
    • Gluten-Free Option: Ensure all store-bought ingredients are labeled gluten-free, particularly mustard and mayonnaise.
    • Low-Calorie Variation: Use Greek yogurt as a substitute for mayonnaise. This will give creaminess while reducing the caloric content.
    • Health-Focused Additions: For an extra boost of nutrition, consider adding chopped bell peppers, shredded carrots, or even broccoli florets. These options not only increase the nutrient profile but also add vibrant colors and textures.

    These substitutions make The Best Pioneer Woman Potato Salad recipe adaptable for everyone, ensuring that no one has to miss out on this delicious side dish!

    How to Prepare the Perfect The Best Pioneer Woman Potato Salad Recipe: Step-by-Step Guide

    Creating The Best Pioneer Woman Potato Salad is easy and rewarding! Follow these step-by-step instructions for a perfect outcome every time:

    1. Prepare the Potatoes: Begin by washing 2 pounds of potatoes thoroughly. In a large pot, add the potatoes and cover them with cold water. Bring to a boil, then reduce the heat and simmer for about 15-20 minutes or until the potatoes are fork-tender. Avoid overcooking to maintain their shape.

    2. Cool the Potatoes: Once cooked, drain the potatoes and let them cool for about 10-15 minutes. Cooling ensures the dressing doesn’t become runny when added to the warm potatoes.

    3. Chop Vegetables: While the potatoes cool, finely chop 1 cup of celery and slice ½ cup of green onions. Place the chopped vegetables in a large mixing bowl.

    4. Prepare the Dressing: In a separate mixing bowl, combine 1 cup of mayonnaise, 2 tablespoons of Dijon mustard, and salt and pepper to taste. Mix well until smooth. Adjust seasoning based on your preference; for spicy flavors, you might add a dash of hot sauce.

    5. Add Eggs: Hard-boil 4 eggs, then peel and chop them. Gently fold them into the dressing mixture.

    6. Combine Ingredients: Once the potatoes are cool enough to handle, chop them into bite-sized pieces and add them to the bowl with the vegetables. Pour the creamy dressing over the potato mixture.

    7. Fold Gently: Use a spatula to gently fold the ingredients together. Be cautious not to mash the potatoes. Stir until everything is evenly coated with the dressing.

    8. Garnish and Chill: Sprinkle paprika on top for garnish, then cover the bowl and refrigerate for at least 1 hour before serving. This allows the flavors to meld beautifully.

    9. Taste and Adjust: Before serving, taste your potato salad and adjust the seasonings if needed. You can add more salt, pepper, or even a splash of vinegar or lemon juice for brightness.

    By following these steps, you’ll create a delightful potato salad that can adapt to various dinner recipes. Feel free to personalize this recipe with your own favorite ingredients!

    Mastering The Best Pioneer Woman Potato Salad Recipe: Advanced Tips and Variations

    To truly master The Best Pioneer Woman Potato Salad Recipe, consider these tips and potential variations that could elevate your dish:

    • Herb Infusion: Fresh herbs like dill, parsley, or chives can add a fresh dimension to the flavor profile. Try adding 2 tablespoons of freshly chopped herbs for an aromatic lift.

    • Sweet and Savory: To introduce a sweet element, consider folding in a cup of diced apples or pickles. They can balance the creaminess beautifully and bring extra crunch.

    • Smoky Flavor: Adding diced crispy bacon can enhance the salad’s depth of flavor, making it appealing for meat lovers. Alternatively, use smoked paprika for a plant-based smoky essence.

    • Chill Ahead of Time: For best results, prepare the salad a day in advance. Allowing the flavors to develop overnight can significantly enhance the taste.

    • Serving Suggestions: This potato salad pairs excellently with grilled meats or sandwiches. Consider offering it as part of a picnic spread alongside fruits and veggie trays.

    By incorporating these advanced tips, you’ll not only master The Best Pioneer Woman Potato Salad but also learn how to make it truly your own.

    How to Store The Best Pioneer Woman Potato Salad Recipe: Best Practices

    Storing The Best Pioneer Woman Potato Salad correctly ensures you maintain its flavor and freshness:

    • Refrigeration: Store any leftover potato salad in an airtight container in the refrigerator. This will help it stay fresh for up to 3-5 days. The cool temperature slows bacterial growth and preserves its flavor.

    • Freezing: While it’s not recommended to freeze potato salad due to its creamy texture, if necessary, you can freeze portions without any eggs or any creamy dressing added. When ready to eat, thaw in the refrigerator and then mix in fresh ingredients and dressing before serving.

    • Reheating: If you have leftovers, you can serve them cold or gently heat them in a microwave for short intervals. If you choose to heat up a portion, let it cool before placing it back in the refrigerator.

    Using these storage methods, you can enjoy The Best Pioneer Woman Potato Salad even after the initial preparation!

    Nutritional Value of The Best Pioneer Woman Potato Salad Recipe

    Understanding the nutritional value of The Best Pioneer Woman Potato Salad allows you to incorporate it thoughtfully into your meals. Here’s a general breakdown of its nutritional profile per serving (about 1 cup):

    • Calories: 250
    • Total Fat: 15g
    • Saturated Fat: 2g
    • Cholesterol: 100mg
    • Sodium: 450mg
    • Total Carbohydrates: 30g
    • Dietary Fiber: 3g
    • Sugars: 2g
    • Protein: 5g

    These values may vary based on how you prepare the dish (e.g., if you use vegan mayo or add additional vegetables).

    You’ll find that this potato salad not only provides satisfying flavors but also contributes essential nutrients from the base ingredients like potatoes, vegetables, and eggs. The dish serves as a balanced option in light of other dinner recipes, offering a great way to incorporate more vegetables into your diet.

    FAQs: Frequently Asked Questions About The Best Pioneer Woman Potato Salad Recipe

    What kind of potatoes are best for potato salad?

    For potato salad, waxy potatoes like Yukon Gold or red potatoes are advisable. Their texture remains firm after cooking, which helps maintain the salad’s shape.

    Can I make this dish in advance?

    Absolutely! The Best Pioneer Woman Potato Salad can be made a day ahead of time. Just store it in the refrigerator to allow the flavors to meld beautifully.

    How do I make this recipe vegan?

    To make the recipe vegan-friendly, replace traditional mayonnaise with an egg-free alternative and omit the hard-boiled eggs, or use vegan egg substitutes.

    Is it okay to freeze potato salad?

    While it’s not typically recommended due to the potential change in texture when thawed, you can freeze portions without dressing or eggs. Just remember that the quality may not be the same once it’s been frozen and thawed.

    What can I add to make it healthier?

    Explore adding more vegetables like carrots, bell peppers, or broccoli. You could also substitute Greek yogurt for mayonnaise to make it creamier while reducing calories.

    With these FAQs, readers can gain a deeper understanding of this recipe and feel confident in customizing it to fit their dietary preferences. Enjoy making The Best Pioneer Woman Potato Salad Recipe—an easy and delicious addition to your dinner recipes!

  • Easy Cottage Cheese Tuna Salad Healthy Lunch

    Easy Cottage Cheese Tuna Salad Healthy Lunch

    Easy Cottage Cheese Tuna Salad Healthy Lunch: A Tropical Delight

    Introduction to Easy Cottage Cheese Tuna Salad Healthy Lunch

    Are you in search of new lunch ideas that are not only delicious but also healthy and easy to prepare? Look no further than this refreshing Easy Cottage Cheese Tuna Salad Healthy Lunch! Perfect for busy parents, students, working professionals, and anyone who wants to enjoy a nourishing meal without spending hours in the kitchen, this salad is your answer to quick and satisfying dining.

    This recipe combines protein-rich tuna with creamy cottage cheese, resulting in a delightful dish that is as versatile as it is wholesome. With every bite, you’ll benefit from the heart-healthy omega-3 fatty acids in tuna and the calcium-packed goodness of cottage cheese. Plus, it’s incredibly customizable! You can adapt the salad to suit vegan or gluten-free diets, making it a go-to meal option for nearly everyone.

    Imagine a weekday lunch that requires minimal preparation yet delivers on flavor and nutritional content. This Easy Cottage Cheese Tuna Salad checks all the boxes and is perfect for sharing with family or packing for a picnic. It thrives as a quick snack option, a substantial meal, or even as a savory add-on to your afternoon lunch ideas. It’s time to discover how simple and satisfying healthy eating can be!

    Benefits and Advantages of Easy Cottage Cheese Tuna Salad Healthy Lunch

    Why should you consider this Easy Cottage Cheese Tuna Salad for your lunch ideas? Here are several compelling reasons to whip up this dish:

    1. Simplicity: The beauty of this recipe lies in its straightforwardness. In less than 20 minutes, you can have a nutritionally balanced meal ready to enjoy. With just a few basic ingredients, it’s easy to prep and even easier to modify according to your preferences.

    2. Health Benefits: This salad is not just a delicious meal; it’s packed with health benefits. Tuna is a fantastic source of lean protein, helping to keep you satiated throughout the day. The cottage cheese adds beneficial probiotics, which support gut health. Together, they form a nutritious mix that aids in muscle recovery, bone health, and supports overall well-being.

    3. Versatility: This dish is incredibly versatile. Whether you’re a busy parent needing quick lunch ideas for your kids, a student looking for easy meal prep options, or someone who enjoys hosting lunch gatherings, this salad fits all occasions. You can serve it on whole-grain bread, use it as a dip with vegetables, or enjoy it on a bed of mixed greens.

    4. Dietary Adaptability: Adhering to specific dietary needs can be a challenge. Luckily, this Easy Cottage Cheese Tuna Salad allows for numerous substitutions! You can easily transform it into a vegan delight by swapping tuna with chickpeas, or you can opt for gluten-free crackers to enjoy it with. This salad ensures that anyone can savor its delightful flavors without compromise.

    Ultimately, this salad is not just a meal; it’s a blend of taste, health, convenience, and creativity. Whether you’re juggling a busy work schedule or winding down after a long day, enjoying your lunch has never been this easy or exciting.

    Ingredients Overview

    Essential Ingredients for Easy Cottage Cheese Tuna Salad Healthy Lunch

    To create this delightful salad, gather the following ingredients. Below, you’ll find the measurements along with explanations of the purpose and benefits of each ingredient:

    • 1 can (5 oz) tuna: Look for tuna packed in water for a lighter option. This is the primary protein source that offers essential omega-3 fatty acids.

    • 1 cup low-fat cottage cheese: A healthy dairy option that adds creaminess and protein. For a vegan option, use plant-based cottage cheese (such as almond or soy-based).

    • 1/2 cup diced celery: Provides crunch and freshness. Celery also contains vitamins and minerals while being low in calories.

    • 1/4 cup diced red onion: Adds flavor and antioxidant properties. Onions can also help support heart health.

    • 1/4 cup diced bell pepper (any color): Rich in vitamin C, bell peppers contribute color and sweetness to the salad.

    • 1 tablespoon lemon juice: Balances the flavors while adding a zesty kick. Lemon juice is also great for digestion.

    • 1 tablespoon Dijon mustard: Adds a tangy flavor, and it’s a healthier condiment compared to others.

    • Salt and pepper to taste: Essential for seasoning. Opt for low-sodium versions if you’re watching your salt intake.

    • Fresh herbs (optional): Consider adding chopped parsley, dill, or cilantro for an extra flavor boost.

    This ingredient list ensures you have a nutritious, protein-packed salad that can easily accommodate your dietary preferences.

    Dietary Substitutions to Customize Your Easy Cottage Cheese Tuna Salad Healthy Lunch

    While the above ingredients create a fantastic base for your Easy Cottage Cheese Tuna Salad, there are plenty of substitutions you can make to customize it to your taste or dietary requirements:

    • Tuna Alternatives: For a plant-based option, replace tuna with chickpeas or cooked quinoa. These alternatives maintain the protein content while making it vegan-friendly.

    • Dairy-Free Options: If you have lactose intolerance, opt for a dairy-free cottage cheese alternative made from nuts. You could also use Greek yogurt for a protein-packed, tangy flavor.

    • Extra Veggies: Feel free to include other vegetables such as cucumber, shredded carrots, or corn. Each additional ingredient adds texture, flavor, and valuable nutrients.

    • Spices and Seasoning: Elevate the dish with spices such as paprika, cumin or cayenne pepper for a kick. You can also adjust the mustard type—try wholegrain mustard for a more robust flavor.

    • Healthy Fats: Consider tossing in some diced avocado or a tablespoon of olive oil for an omega-3 boost and richness.

    These substitutions empower you to craft a salad that not only satisfies your tastebuds but also caters to your health-conscious objectives. The options are endless!

    How to Prepare the Perfect Easy Cottage Cheese Tuna Salad Healthy Lunch: Step-by-Step Guide

    Now that you have your ingredients ready, let’s delve into the step-by-step guide on how to create the perfect Easy Cottage Cheese Tuna Salad Healthy Lunch. This process is straightforward and easy to follow:

    1. Prepare the Base: Open the can of tuna, drain it thoroughly, and place it in a large mixing bowl. Use a fork to break it into smaller chunks.

    2. Mix Ingredients: Add the low-fat cottage cheese to the bowl, followed by the diced celery, red onion, and bell pepper. These crunchy veggies will add texture and freshness.

    3. Season: Squeeze in the lemon juice and add the Dijon mustard. Sprinkle salt and pepper over the mixture, adjusting the quantities according to your taste.

    4. Combine Flavors: Gently mix all the ingredients until they are well combined, ensuring each piece of protein and vegetable is evenly distributed within the creamy cottage cheese.

    5. Tweak and Adjust: Taste your salad and adjust the seasoning if necessary. If you prefer a tangier flavor, add more lemon juice or mustard. If you’re feeling adventurous, toss in some cayenne pepper for a kick.

    6. Add Fresh Herbs (Optional): Finely chop fresh herbs like parsley or cilantro and stir them into your salad for an extra burst of flavor.

    7. Chill (Optional): For a refreshing taste, let the salad chill in the fridge for about 30 minutes before serving. This allows the flavors to meld beautifully.

    8. Serve: Enjoy the salad immediately on whole-grain bread, in lettuce wraps, or simply on its own! It also makes an excellent side dish for gatherings.

    9. Store Leftovers: Transfer any leftovers into an airtight container and store them in the refrigerator for up to three days.

    10. Reinvent Your Leftovers: Get creative! Try serving the salad on a bed of mixed greens or as a filling for a veggie-packed wrap or pita.

    This step-by-step guide makes it incredibly simple to not only prepare a delicious meal but also to customize it to suit your personal taste and dietary needs. Remember, the key is to enjoy the process while experimenting with flavors!

    Mastering Easy Cottage Cheese Tuna Salad Healthy Lunch: Advanced Tips and Variations

    To enhance your experience with this Easy Cottage Cheese Tuna Salad, consider these advanced tips and exciting variations:

    • Experiment with Different Flavors: Swap out the Dijon mustard for sriracha or wasabi for a spicy twist. This adds a new layer of complexity while maintaining the healthy appeal.

    • Add Nuts or Seeds: For those seeking extra crunch and nutritious benefits, toss in some walnuts, sunflower seeds, or pumpkin seeds. These additions not only enhance texture but also add omega-3 and vitamin E.

    • Global Inspirations: Take your salad international by incorporating flavors such as curry powder for an Indian twist or tahini for a Mediterranean flair.

    • Serve Warm: Transform the salad into a warm dish by lightly toasting it on the stovetop. The combination of warm ingredients will surprise your palate, making it feel more comforting.

    • Perfect Pairings: This salad can be served with a side of fresh fruit or whole-grain crackers, creating a balanced meal rich in protein and fiber.

    • Batch Prep: Consider making a larger batch at the beginning of the week. Store it in individual containers for quick and effortlessly healthy lunch ideas throughout the week.

    Experimenting with these tips and variations opens up a world of possibilities, allowing you to make this Easy Cottage Cheese Tuna Salad uniquely yours. You can enjoy it differently each time, keeping it exciting and fresh!

    How to Store Easy Cottage Cheese Tuna Salad Healthy Lunch: Best Practices

    Proper storage of your Easy Cottage Cheese Tuna Salad is essential to maintain its freshness and taste. Here are some best practices to ensure your salad remains delightful:

    • Refrigeration: If you have any leftovers, place them in an airtight container and store them in the refrigerator. Properly sealed, the salad can last for up to three days. However, for optimal taste, it’s best consumed within the first two days.

    • Freezing: While it’s recommended to eat this salad fresh, you can freeze cubes of cottage cheese or prepared tuna separately. Prepare single servings and defrost just before consumption.

    • Reheating: When reheating, do so gently in the microwave to avoid disrupting the textures. Serve warm over grains for a new take.

    By following these storage tips, you can ensure that your Easy Cottage Cheese Tuna Salad stays fresh, flavorful, and ready for your next lunch idea!

    Nutritional Value of Easy Cottage Cheese Tuna Salad Healthy Lunch

    The nutritional content of your Easy Cottage Cheese Tuna Salad largely depends on the specific ingredients used. However, here’s an approximate breakdown based on the ingredients listed:

    • Calories: 290 kcal per serving
    • Protein: 37 g
    • Fat: 7 g
    • Carbohydrates: 20 g
    • Fiber: 3 g
    • Sugar: 3 g
    • Sodium: 400 mg (may vary based on tuna and cottage cheese brands)

    This dish stands out as a great source of protein, making it an excellent choice for those who lead active lifestyles or are looking to maintain their weight. Its versatility also allows for meal customization based on dietary requirements.

    Ultimately, this nutritional profile highlights the benefits of enjoying a well-balanced meal made from whole foods. With every bite, you’re nourishing your body and ensuring sustained energy through your busy day.

    FAQs: Frequently Asked Questions About Easy Cottage Cheese Tuna Salad Healthy Lunch

    Q1: Can I make the Easy Cottage Cheese Tuna Salad ahead of time?

    A: Yes! You can prepare this salad a day ahead. Just store it in an airtight container in the refrigerator. However, for the best flavor, it’s suggested to enjoy it fresh.

    Q2: Can I substitute cottage cheese with yogurt?

    A: Absolutely! Greek yogurt is an excellent substitute that maintains creaminess while enhancing protein content. It also provides a tangy flavor.

    Q3: Is this salad gluten-free?

    A: Yes! The core ingredients are gluten-free. Just make sure that any additional ingredients (like seasonings or dressings) you use are also gluten-free.

    Q4: How can I make this salad lower in calories?

    A: To reduce calories, opt for low-fat or fat-free cottage cheese and use a smaller portion of mayo or mustard. You can also increase the volume of vegetables to enhance the dish without adding many calories.

    Q5: Can I adjust the protein source?

    A: Definitely! You can swap tuna with canned chickpeas, shredded chicken, or diced tofu for a different protein source that maintains the dish’s overall recipe structure.

    Q6: What can I add to this salad for an extra crunch?

    A: Consider adding chopped nuts, roasted chickpeas, or even crispy tortilla strips. These additions can enhance the texture and flavor further.

    Q7: Can this dish be frozen?

    A: Freezing the entire salad isn’t recommended as it may compromise texture. However, individual components, like the tuna or cottage cheese, can be frozen separately before preparation.

    This FAQ section should help clarify any remaining questions you may have about preparing and enjoying your Easy Cottage Cheese Tuna Salad. The flexibility in ingredients and methods also ensures that you can adapt it whenever needed. Get ready to surprise your taste buds with this simple yet satisfying meal!


    This Easy Cottage Cheese Tuna Salad is more than just a meal; it’s your new go-to for healthy and effortless lunch ideas that check all the boxes. Enjoy experimenting with flavors, making it your own, and delighting in every bite!

  • Easy Hawaiian Coleslaw Sweet Tangy Salad

    Easy Hawaiian Coleslaw Sweet Tangy Salad

    Easy Hawaiian Coleslaw Sweet Tangy Salad: A Tropical Delight

    Introduction to Easy Hawaiian Coleslaw Sweet Tangy Salad

    If you’re searching for easy dinner recipes that burst with flavor while being simple and healthy, look no further than the Easy Hawaiian Coleslaw Sweet Tangy Salad. This delightful salad brings the tropics to your table, featuring a colorful mix of fresh ingredients that create a sweet and tangy sensation in every bite. Perfect for busy parents, health-conscious individuals, or anyone needing a refreshing side dish, this salad is both vegan and gluten-free, making it versatile for different dietary preferences.

    The beauty of this Easy Hawaiian Coleslaw lies in its simplicity. It requires minimal prep time and is completely adaptable. You can serve it as a side at barbecues or family gatherings, or enjoy it as a light lunch. Not only does this salad provide vibrant colors to your meal, but it also introduces a medley of textures and flavors—crunchy cabbage, juicy pineapple, and crunchy almonds blend beautifully, creating an enjoyable culinary experience.

    What makes this recipe truly stand out is its health benefits. Packed with vitamins and minerals from fresh vegetables and fruit, this dish delivers essential nutrients while keeping calories low. Plus, it caters to various dietary needs, making it an ideal addition to any lifestyle. With its tropical vibes and healthy profile, the Easy Hawaiian Coleslaw Sweet Tangy Salad is a delightful choice that inspires anyone to become a confident home cook!

    Benefits and Advantages of Easy Hawaiian Coleslaw Sweet Tangy Salad

    There are countless reasons why the Easy Hawaiian Coleslaw Sweet Tangy Salad should find a spot in your recipe repertoire, especially if you’re on the lookout for easy dinner recipes.

    First off, preparation couldn’t be simpler! This salad involves easy chopping and mixing, meaning you won’t spend hours slaving away in the kitchen. In just 15 minutes, you can create a fresh and vibrant dish that your family will love. It’s perfect for those who lead busy lives but still want to enjoy homemade meals.

    Another significant advantage of this recipe is its health profile. The main ingredients—cabbage, carrots, and pineapple—are low in calories while being high in fiber, vitamins, and antioxidants. Cabbage, for example, is loaded with Vitamin C, while carrots offer a good dose of beta-carotene. By incorporating this salad into your meals, you’re not just satisfying your hunger; you’re nourishing your body!

    This versatile dish stands out in any gathering. Its tropical flavor appeals to diverse palates, and it’s easy to modify or adapt based on personal dietary needs. Whether you’re following a vegan lifestyle, seeking gluten-free options, or simply trying to reduce calorie intake, this salad can cater to all.

    Finally, the Easy Hawaiian Coleslaw Sweet Tangy Salad is also wallet-friendly. Most of its ingredients are affordable and widely available, making it an economical choice for families or anyone on a budget. With such beneficial features, it’s no surprise that this salad is becoming a go-to recipe for many looking to combine ease, health, and flavor!

    Ingredients Overview

    Essential Ingredients for Easy Hawaiian Coleslaw Sweet Tangy Salad

    To bring this tropical salad to life, you will need the following ingredients:

    • 4 cups of green cabbage, shredded: This serves as the salad’s base and adds crunch.
    • 1 cup of carrots, grated: Provides sweetness and vibrant color.
    • 1 cup of pineapple, diced (fresh or canned): Adds sweetness and a tropical flair.
    • 1/2 cup of red bell pepper, diced: Introduces a pop of color and added nutrients.
    • 1/4 cup of green onions, chopped: Offers a mild onion flavor that complements the tropical notes of the salad.
    • 1/4 cup of sliced almonds (optional): Adds crunch and healthy fats.
    • 1/2 cup of mayonnaise (or vegan mayonnaise): The dressing that brings everything together. For a lighter version, Greek yogurt can be a great substitute.
    • 2 tablespoons of apple cider vinegar: Provides the tangy kick that elevates the salad.
    • 2 tablespoons of honey (or maple syrup for a vegan option): Adds sweetness and balances the vinegar’s acidity.
    • Salt and pepper to taste: Enhances and rounds out the flavors.

    This ingredient list can cater to a variety of dietary needs, ensuring that everyone can enjoy a serving of this delicious salad!

    Dietary Substitutions to Customize Your Easy Hawaiian Coleslaw Sweet Tangy Salad

    1. Cabbage Alternatives: If you’re not a fan of cabbage or have dietary restrictions, you can swap it out for kale or broccoli slaw. Both will add unique flavors and nutritional benefits.

    2. Vegan Options: As mentioned, you can substitute mayo with vegan mayonnaise or Greek yogurt for a lighter dressing that still packs a creamy punch.

    3. Sweeteners: If you want to reduce sugar intake, you can use agave syrup or skip sweeteners entirely if the pineapple is sweet enough.

    4. Nuts and Seeds: For nut-free variations, consider using sunflower seeds or pumpkin seeds as toppings for that added crunch.

    5. Add-Ins: Feel free to incorporate other ingredients based on your taste preferences. Chopped cilantro, diced apple, or even cooked quinoa can spice up the salad, making it even more nutritious!

    With these substitutions and options, you can tailor the Easy Hawaiian Coleslaw Sweet Tangy Salad to fit your specific dietary requirements and preferences, ensuring everyone at the table can indulge in this tropical delight!

    How to Prepare the Perfect Easy Hawaiian Coleslaw Sweet Tangy Salad: Step-by-Step Guide

    Creating the perfect Easy Hawaiian Coleslaw Sweet Tangy Salad is straightforward and requires no special skills. Follow the steps below to make this refreshing dish.

    1. Prepare the Base: Begin by shredding 4 cups of green cabbage and grating 1 cup of carrots. Place them in a large mixing bowl. This combination of vegetables will give your salad a crunchy texture.

    2. Add Tropical Flavors: Dice 1 cup of pineapple and 1/2 cup of red bell pepper. Add the diced pineapple and red bell pepper to the cabbage and carrots in the mixing bowl.

    3. Incorporate Freshness: Chop 1/4 cup of green onions and add them to the mixing bowl. This adds a fresh flavor that balances the sweetness of the pineapple.

    4. Toss in Crunch: If using, add 1/4 cup of sliced almonds to the mixing bowl. They will give your salad an extra crunch and nuttiness.

    5. Prepare the Dressing: In a separate bowl, combine 1/2 cup of mayonnaise (or vegan alternative), 2 tablespoons of apple cider vinegar, and 2 tablespoons of honey (or maple syrup). Whisk together until the dressing is smooth and creamy.

    6. Mix Ingredients: Drizzle the dressing over the salad ingredients. Use a spatula or wooden spoon to gently toss everything together, ensuring that all the veggies are coated well.

    7. Season to Taste: Sprinkle some salt and pepper over the salad. Taste and adjust the seasoning as needed.

    8. Chill The Salad: For the best flavor, cover the bowl with plastic wrap and refrigerate for at least 30 minutes before serving. This allows the flavors to meld beautifully.

    9. Serve and Enjoy: After chilling, give the salad a quick toss and serve it on a large platter or individual plates.

    This step-by-step guide provides a clear pathway to preparing an Easy Hawaiian Coleslaw Sweet Tangy Salad. Remember, you can adapt ingredients and steps to fit various dietary needs or personal preferences, ensuring that everyone can enjoy this delicious dish!

    Mastering Easy Hawaiian Coleslaw Sweet Tangy Salad: Advanced Tips and Variations

    Creating the Easy Hawaiian Coleslaw Sweet Tangy Salad is straightforward, but mastering it comes down to paying attention to the details. Here are some advanced tips and variations to elevate your salad game.

    • Taste and Texture: To add some depth, consider incorporating shredded coconut for a tropical twist. Unsweetened coconut flakes will enhance that island flair and provide an interesting texture.

    • Add Spice: If you enjoy a bit of heat, try mixing in sliced jalapeños or a pinch of red pepper flakes in the dressing. This will give your salad a thrilling kick, balancing out the sweetness.

    • On-the-Go: If you want to pack this salad for lunch, keep the dressing separate until just before eating. This will ensure the salad remains fresh and crispy.

    • Meal Prep Friendly: Make this salad in bulk and divide it into containers for an easy meal prep option. It can last in the fridge for up to 4 days, making it a great choice for busy weeks.

    • Explore Variations: Consider serving this salad as a topping for grilled chicken or fish. It pairs beautifully with proteins, elevating your meal and enhancing the flavors.

    By experimenting with these tips and variations, you can customize your Easy Hawaiian Coleslaw Sweet Tangy Salad to suit your palate, creating a dish that’s both unique and delightful!

    How to Store Easy Hawaiian Coleslaw Sweet Tangy Salad: Best Practices

    To keep your Easy Hawaiian Coleslaw Sweet Tangy Salad fresh, storing it properly is essential. Here are some best practices to ensure maximum flavor and longevity:

    • Refrigeration: Place the salad in an airtight container and store it in the refrigerator if you have leftovers. This will prevent it from wilting and keep its crunchy texture intact.

    • Freezing: While it’s best not to freeze the salad with the dressing, you can freeze the chopped vegetables like cabbage and carrots if prepared in advance. Just remember to thaw and dress them when you’re ready to enjoy it.

    • Consumption Timeline: For the freshest taste, try to consume the salad within 3-4 days. After that, the vegetables might lose their crunch and the dressing could start to separate.

    • Reheating: If you do prefer warm salads, consider quickly sautéing the cold mixture in a skillet over medium heat for a few minutes. However, be aware that this might alter the fresh flavors.

    By following these storage tips, you can maintain the quality of your Easy Hawaiian Coleslaw Sweet Tangy Salad, ensuring that every bite remains as delicious as the first!

    Nutritional Value of Easy Hawaiian Coleslaw Sweet Tangy Salad

    Understanding the nutritional value of your meals is crucial, especially when searching for easy dinner recipes that are also healthy. The Easy Hawaiian Coleslaw Sweet Tangy Salad offers a nutrient-dense profile:

    • Calories: Approximately 250 calories per serving (1 cup).
    • Total Fat: 15g fat (with vegan options lowering this).
    • Saturated Fat: 1.5g (using light mayonnaise can reduce this).
    • Cholesterol: 0mg (perfect for vegans and heart-conscious individuals).
    • Sodium: 250mg, depending on dressing choice.
    • Total Carbohydrates: 28g, which includes 4g of dietary fiber.
    • Protein: 4g (increased by adding almonds or other nuts).

    This salad is not just about fulfilling hunger; it’s a fantastic way to introduce essential vitamins and minerals into your diet without excessive calories. The presence of fiber from vegetables helps with digestion, while healthy fats offered by the mayonnaise and nuts promotes heart health.

    In conclusion, the Easy Hawaiian Coleslaw Sweet Tangy Salad is a nutritious addition to any meal, making it a healthy choice that aligns perfectly with quick and easy dinner recipes.

    FAQs: Frequently Asked Questions About Easy Hawaiian Coleslaw Sweet Tangy Salad

    Can I make this salad ahead of time?

    Absolutely! You can prepare the salad a day in advance. Just remember to store it in the fridge in an airtight container for the best taste.

    What can I substitute for mayonnaise?

    You can replace mayonnaise with Greek yogurt for a tangy and lighter dressing, or try vegan mayonnaise if you are avoiding dairy.

    How can I make this salad spicier?

    To add some heat, consider incorporating sliced jalapeños or a sprinkle of sriracha into the dressing.

    Is this salad suitable for meal prep?

    Yes, it’s perfect for meal prep! Make it in bulk and portion it into containers for an easy grab-and-go option during the week.

    Can I add protein to this salad?

    Certainly! Grilled chicken, shrimp, or chickpeas are excellent options for making this salad more filling and nutrient-dense.

    How long will the salad last in the fridge?

    The salad should last about 3-4 days in the fridge when stored properly in an airtight container.

    By addressing these frequently asked questions, you’re equipped with all the knowledge you need to enjoy and customize the Easy Hawaiian Coleslaw Sweet Tangy Salad, ensuring it fits perfectly into your easy dinner recipes collection!

  • Cozy Creamy Vegetarian Tortilla Soup Recipe

    Cozy Creamy Vegetarian Tortilla Soup Recipe

    Cozy Creamy Vegetarian Tortilla Soup Recipe: A Tropical Delight

    Introduction to Cozy Creamy Vegetarian Tortilla Soup Recipe

    Welcome to the culinary embrace of a comforting bowl of Cozy Creamy Vegetarian Tortilla Soup! This delightful soup offers a burst of flavors, combining the earthy taste of beans, vibrant vegetables, and the richness of creaminess that warms not just your stomach but your soul. In the world of soup recipes, this vegetarian variety shines brightly, catering to a multitude of dietary preferences including vegan and gluten-free options.

    Imagine a bustling weeknight: you’re busy with work, family commitments, or classes, and the last thing you want is to spend hours in the kitchen. Enter this simple yet indulgent soup, ready in about 30 minutes, making it perfect for busy parents, students, and working professionals alike.

    But the benefits don’t stop there! This hearty dish is packed with nourishment. Rich in vitamins, minerals, and fiber, it promotes better digestive health and serves as an excellent source of plant-based protein. For food enthusiasts, this recipe is a versatile canvas; feel free to customize it with your favorite toppings or ingredients. Newlyweds looking to impress family with ease or seniors desiring nutritious comfort food will find this recipe particularly suitable.

    Join us on a delicious journey where convenience meets health, and where each spoonful of creamy tortilla soup brings a taste of warm, tropical delights to your kitchen.

    Benefits and Advantages of Cozy Creamy Vegetarian Tortilla Soup Recipe

    There are numerous advantages to making the Cozy Creamy Vegetarian Tortilla Soup, making it a favorite within the realm of soup recipes. Here’s why this recipe stands out:

    1. Ease of Preparation: One of the biggest draws to this dish is its straightforward approach. With just a handful of ingredients, it allows home cooks of every level—from beginners to seasoned chefs—to whip it up without stress. This soup is designed to be no-fuss, with minimal chopping and cooking time involved.

    2. Health Benefits: This vegetarian soup is rich in nutrients. Beans and vegetables contribute to a wholesome meal, providing essential fiber, vitamins A and C, and antioxidants. Additionally, using low-fat dairy or plant-based alternatives can cater to those watching their calorie intake without sacrificing creaminess.

    3. Versatility: One of the hallmarks of soup recipes is their adaptability. This tortilla soup can be modified to include seasonal vegetables, spices, or whatever you currently have in your pantry. Want it spicier? Add some jalapeños or cayenne. Looking for a unique twist? Try adding some roasted corn or avocado to enhance the texture and flavor.

    4. Dietary Suitability: This recipe caters to various dietary needs including vegan, vegetarian, and gluten-free diets. By simply replacing or omitting specific ingredients, everyone can enjoy a bowl. Whether you’re a busy parent wanting a nutritious option for your kids or a student seeking quick, healthy meal prep, this soup meets diverse needs.

    5. Family-friendly: With its appealing taste and texture, this soup makes for a great family dinner, appealing to both kids and adults. The colorful presentation and varied toppings can even encourage younger eaters to enjoy their veggies!

    In summary, the Cozy Creamy Vegetarian Tortilla Soup is not just a meal; it’s a wholesome, satisfying, and delicious option that will leave your family asking for seconds without any hesitation.

    Ingredients Overview

    Essential Ingredients for Cozy Creamy Vegetarian Tortilla Soup Recipe

    To make the Cozy Creamy Vegetarian Tortilla Soup, you will need the following essential ingredients:

    • 1 tablespoon olive oil
    • Adds healthy fats and depth of flavor.

    • 1 medium onion, diced

    • Adds sweetness and substance to the base.

    • 2 cloves garlic, minced

    • Infuses the soup with aromatic flavor.

    • 1 bell pepper, chopped (red or yellow for sweetness)

    • Provides color and a mild crunch.

    • 1 zucchini, diced

    • Introduces more vegetables for nutrition and texture.

    • 1 can (15 oz) black beans, drained and rinsed

    • Serves as the protein source in this vegetarian dish.

    • 1 can (15 oz) fire-roasted diced tomatoes

    • Adds depth, acidity, and a smoky flavor.

    • 4 cups vegetable broth

    • Base of the soup for the desired consistency.

    • 1 teaspoon ground cumin

    • Elevates the flavor profile with an earthy note.

    • 1 teaspoon chili powder

    • Introduces a mild kick, adjustable based on preference.

    • Salt and pepper to taste

    • Key seasonings for enhancing overall flavor.

    • 1 cup heavy cream or coconut milk (for vegan option)

    • Adds creaminess to the soup.

    • Corn tortillas, cut into strips (for garnish)

    • Offers a crunchy texture to contrast with the soft soup.

    • Toppings (avocado, cilantro, lime wedges)

    • For extra flavor and freshness.

    With these simple, fresh ingredients, preparing your cozy soup becomes an enjoyable task rather than a chore.

    Dietary Substitutions to Customize Your Cozy Creamy Vegetarian Tortilla Soup Recipe

    The versatility of the Cozy Creamy Vegetarian Tortilla Soup allows for easy substitutions to cater to various dietary needs or ingredient availability:

    • Vegetarian/Vegan: Use coconut milk or almond milk in place of heavy cream to make this soup vegan-friendly. Ensure that any broth used is vegetable-based.

    • Gluten-Free: Replace traditional tortillas with gluten-free versions or simply choose to skip the tortilla strips altogether. Adding extra veggies can enhance texture without gluten.

    • Low-Sodium: Opt for low-sodium vegetable broth and rinse canned beans thoroughly to reduce sodium content, making this a heart-healthier choice.

    • Extra Protein: Consider adding quinoa or lentils to the soup if you’re looking to boost the protein content further.

    • Spice Level: Adjust the chili powder and cumin to cater to your heat tolerance. For a more spicy kick, consider jalapeño peppers or crushed red pepper flakes.

    With the above options, you can easily adapt the Cozy Creamy Vegetarian Tortilla Soup to meet your specific dietary desires. Sharing this flexibility with your family can encourage everyone to customize according to their own tastes!

    How to Prepare the Perfect Cozy Creamy Vegetarian Tortilla Soup Recipe: Step-by-Step Guide

    Ready to create this delightful soup? Follow these simple, step-by-step instructions to ensure your Cozy Creamy Vegetarian Tortilla Soup turns out perfectly:

    1. Prepare the Base: In a large pot, heat olive oil over medium heat. Once hot, add diced onions and sauté for about 3-4 minutes until they begin to soften. Stir occasionally to prevent burning.

    2. Sauté Vegetables: Add minced garlic and chopped bell pepper to the pot. Continue sautéing for an additional 3-4 minutes until the bell pepper has softened.

    3. Mix in Zucchini: Introduce the diced zucchini to the pot and sauté for another 3 minutes, allowing the flavors to meld together before moving to the next step.

    4. Add Beans and Tomatoes: Stir in the black beans and the can of fire-roasted diced tomatoes. Ensure that they are incorporated evenly throughout the mixture.

    5. Pour in Broth: Slowly pour the vegetable broth into the pot, stirring well to combine all ingredients. Bring the mixture to a gentle boil.

    6. Season the Soup: Add ground cumin, chili powder, salt, and pepper. Stir thoroughly, allowing spices to integrate into the mixture. Simmer for about 10 minutes to develop the flavors, stirring occasionally.

    7. Cream it Up: Lower the heat and slowly add the heavy cream or coconut milk, stirring gently until combined. This will give the soup its creamy texture. Let it heat through for about 5 minutes, but do not let it boil.

    8. Taste and Adjust: After heating, taste the soup and adjust seasoning if needed, adding more salt, pepper, or spices according to your preference.

    9. Prepare Tortilla Strips: While the soup simmers, prepare the tortilla strips by cutting corn tortillas into thin strips. In a separate skillet, heat a bit of oil and fry the strips until crispy, or you can also bake them in the oven for a healthier version.

    10. Serve with Toppings: Ladle the soup into bowls, topping each with crispy tortilla strips, diced avocado, chopped cilantro, and a squeeze of lime for a burst of freshness.

    Congratulations! You’ve just made a delicious batch of the Cozy Creamy Vegetarian Tortilla Soup. Serve warm and don’t forget to savor the vibrant flavors in each bite.

    Mastering Cozy Creamy Vegetarian Tortilla Soup Recipe: Advanced Tips and Variations

    To enhance your experience with the Cozy Creamy Vegetarian Tortilla Soup, consider these advanced tips and variations:

    • Texture Play: If you prefer a creamier soup, use an immersion blender to puree a portion of the soup. This thickens the texture while maintaining small chunks for added mouthfeel.

    • Herb Infusion: Add a fresh herb component by incorporating chopped fresh oregano or thyme. This can elevate the flavor even more, especially when added during the last few minutes of cooking.

    • Smoky Flavor: To intensify the flavor profile, consider adding smoked paprika or chipotle peppers in adobo sauce. This can give the soup a delightful smokiness that pairs beautifully with the creaminess.

    • Make it Hearty: If you want to make this soup heartier, toss in some diced potatoes or corn. These ingredients lend additional texture and sweetness.

    • Meal Prep: This soup keeps well in the refrigerator for up to 3-4 days and also freezes beautifully for later enjoyment. Consider making a double batch to have on hand for busy days.

    By utilizing these tips, you can create a personalized version of the soup that perfectly caters to your preferences and impresses your family and friends.

    How to Store Cozy Creamy Vegetarian Tortilla Soup Recipe: Best Practices

    Storing your Cozy Creamy Vegetarian Tortilla Soup properly can ensure maximum freshness for your next meal. Here’s how to go about it:

    • Refrigeration: Allow the soup to cool completely at room temperature before transferring it to an airtight container. Store in the refrigerator for up to 3-4 days.

    • Freezing: For longer storage, place the cooled soup in freezer-safe, airtight containers, leaving some space at the top for expansion. It can be frozen for up to 2-3 months. When ready to enjoy, thaw the soup in the refrigerator overnight before reheating.

    • Reheating: When reheating the soup, consider doing so on the stove over medium heat to retain its texture. Stir frequently to prevent sticking, and add a splash of vegetable broth or water if the soup has thickened too much.

    Following these storage practices will help enhance the longevity of your Cozy Creamy Vegetarian Tortilla Soup while ensuring that it remains tasty and nutritious.

    Nutritional Value of Cozy Creamy Vegetarian Tortilla Soup Recipe

    Understanding the nutritional value of what we consume is important, especially for health-conscious individuals. Here’s a breakdown of the Cozy Creamy Vegetarian Tortilla Soup per serving, assuming it serves 6:

    • Calories: Approximately 280
    • Total Fat: 12g (Saturated Fat: 6g)
    • Cholesterol: 30mg
    • Sodium: 500mg
    • Total Carbohydrates: 35g
    • Dietary Fiber: 10g
    • Sugars: 5g
    • Protein: 10g

    The soup is rich in fiber, thanks to beans and vegetables, which aids digestion and helps you feel full longer. The healthy fats from olive oil and cream contribute to heart health, while the varied vegetables provide essential vitamins and minerals.

    For those following a specific diet, such as lowering calories or sodium, simply adjusting ingredients or portion sizes can create a more suitable version without sacrificing the flavor of this beloved dish.

    FAQs: Frequently Asked Questions About Cozy Creamy Vegetarian Tortilla Soup Recipe

    1. Can I make this soup in a slow cooker?

    Yes! This recipe can easily be adapted for slow cooking. Simply combine all the veggies, broth, beans, and seasonings in your slow cooker. Cook on low for 6-8 hours or on high for 3-4 hours. Stir in the cream just before serving.

    2. Is it possible to make this soup gluten-free?

    Absolutely! As mentioned, simply use gluten-free tortillas or omit the tortilla strips. The soup is naturally gluten-free when made with the recommended ingredients.

    3. What can I use instead of black beans?

    Feel free to swap in any canned beans you have on hand, such as pinto beans, kidney beans, or chickpeas. Each will provide a unique flavor and texture while keeping the soup satisfying.

    4. How can I thicken the soup if it’s too watery?

    If you find your soup is thinner than desired, consider creating a roux with flour (or a gluten-free substitute) and water, or blend a portion of the soup to create a creamy texture.

    5. Can I add meat to this recipe?

    Certainly! Although this recipe is vegetarian, you can add cooked chicken or turkey if desired for an added protein boost. Simply mix it in during the final stages of cooking.

    These FAQs aim to guide you in adjusting the Cozy Creamy Vegetarian Tortilla Soup Recipe to your needs while ensuring you achieve a flavorful, satisfying dish every time!

    By following this detailed guide, cultivating your cooking skills, and enjoying the wonderful flavors and health benefits, you’ll find yourself returning to this delightful soup recipe time and again. Enjoy the lovely balance of convenience, nutrition, and scrumptiousness!

  • IM Obsessed Been Making This Shrimp Non-Stop

    IM Obsessed Been Making This Shrimp Non-Stop

    I’M Obsessed! Been Making This Shrimp Non-Stop!: A Tropical Delight

    Introduction to I’M Obsessed! Been Making This Shrimp Non-Stop!

    If you’ve been searching for an irresistible addition to your dinner table, look no further! This recipe, “I’M Obsessed! Been Making This Shrimp Non-Stop!”, is a vibrant dish bursting with tropical flavors, making it a remarkable choice among shrimp recipes. Whether you’re a busy parent looking to whip up something quick, a student wanting a tasty, affordable meal, or a health-conscious individual seeking a low-calorie option, this shrimp recipe tailors to everyone.

    What makes this dish shine is its combination of simplicity and health benefits. The ingredients are fresh, nutrient-packed, and can easily be adapted for various dietary needs, including gluten-free and low-calorie options. Furthermore, this shrimp dish is not just easy to prepare; it is also packed with lean protein, making it an excellent choice for those maintaining a balanced diet while enjoying delectable flavors.

    Adding to the allure, this shrimp recipe can be served on its own, tossed into pasta, or paired with rice or salad, making it versatile enough for any occasion. Dive into this tropical delight, and you’ll discover the reasons why I can’t stop making it. Let’s explore the numerous benefits and advantages of this dish!

    Benefits and Advantages of I’M Obsessed! Been Making This Shrimp Non-Stop!

    This shrimp recipe stands out for several reasons, making it a staple in any kitchen. First, the ease of preparation is unmatched. In just a few simple steps, you’ll have a dish that looks as if you’ve spent hours in the kitchen. It’s ideal for busy individuals or families juggling hectic schedules.

    Not only is this shrimp dish quick and easy, but it’s also health-packed. Shrimp is a fantastic source of protein, low in calories, and rich in essential nutrients such as selenium and vitamin B12. It contributes to heart health, supports brain function, and can improve skin quality. For those who are particularly health-conscious or managing specific dietary needs, there are several benefits to highlight:

    1. Dietary Flexibility: This shrimp recipe allows for gluten-free and low-carb options, perfect for those with dietary restrictions.

    2. Nutrient-Rich: The combination of fresh vegetables and shrimp provides antioxidants, vitamins, and minerals, enhancing overall health.

    3. Quick Cooking Time: This dish can be ready in under 30 minutes, making it perfect for last-minute dinners or meal prepping for the week ahead.

    4. Versatile Pairing: This shrimp preparation can easily be paired with various sides, from quinoa to leafy greens, accommodating different meal preferences.

    5. Flavor Explosion: Infused with spices and zesty ingredients, this dish delivers flavor without the need for heavy sauces or additives.

    In summary, “I’M Obsessed! Been Making This Shrimp Non-Stop!” excels on multiple fronts, making it an excellent addition to your repertoire of shrimp recipes. Celebrate simplicity, healthiness, and adaptability by trying your hand at this flavorful shrimp dish!

    Ingredients Overview

    Essential Ingredients for I’M Obsessed! Been Making This Shrimp Non-Stop!

    To create this delightful dish, you’ll need the following ingredients:

    • 16 oz fresh shrimp (peeled and deveined): The star of the dish, shrimp is packed with lean protein and essential nutrients. Feel free to use frozen shrimp if fresh is unavailable—just ensure they are thawed properly before cooking.

    • 2 tablespoons olive oil: A healthy fat that adds flavor and richness to the recipe. It can be replaced with avocado oil for a slightly different taste.

    • 3 cloves garlic (minced): Garlic not only enhances flavor but also provides numerous health benefits, including anti-inflammatory effects.

    • 1 medium bell pepper (sliced): Choose any color—red, yellow, or green. Bell peppers are high in vitamin C and add a crunch to the dish.

    • 1 medium zucchini (sliced): Low in calories and rich in vitamins, zucchini lends bulk to the dish while keeping it light.

    • Juice of 1 lime: Adds a refreshing citrus tang that brightens up the flavors.

    • 1 teaspoon cumin: This spice adds depth and warmth to the dish; feel free to adjust based on your personal flavor preferences.

    • Salt and pepper to taste: Essential seasoning for balancing the dish.

    • Fresh cilantro (optional): For garnishing, cilantro adds a burst of freshness and enhances the overall presentation.

    Dietary Substitutions to Customize Your I’M Obsessed! Been Making This Shrimp Non-Stop!

    Not everyone has the same dietary preferences or restrictions, and that’s okay! Here are a few substitutions to tailor this shrimp recipe to your needs:

    • Shrimp Alternatives: If you’re not a shrimp lover or have a shellfish allergy, consider substituting with chicken breast, tofu, or tempeh for a plant-based option.

    • Oil Replacement: If you want to reduce calories or fat content, you can use cooking spray or a small amount of vegetable broth instead of olive oil for sautéing.

    • Vegetable Variations: Feel free to change up the vegetables based on your own preferences or what you have available. Broccoli, asparagus, or snap peas are wonderful alternatives to zucchini and bell peppers.

    • Herbs and Spices: Don’t hesitate to add your favorite spices or fresh herbs. Basil, oregano, or thyme can impart unique flavors.

    Taking these suggestions into account, this incredible shrimp recipe can easily be adapted, ensuring everyone at your table can enjoy a delectable meal that fits their dietary needs!

    How to Prepare the Perfect I’M Obsessed! Been Making This Shrimp Non-Stop!: Step-by-Step Guide

    Cooking delicious shrimp doesn’t have to be a daunting task. With this simple step-by-step guide, you can master preparing “I’M Obsessed! Been Making This Shrimp Non-Stop!” and impress yourself and your loved ones. Let’s get started!

    1. Prepare the Base: Gather and prep all your ingredients, ensuring that the shrimp is thawed and cleaned if you’re using frozen ones. This step ensures a smoother cooking process.

    2. Heat the Pan: In a large skillet, heat 2 tablespoons of olive oil over medium-high heat. Allow the oil to become hot, which helps to prevent sticking and ensures proper cooking.

    3. Sauté Garlic: Add minced garlic to the hot oil and sauté for about 30 seconds or until fragrant. Be careful not to burn it, as burnt garlic can turn bitter.

    4. Cook the Vegetables: Toss in the sliced bell pepper and zucchini. Cook for about 3-4 minutes, stirring occasionally until they start to soften yet retain a bit of their crunch.

    5. Add Shrimp: Next, add the peeled and deveined shrimp to the skillet. Stir well to combine, ensuring the shrimp is coated in oil and garlic.

    6. Season: Sprinkle cumin, salt, and pepper over the shrimp and vegetables. Stir again to ensure everything is evenly seasoned.

    7. Cook the Shrimp: Allow the shrimp to cook for about 3-5 minutes, stirring frequently. The shrimp will turn pink and opaque as they cook, a surefire way to know they are done.

    8. Add Lime Juice: Once the shrimp are cooked, remove the skillet from heat, and immediately squeeze the juice of one lime over the top. This step elevates the flavor profile and adds acidity.

    9. Garnish: If you love cilantro, roughly chop a handful as a garnish before serving. This fresh herb adds vibrant color and flavor.

    10. Serve: Serve the shrimp dish warm over rice, quinoa, or a bed of leafy greens, or just enjoy it solo!

    This shrimp recipe showcases a quick, healthy meal that can be on your table in less than 30 minutes. Feel free to customize servings based on personal preferences or dietary restrictions throughout the cooking process!

    Mastering I’M Obsessed! Been Making This Shrimp Non-Stop!: Advanced Tips and Variations

    Ready to take your shrimp dish to the next level? Here are some additional tips and exciting variations to explore with “I’M Obsessed! Been Making This Shrimp Non-Stop!”:

    1. Spicy Kick: For those who love heat, consider adding red pepper flakes or diced jalapeños when you sauté the garlic to give your dish an extra spice kick.

    2. Sweet and Savory: Add a tablespoon of honey or maple syrup halfway through cooking for a sweet flavor contrast against the savory elements.

    3. Creamy Touch: To create a creamy version, stir in some coconut milk or Greek yogurt with the lime juice before serving. This addition infuses a richness that pairs beautifully with the shrimp.

    4. Pasta Delight: If you’re a pasta enthusiast, toss the sautéed shrimp and vegetables with your favorite cooked pasta for a heartier meal option.

    5. Meal Prep Friendly: This shrimp recipe is fantastic for meal prep! Cook a larger batch, and store it in containers for easy grab-and-go lunches throughout the week.

    6. Cooked Ahead: If you plan to entertain or want to make this dish ahead of time, shrimp can be cooked and refrigerated. Just reheat briefly while adding freshly squeezed lime juice before serving.

    By implementing these variations and tips, you’ll be able to personalize your “I’M Obsessed! Been Making This Shrimp Non-Stop!” dish to match your taste while impressing friends and family.

    How to Store I’M Obsessed! Been Making This Shrimp Non-Stop!: Best Practices

    Storing leftover shrimp is simple and ensures that you can enjoy this dish again later. Here are the best practices for refrigeration and reheating:

    1. Refrigeration: Transfer any leftovers to an airtight container and refrigerate. Properly stored, your shrimp can last in the fridge for up to 3 days. Ensure the dish is cooled to room temperature before sealing it in the container to prevent condensation, which can lead to sogginess.

    2. Freezing: If you want to store the shrimp for a longer duration, consider freezing it. Transfer the cooled dish into a freezer-safe container or a strong Ziploc bag, removing excess air, and seal tightly. It can last in the freezer for up to 2 months.

    3. Reheating: When you’re ready to enjoy the leftovers, reheating can be done on the stovetop or microwave. For stovetop reheating, place the shrimp in a skillet over medium heat and cook until heated through, about 5 minutes. Alternatively, in a microwave, heat it on medium power for 1-2 minutes, stirring halfway to ensure even heating.

    By storing your shrimp properly, you’ll maintain its flavor and texture, allowing you to savor this delightful dish again!

    Nutritional Value of I’M Obsessed! Been Making This Shrimp Non-Stop!

    Understanding the nutritional profile of “I’M Obsessed! Been Making This Shrimp Non-Stop!” is crucial for those monitoring their dietary intake. Here’s a detailed breakdown:

    Estimated Nutritional Information (per serving):

    • Calories: Approximately 250
    • Protein: 25g
    • Fat: 10g
    • Carbohydrates: 18g
    • Fiber: 3g
    • Sugar: 2g
    • Sodium: 400mg

    Health Benefits:

    1. Protein Power: Shrimp provides an excellent source of high-quality protein, essential for muscle repair and growth.

    2. Low Calories: This recipe is low-calorie, making it a great option for those seeking to maintain or lose weight while still enjoying flavorful meals.

    3. Vitamins and Minerals: Rich in selenium, vitamin B12, phosphorus, and iodine, this dish supports various bodily functions, including metabolism and immune health.

    4. Balanced Meal: When paired with nutrient-dense vegetables and healthy fats from olive oil, this recipe offers a balanced meal full of vitamins, minerals, and healthy fats.

    By enjoying “I’M Obsessed! Been Making This Shrimp Non-Stop!”, you’re not only treating yourself to an incredibly delicious meal but also nourishing your body with essential nutrients.

    FAQs: Frequently Asked Questions About I’M Obsessed! Been Making This Shrimp Non-Stop!

    Q1: Can I use frozen shrimp for this recipe?

    A: Yes, frozen shrimp works great! Just ensure you thaw them completely before cooking to achieve the right texture.

    Q2: What can I use as a substitute for shrimp?

    A: If seafood isn’t your preference, feel free to replace shrimp with chicken breasts or tofu for a plant-based option.

    Q3: Is this shrimp recipe gluten-free?

    A: Absolutely! This shrimp recipe is inherently gluten-free as long as you use certified gluten-free ingredients (like the spices).

    Q4: Can I prepare this dish ahead of time?

    A: Yes! You can cook this shrimp dish ahead of time and store it in the refrigerator. Just reheat it before serving for best results.

    Q5: What other vegetables can I add to this dish?

    A: You can customize it with any vegetables you enjoy, such as asparagus, broccoli, snap peas, or even mushrooms. These can all complement the flavors wonderfully.

    Embrace the simplicity and deliciousness of “I’M Obsessed! Been Making This Shrimp Non-Stop!” and discover how easy it is to whip up a meal that pleases any palate. Happy cooking!

  • Tasty Greek Yogurt Jello Fluff

    Tasty Greek Yogurt Jello Fluff

    Tasty Greek Yogurt Jello Fluff: A Tropical Delight

    Introduction to Tasty Greek Yogurt Jello Fluff

    If you’re searching for a delightful addition to your dessert recipes collection, look no further! Introducing Tasty Greek Yogurt Jello Fluff—a light, fluffy, and flavorful treat that’s perfect for anyone looking to indulge without the guilt. This dessert combines the rich creaminess of Greek yogurt with the vibrant taste of Jello, resulting in a dish that’s both refreshing and satisfying.

    Not only is this recipe simplicity itself, but it is also incredibly healthy. Greek yogurt is a fantastic source of protein, calcium, and probiotics, making it a smart choice for anyone, from busy parents to active students and health-conscious individuals. Furthermore, this dish can be customized to fit various dietary needs, being easily made vegan, gluten-free, and low-calorie without compromising on taste.

    The Tasty Greek Yogurt Jello Fluff is not just a treat; it’s an experience. Whether you’re hosting a dinner party or simply enjoying a quiet evening at home, this recipe will impress guests and family alike. So get ready to mix up a tropical delight that everyone can enjoy!

    Benefits and Advantages of Tasty Greek Yogurt Jello Fluff

    When it comes to dessert recipes, Tasty Greek Yogurt Jello Fluff stands out for numerous reasons. First and foremost, simplicity is key. This recipe requires minimal ingredients and straightforward steps, making it perfect for busy individuals or novice home cooks. With an easy preparation process, taking just about 30 minutes from start to finish, this fluffy dessert can fit seamlessly into your culinary routine.

    Next, let’s talk about health benefits. The primary ingredient, Greek yogurt, is low in sugar yet packed with protein. This makes it an excellent choice for those who want to indulge without overloading on calories. Probiotics found in Greek yogurt also contribute to digestive health, which is a bonus for anyone looking to improve their gut health.

    Moreover, the addition of Jello provides a burst of fruity flavors and beautiful colors, enhancing the visual appeal of your dessert. This versatility allows you to experiment with different flavors and colors of Jello, making it a great fit for seasonal occasions or personal preferences.

    Lastly, this recipe can cater to various dietary restrictions. With easy substitutions such as dairy-free yogurt and sugar-free Jello, everyone, from vegan friends to those with gluten sensitivities, can enjoy Tasty Greek Yogurt Jello Fluff without a worry.

    Ingredients Overview

    Essential Ingredients for Tasty Greek Yogurt Jello Fluff

    Here’s a detailed list of the ingredients you’ll need for this delightful dessert:

    • 2 cups Greek yogurt (plain or vanilla): Adds creaminess and protein to the fluff. Look for low-fat or non-dairy alternatives for lighter versions.
    • 1 cup Jello powder (any flavor): This will determine the flavor of your fluff. Choose from popular flavors like strawberry, cherry, or orange for a vibrant dessert.
    • 1 cup hot water: Helps dissolve the Jello powder, creating a smooth texture.
    • 1-2 tablespoons honey or agave syrup (optional): For those with a sweet tooth, these natural sweeteners can enhance the dessert’s taste. Adjust for taste preferences.
    • ½ cup whipped topping or whipped coconut cream (for a dairy-free option): This lightens the mixture and adds airiness.
    • Fresh fruit (optional, for garnish): Berries, sliced bananas, or diced mango make excellent toppings.

    Dietary Substitutions to Customize Your Tasty Greek Yogurt Jello Fluff

    1. Vegan Option:
    2. Use coconut yogurt or almond yogurt instead of Greek yogurt.
    3. Opt for agar-agar or plant-based Jello alternatives to create a vegan-friendly version.

    4. Gluten-Free Option:

    5. Ensure that the Jello you select is gluten-free. Most Jello brands are, but always check the labels to be safe.

    6. Sugar-Free Option:

    7. Use sugar-free Jello mix and substitute honey/agave syrup with a sugar-free sweetener like stevia or monk fruit sweetener.

    8. Low-Calorie Option:

    9. Low-fat Greek yogurt and light whipped topping can significantly reduce calories without sacrificing flavor.

    With these substitutions, anyone can enjoy the deliciousness of Tasty Greek Yogurt Jello Fluff, regardless of dietary preferences!

    How to Prepare the Perfect Tasty Greek Yogurt Jello Fluff: Step-by-Step Guide

    Creating your Tasty Greek Yogurt Jello Fluff is an enjoyable and straightforward endeavor. Follow these step-by-step instructions for a foolproof dessert:

    1. Prepare the Base: In a mixing bowl, combine 1 cup of hot water with 1 cup of Jello powder. Stir thoroughly until the Jello dissolves completely. The mixture should be smooth with no lumps.

    2. Cool the Mixture: Let the Jello mixture cool for about 10-15 minutes at room temperature. This will avoid curdling the yogurt when mixed together.

    3. Combine Yogurt and Jello: In another bowl, add 2 cups of Greek yogurt. Slowly pour the cooled Jello mixture into the yogurt while stirring gently. This step is crucial for achieving a smooth and fluffy texture.

    4. Add Sweetener: If you wish, stir in honey or agave syrup to sweeten the mixture. Adjust according to taste, keeping in mind that the Jello adds sweetness as well.

    5. Fold in Whipped Topping: For extra fluffiness, use a spatula to fold in ½ cup of whipped topping or whipped coconut cream. This adds volume and lightens the mix, creating that cloud-like texture.

    6. Chill the Fluff: Once well combined, pour the mixture into individual serving cups or a large bowl. Cover with plastic wrap and refrigerate for at least 2-3 hours, or until set.

    7. Garnish and Serve: After chilling, take the Tasty Greek Yogurt Jello Fluff out of the fridge. Garnish with fresh fruit or additional whipped topping before serving. Enjoy this refreshing treat on a warm day!

    These instructions ensure that your fluff turns out perfectly every time. Each step may also be tailored for various dietary requirements, so feel free to substitute ingredients as necessary.

    Mastering Tasty Greek Yogurt Jello Fluff: Advanced Tips and Variations

    Now that you’ve mastered the basic Tasty Greek Yogurt Jello Fluff, here are some advanced tips and exciting variations to try:

    • Flavors Galore: Experiment with different Jello flavors to create a rainbow of fluffs. Mixing two flavors can also yield beautiful marbled effects—think strawberry and blueberry for a summer vibe!

    • Layering Technique: For an attractive presentation, layer the Greek yogurt mixture with fruit purees or additional Jello in clear cups. This will not only make it visually appealing but also delicious.

    • Add-ins: Consider folding in some finely diced fruits or nuts into the fluff for added texture. Chopped strawberries, blueberries, or even shavings of coconut can enhance the eating experience.

    • Make it a Parfait: Layer the Jello fluff with granola or nut clusters to create a parfait that can be enjoyed as breakfast or a nutritious snack.

    Incorporating these suggestions can turn your Tasty Greek Yogurt Jello Fluff into a versatile dish that caters to various occasions!

    How to Store Tasty Greek Yogurt Jello Fluff: Best Practices

    To keep your Tasty Greek Yogurt Jello Fluff fresh, follow these storage guidelines:

    • Refrigeration: Store leftovers in an airtight container in the refrigerator for up to 5 days. This will maintain the fluff’s texture and flavor, so you can enjoy this treat throughout the week.

    • Freezing: While this dessert is best enjoyed fresh, you can freeze the Jello fluff for up to 2 weeks. Place it in a suitable airtight container or freezer bag. To enjoy it later, thaw in the fridge overnight before serving.

    • Reheating: If you’ve frozen the fluff and wish to have it served at room temperature, allow it to thaw naturally in the fridge rather than using a microwave.

    These practices will ensure that your fluffy dessert remains delicious for as long as possible!

    Nutritional Value of Tasty Greek Yogurt Jello Fluff

    Curious about how this delightful treat fits into your daily nutrition? Here’s a breakdown of the estimated nutritional values per serving (based on standard ingredients):

    • Calories: Approximately 120-150 calories
    • Total Fat: 3-5g
    • Protein: 8-10g
    • Carbohydrates: 25-30g
    • Fiber: 0g
    • Sugars: 8-12g (depending on the sweetness of Jello)
    • Calcium: 10% Daily Value (DV)
    • Vitamin C: 5% Daily Value (DV)

    The nutritional values may vary based on your ingredient choices—such as using low-fat or full-fat yogurt, and sweetener options. This dessert is a wholesome treat providing essential nutrients, making it a great addition to your dessert recipes collection.

    FAQs: Frequently Asked Questions About Tasty Greek Yogurt Jello Fluff

    Can I use non-flavored yogurt instead of Greek yogurt?

    Yes! If you prefer a different flavor or don’t have Greek yogurt on hand, regular non-flavored yogurt will also work. However, you might want to adjust the sweetness accordingly since Greek yogurt typically has a thicker consistency.

    Is it possible to prepare this recipe without Jello?

    Absolutely! Instead of using Jello, you can incorporate fruit purees for a natural sweetness and flavor. Just blend your desired fruits and sweeten to taste.

    How can I make this recipe more portable?

    Consider using individual cups with lids for easy transportation, making it a perfect on-the-go snack or dessert option!

    Can I prepare this dish in advance?

    Yes! Tasty Greek Yogurt Jello Fluff can be made one day in advance, and it tastes even better after chilling overnight.

    What if I can’t find a certain Jello flavor?

    Feel free to get creative! You can explore your local grocery store for seasonal flavors or even create your own homemade fruit gelatin if you’re feeling adventurous.

    By providing straightforward answers, we hope to assist readers in creating their Tasty Greek Yogurt Jello Fluff according to their preferences and needs.

    Now that you have all the tips, tricks, and detailed instructions, you’re ready to embark on your cooking adventure. Enjoy the delicious Tasty Greek Yogurt Jello Fluff!

  • IM Obsessed With This Healthy Honey Mustard Combo

    IM Obsessed With This Healthy Honey Mustard Combo

    I’M Obsessed With This Healthy Honey Mustard Combo!: A Tropical Delight

    Introduction to I’M Obsessed With This Healthy Honey Mustard Combo!

    Are you searching for healthy dinner recipes that are simple, flavorful, and suitable for the entire family? Look no further! This Healthy Honey Mustard Combo is a delightful blend of tangy and sweet that provides a fresh twist to your meals. Whether you’re a busy parent looking to whip up a nutritious dish for your kids, a student needing quick and healthy options, or someone simply wanting to indulge in great taste without the guilt, this recipe checks all the boxes.

    With ingredients that are not only wholesome but also easy to find, this honey mustard combo combines the lush flavors of mustard and honey with a touch of tropical flair. Moreover, it brings numerous health benefits to the table, such as being low in calories, high in antioxidants, and rich in vitamins. It’s versatile enough to cater to various dietary preferences, including vegan and gluten-free options, making it a go-to choice for everyone.

    Imagine a dish that is quick to prepare while still bursting with flavor: that’s what you get with this Healthy Honey Mustard Combo! It’s perfect for meal prep or a last-minute dinner. So, gather your ingredients and get ready to whip up a meal that’s not just healthy but positively irresistible!


    Benefits and Advantages of I’M Obsessed With This Healthy Honey Mustard Combo!

    Why choose this Healthy Honey Mustard Combo as your go-to dish? Let’s dive into its standout features that make it an excellent choice for those seeking healthy dinner recipes.

    1. Ease of Preparation

    In our fast-paced lives, time is of the essence. One of the significant benefits of this recipe is its straightforward preparation method. With minimal cooking time and a few simple steps, you can have a delicious meal ready in no time. It’s perfect for those busy weeknights when every second counts, allowing you to spend less time in the kitchen and more time enjoying dinner with loved ones.

    2. Health Benefits

    This healthy honey mustard recipe is packed with benefits. Honey not only adds sweetness but also acts as a natural antioxidant, promoting overall health. The mustard is known for its low-calorie content and is rich in selenium, a mineral that has anti-inflammatory benefits. Together, they create a nutritious sauce that enhances the flavor of your dishes without the added sugar or unhealthy fat commonly found in store-bought dressings.

    3. Versatile and Customizable

    Another advantage of this recipe is its adaptability. You can easily swap out ingredients based on your preferences or any dietary needs. Whether you are following a vegan, gluten-free, or low-carb diet, there are numerous substitutions available to fit your lifestyle. By making small changes, you can transform this recipe into a variety of meals, keeping your family excited about healthy eating.

    4. Family-Friendly

    Few meals are universally liked, but this honey mustard combo appeals to adults and kids alike. Its sweet and tangy taste can convert even the pickiest eaters into fans. With this recipe, you can sneak in healthy ingredients without compromising on flavor. It’s a fantastic way to introduce nutritious foods into your children’s diets while ensuring they enjoy every bite.

    In summary, this Healthy Honey Mustard Combo is a one-stop solution for anyone looking to prepare healthy dinner recipes. It checks all the boxes: it’s quick to make, packed with health benefits, adaptable, and family-approved. Get ready to elevate your dining experience!


    Ingredients Overview

    Essential Ingredients for I’M Obsessed With This Healthy Honey Mustard Combo!

    Here’s what you’ll need to create this tangy delight:

    1. Honey (1/4 cup)
    2. Natural sweetener; considered healthy due to its antioxidant properties.

    3. Dijon Mustard (2 tablespoons)

    4. Adds a zesty flavor and is low in calories.

    5. Olive Oil (1 tablespoon)

    6. Healthy fat source rich in monounsaturated fats that promote heart health.

    7. Apple Cider Vinegar (1 tablespoon)

    8. Boosts flavor and has several health benefits, including aiding digestion.

    9. Garlic Powder (1 teaspoon)

    10. Adds depth to the flavor; known for its immune-boosting properties.

    11. Salt & Pepper (to taste)

    12. Enhances overall flavor; always choose sea salt for better health benefits.

    13. Water (as needed)

    14. To adjust the consistency of the sauce.

    15. Optional: Fresh Herbs (Basil, Thyme) (to taste)

    16. Adds freshness and enhances nutritional value.

    This combination not only satisfies your taste buds but also caters to various dietary needs. Note that all ingredients are easily accessible in grocery stores, making this honey mustard combo a highly convenient recipe to prepare.

    Dietary Substitutions to Customize Your I’M Obsessed With This Healthy Honey Mustard Combo!

    To make this recipe suitable for different dietary preferences, consider the following substitutions:

    • For Vegan Options: Replace honey with maple syrup or agave nectar to suit a vegan diet while maintaining sweetness.
    • Gluten-Free Versions: Ensure that the Dijon mustard used is labeled gluten-free, as some brands may contain gluten as a filler.
    • Low-Calorie Variants: Use a sugar-free honey alternative or reduce the amount of honey used to lower the total calorie count.
    • Adding Protein: For added protein, consider mixing in Greek yogurt or silken tofu into the sauce, which can also create a creamy texture.

    By incorporating these substitutions, you can create a dish that not only adheres to your lifestyle but also meets the tastes and preferences of everyone around your dining table.


    How to Prepare the Perfect I’M Obsessed With This Healthy Honey Mustard Combo!: Step-by-Step Guide

    Now that you have your ingredients ready, let’s dive into preparing this delectable Healthy Honey Mustard Combo!

    1. Prepare the Base: In a medium-sized bowl, combine honey and Dijon mustard. Whisk them together until the mixture is nice and smooth.

    2. Mix Additional Ingredients: Add olive oil and apple cider vinegar to the honey-mustard blend. This is where the tanginess is introduced, creating a perfect balance for your dish.

    3. Season the Blend: Sprinkle garlic powder into the mixture. Add salt and pepper to taste. Whisk thoroughly until all ingredients are fully incorporated.

    4. Adjust Consistency: If you find the sauce too thick, gradually add small amounts of water until it reaches your desired consistency. The sauce should be pourable yet thick enough to adhere to your dish well.

    5. Incorporating Fresh Herbs: If you’re adding fresh herbs, finely chop them and mix them into the dressing. This will uplift the flavors significantly.

    6. Taste Test: Always taste your honey mustard sauce after mixing. Adjust sweetness, acidity, or seasoning as per your liking. This allows for a personal touch that can suit various palettes.

    7. Serve and Store: You can now dress your salad with this delightful combo or use it as a marinade for chicken, fish, or vegetables. Store any leftovers in an airtight container in the fridge for up to a week—perfect for making your meal prep easier!

    This Healthy Honey Mustard Combo isn’t just for dressing; it’s a versatile sauce that enhances meats, salads, and even veggies. Plus, it’s a standout option among healthy dinner recipes, as it brings excitement and flavor to your plates without all the unnecessary calories.


    Mastering I’M Obsessed With This Healthy Honey Mustard Combo!: Advanced Tips and Variations

    To take your Healthy Honey Mustard Combo to new heights, consider the following tips and variations:

    1. Infuse with Flavor

    Try adding different spices such as paprika or cayenne pepper for a bit of a kick. You could even experiment with lemon zest for a fresh citrusy flavor.

    2. Create a Marinade

    This combo doubles as an excellent marinade! Coat your chicken, tofu, or fish in the mixture and let it marinate for at least 30 minutes. The longer it sits, the more flavor your protein will absorb.

    3. Pair with Different Dishes

    This dressing works wonders on salads, but also try drizzling it on roasted vegetables or using it as a sandwich spread. You can even turn it into a dipping sauce for fresh veggies or whole-grain crackers.

    4. Customize Quantity

    If you’re preparing meals for a large crowd, feel free to double or triple the recipe. It stores well, and you’ll be grateful for the convenience of having extra sauce on hand!

    5. Sweet Alternatives

    If you’re in the mood for something different, consider swapping honey for different sweeteners like coconut nectar or stevia. This way, you can tailor the sauce to fit dietary preferences such as lower sugar intake.

    By embracing these advanced tips and variations, you’ll ensure that your Healthy Honey Mustard Combo remains a crowd favorite. Each technique adds versatility and depth, giving you a distinct edge in your pursuit of “healthy dinner recipes.”


    How to Store I’M Obsessed With This Healthy Honey Mustard Combo!: Best Practices

    Making a healthy honey mustard combo is just the beginning; knowing how to store it correctly is key to maintaining its flavor and freshness.

    Refrigeration: After preparing your sauce, transfer it to an airtight container. This will keep the sauce fresh and prevent it from absorbing any surrounding odors in the fridge. Properly stored, this honey mustard mix can last for about one week.

    Freezing: Although this sauce is best enjoyed fresh, if you’d like to store it for longer, consider freezing it. Place the mixture in a freezer-safe container, leaving some space at the top for expansion. The sauce can be frozen for up to three months. When ready to use, simply thaw it in the refrigerator overnight before giving it a good shake.

    Reheating: Since this is a sauce, reheating is generally unnecessary. However, if you prefer it warm, gently heat it in a pan over low heat, stirring frequently to avoid burning.

    Storing your Healthy Honey Mustard Combo properly not only extends its lifespan but also keeps your meal prep on track, allowing you to enjoy tasty healthy dinner recipes anytime.


    Nutritional Value of I’M Obsessed With This Healthy Honey Mustard Combo!

    When it comes to assessing the healthiness of recipes, understanding nutritional value is paramount. Here’s a general breakdown of the nutrients you can expect per serving of this Healthy Honey Mustard Combo:

    • Calories: Approximately 80 calories
    • Total Fat: 6 g
    • Saturated Fat: 1 g
    • Cholesterol: 0 mg
    • Sodium: 150 mg
    • Carbohydrates: 9 g
    • Dietary Fiber: 0 g
    • Sugars: 6 g (natural sugars from honey)
    • Protein: 0 g
    • Vitamins and Minerals: Contains small amounts of Vitamin A, Vitamin C, Calcium, and Iron.

    These values can vary slightly based on ingredient quantities and specific brands used. Overall, this honey mustard combo stands out as a healthy alternative to typical sauces, making it a fantastic choice for anyone adhering to healthy dinner recipes.


    FAQs: Frequently Asked Questions About I’M Obsessed With This Healthy Honey Mustard Combo!

    Q1: Can I substitute honey with another sweetener?

    A: Absolutely! For a vegan option, you can swap honey for maple syrup or agave nectar while keeping a similar flavor profile.

    Q2: How long does the sauce last in the refrigerator?

    A: When stored in an airtight container, it can last up to a week in the fridge.

    Q3: Can I use this recipe for meal prepping?

    A: Yes! This Healthy Honey Mustard Combo is perfect for meal prepping. You can make a larger batch at the start of the week and use it across various meals.

    Q4: Can this sauce be used as a marinade?

    A: Definitely! This honey mustard combo works beautifully as a marinade. Allow your protein to marinate for at least 30 minutes for optimal flavor.

    Q5: Is this recipe suitable for gluten-free diets?

    A: Yes, but be sure to check the label of your Dijon mustard, as some brands may contain gluten.

    Q6: Can I spice it up?

    A: Yes! Feel free to add spices like cayenne or paprika to create a spicy variation of this healthy honey mustard sauce.

    Incorporating this Healthy Honey Mustard Combo into your meals will not only elevate your dining experience but also simplify your journey towards healthier dinner recipes. Enjoy the process of making it your own and watch it become a household favorite!

  • Tangy Celery Salad With Cranberries

    Tangy Celery Salad With Cranberries

    Tangy Celery Salad With Cranberries: A Tropical Delight

    Introduction to Tangy Celery Salad With Cranberries

    When it comes to healthy recipes, few dishes offer the refreshing crunch and vibrant flavors found in a Tangy Celery Salad With Cranberries. This delightful salad is a perfect combination of textures and tastes, making it a great option for a light lunch or a side dish at your next gathering. Not only is this salad simple to whip up, but it’s also adaptable to various dietary preferences, ensuring everyone at your table can enjoy it.

    With its bright green celery sticks, crispy almonds, and sweet cranberries, this salad is a feast for the eyes and the palate. Packed with vitamins and minerals, celery serves not only as a fantastic source of hydration but also as a low-calorie foundation for this dish. The cranberries add a tart sweetness, while the dressing brings everything together in a tangy embrace. Vegan, gluten-free, and brimming with flavor, this salad is ideal for busy parents looking for quick and healthy meal options, students on the go, or anyone keen on maintaining a balanced diet without compromising on taste.

    Whether you’re preparing a picnic, hosting a barbecue, or just wanting a vibrant dish to brighten your weekday meal, this Tangy Celery Salad With Cranberries fits the bill. Let’s dive into its numerous benefits and how to prepare this delectable dish!

    Benefits and Advantages of Tangy Celery Salad With Cranberries

    The Tangy Celery Salad With Cranberries is much more than just a scrumptious dish; it carries numerous health benefits that make it an attractive choice for anyone seeking nutritious options. Here are some of the standout advantages of this recipe:

    1. Ease of Preparation: Many of us lead busy lives, and finding time to prepare meals can feel overwhelming. This salad requires minimal effort; with just a handful of ingredients and a few simple steps, you can have a colorful and tasty dish ready in just 15 minutes. Perfect for those hectic weeknights!

    2. Nutritional Powerhouse: Celery is rich in vitamins K and C, along with essential minerals such as potassium. High in antioxidants and low in calories, it’s an ideal base for a healthy meal. Cranberries not only add color and flavor but also provide health benefits such as supporting a healthy urinary tract and boosting heart health.

    3. Versatility: This recipe can be enjoyed on its own as a light meal or paired with grilled chicken or fish for a more substantial dish. Its flexibility aligns perfectly with various dietary preferences, whether vegan, gluten-free, or low-carb.

    4. Great for Meal Prep: If you’re planning for the week, this salad stores well in the refrigerator, making it a perfect contender for meal-prepped lunches. Preparing a large batch can simplify your weekly cooking routine while ensuring nutritious options remain available.

    5. Refreshing and Satisfying: On a hot summer day, a chilled salad is often more appealing than a heavy meal. The crunch of the celery combined with the sweetness of cranberries will satisfy your hunger while leaving you feeling light and energized.

    In summary, the Tangy Celery Salad With Cranberries is not just another salad; it’s a healthy recipe that packs a punch in terms of flavor, nutrition, and dietary adaptability. It stands out as an easy, quick, and delicious way to incorporate more healthy ingredients into your meals.

    Ingredients Overview

    Essential Ingredients for Tangy Celery Salad With Cranberries

    To create this mouthwatering Tangy Celery Salad With Cranberries, you’ll need the following ingredients:

    • Celery Stalks: 4 medium stalks, chopped (approximately 2 cups). Celery serves as the base of this salad, providing a crunchy texture and hydrating properties.
    • Dried Cranberries: 1 cup. The dried cranberries add a sweet and tangy flavor, enhancing the taste profile of the salad.
    • Walnuts or Almonds: ½ cup, chopped (optional). Nuts provide a satisfying crunch and healthy fats; opt for walnuts for omega-3s or almonds for a milder flavor.
    • Red Onion: ¼ cup, finely chopped. Adds a bit of bite and flavor to the salad.
    • Fresh Parsley: ¼ cup, chopped. This herb provides a fresh, peppery flavor while enhancing the salad’s nutritional content.
    • Lemon Juice: 3 tablespoons. Used as part of the dressing, fresh lemon juice brightens flavors and adds a dose of vitamin C.
    • Olive Oil: 2 tablespoons. A healthy fat source that adds creaminess to the salad.
    • Salt and Pepper: to taste. These common seasonings enhance overall flavors.

    This list includes gluten-free, vegan, and low-calorie options, making the salad friendly to a variety of dietary needs.

    Dietary Substitutions to Customize Your Tangy Celery Salad With Cranberries

    To cater to different tastes or dietary restrictions, here are a few suggested substitutions for the Tangy Celery Salad With Cranberries:

    • Nuts: If you’re allergic to nuts, consider replacing them with sunflower seeds or pumpkin seeds for crunch without the allergies.
    • Cranberries: For a change, try raisins or chopped apricots. These dried fruits offer different flavors but still complement the salad well.
    • Dressing: If you’re seeking a lower-calorie dressing, substitute the olive oil with Greek yogurt or a splash of balsamic vinegar for tanginess.
    • Onion: If raw onions are too pungent for your palate, use chives or green onions for a milder onion flavor. Alternatively, skip it entirely and rely on herbs for freshness.

    These substitutions not only ensure that everyone can enjoy the dish but also allow for creativity in the kitchen, encouraging you to make this healthy recipe your own.

    How to Prepare the Perfect Tangy Celery Salad With Cranberries: Step-by-Step Guide

    Creating the Tangy Celery Salad With Cranberries is an enjoyable process that requires little more than straightforward steps. Follow this step-by-step guide to prepare the perfect salad:

    1. Prepare the Ingredients: Gather all your ingredients and wash them properly. Chop the celery stalks, red onion, and parsley into small, bite-sized pieces, ensuring the ingredients mix well.

    2. Mix the Dried Fruit and Nuts: In a large mixing bowl, combine the chopped celery, dried cranberries, and chosen nuts (walnuts or almonds). Toss these together gently to ensure even distribution of these luscious ingredients.

    3. Make the Dressing: In a small bowl, whisk together the olive oil and fresh lemon juice. Add a pinch of salt and pepper; adjust according to taste. This dressing will add tanginess and zest to your salad.

    4. Combine All Ingredients: Pour the dressing over the mixed ingredients in the large bowl. Toss everything together gently, making sure that every piece of celery and cranberry is coated with the dressing.

    5. Add Fresh Herbs: Sprinkle the chopped parsley on top of the salad. Use a spatula or spoon to fold in the herbs carefully, ensuring they are well incorporated without bruising.

    6. Taste and Adjust: Before serving, taste the salad to see if you need to add more seasoning. Feel free to add extra salt, pepper, or even a dash more lemon juice if you prefer a tangier flavor.

    7. Chill (Optional): For the best flavor, let the salad sit in the fridge for about 30 minutes before serving. This step allows the flavors to meld together beautifully.

    8. Serve and Enjoy: Scoop the salad into serving bowls. You can serve it as is or pair it with grilled chicken for a complete meal. Enjoy the refreshing burst of flavors as you dig in!

    This recipe not only highlights the fresh flavors of celery and cranberries but also provides dietary adaptability. Each step can be modified to cater to different preferences, ensuring that this healthy recipe remains flexible for any occasion.

    Mastering Tangy Celery Salad With Cranberries: Advanced Tips and Variations

    To elevate your Tangy Celery Salad With Cranberries, consider these advanced tips and delightful variations:

    1. Add Extra Crunch: For those who love additional texture, add crispy chickpeas or even a sprinkle of toasted panko breadcrumbs for a delightful crunch.

    2. Fresh Fruit Twist: Incorporate fresh fruits like diced apples or pears for an extra fresh twist. Their juiciness complements the tanginess of the dressing beautifully.

    3. Experiment with Spices: To create unique flavors, try adding spices like cumin or paprika to the dressing. A hint of cinnamon can also provide a surprisingly pleasant depth.

    4. Protein Boost: For a heartier salad, mix in some quinoa or cooked lentils. This addition will not only make your salad filling but also increase its protein content.

    5. Herb Swap: While parsley adds a nice touch, experimenting with fresh dill or mint can introduce a different flavor profile. Fresh herbs can brighten up the salad even more!

    By incorporating these tips and variations, you can customize your Tangy Celery Salad With Cranberries to suit different tastes and occasions. Let your culinary creativity shine as you explore the myriad of flavors and textures this healthy recipe can offer!

    How to Store Tangy Celery Salad With Cranberries: Best Practices

    Proper storage of your Tangy Celery Salad With Cranberries ensures that it remains fresh and flavorful for future meals. Here are some best practices for refrigerating, freezing, and reheating the salad:

    Refrigeration:

    • Keep It Fresh: Store your salad in an airtight container in the refrigerator. It is best consumed within 3 days to ensure optimal freshness and taste.
    • Chilling the Salad: If you’ve made a larger batch, consider keeping the dressing separate. Adding it right before serving helps maintain the salad’s crunchiness.

    Freezing (Not Recommended):

    • While freezing is a common storage method, it’s not ideal for this salad due to the high water content in celery, which may lead to a soggy texture when thawed. It’s best to enjoy this healthy recipe fresh.

    Reheating:

    • If you’ve made a grain or protein variation of the salad, simply serve it cold directly from the fridge. For reheating, use a microwave-safe bowl and warm it for a few seconds. However, it’s important to note that this salad is best enjoyed cold for its refreshing appeal.

    By following these storage guidelines, you can ensure your Tangy Celery Salad With Cranberries is preserved accurately and remains a delightful dish to enjoy anytime.

    Nutritional Value of Tangy Celery Salad With Cranberries

    Understanding the nutritional value of your meals is crucial for making conscious, health-conscious choices. Here’s a detailed breakdown of the nutritional information for a serving of Tangy Celery Salad With Cranberries (based on 4 servings):

    • Calories: Approximately 150
    • Total Fat: 7g
      • Saturated Fat: 1g
      • Polyunsaturated Fat: 3g
      • Monounsaturated Fat: 3g
    • Cholesterol: 0mg
    • Sodium: 150mg
    • Total Carbohydrate: 20g
      • Dietary Fiber: 3g
      • Sugars: 12g
    • Protein: 3g

    This breakdown highlights not only the low-calorie nature of the salad but also its abundance of healthy fats and antioxidants from the nuts and cranberries. Incorporating this Tangy Celery Salad With Cranberries into your meal rotation can help contribute to a balanced diet, making it an excellent option for those pursuing healthy recipes.

    FAQs: Frequently Asked Questions About Tangy Celery Salad With Cranberries

    1. Can I adjust the sweetness of the salad?

    Yes! You have control over the sweetness of your Tangy Celery Salad With Cranberries. If you prefer a less sweet variant, you can reduce the amount of dried cranberries or even replace them with a less sweet dried fruit like raisins.

    2. How can I make this salad more filling?

    To increase the satiety of the salad, consider adding a protein source such as chickpeas, grilled chicken, or quinoa. These ingredients add flavor and texture while making the dish more substantial.

    3. Is this salad suitable for meal prep?

    Absolutely! This salad is perfect for meal prep. Just ensure that you store it in an airtight container in the refrigerator for up to three days for the best freshness.

    4. What are some substitutes for celery?

    If you don’t have celery on hand or wish to try something different, you can consider using cucumbers or jicama. These alternatives will provide a similarly crunchy texture with a mild flavor.

    5. Can I serve this salad at a party?

    Yes, the Tangy Celery Salad With Cranberries serves great at gatherings. It’s a refreshing dish that can stand out on a buffet table. Many find it a delightful departure from more traditional party sides.

    6. What should I pair this salad with?

    This salad pairs well with various dishes, including grilled meats, fish, or wraps. It can also serve beautifully as a solo snack or a light meal option accompanying crusty bread.

    With its healthful ingredients and delightful flavors, the Tangy Celery Salad With Cranberries represents a fantastic approach to eating well while enjoying every bite. By following this detailed guide and making it your own, you can create a dish that is as nutritious as it is delicious! So why wait? Get started on this healthy recipe today!

  • Paleo Slow Cooker Honey Mustard Chicken

    Paleo Slow Cooker Honey Mustard Chicken

    Paleo Slow Cooker Honey Mustard Chicken: A Tropical Delight

    Introduction to Paleo Slow Cooker Honey Mustard Chicken

    Are you searching for a simple yet delectable recipe that fits seamlessly into your busy lifestyle? Look no further than Paleo Slow Cooker Honey Mustard Chicken. This dish is not only easy to make, but it’s also a healthier alternative to traditional creamy or fried chicken recipes. With its mind-blowing flavors and tender texture, this slow cooker meal is sure to impress both your family and guests.

    This crowd-pleaser is an ideal fit among crockpot recipes because it allows you to throw all the ingredients into your slow cooker and let them meld together over time without any fuss. Furthermore, it’s gluten-free, dairy-free, and free from refined sugars, making it suitable for various dietary needs. Whether you’re following a paleo diet or simply seeking healthier meal options, this recipe shines with its balance of protein and natural sweetness.

    In addition to its health benefits, this honey mustard chicken recipe exemplifies simplicity. Prepare it in just a few minutes, savor the aroma as it cooks throughout the day, and enjoy a comforting meal that nourishes your body and soul. Not only is it great for family dinners, but it’s also perfect for meal prepping for the week ahead, ensuring you always have a nutritious option ready.

    Let’s dive into the world of flavors and health benefits that this Paleo Slow Cooker Honey Mustard Chicken offers, and inspire you to create a dish that everyone will love.

    Benefits and Advantages of Paleo Slow Cooker Honey Mustard Chicken

    Creating delicious meals can sometimes be intimidating, especially on busy weekdays. However, the Paleo Slow Cooker Honey Mustard Chicken recipe transforms your cooking experience into something enjoyable and stress-free. Here are some key benefits you’ll appreciate:

    1. Effortless Preparation: One of the selling points of crockpot recipes like this honey mustard chicken is their convenience. All you need to do is chop, measure, and toss everything into the slow cooker. With minimal hands-on time, you can carry on with your day, allowing the flavors to deepen as they cook.

    2. Health Benefits: This dish is packed with protein from the chicken, while the honey mustard sauce provides a natural sweetness and tang. By using natural sweeteners and preventing the use of processed ingredients, this recipe supports your commitment to a healthier lifestyle. Furthermore, it’s low in carbohydrates, making it suitable for those observing low-carb or ketogenic diets.

    3. Versatile and Customizable: Whether you’re serving it over a bed of cauliflower rice, eating it plain, or incorporating it into a salad, this recipe accommodates various preferences. Swap ingredients as needed and adapt it to fit dietary restrictions or flavor cravings.

    4. Perfect for Meal Prep: Imagine coming home to a delicious, fully-cooked dinner after a long day! This recipe shines in its ability to make meal prep easy. Prepare a large batch, portion it, and store it in the fridge or freezer for quick meals during the week.

    5. Family-Friendly: Kids and adults alike will enjoy the sweet and savory flavors of the honey mustard glaze. It’s a great way to introduce kids to healthier options without sacrificing taste, making dinner time a breeze.

    By choosing Paleo Slow Cooker Honey Mustard Chicken, you not only simplify your dinner prep but also prioritize health and flavor. As you explore other crockpot recipes, you can experience the ease and enjoyment that slow cooking brings to your kitchen.

    Ingredients Overview

    Essential Ingredients for Paleo Slow Cooker Honey Mustard Chicken

    The beauty of this recipe lies in its simplicity. Below is a detailed list of every key ingredient you will need:

    • Chicken Thighs (2 lbs): Chicken thighs are juicy and flavorful, making them a superior choice for slow cooking. They remain tender during the long cooking process and absorb flavors beautifully. You can also use chicken breasts if preferred.

    • Honey (1/3 cup): Opt for raw honey to ensure it’s paleo-friendly. Honey offers natural sweetness and balances the tanginess of mustard. For a vegan alternative, you can use maple syrup.

    • Dijon Mustard (1/4 cup): Provides a delightful kick to the dish. Choose a brand without added sugar to keep it paleo.

    • Garlic (4 cloves, minced): Freshly minced garlic adds depth of flavor. If you don’t have fresh garlic, garlic powder can be used as a substitute (about 1 teaspoon).

    • Apple Cider Vinegar (2 tablespoons): This ingredient boosts the dish’s acidity, enhancing the overall flavor. It’s also known for its health benefits, including aiding digestion.

    • Olive Oil (2 tablespoons): This healthy fat helps to keep the chicken moist during cooking. Coconut oil can be used as a substitute for a different flavor profile.

    • Salt and Black Pepper (to taste): Essential for enhancing all dish flavors.

    • Fresh Herbs (e.g., thyme or rosemary): Chopped fresh herbs can elevate the dish’s aroma and taste. Feel free to add your favorite herbs.

    This combination of ingredients creates a delicious meal that’s nutritious and free from common allergens. When you explore other crockpot recipes, pay attention to the ingredient quality as it makes a significant difference in the final dish.

    Dietary Substitutions to Customize Your Paleo Slow Cooker Honey Mustard Chicken

    If you’re looking to adapt this recipe to suit specific dietary needs or preferences, several substitutions can be made without compromising flavor. Here are a few suggestions:

    • For a Vegetarian or Vegan Option: Replace the chicken with cubed tofu or chickpeas (cooked) and adjust cooking time accordingly. You can also try using jackfruit for a pulled meat texture.

    • Nut-Free Version: This recipe is already nut-free, but make sure to select condiments that don’t contain hidden nut ingredients or cross-contamination.

    • Low-Calorie Option: To reduce calories further, consider using skinless chicken breasts and minimizing the amount of honey or substituting it with a sugar-free sweetener like stevia or erythritol.

    • Spicy Kick: If you prefer a bit of heat, add red pepper flakes, sriracha, or diced jalapeños to the sauce for an exciting twist.

    By making these adjustments, you can easily tailor Paleo Slow Cooker Honey Mustard Chicken to meet your and your loved ones’ needs. Such versatility is one of the reasons this recipe stands out among other crockpot recipes.

    How to Prepare the Perfect Paleo Slow Cooker Honey Mustard Chicken: Step-by-Step Guide

    Now that you have all the ingredients ready, let’s walk through the preparation process. Follow these simple steps to prepare your Paleo Slow Cooker Honey Mustard Chicken effortlessly.

    1. Prepare the Base: Start by placing the chicken thighs in the bottom of your slow cooker. Make sure they are arranged evenly for optimal cooking.

    2. Mix Ingredients: In a mixing bowl, combine the honey, Dijon mustard, minced garlic, olive oil, apple cider vinegar, salt, and black pepper. Whisk until the ingredients are well blended.

    3. Coat the Chicken: Pour the honey mustard mixture over the chicken thighs in the slow cooker. Use a spatula to ensure the chicken is fully coated with the sauce for maximum flavor.

    4. Add Fresh Herbs: If using fresh herbs, sprinkle them on top of the chicken at this stage. Dry herbs can also be added along with the sauce for infused flavors.

    5. Set the Cooker: Securely place the lid on your slow cooker. Cook on low for 6-8 hours or high for 3-4 hours. The chicken should be fully cooked and fall-off-the-bone tender.

    6. Check for Doneness: Towards the end of cooking, check the chicken’s internal temperature to ensure it reaches 165°F (75°C). This ensures it’s safe to eat.

    7. Serve: Once done, shred the chicken in the slow cooker if desired, and serve hot! Well-paired side options include cauliflower rice, sautéed greens, or a fresh salad.

    8. Store Leftovers: If you have any leftovers, allow them to cool to room temperature before transferring them to airtight containers. This dish stores well in the refrigerator for up to 4 days, or you can freeze portions for later meals.

    As you prepare this delightful dish, remember that adapting the cooking times or ingredients can help accommodate various crockpot recipes for future meals.

    Mastering Paleo Slow Cooker Honey Mustard Chicken: Advanced Tips and Variations

    To elevate your cooking experience and enjoy this dish even more, consider the following advanced tips and variations:

    1. Caramelized Onions: For a sweet depth to the dish, sauté sliced onions until golden and add them to the slow cooker along with the chicken.

    2. Add Vegetables: Throw in some chopped veggies like carrots, bell peppers, or sweet potatoes with the chicken. They will absorb the flavors of the sauce and create a complete meal.

    3. Herb Infusion: For more complexity, you can add fresh herbs such as thyme, sage, or rosemary during the last hour of cooking. This will infuse the dish with aromatic flavors.

    4. BBQ Variation: Substitute honey with your choice of sugar-free barbecue sauce for a barbecue twist. Adjust the cooking time if necessary based on the sauce.

    5. Honey Mustard Dip: After cooking, shred the chicken and toss it in a bowl with the sauce before serving. This is perfect for a zen-like meal feel or as a filling for lettuce wraps.

    By implementing these variations, you can keep mealtime interesting and keep this Paleo Slow Cooker Honey Mustard Chicken fresh and exciting, cementing its place in your family’s recipe rotation alongside other favorite crockpot recipes.

    How to Store Paleo Slow Cooker Honey Mustard Chicken: Best Practices

    After enjoying your delicious Paleo Slow Cooker Honey Mustard Chicken, you may want to save some for later. Proper storage will enable you to enjoy leftovers while maintaining the dish’s flavor and safety.

    • Refrigeration: Allow any leftover chicken to cool down for no more than two hours after cooking. Store it in airtight containers in the refrigerator. It should be consumed within 3-4 days.

    • Freezing: If you want to keep your chicken for longer periods, it can be frozen. After cooling, portion the chicken into freezer-safe bags or containers, making sure to remove as much air as possible. It can last up to 3 months in the freezer.

    • Reheating: When reheating, utilize a slow cooker or countertop appliance to gently warm the chicken to allow for even heating. If using a microwave, ensure it’s heated thoroughly, reaching 165°F (75°C) before consumption.

    By following these practices, you can maintain the quality and taste of your Paleo Slow Cooker Honey Mustard Chicken, ensuring healthful meals throughout the week while saving time and effort.

    Nutritional Value of Paleo Slow Cooker Honey Mustard Chicken

    Understanding the nutritional profile of your meals is essential for maintaining a healthy lifestyle. Here’s a breakdown of the nutritional value of a serving (approximately 4 ounces) of Paleo Slow Cooker Honey Mustard Chicken:

    • Calories: 250-300 calories
    • Protein: 22-27 grams
    • Fat: 10-15 grams (primarily from healthy olive oil and chicken skin)
    • Carbohydrates: 8-12 grams (depending on honey content)
    • Fiber: 0-1 gram
    • Sugar: 5-9 grams (natural sugars from honey)

    This nutritional profile demonstrates that the dish is rich in protein while being relatively low in carbohydrates, making it suitable for various diets, including paleo, keto, and those focusing on protein-rich meals. The use of natural ingredients substantially enhances the meal’s value compared to conventional sugary or processed equivalents, placing this recipe in the upper echelon of healthy crockpot recipes.

    FAQs: Frequently Asked Questions About Paleo Slow Cooker Honey Mustard Chicken

    Q1: Can I use chicken breasts instead of thighs?
    A: Absolutely! Chicken breasts can be used, but they may dry out more quickly than thighs. Be sure to adjust the cooking time, and check for doneness sooner.

    Q2: Is there a way to make it spicier?
    A: Yes! You can incorporate red pepper flakes, diced jalapeños, or a spicy mustard into the marinade for that extra heat.

    Q3: How can I adapt this recipe for meal prep?
    A: Simply double the ingredients, cook as directed, and divide it into meal prep containers for a week’s worth of healthy lunches.

    Q4: Can this be made without honey?
    A: For those preferring no sugars, you can substitute honey with a sugar-free sweetener like stevia or simply omit it for a lower-carb alternative.

    Q5: What can I serve it with?
    A: This chicken pairs beautifully with cauliflower rice, steamed vegetables, or a fresh green salad. You can also use it in wraps for extra portability.

    With this knowledge at hand, you’re now equipped to create a stunning Paleo Slow Cooker Honey Mustard Chicken dish that nourishes and delights. Embarking on culinary adventures with crockpot recipes has never been this easy! Enjoy the benefits and flavors of this dish and incorporate it into your cooking repertoire today.

  • Fresh Asparagus Spring Salad

    Fresh Asparagus Spring Salad

    Fresh Asparagus Spring Salad: A Tropical Delight

    Introduction to Fresh Asparagus Spring Salad

    Spring is a time of renewal, and what better way to celebrate the season than with a Fresh Asparagus Spring Salad? This vibrant and colorful dish perfectly embodies the essence of spring meals—simple, refreshing, and packed with nutrients. With its crisp asparagus and a blend of other seasonal vegetables, this salad not only tantalizes your taste buds but also brings a wealth of health benefits to your table.

    One of the highlights of this recipe is its versatility. Whether you are a busy parent looking for a quick weeknight dinner, a health-conscious individual seeking low-calorie options, or a student trying to impress friends with your culinary skills, this salad is ideal for you. It’s simple enough for novice cooks yet sophisticated enough to delight food enthusiasts. Moreover, it’s vegan, gluten-free, and offers options for dietary substitutions, making it suitable for a variety of diets.

    Incorporating fresh asparagus, this salad is bursting with flavor and nutrients. Asparagus is rich in vitamins A, C, E, and K, while also being high in fiber. This combination supports digestion and contributes to overall health. When paired with a zesty lemon vinaigrette, the result is a refreshing dish that celebrates the flavors of the season. So, gather your ingredients and get ready to whip up this delightful spring salad that will surely impress your family and friends.


    Benefits and Advantages of Fresh Asparagus Spring Salad

    The Fresh Asparagus Spring Salad isn’t just a feast for the eyes; it’s also a nutritional powerhouse loaded with benefits that cater to various needs. Here are some standout features that make it an excellent choice for your next meal.

    1. Easy to Prepare

    One of the most significant advantages of this salad is its simplicity. In just under 30 minutes, you can create a fresh and wholesome dish that requires minimal cooking skills. This makes it perfect for busy parents, working professionals, or anyone short on time. A few quick chopping, mixing, and seasoning steps are all it takes for a dish bursting with seasonal flavors.

    2. Health Benefits

    Health-conscious individuals will appreciate the plethora of nutrients packed into asparagus. A cup of asparagus contains just 27 calories but offers almost 3 grams of dietary fiber—essential for good digestion. It’s also a great source of folate, which plays a vital role in cell function and tissue growth. The vibrant colors of the salad, which may include a mix of cherry tomatoes, radishes, or cucumbers, contribute additional vitamins and antioxidants, making every bite beneficial.

    3. Customizable and Accommodating

    This salad stands out as a versatile option since it caters to various dietary preferences. Whether you’re gluten-free, vegan, or low-carb, you can easily modify the ingredients or dressings to fit your needs. For instance, substitute a classic vinaigrette with a tahini dressing for a creamy, plant-based alternative. Furthermore, this fresh salad complements any spring meal, making it a perfect side dish for grilled proteins or as a light lunch on its own.

    4. Suitable for All Occasions

    Whether you’re hosting a backyard barbecue, planning a picnic, or preparing a cozy dinner at home, this salad fits in beautifully. Its light yet satisfying nature makes it an excellent dish for brunches, formal dinners, and casual gatherings alike. Plus, the bright colors of the fresh produce are sure to please the eye and spark conversation at the table.

    In summary, the Fresh Asparagus Spring Salad is an easy, nutritious, and visually appealing dish that works well for any occasion. As you explore the recipe and make it your own, you’ll find it becomes a staple in your kitchen for creating delightful spring meals infused with health and flavor.


    Ingredients Overview

    Essential Ingredients for Fresh Asparagus Spring Salad

    To create this delicious Fresh Asparagus Spring Salad, gather the following ingredients:

    • 1 bunch of fresh asparagus (trimmed and cut into 2-inch pieces)
    • 1 cup of cherry tomatoes (halved)
    • 1/2 cup of radishes (thinly sliced)
    • 1 cup of cucumbers (diced)
    • 1/4 cup of red onion (thinly sliced)
    • 1/4 cup of fresh parsley (chopped)
    • 1 lemon (juiced)
    • 3 tablespoons of olive oil
    • Salt and pepper (to taste)

    Dietary Features

    • Vegan: Free of all animal products, this salad caters to plant-based diets.
    • Gluten-Free: None of the ingredients contain gluten, making it safe for those with gluten sensitivities.
    • Low-Calorie: With fewer than 30 calories per serving, it’s an excellent option for those monitoring their caloric intake.

    Purpose of Key Ingredients

    1. Asparagus: Rich in vitamins and minerals while providing a satisfying crunch.
    2. Cherry Tomatoes: Add a juicy sweetness and vibrant color to the mix.
    3. Radishes: Their peppery flavor elevates the taste profile of the salad.
    4. Cucumbers: Provide hydration and extra crunch, making the salad refreshing.
    5. Fresh Parsley: Enhances the flavor while offering additional health benefits.

    Dietary Substitutions to Customize Your Fresh Asparagus Spring Salad

    Feel free to get creative with your Fresh Asparagus Spring Salad by making some of the following substitutions based on your preferences or dietary needs:

    • Swap the Asparagus: If asparagus is out of season, consider using green beans or broccoli florets for a similar texture and nutritional profile.
    • Add Protein: For extra sustenance, include proteins like chickpeas, grilled chicken, or quinoa.
    • Dressings: While lemon vinaigrette is a classic choice, experiment with balsamic vinegar, tahini, or even a yogurt-based dressing for varied flavors.
    • Cheese: Opt for crumbled feta or goat cheese for added creaminess (not vegan-friendly). Try vegan cheese alternatives to meet plant-based requirements.
    • Nuts and Seeds: Incorporate walnuts, almonds, or sunflower seeds for additional crunch and healthy fats.

    By tailoring the ingredients to your dietary needs, the Fresh Asparagus Spring Salad can easily transition into a unique dish that satisfies your palate, making it a versatile option for different spring meals.


    How to Prepare the Perfect Fresh Asparagus Spring Salad: Step-by-Step Guide

    Are you ready to create your beautiful Fresh Asparagus Spring Salad? Follow these easy steps to prepare a dish that will wow your guests and satisfy your own cravings for fresh flavors.

    Step 1: Prepare the Base

    1. Wash the Asparagus: Rinse your asparagus under cool water to remove any dirt. Snap off the woody ends and cut the asparagus into 2-inch pieces. This slight trimming will enhance the texture in your salad.
    2. Blanch the Asparagus: Bring a pot of salted water to a boil. Add the cut asparagus and cook for about 2-3 minutes until tender-crisp. Immediately transfer the asparagus to a bowl of ice water to stop the cooking process. This will help retain a vibrant green color and crunchy texture.

    Step 2: Mix Ingredients

    1. Chop Vegetables: While the asparagus cools, chop your cherry tomatoes, cucumbers, radishes, and red onion. Aim for bite-sized pieces to make the salad easy to eat.
    2. Combine in a Bowl: In a large bowl, combine the cooled asparagus, cherry tomatoes, radishes, cucumbers, red onion, and chopped parsley. Toss gently to mix.

    Step 3: Make the Dressing

    1. Whisk Together Ingredients: In a small bowl, whisk together the lemon juice, olive oil, salt, and pepper until combined. Adjust seasoning to taste.
    2. Dress the Salad: Pour the dressing over the salad mixture, tossing gently to ensure all vegetables are evenly coated.

    Step 4: Serve and Enjoy

    1. Plating: Transfer the salad to a serving platter or individual bowls.
    2. Garnish: Opt to sprinkle some nuts, seeds, or cheese on top for an added layer of flavor and texture.
    3. Enjoy Fresh: Serve immediately to enjoy the crispness of the vegetables while the flavors are at their peak.

    Dietary Adaptations

    • For a vegan version, ensure to use a dairy-free dressing if you choose to include cheese alternatives.
    • Looking for low-carb options? Skip the cucumbers and few cherry tomatoes to reduce carbs while still enjoying the fresh taste.

    This Fresh Asparagus Spring Salad makes for an excellent addition to any spring meal, providing a burst of flavors with every bite!


    Mastering Fresh Asparagus Spring Salad: Advanced Tips and Variations

    Now that you know how to make the basic Fresh Asparagus Spring Salad, let us explore some advanced tips and variations to elevate your dish to the next level.

    Use Quality Ingredients

    When it comes to salads, the quality of your ingredients matters. Look for fresh, organic produce whenever possible. This not only enhances the flavor but also contributes to the overall nutritional benefits of your meal.

    Experiment with Flavors

    1. Add Fresh Herbs: Basil, dill, or mint can introduce new flavors. Consider mixing your herbs to find a combination that suits your palate best.
    2. Incorporate Fruits: Adding fresh or dried fruits, like berries or slices of avocado, brings sweetness and richness, pairing beautifully with the asparagus.
    3. Dressings Galore: Try experimenting with other dressings such as a honey mustard, sesame ginger, or a spicy chipotle dressing to find your favorite flavor profile.

    Make it a Main Course

    For a heartier option, transform your Fresh Asparagus Spring Salad into a meal by adding protein. Grilled chicken, shrimp, or even a scoop of quinoa can easily turn this side salad into a satisfying main dish.

    Storage Tips

    Never fear leftovers! If you have any salad remaining, store the dressing separately to maintain the crispness of the vegetables. When ready to eat, simply toss with the dressing for a refreshing meal again.

    Seasonal Additions

    As the months change, feel free to incorporate other seasonal vegetables like grilled zucchini in the summer or roasted squash in the fall. This ensures your salad stays fresh and exciting all year round!

    These tips will not only help you master the Fresh Asparagus Spring Salad but also inspire you to create a diverse range of spring meals that suit your taste and health preferences.


    How to Store Fresh Asparagus Spring Salad: Best Practices

    Once you’ve crafted your delicious Fresh Asparagus Spring Salad, you may have leftovers or want to prepare it ahead of time. Here’s how best to store it.

    Refrigeration

    1. Keep it Cool: Store any unused salad in an airtight container in the refrigerator. This will help preserve the freshness of the vegetables.
    2. Avoid Drenched Vegetables: If the salad has a dressing, consider storing the dressing separately. This prevents the vegetables from becoming soggy and losing their crunch.

    Freezing

    While freezing salads isn’t generally recommended due to texture changes, you can freeze the cooked asparagus separately. Simply blanch it and freeze in a freezer-safe bag for up to three months. When you’re ready to use it, thaw and toss it into a salad just before serving.

    Reheating

    If you’ve stored the salad, no need for reheating. This dish is best enjoyed cold or at room temperature. If you find your leftover salad has lost some of its freshness, try gently tossing it with a little fresh dressing to revitalize the flavors.

    Experiencing new spring meals has never been easier with these storage tips in your arsenal!


    Nutritional Value of Fresh Asparagus Spring Salad

    Before you dig into your delicious Fresh Asparagus Spring Salad, let’s take a closer look at its nutritional profile. Here’s a breakdown based on the main ingredients per serving:

    • Calories: Approximately 100 calories (without added dressing)
    • Total Fat: 7g (from olive oil)
    • Saturated Fat: 1g
    • Cholesterol: 0mg
    • Sodium: 280mg (can be adjusted based on added salt)
    • Total Carbohydrates: 10g
    • Dietary Fiber: 4g
    • Sugars: 3g
    • Protein: 3g

    Vitamins and Minerals

    • Vitamin A: Supports eye health and immune function.
    • Vitamin C: Acts as an antioxidant and helps with the absorption of iron.
    • Vitamin K: Essential for bone health and blood clotting.

    This salad is not only low in calories but also packed with essential vitamins and minerals, making it one of the perfect choices for light spring meals. Enjoy the benefits of good nutrition as you savor every bite!


    FAQs: Frequently Asked Questions About Fresh Asparagus Spring Salad

    1. Can I prepare the salad in advance?

    Absolutely! You can chop the vegetables a few hours ahead and store them in the refrigerator. However, wait to add the dressing until shortly before serving to keep the salad crisp.

    2. What can I substitute for asparagus if it’s not in season?

    No worries! Green beans or zucchini can work as a delicious alternative, offering similar textures and flavors.

    3. Is there a way to make this salad sweeter?

    Indeed! You can add ingredients such as sliced strawberries, mandarin oranges, or a drizzle of honey to enhance the sweetness in your salad.

    4. Can I pack this salad for lunch?

    Yes! It makes a great portable lunch option. Just ensure to keep the dressing separate until you’re ready to eat to maintain freshness.

    5. How long can I store leftover salad?

    Stored in an airtight container, the salad will stay fresh for about 2-3 days in the refrigerator. Just be mindful to consume within this timeframe to enjoy it at its best.

    By addressing these common questions, you’ll be well-prepared to create, store, and enjoy your Fresh Asparagus Spring Salad while sharing the joy of spring meals with others.


    In conclusion, the Fresh Asparagus Spring Salad is not only a beautiful dish but a highly nutritious, versatile option for anyone looking to add something fresh to their dining table. With simple ingredients, a straightforward preparation process, and impressive health benefits, you can enjoy this salad through the spring and beyond. So, embrace the colors of spring and delight in this easy-to-make salad that every cook can enjoy!