Blog

  • Crispy Parmesan Cauliflower Bites

    Crispy Parmesan Cauliflower Bites

    Crispy Parmesan Cauliflower Bites: A Tropical Delight

    Introduction to Crispy Parmesan Cauliflower Bites

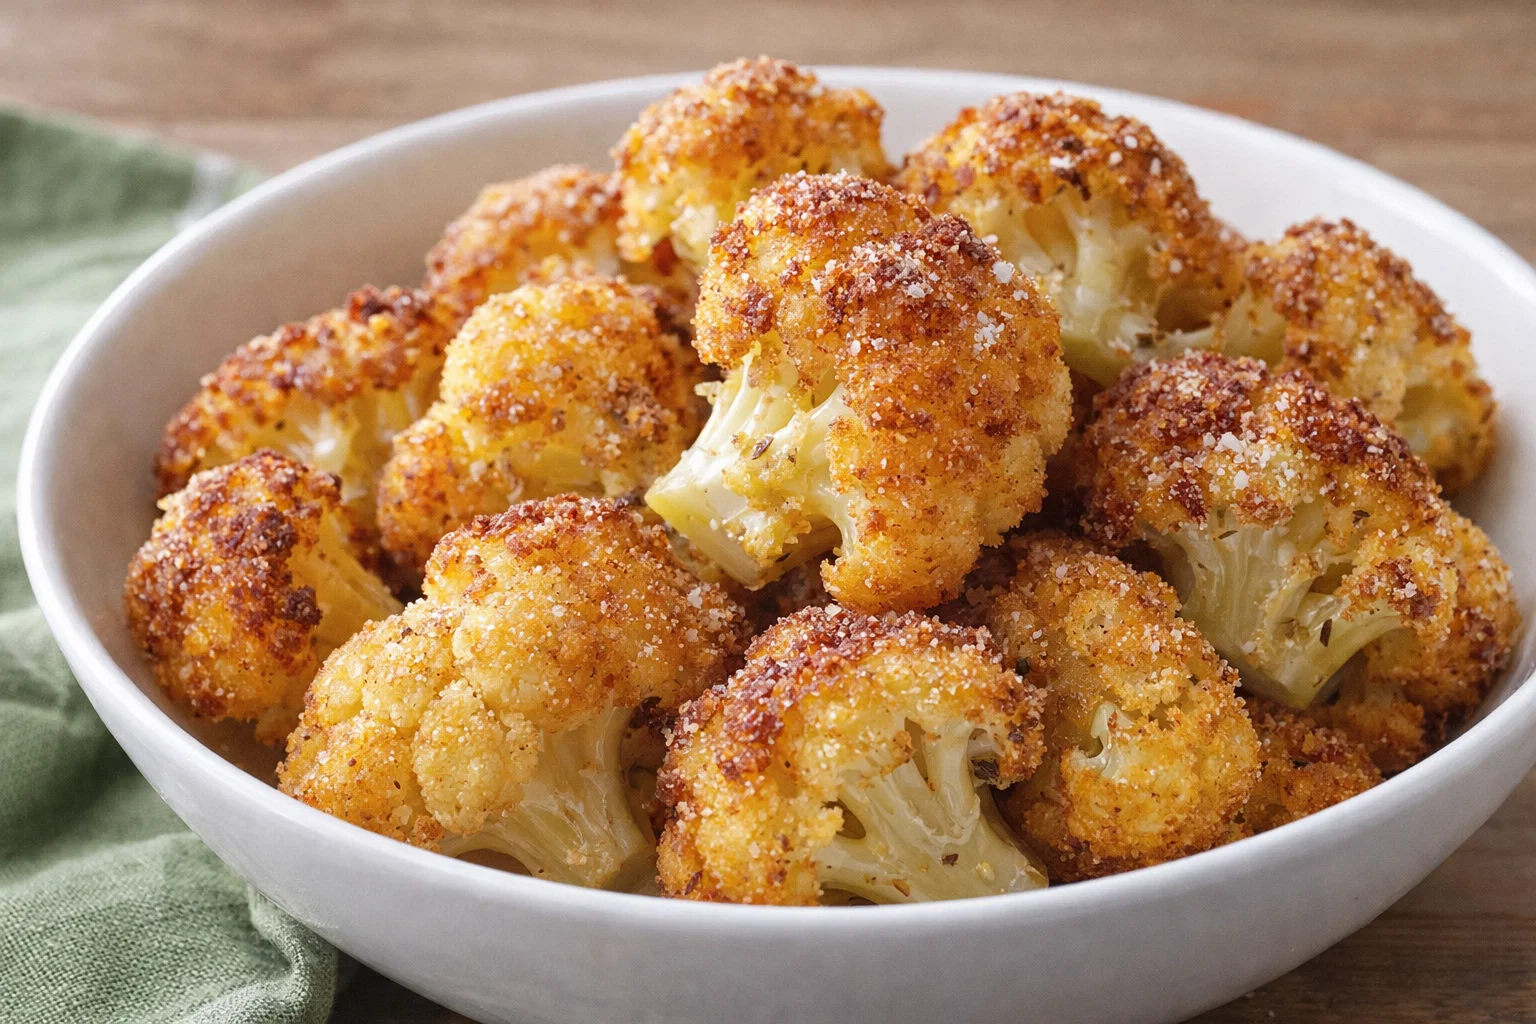
    If you’re searching for healthy snacks that are simple, delicious, and perfect for any occasion, look no further than Crispy Parmesan Cauliflower Bites. This delightful recipe transforms a humble vegetable into a tasty treat that both adults and kids will love. By incorporating fresh cauliflower and the rich, nutty flavor of parmesan cheese, these bites deliver not just on taste but also on nutrition.

    Cauliflower is packed with essential vitamins, including Vitamin C, K, and B6, and is an excellent source of fiber. This makes Crispy Parmesan Cauliflower Bites a fantastic option for those who appreciate health-conscious eats, whether you’re a busy parent in need of a quick appetizer for the kids, a student looking for nutritious study snacks, or a work professional preparing healthy munchies for the office.

    Moreover, this recipe caters to a variety of dietary needs. With minimal ingredients and a straightforward preparation method, it fits well into gluten-free and low-carb diets, and it can easily be adapted to be vegan by substituting cheese. The fun and crispy texture of the bites offer a satisfying crunch that will make you forget you’re eating something healthy! So, grab your apron and prepare to be impressed by these delightful Cauliflower Bites.

    Benefits and Advantages of Crispy Parmesan Cauliflower Bites

    Crispy Parmesan Cauliflower Bites are not only a joy to eat; they also offer numerous health benefits that elevate them far beyond regular snacks. For starters, they are incredibly easy to prepare—perfect for those who may not have a lot of time for elaborate cooking. With just a handful of ingredients, you can create a dish that tastes gourmet and impresses everyone around your dining table.

    One of the standout advantages of this recipe is its versatility. You can customize it to suit your dietary requirements, making it an excellent choice for family gatherings, game nights, or even romantic dinners. It’s a fantastic way to sneak more vegetables into your diet, helping you and your loved ones consume essential nutrients without sacrificing flavor.

    Health-wise, cauliflower is truly a superfood, rich in antioxidants that help combat inflammation and support overall well-being. The addition of parmesan cheese boosts the flavor while also providing protein and calcium, rounding out the nutritional profile of these healthy snacks.

    Additionally, they are oven-baked rather than fried, significantly reducing the calorie count while keeping that satisfying crispy texture. This means you can enjoy a guilt-free indulgence. Moreover, since these bites are finger food, they are perfect for parties, allowing guests to mingle without worrying about utensils.

    Overall, Crispy Parmesan Cauliflower Bites stand out as not just a tasty treat, but a health-conscious option that you will want to keep in your culinary repertoire.

    Ingredients Overview

    Essential Ingredients for Crispy Parmesan Cauliflower Bites

    Creating perfect Crispy Parmesan Cauliflower Bites requires only a few essential ingredients, each serving a unique role in both flavor and texture. Here’s what you’ll need:

    • 1 medium cauliflower head (about 4 cups, broken into florets)
    • The star ingredient, cauliflower, is low in calories and packed with vitamins.

    • 1 cup grated parmesan cheese (or nutritional yeast for a vegan option)

    • Provides a rich, nutty flavor; nutritional yeast is perfect for creating a cheesy taste without dairy.

    • 1/2 cup breadcrumbs (gluten-free breadcrumbs optional)

    • Delivers a satisfying crunch; you can also use almond flour for a low-carb option.

    • 2 tablespoons olive oil

    • Helps to achieve that golden-brown color and crispy texture while adding healthy fats.

    • 1 teaspoon garlic powder

    • Adds depth and flavor to the bites, making them even more irresistible.

    • 1 teaspoon onion powder

    • Enhances the overall taste profile, complementing the garlic.

    • Salt and pepper to taste

    • Essential for seasoning.

    These ingredients come together to form crispy, cheesy bites that you won’t want to put down. They are also naturally gluten-free if you use the appropriate breadcrumbs, making them suitable for those with gluten sensitivities.

    Dietary Substitutions to Customize Your Crispy Parmesan Cauliflower Bites

    Customization is key for any recipe, and Crispy Parmesan Cauliflower Bites are no exception. Here are some adjustments you can make to cater to various dietary needs:

    • Vegan Variation
    • Substitute parmesan cheese with nutritional yeast. This will give you the cheesy flavor without any dairy. For binders, you might want to try flaxseed meal mixed with water to help hold your bites together.

    • Gluten-Free Option

    • Use gluten-free breadcrumbs instead of regular ones. Additionally, substituting almond flour for breadcrumbs is excellent for those on a low-carb or Paleo diet.

    • Spice it Up

    • If you enjoy a little heat, add cayenne pepper or chili flakes to the mix for an extra kick. You can also sprinkle paprika for a smoky flavor.

    • Herbs

    • Fresh herbs like parsley, rosemary, or thyme can elevate the flavor even further. Consider adding them into the mix for a fresh twist.

    These substitutions highlight the adaptability of the recipe, making it easy to accommodate various dietary preferences without compromising taste.

    How to Prepare the Perfect Crispy Parmesan Cauliflower Bites: Step-by-Step Guide

    Now that you’ve gathered your ingredients, it’s time to prepare your Crispy Parmesan Cauliflower Bites! Follow these straightforward steps to achieve that perfect crunch:

    1. Preheat the Oven:
      Preheat your oven to 425°F (220°C). This high temperature will help make your cauliflower bites crispy and golden.

    2. Prepare the Cauliflower:
      Wash the cauliflower and cut it into bite-sized florets. The more uniform your pieces, the better they will cook.

    3. Blanch the Florets (Optional):
      For extra crispiness, you can blanch the cauliflower in boiling water for about 2-3 minutes before proceeding. Drain and pat dry. This step is optional but can enhance the texture.

    4. Mix the Dry Ingredients:
      In a large bowl, combine the parmesan cheese, breadcrumbs, garlic powder, onion powder, salt, and pepper. Mix thoroughly to ensure an even distribution.

    5. Coat the Cauliflower:
      Drizzle the olive oil over the cauliflower florets. Toss to coat evenly. Next, add the dry mixture from the previous step, tossing again until each floret is well-covered with the cheesy mix.

    6. Arrange on a Baking Sheet:
      Line a baking sheet with parchment paper for easy cleanup. Spread the coated cauliflower evenly on the baking sheet, making sure they are not overcrowded. This will guarantee all sides bake up crispy.

    7. Bake:
      Place the baking sheet in the oven and bake for 25-30 minutes. Halfway through, flip the florets to ensure they become golden and crispy on all sides.

    8. Check for Doneness:
      The bites are done when they turn a beautiful golden brown and feel crispy to the touch. If you desire extra crunch, feel free to turn on the broiler for an additional 2-3 minutes, but watch closely to prevent burning.

    9. Serve Warm:
      Remove from the oven and allow to cool for a minute before serving. Enjoy your Crispy Parmesan Cauliflower Bites as a snack, appetizer, or side dish!

    This recipe is simple and adaptable. By following these steps, you can create a batch of delicious bites that cater to your dietary needs, ensuring everyone can enjoy them!

    Mastering Crispy Parmesan Cauliflower Bites: Advanced Tips and Variations

    Now that you’re well-acquainted with the base recipe, here are some advanced tips and variations to master your Crispy Parmesan Cauliflower Bites:

    • Experiment with Seasonings:
      Go beyond garlic and onion powder. Try spices like Italian seasoning, curry powder, or even smoked paprika for different flavor profiles.

    • Serve with Dips:
      Pair your bites with flavorful dips like homemade ranch, marinara sauce, or sriracha mayo. This not only adds flavor but also enhances the snacking experience.

    • Batch Cooking:
      Consider making larger batches and freezing them for future healthy snacks. This way, you have a nutritious option ready to go at any time.

    • Vegetable Mix:
      To introduce variety, you can mix in other vegetables like broccoli florets or zucchini. Just adjust the cooking time accordingly to ensure even cooking.

    • Cauliflower Puree:
      If you’re feeling adventurous, you can blend some of the cauliflower into a puree and fold it into the batter for a creamier texture without sacrificing crispness.

    These advanced tips will help you elevate your Crispy Parmesan Cauliflower Bites, adding endless possibilities and flavors to your snacking routine!

    How to Store Crispy Parmesan Cauliflower Bites: Best Practices

    Storing your Crispy Parmesan Cauliflower Bites properly is crucial to maintain their delightful crunch and flavor. Here’s how to do it effectively:

    • Refrigeration:
      Store any leftover bites in an airtight container in the refrigerator for up to 3 days. When you’re ready to enjoy them again, simply reheat them in the oven for about 10-15 minutes at 375°F (190°C) to bring back the crispiness.

    • Freezing:
      If you want to preserve them for a more extended period, you can freeze uncooked bites. Place them on a baking sheet in a single layer and freeze until solid, then transfer them to a freezer-safe bag. They can last up to 3 months in the freezer. To cook, bake straight from frozen, adding an extra 5-10 minutes to your baking time.

    • Re-heating:
      For the best results, reheat in an oven or air fryer rather than the microwave. Microwaving can make them soggy, while baking or air-frying will help retain that crispy exterior.

    By following these storage tips, your Crispy Parmesan Cauliflower Bites will remain one of your go-to healthy snacks, ready whenever the craving strikes.

    Nutritional Value of Crispy Parmesan Cauliflower Bites

    Understanding the nutritional value of your food is essential for maintaining a balanced diet. Each serving of Crispy Parmesan Cauliflower Bites provides a wholesome balance of macronutrients and important vitamins. Here is an approximate nutritional breakdown for one serving (which is about 4-5 bites):

    • Calories: 150
    • Total Fat: 9g
    • Saturated Fat: 3g
    • Cholesterol: 15mg
    • Sodium: 200mg
    • Total Carbohydrates: 12g
    • Dietary Fiber: 3g
    • Sugars: 1g
    • Protein: 8g

    Vitamin C: 50mg (about 60% of daily value)
    Calcium: 200mg (about 15% of daily value)
    Iron: 1.2mg (about 6% of daily value)

    Note: These values may vary based on specific ingredient choices and portion sizes. Adjustments such as using less cheese or replacing breadcrumbs with a lower-calorie alternative can alter the overall nutrition.

    Crispy Parmesan Cauliflower Bites offer a nutritious and delicious way to enjoy your veggies, making them a fantastic choice for those seeking healthy snacks that don’t compromise on flavor.

    FAQs: Frequently Asked Questions About Crispy Parmesan Cauliflower Bites

    1. Can I make these bites ahead of time?
    Yes, you can prepare the bites ahead of time and store them in the refrigerator for a day or freeze them for longer storage. Just reheat them before serving.

    2. Are these bites suitable for vegans?
    Absolutely! Simply replace the parmesan cheese with nutritional yeast and choose appropriate binders as necessary.

    3. How do I keep the bites crispy after cooking?
    To keep your bites crispy, store them in an airtight container and reheat in the oven instead of the microwave when ready to eat.

    4. Can I use frozen cauliflower?
    Yes, you can use frozen cauliflower florets, but make sure to thaw and pat them dry to prevent excess moisture, which can result in sogginess.

    5. What’s a good way to spice up the flavor?
    You can add spices like cayenne pepper, smoked paprika, or fresh herbs to the dry mixture for an extra flavor boost, tailoring the bites to your preferred taste.

    These frequently asked questions should help clarify any concerns you might have regarding making and enjoying your Crispy Parmesan Cauliflower Bites. Dive right in and experience the joy of a truly healthy snack option! Enjoy!

  • Refreshing Thai Cucumber Salad

    Refreshing Thai Cucumber Salad

    Refreshing Thai Cucumber Salad: A Tropical Delight

    Introduction to Refreshing Thai Cucumber Salad

    Are you in search of a dish that captures the essence of tropical flavors while remaining simple and healthy? Look no further than this vibrant, Refreshing Thai Cucumber Salad. This delightful cucumber salad is not just easy to whip up; it’s bursting with fresh herbs, crunchy vegetables, and a tangy dressing that will invigorate your palate.

    This cucumber salad is perfect for various dietary needs, appealing to vegans, gluten-free eaters, and anyone conscious of their calories. It’s an excellent side dish for any meal or a standalone snack that will leave you feeling light and satisfied. The recipe features hydrating cucumbers, zesty lime, and aromatic herbs, all working in harmony to create a dish that feels like summer on a plate. Plus, this salad can be tailored to suit busy schedules, making it an ideal choice for home cooks, parents juggling multiple tasks, students on-the-go, or anyone simply looking to enjoy a healthy lifestyle without sacrificing flavor.

    Let’s dive into the benefits of this tantalizing Thai salad!

    Benefits and Advantages of Refreshing Thai Cucumber Salad

    One of the primary attractions of this Refreshing Thai Cucumber Salad is its ease of preparation. With only a handful of ingredients and minimal effort required, you can enjoy a fresh, homemade dish in no time. What’s more, this cucumber salad is flexible; you can adjust the amount of dressing, spice, and ingredients to fit your personal preferences or dietary needs.

    Health Benefits

    From a nutritional standpoint, cucumbers are incredibly hydrating; they consist of about 95% water, making them ideal for maintaining hydration. They are low in calories, making this salad suitable for anyone looking to lose weight or simply eat healthier. Additionally, cucumbers are a great source of vitamins C and K, both essential for maintaining overall health.

    The addition of fresh herbs like cilantro and mint not only amplifies the flavors but also infuses the dish with antioxidants and anti-inflammatory properties. This cucumber salad is perfect for:

    • Busy parents seeking quick meal solutions.
    • Students and professionals aiming for nutritious meals that don’t require extended cooking times.
    • Health-conscious individuals wanting to indulge without the guilt.

    Whether you are hosting a summer BBQ, preparing a light lunch, or craving a refreshing snack, this Refreshing Thai Cucumber Salad checks all the boxes. It’s vegan, gluten-free, and incredibly versatile, making it suitable for a wide audience.

    Let’s explore the essential ingredients that make this delicious dish come alive.

    Ingredients Overview

    Essential Ingredients for Refreshing Thai Cucumber Salad

    To create the Refreshing Thai Cucumber Salad, gather the following ingredients:

    • 2 large cucumbers (peeled and sliced thinly) – The star of the show, providing crunch and hydration.
    • 1 red bell pepper (thinly sliced) – For color and sweetness.
    • 1/4 cup red onion (thinly sliced) – Adds a bit of sharpness and depth.
    • 1/2 cup cherry tomatoes (halved) – A burst of flavor and additional color.
    • 1/4 cup fresh cilantro (chopped) – Offers a fragrant note and vibrant color.
    • 1/4 cup fresh mint leaves (chopped) – Invigorating and aromatic.
    • 2 tbsp lime juice – The tang that ties it all together.
    • 1 tbsp fish sauce (or soy sauce for a vegan option) – Adds umami flavor.
    • 1 tbsp sugar (or honey for a natural sweetener) – Balances the acidity of the lime.
    • Salt and pepper to taste – Enhances flavor.

    This combination of ingredients not only results in a tantalizing salad but also offers a plethora of nutrients. To cater to different dietary needs, substitutions can be made easily.

    Dietary Substitutions to Customize Your Refreshing Thai Cucumber Salad

    Adapting the Refreshing Thai Cucumber Salad to your dietary preferences is simple. Here are some suggestions:

    • For a Vegan Version: Substitute fish sauce with soy sauce or tamari to keep the flavor profile intact.
    • Sugar Alternatives: If you prefer a low-glycemic index sweetener, consider using agave syrup or monk fruit sweetener.
    • Extra Protein: For a more filling meal, incorporate grilled chicken, shrimp, or tofu.
    • Add Extra Crunch: Toss in some toasted peanuts, sesame seeds, or edamame for a delightful texture contrast.

    These adjustments ensure that the cucumber salad remains delightful and healthy while catering to various dietary preferences. Now, let’s get your kitchen ready as we step into how to prepare this refreshing dish!

    How to Prepare the Perfect Refreshing Thai Cucumber Salad: Step-by-Step Guide

    1. Prepare the Base: Begin by washing the cucumbers thoroughly. Peel if desired, then slice them thinly using a sharp knife or mandoline slicer. Aim for even slices to ensure a harmonious texture throughout the salad.

    2. Chop Additional Veggies: Slice the red bell pepper, and cherry tomatoes in half. Thinly slice the red onion. Each component should be prepped before mixing for a smooth assembly.

    3. Herbs Prep: Finely chop the fresh cilantro and mint. Set aside as the fragrant herbs will give the salad a fresh burst of flavor and aroma.

    4. Make the Dressing: In a small bowl, combine lime juice, fish sauce (or soy sauce), and sugar (or your preferred sweetener). Whisk until well blended, and the sugar is dissolved. Taste the dressing and adjust as necessary, adding more lime for tanginess or sugar for sweetness.

    5. Combine Ingredients: In a large mixing bowl, add the sliced cucumbers, bell peppers, red onion, and cherry tomatoes. Pour the dressing over the veggies and gently toss to coat everything evenly.

    6. Fold in Fresh Herbs: At this stage, fold in the chopped cilantro and mint delicately. You want to maintain some of the herb leaves intact for aesthetic appeal and flavor.

    7. Season: Sprinkle with salt and pepper to taste. It’s crucial to adjust according to your dietary preferences – less for low-sodium diets.

    8. Chill and Serve: Let the Refreshing Thai Cucumber Salad chill in the refrigerator for at least 15 minutes. This allows the flavors to meld beautifully. Serve cool as a side dish or a light meal.

    Adaptation Tips

    Feel free to scale the recipe based on your needs. If you have a larger gathering, double the ingredients, but keep the dressing proportions balanced. Enjoying this cucumber salad fresh is critical, but you can prep it a few hours in advance.

    Mastering Refreshing Thai Cucumber Salad: Advanced Tips and Variations

    To elevate your Refreshing Thai Cucumber Salad, consider the following advanced tips and variations:

    • Seasonal Add-Ins: Incorporate seasonal veggies like radishes, carrots, or even mango for an added sweetness and crunch.
    • Spice It Up: If you prefer heat, add thinly sliced red chilies or a sprinkle of chili flakes into the dressing for a spicy twist.
    • Flavor with Nuts: Add crushed peanuts or sesame seeds not only for texture but also to enrich the overall flavor profile.
    • Different Dressings: Experiment with a peanut dressing for an Asian twist, or a coconut milk dressing for an extra creamy version.

    By trying different combinations, you can keep this cucumber salad fresh and exciting each time you make it.

    How to Store Refreshing Thai Cucumber Salad: Best Practices

    Storing your Refreshing Thai Cucumber Salad correctly is essential for maintaining its freshness. Follow these guidelines:

    • Refrigeration: Store your cucumber salad in an airtight container in the refrigerator. It’s best enjoyed fresh but can last up to 2 days. The dressing may make the cucumbers a bit limp over time, so consider keeping the dressing separate if you plan to store it.
    • Freezing: Freezing this salad is not recommended, as the cucumbers will lose their crisp texture once thawed.
    • Serving Leftovers: When reheating leftovers, avoid heating the salad itself. Instead, opt for a light refresh by adding fresh herbs or squeezing additional lime juice just before serving.

    These practices will help ensure your cucumber salad stays delicious for as long as possible.

    Nutritional Value of Refreshing Thai Cucumber Salad

    Understanding the nutritional profile of your dish is essential, especially for those monitoring their dietary intake. Here’s a breakdown of the Refreshing Thai Cucumber Salad:

    • Calories: Approximately 150 calories (per 1 cup serving)
    • Total Fat: 5g (includes healthy fats from olive oil, if used in the dressing)
    • Carbohydrates: 22g
    • Fiber: 3g (great for digestion)
    • Sugars: 4g (natural sugars from vegetables and sweetener)
    • Protein: 2g (enhanced with optional additions such as chicken or tofu)

    This low-calorie dish is rich in vitamins and minerals, making it an excellent option for anyone seeking a healthy lifestyle. The refreshing nature of this salad enables you to enjoy great flavor without guilt.

    FAQs: Frequently Asked Questions About Refreshing Thai Cucumber Salad

    How long can I keep the cucumber salad in the fridge?

    The Refreshing Thai Cucumber Salad can stay fresh in an airtight container for up to 2 days. However, it’s best enjoyed within 24 hours of preparation.

    Can I make this salad ahead of time?

    Absolutely! You can prep and mix the ingredients up to 4 hours ahead. Just keep the dressing separate until you are ready to serve to maintain the cucumbers’ crunch.

    What can I substitute for fish sauce?

    If you are looking for a vegan option, soy sauce or tamari works perfectly as a substitute, providing a similar umami flavor without the fish.

    How can I add protein to this salad?

    Incorporate grilled chicken, shrimp, or tofu mixed into the salad or serve it on the side as a protein-rich accompaniment.

    Can I use other vegetables?

    Definitely! Adding vegetables like shredded carrots, radishes, or even avocado can enhance both the flavor and texture of your cucumber salad. Get creative and customize it to your taste!

    In conclusion, this Refreshing Thai Cucumber Salad not only offers a delightful taste explosion but also serves as a versatile, healthy option for anyone’s meal plan. With its simple ingredients and easy preparation steps, you can whip this salad up in no time. So why not try it today and bring tropical delight to your dining table!

  • Crispy Parmesan Onion Ring Chips

    Crispy Parmesan Onion Ring Chips

    Crispy Parmesan Onion Ring Chips: A Tropical Delight

    Introduction to Crispy Parmesan Onion Ring Chips

    Are you ready to elevate your appetizer game? If so, our Crispy Parmesan Onion Ring Chips are a delightful way to do just that! Perfect as a snack, party starter, or even a side dish, these crispy treats offer a unique twist on traditional onion rings, transforming them into chip-like delights that are both flavorful and fun to eat. Not only are they easy to prepare, but they also cater to a variety of dietary preferences – making them the ideal choice for busy parents, college students, or anyone looking to impress their guests without spending hours in the kitchen.

    This recipe focuses on using wholesome ingredients, and if you’re health-conscious, you’ll love the fact that they can be made gluten-free and even vegan, depending on your choice of substitutions. Plus, they’re a wonderful source of fiber and antioxidants, thanks to the onions, while the Parmesan cheese adds a savory depth and richness that takes these chips to the next level.

    Perfect for gatherings or quiet nights in, these Crispy Parmesan Onion Ring Chips are a must-try. Gather your ingredients, set aside some time, and let’s dive into one of the most exciting appetizer recipes you’ll ever prepare!

    Benefits and Advantages of Crispy Parmesan Onion Ring Chips

    Creating dishes that are both enjoyable and healthy can sometimes feel like a daunting task, but our Crispy Parmesan Onion Ring Chips demonstrate that it doesn’t have to be! One of the significant advantages of this recipe lies in its simplicity. With just a handful of ingredients and minimal preparation time, you can whip up a snack that tastes gourmet without the fancy fuss.

    Health Benefits

    When compared to conventional fried onion rings, our recipe significantly reduces the oil content, making it a healthier option. By utilizing an oven instead of deep-frying, you keep calories in check while still achieving a satisfying crunch. Plus, onions, known for their various health benefits, provide nutrients such as vitamin C, dietary fiber, and antioxidants, contributing to heart health and potentially lowering the risk of chronic diseases.

    Dietary Amenities

    Versatility stands at the forefront of this recipe. Due to its customizable nature, you can easily tweak the ingredients to match dietary requirements, from gluten-free to vegan. This adaptability means that nearly anyone can enjoy these chips, regardless of their background or dietary restrictions. Whether you’re a busy parent wanting to whip up something nutritious for the kids or a health-conscious individual looking for low-calorie snack options, these chips fit the bill perfectly.

    A Delight for All Occasions

    Besides their health advantages, the Crispy Parmesan Onion Ring Chips promise to be a hit at any social gathering. Their appealing texture and flavor offer a departure from standard snack options. Whether served at a casual barbecue or a formal dinner party, these chips are sure to impress, creating a memorable culinary experience. Because they are easy to prepare, you can cater to spontaneous gatherings without stress.

    With these key benefits in mind, it’s clear why our Crispy Parmesan Onion Ring Chips stand out as an iconic addition to your collection of appetizer recipes.

    Ingredients Overview

    Essential Ingredients for Crispy Parmesan Onion Ring Chips

    Creating delicious Crispy Parmesan Onion Ring Chips requires a handful of essential ingredients. Below, you’ll find a detailed list with precise measurements along with explanations of how each component plays a significant role in the final result.

    • 2 large onions (preferably sweet onions, like Vidalia): The star ingredient, providing the foundational flavor. Their sweetness along with a slight tang makes them absolutely irresistible once baked.
    • 1 cup all-purpose flour (can substitute with gluten-free flour): This coats the onions, providing a crisp exterior.
    • 1 cup breadcrumbs (panko recommended for extra crunch): This adds texture and becomes the crunchy shell around the onion rings.
    • ½ cup grated Parmesan cheese (can use nutritional yeast for a vegan option): Adds a savory flavor and richness to each bite.
    • 2 large eggs (or flaxseed eggs for a vegan alternative): Binds the flour and breadcrumbs to the onions.
    • 1 teaspoon garlic powder: Compliments the sweetness of the onions and enhances flavor.
    • 1 teaspoon paprika: Adds a subtle smokiness and beautiful color.
    • Salt and black pepper to taste: Essential for seasoning and enhancing the flavors of all ingredients.
    • Olive oil or cooking spray: Helps achieve that perfect crispy texture, used lightly to coat the chips before baking.

    These ingredients combine to create a symphony of flavors, ensuring each bite of your Crispy Parmesan Onion Ring Chips is savory and satisfying.

    Dietary Substitutions to Customize Your Crispy Parmesan Onion Ring Chips

    Given the diverse dietary needs of today’s eaters, ensuring your Crispy Parmesan Onion Ring Chips are adaptable is key. Below are suggested substitutions that maintain the dish’s integrity while catering to various preferences:

    • Gluten-Free: Replace all-purpose flour with a gluten-free flour blend and use gluten-free breadcrumbs to accommodate those with gluten intolerance. Many brands offer delicious options that maintain crunch.

    • Vegan: Substitute eggs with a flaxseed egg (1 tablespoon flaxseed meal mixed with 3 tablespoons water, let sit until gelatinous) for binding. Additionally, replace Parmesan cheese with nutritional yeast or a store-bought vegan cheese alternative for a similar flavor profile.

    • Low-Calorie: To lower calories further, consider air frying them instead of baking and reduce oil usage. You can also monitor the amounts of the breadcrumbs and cheese to suit calorie goals.

    • Spicy Version: Add cayenne pepper or chili powder for those who enjoy a spicy kick. This variation adds zing and makes the snack even more exciting!

    This flexibility ensures that these Crispy Parmesan Onion Ring Chips can bring joy to a wider audience, allowing individuals with different dietary preferences to delight in this versatile dish.

    How to Prepare the Perfect Crispy Parmesan Onion Ring Chips: Step-by-Step Guide

    Now that you’ve gathered your ingredients, let’s dive into preparing these Crispy Parmesan Onion Ring Chips with a thorough, step-by-step guide. This detailed process ensures simplicity while highlighting how easy it is to create gourmet-style snacks at home.

    1. Preheat the Oven: Set your oven to 400°F (200°C), allowing it to reach the desired temperature for a perfect bake.

    2. Prepare the Onions: Peel and slice the onions into ¼-inch thick rings. Maintain a consistent thickness for even cooking.

    3. Set Up a Breading Station:

      • In one bowl, add the flour and season it with salt, pepper, garlic powder, and paprika.
      • In a second bowl, beat the eggs (or prepare your flaxseed egg).
      • In a third bowl, combine your breadcrumbs and Parmesan cheese. (If you’re making a vegan version, omit cheese and use nutritional yeast.)
    4. Dredge the Onion Rings:

      • Take an onion ring and coat it lightly in the flour mixture, ensuring it’s fully covered.
      • Tap off any excess flour and then dip it into the egg mixture (or flaxseed egg).
      • Finally, coat the onion ring in the breadcrumb mixture, pressing gently to adhere. Repeat this process for all onion rings.
    5. Arrange on a Baking Sheet: Line a baking sheet with parchment paper. Place the breaded onion rings in a single layer, ensuring they don’t touch. If desired, lightly spray or drizzle olive oil on top of the rings to enhance crispiness.

    6. Bake: Place the baking sheet in the preheated oven and bake for 15-20 minutes, or until they are golden brown and crispy. Flip the rings halfway through baking for even browning.

    7. Cool & Serve: Once cooked, remove the rings from the oven and allow them to cool slightly before serving. Pair them with your favorite dipping sauce for an even better experience!

    This step-by-step method emphasizes the ease of preparation. Plus, it allows you to tailor elements depending on dietary needs or taste preferences, ensuring everyone can enjoy these fantastic appetizer recipes.

    Mastering Crispy Parmesan Onion Ring Chips: Advanced Tips and Variations

    After perfecting your Crispy Parmesan Onion Ring Chips, why not take your endeavor a step further? Here are some advanced tips and variations that can add complexity and flavor to your dish:

    Tips for Success

    1. Choose the Right Onion: Experiment with different types of onions. Sweet yellow or red onions deliver varying flavor profiles, while white onions provide a sharper bite.

    2. Make it Extra Crispy: For even greater crunch, consider double-breading your onion rings. After the first coating, dip them back in the egg mixture, followed by a second coat of breadcrumbs.

    3. Season to Taste: Don’t hesitate to play with a variety of spices and herbs to create unique flavor combinations. A sprinkle of Italian herbs or a dash of lemon zest can elevate the dish significantly.

    4. Avoid Sogginess: Ensure the onion rings are thawed and patted dry before breading; wet onions may lead to sogginess.

    Flavor Variations

    • Cheesy Garlic Onion Rings: Add minced garlic to the breadcrumb mixture for a zesty kick.

    • Buffalo-Style Chips: Toss your crispy onion ring chips in buffalo sauce before serving for a tangy and spicy flair.

    • Herb-Infused: Use fresh herbs like thyme or rosemary mixed with the breadcrumb coating for more aromatic chips.

    These advanced techniques and variations can help you master your Crispy Parmesan Onion Ring Chips, allowing for endless exploration and flavor combinations well beyond standard appetizer recipes.

    How to Store Crispy Parmesan Onion Ring Chips: Best Practices

    If you happen to have leftover Crispy Parmesan Onion Ring Chips or want to prepare them ahead of time, knowing the best methods for storing them is essential to maintain their crispiness and taste. Here are some best practices for refrigeration, freezing, and reheating:

    Refrigeration

    Allow the chips to cool completely, then store them in an airtight container. Place parchment paper between layers to prevent sticking, and keep them in the refrigerator for up to 3 days. When ready to eat, reheat to restore their crunchiness.

    Freezing

    For longer storage, freeze the breaded but uncooked onion rings. Arrange them in a single layer on a baking sheet and place them in the freezer. Once they are solid, transfer them to airtight freezer bags and keep them frozen for up to a month. When ready to cook, you can bake them from frozen, adding an extra 5 minutes to the baking time.

    Reheating

    To reheat cooked onion rings, use the oven or air fryer rather than the microwave, which can make the chips soggy. Preheat your oven to 375°F (190°C) and bake for 5-10 minutes, or until hot and crispy again.

    Knowing these storage solutions ensures that your Crispy Parmesan Onion Ring Chips can be enjoyed fresh, even on a busy schedule. Accessible appetizer recipes can be made ahead of time without sacrificing quality or taste!

    Nutritional Value of Crispy Parmesan Onion Ring Chips

    Understanding the nutritional profile of your food can aid in making informed choices, especially when it comes to enjoying snacks. Here’s a breakdown of the approximate nutrition content of one serving (about 10 chips) of Crispy Parmesan Onion Ring Chips:

    • Calories: 220
    • Total Fat: 10g
    • Saturated Fat: 3g
    • Cholesterol: 50mg
    • Sodium: 350mg
    • Total Carbohydrates: 26g
    • Dietary Fiber: 3g
    • Sugars: 2g
    • Protein: 5g

    These values can vary based on ingredient substitutions (like cheese or types of flour), cooking methods, and serving sizes. For lower-calorie versions, consider using less cheese or opting for air frying instead of baking.

    By being aware of the nutritional aspects of your dish, you can enjoy your Crispy Parmesan Onion Ring Chips guilt-free and make choices aligned with your dietary goals. Providing healthy appetizer recipes allows everyone to savor delicious flavors without compromising their health!

    FAQs: Frequently Asked Questions About Crispy Parmesan Onion Ring Chips

    Can I make these onion ring chips ahead of time?

    Absolutely! You can prepare the onion rings ahead of time, either bread them and refrigerated or freeze them. They can be baked from frozen when needed for freshness.

    What can I serve with these crispy onion rings?

    These delicious chips pair wonderfully with various homemade dips such as marinara sauce, ranch dressing, or even creamy garlic sauce. They also complement burgers and can serve as a side with salads.

    Why are my onion rings soggy?

    If the onion rings end up soggy, consider two key factors: make sure they are fully dried before breading, and avoid overcrowding during baking, as this can trap steam and inhibit crispness.

    How do I store leftover onion rings?

    Once cooled, store any leftover onion rings in airtight containers in the refrigerator. For longer storage, they can be frozen before cooking, or they can be reheated in the oven for a crisp finish.

    Can I use a different cheese?

    Yes! Feel free to experiment with various cheese options. Cheddar, gouda, or even vegan cheese can work well if you’re seeking an alternative that aligns with your dietary preferences.

    Offering answers to these common queries helps enhance the cooking experience, making it easier for readers to dive into creating wonderful appetizer recipes like Crispy Parmesan Onion Ring Chips.


    With this blog post, you have a complete guide to preparing and enjoying Crispy Parmesan Onion Ring Chips. Its simplicity, health-conscious options, and delightful flavors will make this recipe a repeated favorite among your friends and family. Have fun cooking and inspiring others with your newfound appetizer recipe!

  • Crock Pot Angel Chicken

    Crock Pot Angel Chicken

    Crock Pot Angel Chicken: A Tropical Delight

    Introduction to Crock Pot Angel Chicken

    Crock Pot Angel Chicken is a tempting dish that brings a taste of the tropics right to your kitchen. This baked chicken recipe is quick and straightforward, making it perfect for those busy evenings when you want a delicious meal without spending hours in the kitchen. One of the highlights of this recipe is its simplicity—simply dump, set, and forget! With the ease of crockpot recipes, you can create a sumptuous meal that’s not just tasty but also healthy.

    This dish is not only a breeze to prepare; it caters to various dietary preferences, including gluten-free and low-calorie options. Plus, it’s packed with nutrients, making it a fantastic choice for families, seniors, and health-conscious individuals. The combination of succulent chicken with creamy goodness creates a flavor profile that appeals to food enthusiasts while remaining mindful of dietary restrictions. Whether you’re a busy parent, a newlywed looking to impress your partner, or just someone seeking delicious meals without the hassle, this recipe will surely inspire you to try your hand at creating Crock Pot Angel Chicken.

    Benefits and Advantages of Crock Pot Angel Chicken

    The key to a successful meal lies not just in flavor but also in preparation and health benefits. Crock Pot Angel Chicken shines in all these aspects. Here are some of the key advantages of this delightful dish:

    Ease of Preparation

    Crock Pot recipes in general are loved for their convenience, and Angel Chicken is no exception. The blended flavors simmer together gently, allowing you to continue with your day while the meal cooks itself. This no-fuss approach is perfect for busy families or working professionals who may not have ample time during meal prep hours. Simply layer the ingredients in the crockpot—no complicated steps required!

    Health Benefits

    This heavenly chicken recipe often incorporates wholesome ingredients that offer plenty of health benefits. Chicken is an excellent source of lean protein, making it an ideal choice for individuals looking to maintain a balanced diet. Additionally, if you opt for low-fat cream soups or nut-based alternatives, you can further reduce calories and boost the nutritional content of the dish. This makes Crock Pot Angel Chicken not only heart-healthy but also suitable for those on calorie-restricted diets.

    Versatility

    Another significant advantage is its versatility. The base recipe can be easily adjusted to accommodate various dietary needs. Whether you’re aiming for a gluten-free version or looking to add more veggies, the simple nature of crockpot cooking allows for endless customization. You can switch out the protein for tofu or chickpeas for a vegan option or add in seasonal vegetables for added nutrition.

    Time-Saving

    The set-it-and-forget-it nature of crockpot recipes means you can prepare meals ahead of time. You can throw everything together in the morning and return home to a warm, fragrant dinner. This makes it an excellent option for busy families or anyone constantly on the go.

    Family-Friendly

    Crock Pot Angel Chicken boasts a mild yet enticing flavor profile, ensuring even picky eaters will be satisfied. The creamy sauce can be served over rice or pasta, transforming the mealtime experience for everyone at the table. This dish not only fills bellies but also fosters family bonding over shared meals.

    In essence, the Crock Pot Angel Chicken recipe stands out due to its simplicity, health advantages, and ability to cater to a variety of dietary needs. It truly embodies the essence of convenient yet wholesome meals for all.

    Ingredients Overview

    Essential Ingredients for Crock Pot Angel Chicken

    To whip up this delightful dish, gather the following ingredients:

    • 4 boneless, skinless chicken breasts: This serves as the base of your meal, providing lean protein.
    • 1 can (10.5 oz) cream of chicken soup: Opt for low-fat for a healthier version. This ingredient adds richness and flavor.
    • 1 packet (1 oz) ranch dressing mix: This adds a zesty kick that elevates the taste profile.
    • 1 cup of low-sodium chicken broth: Helps prevent the dish from drying out while cooking. You can use vegetable broth for a vegetarian option.
    • 1 cup of shredded cheese (mozzarella or cheddar): Adds creaminess and flavor. For a lactose-free option, consider using a vegan cheese alternative.
    • 1 tablespoon of minced garlic: Brings a robust flavor that complements the chicken beautifully.
    • Salt and pepper: For seasoning, adjust these to your taste.
    • Optional vegetables: Add carrots, bell peppers, or broccoli if desired for an extra nutritional boost.

    Dietary Substitutions to Customize Your Crock Pot Angel Chicken

    This recipe is already inclined towards accommodating various dietary needs, but here are some substitutes you can consider:

    1. For a Gluten-Free Version:
    2. Use gluten-free cream of chicken soup.
    3. Ensure the ranch dressing mix is gluten-free or prepare your own seasoning blend from scratch.

    4. For a Dairy-Free Variant:

    5. Replace the cream of chicken soup with a dairy-free alternative, like coconut cream or cashew cream.
    6. Use nutritional yeast instead of cheese for a cheesy flavor without the dairy.

    7. Protein Alternatives:

    8. For a plant-based option, swap the chicken breast with cubed tofu or tempeh.
    9. Chickpeas can also be used to create a wholesome, vegan protein option.

    10. For a Low-Calorie Version:

    11. Choose skinless chicken thighs instead of breasts or reduce the cheese quantity.
    12. Swap traditional ranch dressing for a homemade vinaigrette or herb mix.

    With this flexibility, the Crock Pot Angel Chicken recipe can cater to a wide range of dietary preferences, ensuring everyone can enjoy a delightful meal.

    How to Prepare the Perfect Crock Pot Angel Chicken: Step-by-Step Guide

    Now that you’ve gathered your ingredients, let’s dive into how to prepare this scrumptious dish. Following this step-by-step guide will ensure that your Crock Pot Angel Chicken turns out perfectly every time:

    1. Prepare the Base:
    2. Lightly spray the interior of the crockpot with non-stick cooking spray. This helps prevent the ingredients from sticking and makes for easier cleanup.

    3. Layer the Chicken:

    4. Place the chicken breasts at the bottom of the crockpot. Ensure they are arranged evenly to allow for even cooking.

    5. Mix the Cream of Chicken Soup:

    6. In a separate bowl, combine the cream of chicken soup, chicken broth, and ranch dressing mix. Stir until well mixed and smooth.

    7. Pour over Chicken:

    8. Pour the soup mixture over the arranged chicken breasts in the crockpot, ensuring each piece is well covered.

    9. Add Garlic:

    10. Sprinkle minced garlic over the top. This not only enhances flavor but also adds significant health benefits.

    11. Add Optional Vegetables:

    12. If you’re including veggies, layer them on top of the chicken and soup mixture. This not only enhances nutrition but adds color to your dish.

    13. Cover and Cook:

    14. Cover the crockpot with the lid. Set to low heat and cook for about 6-7 hours, or on high for about 3-4 hours, until the chicken is cooked through and tender.

    15. Check for Doneness:

    16. Use a meat thermometer to ensure the chicken has reached an internal temperature of 165°F (75°C). This guarantees your meal is safe to eat.

    17. Shred the Chicken:

    18. Once cooked, carefully remove the chicken from the crockpot. Use two forks to shred the chicken into bite-sized pieces, ensuring they soak up the delicious creamy sauce.

    19. Add Cheese:

      • Return the shredded chicken to the crockpot. Sprinkle the cheese over the top and let it melt for about 10 minutes on low heat, adding extra creaminess to your dish.
    20. Final Touch:

      • Stir the ingredients one last time before serving. This will ensure all flavors are well-combined, and everything is evenly distributed.
    21. Serve:

      • Spoon the creamy chicken mixture over rice, pasta, or even mashed potatoes for a hearty and satisfying meal. Garnish with fresh parsley for a touch of color.

    Incorporating easy-to-follow steps makes this recipe accessible for all cooking skill levels. Whether you’re prepping for a weekend family meal or a quick weekday dinner, this angelic delight will surely please.

    Mastering Crock Pot Angel Chicken: Advanced Tips and Variations

    To elevate your Cork Pot Angel Chicken experience even further, consider the following advanced tips and variations:

    1. Spice It Up:
    2. For an added twist, try incorporating spices such as paprika, cayenne pepper, or a dash of hot sauce for a spicy kick.

    3. Herb Infusion:

    4. Fresh herbs such as rosemary, thyme, or even basil can be added alongside the garlic to enhance the aroma and flavor profile. Herbs can make the dish feel even more luxurious.

    5. Creamy Mushroom Addition:

    6. For mushroom lovers, consider adding sliced mushrooms to the crockpot. Their earthy flavor complements the creamy sauce beautifully.

    7. Tropical Variation:

    8. Incorporate pineapple chunks or coconut milk for a tropical angle that perfectly pairs with the chicken. This adds a bomb of flavors reminiscent of island cuisine.

    9. Meal Prep Ready:

    10. This recipe is excellent for meal prepping. Make a big batch on the weekend and divide it into containers for easy lunches throughout the week.

    11. Slow Cooker vs. Instant Pot:

    12. While this guide focuses on traditional crockpot recipes, know that you can use an Instant Pot for a faster version. Adjust the cooking time accordingly, usually around 25-30 minutes under pressure, to achieve tender chicken.

    Implementing these tips allows you to personalize your experience with Crock Pot Angel Chicken, whether you want to explore different flavor profiles or optimize convenience.

    How to Store Crock Pot Angel Chicken: Best Practices

    Proper storage methods will ensure the longevity and taste of your Crock Pot Angel Chicken. Here’s how to do it:

    Refrigeration

    • Allow the dish to cool down to room temperature before transferring it into an airtight container. This helps maintain freshness and prevents condensation.

    • Store it in the refrigerator for up to 3-4 days, ensuring you consume it within this time frame for maximum flavor and safety.

    Freezing

    • For longer storage, consider freezing. Portion out the chicken into freezer-safe bags or containers. Removing as much air as possible will help prevent freezer burn.

    • This dish can last up to 2-3 months in the freezer. When you’re ready to eat, simply thaw in the refrigerator overnight before reheating.

    Reheating

    • To reheat, place the chicken in a saucepan over low heat, adding a splash of chicken broth to keep it moist as you warm it.

    • Alternatively, you can microwave on medium heat in intervals, stirring occasionally until heated through. Ensure it reaches an internal temperature of 165°F (75°C) before consuming.

    Following these guidelines will help maintain the dish’s deliciousness and nutritional quality, making it ready for you when the craving strikes.

    Nutritional Value of Crock Pot Angel Chicken

    Understanding the nutritional profile of your meals can significantly contribute to healthier eating choices. Here’s what you can expect from a serving of Crock Pot Angel Chicken:

    • Calories: Approximately 350-400 calories per serving, depending on ingredient choices such as cheese and soup options.
    • Protein: Around 35-40 grams of protein, given the use of chicken breast, which is excellent for muscle maintenance and repair.
    • Fat: Roughly 15 grams, primarily from the cream of chicken soup and cheese. Opting for low-fat variations can help reduce this count.
    • Carbohydrates: Approximately 20-25 grams, depending on whether you serve it with rice or pasta.
    • Fiber: This meal can be made to contain fiber, especially when adding veggies or serving with whole grains.
    • Sodium: The sodium content varies based on broth and soup choices; low-sodium alternatives can help manage this.

    By customizing your ingredients, you can control the nutritional profile even further. Keep in mind any allergens or dietary restrictions as you calculate your dish’s values.

    FAQs: Frequently Asked Questions About Crock Pot Angel Chicken

    Here are some common questions regarding Crock Pot Angel Chicken, accompanied by concise answers:

    1. Can I use frozen chicken in this recipe?

    Yes! You can use frozen chicken, but cooking time may increase. It’s best to remove it from the freezer to thaw slightly before placing it in the crockpot.

    2. Is this recipe suitable for meal prep?

    Absolutely! Crock Pot Angel Chicken makes for an excellent meal prep option. Make a larger batch and enjoy it throughout the week.

    3. Can I add vegetables to the crockpot?

    Certainly! Adding chopped vegetables such as carrots, bell peppers, or broccoli not only enhances the dish’s nutrition but also its color.

    4. What can I serve with Crock Pot Angel Chicken?

    This dish pairs wonderfully with a variety of sides, including rice, mashed potatoes, or even over pasta. For a low-carb option, consider serving it over zucchini noodles.

    5. Is there a vegetarian alternative for this dish?

    You can substitute chicken with tofu or chickpeas and use vegetable broth and plant-based cream for a delicious vegetarian version.

    6. How long does the dish last in the fridge?

    When properly stored in an airtight container, your Crock Pot Angel Chicken will last in the refrigerator for around 3-4 days.

    7. Can I make this recipe in an Instant Pot?

    Yes, you can! Using an Instant Pot can significantly reduce cooking time, usually requiring about 25-30 minutes under pressure.

    8. Can I use other types of soup?

    Yes! Feel free to explore different soups, like cream of mushroom or a spicy soup, to add a unique twist to your dish.

    9. Is it possible to make this low in calories?

    Absolutely. Use low-fat soup, reduce the cheese, and serve it with whole grains or veggies for a healthier option.

    10. Does this recipe freeze well?

    Yes! You can freeze it in appropriate containers or bags for up to 2-3 months, ensuring flavor retention when properly stowed.

    Crock Pot Angel Chicken is filled with goodness, endless possibilities, and the spark of creativity in your kitchen. With easy preparation and a flexible recipe, it’s time to gather your ingredients and bring the essence of tropical delight home. Enjoy your cooking adventure!

  • Tasty Pineapple-Teriyaki Chicken Wings

    Tasty Pineapple-Teriyaki Chicken Wings

    Tasty Pineapple-Teriyaki Chicken Wings: A Tropical Delight

    Introduction to Tasty Pineapple-Teriyaki Chicken Wings

    If you’re on the hunt for mouthwatering chicken recipes that combine sweet and savory flavors, look no further! Tasty Pineapple-Teriyaki Chicken Wings are the perfect answer to all your culinary cravings. As a versatile dish, these wings are remarkably easy to prepare, making them a fantastic option for busy parents, students, or anyone with a packed schedule. Imagine tender chicken wings glazed with a luscious teriyaki sauce that’s enriched with the refreshing taste of pineapple—pure bliss!

    But wait, there’s more! Not only are these chicken wings a joy to eat, but they are also health-conscious, as they can be made with low-sodium soy sauce and natural sweeteners, catering to diet-conscious individuals. Furthermore, they can easily be adapted to fit vegan or gluten-free diets. With their colorful presentation and delicious flavor, these wings are ideal for gatherings, BBQs, or even a cozy family dinner at home.

    In addition, preparing Tasty Pineapple-Teriyaki Chicken Wings allows you to experiment with different flavor profiles—whether you prefer a hint of heat or a bolder sweet taste. So grab your apron and let’s dive into this delightful chicken recipe!

    Benefits and Advantages of Tasty Pineapple-Teriyaki Chicken Wings

    When it comes to chicken recipes, Tasty Pineapple-Teriyaki Chicken Wings stand out for numerous reasons. First and foremost is their simplicity in preparation. With just a handful of ingredients, you’ll have a restaurant-worthy dish ready in no time. This recipe eliminates the need for complicated cooking techniques or expensive ingredients. Instead, it focuses on fresh flavors and simple techniques that even novice cooks can master.

    The health benefits of these chicken wings are another major plus. Chicken is a great source of protein, essential for muscle building and repair. By using fresh pineapple, you add a layer of vitamins—like Vitamin C—along with natural enzymes that can aid digestion. If you’re concerned about dietary restrictions, modifying the sauce to be gluten-free and low in sugar is a simple yet impactful change, making them accessible to those on different diets.

    Additionally, these wings are versatile. You can serve them as an appetizer, a main dish, or even toss them into a salad for a protein-packed meal. In a world where everyone is busy, having a quick, nutritious meal like the Tasty Pineapple-Teriyaki Chicken Wings in your repertoire could make all the difference.

    Moreover, the flavor combination of teriyaki and pineapple is not only delicious but also reminiscent of tropical getaways, offering a moment of escape with every bite. Whether you’re hosting friends or treating yourself to a comforting meal, these wings ensure satisfaction without the guilt.

    Ingredients Overview

    Essential Ingredients for Tasty Pineapple-Teriyaki Chicken Wings

    To prepare Tasty Pineapple-Teriyaki Chicken Wings, you will need the following ingredients:

    • 2 pounds chicken wings: The base of the dish, offering protein and flavor.
    • ½ cup pineapple juice: Adds sweetness and acidity.
    • ⅓ cup soy sauce: Provides savory depth; opt for low-sodium if desired.
    • ¼ cup brown sugar or honey: Additional sweetness that balances out the savory elements.
    • 2 tablespoons rice vinegar: Introduces a tangy depth to the sauce.
    • 1 tablespoon minced garlic: For a flavor kick that’s aromatic and robust.
    • 1 tablespoon minced ginger: Enhances the tropical flavor profile.
    • 1 tablespoon sesame oil: Adds complexity and richness.
    • 1 teaspoon chili flakes (optional): Introduces heat for those who enjoy spicy flavors.

    Diet Options:
    Vegan: Substitute chicken with cauliflower wings or tofu and adjust cooking times accordingly.
    Gluten-Free: Use tamari instead of regular soy sauce to maintain a gluten-free diet.
    Low-Calorie: Replace brown sugar with a sugar substitute or opt to reduce the quantity for less sweetness.

    Dietary Substitutions to Customize Your Tasty Pineapple-Teriyaki Chicken Wings

    The beauty of these chicken recipes lies in their adaptability. Feel free to experiment with the following substitutions according to your dietary needs:

    1. Protein Base:
    2. Chicken Substitutes: Use turkey wings or drumsticks if you prefer a different flavor profile or protein source.
    3. Vegan Option: Swap the chicken with extra-firm tofu or jackfruit, which can mimic the texture of chicken.

    4. Sweeteners:

    5. If you want to reduce sugar intake, consider using stevia or monk fruit sweetener instead of brown sugar or honey.

    6. Sauce Variations:

    7. For a tropical twist, mix in some diced mango or use coconut aminos for a different savory profile that is also soy-free.
    8. To increase the kick, experiment with Sriracha or Korean gochujang paste, providing a spicy version of the standard recipe.

    By adopting these substitutions, you can create a version of Tasty Pineapple-Teriyaki Chicken Wings that aligns with your taste preferences and health goals.

    How to Prepare the Perfect Tasty Pineapple-Teriyaki Chicken Wings: Step-by-Step Guide

    Let’s get started with the step-by-step preparation for creating Tasty Pineapple-Teriyaki Chicken Wings that will impress anyone at your dining table!

    1. Prepare the Chicken Wings:
    2. Start by thoroughly rinsing the chicken wings under cold water. Pat them dry with paper towels to ensure the skin becomes crispy during cooking.

    3. Make the Marinade:

    4. In a large mixing bowl, combine the pineapple juice, soy sauce, brown sugar, rice vinegar, minced garlic, minced ginger, and sesame oil. Whisk these ingredients together until the sugar dissolves completely.

    5. Marinate the Wings:

    6. Place the chicken wings into the mixing bowl and toss them until they are well-coated with the marinade. Cover the bowl with plastic wrap and let the wings marinate for at least 30 minutes. For the best flavor, allow them to marinate in the fridge for 2-6 hours.

    7. Preheat the Oven:

    8. Preheat your oven to 400°F (200°C). This temperature will help the skin get crispy while roasting.

    9. Prepare the Baking Tray:

    10. Line a baking sheet with aluminum foil and place a cooling rack on top. This allows air to circulate around the wings for even cooking.

    11. Arrange the Wings:

    12. Take the chicken wings out of the marinade and place them in a single layer on the cooling rack. This helps to achieve a crispy texture.

    13. Bake the Wings:

    14. Bake the chicken wings in the preheated oven for 25-30 minutes. Halfway through cooking, flip them over and brush them with some of the leftover marinade for added flavor.

    15. Optional Broil for Finishing Touch:

    16. For extra crispiness, turn on the broiler for the last 5 minutes of cooking. Keep a close eye on them to avoid burning.

    17. Prepare Garnish:

    18. While the wings are baking, chop some fresh parsley or green onions for garnish.

    19. Serve the Wings:

      • Once they’re cooked and golden brown, remove the wings from the oven. Let them cool for a few minutes before garnishing with parsley or green onions. Serve with additional pineapple chunks for an extra tropical flair.

    This entire process is straightforward, making it perfect for both experienced cooks and novices alike. Feel free to modify this base recipe to create your own signature spin on the classic pineapple-teriyaki combination!

    Mastering Tasty Pineapple-Teriyaki Chicken Wings: Advanced Tips and Variations

    To truly master Tasty Pineapple-Teriyaki Chicken Wings, consider the following tips and variations that can elevate your dish even further:

    • Grilling Option:
    • If you have a grill, consider cooking these wings over medium heat for a smoky flavor. Brush them with the marinade while grilling for enhanced taste.

    • Slow Cooker Method:

    • For an easy, hands-off preparation, place the marinated wings in a slow cooker. Cook on low for 4-6 hours or on high for 2-3 hours. This method ensures the wings stay moist and tender.

    • Smoky Flavor:

    • For a deeper flavor, add a few drops of liquid smoke to your marinade. This creates a depth that complements the sweetness of pineapple beautifully.

    • Add Crunch:

    • For those who enjoy texture, toss roasted peanuts or sesame seeds on top before serving. They add a delightful crunch that pairs excellently with the tender wings.

    • Dippers and Sauces:

    • Serve with a side of dipping sauces like blue cheese or ranch dressing for a classic wing experience. Alternatively, a fruity salsa can complement the tropical elements of the dish!

    These advanced tips will not only enhance your Tasty Pineapple-Teriyaki Chicken Wings but also impress your guests, making your recipe a memorable one!

    How to Store Tasty Pineapple-Teriyaki Chicken Wings: Best Practices

    Proper storage of your Tasty Pineapple-Teriyaki Chicken Wings is essential for maintaining flavor and quality. Here’s how you can do it:

    • Refrigeration:
    • Allow the wings to cool completely before transferring them to an airtight container. They can be stored in the fridge for up to 3-4 days, making them great for meal prep or lunch leftovers.

    • Freezing:

    • If you want to keep them longer, freeze the wings in a single layer on a baking sheet first. Once they are frozen, transfer them to a freezer-safe bag or container. They can last up to 2-3 months in the freezer. When you’re ready to eat, simply thaw them in the fridge overnight before reheating.

    • Reheating:

    • To reheat, preheat your oven to 375°F (190°C) and place the wings on a baking sheet. Heat for about 10-15 minutes, or until warmed through and crispy again.

    By following these best practices, you’ll be able to enjoy your Tasty Pineapple-Teriyaki Chicken Wings for days to come without sacrificing their deliciousness.

    Nutritional Value of Tasty Pineapple-Teriyaki Chicken Wings

    Understanding the nutritional value of Tasty Pineapple-Teriyaki Chicken Wings empowers health-conscious diners to make informed choices. Here is the breakdown based on a serving of about four wings:

    • Calories: Approximately 250 calories
    • Protein: 20 grams
    • Fat: 14 grams (with the option to lower this by baking instead of frying)
    • Carbohydrates: 15 grams
    • Fiber: 0.5 grams
    • Sugars: 10 grams (due to the brown sugar or honey)
    • Sodium: 600 mg (can be reduced by using low-sodium soy sauce)

    These figures can vary based on the specific ingredients used, such as sugar type and portion sizes. By choosing low-sodium soy sauce and reducing sugar, you can create a healthier alternative while still enjoying the rich flavors of this chicken recipe.

    FAQs: Frequently Asked Questions About Tasty Pineapple-Teriyaki Chicken Wings

    1. Can I use frozen chicken wings for this recipe?

    Yes, you can use frozen wings. Just ensure they’re fully thawed before marinating. This ensures better absorption of flavors.

    2. What can I use if I don’t have pineapple juice?

    If you don’t have pineapple juice, orange juice or even apple juice can work as an alternative. Keep in mind that this will slightly change the flavor profile but can still be delicious.

    3. How can I make this recipe spicier?

    To add heat, incorporate more chili flakes, sriracha, or even jalapeño slices into the marinade.

    4. Are these chicken wings gluten-free?

    You can make these gluten-free by using tamari instead of traditional soy sauce. Always check labels to ensure that other ingredients are gluten-free as well.

    5. How long can I store the leftovers?

    Tasty Pineapple-Teriyaki Chicken Wings can be stored in the refrigerator for up to 4 days in an airtight container or frozen for up to 3 months.

    6. Is it possible to make this dish in advance for a gathering?

    Absolutely! You can marinate the chicken wings a day ahead and store them in the fridge. Cook them the day of the event for optimal freshness.

    With these FAQs, you should feel comfortable and prepared to create and enjoy Tasty Pineapple-Teriyaki Chicken Wings at any gathering or meal. Dive into this delicious chicken recipe, and watch your family and friends be amazed by the tropical delight you’ve crafted!

  • Cozy Creamy Keto Chicken Pot Pie Soup

    Cozy Creamy Keto Chicken Pot Pie Soup

    Cozy Creamy Keto Chicken Pot Pie Soup: A Tropical Delight

    Introduction to Cozy Creamy Keto Chicken Pot Pie Soup

    Welcome to a flavorful culinary adventure with this Cozy Creamy Keto Chicken Pot Pie Soup. If you’re seeking a warm and comforting dish that seamlessly fits into your health-conscious lifestyle, then this recipe is perfect for you. Not only does it combine the familiar flavors of traditional chicken pot pie in a healthy, creamy soup format, but it also caters to various dietary needs, making it ideal for busy parents, health enthusiasts, and food lovers alike.

    Imagine the rich and savory taste of tender chicken, vibrant vegetables, and a luscious creamy broth – all coming together in less than 30 minutes! As one of the most effortless soup recipes you can try, this dish makes cozy weeknight dinners a breeze. The ingredients are simple and uncomplicated, ensuring that even novice cooks can effortlessly whip up a delightful meal. Plus, it’s a great option for keto dieters or anyone wanting to reduce their carb intake.

    What’s more, this soup is packed with nutrients from fresh ingredients, making it a healthier alternative to the classic pot pie. You can feel good about serving it to your family while also experimenting with numerous variations to match personal preferences. With options for gluten-free, low-calorie, or even vegan diets, this recipe stands out as a versatile powerhouse in your kitchen.

    Don’t wait any longer; let’s dive into the world of Cozy Creamy Keto Chicken Pot Pie Soup and discover how effortless and delicious cooking can be!

    Benefits and Advantages of Cozy Creamy Keto Chicken Pot Pie Soup

    When it comes to soup recipes, few can compete with the multitude of benefits offered by this Cozy Creamy Keto Chicken Pot Pie Soup. Here are just a few reasons why you’ll love making this dish:

    1. Ease of Preparation: One of the biggest advantages of this recipe is how incredibly simple it is to prepare. With minimal time spent on prep and cooking, you can enjoy a hearty meal ready in under 30 minutes. This makes it an excellent option for busy nights when you don’t want to compromise on flavor or nutrition.

    2. Health Benefits: This soup boasts a range of health benefits. Loaded with protein from the chicken and packed with nutrients from the vegetables, it can help support your immune system and overall well-being. The creamy base, made with healthy fats, ensures that it is satisfying while adhering to keto-friendly guidelines.

    3. Flexible for Dietary Needs: The beauty of this soup lies in its adaptability. Whether you’re looking for options that are gluten-free, vegan, or low-calorie, this recipe can easily be modified to meet dietary requirements, ensuring everyone at your table can enjoy it.

    4. Flavorful Comfort: Who doesn’t love comfort food? This chicken pot pie soup captures all the rich, savory flavors typically found in classic pot pie, yet with a refreshing twist. Each spoonful is rich, creamy, and bursting with flavor, providing the ultimate cozy dining experience.

    5. Perfect for Meal Prep: If you’re someone who enjoys preparing meals for the week, this soup can be made in larger batches, stored easily, and reheated without losing its flavor or texture. The convenience of having a healthy meal on hand is a major plus for anyone with a busy lifestyle.

    These benefits make Cozy Creamy Keto Chicken Pot Pie Soup not just another soup recipe, but a tool for healthy living. With its blend of nutrition, convenience, and flavor, this dish deserves a spot in your regular meal rotation.

    Ingredients Overview

    Essential Ingredients for Cozy Creamy Keto Chicken Pot Pie Soup

    To prepare your Cozy Creamy Keto Chicken Pot Pie Soup, you will need the following essential ingredients:

    • 2 cups cooked chicken (shredded or diced): Adds protein and heartiness to the soup.
    • 1 tablespoon olive oil: Healthy fat for sautéing vegetables.
    • 1 small onion (diced): Offers flavor and depth.
    • 2 cloves garlic (minced): Enhances the overall taste with a fragrant aroma.
    • 1 medium carrot (diced): Adds a touch of sweetness and color; optional for the keto diet.
    • 1 cup celery (diced): Contributes crunch and flavor.
    • 2 cups cauliflower florets: Provides a low-carb base and thickens the soup.
    • 4 cups chicken broth: A flavorful foundation; ensure it’s low-sodium if desired.
    • 1 cup heavy cream: For creaminess without the carbs. Use coconut cream for a dairy-free option.
    • 1 teaspoon dried thyme: Introduces a subtle herb flavor.
    • Salt and black pepper to taste: Enhances all the flavors.
    • Parsley (for garnish, optional): Offers color and a fresh flavor.

    Make sure to read through this ingredient list and gather everything you’ll need. If you’re following a specific diet, I’ll cover substitutions in the next section.

    Dietary Substitutions to Customize Your Cozy Creamy Keto Chicken Pot Pie Soup

    You can easily adjust this recipe according to various dietary preferences. Here are some suggestions for substitutions:

    • For Vegan Option: Swap the chicken for chickpeas or tofu. Use vegetable broth instead of chicken broth and replace the heavy cream with coconut milk or cashew cream for a rich texture.

    • For Dairy-Free Option: Utilize coconut cream or almond milk instead of heavy cream, which will keep the soup creamy without dairy.

    • Low-Carb Alternative: If you’re looking for an even lower carbohydrate option, exclude the carrots and replace them with more celery or zucchini to add volume without the extra carbs.

    • Gluten-Free Alternative: Ensure that all packaged ingredients like broth or spices are labeled gluten-free.

    By incorporating these substitutions, you can create a personalized soup recipe that meets your dietary needs without sacrificing taste or texture!

    How to Prepare the Perfect Cozy Creamy Keto Chicken Pot Pie Soup: Step-by-Step Guide

    Let’s dive into how to prepare this delightful soup recipe! Follow these simple steps to bring your Cozy Creamy Keto Chicken Pot Pie Soup to life:

    1. Prepare the Base: In a large pot over medium heat, add the olive oil. Once heated, sauté the diced onion for about 2-3 minutes until it becomes translucent. Add the minced garlic and sauté for another minute until fragrant.

    2. Add Vegetables: Incorporate the diced carrots and celery into the pot. Cook for approximately 4-5 minutes, stirring occasionally until they soften slightly.

    3. Include Cauliflower: Add the cauliflower florets to the pot and stir everything together. Cook for another 5 minutes, allowing the cauliflower to soften.

    4. Pour in Broth: Gradually pour 4 cups of chicken broth into the pot, stirring well to combine all ingredients. Bring the mixture to a low simmer, allowing it to cook for about 10 minutes.

    5. Add Chicken: Once the vegetables are tender, introduce the cooked chicken into the mixture, stirring thoroughly. This ensures that the chicken heats up and absorbs some of the broth’s flavors.

    6. Stir in Cream: Reduce heat to low and pour in the heavy cream. Stir well to blend all components, creating a rich and creamy texture.

    7. Seasoning: Sprinkle in the dried thyme, salt, and pepper to taste. Adjust seasonings as necessary based on your preference.

    8. Final Simmer: Allow the soup to cook for an additional 5 minutes on low heat, letting all flavors meld together beautifully.

    9. Garnish and Serve: Once the soup is ready, ladle it into bowls and garnish with fresh parsley if desired. Serve warm and enjoy the comforting flavors of your Cozy Creamy Keto Chicken Pot Pie Soup!

    Make sure to adjust any steps as needed for specific dietary requirements – the beauty of this soup recipe is its versatility.

    Mastering Cozy Creamy Keto Chicken Pot Pie Soup: Advanced Tips and Variations

    To elevate your Cozy Creamy Keto Chicken Pot Pie Soup experience, here are some advanced tips and variations:

    1. Herbs and Spices: Consider adding other herbs like rosemary or bay leaves while simmering. Finish with a fresh squeeze of lemon for a hint of brightness.

    2. Extra Vegetables: Get creative with your vegetables! Add green beans, peas, or mushrooms for additional texture. Just be mindful of the carb content based on your dietary goals.

    3. Thickening the Soup: For a thicker consistency, you can gently blend a portion of the soup using an immersion blender. This will create a creamier base while leaving chunks of vegetables intact.

    4. Serving Options: This soup can be served on its own or accompanied by a low-carb bread or salad for a balanced meal.

    5. Storage Variations: If you love versatility, prepare double batches of this soup and freeze portions for later. It makes an ideal quick meal solution for busy days.

    By experimenting with these variations, you can create a new, exciting rendition of this cozy dish every time, ensuring that it never gets boring!

    How to Store Cozy Creamy Keto Chicken Pot Pie Soup: Best Practices

    Storing your Cozy Creamy Keto Chicken Pot Pie Soup properly ensures that it retains its delicious flavors and textures for future meals. Here are some best practices:

    1. Refrigeration: Allow the soup to cool to room temperature before transferring it to an airtight container. It can be stored in the refrigerator for up to 3-4 days.

    2. Freezing: For longer storage, soup recipes like this one freeze well. Transfer cooled portions into freezer-safe containers or bags, leaving some space at the top as the soup will expand when frozen. It can be kept in the freezer for up to 2-3 months.

    3. Reheating: When ready to enjoy, thaw your soup overnight in the refrigerator if frozen. Reheat gently on the stove over medium heat, stirring occasionally to prevent it from sticking. Adding a splash of broth can help restore creaminess if the soup has thickened during storage.

    With these storage methods, your Cozy Creamy Keto Chicken Pot Pie Soup will always be ready and waiting when you desire a comforting bowl of goodness!

    Nutritional Value of Cozy Creamy Keto Chicken Pot Pie Soup

    Understanding the nutritional value of your meals is important for maintaining a balanced diet. Here’s a breakdown of the estimated nutritional information for Cozy Creamy Keto Chicken Pot Pie Soup per serving:

    • Calories: 320
    • Protein: 30g
    • Fat: 20g
    • Carbohydrates: 8g (with low-carb adjustments)
    • Dietary Fiber: 2g
    • Net Carbs: 6g

    The high protein content makes this meal particularly satisfying, while the combination of healthy fats and low net carbs makes it suitable for a keto-friendly diet. Adjust the ingredients based on your specific dietary needs and enjoy a delicious meal that aligns with your health goals.

    FAQs: Frequently Asked Questions About Cozy Creamy Keto Chicken Pot Pie Soup

    1. Can I use rotisserie chicken for this recipe?

    Absolutely! Using rotisserie chicken can save time and adds great flavor to your soup.

    2. How do I make this soup dairy-free?

    To make it dairy-free, substitute heavy cream with coconut cream or almond milk, and ensure that chicken broth is also dairy-free.

    3. Can I make this soup vegetarian?

    Yes, to make it vegetarian, substitute chicken with chickpeas or tofu and use vegetable broth.

    4. How do I thicken the soup if it is too thin?

    You can thicken the soup by blending a portion of it to create a creamier texture or adding more vegetables like cauliflower.

    5. How long can I store the soup in the refrigerator?

    The soup can be stored in the refrigerator for up to 3-4 days.

    With this guidance, you can confidently navigate your cooking journey and adapt this soup recipe to suit your preferences. Enjoy the delicious comfort of Cozy Creamy Keto Chicken Pot Pie Soup!

  • The Best Korean BBQ Steak Bowls Recipe

    The Best Korean BBQ Steak Bowls Recipe

    The Best Korean BBQ Steak Bowls Recipe: A Tropical Delight

    Introduction to The Best Korean BBQ Steak Bowls Recipe

    When it comes to satisfying dinner recipes, few dishes can match the bold flavors and vibrant colors of Korean BBQ steak bowls. This recipe is not only a feast for the eyes but also a delightful journey for your taste buds, bringing together the rich umami of marinated steak, the crunchy freshness of veggies, and the nutty flavor of sesame. With its simplicity and health benefits, this dish is perfect for busy parents, health-conscious eaters, and culinary enthusiasts alike.

    The beauty of this Korean BBQ steak bowl is in its versatility. Easily customizable, it caters to various dietary needs, allowing for vegan, gluten-free, and low-carb options. Cooking at home can often seem daunting, but this recipe breaks down the process into easy-to-follow steps, making it accessible to both novice cooks and established chefs.

    Prepare to be wowed by the goodness packed into each bowl. Inspired by the vibrant flavors of traditional Korean cuisine, you can whip up a meal that is not only quick and convenient but also packed with nutrients and flavor. As you dive into this recipe, you’ll find yourself gravitating towards it time and again for both casual dinners and special occasions.

    Benefits and Advantages of The Best Korean BBQ Steak Bowls Recipe

    The allure of Korean BBQ steak bowls goes beyond their mouthwatering taste. Here are some standout benefits that make this dish an excellent choice for any mealtime:

    Ease of Preparation

    One of the major advantages of this recipe is its simplicity. The preparation requires minimal cooking techniques, which means that even beginner cooks can manage it confidently. It allows you to create a comforting, flavorful meal without spending hours in the kitchen. The marinade can be prepared in advance, and the cooking process is swift, letting you enjoy a homemade feast in less than 30 minutes.

    Health Benefits

    Korean BBQ steak bowls are not just delicious; they’re also healthy! Packed with protein from the beef, essential vitamins from the fresh vegetables, and healthy fats from the sesame oil, this dish provides a balanced diet. You control the ingredients, making it easy to omit anything that doesn’t fit your dietary restrictions. Additionally, it encourages the use of whole ingredients, moving away from processed foods.

    Customizable Options

    This recipe shines for its adaptability. You can tailor the ingredient list to match your taste preferences or dietary needs. Whether you’re looking for a gluten-free option, vegan alternatives, or simply aiming for a lower-calorie meal, this dish offers something for everyone. Customers can enjoy building their bowl with various toppings, creating a unique, personalized experience at each serving.

    Family-Friendly and Shareable

    Korean BBQ steak bowls can easily serve as a fantastic centerpiece for family dinner. Kids appreciate colorful and interactive meals, and these bowls offer just that—everyone gets to build their own unique creation. This can encourage better eating habits amongst children and promote family bonding during meals.

    The combination of ease, health benefits, versatility, and family-friendliness makes the Korean BBQ steak bowl not just another dish—it’s an enriching experience that will appeal to many different palates and preferences, making it a top contender in your collection of go-to dinner recipes.

    Ingredients Overview

    Essential Ingredients for The Best Korean BBQ Steak Bowls Recipe

    For the Marinade:
    Soy Sauce (½ cup): Opt for low-sodium if you’re watching your salt intake. This adds umami and flavor.
    Brown Sugar (2 tablespoons): Provides sweetness to balance the savory components.
    Sesame Oil (2 tablespoons): Adds a nutty flavor characteristic of Korean cuisine.
    Garlic (3 cloves, minced): A must for depth of flavor.
    Ginger (1-inch piece, grated): Imparts a zingy freshness.
    Black Pepper (1 teaspoon): Complementary spice to enhance flavors.

    For the Steak:
    Flank Steak (1 pound): Tender and perfect for marinating. Can be substituted with chicken breast or tofu for a vegetarian option.

    For the Bowl:
    Cooked Rice (2 cups): Traditional white rice or brown rice, quinoa, or cauliflower rice for a low-carb version.
    Cucumber (1, thinly sliced): Adds a refreshing crunch.
    Carrots (1, julienned): Sweet and colorful garnish.
    Red Cabbage (1 cup, finely shredded): Adds vibrant color and nutrients.
    Green Onions (2, chopped): For garnish and extra flavor.
    Sesame Seeds (1 tablespoon): To sprinkle on top for added texture.

    Dietary Substitutions to Customize Your The Best Korean BBQ Steak Bowls Recipe

    • Protein Alternatives: If you need a vegan option, swap the flank steak for tempeh or marinated tofu. If you’re avoiding gluten, utilize tamari in place of soy sauce.
    • Rice Alternatives: If you’re on a keto diet, consider cauliflower rice, zucchini noodles, or shirataki rice instead of traditional rice.
    • Veggie Variations: Incorporate other vegetables such as bell peppers, snow peas, or shredded spinach for extra nutrition and color.
    • Spice it Up: For those who enjoy heat, adding some gochujang (Korean chili paste) to the marinade can provide that extra kick.

    This ingredient overview is designed to ensure that everyone can enjoy a delightful bowl tailored to their dietary preferences!

    How to Prepare the Perfect The Best Korean BBQ Steak Bowls Recipe: Step-by-Step Guide

    1. Prepare the Marinade: In a bowl, combine soy sauce, brown sugar, sesame oil, minced garlic, grated ginger, and black pepper. Whisk until the sugar dissolves. This will infuse the steak with rich flavors.

    2. Marinate the Steak: Place your flank steak in a resealable bag or shallow dish and pour the marinade over. Ensure it’s well-coated. Marinate for at least 30 minutes or, for best results, refrigerate for up to 4 hours.

    3. Cook the Rice: While the steak marinates, cook your rice according to the package instructions. Allow it to cool slightly before serving.

    4. Prep the Veggies: During the cooking of the rice, thinly slice the cucumber, julienne the carrot, and shred the red cabbage. Chop the green onions for garnish. Organize them on a serving platter for an appealing presentation.

    5. Grill the Steak: Heat a grill or grill pan over medium-high heat. Remove the steak from the marinade and discard the excess marinade. Grill the steak for about 4–5 minutes per side for medium-rare, depending on thickness. Adjust cooking time for your preferred doneness.

    6. Slice the Steak: Once cooked, let the steak rest for about 5 minutes to retain juices. Then, slice it thinly against the grain to maximize tenderness.

    7. Assemble the Bowls: In each bowl, place a generous portion of rice as the base. Add sliced steak on top, followed by your prepared veggies—cucumbers, carrots, red cabbage.

    8. Final Touches: Drizzle with additional sesame oil if desired, sprinkle sesame seeds and chopped green onions on top for garnish.

    9. Serve Immediately: Enjoy your luscious Korean BBQ steak bowls hot!

    10. Customize: Encourage guests to customize their bowls with spicy sauce or additional toppings as desired.

    This step-by-step guide ensures that you can create a visually striking and delicious dish that embodies the essence of Korean cuisine! Perfectly suited for any occasion or family gathering, it pairs effortlessly with various sides, making it one of those go-to dinner recipes!

    Mastering The Best Korean BBQ Steak Bowls Recipe: Advanced Tips and Variations

    To take your Korean BBQ steak bowls from good to exceptional, consider these advanced tips and variations:

    Experiment with Marinades

    While the classic marinade is mouthwatering as is, you can explore flavors by adding ingredients such as apple cider vinegar for tanginess, or pineapple juice for sweetness and tenderness. Feel free to experiment with different herbs like cilantro for a refreshing kick.

    Try Different Cooking Methods

    If you’re without a grill, try pan-searing your steak in a cast-iron skillet for a gorgeous sear. Alternately, you could broil the steak in the oven for a flavorful crust. Each method introduces a different taste and texture to the dish.

    Play with Textures

    Adding nuts like crushed peanuts or almonds can add a delightful crunch to your bowls. Incorporating crispy shallots or fried garlic will enhance the textural contrast, making each bite delightful.

    Vegetable Medley

    Rotating seasonal vegetables not only keeps the recipe fresh but also ensures you’re getting a variety of nutrients. Think about roasting or stir-frying the vegetables lightly with a splash of soy sauce before adding them to the bowl.

    Sauce Savvy

    Different sauces can help elevate your bowls. Drizzle with a spicy gochujang sauce for a fusion twist or a tangy yogurt-based sauce to balance the flavors.

    Build a Feast

    Consider preparing a Korean-themed dinner spread with complementary side dishes such as kimchi, pickled vegetables, or steamed dumplings. This enhances the culinary experience and brings a touch of traditional Korean dining to your table.

    With these tips and variations, you’ll not only master the Korean BBQ steak bowl but also adapt it to suit any occasion and crowd, solidifying its status as a go-to dinner recipe.

    How to Store The Best Korean BBQ Steak Bowls Recipe: Best Practices

    Refrigeration

    To store your leftover Korean BBQ steak bowls, place the components (rice, steak, and veggies) in separate airtight containers. This methodology helps retain freshness. Refrigerated leftovers can last for 3 to 4 days.

    Freezing

    If you want to store your dish for an extended time, consider freezing the marinated steak before cooking. Wrap the steak tightly in plastic wrap followed by aluminum foil and freeze for up to 2 months. Cooked components do not freeze as well and are best consumed fresh.

    Reheating

    To reheat, use the microwave for convenience, heating separate components to avoid overcooking. Alternatively, you could rewarm the steak in a skillet over medium heat. Add a sprinkle of water and cover to steam and retain moisture.

    Whenever possible, assemble your new bowls fresh before serving, as this will preserve the delightful crunch of your vegetables.

    Utilizing these storage tips ensures that your Korean BBQ steak bowls stay just as delicious even days after preparation, maintaining their position among your favorite quick dinner recipes!

    Nutritional Value of The Best Korean BBQ Steak Bowls Recipe

    To make informed choices, understanding the nutritional value of your meals is crucial. Here’s a breakdown of the nutrition facts per serving (based on the recipe serving four):

    • Calories: 550
    • Protein: 28g
    • Fat: 18g
    • Carbohydrates: 65g
    • Fiber: 5g
    • Sugars: 8g
    • Sodium: 680mg (if using low-sodium soy sauce, adjust accordingly)

    Health Benefits Review

    This recipe offers a well-rounded meal rich in protein, vitamins, and minerals. The lean beef provides essential amino acids that promote muscle health, while the fresh vegetables contribute fiber, aiding digestion. Using brown rice as a base adds complexity with whole grains for sustained energy.

    Incorporating this dish into your weekly dinner repertoire delivers not only a feast for the senses but also nutritious ingredients—a balance many look for in modern dinner recipes.

    FAQs: Frequently Asked Questions About The Best Korean BBQ Steak Bowls Recipe

    Can I prepare the marinade in advance?

    Absolutely! You can prepare the marinade a day ahead, allowing the flavors to meld beautifully. Just store it in an airtight container in the refrigerator.

    What can I substitute for flank steak?

    If you’re looking for alternatives, sirloin, skirt steak, or even chicken breast are excellent choices. For a vegetarian option, marinated tofu or tempeh will provide that satisfying texture.

    Can I make this dish gluten-free?

    Yes! Simply use tamari in place of regular soy sauce, and ensure that your rice and other ingredients are certified gluten-free.

    Are there low-carb options available for this recipe?

    Certainly! You can replace traditional rice with cauliflower rice or zoodles (zucchini noodles) to keep it low-carb.

    How spicy is this recipe?

    This recipe allows for customization, so you can always adjust the spice level by adding gochujang to the marinade or swapping out for milder vegetables.

    How long can I store leftovers?

    Leftovers can be refrigerated for up to 3-4 days. It’s best to store components separately to maintain the freshness of each ingredient.

    This FAQ section should help address common concerns, making your cooking experience smoother and more enjoyable. Providing this information helps demystify the recipe, empowering even novice cooks to enjoy delightfully interactive dinner recipes that tantalize with Korean flavors.

    By following this guide, you can confidently prepare The Best Korean BBQ Steak Bowls for yourself, your family, and friends, exploring the rich tapestry of flavors that Korean cuisine offers, all while enjoying delicious and satisfying meal options. Enjoy your flavorful journey!

  • Easy Lobster Sauce Recipe

    Easy Lobster Sauce Recipe

    Easy Lobster Sauce Recipe: A Tropical Delight

    Introduction to Easy Lobster Sauce Recipe

    If you’re searching for easy dinner recipes that impress without overwhelming you in the kitchen, then look no further than this Easy Lobster Sauce Recipe. This delectable sauce takes the marine bounty of lobster and transforms it into a rich, creamy, and luxurious addition to your meals. Not only is it incredibly simple to make, but it also offers numerous health benefits—a true standout in the realm of seafood.

    The beauty of this lobster sauce lies in its simplicity. With just a few quality ingredients, you can create a dish that feels elevated and gourmet yet fits seamlessly into a busy weekday dinner or a romantic date night. Ideal for home cooks and busy parents alike, this sauce pairs beautifully with pasta, rice, or even as a topping for seafood dishes.

    Moreover, it caters to various dietary needs. With gluten-free and reduced-calorie options available, this dish invites everyone to indulge guilt-free. Imagine sitting down to a lovely plate of spaghetti topped with this buttery lobster sauce, savoring its rich flavors without any dietary restrictions holding you back.

    In the following sections, we’ll explore the well-rounded benefits of this recipe, detail the essential ingredients, and guide you through the preparation process so you can confidently whip up this tropical delight in your own kitchen.

    Benefits and Advantages of Easy Lobster Sauce Recipe

    When seeking easy dinner recipes, it’s crucial to consider not just the taste but also the preparation and health benefits. This Easy Lobster Sauce Recipe brings a plethora of advantages to the table.

    1. Simplicity in Preparation

    One of the standout attributes of this recipe is its ease of preparation. Unlike traditional complex sauces that require hours of simmering, our lobster sauce can be whipped up in under 30 minutes. The uncomplicated step-by-step approach means you don’t have to be a culinary expert to get it right, making it a perfect choice for novice cooks and experienced chefs alike.

    2. Health Benefits

    Lobster is not only delicious but also packed with nutrients. Rich in protein, low in calories, and loaded with essential vitamins and minerals, it supports a healthy lifestyle. This easy lobster sauce recipe utilizes cream, which can be substituted with lower-calorie alternatives or plant-based options for those watching their diet. The incorporation of fresh herbs and spices provides additional health benefits without overwhelming the palate.

    3. Versatility

    This recipe isn’t just confined to one cuisine; its versatile nature allows it to elevate a variety of dishes. Whether you pair it with pasta, drizzle it over grilled chicken, or use it as a base for seafood dishes, your options are limitless. It could easily fit into various culinary themes—from casual weeknight dinners to elegant weekend gatherings—making it a valuable addition to your recipe repertoire.

    4. Dietary Adaptations

    For health-conscious individuals, this sauce can be tailored to fit diverse dietary needs. It can easily be turned vegan by using plant-based cream substitutes, and gluten-free by selecting appropriate pasta or thickening agents. This flexibility ensures that it can be enjoyed by everyone, regardless of dietary restrictions.

    To sum it up, this Easy Lobster Sauce is not merely a recipe—it’s a holistic dish that combines simplicity, health benefits, and adaptability. It brings a sense of luxury to everyone’s table while remaining grounded in easy dinner recipes that don’t compromise on flavor or convenience.

    Ingredients Overview

    Essential Ingredients for Easy Lobster Sauce Recipe

    Creating the perfect Easy Lobster Sauce requires some carefully selected ingredients:

    • 2 cups cooked lobster meat: Fresh or leftover lobster can be used. It provides the rich flavor that characterizes the sauce.

    • 1 cup heavy cream (or coconut cream for a dairy-free option): This ingredient lends a luxurious texture and richness to the sauce.

    • 2 tablespoons unsalted butter: Adds creaminess and enhances flavor. For a vegan option, you can use olive oil or vegan butter.

    • 2 cloves garlic, minced: Infuses the sauce with aromatic essence.

    • 1/4 cup finely chopped shallots: Provides a slight sweetness that balances the seafood.

    • 1/4 cup white wine (optional): Enhances the depth of flavor, but can be substituted with vegetable broth for a non-alcoholic version.

    • Salt and black pepper to taste: Essential for enhancing flavors.

    • Fresh parsley or chives for garnish: Offers color and freshness.

    These ingredients encapsulate the essence of our Easy Lobster Sauce. They can be easily swapped or modified based on availability or personal preference.

    Dietary Substitutions to Customize Your Easy Lobster Sauce Recipe

    • Vegan Option: Substitute heavy cream with coconut milk and the unsalted butter with olive oil or vegan butter. The flavor will remain rich, while catering to vegan diets.

    • Gluten-Free Option: Ensure that the pasta used (if any) and any thickening agents (if needed) are certified gluten-free.

    • Low-Calorie Version: Use light cream or milk instead of heavy cream for a lower-fat option. Alternatively, a blend of vegetable broth and a small amount of cornstarch can offer a lighter sauce without sacrificing flavor.

    These substitutions allow this recipe to cater to a wider audience, demonstrating that easy dinner recipes can be adaptable and accommodating.

    How to Prepare the Perfect Easy Lobster Sauce Recipe: Step-by-Step Guide

    Creating this Easy Lobster Sauce is a breeze, thanks to its straightforward preparation. Follow these simple steps to achieve a restaurant-quality sauce at home:

    1. Prepare the Base: Start by melting the butter in a medium saucepan over medium heat. Ensure your pan is hot enough to heat the butter without burning it.

    2. Sauté the Aromatics: Once the butter melts, add the minced garlic and chopped shallots. Sauté for about 2-3 minutes until they are fragrant and translucent. This step enhances the base flavor of your sauce.

    3. Add White Wine: If using white wine, pour it into the pan now. Scrape any browned bits off the bottom—this is where the concentrated flavor lies. Allow the wine to reduce by half, which will take about 3-4 minutes.

    4. Incorporate Cream: Lower the heat and slowly stir in the heavy cream (or coconut cream for a vegan option). Allow the mixture to simmer for about 5 minutes, stirring continuously to prevent it from thickening too much.

    5. Add Lobster and Season: Gently fold the cooked lobster meat into the cream mixture and season with salt and black pepper. Allow it to heat through for another 3-4 minutes.

    6. Thicken the Sauce (Optional): If desired, you could thicken the sauce further by mixing 1 tablespoon of cornstarch with 2 tablespoons of water and adding it to the sauce. Stir until thickened.

    7. Garnish and Serve: Once heated through, taste and adjust seasoning if necessary. Serve over your choice of pasta, rice, or grilled meat, and garnish with fresh parsley or chives for a pop of color.

    8. Pairing Options: This sauce goes exceptionally well with fettuccine or linguine, but any pasta of your choice will suffice. For a lighter option, serve over steamed vegetables or in a seafood stew.

    This step-by-step guide ensures that your Easy Lobster Sauce comes out perfect every time. The adaptability of this recipe highlights its appeal as one of your go-to easy dinner recipes.

    Mastering Easy Lobster Sauce Recipe: Advanced Tips and Variations

    To elevate your Easy Lobster Sauce further, consider these advanced tips and variations:

    • Add a Kick of Spice: For those who enjoy a bit of heat, consider adding a pinch of red pepper flakes or a splash of hot sauce while sautéing the garlic to give the sauce a fiery twist.

    • Experiment with Cheeses: A sprinkle of grated Parmesan or Pecorino Romano cheese can add an extra layer of flavor. Just be cautious of cheese’s salt content when seasoning.

    • Use Different Shellfish: If you can’t find lobster or prefer a different flavor profile, shrimp or scallops can create equally delightful variations. Simply substitute the lobster with an equal amount of your chosen shellfish.

    • Herbal Infusion: Fresh basil or tarragon can add a unique twist to the classic recipe. Simply chop and add them in at the end of the cooking process for a burst of flavor.

    • Serving Suggestions: Serve your sauce over a bed of zucchini noodles for a low-carb option or accompany it with crusty bread to soak up the wonderful flavors.

    These tips and tweaks can transform this Easy Lobster Sauce into a signature dish that never feels stale or repetitive.

    How to Store Easy Lobster Sauce Recipe: Best Practices

    Storing your Easy Lobster Sauce properly is essential for maintaining its delicious flavor and texture. Here are the best practices for refrigeration and freezing:

    • Refrigeration: Allow the sauce to cool completely before transferring it to an airtight container. It can be kept in the refrigerator for up to 3 days. Make sure to reheat it gently on the stove, adding a splash of cream to bring it back to life.

    • Freezing: If you want to extend the shelf life, consider freezing the sauce. Divide it into portions in freezer-safe containers and label them with the date. It can stay fresh for up to 3 months. To thaw, simply move the container to the refrigerator overnight or reheat directly from frozen on low heat.

    Using these storage tips will ensure that your Easy Lobster Sauce remains an easy dinner recipe that’s ready to please whenever cravings strike.

    Nutritional Value of Easy Lobster Sauce Recipe

    Understanding the nutritional content of your Easy Lobster Sauce can help you make informed choices, especially if you’re watching your diet. Here’s a general overview based on a serving size of approximately 1/4 cup of the sauce:

    • Calories: Approximately 210
    • Total Fat: 14g (Saturated Fat: 8g)
    • Cholesterol: 50mg
    • Sodium: 280mg
    • Total Carbohydrates: 4g
    • Dietary Fiber: 0g
    • Sugars: 0g
    • Protein: 17g

    This sauce delivers a healthy dose of protein thanks to the lobster, alongside beneficial fats from cream and butter. Adjusting the recipe by opting for low-fat ingredients can further reduce the calorie count, making it an adaptable choice for health-conscious individuals.

    Including easy dinner recipes in your meal rotation doesn’t have to mean sacrificing nutrition. With this lobster sauce, deliciousness is guaranteed.

    FAQs: Frequently Asked Questions About Easy Lobster Sauce Recipe

    1. Can I use frozen lobster for this sauce?

    Absolutely! If fresh lobster is unavailable, frozen lobster can work well. Thaw it completely in the refrigerator before cooking.

    2. How can I make this sauce spicier?

    To add heat, you can include red pepper flakes or diced jalapeños while sautéing the garlic. Adjust to your desired heat level.

    3. What should I serve with lobster sauce?

    This sauce pairs excellently with pasta, rice, grilled chicken, or even as part of a seafood stew. The options are versatile.

    4. Can I substitute the cream for a non-dairy option?

    Yes, coconut cream or cashew cream are excellent substitutes for a vegan or dairy-free adaptation.

    5. How do I store leftovers?

    Refrigerate in an airtight container for up to 3 days or freeze for longer storage. Reheat gently on the stove, adding a splash of cream to restore consistency.

    6. Is it possible to make this recipe ahead of time?

    Yes, you can prepare the sauce a day in advance. Store it in the refrigerator and reheat before serving.

    In summary, the Easy Lobster Sauce Recipe is a culinary delight that promises to elevate your dining experience. With its health-conscious alternatives, simplicity, and versatility, it’s one of those easy dinner recipes that will quickly become a staple in your kitchen. Enjoy the tropical richness and creamy flavor this sauce brings, and don’t hesitate to get creative with variations to suit your tastes!

  • Cozy 20-Minute Marry Me Chickpeas

    Cozy 20-Minute Marry Me Chickpeas

    Cozy 20-Minute Marry Me Chickpeas: A Tropical Delight

    Introduction to Cozy 20-Minute Marry Me Chickpeas

    Looking for easy dinner recipes that not only delight your palate but also offer a myriad of health benefits? Look no further! Cozy 20-Minute Marry Me Chickpeas is the perfect dish to whip up on a busy weeknight. This wholesome meal is packed with protein, fiber, and vibrant flavors, appealing to everyone from busy parents to students seeking quick and satisfying meals.

    Imagine a dish that caters to diverse dietary preferences. Whether you’re vegan, gluten-free, or simply looking to enjoy a healthy meal, this recipe has you covered. In just 20 minutes, you can create a delicious stew of chickpeas, tomatoes, and spices that will warm your heart and soul. Not only is it quick and easy to prepare, but it’s also an excellent choice for those on a budget or anyone who wants to eat well without spending hours in the kitchen.

    This Marry Me Chickpeas recipe stands out because it’s not only meal-friendly but also love-friendly—it’s rumored that anyone who tries it might just fall in love with the dish! With enticing flavors and colors, this dish brightens up any dinner table and surely impresses friends and family alike.

    Benefits and Advantages of Cozy 20-Minute Marry Me Chickpeas

    Cozy 20-Minute Marry Me Chickpeas brings a plethora of benefits to the table, making it a quintessential choice for those searching for easy dinner recipes. Here’s why this delightful chickpea dish excels:

    1. Simplicity: In today’s fast-paced world, quick and straightforward cooking is essential. This recipe contains fewer ingredients and requires minimal prep time, making it ideal for those who are busy yet wish to eat healthily.

    2. Nutritional Powerhouse: Chickpeas are rich in protein and fiber, contributing to satiety and energy levels. This dish helps keep you feeling full longer, making it a great option for weight watchers or health-conscious individuals.

    3. Customizable Ingredients: The recipe’s ingredients can easily be adjusted based on personal preferences or dietary restrictions. Whether you’re vegan, vegetarian, or just looking to reduce meat intake, the versatility of this dish sets it apart.

    4. Health Benefits: Incorporating legumes like chickpeas supports digestion and helps stabilize blood sugar levels. Additionally, they contain essential vitamins and minerals such as iron, magnesium, and potassium, which are crucial for overall health.

    5. Family-Friendly: With its delightful combination of flavors, this recipe appeals to kids and adults alike. It’s a great way to introduce more plant-based meals into your family’s diet while ensuring they enjoy it at the same time.

    6. Budget-Friendly: Chickpeas are economical and can stretch further when combined with other pantry staples. This makes Cozy 20-Minute Marry Me Chickpeas a perfect option for students or anyone looking to save on their grocery bills.

    In summary, whether you’re exploring meal prepping or simply need new easy dinner recipes that the entire family can enjoy, Cozy 20-Minute Marry Me Chickpeas ticks all the boxes. With its easy preparation and numerous health benefits, you’ll want to make this dish a staple in your kitchen.

    Ingredients Overview

    Essential Ingredients for Cozy 20-Minute Marry Me Chickpeas

    To make Cozy 20-Minute Marry Me Chickpeas, gather the following ingredients:

    • 1 can (15 oz.) chickpeas, drained and rinsed
    • Purpose: Provides a high-protein base and adds fiber to the dish.

    • 1 can (14 oz.) diced tomatoes (preferably organic)

    • Purpose: Adds flavor and moisture, while offering vitamins C and A.

    • 2 tablespoons olive oil

    • Purpose: Healthy fat that enhances flavor and supports heart health. For a lower-calorie option, use less oil.

    • 1 small onion, diced

    • Purpose: Adds sweetness and depth to the dish.

    • 3 cloves garlic, minced

    • Purpose: Infuses the dish with rich flavor while providing numerous health benefits.

    • 1 teaspoon ground cumin

    • Purpose: Offers a warm aroma and helps with digestion.

    • 1 teaspoon smoked paprika

    • Purpose: Imparts a lovely smokiness and enhances the overall taste.

    • Salt and pepper, to taste

    • Purpose: Essential for balancing flavors.

    • Fresh cilantro or parsley, for garnish (optional)

    • Purpose: Adds freshness and enhances presentation.

    This ingredients list contains vegan, gluten-free, and low-calorie options, making it ideal for diverse dietary needs. Feel free to swap out any ingredients based on availability or preference, ensuring this dish fits perfectly into your lifestyle.

    Dietary Substitutions to Customize Your Cozy 20-Minute Marry Me Chickpeas

    Customization is key when striving for easy dinner recipes that cater to everyone. Here are potential substitutions to create the perfect Cozy 20-Minute Marry Me Chickpeas:

    • To make it a heartier meal: Add cooked quinoa or brown rice to enhance the protein and provide additional textures.

    • For extra greens: Incorporate spinach or kale during the cooking process for added nutrients.

    • If avoiding tomatoes: Substitute with coconut milk for a creamy alternative while still preserving moisture.

    • If you like heat: Add diced jalapeños or a pinch of red pepper flakes for a spicy kick.

    • Herbal alternatives: If you don’t have cilantro or parsley, use fresh basil or mint for a different but refreshing flavor profile.

    By allowing yourself to experiment with these substitutions, you open the door to an array of delicious variations while making sure everyone at the table finds something they love.

    How to Prepare the Perfect Cozy 20-Minute Marry Me Chickpeas: Step-by-Step Guide

    Preparing Cozy 20-Minute Marry Me Chickpeas is incredibly simple, making it a prime choice for busy weeknights. Follow the steps below for a perfect dish:

    1. Prepare the Base: In a large skillet, heat the olive oil over medium heat. Add the diced onion and sauté for about 3-4 minutes until translucent.

    2. Mix in Garlic: Once the onion is softened, add the minced garlic and sauté for an additional minute until fragrant. This step intensifies the dish’s flavor profile.

    3. Cook the Tomatoes: Pour in the canned diced tomatoes with their juices. Stir to combine and allow the mixture to simmer for about 2-3 minutes, letting the flavors meld together.

    4. Add Chickpeas: Stir in the drained chickpeas, mixing well until they are fully incorporated with the tomato mixture. Allow them to cook for an additional 3-4 minutes, heating through.

    5. Season Generously: Add ground cumin, smoked paprika, salt, and pepper to taste. Mix well, ensuring that spices coat the chickpeas and tomatoes evenly.

    6. Let It Simmer: Reduce the heat to low and let the mixture simmer for another 2-3 minutes. This allows the flavors to deepen and enhances the overall taste of the dish.

    7. Garnish and Serve: Once cooked, remove the skillet from heat. Garnish with chopped cilantro or parsley before serving for an extra touch of freshness.

    8. Pair with Your Favorite Side: Serve the chickpeas with crusty bread, over rice, or with a green salad for a complete meal.

    And there you have it! A simple yet delectable way to create a cozy evening meal. Feel free to adapt any step to suit your taste or dietary needs.

    Mastering Cozy 20-Minute Marry Me Chickpeas: Advanced Tips and Variations

    While the base recipe for Cozy 20-Minute Marry Me Chickpeas is absolutely divine on its own, mastering this dish can open up a world of culinary opportunities. Here are some advanced tips and variations to elevate your cozy dinner experience:

    • Experiment with Spices: Don’t hesitate to explore different spice combinations like curry powder or Moroccan spices for a unique twist. Adjust the quantities according to your heat preference.

    • Incorporate Seasonal Vegetables: Add seasonal veggies such as bell peppers or zucchini to bulk up the dish and add diversity to the flavors and textures.

    • Protein Boost: For those who consume meat, consider adding grilled chicken or shrimp towards the end of cooking for a non-vegan version that offers more protein.

    • Creamy Twist: To make the dish creamier, stir in a dollop of coconut yogurt or a splash of coconut cream just before serving.

    • Meal Prep for Busy Nights: Double the recipe and store leftovers in an airtight container for quick meals on the go. The dish holds up well in the refrigerator for 3-4 days.

    • Make It a One-Pot Meal: Cook everything in a Dutch oven or heavy bottom pot for an even simpler cleanup process, making it even more suitable for busy weeknights.

    With these advanced tips and variations, you can keep this recipe fresh and exciting, ensuring it remains a staple in your quick dinner rotation.

    How to Store Cozy 20-Minute Marry Me Chickpeas: Best Practices

    Storing Cozy 20-Minute Marry Me Chickpeas properly ensures you get the most out of your meal without waste. Here are some best practices for refrigeration, freezing, and reheating:

    • Refrigeration: Allow the chickpeas to cool completely before placing them in an airtight container. Store in the refrigerator for up to 3-4 days. This makes it an excellent choice for easy meal prep.

    • Freezing: If you want to store them for longer, transfer the cooled chickpeas into freezer-safe bags or containers. They can be frozen for up to 3 months. Be sure to label the bags with the date to keep track.

    • Reheating: When ready to enjoy leftovers, reheat on the stovetop over medium heat. Add a few tablespoons of water or broth to rehydrate the dish as it heats. Alternatively, you can use the microwave, heating in short intervals to ensure even warming.

    By following these storage tips, you can enjoy your Cozy 20-Minute Marry Me Chickpeas multiple times with the flavors intact.

    Nutritional Value of Cozy 20-Minute Marry Me Chickpeas

    Understanding the nutritional value of Cozy 20-Minute Marry Me Chickpeas adds to its allure as a healthy meal choice. Here’s a breakdown of the nutrition information per serving (approximately 1 cup):

    • Calories: 280
    • Total Fat: 10g
    • Saturated Fat: 1.5g
    • Cholesterol: 0mg
    • Sodium: 350mg
    • Carbohydrates: 36g
    • Dietary Fiber: 9g
    • Sugars: 5g
    • Protein: 12g
    • Vitamin A: 8% of the Daily Value (DV)
    • Vitamin C: 15% of the DV
    • Calcium: 6% of the DV
    • Iron: 18% of the DV

    This recipe not only fits well into plant-based diets but also offers a hearty serving of vital nutrients. These numbers can vary based on extra added ingredients but give a general idea of how nutritious this delightful dish is. Making Cozy 20-Minute Marry Me Chickpeas a regular in your weekly meal rotation can contribute to a balanced, healthy diet while indulging in delicious flavors.

    FAQs: Frequently Asked Questions About Cozy 20-Minute Marry Me Chickpeas

    1. Can I use dried chickpeas instead of canned ones?

    Yes, you can use dried chickpeas, but you must soak and cook them beforehand. This will take more time than the original recipe, so ensure you plan ahead.

    2. What can I serve with Marry Me Chickpeas?

    Serve Cozy 20-Minute Marry Me Chickpeas with rice, quinoa, pita bread, or a fresh salad to create a well-rounded meal.

    3. Is it suitable for meal prep?

    Absolutely! This dish reheats beautifully, making it an excellent choice for meal prepping for your busy week.

    4. Can I make it spicy?

    Certainly! Adjust the spice level by adding jalapeños or red pepper flakes during cooking to cater to your heat preference.

    5. How long can I store leftovers?

    Store leftovers in an airtight container in the refrigerator for up to 3-4 days or freezing for up to 3 months for best flavor preservation.

    With these answers to common queries, you are well-equipped to tackle the Cozy 20-Minute Marry Me Chickpeas recipe and enjoy a delightful, fuss-free dinner experience. Dive into this recipe today, and you’ll see why it’s become a favorite for so many home cooks!


    In conclusion, Cozy 20-Minute Marry Me Chickpeas is not just a meal; it’s a culinary embrace that invites everyone to the table. Simplistic ingredients, health benefits, and an easy-to-follow recipe make it the quintessential option for anyone searching for easy dinner recipes. Whether you’re a culinary novice or seasoned chef, this dish is sure to captivate you and your loved ones!

  • Tasty Honey-Lime Garlic Butter Salmon

    Tasty Honey-Lime Garlic Butter Salmon

    Tasty Honey-Lime Garlic Butter Salmon: A Tropical Delight

    Introduction to Tasty Honey-Lime Garlic Butter Salmon

    If you’re on the hunt for an exceptional dish that marries the sweet and tangy flavors of honey and lime with the rich, buttery essence of salmon, look no further than Tasty Honey-Lime Garlic Butter Salmon. This dish epitomizes the term “salmon recipes,” bringing a tropical flair to your dinner table while being simple enough for any home cook to whip up in no time.

    Salmon is renowned for its health benefits, packed with omega-3 fatty acids, high-quality proteins, and essential vitamins and minerals. This meal not only pleases the palate but also nourishes the body, making it perfect for busy parents looking to prepare healthy meals, students who want delicious, easy options, or anyone health-conscious who still wants to savor food. Plus, the ingredients are versatile enough to fit into various dietary needs including gluten-free, low-carb, and even vegan adaptations.

    With this recipe, you’ll discover how easy it is to create a gourmet experience right in your own kitchen. Whether you’re a newlywed trying to impress your partner, a working professional in need of quick yet impressive meals, or a baking enthusiast eager to explore new flavors, this salmon dish promises to deliver satisfaction and delight. Let’s dive into the specifics of making this delicious culinary creation!


    Benefits and Advantages of Tasty Honey-Lime Garlic Butter Salmon

    The Tasty Honey-Lime Garlic Butter Salmon recipe stands out among numerous salmon recipes for several important reasons. First and foremost, its preparation is exceptionally straightforward. With only a handful of ingredients and a cooking time of roughly 30 minutes, busy cooks can easily fit this dish into their evening routines without compromising flavor or nutrition. This simplicity makes it ideal for families striving to maintain healthy eating habits amidst a hectic lifestyle.

    Moreover, the health benefits that salmon offers are myriad. This fish is not only rich in omega-3 fatty acids, which support heart health and brain function, but it also provides an excellent source of high-quality protein. In addition to calcium and vitamin D, salmon contributes important nutrients necessary for maintaining strong bones and optimal immune function. The incorporation of honey and lime not only enhances the flavor profile but also adds a host of antioxidants and vitamins, making the dish even healthier.

    Another noteworthy advantage of this recipe is its adaptability. Whether you’re adhering to a gluten-free diet or are looking for ways to reduce caloric intake, the Tasty Honey-Lime Garlic Butter Salmon can be modified to meet various dietary requirements. For those following a vegan diet, alternatives to the butter and fish can be effortlessly paired with the same created sauce for a delectable vegetable dish.

    Lastly, the combination of savory, sweet, and tangy flavors makes this dish an extraordinary option for diverse palates. It’s perfect for entertaining guests or simply enjoying as a weekday family dinner. With its crowd-pleasing ingredients, this dish is a versatile favorite that you can confidently present at any gathering—or savor all to yourself!


    Ingredients Overview

    Essential Ingredients for Tasty Honey-Lime Garlic Butter Salmon

    Here’s what you’ll need for this delightful dish:

    • Salmon Fillets (4 pieces – around 6 ounces each): Opt for fresh or wild-caught salmon to attain the best flavor and health benefits.
    • Honey (1/4 cup): This natural sweetener adds a delicious caramelization when cooked while contributing antioxidants.
    • Lime Juice (from 2 limes): Provides a refreshing citrusy tang that balances the richness of the salmon and butter.
    • Garlic (4 cloves, minced): The aromatic quality of garlic adds depth to the dish.
    • Unsalted Butter (5 tablespoons): Use this for its rich flavor; opt for vegan butter to make it vegan-friendly.
    • Fresh Cilantro (for garnish): Enhances visual appeal while contributing a fresh flavor that pairs wonderfully with our sauce.
    • Salt and Pepper (to taste): Essential for seasoning.

    Vegan Option: Substitute the salmon with tofu or chickpeas, and use vegan butter instead of regular butter.

    Dietary Substitutions to Customize Your Tasty Honey-Lime Garlic Butter Salmon

    This recipe allows for several substitutions to cater to various dietary needs:

    • Low-Calorie Alternatives: Use a light butter or a plant-based oil to cut down on fat and calories.
    • Gluten-Free Option: Ensure your butter is gluten-free; all other ingredients should already be suitable for gluten-sensitive diets.
    • Dairy-Free Alternative: Consider using coconut oil or a dairy-free spread in lieu of butter for those sensitive to dairy.
    • Spicy Kick: Add a pinch of red pepper flakes or a dash of sriracha for heat if you’re looking for extra flavor.

    With these substitutions in mind, Tasty Honey-Lime Garlic Butter Salmon can be enjoyed by everyone, regardless of their dietary preferences!


    How to Prepare the Perfect Tasty Honey-Lime Garlic Butter Salmon: Step-by-Step Guide

    Follow these easy steps to prepare Tasty Honey-Lime Garlic Butter Salmon that your friends and family will rave about.

    1. Preheat the Oven: Start by preheating your oven to 350°F (175°C). This ensures the salmon cooks evenly and achieves that wonderful, flaky texture.

    2. Prepare the Baking Dish: Lightly grease a baking dish with cooking spray or a tablespoon of oil to prevent sticking.

    3. Mix Garlic Butter Sauce: In a medium bowl, combine the softened unsalted butter, minced garlic, honey, freshly squeezed lime juice, and a pinch of salt. Whisk until well blended, creating a luscious glaze.

    4. Season the Salmon: Place the salmon fillets in the prepared baking dish. Season the fillets with salt and pepper to taste.

    5. Pour the Sauce: Drizzle half of the honey-lime garlic butter sauce over the salmon fillets. Reserve the other half for later use.

    6. Bake the Salmon: Transfer the baking dish to the preheated oven. Bake for 15-20 minutes, or until the salmon easily flakes with a fork. Adjust baking time according to fillet thickness.

    7. Broil for Extra Flavor (Optional): If you desire a caramelized crust, switch the oven to broil mode for the last 2-3 minutes. Keep a close eye on it to prevent burning!

    8. Garnish and Serve: Remove the baking dish from the oven. Drizzle the remaining garlic butter sauce over the salmon and sprinkle with fresh cilantro for an aromatic finish.

    9. Plate and Enjoy: Serve the Tasty Honey-Lime Garlic Butter Salmon with a side of roasted vegetables, rice, or a fresh salad. Indulge in the tropical flavors!

    For those interested in variations, consider cooking the salmon on the grill or in a skillet. The keyphrase “salmon recipes” comes into play here as you explore contemporary cooking methods that bring new textures and flavors.


    Mastering Tasty Honey-Lime Garlic Butter Salmon: Advanced Tips and Variations

    To elevate your culinary experience with Tasty Honey-Lime Garlic Butter Salmon, keep these advanced tips in mind:

    • Marinate for Enhanced Flavor: For an even more robust taste, marinate the salmon in the honey-lime garlic butter sauce for at least 30 minutes before cooking. This allows the flavors to penetrate the fish, making every bite bursting with deliciousness.

    • Experiment with Herbs: While cilantro is a fantastic garnish, don’t hesitate to try other fresh herbs such as parsley or basil. They each bring a unique and refreshing note to the dish.

    • Try Different Sauces: If you want to mix things up, you can create a miso glaze by replacing honey with miso paste and adding a dash of sesame oil. This variation creates a different flavor profile while staying true to the essence of salmon recipes.

    • Explore Cooking Methods: Besides baking, this recipe works wonderfully on the grill, where the honey caramelizes beautifully and adds a smoky depth to the salmon. Alternatively, pan-sear the salmon for a crispy skin texture.

    Implementing these tips will ensure that your Tasty Honey-Lime Garlic Butter Salmon becomes a signature dish you’ll come back to time and again.


    How to Store Tasty Honey-Lime Garlic Butter Salmon: Best Practices

    Storing your leftover Tasty Honey-Lime Garlic Butter Salmon is essential to retaining its flavorful essence. Here’s how to do it correctly:

    1. Refrigeration: Allow the salmon to cool down to room temperature before placing it in an airtight container. It can be stored in the refrigerator for up to 3 days.

    2. Freezing: If you want to keep it longer, vacuum seal the salmon or place it in a freezer-safe bag after cooling. It can be frozen for up to 3 months. Make sure to label it with the date for your reference.

    3. Reheating: When you’re ready to indulge in your leftovers, gently reheat the salmon in the oven or on the stove over medium-low heat to maintain tenderness. Avoid using the microwave, as this can dry out the fish.

    Even after storing, the essence of Tasty Honey-Lime Garlic Butter Salmon remains well-preserved when done correctly—ensuring the flavors stay intact for future enjoyment.


    Nutritional Value of Tasty Honey-Lime Garlic Butter Salmon

    One of the many reasons Tasty Honey-Lime Garlic Butter Salmon is a favorite among salmon recipes is its impressive nutritional profile. Here’s a breakdown of the key nutrients found in one serving (approximately 6 oz of salmon with sauce):

    • Calories: 350–400 calories, depending on the amount of butter used.
    • Protein: 34 g – an excellent source of lean protein vital for muscle health.
    • Fat: 20 g – includes healthy fats from salmon and butter.
    • Carbohydrates: 16 g – primarily from honey.
    • Omega-3 Fatty Acids: 2.5 g – supports cardiovascular health.
    • Vitamin D: 570 IU – crucial for bone health and immune function.
    • Calcium: 20% of the Daily Value – essential for strong bones and teeth.

    This dish not only fulfills dietary requirements but does so deliciously. The variety of health benefits from salmon combined with tangy lime and sweet honey makes this a wholesome and satisfying meal. Whether you’re meal prepping for the week or looking to impress at dinner parties, the nutritional value will always stand out!


    FAQs: Frequently Asked Questions About Tasty Honey-Lime Garlic Butter Salmon

    1. Can I use frozen salmon for this recipe?

    Yes, frozen salmon can work; however, ensure it’s thoroughly thawed before cooking for best results.

    2. What can I serve with Tasty Honey-Lime Garlic Butter Salmon?

    This dish pairs well with steamed vegetables, jasmine rice, quinoa, or a fresh salad for a complete meal.

    3. Can I substitute honey with a different sweetener?

    Absolutely! Maple syrup or agave nectar can be good alternatives for those avoiding honey.

    4. How do I know when the salmon is fully cooked?

    Salmon is usually done when its internal temperature reaches 145°F (63°C) and flakes easily with a fork.

    5. Is this dish suitable for meal prep?

    Yes, Tasty Honey-Lime Garlic Butter Salmon makes a fantastic meal prep option since it stays fresh for a few days when stored properly.


    The Tasty Honey-Lime Garlic Butter Salmon recipe not only captures the simplicity and health benefits of salmon but also serves as a delightful canvas for culinary creativity. As you embrace this easy dish, you’ll discover why it ranks among the best salmon recipes available. So, roll up your sleeves, gather your ingredients, and bring a taste of the tropics to your kitchen!