Tag: salad

  • Fresh Vietnamese Spring Rolls Easy Healthy

    Fresh Vietnamese Spring Rolls Easy Healthy

    Fresh Vietnamese Spring Rolls Easy Healthy: A Tropical Delight

    Introduction to Fresh Vietnamese Spring Rolls Easy Healthy

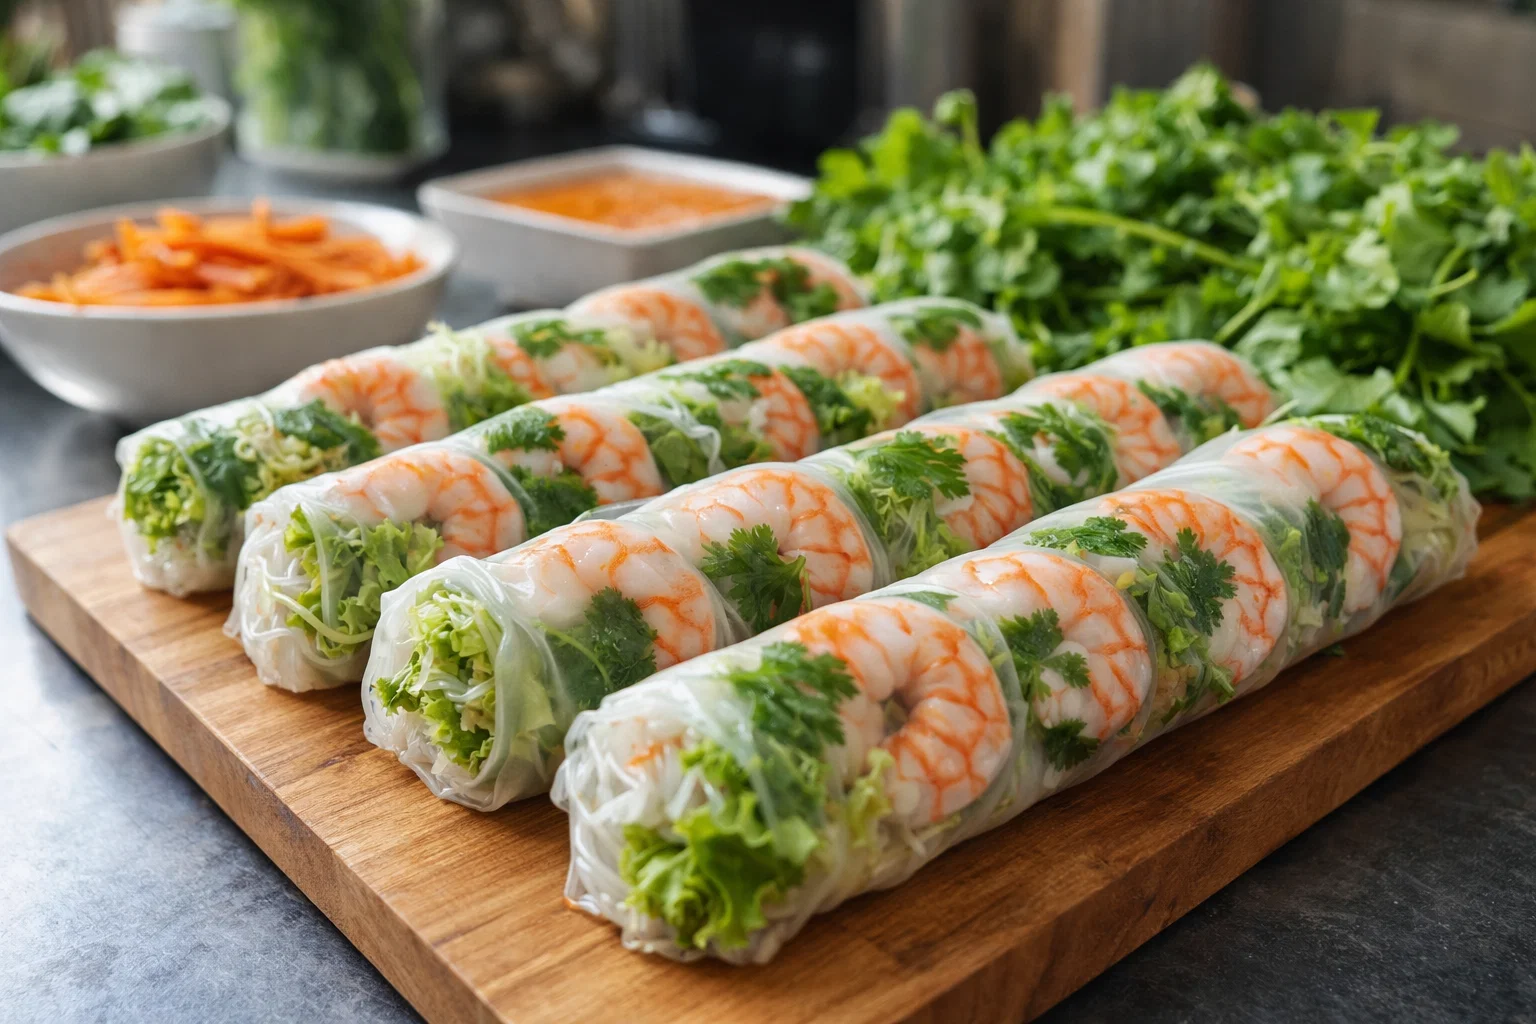
    Welcome to the vibrant world of Fresh Vietnamese Spring Rolls! This delightful dish showcases a perfect blend of colorful vegetables, fresh herbs, and flavorful proteins wrapped in a delicate rice paper. Not only are these spring rolls a feast for the eyes, but they also deliver numerous health benefits that make them stand out in the realm of healthy recipes. Whether you’re a busy parent, a student, or anyone seeking simple yet delicious options, this recipe will become your go-to.

    Preparing these spring rolls is easy and quick, making them an excellent choice for weeknight dinners or meal prep for lunches. Imagine the satisfaction of making a dish that not only delights your palate but also packs a nutritional punch—these rolls can be vegan, gluten-free, and low-calorie, catering to a wide range of dietary needs. The versatility and freshness of ingredients like crisp vegetables and aromatic herbs ensure that each bite is bursting with flavor and vitality. Plus, they make for a visually stunning appetizer or light meal perfect for any occasion!


    Benefits and Advantages of Fresh Vietnamese Spring Rolls Easy Healthy

    What makes Fresh Vietnamese Spring Rolls such a stellar choice? Let’s delve deeper into the benefits that come with this simple yet fulfilling dish.

    Ease of Preparation

    One of the most attractive benefits of these spring rolls is their simplicity. The foundational technique involves soaking rice paper, layering ingredients, and rolling—all of which require minimal culinary skills. This means you can prepare a wholesome meal without spending hours in the kitchen. Whether you’re a novice cook or someone seasoned in the kitchen, making these spring rolls is straightforward and rewarding.

    Health Benefits

    Fresh Vietnamese Spring Rolls score high on the health meter. Packed with colorful veggies like bell peppers, cucumbers, and carrots, they are rich in vitamins and minerals. The inclusion of fresh herbs allows you to tap into their numerous health advantages, such as improved digestion and enhanced immunity. These rolls are low in calories yet satisfyingly filling, making them a fantastic option for weight watchers or those pursuing a healthier lifestyle.

    Versatility

    Another notable aspect of these healthy recipes is their adaptability. You can easily swap out ingredients based on dietary preferences. Whether you choose shrimp, chicken, tofu, or even go completely plant-based, these spring rolls can cater to everyone at the table. In addition, you have the freedom to personalize the fillings to suit your taste, making it an exciting dish that can evolve with each preparation.

    In summary, Fresh Vietnamese Spring Rolls are easy to make, healthful, and versatile. They are perfect for families, students, or anyone looking for a delicious way to enjoy fresh ingredients. Let’s explore the essential components and how to make these delightful spring rolls!


    Ingredients Overview

    Essential Ingredients for Fresh Vietnamese Spring Rolls Easy Healthy

    To make Fresh Vietnamese Spring Rolls, you’ll need the following key ingredients. Each element plays a crucial role in ensuring the delicious taste and fulfilling nature of the dish.

    1. Rice Paper Wrappers (8-10 sheets)
    2. The base of the rolls, rice paper wrappers are gluten-free and can be found in most Asian grocery stores.

    3. Proteins (Pick one or more)

    4. Shrimp (7 oz, cooked and sliced)
    5. Chicken (7 oz, cooked and shredded)
    6. Tofu (8 oz, firm, diced, and lightly sautéed for extra flavor)

    7. Veggies:

    8. Red Bell Pepper (1, julienned)
    9. Carrot (1 large, julienned or grated)
    10. Cucumber (1, julienned)
    11. Lettuce (Romaine or Butter Lettuce for wrapping)

    12. Herbs:

    13. Fresh Mint (1/2 cup, chopped)
    14. Cilantro (1/2 cup, chopped)
    15. Basil (1/2 cup, chopped for added flavor)

    16. Dipping Sauce:

    17. Peanut Sauce or Soy Sauce (1/4 cup)
    18. Chili Sauce (optional for heat)

    This ingredient list provides a colorful, nutritious base for your healthy recipes. Remember to adjust measurements and ingredients based on taste preference and dietary requirements!

    Dietary Substitutions to Customize Your Fresh Vietnamese Spring Rolls Easy Healthy

    Customize your spring rolls with easy substitutions:

    1. Gluten-Free: Ensure your dipping sauce is gluten-free—choose tamari instead of soy sauce.

    2. Vegan: Use tofu as your protein source while ensuring your dipping sauce doesn’t include fish sauce. There are many plant-based peanut sauces available.

    3. Low-Calorie: Focus on adding more veggies and herbs, decreasing the quantity of protein if you’re tracking calories.

    4. Spicy: For those who enjoy a kick, add sliced jalapeños or a sprinkle of Sriracha inside the roll to awaken the flavors.

    These substitutions demonstrate the versatility that Fresh Vietnamese Spring Rolls offer, making it a delightful choice for everyone.


    How to Prepare the Perfect Fresh Vietnamese Spring Rolls Easy Healthy: Step-by-Step Guide

    Are you ready to create delicious Fresh Vietnamese Spring Rolls? Follow these simple steps for an enjoyable cooking experience!

    1. Prepare the Ingredients:
    2. Start by julienning your vegetables (bell pepper, carrot, cucumber) and set them aside.
    3. Cook any protein if necessary (shrimp should be boiled and peeled, chicken should be rotisserie or grilled, and tofu should be sautéed).

    4. Soften Rice Paper Wrappers:

    5. Fill a shallow dish or plate with warm water.
    6. Gently dip one rice paper wrapper in the water for about 15-20 seconds.
    7. Remove it once it becomes pliable but not overly soft.

    8. Lay the Wrapper:

    9. Place the softened rice paper flat on a clean surface or a damp kitchen towel.

    10. Add the Filling:

    11. In the lower third of the wrapper, layer a small handful of lettuce, followed by a few pieces of each vegetable, a portion of your chosen protein, and a sprinkle of fresh herbs.

    12. Roll Tight:

    13. Fold the sides of the wrapper inward over the filling.
    14. Starting from the bottom, tightly roll up the spring roll while keeping the filling packed tightly.

    15. Seal Edges:

    16. Moisten the top edges of the rice paper with a bit of water to help seal the roll.
    17. Press to ensure it sticks.

    18. Repeat:

    19. Continue this process for the remaining wrappers and filling, keeping the finished rolls covered with a damp cloth to prevent drying.

    20. Serve:

    21. Arrange the rolls on a serving platter and serve with your choice of dipping sauce.

    As you create these fresh rolls, feel free to experiment and adjust the ingredients to match various preferences. The resulting spring rolls will be a delightful addition to any meal or gathering.


    Mastering Fresh Vietnamese Spring Rolls Easy Healthy: Advanced Tips and Variations

    Now that you’ve perfected the basic spring roll recipe, let’s explore some advanced tips and variations to take your culinary creation to the next level.

    Advanced Tips:

    1. Use Fresh Ingredients: Always choose the freshest vegetables and herbs. This not only enhances the flavor but also ensures optimal nutrition—important if you’re striving for healthy recipes.

    2. Experiment with Proteins: While shrimp and chicken are traditional proteins, don’t shy away from trying seared tofu, grilled portobello mushrooms, or even quinoa for a plant-based twist.

    3. Herb Combinations: Try blending different herbs such as Thai basil or even arugula for a spicy kick. The variety of flavors will elevate the taste of your rolls.

    4. Prep in Advance: For busy nights, prep your ingredients ahead of time! Store chopped vegetables and cooked proteins separately and roll them just before serving to keep everything fresh.

    Variations:

    1. Fruit Spring Rolls: For a refreshing dessert or a light snack, swap the vegetables with fruits like mango, strawberries, or kiwi, pairing them with a coconut or yogurt dip.

    2. Rice Paper Salad: Tear up the rice paper and use it as a unique base for a salad, mixing chopped spring roll ingredients with a light vinaigrette.

    3. Add Flavor Boosts: Incorporate ingredients like pickled carrots, bean sprouts, or crushed nuts for additional texture and taste.

    These suggestions allow you to customize your Fresh Vietnamese Spring Rolls while maintaining their healthy essence, making them dishes you can enjoy throughout diverse meal plans.


    How to Store Fresh Vietnamese Spring Rolls Easy Healthy: Best Practices

    To maintain the freshness and quality of your Fresh Vietnamese Spring Rolls, proper storage is crucial. Here are some best practices to follow:

    Refrigerator Storage

    • Short-Term: If you have leftover spring rolls, keep them in an airtight container. Place parchment paper between layers to prevent sticking. Refrigerate and consume within 1-2 days for best taste and texture.

    Freezing Spring Rolls

    • Long-Term Storage: For longer preservation, consider freezing the rolls. Wrap each roll in plastic wrap tightly and place in a freezer-safe bag. They can last up to 2 months.
    • Thawing: To enjoy, thaw them overnight in the refrigerator. Serve cold or dip in warm water briefly if you wish to enjoy them fresh again.

    Reheating Tips

    • If you’d like to serve them warm, avoid microwaving as it can make the wrappers tough. Instead, lightly steam the rolls for a few minutes.

    By following these storage methods, you can create healthy recipes that last not only in flavor but also in freshness for days to come.


    Nutritional Value of Fresh Vietnamese Spring Rolls Easy Healthy

    Understanding the nutritional value of your Fresh Vietnamese Spring Rolls enriches the cooking experience. Here’s a general breakdown of the nutritional content per roll, assuming a filling of shrimp, fresh veggies, and herbs, with peanut sauce for dipping.

    • Calories: Approximately 80-100 calories per roll.
    • Protein: Around 6-8 grams (primarily from shrimp or tofu).
    • Carbohydrates: Approximately 15-20 grams (depending on the amount of rice paper).
    • Fat: About 2-4 grams (largely from the dipping sauce, especially if using peanut sauce).
    • Fiber: Roughly 2-3 grams (thanks to the rich array of veggies).
    • Vitamins and Minerals: A great source of Vitamin A, Vitamin C, iron, and calcium, due to the fresh produce used.

    This nutritional profile emphasizes how Fresh Vietnamese Spring Rolls are not only delicious but also a smart choice, aligning perfectly with your goal of incorporating healthy recipes into your meal planning.


    FAQs: Frequently Asked Questions About Fresh Vietnamese Spring Rolls Easy Healthy

    Q1: Can I make spring rolls in advance?

    A: Yes, you can prepare them a few hours in advance. Store the prepared rolls covered with a damp cloth to keep them moist.

    Q2: How do I prevent the rice paper from sticking?

    A: Always ensure that the wrappers are kept moist. You can stack them with parchment paper in between to prevent sticking.

    Q3: What can I substitute for peanut sauce?

    A: If you have nut allergies, consider using soy sauce, hoisin sauce, or a sesame dressing as alternatives.

    Q4: Are these spring rolls suitable for meal prepping?

    A: Absolutely! They are perfect for meal prep. Just ensure you keep them refrigerated and enjoy within a couple of days.

    Q5: Can I use cooked ingredients?

    A: Yes, you can certainly use cooked ingredients! Grilled chicken, shrimp, or sautéed tofu all work beautifully in spring rolls.

    Each of these FAQs provides valuable information while ensuring to align with the overarching theme of healthy recipes our readers are excited to explore.

    In conclusion, Fresh Vietnamese Spring Rolls are a vibrant, nutritious, and versatile dish perfect for everyone. This easy-to-follow recipe will bring a tropical delight to your dining table, allowing you to shine as a home cook while embracing healthy eating habits! So roll up your sleeves and dive into the refreshing flavors of this fantastic dish today!

  • Easy Sushi Cucumber Salad Fresh Recipe

    Easy Sushi Cucumber Salad Fresh Recipe

    Easy Sushi Cucumber Salad Fresh Recipe: A Tropical Delight

    Introduction to Easy Sushi Cucumber Salad Fresh Recipe

    Are you searching for a refreshing dish that brings a taste of the tropics right to your kitchen? Look no further than our Easy Sushi Cucumber Salad. This bright and delectable cucumber salad is the perfect blend of crisp vegetables and zesty flavors, making it an ideal side dish or a light meal. Not only is it simple to prepare, but it’s also a health-conscious choice, suitable for various dietary needs, including vegan and gluten-free diets.

    The best part is that this recipe comes together in under 30 minutes, making it a fantastic option for busy parents, students, or working professionals who appreciate healthy eating without spending hours in the kitchen. The vibrant colors and fresh ingredients make this salad not just a treat for the taste buds but also a feast for the eyes. Whether you’re a first-time cook or a seasoned chef, this cucumber salad will inspire creativity in your kitchen.

    This Easy Sushi Cucumber Salad is also loaded with health benefits. Cucumbers are low in calories but high in vital nutrients, making this salad an ideal choice for diet-conscious individuals. The addition of ingredients like avocado and lime juice not only enhances the flavor profile but also boosts the nutritional value, providing healthy fats and vitamin C. Whether you’re looking for a delightful dish for a summer gathering or a nutritious meal option for your everyday routine, this sushi cucumber salad is a must-try.


    Benefits and Advantages of Easy Sushi Cucumber Salad Fresh Recipe

    The Easy Sushi Cucumber Salad offers an array of benefits that make it a standout dish. First and foremost, this recipe’s simplicity is one of its significant advantages. With minimal preparation and a short cooking time, busy individuals can whip up a delicious, healthy meal or side dish without encountering stress in the kitchen.

    Health Benefits

    Incorporating cucumber into your diet has numerous health advantages. Cucumbers are hydrating and provide essential nutrients while remaining low in calories—making them a perfect addition to any meal. This salad is especially rich in:

    1. Hydration: Cucumbers are composed of about 95% water, helping you stay hydrated.
    2. Vitamins and Minerals: They are a good source of vitamins K and C, which play roles in bone health and immune function.
    3. Antioxidants: Cucumbers contain antioxidants, such as beta-carotene and flavonoids, which help combat free radicals in the body.

    Diet Compatibility

    This cucumber salad is an exceptional choice for a wide range of diets. It is inherently vegan and gluten-free, making it suitable for those with specific dietary restrictions. Additionally, the use of easily available ingredients means you can maintain consistently healthy eating habits without sacrificing flavor.

    Versatility

    Another benefit is its versatility; you can customize the salad by adding various proteins such as tofu for a vegan option or shrimp for a seafood twist. You can easily throw in some additional vegetables or herbs, making it a adaptable dish perfect for different occasions, tastes, and dietary needs.

    In summary, this Easy Sushi Cucumber Salad is a nutritious, versatile, and simple recipe that fits into various lifestyles, ensuring everyone can enjoy a delicious and health-conscious meal.


    Ingredients Overview

    Essential Ingredients for Easy Sushi Cucumber Salad Fresh Recipe

    To create this delightful sushi cucumber salad, you will need the following fresh ingredients:

    • 2 large cucumbers – These are the star of the dish; choose firm, ripe cucumbers for the best texture.
    • 1 ripe avocado – Adds creaminess and healthy fats.
    • 1 small red onion (finely sliced) – Offers crunch and a hint of sharpness.
    • 1 bell pepper (preferably red or yellow) – Provides color and sweetness.
    • 1 small carrot (peeled and shredded) – for a pop of color and extra nutrients.
    • 3 tablespoons soy sauce – Choose low-sodium if preferred.
    • 2 tablespoons rice vinegar – Adds a tangy flavor.
    • 1 tablespoon sesame oil – Provides a nutty undertone.
    • 1 teaspoon freshly grated ginger – Adds zest and a hint of warmth.
    • Chopped fresh cilantro or green onions (for garnish) – This enhances flavor and adds freshness.

    Special Notes:

    • Vegan & Gluten-Free Options: Ensure that the soy sauce is gluten-free, or substitute it with tamari.
    • Low-Calorie Option: Reduce the sesame oil if you wish to make it calorie-friendly without compromising flavor.

    Dietary Substitutions to Customize Your Easy Sushi Cucumber Salad Fresh Recipe

    To tailor the Easy Sushi Cucumber Salad to your dietary needs or ingredient availability, consider the following substitutions:

    1. Cucumbers: While English cucumbers are ideal due to their thin skin and few seeds, you can also use Persian or Japanese varieties for a similar texture.
    2. Avocado: If you’re averse to avocados or are looking to lower your calories, you might substitute it with a dollop of Greek yogurt or leave it out completely.
    3. Vegetables: Don’t hesitate to get creative with veggies! Zucchini, radishes, or even sprouts can be excellent substitutes or additions.
    4. Soy Sauce: For those avoiding soy, coconut aminos provide a similar flavor profile with a different nutritional composition.
    5. Ginger: If fresh ginger is unavailable, powdered ginger can be a suitable substitute, although the flavor may differ slightly.

    These substitutions ensure that everyone can enjoy this cucumber salad, no matter their dietary needs or preferences!


    How to Prepare the Perfect Easy Sushi Cucumber Salad Fresh Recipe: Step-by-Step Guide

    Creating a delicious Easy Sushi Cucumber Salad is simple when you follow these clear instructions. Let’s break it down into easy-to-follow steps.

    1. Prepare the Base:
    2. Wash and Slice the Cucumbers: Begin by washing your cucumbers thoroughly. Then, slice them thinly using either a sharp knife or a mandoline for even pieces. To create a noodle-like effect, you can spiralize the cucumbers into long strands.

    3. Chop the Vegetables:

    4. Dice the avocado and bell pepper. Use a sharp knife to slice the red onion, making sure to keep the pieces small for easy biting in this refreshing cucumber salad. Shred the carrot using a grater.

    5. Toss the Ingredients:

    6. In a large mixing bowl, combine the sliced cucumbers, avocado, bell pepper, red onion, and shredded carrot. Gently toss them together to mix without mashing the avocado.

    7. Make the Dressing:

    8. In a separate bowl, whisk together the soy sauce, rice vinegar, sesame oil, and grated ginger. Ensure the dressing is well mixed, as this will provide flavor to your cucumber salad.

    9. Combine with Dressing:

    10. Pour the dressing over the vegetable mixture. Gently fold the ingredients until the vegetables are evenly coated with the dressing. This step ensures that each bite is filled with flavor.

    11. Add Garnishes:

    12. Sprinkle fresh cilantro or chopped green onions over the top of the salad. These herbs enhance the flavor and gives the dish a vibrant look.

    13. Chill:

    14. For optimum flavor, cover the salad and let it chill in the refrigerator for at least 15-30 minutes. This allows the flavors to meld beautifully.

    15. Serve:

    16. Serve your Easy Sushi Cucumber Salad cold. It’s perfect as a side dish for grilled meals, as part of a picnic, or enjoyed on its own as a light lunch or dinner.

    Adaptations for Dietary Needs

    This recipe can be adapted for various dietary preferences, such as substituting vegetables according to what is available or using gluten-free sauces as previously mentioned. For a protein boost, consider adding grilled chicken, tofu, or even chickpeas, depending on your dietary choices and preferences.


    Mastering Easy Sushi Cucumber Salad Fresh Recipe: Advanced Tips and Variations

    Once you’re comfortable with the basic recipe, consider trying these advanced tips and variations to elevate your Easy Sushi Cucumber Salad experience:

    Add Crunch

    1. Nuts or Seeds: Incorporating toasted sesame seeds, walnuts, or even slivers of almonds can add a delightful crunch and healthy fats.

    2. Crunchy Vegetables: Incorporate radishes, snap peas, or water chestnuts for additional texture and flavor complexity.

    Flavor Enhancements

    1. Add Heat: If you prefer a spice kick, consider adding a dash of sriracha or red pepper flakes to the dressing for a subtle heat.

    2. Herb Variations: Switch up the fresh herbs. Dill or mint can provide a different flavor profile that works beautifully with the refreshing cucumbers.

    Create a Meal

    1. Protein-Packed: Turn this salad into a complete meal by adding grilled shrimp, marinated tofu, or even shredded rotisserie chicken. Pairing proteins makes it hearty enough to serve as a stand-alone dish.

    2. Sushi-Inspired Presentation: Consider rolling the salad in rice paper or serving it over sushi rice for a sushi-inspired bowl theme to impress guests.

    These variations and tips allow you to master the Easy Sushi Cucumber Salad, catering it perfectly to your taste preferences and dietary requirements!


    How to Store Easy Sushi Cucumber Salad Fresh Recipe: Best Practices

    Storing your Easy Sushi Cucumber Salad correctly is essential to maintain its freshness and flavor. Here are some best practices:

    Refrigeration

    • Short-Term Storage: If you plan to eat the salad within a couple of days, store it in an airtight container in the refrigerator. The salad can typically last for up to 2-3 days, but be aware that cucumbers will release moisture over time.

    Freezing

    • Long-Term Storage: While you can freeze cucumber salads, it is not recommended due to the texture changes after thawing. If you still wish to freeze for later use, consider freezing just the dressing and other ingredients (excluding the cucumbers) and combine them fresh before serving.

    Reheating

    • Serving Cold: Enjoy this salad cold; it retains its refreshing taste, so reheating is unnecessary and could alter the desired refreshing aspect.

    By following these storage tips, you can ensure that your cucumber salad remains fresh, delicious, and ready to enjoy when needed.


    Nutritional Value of Easy Sushi Cucumber Salad Fresh Recipe

    Understanding the nutritional value of the Easy Sushi Cucumber Salad allows you to appreciate its health benefits fully. Here’s a breakdown of the nutritional content based on standard servings:

    Nutritional Information (per serving)

    • Calories: Approximately 150
    • Total Fat: 10g (Healthy fats from avocado and sesame oil)
    • Sodium: 290mg (depending on soy sauce used)
    • Carbohydrates: 12g
    • Fiber: 5g (Benefits of fiber from cucumbers and vegetables)
    • Protein: 3g

    This cucumber salad is nutrient-rich and essential for maintaining a balanced diet. It’s packed with vitamins, minerals, and dietary fiber, helping promote fullness and satisfaction without excess caloric intake.

    Health Factors

    • Low-Calorie: With a generous amount of vegetables and healthy fats, this salad is filling yet low in calories—a great choice for those wanting to manage their weight.

    • High in Vitamins: It’s an excellent source of vitamins K and C, which support bone health and the immune system.

    In summary, the Easy Sushi Cucumber Salad combines taste and nutrition, making it an ideal option whether you’re looking to enhance your diet or simply enjoy a delicious meal.


    FAQs: Frequently Asked Questions About Easy Sushi Cucumber Salad Fresh Recipe

    1. Can I make this salad ahead of time?

    Yes, you can prepare the salad in advance. However, it’s best to store the dressing separately and mix it in shortly before serving to avoid the cucumbers becoming soggy.

    2. What can I use instead of soy sauce?

    If you’re looking for a gluten-free option, tamari works well. Alternatively, coconut aminos can also provide a soy sauce-like flavor without the gluten.

    3. Is this salad suitable for meal prep?

    Absolutely! The salad can be prepared at the beginning of the week and stored in the fridge, making it a convenient option for quick meals.

    4. Can I add protein to this salad?

    Definitely! Adding grilled chicken, shrimp, or tofu turns this sushi cucumber salad into a complete meal.

    5. How do I keep the avocado from browning in the salad?

    To prevent the avocado from browning, you could toss it in a little lime juice right after slicing, or you can add it just before serving instead of mixing it in earlier.

    6. What else can I add to this salad?

    Feel free to get creative! Other vegetables like radish, zucchini, or bell peppers can add more crunch and flavor to your cucumber salad.

    By providing clear answers to these frequently asked questions, you can empower readers to make adjustments and enjoy this fresh and vibrant recipe confidently!


    With these detailed steps, tips, and variations, you now have everything you need to create your very own Easy Sushi Cucumber Salad. Now, gather your ingredients, and dive into a refreshing culinary adventure full of health benefits and delicious flavors! Enjoy your cooking!

  • Tasty Din Tai Fung Cucumber Salad Recipe

    Tasty Din Tai Fung Cucumber Salad Recipe

    Tasty Din Tai Fung Cucumber Salad Recipe: A Tropical Delight

    Introduction to Tasty Din Tai Fung Cucumber Salad Recipe

    Welcome to the world of refreshing flavors, where simplicity meets health in the delightful Tasty Din Tai Fung Cucumber Salad Recipe! This vibrant, crunchy cucumber salad is not only a centerpiece for your dining table but also an easy dish that can be prepared in just minutes. Imagine lightly crisp cucumbers tossed with aromatic seasonings and flavors inspired by, and reminiscent of, the famous Din Tai Fung restaurant style.

    This cucumber salad is a fantastic option for everyone—whether you’re a busy parent looking for quick recipes, a college student on a budget, or a health-conscious individual seeking delicious vegan and gluten-free options. Its versatility makes it suitable for any meal, serving as a refreshing appetizer, a palate cleanser between courses, or even as a light, nourishing side dish during summer barbecues.

    What truly sets this cucumber salad apart is not just its flavor profile but also its health benefits. Packed with vitamins, antioxidants, and hydrating elements, this cucumber salad can be the perfect addition to your diet-centric meal plans, helping you maintain energy and vitality. With its delectable crunch and vibrant taste, it’s an excellent choice for food enthusiasts and novice cooks alike. Let’s dive into this aromatic, health-centric delight!

    Benefits and Advantages of Tasty Din Tai Fung Cucumber Salad Recipe

    The Tasty Din Tai Fung Cucumber Salad Recipe offers numerous benefits that make it a stand-out dish for anyone looking to prepare a fresh and healthy meal.

    Ease of Preparation

    First and foremost, one of the main advantages of this delightful cucumber salad is its simplicity. With minimal preparation time—approximately 15 to 20 minutes—you can create a refreshing dish that can impress your friends and family. The ingredients are easy to source, and the directions are straightforward, making it accessible for cooks of all skill levels. Even if you’re a novice in the kitchen, you can prepare this dish without any fear!

    Health Benefits

    In today’s world, health is at the forefront of everyone’s mind. Cucumbers are a fabulous source of hydration and are low in calories, which makes this salad an excellent option for those who are diet-conscious. Rich in vitamins K and C, cucumbers also provide antioxidants that help combat free radicals, thereby promoting overall wellness. Additionally, cucumbers contain fiber, which aids digestion and keeps you feeling full longer.

    Diet Compatibility

    Moreover, this cucumber salad is incredibly versatile. It’s vegan, gluten-free, and can easily be adapted to accommodate various dietary preferences and needs. You can enjoy it alongside grilled meats for a hearty sandwich-style meal or as a standalone appetizer. Plus, for those watching their sodium intake, the dressing can be adjusted perfectly to fit your health goals.

    By prioritizing taste and health in your choice of recipes, this Tasty Din Tai Fung Cucumber Salad not only offers a wealth of benefits but also stands out as a delicious, colorful dish that’s suitable for any occasion.

    Ingredients Overview

    Essential Ingredients for Tasty Din Tai Fung Cucumber Salad Recipe

    Here’s a comprehensive list of all the ingredients you’ll need to prepare the Tasty Din Tai Fung Cucumber Salad, complete with precise measurements:

    1. 1 pound of cucumbers: Choose fresh, firm cucumbers for the best crunch. They can be regular or Persian cucumbers.
    2. 1 tablespoon salt (or to taste): This enhances the flavor and helps to draw moisture out of the cucumbers.
    3. 2 tablespoons rice vinegar: This brings a tangy flavor to the salad. You can use apple cider vinegar for a different twist.
    4. 1 tablespoon soy sauce (or tamari for a gluten-free option): The umami flavor enriches the overall taste.
    5. 1 teaspoon sesame oil: Adds a nutty aroma that complements the cucumbers.
    6. 1 tablespoon sugar (or agave syrup for vegan option): Balances the tanginess with a hint of sweetness.
    7. 2 cloves garlic, minced: Fresh garlic provides an aromatic kick.
    8. 1 teaspoon chili oil (optional): For those who love heat, this adds a spicy kick.
    9. Sesame seeds for garnish: These add texture and additional flavor to the serving dish.

    This salad is naturally low in calories, so you can enjoy it guilt-free. It is also inherently vegan and gluten-free, making it an ideal option for diverse dietary needs.

    Dietary Substitutions to Customize Your Tasty Din Tai Fung Cucumber Salad Recipe

    Making this cucumber salad your own is simple! Here are some suggested substitutions to cater to different dietary preferences or ingredient availability:

    • Cucumbers: If cucumbers are not available, you can substitute them with zucchini, which has a similar crunch and mild flavor.
    • Salt: If you’re following a low-sodium diet, consider using herbs like dill or parsley to add flavor without extra sodium.
    • Rice Vinegar: Feel free to experiment with lime juice or lemon juice for a zesty twist.
    • Soy Sauce: For a low-sodium or gluten-free version, tamari or coconut aminos work well.
    • Sugar: Use honey or maple syrup as alternative sweeteners, or simply omit if you prefer a lower sugar dish.

    These substitutions allow the salad not only to fit various diets but also introduce exciting flavors, making every serving unique.

    How to Prepare the Perfect Tasty Din Tai Fung Cucumber Salad Recipe: Step-by-Step Guide

    Ready to get started on this aroma-filled adventure? Follow these step-by-step instructions to prepare your Tasty Din Tai Fung Cucumber Salad:

    1. Prepare the Base: Begin by washing the cucumbers thoroughly under cold water. Trim off the ends and slice them in half lengthwise. Depending on your preference, you may choose to remove the seeds with a spoon. Then, slice each half into thin half-moon shapes or chop them into bite-sized pieces.

    2. Salt the Cucumber: Place the cut cucumbers into a colander and sprinkle the salt over them. Give them a gentle toss, ensuring all pieces are coated. This step draws out excess water and enhances flavor. Allow them to sit for about 15 minutes. You’ll notice the cucumbers will release moisture during this time.

    3. Prepare the Dressing: While the cucumbers are resting, in a mixing bowl, whisk together the rice vinegar, soy sauce, sesame oil, sugar, minced garlic, and chili oil if you’re using it. Mix until the sugar dissolves and the dressing is well-combined.

    4. Rinse the Cucumbers: After 15 minutes, rinse the salted cucumbers under cold water to remove excess salt. Drain them well in the colander and pat them dry with a clean kitchen towel. This will ensure your salad is not too salty and that it retains a nice crunch.

    5. Mix Ingredients: In a large mixing bowl, combine the prepared cucumbers and the dressing. Toss gently, making sure each cucumber slice is evenly coated with the flavorful dressing.

    6. Garnish and Serve: After you’ve mixed everything well, transfer the salad to your serving dish. Sprinkle the sesame seeds on top for that added crunch and aesthetic appeal.

    7. Taste and Adjust: Take a moment to taste your cucumber salad. You might decide to add a bit more sweetness, acid, or salt according to your liking. Feel free to incorporate fresh herbs such as chopped cilantro or green onions at this point.

    8. Chill and Enjoy: If you’ve got time, allow the salad to chill in the refrigerator for about 30 minutes before serving. This helps the flavors meld together beautifully.

    This simple yet flavorful Tasty Din Tai Fung Cucumber Salad Recipe perfectly complements a range of dishes. Enjoy it as a standalone appetizer, or serve it alongside grilled chicken, fish, or tofu.

    Mastering Tasty Din Tai Fung Cucumber Salad Recipe: Advanced Tips and Variations

    To elevate your Tasty Din Tai Fung Cucumber Salad experience, consider these advanced tips and variations to keep things exciting:

    • Herbs and Spices: Feel free to experiment with different herbs like mint or dill for refreshing twists. You can also add red pepper flakes for an added kick.
    • Added Textures: Incorporate other crunchy vegetables like bell peppers or shredded carrots to boost nutrition while maintaining the crunchiness you love.
    • Protein Boost: For a more substantial meal, try adding cooked shrimp, grilled chicken, or tofu cubes. This will transform your cucumber salad into a balanced, nutrient-rich dish.
    • Make it a Meal: Toss this cucumber salad with cooked quinoa or brown rice. This adds fiber and makes it a complete meal.

    Each variation offers an exciting way to keep this dish as a staple in your kitchen, catering to various tastes and dietary needs.

    How to Store Tasty Din Tai Fung Cucumber Salad Recipe: Best Practices

    Storing your Tasty Din Tai Fung Cucumber Salad properly can enhance its shelf life and flavor. Here are the best practices for storage:

    • Refrigeration: Place any leftover salad in an airtight container. It will remain fresh in the refrigerator for up to 2 days but is best enjoyed within the first day for optimal crunchiness.

    • Freezing: For the best quality, avoid freezing the cucumber salad. The texture of cucumbers may not hold up well after freezing, which can lead to a mushy consistency upon thawing.

    • Reheating: If you wish to warm up your salad, it’s best to remove cucumbers and any delicate vegetables you’ve added, and instead, gently warm protein options in a pan. Combine back only when serving, as a cold salad offers the best taste.

    By following these storage guidelines, you can preserve the fresh taste and nutritional value of your cucumber salad.

    Nutritional Value of Tasty Din Tai Fung Cucumber Salad Recipe

    Understanding the nutritional aspects of the Tasty Din Tai Fung Cucumber Salad Recipe is key to enjoying your meal without any qualms. Here’s a breakdown of the estimated nutritional value per serving (based on four servings):

    • Calories: ~60 kcal
    • Protein: 1 g
    • Fat: 3 g
    • Carbohydrates: 8 g
    • Fiber: 1 g
    • Sugar: 2 g
    • Sodium: 200 mg (adjusted for non-salted preparation)
    • Vitamin K: 16% of the Daily Recommended Intake
    • Vitamin C: 9% of the Daily Recommended Intake

    This cucumber salad not only supports hydration but also adds essential vitamins and minerals to your diet. As a low-calorie option, it allows you to indulge without worrying about excess calories.

    FAQs: Frequently Asked Questions About Tasty Din Tai Fung Cucumber Salad Recipe

    1. Can I prepare this cucumber salad in advance?

    Absolutely! The Tasty Din Tai Fung Cucumber Salad can be prepared a few hours in advance. However, for the best texture, it’s ideal to enjoy it fresh or within a day of preparation.

    2. Is it possible to make this salad without soy sauce?

    Yes, if you have dietary restrictions, you can substitute soy sauce with coconut aminos or simply use a salt and additional vinegar if you wish for a stronger taste.

    3. What type of cucumber is best for this recipe?

    Larger cucumbers like English or Persian varieties are recommended for their firm texture and fewer seeds, giving the salad an enjoyable crunch.

    4. Can I store leftovers?

    Yes, store any leftover salad in an airtight container in the refrigerator, and consume it within 1-2 days for the best taste and crunch.

    5. Can I use other vegetables in this salad?

    Certainly! Feel free to add shredded carrots, radishes, or bell peppers to elevate both flavor and nutritional content.

    This Tasty Din Tai Fung Cucumber Salad is an embodiment of freshness and simplicity that every cook can appreciate, making it a must-try recipe for anyone looking to add radiant flavors to their meal! So go ahead, give it a try and share your creations! Enjoy!

  • Tasty Honey Hot Chicken Salad Easy

    Tasty Honey Hot Chicken Salad Easy

    Tasty Honey Hot Chicken Salad Easy: A Tropical Delight

    Introduction to Tasty Honey Hot Chicken Salad Easy

    If you’re searching for an exciting and nutritious addition to your culinary repertoire, look no further! The Tasty Honey Hot Chicken Salad Easy is a dish that ticks all the boxes: it’s simple to prepare, packed with vibrant flavors, and offers impressive health benefits. This salad combines the richness of succulent chicken with the sweet and spicy undertones of honey and hot sauce. Not only does it make for a tantalizing meal, but it’s also versatile enough to cater to various dietary needs, including making it gluten-free or low-calorie.

    This recipe deserves a spot in your kitchen, especially if you find yourself overwhelmed by complex chicken recipes. The ease of preparation allows busy parents and working professionals to whip up a delicious meal without spending hours in the kitchen. Additionally, it’s an excellent option for health-conscious individuals. Packed with lean protein, fresh vegetables, and wholesome ingredients, it’s sure to nourish your body and delight your taste buds.

    Whether you’re a student searching for an easy meal plan, a newlywed experimenting with cooking, or a food enthusiast looking to impress guests, this honey hot chicken salad is an ideal choice. Let’s dive deeper into the benefits of this delightful recipe, the ingredients required, and how you can prepare this tropical treat with ease!

    Benefits and Advantages of Tasty Honey Hot Chicken Salad Easy

    The Tasty Honey Hot Chicken Salad Easy is not just another recipe; it’s a warm embrace of flavors and benefits that can elevate your dining experience. Here are some compelling reasons to make this dish your next go-to in the realm of chicken recipes:

    1. Quick and Simple Preparation

    In our fast-paced world, finding time to cook can be challenging. This chicken salad offers a straightforward approach, allowing you to prepare a wholesome meal in 30 minutes or less. From seasoned chefs to novice cooks, anyone can enjoy the simplicity of tossing together a few ingredients.

    2. Health Benefits

    One of the greatest advantages of this salad is its health focus. Lean chicken breast provides a protein-packed base, while honey offers natural sweetness without the guilt of refined sugars. Additionally, incorporating fresh veggies provides essential vitamins, minerals, and fiber, making it a well-rounded meal.

    3. Dietary Versatility

    Whether you’re following a vegan diet or require a gluten-free option, this salad has you covered. You can easily substitute chicken with plant-based proteins or gluten-free grains, making it a flexible recipe for diners with various dietary requirements.

    4. Flavor Explosion

    Combining sweet honey and spicy hot sauce creates a unique flavor profile that’s sure to impress. This dish is a delightful dance of sweet and spicy that can please any palate, perfect for potlucks or family gatherings.

    5. Meal Prep Friendly

    With its ability to store well, this chicken salad is not just a one-time meal. Make a batch ahead of time and enjoy it for lunch or dinner throughout the week. It retains its great taste, even after refrigeration.

    In conclusion, the Tasty Honey Hot Chicken Salad Easy stands out due to its ease, health benefits, dietary adaptability, and deliciousness. The next sections will guide you through the ingredients, preparation, and variations of this exceptional salad.

    Ingredients Overview

    Essential Ingredients for Tasty Honey Hot Chicken Salad Easy

    To make your Tasty Honey Hot Chicken Salad Easy, you’ll need the following ingredients. Each item plays a distinct role, offering flavor, texture, and nutrition. Here’s the detailed list:

    1. Chicken Breast (2 cups, cooked and shredded): The primary source of protein. Opt for grilled or baked chicken for a healthier option.
    2. Honey (1/4 cup): Acts as a natural sweetener, balancing the spiciness of the dish.
    3. Hot Sauce (2 tablespoons): Adds a kick of flavor. You can adjust this to meet your spice preference.
    4. Greek Yogurt (1/2 cup): A creamy base that adds a tangy taste, serving as a healthier alternative to mayonnaise.
    5. Red Bell Pepper (1, diced): Offers a punch of color and sweetness, rich in vitamins A and C.
    6. Green Onions (2, chopped): Adds freshness and a mild onion flavor.
    7. Celery (1 cup, chopped): Provides crunch and fiber.
    8. Mixed Greens (4 cups): A bed for the salad, offering a mix of nutrients. For a vegan option, replace it with spinach or kale.
    9. Salt and Pepper (to taste): Enhances the overall flavor of the salad.

    Dietary Substitutions to Customize Your Tasty Honey Hot Chicken Salad Easy

    Here are some great substitutions to ensure this recipe fits your dietary preferences:

    • Vegan Option: Substitute the chicken with chickpeas or tofu. For protein-rich content, use quinoa as the base.
    • Gluten-Free: Ensure that your hot sauce and all packaged ingredients are labeled gluten-free.
    • Dairy-Free: Replace Greek yogurt with dairy-free yogurt or mashed avocado for creaminess.
    • Low-Calorie: Use grilled chicken breast and replace honey with a sugar-free sweetener to cut down on calories.
    • Spice Level Adjustment: Depending on your tolerance for heat, you can reduce the amount of hot sauce or choose milder versions.

    With these ingredients outlined and potential substitutes provided, you are ready to embark on your cooking adventure with the Tasty Honey Hot Chicken Salad Easy!

    How to Prepare the Perfect Tasty Honey Hot Chicken Salad Easy: Step-by-Step Guide

    Creating the Tasty Honey Hot Chicken Salad Easy is an enjoyable process that can be accomplished with simple, actionable steps. Here’s how to make it:

    1. Prepare the Chicken: To start, if you haven’t cooked your chicken yet, grill or bake it until fully cooked. Shred it with two forks or chop it into bite-sized pieces for easier mixing.
    2. Make the Dressing: In a mixing bowl, combine honey, hot sauce, and Greek yogurt. Whisk until smooth, adjusting the honey and hot sauce based on your sweetness and spiciness preferences.
    3. Chop the Vegetables: Dice the red bell pepper and chop the celery and green onions. Make sure to use fresh ingredients for the best flavor and health benefits.
    4. Mix the Base Ingredients: In a large bowl, add the shredded chicken, chopped vegetables, and the dressing you prepared. Toss well until all components are evenly coated.
    5. Prepare the Greens: On a large serving platter or individual plates, lay out the mixed greens as a bed for your salad.
    6. Top the Greens: Spoon the chicken mixture over the greens, making sure to distribute it evenly.
    7. Season to Taste: Sprinkle with salt and pepper according to your preference. Optionally, add crushed red pepper flakes if you desire extra heat.
    8. Garnish: For an additional touch, top with fresh herbs like cilantro or parsley. This adds an aromatic finish to your dish.
    9. Serve Immediately: This salad is best served fresh but can be refrigerated for later. If storing, keep the dressing separate to avoid soggy greens.

    Congratulations! You now have a Tasty Honey Hot Chicken Salad Easy that’s not only healthy but also bursting with flavor. This dish can easily be customized based on your preferences, making it a staple among your chicken recipes.

    Mastering Tasty Honey Hot Chicken Salad Easy: Advanced Tips and Variations

    To enhance your experience with the Tasty Honey Hot Chicken Salad Easy, here are some advanced tips and exciting variations to try:

    1. Add Texture

    Consider incorporating nuts or seeds such as sliced almonds, sunflower seeds, or pumpkin seeds. They’ll provide a satisfying crunch and additional nutrients.

    2. Make it a Wrap

    For a portable version, take your chicken salad and spoon it into whole-wheat pita pockets or spinach tortillas for a delicious wrap. This transformation makes the dish suitable for outings or lunch on the go.

    3. Experiment with Flavors

    If you’re looking for varied flavors, try adding fruits like diced apples or mango for a sweet twist. Their natural sweetness will enhance the honey without overpowering the dish.

    4. Add Grains

    For a heartier meal, introduce a base of quinoa or brown rice underneath the chicken salad. This variation not only adds flavor but also makes the dish more filling.

    5. Herbs and Spices

    Don’t hesitate to experiment with herbs such as basil or dill. Fresh herbs elevate the freshness and enhance the overall flavor profile, making your salad extraordinary.

    6. Spicy Variations

    If you crave more heat, consider adding jalapeños or a splash of Sriracha to the dressing. This will give it an extra kick and create layers of flavor.

    With these tips and variations, you can continue to reinvent the Tasty Honey Hot Chicken Salad Easy, ensuring it never gets dull and remains a favored option in your collection of chicken recipes.

    How to Store Tasty Honey Hot Chicken Salad Easy: Best Practices

    Understanding how to properly store your Tasty Honey Hot Chicken Salad Easy is essential for maintaining freshness. Here are some guidelines to ensure you enjoy your dish at its best:

    1. Refrigeration

    Store leftovers in an airtight container in the refrigerator. This will keep the salad fresh for up to three days. However, remember to keep the dressing separate if you plan to store it for an extended period, as it keeps greens crisp.

    2. Freezing

    While this dish is not ideal for freezing due to the fresh ingredients’ texture, if you have leftover chicken, you can freeze that separately. Cooked chicken can be stored in the freezer for up to 3 months. Just be sure to thaw it in the refrigerator before adding it back to your salad.

    3. Reheating

    If you prefer a warm chicken salad, consider reheating the chicken separately. Microwaving the chicken for about 1-2 minutes or warming it in a pan will bring it back to life. However, avoid reheating mixed greens as they can become wilted and lose their crunch.

    4. Serving Tips

    When ready to serve the refrigerated salad, give it a good stir to recombine the ingredients and dressing. If it appears a little dry, you can add a splash more of Greek yogurt or honey to revitalize it.

    With these storage practices, you can ensure that your Tasty Honey Hot Chicken Salad Easy remains delicious for days to come!

    Nutritional Value of Tasty Honey Hot Chicken Salad Easy

    Understanding the nutritional value of your meals is vital to maintaining a balanced diet. Here’s a breakdown of the key nutritional components for a serving of Tasty Honey Hot Chicken Salad Easy:

    • Calories: Approximately 300-350 calories
    • Protein: 30g (coming from chicken and Greek yogurt)
    • Fat: 10g (mostly unsaturated fats from Greek yogurt)
    • Carbohydrates: 30g (from vegetables and honey)
    • Fiber: 5g (from vegetables and greens)
    • Sugars: 10g (natural sugars from honey and vegetables)

    This nutrient-packed salad provides an excellent source of protein, vitamins, antioxidants, and healthy fats. Its balanced composition makes it a fantastic option for those looking to maintain a healthy lifestyle. Additionally, you can tailor the dish to suit your dietary goals, whether you’re aiming for higher protein, lower calories, or more fiber.

    In conclusion, not only is the Tasty Honey Hot Chicken Salad Easy delicious, but it also brings a load of nutrition to the table, making it a great choice for anyone interested in tasty chicken recipes.

    FAQs: Frequently Asked Questions About Tasty Honey Hot Chicken Salad Easy

    1. Can I substitute the chicken with something else?

    Absolutely! For a vegan option, consider using chickpeas, tofu, or grilled tempeh. Each option offers great protein content while ensuring the salad remains hearty and satisfying.

    2. Is this salad gluten-free?

    Yes, the Tasty Honey Hot Chicken Salad Easy can be made gluten-free by ensuring your hot sauce and ingredients are labeled as such. Opt for gluten-free grains if you decide to add those.

    3. How long does the salad last in the fridge?

    When stored in an airtight container, the salad will stay fresh for about three days. Ensure you keep the dressing separate to maintain the integrity of the greens.

    4. Can I make this ahead of time?

    Certainly! You can prepare the salad base and separately package the dressing, then mix before serving to retain freshness. This makes it perfect for meal prep.

    5. What can I serve with this chicken salad?

    This salad can be a standalone dish but pairs wonderfully with crusty whole-grain bread, tortillas, or even as a topping for baked sweet potatoes.

    6. How can I adjust the spice level?

    Simply modify the amount of hot sauce you use in the dressing. You can also add milder options like mild salsa or skip the hot sauce altogether if desired.

    In summary, the Tasty Honey Hot Chicken Salad Easy is versatile, easy to prepare, and offers nutritional benefits that cater to various dietary preferences. Whether you’re cooking for yourself or hosting a gathering, this refreshing salad is bound to impress. So, roll up your sleeves and get ready to enjoy a vibrant meal that’s as nutritious as it is delicious!

  • My Italian NonnaS Secret Recipe For The Best Carrots

    My Italian NonnaS Secret Recipe For The Best Carrots

    My Italian Nonna’S Secret Recipe For The Best Carrots!: A Tropical Delight

    Introduction to My Italian Nonna’S Secret Recipe For The Best Carrots!

    Welcome to a culinary oasis where simplicity meets flavor! As one of the most cherished dinner recipes in my family, my Italian Nonna’s secret recipe for the best carrots always delights the palate and nourishes the soul. Picture vibrant, tender carrots dressed with aromatic herbs and a hint of sweetness, perfectly balancing flavor and health claims. This dish is not only incredibly easy to prepare, but it’s also packed with vitamins and minerals.

    Whether you’re a busy parent looking for quick dinner ideas, a student craving a healthy meal, or a senior who values taste and nutrition, this dish has something for everyone. Moreover, it’s entirely vegan and gluten-free, making it suitable for various dietary requirements. With a short list of ingredients and minimal cooking time, these carrots can easily become a staple in your weekly meal rotation. So, let’s dive into this delightful recipe and discover why it stands out among other dinner recipes!

    Benefits and Advantages of My Italian Nonna’S Secret Recipe For The Best Carrots!

    Ease of Preparation: One of the standout features of my Italian Nonna’s secret carrot recipe is its accessibility. With only a handful of ingredients and simple steps, you won’t spend hours in the kitchen. In fact, you can whip it up in less than 30 minutes, making it a perfect choice for busy weekday dinners.

    Health Benefits: Carrots are not only delicious but also filled with health benefits. Rich in antioxidants and beta-carotene, they can promote eye health and boost your immune system. The recipe utilizes minimal oil and natural sweeteners, so you can enjoy guilt-free indulgence. It caters to those who are diet-conscious, with options for low-calorie and nutrient-rich meals.

    Flavorful and Versatile: The combination of flavors in this recipe—sweet, savory, and aromatic—offers a delightful harmony that enhances the natural sweetness of the carrots. This dish pairs well with various proteins, like grilled chicken, fish, or tofu, and can seamlessly fit into any dinner plan. Furthermore, it adapts easily to your preferences, whether you want it spicy, herby, or simply roasted.

    In summary, my Italian Nonna’s secret recipe for the best carrots not only brings joy to the table but also nourishes your body. It’s a delightful addition to your collection of dinner recipes, suitable for all ages, lifestyles, and dietary needs.

    Ingredients Overview

    Essential Ingredients for My Italian Nonna’S Secret Recipe For The Best Carrots!

    To prepare the best carrots, gather the following:

    • Carrots (1 pound): Fresh or baby carrots work well. Rich in vitamins A, C, and K, they are the star ingredient!
    • Olive Oil (2 tablespoons): This healthy fat enhances flavor and helps to soften the carrots—use extra virgin for maximum benefits.
    • Garlic (3 cloves, minced): Adding depth and spice, it provides a delicious aroma and flavor boost.
    • Fresh Thyme (1 tablespoon): This herb adds a wonderful herbal note—substitute with dried thyme if necessary.
    • Honey or Maple Syrup (1 tablespoon): A hint of sweetness balances the savory elements, but can be omitted for a low-sugar version.
    • Salt and Pepper (to taste): Essential for amplifying flavor.

    This recipe is naturally gluten-free and vegan, but always ensure the honey is swapped with maple syrup if you want a completely vegan dish.

    Dietary Substitutions to Customize Your My Italian Nonna’S Secret Recipe For The Best Carrots!

    • Oil Substitute: For a lower-calorie option, replace olive oil with vegetable broth to sauté the carrots.
    • Sweetener Alternatives: If avoiding sugars, consider using stevia or monk fruit as a sweetener.
    • Herb Variations: If you don’t have thyme, feel free to experiment with rosemary, dill, or parsley for different flavors.
    • Vegan Option: As previously mentioned, substitute honey with agave nectar or completely omit sweeteners for a more savory dish.

    These substitutions ensure that everyone can enjoy my Italian Nonna’s secret recipe for the best carrots, no matter their dietary restrictions or preferences.

    How to Prepare the Perfect My Italian Nonna’S Secret Recipe For The Best Carrots!: Step-by-Step Guide

    Ready to delight your family with these vibrant carrots? Follow these easy steps to prepare my Italian Nonna’s secret recipe:

    1. Prepare the Carrots:
    2. If using whole carrots, wash and peel them. Cut into uniform sticks or rounds for even cooking. Baby carrots can be left whole.

    3. Preheat the Oven:

    4. Preheat your oven to 400°F (200°C). This ensures that your carrots roast quickly and evenly, enhancing their natural sweetness.

    5. Mix the Oil and Seasonings:

    6. In a large bowl, whisk together the olive oil, minced garlic, salt, pepper, thyme, and honey or maple syrup. This mixture will create a flavorful glaze that coats the carrots beautifully.

    7. Toss the Carrots:

    8. Add the prepared carrots to the bowl with the seasoning mix. Toss them until each piece is well-coated in the aromatic oil blend.

    9. Arrange on Baking Sheet:

    10. Spread the carrots evenly on a baking sheet lined with parchment paper. Use a single layer to ensure they roast rather than steam.

    11. Roast the Carrots:

    12. Place the baking sheet in the preheated oven. Roast the carrots for about 20-25 minutes, turning them halfway through to promote even browning and caramelization.

    13. Check for Doneness:

    14. The carrots should be tender and lightly caramelized. You can test this by piercing them with a fork. If they slide through easily, they’re ready!

    15. Serve Warm:

    16. Remove the carrots from the oven and transfer them to a serving dish. Drizzle any remaining glaze from the baking sheet over them for extra flavor.

    17. Garnish (optional):

    18. For an elegant touch, sprinkle some fresh herbs, a squeeze of lemon juice, or add crushed nuts for texture before serving.

    With these simple steps, you will have perfected the art of preparing my Italian Nonna’s secret recipe for the best carrots. The dish pairs beautifully with a variety of proteins, making it a versatile choice for any occasion.

    Mastering My Italian Nonna’S Secret Recipe For The Best Carrots!: Advanced Tips and Variations

    To take your dish to the next level, consider these advanced tips and variations:

    • Spice it Up: If you enjoy a bit of heat, feel free to add a dash of red pepper flakes to the olive oil mix. This will give your carrots an exciting kick!

    • Culinary Pairings: For a heartier meal, serve these carrots alongside roasted potatoes or a fresh salad. They also complement grilled fish or chicken beautifully.

    • Flavor Infusions: Try infusing other flavors by adding a splash of balsamic vinegar or a sprinkle of sesame seeds before serving. These additions can elevate the dish’s complexity.

    • Batch Cooking: If you love meal prep, double the recipe and roast a larger quantity. These carrots can be a great addition to salads or grain bowls, enjoyed cold or reheated.

    • Serving Suggestions: Consider serving the roasted carrots on a bed of quinoa or couscous, providing a wholesome, nutrient-packed meal for your family.

    By experimenting with these variations and tips, you’ll master my Italian Nonna’s secret recipe for the best carrots and make them your own!

    How to Store My Italian Nonna’S Secret Recipe For The Best Carrots!: Best Practices

    Now that you’ve prepared this delicious recipe, you might have leftovers. Here’s how to properly store them!

    • Refrigeration: Allow the roasted carrots to cool completely before transferring them to an airtight container. They can be stored in the refrigerator for up to 4 days.

    • Freezing: If you’ve made a large batch and want to store them for the long haul, you can freeze the carrots after they cool. Place them in a freezer-safe bag or container, removing as much air as possible. They can last up to 3 months in the freezer.

    • Reheating: To reheat refrigerated carrots, place them in a skillet over medium heat or microwave them in short intervals until warmed through. For frozen carrots, reheat from frozen or allow them to thaw in the fridge before reheating. Bake in the oven for 10-15 minutes at 350°F (175°C) for a delightful crispness.

    By following these storage methods, you can enjoy my Italian Nonna’s secret recipe for the best carrots even days after preparing them!

    Nutritional Value of My Italian Nonna’S Secret Recipe For The Best Carrots!

    Understanding the nutritional benefits of this dish enhances its appeal. Below is a general overview of the nutrition you can expect per serving of my Italian Nonna’s secret recipe for the best carrots:

    • Calories: Approximately 120
    • Total Fat: 6g
    • Saturated Fat: 1g
    • Carbohydrates: 18g
    • Dietary Fiber: 5g
    • Sugars: 5g (natural sugars)
    • Protein: 1g
    • Vitamins and Minerals:
    • Vitamin A: 184% of Daily Value (DV)
    • Vitamin C: 10% of DV
    • Calcium: 4% of DV
    • Iron: 4% of DV

    Each serving is a rich source of vitamins, particularly vitamin A, which supports eye health and boosts the immune system. This recipe also aligns well with your health goals—easy to prepare and nutritious, it’s an excellent choice among hassle-free dinner recipes!

    FAQs: Frequently Asked Questions About My Italian Nonna’S Secret Recipe For The Best Carrots!

    1. Can I use different types of carrots?
    Absolutely! You can use any variety of carrots—baby carrots, rainbow carrots, or even heirloom varieties. Just adjust your cooking time based on their size.

    2. Is this recipe suitable for meal prep?
    Yes! Roasted carrots store well and maintain their flavor. They are great when prepared ahead and can easily be added to salads or grain bowls.

    3. How long can I store leftovers?
    You can refrigerate leftover roasted carrots for up to 4 days or freeze them for up to 3 months.

    4. Can I make this recipe without oil?
    You can substitute olive oil with vegetable broth for a low-fat version, though the flavor might vary slightly.

    5. What main dishes pair well with these carrots?
    These carrots complement numerous main dishes, including grilled chicken, fish, tofu, or served on top of a bed of quinoa.

    By answering these questions, I hope to provide you with confidence in preparing my Italian Nonna’s secret recipe for the best carrots. They’re not only delicious but will surely impress at your dinner table!

  • Caramelized Roasted Brussels Sprouts And Carrots

    Caramelized Roasted Brussels Sprouts And Carrots

    Caramelized Roasted Brussels Sprouts And Carrots: A Tropical Delight

    Introduction to Caramelized Roasted Brussels Sprouts And Carrots

    Welcome to a culinary adventure that embraces healthy dinner recipes without sacrificing flavor! Our Caramelized Roasted Brussels Sprouts and Carrots dish isn’t just a treat for the taste buds; it’s also a visual feast that brightens any dinner table. This recipe is perfect for everyone, including busy parents, health-conscious individuals, vegan food lovers, and even kitchen beginners. It captures all the goodness of vibrant vegetables and transforms them into a caramelized masterpiece that is both hearty and indulgently delicious.

    What makes this dish stand out is its simplicity. With just a few simple steps, you can create a dish that is healthful and filled with nutrients. The Brussels sprouts bring a delightful crunch, while the carrots offer a natural sweetness when roasted. Both are naturally gluten-free and vegan, making them an excellent choice for various dietary needs. Whether you’re trying to incorporate more vegetables into your meals, adhering to a vegan diet, or simply looking for healthy dinner recipes, this caramelized delight has you covered.

    The beauty of this recipe lies in its versatility. It pairs wonderfully with a protein of your choice, but it also shines as a stand-alone side, complementing any main dish beautifully. As you prepare this, you’ll discover that roasting brings out the vegetables’ natural sweetness and enhances their flavors, creating a dish that’s both comforting and nutritious. So, gather your ingredients, ignite your oven, and let’s dive into the world of caramelized roasted Brussels sprouts and carrots!

    Benefits and Advantages of Caramelized Roasted Brussels Sprouts And Carrots

    Opting for Caramelized Roasted Brussels Sprouts and Carrots as part of your meal not only pleases your palate but also contributes various health benefits. One of the foremost advantages of this dish is its ease of preparation. With minimal prep time and straightforward cooking methods, it suits even the busiest of schedules. Health-conscious individuals will appreciate that this recipe aligns perfectly with healthy dinner recipes, packed with vitamins, minerals, and dietary fiber.

    Brussels sprouts are known for their high vitamin K content, which is essential for bone health and blood coagulation. They also contain vitamins C and A, antioxidants that boost immune function. On the other hand, carrots are a fantastic source of beta-carotene, a nutrient that supports eye health and enhances skin vitality. This combination not only makes for a vibrant plate but also provides your body with important nutrients essential for everyday functioning.

    Moreover, the caramelization process adds depth to this dish’s flavor profile. As the vegetables roast, their natural sugars caramelize, enhancing sweetness while balancing the slight bitterness of Brussels sprouts. The result is a complex flavor combination that elevates the ordinary into the extraordinary. Therefore, by incorporating this dish, you’re not only elevating your dinner experience but also providing yourself and your loved ones with a health-boosting meal that’s mouthwateringly delicious.

    Beyond health benefits, this recipe meets various dietary needs. It is completely vegan, gluten-free, and low-calorie, making it an ideal addition to your kitchen repertoire. Whether you’re preparing meals for yourself, your family, or hosting a gathering, these caramelized roasted Brussels sprouts and carrots cater to diverse dietary preferences effortlessly. Enjoy a wholesome dish that brings together great taste, health benefits, and simplicity all in one bowl!

    Ingredients Overview

    Essential Ingredients for Caramelized Roasted Brussels Sprouts And Carrots

    To whip up this delicious dish, you will need the following ingredients:

    • Brussels Sprouts: 1 pound (trimmed and halved)

      • Benefit: Packed with vitamins and high in fiber.
    • Carrots: 4 medium-sized (peeled and sliced into rounds)

      • Benefit: Rich in vitamins A and C; adds natural sweetness.
    • Olive Oil: 3 tablespoons

      • Benefit: Healthy fats for heart health; helps with roasting.
    • Maple Syrup: 1 tablespoon (optional)

      • Benefit: Natural sweetener that enhances the caramelization process.
    • Salt: 1 teaspoon

      • Benefit: Enhances the flavor of the vegetables.
    • Black Pepper: 1/2 teaspoon

      • Benefit: Adds a hint of spice.
    • Garlic Powder: 1 teaspoon (optional)

      • Benefit: Provides aromatic flavor.
    • Balsamic Vinegar: 1 tablespoon (for a tangy finish, optional)

      • Benefit: Complements the sweetness with tanginess.
    • Fresh Thyme or Rosemary: 1 teaspoon (fresh or dried)

      • Benefit: Herbal notes that elevate the dish’s complexity.

    These ingredients combine to create a delightful balance of flavors and textures that are essential in your healthy dinner recipes collection. This dish is gluten-free and vegan, ensuring it accommodates those with dietary constraints. For a low-calorie option, simply adjust the use of maple syrup to your preference.

    Dietary Substitutions to Customize Your Caramelized Roasted Brussels Sprouts And Carrots

    Cooking at home should be flexible, especially when it comes to customizations that cater to specific dietary needs or ingredient availability. Here are some suggestions to adapt this recipe:

    • Oil Substitutions: While olive oil is recommended for its health benefits, you can substitute it with avocado oil or coconut oil based on your flavor preferences or dietary needs.

    • Sweetener Options: If you’re looking for a sugar-free option, consider using stevia or erythritol in place of maple syrup. These alternatives will help achieve sweetness without the calories.

    • Herb Variations: Feel free to swap out thyme or rosemary with other herbs based on what you have on hand. Dill or oregano could be interesting substitutes that give a different flavor twist.

    • Additional Vegetables: This recipe is versatile enough for variations. Add in other root vegetables such as sweet potatoes, parsnips, or even red onions for added layers of flavor and nutrition.

    • Spice It Up: If you’re a fan of spice, consider adding paprika, cayenne pepper, or chili flakes for an extra kick.

    These substitutions enable you to create a customized version of Caramelized Roasted Brussels Sprouts and Carrots, ensuring that it’s enjoyable for everyone at the dining table. Embrace your culinary creativity while keeping this dish as a staple in your collection of healthy dinner recipes.

    How to Prepare the Perfect Caramelized Roasted Brussels Sprouts And Carrots: Step-by-Step Guide

    Now that you have your ingredients ready, let’s dive into the step-by-step preparation of Caramelized Roasted Brussels Sprouts and Carrots! This process is simple and straightforward, making it perfect for any home cook.

    1. Preheat the Oven: Set your oven to 400°F (200°C). Preheating your oven ensures that your vegetables begin roasting immediately, which helps achieve that perfect caramelization.

    2. Prepare Your Vegetables: Rinse the Brussels sprouts under cold water, trim the stems, and slice them in half. Peel the carrots and cut them into even rounds. Uniformity is key for even cooking.

    3. Mix Ingredients: In a large mixing bowl, combine the halved Brussels sprouts and sliced carrots. Drizzle with olive oil, and mix well until the vegetables are thoroughly coated. If using, add the maple syrup and stir until evenly distributed.

    4. Season: Sprinkle salt, black pepper, and garlic powder over the vegetable mixture. Toss everything together to ensure the seasonings are well distributed.

    5. Arrange on a Baking Sheet: Spread the vegetables out in a single layer on a baking sheet. Avoid overcrowding, as this will lead to steaming rather than roasting.

    6. Roast in the Oven: Place the baking sheet in the preheated oven. Roast for 25-30 minutes, stirring halfway through to promote even browning. You’re looking for a perfect golden-brown color.

    7. Check for Doneness: The Brussels sprouts should be tender and have crispy edges, while the carrots should be soft but still have a slight bite. If necessary, roast for an additional 5-10 minutes.

    8. Add Balsamic Vinegar (Optional): For a zesty finish, remove the baking sheet from the oven and drizzle the balsamic vinegar over the roasted vegetables. Toss to combine before serving.

    9. Garnish and Serve: Transfer the roasted Brussels sprouts and carrots to a serving platter. Garnish with fresh herbs if desired and enjoy while warm!

    10. Storing Leftovers: If you have leftovers, store them in an airtight container in the refrigerator for up to three days. Reheat in the oven or microwave before serving.

    This method of preparation will yield beautifully caramelized Brussels sprouts and carrots that not only look appealing but are also bursting with flavor. Plus, each step is easily adjustable for various dietary preferences, keeping it aligned with your repertoire of healthy dinner recipes.

    Mastering Caramelized Roasted Brussels Sprouts And Carrots: Advanced Tips and Variations

    Although this recipe is quite straightforward, here are some advanced tips for perfecting your caramelized Brussels sprouts and carrots. These will help elevate both flavor and presentation:

    • Charring: For extra deep flavor, consider charring the vegetables. After roasting, broil them for an additional 2-3 minutes to get crispy edges that add texture.

    • Herb Infusion: Add a couple of sprigs of fresh thyme or rosemary to the roasting pan before starting. This will infuse the vegetables with aromatic flavors during cooking.

    • Add Nuts: For additional crunch and nutritional value, sprinkle some toasted walnuts or pecans over the top before serving. They provide a delightful contrast in texture.

    • Cheese Top: Add a sprinkle of feta or goat cheese before serving for a creamy, salty addition that enhances the dish’s appeal.

    • Citrus Twist: Squeeze fresh lemon or orange juice over the finished dish for a burst of brightness. The acidity pairs beautifully with the sweetness of the caramelized vegetables.

    Implementing these tips and variations allows you to experiment with flavors and textures while maintaining the essence of this healthy dinner recipe. Create a signature dish that resonates with your personal taste!

    How to Store Caramelized Roasted Brussels Sprouts And Carrots: Best Practices

    Proper storage of leftover Caramelized Roasted Brussels Sprouts and Carrots not only preserves freshness but also maintains their flavorful profile. Here’s how to store your dish effectively:

    1. Refrigeration: Allow any leftovers to cool to room temperature before transferring them to an airtight container. Store in the refrigerator and consume within 3 days for the best taste and quality.

    2. Freezing: For longer storage, you can freeze roasted vegetables. Spread cooled Brussels sprouts and carrots in a single layer on a baking sheet, and freeze until firm. Once frozen, transfer to a freezer-safe zip bag, removing as much air as possible. They can be stored this way for up to 3 months.

    3. Reheating: When ready to enjoy again, reheat in the oven at 350°F (175°C) until warmed through, approximately 15-20 minutes. If reheating from frozen, allow an extra 10 minutes. For a quicker option, you can also microwave for 2-3 minutes, although this may soften the texture somewhat.

    By following these storage tips, you can make this dish part of your weekly healthy dinner recipes rotation without compromising on taste or quality.

    Nutritional Value of Caramelized Roasted Brussels Sprouts And Carrots

    Understanding the nutritional profile of your meals is essential, especially for those seeking healthy dinner recipes. Here’s a breakdown of the approximate nutritional values per serving (based on 4 servings):

    • Calories: 120
    • Total Fat: 7g
      • Saturated Fat: 1g
      • Trans Fat: 0g
    • Cholesterol: 0mg
    • Sodium: 300mg
    • Total Carbohydrates: 14g
      • Dietary Fiber: 5g
      • Sugars: 4g
    • Protein: 3g
    • Vitamins & Minerals:
      • Vitamin A: 150% DV
      • Vitamin C: 120% DV
      • Calcium: 5% DV
      • Iron: 6% DV

    This recipe offers an excellent source of vitamins A and C, dietary fiber, and antioxidants, making it a healthy choice any day of the week. The fiber content is particularly beneficial, aiding digestion and promoting satiety. By integrating Caramelized Roasted Brussels Sprouts and Carrots into your meals, you’re fueling your body with essential nutrients while enjoying a dish that tantalizes the taste buds.

    FAQs: Frequently Asked Questions About Caramelized Roasted Brussels Sprouts And Carrots

    1. Can I make this recipe ahead of time?

    Yes! You can prepare the vegetables and store them in the refrigerator until you’re ready to roast them. This makes for a convenient option in your collection of healthy dinner recipes.

    2. Can I use frozen Brussels sprouts and carrots?

    Fresh vegetables yield the best flavor and texture, but if you only have frozen options, they can work. Just ensure to thaw them completely and pat them dry to avoid excess moisture.

    3. What are some good mains to pair with this dish?

    Caramelized Roasted Brussels Sprouts and Carrots pair perfectly with grilled chicken, salmon, or even a hearty quinoa salad for a complete meal.

    4. How can I adjust the sweetness?

    You can easily control the sweetness by adjusting the amount of maple syrup you use. Skipping it entirely or replacing it with a sugar substitute also works well.

    5. Are there any other ways to season these vegetables?

    Absolutely! Feel free to experiment with different spices such as cumin, paprika, or even herbs like oregano or basil to customize the flavor.

    Embracing the world of food through healthy dinner recipes not only nourishes our bodies but also enriches our lives. We hope this recipe for Caramelized Roasted Brussels Sprouts and Carrots inspires you to create culinary magic in your kitchen! Enjoy your cooking journey and the delightful flavors awaiting you at the dinner table.

  • Feta Greek Broccoli Salad

    Feta Greek Broccoli Salad

    Feta Greek Broccoli Salad: A Tropical Delight

    Introduction to Feta Greek Broccoli Salad

    Are you searching for quick and nutritious healthy dinner recipes that can easily fit into a busy lifestyle? Well, look no further! The Feta Greek Broccoli Salad shines as a vibrant and tasty dish that marries health with flavor. This fresh salad is an excellent choice for anyone, from busy parents to diet-conscious individuals, providing all the essential nutrients and deliciousness without requiring hours in the kitchen.

    Imagine a medley of colorful broccoli, creamy feta cheese, crunchy vegetables, and the bright, zesty flavors of Greek dressing. Not only does this salad deliver on flavor, but it’s also incredibly easy to make. Plus, it’s vegan and gluten-free adaptable, making it suitable for various dietary needs. Packed with vitamins and minerals like vitamin C, calcium, and fiber, this salad not only keeps your body healthy but also supports your overall wellbeing.

    With simple preparation steps and easily accessible ingredients, Feta Greek Broccoli Salad gives you the perfect dish to bring to a potluck, serve at a family dinner, or enjoy as a light meal any day of the week. So, grab your cutting board and let’s dive deeper into this delightful recipe!

    Benefits and Advantages of Feta Greek Broccoli Salad

    The Feta Greek Broccoli Salad stands out for several reasons, making it a favorite among those who appreciate healthy eating.

    Ease of Preparation: One of the standout features of this recipe is its simplicity. With just a handful of fresh ingredients, you can whip up this colorful salad in under 30 minutes. This is especially beneficial for busy parents and working professionals who are short on time but still want to prioritize healthy meals.

    Health Benefits: This salad incorporates nutrient-rich ingredients like broccoli, which is renowned for its antioxidant and anti-inflammatory properties. Broccoli is also high in fiber, promoting digestive health and providing satiety—a perfect combination for anyone trying to manage their weight. The feta cheese adds a delightful creaminess while contributing protein and calcium to your diet.

    Customizable to Fit Any Lifestyle: Whether you’re a vegan, vegetarian, or someone on a gluten-free diet, this salad can be modified to meet your needs. By incorporating different ingredients or substituting the feta with plant-based options, you can enjoy the benefits of this great dish no matter your dietary restrictions.

    Refreshing and Satisfying: The contrast of textures in this salad—from the crunchy broccoli and crisp bell peppers to the creamy cheese and zesty dressing—creates a delightful eating experience that leaves you satisfied without feeling heavy.

    Ultimately, the Feta Greek Broccoli Salad is not just a meal; it’s an experience that pleases the palate, nourishes the body, and fits seamlessly into various lifestyles. Incorporating this dish into your rotation of healthy dinner recipes is a no-brainer!

    Ingredients Overview

    Essential Ingredients for Feta Greek Broccoli Salad

    To create your own Feta Greek Broccoli Salad, gather the following ingredients:

    • 4 cups broccoli florets (raw and chopped)
      Health Benefit: High in vitamins C and K, low in calories.

    • 1 cup cherry tomatoes (halved)
      Health Benefit: Rich in antioxidants and vitamins.

    • 1 cup cucumber (diced)
      Health Benefit: Provides hydration and essential nutrients.

    • ½ cup red onion (thinly sliced)
      Health Benefit: Contains antioxidants and adds flavor without calories.

    • ½ cup feta cheese (crumbled)
      Health Benefit: Good source of protein and calcium. Substitute with dairy-free feta for a vegan option.

    • ¼ cup Kalamata olives (sliced, optional)
      Health Benefit: Healthy fats that support heart health.

    • ¼ cup olive oil
      Health Benefit: Contains healthy monounsaturated fat.

    • 2 tablespoons red wine vinegar
      Health Benefit: Adds flavor and helps with digestion.

    • 1 teaspoon dried oregano
      Flavor Enhancer: Provides a classic Mediterranean taste.

    • Salt and pepper to taste
      Flavor Enhancer: Balances and brings all ingredients together.

    Dietary Substitutions to Customize Your Feta Greek Broccoli Salad

    Your Feta Greek Broccoli Salad can easily be tailored to fit various dietary requirements:

    • Vegan Option: Substitute feta cheese with crumbled tofu or a vegan feta cheese alternative.

    • Gluten-Free Option: This salad is naturally gluten-free, but make sure to check all packaged ingredients like olives and vinegar to ensure no hidden gluten.

    • Low-Calorie Option: Skip the feta or reduce the amount used. You could also add more veggies like bell peppers or spinach to bulk it up without adding many calories.

    • Extra Protein: To make this salad a more complete meal, consider adding grilled chicken, chickpeas, or quinoa for additional protein and fiber.

    With these ingredient variations, you can adapt the Feta Greek Broccoli Salad to suit anyone’s taste preferences or dietary needs, making it a truly versatile option among healthy dinner recipes.

    How to Prepare the Perfect Feta Greek Broccoli Salad: Step-by-Step Guide

    Creating your Feta Greek Broccoli Salad is straightforward. Follow these steps, and you’ll have a delicious dish ready to serve:

    1. Prepare the Base: Start by washing the broccoli florets thoroughly. Once clean, chop them into bite-sized pieces and set them aside in a large mixing bowl.

    2. Chop the Veggies: Dice the cucumber into small cubes and slice the cherry tomatoes in half. Add these freshly chopped vegetables to the bowl with the broccoli.

    3. Add the Onions: Thinly slice the red onion and toss it into the mix. If you are sensitive to the strong flavor of raw onion, consider soaking the slices in cold water for about 10 minutes to mellow the taste.

    4. Incorporate the Feta: Crumble the feta cheese over the salad. If you’re going for a vegan version, use the crumbled tofu or a plant-based feta instead.

    5. Mix in Olives: If using, slice the Kalamata olives and add them to the mixture for a savory kick.

    6. Prepare the Dressing: In a small bowl, whisk together the olive oil, red wine vinegar, dried oregano, salt, and pepper. Adjust the seasoning based on your tastes; feel free to add a little garlic powder for an additional flavor boost.

    7. Drizzle and Toss: Pour the dressing over the salad and gently toss all ingredients to ensure they’re coated evenly.

    8. Chill: For a more invigorating flavor, refrigerate the salad for about 30 minutes before serving. This allows the flavors to meld together beautifully.

    9. Taste and Adjust: Before serving, taste the salad, and if necessary, add a little more salt, pepper, or vinegar based on your preference.

    10. Serve: Present your beautiful Feta Greek Broccoli Salad in a large serving bowl, garnished with a few extra sprigs of oregano or basil to make it visually appealing.

    This salad is perfect for serving at gatherings, but it can also be portioned out and taken as a healthy lunch for the week!

    Mastering Feta Greek Broccoli Salad: Advanced Tips and Variations

    To ensure your Feta Greek Broccoli Salad is always a hit, consider the following advanced tips:

    • Experiment with Seasoning: Try adding fresh herbs, such as basil, parsley, or dill, to enhance the flavor.

    • Use Seasonal Produce: Depending on the time of year, you might want to incorporate seasonal vegetables like bell peppers, snow peas, or carrots for added color and nutrition.

    • Add Nuts or Seeds: Topping your salad with toasted almonds, walnuts, or pumpkin seeds can provide a delightful crunch and boost the health benefits by adding essential fatty acids.

    • Switching Up the Dressing: Feel free to swap the red wine vinegar for lemon juice or balsamic vinaigrette. Each dressing can give the salad a unique twist.

    • Create a Meal Prep Version: Make a larger batch of this salad and divide it into meal prep containers for quick lunches throughout the week.

    • Make it Heartier: Turn this salad into a main dish by adding grilled shrimp, shredded rotisserie chicken, or even roasted chickpeas for a vegetarian protein punch.

    These variations and tips will keep your Feta Greek Broccoli Salad exciting, making it a perennial favorite in your collection of healthy dinner recipes.

    How to Store Feta Greek Broccoli Salad: Best Practices

    To maintain the freshness of your Feta Greek Broccoli Salad, follow these storage guidelines:

    • Refrigeration: Store any leftovers in an airtight container in the refrigerator. The salad can last up to 3 days, although it’s best enjoyed fresh to maintain the crunch of the vegetables.

    • Freezing: Freezing this salad is not recommended due to the ingredients’ textures. However, if you’ve made dressings in bulk, consider freezing them separately for future use.

    • Reheating: For best results, consume the salad cold, as reheating can make the vegetables mushy and affect the overall taste.

    By properly storing your Feta Greek Broccoli Salad, you’ll ensure it remains one of your go-to healthy dinner recipes for days to come.

    Nutritional Value of Feta Greek Broccoli Salad

    If you are keen on monitoring your nutritional intake, here’s a breakdown of the Feta Greek Broccoli Salad per serving (approximately 1 cup):

    • Calories: 220
    • Total Fat: 16g
    • Saturated Fat: 5g
    • Trans Fat: 0g
    • Cholesterol: 35mg
    • Sodium: 450mg
    • Total Carbohydrates: 12g
    • Dietary Fiber: 4g
    • Sugars: 2g
    • Protein: 6g
    • Vitamin A: 14% of DV
    • Vitamin C: 100% of DV
    • Calcium: 10% of DV
    • Iron: 10% of DV

    This salad is a powerhouse of nutrition, offering a low-calorie, high-fiber option that helps you feel full and satisfied. All the essential vitamins make it a stand-out choice among the healthy dinner recipes you can incorporate into any meal plan.

    FAQs: Frequently Asked Questions About Feta Greek Broccoli Salad

    Q1: Can I make Feta Greek Broccoli Salad ahead of time?
    A1: Yes, you can prepare it a day in advance. However, the salad is best enjoyed fresh within a few hours of making it for optimal crunchiness.

    Q2: What vegan substitute can I use for feta cheese?
    A2: Crumbled tofu marinated in herbs or a store-bought vegan feta can substitute well for traditional feta.

    Q3: Can I add other vegetables to this salad?
    A3: Absolutely! Feel free to include any veggies you prefer, such as bell peppers, carrots, or spinach. It’s a great way to enhance flavor and nutrition.

    Q4: Is this salad suitable for meal prep?
    A4: Yes, divide it into meal prep containers and store it in the fridge. Just remember to keep the dressing separate until you’re ready to eat.

    Q5: How can I enhance the taste of the salad?
    A5: Adding fresh herbs, garlic powder, or lemon juice can elevate the flavor. Experimenting with different dressings can also yield fabulous results!

    With these FAQs, we hope to address common queries surrounding the Feta Greek Broccoli Salad while continuing to highlight its qualities as a delicious and nutritious dish in the realm of healthy dinner recipes.

    In conclusion, this Feta Greek Broccoli Salad is not just another recipe—it’s a testament to healthy eating made easy, delicious, and satisfying. Don’t hesitate to customize it to your taste; after all, healthy eating should be enjoyable!

  • Quick Broccoli Salad With Honey Mustard Dressing

    Quick Broccoli Salad With Honey Mustard Dressing

    Quick Broccoli Salad With Honey Mustard Dressing: A Tropical Delight

    Introduction to Quick Broccoli Salad With Honey Mustard Dressing

    If you’re looking for an easy and vibrant addition to your repertoire of healthy dinner recipes, the Quick Broccoli Salad With Honey Mustard Dressing is your go-to dish! Packed with nutrients and refreshing flavors, this salad combines the crunchy goodness of fresh broccoli with tangy, sweet honey mustard dressing.

    This recipe is not only simple to prepare but also caters to a variety of dietary preferences, making it perfect for busy weeknights, festive gatherings, or as a light lunch. The recipe is gluten-free, vegan (with a simple substitution), and low in calories, ensuring that everyone can enjoy a bowlful without guilt. Plus, the unique blend of flavors gives your taste buds a tropical delight that sharpens your appetite for more.

    Whether you are a busy parent juggling work and home life, a student on the go, or someone who simply loves cooking, this broccoli salad will inspire you to create a dish that’s not only healthy but also delightful to eat. With its multitude of benefits, delicious taste, and ease of preparation, there’s no reason not to give this salad a try!

    Benefits and Advantages of Quick Broccoli Salad With Honey Mustard Dressing

    This Quick Broccoli Salad is brimming with benefits that make it stand out among healthy dinner recipes. First and foremost, preparation is a breeze. Within 15-20 minutes, you can whip up a beautiful salad perfect for serving as a side dish or enjoying on your own. It’s a fantastic way to incorporate more vegetables into your diet with minimal effort.

    One of the primary ingredients, broccoli, is known for its nutritional powerhouse properties. Rich in vitamins K and C, fiber, and a plethora of antioxidants, it contributes to overall health and aids digestion. Additionally, using a honey mustard dressing made of natural ingredients provides a sweet yet tangy flavor without resorting to store-bought versions laden with preservatives.

    Moreover, this salad is incredibly versatile. You can serve it at casual family dinners, picnics in the park, or as a potluck dish, pleasing a wide range of palates. Not only does it appeal to vegans and gluten-free eaters, but it can also be adapted for those watching their calories or looking to maintain a nutritious diet while enjoying a variety of flavors. Overall, this dish stands as a glowing example of how healthy eating can be both enjoyable and fulfilling.

    Ingredients Overview

    Essential Ingredients for Quick Broccoli Salad With Honey Mustard Dressing

    To create this vibrant salad, you will need the following ingredients:

    • 2 cups fresh broccoli florets (about 1 medium head)
    • 1 medium carrot, shredded
    • 1/4 cup red onion, finely chopped
    • 1/2 cup cherry tomatoes, halved
    • 1/4 cup sunflower seeds (for crunch, can substitute with pumpkin seeds for a nut-free option)
    • 1/4 cup raisins or dried cranberries (adds sweetness and can be omitted for lower sugar content)
    • 3 tablespoons honey (or agave syrup for a vegan option)
    • 2 tablespoons Dijon mustard
    • 1 tablespoon apple cider vinegar or lemon juice (for tang)

    This lovely mix not only enhances the taste but also packs a punch of nutrients, making it one of the top healthy dinner recipes for any occasion.

    Dietary Substitutions to Customize Your Quick Broccoli Salad With Honey Mustard Dressing

    Whether you’re vegan, gluten-free, or have specific dietary restrictions, this salad can be easily tailored to meet your needs:

    • For a Vegan Option: Substitute honey with agave syrup or maple syrup to keep it plant-based.
    • Gluten-Free Version: The ingredients listed are gluten-free, but always check product labels.
    • Nut-Free Option: Replace sunflower seeds with pumpkin seeds or omit them entirely if allergies are a concern.
    • For Extra Protein: Add cubed tofu or chickpeas for a hearty twist that will keep you full and satisfied.

    By swapping ingredients, you can customize your salad and keep it aligned with your dietary requirements without losing flavor or nutrition.

    How to Prepare the Perfect Quick Broccoli Salad With Honey Mustard Dressing: Step-by-Step Guide

    Now that you have your ingredients lined up, it’s time to dive into preparing this dish. Follow these straightforward steps to craft your Quick Broccoli Salad With Honey Mustard Dressing.

    1. Prepare the Broccoli: Start by washing the fresh broccoli thoroughly. Once clean, cut the florets away from the stalks, ensuring they’re around bite-size pieces. This makes them easier to eat and mix into your salad.

    2. Shred the Carrot: Rinse the carrot and use a grater or a food processor to shred it finely. Shredded carrot adds a lovely color and natural sweetness to the salad.

    3. Chop the Onion: Finely chop the red onion. If you’re sensitive to the strong flavor, you can soak the chopped onion in cold water for a few minutes to mellow its taste.

    4. Prepare the Cherry Tomatoes: Rinse the cherry tomatoes. Slice them in half to expose their juicy interiors. This step not only enhances the presentation but also balances the salad’s flavors.

    5. Combine Base Ingredients: In a large mixing bowl, combine the prepared broccoli florets, shredded carrot, chopped onion, and halved cherry tomatoes. Toss to combine evenly.

    6. Make the Dressing: In a separate small bowl, mix together the honey (or agave syrup), Dijon mustard, and apple cider vinegar, whisking until smooth. If you like a thicker dressing, add a little less vinegar.

    7. Dress the Salad: Pour the honey mustard dressing over the combined salad ingredients. Give it a gentle toss to ensure all components are well coated without bruising the broccoli.

    8. Add Crunch: Finally, sprinkle the sunflower seeds and raisins (or dried cranberries) on top of the salad. Toss again lightly to integrate them into the mixture.

    9. Chill (optional): If time permits, refrigerate the salad for about 30 minutes before serving. This allows the flavors to meld together beautifully.

    10. Serve and Enjoy: Your Quick Broccoli Salad With Honey Mustard Dressing is now ready to serve! Enjoy it as a side dish or a light meal.

    By following these steps, you can create a delightful salad that aligns perfectly with your search for healthy dinner recipes.

    Mastering Quick Broccoli Salad With Honey Mustard Dressing: Advanced Tips and Variations

    Enhancing your Quick Broccoli Salad With Honey Mustard Dressing is simple with a few advanced tips and variations:

    • Incorporate Seasonal Veggies: Feel free to add seasonal vegetables like bell peppers, snap peas, or even avocados to amplify the nutritional profile and flavors.

    • Introduce Fresh Herbs: Adding fresh herbs such as parsley, cilantro, or dill will elevate the freshness of the dish. A handful of fresh herbs can add complexity and enhance the taste.

    • Spice It Up: For those who enjoy some heat, incorporate a pinch of cayenne pepper or some red pepper flakes into the dressing to give it a spicy kick!

    • Protein Boost: For a more filling meal option, consider adding grilled chicken, shrimp, or even hard-boiled eggs. This increases the protein content, making it a more substantial dish.

    By embracing these suggestions, you not only tailor your salad to your personal taste but also accommodate the variety that many healthy dinner recipes aim to achieve.

    How to Store Quick Broccoli Salad With Honey Mustard Dressing: Best Practices

    Proper storage of your Quick Broccoli Salad With Honey Mustard Dressing ensures maximum freshness and taste. If you have leftovers or wish to prepare the salad in advance, here are the best practices for refrigeration and freezing:

    • Refrigeration: Store leftover salad in an airtight container in the refrigerator. It’s best consumed within 3 days for optimal freshness. If you anticipate leftovers, consider dressing only the portion you’re serving to prevent the salad from wilting.

    • Freezing: While it’s possible to freeze this salad, it’s not recommended due to the vegetable texture change after thawing. If you plan to freeze, store the dressing separately and only mix after thawing the salad components.

    By adhering to these practices, you’ll enjoy your Quick Broccoli Salad various times over, without compromising on taste. This aligns well with maintaining healthy dinner recipes in your weekly meal planning.

    Nutritional Value of Quick Broccoli Salad With Honey Mustard Dressing

    Understanding the nutritional benefits of your food is essential. Here’s a breakdown of the key nutritional components in one serving of Quick Broccoli Salad With Honey Mustard Dressing:

    • Calories: Approximately 150 calories (with the dressing optional)
    • Fat: 6 grams (mostly from sunflower seeds)
    • Carbohydrates: 18 grams
    • Fiber: 3.5 grams
    • Protein: 4 grams

    The salad offers an excellent source of Vitamin C and K, providing anti-inflammatory and antioxidant properties beneficial for overall health. It’s also high in fiber, aiding digestion while keeping you full longer. The natural sweetness from the honey dressing is a healthier alternative to sugar-laden options found in many store-bought salads. Including a variety of nutrients this dish is a top contender among healthy dinner recipes.

    FAQs: Frequently Asked Questions About Quick Broccoli Salad With Honey Mustard Dressing

    1. Can I make this salad in advance?
    Absolutely! This salad can be prepared a day ahead. However, for the best texture, avoid adding the dressing until just before serving.

    2. What can I substitute for a nut allergy?
    If you have nut allergies, simply omit any nuts and ensure that the seeds you choose (like sunflower seeds) are processed in a nut-free facility.

    3. Is it possible to use frozen broccoli?
    While fresh broccoli provides the best flavor and texture, you can use frozen broccoli if that’s what you have. Just be sure to thaw and drain it thoroughly before adding it to the salad.

    4. How can I alter the sweetness in the dressing?
    You can adjust the sweetness by using more or less honey or opting for a sugar-free alternative like stevia.

    5. What types of vinegar can I use in the dressing?
    Apple cider vinegar works best, but white wine vinegar or rice vinegar can also provide a delicious tang.

    This Quick Broccoli Salad With Honey Mustard Dressing serves as an inspiration for incorporating healthy vegetables into your meals while staying tuned to your dietary needs. Give it a try, and you may just find it becoming a staple in your collection of healthy dinner recipes!

  • The Most Addictive Garlic Broccoli YouLl Ever Make

    The Most Addictive Garlic Broccoli YouLl Ever Make

    The Most Addictive Garlic Broccoli You’ll Ever Make!: A Tropical Delight

    Introduction to The Most Addictive Garlic Broccoli You’ll Ever Make!

    Welcome to the world of culinary delight where The Most Addictive Garlic Broccoli You’ll Ever Make! takes center stage! This recipe beautifully combines simplicity, flavor, and health benefits, making it a perfect addition to your repertoire of healthy dinner recipes. Whether you’re a busy parent trying to whip up a meal in no time or a food enthusiast looking to impress guests, this dish has got you covered.

    Garlic broccoli is not just a meal; it’s an experience. Imagine tender, vibrant florets sautéed to perfection, enveloped in a garlic-infused sauce that will have you reaching for more. It caters to various dietary needs, being naturally vegan and gluten-free, while also promoting good health. This tasty dish is packed with vitamins, antioxidants, and dietary fiber, ensuring that you get the best from your greens.

    In today’s fast-paced world, cooking can sometimes feel burdensome. That’s where this recipe shines—it’s both quick and incredibly rewarding. With just a handful of ingredients, you’ll create a flavor-packed dish that transforms the humble broccoli into a crowd-pleaser. Whether served as a side dish or the main attraction, this addictive garlic broccoli is bound to become a favorite staple in your home.

    Benefits and Advantages of The Most Addictive Garlic Broccoli You’ll Ever Make!

    Why should you make The Most Addictive Garlic Broccoli You’ll Ever Make!? The advantages go well beyond its delicious taste. Here are some compelling reasons to whip up this easy and satisfying dish:

    1. Ease of Preparation: One of the most attractive aspects of this recipe is its simplicity. With minimal cooking techniques required—sautéing and seasoning—you can have this dish on the table in under 30 minutes. This makes it an excellent choice for weeknight dinners when time is short, yet you still want something nutritious.

    2. Packed with Nutrients: Broccoli is a nutritional powerhouse. It’s low in calories but rich in fiber, vitamins C and K, iron, and potassium. Moreover, this recipe includes garlic, which is known for its health benefits, including boosting the immune system and reducing inflammation. This combination makes it one of the best healthy dinner recipes you can incorporate into your meal rotation.

    3. Adaptable for Various Diets: Whether you’re vegan, gluten-free, or simply looking for low-calorie options, this dish checks all the boxes. It has no animal products and is naturally sans gluten, making it suitable for a wide array of dietary preferences.

    4. Versatile Serving Options: Serve it as an elegant side dish or pair it with grains or proteins for a hearty main dish. This versatility allows you to customize meals according to your or your guests’ tastes.

    5. Flavor Explosion: The combination of garlic, olive oil, and a hint of lemon juice enhances the broccoli’s natural flavor, creating a delightful taste experience. This dish is guaranteed to impress even those who claim they don’t like broccoli, making it a fantastic way to introduce more vegetables into your diet.

    In summary, The Most Addictive Garlic Broccoli You’ll Ever Make! is not just about nutrition but a celebration of flavor and heartiness. By including it in your rotation of healthy dinner recipes, you’re choosing a dish that is delicious, fulfilling, and easy to prepare.

    Ingredients Overview

    Essential Ingredients for The Most Addictive Garlic Broccoli You’ll Ever Make!

    To make The Most Addictive Garlic Broccoli You’ll Ever Make!, gather these ingredients:

    • Broccoli: 1 pound (preferably fresh for best texture)
    • Purpose: The star of the dish. High in nutrients and adds vibrant color.

    • Olive oil: 2 tablespoons

    • Purpose: Adds a healthy fat, enhances flavor, and helps in sautéing.

    • Garlic cloves: 4, minced

    • Purpose: Provides that addictive flavor and health benefits.

    • Lemon juice: 1 tablespoon (freshly squeezed)

    • Purpose: Brightens the dish and balances the flavors.

    • Salt and pepper: To taste

    • Purpose: Enhances the overall flavor.

    • Red pepper flakes: 1/2 teaspoon (optional)

    • Purpose: Adds a bit of heat for spice lovers.

    • Sesame seeds: 1 tablespoon (optional, for garnish)

    • Purpose: Adds a crunch and nuttiness.

    This dish accommodates various dietary needs, making it one of the best healthy dinner recipes around. The ingredients are vegan, gluten-free, and low-calorie, providing you a flavorful dish without sacrificing your health goals.

    Dietary Substitutions to Customize Your The Most Addictive Garlic Broccoli You’ll Ever Make!

    To customize The Most Addictive Garlic Broccoli You’ll Ever Make!, consider the following substitutions:

    • Olive oil: If you’re avoiding oil, you can opt for vegetable broth for sautéing, which will also keep the dish light.

    • Garlic powder: For individuals who are allergic to fresh garlic, garlic powder can be used. Start with 1 teaspoon and adjust according to taste.

    • Lemon juice: If fresh lemons are unavailable, a splash of vinegar (apple cider or white wine) can serve as a substitute to provide acidity.

    • Broccoli florets: If you can’t find fresh broccoli, frozen florets work adequately, but thaw and drain them before cooking to avoid excess moisture.

    • Red pepper flakes: If you prefer a milder flavor, you can substitute with dill or omit it entirely.

    Experimenting with these substitutions allows you to cater to different preferences while maintaining the core concept of this remarkable recipe. It’s a simple yet effective way to create healthy dinner recipes that everyone can enjoy.

    How to Prepare the Perfect The Most Addictive Garlic Broccoli You’ll Ever Make!: Step-by-Step Guide

    Getting started with The Most Addictive Garlic Broccoli You’ll Ever Make! is straightforward and rewarding. Here’s a step-by-step guide to ensure that you create this dish to perfection:

    1. Prepare the Broccoli: Begin by washing the broccoli thoroughly under cold water. Remove the tough stems and chop the broccoli into bite-sized florets. This ensures even cooking and makes eating more enjoyable.

    2. Prep the Garlic: Mince the garlic cloves and set aside. Use fresh garlic for the best flavor.

    3. Heat the Olive Oil: In a large skillet or frying pan, heat the olive oil over medium heat. You can test if the oil is hot enough by dropping a small piece of broccoli into it; it should sizzle.

    4. Sauté the Garlic: Once the oil is hot, add the minced garlic to the pan. Sauté for about 30 seconds until fragrant but be careful not to burn it, as burnt garlic can impart a bitter taste.

    5. Add the Broccoli: Immediately add the broccoli florets to the skillet. Stir well to coat the broccoli with the garlic and oil, ensuring each piece receives that flavorful touch.

    6. Season Generously: Sprinkle salt and pepper over the broccoli, according to your taste preference. If you’re using red pepper flakes, add them at this stage for an extra kick.

    7. Cook the Broccoli: Sauté the broccoli for about 5-7 minutes, stirring occasionally. The goal is to achieve a bright green color and a tender-crisp texture. If you prefer your broccoli cooked a bit more, add a splash of water and cover the pan for a couple of minutes to steam.

    8. Finish with Lemon Juice: Once the broccoli is cooked to your liking, remove it from heat and squeeze fresh lemon juice over the top. Stir to combine and adjust seasoning if necessary.

    9. Serve and Garnish: Transfer the garlic broccoli to a serving dish. If desired, sprinkle toasted sesame seeds on top to enhance the presentation and add a nutty flavor.

    10. Enjoy! Serve your addictive garlic broccoli hot. It pairs seamlessly with grains like quinoa or brown rice, or with grilled chicken or tofu for a complete meal.

    With these simple steps, you’ll create The Most Addictive Garlic Broccoli You’ll Ever Make!, a vibrant dish that celebrates flavor and health.

    Mastering The Most Addictive Garlic Broccoli You’ll Ever Make!: Advanced Tips and Variations

    To elevate your experience with The Most Addictive Garlic Broccoli You’ll Ever Make!, consider these advanced tips and variations that enhance both flavor and presentation:

    • Add Nuts: For extra texture, consider tossing in a handful of toasted almonds or walnuts during the last minute of cooking. Their crunch complements the tenderness of broccoli nicely.

    • Cheesy Option: If you’re not strictly vegan, a sprinkle of grated Parmesan cheese right before serving adds a delightful depth of flavor.

    • Experiment with Other Vegetables: Feel free to add other veggies like bell peppers or carrot ribbons, which complement broccoli’s taste while enhancing nutritional value.

    • Try Different Herbs: For added freshness, consider throwing in some fresh herbs such as basil or parsley just before serving.

    • Make it a Meal: To turn this side dish into a main course, mix it with cooked pasta or rice and toss with a creamy sauce or a homemade pesto for a wholesome meal.

    These tips and variations can transform your garlic broccoli into a versatile accompaniment or a stand-alone dish while maintaining the essence of healthy dinner recipes. Feel free to get creative!

    How to Store The Most Addictive Garlic Broccoli You’ll Ever Make!: Best Practices

    Storing The Most Addictive Garlic Broccoli You’ll Ever Make! is easy and allows you to enjoy leftovers without compromising on flavor:

    1. Refrigeration: After cooking, let the broccoli cool to room temperature. Transfer any leftovers to an airtight container. It will keep well in the fridge for 3-4 days. Reheat in the microwave or on the stovetop for a quick meal.

    2. Freezing: If you want to extend the longevity, consider freezing the garlic broccoli. Portion it into freezer-safe bags or containers. It can be stored for up to 3 months. For reheating, simply add frozen broccoli directly to a skillet and heat over low to medium heat, allowing it time to thaw and heat through.

    3. Reheating Best Practices: To retain the crunchiness, avoid overcooking when reheating. Whether in the microwave or stovetop, aim for a gentle warm rather than a heavy cook.

    Using these best practices ensures you maximize your leftovers while making the process of enjoying healthy dinner recipes seamless and enjoyable.

    Nutritional Value of The Most Addictive Garlic Broccoli You’ll Ever Make!

    Understanding the nutritional benefits of The Most Addictive Garlic Broccoli You’ll Ever Make! adds another layer of appeal. Here’s a detailed breakdown per serving (approximately one cup):

    • Calories: 150
    • Fat: 7g (mostly healthy fats from olive oil)
    • Saturated Fat: 1g
    • Carbohydrates: 20g
    • Fiber: 7g (excellent for digestion)
    • Sugars: 3g
    • Protein: 4g

    Vitamins and minerals:

    • Vitamin C: 135% of daily value
    • Vitamin K: 116% of daily value
    • Iron: 7% of daily value
    • Potassium: 9% of daily value

    Incorporating The Most Addictive Garlic Broccoli You’ll Ever Make! into your meals contributes significant nutrients while adhering to a healthy dietary footprint. This dish epitomizes healthy dinner recipes, being packed with vitamins and minerals while remaining low in calories.

    FAQs: Frequently Asked Questions About The Most Addictive Garlic Broccoli You’ll Ever Make!

    1. Can I use frozen broccoli instead of fresh?

    Absolutely! Frozen broccoli is a great substitute. Just ensure to thaw and drain it before sautéing.

    2. How can I make this recipe spicier?

    To amp up the heat, increase the amount of red pepper flakes or include a dash of cayenne pepper during cooking.

    3. Can I prepare this in advance?

    Yes, you can prepare the garlic broccoli a day ahead. Store it in the refrigerator and simply reheat before serving.

    4. What can I serve with garlic broccoli?

    This dish pairs well with grains like rice or quinoa, as well as proteins such as grilled tofu, chicken, or fish.

    5. Is this recipe suitable for meal prep?

    Definitely! It stores well and is perfect for meal prep as it can be reheated easily throughout the week.

    6. Is this recipe low-carb?

    Since broccoli is a non-starchy vegetable, this recipe is a great low-carb option, making it an excellent addition to grain-free diets.

    7. Can I customize the seasonings?

    Certainly! Feel free to incorporate your favorite herbs or spices, such as herbs de Provence or even a splash of balsamic vinegar for a twist.

    In conclusion, The Most Addictive Garlic Broccoli You’ll Ever Make! is much more than just a side dish; it’s a flavorful, versatile, and nutritious addition to your culinary endeavors. Not only does it stand out as one of the best healthy dinner recipes around, but it also invites creativity in the kitchen. Enjoy trying this delicious recipe and modifying it to suit your taste!

  • Crispy Celery Orange Salad

    Crispy Celery Orange Salad

    Crispy Celery Orange Salad: A Tropical Delight

    Introduction to Crispy Celery Orange Salad

    Are you on the lookout for healthy recipes that bring a delightful twist to your meals? Look no further than the Crispy Celery Orange Salad! This vibrant dish manages to balance freshness and flavor effortlessly, making it an excellent choice for a variety of occasions. The crunchy texture of celery paired with the sweet, zesty essence of oranges creates a refreshing salad that is as nourishing as it is delicious.

    With its simple preparation, this salad is perfect for busy weekdays, festive gatherings, or even as a light meal on the go. Packed with vitamins and antioxidants, this dish is not only vegan and gluten-free but also low in calories. Whether you are a busy parent looking for quick healthy meal ideas or a food enthusiast eager to explore new flavors, this salad will inspire anyone to get creative in the kitchen. In addition to being a great option for those with dietary restrictions, it’s also a fantastic way to incorporate more fruits and vegetables into your diet, making it a staple in healthy cooking.

    In this article, we will explore the key benefits of this unique salad, provide you with all the ingredients you need, and guide you step-by-step in creating your very own Crispy Celery Orange Salad. You’ll also find tips on storing leftovers and ways to customize the recipe to suit your taste preferences. So, let’s dive into the world of fresh, delicious flavors!

    Benefits and Advantages of Crispy Celery Orange Salad

    The Crispy Celery Orange Salad shines not only for its taste but also for its numerous health benefits. First and foremost, incorporating more vegetables and fruits into your diet is essential for a balanced lifestyle. The star ingredient, celery, is a powerhouse of nutrients. It is hydrating, low in calories, and abundant in both vitamins K and C, making it great for your skin and immune system.

    Moreover, oranges are known for their high vitamin C content, which plays an integral role in boosting your immune system and improving skin health. This refreshing fruit also adds a natural sweetness that complements the celery perfectly. As such, this salad is an excellent choice for those who aim to maintain a healthy weight without sacrificing flavor.

    Besides health advantages, one of the key features of this dish is its ease of preparation. In just a few steps, you can whip up a colorful and satisfying dish that requires minimal cooking—perfect for novice cooks or anyone who craves quick, tasty meals. Additionally, it can fit seamlessly into various dietary preferences or lifestyles, including vegan, vegetarian, and gluten-free diets.

    Furthermore, this salad can be customized easily. You can introduce other healthy ingredients such as nuts, seeds, or legumes to enhance its nutritional profile. A sprinkle of walnuts or pumpkin seeds can add a dose of healthy fats and protein, making it heartier while keeping it among the best healthy recipes you can create.

    In summary, the Crispy Celery Orange Salad is a standout option packed with flavor and health benefits. From its quick, simple preparation to its versatility, this dish can accommodate a wide audience, whether you’re a busy professional or someone simply looking to up their healthy eating game.

    Ingredients Overview

    Essential Ingredients for Crispy Celery Orange Salad

    To make the Crispy Celery Orange Salad, gather the following ingredients:

    • 4 stalks of celery (thinly sliced)
    • Celery provides a satisfying crunch while being low in calories and high in vitamins.
    • 2 medium oranges (peeled and segmented)
    • Oranges add sweetness and are rich in vitamin C, enhancing your immune health.
    • 1/4 cup of red onion (finely chopped)
    • This brings a slight kick and flavor depth while offering anti-inflammatory benefits.
    • 1/4 cup of fresh parsley (chopped)
    • Parsley contributes antioxidants and gives the salad a fresh touch.
    • 2 tablespoons of extra virgin olive oil
    • A healthy fat source, this oil is beneficial for heart health.
    • 1 tablespoon of apple cider vinegar
    • Helps promote digestion and adds a tangy flavor
    • Salt and pepper to taste
    • Essential for balancing flavors.

    This recipe is naturally gluten-free and vegan, making it suitable for those following specialized diets. If you prefer alternative dressings, consider using lemon juice or coconut yogurt to dress your salad, catering to your own taste preferences while keeping it among the nutritious recipes.

    Dietary Substitutions to Customize Your Crispy Celery Orange Salad

    The beauty of the Crispy Celery Orange Salad lies in its flexibility. Here are some substitutions and additions to fit various dietary needs:

    • For a Protein Punch: Add chickpeas or black beans for added protein and fiber, creating a more filling meal.
    • For Crunch Lovers: Top off your salad with sunflower seeds or crushed almonds for healthy fats and an extra crunch.
    • For a Sweet Twist: Incorporate slices of avocado for creaminess while also boosting the nutrient content and healthy fats.
    • If You Want Extra Flavor: Consider adding feta or goat cheese (if not making it vegan) for a savory note.

    Feel free to experiment with ingredients based on what you have on hand. The goal is to create a salad that suits your specific tastes and nutritional needs—truly a hallmark of healthy recipes.

    How to Prepare the Perfect Crispy Celery Orange Salad: Step-by-Step Guide

    Ready to create your own Crispy Celery Orange Salad? Follow these simple steps:

    1. Prepare the Base: Start by thoroughly washing the celery stalks under running water. Remove any dirt or debris. Once cleaned, slice them thinly on a diagonal to enhance their visual appeal.

    2. Segment the Oranges: Peel the oranges carefully. Use a sharp knife to cut between the membranes and release the segments. Aim for bite-sized pieces, ensuring that you capture as much juice as possible, as this will add flavor to the salad.

    3. Chop the Onions: Finely chop the red onion. If you’re sensitive to their strong flavor, consider soaking them in cold water for 10 minutes before draining to mellow the taste.

    4. Chop the Parsley: Rinse the fresh parsley and shake off excess water. Remove the leaves from the stems and chop them coarsely for a burst of color and flavor.

    5. Combine Ingredients: In a large mixing bowl, combine the sliced celery, orange segments, chopped onion, and parsley. Toss gently to mix the ingredients while preserving the integrity of the orange segments.

    6. Make the Dressing: In a small bowl, whisk together the extra virgin olive oil, apple cider vinegar, salt, and pepper. Adjust the seasoning to your preference.

    7. Dress the Salad: Pour the dressing over the salad mixture and gently toss to combine, ensuring that the dressing evenly coats all ingredients.

    8. Chill and Serve: For optimal flavor, let the salad chill in the refrigerator for 15-30 minutes before serving. This time allows the flavors to meld together beautifully.

    Altogether, this dish can be prepared in under 30 minutes, and it can be adjusted for any dietary needs. Feel free to use alternative bases, dressings, or toppings to cater to specific diets or preferences, making your salad truly unique while keeping it in line with the concept of healthy recipes.

    Mastering Crispy Celery Orange Salad: Advanced Tips and Variations

    Now that you have your base recipe, let’s take your Crispy Celery Orange Salad to the next level. Here are some advanced tips and variations to consider:

    • Experiment with Citrus: While oranges are a fantastic choice, mix it up with other citrus fruits like grapefruit or tangerines for a different flavor profile. Each fruit brings a unique sweetness or tanginess that changes the dish entirely.

    • Add Seasonal Vegetables: During different seasons, consider adding veggies like finely chopped bell peppers or grated carrots for extra color and nutrition. These additions make the salad more robust and appealing.

    • Herb Variations: Consider using basil or mint in addition to or instead of parsley. These herbs can add unexpected flavors that elevate the dish.

    • Heat Things Up: If you enjoy a little kick, add chopped jalapeño or a sprinkle of cayenne pepper to the dressing. The zing can enliven the salad and create an exciting contrast to the sweetness of the oranges.

    • Meal Prep Ready: This salad is even perfect for meal prep! Make a larger batch and store it without dressing—just add dressing when you’re ready to enjoy. This method preserves freshness and prevents sogginess.

    Making these alterations ensures your Crispy Celery Orange Salad remains exciting and personalized while still aligning with the principles of healthy recipes.

    How to Store Crispy Celery Orange Salad: Best Practices

    Storage is key to maintaining the freshness of your Crispy Celery Orange Salad. To keep it tasting its best, follow these best practices:

    • Refrigeration: Store the prepared salad in an airtight container in the refrigerator. It typically lasts about three days. Ensure you separate any dressing if you expect to keep it for more than one day; this prevents the salad from getting soggy.

    • Freezing: It’s not recommended to freeze this salad due to the high water content in the celery and oranges, which can make them mushy upon thawing. Stick to refrigeration for best results.

    • Reheating: This salad is best served cold or at room temperature, so there’s no need for reheating. Instead, retrieve it from the fridge and enjoy it right away!

    Using these methods, you can enjoy the full flavors of your Crispy Celery Orange Salad over several days, making it a convenient option within your collection of healthy recipes.

    Nutritional Value of Crispy Celery Orange Salad

    A brief overview of the nutritional profile of this salad will show how it aligns with a health-conscious approach to eating. Below is an estimated breakdown of the nutrition per serving (based on a 4-serving recipe):

    • Calories: 100 kcal
    • Protein: 2g
    • Total Fat: 7g
    • Saturated Fat: 1g
    • Carbohydrates: 13g
    • Dietary Fiber: 3g
    • Sugars: 4g
    • Vitamin C: 50% of the Daily Value (DV)
    • Vitamin A: 20% of the DV
    • Calcium: 4% of the DV
    • Iron: 2% of the DV

    Note that these values may fluctuate based on ingredient adjustments and additional toppings or dressings. Regardless, this salad maintains its standing as a nutrient-dense, low-calorie option, easily fitting within any roster of healthy recipes you wish to incorporate into your meals.

    FAQs: Frequently Asked Questions About Crispy Celery Orange Salad

    Can I make this salad ahead of time?

    Yes! You can make the salad a few hours in advance. However, it’s best to dress it just before serving to maintain the crispness of the celery and prevent sogginess.

    What can I substitute for the celery?

    If you’re not a fan of celery, feel free to use cucumbers for a similar crunch or shredded cabbage for added texture.

    Is this salad suitable for meal prep?

    Absolutely! This salad is great for meal prepping. Just keep the dressing separate until you’re ready to eat, and it will stay fresh for several days.

    Can I use bottled dressing instead of making my own?

    Yes, using a store-bought dressing can save time. Just choose one that emphasizes fresh ingredients and flavor to keep it in line with healthy recipes.

    How can I adapt this recipe for a low-carb diet?

    You can replace the oranges with berries like strawberries or blueberries for a lower carbohydrate option, while still keeping the sweetness and vibrant flavors.

    By addressing these common queries, we hope to equip you with the confidence you need to tackle this recipe and enjoy the benefits of incorporating more healthy recipes into your culinary repertoire.

    In conclusion, the Crispy Celery Orange Salad is truly a celebration of flavors, textures, and health! With its simplistic preparation and versatile options, it’s sure to become a favorite in your kitchen. Enjoy crafting this refreshing dish that not only tantalizes your taste buds but also supports your health goals!