Tag: salad

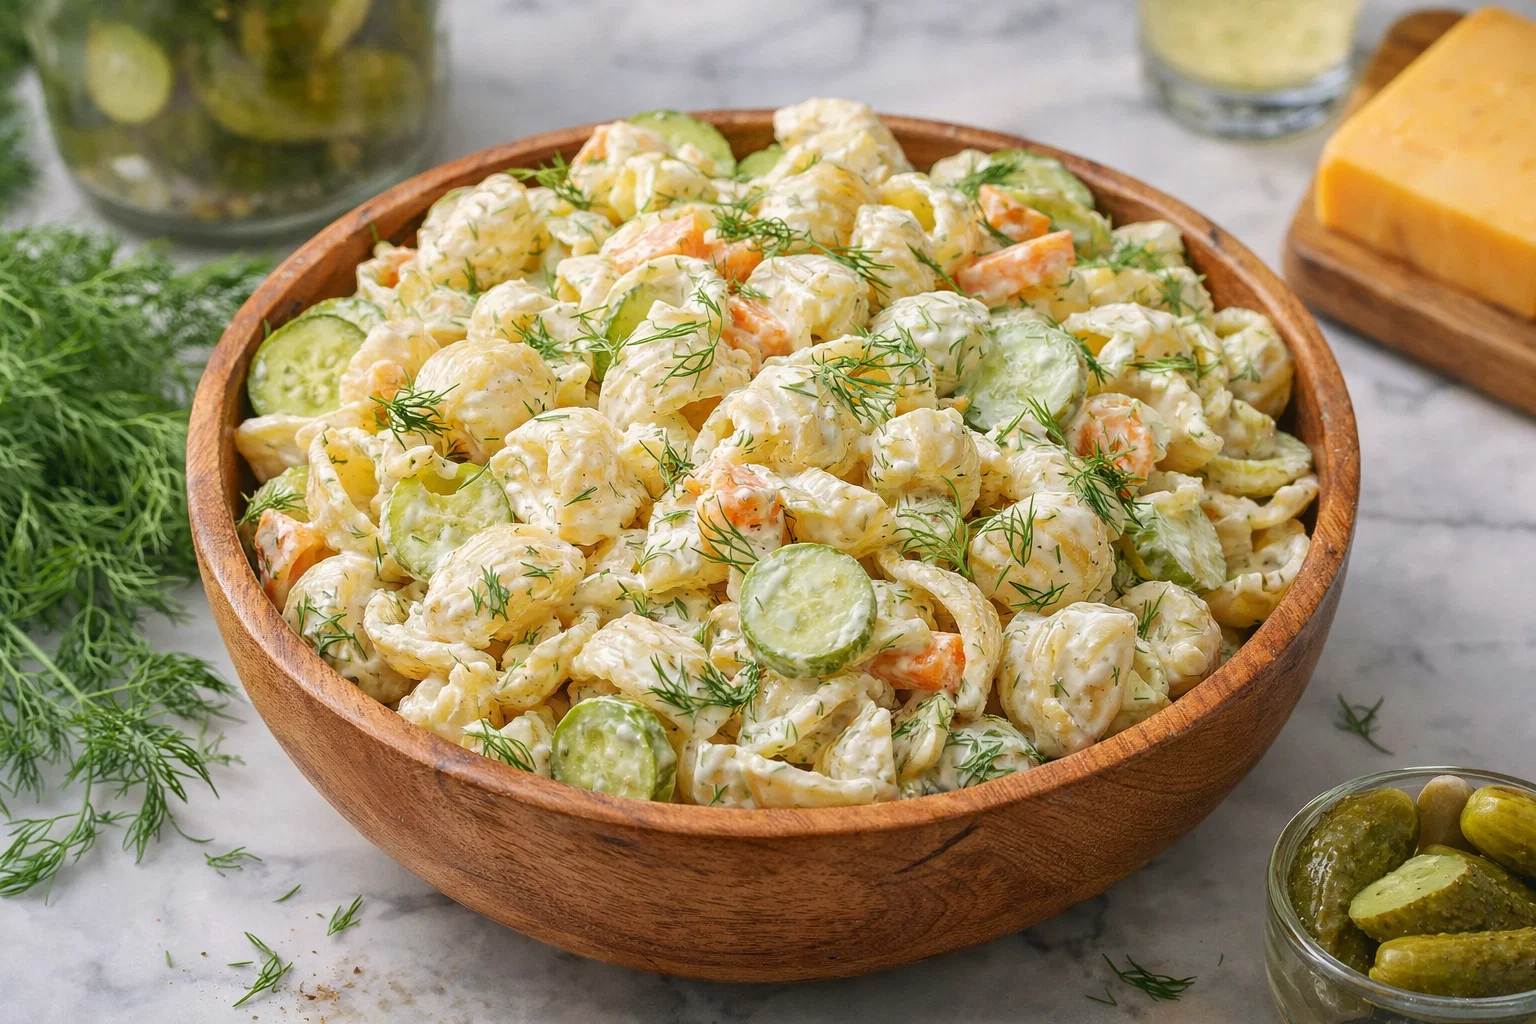
  • Tangy Pickle Pasta Salad

    Tangy Pickle Pasta Salad

    Tangy Pickle Pasta Salad: A Tropical Delight

    Introduction to Tangy Pickle Pasta Salad

    Are you a fan of vibrant and refreshing dishes that come together effortlessly? Look no further! This Tangy Pickle Pasta Salad is not just another side dish; it’s a delightful culinary experience that elevates any meal. In mere minutes, you can whip up a dish that combines the tangy crunch of pickles with the wholesome goodness of pasta, creating an explosion of flavor and texture.

    Perfect for busy parents, students looking for a quick meal, and health-conscious individuals, this pasta salad is also versatile enough to cater to various dietary needs. It’s easily adjustable to be vegan or gluten-free, making it a fantastic choice for gatherings where you want to please everyone. The zesty dressing is what truly makes this pasta salad sing – a blend of tangy pickle juice and wholesome ingredients ensures that this vibrant dish is both satisfying and light on your waistline, making it an excellent option for those watching their calories.

    So whether you’re preparing a quick weeknight dinner, a picnic delight, or just want to brighten up a potluck, this Tangy Pickle Pasta Salad is a dish you’ll come to love. Let’s dive deeper into why you’ll benefit from making this scrumptious salad and how easy it is to prepare!

    Benefits and Advantages of Tangy Pickle Pasta Salad

    This tangy pasta salad isn’t just about flavor; it brings a wealth of advantages that make it stand out in the culinary world. First and foremost, its simplicity is what draws many home cooks to this recipe. With minimal ingredients and straightforward preparation, you can have a meal ready in under thirty minutes. This means less time in the kitchen and more time enjoying your meal or spending it with loved ones.

    Moreover, the health benefits of this pasta salad are noteworthy. The core ingredients – pasta, pickles, vegetables, and a light dressing – provide a good balance of carbohydrates, fiber, and vitamins. Pickles are rich in probiotics, which can help improve gut health, while the veggies add essential nutrients and crunch. For those conscious of their caloric intake, you can use whole wheat or vegetable pasta, and a light vinaigrette instead of heavy dressings without sacrificing flavor.

    Another standout feature is its versatility. The Tangy Pickle Pasta Salad can act as a hearty side dish, a main course, or a colorful addition to your meal spread. It pairs wonderfully with grilled meats, barbecues, or even serves as a light lunch on its own. Moreover, it holds up well for meal prep, making it a smart choice for busy individuals who want nutritious options on hand.

    This pasta salad is not only a feast for the taste buds but also a visual delight, with bright colors and textures that make it appealing for any table setting. Personalize it with your family’s favorite add-ins or tweak the dressing to create a unique version that suits your palate. The possibilities are endless, making the Tangy Pickle Pasta Salad a must-try recipe.

    Ingredients Overview

    Essential Ingredients for Tangy Pickle Pasta Salad

    To create this delightful Tangy Pickle Pasta Salad, you’ll need the following ingredients:

    • 2 cups of pasta (whole wheat or gluten-free)
    • The base of your salad; choose any small pasta shape like shells or elbows for easy eating.

    • 1 cup of dill pickles, diced

    • For that signature tangy flavor.

    • 1 cup of bell peppers, diced (red, yellow, or green)

    • Adds sweetness and crunch.

    • 1 cup of cherry tomatoes, halved

    • For a juicy pop of flavor and color.

    • ½ cup of red onion, finely chopped

    • A crunchy element that adds a mild spice.

    • ¼ cup of fresh parsley, chopped

    • For garnish and freshness.

    • ½ cup of low-fat Greek yogurt or vegan sour cream (for a dairy-free option)

    • Acts as the creamy base for the dressing.

    • ¼ cup of pickle juice

    • To infuse the salad with that tangy flavor.

    • 2 tablespoons of apple cider vinegar (optional)

    • Enhances the salad’s flavor profile.

    • Salt and pepper to taste

    • Always essential for seasoning!

    These ingredients combine to create a rich, tasty salad that’s both fulfilling and healthy. You can easily modify this list to suit your dietary needs, which is another huge plus.

    Dietary Substitutions to Customize Your Tangy Pickle Pasta Salad

    The beauty behind the Tangy Pickle Pasta Salad lies in its flexibility. Here are some substitution suggestions to cater to various dietary preferences and needs:

    • Pasta: If gluten-free, opt for brown rice pasta, chickpea pasta, or quinoa pasta. Whole-grain pasta is a fantastic healthy option as well.

    • Creamy Dressing: Replace Greek yogurt with silken tofu blended until smooth for a vegan and dairy-free option. You can also use homemade cashew cream as a wholesome vegan substitute.

    • Vegetables: Feel free to mix in other vegetables like cucumbers, carrots, or even olives for more flavor and nutrients.

    • Protein Boost: Add some cooked and cooled chickpeas, lentils, or grilled chicken for added protein.

    • Pickles: If you prefer a different flavor profile, consider using sweet gherkins or bread and butter pickles for a change in taste.

    By utilizing these substitutions, you can easily adapt the Tangy Pickle Pasta Salad to fit various dietary restrictions while still retaining its delicious charm.

    How to Prepare the Perfect Tangy Pickle Pasta Salad: Step-by-Step Guide

    Creating the perfect Tangy Pickle Pasta Salad is a breeze! Follow this detailed step-by-step guide to whip up a spectacular dish that everyone will love.

    1. Prepare the Base:
    2. Begin by cooking your chosen pasta according to the package directions. Be sure to add a pinch of salt to the boiling water for flavor. Drain once cooked and rinse under cold water to stop the cooking process. This keeps the pasta al dente and prevents it from becoming mushy.

    3. Mix Ingredients:

    4. In a large mixing bowl, combine the diced pickles, bell peppers, cherry tomatoes, red onion, and chopped parsley. This combination provides a lively mix of colors and flavors to the salad.

    5. Prepare the Dressing:

    6. In a separate bowl, whisk together the Greek yogurt or vegan sour cream, pickle juice, apple cider vinegar, salt, and pepper until smooth. This creamy dressing is integral to tying all the salad components together.

    7. Combine Pasta and Vegetables:

    8. Add the cooled pasta to the bowl with the chopped vegetables. Toss gently but thoroughly until the pasta and vegetables are evenly mixed.

    9. Add the Dressing:

    10. Pour the dressing over the pasta and vegetable mixture. Toss again to ensure every ingredient is uniformly coated with that wonderful creamy goodness.

    11. Chill Your Salad:

    12. Cover the salad with plastic wrap or a tight lid and refrigerate for at least 30 minutes. This allows the flavors to meld together beautifully and enhances the tangy taste.

    13. Final Preparation:

    14. Before serving, stir the salad once more and adjust the seasoning if necessary. Sometimes a splash more of pickle juice or a sprinkle of salt can elevate the flavors.

    15. Serve and Enjoy:

    16. You can present your Tangy Pickle Pasta Salad in a large bowl or individual portions as a side or main meal.

    The charm of this recipe also lies in its adaptability; feel free to play with flavors and ingredients based on your preferences. For instance, add a pinch of herbs like dill or a dash of hot sauce if you enjoy a kick of spice!

    Mastering Tangy Pickle Pasta Salad: Advanced Tips and Variations

    Ready to take your Tangy Pickle Pasta Salad to the next level? Below are some expert tips and appealing variations to explore:

    • Herb Infusion: Embrace the freshness of herbs! Experiment with dill, chives, or basil to find your perfect herb combination.

    • Crunch Factor: For an extra crunch, consider adding sunflower seeds, walnuts, or sliced almonds. These additions not only provide texture but also add healthy fats and proteins.

    • Spicy Twist: If you enjoy heat, mix in some chopped jalapeños or a dollop of sriracha to the dressing for an exciting spicy kick.

    • Make it a Meal: Add grilled shrimp, tofu, or chickpeas to transform this salad into a more filling main course.

    • Sweet and Tangy Balance: Combine a bit of honey or agave nectar if you prefer subtle sweetness offsetting the tartness from pickles.

    By incorporating these advanced tips and variations, you can personalize your Tangy Pickle Pasta Salad to match your taste or dietary lifestyle perfectly.

    How to Store Tangy Pickle Pasta Salad: Best Practices

    To ensure your Tangy Pickle Pasta Salad remains fresh and delicious, here are some best practices for storage:

    • Refrigeration: After preparing, place the salad in an airtight container. It can be refrigerated for up to 3-5 days. The flavors will continue to develop, making it even more delightful on subsequent days.

    • Freezing (Not Recommended): While certain pasta salads can be frozen, creamy dressings typically do not fare well in the freezer due to changes in texture. It’s best to consume this salad fresh or store it in the refrigerator.

    • Reheating: If you desire to enjoy the salad warm, it’s better to heat the pasta slightly (excluding the creamy dressing). However, reheating may affect the freshness and texture of the salad.

    Following these storage practices will ensure that your Tangy Pickle Pasta Salad remains enjoyable and ready for your next meal.

    Nutritional Value of Tangy Pickle Pasta Salad

    Understanding the nutritional profile of your meals helps in making informed dietary choices. Here’s a breakdown of the nutrition content for a typical serving (approximately 1 cup) of Tangy Pickle Pasta Salad:

    • Calories: 200-250 calories
    • Protein: 6-10 grams (depending on added proteins)
    • Carbohydrates: 30-35 grams
    • Fat: 6-10 grams (if using low-fat dressing)
    • Fiber: 3-5 grams
    • Sugar: 2-4 grams (natural sugars from vegetables)
    • Sodium: 300-400 mg (mostly from pickles and processed ingredients)

    As you can see, this pasta salad provides a well-balanced meal option with moderate calories and significant nutrients. Inclusion of whole-food ingredients further contributes vitamins and minerals, promoting a healthy lifestyle.

    FAQs: Frequently Asked Questions About Tangy Pickle Pasta Salad

    1. Can I make this pasta salad ahead of time?

    Absolutely! You can prepare the Tangy Pickle Pasta Salad a day in advance. Just cover it and store it in the refrigerator. Allowing the salad to sit overnight helps the flavors meld together beautifully.

    2. How can I make this pasta salad vegan?

    To make the Tangy Pickle Pasta Salad vegan, simply use a dairy-free yogurt or sour cream in place of Greek yogurt, and ensure your pasta choices are free from egg.

    3. What types of pasta work best for this salad?

    Most types of pasta work well in this recipe, though shorter shapes like shells, elbows, or fusilli are recommended for easy mixing and eating.

    4. Is there a gluten-free option for this recipe?

    Yes, by using gluten-free pasta made from rice, quinoa, or chickpeas, you can enjoy this salad without gluten while retaining its delicious flavors.

    5. Can I add protein to this pasta salad?

    Yes! To make it more filling, consider adding grilled chicken, shrimp, or plant-based proteins like chickpeas or tofu.

    Enjoy your culinary journey with the Tangy Pickle Pasta Salad, and let your taste buds take flight with every delightful bite!
  • Classic Black Bean And Corn Pasta Salad With Lime Greek Yogurt Dressing

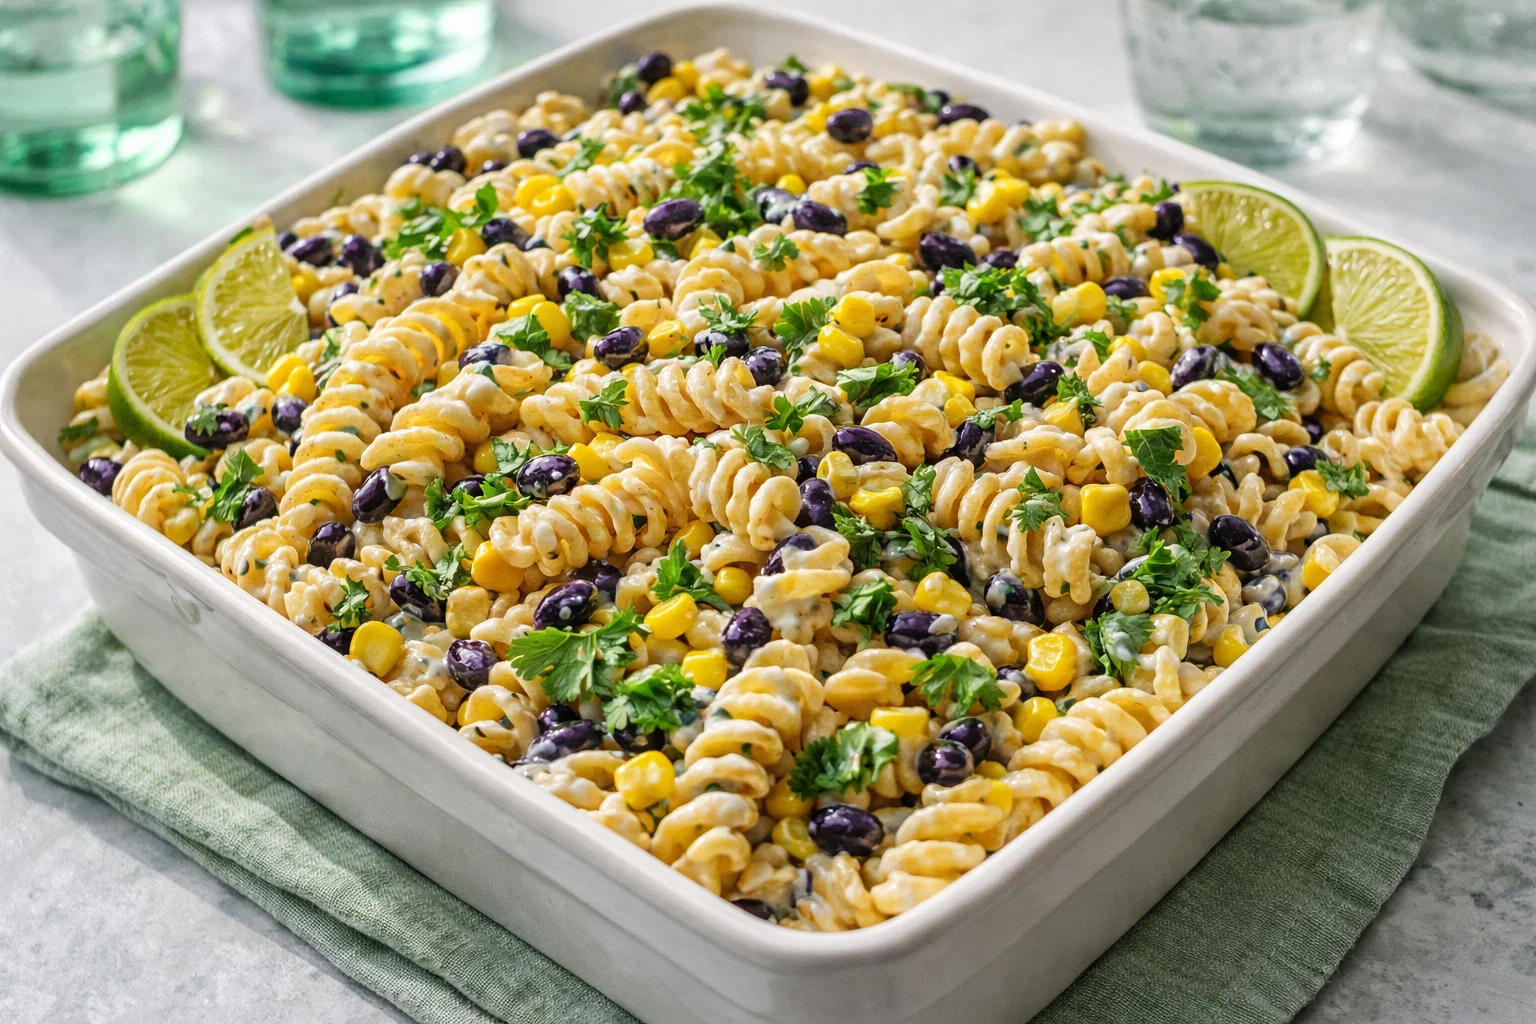
    Classic Black Bean And Corn Pasta Salad With Lime Greek Yogurt Dressing

    Classic Black Bean And Corn Pasta Salad With Lime Greek Yogurt Dressing: A Tropical Delight

    Introduction to Classic Black Bean And Corn Pasta Salad With Lime Greek Yogurt Dressing

    Summer’s warmth calls for vibrant dishes that are not only appetizing but also nourishing. Enter the Classic Black Bean And Corn Pasta Salad With Lime Greek Yogurt Dressing. This tantalizing pasta salad harmonizes savory black beans and sweet corn with a zesty lime Greek yogurt dressing, creating a refreshing dish that’s perfect for sunny days.

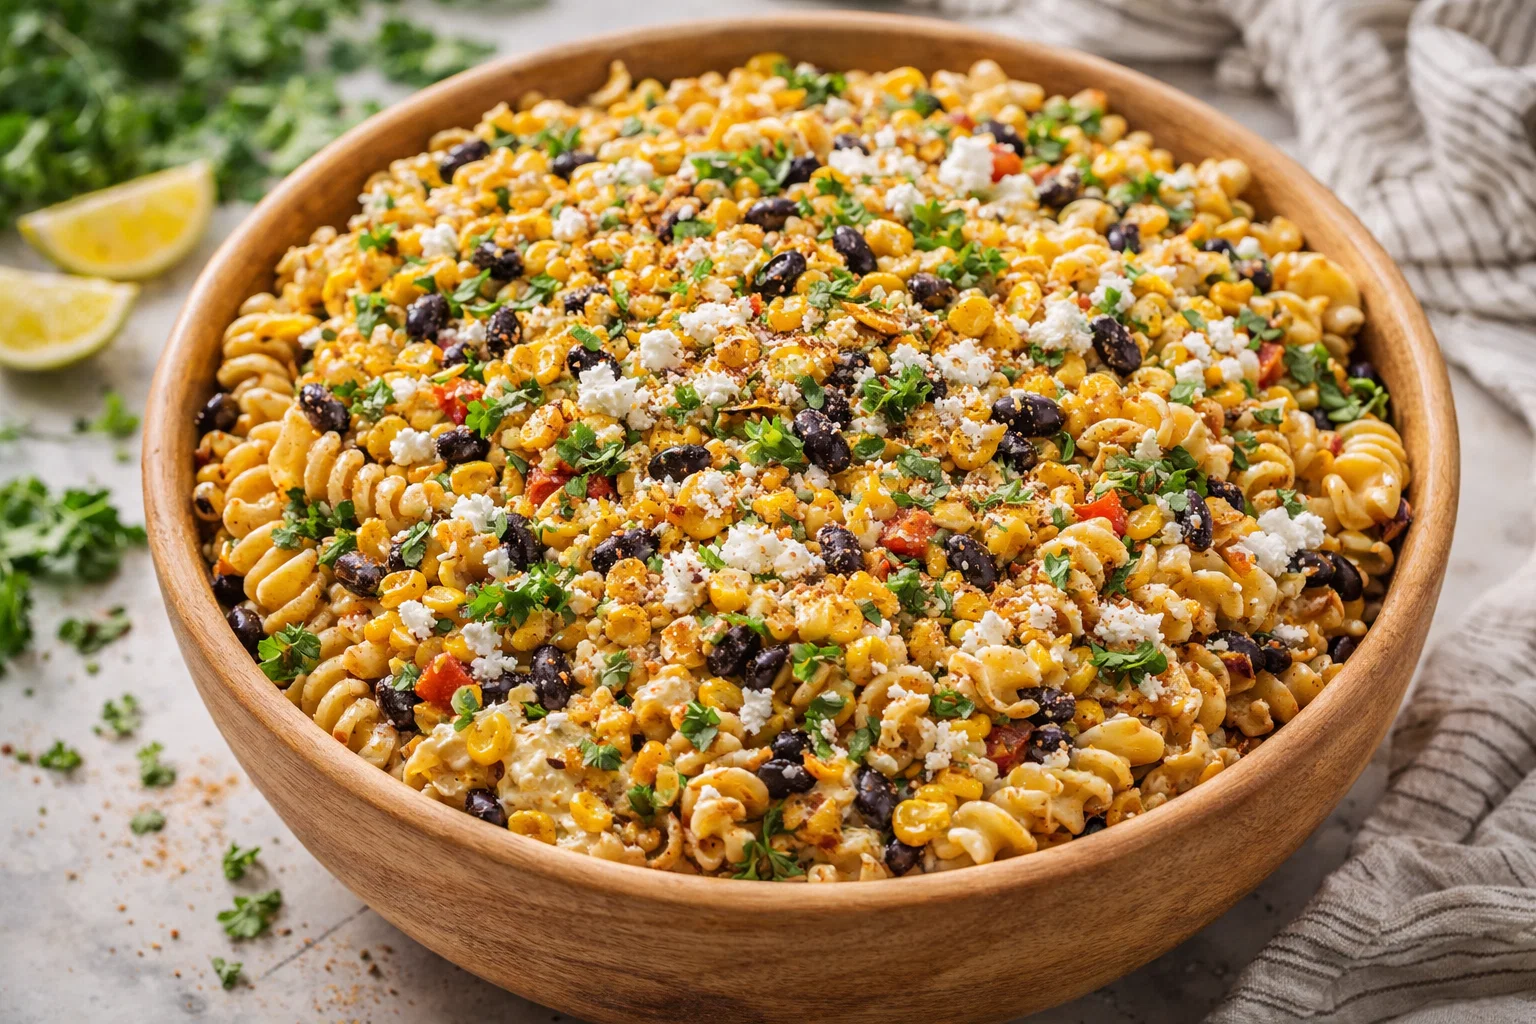
    What makes this pasta salad exceptional is its versatility and health-conscious ingredients; it’s not only simple to prepare but also vegan, gluten-free, and low in calories! Whether you are a busy parent looking to whip up a nutritious meal for your family, a student searching for an easy dish to bring to a potluck, or anyone eager to indulge in a wholesome treat, this recipe is designed for you.

    Moreover, it caters to various dietary needs, making it suitable for almost anyone, including those mindful of their health without sacrificing flavor. So, gather your ingredients, and let’s embark on preparing a colorful bowl of nutrition that can easily become a favorite in your culinary repertoire.

    Benefits and Advantages of Classic Black Bean And Corn Pasta Salad With Lime Greek Yogurt Dressing

    This pasta salad offers numerous advantages that make it stand out in the vast world of salads. To begin with, its ease of preparation is a significant plus. A quick boil for the pasta and simple mixing of ingredients makes it a go-to for weeknight dinners or quick lunches.

    Health Benefits

    Nutritionally, black beans are a fantastic source of plant-based protein, providing essential amino acids while being low in fat. They are rich in dietary fiber, which aids digestion and promotes a healthy weight. Corn adds a vibrant color and a touch of sweetness while contributing to essential vitamins like B vitamins and antioxidants. Greek yogurt not only gives a creamy texture to your salad but is also a healthier alternative to conventional dressings. It’s packed with protein and probiotics, which are excellent for gut health.

    Additionally, the lime in the dressing infuses the dish with invigorating zest, enhancing flavor while providing vitamin C, which is crucial for boosting immunity. The combination of these ingredients makes this pasta salad a powerhouse of nutrition, perfect for fueling your day.

    Versatility

    Another appealing aspect of this pasta salad is its adaptability. Whether served at barbecues, picnics, or simply as a light lunch, it fits seamlessly into any occasion. Plus, it keeps well in the fridge, making it an ideal make-ahead option for busy individuals and families. Pair it with grilled chicken or shrimp for a more substantial meal, or enjoy it on its own as a refreshing side.

    Ingredients Overview

    Essential Ingredients for Classic Black Bean And Corn Pasta Salad With Lime Greek Yogurt Dressing

    To prepare your pasta salad, ensure you have the following ingredients:

    • 8 ounces of whole wheat or gluten-free pasta (farfalle or rotini works best for holding the dressing)
    • 1 can (15 ounces) of black beans, drained and rinsed
    • 1 cup of corn, fresh or frozen (thawed)
    • 1 red bell pepper, diced
    • 1 cup of cherry tomatoes, halved
    • 1 avocado, cubed
    • 1/4 cup of fresh cilantro, chopped
    • 1/2 teaspoon of cumin
    • Salt and pepper, to taste

    For the Lime Greek Yogurt Dressing

    • 1 cup of plain Greek yogurt (use dairy-free yogurt for a vegan option)
    • Juice of 2 limes (about 1/4 cup)
    • 1 clove of garlic, minced
    • 1 tablespoon of olive oil
    • 1 teaspoon of honey or agave syrup (for a vegan option)
    • Salt and pepper, to taste

    This combination of ingredients not only makes for vibrant flavors but also ensures that your pasta salad is loaded with nutrients. For diet-conscious readers, note that all options listed can easily be made gluten-free or vegan.

    Dietary Substitutions to Customize Your Classic Black Bean And Corn Pasta Salad With Lime Greek Yogurt Dressing

    Consider these substitutions to adapt this pasta salad to fit various dietary needs:

    • Pasta: Swap regular pasta for lentil pasta or zoodles (zucchini noodles) for a low-carb option.
    • Beans: If black beans aren’t available, use chickpeas or kidney beans.
    • Dressing: Replace Greek yogurt with a silken tofu blend for a nut-free, vegan dressing while still retaining creaminess.
    • Corn: If fresh corn is out of season, canned or frozen corn works just as well.
    • Vegetables: Feel free to incorporate seasonal vegetables such as diced cucumbers or shredded carrots for additional crunch and nutrition.

    By tailoring this recipe according to preference and dietary restrictions, you can ensure that everyone at the table finds enjoyment in your delicious creation!

    How to Prepare the Perfect Classic Black Bean And Corn Pasta Salad With Lime Greek Yogurt Dressing: Step-by-Step Guide

    Creating the Classic Black Bean And Corn Pasta Salad With Lime Greek Yogurt Dressing is an enjoyable process that yields delightful results. Follow this step-by-step guide for your easy journey to making this delicious salad:

    1. Prepare the Pasta:
    2. Start by boiling a large pot of water. Add a pinch of salt to the water before cooking. Once boiling, add the whole wheat or gluten-free pasta and cook according to package instructions until al dente. Stir occasionally to prevent sticking.

    3. Drain and Rinse:

    4. Once the pasta is cooked, drain it in a colander and rinse it under cold water to stop the cooking process. This will also help in cooling it down to mix with the veggies and dressing.

    5. Prep the Veggies:

    6. While the pasta is cooking, prepare the vegetables. Dice the red bell pepper, halve the cherry tomatoes, and cube the avocado. Chop the cilantro, setting aside a few sprigs for garnish.

    7. Mix the Key Ingredients:

    8. In a large mixing bowl, combine the rinsed black beans, corn (if using frozen, ensure it’s thawed), chopped red bell pepper, cherry tomatoes, and avocados.

    9. Prepare the Dressing:

    10. In a separate bowl, whisk together Greek yogurt, lime juice, minced garlic, olive oil, honey (or agave), cumin, salt, and pepper until well combined.

    11. Combine Pasta and Vegetables:

    12. Add the drained and cooled pasta to the bowl with the vegetable mixture. Toss gently, ensuring not to mash the avocado.

    13. Dress the Salad:

    14. Pour the prepared lime Greek yogurt dressing over the pasta salad. Mix thoroughly but gently until the pasta and veggies are evenly coated with the dressing.

    15. Taste and Adjust:

    16. Taste the pasta salad and adjust seasoning as desired. You can add more lime juice for tanginess or additional salt and pepper.

    17. Chill:

    18. Let the pasta salad sit for at least 30 minutes to allow flavors to meld. This can be done by covering it and placing it in the refrigerator.

    19. Serve:

      • Before serving, give the salad a good stir. Garnish with fresh cilantro sprigs on top for a pop of color and serve chilled.

    Dietary Adaptations

    This recipe can easily be adapted for various dietary needs. For instance, using gluten-free pasta accommodates gluten-sensitive individuals. Similarly, utilizing dairy-free yogurt makes this dish entirely vegan.

    Mastering Classic Black Bean And Corn Pasta Salad With Lime Greek Yogurt Dressing: Advanced Tips and Variations

    To elevate your pasta salad from good to unforgettable, consider the following tips and variations:

    • Add Spice: Incorporate jalapeños or diced green chilies into the mix for a spicy kick. Adjust according to your heat preference.
    • Add Cheese: Crumbled feta or cotija cheese can enhance the flavor profile, providing a creamy texture that contrasts nicely with the other ingredients.
    • Mix of Dressings: Experiment by mixing lime Greek yogurt dressing with a little salsa for a twist on flavors.
    • Grains Switch-Up: Consider replacing pasta with quinoa or farro for a hearty alternative that offers different textures and flavors.
    • Taste Test: Always taste your salad right before serving. Adjust seasonings or ingredients for an optimal balance.

    Implementing these variations can make this pasta salad an interactive dish, inviting guests or family members to customize according to their taste.

    How to Store Classic Black Bean And Corn Pasta Salad With Lime Greek Yogurt Dressing: Best Practices

    Proper storage of your pasta salad ensures that it remains fresh and delicious. Here are some best practices for refrigeration and reheating:

    • Refrigeration: Store leftover pasta salad in an airtight container, ensuring that it’s sealed tightly to prevent moisture from spoiling the ingredients. It can keep well in the fridge for up to 3 days. As the salad sits, the flavors may deepen, making it even tastier.

    • Freezing: While it’s not recommended to freeze the salad due to the yogurt dressing and avocados, if you need to, consider freezing just the veggie and pasta mixture. Add fresh avocado and dressing when ready to consume after thawing.

    • Reheating: If you prefer your salad at room temperature, allow it to sit outside of the fridge for about 30 minutes before serving. However, never heat the salad in the microwave, as it may alter the texture of the yogurt dressing and fresh vegetables.

    By adhering to these storage methods, you can enjoy your pasta salad for days to come without compromising taste or texture.

    Nutritional Value of Classic Black Bean And Corn Pasta Salad With Lime Greek Yogurt Dressing

    Understanding the nutritional value allows you to make informed decisions about your meals. This pasta salad boasts an impressive nutritional profile.

    Nutrition Facts (per serving, based on 6 servings)

    • Calories: 250
    • Protein: 10g
    • Carbohydrates: 40g
    • Fiber: 8g
    • Fat: 7g
    • Saturated Fat: 1.5g
    • Sugars: 3g
    • Sodium: 200mg

    This composition reveals a meal that is rich in protein and fiber, promoting satiety while being relatively low in calories. It’s beneficial for those looking to maintain a balanced diet, making it an excellent option for lunch or dinner.

    FAQs: Frequently Asked Questions About Classic Black Bean And Corn Pasta Salad With Lime Greek Yogurt Dressing

    Can I make this salad in advance?

    Absolutely! The pasta salad can be prepared a day ahead. However, add avocados and dress the salad just before serving to maintain freshness and texture.

    Is this pasta salad suitable for vegans?

    Yes! By using dairy-free yogurt and ensuring that all ingredients are plant-based, this pasta salad meets vegan dietary needs.

    How long can I store this salad?

    When refrigerated in an airtight container, it remains good for up to three days. After that, the ingredients may begin to wilt, especially the avocado.

    Can I use other types of beans?

    Certainly! Feel free to experiment with different beans such as chickpeas or kidney beans, depending on what you have on hand.

    What can I substitute for Greek yogurt?

    If you want a dairy-free option, use any plant-based yogurt (like coconut or almond yogurt), or you can create a dressing by blending silken tofu with lime juice and seasoning.

    How can I adjust the spice level of the dressing?

    If you prefer a spicier dressing, add chili powder or minced jalapeños to the Greek yogurt dressing for an extra kick.

    With its unique blend of flavors and nutritional benefits, the Classic Black Bean And Corn Pasta Salad With Lime Greek Yogurt Dressing is destined to become a staple dish in your home. So why wait? Follow this recipe, customize it to your liking, and serve it at your next gathering or enjoy a nourishing meal at home! Happy cooking!

  • Tasty High Protein Crispy Rice Salad

    Tasty High Protein Crispy Rice Salad

    Tasty High Protein Crispy Rice Salad: A Tropical Delight

    Introduction to Tasty High Protein Crispy Rice Salad

    Are you looking for healthy dinner recipes that are not only delicious but also packed with nutrients? Look no further! Our Tasty High Protein Crispy Rice Salad is an extraordinary choice for anyone who enjoys vibrant flavors while prioritizing their health. This delightful meal combines crispy rice with fresh vegetables, protein-packed legumes, and zesty tropical flavors, making it a refreshing dish that can serve as the star of your dinner table.

    This salad is not only simple to prepare but also vegan and gluten-free, making it suitable for various dietary needs. It is a perfect solution for busy parents looking for quick meal options or students with limited cooking time. The Tasty High Protein Crispy Rice Salad is versatile enough to fit into your busy lifestyle without compromising on nutrition or taste. With just a few ingredients and steps, you can whip up a nourishing meal in no time, impressing your family and friends with your culinary skills!

    Whether you’re embarking on a health journey, trying to add more plant-based options to your diet, or simply want a refreshing meal, this salad fits the bill perfectly. Read on to explore its health benefits, ingredients, and easy preparation steps that will guide you in crafting this tropical delight in your own kitchen!

    Benefits and Advantages of Tasty High Protein Crispy Rice Salad

    One of the primary reasons our Tasty High Protein Crispy Rice Salad stands out among healthy dinner recipes is its ease of preparation. Made with accessible ingredients and straightforward steps, even novice cooks can master this dish with confidence. Not only does it save time, but it also allows you to enjoy a nutrient-rich meal that doesn’t require hours in the kitchen.

    This salad is an excellent source of protein due to the inclusion of legumes like black beans or chickpeas. These ingredients are not only nutritious but also contribute to feelings of fullness, making your meal satisfying and enjoyable. The addition of crispy rice adds a fun texture that elevates this salad beyond ordinary greens.

    Additionally, the Tasty High Protein Crispy Rice Salad is brimming with vitamins and minerals, thanks to the colorful array of vegetables like bell peppers, cucumbers, and carrots. Incorporating these natural ingredients into your diet is a simple yet effective way to boost your overall health, promote better digestion, and enhance immunity.

    Furthermore, this salad is customizable, making it suitable for a wide variety of dietary restrictions. Whether you are vegan, gluten-free, or simply looking to eat clean, you can adjust the ingredients to fit your needs. Not only does this versatility cater to different preferences, but it also encourages creativity in the kitchen, allowing you to experiment with what you have on hand.

    In conclusion, our Tasty High Protein Crispy Rice Salad is not just another meal; it’s a celebration of health and flavor that you can easily integrate into your weekly meal planning. The benefits of this recipe go beyond nourishment; it invites you to enjoy cooking and experimenting with different foods, making healthy eating enjoyable and stress-free!

    Ingredients Overview

    Essential Ingredients for Tasty High Protein Crispy Rice Salad

    1. Crispy Rice: 2 cups (use gluten-free crispy rice for gluten-intolerant individuals)
    2. Adds crunch and lightness to the salad.

    3. Cooked Black Beans: 1 cup (or chickpeas)

    4. Highly nutritious, they promote fullness and provide protein.

    5. Bell Peppers: 1 cup (any color, diced)

    6. Rich in vitamins A and C, they add vibrancy and freshness.

    7. Cucumber: 1 medium, diced

    8. Hydrating and low-calorie, it’s refreshing for a salad.

    9. Carrot: 1 medium, shredded

    10. Loaded with beta-carotene, they enhance eye health.

    11. Avocado: 1, diced

    12. Provides healthy fats that contribute to heart health.

    13. Fresh Cilantro: ¼ cup, chopped

    14. Adds herbal notes while containing antioxidants.

    15. Lime Juice: From 2 limes

    16. Enhances flavor while providing vitamin C.

    17. Olive Oil: 2 tablespoons

    18. Healthy fat helps absorb nutrients from veggies.

    19. Salt and Pepper: To taste

      • Standard seasoning to enhance overall taste.

    Dietary Substitutions to Customize Your Tasty High Protein Crispy Rice Salad

    As culinary enthusiasts, we understand that ingredient availability and dietary preferences can vary. Here are some substitutions to ensure everyone can enjoy their own Tasty High Protein Crispy Rice Salad:

    1. Protein Alternatives:
    2. If legumes aren’t your choice, consider using grilled tofu or tempeh for an alternative protein source. These options maintain the high protein content while being suitable for different diets.

    3. Grains Options:

    4. Instead of crispy rice, you could use quinoa or farro. Both are high in protein and provide a hearty base.

    5. Veggie Variations:

    6. Substitute any vegetables with seasonal produce. Sweet corn, radishes, or spinach can easily add variety and freshness.

    7. Dressing Alternatives:

    8. For a more citrusy flavor, swap lime juice with lemon or add a splash of apple cider vinegar for a tangy zing.

    9. Nut/Seed Additions:

    10. Add chopped nuts or seeds (e.g., sunflower seeds or pumpkin seeds) for an extra crunch and additional protein.

    By making these substitutions, you can tailor the Tasty High Protein Crispy Rice Salad to suit personal preferences or dietary requirements, maintaining the essence of a healthy and satisfying meal.

    How to Prepare the Perfect Tasty High Protein Crispy Rice Salad: Step-by-Step Guide

    Creating the Tasty High Protein Crispy Rice Salad is a breeze! Follow these simple steps to prepare this delightful dish:

    1. Prepare the Base: Start by preparing your crispy rice. If you are using store-bought crispy rice, simply gather it in a large salad bowl. If making from scratch, you can briefly bake rice cakes until crispy.

    2. Cook the Legumes: If using dried legumes, soak and cook them according to package instructions. For canned beans or chickpeas, drain and rinse them to remove excess sodium, then set aside.

    3. Chop Veggies: Dice the bell peppers, cucumber, and shred the carrot. To retain their crispiness, chop these ingredients just before serving.

    4. Prepare the Dressing: In a small bowl, mix olive oil, lime juice, salt, and pepper. Adjust the seasoning according to your taste preference.

    5. Combine Ingredients: In the large salad bowl with crispy rice, add black beans (or chickpeas), chopped vegetables, and cilantro. Toss gently to avoid crushing the crispy rice.

    6. Add Avocado: Just before serving, dice and fold in the avocado. This will prevent browning and keep the salad fresh.

    7. Dress the Salad: Drizzle the prepared dressing over the salad and gently toss until everything is well-coated.

    8. Serve Immediately: This salad is best enjoyed fresh. However, it can be stored in the refrigerator for a few hours for convenience.

    Each step in creating the Tasty High Protein Crispy Rice Salad highlights its adaptability, assuring you that anyone can personalize the dish as per dietary needs and preferences.

    Mastering Tasty High Protein Crispy Rice Salad: Advanced Tips and Variations

    To ensure your Tasty High Protein Crispy Rice Salad is a hit every time, consider these advanced tips and variations:

    1. Herb Infusion: Experiment with different herbs like basil, mint, or parsley to elevate the flavor profile. Fresh herbs bring vibrant taste and color to your salad.

    2. Add Spice: For a touch of heat, add diced jalapeños or sprinkle chili flakes. These additions can elevate your salad for those who enjoy some spice.

    3. Garnish Creatively: Top the salad with toasted seeds, sliced almonds, or crispy onions for added texture. Consider adding feta or goat cheese if you’re not vegan.

    4. Meal Prep Version: Make a bulk version of the salad. Store the ingredients separately in airtight containers and assemble when ready to eat. This method is incredibly convenient for busy individuals.

    5. Sweet Addition: Chop up some mango or pineapple for a hint of sweetness! The tropical fruits complement the savory ingredients wonderfully.

    These tips allow you to master the Tasty High Protein Crispy Rice Salad and inspire you to experiment with flavors and textures, ensuring you’ll never tire of this delightful recipe!

    How to Store Tasty High Protein Crispy Rice Salad: Best Practices

    To enjoy your Tasty High Protein Crispy Rice Salad over time, here are pristine storage practices that prolong freshness:

    1. Refrigeration: Store any leftover salad in an airtight container. Make sure to keep the dressing separate until serving to maintain the crispness of the rice and vegetables. The salad will stay fresh for up to 2-3 days when stored properly.

    2. Freezing: Freezing is not recommended for this salad due to the presence of fresh vegetables and avocado. However, if you have leftovers of the cooked legumes, you can freeze them separately and add to future salads.

    3. Reheating: If you’ve stored the beans or chickpeas with a dressing for leftover use, consider briefly warming them in the microwave before adding to fresh crispy rice and veggies to maintain texture.

    By properly storing the Tasty High Protein Crispy Rice Salad, you can enjoy multiple meals while minimizing waste!

    Nutritional Value of Tasty High Protein Crispy Rice Salad

    Understanding the nutritional benefits of the Tasty High Protein Crispy Rice Salad is essential for health-conscious individuals. The balance of ingredients maximizes flavor while ensuring a nutritious profile.

    • Calories: Approximately 350 calories (per serving, depending on the ingredients and portions used)
    • Protein: About 15 grams (with black beans)
    • Carbohydrates: Roughly 45 grams
    • Healthy Fats: Approximately 12 grams (from avocado and olive oil)
    • Fiber: About 10 grams

    This salad not only delivers essential nutrients needed for maintaining energy levels but also provides a generous amount of dietary fiber that aids in digestion. It’s a wholesome choice for anyone looking to enjoy delicious flavors without sacrificing health.

    Including a variety of colorful vegetables also ensures the salad is rich in vitamins and minerals, promoting overall well-being. With its focus on health, it’s clear why the Tasty High Protein Crispy Rice Salad deserves a place in your repertoire of healthy dinner recipes!

    FAQs: Frequently Asked Questions About Tasty High Protein Crispy Rice Salad

    1. What can I substitute for crispy rice?

    You can use quinoa, farro, or even toasted chickpeas as a base for your salad. These alternatives maintain the crunchy texture and add nutritional benefits.

    2. How long will the salad last in the fridge?

    The Tasty High Protein Crispy Rice Salad lasts up to 2-3 days in the fridge if stored in an airtight container. However, it’s best consumed fresh for optimal taste and texture.

    3. Can I add more protein to the salad?

    Absolutely! You can boost the protein content by adding grilled chicken, shrimp, or more legumes. Tofu or tempeh is also a great addition for plant-based diets.

    4. Is this salad gluten-free?

    Yes! This recipe is gluten-free, especially when using gluten-free crispy rice. Always check ingredient labels to confirm there are no hidden gluten sources.

    5. Can I make this salad ahead of time?

    While it’s best served fresh, you can prepare the ingredients ahead of time and store them separately in the fridge. Simply mix them together with the dressing just before serving to maintain freshness.

    6. How can I make this salad more filling?

    To make the salad more filling, consider incorporating whole grains, such as brown rice or farro, alongside the crispy rice, or add a protein-rich side like hummus or a bean dip.

    By answering these common questions, we provide valuable insights that can help readers maximize their cooking experience. The Tasty High Protein Crispy Rice Salad is versatile and accommodating, ensuring it fits seamlessly into your healthy eating habits!


    Embark on your culinary adventure and try making the Tasty High Protein Crispy Rice Salad today! With its simple preparation, adaptable ingredients, and vibrant flavors, it’s sure to become a newfound favorite in your collection of healthy dinner recipes.

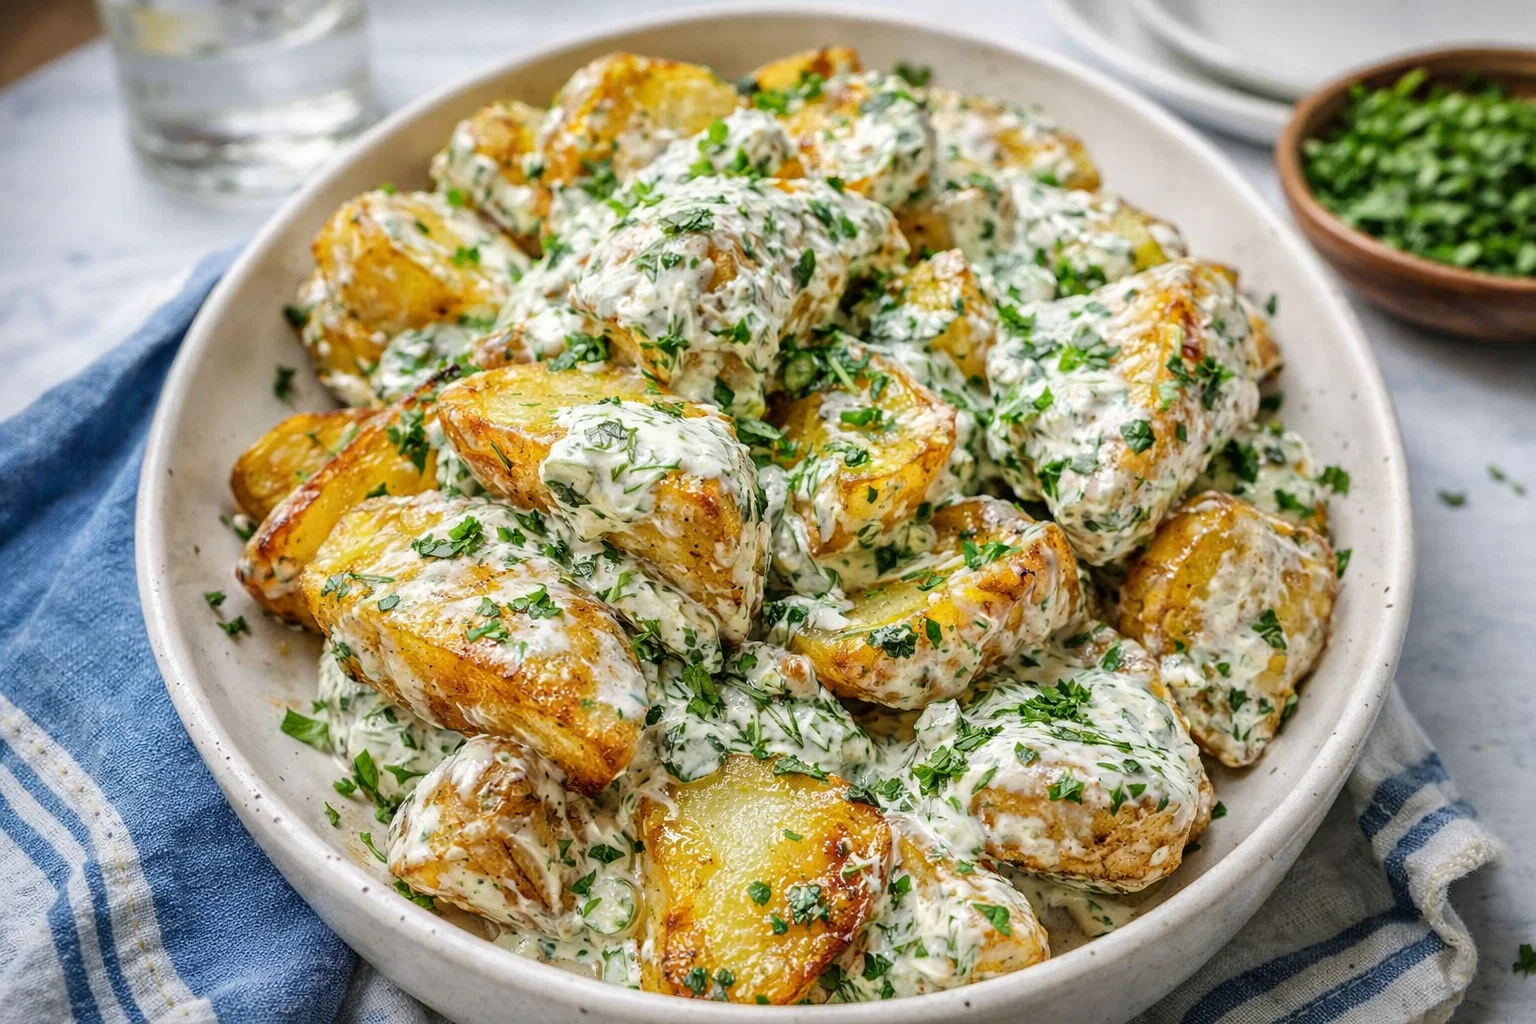
  • The Best Crispy Potato Salad Recipe

    The Best Crispy Potato Salad Recipe

    The Best Crispy Potato Salad Recipe: A Tropical Delight

    Introduction to The Best Crispy Potato Salad Recipe

    When it comes to delectable yet simple dinner recipes, nothing shines quite like The Best Crispy Potato Salad Recipe. This delightful dish combines the creamy texture of perfectly cooked potatoes with a satisfying crunch, creating a balanced dish that caters to individuals with diverse dietary needs. Whether you’re a busy parent scrambling for a quick meal or a food enthusiast looking to expand your recipe repertoire, this potato salad meets all those demands.

    Imagine savoring fluffy potato pieces, crisp vegetables, and a tangy dressing—all tossed together to create a palette of taste and texture. The beauty of this recipe lies not only in its flavor but also in its health benefits. Packed with essential nutrients, it’s a vegan and gluten-free option that fits seamlessly into health-conscious lifestyles. Moreover, this potato salad can be prepped ahead of time, making it an excellent choice for meal prep, backyard barbecues, or picnic outings. Not only is it a culinary delight, but it also offers versatility for various occasions, serving as a side at gatherings or a main dish on its own.

    Ultimately, The Best Crispy Potato Salad Recipe is more than just a side—it embodies a celebration of freshness, nourishment, and fun, making it a must-try for anyone seeking to elevate their mealtime experience.

    Benefits and Advantages of The Best Crispy Potato Salad Recipe

    There are countless dinner recipes out there, but few can match the versatility and nutrition of The Best Crispy Potato Salad Recipe. First and foremost, let’s talk about ease of preparation. This salad can be whipped up quickly, making it a fantastic option for those with busy schedules. You boil potatoes, chop fresh vegetables, and mix in a homemade dressing, and in no time, you have a delicious side dish.

    One prominent reason why this recipe stands out is its health benefits. Potatoes are a rich source of vitamins C and B6, potassium, and fiber, all of which play vital roles in overall health. The addition of colorful vegetables increases the nutritional content, providing antioxidants and essential nutrients. Moreover, this dish can be entirely vegan and gluten-free, accommodating various dietary restrictions without sacrificing flavor.

    Notably, the crispy element elevates this potato salad above the rest. The secret lies in the preparation technique that allows for a delightful crunch—a unique twist that most potato salads lack. This added texture will surprise and satisfy your taste buds, making it a standout addition to any meal.

    In conclusion, The Best Crispy Potato Salad Recipe doesn’t just taste great; it embodies a fantastic blend of nutrition, flavor, and practicality, making it an incredibly advantageous choice for any occasion.

    Ingredients Overview

    Essential Ingredients for The Best Crispy Potato Salad Recipe

    Creating The Best Crispy Potato Salad Recipe requires a few essential ingredients, and each contributes to the overall flavor and texture of the dish. Here’s what you’ll need:

    • 2 pounds of potatoes (Yukon Gold or red potatoes are preferable; they maintain their shape well.)
    • 1 cup of celery (finely chopped; adds crunch and freshness)
    • 1 cup of bell peppers (diced; for color and sweetness)
    • 1 cup of green onions (chopped; provides a mild onion flavor)
    • 1/2 cup of pickles (diced; introduces tanginess)
    • 3/4 cup of vegan mayonnaise (for creaminess; feel free to substitute regular mayonnaise)
    • 2 tablespoons of apple cider vinegar (adds a zesty kick)
    • 1 teaspoon of mustard (Dijon or yellow works; helps to add depth of flavor)
    • Salt and pepper (to taste; enhances overall flavor)
    • Optional: diced avocados (for a creamy texture; naturally vegan and adds healthy fats)

    Dietary Options

    • Vegan: Ensure the mayo is plant-based.
    • Gluten-Free: Verify that all condiments are gluten-free.
    • Low-Calorie: Use less mayo or substitute with a yogurt alternative to reduce calories.

    Dietary Substitutions to Customize Your The Best Crispy Potato Salad Recipe

    This potato salad is highly adaptable, allowing you to make swaps based on dietary needs or ingredient availability. Here are some suggestions:

    1. Potato alternatives: If you’re seeking a lower-carb option, consider substituting potatoes with cauliflower. Cook and mash the cauliflower to mimic the texture of traditional potato salad.

    2. Vegan mayo alternatives: Greek yogurt can be used for those not strictly vegan, providing a creaminess while lowering calorie content.

    3. Add protein: To turn this potato salad into a complete meal, consider incorporating chickpeas, black beans, or grilled tofu. This will add a satisfying protein component.

    4. Different veggies: Feel free to swap in any seasonal vegetables you have on hand, such as peas, corn, or shredded carrots for added color and nutrition.

    By personalizing this recipe according to individual diets and tastes, you create a dish that’s not only delicious but also uniquely yours.

    How to Prepare the Perfect The Best Crispy Potato Salad Recipe: Step-by-Step Guide

    Now that you have everything you need, it’s time to bring this delicious dish to life! Follow these detailed, step-by-step instructions to create The Best Crispy Potato Salad Recipe:

    1. Prepare the Potatoes: Begin by washing the potatoes under cold water. Cut them into equal-sized chunks to ensure even cooking. Fill a large pot with water, add the potatoes, and bring to a boil over medium-high heat. Cook for about 10-15 minutes or until they are fork-tender.

    2. Cool and Chop: Once cooked, drain the potatoes and spread them on a baking sheet to cool. This will help prevent them from becoming mushy. While the potatoes cool, chop your celery, bell peppers, green onions, and pickles.

    3. Make the Dressing: In a mixing bowl, combine the vegan mayonnaise, apple cider vinegar, mustard, salt, and pepper. Whisk until smooth. Taste and adjust seasoning as necessary.

    4. Combine the Ingredients: Once the potatoes have cooled, transfer them to a large bowl. Add the chopped vegetables and pickles to the bowl.

    5. Mix Everything: Pour the dressing over the potato mixture. Gently toss with a rubber spatula until all ingredients are well coated. Be careful not to mash the potatoes while stirring.

    6. Add Avocado (Optional): If you’re using avocados, add them at this stage, and gently fold them into the salad for creaminess.

    7. Chill the Salad: Cover the bowl with plastic wrap or a lid and place the salad in the refrigerator for at least 30 minutes before serving. This allows the flavors to meld beautifully.

    8. Serve and Enjoy: Before serving, taste again and add more salt and pepper if needed. Serve chilled or at room temperature and enjoy!

    This step-by-step guide should have you well on your way to creating a crispy, creamy potato salad that everyone will love. This recipe can serve as a fantastic side dish or a delightful main feature of any meal—it’s as versatile as it is delicious!

    Mastering The Best Crispy Potato Salad Recipe: Advanced Tips and Variations

    To take your potato salad to the next level, consider the following advanced tips and variations:

    • Herbs for Freshness: Incorporating fresh herbs such as dill, parsley, or chives can elevate the flavor and freshness of the dish. Simply chop the herbs and fold them into the salad right before serving for an aromatic bonus.

    • Spicy Kick: If spice is your thing, add a pinch of cayenne pepper or some finely diced jalapeño for extra heat. This plays beautifully against the creamy textures of the potatoes.

    • Crispy Toppings: For extra crunch, consider garnishing your salad with fried onions, toasted nuts, or panko breadcrumbs just before serving. This contrast will surprise and delight!

    • Grilled Variants: If you want to add a smoky flavor, consider grilling the potatoes before adding them to the salad. Just be cautious to keep them intact so you can still enjoy that crispy texture.

    Worry not if you don’t have all these ingredients on hand; part of the fun of cooking is experimenting. Adjust based on what you love and have available!

    How to Store The Best Crispy Potato Salad Recipe: Best Practices

    To extend the deliciousness of The Best Crispy Potato Salad Recipe, proper storage is key. Here’s how to ensure your salad stays fresh:

    • Refrigeration: Transfer leftover potato salad to an airtight container. It will keep in the fridge for up to 3-5 days. The flavors will continue to meld over time, making it taste even better the next day!

    • Freezing: While it’s not recommended to freeze potato salad due to the creamy nature, if you have significant leftovers, consider freezing just the potato base without the dressing or vegetables. When ready to enjoy, thaw and mix in fresh ingredients prior to serving.

    • Reheating: If you’ve frozen the potatoes, reheat them in a skillet with a drizzle of olive oil until warmed through but not mushy. For refrigerated leftover salads, enjoy them cold or allow them to sit at room temperature for about 20 minutes before serving.

    By following these storage tips, you can keep your potato salad tasting fresh and delicious for days, ensuring none of this savory dish goes to waste!

    Nutritional Value of The Best Crispy Potato Salad Recipe

    Understanding the nutritional value of The Best Crispy Potato Salad Recipe helps you make informed dietary choices. Here’s a breakdown of the key nutrients in each serving (this serving size assumes about 1/2 cup):

    • Calories: 200-250 calories
    • Total Fat: 10-12g
    • Saturated Fat: 1-2g
    • Sodium: 350mg
    • Carbohydrates: 30g
    • Dietary Fiber: 3g
    • Sugars: 2g
    • Protein: 3-4g

    Health Benefits Context

    This salad is packed with vital nutrients, primarily from the potatoes and vegetables. Potatoes provide a hearty dose of potassium, beneficial for heart health and blood pressure regulation. The addition of fiber from the celery and pickles supports digestive health.

    Moreover, using vegan mayonnaise lowers the calorie count while still offering a creamy texture. Feel free to incorporate fresh herbs to enhance vitamins and minerals in the dish.

    This nutritional breakdown serves as a guide, particularly for those tracking their intake or seeking healthier dinner recipes that align with their dietary goals.

    FAQs: Frequently Asked Questions About The Best Crispy Potato Salad Recipe

    Q1: Can I make this potato salad ahead of time?

    Absolutely! This recipe is perfect for make-ahead meals. You can prepare it a day in advance and refrigerate it overnight. Just be sure to give it a good stir before serving.

    Q2: Is it possible to make this recipe low-calorie?

    Definitely! You can reduce calories by using less mayonnaise or opting for a yogurt-based dressing. Additionally, using fewer potatoes or increasing the ratio of vegetables will help lighten the dish.

    Q3: What type of potatoes are best for this recipe?

    Yukon Gold and red potatoes are the best choices due to their ability to hold shape when boiled. However, you can use any waxy potato variety.

    Q4: Can I add hard-boiled eggs to this potato salad?

    Yes, hard-boiled eggs add an excellent source of protein and create a creamy texture. They can be chopped and folded in at the same time as the other ingredients.

    Q5: Will this recipe still taste good after freezing?

    Freezing isn’t usually recommended for potato salad due to the texture changes from thawing. However, if you freeze the potato base without the others, it can work, but you’ll want to add in fresh ingredients upon reheating for the best flavor.

    Using these answers, equipped with your knowledge, you can craft the best potato salad to suit various occasions while satisfying the tastes and dietary preferences of your guests. Whether you enjoy it as is or give it your twist, The Best Crispy Potato Salad Recipe guarantees a representation of fresh, healthy, and enjoyable eating.


    This guide provides you with everything you need to make The Best Crispy Potato Salad Recipe, ensuring it’s not only delicious but also aligned with your dietary preferences and needs. Dive into this tropical delight and share it with friends and family for a memorable experience!

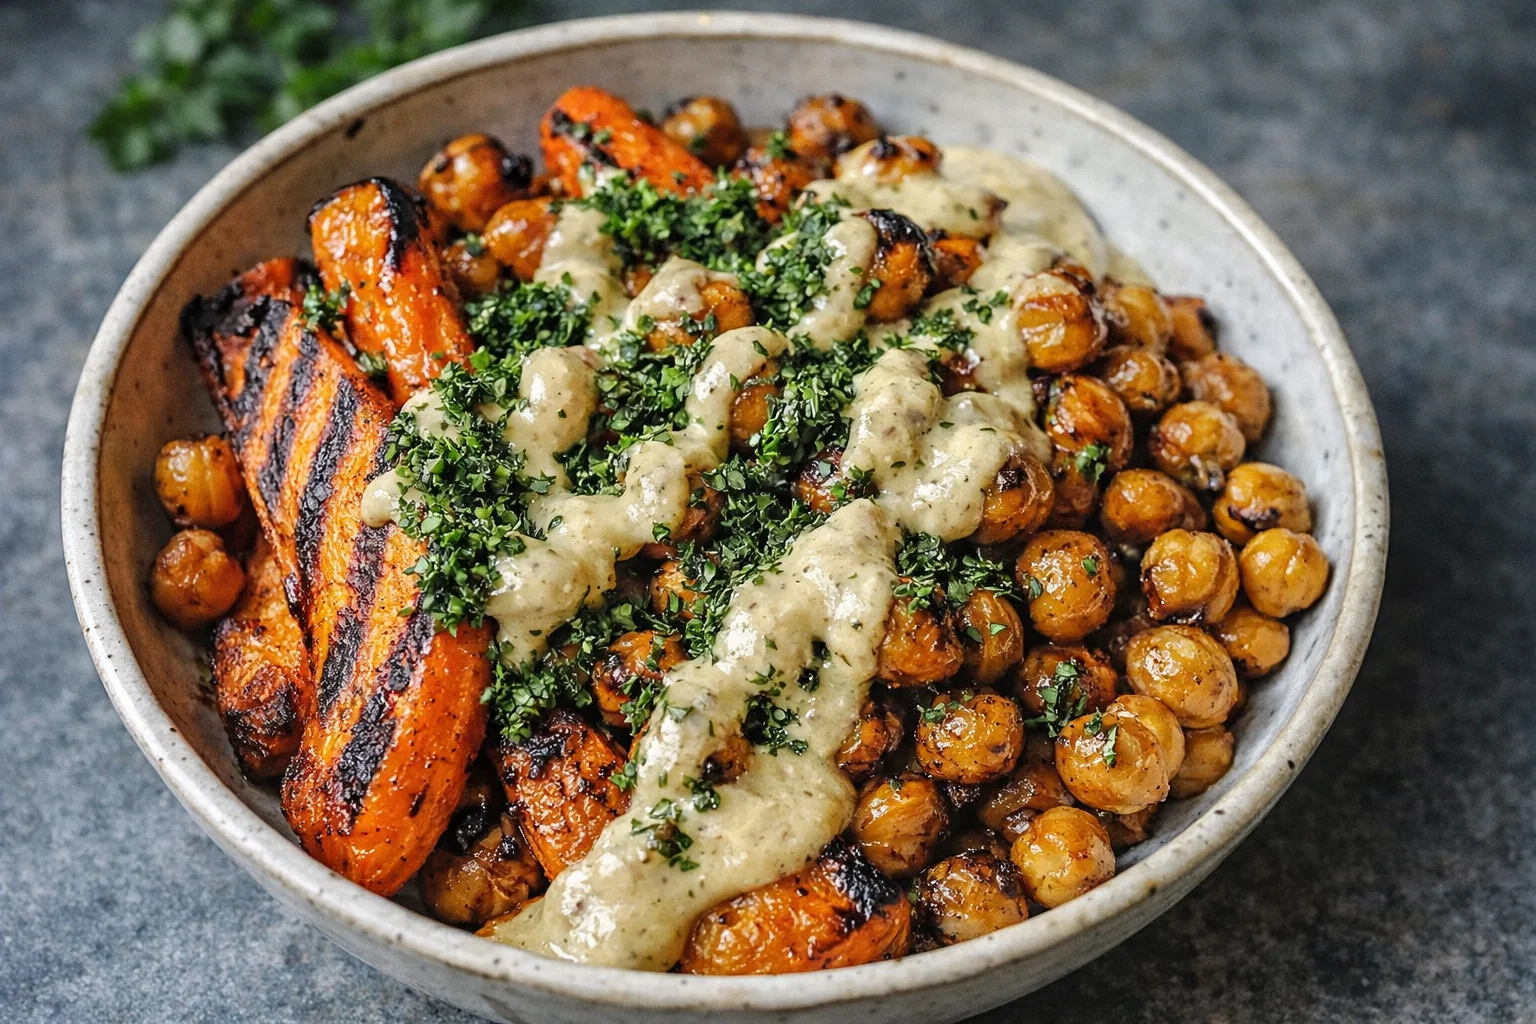
  • Cozy Roasted Carrot Chickpea Bowl Recipe

    Cozy Roasted Carrot Chickpea Bowl Recipe

    Cozy Roasted Carrot Chickpea Bowl Recipe: A Tropical Delight

    Introduction to Cozy Roasted Carrot Chickpea Bowl Recipe

    If you are on the lookout for healthy dinner recipes that delight your palate, the Cozy Roasted Carrot Chickpea Bowl is not just a meal; it’s an experience. Crafted for busy weeknights or leisurely weekends, this nourishing bowl combines the natural sweetness of roasted carrots with protein-packed chickpeas, creating a vibrant dish that’s both filling and satisfying. This recipe stands out due to its impressive health benefits—it’s vegan, gluten-free, and rich in essential nutrients.

    Additionally, the colors and flavors of this bowl are quite inspiring, turning any simple dinner into a culinary adventure. With a preparation time of around 30 minutes, even the busiest parents and working professionals will find it manageable. Perfectly suited for various dietary needs, this cozy bowl can easily be customized to fit your lifestyle, be it vegetarian, gluten-free, or low-calorie.

    As you explore this recipe, you’ll also discover how simple it is to prepare, allowing even novice cooks to create a restaurant-worthy dish at home. Whether you’re a student, newlywed, or seasoned chef, this recipe serves as a wonderful reminder of how healthy and delicious dinners can be. Let’s dive into the delicious details of this delightful dish!

    Benefits and Advantages of Cozy Roasted Carrot Chickpea Bowl Recipe

    One of the many appealing aspects of the Cozy Roasted Carrot Chickpea Bowl is its ease of preparation. You can roast the carrots and chickpeas together, which minimizes cooking time and cleanup. The simplicity of this dish makes it a great back-pocket recipe, especially for busy families or students who may lack the time for complicated meals.

    The health benefits of this recipe are equally impressive. Carrots are loaded with vitamins like A, K, and C, while chickpeas provide high-quality protein and fiber. This combination promotes satiety, making it easier to maintain a balanced diet. Not to mention, by opting for a plant-based meal, you’re contributing to a more sustainable lifestyle.

    What also sets this recipe apart is its versatility. You can easily adjust the spices and toppings to suit your taste. Whether you prefer a spicier kick with cayenne pepper or a creamier texture with avocado, the possibilities are endless. Another advantage is its suitability for meal prep. You can make a large batch at once and store it in the fridge, providing a quick and nourishing meal option throughout the week.

    Moreover, this bowl appeals to a broad audience. Busy parents, food enthusiasts, and even seniors will appreciate the quick setup and nutrient-dense content. In summary, the Cozy Roasted Carrot Chickpea Bowl makes for delightful healthy dinner recipes that cater to various dietary needs while being simple to prepare.

    Ingredients Overview

    Essential Ingredients for Cozy Roasted Carrot Chickpea Bowl Recipe

    Here’s a detailed list of all the ingredients you’ll need to whip up this delightful bowl, along with explanations to highlight their benefits:

    • 2 cups of fresh carrots, peeled and sliced: Carrots are a rich source of beta-carotene, fiber, and vitamins.
    • 1 can (15 oz) of chickpeas, drained and rinsed: Chickpeas provide protein and fiber, supporting digestion and fullness.
    • 2 tablespoons of olive oil: A healthy fat that aids in the absorption of vitamins and is loaded with antioxidants.
    • 1 teaspoon of ground cumin: Adds a warm, earthy flavor and aids in digestion.
    • 1 teaspoon of smoked paprika: Offers a slight smokiness, elevating the dish’s flavor.
    • Salt and pepper to taste: Enhances overall flavor.
    • 1 tablespoon of lemon juice: Brightens the bowl and adds vitamin C.
    • Fresh parsley for garnish (optional): Adds a fresh touch and additional nutrients.

    Vegan-friendly options are used throughout this recipe, making it accessible for those following plant-based diets. Additionally, it is gluten-free as all ingredients are free from gluten-containing items.

    Dietary Substitutions to Customize Your Cozy Roasted Carrot Chickpea Bowl Recipe

    While the base recipe is both delicious and nutritious, you could consider the following substitutions to cater to different dietary needs:

    • Swap olive oil for avocado oil: If you’re looking for a higher smoke point, avocado oil is a great alternative.
    • Replace chickpeas with white beans: For those who might have a preference or allergy to chickpeas, white beans provide a similar texture and nutrition profile.
    • Add quinoa or brown rice: If you’d like to enhance the dish’s nutritional value further, incorporating whole grains offers added fiber and protein.
    • Try different seasoning blends: If cumin and smoked paprika aren’t to your taste, try curry powder or Italian herbs for different flavor profiles.
    • Top with nuts or seeds: Adding nuts like almonds or seeds like pumpkin seeds can provide an extra crunch and beneficial fats.

    By making these substitutions, you can create variations of the Cozy Roasted Carrot Chickpea Bowl, allowing everyone to enjoy it while addressing specific dietary preferences.

    How to Prepare the Perfect Cozy Roasted Carrot Chickpea Bowl Recipe: Step-by-Step Guide

    Ready to dive into the kitchen? Making this Cozy Roasted Carrot Chickpea Bowl is straightforward and efficient. Let’s follow these easy steps to create a wonderful, healthy meal:

    1. Preheat the Oven: Start by preheating your oven to 425°F (220°C). A hot oven helps the carrots and chickpeas caramelize, enhancing their flavors.

    2. Prepare the Carrots: Peel and chop the carrots into evenly sized pieces. This ensures even cooking.

    3. Rinse the Chickpeas: Drain and rinse the chickpeas under cold water to remove excess sodium and starch. Pat them dry with a towel to enhance crispiness when roasted.

    4. Combine Ingredients: In a large mixing bowl, combine the carrots and chickpeas. Add olive oil, cumin, smoked paprika, salt, and pepper. Toss everything together until the vegetables are evenly coated.

    5. Spread on Baking Sheet: Line a baking sheet with parchment paper for easier cleanup. Spread the chickpea and carrot mixture in a single layer.

    6. Roast: Place the baking sheet in the preheated oven and roast for about 25-30 minutes, or until the chickpeas are crispy and the carrots are tender and golden.

    7. Prepare the Dressing: While the vegetables roast, whisk together lemon juice, a pinch of salt, and any other desired seasonings in a small bowl.

    8. Assemble the Bowl: Once the chickpeas and carrots are roasted, remove them from the oven and let them cool slightly. Spoon them into serving bowls.

    9. Drizzle with Dressing: Drizzle your prepared dressing over the mixture, and toss gently to coat everything well.

    10. Garnish: Top the bowls with fresh parsley, nuts, or seeds if desired. Enjoy your meal!

    This step-by-step guide illustrates how to create an impressive dish while still embracing the goal of providing healthy dinner recipes that are easy and accessible for everyone.

    Mastering Cozy Roasted Carrot Chickpea Bowl Recipe: Advanced Tips and Variations

    For those looking to elevate their Cozy Roasted Carrot Chickpea Bowl experience, consider these advanced tips and delightful variations:

    • Experiment with Seasonings: Besides cumin and paprika, try garam masala for a warm, aromatic twist or chili powder for a spicy kick.

    • Add Roasted Garlic: Incorporate roasted garlic into your dish for a deeper flavor profile. Simply wrap whole garlic cloves in foil with a drizzle of olive oil and roast alongside the carrots and chickpeas.

    • Incorporate Greens: For added nutrition, toss in leafy greens such as spinach or kale after roasting. The residual heat will wilt them slightly without compromising their texture.

    • Make it a Complete Meal: Layer your bowl with a base of quinoa or brown rice to make it even heartier. This addition can further increase your meal’s protein and fiber content.

    • Dress it Differently: Experiment with delicious dressings like tahini or a yogurt-based sauce to complement the flavors of the bowl.

    These tips can help you customize and elevate your Cozy Roasted Carrot Chickpea Bowl, making it uniquely yours.

    How to Store Cozy Roasted Carrot Chickpea Bowl Recipe: Best Practices

    One of the wonderful qualities of the Cozy Roasted Carrot Chickpea Bowl is its compatibility with meal prep. Here are the best practices for storing your dish:

    • Refrigeration: If you have leftovers, let them cool completely before storing them in an airtight container in the fridge. They will last for up to four days.

    • Freezing: For longer storage, you can freeze the roasted carrot and chickpea mix. Place it in a freezer-safe container or bag, ensuring to remove excess air. This method preserves the meal for about three months.

    • Reheating: When ready to eat, reheating is simple. For the best results, spread the mixture on a baking sheet and heat in a preheated oven at 350°F (175°C) for about 10-15 minutes. This helps maintain the dish’s crispy texture. Alternatively, you can heat it in the microwave, though the texture may not be as delightful.

    By following these storage methods, you ensure that your Cozy Roasted Carrot Chickpea Bowl remains fresh and delicious, making it the perfect candidate for healthy dinner recipes that can be enjoyed even on the busiest of nights.

    Nutritional Value of Cozy Roasted Carrot Chickpea Bowl Recipe

    Understanding the nutritional value of your meals is essential for maintaining a healthy lifestyle. Here’s the approximate breakdown of one serving of the Cozy Roasted Carrot Chickpea Bowl:

    • Calories: 350
    • Protein: 12g
    • Fat: 10g
    • Carbohydrates: 50g
    • Fiber: 15g
    • Sugar: 6g
    • Vitamins & Minerals: High levels of Vitamin A (from carrots), B vitamins, and essential minerals such as potassium and magnesium.

    This nutritional overview emphasizes how the Cozy Roasted Carrot Chickpea Bowl is not just a delight for the taste buds but also a powerhouse of nutrients, aligning perfectly with the goals of healthy dinner recipes that serve your well-being.

    FAQs: Frequently Asked Questions About Cozy Roasted Carrot Chickpea Bowl Recipe

    Here are some frequently asked questions about the Cozy Roasted Carrot Chickpea Bowl, which can provide further insight into preparing and customizing this dish:

    1. Can I make Cozy Roasted Carrot Chickpea Bowl in advance?
    Yes, you can prepare the components ahead of time. Store cold ingredients separately in the fridge and combine them just before serving.

    2. What other vegetables can I add to the bowl?
    Feel free to add bell peppers, sweet potatoes, or any seasonal vegetables you enjoy to make the dish even more vibrant!

    3. How can I make this bowl more filling?
    Consider adding grains like quinoa or brown rice as a base for more complex carbohydrates and fiber.

    4. Can I substitute chickpeas for another protein?
    Absolutely! You can use lentils, black beans, or any preferred protein source if you’re looking for variety.

    5. What’s the best way to reheat leftovers?
    For best texture, reheat in the oven to retain crispiness, or use a microwave for convenience.

    Through this FAQ section, you found answers to commonly asked questions, reinforcing the convenience and multifunctionality of this fantastic recipe.

    Now, it’s time for you to try your hand at the Cozy Roasted Carrot Chickpea Bowl! Whether it’s a cozy evening in or part of a meal prep plan for the week, this recipe makes for healthy dinner recipes that are not only nourishing but also bursting with flavor. Enjoy your culinary creation!

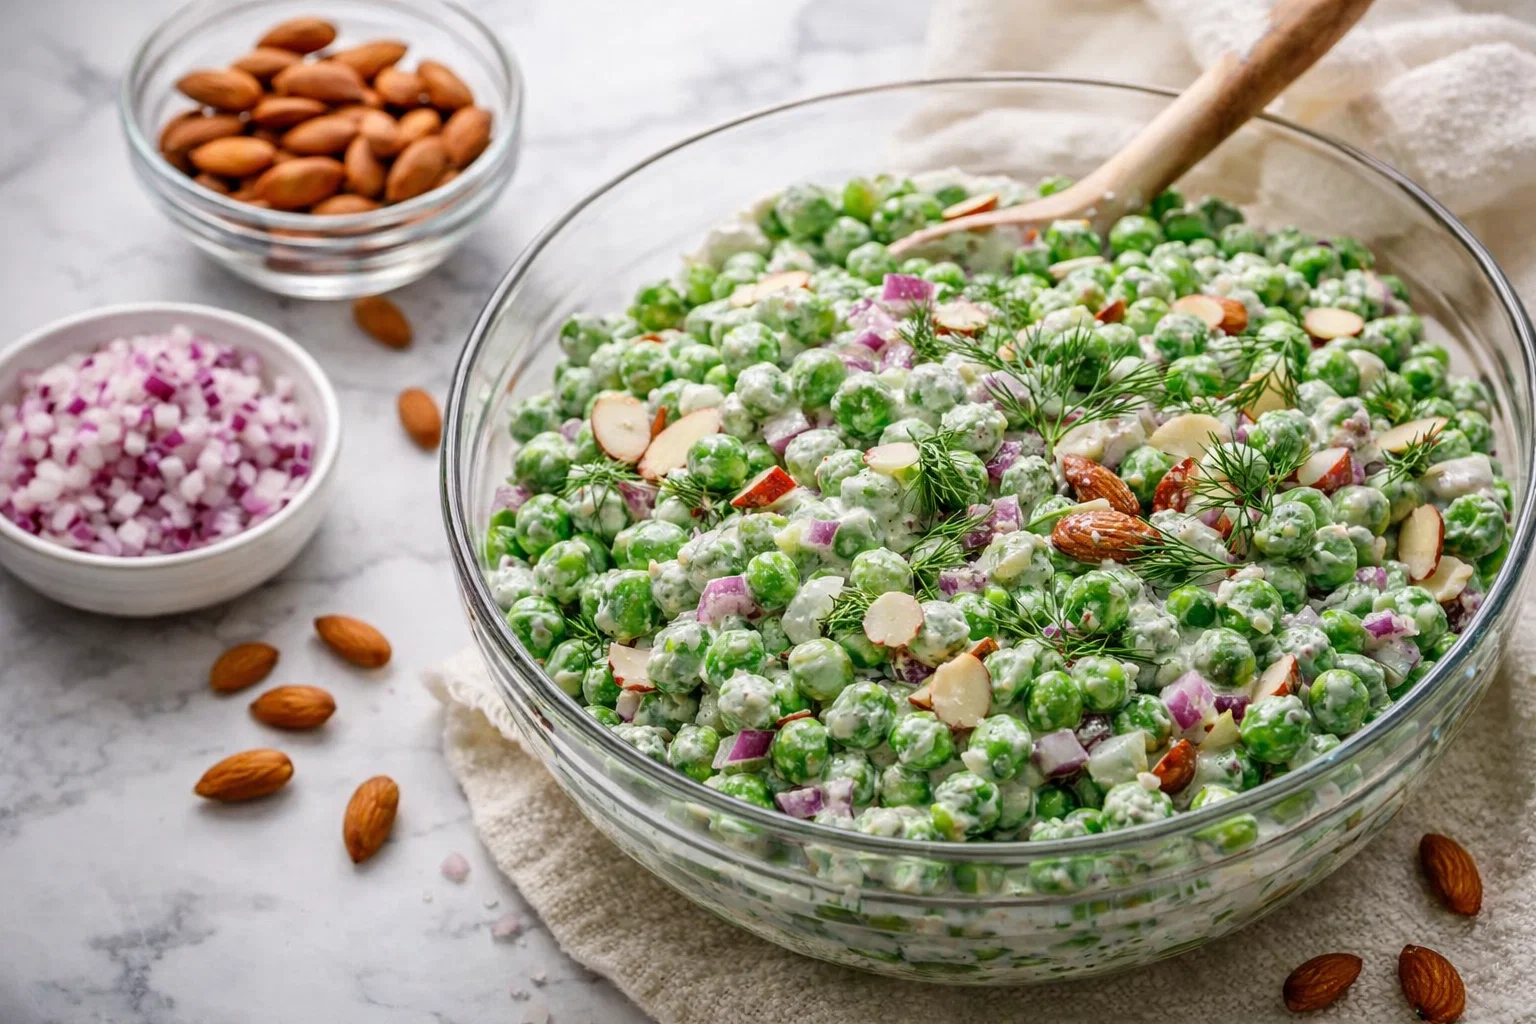
  • I CanT Stop Making This Creamy Pea Salad

    I CanT Stop Making This Creamy Pea Salad

    I Can’T Stop Making This Creamy Pea Salad: A Tropical Delight

    Introduction to I Can’T Stop Making This Creamy Pea Salad

    If you’re on the lookout for refreshing and satisfying spring meals, then look no further than my delightful Creamy Pea Salad! This vibrant dish, bursting with flavors and textures, is the perfect addition to any spring gathering or a light lunch at home. Made with simple, wholesome ingredients, this salad not only serves as a tasty side dish but also brings a wealth of health benefits to your table.

    Crafted with sweet green peas, a creamy dressing, and a medley of colorful veggies, this salad is naturally gluten-free, vegan, and incredibly easy to prepare. It caters to busy parents, health-conscious individuals, and anyone seeking a quick yet nutritious meal. The natural sweetness of peas paired with a creamy dressing creates a wonderful balance that even the pickiest eaters will love.

    Because it’s so versatile, you can enjoy this Creamy Pea Salad as a standalone dish or serve it alongside grilled chicken, fish, or other protein options. Whether you’re a student eager for a quick meal, a newlywed looking to impress your partner, or a seasoned cook wanting to spice up your spring meals, this recipe will inspire you. Let’s dive into the benefits and advantages of this captivating salad that will have you making it time and time again!

    Benefits and Advantages of I Can’T Stop Making This Creamy Pea Salad

    One of the most significant advantages of the Creamy Pea Salad is how incredibly easy it is to prepare. In just a matter of minutes, you can whip up a delicious and visually stunning dish that’s sure to impress. The simplicity of the recipe reduces the time needed in the kitchen, making it perfect for busy weeknights or impromptu gatherings.

    Health-wise, this salad is packed with nutrients. Peas are an excellent source of plant-based protein, dietary fiber, vitamins A, C, and K, and essential minerals like iron and magnesium. The creamy dressing, often made from vegan mayo and other wholesome ingredients, enhances the flavor without adding excessive calories or sugar. Plus, it’s adaptable to various dietary needs, making it suitable for vegans, gluten-free diners, and those watching their calorie intake.

    Another significant benefit of this vibrant salad is its versatility. You can enjoy Creamy Pea Salad in various ways—serve it chilled as a refreshing lunch option, bring it to picnics or BBQs, or use it as a side dish to complement grilled proteins. The vibrant green color and freshness of the peas make it an appealing choice for spring meals or summer soirées.

    Finally, this dish is perfect for meal prep! Make a large batch at the beginning of the week, and you’ll have healthy, fulfilling lunches ready to go. It doesn’t just taste fantastic but also adds a bright pop of color to your meal, elevating your dining experience. All these factors contribute to why I can’t stop making this Creamy Pea Salad—it’s a delightful way to enjoy the freshness of spring!

    Ingredients Overview

    Essential Ingredients for I Can’T Stop Making This Creamy Pea Salad

    To make the Creamy Pea Salad, you’ll need several straightforward ingredients. Here’s a detailed list along with their precise measurements:

    • 2 cups fresh or frozen peas (defrosted if using frozen): The star ingredient, peas are a nutrient powerhouse.
    • 1/2 cup diced bell pepper (any color): Adds crunch and color.
    • 1/4 cup finely chopped red onion: Provides a mild bite and enhances flavor.
    • 1/2 cup vegan mayonnaise: Makes the salad creamy; opt for a low-fat version if desired.
    • 2 tablespoons apple cider vinegar: For tanginess that brightens up the dish.
    • 1 teaspoon sugar or agave syrup: Balances the acidity of the vinegar; can be omitted or replaced with a sugar alternative.
    • Salt and pepper to taste: Essential for seasoning.

    Vegan and Gluten-Free Options: All components in this salad are vegan and gluten-free. If you’re opting for a lower-calorie dressing, choose a low-fat vegan mayo or yogurt-based product to maintain creaminess without excess calories.

    Dietary Substitutions to Customize Your I Can’T Stop Making This Creamy Pea Salad

    Feel free to customize this Creamy Pea Salad based on your dietary needs and available ingredients:

    • Protein Boost: Add in some diced tofu, chickpeas, or edamame for added protein, making it a heartier meal.
    • Nutitional Yeast: For a cheesy flavor, sprinkle some nutritional yeast, which is great for vegans.
    • Herbs: Fresh herbs like dill, parsley, or cilantro can add extra flavor and freshness, allowing customization based on taste preference.
    • Other Veggies: Consider adding shredded carrots, cucumber, or corn for additional texture and nutrition.
    • Onion Alternatives: If red onion is too strong, try using green onions or chives for a milder flavor.

    Whether you follow specific dietary restrictions or just love experimenting with flavors, the Creamy Pea Salad is endlessly adaptable to suit your preferences!

    How to Prepare the Perfect I Can’T Stop Making This Creamy Pea Salad: Step-by-Step Guide

    Creating the perfect Creamy Pea Salad is as easy as pie! Follow this step-by-step guide to ensure delicious results every time. This section will emphasize how simple it is to create refreshing spring meals that are also customizable.

    1. Prepare the Base: Begin by rinsing your peas under cold water if they are fresh. If you’re using frozen peas, place them in a bowl, and let them sit at room temperature to thaw for about 10-15 minutes.

    2. Mix Ingredients: In a large bowl, add the thawed peas, diced bell pepper, and finely chopped red onion.

    3. Combine Dressing: In a separate bowl, whisk together the vegan mayonnaise, apple cider vinegar, sugar, and season with salt and pepper to taste. Mix until smooth and creamy.

    4. Combine the Two Mixtures: Pour the dressing over the pea mixture. Gently fold everything together until the veggies are evenly coated with the creamy dressing.

    5. Season to Taste: Taste your salad and adjust the seasoning with more salt, pepper, or sugar if needed. Don’t forget to add herbs if you’re using any for added freshness.

    6. Chill Before Serving: To allow the flavors to meld beautifully, cover the bowl with plastic wrap and refrigerate for at least 30 minutes before serving. This step enhances the taste and texture, making it an ideal option for spring meals.

    7. Serve Cold: After chilling, give the salad one last gentle stir and serve it chilled. Enjoy it alone as a light meal or alongside your favorite protein.

    By following these steps, you can craft a stunning, delectable Creamy Pea Salad that embodies the essence of spring.

    Mastering I Can’T Stop Making This Creamy Pea Salad: Advanced Tips and Variations

    To elevate your creamy pea salad experience, consider these advanced tips and delightful variations:

    • Texture Balance: Incorporate some toasted nuts or seeds, like sunflower seeds or sliced almonds, for a satisfying crunch and added nutrients.
    • Flavor Enhancements: For a little kick, add a dash of hot sauce or red pepper flakes to the dressing to spice things up.
    • Fruit Infusion: For a unique twist, consider adding diced mango, pineapple, or strawberries for a delightful fruity flavor that pairs perfectly with peas.
    • Herb Swaps: Experiment with different herbs depending on the season or your personal preference; basil, mint, or thyme make fantastic substitutes that will change up the flavor profile.

    By trying out these variations, you’ll find you can create a new version of this salad every week, making it a staple in your spring meals repertoire.

    How to Store I Can’T Stop Making This Creamy Pea Salad: Best Practices

    Storing your Creamy Pea Salad correctly will help retain its freshness and flavor, allowing you to enjoy it as leftovers. Here’s how to store it properly:

    • Refrigeration: If you have leftover salad, transfer it into an airtight container and store it in the refrigerator. It can typically last up to 3 days when stored correctly.
    • Freezing: Although it’s best enjoyed fresh, if you plan to freeze it, consider omitting the dressing beforehand. Freeze the pea base in a freezer-safe container for up to 2 months. Thaw, then mix in the dressing upon defrosting, ensuring it retains its creamy goodness.
    • Quick Reheating: If you prefer to serve it warm, lightly steam the peas right before serving, and then add the dressing.

    Proper storage ensures that your creamy pea salad is always ready for your spring meals, be it for lunch or dinner!

    Nutritional Value of I Can’T Stop Making This Creamy Pea Salad

    Understanding the nutritional value is essential for health-conscious cooks. This Creamy Pea Salad is not only a joy to eat but is also filled with nutrients. Here is a rough breakdown of the nutrition per serving (estimated for 1/4 of the prepared salad):

    • Calories: 150
    • Fat: 8g
    • Protein: 5g
    • Carbohydrates: 15g
    • Fiber: 5g
    • Sugar: 2g

    Additionally, peas are an excellent source of vitamins like Vitamin K, which is crucial for bone health, and Vitamin C, which supports your immune system. The healthy fats in the dressing can help with nutrient absorption, providing a complete and balanced meal option for spring.

    FAQs: Frequently Asked Questions About I Can’T Stop Making This Creamy Pea Salad

    Here are some common questions surrounding the Creamy Pea Salad that might help you in the kitchen.

    Q: Can I use canned peas instead of fresh or frozen?

    A: Yes, canned peas can be used, but they may have a different texture. Rinse and drain them well to remove excess sodium.

    Q: How can I make this salad spicier?

    A: Consider adding a dash of cayenne pepper, hot sauce, or finely chopped jalapenos to the dressing for heat.

    Q: Can I make this salad in advance?

    A: Absolutely! It’s even better the next day as the flavors meld together. Just remember to store it properly in an airtight container.

    Q: Can I add fruit to the salad?

    A: Yes! For a refreshing twist, try incorporating diced apple, pear, or even berries to complement the other flavors.

    Q: Is this salad suitable for meal prep?

    A: Yes, it is perfect for meal prep! Just keep the dressing separate if you plan to store it for multiple days to prevent the veggies from getting mushy.

    With these insights, you’ll be well-equipped to make the most of your Creamy Pea Salad for spring meals, indulging in both taste and nutrition!

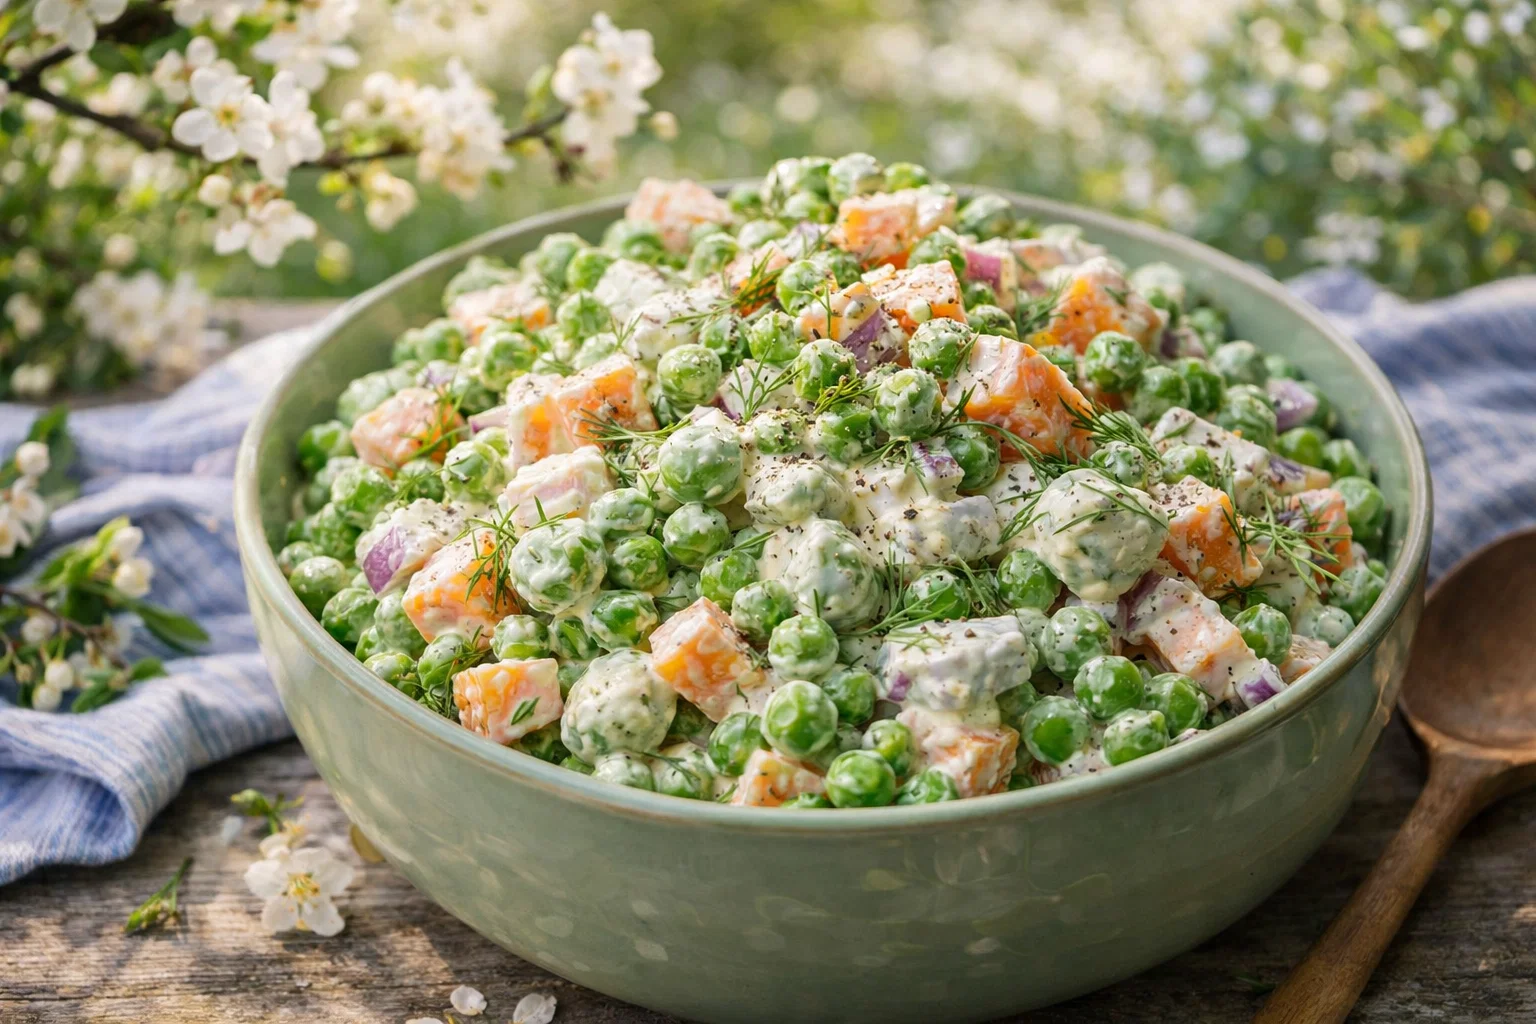
  • Cheddar Gluten Free Pea Salad

    Cheddar Gluten Free Pea Salad

    Cheddar Gluten Free Pea Salad: A Tropical Delight

    Introduction to Cheddar Gluten Free Pea Salad

    As the season of fresh produce arrives, the realm of spring meals opens up a world of culinary possibilities. One delightful addition to your spring recipe repertoire is the Cheddar Gluten Free Pea Salad. Featuring a vibrant medley of peas, crispy vegetables, and creamy cheddar, this salad is not just delicious; it’s also simple and adaptable for various dietary needs.

    What sets this salad apart is its flexibility. Whether you are a busy parent looking for quick meals, a student navigating tight budgets, or a diet-conscious individual aiming for fresh and nutritious options, this recipe is a game changer. It’s gluten-free, making it suitable for those with sensitivities, and the ingredients can be modified to align with different dietary preferences.

    Besides being a feast for the eyes, the Cheddar Gluten Free Pea Salad is rich in vitamins and minerals, thanks to its wholesome components. It serves as a perfect side dish at spring gatherings or a nutritious lunch option that’s easy to prepare. The best part? You can whip it up in under 30 minutes, making it an effortless choice for those busy days. Explore the benefits of this versatile salad and learn how to create your own bowl of goodness.

    Benefits and Advantages of Cheddar Gluten Free Pea Salad

    The appeal of Cheddar Gluten Free Pea Salad goes far beyond its taste. Here are several reasons why this recipe stands out, especially for spring meals:

    1. Ease of Preparation: Busy cooks will appreciate the quick prep time. In less than 30 minutes, you can have a vibrant salad ready. Simply wash, chop, and mix the ingredients.

    2. Nutritional Powerhouse: Peas are packed with protein, fiber, and essential vitamins such as A, C, and K, making this salad a nutrient-rich option for all ages. Incorporating a cheese like cheddar adds calcium and helps keep your bones strong.

    3. Versatile and Adaptable: This dish can easily accommodate various dietary restrictions. Whether you are vegan, following a low-calorie diet, or simply looking to introduce more plant-based options into your meals, this salad can be customized to meet your needs.

    4. Seasonal Ingredients: With fresh peas being a staple of spring, this salad not only celebrates the season but also prioritizes using fresh, local ingredients. This not only ensures flavor but also supports local farmers.

    5. Perfect for Meal Prep: Preparing this salad in advance means you can enjoy it throughout the week. Simply store it in an airtight container in the refrigerator and enjoy a quick and healthy meal anytime.

    6. Family-Friendly: Kids love the sweet taste of peas, and the cheddar adds an appealing flavor that encourages even the pickiest eaters to try vegetables.

    This salad is a go-to option for spring meals, effortlessly meeting the tastes and preferences of all your family members.

    Ingredients Overview

    Essential Ingredients for Cheddar Gluten Free Pea Salad

    Before diving into the preparation, it’s crucial to gather the essential ingredients for your Cheddar Gluten Free Pea Salad. Below is a detailed list, complete with measurements and the purpose of each component:

    1. Fresh Peas – 2 cups (about 1 lb)
    2. Provides sweetness and a vibrant green color.
    3. Rich in fiber, protein, and vitamins.

    4. Cheddar Cheese – 1 cup, shredded

    5. Adds creaminess and delicious flavor.
    6. Packed with calcium and protein.

    7. Red Bell Pepper – 1 medium, diced

    8. For extra crunch and a pop of color.
    9. High in vitamin C and adds antioxidants.

    10. Green Onions – 1/2 cup, diced

    11. Brings a mild onion flavor.
    12. Loaded with vitamins and minerals.

    13. Dijon Mustard – 2 tablespoons

    14. Adds a tangy kick to the dressing.
    15. Often lower in calories compared to mayonnaise.

    16. Olive Oil – 3 tablespoons

    17. Provides healthy fats and enhances the flavor.
    18. Great source of monounsaturated fats.

    19. Lemon Juice – 1 tablespoon

    20. Brightens the dish with acidity.
    21. A source of vitamin C.

    22. Salt and Pepper – to taste

    23. Essential for enhancing all the flavors.

    Diet Note: For a vegan version, substitute cheddar with a dairy-free cheese alternative or omit it altogether. You can also use a low-fat cheese for a lighter option.

    Dietary Substitutions to Customize Your Cheddar Gluten Free Pea Salad

    Flexibility is one of the defining features of the Cheddar Gluten Free Pea Salad. Here are some suggested substitutions to cater to various dietary needs:

    1. Dairy-Free Option:
    2. Substitute cheddar cheese with a lactose-free cheese or a plant-based cheese alternative, like cashew cheese or nutritional yeast, for those aiming for a vegan diet.

    3. Protein Boost:

    4. To add extra protein, consider incorporating cooked quinoa, chickpeas, or diced tofu. These ingredients work well with the existing flavors and contribute to a filling meal.

    5. Low-Carb Option:

    6. If you are following a low-carbohydrate diet, reduce or omit the peas and add more leafy greens such as spinach or mixed spring greens. This will cut down on the carbohydrates while keeping the salad crunchy and fresh.

    7. Nut Allergies:

    8. If nut allergies are a concern, avoid using nuts as toppings or mix-ins. Instead, opt for additional seeds, like pumpkin or sunflower seeds, for added texture.

    9. Herb Variations:

    10. Increase the flavor profile by experimenting with herbs like dill, parsley, or basil. These fresh herbs enhance the taste while providing additional health benefits.

    These substitutions ensure the Cheddar Gluten Free Pea Salad can suit a variety of tastes and dietary preferences without compromising on flavor or nutrition.

    How to Prepare the Perfect Cheddar Gluten Free Pea Salad: Step-by-Step Guide

    Now, let’s delve into the straightforward process for making your own Cheddar Gluten Free Pea Salad. Follow these steps to master this delectable dish:

    1. Prepare the Base:
    2. Start by bringing a pot of water to a boil. Add the fresh peas and blanch for 2-3 minutes until bright green and tender. Once ready, drain and immediately immerse them in an ice bath to halt the cooking process.

    3. Chop the Vegetables:

    4. While the peas cool, wash and chop the red bell pepper and green onions. Aim for a uniform dice for even distribution throughout the salad.

    5. Mix Cheese and Veggies:

    6. In a large mixing bowl, combine the blanched peas, diced red bell pepper, and green onions. Then add the shredded cheddar cheese to the mixture.

    7. Make the Dressing:

    8. In a small mixing bowl, whisk together Dijon mustard, olive oil, lemon juice, salt, and pepper until well combined. The dressing should be smooth and tangy.

    9. Combine Everything:

    10. Pour the dressing over the pea and vegetable mixture. Using a spatula or large spoon, gently toss to ensure the dressing coats all the ingredients evenly.

    11. Taste and Adjust:

    12. Taste the salad and adjust the seasoning if necessary. If you prefer a bit more tang, add a splash more lemon juice, or for more kick, consider additional mustard.

    13. Chill or Serve Immediately:

    14. Allow the salad to chill in the refrigerator for at least 15 minutes to let the flavors meld together before serving. For those in a rush, it’s still delicious served right away.

    15. Garnish (Optional):

    16. If you wish to elevate the presentation, consider garnishing with additional green onions, a sprinkle of shredded cheese, or even some toasted seeds for extra crunch.

    The Cheddar Gluten Free Pea Salad shines as a refreshing dish that captures the essence of spring meals while being easy to prepare. Adapt each step as needed to suit dietary preferences.

    Mastering Cheddar Gluten Free Pea Salad: Advanced Tips and Variations

    Ready to elevate your Cheddar Gluten Free Pea Salad? Use these advanced tips and variations to take your salad experience beyond the basics:

    • Add Fresh Herbs: Incorporating fresh herbs like mint, dill, or cilantro can introduce unique flavors and elevates the overall experience.

    • Try Different Cheeses: Experiment with various cheese types such as feta or goat cheese for a tangy twist. Each option will give the salad a distinct character and creaminess.

    • Introduce Fruits: For a sweet contrast, try adding diced apples, pears, or even some cranberries. These fruits complement the salad’s existing flavors and add layers of texture.

    • Create a Grain Salad: To transform your salad into a substantial meal, mix in cooked grains like farro, brown rice, or bulgur. These components add chewiness and further enhance the nutritional value.

    • Spice It Up: For those who love a little heat, consider adding diced jalapeños or a sprinkle of red pepper flakes. The extra spice can invigorate the dish, making it suitable for adventurous palates.

    With these advanced tips, you can customize the Cheddar Gluten Free Pea Salad to suit any occasion or taste preference, making it fit for alfresco dining or dinner parties.

    How to Store Cheddar Gluten Free Pea Salad: Best Practices

    To enjoy your Cheddar Gluten Free Pea Salad throughout the week, proper storage is key. Here are the best practices for keeping your salad fresh and flavorful:

    • Refrigeration: Store any leftovers in an airtight container in the refrigerator. This will keep the salad fresh for up to 3 days. Before serving again, give it a gentle toss to redistribute the dressing.

    • Freezing: Although fresh peas can be frozen, it’s not recommended to freeze the entire salad mixture as the texture of the peas and vegetables may change upon thawing. Instead, consider freezing any leftover blanched peas separately for future use.

    • Reheating: If you choose to add ingredients like grains and want to serve the dish warm, gently reheat on the stovetop. However, avoid reheating if the salad is consumed cold, as it loses its fresh appeal.

    • Make-Ahead Tip: Preparing the salad a few hours in advance can enhance the flavors. Just be mindful not to add certain delicate ingredients (like greens) until right before serving to prevent wilting.

    By following these guidelines, you can enjoy your Cheddar Gluten Free Pea Salad rejuvenated after a day or two, reinvigorating your spring meals.

    Nutritional Value of Cheddar Gluten Free Pea Salad

    Understanding the nutritional profile of your Cheddar Gluten Free Pea Salad helps make informed choices, particularly when planning spring meals. Here’s a detailed breakdown based on an average serving (about 1 cup):

    • Calories: approximately 250
    • Total Fat: 15g (includes healthy fats from olive oil)
    • Saturated Fat: 5g (from cheddar cheese)
    • Cholesterol: 25mg
    • Sodium: 300mg (depending on the amount of salt added)
    • Carbohydrates: 20g
    • Fiber: 6g (thanks to peas and vegetables)
    • Sugars: 3g
    • Protein: 9g

    This salad provides a balanced mix of macronutrients: healthy fats, protein, and fiber. The high fiber content promotes digestive health, while the vitamins from fresh vegetables support overall wellbeing.

    For those on specific diets—like vegan or low-carb—adjusting or swapping ingredients allows for maintaining your desired nutritional goals without sacrificing flavors.

    FAQs: Frequently Asked Questions About Cheddar Gluten Free Pea Salad

    1. Can I make Cheddar Gluten Free Pea Salad ahead of time?

    Absolutely! This salad can be prepared a few hours beforehand to enhance the flavors. Just keep it in the refrigerator until you are ready to serve.

    2. How do I make this salad vegan?

    To make the salad vegan, simply replace cheddar with a dairy-free cheese alternative or omit it altogether. The salad remains vibrant and flavorful without compromising ingredients.

    3. What can I add to boost protein in the salad?

    To increase the protein content, consider adding cooked quinoa, chickpeas, or even diced tofu. All these additions will not only enhance nutritional value but also contribute to a filling meal.

    4. Can I freeze leftovers?

    It is not advisable to freeze the salad as the texture of peas and vegetables can become mushy upon thawing. However, blanched peas can be frozen separately for future use.

    5. What can I substitute for Dijon mustard?

    If you don’t have Dijon mustard on hand, yellow mustard works as an adequate substitute. Alternatively, you can mix in some vinegar or citrus juice to maintain the acidity.

    With these FAQs, readers should feel empowered to engage with the recipe tailored to their dietary needs, encouraging experimentation with this delightful spring meal.


    By following this comprehensive guide, you can easily prepare a Cheddar Gluten Free Pea Salad that’s perfect for any occasion, all while enjoying the numerous advantages it offers for every member of your family. Dive into spring meals filled with flavor and freshness today!

  • My Favorite Creamy Mexican Street Corn Dish

    My Favorite Creamy Mexican Street Corn Dish

    My Favorite Creamy Mexican Street Corn Dish!: A Tropical Delight

    Introduction to My Favorite Creamy Mexican Street Corn Dish!

    If you’re on the lookout for simple yet vibrant dinner recipes, look no further than this Creamy Mexican Street Corn Dish! Traditionally known as “Esquites,” this dish is a delightful fusion of flavors that brings the essence of Mexican street food right to your kitchen. It’s creamy, savory, and slightly tangy, which makes it a perfect side dish for grilled meats or as a stand-alone vegan appetizer that’s sure to impress.

    This recipe is not only delightfully simple to prepare, but it is also packed with health benefits. Sweet corn is rich in fiber, vitamins, and minerals, making it a nutritious addition to your meals. This creamy version is naturally gluten-free and can be made vegan by using plant-based mayonnaise and cheese alternatives. The dish is versatile and can be easily customized to meet various dietary needs. Whether you’re serving a hungry family, planning for a potluck, or simply craving a delicious snack, this creamy Mexican street corn makes for a wholesome option that everyone will love. Let’s dive into the vibrant flavors of Mexico and discover how easy it is to whip up this delightful dish!

    Benefits and Advantages of My Favorite Creamy Mexican Street Corn Dish!

    One of the standout features of this Creamy Mexican Street Corn Dish is its ease of preparation. Unlike many dinner recipes that require numerous steps and ingredients, this dish can be put together quickly. In just a matter of minutes, you can enjoy a meal that feels abundant in flavor and presentation. With very few basic ingredients, this dish favors fresh produce and simple preparation methods, making it an ideal recipe for anyone, including busy parents and novices in the kitchen.

    Furthermore, this dish is brimming with nutritional benefits. Sweet corn is high in fiber, which promotes good digestion and a healthy gut. It is also an excellent source of antioxidants, protecting against oxidative stress and inflammation. The added benefits of lime juice contribute vitamin C and other essential nutrients.

    Another notable advantage of this recipe is its adaptability. It caters to various dietary preferences and restrictions. Vegans can easily alter the recipe by using plant-based substitutes for mayonnaise and cheese. Gluten-free enthusiasts will find comfort in knowing that corn is naturally gluten-free. Moreover, this dish can be made low-calorie by adjusting the amount of cheese or opting for low-fat dairy alternatives.

    In summary, this Creamy Mexican Street Corn Dish stands out due to its simplicity, health benefits, and flexibility, making it a favorite among diverse groups of food enthusiasts and health-conscious individuals alike.

    Ingredients Overview

    Essential Ingredients for My Favorite Creamy Mexican Street Corn Dish!

    For the perfect Creamy Mexican Street Corn Dish, you will need the following ingredients:

    • 4 cups of sweet corn (fresh, frozen, or canned, drained)
    • 1/2 cup of mayonnaise (can substitute vegan mayonnaise for a vegan-friendly option)
    • 1/2 cup of crumbled cotija cheese (use vegan cheese for a dairy-free version)
    • 1/4 cup of sour cream (substitute with coconut yogurt for vegan)
    • 2 tablespoons of lime juice (freshly squeezed for the best flavor)
    • 1 teaspoon of chili powder (adjust to your spice preference)
    • 1/2 teaspoon of garlic powder
    • Salt and pepper to taste
    • Chopped cilantro or parsley for garnish

    This ingredient list highlights just how achievable it is to create a flavorful dish that’s nourishing and satisfying. The combination of mayonnaise and sour cream gives that coveted creaminess, while cotija cheese adds depth and richness. The spice elements tie together the flavor notes, relaying the traditional essence of Mexican street corn.

    Dietary Substitutions to Customize Your My Favorite Creamy Mexican Street Corn Dish!

    Cooking allows for creativity, and this Creamy Mexican Street Corn Dish is no exception. Here are some suggested substitutions to cater to different dietary needs:

    1. Vegan/GF Options: Replace regular mayonnaise with a plant-based variety and use vegan cheese for a completely dairy-free version. Ensure that the ingredients you select, especially canned corn, don’t contain any gluten.

    2. Low-Calorie Options: Opt for low-fat mayonnaise and sour cream to reduce the overall calorie count and fat content of the dish.

    3. Spice Level Adjustment: If you’re looking for a spicier kick, feel free to add diced jalapeños or a dash of hot sauce to elevate the heat.

    4. Extra Flavor: Add chopped red onions or bell peppers for a crunchy texture and additional flavoring.

    By using these substitutions, this dish can easily adapt to accommodate various dietary preferences without sacrificing taste or experience.

    How to Prepare the Perfect My Favorite Creamy Mexican Street Corn Dish!: Step-by-Step Guide

    Creating this Creamy Mexican Street Corn Dish is a breeze! Here’s a step-by-step guide to help you achieve the perfect result:

    1. Prepare the Base: In a large mixing bowl, add the 4 cups of sweet corn. If using fresh corn, cut the kernels off the cob. For frozen corn, cook according to package instructions; for canned corn, drain and rinse.

    2. Mix Ingredients: To the bowl of corn, add 1/2 cup of mayonnaise and 1/4 cup of sour cream. Stir well to combine, ensuring that the corn is fully coated with the creamy mixture.

    3. Add Flavorings: Sprinkle in 1 teaspoon of chili powder and 1/2 teaspoon of garlic powder. Squeeze in 2 tablespoons of freshly squeezed lime juice. Season with salt and pepper to taste. Mix until fully incorporated.

    4. Incorporate Cheese: Gently fold in 1/2 cup of crumbled cotija cheese. Reserve a bit for garnish if desired.

    5. Serve Warm or Chilled: At this point, you can choose to serve the dish warm or allow it to chill for about 30 minutes in the refrigerator for all the flavors to meld together—this enhances the taste.

    6. Garnish: Transfer the corn mixture to a serving bowl and garnish with chopped cilantro or parsley, and additional cheese if you saved some.

    7. Enjoy: Serve this dish as a side with your favorite grilled meats, or as a vibrant appetizer or snack, allowing everyone to enjoy the tropical flavors of Mexico right at home.

    By following these steps, you can create a remarkable dish that embodies the essence of Mexican street food, right in your own kitchen. Such dinner recipes can easily elevate your weeknight meals or impress guests at gatherings.

    Mastering My Favorite Creamy Mexican Street Corn Dish!: Advanced Tips and Variations

    To elevate your Creamy Mexican Street Corn Dish further, consider these advanced tips and variations:

    1. Smoke and Char: For an authentic street corn vibe, grill fresh corn on the cob until slightly charred before cutting the kernels off. This adds a smoky flavor that takes the dish to another level.

    2. Experiment with Herbs: Try adding fresh herbs like basil or dill for a unique twist. Mixing traditional flavors with new can create unexpected delights.

    3. Add Protein: Incorporate black beans or shredded chicken for a heartier dish that can serve as a main course rather than a side. This provides added nourishment for those who need a little more substance in their meals.

    4. Themed Dishes: Serve your Creamy Mexican Street Corn alongside other Mexican-inspired dinner recipes, like tacos or quesadillas, for a complete themed dinner that is sure to please guests.

    By employing these tips, not only will you enhance the flavor profile of the dish, but you’ll also gain confidence in your ability to create adaptable and innovative meals.

    How to Store My Favorite Creamy Mexican Street Corn Dish!: Best Practices

    To ensure that your Creamy Mexican Street Corn Dish remains fresh and delicious, consider the following storage methods:

    • Refrigeration: Store any leftovers in an airtight container in the refrigerator. The dish is best consumed within 3-4 days but can be kept for up to a week.

    • Freezing: While this dish is best served fresh, it can be frozen for extended storage. Place the corn mixture in resealable freezer bags, making sure to remove excess air, and freeze for up to three months.

    • Reheating: When ready to enjoy, thaw the dish overnight in the refrigerator. To reheat, gently warm it on the stovetop over medium-low heat, or in the microwave in short intervals until warmed through. If it seems dry, stir in a bit of extra mayonnaise or sour cream to revive the creaminess.

    Properly storing your Creamy Mexican Street Corn ensures you can enjoy it at your convenience while still providing a delicious experience, worthy of any dinner recipes collection.

    Nutritional Value of My Favorite Creamy Mexican Street Corn Dish!

    Understanding the nutritional value of the Creamy Mexican Street Corn Dish can help you make informed decisions about your meals. Here’s a breakdown of a typical serving size (1 cup):

    • Calories: Approximately 250-300 calories
    • Fat: 15g (includes healthy fats from mayonnaise)
    • Protein: 6g (from cheese and corn)
    • Carbohydrates: 30g
    • Dietary Fiber: 4g
    • Sugars: 5g (naturally occurring in corn)
    • Sodium: 400mg (depending on added salt and cheese)

    This dish is a great source of vitamins and minerals, especially vitamin C and essential B vitamins, making it not just a savory treat but a nutritional powerhouse as well. It’s a wonderful option that delivers both flavor and nutritional benefits, making it a well-rounded component of your dinner recipes routine.

    FAQs: Frequently Asked Questions About My Favorite Creamy Mexican Street Corn Dish!

    Q: Can I use frozen corn instead of fresh corn?
    A: Absolutely! Frozen corn is a great alternative and can even be sweeter. Just thaw it and proceed with the recipe as directed.

    Q: How can I adjust the recipe for a spicy version?
    A: To infuse some heat, add diced jalapeños or a generous pinch of cayenne pepper during the mixing phase.

    Q: Can I make this dish ahead of time?
    A: Yes! In fact, making it a few hours ahead allows the flavors to meld beautifully. Just store it in the refrigerator until you’re ready to serve.

    Q: How can I make it dairy-free?
    A: For a dairy-free option, substitute dairy mayonnaise and cotija cheese with plant-based alternatives.

    Whether you are preparing for a busy weeknight meal or wanting to impress guests with a delightful dish, this Creamy Mexican Street Corn Dish is a versatile and enjoyable recipe that’s sure to become a staple among your favorite dinner recipes. Enjoy the burst of flavor and nutritional benefits that it brings to your table!

  • Mouthwatering Vegan Mexican Street Corn Pasta Salad

    Mouthwatering Vegan Mexican Street Corn Pasta Salad

    Mouthwatering Vegan Mexican Street Corn Pasta Salad: A Tropical Delight

    Introduction to Mouthwatering Vegan Mexican Street Corn Pasta Salad

    Are you looking for a vibrant, flavorful dish that’s easy to prepare and perfect for any occasion? Look no further than this Mouthwatering Vegan Mexican Street Corn Pasta Salad! Packed with the delightful flavors of summer and a medley of nutritious ingredients, this pasta salad is not just another side dish; it’s a celebration of tastes and textures that will excite your taste buds.

    This dish offers a multitude of benefits: it’s simple to make, healthy, vegan, and gluten-free, making it a fantastic choice for busy weeknights, weekend gatherings, or potluck events. The base of the pasta combined with fresh, crisp vegetables and the signature sweetness of corn creates a satisfying balance that suits various dietary requirements, whether you’re a health-conscious eater or a food enthusiast looking to explore new recipes.

    Moreover, this mouthwatering pasta salad provides an excellent source of fiber, protein, and essential vitamins, making it both nourishing and indulgent. Add in the enchanting aroma of spices and herbs, and you have a dish that invites everyone to the table. Whether you’re a student trying to whip up a quick meal, a newlywed preparing for your first family gathering, or a busy parent looking for a nutritious meal for your kids, this vegan Mexican street corn pasta salad delivers.

    In the following sections, we will delve into the numerous benefits of this recipe, the ingredients you’ll need, and a step-by-step guide to perfecting this delectable pasta salad. Let’s get started on this culinary adventure!

    Benefits and Advantages of Mouthwatering Vegan Mexican Street Corn Pasta Salad

    This Mouthwatering Vegan Mexican Street Corn Pasta Salad reveals a treasure trove of benefits that make it a delightful addition to your meal rotation.

    Ease of Preparation

    One of the standout features of this pasta salad is its simplicity. With minimal prep and cooking time, you can have a delicious dish ready in under 30 minutes, making it ideal for busy lifestyles. Home cooks of all skill levels will appreciate how easily the ingredients come together.

    Health Benefits

    Incorporating fresh vegetables like bell peppers, red onions, and cilantro brings refreshing flavors and a wealth of nutrients to the table. Sweet corn offers natural sweetness and essential vitamins, while whole grain pasta provides a wholesome base rich in fiber. Together, these ingredients contribute to a balanced diet, making this pasta salad a smart choice for the health-conscious individual.

    Versatility and Adaptability

    Another advantage of this recipe is its versatility. Whether served as a main course, side dish, or summer potluck standout, this pasta salad fits various occasions seamlessly. You can also customize it according to your palate by adjusting the spices or adding your favorite plant-based proteins.

    Complete Meal Option

    This vegan Mexican street corn pasta salad serves as a complete meal on its own, saving you time in the kitchen while ensuring you meet your nutritional needs. It’s filling without feeling heavy, so you can enjoy it any time of day.

    Dietary Considerations

    For those with specific dietary restrictions, this pasta salad is inherently free from animal products and gluten, making it suitable for vegans and individuals with gluten sensitivities. Moreover, it’s a low-calorie choice without sacrificing flavor, marrying health and indulgence effortlessly.

    By choosing to make this delectable pasta salad, you’re opting for a dish that embodies health, flavor, and simplicity—perfect for anyone from busy professionals to enthusiastic home cooks.

    Ingredients Overview

    Essential Ingredients for Mouthwatering Vegan Mexican Street Corn Pasta Salad

    Creating this flavorful pasta salad requires just a handful of ingredients, each chosen for its unique contribution to the dish’s delectable taste and nutritional profile. Below is a detailed list of everything you’ll need:

    • 8 oz (225g) whole grain pasta (gluten-free spaghetti or penne works well)
    • 2 cups corn (fresh or frozen; if using frozen, thaw beforehand)
    • 1 cup cherry tomatoes, halved
    • 1 medium red bell pepper, diced
    • 1 small red onion, finely chopped
    • 1 cup fresh cilantro, roughly chopped
    • 1 avocado, diced (optional but adds creaminess)
    • 1/4 cup lime juice (about 2 limes)
    • 2 tbsp olive oil
    • 1 tsp chili powder (adjust for spice tolerance)
    • 1/2 tsp cumin
    • Salt and pepper, to taste

    These ingredients work harmoniously, bringing a burst of flavor and color to your plate. Not to mention, they’re packed with essential nutrients to fuel your day!

    Dietary Substitutions to Customize Your Mouthwatering Vegan Mexican Street Corn Pasta Salad

    Substitutions can elevate this pasta salad to suit your tastes or accommodate dietary restrictions. Here are some suggestions to modify the recipe:

    • Pasta Options: If you’re looking for lower-carb options, consider using spaghetti squash or zoodles (zucchini noodles) instead of wheat-based pasta.
    • Corn Alternatives: If you prefer different flavors, replace corn with diced red bell pepper or peas for a similar sweet crunch.
    • Oil-Free Option: For a lighter dressing, omit olive oil and use vegetable broth instead when mixing the ingredients.
    • Avocado: If you need a lower-fat alternative, skip the avocado and opt for a dollop of your favorite vegan mayo or yogurt for creaminess without the added fat.
    • Spice Level: Adjust the chili powder to cater to heat preferences; jalapeños can be added for an extra kick.

    Feel free to experiment with spices and additional ingredients like black beans or roasted chickpeas for added protein. The beauty of this pasta salad lies in its adaptability, allowing you to create a dish uniquely your own.

    How to Prepare the Perfect Mouthwatering Vegan Mexican Street Corn Pasta Salad: Step-by-Step Guide

    Ready to dive into the kitchen? Follow this step-by-step guide to prepare your Mouthwatering Vegan Mexican Street Corn Pasta Salad effortlessly.

    1. Cook the Pasta:
      Begin by bringing a large pot of salted water to a boil. Add the whole grain pasta and cook according to package instructions until al dente. Drain the pasta and rinse under cold water to halt the cooking process.

    2. Prepare the Vegetables:
      While the pasta cooks, chop the cherry tomatoes, red bell pepper, red onion, and cilantro. If you’re including avocado, dice it at the last minute to prevent browning.

    3. Cook the Corn:
      If using fresh corn, cut the kernels off the cob, or if using frozen corn, measure out two cups and place them in a heated skillet over medium heat. Stir them for about 3-5 minutes until warmed through and slightly caramelized for added flavor.

    4. Mix the Dressing:
      In a small bowl, whisk together lime juice, olive oil, chili powder, cumin, salt, and pepper. Taste and adjust the seasoning according to your preference.

    5. Combine the Ingredients:
      In a large mixing bowl, combine the cooked pasta, corn, diced vegetables, and chopped cilantro. Pour the dressing over the mixture and toss gently until everything is well coated.

    6. Add the Avocado:
      If you’re using avocado, gently fold it into the pasta salad last to avoid mashing it.

    7. Chill and Serve:
      This pasta salad can be enjoyed immediately, but for even better results, refrigerate it for at least 30 minutes. Chilling allows the flavors to meld beautifully.

    8. Garnish:
      Before serving, add an additional sprinkle of lime juice and fresh cilantro for an appealing finish.

    Following these steps, you can master this pasta salad, creating a flavorful dish perfect for any meal or occasion.

    Mastering Mouthwatering Vegan Mexican Street Corn Pasta Salad: Advanced Tips and Variations

    To elevate your pasta salad game even further, explore these advanced tips and variations:

    • Herb Substitutions: Fresh herbs like parsley, dill, or green onions can replace cilantro for a subtly different flavor profile.
    • Cheesy Flavor: Nutritional yeast can be sprinkled over the salad to add a cheesy depth without dairy.
    • Grilled Vegetables: Consider grilling the bell peppers and corn for a smoky flavor that enhances the salad’s overall taste.
    • Protein Boost: For those needing extra protein, add black beans or chickpeas. They not only enrich the flavor but also make the salad more filling.
    • Make Ahead: This pasta salad keeps well in the fridge for up to 3 days, making it a perfect dish for meal prepping. Just hold off on adding avocado until ready to serve to maintain freshness.

    These tips encourage creativity, ensuring you never get bored of this delightful pasta salad. By trying different ingredients and techniques, you can persistently reinvent your dish, keeping it fresh and exciting.

    How to Store Mouthwatering Vegan Mexican Street Corn Pasta Salad: Best Practices

    Creating a delicious pasta salad is just half the fun—proper storage is essential to maintain freshness and flavor. Here’s how to do it right:

    Refrigeration

    After preparing your vegan Mexican street corn pasta salad, store any leftovers in an airtight container in the refrigerator. This salad can typically last for about 3-4 days. Just remember, if you’ve added avocado, it may brown over time.

    Freezing

    While freezing this pasta salad isn’t generally recommended due to the texture changes in fresh vegetables when thawed, you can freeze the base (the pasta and corn mixture) separately. Ensure it’s cool before placing it in a freezer-safe bag or container—just be aware that when reheating, you’ll likely need to add fresh vegetables and dressing for the best flavor.

    Reheating

    When you’re ready to enjoy your pasta salad again, simply thaw (if frozen) and mix in fresh ingredients. For refrigerated leftovers, you can either enjoy them cold or warm it up slightly in a skillet on low heat, stirring gently until warmed.

    By following these storage recommendations, you can keep your delicious dish fresh and ready to go!

    Nutritional Value of Mouthwatering Vegan Mexican Street Corn Pasta Salad

    Understanding the nutritional aspects of your food can empower your cooking choices. Here’s a closer look at the nutritional value of one serving of Mouthwatering Vegan Mexican Street Corn Pasta Salad, based on the ingredients outlined:

    • Calories: Approximately 250-300 calories
    • Fat: 10-12g
    • Saturated Fat: 1.5g
    • Carbohydrates: 40-45g
    • Fiber: 8-10g
    • Protein: 7-9g
    • Sugars: 5-7g
    • Vitamin A: 25% of the Daily Value
    • Vitamin C: 40% of the Daily Value
    • Iron: 15% of the Daily Value

    This pasta salad is not just delicious; it’s a nutrient-dense option packed with vitamins and minerals essential for your wellbeing. Plus, the fiber content will help keep you satisfied longer while supporting digestive health.

    Eating healthfully doesn’t have to be bland; enjoy the vibrant flavors and nutrition of this stunning dish!

    FAQs: Frequently Asked Questions About Mouthwatering Vegan Mexican Street Corn Pasta Salad

    1. Can I use a different type of pasta for this recipe?

    Absolutely! You can use any pasta of your choice, including gluten-free options like quinoa or chickpea pasta. Adjust cooking times as needed to ensure the pasta is cooked al dente.

    2. How can I make this pasta salad spicier?

    To add heat, include diced fresh jalapeños, increase the amount of chili powder, or add a dash of hot sauce to the dressing. Customize it until it’s just the right level of spice for you!

    3. Can I make this pasta salad ahead of time?

    Yes, this pasta salad is perfect for meal prep! It stays fresh in the refrigerator for up to 3-4 days, allowing you to enjoy it for lunches and dinners throughout the week.

    4. Is this recipe suitable for meal prep?

    Definitely! Make a larger batch and portion it into single-serving containers for easy grab-and-go lunches. Just add avocado fresh to maintain its texture.

    5. What should I serve with this pasta salad?

    This dish pairs wonderfully with grilled vegetables, a green salad, or even as a side to tacos or burritos. Its versatility makes it a delightful addition to any meal!

    6. Can I add protein to this salad?

    Yes! Feel free to add cooked beans, lentils, or grilled tofu to enhance the protein content. This adjustment makes the salad even more filling and nutritious.

    Now that you have all this information at your fingertips, it’s time to roll up your sleeves and embrace the kitchen. This Mouthwatering Vegan Mexican Street Corn Pasta Salad is a delightful dish ready to impress and nourish, no matter the occasion! Enjoy whipping it up and savoring each delicious bite!

  • Tasty Roasted Carrots With Whipped Feta

    Tasty Roasted Carrots With Whipped Feta

    Tasty Roasted Carrots With Whipped Feta: A Tropical Delight

    Introduction to Tasty Roasted Carrots With Whipped Feta

    Are you in search of delightful dinner recipes that are not only simple to prepare but also healthful and delicious? Look no further! Introducing Tasty Roasted Carrots With Whipped Feta—a tropical delight that is sure to elevate your dining experience. This vibrant dish combines the sweetness of roasted carrots with the creamy tang of whipped feta, creating a flavor profile that’s hard to resist.

    Perfect for busy weeknights or leisurely weekend meals, this recipe is both vegan and gluten-free, accommodating various dietary needs with ease. What’s more, it’s a fantastic way to showcase the natural flavor of carrots while delivering essential vitamins and minerals to your plate. The simplicity of this recipe is one of its greatest benefits, making it accessible whether you’re a novice home cook, a busy parent, or a culinary enthusiast looking for fresh ideas.

    The combination of sweet and savory offers a satisfying side that pairs well with most main dishes. This wholesome option is not only visually appealing but will leave your family raving about your cooking skills. So, if you’re ready to create an impressive dish that will delight your taste buds and nourish your body, let’s dive into the benefits and advantages of Tasty Roasted Carrots With Whipped Feta.

    Benefits and Advantages of Tasty Roasted Carrots With Whipped Feta

    When browsing dinner recipes, it’s essential to find options that align with your health and flavor preferences. Tasty Roasted Carrots With Whipped Feta stands out for several reasons:

    1. Ease of Preparation: This recipe requires minimal ingredients and straightforward steps, making it ideal for home cooks at all skill levels. You can whip it up quickly, making it perfect for those busy evenings when you don’t have time to spend hours in the kitchen.

    2. Nutritional Health Benefits: Carrots are packed with vitamins A, C, and K, and are an excellent source of fiber, promoting good digestive health. The addition of feta cheese introduces protein and calcium, offering a well-rounded nutritional profile.

    3. Versatility: This recipe can easily be adapted to fit various dietary needs. For vegan options, simply replace the feta with a plant-based alternative. Additionally, it can be paired with numerous main courses like grilled chicken, fish, or a hearty grain salad.

    4. Family-Friendly: Introducing roasted carrots into your family meals can encourage kids to enjoy vegetables in a new and exciting way. Their natural sweetness, combined with the creamy feta, creates an appealing dish for even the pickiest eaters.

    5. Impressive Presentation: The vibrant orange of the carrots against the creamy white of the whipped feta offers a beautiful display, making it not only a treat for the taste buds but also for the eyes. Perfect for gatherings and special occasions!

    Overall, Tasty Roasted Carrots With Whipped Feta is a recipe that caters to both flavor and nutrition, making it a go-to choice among dinner recipes. Whether you’re preparing for an ordinary weeknight or a festive celebration, this dish adds a touch of gourmet appeal with effortless preparation.

    Ingredients Overview

    Essential Ingredients for Tasty Roasted Carrots With Whipped Feta

    To craft Tasty Roasted Carrots With Whipped Feta, you will need the following ingredients:

    • Carrots (500g): Choose fresh, firm carrots for the best flavor. They’re naturally sweet and add vibrant color to the dish.

    • Feta Cheese (150g): Crumbled feta cheese is key for creating that rich, creamy whipped topping. For a vegan option, use plant-based feta or blended tofu mixed with lemon juice.

    • Olive Oil (2 tablespoons): Olive oil not only helps with roasting but also adds a slight nuttiness to the carrots.

    • Honey or Maple Syrup (1 tablespoon): A touch of sweetness helps to caramelize the carrots and enhances their natural flavor.

    • Garlic (2 cloves): Minced garlic adds depth and aroma to the dish, elevating its overall taste.

    • Salt and Pepper (to taste): Basic seasonings that bring out the best in each ingredient.

    • Fresh Herbs (optional, such as thyme or parsley): Chopped fresh herbs can sprinkle on top for added flavor and color.

    All these ingredients are easily accessible and can often be found in most kitchens, making this dish budget-friendly as well. Additionally, you can count on these essential items to deliver consistent results.

    Dietary Substitutions to Customize Your Tasty Roasted Carrots With Whipped Feta

    The flexibility of this recipe allows for various dietary substitutions:

    • To make it vegan: Swap feta cheese for vegan feta or silken tofu blended with a bit of lemon juice and nutritional yeast for a cheesy flavor.

    • For a lower-calorie version: Reduce the amount of olive oil or honey. Substitute with lemon juice for flavor without the calories.

    • Gluten-Free: This recipe is already gluten-free, so you can enjoy it without any alterations.

    • For nut-free: The ingredients are already nut-free; just ensure that any replacements, like vegan cheese, do not contain nuts.

    By customizing these ingredients, anyone can enjoy a delicious and nourishing meal that meets their dietary restrictions. Now that you’re familiar with what goes into this delightful dish, let’s explore how to prepare the perfect Tasty Roasted Carrots With Whipped Feta!

    How to Prepare the Perfect Tasty Roasted Carrots With Whipped Feta: Step-by-Step Guide

    Ready to impress your family or guests with this delightful dish? Follow these step-by-step instructions to make your Tasty Roasted Carrots With Whipped Feta a winner!

    1. Preheat the Oven: Begin by preheating your oven to 400°F (200°C). A hot oven is essential for achieving that perfect caramelization on the carrots.

    2. Prepare the Carrots: Rinse your carrots thoroughly. If using large carrots, peel and cut them into uniform pieces—about 1-inch thick—so they cook evenly.

    3. Toss with Olive Oil: In a large bowl, combine the carrots with olive oil, minced garlic, honey (or maple syrup), salt, and pepper. Mix well to ensure each carrot is evenly coated in the flavorful mixture.

    4. Arrange for Roasting: Spread the coated carrots in a single layer on a baking sheet lined with parchment paper. This step is crucial, as overlapping can lead to steaming instead of roasting.

    5. Roast the Carrots: Place the baking sheet in the preheated oven. Roast for about 25-30 minutes or until the carrots are tender and slightly caramelized. You can stir them halfway through for even cooking.

    6. Prepare the Whipped Feta: While the carrots roast, combine the feta cheese with a drizzle of olive oil in a mixing bowl or a food processor. Blend until creamy and smooth. If you prefer a thinner consistency, add a splash of water or lemon juice to reach your desired texture.

    7. Taste and Adjust Seasoning: Once the whipped feta is blended, taste it and add salt and pepper according to your preference. Consider adding fresh herbs like dill or parsley for a fresh flavor boost!

    8. Combine and Serve: Once the carrots are beautifully roasted, remove them from the oven and let them cool slightly. Serve them warm, drizzled with the whipped feta on top. Garnish with additional herbs if desired.

    9. Enjoy Your Creation: Revel in the admiration from your family or guests as they savor the Tasty Roasted Carrots With Whipped Feta. You’ll feel accomplished knowing you’ve prepared a dish that is both nutrient-rich and deliciously satisfying.

    This step-by-step guide facilitates an enjoyable cooking experience while adapting easily to various dietary preferences. Let’s enhance your cooking skills by exploring advanced tips and variations!

    Mastering Tasty Roasted Carrots With Whipped Feta: Advanced Tips and Variations

    To take your Tasty Roasted Carrots With Whipped Feta to new heights, consider these advanced tips and delightful variations:

    • Add Citrus Zest: Incorporate a pinch of orange or lemon zest into the whipped feta to give it an added zing. This zest will complement the sweetness of the carrots magnificently.

    • Include Other Vegetables: Don’t hesitate to roast additional vegetables alongside the carrots. Beets, parsnips, or sweet potatoes make excellent companions and add different colors and textures.

    • Experiment with Spices: Combine spices like cumin or smoked paprika with the olive oil when coating your carrots for a unique twist on flavor.

    • Nutty Toppings: For a crunch factor, add toasted nuts such as walnuts or pine nuts on top before serving. They provide an appealing texture and nutty flavor that pairs well with the creamy feta.

    • Serve as a Main Dish: To elevate your meal, serve the roasted carrots on a bed of quinoa or couscous. It transforms the dish into a satisfying main course, suitable for lunch or dinner.

    Integrating these tips and variations will ensure that your Tasty Roasted Carrots With Whipped Feta remains exciting and fresh each time you prepare it, standing out among your favorite dinner recipes.

    How to Store Tasty Roasted Carrots With Whipped Feta: Best Practices

    After preparing your Tasty Roasted Carrots With Whipped Feta, it’s essential to know how to store any leftovers properly:

    1. Refrigeration: Allow the dish to cool down to room temperature, then transfer it into an airtight container. Make sure to refrigerate within two hours of cooking. The dish can be stored in the fridge for up to 4-5 days.

    2. Freezing: While roasted carrots maintain a better texture when refrigerated, if you’d like to prolong their shelf life, you can freeze them. Place the cooled carrots in a freezer-safe bag or container, removing as much air as possible. They can last for about three months in the freezer.

    3. Reheating: To reheat, toss the refrigerated or frozen carrots back into a preheated oven at 350°F (175°C) until warmed through—about 10-15 minutes for refrigerated carrots and longer for frozen ones. You can also pop them in the microwave for a quick reheating option.

    Knowing these storage practices can keep your Tasty Roasted Carrots With Whipped Feta fresh and ready to enjoy later, ensuring that this recipe fits smoothly into a busy lifestyle filled with delicious dinner recipes.

    Nutritional Value of Tasty Roasted Carrots With Whipped Feta

    The nutritional value of Tasty Roasted Carrots With Whipped Feta makes it not only a tasty option but also a healthy choice for your meals. Below, we highlight the nutritional content per serving (approximately 150g of carrots with 30g of whipped feta):

    • Calories: 250
    • Total Fat: 12g
    • Saturated Fat: 5g
    • Cholesterol: 30mg
    • Sodium: 450mg
    • Total Carbohydrates: 30g
    • Dietary Fiber: 5g
    • Sugars: 6g
    • Protein: 8g

    This dish contains a delightful mix of nutrients, particularly fiber from the carrots, which promotes digestive health, and protein from the feta cheese. This combination of vitamins and minerals supports both physical health and wellness, making it an excellent addition to your dinner recipes, whether at home or for entertaining.

    Keep in mind that making dietary adjustments, such as reducing the honey or substituting the feta, can lower the calorie count further while maintaining flavor.

    FAQs: Frequently Asked Questions About Tasty Roasted Carrots With Whipped Feta

    Can I prepare Tasty Roasted Carrots With Whipped Feta ahead of time?

    Absolutely! You can roast the carrots and prepare the whipped feta ahead of time. Simply store them separately in airtight containers in the refrigerator until you’re ready to serve.

    How can I enhance the flavor of the whipped feta?

    For additional flavor, consider mixing in roasted garlic, chopped fresh herbs, or a hint of lemon zest. These ingredients will elevate the creamy feta to new taste dimensions.

    Are there alternatives to feta cheese for those with lactose intolerance?

    Yes! For lactose-sensitive individuals, options like vegan feta, nutritional yeast blended with silken tofu, or even tahini can be great substitutes that still provide a creamy texture.

    What can I serve with Tasty Roasted Carrots With Whipped Feta?

    This dish pairs beautifully with grilled proteins such as chicken or fish, as well as alongside grain dishes like quinoa or couscous. Its versatility allows it to shine in a variety of meal contexts.

    Can I use pre-packaged frozen carrots instead of fresh ones?

    While fresh carrots yield the best flavor and texture, you can use frozen carrots if needed. Just note that they may release more moisture during roasting, so adjust the cooking time as necessary.

    By addressing these common questions, you can feel confident about your culinary choices regarding this delightful dish. With all these insights, you’re ready to embark on your journey towards mastering Tasty Roasted Carrots With Whipped Feta—a delightfully delectable option among dinner recipes!