Tag: salad

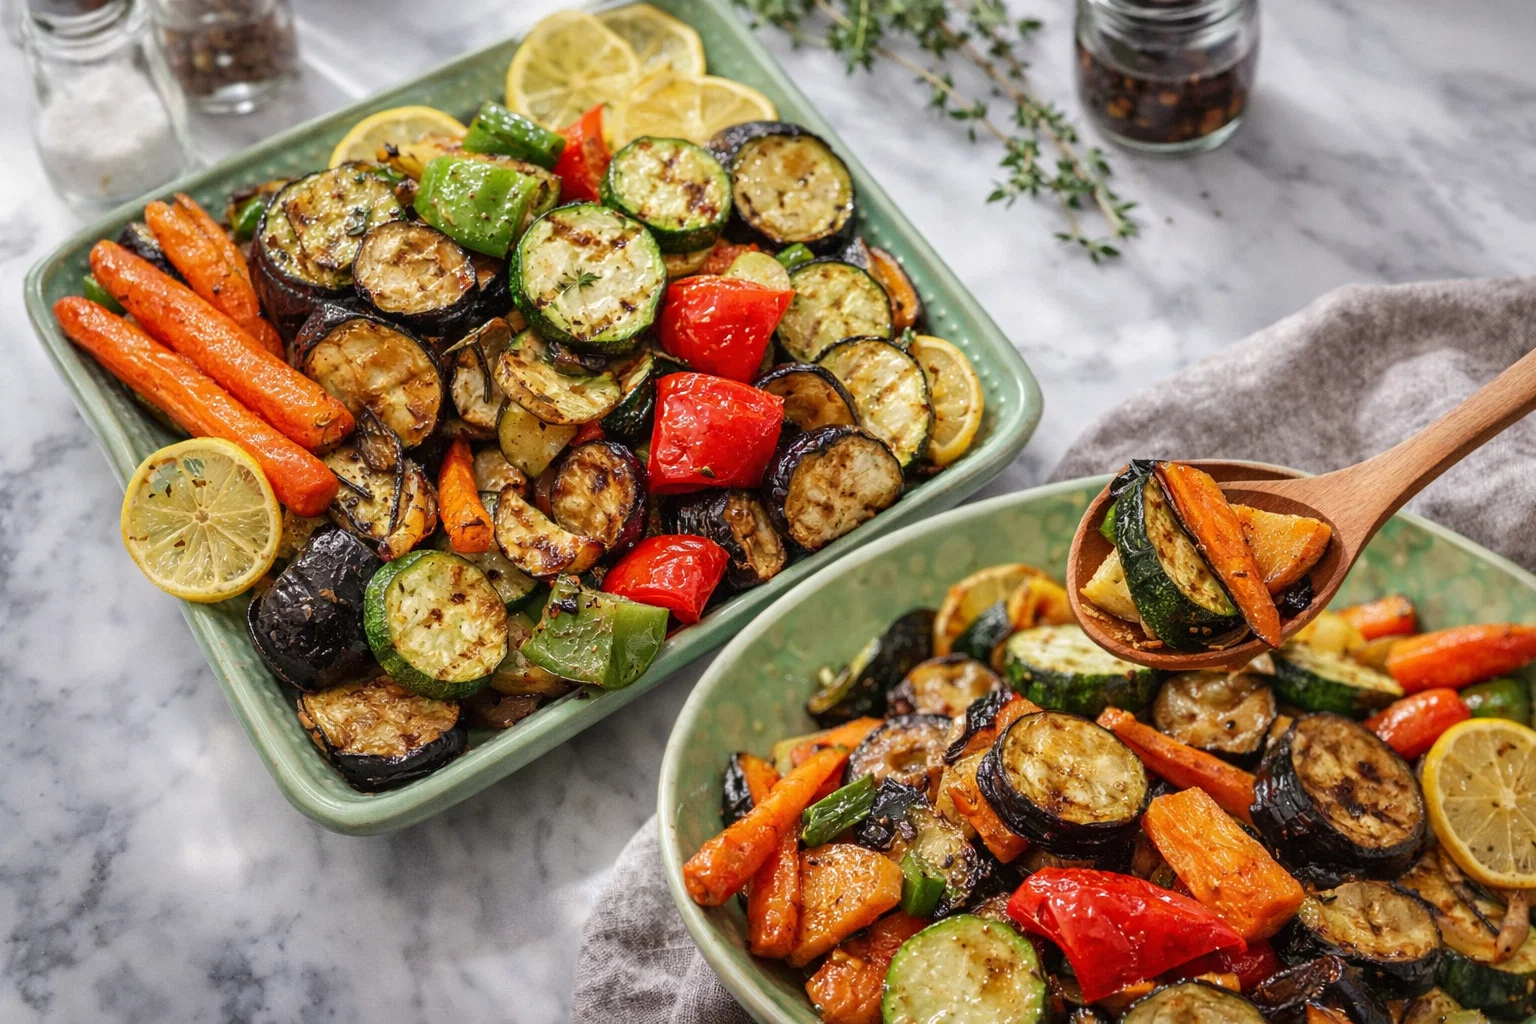
  • Healthy Low Fodmap Grilled Vegetables

    Healthy Low Fodmap Grilled Vegetables

    Healthy Low Fodmap Grilled Vegetables: A Tropical Delight

    Introduction to Healthy Low Fodmap Grilled Vegetables

    If you’re searching for healthy dinner recipes that are not only delicious but also easy to prepare, look no further than this Healthy Low Fodmap Grilled Vegetables dish. Perfect for busy parents, students, or anyone looking to maintain a balanced diet, this recipe embraces the vivid flavors of grilled vegetables while meeting specific dietary restrictions. Vegetarians and vegans will rejoice; this dish is entirely plant-based and gluten-free, making it a versatile option for almost any table setting.

    The best thing about these grilled vegetables is their simplicity. Toss them on the grill or in a grill pan, and within minutes, you’ll have a nutritious dish ready to complement any protein or serve as a light meal on its own. Packed with fiber, vitamins, and minerals, healthy low Fodmap grilled vegetables support digestive health while contributing to overall wellness. Whether you’re prepping for a summer barbecue or need something quick to whip up after a long workday, this dish shines as a delightful and healthful option.

    Benefits and Advantages of Healthy Low Fodmap Grilled Vegetables

    When it comes to healthy dinner recipes, this recipe stands out for multiple reasons:

    1. Ease of Preparation: One of the main advantages of grilled vegetables is how simple they are to prepare. With minimal ingredients, you can quickly chop, season, and grill, making this the perfect choice for those busy weeknights or weekends spent entertaining.

    2. Nutritional Benefits: Grilled vegetables are incredibly nutritious. They provide essential vitamins such as A and C from bell peppers and carrots, along with antioxidants that help boost overall health. The low FODMAP nature of the recipe makes it accessible for those with specific dietary needs, especially individuals with IBS (Irritable Bowel Syndrome) or those sensitive to high-FODMAP foods.

    3. Diverse Flavor Profiles: You can customize the vegetables used in this recipe, allowing for different flavors and textures with each preparation. Whether you prefer the sweetness of zucchini, the smokiness of eggplant, or the crispness of asparagus, this recipe gives you the flexibility to explore your palate while staying healthy.

    4. Ideal for Meal Prepping: Grilled vegetables store well, making them an excellent candidate for meal prepping. Prepare a large batch at the start of the week, and you’ll have a nutritious side ready to go, perfect for quick lunches or dinners.

    5. Vegan and Gluten-Free Options: This recipe caters to a wide array of dietary preferences, ensuring that everyone at the table will find something they can enjoy. Being plant-based and gluten-free, it aligns with many healthy lifestyle choices.

    With all these beneficial aspects, it’s clear why Healthy Low Fodmap Grilled Vegetables are a must-try for anyone seeking flavorsome healthy dinner recipes.

    Ingredients Overview

    Essential Ingredients for Healthy Low Fodmap Grilled Vegetables

    To craft a plate of delicious Healthy Low Fodmap Grilled Vegetables, gather the following ingredients:

    • 1 Medium Zucchini (sliced into ¼-inch rounds): Zucchini is low in calories and contains antioxidants.
    • 1 Medium Bell Pepper (any color, sliced): Provides vitamins A and C and adds a vibrant splash of color.
    • 1 Cup Cherry Tomatoes: Packed with lycopene, these little gems add a delightful sweetness.
    • 1 Medium Eggplant (sliced): Rich in fiber and antioxidants, eggplant also has a unique texture.
    • 1 Cup Asparagus Spears: Contains vitamins A, C, E, and K while being low in calories.
    • 2 Tablespoons Olive Oil: Adds healthy fats and enhances flavors; oil is also good for heart health.
    • 1 Teaspoon Dried Oregano: Offers potential anti-inflammatory benefits and pairs well with grilled flavors.
    • Salt and Pepper to Taste: Essential seasonings that enhance the overall taste.

    These ingredients exemplify the simplicity and nutritional advantages of healthy low Fodmap options.

    Dietary Substitutions to Customize Your Healthy Low Fodmap Grilled Vegetables

    1. For a Spicy Kick: If you enjoy a bit of heat, consider adding sliced jalapeños or crushed red pepper flakes, but remember to check their FODMAP content.
    2. Different Vegetables: Replace eggplant with butternut squash or try adding yellow squash instead of zucchini. Always remember to check for low FODMAP options.
    3. Herb Variety: Mix up the dried herbs by including basil or thyme for diverse flavor profiles. Fresh herbs like cilantro or parsley can also add a lovely finish.
    4. Oil Alternatives: If olive oil isn’t your preference or if you’re looking for a different flavor, avocado oil serves as an excellent substitute.
    5. For Added Protein: Pair with grilled chicken or tofu, both of which fit seamlessly into many healthy dinner recipes, making this a versatile main dish.

    With these substitutions, your Healthy Low Fodmap Grilled Vegetables can be customized to suit any palate or dietary requirement.

    How to Prepare the Perfect Healthy Low Fodmap Grilled Vegetables: Step-by-Step Guide

    Creating a delightful dish of Healthy Low Fodmap Grilled Vegetables is both easy and rewarding. Follow these detailed instructions for a perfect outcome:

    1. Prepare the Vegetables: Begin by washing your vegetables thoroughly. Slice the zucchini, eggplant, and bell peppers into even rounds or strips for uniform cooking. Trim the ends of the asparagus if needed.

    2. Season: In a large mixing bowl, toss the prepared vegetables with olive oil, salt, pepper, and dried oregano. Ensure that each piece is evenly coated with the seasoning for maximum flavor.

    3. Preheat Your Grill: If using an outdoor grill, preheat it to medium-high heat. If using a grill pan, warm it over medium heat on the stove.

    4. Grill the Veggies: Carefully place the seasoned vegetables directly on the grill grates or place them in the grill pan. Avoid overcrowding; leave some space to ensure even cooking. Depending on the type and size, grill for about 5-7 minutes on each side, or until tender and slightly charred.

    5. Check for Doneness: Use tongs to turn the vegetables halfway through cooking. Ensure they are fork-tender but not mushy. You want that perfect caramelization without losing the fresh crunch.

    6. Serve and Enjoy: Once grilled to perfection, remove the vegetables from the heat and arrange them on a serving platter. These can be served hot or at room temperature, making them incredibly versatile for entertaining.

    7. Save Leftovers: If you happen to have leftovers, allow them to cool down before storing them. Place them in an airtight container in the refrigerator for up to three days. You can easily reheat them in a skillet to retain their flavors.

    Following these steps ensures you’ll create a delicious plate of Healthy Low Fodmap Grilled Vegetables every time, solidifying this dish’s spot in your roster of healthy dinner recipes.

    Mastering Healthy Low Fodmap Grilled Vegetables: Advanced Tips and Variations

    Here are some additional tips and variations to elevate your Healthy Low Fodmap Grilled Vegetables:

    • Marinate for Flavor: Enhance flavors by marinating vegetables in seasoning and herbs for a few hours before grilling. A simple balsamic vinegar and olive oil mix adds depth.
    • Add Citrus Zing: Squeeze fresh lemon or lime juice over the grilled vegetables before serving. This addition brightens flavors and adds a fresh twist.
    • Experiment with Grilling Methods: If you don’t have a grill, you can use a broiler or oven-roast the vegetables. Placing them on a baking sheet at a high oven temperature can yield delicious results.
    • Combine with Whole Grains: Create a wholesome bowl by adding quinoa or brown rice alongside your vegetables. This not only adds texture but also increases the nutritional profile.
    • Create a Dip: Serve your grilled vegetables with a homemade low FODMAP dip like a lemon tahini or a yogurt-based dip for added flavor and appeal.

    These advanced tips and variations will help you gain the confidence to experiment with your Healthy Low Fodmap Grilled Vegetables, making them a signature dish among your healthy dinner recipes.

    How to Store Healthy Low Fodmap Grilled Vegetables: Best Practices

    Storing your Healthy Low Fodmap Grilled Vegetables properly can extend their freshness and keep them delicious. Here’s how:

    • Refrigeration: Store leftover grilled vegetables in an airtight container. They can last in the refrigerator for up to three days. Keep in mind the flavor may diminish over time, but they remain safe to eat.

    • Freezing: If you need to store them for longer, consider freezing grilled vegetables. Place them in freezer-safe bags or containers, ensuring as much air is removed as possible. You can keep them in the freezer for up to three months.

    • Reheating: For the best results, reheat grilled vegetables in a skillet over medium heat or in the oven at 350°F until warmed through. Avoid microwaving, as it can lead to soggy textures.

    By following these storage practices, you can easily enjoy your Healthy Low Fodmap Grilled Vegetables beyond the initial meal, making this dish an excellent addition to your collection of healthy dinner recipes.

    Nutritional Value of Healthy Low Fodmap Grilled Vegetables

    Understanding the nutritional value of your food can encourage healthier choices. Here’s a detailed analysis of the nutritional components per serving (approximately 1 cup of grilled vegetables):

    • Calories: 80
    • Total Fat: 4g
    • Saturated Fat: 0.5g
    • Cholesterol: 0mg
    • Sodium: 100mg (varies based on salt usage)
    • Total Carbohydrates: 12g
    • Dietary Fiber: 4g
    • Sugars: 3g
    • Protein: 3g
    • Vitamins & Minerals:
    • Vitamin A: 40% of the Daily Value
    • Vitamin C: 60% of the Daily Value
    • Iron: 6% of the Daily Value
    • Calcium: 2% of the Daily Value

    The low calorie and high fiber content make these healthy dinner recipes an ideal choice for anyone looking to maintain a balanced diet while enjoying flavorful food.

    FAQs: Frequently Asked Questions About Healthy Low Fodmap Grilled Vegetables

    1. Can I use frozen vegetables for this recipe?
    2. Yes, you can use frozen vegetables, but it’s best to thaw and pat them dry before grilling to avoid excess moisture.

    3. What other vegetables can I include?

    4. You can try using bell peppers, squash, mushrooms, or green beans as they are all low FODMAP and grill well.

    5. Is this recipe suitable for meal prep?

    6. Absolutely! You can grill a large batch and store it in the fridge or freezer for convenient meal options throughout the week.

    7. What can I serve alongside grilled vegetables?

    8. Grilled chicken, fish, or tofu pair well. You can also serve it over quinoa or make a grain bowl for a nutritious meal.

    9. Can I make this recipe spicy?

    10. Certainly! You can add red pepper flakes or sliced jalapeños while seasoning the vegetables.

    By addressing these common queries, you can set yourself up for success when preparing and enjoying Healthy Low Fodmap Grilled Vegetables, solidifying their place in your lineup of healthy dinner recipes.

    In conclusion, making healthy, tasty meals doesn’t have to be complicated. The Healthy Low Fodmap Grilled Vegetables will not only satisfy your taste buds but also cater to various dietary needs, making it a true hero for home cooks, busy families, and health-conscious individuals alike!

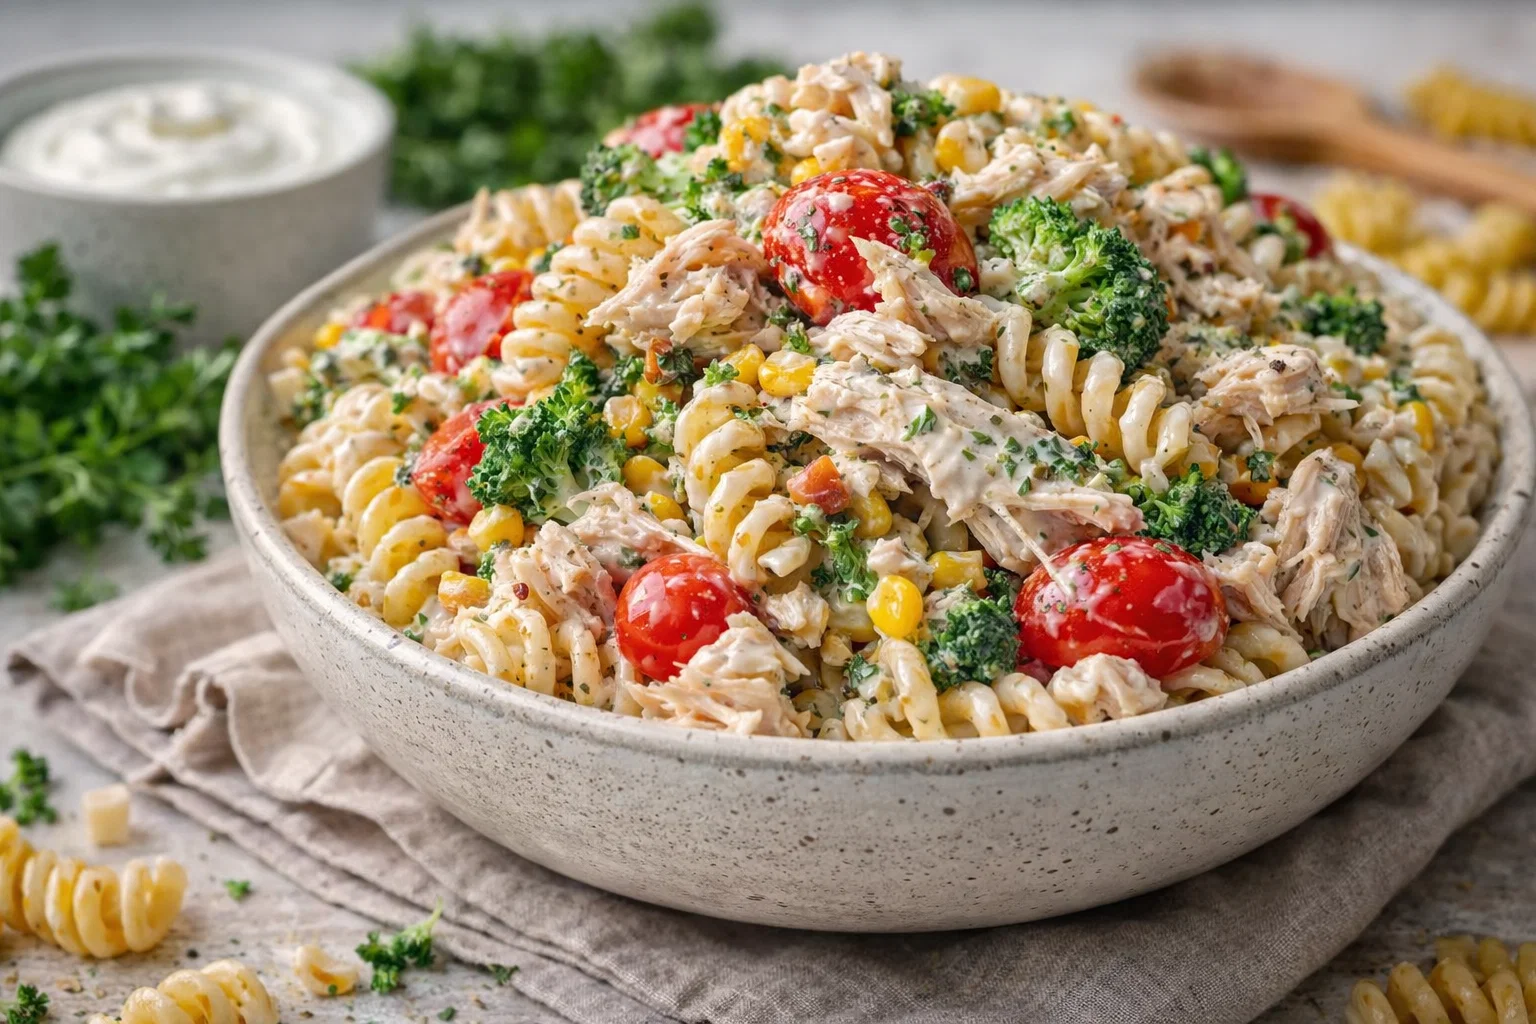
  • Perfect Chicken Pasta Salad With Creamy Greek Yogurt Dressing

    Perfect Chicken Pasta Salad With Creamy Greek Yogurt Dressing

    Perfect Chicken Pasta Salad With Creamy Greek Yogurt Dressing: A Tropical Delight

    Introduction to Perfect Chicken Pasta Salad With Creamy Greek Yogurt Dressing

    If you’re searching for a versatile and delicious pasta salad, look no further than this Perfect Chicken Pasta Salad With Creamy Greek Yogurt Dressing. This recipe effortlessly combines tender chicken, colorful vegetables, and a creamy dressing that’s not only zesty but also healthy. The creamy Greek yogurt dressing offers a delightful twist, ensuring you enjoy every bite while keeping it nutritious.

    This dish is not only simple to prepare but also packs a punch in terms of flavor and health benefits. It’s a fantastic option for busy parents looking to whip up a quick meal, diet-conscious individuals wanting to indulge without the guilt, and food enthusiasts eager to try something new. Plus, it’s suitable for various dietary needs – easily adaptable for those on vegan or gluten-free diets. So, whether you’re meal prepping for the week or planning a picnic, this pasta salad is sure to impress and satisfy a crowd. Let’s dive into the benefits and advantages of this delightful dish!

    Benefits and Advantages of Perfect Chicken Pasta Salad With Creamy Greek Yogurt Dressing

    This Perfect Chicken Pasta Salad stands out for several reasons, making it a must-try for anyone.

    Ease of Preparation

    One of the key advantages of this pasta salad is its simplicity. With just a handful of ingredients and straightforward steps, you can create a meal that looks and tastes gourmet. The preparation time is minimal, making it an excellent choice for those hectic weekdays when time is not on your side.

    Health Benefits

    The incorporation of Greek yogurt not only enhances the creaminess but also adds a healthy dose of protein and probiotics, which are great for digestion. This dish is balanced, featuring lean chicken breast, fresh vegetables, and whole grain pasta, offering plenty of nutrients without excess calories. Additionally, making it yourself allows you to control the ingredients, which means fewer preservatives and artificial additives.

    Versatility for Dietary Needs

    Whether you are vegan, gluten-free, or simply watching your calorie intake, this pasta salad can cater to your preferences. Use chickpeas or tofu instead of chicken for a plant-based version, while gluten-free pasta varieties ensure everyone can enjoy it. This adaptability makes it a perfect choice for gatherings, where guests may have diverse dietary restrictions.

    Flavorful and Satisfying

    The combination of fresh ingredients gives this pasta salad a vibrant flavor and a satisfying texture. You get the crunch from the vegetables, the creaminess of the dressing, and the heartiness of the chicken, making every bite a delightful experience.

    In conclusion, this pasta salad isn’t just a meal—it’s a celebration of fresh ingredients, healthy eating, and versatility that everyone can appreciate.

    Ingredients Overview

    Essential Ingredients for Perfect Chicken Pasta Salad With Creamy Greek Yogurt Dressing

    To whip up this delightful dish, gather the following ingredients:

    • 2 cups cooked pasta (whole grain or gluten-free): Provides a hearty base. Use any pasta shape you prefer, such as rotini, penne, or fusilli.
    • 1 ½ cups grilled chicken breast: Omitted skin and excess fat for health benefits; source of lean protein.
    • 1 cup cherry tomatoes (halved): Adds a pop of color and flavor while being low in calories.
    • 1 cup cucumber (diced): Provides crunch and hydration.
    • ½ cup red bell pepper (diced): A vitamin C booster, adding both sweetness and color.
    • ½ cup red onion (finely chopped): Gives a flavorful kick to the dish.
    • 1 cup Greek yogurt (plain, low-fat): The star of the creamy dressing that also adds protein.
    • 2 tablespoons Dijon mustard: Adds tanginess to the dressing.
    • 1 tablespoon lemon juice: Freshens up flavors and preserves color.
    • Salt and pepper to taste: Essential seasonings to enhance flavor.
    • Optional: Fresh herbs (such as parsley or basil): Adds a refreshing twist with nutritional benefits.

    Dietary Substitutions to Customize Your Perfect Chicken Pasta Salad With Creamy Greek Yogurt Dressing

    To tailor this pasta salad to various dietary needs, here are some substitution ideas:

    • For vegan options: Replace chicken with chickpeas, lentils, or pressed tofu, and ensure the yogurt is coconut or almond-based.
    • For a gluten-free version: Use gluten-free pasta and ensure all other ingredients are certified gluten-free.
    • Dairy-free adaptation: Just as mentioned, swap Greek yogurt for a plant-based yogurt or a dressing made from cashew cream.
    • Low-calorie alternative: Reduce the amount of dressing or choose a yogurt with fewer calories. You can increase the vegetable quantity for volume without significantly impacting the calorie count.

    By using these substitutions, you can create a pasta salad that meets everyone’s dietary requirements while still being delicious.

    How to Prepare the Perfect Chicken Pasta Salad With Creamy Greek Yogurt Dressing: Step-by-Step Guide

    Creating this pasta salad is a breeze with these easy-to-follow steps:

    1. Prepare the Pasta: Boil 2 cups of water in a large pot. Add your desired pasta and cook according to package instructions until al dente. Drain and rinse under cold water to stop the cooking process. This step ensures that your pasta doesn’t turn mushy in your salad.

    2. Grill the Chicken: Season your chicken breast with salt and pepper. Grill on medium heat for about 6-7 minutes per side, or until fully cooked. Use a meat thermometer to check that the internal temperature reaches 165°F (75°C). Once cooked, let it rest for 5 minutes before slicing it into bite-sized pieces.

    3. Chop Vegetables: While waiting for the chicken, wash and dice your cucumbers, cherry tomatoes, bell peppers, and red onions. The freshness of these veggies will enhance the salad’s taste and give it a lovely crunch.

    4. Mix the Dressing: In a mixing bowl, combine the Greek yogurt, Dijon mustard, lemon juice, salt, and pepper. Whisk until smooth and creamy. Taste and adjust seasoning if necessary. This creamy dressing is the heart of your pasta salad.

    5. Combine Ingredients in a Large Bowl: In a large mixing bowl, combine the cooled pasta, grilled chicken, and chopped vegetables. Add the creamy dressing and mix well until every ingredient is coated.

    6. Add Fresh Herbs: If desired, incorporate freshly chopped herbs for an extra flavor boost. Herbs like parsley or basil enhance the salad with freshness and additional nutritional benefits.

    7. Chill in the Refrigerator: Allow the pasta salad to chill in the refrigerator for at least 30 minutes. This step allows all flavors to meld together beautifully.

    8. Serve and Enjoy! Once chilled, give the salad a gentle stir, taste for seasoning, and adjust if necessary. It’s now ready to serve as a side or a main dish.

    This step-by-step guide makes preparing this pasta salad effortless, resulting in a dish that is guaranteed to shine on any dining table.

    Mastering Perfect Chicken Pasta Salad With Creamy Greek Yogurt Dressing: Advanced Tips and Variations

    To elevate your perfect chicken pasta salad, consider incorporating some of the following tips and variations:

    • Experiment with Additions: Try incorporating other vegetables like broccoli, spinach, or avocado for added nutritional benefits. You could also add nuts, such as walnuts or almonds, for a crunch.

    • Swap Proteins: Feel free to use different proteins like shrimp, turkey, or hard-boiled eggs for a change. Each protein adds a distinct taste.

    • Add a Sweet Element: Consider adding dried cranberries or chopped apples to bring a sweet contrast to the salad’s savory elements.

    • Change Up the Dressing: For variety, try swapping out the dressing for a balsamic vinaigrette or a lemon-tahini dressing. This can create a whole new flavor profile for your salad.

    Incorporating these advanced tips will provide you with an array of options to keep this pasta salad fresh and exciting.

    How to Store Perfect Chicken Pasta Salad With Creamy Greek Yogurt Dressing: Best Practices

    To ensure your Perfect Chicken Pasta Salad stays fresh and delicious, follow these storage practices:

    • Refrigeration: Store any leftover pasta salad in an airtight container in the refrigerator. It can safely last up to three to five days. Always remember to give it a good stir before serving again, as some ingredients may settle.

    • Freezing: While it’s generally not recommended to freeze pasta salad due to potential texture changes, if you plan to freeze it, omit the fresh vegetables and herbs before going into the freezer. You can add them once you’re ready to enjoy your salad after thawing.

    • Reheating Tips: If you prefer to serve your pasta salad warm after freezing, gently reheat it in a microwave or on the stovetop, but avoid the dressing ahead of time. Add the dressing afterward for the best flavor.

    By following these best practices, you can keep your pasta salad fresh for longer, maximizing its delightful flavors.

    Nutritional Value of Perfect Chicken Pasta Salad With Creamy Greek Yogurt Dressing

    The nutritional profile of this pasta salad is commendable, particularly for its balance of macronutrients. Here’s a breakdown of the estimated nutrition per serving (based on the entire recipe serving four individuals):

    • Calories: Approximately 350 per serving
    • Total Fat: 10g
    • Saturated Fat: 2g
    • Cholesterol: 68mg
    • Sodium: 250mg
    • Carbohydrates: 45g
    • Dietary Fiber: 4g
    • Sugars: 5g
    • Protein: 27g

    This pasta salad provides a hearty serving of protein from the chicken and yogurt while remaining relatively low in calories, making it a great option for those who are health-conscious. Its abundance of vegetables contributes valuable vitamins and minerals, further enhancing its nutritious profile.

    FAQs: Frequently Asked Questions About Perfect Chicken Pasta Salad With Creamy Greek Yogurt Dressing

    1. Can I make this pasta salad ahead of time?
    Yes, this pasta salad keeps well in the refrigerator for three to five days, allowing you to meal prep efficiently.

    2. Is the dressing suitable for meal prep?
    Absolutely! The creamy Greek yogurt dressing can be made in advance; just keep it separate until you’re ready to serve to maintain freshness.

    3. What can I substitute for chicken?
    You can use tofu, chickpeas, or even shrimp as an alternative protein source, making this dish versatile for various diets.

    4. Can this recipe be made vegan?
    Certainly! Use a vegan protein source and plant-based yogurt instead of chicken and Greek yogurt.

    5. How can I add more vegetables?
    Feel free to include your favorite veggies such as broccoli, spinach, or bell peppers. The more colorful, the better!

    By addressing these common questions, you can help potential cooks feel confident and informed about making this delightful pasta salad. Enjoy the process and savor every delicious bite!

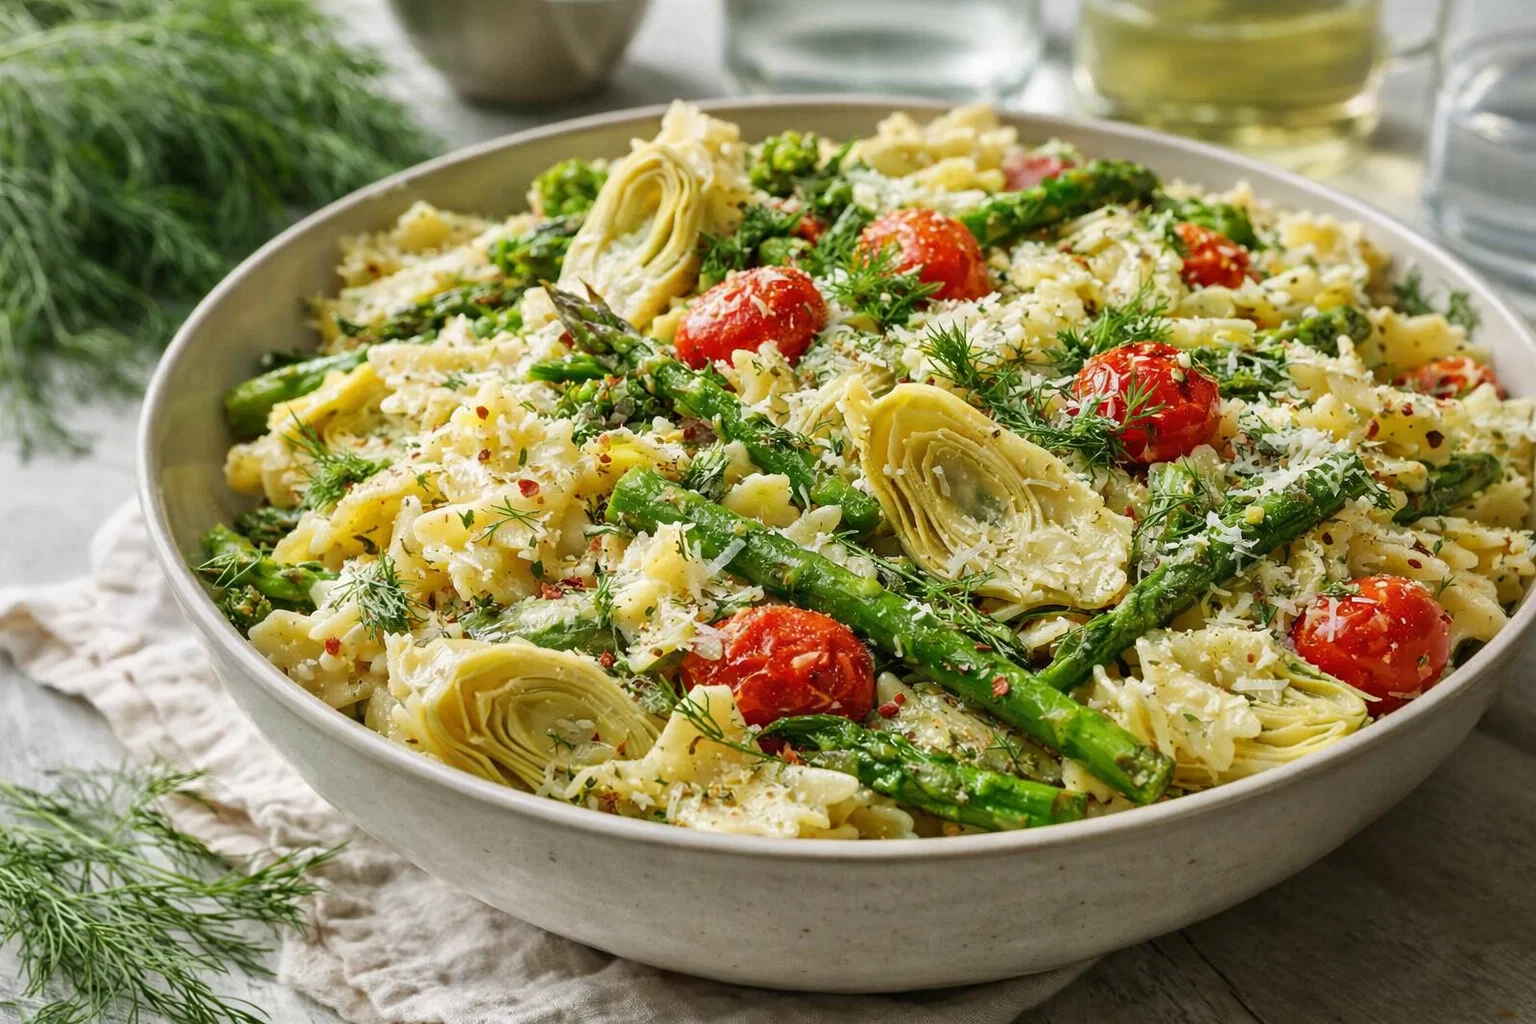
  • Quick Artichoke And Asparagus Pasta Salad

    Quick Artichoke And Asparagus Pasta Salad

    Quick Artichoke And Asparagus Pasta Salad: A Tropical Delight

    Introduction to Quick Artichoke And Asparagus Pasta Salad

    Are you looking for a refreshing and vibrant dish that combines simplicity with flavor? Look no further than this delightful Quick Artichoke And Asparagus Pasta Salad! This pasta salad is not only easy to make but also serves as a nourishing option for various dietary preferences, including vegan and gluten-free. Imagine indulging in a colorful bowl featuring tender pasta, crisp asparagus, and savory artichokes, all tossed in a zesty dressing.

    In addition to its tantalizing taste, this pasta salad is packed with nutrients, making it an ideal choice for health-conscious individuals. With protein-rich ingredients and an array of vitamins from the fresh veggies, it fulfills the needs of busy parents looking to whip up a quick dinner, students seeking a nutritious meal, or working professionals aiming for a light lunch. Whether you’re preparing for a summer picnic, a family gathering, or simply a meal at home, this pasta salad shines in every setting with its tropical flair and versatility.

    Benefits and Advantages of Quick Artichoke And Asparagus Pasta Salad

    This Quick Artichoke And Asparagus Pasta Salad stands out in a world filled with complicated recipes. Firstly, its ease of preparation makes it particularly appealing; with minimal cooking required, you can have a delectable dish on the table in no time. Simply cook the pasta and mix in the fresh ingredients for a satisfying meal that requires little culinary skill.

    Secondly, the health benefits of this pasta salad cannot be overlooked. Asparagus is known for its high fiber content and numerous vitamins, while artichokes are rich in antioxidants and can contribute to heart health. Combined with whole-grain or gluten-free pasta, this dish offers a balanced ratio of carbohydrates, fiber, and protein. Additionally, this recipe is easily adaptable; feel free to add chicken or beans for extra protein, ensuring it meets your dietary requirements.

    Moreover, this salad is incredibly versatile, making it a great fit for various occasions. It can be enjoyed immediately after preparation or served as a make-ahead meal that tastes even better when left to marinate for a few hours. And because it caters to vegan and gluten-free diets, it’s perfect for entertaining guests with diverse dietary restrictions.

    In summary, the Quick Artichoke And Asparagus Pasta Salad combines simplicity, flavor, and health benefits, making it a must-try recipe for any home cook.

    Ingredients Overview

    Essential Ingredients for Quick Artichoke And Asparagus Pasta Salad

    To create this vibrant pasta salad, gather the following ingredients:

    • 8 oz. pasta (penne, fusilli, or gluten-free pasta)

      • This serves as the base of the salad, providing hearty texture.
    • 1 can (14 oz.) artichoke hearts (drained and chopped)

      • Artichokes add a unique flavor while being rich in antioxidants.
    • 1 cup fresh asparagus (trimmed and cut into 1-inch pieces)

      • Asparagus lends a crunchy texture and is loaded with vitamins.
    • 1 cup cherry tomatoes (halved)

      • Tomatoes provide a burst of juiciness and are rich in lycopene.
    • 1/4 cup red onion (finely chopped)

      • Red onion adds a bit of sharpness and complements the flavors.
    • 1/4 cup Kalamata olives (sliced)

      • Olives bring a Mediterranean flair and healthy fats.
    • 2 tablespoons fresh parsley (chopped)

      • Parsley brightens up the dish and adds freshness.
    • 1/4 cup extra virgin olive oil

      • Olive oil serves as a healthy fat base for the dressing.
    • 2 tablespoons lemon juice

      • Freshly squeezed lemon juice brightens and enhances the flavors.
    • Salt and pepper to taste

      • Essential for balancing all the flavors.

    Diet-Conscious Options:

    • Pasta: Opt for gluten-free pasta to make it celiac-friendly.
    • Olives: Substitute with capers for those watching sodium intake.
    • Oil: Can be replaced with a low-calorie, oil-free salad dressing.

    Dietary Substitutions to Customize Your Quick Artichoke And Asparagus Pasta Salad

    To make this recipe your own, consider these substitutions:

    • Pasta: Instead of traditional pasta, use zucchini noodles for a low-carb option. Spiralized zucchini provides a fresh crunch and less carbohydrate count.

    • Artichokes: If artichokes are not available, canned mushrooms can serve as an alternative without compromising too much on flavor.

    • Olive Oil: For a lighter variation, you can replace olive oil with yogurt or a plant-based dressing to maintain creaminess without the calories.

    • Veggies: Feel free to mix in your favorite veggies, such as bell peppers, spinach, or avocados, to further enhance the nutrition and flavor profile.

    These substitutions make the Quick Artichoke And Asparagus Pasta Salad a versatile dish adaptable to any dietary need, ensuring that everyone can enjoy its delightful flavors.

    How to Prepare the Perfect Quick Artichoke And Asparagus Pasta Salad: Step-by-Step Guide

    Follow these detailed steps to create your Quick Artichoke And Asparagus Pasta Salad:

    1. Prepare the Base:
    2. In a large pot, bring salted water to a boil. Add your pasta and cook according to package instructions until al dente. Drain and rinse under cold water to stop the cooking process. This helps maintain the pasta’s texture.

    3. Cook the Asparagus:

    4. In the same pot, fill it with fresh water and bring it to a boil again. Add the prepared asparagus pieces and blanch them for about 2 minutes until tender yet crisp. Drain and place the asparagus in a bowl of ice water to preserve their bright green color.

    5. Combine the Salad Ingredients:

    6. In a large mixing bowl, combine the drained pasta, chopped artichokes, halved cherry tomatoes, drained asparagus, finely chopped red onion, and sliced Kalamata olives. Stir well to combine all ingredients.

    7. Prepare the Dressing:

    8. In a small bowl, whisk together the olive oil, lemon juice, salt, and pepper.

    9. Mix the Dressing with the Salad:

    10. Pour the dressing over the pasta mixture. Toss gently until everything is evenly coated.

    11. Garnish and Serve:

    12. Before serving, sprinkle the chopped parsley over the top for added color and flavor.

    13. Chill (Optional):

    14. To enhance the flavors, cover the salad and refrigerate for at least 30 minutes before serving.

    This simple yet flavorful recipe reflects the versatility and nutrition of a classic pasta salad, inviting you to personalize it according to your taste and dietary needs.

    Mastering Quick Artichoke And Asparagus Pasta Salad: Advanced Tips and Variations

    To make the most of your Quick Artichoke And Asparagus Pasta Salad, consider these expert tips:

    • Add Protein: To make this salad a full meal, consider adding grilled chicken, chickpeas, or tofu. Each of these options complements the existing flavors while ensuring a good protein source.

    • Make It Creamy: For those who prefer creaminess, mix in a dollop of Greek yogurt or vegan mayonnaise to work in some extra richness.

    • Experiment with Herbs: Beyond parsley, try adding basil or dill for a different flavor profile. Fresh herbs can transform your salad and enhance its overall freshness.

    • Serving Suggestions: This pasta salad pairs well with grilled seafood or chicken, making it a great side dish for summer barbecues or picnics.

    By integrating these tips and variations, you can create a truly unique version of the Quick Artichoke And Asparagus Pasta Salad that excites your taste buds and impresses your guests.

    How to Store Quick Artichoke And Asparagus Pasta Salad: Best Practices

    For optimal storage of your Quick Artichoke And Asparagus Pasta Salad, follow these best practices to enjoy leftovers without compromising the flavor:

    • Refrigeration: Store any leftovers in an airtight container in the refrigerator. This salad can stay fresh for up to 3 days. The flavors will meld nicely as it rests.

    • Avoid Freezing: It’s not recommended to freeze this pasta salad due to the ingredients, particularly the vegetables, which may become mushy and unappealing once thawed.

    • Reheating: To serve the salad warm, gently sauté it in a pan with a little olive oil, or add a splash of water to steam it slightly. However, this dish is best enjoyed chilled.

    Employing these tips ensures that your pasta salad remains a delicious, healthy meal choice throughout the week.

    Nutritional Value of Quick Artichoke And Asparagus Pasta Salad

    Let’s explore the nutritional profile of an individual serving (1 cup) of the Quick Artichoke And Asparagus Pasta Salad, estimating your intake:

    • Calories: Approx. 290-350 kcal
    • Protein: 9 grams
    • Fat: 14 grams (primarily healthy fats from olive oil and olives)
    • Carbohydrates: 30 grams
    • Fiber: 4-6 grams
    • Sugar: 2-3 grams
    • Vitamins and Minerals: Rich in Vitamin A, C, dietary fiber, iron, and antioxidants from the artsichokes and asparagus.

    This nutrition profile highlights the balance of macronutrients, making this pasta salad not just delicious but a wholesome choice for maintaining a healthy lifestyle.

    FAQs: Frequently Asked Questions About Quick Artichoke And Asparagus Pasta Salad

    1. Can I make this pasta salad ahead of time?
    Absolutely! In fact, making it ahead of time allows the flavors to meld beautifully, and it will stay fresh in the refrigerator for up to 3 days.

    2. What types of pasta work best?
    You can use any pasta shape you prefer! Whole wheat or gluten-free pasta are excellent substitutions to meet dietary needs.

    3. Is this dish suitable for vegan diets?
    Yes! Simply omit any non-vegan dressing options, and stick with the vegetable ingredients listed to keep it vegan.

    4. Can I add chicken or other proteins to this salad?
    Definitely! Shredded grilled chicken or cubed tofu are excellent additions that enhance the protein content and make this dish a complete meal.

    5. What can I substitute for artichokes?
    If you can’t find artichokes, consider using canned mushrooms or sun-dried tomatoes as alternative ingredients.

    These commonly asked questions should clarify your potential concerns and inspire you to create your own rendition of this delightful pasta salad.

    By following this comprehensive guide, you’re well on your way to serving up a charming dish that is delightful for both taste buds and health. Enjoy your cooking!

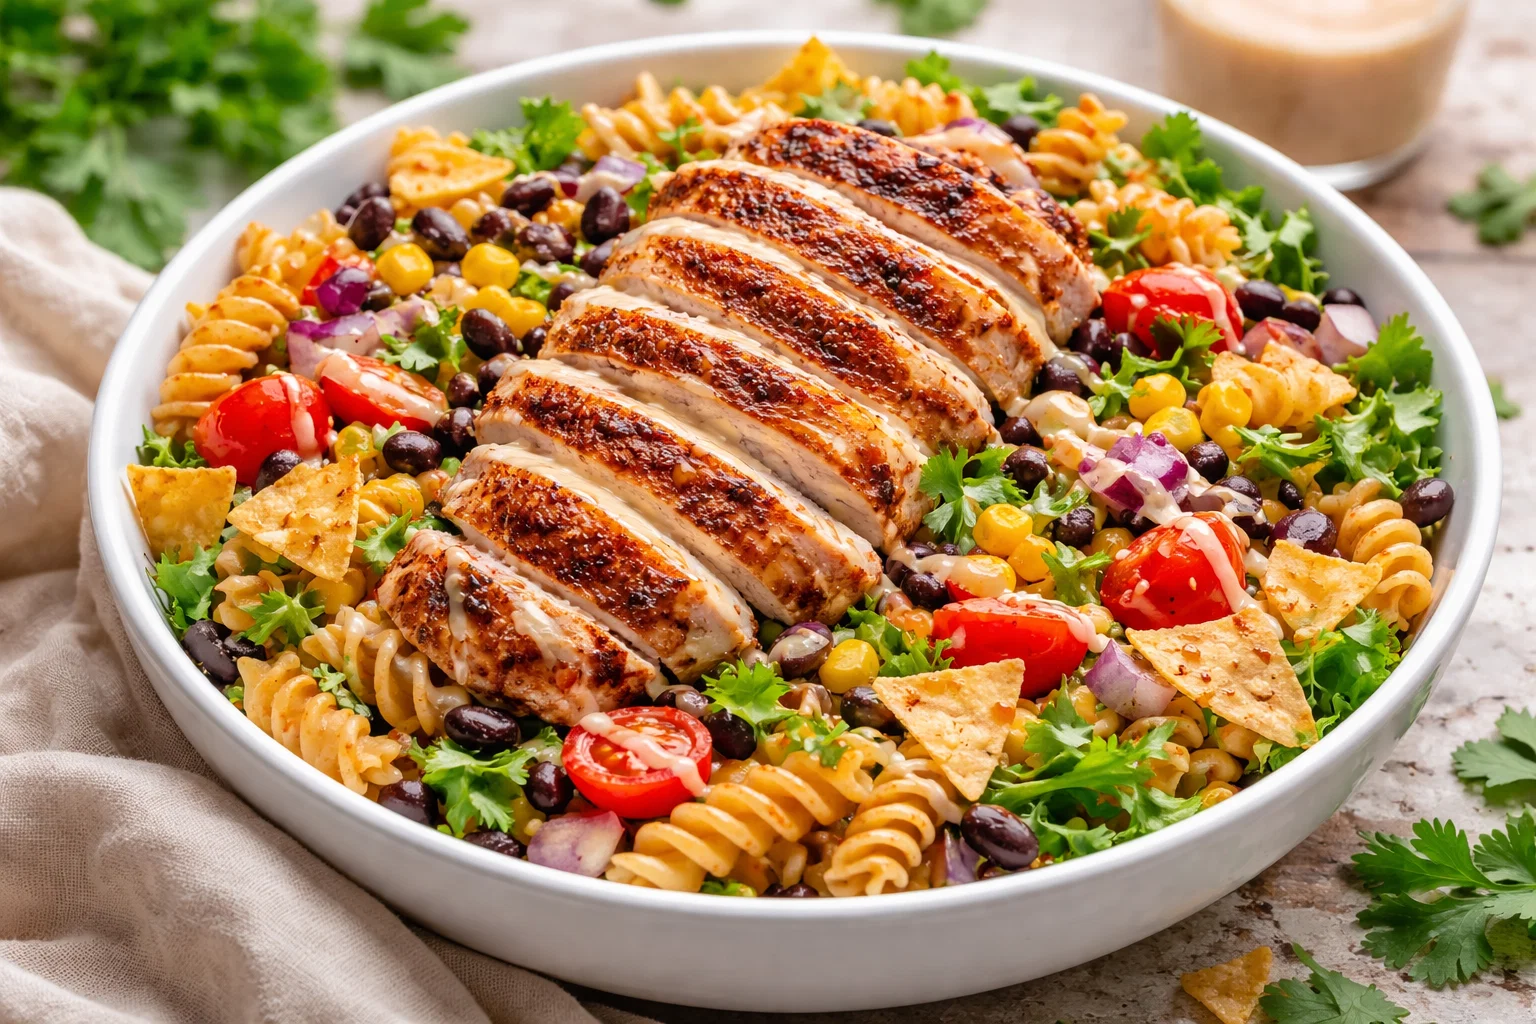
  • Zesty Southwest Pasta Salad With Chipotle Greek Yogurt Dressing

    Zesty Southwest Pasta Salad With Chipotle Greek Yogurt Dressing

    Zesty Southwest Pasta Salad With Chipotle Greek Yogurt Dressing: A Tropical Delight

    Introduction to Zesty Southwest Pasta Salad With Chipotle Greek Yogurt Dressing

    Are you on the lookout for a refreshing, nutritious, and incredibly delicious meal option? Look no further than this Zesty Southwest Pasta Salad With Chipotle Greek Yogurt Dressing! This pasta salad is not only bursting with flavor but also showcases simplicity and health benefits that cater to a variety of dietary needs. Packed with colorful vegetables, whole grain pasta, and a creamy, spicy dressing made from chipotle Greek yogurt, it’s a dish that can satisfy anyone at your table.

    Whether you are a busy parent seeking quick meal solutions, a student needing a tasty lunch, or a health-conscious individual wanting to keep your meals nutritious, this zesty pasta salad is an excellent choice. Its vibrant ingredients are not only appealing to the eye but also provide a plethora of health benefits. Moreover, for those following vegan or gluten-free diets, we offer suggestions for substitutions, making this recipe adaptable to everyone’s culinary preferences.

    Crafting this pasta salad is a straightforward process; with just a few key ingredients, you can create a delightful dish that will impress family and friends. So, if you are seeking an easy-to-follow, healthful recipe that will become a staple in your meal plan, this Southwest-inspired pasta salad is the answer!


    Benefits and Advantages of Zesty Southwest Pasta Salad With Chipotle Greek Yogurt Dressing

    Effortless Preparation

    One of the greatest attributes of this Zesty Southwest Pasta Salad is its ease of preparation. In just a matter of minutes, you can whip up this satisfying dish, making it an ideal choice for busy weeknights or last-minute gatherings. The minimal cooking required adds to its appeal, as you primarily just need to boil some pasta and chop your veggies.

    Health Benefits

    Packed full of nutritious ingredients, this pasta salad is not only delicious but also beneficial for your health. The variety of vegetables includes bell peppers, corn, and black beans, all rich in vitamins, minerals, and antioxidants. Moreover, by using Greek yogurt instead of traditional mayonnaise for the dressing, you significantly reduce the fat while boosting the protein content. This makes it a great option for those on a diet or anyone looking to maintain a healthy lifestyle.

    Adaptability to Dietary Needs

    This pasta salad is incredibly versatile, making it suitable for various dietary preferences. With options for gluten-free pasta or substituting the beans with quinoa for a higher protein option, everyone can enjoy a serving of this flavorful dish. The chipotle Greek yogurt dressing brings a burst of flavor while being lower in calories compared to traditional creamy dressings, appealing to both health-conscious and taste-driven palates.

    Eye-Catching Presentation

    Another advantage lies in the vibrant colors of the ingredients, which not only make the dish visually appealing but also ensure you are getting a variety of nutrients. The juxtaposition of bright greens, reds, and yellows creates an inviting appearance that can lift anyone’s spirits. This pasta salad is perfect for picnics, potlucks, or simply enjoying at home, ensuring it stands out on any table.

    以上の理由から、Zesty Southwest Pasta Salad With Chipotle Greek Yogurt Dressingはいかに優れた料理であるかが明らかです。手軽に準備でき、健康的かつ適応性があり、目にも嬉しい料理です。


    Ingredients Overview

    Essential Ingredients for Zesty Southwest Pasta Salad With Chipotle Greek Yogurt Dressing

    This delightful pasta salad requires a selection of fresh and nutritious ingredients, enabling you to create a meal bursting with flavor. Here’s what you will need:

    • Whole Grain Pasta (8 ounces): This serves as the base of your salad, providing fiber and essential nutrients.
    • Black Beans (1 can, drained and rinsed): A great source of plant-based protein, adding to the dish’s heartiness.
    • Corn (1 cup): Fresh or frozen corn can add sweetness and texture.
    • Cherry Tomatoes (1 cup, halved): Packed with vitamins and antioxidants, tomatoes contribute vibrant color.
    • Bell Peppers (1 cup, diced): Use a mix of red, yellow, and green peppers for various flavors and nutrients.
    • Red Onion (1 small, diced): Adds a crunch and sharpness that balances the other ingredients.
    • Fresh Cilantro (1/4 cup, chopped): Enhances the flavor profile with its fresh, aromatic touch.
    • Chipotle Greek Yogurt (1 cup): The star ingredient, replacing mayonnaise for a healthier dressing with a spicy kick.
    • Lime Juice (2 tablespoons): Provides acidity, brightening the dish.
    • Salt and Pepper: To taste, enhancing the overall flavor.

    Dietary Options:
    – For a gluten-free version, substitute regular pasta with gluten-free pasta.
    – To make this salad vegan, swap Greek yogurt with a plant-based yogurt alternative.

    Dietary Substitutions to Customize Your Zesty Southwest Pasta Salad With Chipotle Greek Yogurt Dressing

    Adapting this Zesty Southwest Pasta Salad to accommodate various dietary preferences is easy. Here are a few substitutions to consider:

    • Pasta Alternatives:
    • Zucchini Noodles: For a low-carb option, spiralize zucchini as a pasta substitute.
    • Quinoa: If looking for a gluten-free option, cooked quinoa can also serve as a nutritious base.

    • Bean Variations:

    • Chickpeas: Instead of black beans, you can use chickpeas for a different texture and flavor.
    • Lentils: For an additional protein source, cooked lentils work well.

    • Vegetable Swaps:

    • Avocado: For creaminess, add diced avocado to enhance the texture and flavor.
    • Spinach or Kale: Tossing in fresh spinach or kale can amp up the nutrient content significantly.

    • Dressing Modifications:

    • Spice Level: Adjust the level of chipotle to suit your spice preference, or use smoked paprika for a milder flavor.
    • Herbs: If cilantro isn’t to your taste, try parsley or basil instead.

    These customizable options ensure that your pasta salad remains inclusive, accommodating the diverse tastes and dietary needs of your guests or family members.


    How to Prepare the Perfect Zesty Southwest Pasta Salad With Chipotle Greek Yogurt Dressing: Step-by-Step Guide

    Creating this delicious Zesty Southwest Pasta Salad With Chipotle Greek Yogurt Dressing is a straightforward process. Follow these step-by-step instructions for a flawless preparation:

    1. Boil the Pasta:
    2. In a large pot, bring salted water to a boil. Add 8 ounces of whole grain pasta and cook according to package instructions until al dente. Drain and rinse under cold water to cool.

    3. Prepare the Ingredients:

    4. While the pasta cooks, chop the bell peppers, red onion, and cherry tomatoes. Rinse and drain the black beans and corn. Set all prepared vegetables aside.

    5. Make the Dressing:

    6. In a mixing bowl, combine 1 cup of chipotle Greek yogurt with 2 tablespoons of fresh lime juice. Season with salt and pepper to taste. Mix well until creamy and thoroughly combined.

    7. Combine Salad Ingredients:

    8. In a large salad bowl, add the cooled pasta, black beans, corn, diced bell peppers, cherry tomatoes, and red onion. Toss gently to combine.

    9. Add the Dressing:

    10. Drizzle the chipotle Greek yogurt dressing over the pasta mixture. Toss everything gently until all ingredients are coated evenly with the dressing.

    11. Incorporate Freshness:

    12. Fold in the chopped cilantro for that fresh touch, adjusting the amount to your taste preference.

    13. Taste and Adjust:

    14. Taste the salad and adjust seasoning as necessary. If you’d like more lime flavor or spice, feel free to add additional lime juice or chipotle.

    15. Chill Before Serving:

    16. For best results, refrigerate the pasta salad for at least 30 minutes before serving. This allows the flavors to meld beautifully.

    17. Serve and Enjoy:

    18. Serve this zesty pasta salad cold or at room temperature. It pairs well with grilled meats, as a side dish, or can even be enjoyed on its own for a light lunch.

    Feel free to adapt any steps according to your dietary requirements or to make the pasta salad your own.


    Mastering Zesty Southwest Pasta Salad With Chipotle Greek Yogurt Dressing: Advanced Tips and Variations

    To make your experience with the Zesty Southwest Pasta Salad even more enjoyable, consider these advanced tips and variations:

    Tips for Success

    • Meal Prep: This pasta salad can be prepared in advance and stored in the refrigerator. It is an excellent option for meal prep, as the flavors improve over time.
    • Taste Test: When making the dressing, start with a little chipotle and build up the heat gradually. This ensures the dressing suits your spice tolerance.
    • Fresh Ingredients: Whenever possible, use fresh ingredients for the best flavor and nutritional benefit.

    Flavor Variations

    • Mediterranean Twist: Swap out the chipotle for pesto and use sun-dried tomatoes, olives, and feta cheese for a Mediterranean flair.
    • Asian Influence: Replace the Greek yogurt dressing with a sesame-ginger vinaigrette, and add edamame and shredded carrots for an Asian-inspired twist.
    • Tropical Touch: Introduce diced mango or pineapple for a sweet and fruity flavor that contrasts beautifully with the spiciness of the chipotle.

    These tips and variations can inspire creativity and help you make the recipe truly your own, providing options for any occasion.


    How to Store Zesty Southwest Pasta Salad With Chipotle Greek Yogurt Dressing: Best Practices

    Properly storing your Zesty Southwest Pasta Salad ensures it remains fresh and maintains its delicious flavor. Here are some best practices for refrigeration and storage:

    Refrigeration

    • Store any leftover pasta salad in an airtight container in the refrigerator. It stays fresh for up to 3-5 days.
    • Make sure to stir it well before serving, as some components may settle.

    Freezing

    • While it’s not recommended to freeze the entire pasta salad with the yogurt dressing (it may change the texture), you can freeze the pasta salad base (without dressing and fresh veggies) for up to 2 months.
    • When ready to serve, thaw the salad overnight in the refrigerator and prepare a fresh batch of dressing to mix in when you’re ready to enjoy.

    Reheating

    • If you prefer your pasta salad warm, gently reheat it in the microwave. Be careful not to overheat, as this can make the yogurt dressing curdle.

    By following these storage techniques, you will ensure the best quality of your pasta salad, allowing you to enjoy it multiple times!


    Nutritional Value of Zesty Southwest Pasta Salad With Chipotle Greek Yogurt Dressing

    Understanding the nutritional benefits of the Zesty Southwest Pasta Salad With Chipotle Greek Yogurt Dressing can guide you in maintaining a balanced diet. Below, we break down the estimated nutritional values per serving (approximately 1 cup):

    • Calories: 290
    • Total Fat: 8g
    • Saturated Fat: 2g
    • Cholesterol: 5mg
    • Sodium: 300mg
    • Carbohydrates: 45g
    • Dietary Fiber: 10g
    • Sugars: 4g
    • Protein: 12g
    • Vitamins and Minerals:
    • Vitamin A: 15% of the Daily Value (DV)
    • Vitamin C: 30% of the DV
    • Iron: 10% of the DV
    • Calcium: 8% of the DV

    This pasta salad is rich in protein and fiber, making it a fulfilling option. Meanwhile, the variety of vegetables contributes essential vitamins and minerals, reinforcing your overall nutritional intake. Adjusting ingredients to individual dietary preferences will allow for tailored nutrition.


    FAQs: Frequently Asked Questions About Zesty Southwest Pasta Salad With Chipotle Greek Yogurt Dressing

    1. Can I make the pasta salad ahead of time?

    Absolutely! This pasta salad can be prepared the day before, allowing flavors to meld together. Just keep the dressing separate until you’re ready to serve for the best texture.

    2. How can I make it vegan?

    To make this dish vegan, swap regular Greek yogurt with a plant-based yogurt alternative. Use vegan sour cream or cashew cream for additional creaminess.

    3. Is there a gluten-free version of this pasta salad?

    Yes, simply substitute regular pasta with gluten-free pasta. This will allow you to enjoy the flavors of the salad without gluten.

    4. What are some good add-ins for extra flavor or nutrition?

    Consider adding avocado, hemp seeds, or nutritional yeast for a cheesy flavor. Roasted veggies can also enhance the taste and add a unique twist.

    5. How do I store leftovers?

    Store any leftovers in an airtight container in the refrigerator for up to 3-5 days. If it contains the dressing, give it a good stir before serving.

    6. Can I use other types of pasta?

    Definitely! Feel free to experiment with different pasta shapes such as fusilli or penne. Just ensure it is cooked to the appropriate level.

    7. What if I don’t like spicy flavors?

    You can easily reduce the amount of chipotle in the dressing or replace it with smoked paprika for a milder smoky flavor.

    These FAQs address common concerns and will help you make the best of your culinary experience with Zesty Southwest Pasta Salad With Chipotle Greek Yogurt Dressing.


    This vibrant and flavorful Zesty Southwest Pasta Salad With Chipotle Greek Yogurt Dressing is a must-try for anyone looking to add some zest to their cooking routine. Easy to prepare, packed with nutrition, and highly adaptable for various diets, this pasta salad is sure to impress anyone who indulges! Enjoy the burst of flavors that transport your taste buds to a tropical paradise with every bite!

  • Classic Pickle Pasta Salad

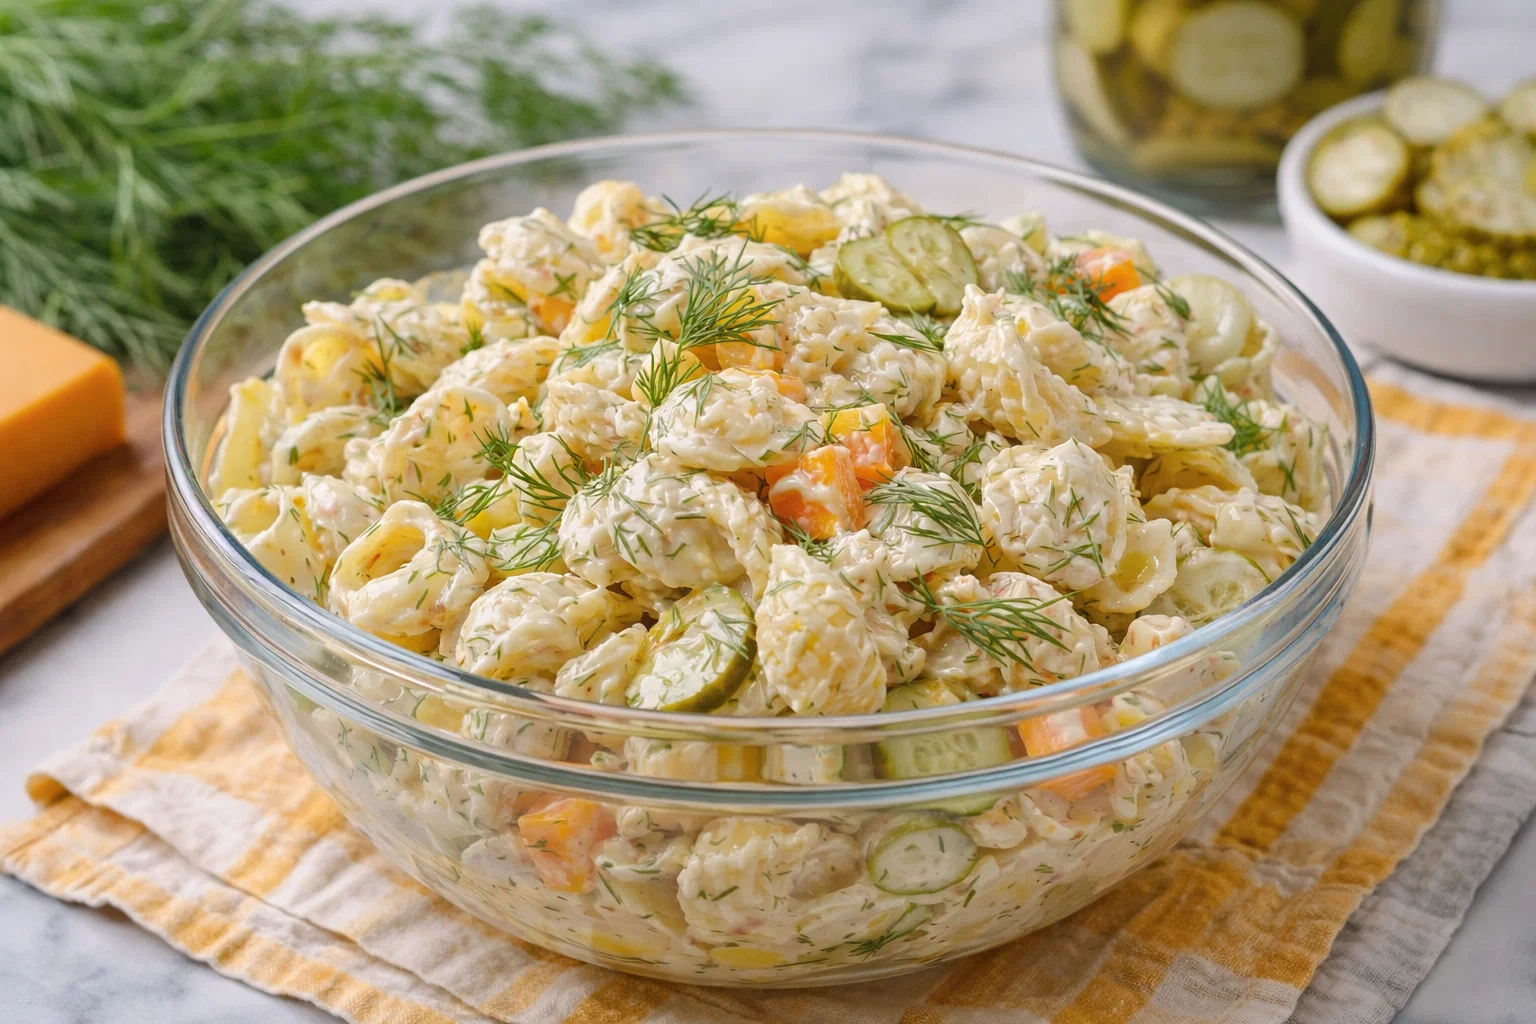
    Classic Pickle Pasta Salad

    Classic Pickle Pasta Salad: A Tropical Delight

    Introduction to Classic Pickle Pasta Salad

    When it comes to summer gatherings, potluck dinners, or even a quick meal at home, Classic Pickle Pasta Salad is the perfect dish. Vibrant, delicious, and easy to make, this pasta salad is a delightful fusion of flavors and textures. Imagine the crunch of dill pickles mingling with the softness of tender pasta—it’s a symphony for your taste buds! Not only is it incredibly simple to prepare, but it’s also a versatile dish that caters to various dietary needs. Whether you’re a busy parent looking for a quick meal solution, a college student trying to manage a budget, or a food enthusiast wanting a new culinary adventure, this recipe has something for everyone.

    Moreover, this pasta salad is packed with health benefits. It can be made vegan or gluten-free, and with nutritious ingredients, it aligns perfectly with those keeping an eye on their calorie intake. With its refreshing flavors and colorful presentation, Classic Pickle Pasta Salad is appealing to the eyes and gratifying to consume. So, if you’re looking for a dish that’s as enjoyable to make as it is to eat, look no further!

    Benefits and Advantages of Classic Pickle Pasta Salad

    One of the standout features of Classic Pickle Pasta Salad is its incredible ease of preparation. Busy parents can whip this up in no time, making it a perfect weeknight dinner option. Likewise, newlyweds or working professionals can enjoy a meal without spending hours in the kitchen. Just boil the pasta, chop the vegetables, and mix in your favorite dressing—the steps are as simple as that!

    The health benefits of this dish are also noteworthy. Pasta is a comforting carbohydrate source, and when paired with fresh vegetables and pickles, it becomes a vibrant, nutrient-dense meal. The pickles add not only a unique flavor but also probiotics, which are essential for gut health. When you choose whole-grain pasta, you’re incorporating fiber into your meal, making it more filling and beneficial for your digestive system.

    Another advantage is its versatility. You can easily customize this pasta salad to meet various dietary needs. For those who are vegan, subbing traditional pasta with gluten-free versions or whole grain options can make this dish a delicious alternative without sacrificing taste. Plus, portions can easily be scaled up or down, letting you serve a small family lunch or a hearty dish for a crowd.

    Besides being a fantastic side dish for barbecues and family gatherings, Classic Pickle Pasta Salad can double as a standalone meal. Its balance of carbohydrates, vegetables, and dressing ensures it’s not just nutritious, but also incredibly satisfying. You can add protein options, making it a complete meal for diet-conscious individuals. Overall, it’s a dish that delivers on all fronts: flavor, nutrition, and convenience.

    Ingredients Overview

    Essential Ingredients for Classic Pickle Pasta Salad

    Making a Classic Pickle Pasta Salad requires a simple yet delightful assortment of ingredients. Below is a list of what you’ll need:

    • 2 cups of elbow macaroni pasta (or any pasta of your choice)
    • 1 cup of pickles (dill pickles work best; chop them into small pieces)
    • 1 cup of cherry tomatoes (halved)
    • 1/2 cup of red onion (diced)
    • 1/2 cup of bell pepper (any color, diced)
    • 1/2 cup of mayonnaise (or vegan mayo for a dairy-free option)
    • 2 tablespoons of pickle juice (add more for extra zing!)
    • 1 teaspoon of garlic powder
    • Salt and pepper to taste
    • Fresh parsley (for garnish, optional)

    This combination of ingredients creates a classic flavor profile that pairs perfectly for a refreshing dish. The pasta serves as a hearty base while pickles and vegetables provide crunch, tanginess, and a riot of colors.

    Dietary Substitutions to Customize Your Classic Pickle Pasta Salad

    Customize your Classic Pickle Pasta Salad to fit your dietary needs with these optional substitutions:

    1. Pasta Alternatives:
    2. Use gluten-free pasta for gluten-sensitive diners.
    3. Substitute pasta with zucchini noodles (zoodles) for a low-carb option.

    4. Creamy Base Options:

    5. Replace traditional mayonnaise with Greek yogurt for added protein and a tangy twist.
    6. Use vegan mayonnaise to adapt for a plant-based diet.

    7. Add Extra Nutrition:

    8. Incorporate protein boosters such as chopped hard-boiled eggs or chickpeas.
    9. Include more veggies like cucumbers or carrots for added crunch and nutrition.
    10. For a spicier version, add jalapeños or hot sauce.

    Through these substitutions, you can ensure that your pasta salad aligns perfectly with your personal dietary preferences while still delivering fantastic flavor!

    How to Prepare the Perfect Classic Pickle Pasta Salad: Step-by-Step Guide

    Follow this straightforward, step-by-step guide to whip up your Classic Pickle Pasta Salad. It’s a delightful process, and soon you’ll be enjoying a delicious homemade dish.

    1. Prepare the Base:
    2. Begin by cooking the pasta. In a large pot of salted boiling water, add 2 cups of elbow macaroni. Cook according to the package instructions until al dente, usually about 8-10 minutes.

    3. Drain and Cool:

    4. Once cooked, drain the pasta and rinse it under cold water to halt the cooking process. This helps maintain the perfect pasta texture and reduces stickiness.

    5. Chop Your Veggies:

    6. While the pasta cools, take your time to chop the vegetables. Dice the red onion, bell pepper, and cherry tomatoes, and chop the pickles into small pieces.

    7. Mix Dressing Ingredients:

    8. In a separate bowl, combine 1/2 cup of mayonnaise, 2 tablespoons of pickle juice, 1 teaspoon of garlic powder, and a sprinkle of salt and pepper. Mix until creamy and well-blended.

    9. Combine Pasta and Vegetables:

    10. In a large mixing bowl, combine the cooled pasta with the diced vegetables and pickles. Stir gently to mix without breaking the pasta.

    11. Add Dressing:

    12. Pour the dressing over the pasta mixture. Gently fold the ingredients with a spatula until everything is evenly coated. Taste and adjust seasoning if necessary, adding more salt or pickle juice to your liking.

    13. Add Fresh Herbs:

    14. If desired, chop some fresh parsley and sprinkle it on top for an extra burst of flavor and a pop of color.

    15. Chill Before Serving:

    16. It’s best to let your Classic Pickle Pasta Salad chill in the refrigerator for at least an hour. This allows the flavors to meld beautifully and enhances the overall taste.

    17. Serve and Enjoy:

    18. Once chilled, give the pasta salad a gentle stir. Serve in a large bowl or individual portions. Garnish with additional pickles, if desired.

    Additional Tips for Preparation:

    • For extra creaminess, consider adding a splash of sour cream or even crumbled feta cheese (if not sticking strictly to vegan).
    • Make sure to taste as you go; feel free to adapt the seasoning to suit your palate.

    Mastering Classic Pickle Pasta Salad: Advanced Tips and Variations

    Now that you have your Classic Pickle Pasta Salad recipe down, let’s explore some advanced tips and exciting variations to elevate your dish further:

    • Seasonal Variations: Consider adding seasonal vegetables like zucchini or asparagus in the spring or roasted corn in the summer, which will enhance the salad while providing a fresh and light feel.

    • Protein Boost: To make this dish heartier, include protein such as cooked chicken, shrimp, or even plant-based options like chickpeas, making it a complete meal. This is especially beneficial for working professionals or students looking for a filling yet nutritious meal.

    • Flavor Profiles: Experiment with different dressings or spices! Swap mayonnaise for a vinaigrette for a lighter dressing, or sprinkle some smoked paprika for an added smoky flavor.

    • Garnish Creatively: Fresh herbs like dill or chives can contribute an aromatic dimension, enhancing the overall flavor profile of the pasta salad.

    • Meal Prep Ready: Classic Pickle Pasta Salad can be meal prepped for busy weeks ahead. Store in individual serving containers for grab-and-go lunches or snacks, especially needed in the hustle and bustle of working professionals or active students.

    • Spicy Twists: If you’re a spice lover, throw in some diced jalapeños or a spoon of hot sauce into the dressing for an exciting kick. This will make your pasta salad stand out at any event!

    With these tips and variations, you can make the Classic Pickle Pasta Salad your own, catering to your preferences while delighting any crowd.

    How to Store Classic Pickle Pasta Salad: Best Practices

    To keep your Classic Pickle Pasta Salad fresh and delicious, proper storage is key. Here are some best practices for storing your delectable creation:

    • Refrigeration: Store the salad in an airtight container in the refrigerator if you have leftovers. It will stay fresh for up to 3-5 days. This is perfect for those who love meal prepping or need simple lunches throughout the week!

    • Freezing: While it is possible to freeze pasta salad, be mindful that the texture may change once thawed. For best results, it’s advisable to freeze it without the dressing. Store pasta and mixed veggies separately, and combine with dressing after thawing.

    • Reheating: If you prefer your pasta warm, gently reheat it on the stove or in the microwave. Make sure to add a little dressing or a splash of pickle juice, as this helps to reinvigorate the flavor.

    These storage methods ensure you can enjoy your Classic Pickle Pasta Salad well beyond the original serving, making it a versatile dish that adapts to busy lifestyles!

    Nutritional Value of Classic Pickle Pasta Salad

    Understanding the nutritional value of your meals is just as important as knowing how to prepare them. Here’s a breakdown of the nutrition information for a serving of Classic Pickle Pasta Salad (approximately 1 cup):

    • Calories: 250-300 (dependent on the use of mayonnaise and add-ins)
    • Protein: 5-7 grams (increases with proteins added)
    • Carbs: 35-40 grams
    • Fat: 12-15 grams (adjust based on the choice of mayonnaise)
    • Fiber: 2-3 grams

    Additional nutritional benefits include:

    • Vitamins and Minerals: The addition of fresh vegetables enriches the dish with vitamins A, C, and K, as well as essential minerals like potassium and magnesium.
    • Gut Health: The presence of pickles offers probiotics, essential for maintaining a healthy gut.

    This nutritional overview positions Classic Pickle Pasta Salad as a wholesome option for various dietary preferences and requirements. By customizing it to fit personal needs, you can craft dishes that not only taste great but also nourish the body!

    FAQs: Frequently Asked Questions About Classic Pickle Pasta Salad

    As with any beloved dish, questions often arise! Here are some frequently asked questions about Classic Pickle Pasta Salad along with straightforward answers.

    1. Can I make this pasta salad in advance?
    – Absolutely! In fact, making it a day in advance allows the flavors to meld beautifully. Just make sure to store it in an airtight container in the refrigerator.

    2. Can I use different types of pasta?
    – Yes! While elbow macaroni is traditional, you can use any pasta shape you enjoy, such as rotini, bowtie, or even gluten-free options like quinoa pasta.

    3. Is the salad suitable for a vegan diet?
    – Yes! By replacing mayonnaise with vegan mayo or using Greek yogurt, you can easily adapt this salad for a plant-based lifestyle.

    4. How long can I store leftover pasta salad?
    – Leftovers are good for up to 3-5 days when stored properly in the refrigerator. Consume within this timeframe for the best quality.

    5. How can I elevate the flavor of my pasta salad?
    – Consider adding fresh herbs, spices like smoked paprika, or even some crunchy toppings like nuts or seeds for extra texture and flavor!

    6. Can I freeze Classic Pickle Pasta Salad?
    – Freezing is possible, but for best results, keep the dressing separate from the salad until you’re ready to serve. Texture may change after freezing.

    Now that you’ve got all the details on Classic Pickle Pasta Salad, it’s time to gather your ingredients and start creating this delicious, vibrant dish! Whether as a side, a light lunch, or a stand-alone meal, enjoy every moment of the preparation and, most importantly, the tasting!

  • Tasty Italian Pasta Salad With Greek Yogurt Dressing

    Tasty Italian Pasta Salad With Greek Yogurt Dressing

    Tasty Italian Pasta Salad With Greek Yogurt Dressing: A Tropical Delight

    Introduction to Tasty Italian Pasta Salad With Greek Yogurt Dressing

    Welcome to a world of flavor, health, and ease with our Tasty Italian Pasta Salad With Greek Yogurt Dressing! This vibrant dish isn’t just a regular pasta salad; it’s a celebration of colorful vegetables, wholesome pasta, and a creamy, tangy dressing that’s packed with nutritional goodness. Perfect for a summer picnic, a quick lunch, or as a side dish for your dinner table, this pasta salad checks all the boxes.

    What makes this recipe particularly appealing is its simplicity and adaptability. Whether you’re a busy parent seeking quick meal solutions, a student needing a nutritious pick-me-up, or an individual conscious of dietary needs, this pasta salad is your go-to option. It’s both healthy and satisfying, leveraging Greek yogurt as a healthier alternative to traditional mayonnaise. This not only reduces calories but also adds a generous dose of protein and probiotics, helping you feel full without the guilt.

    Furthermore, this Italian pasta salad can easily accommodate various dietary preferences. Looking for vegan options? Swap the yogurt for a plant-based alternative! Gluten-free eaters can opt for pasta made from chickpeas or brown rice. With endless possibilities for customization, this pasta salad is not just a dish; it’s a canvas for your culinary creativity. Dive in and discover how this simple recipe can bring people together around the table.

    Benefits and Advantages of Tasty Italian Pasta Salad With Greek Yogurt Dressing

    When it comes to delicious and nutritionally rich meals, the Tasty Italian Pasta Salad With Greek Yogurt Dressing stands out for several reasons, making it a smart choice for health-conscious individuals. Below are the key benefits of this vibrant dish:

    1. Easy Preparation

    Creating this pasta salad is a breeze! With minimal cooking required—boil the pasta and chop your favorite vegetables—this dish comes together in under 30 minutes. For busy schedules, meal-prepping this dish allows you to have a nutritious lunch ready to go for the week without breaking a sweat.

    2. Health Benefits

    Packed with fresh vegetables like bell peppers, cherry tomatoes, and zucchini, this recipe enhances your diet with vitamins and minerals. The Greek yogurt dressing brings a creamy, rich flavor while being lower in fat compared to traditional dressings. By making smart ingredient choices, this pasta salad becomes a wholesome meal that helps you maintain your wellness goals without sacrificing taste.

    3. Versatility

    One of the standout features of this pasta salad is its adaptability. You can customize it to suit various dietary preferences—vegetarian, gluten-free, or even vegan—by simply swapping out a few ingredients. The choice of pasta also allows for experimentation: whole grain for extra fiber or zucchini noodles for a lower-carb alternative. You have the freedom to play with flavors and textures, making every bowl a unique masterpiece.

    4. Kid-Friendly Option

    For parents, finding meals that are both healthy and appealing to kids can be a challenge. This dish is colorful, easy to eat, and can be tailored to include your child’s favorite vegetables. Plus, the playful combination of textures will keep them engaged with their food. Serve it at parties or family gatherings, and watch as it quickly disappears!

    5. Great for Meal Prep

    Planning meals in advance is key to staying on track with dietary goals. This pasta salad keeps well in the fridge for up to three days, making it a perfect candidate for meal prep. Simply jar it up for easy lunches or quick dinner sides throughout a busy week.

    Conclusion

    The Tasty Italian Pasta Salad With Greek Yogurt Dressing is an exceptional recipe that brings joy to cooking and eating. Its ease of preparation, health benefits, versatility, kid-friendly appeal, and meal prep friendliness make it a must-try for anyone seeking a satisfying yet nutritious dish. With every bite, enjoy the satisfaction of knowing you are nourishing your body while tantalizing your taste buds.

    Ingredients Overview

    Essential Ingredients for Tasty Italian Pasta Salad With Greek Yogurt Dressing

    To create your delicious Italian pasta salad, gather the following ingredients, which work together to deliver both flavor and nutrition:

    • Pasta: 2 cups of uncooked whole wheat or gluten-free pasta (fusilli or penne work well)
    • Cherry Tomatoes: 1 cup, halved
    • Bell Peppers: 1 cup, diced (use any color you like!)
    • Cucumber: 1 cup, diced
    • Red Onion: ¼ cup, finely chopped
    • Olives: ½ cup, sliced (Kalamata or green)
    • Feta Cheese: ½ cup, crumbled (optional for vegans)

    Greek Yogurt Dressing:

    • Greek Yogurt: 1 cup (use dairy-free yogurt for vegan)
    • Olive Oil: 2 tablespoons
    • Lemon Juice: 2 tablespoons (freshly squeezed for best flavor)
    • Dried Oregano: 1 teaspoon
    • Garlic Powder: ½ teaspoon
    • Salt and Pepper: To taste

    Notes on Ingredients:

    • Gluten-Free Option: Use gluten-free pasta made from chickpeas, quinoa, or brown rice.
    • Lower-Calorie Option: Replace regular feta with reduced-fat or skip it entirely for a lighter version.
    • Vegetarian/Vegan Option: For a vegan version, substitute Greek yogurt with coconut yogurt and omit the feta cheese.

    Dietary Substitutions to Customize Your Tasty Italian Pasta Salad With Greek Yogurt Dressing

    To cater to a variety of guests or dietary preferences, consider the following substitutions:

    1. Pasta Alternatives:
    2. Zucchini Noodles (Zoodles): A fantastic low-carb option that adds freshness.
    3. Chickpea Pasta: High in protein and fiber, great for a filling salad.

    4. Dairy Alternatives:

    5. Vegan Yogurt: Use almond, coconut, or soy yogurt in place of Greek yogurt.
    6. Nutritional Yeast: To replace feta cheese for a cheesy flavor without dairy.

    7. Vegetable Substitutions:

    8. Add Spinach or Kale: For a nutrient boost, mix in fresh leafy greens.
    9. Broccoli or Asparagus: Lightly steamed, add crunch and fiber to the dish.

    10. Protein Additions:

    11. Grilled Chicken or Shrimp: For a heartier meal option.
    12. Chickpeas or Beans: Stir in canned beans for additional protein and fiber.

    By exploring these substitutions, you can easily make the pasta salad work for different allergy concerns or personal tastes. The flexibility of this recipe is truly one of its strongest features, ensuring that everyone can enjoy this delightful dish.

    How to Prepare the Perfect Tasty Italian Pasta Salad With Greek Yogurt Dressing: Step-by-Step Guide

    Creating a Tasty Italian Pasta Salad With Greek Yogurt Dressing is a straightforward process that brings together simple steps for a delightful outcome. Follow this step-by-step guide, and you’ll have a beautiful and delicious pasta salad ready to serve in no time.

    1. Prepare the Base

    • Cook the Pasta: Begin by boiling a pot of salted water. Add 2 cups of pasta and cook according to package instructions until al dente. Drain the pasta in a colander and rinse under cold water to stop the cooking process and cool the pasta down.

    2. Chop the Vegetables

    • Dice and Slice: While the pasta is cooking, take the opportunity to chop the vegetables. Dice your bell peppers, cucumber, and red onion. Halve the cherry tomatoes and slice the olives. Aim to have all your vegetables ready before mixing for a smooth workflow.

    3. Make the Greek Yogurt Dressing

    • Mix Ingredients: In a medium bowl, combine 1 cup of Greek yogurt, 2 tablespoons of olive oil, 2 tablespoons of freshly squeezed lemon juice, 1 teaspoon of dried oregano, and ½ teaspoon of garlic powder. Whisk together until you achieve a smooth consistency. Season with salt and pepper to your liking.

    4. Combine Ingredients

    • Mix everything: In a large mixing bowl, combine the cooled pasta, chopped vegetables, and olives. Pour the Greek yogurt dressing over the pasta mixture and toss gently to combine, ensuring all ingredients are evenly coated in the dressing.

    5. Add Cheese (Optional)

    • Feta Cheese: If you’re including feta, sprinkle ½ cup of crumbled feta cheese over the salad mixture. Gently fold it in to incorporate without breaking the cheese too much.

    6. Chill Before Serving

    • Refrigerate: For the best flavor, cover the salad and let it chill in the refrigerator for at least 30 minutes. This allows the flavors to meld together beautifully.

    7. Serve and Garnish

    • Garnish: Before serving, give the salad a gentle toss. You might want to add a sprinkle of fresh herbs—basil or parsley—on top for added freshness and color.

    8. Make It Your Own

    • Customize: Feel free to adjust ingredients according to your taste preferences. Add spices, substitute vegetables, or include proteins based on what you have on hand.

    Optional Steps for Meal Prep:

    If you’re making the pasta salad in advance, layer the ingredients in jars or containers, keeping the dressing separate until ready to serve. This helps maintain freshness and texture.

    By following these simple steps, you will have perfected a Tasty Italian Pasta Salad With Greek Yogurt Dressing that is not only delicious but also a feast for the eyes.

    Mastering Tasty Italian Pasta Salad With Greek Yogurt Dressing: Advanced Tips and Variations

    Enhance your culinary experience with these advanced tips and variations for the Tasty Italian Pasta Salad With Greek Yogurt Dressing:

    1. Experiment with Herbs:
    2. Fresh herbs can elevate the flavors in your pasta salad. Consider adding fresh basil, dill, or parsley for an aromatic twist. Use dried herbs in the dressing for a more intense flavor.

    3. Add Nuts or Seeds:

    4. For a delightful crunch, incorporate nuts or seeds. Toasted pine nuts, walnuts, or sunflower seeds can provide a contrasting texture that enhances the overall dish.

    5. Spice It Up:

    6. If you like a little heat, sprinkle in some red pepper flakes or diced jalapeños for a spicy kick. This addition elevates the flavor profile and makes for an exciting dining experience.

    7. Roast Your Vegetables:

    8. For a deeper flavor, try roasting some of your vegetables, like bell peppers or zucchini, before adding them to the salad. Roasting caramelizes the natural sugars, bringing out their sweetness.

    9. Season the Pasta Water:

    10. To amplify the flavor of the pasta, always add salt to the boiling water. Seasoning the pasta as it cooks ensures a flavorful base for your dish.

    11. Add Seasonal Ingredients:

    12. Vary your vegetables based on the season. In summer, use fresh corn; in fall, consider roasted squash. This keeps your pasta salad fresh and in tune with the seasons.

    13. Make a Larger Batch:

    14. If you’re hosting or planning for a week, consider doubling the recipe. Pasta salads store well in the refrigerator and taste even better after the flavors have had time to meld.

    15. Taste and Adjust:

    16. Always taste your salad before serving. Adjust the seasoning, dressing, or add additional ingredients to suit your preferences, ensuring that every bite is delightful.

    By incorporating these advanced tips, your Tasty Italian Pasta Salad With Greek Yogurt Dressing can become a signature dish, impressing friends and family while enriching your culinary repertoire.

    How to Store Tasty Italian Pasta Salad With Greek Yogurt Dressing: Best Practices

    Storing your prepared Tasty Italian Pasta Salad With Greek Yogurt Dressing properly is key to maintaining its freshness and flavor. Here are best practices for storage:

    Refrigeration

    • In an Airtight Container: Place your pasta salad in an airtight container to prevent it from absorbing other flavors in the fridge. This salad can be stored safely for up to 3 days.
    • Layer Ingredients Wisely: If preparing in advance, consider layering components in the container. Keep dressing separate until you’re ready to eat, which helps preserve the salad’s crispness.

    Freezing

    • Not Recommended for Dressings: While you can freeze pasta, it’s best not to freeze the salad if it contains creamy elements like Greek yogurt. The freezing process can alter the texture.
    • Freeze Separately: In cases where you’ve cooked your pasta and want to freeze it, do so separately without the dressing or fresh vegetables. Thaw and mix it when you’re ready to enjoy your salad.

    Reheating

    • Thawing: If you must freeze your pasta, place it in the refrigerator to thaw overnight before using it in your salad.
    • No Reheating Needed: This pasta salad is best enjoyed cold. If you prefer a warm pasta dish, consider making a fresh batch of dressing beforehand and mix it in with warm pasta.

    By following these storage practices, you’ll ensure that your Tasty Italian Pasta Salad remains fresh, delicious, and ready to enjoy whenever hunger strikes.

    Nutritional Value of Tasty Italian Pasta Salad With Greek Yogurt Dressing

    Understanding the nutritional value of what you eat is essential for health-conscious individuals. This Tasty Italian Pasta Salad With Greek Yogurt Dressing not only delights the palate but also provides a wholesome serving of nutrients. Below is a breakdown of the nutrition provided per serving (estimated for a 1-cup serving):

    • Calories: 320
    • Fat: 14g
    • Saturated Fat: 3g (if feta is included)
    • Carbohydrates: 40g
    • Fiber: 4g
    • Sugars: 4g
    • Protein: 12g
    • Vitamin A: 20% of daily value
    • Vitamin C: 45% of daily value
    • Calcium: 10% of daily value
    • Iron: 8% of daily value

    Analysis

    • High in Vitamins: The vegetables provide a significant boost of essential vitamins, particularly vitamin A and vitamin C, which are vital for immune function and skin health.
    • Good Source of Protein: The Greek yogurt adds a nice source of protein, promoting satiety and muscle repair.
    • Fiber-Rich: Including whole wheat pasta contributes to upholding digestive health, ensuring that your meal is not just filling but also beneficial.

    This dish stands as a nutritious option that supports a balanced diet. Adjustions can be made to align with various dietary mandates, such as low-fat or high-protein variations.

    FAQs: Frequently Asked Questions About Tasty Italian Pasta Salad With Greek Yogurt Dressing

    1. Can I use any type of pasta for this salad?

    Yes, you can use any type of pasta you prefer. Whole wheat and gluten-free options are great alternatives. Experiment with different shapes like farfalle or bowtie for added fun.

    2. How can I make this salad vegan?

    To make this pasta salad vegan, substitute Greek yogurt with a plant-based yogurt, and omit the feta cheese or replace it with nutritional yeast for a cheesy flavor.

    3. How long can I store the pasta salad?

    The pasta salad can be stored in the refrigerator for up to 3 days. For the best texture, keep the dressing separate until ready to serve.

    4. Can I freeze the salad?

    Freezing the Tasty Italian Pasta Salad isn’t recommended due to the creamy dressing, which may not thaw well. However, you can freeze cooked pasta without dressing or vegetables.

    5. Can I meal prep this dish?

    Absolutely! This pasta salad is perfect for meal prep. Just store it in separate portions and refrigerate. Add dressing just before serving for the freshest taste.

    6. What can I add to enhance the flavors?

    Consider adding fresh herbs, nuts, or roasted vegetables to enhance the flavor profile of your pasta salad. Adding a splash of balsamic vinegar can also elevate the taste.

    By addressing these common inquiries, you can ensure a delightful cooking experience that caters to various preferences and concerns. Your Tasty Italian Pasta Salad With Greek Yogurt Dressing is bound to become a favorite in your home!

  • Tasty Hawaiian Chicken Salad

    Tasty Hawaiian Chicken Salad

    Tasty Hawaiian Chicken Salad: A Tropical Delight

    Introduction to Tasty Hawaiian Chicken Salad

    Imagine a vibrant bowl brimming with fresh ingredients, sweet tropical flavors, and tender chicken, all coming together to create the perfect summer meal. The Tasty Hawaiian Chicken Salad is not just any salad; it’s a delightful fusion of taste and nutrition that elevates the humble chicken recipes to gourmet status. Perfect for busy parents looking for a quick dinner option, travelers craving a taste of the islands, or even health-conscious individuals eager to include more nutritious meals—all while being absolutely delicious.

    This recipe stands out due to its simplicity and versatility. It combines a variety of textures and flavors, making it a feast for both the eyes and the palate. Moreover, this salad is incredibly health-friendly. Packed with lean protein from the chicken, nutritious veggies, and the sweetness of pineapple, it offers a balanced meal that can fit seamlessly into diverse dietary requirements. For those adhering to vegan or gluten-free lifestyles, it can easily be adapted.

    Whether you’re hosting a summer barbecue, preparing a quick lunch for work, or enjoying a cozy dinner at home, the Tasty Hawaiian Chicken Salad is an excellent choice. With a preparation time of just 30 minutes, you will wonder why you didn’t try this delightful dish sooner!

    Benefits and Advantages of Tasty Hawaiian Chicken Salad

    The Tasty Hawaiian Chicken Salad isn’t just delicious; it also boasts a plethora of benefits that make it stand out among chicken recipes. First and foremost, the preparation process is incredibly straightforward. With just a handful of fresh ingredients and a few simple steps, you can create a flavorful dish that doesn’t require culinary expertise. This makes it perfect for novice cooks, busy parents, and even seasoned chefs looking for a quick and satisfying meal option.

    Health-wise, this salad is a powerhouse. The main ingredient, chicken, provides lean protein, which is essential for muscle repair and growth. Additionally, the inclusion of vibrant vegetables like bell peppers and greens adds vitamins, minerals, and antioxidants to the mix. Pineapple, with its refreshing flavor, contributes natural sweetness without the need for added sugars, making it a healthier alternative to traditional dressings.

    Another advantage of the Tasty Hawaiian Chicken Salad is its adaptability. You can customize it based on dietary needs or personal preferences. Whether you choose to make it gluten-free by using certified gluten-free ingredients, vegetarian by substituting chicken with chickpeas, or even vegan—this salad can adapt to accommodate your lifestyle. Furthermore, it’s a dish that’s perfect for meal prepping, saving busy individuals time throughout the week while ensuring access to healthy, home-cooked meals.

    To top it all off, this Hawaiian-inspired salad is visually stunning. The bright colors of the ingredients will entice even the pickiest eaters, making it a hit at gatherings. It’s not merely a recipe; it’s an experience that can transport you to a tropical paradise with every bite.

    Ingredients Overview

    Essential Ingredients for Tasty Hawaiian Chicken Salad

    Creating your Tasty Hawaiian Chicken Salad requires a selection of fresh and wholesome ingredients. Here’s a detailed list with measurements to ensure your dish turns out splendidly:

    • 2 cups cooked chicken breast, shredded or diced
      Protein-rich base of the salad.

    • 1 cup pineapple chunks (fresh or canned, drained)
      Provides natural sweetness and a tropical flair.

    • 1 red bell pepper, diced
      Adds crunch and a pop of color.

    • 1 cup celery, diced
      Offers a refreshing texture.

    • 1/2 cup red onion, finely chopped
      Enhances flavor with its zestiness.

    • 1/2 cup mayonnaise (for a healthier option, Greek yogurt or a vegan mayo alternative can be used)
      Acts as the creamy binder for the salad.

    • 1 tablespoon apple cider vinegar
      Enhances tanginess and balances the sweetness of pineapple.

    • Salt and pepper, to taste
      Essentials for seasoning.

    • 2 tablespoons fresh cilantro or parsley (optional)
      For an additional burst of flavor and freshness.

    This list emphasizes healthy choices without sacrificing taste. For those who want a gluten-free version, verify that your mayonnaise and any other condiments are certified gluten-free.

    Dietary Substitutions to Customize Your Tasty Hawaiian Chicken Salad

    Customization is key to the Tasty Hawaiian Chicken Salad, allowing it to suit various dietary preferences or restrictions. Here are some recommended substitutions:

    1. To Make It Vegan:
      Replace chicken with chickpeas or tofu (grilled or sautéed) as a protein base. Use vegan mayonnaise or a mix of avocados for creaminess.

    2. For a Gluten-Free Version:
      Ensure all ingredients, especially mayo, are gluten-free. You could also use quinoa or brown rice instead of chicken for a grain salad variation.

    3. For Low-Calorie Options:
      Substitute regular mayonnaise with Greek yogurt to reduce calories while adding protein. Use less pineapple and incorporate more leafy greens to bulk it up without adding many calories.

    4. Adding More Fiber:
      Consider throwing in black beans or kidney beans into the mix for an additional fiber boost.

    With these substitutions, the Tasty Hawaiian Chicken Salad can be tailored to meet almost anyone’s dietary needs while maintaining its delicious tropical essence.

    How to Prepare the Perfect Tasty Hawaiian Chicken Salad: Step-by-Step Guide

    Now that you have gathered all the ingredients and considered customizing your salad to fit your needs, let’s dive into the preparation! Follow these step-by-step instructions to create the Tasty Hawaiian Chicken Salad and explore variations as you go:

    1. Prepare Your Chicken:
      If starting with raw chicken, season it with salt and pepper, then grill, bake, or steam it until cooked through (about 15-20 minutes at 375°F). Allow it to cool before shredding or dicing. If you’re using pre-cooked or leftover chicken, simply shred or cube it.

    2. Chop Your Veggies:
      While the chicken is cooling, take a cutting board and chop your red bell pepper, celery, and red onion into bite-sized pieces. Make sure the pieces are uniform for even mixing and texture.

    3. Combine Ingredients in a Large Bowl:
      In a large mixing bowl, combine the shredded chicken, pineapple chunks, diced vegetables, and fresh herbs (if using). This makes it easy to see all your colors and textures coming together!

    4. Prepare the Dressing:
      In a separate small bowl, mix together the mayonnaise (or yogurt), apple cider vinegar, salt, and pepper. If you want a lighter taste, add a splash of lemon juice for a zesty kick.

    5. Mix it Up!:
      Pour the dressing over the chicken and veggie mixture. Gently toss everything together until everything is evenly coated. Be careful not to mash the pineapple.

    6. Taste and Adjust:
      Give the salad a taste. You might want to adjust the seasonings—adding more salt, pepper, or vinegar as per your preference.

    7. Chill Before Serving (optional):
      For the best flavor, allow the salad to chill in the fridge for about 30 minutes. This helps the flavors meld beautifully!

    8. Enjoy Your Salad:
      Serve chilled over a bed of greens, in wraps, or in sandwich form. It’s truly versatile!

    Feel free to explore additional variations as you prepare the Tasty Hawaiian Chicken Salad. Each time you make it, you can discover new elements that suit your taste preferences!

    Mastering Tasty Hawaiian Chicken Salad: Advanced Tips and Variations

    To truly master the Tasty Hawaiian Chicken Salad, consider these advanced tips and variations for even more flavor and creativity:

    • Add Crunch: Sprinkle in some toasted almonds or macadamia nuts for an added crunch and nutty flavor that complements the tropical elements perfectly.

    • Spice it Up: If you crave some heat, add finely diced jalapeños or a dash of hot sauce to the dressing for a spicy twist.

    • Fruit Alternatives: While pineapple is the star, consider swapping in mango or papaya for a different tropical experience. Both fruits offer unique sweetness and texture.

    • Grain Mix: Incorporate cooked quinoa or wild rice to turn this salad into a hearty meal that’s perfect for lunch or dinner.

    • Herb Expansion: Experiment with fresh herbs like basil or mint for a fresh note that cuts through richness and adds complexity.

    These small tweaks can elevate your salad from simple to extraordinary, making it a dish that delights friends and family alike, whether served at casual summer gatherings or formal dinners.

    How to Store Tasty Hawaiian Chicken Salad: Best Practices

    Proper storage of your Tasty Hawaiian Chicken Salad can maintain its freshness and flavor. Here are some tips for refrigeration, freezing, and reheating:

    • Refrigerating: Store any leftover salad in an airtight container in the refrigerator. It’s best enjoyed within 3-4 days. However, if you add dressing to the entire bowl, it may not keep as well; it’s more effective to dress individual servings when serving.

    • Freezing: While it’s not recommended to freeze this salad because the vegetables and pineapple can become mushy, you can freeze the cooked chicken separately. When ready to make the salad, you can thaw the chicken and assemble it fresh.

    • Reheating: If your salad contains only cooked chicken and veggies, you can reheat it in a microwave-safe dish. However, it’s best served chilled. If you prefer it warm, avoid dressing until just before serving.

    Using these storage methods will allow you to enjoy the Tasty Hawaiian Chicken Salad even after the initial meal, making it a fantastic option for meal prep!

    Nutritional Value of Tasty Hawaiian Chicken Salad

    Understanding the nutritional value of your meal is crucial, especially for those who are diet-conscious. Here’s a breakdown of the approximate nutritional values per serving (based on the recipe serving four):

    • Calories: 350-400
    • Protein: 32g
    • Carbohydrates: 25g
    • Fat: 20g
    • Fiber: 2g
    • Sodium: 500mg

    This hearty salad provides a well-rounded meal filled with nutrients, protein, and delicious flavors that satisfy without weighing you down. By customizing the ingredients based on your needs or desires, you could easily modify these values while retaining its overall health benefits.

    FAQs: Frequently Asked Questions About Tasty Hawaiian Chicken Salad

    Q: Can I make Tasty Hawaiian Chicken Salad ahead of time?
    A: Yes! It’s an excellent make-ahead dish. You can prepare it the day before, but consider adding the dressing just before serving for maximum freshness.

    Q: How do I know if the chicken is cooked properly?
    A: The chicken should reach an internal temperature of 165°F. Use a meat thermometer for accuracy.

    Q: Can I use leftover rotisserie chicken?
    A: Absolutely! Using shredded rotisserie chicken is a fantastic time-saver and adds a lovely flavor to the salad.

    Q: What can I use instead of mayonnaise for a lighter version?
    A: Greek yogurt works wonderfully as a healthier substitute, providing creaminess with added protein.

    Q: Is this recipe adaptable for meal prep?
    A: Indubitably! You can portion it out for lunches for the week. Just be mindful of adding dressing to portions when you’re ready to enjoy them to prevent sogginess.

    In conclusion, the Tasty Hawaiian Chicken Salad not only embodies a tropical escape but also delivers on health, flavor, and convenience. Whether you’re whipping it up for a family dinner, a potluck gathering, or simply to enjoy as a light lunch, this dish will become a staple in your collection of chicken recipes. Enjoy your cooking adventure and let every bite whisk you away to a sunny, Hawaiian paradise!

  • Im Obsessed Making This Chicken Salad Non-Stop

    Im Obsessed Making This Chicken Salad Non-Stop

    I’m Obsessed! Making This Chicken Salad Non-Stop!: A Tropical Delight

    Introduction to I’m Obsessed! Making This Chicken Salad Non-Stop!

    If you’ve been searching for the ultimate summer dish, look no further—this chicken salad recipe will take you to culinary paradise! I’m Obsessed! Making This Chicken Salad Non-Stop! is more than just a meal; it’s a celebration of flavors, textures, and insights into healthy eating. Packed with wholesome ingredients, this chicken salad offers a delightful contrast of savory and sweet, featuring succulent pieces of chicken tossed with tropical fruits and a zesty dressing.

    This recipe is simple, versatile, and can easily accommodate various dietary needs, from gluten-free to low-calorie options. It’s the go-to choice for busy parents who want to whip up a fast meal, food enthusiasts looking for a new favorite, or anyone who aims to enjoy something light yet satisfying. With just a few ingredients and a little love, you can have a tasty dish that makes for excellent meal prep or a charming dish for gatherings.

    What further sets this chicken salad apart is its health benefits. It boasts lean protein, vitamins, and minerals, making it not only delicious but nutritious. Moreover, the simple steps ensure that even novice cooks can get it right the first time. So grab your cutting board, a bowl, and let’s dive into a realm of flavor with my obsession—this chicken salad!

    Benefits and Advantages of I’m Obsessed! Making This Chicken Salad Non-Stop!

    What makes this chicken salad irresistible? The benefits stem from its simplicity and ability to satisfy various dietary preferences all at once. Let’s break it down:

    Quick and Easy Preparation

    One of the hallmarks of a great recipe is its ease of preparation. This chicken salad comes together in under 30 minutes! Just cook your chicken, chop your ingredients, and mix everything together. This makes it perfect for those bustling weekdays or for impromptu gatherings, where you need something that pleases the crowd without much hassle.

    Nutrient-Rich Ingredients

    With components like lean chicken breast, fresh vegetables, and fruits such as mango or pineapple, this chicken salad is loaded with essential nutrients. Chicken provides high-quality protein, while the fruits offer dietary fiber and antioxidants. You can feel good about serving it to your family, as it promotes health and well-being without sacrificing flavor.

    Customizable for Everyone

    The beauty of this dish lies in its versatility. You can modify the ingredients based on dietary restrictions or preferences, such as using Greek yogurt instead of mayonnaise for a lighter version. It’s also easily adaptable for gluten-free diets by ensuring all condiments and added ingredients meet your specifications.

    Balanced Meal Option

    Whether you’re a busy professional, a health-conscious individual, or someone simply looking for a fresh meal, this chicken salad fulfills goals of creating a balanced dish. Low in carbs and high in protein, it serves as an ideal option for those watching their caloric intake while still feeling satisfied.

    Perfect for Meal Prep

    This chicken salad makes excellent leftovers! It stores well in the fridge, maintaining its taste and texture, which makes it a stellar choice for meal planning. Prepare a large batch on the weekend, and you’ll have lunches or snacks ready for the week ahead.

    In summary, with its fast preparation, nutritious components, and adaptability, it’s no wonder my chicken salad has become an obsession. You’ll want to make it non-stop!

    Ingredients Overview

    Essential Ingredients for I’m Obsessed! Making This Chicken Salad Non-Stop!

    To make the best chicken salad, you’ll need a select group of ingredients. Here’s the breakdown:

    • 2 cups cooked chicken breast, diced – You can use rotisserie chicken for convenience or grill your own.
    • 1/2 cup plain Greek yogurt (or mayonnaise) – This serves as the creamy base; Greek yogurt is a healthy alternative.
    • 1/4 cup diced celery – Adds a satisfying crunch and is low in calories.
    • 1/2 cup diced pineapple (fresh or canned, drained) – Offers tropical sweetness and vitamin C.
    • 1/4 cup diced red bell pepper – This brings a pop of color and antioxidants.
    • 1/4 cup chopped green onions – Provides a mild onion flavor that complements the chicken.
    • Salt and pepper to taste – Simple but essential for enhancing all the flavors.
    • 1 tablespoon lime juice – A splash of acidity that brightens the dish.

    Dietary Options:
    Vegan: Replace chicken with chickpeas or tofu and use a plant-based yogurt.
    Gluten-Free: Ensure all seasonings and components are gluten-free certified.

    Dietary Substitutions to Customize Your I’m Obsessed! Making This Chicken Salad Non-Stop!

    Creating a chicken salad that meets everyone’s needs has never been easier! Here are some substitutions tailored for various diets:

    • For a Low-Calorie Option: Swap out Greek yogurt with low-fat versions or use a mix of lemon juice and mustard for a lighter dressing.
    • For Dairy-Free Needs: Use plant-based alternatives like coconut yogurt or silken tofu blended until smooth.
    • For Extra Greens: Add in chopped spinach, kale, or arugula for a nutrient boost.
    • Nut Allergies: Omit any nuts if you utilize cashew or almond slices for crunch.
    • For Added Taste: Experiment with spices such as smoked paprika or fresh herbs like cilantro and basil for aromatic flavor variations.

    By being mindful of these substitutions, you can ensure that your chicken salad can happily cater to everyone at the table.

    How to Prepare the Perfect I’m Obsessed! Making This Chicken Salad Non-Stop!: Step-by-Step Guide

    Creating your chicken salad is straightforward when you follow these clear steps. Let’s get started!

    1. Cook the Chicken: If you haven’t done so already, grill or bake chicken breasts until fully cooked (about 20-25 minutes at 375°F). Let it rest before dicing into bite-sized pieces.

    2. Prepare the Produce: While the chicken is cooling, wash and dice the celery, pineapple, red bell pepper, and green onions. Aim for uniform pieces for a balanced texture.

    3. Mix the Dressing: In a large bowl, combine the Greek yogurt (or mayonnaise) with lime juice, salt, and pepper. Whisk until smooth.

    4. Combine Ingredients: Add the diced chicken, celery, pineapple, red bell pepper, and green onions into the bowl with the dressing.

    5. Toss Gently: Using a spatula or wooden spoon, gently fold all ingredients together. You want everything to be evenly coated without breaking the chicken or vegetables down too much.

    6. Taste and Adjust Seasonings: Take a small bite to check the flavor. This is the time to adjust salt, pepper, or lime juice if needed for your palate.

    7. Chill the Salad: Cover the bowl with plastic wrap or a lid. Place it in the refrigerator for at least 30 minutes. Chilling allows the flavors to meld beautifully.

    8. Serve and Enjoy: After chilling, serve the chicken salad on a bed of greens, in a wrap, or with whole-grain crackers.

    Optional: Garnish with additional green onions or a sprinkle of nuts for crunch.

    Tips for Variations:

    • Fruit Variations: Experiment with other fruits like mango or grapes to explore new flavor profiles.
    • Spice It Up: Toss in jalapeños or sriracha for a spicy kick.
    • Herbed Chicken: Marinate the chicken in herbs like rosemary or thyme before cooking for added depth.

    Remember, following this step-by-step guide makes your chicken salad foolproof!

    Mastering I’m Obsessed! Making This Chicken Salad Non-Stop!: Advanced Tips and Variations

    Having grounded your foundation with the basic chicken salad recipe, let’s elevate it even further with advanced tips and exciting variations:

    Flavor Infusions

    • Herbs Galore: Adding fresh herbs like dill, cilantro, or basil can change your chicken salad dramatically. They lend a fresh aroma and vivid flavor that will impress anyone.

    • Add Crunch: Experiment with nuts and seeds. Chopped walnuts or sunflower seeds can introduce unexpected crunch and health benefits.

    Presentation Matters

    • Serving Style: Serve your chicken salad in unique ways—inside avocado halves or lettuce wraps create elegant presentations.

    • Salad Jars: For meal prep, consider layering the ingredients in mason jars. Start with the dressing at the bottom, then layers of solid ingredients, and finish with the chicken on top. Just shake to mix when you’re ready to eat!

    International Flair

    • Mediterranean Twist: Add olives, capers, and feta cheese to make a Greek-style chicken salad.

    • Asian Influence: Incorporate sesame oil, soy sauce, and mandarin oranges for an Asian-inspired version that’s refreshingly different and tantalizing.

    Keep It Fresh

    Add a squeeze of lemon or lime just before serving to brighten the flavors, and consider tossing in freshly sliced or diced fruits for a summer-inspired variation. Always aim for freshness by utilizing seasonal produce.

    These additions and variations will allow you to create a chicken salad that reflects your preferences, ensuring no two salads are alike!

    How to Store I’m Obsessed! Making This Chicken Salad Non-Stop!: Best Practices

    Storing your chicken salad properly will ensure its freshness and flavor persist through your meal prep or leftovers. Here are the best practices:

    • Refrigeration: Store your chicken salad in an airtight container. It will stay fresh in the refrigerator for about 3-4 days. This makes it perfect for meal planning, allowing you to create multiple portions at once.

    • Freezing: Although it’s not recommended to freeze chicken salads containing the yogurt or mayonnaise, you can freeze just the cooked chicken and add the fresh ingredients later when you’re ready to serve. Seal in a freezer-safe bag for up to four months.

    • Reheating: If you’ve stored your chicken salad in the fridge for a few days, give it a quick stir before serving. If any liquid has separated, mix it back in, or add a little more yogurt or dressing to bring it back together.

    By following these storage tips, you guarantee that your chicken salad remains delightful even days after preparation!

    Nutritional Value of I’m Obsessed! Making This Chicken Salad Non-Stop!

    It’s essential to know what you’re consuming, especially when you love something as much as chicken salad! Here’s a basic nutritional breakdown per serving (approximately 1 cup):

    • Calories: 290 kcal
    • Protein: 30 grams
    • Fat: 12 grams (With Greek yogurt option)
    • Carbohydrates: 15 grams
    • Fiber: 2 grams
    • Sugars: 4 grams (natural sugars from fruits)
    • Vitamin C: 15% of Daily Recommended Intake

    Dietary Benefits:

    • High protein content keeps you full longer, supporting weight management.
    • Contains essential vitamins and minerals from the fresh produce.
    • A great source of probiotics if you opt for yogurt, promoting gut health.

    Depending on ingredient choices, you can even lower the calorie count further, making it suitable for various meal plans. Always tailor your ingredients based on dietary goals.

    FAQs: Frequently Asked Questions About I’m Obsessed! Making This Chicken Salad Non-Stop!

    1. Can I use leftover rotisserie chicken for this recipe?

    Absolutely! Using leftover rotisserie chicken is not only time-saving but also adds depth to the flavor.

    2. How long can the chicken salad be stored?

    It can last in the refrigerator for up to 3-4 days in an airtight container. Remember that freshness is key!

    3. Can I make this salad vegan?

    Definitely! Substitute chicken with chickpeas or cooked tofu and use a plant-based yogurt or blend of lemon juice and mustard.

    4. What other fruits work well in this chicken salad?

    You can try grapes, apples, or even peaches for a unique twist. It all depends on your taste preferences!

    5. Is there a way to make a low-fat version?

    Yes! You can replace Greek yogurt with low-fat or fat-free yogurt, or use a vinegar-based dressing instead of mayonnaise.

    6. How can I serve this salad?

    You can serve chicken salad in various ways—on a bed of greens, in sandwiches, as wraps, or even with whole-grain crackers for a delightful crunch.

    7. Can I add more vegetables?

    Certainly! Feel free to add whatever veggies you have on hand, such as cucumbers, shredded carrots, or even corn.

    I hope these FAQs provide clarity, should you have any further questions, feel free to consult more resources as needed!

    Embrace the versatility of chicken salad! Experiment, customize, and enjoy all the delightful options it offers. Now equipped with this knowledge, you’re ready to make your chicken salad obsession a reality!

  • Im Officially Addicted To This Chicken Salad Jar

    Im Officially Addicted To This Chicken Salad Jar

    I’m Officially Addicted To This Chicken Salad Jar!: A Tropical Delight

    Introduction to I’m Officially Addicted To This Chicken Salad Jar!

    If you’re on the lookout for fresh and easy chicken recipes, you’ll love this vibrant and flavorful chicken salad jar! This recipe stands out as not just another average dish; it’s a tropical delight bursting with flavors and nutrition. It’s packed with wholesome ingredients that make it perfect for anyone—whether you’re a busy parent, a health-conscious individual, or a food enthusiast searching for a light and satisfying meal.

    Imagine enjoying tender, juicy chunks of chicken tossed with colorful vegetables and a delicious dressing, all layered beautifully in a jar. This chicken salad goes beyond mere taste; it’s a powerhouse of nutrients that supports your healthy lifestyle. With its straightforward preparation, this recipe also ensures that time is on your side, allowing you to prep several jars at once for enjoyment throughout the week. Plus, it’s versatile enough to accommodate various dietary needs such as gluten-free, low-calorie, or even vegan options.

    The chicken salad jar can be a perfect choice for picnics, quick lunches, or even a light dinner. With its stunning presentation and irresistible taste, you might just find yourself officially addicted to this chicken salad jar! Let’s dive in and explore why this recipe is ideal for your table.

    Benefits and Advantages of I’m Officially Addicted To This Chicken Salad Jar!

    This chicken salad jar isn’t just a pretty meal; it’s a smart choice for numerous reasons. First and foremost, its simplicity ensures that you can whip it up in no time. Utilizing leftover chicken or rotisserie chicken makes it even easier, saving you precious time on busy days. Additionally, the recipe calls for fresh vegetables, which means you’re getting a healthy dose of vitamins and minerals in every bite.

    One of the standout benefits of this chicken salad is its ability to cater to diverse dietary preferences. The base can be easily adapted to include gluten-free grains, or even turned completely vegan by substituting chickpeas or tofu for chicken. This flexibility is key for those who are health-conscious or who have specific dietary restrictions.

    Moreover, this salad jar recipe lets you control portion sizes, making it easier to manage your caloric intake if you’re watching your diet. Whether you are looking to pack lunches for the week or need a tasty dish for gatherings, this chicken salad jar is your go-to recipe.

    Lastly, the combination of flavors in this salad hits the mark for both nostalgic comfort and adventurous eating. With tropical influences and a zesty dressing, eating healthy has never been this enjoyable. Given all these benefits, it’s easy to see why this chicken salad jar is not only a meal but a true culinary experience!

    Ingredients Overview

    Essential Ingredients for I’m Officially Addicted To This Chicken Salad Jar!

    To make this delicious chicken salad jar, you will need the following ingredients:

    • 2 cups cooked chicken (diced or shredded) – Provides lean protein.
    • 1 cup mixed greens (spinach, arugula, etc.) – Adds fiber and essential nutrients.
    • 1/2 cup cherry tomatoes (halved) – A source of antioxidants.
    • 1/2 cucumber (diced) – Delivers hydration and crunch.
    • 1/4 cup red onion (sliced) – Enhances flavor and offers anti-inflammatory properties.
    • 1/4 cup feta cheese (crumbled) – Adds creaminess and flavor (optional for vegan).
    • 1/4 cup chopped nuts (almonds or walnuts) – Introduces healthy fats and protein.
    • 1 avocado (diced) – High in healthy fats and aids in heart health.

    Dressing:
    1/4 cup olive oil – Provides essential fatty acids.
    2 tablespoons lemon juice – Freshens the flavor and is rich in vitamin C.
    1 teaspoon honey or agave – For a hint of sweetness (reduce for low-calorie).
    Salt and pepper to taste – Enhances overall flavor.

    Dietary Notes: To make this dish vegan, substitute chicken with chickpeas or tofu, use nutritional yeast in place of feta cheese, and select a plant-based dressing.

    Dietary Substitutions to Customize Your I’m Officially Addicted To This Chicken Salad Jar!

    The beauty of this chicken salad jar is its flexibility regarding ingredient substitutions. Here are some suggestions to cater to different dietary needs:

    • Protein Options: If you prefer not to use chicken, consider alternatives like shredded rotisserie turkey, chickpeas, lentils, or even diced tofu for a vegan option.
    • Vegetable Variations: Almost any vegetable can be added! Bell peppers, carrots, or kale can replace cucumber or lettuce for an added crunch.
    • Dairy-Free Choices: Replace feta cheese with avocado or a vegan cheese option to keep it dairy-free while still creamy.
    • Herbs and Spices: For additional flavor, add fresh herbs such as parsley, cilantro, or dill. You can also spice things up with cumin or paprika.

    By incorporating these substitutions, this chicken salad jar can suit almost any dietary lifestyle without sacrificing taste or nutrition!

    How to Prepare the Perfect I’m Officially Addicted To This Chicken Salad Jar!: Step-by-Step Guide

    Preparing an addictively delicious chicken salad jar is a breeze if you follow these easy steps:

    1. Prepare the Base: Start by gathering your cooked chicken, diced into bite-sized pieces. If using leftover chicken, ensure it’s shredded for easy mixing.

    2. Mix Ingredients: In a large mixing bowl, combine the mixed greens, cherry tomatoes, cucumber, red onion, and any additional vegetables. Toss them lightly to combine.

    3. Add Protein: Gently fold the diced chicken into the mixed vegetables, ensuring that every piece of chicken is enveloped with the delicious veggies for flavor.

    4. Incorporate Cheese and Nuts: If using cheese, sprinkle in crumbled feta and mix again. Add the chopped nuts for crunch, which will elevate the texture of your salad.

    5. Make the Dressing: In a small bowl, whisk together olive oil, lemon juice, honey, salt, and pepper until emulsified.

    6. Dress the Salad: Drizzle the prepared dressing over the chicken and vegetable mixture, tossing lightly to combine without bruising the greens.

    7. Layer in the Jar: If you are using jars, start by placing the dressing at the bottom, followed by the chicken and vegetable mixture. Add diced avocado on top to prevent browning.

    8. Seal and Store: Tightly seal the jars and refrigerate if they are not being consumed immediately. This salad will keep fresh for several days.

    9. Enjoy Anytime: When you’re ready to enjoy, shake the jar to distribute the dressing evenly. Serve immediately.

    Feel free to adapt the steps to suit your kitchen setup or ingredient availability. This chicken salad jar truly shines in its adaptability!

    Mastering I’m Officially Addicted To This Chicken Salad Jar!: Advanced Tips and Variations

    To make your chicken salad jar even more extraordinary, consider these advanced tips and exciting variations:

    • Use Grains: Add quinoa, brown rice, or farro to provide additional texture and fiber. This will turn your salad into a more filling meal option.

    • Spice it Up: Introduce heat by incorporating diced jalapeños or a drizzle of sriracha to your dressing. This can complement the creamy texture and provide a satisfying kick.

    • Herbed Dressing: For a refreshing twist, make a herbed dressing using Greek yogurt as a base. Add chopped fresh herbs like mint or dill for aromatic notes.

    • Savory Additions: Toss in olives, sun-dried tomatoes, or artichoke hearts for a Mediterranean flavor enhanced by umami.

    • Fruit Add-ins: Slices of mango, pineapple, or even diced apple can add a delightful sweetness and contrast to the savory elements in your salad.

    Experiment with these suggestions to personalize your chicken salad according to your palate! Every variation brings forth a new experience, ensuring you’ll never tire of this recipe.

    How to Store I’m Officially Addicted To This Chicken Salad Jar!: Best Practices

    Proper storage can prolong the life of your chicken salad jar and maintain its freshness. Here are the best practices to follow:

    • Refrigeration: If stored in airtight containers or jars, this salad can last up to 4 to 5 days in the fridge. Ensure to keep the dressing separate until you’re ready to eat to keep the greens from wilting.

    • Freezing: While freezing is not recommended due to the structure of vegetables like cucumbers and avocado changing upon thawing, you can freeze just the chickpeas or protein base for future use. Simply defrost when needed and mix fresh ingredients.

    • Reheating: If you prefer a warm chicken salad, transfer your ingredients to a microwave-safe dish and heat for 30-60 seconds. Just make sure to give it a good stir afterward to mix the warm and cold parts.

    Remember, minimizing air in your storage containers helps maintain freshness, so choose containers that fit the amount you have prepared!

    Nutritional Value of I’m Officially Addicted To This Chicken Salad Jar!

    Understanding the nutritional value of your meals can help in meal planning and maintaining a balanced diet. Here’s a breakdown of the estimated nutritional contents per serving of this chicken salad jar:

    • Calories: Approximately 350-450 calories (depending on ingredients used).
    • Protein: 30-35 grams (from chicken and legumes).
    • Fat: 20-25 grams (due to olive oil, nuts, and avocado).
    • Carbohydrates: 15-20 grams (mainly from vegetables and optional grains).
    • Fiber: 6-8 grams (from greens and vegetables).

    Micronutrients:

    • Vitamin A: Known for its benefits to eye health, this salad is packed with leafy greens.
    • Vitamin C: Present in abundance in cherry tomatoes and lemon juice, which help boost your immune system.
    • Iron: Sourced from chicken, nuts, and greens.

    This nutrient profile makes this chicken salad jar not only delicious but also supports various health goals, including weight management and enhanced energy levels!

    FAQs: Frequently Asked Questions About I’m Officially Addicted To This Chicken Salad Jar!

    What can I substitute for chicken?

    You can replace chicken with chickpeas, tofu, or shredded turkey to cater to different dietary preferences.

    How long does this salad last in the fridge?

    When stored in an airtight container, the chicken salad jar can last for up to 4 to 5 days. Just remember to keep your dressing separate to maintain the crispness of the vegetables.

    Can I make this salad jar ahead of time?

    Absolutely! You can batch prepare these salad jars for meal prep, making it easy to have a ready-to-eat meal throughout the week.

    Can I freeze my chicken salad jar?

    While freezing isn’t recommended due to the risk of soggy vegetables, you can freeze the cooked chicken and add fresh ingredients when you are ready to eat.

    What dressing works best for this salad?

    A lemon-olive oil vinaigrette is the most popular choice, but feel free to experiment with different dressings like yogurt-based or creamy options!

    By addressing these frequently asked questions, you’ll be well-equipped to enjoy this chicken salad jar to its fullest! Whether you’re looking for a quick meal, a healthy lunch, or a tasty dinner, this jar will surely become a staple in your recipe collection.


    By following this guide to “I’m Officially Addicted To This Chicken Salad Jar!”, you can transform your meals into something exciting, nutritious, and remarkably easy to prepare. Happy cooking!

  • Tasty Deviled Eggs With Cottage Cheese

    Tasty Deviled Eggs With Cottage Cheese

    Tasty Deviled Eggs With Cottage Cheese: A Tropical Delight

    Introduction to Tasty Deviled Eggs With Cottage Cheese

    If you are on the lookout for unique appetizer recipes that are both nutritious and flavorful, you’ve landed in the right place. Tasty deviled eggs with cottage cheese offer a delightful twist to a classic recipe that everyone loves. These deviled eggs are not only simple to prepare but also packed with protein and essential nutrients, making them an ideal choice for busy parents, health-conscious individuals, and food enthusiasts alike.

    What makes this dish stand out is its creaminess derived from cottage cheese, which adds a rich texture without being overwhelming. Additionally, this recipe can easily fit into various dietary needs. It’s gluten-free, and the ingredients can be adjusted to accommodate vegan diets, depending on your preferences. Whether you want to whip up a batch for a party, a family gathering, or just as a quick snack, these deviled eggs are your go-to option.

    In the coming sections, we will dive deeper into the benefits of this delightful recipe, the ingredients needed, and easy-to-follow instructions to help you master the art of making delicious deviled eggs with cottage cheese. Get ready to be inspired as we explore the world of tasty appetizers that not only satisfy your taste buds but also nourish your body.

    Benefits and Advantages of Tasty Deviled Eggs With Cottage Cheese

    Creating tasty appetizers isn’t just about flavor; it’s also about ease and health. Tasty deviled eggs with cottage cheese check all the boxes. This recipe is incredibly user-friendly, making it suitable for cooks of every skill level. From swamped working professionals to culinary novices, anyone can whip up this dish with minimal hassle.

    Health Benefits: One of the largest advantages of using cottage cheese is its high protein content, which can help fuel your day. Compared to traditional recipes that might use mayonnaise, swapping in cottage cheese significantly reduces unhealthy fat while boosting the nutritional profile of each bite. For those seeking a low-calorie option or anyone watching their waistline, this deviled egg variation becomes a guilt-free indulgence.

    Versatility: Tasty deviled eggs with cottage cheese can easily adapt to various dietary requirements. They can be made vegan by replacing traditional egg yolks with pureed tofu, and they remain gluten-free, ensuring that everyone can enjoy this dish without concern. Furthermore, with a variety of flavorful additives, from spices to fresh herbs, you can tailor the taste to your liking.

    Perfect for All Occasions: Whether it’s a potluck, a picnic, or a fancy brunch, these deviled eggs can shine at any gathering. They are compact and easy to transport, making them an ideal choice when you need an appetizer that travels well. Impress your guests with your creativity, while providing them with a dish that is wholesome and delectable.

    In short, this recipe exemplifies the joy of cooking—bringing people together with food that is not only easy to make but also gratifying to eat. So why not elevate your appetizer recipes game with this tasty offering?

    Ingredients Overview

    Essential Ingredients for Tasty Deviled Eggs With Cottage Cheese

    To prepare your own batch of tasty deviled eggs with cottage cheese, gather the following ingredients:

    • 6 large eggs: The star of the dish; eggs provide protein and essential nutrients.
    • ½ cup cottage cheese: Adds creaminess while being low in calories. Opt for low-fat cottage cheese for a healthier option.
    • 1 tablespoon Dijon mustard: Enhances flavor and provides a subtle kick.
    • 1 tablespoon olive oil or avocado oil: For creaminess and healthy fats.
    • 1 teaspoon apple cider vinegar or lemon juice: Adds brightness and balances flavors.
    • Salt and black pepper, to taste: Essential for seasoning.
    • Paprika, for garnish: Provides that classic finishing touch and adds visual appeal.
    • Fresh herbs (chives, dill, or parsley): Optional, but these add freshness and can enhance the flavor profile.

    Keep in mind, each ingredient contributes to the overall consistency and taste of the deviled eggs. If you’re after a more vibrant version, feel free to mix in finely chopped veggies for an added crunch.

    Dietary Substitutions to Customize Your Tasty Deviled Eggs With Cottage Cheese

    Adapting this recipe for dietary preferences is straightforward. Here are some suggested substitutions:

    • Gluten-Free Option: This recipe is naturally gluten-free as all ingredients listed are gluten-free. Ensure any additional spices or garnishes are also confirmed gluten-free.
    • Vegan Version: Replace eggs with silken tofu or chickpea flour mixed with water for a vegan egg substitute. Blend with cottage cheese to retain a creamy texture.
    • Low-Calorie Option: Use non-fat cottage cheese and skip the oil. Replace it with a bit of water or vegetable broth for moisture.
    • Dairy-Free: Incorporate almond, soy, or cashew-based creamy spreads instead of cottage cheese while ensuring the substitute has a similar consistency.
    • Nut-Free Option: This recipe is already nut-free; however, ensure that any garnishes used do not contain nuts if you’re catering to allergies.

    Customization makes your tasty deviled eggs with cottage cheese not just a meal but a reflection of various dietary lifestyles, ensuring no one is left out from enjoying this delectable appetizer.

    How to Prepare the Perfect Tasty Deviled Eggs With Cottage Cheese: Step-by-Step Guide

    Creating tasty deviled eggs with cottage cheese is simple and rewarding. Just follow these steps to ensure that your appetizer triumphs!

    1. Boil the Eggs: Begin by placing the eggs in a saucepan. Cover them with water, ensuring there are at least an inch of water above the eggs. Bring to a boil over medium heat. Once boiling, cover and remove from heat. Allow the eggs to sit for 12-15 minutes.

    2. Cool The Eggs: After the time is up, transfer the eggs to a bowl of ice-cold water. Let them sit for at least 5 minutes to cool down and make peeling easier.

    3. Peel The Eggs: Gently tap the eggs on a hard surface, then roll them to loosen the shell. Carefully peel, starting at the wider end where the air pocket is usually located.

    4. Prepare the Filling: Slice each egg in half lengthwise and carefully remove the yolks. Place the yolks in a mixing bowl and add the cottage cheese, Dijon mustard, olive oil, apple cider vinegar or lemon juice, salt, and pepper.

    5. Mix Ingredients: Use a fork or whisk to blend the mixture until smooth. If you prefer a chunkier version, mash the cottage cheese slightly before blending to leave some small lumps.

    6. Fill the Egg Whites: Spoon or pipe the filling back into the egg white halves. For piping, use a zip-top bag with a corner snipped off.

    7. Garnish and Serve: Sprinkle paprika on top for a hint of flavor and a pop of color. Add freshly chopped herbs if desired.

    8. Chill If Desired: For enhanced flavor, let the eggs chill in the refrigerator for at least 30 minutes before serving. This also makes them easier to handle if you are preparing for a gathering.

    9. Arrange and Enjoy: Serve your tasty deviled eggs on a serving platter. Enjoy with family, friends, or save some for yourself; these are sure to become a staple.

    This straightforward, step-by-step guide allows anyone to create delicious appetizer recipes without frustration. The flexibility also lets you substitute ingredients to suit dietary needs.

    Mastering Tasty Deviled Eggs With Cottage Cheese: Advanced Tips and Variations

    Once you have mastered the basic recipe, it’s time to elevate your deviled eggs with a few advanced tips and exciting variations:

    • Flavor Infusion: Add spices such as garlic powder, cayenne pepper, or even a dash of sriracha to kick up the heat. This allows you to personalize your deviled eggs according to your preferred spice levels.

    • Unique Additions: Consider adding finely diced bell peppers or jalapeños to the filling for extra texture and taste. Avocado is another great addition that pairs wonderfully with cottage cheese, enhancing the creaminess while providing healthy fats.

    • Different Herbs: While traditional garnishing with paprika is delightful, you can switch it up by using smoked paprika, which imparts a more robust flavor. Fresh cilantro or basil also makes for an aromatic alternative.

    • Swapping Protein: For those interested in working with other protein sources, you could use Greek yogurt in place of cottage cheese for a refreshing twist while maintaining a creamy texture.

    • Presentation: If you’re serving these deviled eggs at a party, use a deviled egg tray for an attractive display. Alternatively, try serving them on a bed of leafy greens or with a selection of your favorite crackers.

    These tips and variations make your tasty deviled eggs with cottage cheese stand out as a truly unique appetizer option at any gathering. Keeping things interesting is part of the fun of cooking, after all!

    How to Store Tasty Deviled Eggs With Cottage Cheese: Best Practices

    When it comes to appetizer recipes, serving them fresh is ideal, but sometimes you’ll need to make them in advance. Here are the best practices for storing your tasty deviled eggs with cottage cheese:

    • Refrigeration: Store your deviled eggs in an airtight container in the refrigerator. They are best consumed within 3 to 4 days. To retain the creamy texture, avoid covering them tightly with plastic wrap; instead, use parchment paper over the top of the container.

    • Freezing: Freezing deviled eggs is not recommended, as the texture of the eggs alters once thawed. The filling may separate, leading to a less appetizing dish. Instead, prepare the filling without egg whites and freeze that mixture. Then, you can quickly assemble the deviled eggs when needed.

    • Reheating: If you must reheat the deviled eggs, do so gently in a microwave just until warm—but be careful not to overheat them, as this can lead to undesirable texture changes.

    By following these storage tips, you can ensure your tasty deviled eggs with cottage cheese stay fresh and enjoyable for any occasion.

    Nutritional Value of Tasty Deviled Eggs With Cottage Cheese

    Understanding the nutritional value of what you eat contributes significantly to making health-conscious decisions. Here’s a breakdown of the nutritional value per serving (2 halves):

    • Calories: Approximately 130-150 calories
    • Protein: About 10-12 grams
    • Fat: 5-7 grams (depending on the cottage cheese and oil used)
    • Carbohydrates: Roughly 2-3 grams
    • Fiber: 0 grams (as eggs are low in fiber)
    • Cholesterol: Approximately 165 mg

    Including cottage cheese enhances the protein content while keeping calories in check, making it an excellent choice for high-protein diets. Moreover, eggs are an excellent source of B vitamins, selenium, and other essential nutrients. This combination offers a balanced option for anyone looking to enjoy proteins while keeping fats and carbs minimal.

    When exploring appetizer recipes, it’s crucial to consider the nutritional aspects. Tasty deviled eggs with cottage cheese not just taste great; they also nourish your body effectively!

    FAQs: Frequently Asked Questions About Tasty Deviled Eggs With Cottage Cheese

    1. Can I make deviled eggs ahead of time?

    Yes! Tasty deviled eggs can be prepared a day in advance. Store them in an airtight container in the refrigerator for the best quality.

    2. What can I substitute for cottage cheese?

    If you prefer a different flavor profile, you can replace cottage cheese with Greek yogurt, silken tofu for a vegan option, or even cream cheese for a richer texture.

    3. Are deviled eggs gluten-free?

    Yes, this recipe is naturally gluten-free. Ensure any additional ingredients you include do not contain gluten.

    4. Can I add different flavors or spices?

    Absolutely! Feel free to experiment with various spices and herbs, including smoked paprika, dill, or even a touch of hot sauce for added zing.

    5. How many eggs should I make for a party?

    It depends on the number of guests and their appetite. A general guideline is 2 halved eggs per person, so calculate your total based on your guest list.

    6. How long do deviled eggs last in the fridge?

    Deviled eggs can last well in the refrigerator for 3 to 4 days. However, they are best enjoyed fresh.

    These frequently asked questions help demystify some common concerns around deviled eggs with cottage cheese and provide further insight for those curious about this crowd-pleasing dish.


    With the simple, nutritious, and delicious nature of these tasty deviled eggs with cottage cheese, you’re set to have a new favorite appetizer. Whether you share them at a gathering or savor them as a personal treat, they promise to delight your palate. So gather your ingredients, follow the steps, and relish every bite of these flavorful little bites! Enjoy experimenting with variations, and keep this recipe in your collection of go-to appetizer recipes for memorable occasions. Happy cooking!