Blog

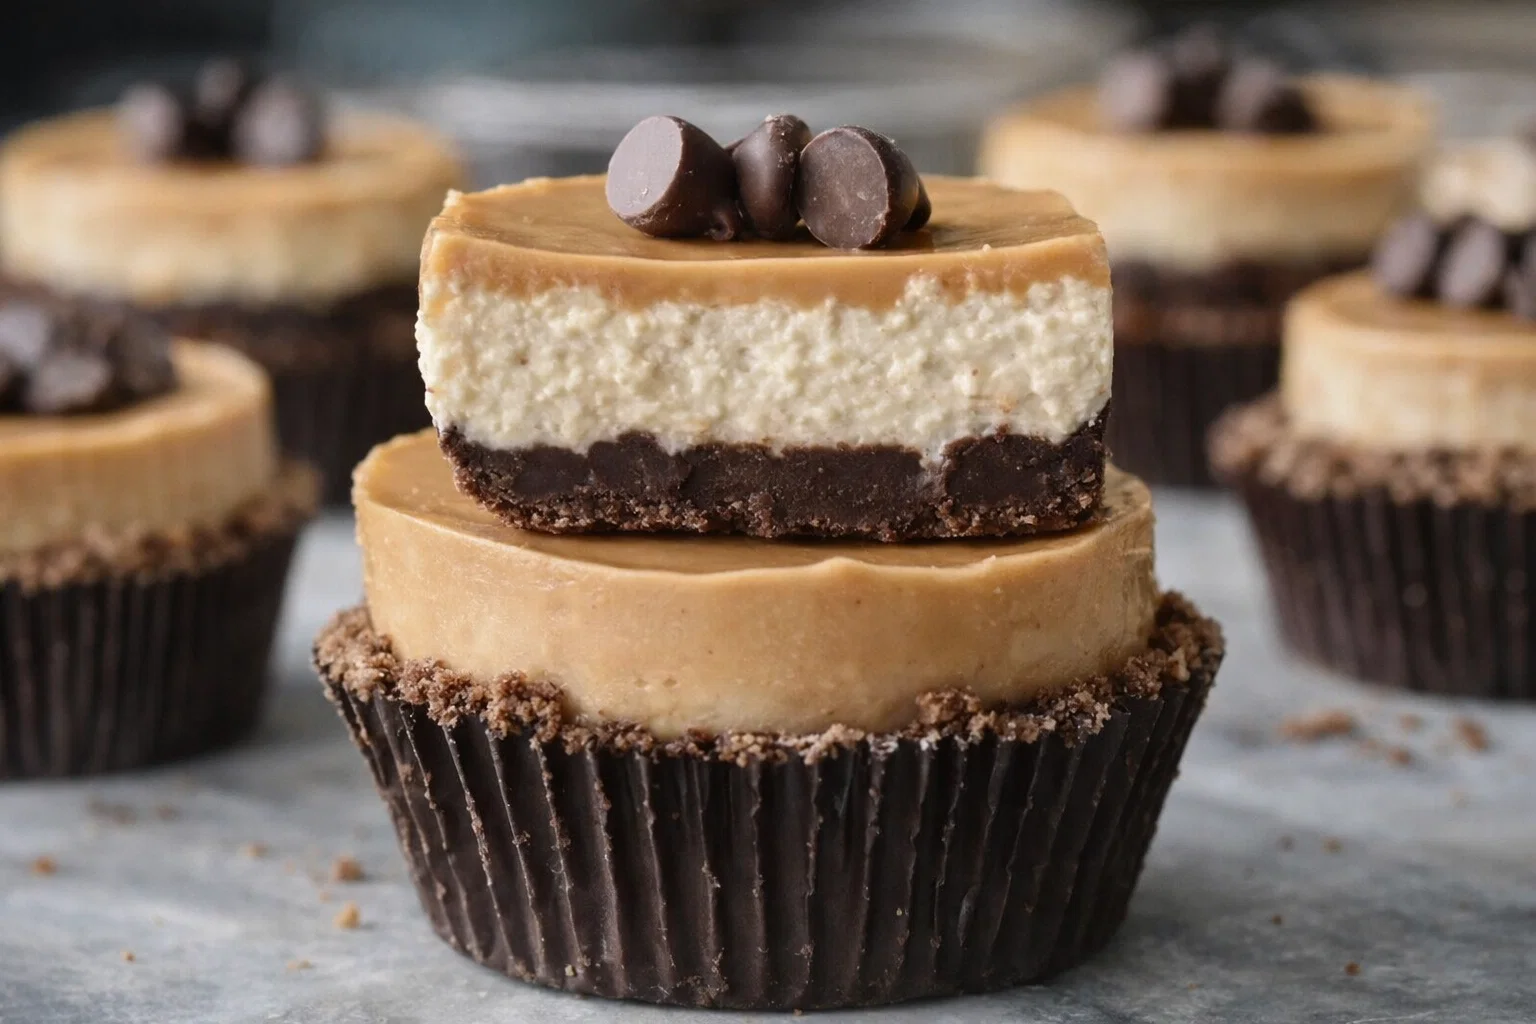
  • Easy No Bake Peanut Butter Cheesecake Cups

    Easy No Bake Peanut Butter Cheesecake Cups

    Easy No Bake Peanut Butter Cheesecake Cups: A Tropical Delight

    Introduction to Easy No Bake Peanut Butter Cheesecake Cups

    If you’re on the lookout for delicious dessert recipes that require minimal effort and time, then you’re in for a treat with these Easy No Bake Peanut Butter Cheesecake Cups. These delightful little cups combine the rich, creamy goodness of cheesecake with the unmistakable flavor of peanut butter—all without turning on your oven.

    What makes these cheesecake cups particularly enticing is their versatility. Whether you’re a busy parent trying to whip up something sweet for a family gathering, a student needing a quick treat, or just someone who loves to indulge in a little dessert, these cups fit the bill perfectly. They are simple to prepare, healthier than traditional desserts (especially if you make a few substitutions), and they accommodate various dietary needs, including vegan options and gluten-free choices.

    Moreover, these cheesecake cups are not only a feast for the palate but also a visual treat. Arranged beautifully in individual cups, they make an impressive addition to any gathering or celebration. So, gather your ingredients, and let’s dive into creating these no-bake sensations that are sure to become a staple in your repertoire of dessert recipes.

    Benefits and Advantages of Easy No Bake Peanut Butter Cheesecake Cups

    The Easy No Bake Peanut Butter Cheesecake Cups stand out in a world filled with complicated dessert recipes. Here are several reasons why this delightful treat is easy to love:

    1. Hassle-Free Preparation: One of the major advantages of this recipe is that it requires no baking. Unlike traditional cheesecakes that often require hours in the oven, these cups can be assembled in just a matter of minutes. This makes them ideal for those who may not have extensive baking experience or time to spare.

    2. Health Benefits: Besides being delicious, peanut butter has several health benefits, including being a great source of protein, healthy fats, and essential vitamins. By incorporating it into this cheesecake recipe, you’re not just satisfying your sweet tooth; you’re also nourishing your body.

    3. Dietary Versatility: Whether you’re aiming to lower your sugar intake, following a gluten-free diet, or adhering to a vegan lifestyle, these cheesecake cups can be adapted to meet your needs. Ingredients can be swapped seamlessly to create versions that taste fantastic while keeping your dietary preferences in mind.

    4. Customizable Flavors: The beauty of these peanut butter cheesecake cups lies not only in their flavor profile but also in their potential for customization. You can easily experiment with different types of nut butters, toppings, or crusts, ensuring there’s a version for everyone’s taste.

    5. Perfect Portion Control: These dessert cups are served in individual portions, making it easier to manage serving sizes. This is particularly beneficial for those watching their calorie intake or looking to indulge without overdoing it.

    Overall, the Easy No Bake Peanut Butter Cheesecake Cups are a foolproof way to satisfy your cravings while enjoying all the benefits of a wholesome dessert that can be made in a snap.

    Ingredients Overview

    Essential Ingredients for Easy No Bake Peanut Butter Cheesecake Cups

    To bring these fantastic cheesecake cups to life, gather the following ingredients:

    • 1 cup of graham cracker crumbs: This forms the base of your cups. You can substitute with gluten-free graham crackers if necessary.
    • 1/4 cup of butter, melted: This binds the crumbs together; coconut oil can be used as a vegan substitute.
    • 8 oz cream cheese, softened: The base of your cheesecake filling; for a dairy-free option, look for vegan cream cheese.
    • 1/2 cup of creamy peanut butter: Adds richness and flavor. You can use almond butter for a milder taste.
    • 1 cup of powdered sugar: Sweetens the filling. For a low-calorie version, consider using a sugar substitute like erythritol.
    • 1 tsp of vanilla extract: Enhances the overall flavor.
    • 1/2 cup whipped topping or whipped coconut cream (optional): For an airy consistency. You can skip this for a denser filling.

    Dietary Substitutions to Customize Your Easy No Bake Peanut Butter Cheesecake Cups

    The great thing about this recipe is its flexibility! Here are some dietary substitutions to cater to various needs:

    • Gluten-Free Option: Replace traditional graham crackers with gluten-free versions or even crushed nuts to create a nutty base.
    • Vegan Option: Use vegan cream cheese and coconut oil instead of butter. Whipped coconut cream replaces the whipped topping beautifully.
    • Low-Calorie/Sugar-Free Option: Utilize sugar substitutes such as stevia or monk fruit in place of powdered sugar, and choose low-calorie whipped topping brands if desired.
    • Nut-Free Version: Replace peanut butter with sunflower seed butter for a nut-free alternative; just be mindful of allergies if serving to groups.

    How to Prepare the Perfect Easy No Bake Peanut Butter Cheesecake Cups: Step-by-Step Guide

    Creating these Easy No Bake Peanut Butter Cheesecake Cups is a delightful process that allows you to unleash your inner chef while enjoying the fruits of your labor quickly. Follow these straightforward steps:

    1. Prepare the Base: In a mixing bowl, combine 1 cup of graham cracker crumbs and 1/4 cup of melted butter. Mix well until the crumbs are fully coated. This will create a smooth, pale-colored mixture that holds together when pressed.

    2. Press the Mixture: Take this crumb mixture and divide it evenly among serving cups (you can use small glass jars or muffin liners). Using your fingers or the back of a spoon, firmly press the mixture down to create a compact base.

    3. Make the Filling: In a separate bowl, beat 8 oz of softened cream cheese until smooth. Add 1/2 cup of creamy peanut butter and continue to mix until fully combined. Add 1 cup of powdered sugar and 1 tsp of vanilla extract, beating until the mixture is creamy and fluffy.

    4. Fold in Whipped Topping: If you’re using whipped topping or whipped coconut cream, gently fold it into the peanut butter and cream cheese mixture. This will lighten the texture, making it a delightful contrast to the base.

    5. Fill the Cups: Spoon the peanut butter cheesecake mixture into each cup on top of the graham cracker crust. Use a spatula or the back of the spoon to smooth out the tops.

    6. Chill the Cups: Cover the cups with plastic wrap or a lid and refrigerate for at least 2 hours, or until the filling has set. This cooling time is crucial for achieving the right texture!

    7. Add Toppings (Optional): Before serving, feel free to add your favorite toppings. This could include a drizzle of chocolate syrup, crushed peanuts, or a dollop of whipped cream for extra flair.

    8. Serve and Enjoy: Once chilled, serve your Easy No Bake Peanut Butter Cheesecake Cups straight from the fridge. Enjoy each creamy bite!

    This step-by-step guide aims to simplify your cooking process, making it an enjoyable experience for cooks of any skill level. You can easily modify the steps according to your dietary preferences, ensuring anyone can enjoy these delectable dessert recipes.

    Mastering Easy No Bake Peanut Butter Cheesecake Cups: Advanced Tips and Variations

    To elevate your cheesecake cups further, consider these advanced tips and exciting variations that will make your dessert stand out even more:

    • Flavor Boosters: For a touch of uniqueness, consider adding spices such as cinnamon or nutmeg to the filling for a warm, aromatic flavor. You can also include a pinch of sea salt to enhance the sweetness of the peanut butter.

    • Mix in Crunch: If you enjoy textures, adding a handful of crushed nuts or chocolate chips into the peanut butter layer can provide satisfying crunch with every spoonful.

    • Layering Flavors: Try creating a layered effect by alternating the peanut butter filling with chocolate ganache or fruit purees within the cup, providing a delightful visual presentation as well as a flavor explosion.

    • Presentation Ideas: Serve these cheesecake cups in mason jars or clear plastic cups for a delightful visual appeal. Add a decorative ribbon or label for special occasions like birthdays or potlucks.

    • Themed Variations: Create themed desserts by adding flavors like chocolate, caramel, or even coffee for a mocha-inspired cheesecake cup. The options are endless and can easily be customized based on your mood or the season.

    By employing these tips and variations, you’ll not only master the original recipe but also create multiple dessert options that can cater to various tastes and preferences, elevating the humble cheesecake to gourmet status.

    How to Store Easy No Bake Peanut Butter Cheesecake Cups: Best Practices

    Storing your Easy No Bake Peanut Butter Cheesecake Cups properly ensures they remain fresh and enjoyable:

    • Refrigeration: Keep the cups in the refrigerator if you plan to consume them within a few days. They should last up to 5-7 days when covered tightly with plastic wrap or stored in airtight containers.

    • Freezing: For longer storage, these cheesecake cups can be frozen. Simply cover them thoroughly with plastic wrap or transfer them to airtight freezer-safe containers. They can last in the freezer for up to 2 months. When you’re ready to eat, thaw the cups in the refrigerator overnight before enjoying.

    • Reheating: Typically, no reheating is necessary for no-bake desserts. If you’d like the filling to be a bit softer, allow the cups to sit at room temperature for about 15-20 minutes before serving.

    By implementing these storage best practices, you’ll optimize the longevity of your delectable cheesecakes while retaining their delightful flavors and textures.

    Nutritional Value of Easy No Bake Peanut Butter Cheesecake Cups

    Understanding the nutritional value of each portion is essential for those mindful of their dietary intake. Here’s a rough estimate for each cup of Easy No Bake Peanut Butter Cheesecake Cups based on the standard recipe:

    • Calories: 250-300 calories per cup
    • Total Fat: 18g
    • Saturated Fat: 8g
    • Cholesterol: 30mg
    • Sodium: 150mg
    • Total Carbohydrates: 25g
    • Dietary Fiber: 1g
    • Sugars: 12g
    • Protein: 4g

    Note that these values can vary greatly depending on the specific ingredients chosen, especially when substitutions are involved (e.g., using low-calorie sweeteners or fat alternatives). Always check the labels and adjust the recipe to meet your nutritional goals.

    By understanding the nutritional aspect of your dessert recipes, you can enjoy these delicious cheesecake cups without compromising your health objectives.

    FAQs: Frequently Asked Questions About Easy No Bake Peanut Butter Cheesecake Cups

    1. Can I use crunchy peanut butter instead of creamy?
      Yes, using crunchy peanut butter will add a delightful texture to your cheesecake cups; just ensure the peanut butter is well mixed for even consistency.

    2. How do I know when the filling is set?
      The filling should be firm to the touch. If it holds its shape when you press lightly, it’s ready to enjoy. It typically takes around 2-4 hours in the refrigerator.

    3. Can I make these cheesecake cups ahead of time?
      Absolutely! These cups are perfect for making a day or two in advance, allowing the flavors to meld together beautifully.

    4. Is there a vegan alternative for cream cheese?
      Yes, there are several delicious vegan cream cheese brands available. Look for options made from cashews or tofu for a creamy texture.

    5. Can I add fruits on top?
      Certainly! Fresh fruits like strawberries, banana slices, or blueberries make excellent toppings and enhance the flavor profile of your cheesecake cups.

    6. What can I use instead of graham cracker crumbs for a gluten-free version?
      Seek gluten-free cracker options or try almond flour mixed with melted coconut oil for a tasty alternative crust.

    By addressing common questions, you can encourage your readers to feel confident in making these Easy No Bake Peanut Butter Cheesecake Cups, ensuring everyone can create and savor this delicious, versatile dessert recipe.

    In conclusion, these Easy No Bake Peanut Butter Cheesecake Cups are not only a delightful treat but also a boon for anyone looking for a simple yet satisfying dessert experience. Whip some up today, and share the joy with friends and family!
  • This Easter Bread Recipe Will Change Your Life

    This Easter Bread Recipe Will Change Your Life

    This Easter Bread Recipe Will Change Your Life!: A Tropical Delight

    Introduction to This Easter Bread Recipe Will Change Your Life!

    Spring is the season of renewal, a time to gather with loved ones and celebrate the delightful flavors of the season. There’s something truly magical about Easter, filled with joy, family gatherings, and, of course, scrumptious meals. This Easter bread recipe will change your life as it embodies the essence of spring meals while being incredibly simple and versatile.

    Imagine a fluffy, sweet bread that is not only visually stunning, adorned with colorful sprinkles or dried fruit, but also healthy and delicious. Whether you’re vegan, gluten-free, or simply looking for a lighter option, this recipe caters to all dietary needs without compromising flavor.

    Many home cooks often shy away from making bread at home due to the perceived complexity. However, this recipe invites everyone to rise to the occasion! You don’t need to be a baking pro; just a few essential ingredients and simple steps will transform your kitchen into a delightful bakery. This Easter bread is perfect for busy parents wanting a delightful treat for their kids, students looking for a quick and nutritious recipe to impress housemates or anyone seeking a unique addition to their festive table.

    This Easter bread can be served as a standalone treat or enjoyed with jams and spreads, perfect for brunch or as an after-dinner delight. Join us on this culinary journey and discover a loaf that will become a staple in your spring meals repertoire!

    Benefits and Advantages of This Easter Bread Recipe Will Change Your Life!

    The benefits of this Easter bread recipe are plentiful, and they’re designed not just to please the palate but to fit seamlessly into your lifestyle. One of the standout attributes of this recipe is its ease of preparation. You only need a handful of ingredients and about an hour of your time to create something utterly satisfying.

    Here are some remarkable advantages of creating this sweet bread:

    1. Health-conscious Options

    You can make this bread throughout the spring season with a focus on health. Ingredients like almond milk and whole wheat flour can replace traditional options, creating a lighter weight yet fulfilling dish. This recipe is flexible enough to accommodate those pursuing gluten-free or plant-based diets.

    2. Ease and Convenience

    For those busy parents or working professionals, whipping up fresh bread may seem daunting. This recipe simplifies the process with quick prep time and minimal cleanup. The bread can be prepared in bulk, allowing you to bake once and enjoy multiple meals.

    3. Versatility

    This Easter bread suits various occasions. Whether you’re celebrating Easter brunch, family gatherings, or a simple spring picnic, this dish fits effortlessly into all settings. You can customize the flavor with spices like cinnamon or nutmeg or add nuts and dried fruits based on what you have at hand.

    4. Family-Friendly

    Kids love sweets, and this Easter bread is sweet enough to satisfy their cravings while being wholesome enough for parents to feel good about serving it. Baking this bread with your family can also provide a wonderful opportunity to bond, creating memories that will last a lifetime.

    5. Customize for Dietary Needs

    You can swap out ingredients based on dietary restrictions or personal preferences. The possibility of creating a low-calorie version will make this bread a favorite among diet-conscious individuals.

    In conclusion, this Easter bread recipe is not only a treat for the taste buds but also a versatile addition to spring meals that anyone can enjoy.

    Ingredients Overview

    Essential Ingredients for This Easter Bread Recipe Will Change Your Life!

    To embark on this culinary journey, gather the following ingredients:

    • 3 1/2 cups all-purpose flour: The base of our bread; you can also use gluten-free flour for a gluten-free version.
    • 1 cup almond milk (or any plant-based milk): Provides moisture without the calories of dairy.
    • 1/2 cup coconut sugar (or brown sugar): A healthier sweetener that also adds a rich flavor.
    • 1/4 cup unsweetened apple sauce: Acts as a natural sweetener and substitution for eggs in a vegan recipe.
    • 2 1/4 teaspoons instant yeast: Gives your bread the perfect airy texture.
    • 1/2 teaspoon salt: Enhances the flavors.
    • 1 teaspoon vanilla extract: Infuses the dough with a rich aroma and taste.
    • 1/4 cup dried fruits or nuts (optional): Provides additional flavor and texture; consider using raisins, cranberries, or walnuts.
    • Sprinkles or edible flowers for topping: A colorful finishing touch that makes for a festive appearance.

    These ingredients not only work harmoniously together but also cater to various dietary needs. The almond milk makes it lactose-free, while the coconut sugar can accommodate vegan diets. You can enhance the nutritional profile even more by incorporating chia seeds or flaxseeds.

    Dietary Substitutions to Customize Your This Easter Bread Recipe Will Change Your Life!

    Here are some substitutions you can consider, allowing you to customize the Easter bread according to your needs:

    • Flour Substitutes:
    • For a gluten-free option, substitute all-purpose flour with a gluten-free blend or almond flour.
    • For a lower-carb version, you can experiment with coconut flour, but note that this may alter the moisture and texture.

    • Sweeteners:

    • For a sugar-free alternative, use a sugar substitute like erythritol or stevia.
    • Replace coconut sugar with maple syrup; reduce the liquid in the recipe by a few tablespoons.

    • Milk Alternatives:

    • If almond milk isn’t available, feel free to use oat milk, soy milk, or any nut milk of your choice.

    • Substituting Apple Sauce:

    • If you’re not a fan of apple-flavored bread, consider using mashed bananas or plain yogurt for similar moisture and a hint of flavor.

    By taking these suggestions into account, you can easily adapt this recipe to meet your dietary preferences or ingredient availability. Creating a personalized version encourages creativity and gives a unique touch with every bake!

    How to Prepare the Perfect This Easter Bread Recipe Will Change Your Life!: Step-by-Step Guide

    Creating this delightful Easter bread may sound labor-intensive, but I assure you it’s incredibly simple and rewarding. Follow this step-by-step guide to ensure your baking experience is seamless.

    1. Prepare the Base: In a mixing bowl, combine 3 1/2 cups of all-purpose flour and 1/2 teaspoon of salt. Whisk together to blend evenly.

    2. Activate Yeast: In a small saucepan, warm 1 cup of almond milk until lukewarm (not boiling). Remove from heat and stir in 2 1/4 teaspoons of instant yeast and 1/4 cup of coconut sugar. Let it sit for about 5 minutes until it becomes frothy.

    3. Mix Ingredients: In a larger bowl, add 1/4 cup of unsweetened apple sauce and 1 teaspoon of vanilla extract. Pour the yeast mixture into this bowl and whisk together. Gradually add the flour mixture, stirring until it forms a dough.

    4. Knead the Dough: Once the dough begins to pull away from the sides of the bowl, transfer it to a floured surface. Knead the dough for about 5-7 minutes until it becomes smooth and elastic.

    5. First Rise: Place the kneaded dough in a greased bowl, cover it with a damp cloth, and let it rise in a warm location for about 1 hour, or until it doubles in size.

    6. Add Optional Ingredients: After the first rise, gently punch down the dough. If you’re adding dried fruits or nuts, fold them into the dough during this stage.

    7. Shape the Dough: On a floured surface, divide the dough into two equal pieces. Shape each piece into a loaf or braided design, and place it in a greased baking pan.

    8. Second Rise: Cover the shaped loaves again and allow them to rise for another 30-45 minutes until puffy. Preheat your oven to 350°F (175°C) during this time.

    9. Prepare for Baking: Once the bread is ready, brush the tops with a little almond milk for a golden finish. If you have sprinkles or edible flowers, sprinkle them on top.

    10. Bake: Place the bread in the oven and bake for 25-30 minutes or until the loaves are golden brown, and the bread sounds hollow when tapped.

    11. Cool and Serve: Remove from the oven and allow the loaves to cool in the pan for 10 minutes before transferring them to a wire rack to cool completely. Slice and serve warm or at room temperature.

    Tips for Dietary Adaptation:

    • For a gluten-free option, ensure you use a certified gluten-free flour blend.
    • To add more flavor to gluten-free dough, enrich it with spices or zest.
    • For vegan options, ensure all toppings and add-ins comply with vegan dietary preferences.

    Creating this Easter bread at home can serve as an inspiration to experiment with seasonal flavors in future spring meals!

    Mastering This Easter Bread Recipe Will Change Your Life!: Advanced Tips and Variations

    To take your Easter bread to the next level, consider the following advanced tips and delicious variations:

    • Flavor Infusions: Enhance the taste by infusing your dough with spices like cinnamon, cardamom, or orange zest. These additional flavors will make the bread even more tantalizing.

    • Filling Options: Get creative by incorporating fillings such as cream cheese or nut butter mixed with honey before baking. This will create a delightful surprise within the bread.

    • Glazing the Loaves: After baking, give your loaves a delicious glaze made from a mixture of powdered sugar and lemon juice. Simply drizzle over the top for added sweetness that complements the bread perfectly.

    • Bread Cupecakes: Instead of baking in a loaf pan, consider spooning the dough into muffin tins for fluffy bread cupcakes. Top these with sprinkles for a festive treat!

    • Frozen Options: If you find you have extra bread, slice it and freeze individual pieces. When you’re in the mood for a quick spring meal, simply pop it in the toaster for a fresh treat.

    • Topping Ideas: Consider a light dusting of powdered sugar or a sprinkle of coconut flakes to elevate the festive presentation.

    These variations will not only customize the bread to your taste preferences but will also impress family and friends. Remember that baking is all about creativity and enjoying the process.

    How to Store This Easter Bread Recipe Will Change Your Life!: Best Practices

    Proper storage ensures that your Easter bread remains fresh and delicious for days to come. Here’s how to do it:

    For Short-Term Storage:

    • Room Temperature: Allow the bread to cool completely before wrapping it tightly in plastic wrap or aluminum foil. Store it in a cool, dry place for up to 2-3 days.

    For Long-Term Storage:

    • Refrigeration: If you’re making this bread ahead, keep it in an airtight container in the refrigerator. It will stay fresh for about a week.

    • Freezing: For longer preservation, slice the bread and place it in a freezer-safe bag. This way, you can thaw only the slices you need. Use within 2-3 months for the best quality.

    Reheating:

    To reheat, simply toast the slices or place them in the oven at around 350°F (175°C) for approximately 10 minutes. This helps retain its freshly baked taste and texture.

    By following these best practices, you can ensure that your Easter bread remains a delightful addition to your spring meals, enjoyed fresh and flavorful, anytime!

    Nutritional Value of This Easter Bread Recipe Will Change Your Life!

    As you prepare to savor your Easter bread, understanding its nutritional value can help you fit it into your dietary needs. Here’s a breakdown of the estimated nutritional information per serving (based on 12 servings without optional add-ins):

    • Calories: 180 kcal
    • Total Fat: 4g
    • Saturated Fat: 0.5g
    • Trans Fat: 0g
    • Cholesterol: 0mg
    • Sodium: 90mg
    • Total Carbohydrates: 34g
    • Dietary Fiber: 1g
    • Sugars: 7g (without additional sweet toppings)
    • Protein: 3g

    Additional Notes:

    • Vegan-Friendly: The use of plant-based milk and a substitute for eggs aligns with a vegan dietary plan.
    • Gluten-Free: Utilizing a gluten-free flour blend can cater to those with gluten sensitivities without sacrificing texture.
    • Customization: Depending on the fillings and toppings, such as nuts or dried fruits, the nutritional profile will change, adding more healthy fats and fiber.

    This recipe not only contributes to the festivities of spring meals but also accommodates various diets, making it an inclusive dish for everyone at the table.

    FAQs: Frequently Asked Questions About This Easter Bread Recipe Will Change Your Life!

    Here are some common questions regarding this delightful Easter bread, along with their answers:

    1. Can I make this bread ahead of time?
    2. Absolutely! You can prepare the dough the night before and allow it to rise in the fridge overnight. Just take it out the next morning, shape it, and then allow it a second rise before baking.

    3. What can I substitute for almond milk?

    4. If almond milk is unavailable, you can use any dairy or non-dairy milk you have on hand, such as soy milk or coconut milk, and it should still yield great results.

    5. How do I make this recipe gluten-free?

    6. Simply replace the all-purpose flour with a gluten-free flour blend. Ensure that the blend contains xanthan gum for the best texture.

    7. Can I use fresh fruit instead of dried fruit?

    8. Fresh fruit can add moisture but may affect the texture. If you prefer to use fresh fruit, make sure they are well-drained and chopped small before mixing into the dough.

    9. What is the best way to store leftovers?

    10. To store leftovers, wrap them in plastic wrap and keep them at room temperature for up to three days. For longer storage, slice and freeze as recommended above.

    11. How can I adjust the sweetness of the bread?

    12. You can easily customize the sweetness by adjusting the level of coconut sugar or opting for sugar alternatives. Try adding sweet spices like cinnamon for additional flavor without added sugar.

    With these answers in mind, you can enjoy this Easter bread without hesitation, whether you’re a novice baker or a seasoned expert seeking spring meal inspiration!


    By embracing the flavors of this Easter bread recipe, you’re not only making a delightful treat but also encouraging healthy and inclusive spring meals for your family and friends. Happy baking!

  • Irresistible Traditional British Hot Cross Buns

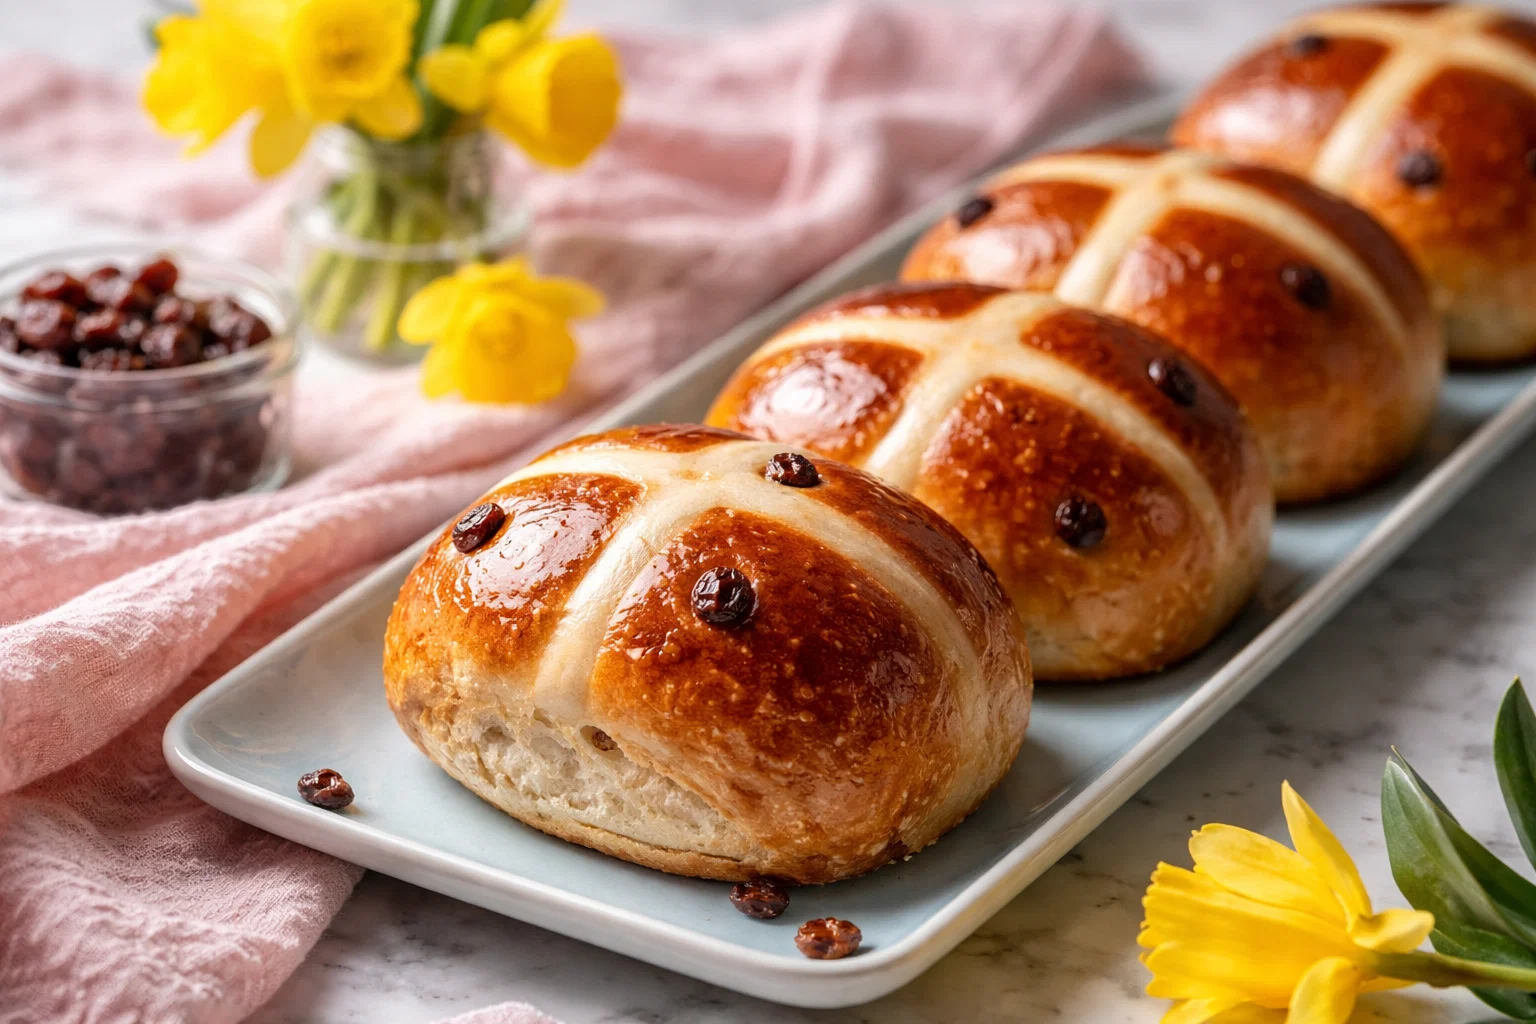
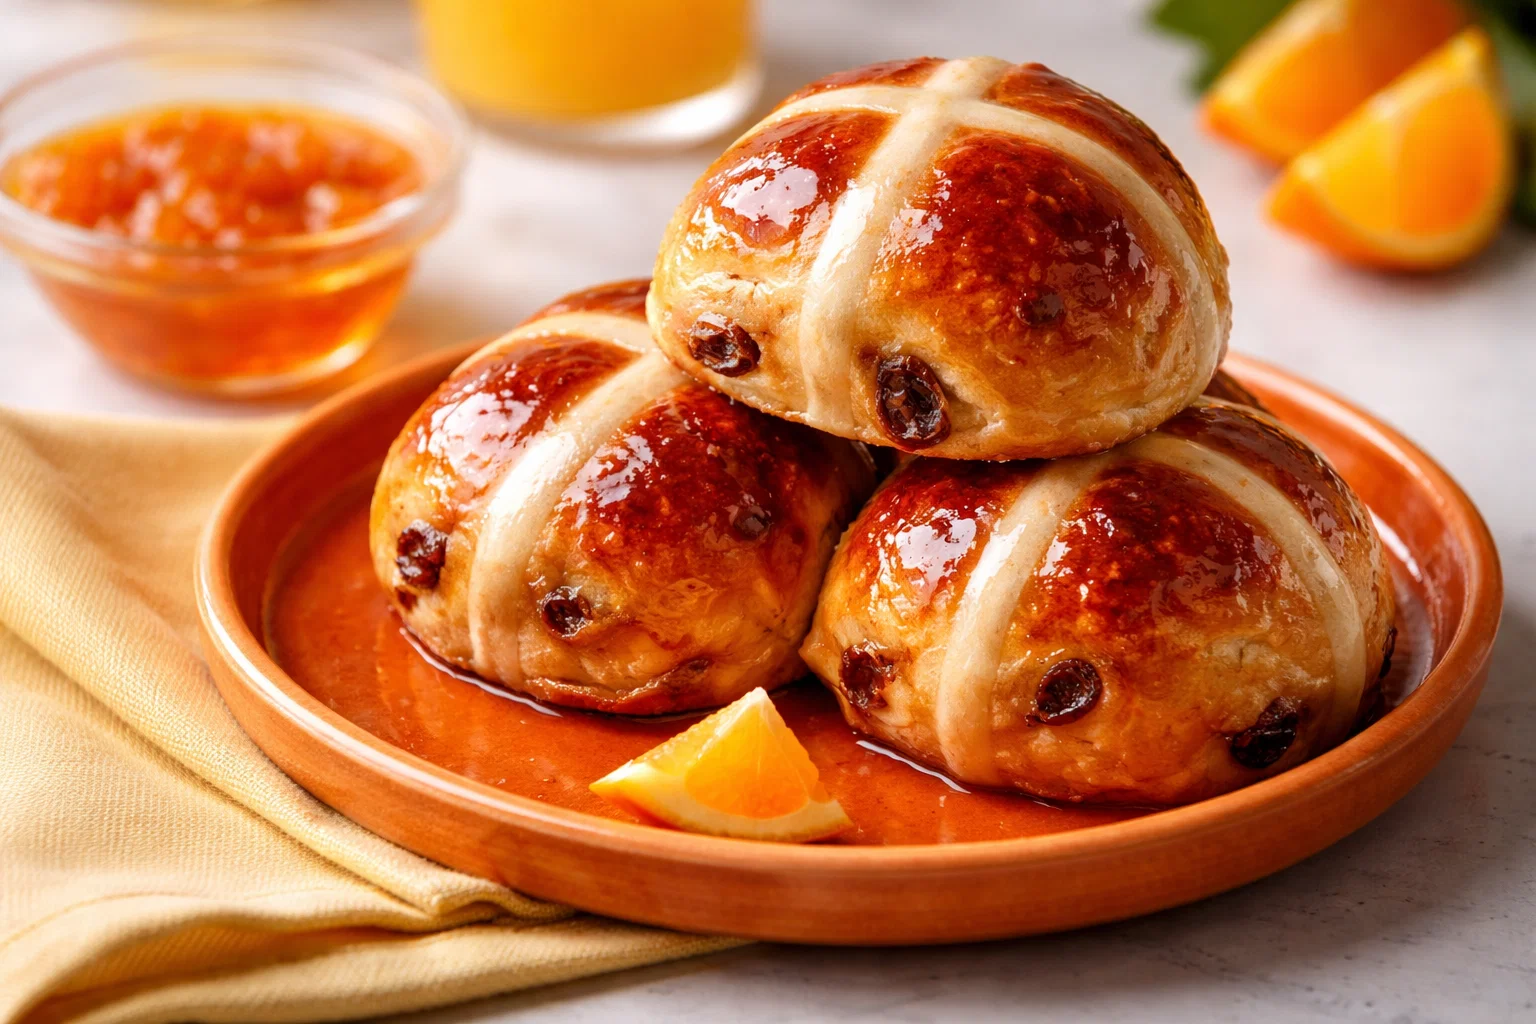
    Irresistible Traditional British Hot Cross Buns

    Irresistible Traditional British Hot Cross Buns: A Tropical Delight

    Introduction to Irresistible Traditional British Hot Cross Buns

    As the vibrant season of spring approaches, many of us begin to crave delightful spring meals that evoke warmth, comfort, and tradition. Among these culinary treasures are the Irresistible Traditional British Hot Cross Buns. These spiced, sweet rolls, adorned with a simple cross on top, carry a rich cultural heritage dating back centuries and are emotionally linked to Easter celebrations. However, their appeal extends far beyond just one holiday.

    Crafted with simple ingredients like flour, sugar, and a medley of spices, these buns present a perfect blend of flavor and nostalgia. What makes this recipe particularly outstanding is its flexibility. You can prepare them using vegan alternatives, gluten-free substitutes, or even as low-calorie treats without sacrificing taste. For busy parents balancing time constraints, or students juggling studies and part-time jobs, these buns are surprisingly simple and satisfying to bake.

    These buns are not only a delicious option for spring meals, filled with antioxidants from spices like cinnamon and nutmeg, but they also boast an inviting aroma that fills your home with comfort and cheer. In this article, we’ll guide you through the process of making these delectable buns that are sure to become a staple in your seasonal repertoire. So put on your apron and let’s dive in!

    Benefits and Advantages of Irresistible Traditional British Hot Cross Buns

    One of the most appealing aspects of Irresistible Traditional British Hot Cross Buns is their remarkable ease of preparation. Even novice bakers can create these flavorful buns, making them an accessible choice for home cooks of all skill levels. The recipe is straightforward, requiring minimal specialized equipment. All you need is a mixing bowl, a baking tray, and a warm space for the dough to rise.

    From a health perspective, these buns can incorporate wholesome ingredients, making them a guilt-free treat for those who are health-conscious. You can use whole grain flour to boost fiber content while adding dried fruits like raisins or cranberries provides essential vitamins and minerals. Moreover, since the recipe can easily be adjusted for various dietary restrictions, everyone can enjoy them—whether they’re vegan, vegetarian, gluten-free, or simply trying to watch their calorie intake.

    Additionally, the versatility of Hot Cross Buns allows for creative adaptations. You can experiment with different spices or add zesty flavors like citrus zest or chocolate chips to customize them. They can be savored fresh out of the oven, toasted with a pat of butter, or even transformed into a mouth-watering bread pudding the next day. This unique mix of tradition, simplicity, and endless adaptability is what sets these buns apart as an ideal choice for spring celebrations and gatherings.

    While many spring meals focus on light salads, fresh herbs, or grilled vegetables, Hot Cross Buns bring a comforting, filling option to the table. They elevate any brunch or family gathering, providing a heartwarming experience everyone can relish. Their aesthetic appeal adds to their charm, as the signature cross adds an inviting touch to your spread.

    Ingredients Overview

    Essential Ingredients for Irresistible Traditional British Hot Cross Buns

    To prepare Irresistible Traditional British Hot Cross Buns, you’ll need the following ingredients:

    Basic Ingredients:

    • 4 cups all-purpose flour: Essential for structure and base.
    • 1/2 cup granulated sugar: Adds sweetness and is vital for browning.
    • 2 teaspoons active dry yeast: Essential for leavening, resulting in a light, fluffy texture.
    • 1 teaspoon salt: Enhances flavor.
    • 1 teaspoon ground cinnamon: Classic spice providing warmth.
    • 1/2 teaspoon ground nutmeg: Offers a unique, aromatic flavor.
    • 1/4 teaspoon ground cloves: A hint of spiciness.
    • 1 cup milk (dairy or plant-based): Acts as a liquid for the dough.
    • 1/4 cup unsalted butter (or plant-based option): Makes the bread tender.
    • 2 large eggs: Provides richness and helps with structure.
    • 1 cup mixed dried fruit (raisins, currants, or sultanas): Adds natural sweetness and texture.
    • 1/4 cup orange zest (optional): Brightens the flavor profile.

    Vegan Option: Substitute milk with almond or oat milk, butter with coconut oil or vegan butter, and eggs with a flaxseed mixture (1 tablespoon flaxseed meal + 2.5 tablespoons water = 1 egg).

    Gluten-Free Option: Use a gluten-free flour blend and ensure the baking powder is certified gluten-free.

    Low-Calorie Option: Reduce the sugar by half and replace butter with unsweetened applesauce.

    Dietary Substitutions to Customize Your Irresistible Traditional British Hot Cross Buns

    When making Irresistible Traditional British Hot Cross Buns, you can easily cater the recipe to fit various dietary needs. Below are some popular substitutions:

    • Flour Substitutes: For a gluten-free option, use a blend of almond flour and tapioca flour. Alternatively, spelt flour offers a nuttier flavor and easier digestibility for some individuals who are sensitive to gluten but not celiac.

    • Sweetness Adjustments: If you prefer a lower sugar option, consider using natural sweeteners like honey, maple syrup, or coconut sugar. Keep in mind that the liquid content might need adjustments.

    • Fruit Varieties: Dried fruits are key to elevating your bun’s texture and flavor. Feel free to mix in apple chunks, goji berries, or even nuts to add extra nutrition and dimension.

    • Milk Alternatives: Any non-dairy milk can work perfectly in this recipe, including soy milk, coconut milk, or cashew milk to make it suitable for lactose-intolerant individuals.

    These intuitive substitutions ensure that everyone can indulge in these delightful buns without compromising their dietary preferences or restrictions.

    How to Prepare the Perfect Irresistible Traditional British Hot Cross Buns: Step-by-Step Guide

    Now that you have gathered all your ingredients and decided on any necessary substitutions, it’s time to roll up your sleeves and get baking. Follow these detailed steps to create the perfect Irresistible Traditional British Hot Cross Buns:

    1. Prepare the Yeast Mixture: In a small bowl, combine 1/2 cup of warm milk (about 110°F/43°C) with 1 tablespoon of sugar. Sprinkle the yeast over the top, stir gently, and let it sit for about 10 minutes until foamy.

    2. Mix Dry Ingredients: In a large mixing bowl, whisk together 4 cups of all-purpose flour, 1/2 cup of sugar, 1 teaspoon of salt, 1 teaspoon of cinnamon, 1/2 teaspoon of nutmeg, and 1/4 teaspoon of cloves until well combined.

    3. Combine Wet Ingredients: In a separate bowl, melt 1/4 cup of butter and let it cool slightly. Add the eggs, then whisk in the foamy yeast mixture and remaining 1 cup of milk until just combined.

    4. Form the Dough: Pour the wet ingredients into the dry ingredients and stir with a wooden spoon until a dough forms. If using a stand mixer, use the dough hook to knead on low speed for about 5-7 minutes until smooth and elastic.

    5. Add the Fruit: Incorporate the dried fruit and orange zest into the dough. If you added nuts or other fruits, this is the step to mix them in.

    6. Knead the Dough: Transfer the dough onto a lightly floured surface and knead it by hand for 5-10 minutes until stretchy and well incorporated. Alternatively, allow the stand mixer to do the work.

    7. First Rise: Place the dough in a greased bowl, cover with a damp cloth or plastic wrap, and set it in a warm area for about 1-2 hours, or until it has doubled in size.

    8. Shape the Buns: Once the dough has risen, punch it down gently. Divide it into 12 equal portions, shape them into balls, and arrange them on a greased or parchment-lined baking tray.

    9. Second Rise: Cover the trays loosely with plastic wrap and let the buns rise again for about 30-45 minutes until puffy.

    10. Prepare for Baking: Preheat your oven to 375°F (190°C). While the buns rise, prepare the cross mixture by combining 1/2 cup of flour with water to make a paste. Transfer it to a piping bag and pipe crosses on top of each bun.

    11. Bake: Bake the buns in the preheated oven for about 20-25 minutes, or until golden brown. They should sound hollow when tapped on the bottom.

    12. Glaze for Extra Flavor: As the buns cool, you can prepare the glaze. Mix equal parts sugar and water and simmer until it thickens slightly. Brush this glaze over the warm buns for a shiny finish.

    With these steps, you’ve successfully prepared Irresistible Traditional British Hot Cross Buns that will be a favorite for any occasion, especially during spring meals. The delightful aroma will make your kitchen feel extra inviting.

    Mastering Irresistible Traditional British Hot Cross Buns: Advanced Tips and Variations

    To truly elevate your Hot Cross Buns, here are some advanced tips and exciting variations to try:

    • Infuse with Flavor: Consider adding a splash of vanilla extract or using almond milk as your liquid base. Spices like cardamom or ginger can also provide unique flavor profiles.

    • Chocoholics Delight: For a sweet twist, add chocolate chips or chunks to the dough for an indulgent treat that will satisfy any chocolate lover.

    • Fruity Variants: Customize your fruit choice by adding candied citrus peel or dried cherries for unexpected bursts of flavor that complement the spices beautifully.

    • Savory Option: If you’re feeling adventurous, try a savory version with herbs like rosemary or thyme, ditching the sweetness for a more rustic flavor profile.

    • Bun Size: For mini versions, simply divide the dough into smaller portions, reducing the baking time accordingly for quick bites.

    These tips will help you master the art of making Hot Cross Buns, offering delicious variations suitable for any gathering or simply as an everyday treat.

    How to Store Irresistible Traditional British Hot Cross Buns: Best Practices

    To ensure your Irresistible Traditional British Hot Cross Buns remain fresh and delicious, proper storage is key. Here are the best methods for refrigeration, freezing, and reheating:

    Refrigeration

    After the buns have cooled completely, store them in an airtight container at room temperature for up to 3 days. If you prefer a cold treat, they can also be refrigerated but expect them to lose a bit of texture.

    Freezing

    For longer storage, freeze the buns. Wrap each bun tightly in plastic wrap, then place them in a resealable freezer bag or an airtight container. They can be frozen for up to 3 months. When you’re ready to enjoy them, simply thaw at room temperature or pop them in the microwave for 30 seconds for a quick warm-up.

    Reheating

    To restore the original softness of the buns after refrigeration or freezing, reheat them in the oven at 350°F (175°C) for about 5-10 minutes. Alternatively, a toaster oven or microwave can work if you’re only reheating a few.

    These tips ensure that your Hot Cross Buns continue to be a delightful addition to your spring meals even after the baking day.

    Nutritional Value of Irresistible Traditional British Hot Cross Buns

    Understanding the nutritional value of Irresistible Traditional British Hot Cross Buns can help you make informed choices about incorporating them into your diet. Here’s an approximate breakdown (per bun, based on a standard recipe):

    • Calories: 200
    • Total Fat: 6g (Saturated Fat: 3g)
    • Cholesterol: 30mg
    • Sodium: 190mg
    • Total Carbohydrates: 33g
    • Dietary Fiber: 1g
    • Sugars: 7g
    • Protein: 5g

    Health Considerations

    These buns can be adjusted for various dietary needs. Using alternative sweeteners, low-fat milk, and egg substitutes can help reduce calories. The addition of dried fruits contributes vitamins and fiber, making them more nutritious.

    Unless you’re indulging in a decadent variant, these buns can be a reasonably healthy option compared to many commercial baked goods. Always remember to enjoy them in moderation, especially given their sweet content.

    FAQs: Frequently Asked Questions About Irresistible Traditional British Hot Cross Buns

    Here are some common queries you might have regarding Irresistible Traditional British Hot Cross Buns:

    1. Can I make Hot Cross Buns ahead of time?
      Yes! You can prepare the dough the night before, let it rise, shape it, and refrigerate overnight. Allow extra time for the second rise in the morning before baking.

    2. What can I substitute for dried fruit?
      If you don’t have dried fruit on hand, you can use fresh fruit, nuts, or skip it altogether. Alternatively, consider chocolate chips for a sweet variation.

    3. Is there a gluten-free version of Hot Cross Buns?
      Absolutely! Use gluten-free flour blends for the base ingredient, ensuring all other components, including yeast and add-ins, are also gluten-free.

    4. How can I make Hot Cross Buns vegan?
      Replace dairy milk with plant-based milk, butter with coconut oil or vegan butter, and use flaxseed mixture as an egg substitute.

    5. How should I serve Hot Cross Buns?
      Serve them fresh out of the oven, toasted with butter, or as a base for a delightful bread pudding! They pair wonderfully with coffee or tea.

    Baking Irresistible Traditional British Hot Cross Buns is sure to provide a delicious addition to your spring meals this season. Embrace the tradition, adapt it to your tastes, and share these fantastic treats with your loved ones! Happy baking!

  • IM Obsessed With This Herbed Garden Fresh Salad

    IM Obsessed With This Herbed Garden Fresh Salad

    I’M Obsessed With This Herbed Garden Fresh Salad!: A Tropical Delight

    Introduction to I’M Obsessed With This Herbed Garden Fresh Salad!

    Welcome to the world of vibrant flavors and nutrients with my Herbed Garden Fresh Salad! If you’re on the lookout for healthy dinner recipes that tantalize your taste buds and satisfy your hunger, look no further. This salad is not only strikingly beautiful but also incredibly simple to prepare, full of seasonal vegetables, and bursting with flavor from fresh herbs. The best part? It caters to a plethora of dietary needs—vegan, gluten-free, and low-calorie!

    Imagine indulging in a bowl of crisp mixed greens, juicy tomatoes, and crunchy cucumbers, all drizzled with a light herbed vinaigrette that enhances every bite. This salad is more than just a meal; it’s an experience, making it ideal for busy parents juggling mealtime chaos, students in need of quick nourishment, or health-conscious individuals looking to maintain a balanced diet.

    Not only does this dish deliver wholesome goodness, but it also invites creativity in the kitchen. With the right ingredients and a sprinkle of passion, you can elevate your culinary skills while enjoying a satisfying dish. Dive into the recipe, and embrace the joy of making a refreshing salad that you’ll be obsessed with!

    Benefits and Advantages of I’M Obsessed With This Herbed Garden Fresh Salad!

    Why should you make this Herbed Garden Fresh Salad? Let’s delve into its numerous benefits and attributes that make it a standout choice among healthy dinner recipes.

    1. Easy Preparation: This salad is remarkably simple to prepare. Within minutes, you can assemble an appealing dish that is both nutritious and delicious. Its quick prep time makes it perfect for any home cook, whether you’re a busy parent needing a quick dinner solution or a student who wants to whip up something simple after class.

    2. Health Benefits: Eating a salad packed with fresh vegetables means you’re boosting your intake of vitamins, minerals, and antioxidants. Leafy greens like spinach and kale are great sources of fiber and help in digestion. Furthermore, the colorful vegetables provide hydration and are low in calories, making this dish ideal for anyone trying to maintain or lose weight.

    3. Versatile and Customizable: This recipe is versatile enough to adapt to various dietary preferences. Whether you’re vegan, vegetarian, or simply looking for nutritious meals, this Herbed Garden Fresh Salad can be tailored to fit. By swapping out certain veggies or adjusting the dressing, you can personalize it to suit your taste while adhering to healthy eating habits.

    4. Suitable for Gatherings: Whether it’s a casual family dinner or a potluck with friends, this salad is a showstopper. Its vibrant colors and fresh flavors make it a delightful centerpiece that everyone will appreciate, allowing it to stand tall amidst a plethora of other dishes.

    In essence, this Herbed Garden Fresh Salad stands out due to its easy preparation, health benefits, adaptability, and impressive presentation. It’s a delightful choice that aligns perfectly with the objectives of anyone seeking healthy dinner recipes.

    Ingredients Overview

    Essential Ingredients for I’M Obsessed With This Herbed Garden Fresh Salad!

    To create this delightful Herbed Garden Fresh Salad, you’ll need the following ingredients:

    • 4 cups mixed greens (spinach, arugula, and romaine)
    • Purpose : Provides a nutrient-rich base full of vitamins A, C, and K.

    • 1 cup cherry tomatoes, halved

    • Purpose : Adds sweetness and richness with antioxidants.

    • 1 cucumber, diced

    • Purpose : Offers crunch and hydration, low in calories.

    • 1/2 red onion, thinly sliced

    • Purpose : Contributes flavor and helps in blood circulation.

    • 1 cup fresh herbs (basil, parsley, cilantro)

    • Purpose : Infuses your salad with fresh flavors and various health benefits.

    • 1/4 cup feta cheese (optional)

    • Purpose : Adds creaminess and a touch of tang; use nutritional yeast for a vegan version.

    • 1/4 cup olive oil

    • Purpose : A source of healthy fats that enhances the salad’s flavor.

    • 2 tablespoons balsamic vinegar

    • Purpose : Provides tanginess and balances flavors.

    • Salt and pepper to taste

    For gluten-free options, ensure your balsamic vinegar is certified gluten-free. This salad is naturally low-calorie and easily fits into a variety of dietary plans.

    Dietary Substitutions to Customize Your I’M Obsessed With This Herbed Garden Fresh Salad!

    One of the best aspects of the Herbed Garden Fresh Salad is its adaptability. Here are some substitutions to ensure it meets a range of dietary requirements or personal preferences:

    • For Vegan Adaptations: Use a dairy-free cheese alternative instead of feta or skip it entirely. The salad remains incredibly flavorful without it.

    • Low-Carb Option: Swap the cucumber for avocado to maintain healthy fats while reducing carbohydrates.

    • Nut-Free Variation: Ensure you omit any nuts or seeds (if used) to keep the salad nut-free.

    • Boost Protein: Add grilled chicken or chickpeas to turn this salad into a heartier meal.

    • Change Up the Greens: If romaine isn’t available, feel free to substitute with kale, shredded cabbage, or your favorite leafy greens.

    These substitutions provide flexibility, ensuring everyone can enjoy this refreshing dish while adhering to their unique tastes and dietary needs.

    How to Prepare the Perfect I’M Obsessed With This Herbed Garden Fresh Salad!: Step-by-Step Guide

    Follow this step-by-step guide to prepare the ultimate Herbed Garden Fresh Salad. You’ll appreciate how easy it is to create a colorful, nutritious dish that meets your healthy dinner recipes goals.

    1. Prepare the Base: Begin by washing and drying your mixed greens. Pat them dry gently with a paper towel or use a salad spinner to remove excess water. Place the dried greens into a large salad bowl as the foundation for your salad.

    2. Chop Vegetables: Next, take the cucumber and dice it into bite-sized pieces. Halve the cherry tomatoes and thinly slice the red onion. Incorporate all of these veggies into your bowl of mixed greens for color and texture.

    3. Add Fresh Herbs: Rinse your fresh herbs under running water and gently pat them dry. Chop them coarsely and sprinkle the herbs over your salad to introduce vibrant flavors.

    4. Prepare the Dressing: In a small bowl, whisk together the olive oil, balsamic vinegar, salt, and pepper. Taste it and adjust the seasoning to your preference. Drizzle the dressing over the salad, ensuring an even coating.

    5. Toss the Salad: Gently toss all ingredients together until the greens and vegetables are well-coated with the dressing. Be gentle to keep some of the ingredients intact and not mushy.

    6. Plate and Serve: Transfer your beautifully tossed salad onto individual plates or serve it family-style in the bowl. If desired, sprinkle feta cheese on top just before serving, or keep it on the side for those with dietary restrictions.

    7. Taste and Adjust: Finally, taste your salad. Does it need more salt? A splash of lemon juice for brightness? Make any adjustments right before serving to enhance flavor.

    And just like that, you’ve crafted a stunning Herbed Garden Fresh Salad! Feel free to customize the components, always remembering the delicious and wholesome intention behind this healthy dinner recipe.

    Mastering I’M Obsessed With This Herbed Garden Fresh Salad!: Advanced Tips and Variations

    Once you’re comfortable with the basic Herbed Garden Fresh Salad, consider these advanced tips and variations to elevate your dish:

    1. Mix of Greens: Experiment with different greens like kale, swiss chard, or even spicy arugula for a unique flavor profile. This keeps the salad fresh and gives you an opportunity to explore new textures and tastes.

    2. Dressings: Beyond balsamic vinaigrette, experiment with other dressings like lemon-tahini or honey mustard. Homemade dressings can be low in preservatives and tailored to your flavor preferences.

    3. Incorporate Grains: For a more filling meal, you can add cooked quinoa, farro, or brown rice. These grains provide extra fiber, protein, and make your salad more satisfying.

    4. Fruits & Nuts: Adding slices of apple, pear, or dried cranberries introduces a sweet element that complements the savory flavors. A handful of toasted nuts can also enhance the salad with healthy fats and crunch.

    5. Global Twist: Inspired by different cuisines, add ingredients like avocado and citrus for a Southwest feel or incorporate olives and feta to achieve a Greek-style salad.

    Through these variations, you can continuously discover new favorites while maintaining your healthy dinner recipes standard.

    How to Store I’M Obsessed With This Herbed Garden Fresh Salad!: Best Practices

    To keep your Herbed Garden Fresh Salad fresh and tasty, follow these storage tips:

    1. Refrigeration: If you have leftovers, store the salad components separately when possible. Place the greens without dressing in an airtight container, while veggies can be stored in a separate container. This keeps the greens fresh and prevents wilting.

    2. Freezing: Generally, salads do not freeze well due to moisture content. If you want to prep ingredients ahead, consider freezing cooked grains or proteins separately for later use, adding them to your salad just before serving.

    3. Reheating: Most salads are best served cold, so reheating isn’t necessary. However, if you mixed in grains or proteins, gently warm them on the stovetop without overcooking to prevent the greens from wilting.

    By following these best practices, you can ensure that you maintain the vibrant flavors and textures of your Herbed Garden Fresh Salad, enabling you to enjoy it beyond the first serving.

    Nutritional Value of I’M Obsessed With This Herbed Garden Fresh Salad!

    This Herbed Garden Fresh Salad is packed with nutritional benefits. Here’s a breakdown of its nutritional value:

    • Calories: Approximately 150 calories per serving (excluding optional cheese and grains)
    • Total Fat: 10g (healthy fats from olive oil)
    • Saturated Fat: 1.5g (if including feta)
    • Carbohydrates: 12g
    • Fiber: 5g (high fiber from vegetables and greens)
    • Sugars: 3g (natural sugars from veggies)
    • Protein: 3g (increased with added grains or proteins)

    This salad serves as a nutrient-dense option among the myriad of healthy dinner recipes. It not only provides essential macro and micronutrients but also keeps you satiated, promoting overall well-being.

    FAQs: Frequently Asked Questions About I’M Obsessed With This Herbed Garden Fresh Salad!

    Can I make this salad in advance?

    Yes! You can prep all the ingredients a day ahead. Just store the components separately and assemble right before serving to keep the greens crisp.

    What can I substitute for feta cheese?

    For a vegan alternative, nutritional yeast or a store-bought dairy-free cheese works well. You can also skip it completely for a lighter dish.

    What if I have leftover salad?

    Store leftovers without dressing in an airtight container in the refrigerator to keep it fresh. Consume within a couple of days for the best quality.

    Can I add protein to this salad?

    Definitely! Grilled chicken, chickpeas, or even boiled eggs can enhance the salad’s nutritional profile for a complete meal.

    In conclusion, making the Herbed Garden Fresh Salad is a joy that anyone can experience. It embodies the vibrant essence of healthy eating while being accommodating to different dietary needs. I hope you find as much obsession with this delightful salad as I do! Try it out, make it your own, and enjoy a delicious meal that aligns beautifully with your healthy dinner recipes goals. Happy cooking!

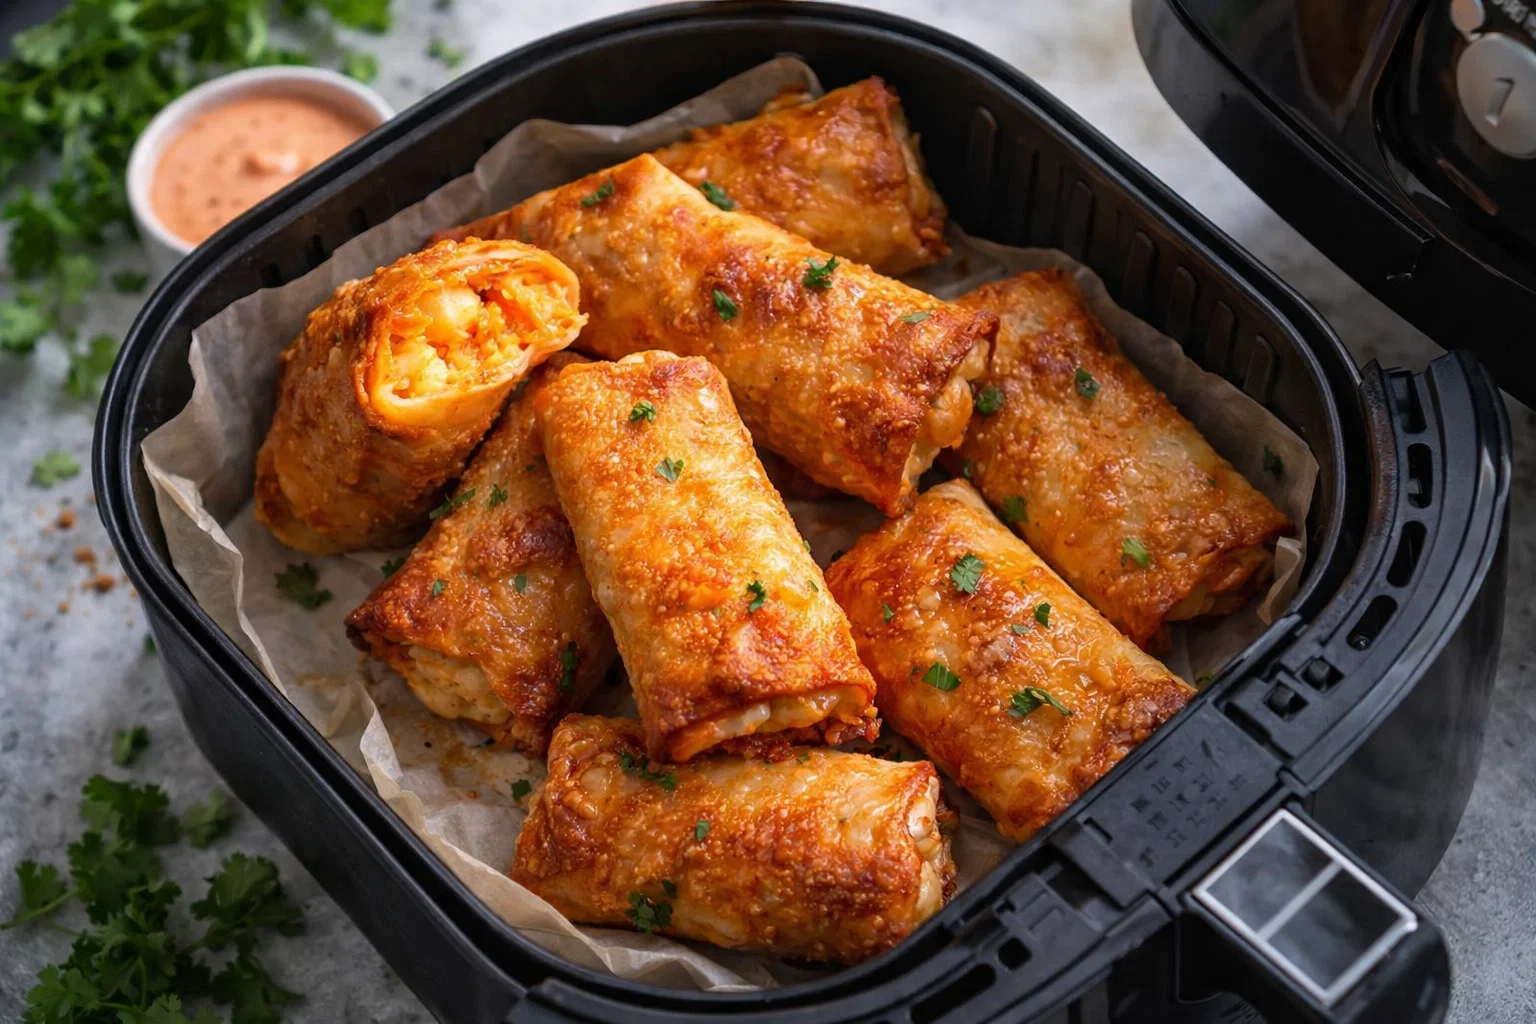
  • Quick Air Fryer Bang Bang Shrimp Egg Rolls

    Quick Air Fryer Bang Bang Shrimp Egg Rolls

    Quick Air Fryer Bang Bang Shrimp Egg Rolls: A Tropical Delight

    Introduction to Quick Air Fryer Bang Bang Shrimp Egg Rolls

    Are you on the lookout for an exciting new addition to your repertoire of shrimp recipes? Look no further! These Quick Air Fryer Bang Bang Shrimp Egg Rolls are not only deliciously crispy but also simple to prepare, making them an ideal option for everyone—whether you’re a busy parent, a health-conscious individual, or a culinary enthusiast. Packed with succulent shrimp and vibrant vegetables enveloped in a delightful egg roll wrapper, these treats are perfect for satisfying your cravings without the guilt.

    The beauty of this dish lies in its versatility; it can be tailored to fit various dietary needs, from gluten-free to vegan substitutions. But that’s not all—using an air fryer means you get that satisfying crunch without the use of excessive oil, making it a healthier choice compared to traditional frying methods. With the perfect balance of spices and a creamy sauce to drench these egg rolls, it’s a tropical delight that’s bound to impress your family and friends. Whether you’re whipping these up for a casual weeknight dinner or serving them at a gathering, they are sure to be a hit.

    By the end of this article, you’ll not only have a delicious recipe to try, but you’ll also gain insights into health benefits, preparation tips, and all the variations you can explore. So let’s dive into the delightful world of Quick Air Fryer Bang Bang Shrimp Egg Rolls!

    Benefits and Advantages of Quick Air Fryer Bang Bang Shrimp Egg Rolls

    The allure of Quick Air Fryer Bang Bang Shrimp Egg Rolls extends beyond their amazing taste. This recipe is a fantastic choice for multiple reasons, catering to myriad lifestyles and dietary preferences. Below are some standout benefits:

    1. Ease of Preparation

    This egg roll recipe is remarkably simple and can be accomplished in under 30 minutes. With minimal prep work and straightforward steps, even novice cooks can master this dish. For busy parents and students, it’s a lifesaver—perfect for those evenings when you need a quick and delightful meal.

    2. Healthy without Compromising Flavor

    Utilizing the air fryer allows you to enjoy crispy food without the added calories from frying oil. These shrimp egg rolls contain lean proteins and are loaded with fresh vegetables, perfect for those who are health-conscious or following a fitness regimen. Moreover, they can be made with whole or low-carb wraps to suit your dietary needs.

    3. Customizable for Various Diets

    Whether you’re vegan, gluten-free, or simply looking for a low-calorie alternative, this recipe can be easily adapted. Swap in plant-based shrimp alternatives for vegetarians or gluten-free wraps for those who cannot consume gluten. You can also adjust the spice level to suit your family’s taste preferences.

    4. Perfect for Meal Prepping

    These egg rolls are excellent for meal prepping, allowing you to whip up a large batch and store them for later. Enjoy them as a snack, appetizer, or even a main dish—they’re versatile enough for any occasion!

    5. Spectacular Presentation

    Who can resist beautifully presented food? These egg rolls are not only aesthetically pleasing but also taste fantastic, making them perfect for entertaining guests. Dipping them in a zesty Bang Bang sauce elevates the entire dish and ensures that they’ll be the highlight of any party table.

    In conclusion, Quick Air Fryer Bang Bang Shrimp Egg Rolls offer an exciting and nutritious meal option for anyone looking to enjoy shrimp recipes that are quick, healthy, and delicious. Let’s delve into the ingredients needed to create this tropical delight!

    Ingredients Overview

    Essential Ingredients for Quick Air Fryer Bang Bang Shrimp Egg Rolls

    To make these delightful egg rolls, you will need the following essential ingredients. Each one plays a crucial role in creating that bold, tropical flavor.

    • 1 pound shrimp (peeled and deveined): Shrimp are a rich source of protein and essential minerals. They are low in calories, making them a great choice.
    • 1 cup coleslaw mix: This provides crunch and a burst of flavor. You can mix it with different veggies like bell peppers or carrots for extra nutrition.
    • 1 teaspoon garlic powder: Adds robust flavor to the filling.
    • 1 teaspoon onion powder: Transforms taste and depth.
    • 1 teaspoon paprika: For a subtle smokiness.
    • Egg roll wrappers (can be found in regular or gluten-free varieties): These hold the filling and contribute to the texture.
    • Cooking spray (or your choice of oil): Helps achieve a crispy finish in the air fryer without added fat.
    • Bang Bang sauce (store-bought or homemade): This creamy, spicy sauce is essential for that signature taste.

    Vegan Option: Replace shrimp with plant-based shrimp alternatives and use a vegan-friendly egg roll wrapper.

    Gluten-Free Option: Use gluten-free egg roll wrappers to make this dish accommodating for gluten-sensitive individuals.

    Low-Calorie Option: Opt for smaller servings of the Bang Bang sauce, or prepare a homemade lighter version.

    Dietary Substitutions to Customize Your Quick Air Fryer Bang Bang Shrimp Egg Rolls

    1. Shrimp Substitutes: For vegetarians or vegans, plant-based shrimp or tofu can be substituted for shrimp. Both options allow you to maintain the protein content and texture.

    2. Egg Roll Wrappers: If traditional wrappers are not available, you can also use rice paper wraps or lettuce for a lighter version.

    3. Fresh Vegetables: Feel free to add any of your favorite vegetables into the mix. Zucchini, spinach, or even corn can enhance both the flavor and the nutritional profile of your egg rolls.

    4. Sauce Adjustments: The Bang Bang sauce can also be modified. Substitute mayo with Greek yogurt for a healthier, protein-packed alternative. You could also experiment with different spice levels by adjusting the Sriracha or adding sweet chili sauce for a milder flavor.

    By incorporating these ingredient options, you ensure that your Quick Air Fryer Bang Bang Shrimp Egg Rolls can cater to a wider audience. Now, let’s move on to the preparation process!

    How to Prepare the Perfect Quick Air Fryer Bang Bang Shrimp Egg Rolls: Step-by-Step Guide

    Creating these tantalizing Quick Air Fryer Bang Bang Shrimp Egg Rolls is straightforward. Follow the step-by-step guide below to ensure your dish is a success.

    1. Prepare the Base:

    • Start by rinsing the shrimp under cold water and patting them dry. Season the shrimp with garlic powder, onion powder, paprika, salt, and pepper.

    2. Cook the Shrimp:

    • Option A: You can sauté the seasoned shrimp in a non-stick skillet over medium heat for about 3-5 minutes until they turn pink and opaque.
    • Option B: Alternatively, you could Air Fry the shrimp for about 5-7 minutes at 400°F (200°C) until cooked through.

    3. Make the Filling:

    • In a mixing bowl, combine the cooked shrimp with the coleslaw mix. Add a tablespoon of your Bang Bang sauce and mix well to ensure each piece is coated.

    4. Assemble the Egg Rolls:

    • Lay an egg roll wrapper on a clean, flat surface. Place about 2-3 tablespoons of the shrimp and coleslaw filling in the center of the wrapper. Fold the edges over the filling, then roll it away from you, tucking in the sides as you go. Seal the edge with a little water.

    5. Pam the Egg Rolls:

    • Preheat your air fryer to 380°F (193°C). Lightly spray the egg rolls with cooking spray for an extra-crispy texture.

    6. Air Fry the Egg Rolls:

    • Place the prepared egg rolls in the air fryer basket in a single layer, being careful not to overcrowd. Cook for 10-12 minutes, flipping them halfway through until they are golden brown and crispy.

    7. Serve with Bang Bang Sauce:

    • Once cooked, remove the egg rolls from the air fryer. Serve them hot with the remaining Bang Bang sauce for dipping.

    8. Enjoy!

    • Share with family or friends, or savour them on your own. They’re perfect for satisfying any craving!

    Following these steps ensures that your Quick Air Fryer Bang Bang Shrimp Egg Rolls come out perfectly every time. The beauty of this shrimp recipe is not just in its flavor but in its adaptability to various tastes and dietary requirements. Let’s look at some advanced tips and variations next!

    Mastering Quick Air Fryer Bang Bang Shrimp Egg Rolls: Advanced Tips and Variations

    To make your egg rolls even more enticing, consider these advanced tips and variations:

    1. Enhance Flavor with Fresh Herbs:

    Add fresh herbs like cilantro or green onions in the filling for added freshness and flavor contrast.

    2. Experiment with Sauces:

    While Bang Bang sauce is a classic, don’t hesitate to try sweet and sour sauce, teriyaki glaze, or even a spicy aioli. Each option will provide new twists to your egg roll experience.

    3. Baking Option:

    If you prefer a less greasy method, you can bake your egg rolls in an oven preheated to 400°F (200°C) for about 20 minutes. Just remember to flip halfway.

    4. Hosting a Bang Bang Party:

    Consider making an array of fillings for a fun cooking night with friends! Shrimp, chicken, veggies, or even cream cheese can provide each guest with their own customized egg roll.

    5. Optimal Storage:

    Making a large batch? Egg rolls can be stored in the refrigerator for up to three days or frozen for up to three months. When ready to enjoy, reheat them in the air fryer for about 10 minutes.

    These tips not only help you to master the recipe but also enable you to dive deeper into the world of shrimp recipes. Now, let’s cover how to store your bang bang egg rolls effectively.

    How to Store Quick Air Fryer Bang Bang Shrimp Egg Rolls: Best Practices

    Storing your Quick Air Fryer Bang Bang Shrimp Egg Rolls properly ensures that they maintain their deliciousness for another day. Here are some best practices for refrigeration, freezing, and reheating:

    Refrigeration:

    • Place the cooled egg rolls in an airtight container and store them in the refrigerator. They can last for about 3-4 days.

    Freezing:

    • To freeze, arrange the uncooked egg rolls on a baking sheet in a single layer, and freeze them until solid. Transfer the frozen egg rolls to a freezer bag and store them for up to 3 months. This way, you can enjoy freshly cooked egg rolls whenever you please.

    Reheating:

    • When you’re ready to enjoy leftover or frozen egg rolls, simply preheat your air fryer to 375°F (190°C) and cook for 8-10 minutes for refrigerated egg rolls or approximately 12-15 minutes if from frozen. This will help restore their crunchiness without making them oily.

    By mastering the art of storing Quick Air Fryer Bang Bang Shrimp Egg Rolls, you’ll ensure that they taste fresh even after a few days. Now, let’s take a detailed look at the nutritional value of this delicious recipe.

    Nutritional Value of Quick Air Fryer Bang Bang Shrimp Egg Rolls

    When indulging in Quick Air Fryer Bang Bang Shrimp Egg Rolls, it’s essential to understand what you’re putting into your body. Here’s a breakdown of the nutritional value for one egg roll (approximately 100 grams, based on common ingredients):

    • Calories: 150-180 kcal
    • Total Fat: 7-9 g
    • Saturated Fat: 1-2 g
    • Cholesterol: 70-100 mg
    • Sodium: 300-400 mg
    • Total Carbohydrates: 15-20 g
    • Dietary Fiber: 1-2 g
    • Sugars: 1-2 g
    • Protein: 8-12 g

    Nutritional Benefits:

    • High in Protein: The shrimp provides a significant amount of protein essential for muscle repair and growth.
    • Low in Calories: Compared to traditional fried egg rolls, air-fried versions offer a healthier alternative without compromising on taste.
    • Great Source of Vitamins: The addition of coleslaw mix adds essential vitamins and minerals to support overall health.

    By keeping these nutritional insights in mind, you can enjoy your Quick Air Fryer Bang Bang Shrimp Egg Rolls guilt-free. Now, let’s address some frequently asked questions!

    FAQs: Frequently Asked Questions About Quick Air Fryer Bang Bang Shrimp Egg Rolls

    1. Can I use frozen shrimp?

    Absolutely! Just make sure to thaw them completely before preparing your egg rolls to ensure even cooking.

    2. How can I make shrimp egg rolls spicy?

    You can easily enhance the spice level by adding diced jalapeños or mixing in more Sriracha into your filling.

    3. Can I prepare the egg rolls in advance?

    Yes! You can assemble the egg rolls beforehand and store them in the fridge for a day. Cook them just before serving them.

    4. What other vegetables can I use in the filling?

    Feel free to add shredded carrots, zucchini, or bell peppers for added nutrition and flavor.

    5. How can I reheat frozen egg rolls?

    Simply air fry them from frozen at 375°F (190°C) for about 12-15 minutes, turning halfway through.

    6. Is there a way to make the recipe lower in carbs?

    To make a low-carb version, use low-carb wraps or lettuce leaves instead of traditional egg roll wrappers.

    These FAQs provide further clarity on preparing your Quick Air Fryer Bang Bang Shrimp Egg Rolls, ensuring a smooth cooking process.

    In summary, this delightful recipe for Quick Air Fryer Bang Bang Shrimp Egg Rolls not only features simplicity and health benefits but also brings a tantalizing tropical taste to your table. It’s a perfect dish for any occasion, and you can customize it based on dietary preferences. Whether you’re enjoying a casual dinner or hosting a gathering, everyone will love these delicious egg rolls! So, gather your ingredients, and let the cooking adventure begin!

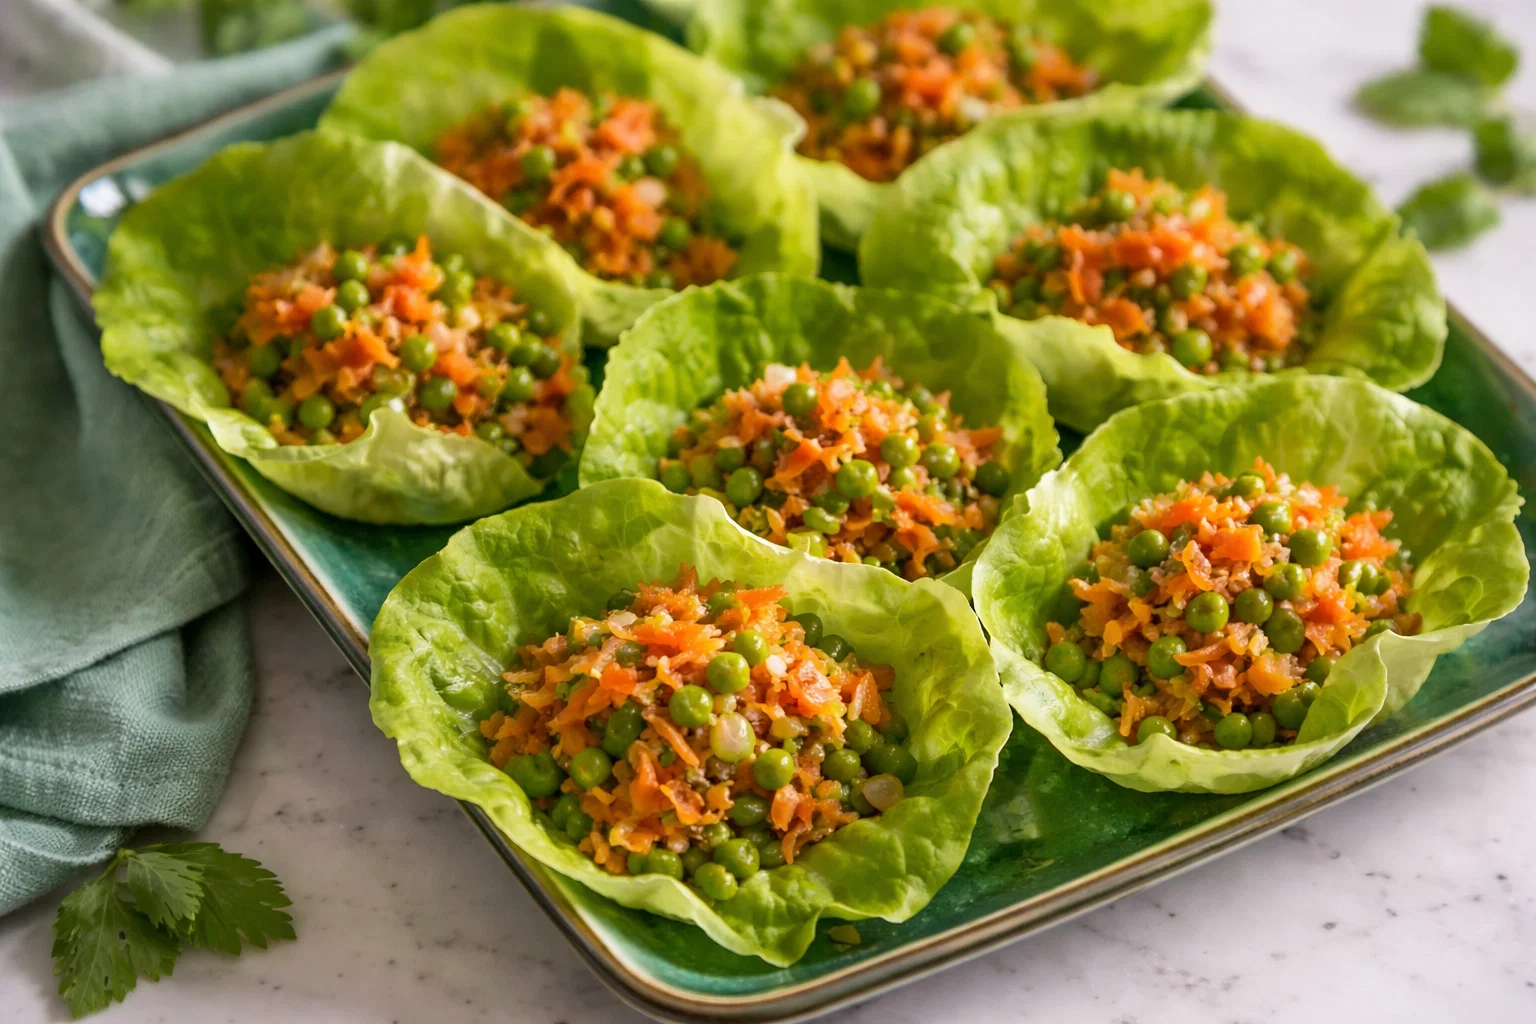
  • Crispy Pea Salad Lettuce Cups

    Crispy Pea Salad Lettuce Cups

    Crispy Pea Salad Lettuce Cups: A Tropical Delight

    Introduction to Crispy Pea Salad Lettuce Cups

    Are you looking for quick, healthy recipes that pack a punch of flavor and nutrition? Look no further than these delightful Crispy Pea Salad Lettuce Cups! This vibrant dish brings a refreshing taste to your table, perfect for busy weeknights, picnics, or entertaining guests. Made primarily with sweet green peas, crisp lettuce, and a medley of colorful vegetables, these lettuce cups serve as a fantastic bite-sized option for anyone seeking a light and satisfying meal.

    One of the standout features of Crispy Pea Salad Lettuce Cups is their versatility. They cater to various dietary needs, making them an excellent choice for vegan, gluten-free, and low-calorie diets. With their bright colors and crunch, these cups are not just visually appealing; they also deliver essential vitamins and minerals, making them a superfood snack. Additionally, the flavor combinations are endlessly adaptable, allowing you to use seasonal ingredients, making it a great recipe for year-round enjoyment.

    As a busy parent, a working professional, or even a student, you’ll appreciate the minimal time it takes to whip these up in the kitchen. This recipe is not just about nourishment—it’s a celebration of global flavors that are easy to create. Let’s dive into the benefits and advantages of these Crispy Pea Salad Lettuce Cups!

    Benefits and Advantages of Crispy Pea Salad Lettuce Cups

    Crispy Pea Salad Lettuce Cups offer numerous benefits that extend beyond their simplicity. First and foremost, the recipe is incredibly easy to prepare. In just 30 minutes or less, you can assemble these delightful bites, making them an excellent option for those with hectic schedules. Whether you are a working professional, a busy parent, or a student cramming for exams, this dish can be your go-to for healthy meals.

    Moreover, these lettuce cups are nutrient-dense. Peas are rich in fiber, vitamins A, C, and K, and plant-based protein, making them a fantastic addition to any meal. They are also low in calories, helping those who are diet-conscious to indulge without guilt. The use of fresh vegetables enhances this salad’s nutritional profile, offering a burst of flavor and varied textures. Green peppers, carrots, and red onions not only add crunch but also bring additional vitamins and antioxidants.

    Another advantage of this recipe is its adaptability. Crispy Pea Salad Lettuce Cups can easily accommodate different dietary preferences. They can easily be turned vegan by keeping with plant-based variations, are naturally gluten-free, and can be made low-calorie with the right ingredient substitutions. Whether you serve them as an appetizer, a light lunch, or a side dish during a family dinner or gathering, these lettuce cups shine as a crowd-pleaser.

    In summary, Crispy Pea Salad Lettuce Cups stand out for their ease of preparation, impressive nutritional benefits, and adaptability to various dietary requirements. With “healthy recipes” like these at your disposal, you can confidently serve meals that are both delicious and nourishing.

    Ingredients Overview

    Essential Ingredients for Crispy Pea Salad Lettuce Cups

    To create Crispy Pea Salad Lettuce Cups, you will need the following essential ingredients:

    • 1 cup green peas (fresh or frozen): Packed with protein, fiber, and vitamins, peas are the star of this dish.
    • 1 medium cucumber, diced: Adds refreshing crunch and hydration.
    • 1 cup cherry tomatoes, halved: Provide sweetness and vibrant color.
    • 1/2 red onion, finely chopped: For a touch of sharpness and flavor depth.
    • 1/2 cup shredded carrots: Adds sweetness and nutrients, making it a great mix.
    • 1/4 cup fresh parsley, chopped: Introduces a herbaceous note for added freshness.
    • 1 tablespoon olive oil: A heart-healthy fat that helps the salad to bind.
    • Juice of 1 lemon: For acidity that brightens flavors.
    • Salt and pepper, to taste: Basic seasonings that enhance all component flavors.
    • 1 head of Romaine or Butter lettuce: Serves as the cups for filling.

    Diet-Conscious Options: The ingredients selected are naturally vegan, gluten-free, and low in calories, making this a guilt-free treat.

    Dietary Substitutions to Customize Your Crispy Pea Salad Lettuce Cups

    You can easily customize your Crispy Pea Salad Lettuce Cups to fit a variety of dietary needs or ingredient preferences:

    • Protein Boost: For added protein, consider mixing in some cooked quinoa, chickpeas, or shredded chicken. These additions work seamlessly within the healthy recipe framework while keeping it nutritious.
    • Low-Carb Alternative: If you’re following a keto or low-carb diet, simply increase the proportion of cucumber and reduce other ingredients that contain carbohydrates.
    • Herbs and Spices: Feel free to experiment with different herbs and spices. Fresh mint or cilantro can give your salad a fresh twist. A sprinkle of cumin or paprika can add warmth to the flavor profile.
    • Dressings: If you prefer a creamier texture, consider adding tahini or a dollop of Greek yogurt. For a spicy kick, a touch of hot sauce can elevate the taste.

    This flexibility allows you to create dishes tailored to your dietary preferences while maintaining the essence of a healthy recipe.

    How to Prepare the Perfect Crispy Pea Salad Lettuce Cups: Step-by-Step Guide

    Creating the perfect Crispy Pea Salad Lettuce Cups is easy, thanks to this step-by-step guide. Follow these instructions to enjoy a deliciously healthy meal.

    1. Prepare the Base: Start by washing your lettuce leaves. Choose large, intact leaves from the Romaine or Butter lettuce. This will serve as the cup, so ensure they are sturdy enough to hold the filling without breaking.

    2. Cook the Peas: If using fresh peas, shell them and boil for about 2-3 minutes until tender. For frozen peas, simply thaw them in warm water. Drain and place them in a large mixing bowl.

    3. Mix Ingredients: Add the diced cucumber, cherry tomatoes, red onion, shredded carrots, and fresh parsley to the bowl with the peas. Use a spatula or wooden spoon to gently fold the ingredients without breaking the peas.

    4. Dress the Salad: In a small bowl, whisk together the olive oil, lemon juice, salt, and pepper until well combined. Pour this dressing over your salad mix, stirring well to ensure all ingredients are coated.

    5. Adjust Seasonings: Taste the salad and adjust the seasonings if necessary. You can add more salt, pepper, or lemon juice based on your preference. Remember, this is a healthy recipe, so less is more with the added flavors!

    6. Fill the Lettuce Cups: Take each lettuce leaf and spoon a generous amount of the pea salad mixture into the center, carefully folding the lettuce around the filling like a taco.

    7. Serve Immediately: You can serve the Crispy Pea Salad Lettuce Cups immediately or place them on a platter for easy serving. They are best enjoyed fresh, but can also be stored briefly in the fridge.

    8. Garnish Options: For an added touch, consider garnishing with extra chopped parsley or a sprinkle of sesame seeds for crunch.

    9. Enjoy Your Meal: Bite into these light, refreshing cups filled with nutritious goodness, perfect for any meal of the day!

    This clear and approachable recipe will help you create deliciously healthy meals perfect for any occasion.

    Mastering Crispy Pea Salad Lettuce Cups: Advanced Tips and Variations

    To elevate your Crispy Pea Salad Lettuce Cups, consider these advanced tips and exciting variations:

    • Add Crunch: For an extra layer of texture, include roasted nuts or seeds such as sunflower seeds or chopped almonds. Not only do they provide crunch, but they also enhance the nutrient profile, aligning nicely with healthy recipes.

    • Cheese Additions: If dairy fits your lifestyle, sprinkle some crumbled feta or goat cheese over the top for a creamy addition that complements the salad beautifully.

    • Spicy Twist: If you love a bit of heat, add diced jalapeños or a dash of chili powder to the mixture. This variation can switch up the flavor and enhance the excitement level of your dish.

    • International Flair: Infuse your salad with international inspiration by using different herbs and spices. For an Asian flair, add sesame oil and garnished sesame seeds; for a Mediterranean twist, consider olives and sun-dried tomatoes.

    • Meal Prep: If preparing meals in advance, store the salad mix and lettuce cups separately to maintain crispness. You can quickly assemble them when ready to serve, saving time while keeping meals fresh.

    Implementing these tips not only refines your cooking skills but offers delicious twists to this already versatile recipe, giving you a plethora of options in your collection of healthy recipes.

    How to Store Crispy Pea Salad Lettuce Cups: Best Practices

    When it comes to storage, it is essential to maintain freshness while reducing waste. Here’s how to keep your Crispy Pea Salad Lettuce Cups in peak condition:

    1. Refrigeration: Store leftover salad filling in an airtight container in the refrigerator. It can be kept for up to 2 days. However, for optimal freshness and texture, consume it within the first day.

    2. Lettuce Storage: Keep the lettuce leaves in a separate container, as wet leaves can spoil quickly. Wrap them in a damp paper towel and place them in a plastic bag or container in the crisper drawer of your fridge.

    3. Freezing: While it is not recommended to freeze the salad mix due to the vegetables’ water content, you can freeze leftover peas. Thaw and integrate them into a new batch of salad mix later.

    4. Re-serving: To serve leftovers, simply combine the salad mix with fresh lettuce cups just before eating. This way, you’ll keep the crunch intact for a delightful experience each time you enjoy your healthy recipe.

    Proper storage ensures that you maximize the lifespan of your meals without compromising flavor or nutrition.

    Nutritional Value of Crispy Pea Salad Lettuce Cups

    Understanding the nutritional profile of your meals helps you make informed dietary choices. Here’s the breakdown for the Crispy Pea Salad Lettuce Cups:

    • Calories: Approximately 150-200 calories per serving, depending on the exact ingredients and portion sizes.
    • Protein: Around 7-10 grams per serving, mainly from peas and optional added ingredients like chickpeas or quinoa.
    • Fat: Approximately 5-7 grams, primarily from olive oil and any nuts or cheese added.
    • Carbohydrates: Roughly 25 grams, depending on the vegetables used and their proportions.
    • Fiber: About 6-8 grams, contributing to daily fiber needs and promoting a healthy digestive system.
    • Vitamins and Minerals: A rich source of vitamins A, C, and K, iron, and calcium, making it a nourishing addition to your diet.

    With nutritional components that cater to various health goals, Crispy Pea Salad Lettuce Cups are an excellent fit for health-conscious eaters looking for delightful flavors and a light meal.

    FAQs: Frequently Asked Questions About Crispy Pea Salad Lettuce Cups

    1. Can I prepare Crispy Pea Salad Lettuce Cups in advance?

    While it’s best to assemble the cups just before serving for maximum crunch, you can prepare the salad mix up to 2 days in advance and store it in the refrigerator. Just keep lettuce leaves separate to avoid wilting.

    2. Are these salad cups suitable for meal prep?

    Yes! They work beautifully for meal prep. Just portion the salad filling and lettuce cups separately to maintain their freshness, making it a perfect option for those seeking healthy recipes throughout the week.

    3. How can I make this recipe more filling?

    You can add higher-protein ingredients like cooked quinoa, chickpeas, or shredded chicken, making it not only satisfying but also a balanced meal option.

    4. What’s the best way to make this recipe gluten-free?

    This recipe is naturally gluten-free. Just ensure all prepackaged ingredients like dressings or additional toppings are labeled gluten-free to suit your dietary needs.

    5. Can I use different types of lettuce?

    Absolutely! While Romaine and Butter lettuce are ideal for their structure, you can also use other varieties like iceberg, butter, or even cabbage leaves. Each will provide a unique texture and taste.

    6. What dips or sauces go well with these lettuce cups?

    For enhanced flavor, consider serving them with dips like tzatziki, hummus, or a spicy yogurt sauce. The addition of such sauces can elevate your dish, making it even more indulgent!

    By addressing common queries, this section brings clarity to your culinary journey with Crispy Pea Salad Lettuce Cups while encouraging culinary creativity consciously.


    Embarking on your culinary adventure with the Crispy Pea Salad Lettuce Cups guarantees nutritious and delightful experiences. Embrace the simplicity, experiment with variations, and savor the health benefits of this beautiful dish! Whether preparing for yourself or feeding a crowd, these cups are sure to impress while aligning with healthy recipes that promote wellness and enjoyment.

  • Best Vegan Rhubarb Crisp

    Best Vegan Rhubarb Crisp

    Best Vegan Rhubarb Crisp: A Tropical Delight

    Introduction to Best Vegan Rhubarb Crisp

    Are you looking for the perfect addition to your collection of dessert recipes? Look no further than the delightful Best Vegan Rhubarb Crisp! This simple yet oh-so-delicious treat is a fantastic option for anyone seeking a warm, comforting dessert. Combining the tartness of rhubarb with a crunchy, sweet topping, this rhubarb crisp offers a unique twist that’s sure to please your palate.

    What sets this recipe apart is its emphasis on healthy, plant-based ingredients that cater to various dietary needs. Whether you’re vegan, gluten-free, or even watching your calorie intake, this recipe has got you covered. Not only is it easy to prepare, but it also provides an excellent way to enjoy the taste of fresh rhubarb, making it an ideal option for busy parents or anyone craving a quick yet satisfying dessert.

    With its layers of flavor and texture, the Best Vegan Rhubarb Crisp invites you to gather around the table and indulge without guilt. Perfect for any occasion—be it a family dinner, a summer potluck, or a cozy night in—this dessert will warm your heart and fill your home with irresistible aromas. Get ready to embrace a dessert that not only satisfies your cravings but also promotes a healthier lifestyle!


    Benefits and Advantages of Best Vegan Rhubarb Crisp

    When it comes to dessert recipes, the Best Vegan Rhubarb Crisp really shines, thanks to its remarkable attributes. Here’s why you should consider adding this delectable dish to your dessert arsenal:

    1. Easy Preparation

    One of the biggest advantages of this recipe is its simplicity. With just a handful of ingredients, you can whip up a delightful dessert in under an hour! The straightforward instructions make it accessible for cooks at every level, from beginners to seasoned bakers. Whether you’re short on time or just want a fuss-free dessert, this rhubarb crisp fits the bill perfectly.

    2. Health Benefits

    Unlike many traditional dessert recipes that are loaded with sugar and fat, the Best Vegan Rhubarb Crisp is a healthier alternative. Rhubarb is known for its rich nutritional profile, offering vitamins C and K, as well as antioxidants. By opting for natural sweeteners like maple syrup and using oats for the topping, you’ll create a dessert that satisfies your sweet tooth without the guilt. It’s a great choice for those conscious about their health or looking to maintain a balanced diet.

    3. Versatility

    This vegan rhubarb crisp is incredibly versatile. Not only can it be enjoyed warm straight from the oven, but it’s also delightful served cold or at room temperature. You can pair it with a scoop of dairy-free ice cream or a dollop of coconut yogurt for an extra touch. This flexibility makes it perfect for any occasion—whether you’re hosting a dinner party or simply enjoying a quiet evening at home.

    4. Suitable for Various Dietary Needs

    If you’re entertaining guests or feeding a family, having a dessert that caters to various dietary requirements can be a challenge. Fortunately, this Best Vegan Rhubarb Crisp is not only vegan but can also be easily made gluten-free by choosing certified gluten-free oats. It accommodates different dietary lifestyles without sacrificing flavor, making it an excellent option for gatherings or celebrations.

    In conclusion, the Best Vegan Rhubarb Crisp isn’t just a treat; it’s a friendly addition to your collection of dessert recipes that prioritizes health and inclusivity. Its ease of preparation, health benefits, versatility, and suitability for various diets make it a standout recipe that you’ll want to make again and again.


    Ingredients Overview

    Essential Ingredients for Best Vegan Rhubarb Crisp

    To create a scrumptious Best Vegan Rhubarb Crisp, you’ll need the following ingredients:

    For the Rhubarb Filling:

    • 4 cups of fresh rhubarb, chopped: Offers a tangy flavor and dense texture.
    • ¾ cup of maple syrup or agave nectar: A natural sweetener that complements the tartness of rhubarb while keeping it vegan.
    • 1 tablespoon of cornstarch: Acts as a thickener, creating a perfect filling consistency.
    • 1 teaspoon of vanilla extract: Enhances the flavor profile.
    • 1 teaspoon of cinnamon: Adds warmth and sweetness.

    For the Crisp Topping:

    • 1 cup of rolled oats: Provides crunch and health benefits; choose certified gluten-free if needed.
    • ½ cup of almond flour or oat flour: Contributes to a crumbly texture while remaining gluten-free.
    • ½ cup of coconut oil or vegan butter, melted: Binds the topping ingredients together while adding richness.
    • ¼ cup of brown sugar or coconut sugar: Adds sweetness to the topping.
    • 1 teaspoon of salt: Balances flavors and enhances the overall taste.

    This straightforward list ensures your Best Vegan Rhubarb Crisp is as healthy as it is delicious, making it one of the most enjoyable dessert recipes you can try!

    Dietary Substitutions to Customize Your Best Vegan Rhubarb Crisp

    Customization is key in making this recipe work for your specific dietary needs or preferences. Here are some substitutions you can consider:

    • Rhubarb Substitute: If fresh rhubarb isn’t available, consider using frozen rhubarb. Just remember to thaw and drain excess moisture to avoid a soggy filling.
    • Sweeteners: If you prefer a lower-glycemic option, swap out the maple syrup for monk fruit sweetener or stevia, adjusting to taste.
    • Gluten-Free Options: Use certified gluten-free oats and almond flour to ensure the crisp is suitable for those sensitive to gluten.
    • Nut-Free Options: Replace almond flour with sunflower seed flour to accommodate nut allergies while maintaining a delightful texture.
    • Oil-Free Version: To make the dish oil-free, use applesauce instead of coconut oil or vegan butter in the topping. Just remember to adjust the texture accordingly.

    With these substitutions, the Best Vegan Rhubarb Crisp can easily be tailored to meet the needs of anyone at your table, making it a universally loved dessert!


    How to Prepare the Perfect Best Vegan Rhubarb Crisp: Step-by-Step Guide

    Creating a delicious Best Vegan Rhubarb Crisp involves a few easy steps. Follow this step-by-step guide to ensure a successful bake:

    1. Prepare the Oven: Preheat your oven to 350°F (175°C). This will ensure your rhubarb crisp bakes evenly and reaches the perfect consistency.

    2. Prepare the Filling: In a large mixing bowl, combine the chopped rhubarb, maple syrup, cornstarch, vanilla extract, and cinnamon. Stir the mixture until the rhubarb is evenly coated. Pour this filling into a greased 9×13-inch baking dish.

    3. Make the Crisp Topping: In a separate bowl, combine the rolled oats, almond flour (or oat flour), melted coconut oil (or vegan butter), brown sugar, and salt. Mix thoroughly until all ingredients are combined.

    4. Assemble the Crisp: Evenly spread the oat topping over the rhubarb filling in the baking dish. Ensure that the topping covers the filling completely for a delightful crunch.

    5. Bake: Place the baking dish in the preheated oven and bake for 35-40 minutes, or until the filling is bubbling and the topping is golden brown.

    6. Cool and Serve: Once baked, remove the crisp from the oven. Let it cool for about 10-15 minutes to allow the filling to set. Then, serve warm with your favorite vegan ice cream or coconut yogurt.

    7. Storing Leftovers: If you have any leftovers, ensure they are stored in an airtight container in the refrigerator. They’ll stay fresh for a few days.

    8. Making It Ahead: Feel free to prep the rhubarb filling and the crisp topping separately a day in advance for an even quicker assembly on serving day.

    This clear guide to making the Best Vegan Rhubarb Crisp is crafted so that you’ll succeed on your first try! It’s a gem among dessert recipes, perfect for sharing with family and friends while enjoying the wholesome taste of rhubarb.


    Mastering Best Vegan Rhubarb Crisp: Advanced Tips and Variations

    Now that you have the foundational recipe, it’s time to explore some advanced tips and variations to elevate your Best Vegan Rhubarb Crisp:

    1. Blend of Fruits:

    For a unique fruit medley, consider mixing rhubarb with other fruits such as strawberries, blueberries, or apples. Each addition will introduce new flavors and textures, enhancing your crisp.

    2. Add Nuts or Seeds:

    Incorporate chopped nuts such as walnuts, pecans, or even sunflower seeds into the topping. They will add an extra crunch and richness while providing additional nutrients.

    3. Spice It Up:

    Enhance the flavor by experimenting with spices. Try adding nutmeg or ginger, which can complement the tangy rhubarb beautifully.

    4. Top with Coconut Cream:

    For a delightful finish, serve your rhubarb crisp warm with a dollop of whipped coconut cream. The creaminess adds a luxurious touch that pairs beautifully with the crisp.

    5. Make Mini Crisps:

    For individual servings, consider preparing mini crisps by layering the rhubarb and topping in ramekins. This is not only a fun presentation but also makes for easier portion control.

    6. Vegan Cheese Option:

    For a savory twist, add a layer of nut-based vegan cheese under your topping for a unique contrast to the tart rhubarb.

    Each of these tips and variations will allow you to create a customized version of the Best Vegan Rhubarb Crisp that reflects your personal taste while keeping it healthy and delicious. Embrace the creativity in your kitchen and turn this recipe from basic into extraordinary!


    How to Store Best Vegan Rhubarb Crisp: Best Practices

    If you end up with leftovers—though it’s unlikely—you want to make sure your Best Vegan Rhubarb Crisp stays fresh for as long as possible. Use these best storage practices:

    1. Refrigeration: Allow the crisp to cool completely before covering it with plastic wrap or transferring it to an airtight container. Store it in the refrigerator for up to five days.

    2. Freezing: For longer storage, the rhubarb crisp can be frozen. Make sure to wrap it tightly in plastic wrap and then foil to prevent freezer burn. This dessert can last for up to three months in the freezer.

    3. Reheating: To reheat, simply place the crisp in a preheated oven at 350°F (175°C) for about 15-20 minutes, or until warmed through. Alternatively, individual servings can be reheated in the microwave for about 30-60 seconds.

    Utilizing these best practices ensures that your Best Vegan Rhubarb Crisp remains delicious and flavorful, making it one of the more practical dessert recipes to store and enjoy later!


    Nutritional Value of Best Vegan Rhubarb Crisp

    Understanding the nutritional value of the Best Vegan Rhubarb Crisp allows you to enjoy it as part of a balanced diet. Here is a breakdown of the nutritional values you can expect per serving (approximately 1/8 of the recipe):

    • Calories: 180
    • Total Fat: 8g
    • Saturated Fat: 4g
    • Cholesterol: 0mg
    • Sodium: 75mg
    • Total Carbohydrates: 27g
    • Dietary Fiber: 3g
    • Sugar: 7g
    • Protein: 3g
    • Vitamin A: 2% DV
    • Vitamin C: 6% DV
    • Calcium: 4% DV
    • Iron: 6% DV

    This nutritional profile showcases the health benefits of this delightful dessert while remaining mindful of calories, fats, and sugars. The combination of rhubarb and other wholesome ingredients contributes to a dessert that fits nicely into many dietary frameworks, making it a top contender among healthy dessert recipes.


    FAQs: Frequently Asked Questions About Best Vegan Rhubarb Crisp

    Q: Can I use frozen rhubarb?
    A: Yes, you can substitute frozen rhubarb for fresh! Just remember to thaw and drain any excess liquid to avoid a watery filling.

    Q: What can I use instead of maple syrup?
    A: Agave nectar, brown sugar, or a sugar-free sweetener can be used as a substitute; however, taste and texture may vary slightly.

    Q: How do I store the rhubarb crisp?
    A: Store any leftovers in an airtight container in the refrigerator for up to five days. For longer storage, wrap tightly and freeze for up to three months.

    Q: Is it possible to make this crisp gluten-free?
    A: Absolutely! Just make sure to choose certified gluten-free oats and flour types for the topping to keep it gluten-free.

    Q: Can I make this ahead of time?
    A: Yes, you can prep the filling and the topping separately in advance. Just assemble and bake when you’re ready to serve!

    Q: Can I add other fruits to the filling?
    A: Yes, mixing in strawberries, apples, or blueberries works wonderfully and can enhance the flavor palette of your crisp!

    These FAQs cover common queries related to the Best Vegan Rhubarb Crisp, making this recipe easy to approach for everyone. It stands as a delicious addition to your favorite dessert recipes that delights both the palate and the body. Happy baking!

  • My Southern MamaS Secret Recipe For The Best Pea Salad

    My Southern MamaS Secret Recipe For The Best Pea Salad

    My Southern Mama’s Secret Recipe For The Best Pea Salad!: A Tropical Delight

    Introduction to My Southern Mama’s Secret Recipe For The Best Pea Salad!

    Welcome to the heart of Southern cooking with a twist, where ‘My Southern Mama’s Secret Recipe For The Best Pea Salad!’ is not just a dish but a celebration of flavors and traditions. This pea salad is a staple at family gatherings, bringing together simplicity and satisfaction in every bite. If you’re seeking recipe ideas that are not only easy to prepare but also pack a nutritional punch, you’ve hit the jackpot.

    At its core, this salad features vibrant green peas, which are a fantastic source of vitamins and minerals. Plus, it’s vegan, gluten-free, and low-calorie, making it an ideal choice for everyone—busy parents, health-conscious individuals, and food enthusiasts alike. Whether you enjoy it as a side dish at your next barbecue or as a light lunch during the week, this pea salad is versatile enough to fit any occasion and dietary need.

    The best part? Preparing this salad is incredibly straightforward. With just a handful of fresh ingredients and a few minutes in the kitchen, you can whip up a dish that feels festive and indulgent without the fuss. This recipe is bound to become a go-to in your kitchen, perfect for serving at casual get-togethers or even more formal occasions. Let’s dive into the details of this delightful pea salad!

    Benefits and Advantages of My Southern Mama’s Secret Recipe For The Best Pea Salad!

    One of the primary reasons why My Southern Mama’s Secret Recipe For The Best Pea Salad! stands out amongst countless recipe ideas is its incredible ease of preparation. All you need are a few fresh ingredients, a mixing bowl, and about 10 minutes of your time. This simplicity allows even novice cooks to create an impressive dish without stress.

    The health benefits are equally compelling. Green peas are low in calories yet high in fiber, protein, and an array of vitamins including A, C, and K. They support digestive health, boost immunity, and are excellent for maintaining muscle mass. Furthermore, this salad is perfect for anyone following a vegan or gluten-free diet, making it a great option for gatherings with diverse dietary preferences.

    Another advantage of this recipe is its adaptability. Feel free to mix in your favorite ingredients, whether it’s crunchy bell peppers, creamy avocado, or zesty onions. This not only enhances the flavors but allows you to customize the dish for those particular taste buds in your family or friend group. The recipe shines in its versatility, making it a perfect addition to lunchboxes, side dishes at summer picnics, or potlucks.

    Furthermore, it pairs wonderfully with various mains, from grilled chicken to hearty plant-based burgers. So if you’re searching for recipe ideas that are nutritious, quick, and inclusive, you’ll find this pea salad to be a refreshing and satisfying choice.

    Ingredients Overview

    Essential Ingredients for My Southern Mama’s Secret Recipe For The Best Pea Salad!

    To prepare My Southern Mama’s Secret Recipe For The Best Pea Salad!, you will need the following essential ingredients:

    • 2 cups fresh or frozen peas (thaw if frozen)
      These little gems are the star of the show, providing protein and fiber.

    • 1 cup diced bell peppers (red, yellow, or green)
      Bell peppers add a pop of color and a sweet crunch.

    • 1/2 cup diced red onion
      This ingredient brings a sharp taste that pairs well with the sweetness of the peas.

    • 1/2 cup vegan mayonnaise (or regular mayonnaise for non-vegan option)
      The mayo serves as a creamy base, ensuring the salad is rich in texture while remaining light.

    • 2 tablespoons apple cider vinegar
      A drizzle of this tangy vinegar balances the creaminess with a pleasant acidity.

    • Salt and pepper to taste
      These staples nourish your salad with essential seasoning to enhance all flavors.

    • 1/4 cup fresh dill or parsley (chopped)
      Adding fresh herbs provides an aromatic freshness that complements the ingredients beautifully.

    Vegan, Gluten-Free, and Low-Calorie Options

    • For a vegan option, ensure to use plant-based mayonnaise—many brands offer amazing substitutes that taste just as good.
    • This recipe is naturally gluten-free, so feel free to serve it to your guests without worries about gluten contamination.
    • Additionally, using non-fat or low-calorie mayonnaise can help reduce the overall calorie count for those watching their intake.

    Dietary Substitutions to Customize Your My Southern Mama’s Secret Recipe For The Best Pea Salad!

    Here are some recipe ideas for substitutions that can cater to various dietary needs or preferences:

    • For Protein: Add diced tofu or chickpeas to enhance the protein content. This addition makes it even more filling.
    • For Extra Crunch: Swap in diced celery or shredded carrots if you’re looking for a crunch that also adds extra color and nutrients.
    • For a Zesty Kick: Introduce diced jalapeños or a touch of hot sauce for those who crave a bold flavor.
    • For Sweetness: A teaspoon of honey or maple syrup can elevate the flavor profile while keeping the dish vegan—just check on the preferences of your group.

    With these ingredients and substitutions in mind, you can tailor the dish to suit nearly any dietary requirement without sacrificing flavor.

    How to Prepare the Perfect My Southern Mama’s Secret Recipe For The Best Pea Salad!: Step-by-Step Guide

    Creating My Southern Mama’s Secret Recipe For The Best Pea Salad! is a breeze! Follow these simple steps to craft your delightful dish:

    1. Prepare the Base: Start by gathering all your ingredients. If using frozen peas, ensure they are completely thawed.

    2. Mix Peas and Vegetables: In a large mixing bowl, combine the peas, diced bell peppers, and red onion. Toss gently to mix the ingredients.

    3. Add the Dressing: In a separate smaller bowl, whisk together the vegan mayonnaise and apple cider vinegar. Pour this mixture over the pea and vegetable mix.

    4. Season and Toss: Sprinkle salt and pepper to taste. Mix everything together until all components are coated in the creamy dressing.

    5. Finish with Fresh Herbs: Add the chopped dill or parsley, giving the salad one final toss to integrate the herb flavor throughout.

    6. Taste Test: Before serving, taste your salad and adjust the seasoning as desired. Feel free to add more herbs, vinegar, or seasoning based on your preferences.

    7. Chill Before Serving: For the best flavor, allow the salad to chill in the refrigerator for at least 30 minutes. This allows the flavors to meld beautifully.

    8. Serve and Enjoy: Present your beautiful pea salad in a bowl, garnished with additional herbs if you desire. Serve cold and watch it disappear!

    With these straightforward steps, you’ll have a delightful dish that anyone can enjoy. The simplicity and adaptability of this recipe make it a fantastic addition to any meal or gathering!

    Mastering My Southern Mama’s Secret Recipe For The Best Pea Salad!: Advanced Tips and Variations

    To take your pea salad to the next level, consider these advanced tips and variations:

    • Experiment with Flavors: Try adding crushed garlic or a squeeze of lemon juice for a depth of flavor. These surprises will elevate your salad!

    • Make It an Entrée: Transform the salad into a main course by adding cooked quinoa, lentils, or whole grain pasta for extra nutrients and satiety.

    • Cheese Lovers Unite: For non-vegan versions, crumbled feta or shredded cheddar can introduce creaminess and add a savory touch.

    • Herb Swaps: While dill is a classic choice, experimenting with herbs like basil, cilantro, or mint can yield delightful outcomes.

    • Nuts and Seeds: Toss in some sunflower seeds or slivered almonds for an added layer of texture and healthy fats.

    Stirring in these variations will not only allow your creativity to shine but will keep this dish refreshing and interesting for each serving occasion.

    How to Store My Southern Mama’s Secret Recipe For The Best Pea Salad!: Best Practices

    To ensure your My Southern Mama’s Secret Recipe For The Best Pea Salad! stays fresh and delicious, follow these storage tips:

    • Refrigeration: Store any leftovers in an airtight container in the refrigerator. This salad will usually keep well for up to 3-5 days, allowing you to enjoy it as a quick lunch or side dish throughout the week.

    • Freezing: While it’s best enjoyed fresh, you can freeze this salad if necessary. Just be aware that the texture may change slightly upon thawing. Place it in a freezer-safe container, and it can last for up to 2 months.

    • Reheating: If you’ve made adjustments or had it frozen, to serve it again, simply thaw it in the fridge overnight and give it a good stir before serving.

    By following these storage practices, you maximize your salad’s shelf life while enjoying its delightful flavors over time.

    Nutritional Value of My Southern Mama’s Secret Recipe For The Best Pea Salad!

    This pea salad is not only a feast for the taste buds, but it also serves as a nutritious addition to your meals. Here’s a closer look at the nutritional value of My Southern Mama’s Secret Recipe For The Best Pea Salad! (serving size: 1 cup).

    • Calories: Approximately 150
    • Total Fat: 5g
      Includes 0g trans fat
    • Saturated Fat: 1g
    • Cholesterol: 0mg
    • Sodium: 200mg
    • Total Carbohydrates: 22g
      Dietary Fiber: 6g, Sugars: 5g
    • Protein: 6g

    Health Benefits

    This nutrient-dense salad is an excellent source of:
    – Vitamins A, C, & K
    – Magnesium and Iron
    – Folate and Antioxidants

    Due to its rich nutrient profile, this salad supports various aspects of health, from improving digestion to enhancing skin health. Incorporating this dish into your diet can help meet your daily vegetable intake while keeping your meals light and fulfilling.

    FAQs: Frequently Asked Questions About My Southern Mama’s Secret Recipe For The Best Pea Salad!

    Q1: Can I make this salad ahead of time?
    Absolutely! The flavors deepen as they sit, so making it a day in advance can enhance the taste. Just store it in the refrigerator.

    Q2: Is this salad suitable for meal prep?
    Yes! This salad keeps well and is great for meal prep. Just ensure you store it in an airtight container to maintain freshness.

    Q3: Can I substitute the mayonnaise?
    Certainly! You can use Greek yogurt, avocado, or even cashew cream for a healthier alternative without sacrificing creaminess.

    Q4: What other ingredients can I add?
    Feel free to get creative! You can add diced avocados, crispy bacon bits, or even nuts for an added crunch.

    Q5: How long does the salad last in the fridge?
    The salad will stay fresh stored in an airtight container in the refrigerator for about 3-5 days.

    By addressing these common questions, we hope to encourage both novice and experienced cooks to embrace My Southern Mama’s Secret Recipe For The Best Pea Salad! and make it their own. The beauty of this recipe is found in its versatility, catering to a variety of tastes and dietary needs. So gather your ingredients and prepare to create a dish that will surely delight yourself and anyone who shares it with you!

  • 15-Minute Dairy Free Pea Salad

    15-Minute Dairy Free Pea Salad

    15-Minute Dairy Free Pea Salad: A Tropical Delight

    Introduction to 15-Minute Dairy Free Pea Salad

    Spring is a delightful time of year, often characterized by vibrant flavors and refreshing meals. Among the simplest and most delicious spring meals you can whip up is this 15-Minute Dairy Free Pea Salad. This salad embodies the essence of spring with its crisp textures and bright colors while being incredibly easy to prepare. With just a few wholesome ingredients, you can create a dish that is not only delightful to the palate but also caters to various dietary needs.

    Imagine a salad bursting with the sweetness of peas, the crunch of fresh vegetables, and the tang of a light dressing—all while being dairy-free and suitable for vegans and gluten-free eaters alike. This recipe incorporates nutritious ingredients, making it a healthful choice for busy parents, students, or anyone aiming for a quick yet satisfying meal.

    Whether you want a refreshing dish to serve at a family picnic or a quick lunch to enjoy on your own, this salad covers all your bases. It requires minimal kitchen skills, making it accessible to novice cooks, and it’s an excellent way to introduce fresh, seasonal produce into your diet. So, grab your mixing bowl, and let’s dive into this easy and nutritious salad that’s perfect for busy lifestyles!

    Benefits and Advantages of 15-Minute Dairy Free Pea Salad

    What makes this 15-Minute Dairy Free Pea Salad so appealing? For starters, it embodies convenience. In today’s fast-paced world, finding time to prepare healthy meals can be challenging, especially for busy parents, working professionals, or students. This salad can be thrown together in 15 minutes, making it ideal for anyone seeking to enjoy a quick, nutrient-dense meal.

    Health-wise, peas are a powerhouse of nutrition. They are rich in vitamins A, C, and K, as well as high in protein and fiber, which makes this salad a wholesome option. Furthermore, being dairy-free, this recipe is suitable for those who are lactose intolerant, vegan, or simply looking to reduce their dairy consumption. It not only caters to diverse dietary needs but also blesses your body with essential nutrients.

    Additionally, this salad is highly adaptable. You can easily tweak the ingredients based on what you have on hand, making it perfect for a last-minute dish or for accommodating varying taste preferences. Whether you want to omit certain vegetables, add some grains for added texture, or throw in your favorite nuts for a crunch, the possibilities are endless.

    This spring meal is also visually appealing, making it a great addition to your lunch table or spring gatherings. Its bright colors and fresh ingredients can make any meal look gourmet. Plus, with its light and refreshing qualities, it can serve as a delightful side dish or a satisfying main course.

    Ingredients Overview

    Essential Ingredients for 15-Minute Dairy Free Pea Salad

    Here is a comprehensive list of the key ingredients you’ll need to make this delicious Dairy Free Pea Salad:

    • 1 ½ cups fresh or frozen peas (thawed) – Packed with protein and fiber, they form the base of the salad.
    • 1 cup cherry tomatoes, halved – These add a burst of sweetness and vibrant color.
    • 1 cup cucumber, diced – Offers a refreshing crunch and hydrating quality.
    • ½ red onion, finely chopped – Provides a sharp flavor that balances the sweetness of the peas and tomatoes.
    • 1 bell pepper (any color), chopped – Adds sweetness and additional crunch.
    • 3 tablespoons olive oil – Acts as a healthy fat, enriching the flavors while being dairy-free.
    • 2 tablespoons lemon juice – Brightens the salad and enhances its fresh taste.
    • Salt and pepper to taste – Essential for seasoning and enhancing all the flavors.

    Note: This recipe is vegan, gluten-free, and low in calories, making it suitable for various dietary preferences.

    Dietary Substitutions to Customize Your 15-Minute Dairy Free Pea Salad

    This recipe’s design allows for numerous modifications, making it easy to customize according to your tastes or dietary restrictions. Here are some options for substitutions:

    • Peas: If you’re not a fan of peas, consider using green beans or edamame as alternatives. Both options bring a similar texture and nutritional value.

    • Vegetables: Feel free to swap in any vegetables you have on hand. Carrots, radishes, or even avocado can complement the dish beautifully.

    • Olive Oil: For a different flavor profile, you can use avocado oil or toasted sesame oil to dress the salad.

    • Lemon Juice: In place of the lemon juice, vinegar (such as apple cider or balsamic) can provide acidity but change the flavor profile slightly.

    • Nuts/Seeds: To add crunch, sprinkle some sunflower seeds or sliced almonds on top. This addition enhances the salad’s protein content and creates a fun texture contrast.

    By complying with dietary needs and ingredient availability, you can easily personalize your 15-Minute Dairy Free Pea Salad without compromising on flavor!

    How to Prepare the Perfect 15-Minute Dairy Free Pea Salad: Step-by-Step Guide

    Creating this refreshing 15-Minute Dairy Free Pea Salad is a breeze! Follow these simple steps for a quick preparation.

    1. Prepare the Base: Begin by rinsing the fresh or thawed peas under cold water. If you’re using frozen peas, ensure they are completely thawed to maintain the salad’s crisp texture.

    2. Chop the Vegetables: Dice the cucumber, halve the cherry tomatoes, and chop the bell pepper into bite-sized pieces. Finely chop the red onion, maintaining an even size for consistent flavor distribution.

    3. Combine Ingredients: In a large mixing bowl, add the peas, chopped cucumber, halved cherry tomatoes, diced bell pepper, and red onion. Toss them together gently until they are well combined.

    4. Prepare the Dressing: In a small bowl, whisk together the olive oil and lemon juice. Add salt and pepper to taste. This dressing provides a simple yet effective way to enhance flavor while keeping it dairy-free.

    5. Dress the Salad: Pour the prepared dressing over the salad ingredients. Toss gently again to ensure each component is coated evenly. This step is crucial for achieving a harmonious blend of flavors.

    6. Taste and Adjust: After tossing, take a moment to taste the salad. If needed, adjust seasoning by adding more salt, pepper, or lemon juice according to your liking.

    7. Serve Immediately or Chill: This salad can be enjoyed immediately, but letting it sit for about 10 minutes allows the flavors to meld beautifully. Alternatively, you can refrigerate it for an hour or two for a refreshing, chilled option.

    8. Customize: Finally, feel free to sprinkle your choice of nuts or seeds on top for added texture before serving. Enjoy your delightful spring meal!

    With these easy steps, you’ll have a colorful, nutritious dish ready in just 15 minutes, perfect for any occasion or quick family dinner!

    Mastering 15-Minute Dairy Free Pea Salad: Advanced Tips and Variations

    To elevate your 15-Minute Dairy Free Pea Salad to the next level, consider trying some of these advanced tips and variations:

    • Herb Infusion: Incorporating fresh herbs can significantly enhance the flavor profile. Try adding chopped mint, cilantro, or basil to give the salad a refreshing twist.

    • Grains and Proteins: You can further indulge this recipe by adding grains like quinoa or farro for added texture and nutritional value. Similarly, incorporating chickpeas or lentils can boost the protein content, making it more filling.

    • Spicy Kick: Add a dash of red pepper flakes or a sprinkle of chili powder if you’re in the mood for a bit of heat. This variation could introduce an unexpected twist to your refreshing salad.

    • Tofu or Tempeh: For a protein-packed option, try adding cubed tofu or tempeh. Just ensure they are properly seasoned to keep the flavor balanced.

    • Noodle Version: If you want something heartier, replace the salad base with noodles. Zoodles (zucchini noodles) or rice noodles can be used to create a unique, light dish perfect for a springtime meal.

    By experimenting with these variations, you can make each serving of this 15-Minute Dairy Free Pea Salad uniquely yours!

    How to Store 15-Minute Dairy Free Pea Salad: Best Practices

    Storing your 15-Minute Dairy Free Pea Salad properly ensures that you can enjoy it for days to come. Here are some simple practices to follow:

    • Refrigerate: Store leftover salad in an airtight container in the refrigerator for up to 3 days. This will help maintain its freshness and crispness. Just be aware that the vegetables may soften after a day or two, affecting texture.

    • Dress Separately: If you plan to keep the salad longer than a day, consider storing the dressing separately and adding it just before serving. This will keep the salad ingredients from becoming soggy.

    • Freezing: While this salad is best enjoyed fresh, if you have leftovers you won’t be able to eat within a few days, you can freeze the peas and other washed vegetables for later use in soups or stews. However, freezing may change the texture, so it’s not ideal for this specific salad.

    With these storage tips, you can ensure your spring meal stays fresh and delicious for several days, allowing for intermittent healthy snacking!

    Nutritional Value of 15-Minute Dairy Free Pea Salad

    When it comes to nutritional benefits, this 15-Minute Dairy Free Pea Salad excels. The following is an approximate nutritional breakdown per serving (based on 4 servings):

    • Calories: 150
    • Total Fat: 7g
    • Saturated Fat: 1g
    • Cholesterol: 0mg
    • Sodium: 200mg
    • Total Carbohydrates: 20g
    • Dietary Fiber: 5g
    • Sugars: 3g
    • Protein: 5g

    This salad provides a good balance of macronutrients, with a focus on protein and fiber, which is essential for promoting satiety and digestive health. The high vitamin content from peas and fresh veggies adds to its health benefits, making it a great option for anyone focused on clean eating or looking to maintain a balanced diet. Enjoy this nutritious meal as part of your spring meals routine for a refreshing dietary boost!

    FAQs: Frequently Asked Questions About 15-Minute Dairy Free Pea Salad

    Can I use frozen peas instead of fresh?

    Absolutely! Frozen peas work just as well and make preparation even quicker. Just be sure to thaw them beforehand.

    How long does this salad last in the fridge?

    The 15-Minute Dairy Free Pea Salad will stay fresh in the refrigerator for approximately 3 days. Just be mindful that the texture may soften a bit over time.

    Can I add more vegetables?

    Certainly! This salad is highly customizable. Feel free to mix in any fresh vegetables you have on hand, such as carrots, radishes, or avocado.

    Is this salad suitable for meal prep?

    Yes, it makes an excellent meal prep option! Just store the dressing separately if you plan to have leftovers for more than one day.

    Can I make this salad ahead of time?

    It’s best to prepare the salad shortly before serving for optimum freshness, but if needed, you can make it up to a few hours in advance. Just dress it right before eating for the best flavor.

    Enjoy crafting this 15-Minute Dairy Free Pea Salad for your family and friends. Its ease, versatility, and health benefits perfectly represent the essence of wonderful and simple spring meals!

  • Irresistible Rhubarb Zucchini Crisp

    Irresistible Rhubarb Zucchini Crisp

    Irresistible Rhubarb Zucchini Crisp: A Tropical Delight

    Introduction to Irresistible Rhubarb Zucchini Crisp

    When it comes to dessert recipes, the “Irresistible Rhubarb Zucchini Crisp” stands out as a vibrant, nourishing option that perfectly captures the essence of summer. This unique dish marries the tartness of fresh rhubarb with the subtle sweetness of grated zucchini, creating a delightful textural contrast that tickles the palate. Whether you’re a busy parent looking to whip up a quick treat or a student searching for an easy recipe to impress your friends, this crisp is a fantastic choice.

    Not only is it simple to make, but it’s also packed with health benefits. By utilizing whole ingredients, this recipe is inherently health-conscious, making it suitable for various dietary needs. It’s vegan, gluten-free, and can easily be adapted to become low-calorie by using alternatives like sugar substitutes. The zesty flavor of rhubarb is complemented by the moisture of zucchini, producing a crispy, crumbly topping that makes it irresistible! Moreover, the freshness of the ingredients ensures that every bite is bursting with flavor. This is not just a dish; it’s a celebration of the bounty of nature, designed to delight your taste buds while being easy on your waistline.

    Benefits and Advantages of Irresistible Rhubarb Zucchini Crisp

    The “Irresistible Rhubarb Zucchini Crisp” is particularly effective for several reasons. First, its ease of preparation makes it an ideal weeknight dessert or a delightful addition to any potluck. Without complicated techniques or hard-to-find ingredients, even novice cooks can create a masterpiece in their own kitchens.

    Health and Nutritional Benefits

    Moreover, this dish brings numerous health benefits to the table. Rhubarb is rich in dietary fiber, vitamins C and K, and minerals like calcium and magnesium. The addition of zucchini boosts the nutrient profile even further by providing antioxidants and additional fiber, which are essential for digestion and maintaining healthy blood sugar levels. Alternatively, if you’re concerned about sugar intake, you can easily replace granulated sugar with natural sweeteners like maple syrup or agave nectar.

    Additionally, this crisp is wonderfully versatile. You can enjoy it warm or cold, with a dollop of vegan ice cream or a splash of coconut cream. Perfect for those following a vegan or gluten-free lifestyle, it satisfies sweet cravings without compromising dietary restrictions. You can bring it to gatherings, serve it as a mid-week treat to your family, or simply indulge in it yourself.

    Ingredients Overview

    Essential Ingredients for Irresistible Rhubarb Zucchini Crisp

    Establishing a solid foundation for the “Irresistible Rhubarb Zucchini Crisp” is crucial for achieving ultimate deliciousness. Below is a list of all necessary ingredients along with their precise measurements and the benefits of key components:

    • 2 cups of chopped rhubarb: Provides the tartness that balances the sweetness.
    • 2 cups of grated zucchini: Adds moisture and important nutrients.
    • 1 cup of rolled oats: Gives the crisp topping a hearty texture.
    • 1/2 cup of all-purpose flour (or gluten-free flour): Helps bind the topping.
    • 1/2 cup of brown sugar (or coconut sugar): Sweetens the dish while giving it a caramel-like flavor.
    • 1/4 cup of melted coconut oil (or vegan butter): Imparts richness and moisture.
    • 1 tsp of vanilla extract: Enhances overall flavor.
    • 1/2 tsp of cinnamon (optional): Adds warmth and depth to the crisp topping.
    • 1/4 tsp of salt: Balances flavors.

    Dietary Substitutions to Customize Your Irresistible Rhubarb Zucchini Crisp

    Switching things up is easy with this recipe; here are some dietary substitutions to consider:

    • For a Vegan option: Use maple syrup or agave nectar instead of honey and ensure your butter is plant-based.
    • Gluten-Free: Swap all-purpose flour for gluten-free alternatives like coconut or almond flour.
    • Low-Calorie: Replace sugar with natural low-calorie sweeteners like stevia or erythritol.

    Immediate adaptability means your “Irresistible Rhubarb Zucchini Crisp” can cater to health-conscious consumers and those with dietary restrictions, ensuring that everyone can enjoy this delicious dessert.

    How to Prepare the Perfect Irresistible Rhubarb Zucchini Crisp: Step-by-Step Guide

    Taking on dessert recipes can be a rewarding experience, especially when you have a clear, actionable plan. Follow these easy steps to prepare your Irresistible Rhubarb Zucchini Crisp.

    1. Preheat the Oven: Start by preheating your oven to 350°F (175°C). This ensures uniform cooking.
    2. Prepare the Fruit: Wash and chop the rhubarb into small pieces. Grate the zucchini, squeezing out excess moisture using a clean dish towel or cheesecloth.
    3. Mix the Fruit Filling: In a large mixing bowl, combine the chopped rhubarb and grated zucchini. Add 1/4 cup of sugar and 1 tsp of vanilla extract, mixing well until everything is evenly coated.
    4. Prepare the Topping: In another bowl, mix the rolled oats, flour, brown sugar, cinnamon, and salt. Stir in the melted coconut oil until the mixture resembles coarse crumbs.
    5. Assemble the Dish: Spread the rhubarb and zucchini mixture evenly at the bottom of a greased baking dish. Top it generously with the oat mixture, ensuring an even layer.
    6. Bake: Place the baking dish in the preheated oven and bake for about 35–45 minutes, or until the top is golden brown and the juices are bubbling.
    7. Cool Before Serving: Once baked, remove from the oven and let it cool for about 10–15 minutes before serving. This cooling time helps the flavors meld beautifully.
    8. Optional Serving Suggestions: Serve warm topped with a scoop of vegan ice cream or enjoy it plain for a comforting dessert.

    By following these straightforward steps, you can easily create a delightful and wholesome treat while ensuring that it’s suitable for an array of dietary preferences.

    Mastering Irresistible Rhubarb Zucchini Crisp: Advanced Tips and Variations

    To truly elevate your Irresistible Rhubarb Zucchini Crisp, consider these advanced tips and variations that might inspire you:

    • Experiment with Spices: Feel free to add nutmeg, ginger, or cardamom to your topping mixture for an unexpected depth of flavor.
    • Add Nuts or Seeds: Chopped pecans, walnuts, or sunflower seeds can add a delightful crunch and a healthy dose of fats.
    • Try Different Fruits: Mix in other fruits like strawberries or apples for more flavor complexity. Each fruit will add a unique twist.
    • Make it a Breakfast Dish: Serve the crisp with a dollop of yogurt or as part of a hearty breakfast parfait, turning it into a healthy morning staple.

    Incorporating these suggestions into your preparation can allow the flexibility of this dish to shine through, making it adaptable and enjoyable for any occasion.

    How to Store Irresistible Rhubarb Zucchini Crisp: Best Practices

    After making your delightful crisp, proper storage ensures you can enjoy it for days. Here are the best practices for keeping your dessert recipes fresh:

    • Refrigeration: Allow the crisp to cool completely before transferring it to an airtight container. It will keep in the refrigerator for up to 4 days.
    • Freezing: If you wish to keep it longer, you can freeze the crisp. Wrap tightly in plastic wrap and place it in a freezer-safe container; it can last for up to 3 months.
    • Reheating: To enjoy leftovers, reheat in an oven preheated to 350°F (175°C) for about 15 minutes or until warm. Alternatively, you can microwave it for about a minute, but the oven retains the crispness better.

    These methods ensure that your Irresistible Rhubarb Zucchini Crisp preserves its flavor and texture, allowing you to enjoy it whenever you please.

    Nutritional Value of Irresistible Rhubarb Zucchini Crisp

    Understanding the nutritional value of your dessert recipes is important, especially if you’re health-conscious. Here’s a breakdown of a serving of Irresistible Rhubarb Zucchini Crisp:

    • Calories: Approximately 220
    • Total Fat: 8g (Saturated Fat: 5g)
    • Cholesterol: 0mg
    • Sodium: 150mg
    • Carbohydrates: 35g (Dietary Fiber: 4g, Sugars: 10g)
    • Protein: 3g

    This dessert contains a good balance of macronutrients and is a source of fiber, thanks to the oats and vegetables. Key vitamins and minerals from the rhubarb and zucchini enhance the overall nutritional profile, making your treat not just delicious but beneficial for your body.

    FAQs: Frequently Asked Questions About Irresistible Rhubarb Zucchini Crisp

    Q1: Can I substitute rhubarb with something else?
    A: Absolutely! You can substitute rhubarb with apples, strawberries, or even mixed berries. Just remember to adjust the sweetness to accommodate sweeter fruits.

    Q2: How can I make this recipe nut-free?
    A: Simply omit any nuts that may be added for crunch. The crisp still delivers great texture without compromising flavor.

    Q3: Is the Irresistible Rhubarb Zucchini Crisp suitable for meal prep?
    A: Yes, this crisp can easily be prepared in advance and stored in the refrigerator for several days or frozen for longer storage.

    Q4: What can I serve with this crisp?
    A: Pairing it with whipped coconut cream or a scoop of dairy-free ice cream can elevate this dish further. It works well as a breakfast or dessert!

    Q5: How can I make it more visually appealing?
    A: Adding fresh mint leaves as a garnish before serving or sprinkling crushed nuts on top can make your dish look enticing and elegant.

    By addressing these common queries, you provide further insight into the versatility and convenience of the Irresistible Rhubarb Zucchini Crisp, making it accessible for various readers interested in dessert recipes.

    In conclusion, the Irresistible Rhubarb Zucchini Crisp is a perfect illustration of how simple, healthy ingredients can come together to create something truly special. Whether you’re serving it at a gathering, enjoying it as a personal treat, or making it for your family, this recipe is bound to impress. Don’t hesitate to dive into the world of baking and enjoy the delightful flavors that this dish has to offer!