Blog

  • Simple Lemon Asparagus Pasta Salad

    Simple Lemon Asparagus Pasta Salad

    Simple Lemon Asparagus Pasta Salad: A Tropical Delight

    Introduction to Simple Lemon Asparagus Pasta Salad

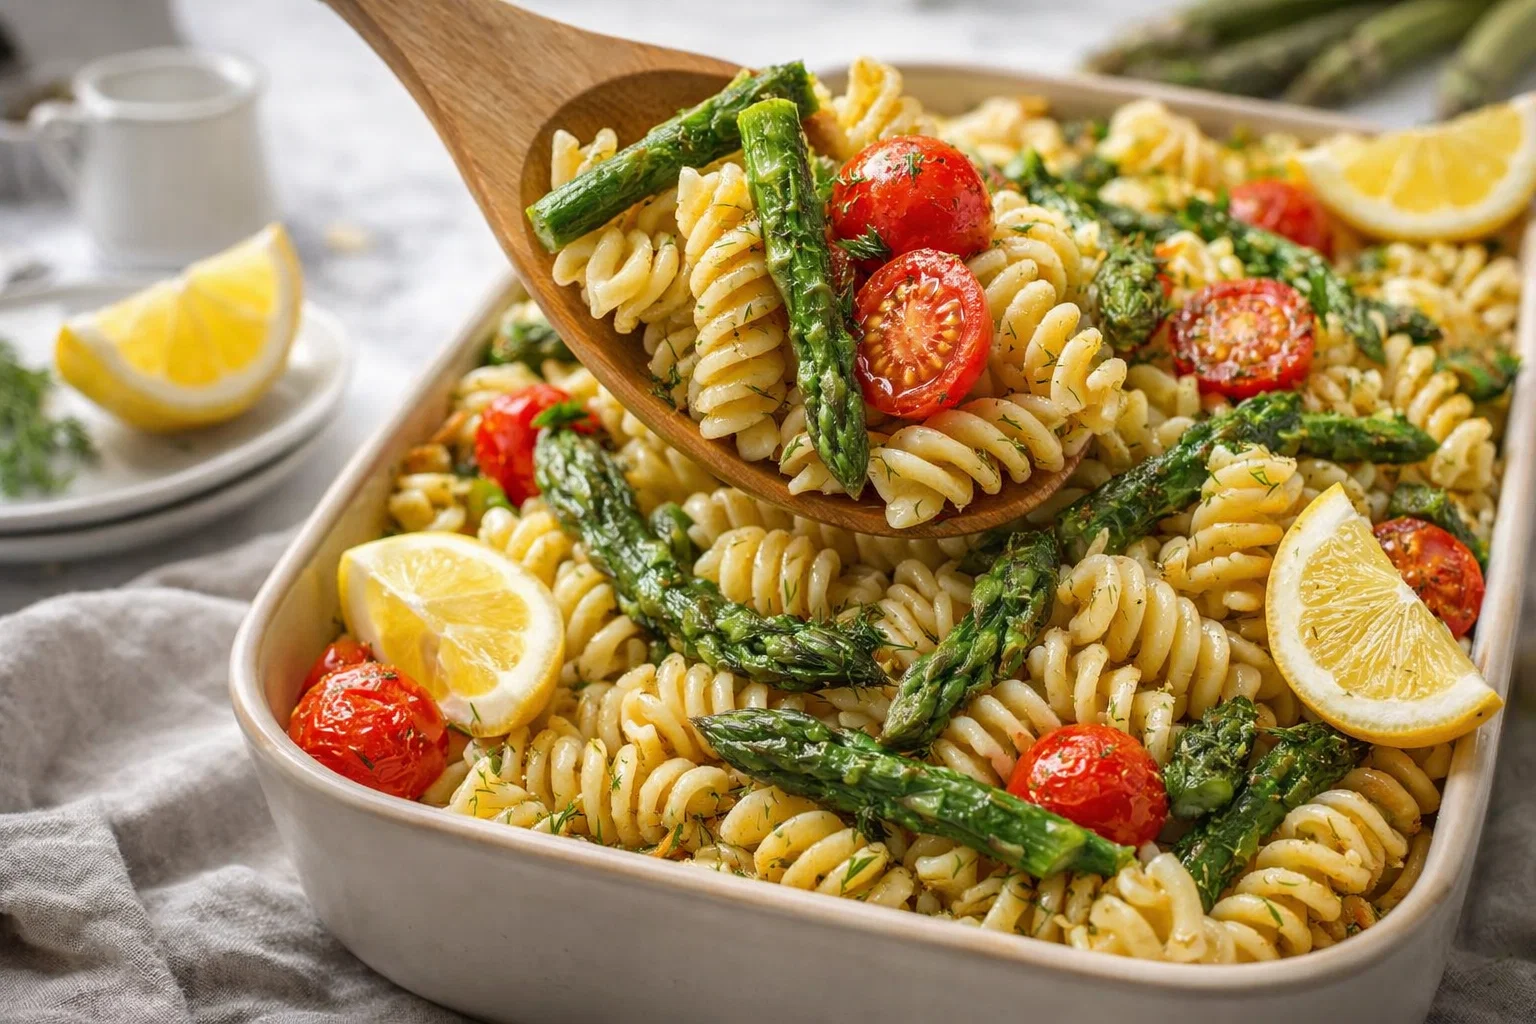
    When you think about a vibrant, fresh dish that brims with flavor and is remarkably simple to prepare, the Simple Lemon Asparagus Pasta Salad comes to mind. This delightful pasta salad serves as a refreshing option for various occasions, from family gatherings to casual weekday dinners. The beauty of a pasta salad lies not only in its taste but in its versatility and health benefits.

    This particular recipe shines a spotlight on the bright flavors of lemon and the crispness of asparagus, offering a tangy yet satisfying experience that many will appreciate. It’s simple enough for novice cooks yet enjoyable for seasoned chefs, making it an ideal dish for home cooks, busy parents, students, or anyone aiming for a gourmet touch in their meals without an exhaustive effort.

    Beyond the enticing flavors, this pasta salad checks numerous boxes for health-conscious individuals. It’s not just a feast for your taste buds; it is healthy, vegan, and gluten-free, accommodating a variety of dietary needs. As you dive into this recipe, you’ll discover how accessible, flavorful, and nourishing this dish truly is. With each bite, you can savor a symphony of tastes that evoke sunny days and warm company. So grab your ingredients and let’s make a delicious batch of pasta salad!

    Benefits and Advantages of Simple Lemon Asparagus Pasta Salad

    The benefits of making a Simple Lemon Asparagus Pasta Salad extend far beyond its delicious taste. Not only is it a crowd-pleaser, but it’s also a nutrient-dense meal perfect for anyone, whether you are a busy professional looking for quick meal options or a diet-conscious individual seeking light yet filling recipes.

    Ease of Preparation

    One of the primary reasons this pasta salad stands out is its simplicity. With readily available ingredients and straightforward cooking techniques, anyone can whip it up in under 30 minutes. This convenience is a boon for busy parents or students, who often juggle time between various commitments.

    Health Benefits

    Packed with healthful ingredients, this pasta salad incorporates fresh asparagus, known for its high fiber content and rich vitamins. Asparagus is low in calories but high in nutrients, making it a great addition for weight watchers. The dish also benefits from the antioxidants present in fresh lemons, contributing to good skin health and boosting your immune system.

    Moreover, if you opt for whole wheat or gluten-free pasta, you not only enhance the nutritional profile but also cater to various dietary preferences. This adaptability ensures everyone can enjoy a hearty meal without compromising their health goals.

    Nutrient-Rich Profile

    More than just a delicious dish, this pasta salad delivers a balanced mix of carbohydrates, proteins, and vitamins. Incorporating seasonal vegetables can elevate the nutritional value even further. Feel free to add ingredients like cherry tomatoes or spinach for added flavor and nutrients.

    Overall, the Simple Lemon Asparagus Pasta Salad not only proves to be a fantastic side dish but also serves as a satisfying main course on hot summer days or light winter lunches.

    Ingredients Overview

    Essential Ingredients for Simple Lemon Asparagus Pasta Salad

    Below is a detailed list of ingredients needed to create this vibrant pasta salad. With a perfect balance of flavors and textures, these components come together to delight the palate.

    • 12 ounces of pasta: Choose whole wheat or gluten-free varieties for added nutrition.
    • 1 bunch of fresh asparagus (about 1 pound): Provides a crunchy texture and is rich in vitamins A, C, E, and K.
    • 1 cup of cherry tomatoes: For a burst of sweetness, these also add vibrant color.
    • 1/2 cup of red onion, diced: Adds a punch of flavor and is packed with antioxidants.
    • 1/4 cup of fresh parsley, chopped: A great herb to brighten flavors while introducing added vitamins.
    • 1/2 cup of olive oil: For dressing, provides healthy fats.
    • Juice of 1 large lemon: Offers zest and brightness, elevating the entire dish.
    • Salt and pepper to taste: Essentials for seasoning and enhancing flavors.

    Diet-Friendly Options:
    – Use gluten-free pasta or zoodles (zucchini noodles) for those avoiding gluten.
    – Replace olive oil with avocado oil for a different flavor profile.
    – To make it richer, incorporate toasted nuts or seeds for added crunch and protein, making it more filling without excess calories.

    Dietary Substitutions to Customize Your Simple Lemon Asparagus Pasta Salad

    Creating an inclusive dish allows everyone to enjoy the robust flavors this pasta salad offers. Here are some substitutions you can easily make:

    • Vegetarian/Vegan: Keep the salad vegan by ensuring all dressings and added ingredients are free from animal products.
    • Nut-Free: For those with nut allergies, omit the nuts or substitute with seeds.
    • Low-Calorie: Swap traditional pasta for spiralized vegetables like zucchini or carrots for a lighter option.
    • Add Protein: Incorporate chickpeas, grilled chicken, or tofu to make the dish more filling and protein-rich, ideal for active individuals.

    By adjusting the ingredients to fit your dietary preferences or needs, you can enjoy this unique take on pasta salad guilt-free!

    How to Prepare the Perfect Simple Lemon Asparagus Pasta Salad: Step-by-Step Guide

    Creating the Simple Lemon Asparagus Pasta Salad is straightforward, following this easy step-by-step guide. Let’s dive into the flavor-packed process.

    Step 1: Prepare the Pasta

    1. Boil Water: In a large pot, bring salted water to a rolling boil.
    2. Cook the Pasta: Add your chosen pasta to the boiling water. Stir occasionally to prevent sticking, and cook until al dente, usually about 8-10 minutes for most types.
    3. Drain and Rinse: Once cooked, drain the pasta, and rinse it under cold running water to stop the cooking process. Set aside to cool.

    Step 2: Prepare the Asparagus

    1. Trim the Asparagus: Rinse and trim the ends of the asparagus. You want to remove the tough parts while keeping the tender tips.
    2. Blanching: In a saucepan of boiling water, blanch the asparagus for 2-3 minutes. You want it bright green and still crisp.
    3. Ice Bath: Immediately transfer the blanched asparagus to an ice bath to halt the cooking process. After a couple of minutes, drain and chop into 2-inch pieces.

    Step 3: Mix the Salad Ingredients

    1. Combine Vegetables: In a large mixing bowl, combine the cooled pasta, chopped asparagus, halved cherry tomatoes, diced red onion, and chopped parsley.
    2. Make the Dressing: In a small bowl, whisk together the olive oil, lemon juice, salt, and pepper. Create enough dressing to coat your salad generously.

    Step 4: Toss and Serve

    1. Toss Ingredients Together: Pour the dressing over the salad mixture and gently toss until all components are evenly coated.
    2. Adjust Seasoning: Taste and adjust the seasoning with additional salt or pepper as needed.
    3. Chill (Optional): For the best flavor, chill in the refrigerator for 30 minutes before serving. This allows the pasta salad flavors to meld beautifully.

    Step 5: Garnish and Enjoy

    1. Serve: Serve cold or at room temperature. Garnish with additional parsley or lemon slices for a bright presentation.
    2. Store Leftovers: If you have any leftovers, transfer them into an airtight container and refrigerate for up to three days.

    Enjoy your delicious Simple Lemon Asparagus Pasta Salad as a refreshing side dish or a satisfying main course. It’s versatile enough for any occasion—from festive gatherings to simple lunch breaks.

    Mastering Simple Lemon Asparagus Pasta Salad: Advanced Tips and Variations

    Creating a delightful Simple Lemon Asparagus Pasta Salad is only the beginning. Once you master the basics, there are countless ways to elevate your dish with advanced techniques and variations:

    Advanced Tips

    • Roasting Asparagus: Instead of boiling, try roasting your asparagus for a smokier flavor. Toss the trimmed asparagus with olive oil, salt, and pepper, and roast at 400°F (200°C) for 15-20 minutes.
    • Add Pesto: Toss in some pesto for a nutty flavor that complements the lemon beautifully. Just a couple of tablespoons can elevate the dish dramatically.
    • Use Artisanal Pasta: Experiment with a unique type of pasta, such as farfalle or orecchiette, for a different mouthfeel that merges well with the other ingredients.

    Creative Variations

    • Mediterranean Twist: Include ingredients like olives, feta cheese, or sun-dried tomatoes to create a Mediterranean-inspired version.
    • Protein-Packed: Add grilled shrimp, chicken breast, or chickpeas for extra protein and a heartier dish.
    • Vegan Caesar Twist: Incorporate a vegan caesar dressing for a creamy option that still complements the lemon flavors well.

    With these tips and variations, you can customize your Simple Lemon Asparagus Pasta Salad to keep it fresh and exciting every time you prepare it!

    How to Store Simple Lemon Asparagus Pasta Salad: Best Practices

    Proper storage of your Simple Lemon Asparagus Pasta Salad ensures you can enjoy leftovers without losing flavor or quality. Here are some best practices:

    Refrigeration

    • In the Fridge: Sealed in an airtight container, the pasta salad will keep well in the fridge for 3 to 4 days. This is perfect for meal prep or quick lunches.
    • Serving from the Fridge: If the salad has been refrigerated, you might want to give it a gentle toss to redistribute the ingredients before serving.

    Freezing

    • Freezing is Not Recommended: Due to the pasta and vegetables’ texture, freezing my alter the quality. Fresh ingredients lose their crunch after thawing. It is recommended to enjoy the salad fresh for the best texture and flavor experience.

    Reheating

    • Serving Cold or Room Temperature: The beauty of this pasta salad is that it can be served cold, and it doesn’t require reheating. Just pull it from the fridge, give it a toss, and it’s ready to enjoy!

    By ensuring proper storage, you can indulge in tasty, fresh leftovers while still enjoying the vibrant flavors of your pasta salad.

    Nutritional Value of Simple Lemon Asparagus Pasta Salad

    Understanding the nutritional value of your meals is essential, especially when aiming for a balanced diet. Here’s a breakdown of the nutrition for the Simple Lemon Asparagus Pasta Salad, based on typical ingredients and serving sizes.

    Nutritional Breakdown (Per Serving)

    • Calories: Approximately 250-300 calories
    • Protein: 8-10 grams
    • Carbohydrates: 35-40 grams
    • Dietary Fiber: 5-7 grams
    • Fats: 10-15 grams
    • Vitamin A: 25% DV (Daily Value)
    • Vitamin C: 30% DV
    • Calcium: 4% DV
    • Iron: 10% DV

    Health Benefits

    This nutrient-rich pasta salad supports cardiovascular health, aids in digestion with high fiber content, and provides a range of vitamins and antioxidants that boost your immune system. With its whole-food ingredients and healthy fats from olive oil, this dish stands as a smart choice for anyone looking to nourish their body.

    FAQs: Frequently Asked Questions About Simple Lemon Asparagus Pasta Salad

    As with any recipe, questions may arise about adaptations and specific cooking methods tailored to personal preferences. Here are some common FAQs regarding the Simple Lemon Asparagus Pasta Salad:

    Q1: Can I use other vegetables in this pasta salad?

    Absolutely! Feel free to incorporate seasonal vegetables, such as bell peppers, peas, or spinach, to suit your taste preferences or whatever you have on hand.

    Q2: How can I make this pasta salad gluten-free?

    Simply swap the traditional pasta for a gluten-free variety made from legumes or vegetables. Be sure to check labeling for any gluten-related concerns.

    Q3: Can I prepare the pasta salad ahead of time?

    Yes! Actually, making the salad a few hours—or even a day—ahead of time allows the flavors to meld, enhancing the taste. Just be sure to store it in an airtight container in the fridge.

    Q4: What can I replace lemon juice with if I’m not a fan of citrus?

    You can substitute lemon juice with vinegar, such as apple cider vinegar or red wine vinegar, keeping in mind this will alter the flavor profile.

    Q5: How can I make this recipe higher in protein?

    Consider adding grilled chicken, seared shrimp, or chickpeas to bump up the protein content. These additions will make the pasta salad more filling and suitable as a main course.

    Q6: Is this pasta salad vegan?

    Yes, if you make it without any non-vegan dressings or cheese, this pasta salad is entirely vegan and perfect for those following plant-based diets.

    By considering these FAQs, you can create your Simple Lemon Asparagus Pasta Salad tailored to your needs and preferences, ensuring everyone can enjoy this delightful dish to its fullest!


    Embark on a flavorful journey with this delightful Simple Lemon Asparagus Pasta Salad. Not only is this recipe straightforward and adaptable, but it also brings together vibrant tastes and nutritious ingredients, allowing every cook, from the novice to the expert, to relish a dish that satisfies the palate while meeting various dietary needs. So, prepare to embrace the freshness—your kitchen deserves this culinary delight! Enjoy!

  • Fun Rainbow Peeps Rice Krispie Treats

    Fun Rainbow Peeps Rice Krispie Treats

    Fun Rainbow Peeps Rice Krispie Treats: A Tropical Delight

    Introduction to Fun Rainbow Peeps Rice Krispie Treats

    Are you ready to embark on a colorful culinary adventure? Enter the world of Fun Rainbow Peeps Rice Krispie Treats, a delightful twist on classic dessert recipes that guarantees to bring a smile to your face. These treats are not only bursting with vibrant colors but are also incredibly simple to prepare, making them a perfect option for busy parents, enthusiastic bakers, and anyone looking to add a sweet touch to their day.

    Imagine gooey marshmallows, crispy Rice Krispies, and fluffy, sugary Peeps mingling together. This dessert recipe captures the essence of fun and creativity, perfect for birthdays, celebrations, or simply to brighten up a regular day. Moreover, they are customizable! Whether you prefer gluten-free, vegan, or low-calorie options, this recipe allows for substitutions that cater to various dietary preferences.

    Additionally, with just a handful of ingredients, this colorful treat is an approachable and enjoyable recipe for novice cooks and seasoned chefs alike. Not to mention, the bonding experience it provides for families, as everyone can join in mixing, molding, and decorating. This recipe is destined to be a favorite in your dessert repertoire, packed with nostalgic flavors that evoke feelings of joy and happiness.

    Benefits and Advantages of Fun Rainbow Peeps Rice Krispie Treats

    The Fun Rainbow Peeps Rice Krispie Treats offer an array of benefits that make this dessert recipe a standout choice:

    1. Ease of Preparation: The simplicity of this recipe is a significant advantage. With only three primary ingredients—Rice Krispies, marshmallows, and Peeps—it’s a quick and fun treat to whip up. Just melt, mix, and mold, and you’ll enjoy delicious results in no time. This makes them an ideal project for busy parents looking to occupy their children with a fun kitchen activity.

    2. Customizability: One of the greatest attributes of this recipe is its adaptability. You can easily swap ingredients to suit specific dietary preferences. For instance, opt for gluten-free Rice Krispies and vegan marshmallows, allowing those with dietary restrictions to enjoy these treats without worry. Additionally, it offers the opportunity to experiment with flavors and colors, turning basic ingredients into an eye-catching masterpiece.

    3. Health Benefits: While these treats are undoubtedly indulgent, they also lend themselves to healthier versions. By using lower-sugar or reduced-calorie marshmallows, you can enjoy them without the added guilt. Furthermore, you can include additional ingredients such as dried fruits or nuts for a nutrient boost, making these desserts a bit more wholesome.

    4. Perfect for Various Occasions: Whether you’re throwing a birthday party, organizing a school event, or preparing for a holiday celebration, these colorful treats can brighten any occasion. They’re not only fun to eat but also visually appealing, adding a festive flair to the dessert table. Plus, who can resist a treat topped with adorable, colorful Peeps?

    5. Engaging Activity: Making these treats can transform into a creative, bonding experience with family and friends. From choosing color combinations to decorating the treats, each step can encourage interaction and boost teamwork. This baking project becomes more than just food; it turns into memorable moments together.

    In summary, Fun Rainbow Peeps Rice Krispie Treats are a fun and fabulous way to express creativity, cater to dietary needs, and enjoy the delightful aspects of cooking with beloved ingredients. With their simplicity, health-conscious adaptations, and ability to fit seamlessly into any event, these treats are a must-add to your dessert recipe collection.

    Ingredients Overview

    Essential Ingredients for Fun Rainbow Peeps Rice Krispie Treats

    To create your vibrant Fun Rainbow Peeps Rice Krispie Treats, you will need the following ingredients:

    • 3 tablespoons unsalted butter (can be substituted with vegan butter for a dairy-free option)
    • 1 package (10 oz) mini marshmallows (use vegan marshmallows for a plant-based version)
    • 6 cups Rice Krispies cereal (gluten-free alternatives are available)
    • 1 package (10-count) Peeps in various colors (these can be arranged creatively on top or mixed in)

    Each ingredient plays a pivotal role in creating your delightful dessert:
    – Butter: Adds richness and helps bind the ingredients together.
    – Mini Marshmallows: The star ingredient that gives Rice Krispie treats their signature chewy texture. Their sweetness balances the slight crunch of the Rice Krispies.
    – Rice Krispies: This cereal forms the base of the recipe, providing that quintessential crispy texture.
    – Peeps: These marshmallow treats not only add color but offer a layer of flavor and fun, making the finished treat visually appealing.

    Dietary Substitutions to Customize Your Fun Rainbow Peeps Rice Krispie Treats

    To cater to various dietary needs, consider the following substitutions:

    • Gluten-Free: Swap regular Rice Krispies with gluten-free Rice Krispies, which are widely available at most grocery stores.
    • Vegan: Use vegan butter and marshmallows (such as Dandies or another brand) to keep this treat fully vegan-friendly.
    • Lower Sugar: Look for sugar-free or reduced-sugar marshmallows if you want a lighter version.
    • Flavor Variations: For a twist, consider adding a teaspoon of vanilla extract for extra flavor, or mix in festive sprinkles for a celebratory touch.
    • Textural Elements: You can incorporate nuts (such as almonds or pecans) or dried fruits (like cranberries or raisins) for additional nutrition and texture.

    These substitutions make it easy to adapt the recipe for individual dietary needs while maintaining the delightful experience of making and enjoying these colorful treats!

    How to Prepare the Perfect Fun Rainbow Peeps Rice Krispie Treats: Step-by-Step Guide

    Creating your Fun Rainbow Peeps Rice Krispie Treats is straightforward and enjoyable. Here’s a step-by-step guide to ensure your treat turns out perfectly every time:

    1. Prepare the Base: Begin by greasing a 9×13 inch pan with butter or cooking spray to prevent sticking.

    2. Melt the Butter: In a large saucepan, over low heat, melt 3 tablespoons of unsalted butter. Be careful not to let it brown.

    3. Add Marshmallows: Once the butter is completely melted, add the entire package of mini marshmallows to the saucepan. Stir continuously until the marshmallows are fully melted and mixed with the butter, creating a smooth and gooey mixture.

    4. Incorporate Rice Krispies: Remove the saucepan from heat, and immediately add 6 cups of Rice Krispies cereal to the marshmallow mixture. Stir gently but thoroughly until all of the cereal is evenly coated in the marshmallow.

    5. Add Peeps: If you like, you can fold in a few chopped Peeps into the mixture at this stage. This adds an extra layer of flavor.

    6. Spread Mixture into Pan: Transfer the mixture into the greased pan. Use a spatula or your hands (but be careful of the heat!) to press the mixture evenly into the pan. Ensure it’s compacted, so it holds together.

    7. Set the Treats: Allow the Rice Krispie mixture to sit at room temperature for about 30 minutes, or until set. Avoid placing it in the refrigerator, as this can make the treats too hard.

    8. Decorate with Peeps: Once set, take your Peeps and place them in fun patterns on top of the Rice Krispie treats. You can arrange them by color, or create whimsical shapes to enhance the overall presentation.

    9. Cut into Squares: To serve, use a sharp knife to cut the treats into squares or rectangles. You can also use cookie cutters to create fun shapes, ideal for parties.

    10. Serve and Enjoy: Arrange your colorful treats on a platter, and get ready to enjoy your vibrant, chewy creations with family and friends!

    Note on Customization

    Throughout the preparation process, feel free to get creative! You can customize colors, and flavors, and even mix in fun ingredients based on your preferences and dietary needs. The possibilities are endless!

    Mastering Fun Rainbow Peeps Rice Krispie Treats: Advanced Tips and Variations

    While the basic version of Fun Rainbow Peeps Rice Krispie Treats is sure to delight, here are some advanced tips and exciting variations to elevate your dessert recipe:

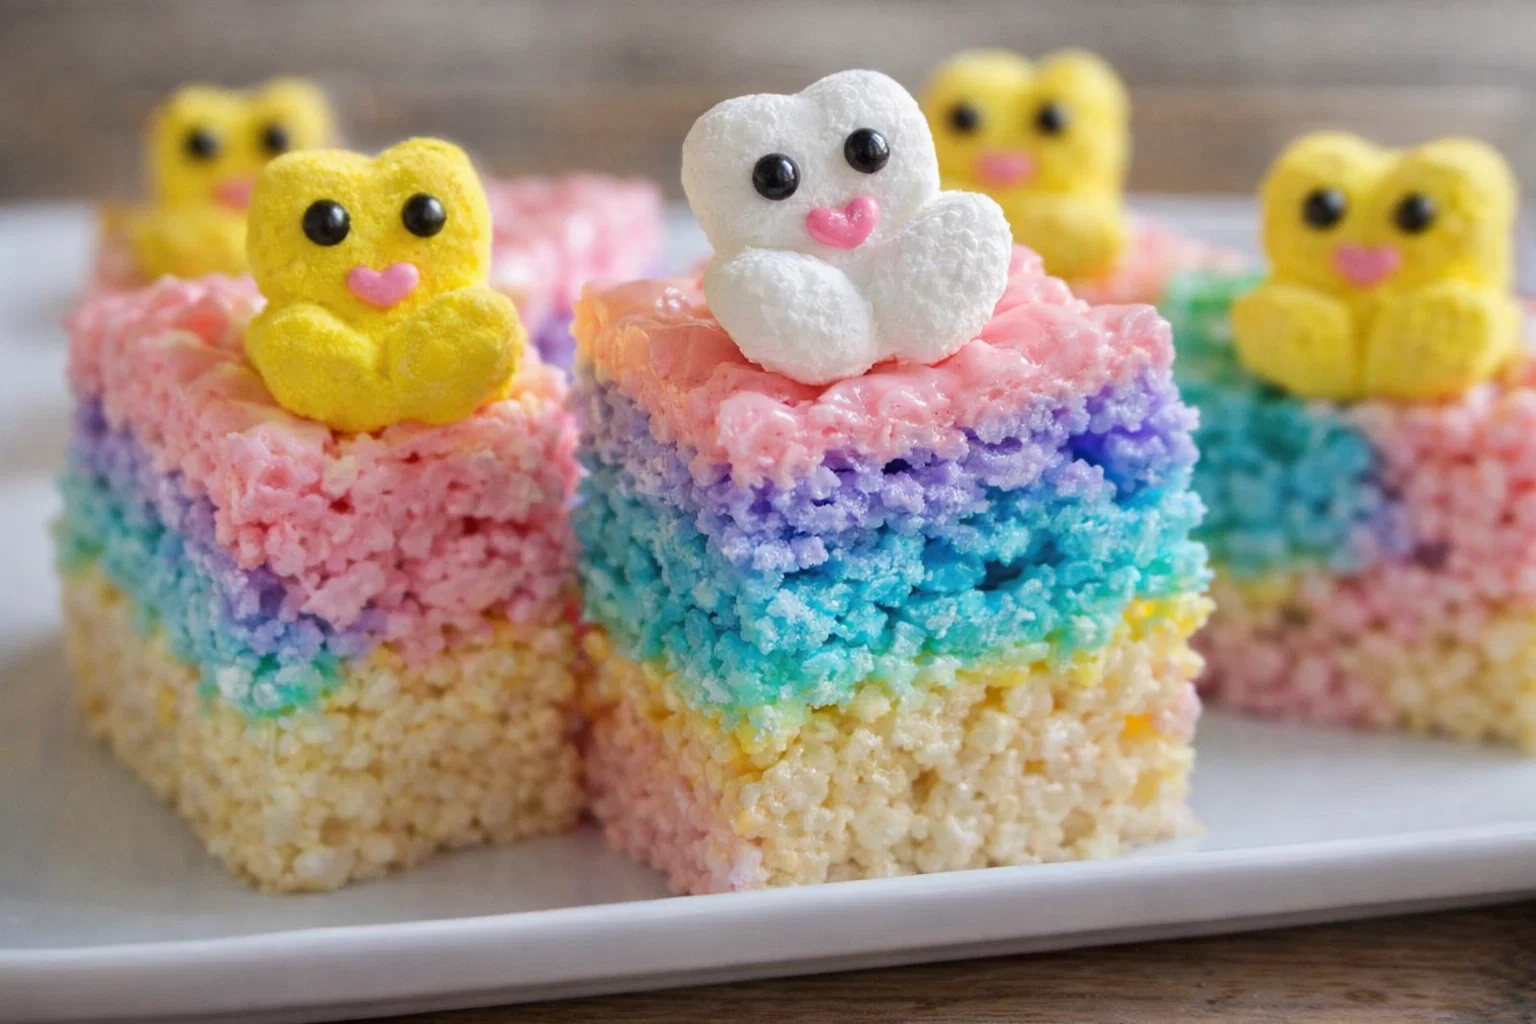
    1. Layered Treats: Create a fun layered effect by preparing different colors of Rice Krispie mixtures. Simply divide the marshmallow mixture into bowls and color them with a few drops of food coloring. Layer different colors in the pan for a vibrant visual.

    2. Chocolate Drizzle: For a decadent twist, melt some chocolate (milk, dark, or white) and drizzle it over the set treats before adding the Peeps. Allow the chocolate to harden for added flavor and visual appeal.

    3. Peep Variations: Use different themed Peeps depending on holidays or events—Halloween Peeps for spooky treats, heart-shaped Peeps for Valentine’s Day, or Christmas-themed Peeps can make these treats festive all year round.

    4. Fun Add-ins: Mix in mini chocolate chips, candy corn, or rice chips for a delightful texture variation. These add-ins not only provide flavor but also elevate the overall enjoyment of the treats.

    5. Serve with Dipping Sauce: Serve your treats with a side of melted chocolate or caramel as a dipping option. This adds another layer of indulgence while offering serving variety.

    By applying these tips and variations, you can transform your Fun Rainbow Peeps Rice Krispie Treats into a stunning centerpiece for any occasion!

    How to Store Fun Rainbow Peeps Rice Krispie Treats: Best Practices

    To keep your Fun Rainbow Peeps Rice Krispie Treats fresh and delicious, it’s essential to store them properly:

    • Room Temperature: The best way to store these treats is in an airtight container at room temperature. They can typically last about 3-5 days without losing their chewy texture.

    • Refrigeration: If you want to extend their shelf life, you can keep the treats in the fridge for up to a week. However, be aware that refrigeration may make them slightly harder. Allow them to come to room temperature before serving for optimal chewiness.

    • Freezing: For longer storage, you can freeze the Rice Krispie treats. Cut them into squares, wrap them tightly in plastic wrap, and place them in a resealable freezer bag. They can last up to 2 months in the freezer. When ready to enjoy, allow them to thaw at room temperature before indulging.

    • Avoiding Sticking: To prevent the treats from sticking together, you can layer parchment paper between the treats in the storage container. This simple technique keeps them manageable and easy to serve.

    By employing these storage tips, you can maintain the deliciousness of your Fun Rainbow Peeps Rice Krispie Treats, ensuring they remain a delightful treat for all!

    Nutritional Value of Fun Rainbow Peeps Rice Krispie Treats

    Understanding the nutritional value of your Fun Rainbow Peeps Rice Krispie Treats can help you indulge mindfully. Here’s an approximate nutritional breakdown per serving (based on 16 servings):

    • Calories: 140
    • Total Fat: 4g
    • Saturated Fat: 2.5g
    • Carbohydrates: 24g
    • Dietary Fiber: 0g
    • Sugars: 12g
    • Protein: 1g

    These numbers can vary based on specific ingredient choices and portions. Moreover, if you opt for dietary substitutions like sugar-free marshmallows or gluten-free Rice Krispies, the nutritional profile can change accordingly. You may want to consider amounts based on portions and any additional ingredients used.

    If you’re serving these treats at a gathering, consider balancing them out with healthier snacks options. By doing so, you can create a well-rounded spread that caters to a variety of tastes while ensuring there’s something for everyone.

    FAQs: Frequently Asked Questions About Fun Rainbow Peeps Rice Krispie Treats

    Q1: Can I use different types of cereal for this recipe?

    Absolutely! While traditional Rice Krispies work best, you can experiment with other cereals like Fruity Pebbles or Corn Flakes for a unique twist.

    Q2: How can I make these treats without marshmallows?

    For a marshmallow-free version, consider using a mixture of melted nut butter or sunflower seed butter combined with honey or maple syrup. Mix in the Rice Krispies until fully coated.

    Q3: How can I make this recipe allergy-friendly?

    To cater to allergies, use certified gluten-free Rice Krispies, vegan marshmallows, and substitutes for nuts or allergens based on individual needs. Always check labels before use.

    Q4: Can I prepare these treats ahead of time?

    Yes, you can prepare them a few days in advance. Just follow the best storage practices mentioned earlier to keep them fresh until you’re ready to serve.

    Q5: Is there a way to make these treats healthier?

    To create a healthier option, reduce the sugar by using lower sugar marshmallows, swap the butter for a healthy fat option, or incorporate nuts and dried fruits for added nutrition.

    By addressing these common questions, you can create a more informed and enjoyable baking experience. With the right knowledge, your Fun Rainbow Peeps Rice Krispie Treats will shine bright in every kitchen setting!

  • Easy Strawberry Shortbread Cookies Recipe

    Easy Strawberry Shortbread Cookies Recipe

    Easy Strawberry Shortbread Cookies Recipe: A Tropical Delight

    Introduction to Easy Strawberry Shortbread Cookies Recipe

    Are you on the lookout for delightful strawberry recipes to satisfy your sweet tooth? Look no further than our Easy Strawberry Shortbread Cookies! This recipe showcases the vibrant flavor of fresh strawberries, perfectly complemented by the buttery texture of shortbread. Not only is this treat unbelievably simple to make, but it is also adaptable for various dietary needs—making it ideal for families, busy professionals, and anyone craving a sweet snack.

    What makes these cookies stand out is their healthful ingredient list. You can easily create vegan, gluten-free, or low-calorie versions without compromising on taste. They’re perfect for serving at a summer party, packing in lunchboxes, or enjoying as a late-night snack. Moreover, with fresh strawberries packed with Vitamin C and antioxidants, these cookies provide a burst of nutrition that elevates your dessert experience to something joyous and heartwarming.

    This Easy Strawberry Shortbread Cookies Recipe not only encourages creativity in the kitchen but also invites you to enjoy the simple pleasures of baking. Whether you’re a novice baker or a seasoned pro, you’ll find this recipe to be a delightful addition to your collection of strawberry recipes. Let’s dive into the benefits and advantages of this wonderful treat!

    Benefits and Advantages of Easy Strawberry Shortbread Cookies Recipe

    This Easy Strawberry Shortbread Cookies recipe isn’t just easy to make; it’s also incredibly beneficial for those who want to balance taste and nutrition. Here are the key benefits:

    1. Simplicity: With few ingredients and straightforward instructions, this recipe allows even the novice cook to whip up a delicious batch of cookies in no time. You can easily prepare the dough in under 15 minutes!

    2. Health Benefits: Using fresh strawberries means you’re infusing your cookies with essential nutrients. Strawberries are high in antioxidants, Vitamin C, and fiber, all of which support overall well-being. Furthermore, you can modify the sugar content to make it healthier, catering to those mindful of their sugar intake.

    3. Versatility: This recipe caters to various dietary requirements. Whether you’re making vegan versions using plant-based butter or gluten-free options using almond flour, there’s a modification for everyone. It’s also ideal for busy parents who can involve their kids in the kitchen, teaching them valuable cooking skills!

    4. Customizable Flavor: The beauty of shortbread cookies lies in their adaptability. While these cookies shine with strawberries, you can always swap in your favorite fruits or flavors—blueberries, raspberries, or even chocolate chips!

    5. Perfect for Any Occasion: Be it a holiday gathering, an afternoon tea, or just a cozy family evening, these cookies are suitable for every occasion. They also make fabulous gifts or party favors.

    Incorporating the focus keyphrase “strawberry recipes” throughout highlights the allure of this delicious treat while reinforcing its appeal to health-conscious individuals. By focusing on simplicity and flavor, you can’t go wrong with this scrumptious recipe!

    Ingredients Overview

    Essential Ingredients for Easy Strawberry Shortbread Cookies Recipe

    Good baking begins with quality ingredients. Here’s what you will need to make these delicious Easy Strawberry Shortbread Cookies:

    • 1 cup (226g) unsalted butter (or dairy-free margarine for a vegan option)
    • ½ cup (100g) granulated sugar (adjust based on preference or use a healthy substitute like coconut sugar)
    • 2 cups (250g) all-purpose flour (or gluten-free flour for a gluten-free version)
    • ½ cup (75g) chopped fresh strawberries (be sure to use ripe strawberries for the best flavor)
    • 1 tsp vanilla extract
    • A pinch of salt

    These ingredients come together to create the perfect balance of sweetness and buttery flavor that showcases the strawberries beautifully. For those looking for healthier options, replacing white sugar with a natural sweetener or using whole wheat flour can add nutritional value without sacrificing flavor.

    Dietary Substitutions to Customize Your Easy Strawberry Shortbread Cookies Recipe

    Here are some substitutions to cater to your dietary needs:

    1. Butter: Swap unsalted butter with coconut oil or dairy-free margarine for a vegan approach. This alternative keeps the cookies rich yet plant-based.

    2. Flour: If gluten is an issue, gluten-free all-purpose flour or almond flour can be substituted. This modification still provides a deliciously crumbly texture.

    3. Sugar: For those watching their sugar intake, consider using a sugar substitute like stevia or monk fruit sweetener. These alternatives keep the cookies sweet without the calories of traditional sugar.

    4. Additional Flavoring: Feel free to add spices like cinnamon or nutmeg to the cookie dough for an extra flavor punch, although the classic beauty of the strawberry flavor stands on its own.

    You can modify the recipe effortlessly, accommodating various dietary needs while ensuring everyone can enjoy these scrumptious cookies. Emphasizing flexibility guarantees that your strawberry recipes remain enjoyable for every palate!

    How to Prepare the Perfect Easy Strawberry Shortbread Cookies Recipe: Step-by-Step Guide

    Ready to bake some cookies? Follow this step-by-step guide to create your Easy Strawberry Shortbread Cookies:

    1. Prepare the Base:

    Start by preheating your oven to 350°F (175°C). Line a baking sheet with parchment paper to prevent sticking and make cleanup easier.

    2. Cream Butter and Sugar:

    In a large mixing bowl, beat the unsalted butter and sugar together until light and fluffy. This should take about 3-5 minutes. The creaming process helps incorporate air into the mixture, producing a light cookie.

    3. Add Vanilla:

    Add the vanilla extract to the mixture and blend well. This enhances the flavor profile, complementing the sweet strawberries.

    4. Mix Dry Ingredients:

    In a separate bowl, whisk together the all-purpose flour and a pinch of salt to combine. If you’re using gluten-free flour, ensure it is entirely blended for a uniform mixture.

    5. Incorporate Dry Mix:

    Gradually add the dry mixture into the butter-sugar blend, stirring gently until just incorporated. Be careful not to over-mix! Overworking the dough can lead to tough cookies.

    6. Fold in Strawberries:

    Gently fold in the chopped strawberries. The beautiful red color and fresh taste will shine through in every bite.

    7. Shape the Cookies:

    Using a tablespoon or cookie scoop, drop dollops of dough onto the prepared baking sheet, spacing them about 2 inches apart. Flatten them slightly with your palm or the bottom of a glass.

    8. Bake:

    Place the cookies in the preheated oven and bake for 12-15 minutes, or until the edges turn a light golden brown. Keep an eye on them, as baking times may vary based on your oven.

    9. Cool and Serve:

    Once baked, remove the cookies from the oven and let them cool on the baking sheet for about 5 minutes before transferring them to a wire rack. This cooling time allows them to firm up a bit.

    10. Enjoy:

    Once cooled thoroughly, your Easy Strawberry Shortbread Cookies are ready to enjoy. Pair them with a cup of tea or enjoy them as a fresh snack that everyone will love!

    This easy-to-follow recipe ensures you’ll have delicious homemade cookies in no time, reinforcing the appeal of various strawberry recipes available for any occasion.

    Mastering Easy Strawberry Shortbread Cookies Recipe: Advanced Tips and Variations

    Once you’ve gotten the hang of this Easy Strawberry Shortbread Cookies recipe, you can experiment with various tips and variations to make it your own:

    Advanced Tips:

    • Hydrate Strawberries: If your strawberries are overly juicy, consider patting them dry with a paper towel to prevent the dough from becoming too wet. This helps maintain a perfect cookie texture.

    • Chill the Dough: For a firmer cookie, chill the dough in the refrigerator for about 30 minutes before baking. This step enhances the flavors and ensures your cookies keep their shape while baking.

    • Test for Doneness: Don’t wait until the edges are brown for perfect cookies. They should be just set in the middle. They will continue to cook slightly after removed from the oven.

    Variations to Try:

    • Chocolate-Dipped Cookies: After the cookies have cooled, dip half of each cookie in melted dairy-free chocolate for an indulgent twist.

    • Lemon Zest Addition: Include the zest of one lemon in the dough for a bright, citrusy flavor that pairs beautifully with strawberries.

    • Replace Strawberries: Try substituting strawberries with other fruits like raspberries, blackberries, or even dried fruits for a different taste experience.

    Experimenting with these advanced tips and suggestions ensures that you can enjoy a rich variety of strawberry recipes made from this delightful base cookie dough. Your creativity can shine!

    How to Store Easy Strawberry Shortbread Cookies Recipe: Best Practices

    To maintain the freshness and flavor of your Easy Strawberry Shortbread Cookies, proper storage is essential:

    1. Room Temperature Storage: Keep your cookies in an airtight container at room temperature. They will stay fresh for about 3-5 days. After this period, they may become less crisp but still delicious.

    2. Refrigeration: If you live in a warm climate or want them to last longer, store the cookies in the fridge for up to a week. Place parchment paper between layers to prevent them from sticking.

    3. Freezing: To freeze your cookies, allow them to cool completely before placing them in a single layer on a baking sheet. Freeze until solid, then transfer them to freezer-safe bags. They can last up to 3 months in the freezer. Thaw them in the refrigerator or at room temperature before serving.

    4. Reheating: If you like them warm, pop them in the oven at 300°F (150°C) for about 5-10 minutes or use the microwave for a few seconds—just be careful not to overheat, or they may become chewy.

    This storage information will help you keep your strawberry recipes fresh and enjoyable, ensuring you can savor each cookie at its best!

    Nutritional Value of Easy Strawberry Shortbread Cookies Recipe

    Understanding the nutritional content of your cookies is crucial, especially when adapting recipes for various dietary needs. Here’s a general nutritional breakdown per cookie (based on a yield of 24 cookies):

    • Calories: Approximately 120
    • Total Fat: 7g
    • Saturated Fat: 4g
    • Cholesterol: 20mg
    • Sodium: 50mg
    • Total Carbohydrates: 14g
    • Dietary Fiber: 0.5g
    • Sugars: 6g
    • Protein: 1g

    It’s worth noting that these values can vary based on ingredient substitutions. Gluten-free flour options may yield a different calorie count, while using plant-based butter can reduce cholesterol levels. Adjusting the sugar will also affect overall calories.

    These delicious cookies offer a balance of sweetness while providing some health benefits thanks to the strawberries. They present a wholesome option among other strawberry recipes, and with mindful adjustments, they can fit seamlessly into various dietary regimens.

    FAQs: Frequently Asked Questions About Easy Strawberry Shortbread Cookies Recipe

    1. Can I use frozen strawberries instead of fresh ones?

    Yes! While fresh strawberries yield the best flavor, you can use frozen strawberries. Make sure to thaw and drain them beforehand to avoid excess moisture in the dough.

    2. How can I make these cookies healthier?

    You can use whole wheat flour instead of all-purpose flour and substitute sugar with natural sweeteners. Additionally, using less butter or opting for a low-calorie alternative can help reduce the cookie’s calorie count.

    3. Can I double the recipe?

    Absolutely! If you’re in the mood for a large batch, simply double the quantities of each ingredient. It’s a fantastic way to share with friends or to save some cookies for later.

    4. What’s the best way to enjoy these cookies?

    These cookies can be enjoyed on their own or paired with tea, coffee, or a scoop of vanilla ice cream for a delightful dessert experience.

    5. How can I make the cookies more flavorful?

    Experiment with adding almond extract or even spices like cinnamon to the dough. The combination of flavors can elevate the cookie experience.

    By addressing these FAQs, we aim to enhance your baking journey with the Easy Strawberry Shortbread Cookies Recipe, ensuring that this delightful treat finds its way into your home while embracing various interpretations of strawberry recipes!

  • Easy Easter Cookie Decorating Ideas

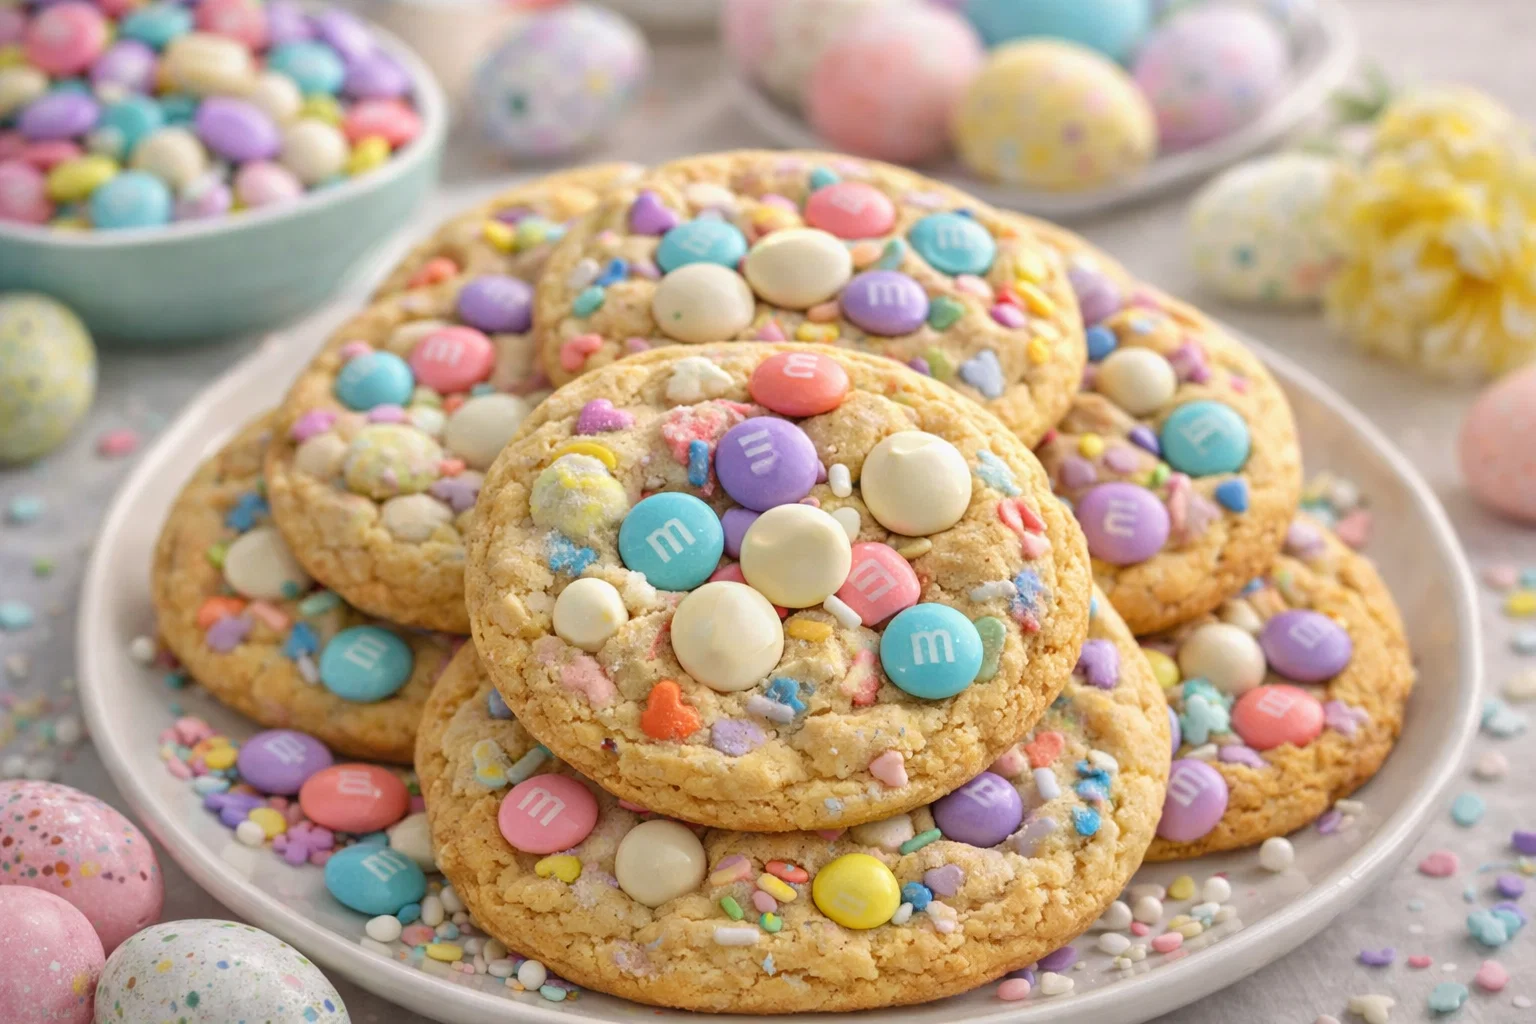
    Easy Easter Cookie Decorating Ideas

    Easy Easter Cookie Decorating Ideas: A Tropical Delight

    Introduction to Easy Easter Cookie Decorating Ideas

    Easter is just around the corner, and it’s the perfect opportunity to get creative in the kitchen with cookie recipes that are not only festive but also easy to make. Decorating cookies is a fun-filled activity that brings together families, friends, and anyone who loves to bake. Whether you are a busy parent looking to engage your kids, a food enthusiast wanting to impress your guests, or a newlywed preparing your first holiday feast, these Easy Easter Cookie Decorating Ideas will inspire you to get into the kitchen and decorate delightful treats.

    What makes these cookie recipes particularly appealing is their simplicity. You don’t need to be a professional baker to create beautiful designs that will wow your friends and family. These recipes can also be tailored to meet various dietary preferences, including vegan and gluten-free options! They promote healthier snacking without sacrificing flavor, allowing you to indulge without the guilt. With colorful icing and fun toppings, these cookies can be transformed into little masterpieces, perfect for an Easter gathering or simply to enjoy at home.

    Let’s hop right into the fun and flavorful world of Easy Easter Cookie Decorating Ideas!

    Benefits and Advantages of Easy Easter Cookie Decorating Ideas

    One of the standout aspects of Easy Easter Cookie Decorating Ideas is their versatility. These cookie recipes allow for a personal touch, enabling you to express your creativity. Not to mention, decorating cookies can be a fantastic bonding experience. So whether you’re planning an Easter party or simply enjoying time with your kids, cookie decorating serves as a memorable and enjoyable activity.

    The ease of preparation is another enticing factor. With straightforward instructions and a handful of essential ingredients, you won’t feel overwhelmed when making these cookies. Even if you are new to the baking scene, these cookie recipes are approachable, ensuring delicious results.

    In addition, these cookies can be designed to cater to different health needs. You can swap refined sugars for healthier alternatives, use whole grain flour to up the fiber content, or incorporate natural food colors in your icing. Even better? Many of these cookie recipes can be made vegan or gluten-free, so everyone can enjoy them!

    Furthermore, the health benefits of home-baked cookies can’t be overstated. When you control the ingredients, you know exactly what goes into each bite. This means you can reduce preservatives and artificial additives commonly found in store-bought cookies. Plus, they are an opportunity to sneak in some nutritious ingredients like almond flour or coconut oil, paving the way for guilt-free enjoyment.

    Ingredients Overview

    Essential Ingredients for Easy Easter Cookie Decorating Ideas

    To create these delightful cookies, you’ll need the following essential ingredients:

    • 2 ¾ cups all-purpose flour or gluten-free flour blend
    • 1 cup unsalted butter (softened; can substitute with coconut oil for a dairy-free option)
    • 1 cup granulated sugar (or coconut sugar for a lower glycemic index)
    • 1 large egg (or a flaxseed egg for a vegan alternative)
    • 2 teaspoons vanilla extract
    • ½ teaspoon baking powder
    • ½ teaspoon salt
    • Food coloring (for your icing; natural food dyes for a healthier option)

    These ingredients form the base of your cookies. Each plays a crucial role:

    • Flour: Provides structure and texture.
    • Butter: Adds moisture and flavor.
    • Sugar: Sweetens the cookie and enhances browning.
    • Egg: Acts as a binder (substitutes available).
    • Vanilla extract: Infuses a delightful aroma and flavor.

    Dietary Substitutions to Customize Your Easy Easter Cookie Decorating Ideas

    If you’re looking to cater to specific dietary needs, here are some substitutions you can consider:

    • Dairy-Free: Replace unsalted butter with coconut oil or vegan butter.
    • Gluten-Free: Use a gluten-free flour blend; be sure to include a binder like xanthan gum if necessary.
    • Vegan: Swap the egg for a flaxseed or chia seed egg (1 tablespoon flaxseed meal with 2.5 tablespoons of water; let sit for 5 minutes).
    • Reduced Sugar: Substitute granulated sugar with mashed bananas, unsweetened applesauce, or use natural sweeteners like maple syrup in moderation.
    • Low-Calorie: Use a stevia blend for sugar reduction, but adjust the measurement according to the brand.

    These adaptations allow you to enjoy the fun of decorating while adhering to your dietary goals or restrictions.

    How to Prepare the Perfect Easy Easter Cookie Decorating Ideas: Step-by-Step Guide

    Let’s dive into preparing these fabulous cookies! Follow this step-by-step guide to create your own wonderful Easter-themed cookies.

    1. Prepare the Base: Start by preheating your oven to 350°F (175°C). Line your baking sheets with parchment paper or silicone mats, ensuring the cookies don’t stick.

    2. Cream the Butter and Sugar: In a large mixing bowl, beat the softened butter and granulated sugar together until light and fluffy. This takes about 2-3 minutes on medium speed.

    3. Add the Egg and Vanilla: Mix in the large egg (or flaxseed egg) and vanilla extract. Beat until the mixture is well-combined.

    4. Combine Dry Ingredients: In a separate bowl, whisk together the all-purpose flour, baking powder, and salt. Gradually add this mixture to the wet ingredients, mixing until no flour is visible.

    5. Chill the Dough: Cover your dough with plastic wrap and refrigerate for at least 30 minutes. This step prevents the cookies from spreading too much during baking.

    6. Roll Out the Dough: Once chilled, divide the dough into manageable portions. Roll out each portion on a floured surface to about ¼-inch thickness.

    7. Cut Out Shapes: Use cookie cutters to cut out fun Easter shapes. Traditional bunnies and eggs are always a hit!

    8. Bake the Cookies: Place your shapes on the prepared baking sheets and bake for 8-10 minutes, or until the edges are lightly golden. Keep an eye on them, as ovens vary in temperature!

    9. Cool Completely: Allow the cookies to cool on the baking sheets for about 5 minutes before transferring them to wire racks to cool completely. This cooling allows the icing to adhere better later.

    10. Prepare Icing: While your cookies cool, mix up some icing! Use powdered sugar, a splash of milk (or a non-dairy substitute), and food coloring. Aim for a thick consistency that holds its shape.

    11. Decorate Your Cookies: Now the fun begins! Use piping bags or simple ziplock bags with the tip cut off to pipe out your designs. Get creative—draw patterns, create flowers, or even write names!

    12. Let Set: Allow the decorated cookies to set for at least 30 minutes before serving or storing. This ensures the icing hardens properly.

    Follow these steps, and you’ll have a batch of beautifully decorated cookies that will amaze everyone. And remember, you can always switch up your decorating techniques, or even fill your cookies with different treats!

    Mastering Easy Easter Cookie Decorating Ideas: Advanced Tips and Variations

    To truly master your cookie decorating skills, here are some advanced tips and variations you can try:

    1. Layered Icing: Use multiple layers of icing in different colors for a more dynamic look. Allow each layer to dry completely before applying the next.

    2. Themed Variations: Utilize other themes beyond Easter. Consider using floral designs for spring or adding festive elements for birthdays and weddings.

    3. Experiment with Flavors: Add almond extract, lemon zest, or orange juice to your dough for a unique flavor twist that complements the traditional vanilla taste.

    4. Use Edible Glitter: For an extra touch, sprinkle edible glitter or colored sugar on top of your icing before it sets. This addition will make your cookies shimmer and shine!

    5. Go Natural: Instead of artificial food dyes, try using beet juice for red, spirulina for green, and turmeric for yellow. These natural colorings are healthier and still vibrant!

    With these advanced techniques, you will undoubtedly transform your cookie decorating from ordinary to extraordinary.

    How to Store Easy Easter Cookie Decorating Ideas: Best Practices

    Storing your decorated cookies correctly is essential to maintaining their freshness. Here are some best practices to follow:

    • Cool Completely: Ensure cookies are completely cooled before storing them to prevent moisture build-up that leads to sogginess.

    • Use Airtight Containers: Store your cookies in airtight containers layered with parchment paper to maintain crispness.

    • Refrigeration: If your icing contains cream cheese or perishable items, keep the cookies in the refrigerator, but be aware that this may cause the icing to lose some of its shine.

    • Freezing: For long-term storage, freeze your cookies in a single layer on a baking sheet until solid. Then, place them in freezer-safe bags or containers. Thaw them at room temperature before serving.

    Following these storage tips allows you to enjoy your delicious cookie creations long after Easter!

    Nutritional Value of Easy Easter Cookie Decorating Ideas

    When looking at the nutritional value of your Easy Easter Cookie Decorating Ideas, it’s essential to consider the base ingredient.

    A standard cookie made using classic ingredients might contain the following approximate values per cookie (based on a batch of 24 cookies):

    • Calories: 150-200
    • Total Fat: 7g (Saturated Fat: 4g)
    • Cholesterol: 15 mg
    • Sodium: 50 mg
    • Total Carbohydrates: 22g (Dietary Fiber: 1g, Sugars: 8g)
    • Protein: 2g

    These values can fluctuate based on ingredient choices, such as opting for coconut oil in place of butter or using lower sugar alternatives.

    To keep your cookie recipes healthier, consider:

    • Reducing sugar content.
    • Using whole grain flours for added fiber.
    • Incorporating nut flours for added protein.

    By making small adjustments, you can create satisfying treats that contribute to your overall well-being while still being delicious.

    FAQs: Frequently Asked Questions About Easy Easter Cookie Decorating Ideas

    1. Can I make these cookies ahead of time?
    Yes! You can bake the cookies in advance and store them properly. Decorate them closer to your event for the best results.

    2. How can I make the icing thicker?
    To thicken your icing, add more powdered sugar until it reaches your desired consistency.

    3. Are there vegan alternatives for these cookie recipes?
    Absolutely! You can replace butter with coconut oil, and you can use a flaxseed or chia egg substitute.

    4. How do I achieve vibrant colors with my icing?
    To achieve vibrant colors, use gel food coloring, as it gives richer colors without adding too much liquid.

    5. Can I use different shapes for my cookies?
    Of course! Feel free to use any cookie cutters you have on hand to create various festive shapes.

    By using these tips and tricks, you will elevate your baking and decorating skills, unleashing endless possibilities for creativity in the kitchen. Enjoy making these Easy Easter Cookie Decorating Ideas and have fun sharing them with family and friends!

  • The Best Easter Egg Cheesecake Dessert

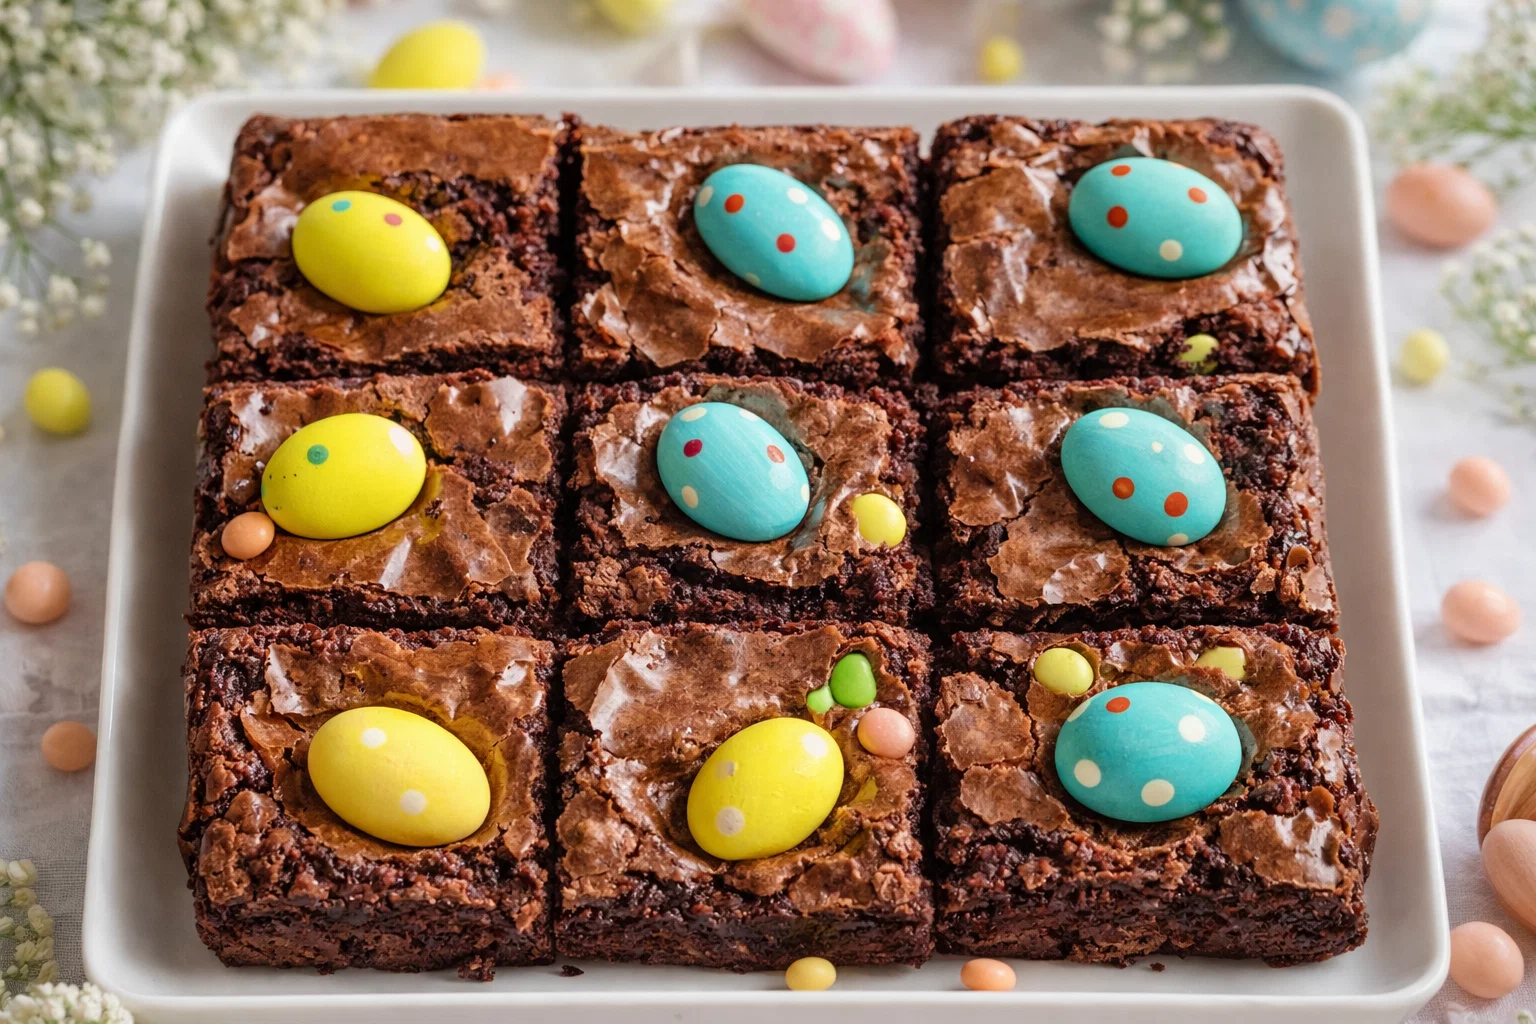
    The Best Easter Egg Cheesecake Dessert

    The Best Easter Egg Cheesecake Dessert: A Tropical Delight

    Introduction to The Best Easter Egg Cheesecake Dessert

    Easter is a time for joyous celebration, and what better way to mark the occasion than with an indulgent dessert? Introducing The Best Easter Egg Cheesecake Dessert—a delightful treat that is sure to impress both family and friends. This cheesecake combines the creamy richness of traditional cheesecakes with a playful twist—Easter egg-inspired flavors and a beautiful presentation.

    Perfect for all cooks, this recipe is incredibly simple and doesn’t require any advanced baking skills. In fact, you can whip it up quickly, making it ideal for busy parents, students, or anyone who wants a crowd-pleasing dessert without spending all day in the kitchen. Additionally, the recipe can easily be adapted to fit various dietary needs. Vegan, gluten-free, or low-calorie options can be made without compromising on flavor or texture, making it a versatile choice for all guests.

    Not only is this dessert scrumptious, but it also boasts several health benefits, providing a delightful balance between indulgence and nutrition. The inclusion of wholesome ingredients means your sweet tooth can be satisfied without the guilt. So whether you’re a culinary novice, an experienced baker, or somewhere in between, you’ll find that this recipe will elevate your Easter festivities.

    Benefits and Advantages of The Best Easter Egg Cheesecake Dessert

    The Best Easter Egg Cheesecake Dessert stands out among other dessert recipes for its delightful combination of flavors, ease of preparation, and versatility. Here are several reasons why you should consider adding this enchanting cheesecake to your dessert table this Easter:

    1. Simplicity: The recipe is straightforward, with minimal ingredients and easy-to-follow instructions. You won’t need to worry about mastering complex techniques or spending hours in the kitchen.

    2. Health Benefits: This cheesecake incorporates healthier options that allow you to satisfy your dessert cravings without the high calorie count typically associated with traditional cheesecakes. For instance, alternative sweeteners can reduce sugar content, and dairy-free options cater to those avoiding lactose.

    3. Creativity: This dessert provides a blank canvas for culinary creativity. You can choose to infuse the cheesecake with strawberries, blueberries, or even chocolate, mimicking the vibrant colors and flavors of Easter eggs.

    4. Dietary Flexibility: With easy substitutions, you can adapt the recipe to accommodate various dietary preferences, such as vegan, gluten-free, or low-calorie versions. This makes it a great choice for gatherings where guests may have different dietary restrictions.

    5. Presentation: The colorful and whimsical appearance of this cheesecake makes it a show-stopping centerpiece for your Easter table. It’s not just a dessert; it’s a conversation starter that will impress everyone.

    6. Perfect for Leftovers: This dessert can be stored in the refrigerator for several days, allowing you to enjoy the delightful flavors long after the holiday celebrations have ended.

    By combining these aspects, The Best Easter Egg Cheesecake Dessert will not only elevate your meal’s sweet ending but also cater to the diverse needs of your guests, making it a must-try for any Easter celebration.

    Ingredients Overview

    Essential Ingredients for The Best Easter Egg Cheesecake Dessert

    Here’s a detailed list of all the ingredients needed for the cheesecake, including their purpose and benefits. This recipe serves approximately 12 people.

    For the Crust:

    • 1 ½ cups graham cracker crumbs: A classic choice for cheesecake bases, offering a sweet and crunchy texture.
    • ½ cup unsalted butter, melted: Binds the crust together and adds richness. You can substitute with coconut oil for a dairy-free option.
    • ¼ cup sugar: Sweetens the crust. For a healthier option, consider a natural sweetener like coconut sugar.

    For the Cheesecake Filling:

    • 2 (8 oz.) packages cream cheese, softened: The base of the cheesecake contributing to its creamy texture. For a vegan option, use dairy-free cream cheese.
    • ½ cup sour cream: Adds tanginess and creaminess. You can substitute with dairy-free yogurt.
    • ¾ cup sugar: Sweetens the filling. Use natural sweeteners such as maple syrup or agave nectar as alternatives.
    • 3 large eggs: Bind the ingredients and provide structure. For a vegan alternative, use flaxseed meal or aquafaba.
    • 1 tsp vanilla extract: Enhances flavor; opt for pure vanilla for the best taste.
    • ½ cup Easter candy (mini chocolate eggs, hollow eggs, or assorted candies): Adds color, texture, and fun, making it perfect for Easter.

    Dietary Substitutions to Customize Your The Best Easter Egg Cheesecake Dessert

    This section outlines possible ingredient swaps to cater to various dietary preferences:

    1. Gluten-Free Option: Use gluten-free graham cracker crumbs or almond flour to make the crust.

    2. Vegan Option: Substitute cream cheese with dairy-free alternatives and replace eggs with a mixture of 1 tablespoon of flaxseed meal with 3 tablespoons of water each for every egg.

    3. Lower-Calorie Version: Consider using light cream cheese and reducing sugar to enhance the health profile without sacrificing flavor.

    4. Nut-Free: Ensure your graham cracker crust and any decorative elements (like chocolate candy) do not contain nuts for those with allergies.

    5. Flavor Variations: Swap out the Easter candy for fresh fruits like strawberries or blueberries, or incorporate citrus zest for an additional flavor layer.

    With these substitutions, everyone can enjoy the delightful flavors of this Easter dessert.

    How to Prepare the Perfect The Best Easter Egg Cheesecake Dessert: Step-by-Step Guide

    Now that you have gathered your ingredients, it’s time to start crafting The Best Easter Egg Cheesecake Dessert. Follow these simple steps for a fuss-free baking experience:

    1. Prepare the Base: Preheat your oven to 350°F (175°C). In a medium bowl, combine graham cracker crumbs, melted butter, and sugar. Mix until it resembles wet sand. Press this mixture evenly into the bottom of a 9-inch springform pan, making sure to create a solid base. Bake for about 8 minutes or until lightly golden. Remove from oven and let cool.

    2. Mix the Cream Cheese Filling: While the crust is cooling, take a large mixing bowl and beat the softened cream cheese until smooth and fluffy using an electric mixer. This should take about 3-5 minutes.

    3. Add the Sweetness: Gradually add the sugar while mixing continuously. Then incorporate the sour cream, vanilla extract, and eggs, one at a time, mixing well after each addition. Be careful not to overmix, as this can lead to a less firm texture.

    4. Add the Fun Ingredients: Gently fold in the crushed Easter candy to incorporate it within the filling. This will provide pockets of sweetness throughout the cheesecake.

    5. Pour the Filling: Carefully pour the cheesecake filling over the prepared crust, smoothing the top with a spatula.

    6. Bake: Place the cheesecake in the preheated oven and bake for approximately 50-60 minutes. You’ll know it’s ready when the edges are set but the center is still slightly jiggly.

    7. Cool Down: Once baked, turn off the oven and crack the door open. Allow the cheesecake to cool in the oven for an hour to prevent cracking.

    8. Chill: After it has cooled, transfer to the refrigerator for at least 4 hours, preferably overnight. This helps achieve a dense and creamy texture.

    9. Serve and Enjoy: When ready to serve, remove the cheesecake from the springform pan. You can garnish with additional candy, whipped cream, or fresh fruit if desired.

    10. Storing Leftovers: Should you have any leftovers, store them in an airtight container in the refrigerator for up to 5 days.

    By following these detailed steps, you’ll create a cheesecake that not only looks stunning but is also bursting with flavor suitable for any gathering.

    Mastering The Best Easter Egg Cheesecake Dessert: Advanced Tips and Variations

    To take your Easter Egg Cheesecake Dessert to the next level, consider these advanced tips and creative variations:

    1. Water Bath Baking: For an ultra-smooth cheesecake with minimal cracks, consider using a water bath. Wrap the springform pan in foil to prevent leaks, and place it in a larger baking dish filled with hot water while baking.

    2. Flavoring the Filling: Enhance your cheesecake with different flavor extracts, such as almond or lemon. A hint of lemon zest can elevate the flavor profile beautifully.

    3. Layered Cheesecake: Use various Easter-themed fillings. Create a marbled effect with chocolate and vanilla layers by dividing your filling into two and swirling them together.

    4. Serving Extras: Provide a fun topping bar with whipped cream, additional Easter candies, fresh fruit, or chocolate shavings for guests to customize their slices.

    5. Leftover Cheesecake Crust: If you have leftover filling, use pie crust to make mini cheesecakes in muffin tins or fill dessert cups for single servings.

    6. Freezing: This cheesecake freezes well. Just ensure that it’s wrapped tightly to avoid freezer burn, and thaw it in the refrigerator before serving.

    These tips will help you not just master the basic recipe but also offer fun variations for your guests to enjoy!

    How to Store The Best Easter Egg Cheesecake Dessert: Best Practices

    Proper storage of The Best Easter Egg Cheesecake Dessert is essential for maintaining its freshness and flavor. Here’s how to best preserve your cheesecake:

    1. Refrigeration: Store any leftovers in an airtight container in the refrigerator. Ensure that it’s well covered to prevent absorbing any odors from other foods. Properly stored, the cheesecake can last up to 5 days.

    2. Freezing Method: If you plan to keep the cheesecake for longer, freezing is a great option. Wrap your cheesecake tightly in plastic wrap, and then in aluminum foil. This will protect it from freezer burn and maintain flavor. When ready to serve, thaw in the refrigerator for several hours or overnight.

    3. Reheating: There’s no need to reheat cheesecake, as it’s best enjoyed chilled. If it has been frozen, allow it to thaw completely in the refrigerator before serving for optimal taste and texture.

    4. Serving Recommendations: When serving leftovers, consider garnishing with a fresh fruit topping or additional Easter candies to give it a fresh and inviting look.

    By using these storage methods, you’ll ensure that The Best Easter Egg Cheesecake Dessert stays delicious and enjoyable for every occasion!

    Nutritional Value of The Best Easter Egg Cheesecake Dessert

    Understanding the nutritional content of your dessert is crucial, particularly for diet-conscious individuals. Here’s a breakdown of the nutritional values for one slice (assuming 12 slices) of the traditional Easter Egg Cheesecake Dessert:

    • Calories: Approximately 320 kcal
    • Total Fat: 23 g
    • Saturated Fat: 12 g
    • Cholesterol: 85 mg
    • Sodium: 250 mg
    • Total Carbohydrates: 28 g
    • Dietary Fiber: 1 g
    • Sugars: 20 g
    • Protein: 6 g

    Healthier Options:

    • Vegan Variation: Using substitutes may reduce cholesterol completely as well as saturated fats.
    • Low-Calorie Sweeteners: Opting for a natural sweetener can significantly lower overall sugars and calories per serving.
    • Gluten-Free: The nutritional profile will differ slightly based on ingredient choices, particularly in the crust.

    This breakdown equips you with the information to make healthier dessert decisions while allowing you to enjoy this delightful cheesecake during your celebrations.

    FAQs: Frequently Asked Questions About The Best Easter Egg Cheesecake Dessert

    Q1: Can I make this cheesecake in advance?

    A: Yes! This cheesecake is perfect for making ahead of time. It tastes even better after chilling overnight in the refrigerator.

    Q2: Is it possible to use different flavors of Easter candy?

    A: Absolutely! Feel free to experiment with your favorite candy. Mini chocolate candy, caramel eggs, or even marshmallow peeps can add a different flavor twist.

    Q3: How do I know when my cheesecake is done?

    A: The edges should be set, but the center should still have a slight jiggle. The cheesecake will firm up as it cools and chills.

    Q4: What can I substitute for cream cheese in a vegan version?

    A: You can use dairy-free cream cheese or a silken tofu blend that provides a creamy texture with less fat.

    Q5: Can I freeze this cheesecake?

    A: Yes! It can be frozen for up to three months. Ensure it’s properly wrapped to prevent freezer burn.

    Q6: How do I fix a cracked cheesecake?

    A: If cracks occur, you can cover them with whipped cream or a fruit topping. Preventing cracks starts with gradual cooling and using room temperature ingredients.

    Q7: Will this dessert be suitable for gluten-intolerant guests?

    A: Certainly! Just be sure to use a gluten-free graham cracker option for the crust.

    This FAQs section aims to provide clarity on common inquiries and encourage anyone to try out this delightful recipe without worries or hesitations!


    By following this comprehensive guide to The Best Easter Egg Cheesecake Dessert, you’ll not only impress your family and friends but also create lasting memories this holiday season. Happy baking and enjoy your tasty festive dessert!

  • Easy Caramel Crush Bars Dessert Recipe

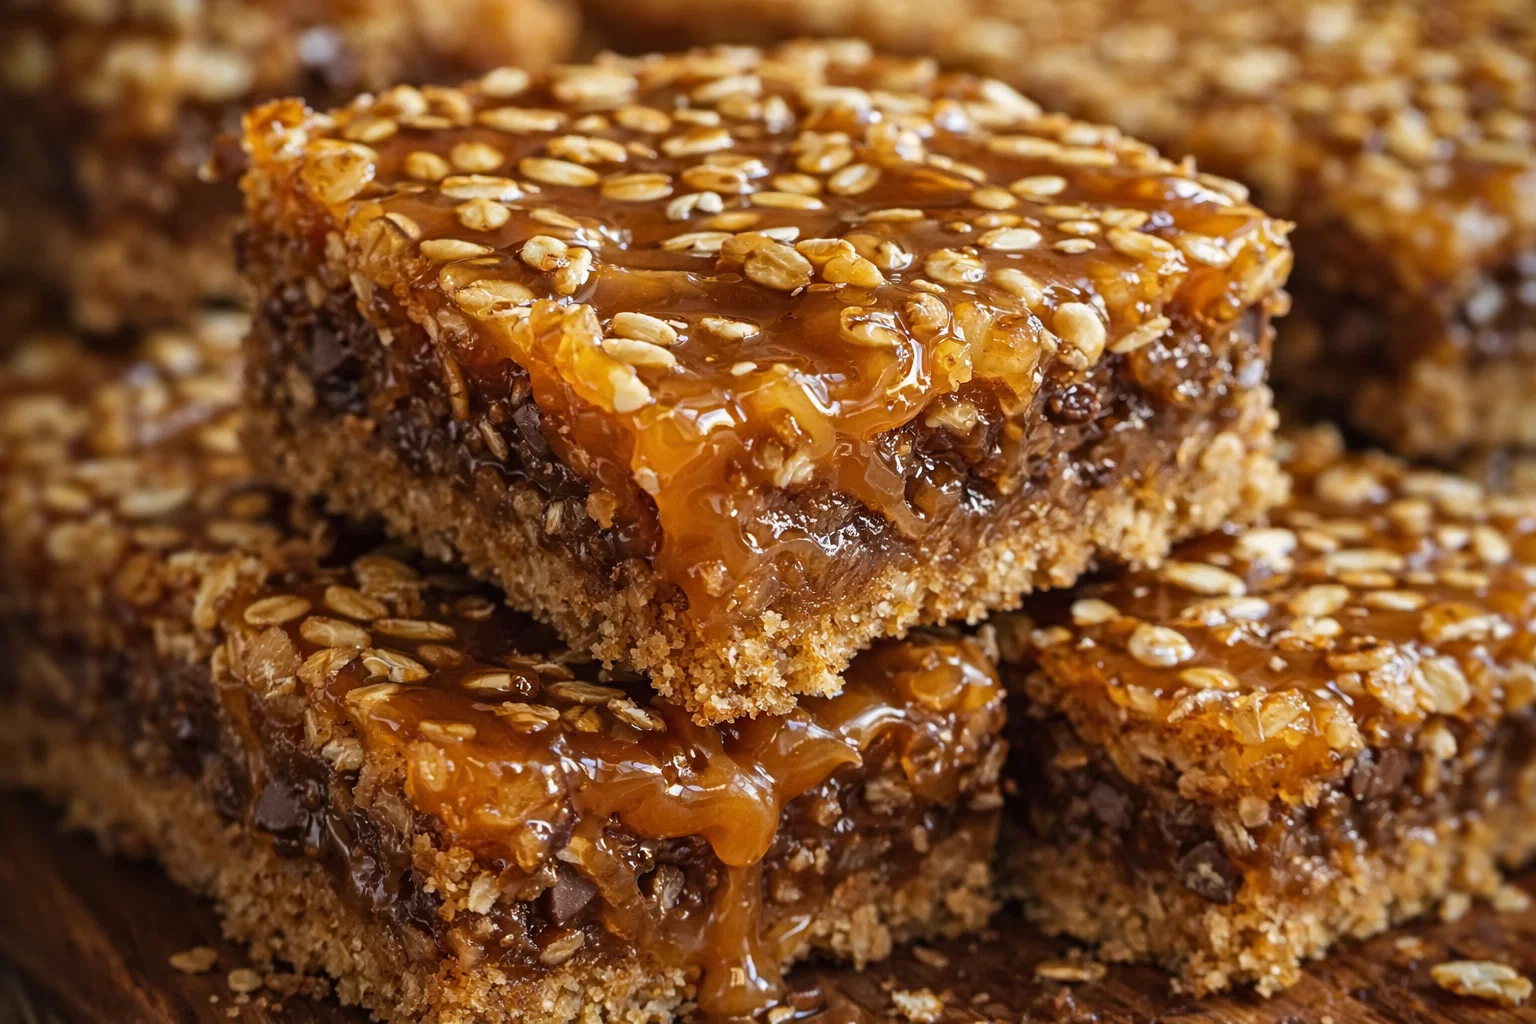
    Easy Caramel Crush Bars Dessert Recipe

    Easy Caramel Crush Bars Dessert Recipe: A Tropical Delight

    Introduction to Easy Caramel Crush Bars Dessert Recipe

    In the world of dessert recipes, few delights can compete with the rich, gooey satisfaction of caramel. The Easy Caramel Crush Bars Dessert Recipe is not only a mouthwatering treat but also a fantastic option for those seeking simplicity and health benefits. Designed with home cooks, busy parents, students, and health-conscious individuals in mind, this dessert is versatile enough to suit various dietary needs.

    Perfect for casual gatherings, family celebrations, or a sweet ending to a busy day, these bars combine the indulgent flavor of caramel with a crunchy base that makes every bite a delightful experience. Taking only a handful of ingredients, this recipe showcases how easy it can be to create amazing desserts without spending hours in the kitchen.

    Moreover, the Easy Caramel Crush Bars are adaptable, providing gluten-free and vegan options to ensure that everyone at the table can enjoy a slice of this tropical delight. Its straightforward preparation makes it an excellent choice for beginners and seasoned bakers alike. By embracing the essence of sweet, crunchy, and creamy, this dessert recipe effortlessly embodies comfort and joy.

    Benefits and Advantages of Easy Caramel Crush Bars Dessert Recipe

    When it comes to creating a fantastic dessert, simplicity often reigns supreme. The Easy Caramel Crush Bars Dessert Recipe stands out due to its straightforward process and adaptable nature. Within a short time, even the busiest of individuals can whip up a delightful treat that impresses both family and friends.

    1. Ease of Preparation

    One of the key attractions of this recipe is its simplicity. With minimal steps involved, busy parents and working professionals can create something that tastes gourmet without demanding hours of their precious time. Even novices in the kitchen will find this recipe approachable, allowing them to gain confidence in their baking skills.

    2. Health-Conscious Choices

    Beyond ease, health is an essential factor in today’s culinary landscape. By offering alternatives such as gluten-free or vegan ingredients, this dessert recipe accommodates various dietary preferences, ensuring that nobody misses out on dessert. For instance, utilizing coconut oil instead of butter makes these bars dairy-free and suitable for vegans.

    3. Satisfying Sweetness with Balanced Nutrition

    Although caramel usually suggests indulgence, this recipe includes options like nuts and oats that add nutritional value. These ingredients contribute beneficial fibers and proteins, making each bar a perfect balance of sweetness and sustenance. By incorporating whole food options, you not only satisfy your sweet tooth but also offer your body something nutritious.

    4. Perfect for Any Occasion

    Whether it’s a birthday party, an afternoon snack, or a romantic dinner, these bars fit seamlessly into a variety of occasions. They are easy to slice and share, making them an excellent option for gatherings. Plus, they keep well, meaning you can bake them in advance and serve them later.

    All these benefits combined make the Easy Caramel Crush Bars a standout choice among other dessert recipes. It invites everyone—be it travelers seeking easy-to-carry snacks or baking enthusiasts looking for their next project—to join in on the fun of creating something delicious.

    Ingredients Overview

    Essential Ingredients for Easy Caramel Crush Bars Dessert Recipe

    Creating delectable Easy Caramel Crush Bars couldn’t be simpler when you have the right ingredients. Below is a detailed list of what you’ll need:

    • 1 cup of rolled oats: A wholesome base that provides fiber and texture.
    • 1/2 cup of all-purpose flour (or gluten-free flour blend): Acts as a binding agent for the base.
    • 3/4 cup of brown sugar: Adds sweetness and depth of flavor to the bars.
    • 1/2 cup of unsalted butter (or coconut oil for a vegan option): Provides moisture and richness.
    • 1 cup of soft caramels: The star of this dessert, offering a rich sweetness.
    • 1/4 cup of whole milk (or any dairy/non-dairy milk substitute): Helps to melt the caramels smoothly.
    • 1/2 cup of crushed nuts (optional): Adds a delightful crunch, with almonds or pecans being popular choices.

    This ingredient list is simple yet effective, making it easy to whip up a batch without any hassle. Furthermore, those who prefer healthier options can substitute the brown sugar with coconut sugar and use almond flour instead of regular flour.

    Dietary Substitutions to Customize Your Easy Caramel Crush Bars Dessert Recipe

    This recipe can easily cater to various dietary needs. Here are some suggested substitutions:

    • Gluten-Free: Replace all-purpose flour with a gluten-free flour alternative such as almond flour or a store-bought gluten-free blend.

    • Vegan: Use coconut oil instead of butter and substitute whole milk with almond milk or oat milk. Ensure that the caramels used are vegan-friendly.

    • Low-Calorie Options: Swap out brown sugar for a granular sugar substitute like erythritol or stevia to reduce calories without sacrificing sweetness.

    By providing these alternatives, this recipe ensures it suits everyone’s dietary preferences, allowing anyone to enjoy a treat that feels indulgent without the guilt.

    How to Prepare the Perfect Easy Caramel Crush Bars Dessert Recipe: Step-by-Step Guide

    Creating these Easy Caramel Crush Bars is straightforward and enjoyable. Here’s how to prepare them step-by-step:

    1. Prepare the Base:
    2. Preheat your oven to 350°F (175°C). Grease an 8-inch square baking dish or line it with parchment paper for easy removal.

    3. Mix Dry Ingredients:

    4. In a large mixing bowl, combine rolled oats, all-purpose flour, and brown sugar. Stir until well blended.

    5. Add Wet Ingredients:

    6. Melt the butter (or coconut oil) in a saucepan over low heat. Once melted, pour it into the dry mixture and combine until a crumbly dough forms.

    7. Press the Mixture:

    8. Take about two-thirds of the mixture and press it firmly into the bottom of the prepared baking dish to form an even base.

    9. Prepare the Caramel Layer:

    10. In a separate saucepan, combine the soft caramels and whole milk (or non-dairy alternative). Heat on low, stirring continuously until melted and smooth.

    11. Spread the Caramel:

    12. Once the caramel is evenly melted, pour it over the pressed base and spread it evenly using a spatula.

    13. Top with Crumble:

    14. Take the remaining one-third of the oat mixture and scatter it evenly over the caramel layer, pressing down gently to adhere.

    15. Bake:

    16. Place the baking dish in the preheated oven and bake for about 20-25 minutes or until the top is golden brown.

    17. Cool:

    18. Allow the bars to cool in the pan for at least 30 minutes before lifting them out using the edges of the parchment paper.

    19. Slice and Serve:

      • Cut the bars into squares and serve. They can be enjoyed warm or stored for later.

    This step-by-step guide ensures that anyone can successfully create these caramel bars with ease. Feel free to adapt each step for different dietary needs, tweaking ingredients as necessary.

    Mastering Easy Caramel Crush Bars Dessert Recipe: Advanced Tips and Variations

    To elevate your Easy Caramel Crush Bars, consider the following advanced tips and variations:

    • Flavor Enhancements: Adding a teaspoon of vanilla extract or a pinch of sea salt to the caramel will enhance the flavor profile. Similarly, incorporating spices like cinnamon or nutmeg can add warmth to the bars.

    • Nut Butter Swirls: For a nutty twist, consider drizzling almond or peanut butter over the caramel layer before adding the crumble on top. This adds depth and richness.

    • Chocolate Drizzle: For chocolate lovers, melt dark chocolate and drizzle it over the cooled bars for an extra layer of indulgence.

    How to Store Easy Caramel Crush Bars Dessert Recipe: Best Practices

    Storing your Easy Caramel Crush Bars properly ensures they remain fresh and delicious.

    • Refrigeration: Store the bars in an airtight container in the fridge for up to one week. This will help keep them firm and fresh, preventing any excess moisture.

    • Freezing: For longer storage, you can freeze the bars. Wrap them well in plastic wrap or aluminum foil, and then place them in a freezer bag. When properly stored, they can last for up to three months. Simply let them thaw in the fridge or at room temperature before serving.

    • Reheating: If you enjoy warm bars, you can reheat them in the microwave for a few seconds or in the oven at a low temperature. This will refresh the gooey caramel and bring back the delightful texture.

    By following these guidelines, you’ll ensure your Easy Caramel Crush Bars stay delicious and irresistible for days.

    Nutritional Value of Easy Caramel Crush Bars Dessert Recipe

    A clear understanding of the nutritional profile of your Easy Caramel Crush Bars Dessert Recipe can help you enjoy each bite more mindfully. Here’s a general breakdown per serving (assuming 16 servings):

    • Calories: Approx. 150 calories
    • Total Fat: 7 grams
    • Saturated Fat: 4 grams
    • Trans Fat: 0 grams
    • Cholesterol: 15 mg
    • Sodium: 55 mg
    • Total Carbohydrates: 20 grams
    • Dietary Fiber: 1 gram
    • Sugars: 10 grams
    • Protein: 2 grams

    These values can vary based on substitutions made (like using coconut oil or sugar alternatives). Hence, if you adapt the recipe for dietary needs, be mindful of recalculating nutritional values accordingly.

    FAQs: Frequently Asked Questions About Easy Caramel Crush Bars Dessert Recipe

    1. Can I make these bars ahead of time?

    Absolutely! These bars can be made in advance and stored in the refrigerator for up to a week or frozen for up to three months.

    2. What can I substitute for caramels?

    If you wish, you can use homemade caramel sauce or store-bought vegan caramel as a substitute.

    3. Are these bars suitable for a gluten-free diet?

    Yes, simply replace all-purpose flour with a gluten-free flour alternative to cater to gluten-sensitive individuals.

    4. How can I make these bars healthier?

    To make them healthier, you can capitalize on natural sweeteners like honey or maple syrup and add nuts for protein.

    5. Can I vary the toppings?

    Yes! Feel free to add chocolate chips, dried fruits, or different nuts to the base for unique variations.

    Creating the Easy Caramel Crush Bars Dessert Recipe is not just about baking; it’s about crafting a delightful experience that everyone can enjoy. With its attractive appearance, delicious flavors, and healthy variations, this recipe is sure to become a staple in your collection of go-to dessert recipes. Whether for family gatherings, holiday celebrations, or cozy evenings at home, these bars are bound to impress. Happy baking!

  • Refreshing Blackberry Coconut Mojito Drink

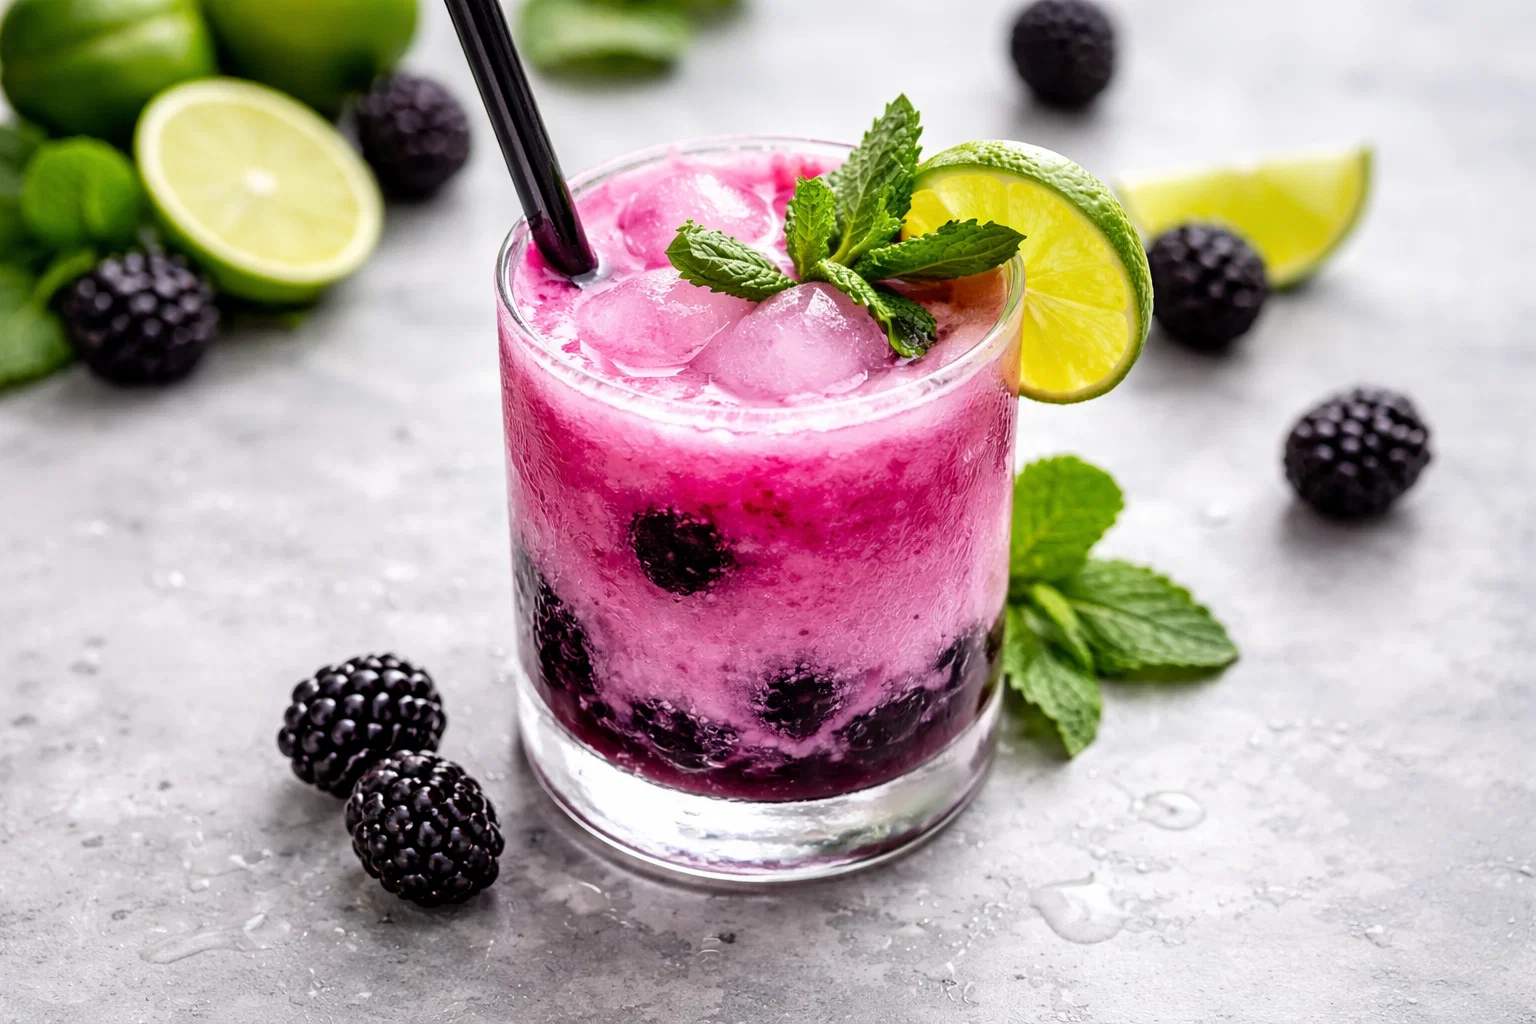
    Refreshing Blackberry Coconut Mojito Drink

    Refreshing Blackberry Coconut Mojito Drink: A Tropical Delight

    Introduction to Refreshing Blackberry Coconut Mojito Drink

    Welcome to the world of refreshing recipes! Picture yourself on a sun-soaked beach, the sound of waves gently lapping the shore. A glass of a stunning Blackberry Coconut Mojito in hand brings that imagery to life. This drink is a perfect marriage of sweet and tart blackberries, creamy coconut, and invigorating mint, creating a beverage that is nothing short of a tropical delight.

    This Refreshing Blackberry Coconut Mojito Drink isn’t just a visual treat; it’s also simple, healthy, and suitable for various dietary needs. Whether you’re a busy parent looking for a quick mixer for a family gathering, or a college student wanting to impress friends with a delightful drink, this recipe checks all the boxes. It’s vegan, gluten-free, and low in calories – making it an ideal choice for the health-conscious. Plus, the combination of coconut water and blackberries brings you an ample dose of vitamins and hydration, making this mojito not just delicious, but also beneficial.

    In this article, we’ll guide you through every detail—ingredients, tips, nutritional benefits, and even how to customize the drink for your palate. So, pour yourself a tall glass and let’s dive into crafting this easy yet luxurious drink that everyone will love!

    Benefits and Advantages of Refreshing Blackberry Coconut Mojito Drink

    The Refreshing Blackberry Coconut Mojito Drink stands out not only due to its vibrant flavor but also because it offers a myriad of benefits. Here’s why you’ll love this drink:

    1. Simplicity of Preparation: This drink takes mere minutes to make! With just a handful of ingredients and simple steps, you won’t spend hours in the kitchen. Ideal for busy parents or working professionals, this mojito adds a taste of luxury without the hassle.

    2. Health Conscious: One of the standout attributes of this recipe is its health benefits. Blackberries are rich in antioxidants, while coconut water boasts hydrating properties and natural electrolytes. Together, they create a refreshing beverage that can easily replace sugary sodas or cocktails, perfect for those watching their calorie intake.

    3. Vegan and Gluten-Free: For those adhering to specific dietary restrictions, this drink checks all the boxes. It contains no animal products, making it vegan-friendly, and is gluten-free, catering to the needs of those with gluten sensitivities.

    4. Customizable: Feel free to customize the drink’s sweetness and tartness based on your preference. Whether you like it extra sweet or prefer a tangy punch, this mojito is versatile enough to accommodate different tastes.

    5. Socially Appealing: This drink is perfect for gatherings, picnics, or even just a relaxing evening at home. Its eye-catching color and refreshing taste make it a conversation starter and a perfect choice for newlyweds hosting their first gathering or food enthusiasts wanting to impress guests.

    When you think of refreshing recipes, this Blackberry Coconut Mojito undoubtedly deserves a special place, considering its multitude of advantages tailored for any lifestyle.

    Ingredients Overview

    Essential Ingredients for Refreshing Blackberry Coconut Mojito Drink

    Creating the perfect Refreshing Blackberry Coconut Mojito Drink begins with selecting quality ingredients. Below is a detailed list of what you’ll need:

    • 1 cup fresh blackberries: Nature’s candy, providing sweetness and a wealth of antioxidants.
    • 1 cup coconut water: Hydrating and energizing, coconut water is packed with potassium and electrolytes.
    • 1 tablespoon fresh lime juice: Adds a zesty zing that balances the sweetness.
    • 10 fresh mint leaves: For that refreshing, aromatic flavor that makes mojitos legendary.
    • 2 teaspoons agave syrup or honey (optional): Customize the sweetness according to your taste preferences; agave syrup keeps it vegan.
    • Ice cubes: Essential for a chilled, delightful experience.
    • Mint sprigs and lime slices for garnish: For an appealing presentation.

    Dietary Note: This recipe is naturally vegan, gluten-free, and low-calorie. Feel free to use low-calorie sweeteners if you wish to cut down on sugar!

    Dietary Substitutions to Customize Your Refreshing Blackberry Coconut Mojito Drink

    Customizing your Refreshing Blackberry Coconut Mojito Drink is simple! Here are some suggested substitutions that cater to various dietary needs:

    1. Sweetener Alternatives:
    2. Instead of agave syrup or honey, try stevia or monk fruit sweetener to lower the calorie count further.
    3. If you prefer a more traditional sweetener, sugar can be used but may increase calorie content.

    4. Coconut Water Alternatives:

    5. If coconut water is unavailable, substitute it with sparkling water for a fizzy twist.
    6. For a creamier texture, use coconut milk, which can lend a different taste profile but watch for calories.

    7. Changing Up the Berries:

    8. If blackberries aren’t in season, feel free to swap in raspberries or blueberries for a delightful variation that still maintains that summery flavor.

    These substitutions ensure that your drink can fit any occasion or dietary restriction, making it one of the ultimate refreshing recipes!

    How to Prepare the Perfect Refreshing Blackberry Coconut Mojito Drink: Step-by-Step Guide

    Eager to craft your very own Refreshing Blackberry Coconut Mojito Drink? Follow these straightforward steps to concoct this tropical delight:

    1. Prepare the Glass:
    2. Take a tall glass or a mason jar and set it aside, ready for your refreshing mojito.

    3. Muddle Blackberries and Mint:

    4. In the bottom of the glass, add 1 cup of fresh blackberries and 10 fresh mint leaves. Using a muddler (or the back of a spoon), gently press down on the berries and mint to release their juices and aromas. This step is critical for obtaining that vibrant flavor that makes mojitos special.

    5. Add Lime Juice:

    6. Pour in 1 tablespoon of fresh lime juice over the muddled mixture. The lime juice will enhance the flavors beautifully, cutting through the sweetness of the blackberries.

    7. Sweeten to Taste:

    8. If you’re looking for extra sweetness, add 2 teaspoons of agave syrup or honey to the glass. However, this step is optional based on your sweetness preference.

    9. Incorporate Coconut Water:

    10. Now, fill the glass with 1 cup of coconut water. Stir gently to combine all the ingredients.

    11. Add Ice:

    12. Fill the glass to the top with ice cubes. This will keep your mojito refreshing and cool.

    13. Garnish:

    14. Top with a sprig of mint and a slice of lime for a delightful garnish. This not only looks attractive but also adds an extra aromatic element.

    15. Enjoy:

    16. Stir your mojito one last time and dig in! Sip slowly and savor the infusion of blackberry, coconut, and mint.

    17. Experiment with Variations:

    18. This drink can be adapted for special occasions by adding a splash of sparkling wine or rum if desired, transforming it into a cocktail.

    This step-by-step guide ensures a simple yet effective approach to making a Refreshing Blackberry Coconut Mojito Drink. Enjoy with friends, family, or simply relish the personal moment of tropical bliss!

    Mastering Refreshing Blackberry Coconut Mojito Drink: Advanced Tips and Variations

    Once you’ve nailed the basic recipe, why not get adventurous? Here are some advanced tips and variations to elevate your Refreshing Blackberry Coconut Mojito Drink experience:

    1. Make it a Pitcher:
    2. Perfect for parties! Multiply the recipe to make a pitcher of this delightful drink. Combine ingredients in a large bowl and stir well. Be sure to adjust sweetness as needed.

    3. Experiment with Herbs:

    4. Why stop at mint? Try adding basil or cilantro for a unique twist on the traditional mojito flavor profile. These herbs can add refreshing undertones that surprise and delight.

    5. Add A Splash of Citrus:

    6. Besides lime, consider integrating orange or grapefruit juice. This adds another layer of flavor without overwhelming the original taste.

    7. Frozen Treat:

    8. Turn your mojito into a frozen slush! Blend the blackberries, coconut water, and lime juice with ice until smooth for a frosty treat perfect for hot days.

    9. Mocktail-Friendly:

    10. For those avoiding alcohol but still wanting a sophisticated drink, this mojito works beautifully as a non-alcoholic option, maintaining its status as one of the greatest refreshing recipes.

    11. Infuse Your Coconut Water:

    12. Consider infusing your coconut water with other flavors, such as ginger or lemongrass, the night before. This will add an unexpected twist to the flavor that your guests will love.

    13. Garnish Variations:

    14. Use colorful edible flowers as a garnish for a stunning presentation, making it not just a mojito, but an aesthetic masterpiece.

    These advanced tips and variations allow you to play with flavors and concepts, ensuring that your Refreshing Blackberry Coconut Mojito Drink remains exciting and new, whether it’s your first time making it or you’re serving it at a gathering!

    How to Store Refreshing Blackberry Coconut Mojito Drink: Best Practices

    After preparing a delicious batch of your Refreshing Blackberry Coconut Mojito Drink, you may wonder about the best storage methods:

    1. Refrigeration:
    2. If you have leftover mojito, it’s best to store it in a tightly sealed container in the fridge. The drink will remain fresh for up to 24 hours. However, you will want to avoid adding ice cubes until you’re ready to drink it, to prevent dilution.

    3. Freezing:

    4. Want to enjoy your mojito later? You can freeze the mixture (without ice) in an airtight container. When you’re ready to enjoy it, simply thaw it in the fridge and blend it with fresh ice.

    5. Avoiding Nutritional Loss:

    6. For optimal freshness, it’s advisable to keep the blackberries and mint separate and add them freshly to your drink just before consumption. This keeps the flavors at their peak and ensures your mojito remains vibrant.

    7. Mason Jar Storage:

    8. If you prefer a more aesthetically pleasing option, consider storing your mojito in a mason jar. This allows for easy transport if you’re taking it to a picnic or outdoor gathering.

    Remember, the essence of a refreshing recipe like the Blackberry Coconut Mojito is best enjoyed fresh, but with these storage tips, you can keep the tropical vibes alive!

    Nutritional Value of Refreshing Blackberry Coconut Mojito Drink

    Curious about the nutritional profile of your Refreshing Blackberry Coconut Mojito Drink? Here’s a breakdown:

    • Calories: Approximately 70–90 calories per serving when made as per the original recipe without added sweeteners.
    • Carbohydrates: 18g (including natural sugars from blackberries and coconut water).
    • Protein: 1g (primarily from coconut).
    • Fat: 0.5g (minimal, mostly healthy fats from coconut).
    • Vitamin C: More than 25% of the daily value, mainly from the fresh lime juice and blackberries.
    • Potassium: A good source, due to coconut water content, helping with hydration.
    • Antioxidants: Rich in antioxidants from blackberries, offering health benefits and supporting the immune system.

    This drink not only quenches your thirst but also serves as a nutritious and tasty choice for anyone looking to elevate their hydration game. As with all refreshing recipes, the key is balance, and this mojito offers just that.

    FAQs: Frequently Asked Questions About Refreshing Blackberry Coconut Mojito Drink

    1. Can I use frozen blackberries?

    Absolutely! Frozen blackberries work just as well in this recipe. They will create a colder, slushier texture, making for an even more refreshing drink.

    2. Is there a way to make this drink less sweet?

    Certainly! Simply reduce the amount of sweetener, or opt for unsweetened coconut water. You can also increase the lime juice for more tang.

    3. Can I substitute coconut water with anything else?

    Yes! Sparkling water or regular water can act as a substitutes, though they will change the drink’s flavor slightly. Coconut milk can be used as well but will create a creamier drink.

    4. Can the mojito be made ahead of time?

    You can make the mixture ahead of time without the ice and store it in the refrigerator. Add fresh mint, ice, and any optional sweetener right before serving.

    5. What other fruits can I use in this drink?

    You can experiment with a variety of berries like raspberries, strawberries, or even mango for a tropical twist! Each fruit will bring its unique flavor profile.

    This FAQ section addresses common inquiries and offers clear, concise answers, ensuring that any cook, regardless of skill level, will feel informed and confident in making their Refreshing Blackberry Coconut Mojito Drink.


    In crafting this Refreshing Blackberry Coconut Mojito Drink, we’ve explored its making, benefits, and nutritional value. With customization options and storage tips, this recipe is perfect for all – from busy professionals to enthusiastic home cooks. So gather your ingredients, rally your friends, and create this vibrant drink. Cheers to refreshing recipes that bring us together!

  • Easy Banana Pudding Easter Truffles

    Easy Banana Pudding Easter Truffles

    Easy Banana Pudding Easter Truffles: A Tropical Delight

    Introduction to Easy Banana Pudding Easter Truffles

    Welcome to a delightful culinary journey with our Easy Banana Pudding Easter Truffles! If you love scrumptious dessert recipes that are simple to make, healthy, and cater to various dietary preferences, you’re in for a real treat. These truffles embody the essence of spring, blending the creamy goodness of banana pudding with a fun, festive touch perfect for Easter celebrations.

    The delightful combination of flavors and textures in these truffles will bring a smile to anyone’s face. They are not just delicious but also incredibly easy to prepare, making them an excellent choice for busy parents seeking quick yet impressive treats, or for home cooks eager to impress guests with minimal effort. Whether you’re a vegan, gluten-free, or just health-conscious, these truffles tick all the boxes.

    By utilizing ripe bananas, creamy coconut, and light chocolate, this recipe transforms ordinary ingredients into an extraordinary dessert. Plus, these banana pudding Easter truffles are perfect for a range of occasions—from a leisurely brunch with friends to a sweet surprise for your loved ones. With each bite, you’ll experience the nostalgic flavor of banana pudding reimagined in a fun, bite-sized form. So, let’s dive into the details of this delightful dessert recipe that is sure to become a staple in your baking repertoire!

    Benefits and Advantages of Easy Banana Pudding Easter Truffles

    One of the most compelling reasons to make these Easy Banana Pudding Easter Truffles is their simplicity. This dessert recipe is designed for everyone, from novice bakers to seasoned professionals. With minimal preparation time and no complicated techniques involved, even busy students or working professionals can whip up this treat in no time.

    Moreover, the health benefits of this recipe are hard to resist. Ripe bananas are a rich source of potassium and vitamins, making them a natural way to enhance your diet without sacrificing flavor. The use of coconut cream adds a creamy texture without the dairy, making this healthy dessert suitable for vegans and individuals with lactose intolerance. Additionally, by choosing dark chocolate for the coating, you enhance not only the taste but also add antioxidants to your treats.

    Another standout attribute is the recipe’s versatility. The truffles can be customized based on your family’s or guests’ dietary needs. For instance, opt for sugar alternatives to make them low-calorie, or enjoy them gluten-free by ensuring your chocolate coating meets gluten-free standards. This flexibility makes them suitable for gatherings with friends or family, where dietary restrictions are often in play.

    Beyond their delicious taste and health benefits, these truffles bring people together. They’re perfect for festive occasions, such as Easter, where you can showcase your creation among friends and family. Ultimately, these dessert recipes celebrate flavor, health, and simplicity, delivering a tropical delight that everyone can enjoy.

    Ingredients Overview

    Essential Ingredients for Easy Banana Pudding Easter Truffles

    To create your Easy Banana Pudding Easter Truffles, gather the following ingredients:

    • 3 ripe bananas (the riper, the better!): Provides natural sweetness and flavor.
    • 1 cup gluten-free oats: Acts as a binding agent while remaining gluten-free.
    • 1 cup coconut cream: Gives a rich, creamy texture without dairy.
    • 1/2 cup instant vanilla pudding mix: The star ingredient that enhances the classic banana pudding flavor.
    • 1 cup dark chocolate chips: For coating the truffles, choose dairy-free chocolate for a vegan option.
    • 1/2 teaspoon vanilla extract: Elevates the flavor profile beautifully.
    • Pinch of sea salt: Balances the sweetness.

    Vegan Option: Ensure all ingredients, particularly the chocolate chips and pudding mix, are labeled as vegan.

    Gluten-Free Option: Confirm that your oats and chocolate are certified gluten-free.

    Dietary Substitutions to Customize Your Easy Banana Pudding Easter Truffles

    If you need to customize your Easy Banana Pudding Easter Truffles based on dietary preferences or ingredient availability, here are some helpful substitutions:

    • Bananas can be replaced with applesauce in a 1:1 ratio for a lower-calorie option. While this change yields a different flavor profile, it can create a fun twist on the original recipe.
    • Instead of coconut cream, you can use Greek yogurt for a protein boost. However, it does make the truffles less dairy-free, so this swap may not be suitable for vegans.
    • You can switch the instant pudding mix for a homemade mix or for a brand that uses alternative sweeteners if sugar is a concern.
    • For a nut-free version, avoid any nuts that may be present in your chocolate chips or toppings, opting for brands that ensure a nut-free environment.

    With these substitutions, you can personalize your truffles to meet the specific needs of your family and friends while still keeping the core of this recipe intact.

    How to Prepare the Perfect Easy Banana Pudding Easter Truffles: Step-by-Step Guide

    Creating these delectable Easy Banana Pudding Easter Truffles is a straightforward and enjoyable experience. Follow these simple steps to bring this tropical delight into your kitchen:

    1. Prepare the Base: Begin by peeling the ripe bananas and placing them in a mixing bowl. Mash the bananas with a fork until smooth and free of lumps.

    2. Mix Ingredients: In the bowl with the mashed bananas, add the oats and coconut cream. Using a spatula, mix until everything is combined well.

    3. Blend in Flavor: Stir in the instant vanilla pudding mix, vanilla extract, and a pinch of sea salt. Mix until the mixture is evenly combined and thick.

    4. Chill the Mixture: Cover the bowl with plastic wrap and refrigerate the mixture for about 30 minutes. This cooling step will help your truffle mixture firm up, making rolling easier.

    5. Shape the Truffles: After chilling, remove the mixture from the fridge and scoop approximately one tablespoon of the mixture. Roll it between your palms to shape it into a small ball. Place the rolled truffle onto a parchment-lined baking sheet. Repeat this process until all the mixture has been shaped into truffles.

    6. Melt the Chocolate: In a microwave-safe bowl, add the dark chocolate chips. Microwave in 30-second intervals, stirring between each interval until the chocolate is fully melted and smooth.

    7. Coat the Truffles: Using a fork, dip each truffle into the melted chocolate, ensuring each ball is fully coated. Allow any excess chocolate to drip off before transferring the truffles back to the parchment-lined sheet.

    8. Chill Again: Place the chocolate-coated truffles back in the refrigerator for at least 30 minutes or until the chocolate has set.

    9. Enjoy Your Treats: Once the chocolate coating has hardened, remove the truffles from the fridge. You can serve them immediately or store them in an airtight container in the refrigerator for later.

    10. Serving Suggestions: Serve your Easy Banana Pudding Easter Truffles as a delightful dessert, snack, or as part of a festive celebration spread. Garnish with a sprinkle of crushed nuts, shredded coconut, or colorful sprinkles for a fun flair!

    These steps make it incredibly simple to prepare a luscious dessert that delights the senses. Not to mention, this process allows you to adapt your truffles for any dietary requirements or personal tastes.

    Mastering Easy Banana Pudding Easter Truffles: Advanced Tips and Variations

    For those looking to elevate their Easy Banana Pudding Easter Truffles, here are some advanced tips and exciting variations:

    • Add Nuts: Incorporate crushed nuts into the mixture for an added crunch. Pecans or walnuts pair beautifully with banana flavors.

    • Spice it Up: Consider adding a dash of cinnamon or nutmeg to the mixture to deepen the flavor profile. These spices can elevate the nostalgic essence of banana pudding while providing additional warmth.

    • Flavor Variations: Experiment with different flavored instant pudding mixes, such as chocolate or strawberry, to create unique flavor profiles for your truffles.

    • Roll in Toppings: After coating the truffles in chocolate, roll them in various toppings such as crushed graham crackers for that ‘banana pudding’ essence, or shredded coconut for a tropical twist.

    • Refrigerated Storage: These truffles can be stored in an airtight container in the refrigerator for up to a week. Their flavors develop beautifully over time, making them even more enjoyable as days pass.

    By exploring these variations and tips, you’ll impress your family and friends while adding a personalized touch to this recipe.

    How to Store Easy Banana Pudding Easter Truffles: Best Practices

    Storing your Easy Banana Pudding Easter Truffles properly is essential to ensure they remain fresh and delicious. Here are the best practices for refrigerator and freezer storage:

    • Refrigeration: Store the truffles in an airtight container in the refrigerator. This method helps maintain their moisture, making them last about one week while remaining fresh and tasty.

    • Freezing: For longer storage, you can freeze the truffles. Place them on a parchment-lined baking sheet single-layered and freeze them until solid. Once frozen, transfer the truffles into a freezer-safe bag or container. They can last up to three months in the freezer. When you’re ready to enjoy, simply take them out and allow them to thaw in the refrigerator for several hours.

    • Avoid Temperature Shock: Avoid exposing your truffles to room temperature for extended periods, especially those with chocolate coating, as it may cause sweating and affect texture.

    Following these storage methods will help retain the quality of your Easy Banana Pudding Easter Truffles, ensuring every bite is just as delightful as the first.

    Nutritional Value of Easy Banana Pudding Easter Truffles

    Understanding the nutritional value of your homemade dessert recipes is essential, especially for those who are health-conscious. Here’s a breakdown of the approximate nutritional information per truffle (based on 15 servings):

    • Calories: 120 kcal
    • Carbohydrates: 15g
    • Fat: 6g
    • Protein: 2g
    • Sugars: 5g
    • Fiber: 2g
    • Sodium: 20mg

    Nutritional Benefits:

    1. Low in Saturated Fat: The use of coconut cream and dark chocolate keeps saturated fats lower compared to traditional truffle recipes.

    2. Rich in Potassium: With bananas as the base, each truffle offers a good source of potassium, essential for heart health.

    3. Vegan-Friendly: This recipe provides a complete plant-based treat, making it perfect for those following a vegan lifestyle.

    4. Gluten-Free Options: Ensuring gluten-free ingredients allows those with gluten sensitivities to enjoy these treats without worry.

    Given these nutritional values, it’s clear that these Easy Banana Pudding Easter Truffles are a guilt-free indulgence that satisfies your sweet tooth while offering some health benefits.

    FAQs: Frequently Asked Questions About Easy Banana Pudding Easter Truffles

    Q1: Can I make these truffles ahead of time?
    A: Absolutely! These truffles can be made in advance and stored in the refrigerator or freezer, making them perfect for planning ahead for events.

    Q2: How long do the truffles stay fresh?
    A: When stored in an airtight container in the refrigerator, they can last up to a week. If frozen, they maintain their quality for about three months.

    Q3: Can I substitute the bananas for something else?
    A: Yes, you can use applesauce or even pureed peaches as substitutes, but keep in mind that flavor profiles may change.

    Q4: Is it possible to make these truffles without added sugar?
    A: You can opt for sugar-free pudding mixes and use ripe bananas to provide natural sweetness, making this recipe suitable for those monitoring their sugar intake.

    Q5: What can I use as a coating besides chocolate?
    A: You can coat the truffles with crushed nuts, shredded coconut, or even a dusting of cocoa powder for a delicious alternative.

    With this comprehensive guide, you are now well-equipped to create your very own Easy Banana Pudding Easter Truffles. This dessert recipe tantalizes your taste buds while being simple, healthy, and adaptable to different dietary needs, making it perfect for any occasion. Dive in and enjoy a taste of tropical delight today!

  • The Best Easter Mini Egg Brownies

    The Best Easter Mini Egg Brownies

    The Best Easter Mini Egg Brownies: A Tropical Delight

    Introduction to The Best Easter Mini Egg Brownies

    Are you ready to indulge in a delightful dessert that celebrates the spirit of Easter while satisfying your sweet tooth? Welcome to The Best Easter Mini Egg Brownies, a unique treat that combines the richness of brownies with the playful charm of colorful mini chocolate eggs. These brownies are not just a feast for the eyes but also a deliciously satisfying choice among various dessert recipes, making them perfect for any occasion.

    What makes this recipe even better is its incredible simplicity. Whether you’re a busy parent, a student juggling studies, or a novice baker, you can whip up these brownies with minimal fuss. With straightforward ingredients and simple steps, you’ll be in and out of the kitchen in no time.

    Additionally, this recipe offers flexibility, catering to vegetarian, gluten-free, and low-calorie diets. Enjoy the delicious combination of fudgy brownies and crunchy, creamy mini eggs, while knowing you can modify the recipe to fit your needs. These brownies not only taste divine, but they can be part of a balanced lifestyle, too. It’s time to gather your ingredients and bake a batch of these delightful treats that everyone will love!

    Benefits and Advantages of The Best Easter Mini Egg Brownies

    When it comes to dessert recipes, The Best Easter Mini Egg Brownies stand out for several compelling reasons. Firstly, the ease of preparation makes them accessible to all levels of bakers. You don’t need to be a professional chef to create these indulgent treats; just a few simple ingredients and you’re ready to go! This is particularly appealing for busy individuals and parents who want to whip up a sweet surprise without spending hours in the kitchen.

    Beyond their simplicity, these brownies can be tailored to fit various dietary preferences, making them a versatile choice. For instance, if you need a vegan version, you can easily substitute traditional eggs and dairy with plant-based alternatives. Gluten-free flour options are readily available, ensuring that those with gluten sensitivities can also enjoy the same rich flavors.

    Moreover, the mini eggs provide a fun texture and beautiful appearance, making the brownies perfect for celebrations or family gatherings. The visual appeal, combined with the ease of baking, leads to a satisfying experience for bakers and eaters alike. With a balanced approach to indulgence, these brownies can even serve as a guilt-free treat, especially when you swap in lower-calorie ingredients.

    How about we delve into the components of this scrumptious recipe? You’re about to discover the essential ingredients that will bring your Easter Mini Egg Brownies to life!

    Ingredients Overview

    Essential Ingredients for The Best Easter Mini Egg Brownies

    Here is a detailed list of all the ingredients you will need to create The Best Easter Mini Egg Brownies. Each ingredient has been chosen for its specific purpose in delivering a rich flavor and satisfying texture.

    • 1 cup (200g) granulated sugar
    • Sweetens your brownies, giving them that classic dessert taste.

    • 1 cup (200g) brown sugar

    • This adds depth and moisture, resulting in fudgy brownies.

    • 1 cup (240ml) unsweetened applesauce (Vegan Option)

    • Acts as a binding agent, replacing eggs and contributing to moistness.

    • 1 cup (240ml) vegetable oil

    • Provides richness and prevents the brownies from drying out.

    • 1 tsp vanilla extract

    • Enhances the flavor, making your brownies aromatic and delicious.

    • 1 cup (125g) all-purpose flour (Gluten-Free Option: almond flour or gluten-free flour blend)

    • The backbone of your brownies, giving them structure.

    • 1/2 cup (50g) unsweetened cocoa powder

    • Imparts a deep chocolate flavor, crucial for delicious brownies.

    • 1 tsp baking powder

    • Helps the brownies rise, ensuring a light and fluffy texture.

    • 1/2 tsp salt

    • Balances the sweetness and enhances the flavors.

    • 1 to 2 cups (200-400g) mini chocolate eggs

    • These are the star of the show, adding a surprise in each bite!

    With these essential components, you’re all set to create delectable brownies that can be enjoyed by anyone who appreciates sweet treats.

    Dietary Substitutions to Customize Your The Best Easter Mini Egg Brownies

    One of the greatest advantages of The Best Easter Mini Egg Brownies is their adaptability. Here are some substitutions to cater to various dietary needs or ingredient availability:

    1. Vegan Variations:
    2. You can replace the eggs with flax eggs (1 tbsp ground flaxseed + 2.5 tbsp water per egg, allow to sit until gel-like) or use commercial egg replacers. Opt for unsweetened almond milk in place of dairy-based options.

    3. Gluten-Free Options:

    4. Use gluten-free all-purpose flour or almond flour instead of regular all-purpose flour. The gluten-free blends often contain xanthan gum to mimic the elasticity of wheat flour, ensuring you still get that perfect brownie texture.

    5. Reduced Sugar:

    6. For a lower-sugar option, replace half the granulated sugar with a sugar substitute like Stevia or Erythritol. The brownies will still taste sweet while being lighter on the sugar content.

    7. Nut-Free Variations:

    8. Should you or your guests have nut allergies, using sunflower seed butter instead of any nut butter makes for an equally satisfying and allergy-friendly treat.

    By adjusting these ingredients accordingly, you can create a batch of brownies that everyone can enjoy without compromising on flavor.

    How to Prepare the Perfect The Best Easter Mini Egg Brownies: Step-by-Step Guide

    Ready to make The Best Easter Mini Egg Brownies? Here’s the detailed, step-by-step guide to preparing these incredible treats. Let’s dive in!

    1. Preheat the Oven:
    2. Start by preheating your oven to 350°F (175°C). This ensures that your brownies bake evenly and come out perfectly moist.

    3. Prepare the Baking Pan:

    4. Grease a 9×13 inch (23×33 cm) baking pan with cooking spray or line it with parchment paper for easy removal after baking.

    5. Mix Sugars:

    6. In a large mixing bowl, combine 200g granulated sugar and 200g brown sugar. Whisk together until thoroughly mixed.

    7. Incorporate Wet Ingredients:

    8. Add 1 cup unsweetened applesauce and 1 cup vegetable oil into the sugar mixture. Stir in 1 tsp vanilla extract. Whisk until the mixture is smooth and well combined.

    9. Combine Dry Ingredients:

    10. In a separate bowl, sift together 125g all-purpose flour, 50g cocoa powder, 1 tsp baking powder, and 1/2 tsp salt. This helps to eliminate any lumps in the cocoa and flour.

    11. Combine Wet and Dry Ingredients:

    12. Gradually add the dry ingredient mixture into the wet ingredients. Stir carefully until just combined. Avoid overmixing to ensure that your brownies stay tender.

    13. Add Mini Eggs:

    14. Fold in 1 to 2 cups of mini chocolate eggs gently, reserving a handful to sprinkle on top before baking.

    15. Pour into the Pan:

    16. Pour the brownie batter into the prepared baking pan. Use a spatula to spread it evenly.

    17. Sprinkle Additional Mini Eggs:

    18. Before placing the pan in the oven, add the reserved mini eggs on the surface of the brownie batter, pressing them slightly to secure.

    19. Bake:

      • Bake in the preheated oven for approximately 25-30 minutes, or until a toothpick inserted into the center comes out with a few moist crumbs (not wet batter).
    20. Cool:

      • Once baked, remove the pan from the oven and allow it to cool completely in the pan for at least 15 minutes before slicing.
    21. Slice and Serve:

      • Cut into squares and serve. You can add a dusting of powdered sugar on top or serve with a scoop of ice cream for an elevated treat!

    These straightforward steps make it easy for anyone to create delicious brownies at home.

    Mastering The Best Easter Mini Egg Brownies: Advanced Tips and Variations

    To elevate your baking game even further, consider these advanced tips and exciting variations for your Easter Mini Egg Brownies:

    • Include a Swirl:
    • For a visually appealing brownie, consider adding a swirl of homemade or store-bought peanut butter or Nutella into your brownie batter before baking. Simply spoon it over the batter and swirl with a knife.

    • Add Nuts for Flavor:

    • If you enjoy a crunch, try adding chopped nuts (like walnuts or pecans) into the mixture. This additional texture enhances the brownies’ overall appeal.

    • Top with Ganache:

    • After the brownies have cooled, create a simple chocolate ganache by melting chocolate and heavy cream and pouring it over the top. Allow this to set for an extra rich flavor experience.

    • Seasonal Sprinkles:

    • As an alternative to mini eggs, consider using seasonal sprinkles or even dried fruits like cranberries or cherries to give the brownies a unique twist while keeping the festive spirit alive.

    By utilizing these tips and exploring variations, you can continue to adapt the recipe, making it your own while impressing friends and family.

    How to Store The Best Easter Mini Egg Brownies: Best Practices

    Storing your The Best Easter Mini Egg Brownies properly ensures they remain fresh and delicious longer. Here are the best practices for refrigerating, freezing, and reheating them:

    • At Room Temperature:
    • For short-term storage, simply keep the brownies in an airtight container at room temperature. They will stay fresh for up to 3 days.

    • Refrigeration:

    • If you need to keep them longer, transfer the brownies to the fridge. Ensure they’re covered well to prevent them from drying out. They can last up to one week in the refrigerator.

    • Freezing:

    • For longer-term storage, brownies freeze exceptionally well! Cut them into squares and wrap each square tightly in plastic wrap, then place them in a freezer-safe container. They can be frozen for up to 3 months.

    • Reheating:

    • When you’re ready to enjoy your frozen brownies, let them thaw in the refrigerator overnight. If you want to serve them warm, pop them in a microwave for a few seconds, or reheat in an oven at 300°F (150°C) for about 10 minutes.

    Utilizing these storage methods not only extends the life of your brownies but ensures they remain as delightful as the day they were baked!

    Nutritional Value of The Best Easter Mini Egg Brownies

    Understanding the nutritional value of your treats can help you enjoy them mindfully. Here’s a general breakdown of the nutritional information for The Best Easter Mini Egg Brownies based on standard ingredients, assuming 16 servings:

    • Calories per Serving: 210
    • Total Fat: 10g
    • Saturated Fat: 3g
    • Cholesterol: 0mg
    • Sodium: 150mg
    • Total Carbohydrates: 30g
    • Dietary Fiber: 2g
    • Sugars: 18g
    • Protein: 2g

    By utilizing low-calorie sweeteners or swapping in healthier oils, you can lower the calorie count and fat content. These brownies can fit into a balanced diet, especially when enjoyed in moderation.

    FAQs: Frequently Asked Questions About The Best Easter Mini Egg Brownies

    Q: Can I use different candies instead of mini eggs?

    A: Absolutely! Feel free to use chocolate chips, M&Ms, or seasonal candies that you love. This will customize your brownies and make them even more fun!

    Q: Are there any vegan options for this recipe?

    A: Yes! Replace eggs with flax eggs and use cocoa powder that’s dairy-free. Make sure to choose vegan mini eggs or use plant-based chocolate chunks.

    Q: How do I know when my brownies are baked perfectly?

    A: The best indication is to insert a toothpick in the center. It should come out with a few moist crumbs but not wet batter.

    Q: Can I double the recipe?

    A: Yes! You can easily double the ingredients for a larger batch. Make sure to adjust your baking time if you’re using a larger pan.

    Q: How can I make these brownies lower in sugar?

    A: Use a sugar substitute or decrease the amount of sugar by replacing some of it with applesauce. This keeps moisture while reducing calories.

    Q: What’s the best way to cut brownies neatly?

    A: Use a sharp knife or a plastic knife (to avoid sticking) and clean it between cuts to achieve perfectly sliced squares.

    Now you’re equipped with all the knowledge to bake The Best Easter Mini Egg Brownies, be it for a festive occasion or any sweet craving! Enjoy the blend of flavors and textures in these rich brownies that promise to be a hit with anyone who tries them.

  • Easy Lemon Cream Chia Pudding Breakfast

    Easy Lemon Cream Chia Pudding Breakfast

    Easy Lemon Cream Chia Pudding Breakfast: A Tropical Delight

    Introduction to Easy Lemon Cream Chia Pudding Breakfast

    Are you looking for quick and delicious breakfast ideas that are also both healthy and satisfying? Look no further than this Easy Lemon Cream Chia Pudding Breakfast. This delightful dish not only tickles your taste buds but also packs a nutritious punch. Chia seeds, a superfood loaded with omega-3 fatty acids, protein, and fiber, form the backbone of this recipe. When combined with creamy coconut milk and zesty lemon, they create a refreshing breakfast that tastes indulgent yet remains guilt-free.

    With the rise of health-conscious eating habits, this chia pudding offers an easy solution for busy mornings. Simply prepare it the night before, and you’ll have a ready-made, wholesome breakfast to take on the go. Moreover, it’s suitable for a range of dietary preferences, being naturally vegan, gluten-free, and low in calories. Whether you’re a busy parent, a student rushing to class, or someone enjoying a leisurely weekend brunch, this recipe is versatile enough to please everyone at the table.

    Let’s dive deeper into why this Easy Lemon Cream Chia Pudding is an outstanding breakfast choice.

    Benefits and Advantages of Easy Lemon Cream Chia Pudding Breakfast

    The Easy Lemon Cream Chia Pudding Breakfast stands out among breakfast ideas for numerous reasons. First and foremost, this recipe is incredibly easy to prepare. In about five minutes of prep time, you can have a delightful breakfast waiting for you the next morning. Chia seeds are unique because, unlike many ingredients, they don’t require cooking; they simply need to soak and absorb liquid – transforming into a thick, pudding-like consistency.

    Furthermore, this dish is chock-full of health benefits. Chia seeds are known for their high fiber content, which aids in digestion and can help you feel full longer. They are also a fantastic source of protein, making this breakfast suitable for those seeking to manage their weight or fuel up for a busy day. In addition, the lemon zest and juice not only provide refreshing flavor but are rich in vitamin C, boosting your immune system and brightening your mood.

    This pudding is also easy to customize according to personal needs. You can use plant-based milk alternatives, switch up sweeteners, and add various toppings, making it suitable for various dietary requirements. From vegan to gluten-free diets, this recipe adapts easily without sacrificing flavor or enjoyment.

    Not only does it serve health goals, but it also satisfies the craving for something sweet and satisfying in the morning. Once you try this Easy Lemon Cream Chia Pudding, it’ll surely become one of your go-to breakfast ideas.

    Ingredients Overview

    Essential Ingredients for Easy Lemon Cream Chia Pudding Breakfast

    To bring the Easy Lemon Cream Chia Pudding Breakfast to life, you will need the following ingredients:

    • Chia Seeds (1/4 cup)
    • Health Benefits: High in omega-3 fatty acids, fiber, and protein.

    • Coconut Milk (1 cup, full-fat or light)

    • Health Benefits: Adds creaminess and healthy fats. (For low-calorie options, use light coconut milk or almond milk).

    • Lemon Juice (1/4 cup, freshly squeezed)

    • Health Benefits: Provides vitamin C and adds bright flavor.

    • Lemon Zest (1 tablespoon)

    • Health Benefits: Enhances flavor without added sugars.

    • Maple Syrup or Honey (to taste, optional)

    • Health Benefits: Natural sweeteners to suit your taste (use agave syrup for vegan-friendly options).

    • Vanilla Extract (1 teaspoon)

    • Purpose: Enhances the creamy flavor profile.

    • Fresh Berries or Nuts for Topping (1/2 cup, optional)

    • Health Benefits: Provide additional vitamins, minerals, and textures.

    This combination of ingredients ensures that your start to the day is not only nutritious but also flavorful. Each component contributes to an overall healthy breakfast that fits various dietary preferences.

    Dietary Substitutions to Customize Your Easy Lemon Cream Chia Pudding Breakfast

    Catering to specific dietary needs is a breeze with this Easy Lemon Cream Chia Pudding recipe. Here are some suggestions for substitutions:

    • Milk Alternatives: To make this chia pudding nut-free or lower in calories, use almond milk or oat milk as substitutes for coconut milk.
    • Sweeteners: If you’re watching your sugar intake, consider using stevia or erythritol instead of honey or maple syrup. For a flavorful alternative, try ripe mashed banana or unsweetened applesauce.
    • Fruit Choices: While berries are a popular topping, feel free to experiment with other fruits like kiwi, mango, or even diced peaches for a tropical twist.
    • Flavor Variations: Turn this recipe into a chocolate cream chia pudding by adding cocoa powder or melted dark chocolate along with the original ingredients.
    • Nut and Seed Toppings: Instead of the usual nuts, you could also add sunflower or pumpkin seeds for an extra crunch and additional health benefits.

    This flexibility allows you to create a unique version of the Easy Lemon Cream Chia Pudding Breakfast that maintains its core healthy benefits while catering to your specific taste preferences.

    How to Prepare the Perfect Easy Lemon Cream Chia Pudding Breakfast: Step-by-Step Guide

    Embarking on the journey to make the Easy Lemon Cream Chia Pudding Breakfast is simple, even for novice cooks. Follow these straightforward steps for a breakfast idea that will brighten your mornings:

    1. Prepare the Base: In a mixing bowl, combine 1/4 cup of chia seeds with 1 cup of coconut milk. Stir until thoroughly combined. Ensure there are no clumps of chia seeds remaining in the mixture.

    2. Add Flavor: Pour in 1/4 cup of fresh lemon juice and 1 tablespoon of lemon zest. Follow this with 1 teaspoon of vanilla extract. Stir to combine, integrating the flavors fully into the mixture.

    3. Sweeten to Taste: If desired, add maple syrup or honey according to your sweetness preference. Remember to start small; it’s easier to add more sweetness later than to take it out.

    4. Mix Until Smooth: Continue to stir the mixture for about one minute until the chia seeds are evenly distributed. Prevent lumps by ensuring all seeds are submerged in the liquid.

    5. Let It Chill: Cover your bowl with plastic wrap or a lid. Transfer it to the refrigerator and allow the mixture to chill for at least 2 hours, or preferably overnight. This resting time is essential for the chia seeds to absorb the liquid and thicken your pudding.

    6. Final Touchings: Once the pudding has set, give it a good stir. It should have a creamy, thick texture. If it’s too thick, feel free to add a splash of milk to reach your desired consistency.

    7. Serve and Customize: Spoon the chia pudding into individual bowls or jars. Top with your choice of fresh berries, nuts, or any other toppings you prefer.

    8. Enjoy Your Creation: Dive into your delicious, refreshing Easy Lemon Cream Chia Pudding Breakfast. Store any leftovers in the refrigerator for up to five days, allowing for nutritious and satisfying breakfasts all week long.

    This simple step-by-step guide ensures that you can easily whip up this breakfast idea without any fuss!

    Mastering Easy Lemon Cream Chia Pudding Breakfast: Advanced Tips and Variations

    Now that you have a delightful recipe in hand, let’s explore some tips and variations to master the Easy Lemon Cream Chia Pudding Breakfast:

    • Layered Presentation: For added visual appeal, consider layering the chia pudding with yogurt and fruits in a glass. This not only looks stunning but also enhances the textures in each bite.

    • Infused Variants: Experiment with flavor infusions by adding spices like cinnamon or nutmeg to the chia pudding base. You can also switch up the citrus flavor; try using lime or orange for a different taste twist.

    • Breakfast Parfaits: Turn it into a delightful breakfast parfait by adding granola or additional fruits between layers of chia pudding.

    • Nut Butters: Swirling in almond or peanut butter can elevate the flavor and add an extra punch of protein, making it even more filling.

    • Smoothie Bowl Option: Blend the prepared pudding with some frozen fruit to create a smoothie bowl. This variation makes for a refreshing summer breakfast idea.

    • Make it a Dessert: Who says chia pudding is only for breakfast? Layer it with crunchy granola and fresh fruit as a healthy dessert option.

    These tips and variations will help you tailor the Easy Lemon Cream Chia Pudding to fit any occasion or craving.

    How to Store Easy Lemon Cream Chia Pudding Breakfast: Best Practices

    Storing your Easy Lemon Cream Chia Pudding is straightforward and essential if you want to enjoy it over multiple days. Here’s how to keep it fresh:

    • Refrigeration: Store the pudding in an airtight container in the refrigerator. This will keep it fresh for up to five days, making it a perfect make-ahead breakfast idea for busy weeks.

    • Freezing: If you want to keep it longer, chia pudding can be frozen. Just make sure to use a freezer-safe container and leave some space for expansion as it freezes. Thaw it overnight in the refrigerator before consuming.

    • Reheating: If you prefer it warm, you can reheat your chia pudding on the stovetop over low heat. However, for a cooler, refreshing breakfast, enjoy it chilled with toppings added just before serving.

    By following these storage practices, you can enjoy your Easy Lemon Cream Chia Pudding on your schedule.

    Nutritional Value of Easy Lemon Cream Chia Pudding Breakfast

    Understanding the nutritional value of your meals is crucial for anyone concerned about health. Here’s a detailed breakdown of the nutritional components in Easy Lemon Cream Chia Pudding Breakfast per serving (approx. 1/2 cup):

    • Calories: 220-300 calories (depending on milk and sweetener used)
    • Calories from Fat: 120 calories
    • Total Fat: 13g
    • Saturated Fat: 10g (from coconut milk)
    • Carbohydrates: 28g
    • Dietary Fiber: 11g (from chia seeds, helps with digestion)
    • Sugars: 4-10g (depending on sweeteners and fruits)
    • Protein: 6-8g
    • Vitamin C: Strong source due to lemon juice
    • Calcium: Approximately 200mg (helps bone health)

    This chia pudding not only satisfies hunger but is loaded with nutrients that support overall health, making it an excellent breakfast idea for any time of the day.

    FAQs: Frequently Asked Questions About Easy Lemon Cream Chia Pudding Breakfast

    1. Can I make Easy Lemon Cream Chia Pudding Vegan?

    Absolutely! This recipe is naturally vegan if you use plant-based milk and maple syrup as a sweetener.

    2. How long does the chia pudding need to set?

    For optimal results, let it set for at least 2 hours, but overnight is preferred for the best texture.

    3. Can I use sweeteners other than honey or maple syrup?

    Yes! You can use agave syrup, stevia, or even ripe mashed bananas to add natural sweetness.

    4. What’s a good topping for this chia pudding?

    Fresh fruits, nuts, granola, or a dollop of yogurt are all fantastic choices to enhance flavor and texture.

    5. How long will the pudding last in the fridge?

    When stored in an airtight container, it will stay good for up to five days, making it a handy meal prep choice.

    6. Can I add protein powder to chia pudding?

    Definitely! Adding a scoop of protein powder can enhance the protein content, especially beneficial for those with active lifestyles.

    By addressing these common queries, you can effortlessly make this Easy Lemon Cream Chia Pudding Breakfast with confidence, tailoring it to fit your dietary needs and preferences.

    Conclusion

    In summary, the Easy Lemon Cream Chia Pudding Breakfast not only serves as a delightful start to your day but also packs a wealth of nutritional benefits. With its simplicity, health-conscious appeal, and versatility, it’s a great option for many – from busy professionals to families or students on the go. Don’t wait any longer; treat yourself to a bowl of this refreshing pudding, and enjoy the blend of flavors and textures that make for a satisfying morning meal. With the right approach to preparation, storage, and customization, this recipe can easily become a staple in your collection of breakfast ideas.