Blog

  • Tasty Fettuccine Alfredo

    Tasty Fettuccine Alfredo

    Tasty Fettuccine Alfredo: A Tropical Delight

    Introduction to Tasty Fettuccine Alfredo

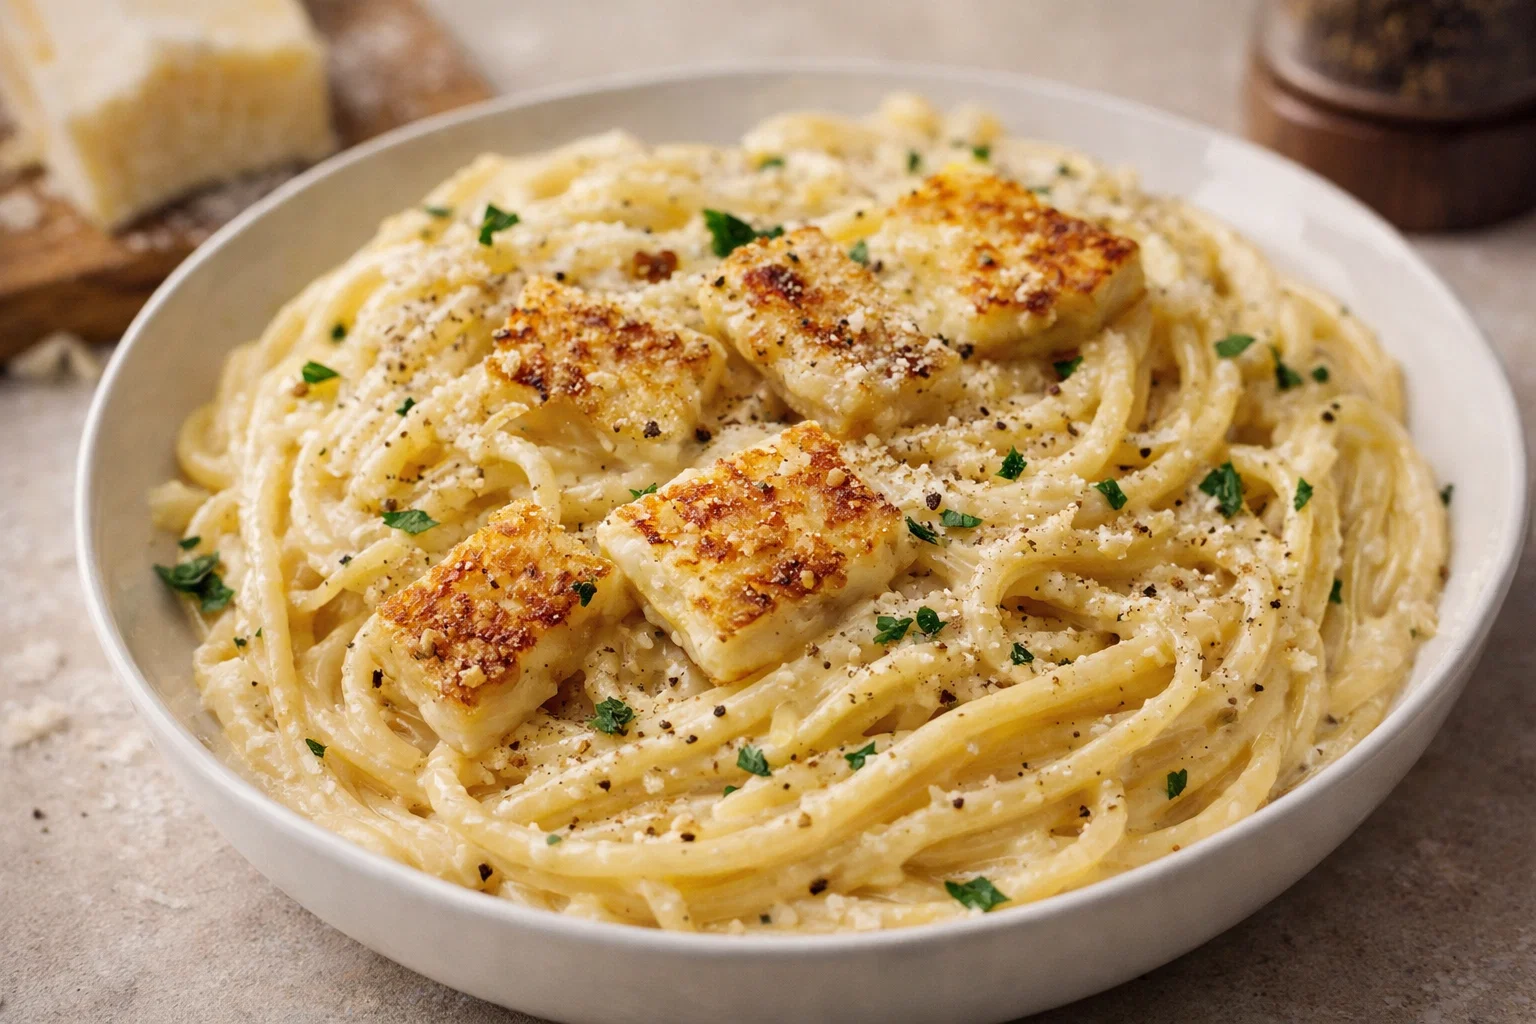
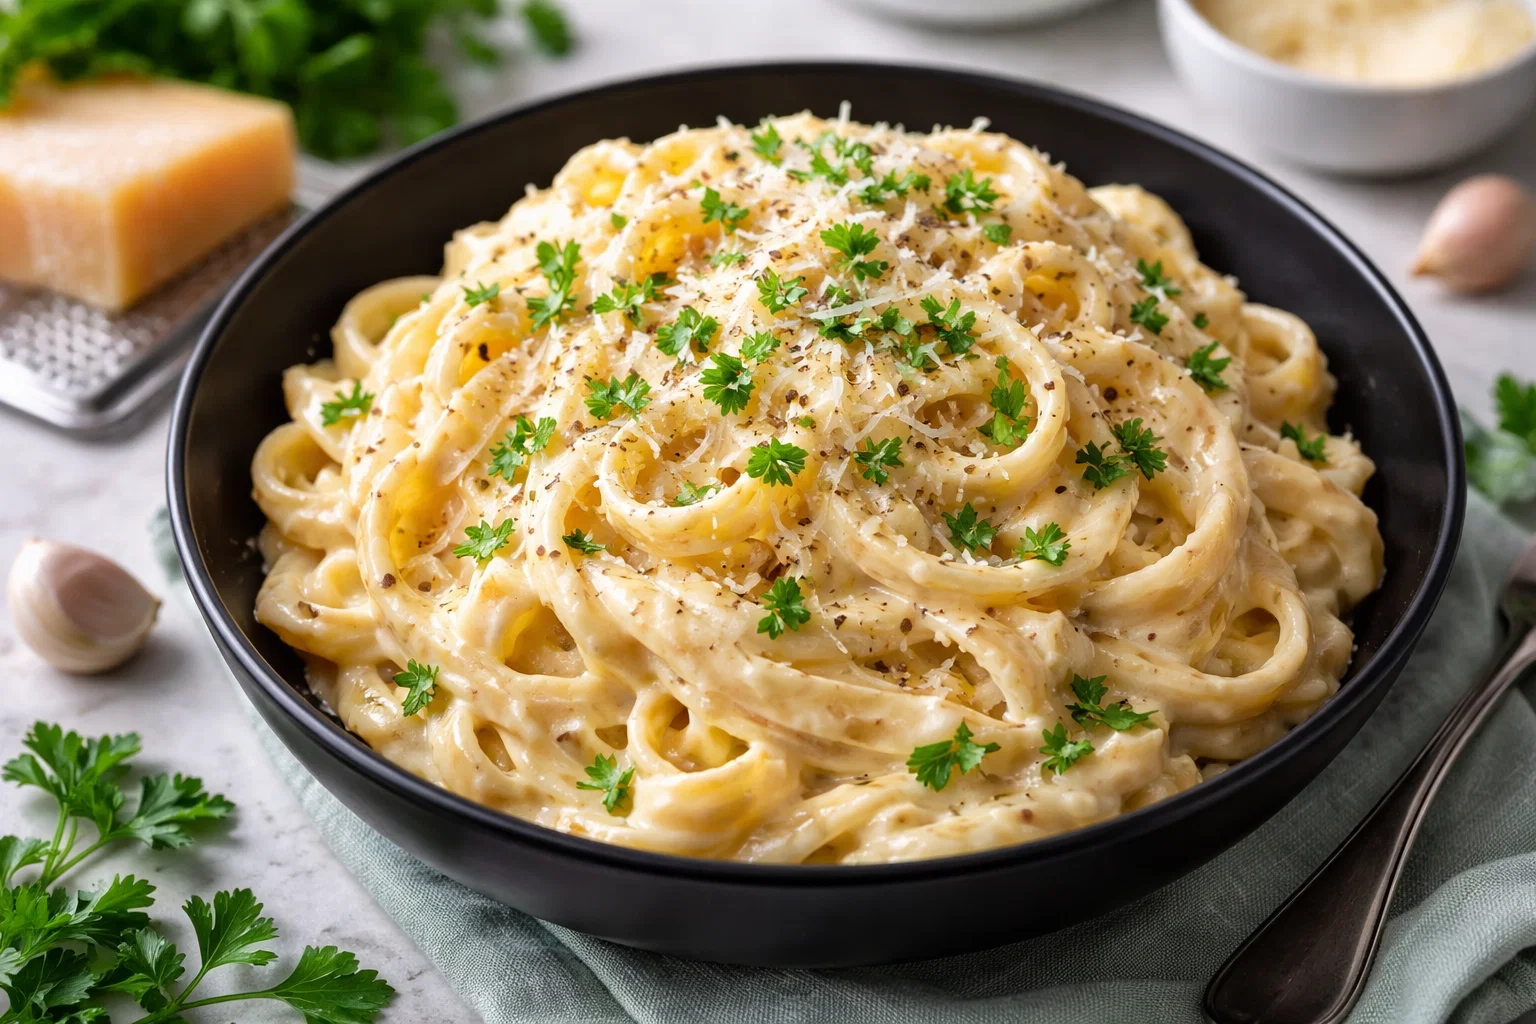
    Welcome to the world of Tasty Fettuccine Alfredo, a delicious pasta recipe that combines simple ingredients to create a creamy, indulgent dish that can delight any palate. Whether you’re a busy parent looking for a quick meal, a student needing a budget-friendly dish, or anyone in between, this Fettuccine Alfredo recipe offers you a chance to whip up a delightful dinner in no time. This dish elegantly balances rich flavors with straightforward preparation, showcasing the versatility of pasta.

    Not only is this pasta dish delicious, but it also provides a variety of dietary options. You can easily modify it to be gluten-free, vegan, or low in calories without sacrificing taste. Additionally, Fettuccine Alfredo is a rewarding experience for home cooks of all levels. With just a few staple ingredients, you can create a creamy sauce that elevates your dining experience. This recipe is effortlessly adaptable, meaning that whether you are catering to dietary needs or simply craving comfort food, Tasty Fettuccine Alfredo is the perfect choice.

    So, gather your ingredients, roll up your sleeves, and prepare for an unforgettable culinary journey filled with flavor and joy. Let’s dive into this classic dish that transports you straight to Italy with every creamy bite.

    Benefits and Advantages of Tasty Fettuccine Alfredo

    One of the key reasons why Tasty Fettuccine Alfredo stands out in the realm of pasta recipes is its simplicity. In a world that often feels overwhelmingly fast-paced, this dish allows you to create a comforting meal in the comfort of your home. With minimal prep time and simple cooking techniques, you’ll find that preparing homemade Fettuccine Alfredo is not only achievable but also exceedingly rewarding.

    Health Benefits

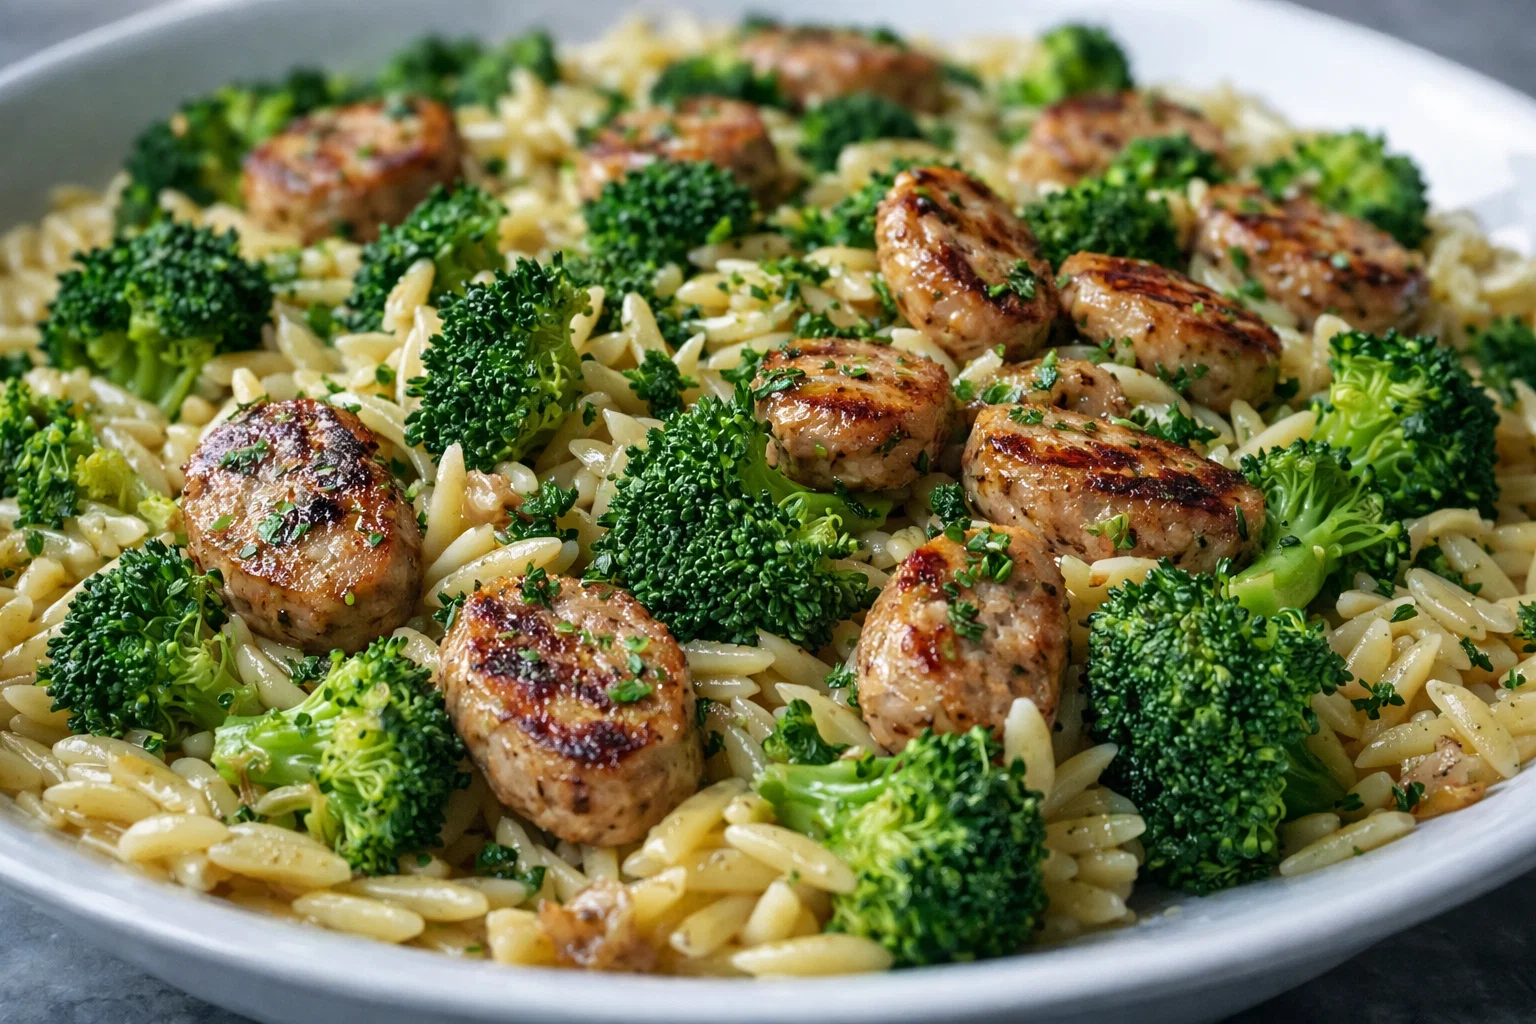
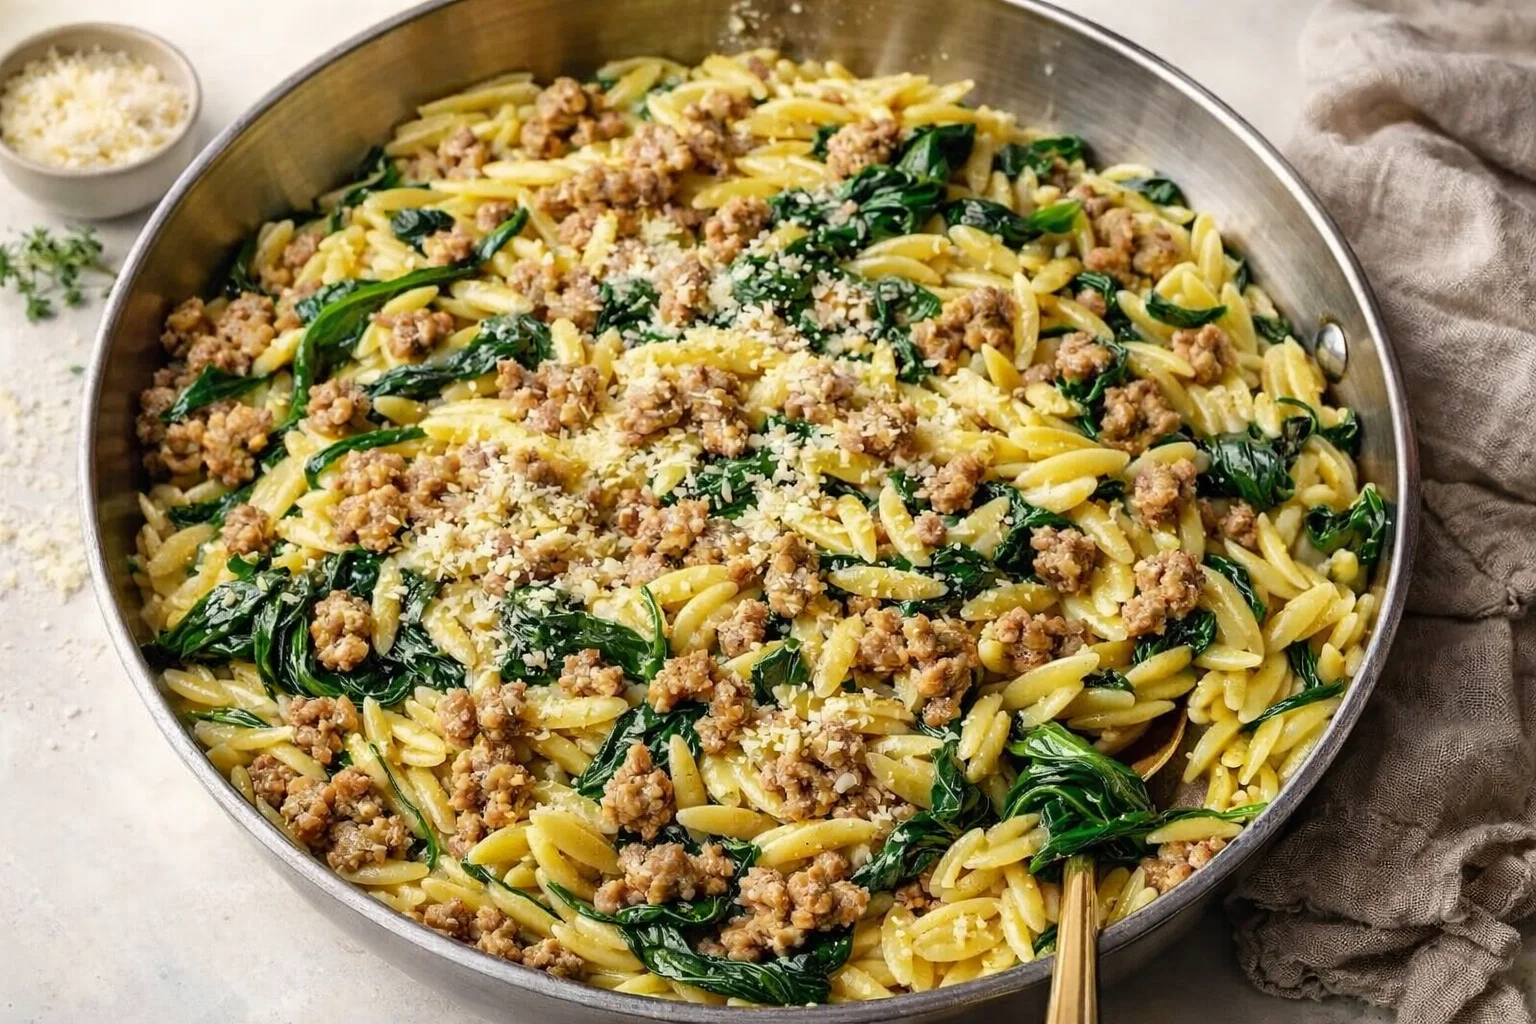
    Fettuccine Alfredo is not only delectable; it can also be made health-conscious. For instance, by choosing whole-grain pasta, you introduce more fiber into your meal. Additionally, using lighter cream options or plant-based substitutes can help reduce calories. If you’re looking to add nutrient density, consider incorporating vegetables like spinach or broccoli. This not only enhances the creaminess of the sauce but also adds vitamins and minerals to your plate.

    Moreover, this dish is easy to customize, making it suitable for various dietary restrictions. If you are vegan or lactose-intolerant, there are many alternatives available that don’t compromise on flavor. Substitute traditional dairy products with cashew cream or nutritional yeast, which can replicate the richness of cheese.

    Overall, Tasty Fettuccine Alfredo provides a comforting, versatile meal that caters to many preferences and dietary requirements, making it a must-have in your collection of pasta recipes.

    Ingredients Overview

    Essential Ingredients for Tasty Fettuccine Alfredo

    To make the ultimate Tasty Fettuccine Alfredo, you will need the following ingredients:

    1. Fettuccine Pasta – 12 ounces: The star of the dish, fettuccine provides the perfect base for the creamy sauce.
    2. Butter – 1/2 cup: Unsalted butter adds a rich, creamy flavor. (Vegan option: Use coconut oil or vegan margarine)
    3. Heavy Cream – 1 cup: This forms the sauce’s foundation. (Low-calorie alternative: Use almond milk mixed with cornstarch for thickness)
    4. Parmesan Cheese – 1 cup, grated: A traditional element that brings cheesiness. (Vegan option: Nutritional yeast can add a similar flavor)
    5. Garlic – 2 cloves, minced: Enhances flavor and aroma.
    6. Salt – to taste: Essential for balancing flavors.
    7. Black Pepper – to taste: Adds mild spiciness.
    8. Nutmeg – a pinch: A secret ingredient adding depth.

    Dietary Substitutions to Customize Your Tasty Fettuccine Alfredo

    To tailor this recipe to fit various dietary needs, consider the following substitutions:

    • Gluten-Free: Use gluten-free fettuccine, available in most grocery stores.
    • Vegan: Replace the heavy cream with coconut milk or cashew cream, and the Parmesan cheese with a vegan alternative.
    • Low-Calorie: Utilize Greek yogurt in place of heavy cream for a protein boost and lower fat content.
    • Extra Nutrition: Add cooked vegetables like spinach, peas, or broccoli to the sauce for added nutrients.

    No matter your dietary preferences or restrictions, Tasty Fettuccine Alfredo can adapt effortlessly to create a comforting meal for everyone.

    How to Prepare the Perfect Tasty Fettuccine Alfredo: Step-by-Step Guide

    Creating your dish of Tasty Fettuccine Alfredo is straightforward. Follow these steps to craft this delicious pasta dish right at home:

    1. Prepare the Pasta:
    2. Fill a large pot with water and bring it to a boil. Add salt to the boiling water to season it.
    3. Add 12 ounces of fettuccine, and cook according to package instructions (usually about 8-10 minutes), making sure it remains al dente.

    4. Melt the Butter:

    5. In a large skillet, melt 1/2 cup of unsalted butter over medium heat.
    6. Allow it to melt completely without browning, ensuring a smooth base for the sauce.

    7. Sauté the Garlic:

    8. Add 2 minced garlic cloves to the melted butter and sauté until fragrant (about 1-2 minutes). Be careful not to let it burn.

    9. Add the Cream:

    10. Pour in 1 cup of heavy cream, stirring to combine with the butter and garlic. Increase the heat slightly and simmer for about 5 minutes.

    11. Incorporate the Cheese:

    12. Gradually whisk in 1 cup of grated Parmesan cheese, stirring continuously until the cheese melts and the sauce thickens.
    13. If using nutritional yeast as a vegan option, add it slowly while stirring.

    14. Season the Sauce:

    15. Sprinkle in salt, black pepper, and a pinch of nutmeg. Stir well to distribute the seasoning.

    16. Combine Pasta and Sauce:

    17. Once the fettuccine is cooked, reserve 1/2 cup of the pasta water before draining the pasta.
    18. Add the drained fettuccine to the sauce along with reserved pasta water, a little at a time, until you achieve the desired creaminess.

    19. Serve Immediately:

    20. Top with additional Parmesan cheese and fresh black pepper. Optionally, garnish with freshly chopped parsley for added color and flavor.

    Note: Ensure you adjust the ingredients according to dietary preferences and the serving size. You can easily double the recipe for larger gatherings or festivities.

    Mastering Tasty Fettuccine Alfredo: Advanced Tips and Variations

    To elevate your Fettuccine Alfredo and impress your guests, consider these advanced tips and variations:

    1. Add Protein: Grilled chicken, shrimp, or sautéed mushrooms can provide extra protein and heartiness to the dish. Simply cook the protein separately and mix it in just before serving.

    2. Use Fresh Herbs: Fresh basil or parsley can bring vibrant flavors. Adding these herbs right before serving provides freshness and color.

    3. Spice It Up: If you prefer a bit more heat, add red pepper flakes while sautéing the garlic. It gives a pleasant warmth to the dish.

    4. Explore Variations: Experiment with different types of cheese like gouda or goat cheese for a unique flavor profile. You can also try adding tomato sauce for a rosé version.

    5. Make It a Casserole: For something different, layer cooked fettuccine with Alfredo sauce in a baking dish, top it with breadcrumbs, and bake until golden for a crispy finish.

    How to Store Tasty Fettuccine Alfredo: Best Practices

    To ensure the longevity and quality of your Tasty Fettuccine Alfredo, here are the best practices for storage:

    • Refrigeration: Store leftover Fettuccine Alfredo in an airtight container in the refrigerator. It will keep well for about 3-4 days.

    • Freezing: While it is possible to freeze Alfredo pasta, keep in mind that the cream may separate upon thawing. To freeze, place the cooled Fettuccine Alfredo in a freezer-safe container. It is best used within 2-3 months.

    • Reheating: Reheat on the stove over low heat, stirring continuously. Adding a splash of milk or cream can help bring the sauce back to its original creamy texture.

    Nutritional Value of Tasty Fettuccine Alfredo

    Understanding the nutritional profile can help in making informed choices. Here’s a rough estimate of the nutritional values for one serving of traditional Tasty Fettuccine Alfredo (based on a standard recipe):

    • Calories: 600-800 kcal
    • Protein: 20-25g
    • Carbohydrates: 50-55g
    • Fat: 40-50g
    • Fiber: 2-3g

    Nutritional Considerations

    • Opting for whole-grain pasta increases fiber content, and incorporating vegetables chains raises the vitamin profile. Always check ingredient labels as nutritional values can vary significantly based on brands and ingredients used.

    FAQs: Frequently Asked Questions About Tasty Fettuccine Alfredo

    Q: Can I make Fettuccine Alfredo in advance?
    A: Yes, you can prepare it ahead of time. However, it’s best to cook the pasta fresh and combine it with the sauce shortly before serving for optimal texture and flavor.

    Q: What can I use instead of heavy cream?
    A: Alternatives include milk mixed with cornstarch, soy cream, or a dairy-free option such as cashew cream for a vegan version.

    Q: Can I add vegetables to the recipe?
    A: Absolutely! Broccoli, peas, or spinach can be added for extra nutrients. Sauté them lightly before mixing them into the sauce.

    Q: What sides pair well with Fettuccine Alfredo?
    A: A simple garden salad, roasted vegetables, or garlic bread complement this meal nicely.

    Q: Is Fettuccine Alfredo suitable for meal prep?
    A: While it can be included in meal prep, consider that the cream sauce may separate when reheated. Store it in portioned containers and reheat with added moisture to restore creaminess.

    With this comprehensive guide, you are now equipped to create a delightful dish of Tasty Fettuccine Alfredo that caters to a variety of tastes and dietary preferences. Embrace the opportunity to explore new flavors and make this classic pasta recipe a staple in your home. Happy cooking!

  • 5-Ingredient Coconut Chia Seed Pudding

    5-Ingredient Coconut Chia Seed Pudding

    5-Ingredient Coconut Chia Seed Pudding: A Tropical Delight

    Introduction to 5-Ingredient Coconut Chia Seed Pudding

    Are you on the lookout for delicious healthy snacks that can fit into your busy lifestyle? Look no further! The 5-Ingredient Coconut Chia Seed Pudding offers an easy, nutritious option that boasts not only simplicity in preparation but also deliciousness that can satisfy your sweet cravings. This delightful pudding features the tropical flavors of coconut wonderfully combined with the unique texture of chia seeds. Whether you’re a busy parent, a student, or just someone who loves food, this recipe is perfect for you.

    The beauty of this pudding lies in its versatility. It’s vegan, gluten-free, and low in calories, making it an excellent choice for anyone on specific dietary plans. Chia seeds are packed with nutrients—high in fiber, omega-3 fatty acids, and protein—while coconut milk adds creaminess and a burst of flavor. The pudding can serve as a refreshing breakfast, a light dessert, or even a quick snack anytime during your day. With just five easy-to-find ingredients, this recipe will lighten up your kitchen routine without sacrificing taste. Try it out, and you may just find your new go-to healthy treat!

    Benefits and Advantages of 5-Ingredient Coconut Chia Seed Pudding

    The 5-Ingredient Coconut Chia Seed Pudding stands out among healthy snacks for several compelling reasons. First, its preparation is incredibly simple, making it accessible for cooks of all skill levels. In just a few minutes, you can whip up a batch, let it chill overnight, and have a healthy treat ready for the next day. This can be especially beneficial for busy parents or professionals who wish to prepare snacks in advance.

    Moreover, this pudding provides numerous health benefits. As mentioned, chia seeds are nutrient-dense, providing vital omega-3 fatty acids that promote heart health, along with antioxidants that may help ward off diseases. Coconut milk is packed with medium-chain triglycerides (MCTs) that can boost energy and support weight management. The combination of these ingredients creates a balanced snack that not only fills you up but also nourishes your body.

    Furthermore, this pudding caters to various dietary needs. Whether you’re on a vegan diet, gluten-free regime, or looking to enjoy low-calorie treats, this recipe adapts to your lifestyle. It’s an ideal dish for travelers who need nutritious options away from home, newlyweds eager to explore cooking together, or even seniors seeking easy-to-digest meals. By incorporating this pudding into your snack rotation, you’ll be treating yourself to a refreshing and healthy option that doesn’t compromise on flavor.

    Ingredients Overview

    Essential Ingredients for 5-Ingredient Coconut Chia Seed Pudding

    To create this delightful pudding, you’ll need the following five essential ingredients:

    1. Chia Seeds (1/4 cup)
      Chia seeds are the star of this recipe, providing a unique texture and many health benefits. They are rich in fiber, which aids digestion, and they soak up liquid to create a creamy pudding-like consistency.

    2. Coconut Milk (1 cup)
      Use canned coconut milk for a rich and creamy pudding. Coconut milk is dairy-free and gives the pudding its tropical flavor. You can also choose light coconut milk if you’re looking for a lower-calorie option.

    3. Sweetener of Choice (2 tablespoons)
      Maple syrup or agave nectar works beautifully in this recipe, adding just the right amount of sweetness. For those who prefer a zero-calorie sweetener, consider using stevia or erythritol.

    4. Vanilla Extract (1 teaspoon)
      Pure vanilla extract adds depth to the pudding, enhancing its flavor without overpowering it. It also provides a lovely aromatic quality.

    5. Optional Toppings
      Fresh fruits such as berries, mango slices, or nuts add texture, flavor, and additional nutrients. They transform the pudding from a simple snack into an appealing dessert.

    Each of these ingredients has its purpose and contributes to a well-rounded, healthy treat. You can enjoy this pudding knowing it aligns with various dietary requirements, whether you’re vegan, gluten-free, or simply seeking healthy snack options.

    Dietary Substitutions to Customize Your 5-Ingredient Coconut Chia Seed Pudding

    Although the base recipe is simple, you might want to customize it to suit your preferences or pantry availability. Here are some substitutions you can consider:

    • Chia Seeds: If you don’t have chia seeds on hand, consider swapping them for flaxseeds. Keep in mind that ground flaxseeds will yield a different texture, but they contain similar health benefits.

    • Coconut Milk: Almond or soy milk can replace coconut milk for a lighter alternative. Be mindful of the flavors they bring—almond milk will lend a nuttier taste, while soy milk alters the richness slightly.

    • Sweeteners: For those who want a sugar-free option, consider using mashed bananas or unsweetened applesauce instead of traditional sweeteners. They not only add sweetness but also enhance nutrition.

    • Vanilla Extract: If you’re out of vanilla extract, try alternative flavorings like almond extract or a small amount of cinnamon for a different twist.

    • Toppings: Get creative with your toppings! Use yogurt for extra creaminess, chocolate chips for indulgence, or nut butter for added protein. The possibilities are endless, making this pudding adaptable for any palate or dietary need.

    By customizing this pudding, you can create healthy snacks that align with your personal preferences and dietary restrictions, all while treating yourself to a tropical experience.

    How to Prepare the Perfect 5-Ingredient Coconut Chia Seed Pudding: Step-by-Step Guide

    Creating the 5-Ingredient Coconut Chia Seed Pudding is straightforward. Follow these detailed steps to prepare this deliciously creamy dish:

    1. Gather Your Ingredients:
      Before you begin, gather all the ingredients: chia seeds, coconut milk, sweetener, and vanilla extract. If you plan on using toppings, have those ready as well.

    2. Prepare the Base:
      In a mixing bowl, combine the chia seeds and coconut milk. This forms the foundation of your pudding.

    3. Mix Ingredients:
      Add in the sweetener and vanilla extract. Stir the mixture well, ensuring that the chia seeds are evenly distributed in the coconut milk.

    4. Let It Sit:
      Allow the mixture to sit for about 10-15 minutes. This step allows the chia seeds to absorb the liquid and swell, creating a pudding-like texture.

    5. Whisk Again:
      After the chia seeds have soaked for a bit, give the mixture another good stir to break up any clumps of seeds.

    6. Transfer to Containers:
      Divide the pudding into small jars or bowls for easy storage. This makes it convenient as a ready-to-go healthy snack throughout the week.

    7. Chill:
      Cover the containers with lids or plastic wrap and refrigerate for at least 4 hours (or overnight) to allow the pudding to thicken and set properly.

    8. Add Toppings:
      Once ready to serve, top with your choice of fresh fruits, nuts, or even a dollop of yogurt for added creaminess.

    9. Enjoy Your Creation:
      Dig in and enjoy your tropical treat! Whether it’s breakfast, a snack, or dessert, this pudding is sure to satisfy your cravings.

    This pudding not only serves as a delightful dish but also exemplifies how easy it is to whip up healthy snacks at home. Remember, you can always adjust the recipe to maintain dietary preferences or personal tastes.

    Mastering 5-Ingredient Coconut Chia Seed Pudding: Advanced Tips and Variations

    To take your 5-Ingredient Coconut Chia Seed Pudding to the next level, here are some advanced tips and variations you can try:

    • Experiment with Flavors:
      Besides vanilla, try adding spices such as cinnamon, cardamom, or nutmeg for an exotic twist. Vanilla bean paste offers an upscale touch, while citrus zest provides a refreshing tang.

    • Layer with Granola:
      For a fun breakfast option, layer your chia pudding with gluten-free granola for texture. This can be a delightful way to incorporate crunch into your pudding while keeping it nutritious.

    • Make it Chocolate:
      If you’re a chocolate lover, add unsweetened cocoa powder or melted dark chocolate to the mixture before chilling. This transformation leads to a rich and creamy chocolate chia pudding that is equally healthy.

    • Infuse with Tea:
      Steep herbal tea, like chai or mint, in the coconut milk before mixing it with chia seeds. This adds a unique flavor profile and an aromatic twist that elevates the pudding experience.

    • Portion Control:
      Use smaller portions for kids or when you’re looking to manage calorie intake while still enjoying flavors. Individual servings make this dish perfect as a meal prep option.

    Mastering these tips will not only enhance your chia pudding but will also keep your taste buds entertained while you focus on nourishing your body with healthy snacks.

    How to Store 5-Ingredient Coconut Chia Seed Pudding: Best Practices

    Storing your 5-Ingredient Coconut Chia Seed Pudding properly ensures freshness so you can enjoy it as a nutritious healthy snack for days to come. Here are some best practices for storage:

    • Refrigeration:
      You can keep the pudding stored in the refrigerator for up to five days in an airtight container. Make sure that the lids are sealed tightly to prevent any unwanted odors or contamination.

    • Freezing:
      While chia pudding can be frozen, it can change texture slightly upon thawing. If you choose to freeze it, pour the pudding into freezer-safe containers, leaving space for expansion. You can freeze it for up to three months, but it’s recommended to use it promptly for the best taste.

    • Thawing:
      When you’re ready to enjoy, move the pudding from the freezer to the refrigerator, allowing it to thaw overnight. Stir well before serving to regain a creamy consistency.

    • Serving After Storage:
      If the pudding appears too thick after chilling, feel free to stir in a little coconut milk or almond milk until you achieve the desired consistency. This will help restore its creamy, delicious texture.

    By following these best practices, you’ll maximize the shelf life of your chia pudding while ensuring that your healthy snacks stay fresh and tasty.

    Nutritional Value of 5-Ingredient Coconut Chia Seed Pudding

    Understanding the nutritional value of your food is crucial when looking for healthy snacks. Here’s a breakdown of what you will get from one serving (based on the base recipe, without toppings):

    • Calories: Approximately 200 calories
    • Total Fat: 13 grams
    • Saturated Fat: 11 grams (from coconut milk)
    • Carbohydrates: 20 grams
    • Dietary Fiber: 10 grams
    • Sugars: 5 grams (depending on sweetener)
    • Protein: 4 grams
    • Omega-3s: Around 5 grams (from chia seeds)

    This pudding is not just low-calorie; it also packs healthy fats and fiber that keep you feeling full longer. Additionally, the chia seeds provide a plant-based protein source, making this pudding an excellent choice for athletes or anyone exercising regularly.

    Remember that adding toppings can vary your caloric intake, so be mindful if you’re tracking those numbers. The nutritional benefits of this pudding truly demonstrate its suitability as a go-to healthy snack.

    FAQs: Frequently Asked Questions About 5-Ingredient Coconut Chia Seed Pudding

    1. Can I make this pudding in advance?
    Yes, it’s perfect for meal prep! This pudding can be made up to five days in advance, making it a convenient option for healthy snacks throughout the week.

    2. Does chia pudding have to be refrigerated?
    Yes, always refrigerate chia pudding as it contains perishable ingredients. This keeps the pudding fresh and safe to consume.

    3. What can I use instead of coconut milk?
    You can substitute with almond milk, soy milk, or oat milk, but remember that those will change the flavor slightly. Choose a milk that aligns with your dietary preferences.

    4. How can I add flavor without adding sugar?
    You can enhance the flavor by incorporating spices like cinnamon or nutmeg, or by using flavored extracts like almond or hazelnut. Fresh fruits will also add natural sweetness.

    5. Is chia pudding good for weight loss?
    Yes! Chia pudding is high in fiber and healthy fats that can help support weight management by keeping you satisfied longer and providing essential nutrients.

    By addressing these FAQs, readers can better appreciate the versatility and ease of preparing 5-Ingredient Coconut Chia Seed Pudding as a delightful and nutritious addition to their diets.

    With its delightful flavor, nutritious ingredients, and clean preparation process, this pudding makes for an impeccable addition to anyone’s recipe repertoire. Enjoy your coconut chai adventure and relish in the benefits of healthy snacking!

  • Irresistible Chicken Fettuccine Alfredo

    Irresistible Chicken Fettuccine Alfredo

    Irresistible Chicken Fettuccine Alfredo: A Tropical Delight

    Introduction to Irresistible Chicken Fettuccine Alfredo

    Welcome to your new favorite meal — Irresistible Chicken Fettuccine Alfredo! If you’re on the lookout for a delicious, creamy dish that not only tantalizes your taste buds but also suits a variety of dietary preferences, you’re in the right place. This recipe is an excellent addition to your collection of chicken recipes, as it is simple to make and loaded with flavor.

    What makes this fettuccine Alfredo remarkably delightful is its adaptability. It can be enjoyed as a classic dish or modified to accommodate vegan, gluten-free, or low-calorie needs. Using fresh ingredients, you’ll create a creamy sauce that combines tantalizing flavors with satisfying textures — perfect for any occasion, from a Friday night dinner to impressing guests. With easy-to-follow instructions, even the busiest home cooks can whip this up in under 30 minutes!

    Not only is this dish straightforward for any culinary skill level, but it also offers health benefits, such as protein from chicken and nutrition from garlic and herbs. Whether you’re a working professional, a busy parent, or just someone who loves food, this Irresistible Chicken Fettuccine Alfredo will make an ideal candidate for your weekly menu, giving you the comfort of home-cooked meals without the fuss!

    Benefits and Advantages of Irresistible Chicken Fettuccine Alfredo

    Ease of Preparation

    One of the biggest advantages of this chicken recipe is its simplicity. Within 30 minutes, you can create a mouth-watering meal that tastes like it was made by a professional chef. The preparation process is straightforward, allowing you to spend less time in the kitchen and more time with family and friends.

    Health Benefits

    Chicken is an excellent source of lean protein that supports muscle health and overall body function. The presence of garlic in the dish not only enhances flavor but also brings numerous health benefits, including anti-inflammatory and antibacterial properties. The cream can be replaced with healthier alternatives, making it easier to tailor it to your dietary requirements.

    Additionally, you can easily adapt the recipe for those who follow gluten-free or vegan diets. Using gluten-free pasta or dairy alternatives like cashew cream or coconut milk allows everyone at the table to enjoy this dish.

    Suitability for Various Dietary Needs

    Whether you’re meal-prepping for the week, accommodating picky eaters, or looking for a quick dinner option after a long day, this Irresistible Chicken Fettuccine Alfredo meets multiple dietary needs while still being absolutely delightful. Not only will it satisfy cravings for creamy, indulgent dishes, but it also provides a canvas for personalization.

    No matter if you’re a newlywed attempting to impress your spouse or a seasoned cook wanting to impress friends at a gathering, this fettuccine Alfredo stands in a league of its own!

    Ingredients Overview

    Essential Ingredients for Irresistible Chicken Fettuccine Alfredo

    To put together this exquisite dish, here’s what you’ll need:

    • Fettuccine Pasta (12 ounces): Traditional choice; feel free to substitute with gluten-free pasta.
    • Chicken Breast (1 pound): Boneless, skinless and cubed for convenience.
    • Heavy Cream (1 cup): Provides that rich, creamy consistency.
    • Parmesan Cheese (1 cup, grated): Adds a sharp, savory depth to your sauce.
    • Butter (4 tablespoons): For sautéing the chicken and enriching the sauce.
    • Garlic (4 cloves, minced): Enhances flavor; can be adjusted to preference.
    • Salt and Pepper: To taste; essential for bringing out the flavors.
    • Parsley (fresh, finely chopped for garnish): Adds color and a hint of freshness.

    Dietary Substitutions to Customize Your Irresistible Chicken Fettuccine Alfredo

    For various dietary needs, here are some substitutions you can employ:

    • Vegan Option: Substitute chicken with chickpeas or mixed vegetables. Use coconut or almond milk in place of heavy cream and nutritional yeast instead of Parmesan cheese.
    • Gluten-Free: Use gluten-free fettuccine or spaghetti, which can be easily found in grocery stores.
    • Lower-Calorie: Replace heavy cream with Greek yogurt for a creamy texture with lower fat content.

    These substitutions ensure that everyone can enjoy this flavorful fettuccine Alfredo, making it one of the most versatile chicken recipes in your culinary repertoire!

    How to Prepare the Perfect Irresistible Chicken Fettuccine Alfredo: Step-by-Step Guide

    Follow these simple yet effective steps to create Irresistible Chicken Fettuccine Alfredo at home.

    1. Cook the Fettuccine: Begin by boiling a large pot of salted water. Once boiling, add the fettuccine and cook according to package instructions until al dente. Drain and set aside.

    2. Prepare the Chicken: In a large skillet, melt 2 tablespoons of butter over medium heat. Add the cubed chicken and season with salt and pepper. Sauté until the chicken pieces are golden brown and fully cooked, about 6-7 minutes. Remove from the skillet and set aside.

    3. Make the Alfredo Sauce: In the same skillet, add the remaining 2 tablespoons of butter and minced garlic. Sauté for about a minute, stirring continuously until fragrant, but be careful not to burn the garlic.

    4. Add Cream: Pour in the heavy cream and bring to a gentle simmer. Stir frequently, allowing the cream to thicken slightly.

    5. Incorporate Cheese: Gradually add in the grated Parmesan cheese, stirring until it has melted and combined smoothly with the cream, creating a luscious sauce.

    6. Combine Chicken and Pasta: Return the cooked chicken to the skillet and add the drained fettuccine. Toss everything together until the pasta is well coated with the creamy Alfredo sauce.

    7. Season and Serve: Taste for seasoning and adjust with additional salt and pepper as necessary. Remove from heat and serve immediately, garnished with fresh parsley.

    Customization Notes

    • For a spicy kick, consider adding red pepper flakes during the simmer or sauté process.
    • Add vegetables like spinach or broccoli for an additional layer of flavor and nutrition!

    This step-by-step recipe remains approachable for home cooks of all skill levels and allows for flexibility based on your dietary needs.

    Mastering Irresistible Chicken Fettuccine Alfredo: Advanced Tips and Variations

    To elevate your dish even further, here are some expert tips and variations to try:

    • Infuse Flavors: Add sautéed mushrooms or sun-dried tomatoes to the sauce for a rich, earthy flavor.
    • Lemon Zest: Incorporate lemon zest into the sauce for a refreshing citrus note, balancing the richness.
    • Cheese Alternatives: Experiment with different cheeses like Asiago or Pecorino Romano for distinct flavors.
    • Herb Variations: Replace parsley with fresh basil or thyme for an aromatic twist.

    These enhancements can give your Irresistible Chicken Fettuccine Alfredo a unique flavor profile while still remaining true to its creamy comfort food roots.

    How to Store Irresistible Chicken Fettuccine Alfredo: Best Practices

    To ensure the quality of this delectable dish remains intact, follow these best practices for storage:

    1. Refrigeration: Allow any leftovers to cool fully before transferring them to an airtight container. Refrigerate within two hours of cooking. This dish can be stored in the fridge for up to 3 days.

    2. Freezing: If you wish to store it for longer, consider portioning the pasta into freezer-safe containers. It will keep well for about 2-3 months. Note that the cream might change in texture upon thawing but still remains tasty.

    3. Reheating: To reheat, microwave in short intervals or warm on the stove over low heat. Add a splash of cream or milk to reintroduce creaminess.

    By implementing these storage and reheating strategies, you can enjoy the Irresistible Chicken Fettuccine Alfredo long after the initial cooking, making it a convenient choice for meal prep!

    Nutritional Value of Irresistible Chicken Fettuccine Alfredo

    Understanding the nutritional value of your meals is crucial for maintaining a balanced diet. Here’s a breakdown of the estimated nutritional content per serving of Irresistible Chicken Fettuccine Alfredo (based on 4 servings):

    • Calories: 600-650 kcal
    • Protein: 35-40 g
    • Fat: 30-35 g
    • Carbohydrates: 60-65 g
    • Fiber: 2-3 g
    • Sugars: 2-3 g

    Adapting Nutritional Values

    To make this dish lighter, opting for whole-grain or vegetable-based pasta can increase the fiber content while decreasing carbs. Additionally, substituting heavy cream with lower-calorie options will make this dish even more diet-friendly. Remember, the beauty of this chicken recipe is its versatility to fit your health goals!

    FAQs: Frequently Asked Questions About Irresistible Chicken Fettuccine Alfredo

    1. Can I use store-bought Alfredo sauce?

    While it’s convenient, homemade Alfredo sauce made with fresh ingredients offers a superior flavor and texture!

    2. How can I make this recipe vegan-friendly?

    You can substitute the chicken with chickpeas, use dairy-free cream alternatives, and nutritional yeast instead of Parmesan cheese.

    3. Can I make this dish in advance?

    Yes! Cooked fettuccine Alfredo can be stored in the fridge for up to three days and reheated without losing its deliciousness!

    4. What can I serve alongside this dish?

    This creamy pasta pairs deliciously with a side salad, garlic bread, or roasted vegetables to balance the rich flavors.

    5. How can I add more veggies to the dish?

    Incorporate sautéed spinach, peas, or broccoli for added nutrients and texture while maintaining the creamy essence of the dish.

    6. What are some good substitutes for Parmesan cheese?

    Consider using Pecorino Romano or nutritional yeast if you’re vegan to give a similar cheesy flavor without dairy.

    Your adventure into the world of Irresistible Chicken Fettuccine Alfredo begins here, making every meal a delightful experience while catering to various dietary needs! Embrace simple, flavorful cooking that the entire family will love and savor together!

  • The Best Homemade Halloumi Carbonara

    The Best Homemade Halloumi Carbonara

    The Best Homemade Halloumi Carbonara: A Tropical Delight

    Introduction to The Best Homemade Halloumi Carbonara

    Searching for a unique twist on classic pasta recipes? Look no further! The Best Homemade Halloumi Carbonara is a delightful fusion that brings together the creamy goodness of traditional carbonara with the salty, distinct flavor of halloumi cheese. This recipe is not only straightforward, but it’s also packed with flavor and offers a healthier alternative to usual carbonara dishes that are laden with heavy cream and egg.

    Whether you’re a busy parent looking to whip up a quick meal, a student on a budget craving something delicious, or a health-conscious food lover eager to try new dietary-friendly options, this dish has something for everyone. The Best Homemade Halloumi Carbonara is vegetarian-friendly and can easily be adapted for vegan or gluten-free diets, making it an excellent choice for anyone with dietary restrictions.

    Imagine indulging in a warm bowl of pasta, generously drizzled with olive oil, paired with sautéed halloumi, and enveloped in a light sauce. This versatile dish proves to be perfect for various occasions—from casual weeknight dinners to more romantic date nights at home. Plus, with its simple preparation, you will find that making this delightful meal is a stress-free experience. Let’s dive deeper into the benefits and flavors of this unique recipe!

    Benefits and Advantages of The Best Homemade Halloumi Carbonara

    The Best Homemade Halloumi Carbonara offers numerous benefits that make it stand out in the world of pasta recipes. Emphasizing simplicity and health, this recipe caters to everyone—from culinary novices to seasoned chefs. Here’s why you’ll fall in love with this dish:

    1. Ease of Preparation:
      This carbonara recipe is straightforward, requiring minimal ingredients and kitchen skills. With just a few basic cooking techniques, such as boiling pasta and sautéing, you can create a rewarding meal that feels indulgent despite its simplicity.

    2. Health Benefits:
      Traditionally, carbonara can be calorie-heavy. However, this version replaces heavy cream with halloumi, a cheese that is high in protein and calcium, providing a satisfying mouthfeel without the extra calories. Moreover, by using whole-wheat pasta or gluten-free alternatives, you can increase the fiber content, making the dish more nutritious and hearty.

    3. Diverse Adaptability:
      The versatility of this recipe is infinite. It’s easily customizable based on your dietary needs or preferences. Whether you’re vegetarian, gluten-free, or vegan, you can modify the ingredients without sacrificing flavor. For instance, using a plant-based halloumi alternative or chickpea pasta allows you to cater to different dietary restrictions, ensuring everyone at your table can enjoy a hearty meal.

    4. Flavorful and Comforting:
      It’s not just about health benefits; the taste is undeniably satisfying. The combination of sautéed halloumi creates a luscious texture that complements the pasta beautifully. Plus, the saltiness of the cheese adds depth that makes this dish feel rich and indulgent.

    5. Quick to Make:
      With a total preparation and cooking time of about 30 minutes, this dish is perfect for busy weeknights or impromptu meals when you’re short on time. It’s a real lifesaver!

    In summary, The Best Homemade Halloumi Carbonara is perfect for anyone seeking delicious yet simple pasta recipes that promote health while remaining satisfactory and exciting. From busy parents to food enthusiasts, this dish is a sure-fire hit that guarantees smiles around the dinner table.

    Ingredients Overview

    Essential Ingredients for The Best Homemade Halloumi Carbonara

    Here’s a detailed list of all the ingredients you’ll need to create your delicious meal, along with their benefits:

    • Pasta (300g): Choose either spaghetti or fettuccine pasta made from whole grains or gluten-free alternatives like chickpea or rice pasta to enhance the health profile of the dish. Pasta is a great source of carbohydrates for energy.

    • Halloumi Cheese (250g): This semi-hard cheese from Cyprus provides a salty, rich flavor and is packed with protein and calcium. Halloumi is a fantastic alternative to the traditional creamy elements found in carbonara.

    • Olive Oil (2 tbsp): A healthy fat that adds richness and enhances flavors. Extra virgin olive oil is packed with antioxidants and healthy monounsaturated fats, promoting heart health.

    • Garlic (2 cloves, minced): Adds depth of flavor and has numerous health benefits, including anti-inflammatory properties.

    • Black Pepper (to taste): Freshly cracked black pepper adds a spicy note to the dish, enhancing its overall flavor and has health-promoting qualities.

    • Parmesan Cheese (50g, optional): For an extra cheesy flavor. Parmesan is also an excellent source of calcium and protein. Vegan options can be substituted with nutritional yeast for a cheesy flavor without dairy.

    • Fresh Parsley (to garnish): Adds freshness and color to the plate, and it’s rich in vitamins A, C, and K.

    • Salt (to taste): Essential for flavor enhancement, be cautious with the amount as halloumi is already salty.

    Dietary Substitutions to Customize Your The Best Homemade Halloumi Carbonara

    For those with dietary restrictions, it’s an advantage that this recipe can be easily altered:

    • For Vegan Options: Substitute halloumi with a plant-based cheese alternative that mimics the texture. Use silken tofu blended with nutritional yeast for added flavor, or even a mixture of cashews soaked and blended for creaminess.

    • For Gluten-Free: Use gluten-free pasta made from chickpeas, lentils, or rice, providing variety and keeping the meal light while ensuring it’s safe for those with gluten intolerance.

    • Low-Calorie Option: Opt for spiralized vegetables such as zucchini or squash to replace traditional pasta. This not only cuts calories but also packs in extra nutrients, appealing to the health-conscious cook.

    Incorporating these alternatives ensures that everyone, regardless of dietary needs, can enjoy The Best Homemade Halloumi Carbonara without missing out on flavor or texture.

    How to Prepare the Perfect The Best Homemade Halloumi Carbonara: Step-by-Step Guide

    Creating The Best Homemade Halloumi Carbonara is an enjoyable process that you can complete in mere minutes. Here’s your step-by-step guide to making this delectable dish:

    1. Prepare the Pasta:
    2. Bring a large pot of salted water to a boil. Add your pasta and cook according to package instructions until al dente. Remember, if you are using gluten-free pasta, the cooking time may differ, so keep an eye on it.

    3. Sauté the Halloumi:

    4. While the pasta is cooking, heat olive oil in a large skillet over medium heat. Once hot, add the halloumi slices, cooking each side until golden brown. This should take about 3-4 minutes per side. Remove from the heat and set aside.

    5. Cook the Garlic:

    6. In the same skillet, add the minced garlic to the residual oil and sauté for about 1 minute until fragrant. Be careful not to burn the garlic, as this will impart a bitter flavor to your dish.

    7. Combine the Pasta and Halloumi:

    8. Once the pasta is finished, reserve about 1 cup of the pasta water and drain the rest. Add the drained pasta to the skillet with the garlic, turning the heat to low.

    9. Create the Sauce:

    10. Mix in the sautéed halloumi, and add your reserved pasta water a little at a time until you reach your desired sauce consistency. It should be creamy without being soupy.

    11. Season It Up:

    12. Season generously with freshly cracked black pepper and salt, taking care with the salt due to the halloumi’s natural saltiness.

    13. Final Touches:

    14. If using, stir in the grated Parmesan cheese until melted and well combined. This step adds a creamy, cheesy flavor that enhances the dish remarkably.

    15. Plate and Garnish:

    16. Serve the carbonara immediately, garnished with freshly chopped parsley for a pop of color and freshness.

    17. Enjoy!

    18. Dig in, and relish the delightful flavors of your homemade affair.

    With this simple guide, anyone can master the art of preparing The Best Homemade Halloumi Carbonara. The clear directions ensure that you can easily adapt it for dietary needs or personal preferences!

    Mastering The Best Homemade Halloumi Carbonara: Advanced Tips and Variations

    To take your carbonara experience to the next level, here are some advanced tips and variations that you can explore:

    1. Add Vegetables:
    2. Consider incorporating seasonal vegetables like spinach, peas, or cherry tomatoes for added flavors and textures. Sautéing these along with the garlic adds freshness and nutrition to your dish.

    3. Infuse Your Oil:

    4. Before cooking the garlic, consider infusing your olive oil with red pepper flakes or herbs like rosemary and thyme to elevate the flavors.

    5. Experiment with Noodles:

    6. While spaghetti and fettuccine are traditional choices, try using other types of noodles like penne, rigatoni, or even whole grain varieties to make the dish your own.

    7. Finish With Lemon Zest:

    8. Adding a hint of lemon zest before serving brightens the entire dish and adds a vibrant flavor that contrasts beautifully with the richness of the halloumi.

    9. Make It a Meal Prep Option:

    10. The Best Homemade Halloumi Carbonara can serve wonderfully as meal prep. Just make sure to store the pasta and sauce separately for better texture when reheating.

    By adopting these tips and testing out variations, your journey with The Best Homemade Halloumi Carbonara can be even more gratifying, adding layers of creativity into your cooking routine.

    How to Store The Best Homemade Halloumi Carbonara: Best Practices

    Storing your Halloumi Carbonara properly ensures that it remains fresh and delicious for future meals. Follow these best practices for optimal storage:

    1. Refrigeration:
    2. Allow the carbonara to cool to room temperature before closing it in an airtight container. It can be stored in the refrigerator for up to 3 days. When reheating, add a splash of water or olive oil before microwaving or warming it on the stovetop to bring back moisture.

    3. Freezing:

    4. While it’s best enjoyed fresh, you can freeze your carbonara for up to a month. Make sure to freeze it in portions to avoid thawing more than you need. However, halloumi’s texture may change upon freezing, and may become crumbly upon thawing—but it will still taste great!

    5. Reheating:

    6. For the best results when reheating, use a skillet over low heat. Stir frequently and add a bit of water or olive oil to retain the creamy texture. Avoid using the microwave if possible, as this can make the pasta tough.

    By following these storage practices, you can make the most out of your leftovers while retaining the delightful flavors of this wonderful dish!

    Nutritional Value of The Best Homemade Halloumi Carbonara

    Understanding the nutritional content of The Best Homemade Halloumi Carbonara can empower you to make the best choices for your diet. Here’s a quick breakdown of the estimated nutritional values per serving:

    • Calories: 450-550 kcal (depending on ingredient customization)
    • Protein: 25-30 g
    • Carbohydrates: 50-65 g
    • Fat: 15-20 g (including healthy fats from olive oil)
    • Fiber: 5-7 g
    • Calcium: Approximately 200-250 mg
    • Iron: Approximately 2 mg

    Note that the nutritional values may vary based on ingredient substitutions, such as using vegan alternatives or whole-grain pasta. Be sure to measure carefully and adjust the quantities of cheese or oil based on your health goals or dietary requirements.

    In summary, The Best Homemade Halloumi Carbonara is not just a delicious meal but a nutritious one too. Its health profile makes it an excellent addition to any balanced diet.

    FAQs: Frequently Asked Questions About The Best Homemade Halloumi Carbonara

    Here are some common questions that home cooks tend to have regarding The Best Homemade Halloumi Carbonara, along with clear and concise answers to help you navigate your cooking experience:

    1. Can I use a different type of cheese instead of halloumi?
    2. Yes! While halloumi is traditional for this recipe, feel free to experiment with other cheeses that melt nicely, such as feta for a tangy twist, or a vegan cheese option to keep it dairy-free.

    3. Is this recipe suitable for freezing?

    4. Yes, The Best Homemade Halloumi Carbonara can be frozen. However, note that halloumi may change in texture upon thawing.

    5. Can I make this dish ahead of time?

    6. While it’s best served fresh, you can prepare the elements separately and then combine them just before serving.

    7. What can I use instead of pasta?

    8. For a low-carb option, you can spiralize zucchini to make “zoodles” or utilize other alternatives like quinoa for a grain-based approach.

    9. How can I make this dish spicier?

    10. Add red pepper flakes during the cooking process or drizzle with a spicy olive oil for an extra kick!

    By addressing these FAQs, you can feel confident when preparing your flavorful Halloumi Carbonara, making it a hit at the dinner table while accommodating various needs and preferences.

    Conclusion

    In conclusion, The Best Homemade Halloumi Carbonara is an exceptional dish that strikes a perfect balance between flavor, simplicity, and healthiness. It caters to various dietary needs, making it accessible for everyone to enjoy. Whether you’re a novice in the kitchen or a seasoned chef, this recipe offers delightful flavors while remaining quick and easy to prepare.

    So step into your kitchen, harness the delightful essence of a classic dish with a tropical twist, and treat yourself and your loved ones to an unforgettable meal! Enjoy your cooking adventure!

  • Cozy Blackberry Dumplings Recipe

    Cozy Blackberry Dumplings Recipe

    Cozy Blackberry Dumplings Recipe: A Tropical Delight

    Introduction to Cozy Blackberry Dumplings Recipe

    When it comes to dessert recipes, few things can inspire a sense of warmth and happiness quite like cozy blackberry dumplings. This delightful dish perfectly marries the sweetness of ripe blackberries with tender, fluffy dumplings, making it the ideal treat for family gatherings or quiet evenings at home. Not only is it a heartwarming dessert, but it’s also impressively simple to prepare and can be made to suit a variety of dietary needs, including vegan and gluten-free options.

    Blackberries are not only delicious but also pack a nutritious punch. They are rich in antioxidants, vitamins, and fiber, making them a smart choice for a health-conscious dessert. Preparing these dumplings from scratch involves common pantry ingredients, allowing even busy parents or novice bakers to whip up this dish effortlessly.

    Imagine serving warm dumplings that cushion juicy blackberries at the center, drizzled with a hint of maple syrup or dusted with powdered sugar. With such an inviting, cozy vibe around this recipe, it’s no wonder it has become a favorite among food enthusiasts and newlyweds alike. By following this recipe, you’ll create a dessert that feels comforting yet sophisticated—a perfect end to any meal.

    Benefits and Advantages of Cozy Blackberry Dumplings Recipe

    One of the most appealing aspects of the cozy blackberry dumplings recipe is its ease of preparation. Utilizing straightforward techniques makes this dessert accessible for home cooks at any skill level. The steps are uncomplicated, allowing a busy parent or a student to create a remarkable dish without fuss. This accessibility is a hallmark of great dessert recipes; the best ones are made simple so anyone can enjoy them.

    Health Benefits

    Blackberries, the star of this dish, are not just tasty; they also provide numerous health benefits. These berries are low in calories yet high in essential vitamins such as Vitamin C and K. Additionally, they contain a wealth of dietary fiber, promoting digestive health and a feeling of fullness, making them a guilt-free indulgence. This cozy dumpling recipe also serves as a healthier alternative to traditional pastries that often load up on sugars and fats.

    Given its versatility, this dish appeals to various dietary lifestyles, including those who seek low-calorie, vegan, or gluten-free options. Whether you’re a working professional, a baking enthusiast, or a health-conscious traveler, you will find this recipe easy to adapt.

    The cozy blackberry dumplings can quickly transform into a breakfast option when paired with yogurt or a delightful afternoon snack. Not to mention, unlike many complex dessert recipes, you can incorporate personal twists to customize it to your liking effortlessly.

    Ingredients Overview

    Essential Ingredients for Cozy Blackberry Dumplings Recipe

    Crafting cozy blackberry dumplings requires basic ingredients that you probably already have in your kitchen. Here’s what you’ll need:

    1. Fresh Blackberries (4 cups)
      These provide the juicy, sweet contrast that perfectly balances out the dumplings.

    2. All-Purpose Flour (2 cups)
      The foundation of your dumpling dough. A gluten-free flour mix can substitute this.

    3. Baking Powder (2 tsp)
      This helps the dumplings rise and achieve their fluffy texture.

    4. Granulated Sugar (1/2 cup)
      Add sweetness to your dumplings and balance the tartness of the blackberries.

    5. Salt (1/4 tsp)
      Enhances the flavors of the other ingredients and should not be overlooked.

    6. Plant-Based Milk (1 cup)
      A vegan-friendly option can be almond milk, oat milk, or coconut milk.

    7. Vegan Butter or Coconut Oil (1/4 cup)
      This keeps the dumpling dough rich and moist. For a lower-calorie alternative, use unsweetened applesauce.

    8. Lemon Juice (2 tbsp)
      Brightens the flavors and complements the blackberries beautifully.

    Note: For those who are counting calories, you can opt for a sugar substitute or a sugar-free version of the syrup for topping, making this a flexible dessert recipe.

    Dietary Substitutions to Customize Your Cozy Blackberry Dumplings Recipe

    • Vegan Substitutes: Replace butter with coconut oil or an oil blend, and use plant-based milk to retain the creamy texture without any animal products.

    • Gluten-Free Option: Substitute all-purpose flour with a gluten-free flour blend. Add a few extra tablespoons of baking powder to ensure that your dumplings still rise well.

    • Lower Sugar: Using unsweetened applesauce or a natural sugar alternative can reduce calories while still ensuring flavor. Adjust the sugar level according to personal preference, especially if your blackberries are particularly ripe.

    These substitutes allow everyone to enjoy this delightful dessert while adhering to their dietary needs without sacrificing taste.

    How to Prepare the Perfect Cozy Blackberry Dumplings Recipe: Step-by-Step Guide

    Follow these simple, easy-to-understand steps to prepare the perfect batch of cozy blackberry dumplings.

    1. Prepare the Blackberries:
      Start by rinsing the blackberries gently under cold water. Remove any stems or leaves and set them in a bowl. Toss with 2 tablespoons of sugar and a splash of lemon juice. Allow them to sit while you prepare the dumplings, letting the flavors meld.

    2. Mix Dry Ingredients:
      In a large bowl, combine the all-purpose flour, baking powder, granulated sugar, and salt. Whisk until evenly mixed. For a gluten-free alternative, use your preferred gluten-free flour blend.

    3. Blend Wet Ingredients:
      In another bowl, mix the plant-based milk, melted vegan butter or coconut oil, and remaining lemon juice. Stir until smoothly combined.

    4. Combine Mixtures:
      Form a well in the center of the dry ingredients. Gradually pour the wet mixture into the well and stir using a wooden spoon until a dough starts forming. Be careful not to overmix; a few lumps are fine.

    5. Shape the Dumplings:
      Use a spoon or ice cream scoop to portion the dough into rounds. The size is up to you, but about 2 tablespoons works well for a fluffy, bite-sized dumpling.

    6. Assemble and Cook:
      In a large pot or deep skillet, bring about 2 cups of water or vegan-friendly broth to a gentle simmer. Drop in the dumplings, ensuring they float on the surface. Allow them to steam with a lid on for 15-20 minutes, or until they become fluffy. Optionally, you can stir in the macerated blackberries or spoon them over the top once the dumplings are steamed.

    7. Serve Warm:
      Spoon the warm blackberry mixture over the dumplings. Dust with powdered sugar or drizzle with maple syrup for an added touch of sweetness. Enjoy your cozy dessert!

    Adaptation for Dietary Needs

    If needed, you can modify this recipe: opt for lower-sugar options, swap non-dairy milk to fit personal preferences, or even experiment with different fruits like raspberries or blueberries for a unique twist on this beloved dessert.

    Mastering Cozy Blackberry Dumplings Recipe: Advanced Tips and Variations

    To truly make the most of your cozy blackberry dumplings, consider these tips and variations:

    • Herbaceous Twist: Infuse your dumplings with fresh herbs like mint or basil for a refreshing take on the traditional flavors. These herbs pair excellently with blackberries, adding an unexpected freshness.

    • Crispy Topping: For added texture, sprinkle a modest amount of brown sugar on top before cooking. This creates a caramelized crust, enhancing the overall experience.

    • Experiment with Flavors: Add spices like cinnamon or nutmeg to the dough mixture for a warm, comforting flavor profile.

    • Create a Sauce: For a fancier presentation and an enriched flavor experience, make a sauce from blackberry puree or a simple vanilla custard to serve alongside the dumplings.

    By adding these variations, you can expand on the cozy blackberry dumplings’ charm and keep things interesting. Each time, you might end up discovering something new that complements your taste!

    How to Store Cozy Blackberry Dumplings Recipe: Best Practices

    Keeping your cozy blackberry dumplings fresh is essential for maintaining their delightful flavors:

    • Refrigeration: Allow any leftover dumplings to cool completely before transferring them to an airtight container. They can be kept in the refrigerator for up to three days.

    • Freezing: To freeze the dumplings, place them on a baking sheet in a single layer and freeze until solid. Then transfer to a freezer-safe bag. They can last up to three months. To reheat, thaw overnight in the refrigerator and steam or microwave until warmed through.

    • Reheating: Reheat dumplings on the stove using a steamer basket to preserve their fluffy texture. If using a microwave, add a tablespoon of water to maintain moisture and heat on medium power in short increments.

    Following these storage techniques ensures that this delightful dessert maintains its cozy essence even when saved for later.

    Nutritional Value of Cozy Blackberry Dumplings Recipe

    Each serving of cozy blackberry dumplings offers a well-balanced dessert option. Here’s a look at the estimated nutritional information per serving (assuming 8 servings):

    • Calories: 180
    • Total Fat: 7g
    • Saturated Fat: 3g
    • Cholesterol: 0mg
    • Sodium: 180mg
    • Total Carbohydrates: 27g
    • Dietary Fiber: 3g
    • Sugars: 5g
    • Protein: 3g

    This nutritional breakdown highlights the role of fiber and healthy components provided by blackberries, making this dessert both satisfying and nutritious. Adjustments are easy: you can reduce sugar further or use healthier dairy substitutes.

    FAQs: Frequently Asked Questions About Cozy Blackberry Dumplings Recipe

    1. Can I use frozen blackberries instead of fresh?
      Yes! Frozen blackberries can work well. Make sure to thaw and drain extra moisture before using.

    2. How can I adjust the sweetness if I’m watching my sugar intake?
      You can reduce the sugar or use a natural sweetener. Make sure to taste-test and adjust according to your preferences.

    3. What cooking methods can I use?
      Besides steaming, you can also bake the dumplings in an oven at 350°F for about 20-25 minutes, until golden brown.

    4. Can I add different fruits?
      Absolutely! Feel free to mix in fruits like raspberries, blueberries, or even diced peaches, adjusting sugar levels based on the fruit’s tartness.

    5. What’s a good alternative for the butter?
      Coconut oil, or a plant-based spread, works well. For a low-fat option, unsweetened applesauce can substitute butter in the dumpling dough.

    By addressing common questions, you can browse this section for quick solutions that will enhance your cooking experience and encourage you to dive into making these scrumptious dumplings.


    By following this comprehensive guide to the cozy blackberry dumplings recipe, you are not just creating a dessert; you are crafting a flavorful experience that can be enjoyed by everyone. This recipe is ready to inspire many home cooks, and with its myriad of adaptations, it becomes a tantalizing staple in any household that delights in dessert recipes. Happy cooking!

  • Easy Chicken Sausage Broccoli Orzo Meal

    Easy Chicken Sausage Broccoli Orzo Meal

    Easy Chicken Sausage Broccoli Orzo Meal: A Tropical Delight

    Introduction to Easy Chicken Sausage Broccoli Orzo Meal

    Welcome to a culinary adventure that perfectly blends taste and convenience: the Easy Chicken Sausage Broccoli Orzo Meal. This dish is an exemplary choice for those seeking easy dinner recipes that don’t compromise on flavor or nutrition. Packed with vibrant ingredients and delightful textures, this meal promises to satisfy even the most discerning palates. Imagine a nourishing blend of hearty chicken sausage, tender orzo pasta, and crisp broccoli—a combination that not only pleases the taste buds but also enriches the body.

    What makes this recipe stand out is its adaptability to various dietary preferences. Whether you’re cooking for busy parents, health-conscious individuals, or spontaneous home chefs, this dish provides flexibility. It can easily be tailored to be gluten-free, low-calorie, or even vegan, making it a delightful option for everyone at the table. The simplicity of this recipe ensures that even novice cooks can whip it up in minimal time, leaving you plenty of opportunity to relax and enjoy the company of your loved ones.

    As you prepare for this flavorful journey, get ready to be inspired by the combination of wholesome ingredients and delightful seasonings that create a meal not only delicious but also easy and quick. The Easy Chicken Sausage Broccoli Orzo Meal is indeed a culinary delight that makes busy evenings more manageable without sacrificing health or taste.


    Benefits and Advantages of Easy Chicken Sausage Broccoli Orzo Meal

    The Easy Chicken Sausage Broccoli Orzo Meal comes with a myriad of benefits that make it a standout choice for easy dinner recipes. For starters, its preparation is incredibly straightforward—perfect for busy weeknights when time is of the essence. With one pot and minimal prep, home cooks can assemble a hearty meal without the hassle of multiple dishes to clean afterward.

    Moreover, the nutritional profile of this dish is highly commendable. Chicken sausage provides a lean source of protein, and coupled with orzo—a type of pasta that cooks quickly—this meal becomes a balanced option that fulfills daily energy needs. Broccoli adds a vibrant pop of color and is rich in vitamins C and K. This recipe is not just about filling the stomach; it’s about nourishing the body with wholesome ingredients.

    It also caters to various dietary needs; for instance, substituting the chicken sausage for plant-based alternatives opens up the dish for vegans or those wanting to reduce meat consumption. The same applies to making the dish gluten-free by selecting gluten-free orzo. In essence, this recipe exemplifies culinary creativity while ensuring the healthiest options remain accessible.

    Furthermore, it is an excellent way to introduce young children to healthy eating without overwhelming them. The combination of flavors and textures makes it enjoyable for even the pickiest eaters. By preparing this meal, you’re not just putting food on the table—you’re fostering healthy habits for the future.

    Additionally, the nature of this dish makes it perfect for meal prep and leftovers, allowing you to enjoy its delightful flavors multiple times throughout the week. Overall, this Easy Chicken Sausage Broccoli Orzo Meal shines as an exemplary choice for anyone seeking convenient, tasty, and nutritious easy dinner recipes.


    Ingredients Overview

    Essential Ingredients for Easy Chicken Sausage Broccoli Orzo Meal

    Here, we outline the essential ingredients for crafting your Easy Chicken Sausage Broccoli Orzo Meal:

    • 1 pound (450g) Chicken Sausage (Italian or spicy sausage works best)
    • 1 cup (200g) Orzo Pasta
    • 2 cups (300g) Fresh Broccoli Florets
    • 4 cups (950ml) Chicken Broth (for added flavor; can use vegetable broth for a vegetarian option)
    • 1 medium Yellow Onion, diced
    • 3 cloves Garlic, minced
    • 2 tablespoons Olive Oil
    • Salt and Black Pepper, to taste
    • 1 teaspoon Dried Italian Herbs (or mixed herbs)
    • Grated Parmesan Cheese (optional, can be substituted with nutritional yeast for a vegan option)

    Purpose and Benefits:
    Chicken Sausage: Offers a quick source of protein and enhances flavor without excessive fat.
    Orzo Pasta: Cooks rapidly and has a pleasing texture that complements the dish.
    Broccoli: A nutritional powerhouse that adds color and crunch, packed with vitamins and minerals.
    Olive Oil: A heart-healthy fat that adds richness to the meal.
    Garlic and Onion: Enhance flavor and provide various health benefits, including anti-inflammatory properties.

    This collection of ingredients allows you to create a dish that is not only satisfying but also supports a variety of diets.

    Dietary Substitutions to Customize Your Easy Chicken Sausage Broccoli Orzo Meal

    To ensure everyone can enjoy this delightful meal, here are some thoughtful substitutions tailored to specific dietary needs:

    1. Vegan Option: Replace chicken sausage with plant-based sausage or sautéed mushrooms for a meaty texture.

    2. Gluten-Free Option: Substitute regular orzo with gluten-free orzo or couscous made from rice or corn flour.

    3. Low-Calorie Option: Utilize turkey sausage or chicken breast instead of chicken sausage for a lower calorie count. You can also reduce the amount of pasta in the dish and increase the vegetables.

    4. Dairy-Free Option: Omit the Parmesan cheese or substitute it with vegan cheese or nutritional yeast, which adds a cheesy flavor without dairy.

    With these adjustments, the Easy Chicken Sausage Broccoli Orzo Meal remains accessible to almost everyone, demonstrating its versatility as an easy dinner recipe for all occasions.


    How to Prepare the Perfect Easy Chicken Sausage Broccoli Orzo Meal: Step-by-Step Guide

    Creating a delicious Easy Chicken Sausage Broccoli Orzo Meal is simple with this step-by-step guide. Let’s dive into the kitchen!

    1. Sauté the Aromatics:
      Heat 2 tablespoons of olive oil in a large pot over medium heat. Add the diced onion and sauté for about 2-3 minutes until it becomes translucent. Then, add the minced garlic and continue to cook for another 1 minute, ensuring you don’t burn the garlic.

    2. Add the Sausage:
      Remove the casing from the chicken sausage and crumble it into the pot. Cook for about 5-7 minutes until browned and cooked through, stirring occasionally. This step infuses the dish with rich flavors from the sausage.

    3. Combine with Broth:
      Pour-in 4 cups of chicken broth (or vegetable broth for a vegetarian option) and bring to a simmer. Stir well to combine the sausage with the broth, allowing the flavors to meld together.

    4. Stir in the Orzo:
      Add 1 cup of orzo pasta to the pot. Cook according to the package instructions, usually around 8-10 minutes, stirring occasionally. The orzo will absorb the broth and become tender.

    5. Prepare the Broccoli:
      Five minutes before the orzo is fully cooked, add 2 cups of broccoli florets to the pot. This allows for steaming the broccoli until it is tender yet still vibrant in color.

    6. Season and Flavor:
      Once the orzo and broccoli are cooked, season with salt, black pepper, and 1 teaspoon of dried Italian herbs. Adjust the seasoning according to your taste.

    7. Serve:
      Ladle the meal into bowls and garnish with grated Parmesan cheese (if desired) or a sprinkle of nutritional yeast for a dairy-free option. Serve hot and enjoy your satisfying dish!

    8. Storage Options:
      If you have leftovers, let the meal cool to room temperature, then store in airtight containers in the refrigerator for up to 3 days. You can also freeze portions for later use.


    Mastering Easy Chicken Sausage Broccoli Orzo Meal: Advanced Tips and Variations

    To elevate your Easy Chicken Sausage Broccoli Orzo Meal, consider these advanced tips and variations:

    • Flavor Enhancements: Experiment with adding a splash of white wine or a spoonful of lemon juice during the cooking process for added depth and brightness to the flavor profile.

    • Add More Vegetables: Consider incorporating other vegetables such as bell peppers, spinach, or zucchini to boost the nutritional value and add variety.

    • Cook on a Sheet Pan: For a different cooking method, you can roast the chicken sausage and vegetables on a sheet pan in the oven. This creates a caramelized flavor that enhances the overall dish.

    • Top with Fresh Herbs: Fresh herbs such as parsley or basil can dramatically uplift the dish. Just sprinkle them on right before serving for vibrant flavor.

    • Experiment with Different Sausages: Feel free to try out various flavored sausages—like apple or chorizo—to introduce exciting twists to your meal.

    By utilizing these enhancements, this recipe can suit a variety of preferences while ensuring you never get bored of the same meal.


    How to Store Easy Chicken Sausage Broccoli Orzo Meal: Best Practices

    Storing your Easy Chicken Sausage Broccoli Orzo Meal properly allows you to enjoy the leftovers while maintaining its flavor and texture. Here are the best practices:

    1. Refrigeration: Allow the meal to cool completely before transferring it to an airtight container. It can be stored in the refrigerator for up to 3 days. Make sure to reheat portions in the microwave or on the stovetop—adding a bit of water or broth can help restore moisture.

    2. Freezing: If you wish to store it for a longer period, transfer the cooled meal into freezer-safe containers or bags. It should be kept in the freezer for up to 2 months. Thaw in the refrigerator overnight before reheating.

    3. Reheating: When reheating, do so until steaming hot, which ensures any leftovers are safe to eat. Reheat slowly on the stovetop or in the microwave, adding a splash of broth or water to prevent drying out.

    By mastering these storage techniques, you can enjoy the deliciousness of this easy dinner recipe even days or weeks after preparation.


    Nutritional Value of Easy Chicken Sausage Broccoli Orzo Meal

    Understanding the nutritional value of your meals is crucial for maintaining a balanced diet. Here’s a breakdown of the Easy Chicken Sausage Broccoli Orzo Meal.

    Per Serving (Approx. 1 cup):
    – Calories: 400
    – Protein: 24g
    – Total Fat: 15g
    – Saturated Fat: 4g (depends on the sausage used)
    – Carbohydrates: 45g
    – Dietary Fiber: 4g
    – Sugars: 3g
    – Sodium: 600mg (may vary based on broth and sausage choice)

    This meal is packed with protein from the chicken sausage and wholesome carbohydrates from the orzo while offering fiber from the broccoli. The inclusion of a variety of nutrients makes this dish not just a fantastic easy dinner recipe, but also a well-rounded option for your dietary needs.

    When making substitutions to meet dietary preferences, be sure to adjust the nutritional values accordingly, especially if you choose lower-fat meats or gluten-free options.


    FAQs: Frequently Asked Questions About Easy Chicken Sausage Broccoli Orzo Meal

    1. Can I use different types of pasta?
      Absolutely! While orzo is preferred for this recipe, you can substitute it with any small pasta, such as ditalini or even gluten-free pasta.

    2. Is this recipe suitable for freezing?
      Yes! It freezes well. Just ensure it is stored in an airtight container or freezer bag with as much air removed as possible to prevent freezer burn.

    3. Can I skip the sausage for a vegetarian option?
      Certainly! Omit the sausage and replace it with sautéed mushrooms, chickpeas, or any protein of your choice.

    4. How can I make this dish spicier?
      Add red pepper flakes or a dash of hot sauce to the dish before serving. If using spicy sausage, you’re already on track for some heat.

    5. What can I serve as a side with this meal?
      While this dish is hearty enough on its own, consider serving a simple side salad or garlic bread to round out the meal.

    In conclusion, the Easy Chicken Sausage Broccoli Orzo Meal perfectly embodies the spirit of easy dinner recipes that are quick, nutritious, and delicious. With its versatility and ease of preparation, it’s an ideal candidate for those seeking to enrich their weekly dinner rotation. This meal is sure to impress your family and friends alike!

  • Tasty Italian Ground Turkey Spinach Orzo

    Tasty Italian Ground Turkey Spinach Orzo

    Tasty Italian Ground Turkey Spinach Orzo: A Tropical Delight

    Introduction to Tasty Italian Ground Turkey Spinach Orzo

    Finding easy dinner recipes can often feel like a daunting task, especially for busy home cooks and families on the go. This Tasty Italian Ground Turkey Spinach Orzo offers an ideal solution by combining simplicity, nutrition, and tantalizing flavors in one pot. With its vibrant mix of ingredients, this dish is not only effortless to prepare but also packed with health benefits that cater to various dietary needs.

    Ground turkey serves as a lean protein, making it a great alternative to traditional ground meats. Spinach adds a delightful green touch, enriching the dish with essential vitamins and minerals. Orzo, a versatile pasta option, is the perfect base to absorb the flavors, creating a satisfying meal for everyone.

    Whether you are a working professional, a busy parent, a student, or simply someone seeking healthier meal options, this crowd-pleaser guarantees to be a hit at your dinner table. Plus, it’s a great candidate for meal prep, ensuring delicious leftovers for lunches or quick snacks. Let’s explore the benefits, ingredients, preparation steps, and more that make this dish a perfect addition to your weeknight dinner repertoire.

    Benefits and Advantages of Tasty Italian Ground Turkey Spinach Orzo

    When it comes to creating easy dinner recipes, convenience should never come at the cost of nutrition. This Tasty Italian Ground Turkey Spinach Orzo recipe checks both boxes. First and foremost, its ease of preparation is a significant advantage for any home cook. With a total cooking time of just about 30 minutes, you can whip up a nourishing meal even on the busiest of days.

    The health benefits are abundant as well. Ground turkey is lower in fat than beef and pork, making this dish a heart-friendly option. Spinach is an excellent source of iron and other vital nutrients, making it a powerful addition. Orzo brings carbohydrates into the mix, providing energy and comfort, perfect for students or anyone needing a little nutritional boost after a long day.

    Furthermore, this dish can easily accommodate various dietary needs. Whether you’re looking for gluten-free options, need a vegan alternative, or are counting calories, the flexibility of this recipe allows for numerous adaptations. Each ingredient can be swapped or altered based on preferences or availability, ensuring that your family can enjoy this delightful dish without any fuss.

    Overall, Tasty Italian Ground Turkey Spinach Orzo stands out among easy dinner recipes not only for its appealing flavors but also for its commitment to health and convenience.

    Ingredients Overview

    Essential Ingredients for Tasty Italian Ground Turkey Spinach Orzo

    To create your Tasty Italian Ground Turkey Spinach Orzo, you’ll need the following essential ingredients:

    • 1 lb (450g) ground turkey: A lean protein that keeps the dish light yet satisfying.
    • 1 cup orzo pasta: This pasta is similar in size to rice and perfectly absorbs flavors.
    • 2 cups fresh spinach: Rich in vitamins A, C, and K, it’s a nutritious addition.
    • 1 medium onion, diced: This adds a base layer of flavor to the dish.
    • 2 cloves garlic, minced: Garlic brings a robust, aromatic flavor.
    • 1 can (14.5 oz) diced tomatoes: Adds moisture and a hint of sweetness.
    • 1 tsp Italian seasoning: A blend of herbs that encapsulates classic Italian flavors.
    • Salt and pepper, to taste: Essential for enhancing overall flavor.
    • 1 cup chicken or vegetable broth: For cooking the orzo and adding depth.
    • Optional: Grated Parmesan cheese for garnish.

    This recipe is easily adjustable. If you are seeking gluten-free or vegan options, consider using gluten-free orzo made from rice or lentils and substituting the ground turkey with a plant-based ground meat alternative like lentils or chickpeas.

    Dietary Substitutions to Customize Your Tasty Italian Ground Turkey Spinach Orzo

    1. For Gluten-Free Needs: Use gluten-free orzo, available in most supermarkets. This ensures that anyone with gluten intolerance can enjoy the dish.

    2. Vegan Option: Replace ground turkey with crumbled tofu or chickpeas to create a plant-based protein source. Ensure to use vegetable broth instead of chicken broth for full vegan compliance.

    3. Low-Calorie Variants: For a lighter version, decrease the amount of added oil or cheese and increase vegetable portions, yielding a lower-calorie meal without sacrificing flavor.

    4. Swap the Base: If orzo isn’t available, consider using quinoa or even rice as an alternative base, which will offer additional textures and nutritional benefits.

    These substitutions align the Tasty Italian Ground Turkey Spinach Orzo with dietary preferences while maintaining its essence as one of the best easy dinner recipes.

    How to Prepare the Perfect Tasty Italian Ground Turkey Spinach Orzo: Step-by-Step Guide

    Creating the Tasty Italian Ground Turkey Spinach Orzo involves straightforward steps that anyone can follow, making it one of the simplest easy dinner recipes available. Here’s a step-by-step guide to help you create this delightful dish.

    1. Prepare the Base:
      In a spacious pot or Dutch oven, heat a drizzle of olive oil over medium heat. Add the diced onion and sauté it for about 3-4 minutes until it becomes translucent. Next, add minced garlic and sauté for an additional minute, allowing the garlic to release its fragrant aroma.

    2. Cook the Turkey:
      Add the ground turkey to the pot. Season with salt, pepper, and Italian seasoning. Cook for around 5-7 minutes, breaking apart the meat with a spoon, until it’s browned and cooked through.

    3. Add Orzo and Liquid:
      Stir in the orzo pasta, ensuring it gets coated in the juices among the meat. Pour in the diced tomatoes and chicken or vegetable broth. Bring the mixture to a gentle boil.

    4. Simmer the Dish:
      Once boiling, reduce the heat to low. Cover the pot and let it simmer for approximately 10-12 minutes, stirring occasionally. The orzo should absorb most of the liquid and become perfectly cooked during this time.

    5. Incorporate Spinach:
      After the orzo is done, gently fold in the fresh spinach. Allow it to wilt for about 2-3 minutes, mixing it well with the rest of the ingredients.

    6. Final Seasoning:
      Taste the dish and adjust seasoning as necessary. If desired, sprinkle with grated Parmesan cheese for extra richness.

    7. Serve Hot:
      Remove from heat and serve hot. You can garnish with extra Parmesan and fresh herbs, such as basil or parsley, for a beautiful presentation.

    8. Storage Tip:
      If you have leftovers, let them cool completely and store them in an airtight container in the refrigerator for up to 3 days.

    These clear steps make it easy to enjoy a hearty, delicious meal that meets various dietary needs, further solidifying its status among the best easy dinner recipes!

    Mastering Tasty Italian Ground Turkey Spinach Orzo: Advanced Tips and Variations

    To elevate your Tasty Italian Ground Turkey Spinach Orzo, consider implementing the following tips and variations:

    • Add Extra Vegetables: For more nutrition and flavor, add bell peppers, zucchini, or mushrooms while cooking the turkey. They will enhance the dish’s color and offer a medley of textures.

    • Herbs and Spices: Experiment with fresh herbs, such as basil or oregano, or even a pinch of red pepper flakes for a bit of heat. These additions can personalize the dish further and introduce a depth of flavor.

    • Make It Creamy: If you prefer a creamier consistency, stir in a splash of heavy cream or a dollop of cream cheese right before serving. This variation transforms the dish into a decadent comfort meal without losing its fundamental characteristics.

    • Use Different Proteins: Instead of ground turkey, consider exploring different ground meats like chicken, beef, or even sausage, which can dramatically alter the flavor profile. Each option will provide a uniquely satisfying meal.

    With these tips, you can customize your dish to suit any taste or occasion, making this Tasty Italian Ground Turkey Spinach Orzo a versatile option in your collection of easy dinner recipes.

    How to Store Tasty Italian Ground Turkey Spinach Orzo: Best Practices

    Proper storage of Tasty Italian Ground Turkey Spinach Orzo helps maintain its fresh taste and prevent food waste. Follow these best practices:

    1. Refrigeration: Allow the dish to cool completely before transferring it to an airtight container. Properly stored, it can last in the refrigerator for up to 3 days. Before serving leftovers, you can quickly reheat them in the microwave or on the stove over medium heat, adding a splash of broth or water to prevent drying out.

    2. Freezing: For longer storage, this orzo dish freeze perfectly. Once cooled, divide it into serving-sized portions, placing them in freezer-safe containers or bags. Label them with a date and consume within 2-3 months for best quality. When ready to eat, defrost in the refrigerator overnight and reheat thoroughly before serving.

    By taking these steps, you ensure that your Tasty Italian Ground Turkey Spinach Orzo remains a delightful and nourishing option for your busy nights, affirming its status among your go-to easy dinner recipes.

    Nutritional Value of Tasty Italian Ground Turkey Spinach Orzo

    Understanding the nutritional value of your meals is essential for making informed dietary choices. The following is an approximate breakdown of the nutrients found in a standard serving of Tasty Italian Ground Turkey Spinach Orzo:

    • Calories: 350
    • Protein: 24g
    • Total Fat: 12g
    • Saturated Fat: 3g
    • Carbohydrates: 38g
    • Dietary Fiber: 4g
    • Sugars: 3g
    • Iron: 15% DV
    • Vitamin A: 35% DV
    • Vitamin C: 20% DV

    This nutrient profile highlights the balance of protein, healthy fats, and carbohydrates, making it a wholesome meal option for everyone. Adjusting ingredients based on dietary needs can further enhance the nutritional content, whether lowering calories, increasing protein, or avoiding certain allergens. This versatility keeps it in the running as one of the best easy dinner recipes for diverse dietary preferences.

    FAQs: Frequently Asked Questions About Tasty Italian Ground Turkey Spinach Orzo

    1. Can I prepare this dish in advance?

    Yes! Tasty Italian Ground Turkey Spinach Orzo can be made ahead of time. Prepare it in advance, cool it completely, and store it in an airtight container in the fridge for up to 3 days.

    2. How can I make this dish vegetarian?

    To make a vegetarian version, replace the ground turkey with lentils, chickpeas, or tofu. Ensure to use vegetable broth instead of chicken broth to maintain the dish’s vegetarian-friendly status.

    3. Is this dish suitable for meal prep?

    Definitely! This recipe is perfect for meal prep. You can portion out servings to grab-and-go throughout the week, making it a convenient option for busy schedules.

    4. What can I serve alongside Tasty Italian Ground Turkey Spinach Orzo?

    This dish pairs wonderfully with a fresh green salad, roasted vegetables, or garlic bread. These sides complement the orzo’s flavors and help round out your meal.

    5. How can I reheat leftovers?

    To reheat leftovers, you can microwave them for a few minutes or heat them on the stove over medium heat, adding a splash of broth to keep the dish moist.

    By addressing these common questions, you can prepare and enjoy Tasty Italian Ground Turkey Spinach Orzo with confidence, making it one of your favorite easy dinner recipes for any occasion.


    With this guide in hand, you’re well-equipped to create a delicious and nutritious meal that the whole family will love. The Tasty Italian Ground Turkey Spinach Orzo is not just a meal; it’s an experience that brings joy to your kitchen and your table! Dive into this recipe, and let it inspire your culinary adventures!

  • Easy Greek Ground Turkey Gyro Bowls

    Easy Greek Ground Turkey Gyro Bowls

    Easy Greek Ground Turkey Gyro Bowls: A Tropical Delight

    Introduction to Easy Greek Ground Turkey Gyro Bowls

    When you think of easy dinner recipes, the classic Greek gyro surely comes to mind. The flavors, the ingredients, and that delightful Mediterranean flair all converge in a dish that satisfies both your hunger and your health goals. Today, we’re introducing a refreshing twist on this beloved dish by using ground turkey, making it a healthier yet equally delicious option. These Easy Greek Ground Turkey Gyro Bowls are packed with protein, rich in flavor, and incredibly simple to prepare, ensuring that you can whip up a wholesome meal even during the busiest weeknights.

    Imagine a bowl filled with seasoned ground turkey, fresh vegetables, and a creamy tzatziki sauce served over a bed of hearty grains. Not only does this recipe cater to various dietary needs—with options for vegan, gluten-free, or low-calorie variations—but it also brings the essence of the Mediterranean right into your kitchen. Easy Greek Ground Turkey Gyro Bowls encourage you to explore bold flavors without the fuss, making it perfect for busy parents, students, or anyone who appreciates a quick, scrumptious meal.

    Let’s delve into the benefits of this dish, dig into its ingredients, and learn how to prepare it step by step!

    Benefits and Advantages of Easy Greek Ground Turkey Gyro Bowls

    Simple and Quick Preparation

    One of the hallmarks of easy dinner recipes is how effortlessly they come together. Easy Greek Ground Turkey Gyro Bowls are designed for convenience, featuring a straightforward cooking process that doesn’t require hours in the kitchen. With minimal prep time and cooking time, this recipe serves as a perfect solution for busy weeknights when you don’t want to compromise on flavor or nutrition.

    Packed with Nutrition

    Using ground turkey instead of traditional lamb or beef not only lowers the fat content but also provides ample protein to keep you satiated longer. Turkey is an excellent source of lean protein, which is essential for muscle maintenance and overall health. Combined with fresh vegetables like cucumbers, tomatoes, and red onions, you’re getting a generous dose of vitamins, minerals, and antioxidants, making this a well-rounded meal.

    Versatile Dietary Options

    This recipe is highly adaptable, catering to many different dietary restrictions. For those who are vegan or vegetarian, swapping out the ground turkey for plant-based protein like lentils or chickpeas can maintain the integrity of the dish without sacrificing flavor. Additionally, you can serve the gyro bowl with gluten-free grains, such as quinoa or brown rice, ensuring everyone at your table can enjoy this delightful meal.

    Flavorful and Satisfying

    Besides its health benefits, what sets Easy Greek Ground Turkey Gyro Bowls apart is the rich and zesty profile that captures the essence of Greek cuisine. With herbs such as oregano and dill, along with the tangy tzatziki sauce, every bite is a burst of flavor. It’s a dish that inspires not just home cooks but also food enthusiasts and culinary adventurers craving a taste of the Mediterranean.

    In a nutshell, Easy Greek Ground Turkey Gyro Bowls are the perfect example of easy dinner recipes that offer simplicity, nutrition, and mouthwatering flavor all in one bowl. These bowls make any meal feel like a special occasion, whether it’s a family dinner, a gathering with friends, or a light lunch.

    Ingredients Overview

    Essential Ingredients for Easy Greek Ground Turkey Gyro Bowls

    To craft these Easy Greek Ground Turkey Gyro Bowls, you’ll need the following ingredients:

    • 1 pound ground turkey: A lean protein source rich in nutrients.
    • 1 tablespoon olive oil: Provides healthy fats and enhances flavor.
    • 2 cloves garlic, minced: Adds an aromatic element to the turkey.
    • 1 teaspoon dried oregano: A staple in Greek cooking, offering a savory profile.
    • ½ teaspoon ground cumin: Adds warmth and depth to the dish.
    • Salt and pepper to taste
    • 1 cup cooked quinoa or brown rice: A wholesome base that keeps you full. Use quinoa for gluten-free options.
    • 1 cup chopped cucumbers: Fresh and crisp, these add crunch.
    • 1 cup diced tomatoes: Juicy and nutritious, a staple in Greek salads.
    • ¼ cup red onion, thinly sliced: Adds a nice bite.
    • ½ cup tzatziki sauce: For that creamy, tangy finish. You can make your own or buy store-bought, ensuring it meets your dietary needs.
    • Fresh parsley or dill for garnish: Brightens the dish and adds visual appeal.

    Dietary Substitutions to Customize Your Easy Greek Ground Turkey Gyro Bowls

    This recipe is designed to be versatile, and there are numerous substitutions you can make to cater to different dietary needs:

    • Vegan Option: Replace ground turkey with 1 cup of lentils or hearty mushrooms for texture. You can use a plant-based tzatziki made with cashews or coconut yogurt instead of traditional yogurt.

    • Gluten-Free: Ensure you select gluten-free grains—quinoa is an excellent choice. Additionally, double-check that your tzatziki is gluten-free or make your own to ensure it fits your dietary needs.

    • Low-Calorie Option: Reduce the amount of olive oil used for cooking or opt for leaner cuts of turkey. You can also increase the quantity of vegetables while decreasing the grains, allowing for a lighter dish.

    With these adjustments, you can tailor the Easy Greek Ground Turkey Gyro Bowls to fit nearly any dietary preference while still keeping preparations simple.

    How to Prepare the Perfect Easy Greek Ground Turkey Gyro Bowls: Step-by-Step Guide

    Creating tasty Easy Greek Ground Turkey Gyro Bowls is a breeze! Just follow these detailed step-by-step instructions. You’ll see how simple it is to prepare your next go-to easy dinner recipe.

    1. Prepare the Base

    Start by cooking your quinoa or brown rice according to package instructions. Usually, quinoa requires a ratio of 2:1 water to quinoa, while brown rice may require about 2.5:1. Once cooked, fluff with a fork and set aside.

    2. Cook the Ground Turkey

    • Heat a skillet: Add 1 tablespoon of olive oil to the skillet over medium heat.
    • Sauté garlic: Add minced garlic and sauté for about 30 seconds until fragrant.
    • Brown the turkey: Add the ground turkey, breaking it apart with a spatula. Cook for about 6-8 minutes until it’s fully cooked and browned.

    3. Season the Turkey

    • Add spices: Sprinkle dried oregano, ground cumin, salt, and pepper over the turkey. Stir well to combine and cook for an additional 2-3 minutes to allow the flavors to meld together.

    4. Assemble the Bowls

    • Layer the base: In serving bowls, add a generous scoop of quinoa or brown rice as your base.
    • Add the turkey: Top with a hearty portion of the seasoned ground turkey.

    5. Fresh Vegetables

    • Top with veggies: Add chopped cucumbers, diced tomatoes, and sliced red onions to each bowl.

    6. Drizzle with Tzatziki

    • Creamy finish: Add a spoonful of tzatziki sauce on top of each bowl, or serve it on the side for dipping. Feel free to add more, depending on your preference!

    7. Garnish to Perfection

    • Herb touch: Finish with a sprinkle of fresh parsley or dill for an aromatic note.

    8. Serve and Enjoy!

    Your Easy Greek Ground Turkey Gyro Bowls are ready to be enjoyed! These vibrant bowls are not only visually appealing but also packed with flavor and nutrition.

    Mastering Easy Greek Ground Turkey Gyro Bowls: Advanced Tips and Variations

    To take your Easy Greek Ground Turkey Gyro Bowls to the next level, consider these advanced tips and enticing variations:

    1. Marinate the Turkey

    For an extra burst of flavor, consider marinating the ground turkey in a mixture of olive oil, lemon juice, garlic, and herbs for at least 30 minutes before cooking. This technique infuses more taste right into the meat.

    2. Grill the Veggies

    For a smoky and charred flavor, grill your vegetables instead of using them raw. Zucchini, bell peppers, and eggplant can be delightful additions when grilled.

    3. Explore Different Bases

    While quinoa and brown rice are excellent starts, feel free to experiment with other grains like couscous or farro. For a low-carb option, serve the turkey and veggies in lettuce wraps or over a bed of spiralized zucchini.

    4. Introduce New Sauces

    If you’re feeling adventurous, try variations of the traditional tzatziki sauce by adding avocado to create a creamy, rich version or mixing in fresh herbs for a unique twist.

    5. Try Different Proteins

    If you’re not in the mood for turkey, lean ground chicken or a cubed chicken breast are both tasty alternatives. For a completely different flavor profile, swap in lamb for a more traditional touch.

    These tips and variations will help personalize your dish while maintaining the essential flavors that make Easy Greek Ground Turkey Gyro Bowls a winner!

    How to Store Easy Greek Ground Turkey Gyro Bowls: Best Practices

    Storing your Easy Greek Ground Turkey Gyro Bowls properly can extend their freshness and keep your meal options ready for the week ahead. Here’s how to do it:

    Refrigeration

    • Store cooked turkey and grains in separate airtight containers to maintain freshness for up to 4 days in the fridge. Keeping them apart helps prevent sogginess.

    Freezing

    • If you wish to prepare a larger batch, the turkey can be frozen in portions for up to 3 months. Make sure to let it cool before transferring to freezer bags. To use, defrost overnight in the fridge before reheating.
    • Grains can also be frozen; however, freshly cooked grains may become slightly mushy after freezing.

    Reheating

    • Reheat the turkey in a skillet over medium heat until warmed through. Add a splash of water or broth to prevent it from drying out.
    • For reheating grains, sprinkle with a bit of water or broth to keep them moist, then gently microwave or reheat on the stove.

    By following these storage guidelines, you can enjoy Easy Greek Ground Turkey Gyro Bowls on demand without sacrificing quality or taste.

    Nutritional Value of Easy Greek Ground Turkey Gyro Bowls

    Understanding the nutritional profile of your meals helps you make informed choices. Here’s a breakdown of the approximate nutritional values per serving of Easy Greek Ground Turkey Gyro Bowls:

    • Calories: 450
    • Protein: 32g
    • Fat: 20g
    • Carbohydrates: 40g
    • Fiber: 6g
    • Sugars: 4g

    These healthy gyro bowls are considered a balanced meal option, providing a generous amount of protein from ground turkey, healthy fats from olive oil and tzatziki, and carbohydrates from quinoa or grains. Plus, with the inclusion of fresh veggies, you are boosting your intake of vitamins and minerals.

    Moreover, the ability to customize and adjust ingredients lets you easily cater to specific dietary needs without sacrificing nutrition or flavor, making these easy dinner recipes an excellent addition to your weekly meal plans.

    FAQs: Frequently Asked Questions About Easy Greek Ground Turkey Gyro Bowls

    1. How can I make a vegetarian version of the Easy Greek Ground Turkey Gyro Bowls?

    You can substitute the ground turkey with lentils, chickpeas, or a plant-based meat alternative, ensuring that the flavors of the spices still shine through.

    2. Can I use a different grain instead of quinoa or brown rice?

    Absolutely! You can opt for couscous, farro, or even cauliflower rice for a lower-carb alternative.

    3. How long do Easy Greek Ground Turkey Gyro Bowls last in the fridge?

    When stored properly in airtight containers, they can last up to 4 days in the fridge.

    4. What can I serve as a side dish to complement the gyro bowls?

    Consider serving with a fresh Greek salad, pita bread with a side of hummus, or roasted vegetables for a complete meal.

    5. Can I meal prep these gyro bowls?

    Yes! These bowls are perfect for meal prep. You can cook everything in advance and store the components separately, then assemble the bowls when ready to eat.

    6. How can I adjust the recipe to make it spicier?

    To add some heat, you can incorporate red pepper flakes or cayenne pepper into the turkey seasoning or serve with a spicy tahini or harissa sauce.

    With these easy dinner recipes, you can enjoy a nutritious, delicious meal that pleases everyone. Easy Greek Ground Turkey Gyro Bowls are a celebration of flavor and health, making them a must-try for your dinner table. Give them a shot and experience the delightful flavors of the Mediterranean today!

  • The Best Salted Caramel Pretzel Cookies

    The Best Salted Caramel Pretzel Cookies

    The Best Salted Caramel Pretzel Cookies: A Tropical Delight

    Introduction to The Best Salted Caramel Pretzel Cookies

    Welcome to the ultimate cookie experience! If you’re on the hunt for delicious cookie recipes that delight your taste buds, look no further than The Best Salted Caramel Pretzel Cookies. This delightful treat combines the sweet, gooey richness of caramel with a satisfying crunch from pretzels, all while being incredibly simple to prepare. These cookies are not just a feast for the senses; they also come with a variety of health benefits that make them an ideal choice for busy households, traveling food enthusiasts, and anyone looking to indulge guilt-free.

    Crafted with a blend of wholesome ingredients, these cookies fit dietary needs without compromising on flavor. Whether you are vegan, gluten-free, or simply looking for a healthier treat, this recipe can easily be adapted to suit your needs. The balance of sweet and salty in these cookies makes them an excellent addition to any gathering, adding a touch of tropical decadence that your friends and family will love.

    So, gather your ingredients and let’s embark on this exciting journey to create The Best Salted Caramel Pretzel Cookies that will become a staple in your cookie recipes repertoire!


    Benefits and Advantages of The Best Salted Caramel Pretzel Cookies

    Crafting The Best Salted Caramel Pretzel Cookies is not just about baking; it’s about enjoying a well-rounded experience that brings people together. Here are some of the standout benefits of this delectable recipe:

    1. Easy to Prepare: Whether you are a seasoned baker or have never stepped into the kitchen before, this recipe is straightforward and user-friendly. With fewer than 10 ingredients and simple instructions, home cooking has never been more accessible.

    2. Health Benefits: Made with quality ingredients like whole grain flour and rich in antioxidants from dark chocolate and nuts, these cookies can be a healthier treat option for those who keep an eye on their diet.

    3. Versatile: This recipe can be adapted to fit various dietary preferences. For instance, you can easily substitute traditional ingredients for healthier alternatives, making this a flexible option for everyone—from gluten-free folks to vegans.

    4. Family-Friendly Fun: Baking these cookies can become a cherished family tradition, and it’s a wonderful way to spend time with loved ones. Everyone can get involved, from measuring ingredients to decorating the final treats.

    5. Deliciously Unique Flavor Profile: The unique combination of sweet caramel and crunchy pretzels creates a flavor explosion that is sure to satisfy any sweet tooth. It’s this eccentric taste that makes these cookies so memorable.

    These attributes not only make The Best Salted Caramel Pretzel Cookies a wonderful treat but also a recipe you’ll want to pass down through generations. With its array of advantages, it’s clear why this dessert is worth your time and effort!


    Ingredients Overview

    Essential Ingredients for The Best Salted Caramel Pretzel Cookies

    To create The Best Salted Caramel Pretzel Cookies, you’ll need the following ingredients:

    • 1 cup (225g) unsalted butter, softened – Adds richness and moisture.
    • 1 cup (200g) brown sugar – Provides a deep caramel flavor.
    • 1/2 cup (100g) granulated sugar – Balances the sweetness.
    • 2 large eggs – Binds ingredients together (for vegan, see substitutions).
    • 1 tsp pure vanilla extract – Enhances flavor depth.
    • 2 cups (240g) all-purpose flour (or gluten-free flour blend) – The base for the cookies.
    • 1 tsp baking soda – Leavening agent for a chewy texture.
    • 1/2 tsp salt – Balances the sweetness and enhances flavors.
    • 1 cup (150g) broken pretzel pieces – Adds a crunch.
    • 1 cup (250g) salted caramel sauce – The irresistible star ingredient.
    • 1/2 cup (90g) dark chocolate chips – For a rich chocolatey flair.

    Dietary Substitutions to Customize Your The Best Salted Caramel Pretzel Cookies

    Here’s how to customize the ingredients based on dietary needs:

    • Vegan Option: Substitute unsalted butter with coconut oil, and eggs can be replaced with flax eggs (1 tablespoon ground flaxseed mixed with 2.5 tablespoons water per egg).

    • Gluten-Free: Use a gluten-free flour blend to ensure everyone can enjoy these delicious cookies.

    • Lower-Calorie Options: Opt for applesauce to replace some of the butter, and use a sugar substitute like erythritol or stevia for reduced calories.

    By adapting your ingredients, you can cater to everyone’s dietary preferences without sacrificing the delicious flavor and satisfying crunch of these wonderful cookies!


    How to Prepare the Perfect The Best Salted Caramel Pretzel Cookies: Step-by-Step Guide

    Creating The Best Salted Caramel Pretzel Cookies is easier than you think! Follow this step-by-step guide to enjoy these delightful treats in no time.

    1. Preheat Your Oven: Start by preheating your oven to 350°F (175°C). This ensures that your cookies will bake evenly and achieve that perfect golden color.

    2. Cream the Butter and Sugars: In a large mixing bowl, combine the softened unsalted butter, brown sugar, and granulated sugar. Using a hand mixer or a stand mixer, beat until the mixture is light and fluffy, around 2-3 minutes.

    3. Add Eggs and Vanilla: Crack in the eggs (or flax eggs for a vegan option) and pour in the vanilla extract. Continue to mix until well combined.

    4. Combine Dry Ingredients: In another bowl, whisk together the all-purpose flour, baking soda, and salt. Gradually add this dry mixture to the wet ingredients, mixing until just combined. Do not overmix, as this can create tough cookies.

    5. Fold in the Pretzels and Caramel: Gently fold in the broken pretzel pieces and the salted caramel sauce. Be careful not to break up the pretzels too much; you want to keep that delightful crunch.

    6. Scoop the Dough: Using a cookie scoop or tablespoon, scoop the dough onto a prepared baking sheet lined with parchment paper. Leave enough space between each cookie, approximately 2 inches.

    7. Sprinkle with Sea Salt: For added flavor, sprinkle a small pinch of sea salt on top of each cookie dough ball before baking. This accentuates the salted caramel flavor beautifully!

    8. Bake: Place the baking sheet in the preheated oven and bake for 10-12 minutes or until the edges are golden brown. The centers will look soft; they’ll firm up as they cool.

    9. Cool and Enjoy: Once baked, remove the cookies from the oven and let them cool on the baking sheet for about 5 minutes. Then, carefully transfer them to a wire rack to cool completely.

    10. Store or Serve: These cookies are best enjoyed warm, but they also store beautifully, which we’ll discuss in the next section!

    With these easy-to-follow steps, you’ll craft the most delicious Salted Caramel Pretzel Cookies that surpass any store-bought treat.


    Mastering The Best Salted Caramel Pretzel Cookies: Advanced Tips and Variations

    To take your Salted Caramel Pretzel Cookies to the next level, try these advanced tips and variations:

    1. Add Different Mix-Ins: For variety, consider adding chopped nuts such as walnuts or pecans, or even dried fruit like cranberries for a chewy contrast.

    2. Experiment with Caramel: If you want to elevate the flavor, try adding a pinch of cinnamon to your caramel sauce or swirling in some melted chocolate for a rich twist.

    3. Chill the Dough: If you have the time, refrigerating the dough for at least an hour can enhance the flavor of the cookies and help them maintain shape while baking.

    4. Dunk in Chocolate: After they cool, consider drizzling or dipping half of your cookies in melted chocolate for an indulgent touch.

    5. Cookie Sandwiches: Create cookie sandwiches filled with whipped cream or softened ice cream for a delicious dessert that’s perfect for entertaining.

    Exploring these variations can add new life to your baking routine and provide exciting options for family gatherings and parties!


    How to Store The Best Salted Caramel Pretzel Cookies: Best Practices

    Proper storage of your newly baked Salted Caramel Pretzel Cookies will keep them fresh and delightful for days. Here are the best practices:

    1. Room Temperature: Store the cooled cookies in an airtight container at room temperature. They’ll remain fresh for about 4-5 days.

    2. Refrigeration: If you live in a warm climate or want to keep them fresh longer, refrigerate the cookies in an airtight container. They can last up to a week in the fridge.

    3. Freezing: For longer preservation, freeze the cookie dough or baked cookies. To freeze cookie dough, scoop it onto a baking sheet and freeze until solid, then transfer to a freezer-safe bag for up to 3 months. For baked cookies, wrap them well in plastic wrap and store in an airtight bag, suitable for up to 3 months.

    4. Reheating: To enjoy cookies that taste freshly baked, reheat in the microwave for about 10-15 seconds or warm them in the oven at 300°F (150°C) for a few minutes.

    By following these storage tips, you can ensure that your delectable Salted Caramel Pretzel Cookies stay tasty and satisfying long after they’re baked!


    Nutritional Value of The Best Salted Caramel Pretzel Cookies

    Understanding the nutritional profile of your cookies can help you make informed decisions about your treats. Here’s a breakdown of the approximate nutritional values per standard cookie (based on a yield of 24 cookies):

    • Calories: 150-200
    • Total Fat: 8g
    • Saturated Fat: 4g
    • Trans Fat: 0g
    • Cholesterol: 20mg
    • Sodium: 150mg
    • Total Carbohydrates: 20g
    • Dietary Fiber: 1g
    • Sugars: 10g
    • Protein: 2g

    Variations Based on Customization

    Affording the opportunity to swap ingredients can alter the nutritional content. Using whole wheat flour or oats can increase fiber, while employing a sugar substitute lowers-calories significantly. Vegan and gluten-free adaptations will also vary nutrient values, often raising healthy fat content while reducing sugar.

    While these cookies are a sweet treat, indulging responsibly and being mindful of the nutritional values allow you to enjoy them without guilt.


    FAQs: Frequently Asked Questions About The Best Salted Caramel Pretzel Cookies

    1. Can I make these cookies gluten-free?

    Absolutely! Simply swap all-purpose flour for a gluten-free flour blend. They’ll turn out just as delicious!

    2. What can I use instead of eggs?

    For vegan options, use a flax egg (1 tbsp ground flaxseed + 2.5 tbsp water) per egg needed.

    3. Can I freeze the dough?

    Yes! Freeze the dough by portioning it onto a baking sheet and place in the freezer until solid. Transfer to an airtight container for up to 3 months.

    4. How long do the cookies last?

    Stored at room temperature in an airtight container, they’ll stay fresh for about 4-5 days. For prolonged freshness, refrigerate or freeze.

    5. Can I add nuts or other mix-ins?

    Absolutely! Feel free to mix in chopped nuts, dried fruit, or swap in different types of chocolate for variety.

    6. What type of caramel should I use?

    You can use store-bought salted caramel sauce or make your own at home for an even more delicious result!

    7. Can I use a different type of chocolate?

    Definitely! You can try semi-sweet, milk, or even white chocolate chips for a different flavor profile.

    By addressing these frequently asked questions, we ensure that you’re well-equipped to create the perfect Salted Caramel Pretzel Cookies, whatever your preferences or needs may be.


    As you can see, The Best Salted Caramel Pretzel Cookies are not just another treat; they are a celebration of flavors and a versatile recipe that can adapt to any dietary need. Get ready to impress your friends, treat your family, or enjoy a little indulgence all on your own! Happy baking!

  • Easy Carrot Cake Overnight Oats Breakfast

    Easy Carrot Cake Overnight Oats Breakfast

    Easy Carrot Cake Overnight Oats Breakfast: A Tropical Delight

    Introduction to Easy Carrot Cake Overnight Oats Breakfast

    Easy Carrot Cake Overnight Oats are not just a breakfast; they’re a delightful way to start your day with a burst of flavor and nutrition. Imagine waking up to the enticing aroma of freshly baked carrot cake, now ready to enjoy without any fuss! This simple and healthy recipe is an absolute treat for anyone looking for a nutritious breakfast that feels indulgent.

    Overnight oats are a smart way to incorporate various nutrients into your diet effortlessly. With oats as the base, they provide a perfect source of fiber, which aids in digestion and keeps you full longer. The addition of carrots infuses your breakfast with vitamins A and K, potassium, and antioxidants while adding a natural sweetness that makes this dish feel like dessert.

    This Easy Carrot Cake Overnight Oats recipe is versatile enough to accommodate various dietary needs—it’s suitable for vegans, those requiring gluten-free options, and individuals aiming for low-calorie meals. Anyone from busy parents to hard-working professionals can benefit from this make-ahead breakfast that takes only minutes to prepare. So let’s dive into this deliciously easy breakfast option that will have you starting your day on the right note!

    Benefits and Advantages of Easy Carrot Cake Overnight Oats Breakfast

    There are numerous perks to choosing Easy Carrot Cake Overnight Oats for your morning routine. Firstly, the convenience of overnight oats cannot be overstated. You can prepare them in advance, allowing you to grab a nutritious breakfast on your way out the door. No cooking, no mess, just pure deliciousness ready in the morning!

    Another compelling advantage of this recipe is its impressive health benefits. The primary ingredient—oats—are rich in beta-glucans, a type of soluble fiber that promotes heart health and helps maintain stable blood sugar levels. They can also aid in weight management by keeping you feeling satiated longer. The addition of carrots offers a boost of vitamins while also providing a natural sweetness, reducing the need for added sugars.

    Moreover, making this recipe easy to digest, suitable for various dietary preferences is a breeze. Want a vegan option? Swap yogurt with your favorite plant-based alternative. Need it gluten-free? Use certified gluten-free oats! Unlike many breakfast dishes that often require specific cooking methods and lengthy preparation, these overnight oats cater to your needs without sacrificing flavor or nutrition.

    By opting for Easy Carrot Cake Overnight Oats, you’re investing in a breakfast that supports a healthy lifestyle, provides sustained energy, and can effortlessly fit into your busy schedule. Whether you’re a food enthusiast searching for new recipes or a busy individual looking for health-conscious meals, you’ll adore this delightful concoction that brings the flavors of carrot cake straight to your breakfast table.

    Ingredients Overview

    Essential Ingredients for Easy Carrot Cake Overnight Oats Breakfast

    To prepare your tasty Easy Carrot Cake Overnight Oats, you will need the following ingredients:

    • 1 cup rolled oats: The hearty base for your overnight oats, providing fiber and long-lasting energy.
    • 1 cup milk (dairy or plant-based): This adds creaminess; try almond, coconut, or soy milk for a vegan option.
    • 1/2 cup grated carrots: For that authentic carrot cake flavor and a boost of vitamins.
    • 1/4 cup plain Greek yogurt (optional for creaminess): Adds protein; opt for a dairy-free version if needed.
    • 2 tablespoons maple syrup or honey: Natural sweetener that complements the carrots and spices.
    • 1/2 teaspoon ground cinnamon: Essential for that warm, aromatic flavor synonymous with carrot cake.
    • 1/4 teaspoon nutmeg: Enhances the spiced flavor profile.
    • 1/4 cup chopped walnuts or pecans: Provides a satisfying crunch and healthy fats.
    • 1/4 cup raisins (optional): For a touch of sweetness and texture.
    • A pinch of salt: Balances flavors beautifully.

    These ingredients not only come together to create a delightful meal but also provide numerous health benefits. You can easily adapt this recipe to be gluten-free by using gluten-free rolled oats and keep it low-calorie by omitting sweeteners or using an appropriate substitute.

    Dietary Substitutions to Customize Your Easy Carrot Cake Overnight Oats Breakfast

    Making this Easy Carrot Cake Overnight Oats recipe suit your dietary needs is a breeze! Here are some great substitutions:

    • For Dairy-Free Options: Use plant-based milk, such as almond, oat, or coconut milk, and substitute the Greek yogurt with a nut-based yogurt.

    • Vegan Sweetener: Instead of honey, simply use maple syrup or agave nectar to maintain that sweet flavor without using animal products.

    • Nuts Allergy: If you have a nut allergy, you can either omit the walnuts or replace them with sunflower seeds for that same crunch.

    • Low-Calorie Adjustments: Reduce or skip the sweeteners entirely, or consider using stevia or monk fruit if you’re watching your calorie intake.

    • Gluten-Free Oats: Be sure to use certified gluten-free oats to cater to gluten intolerances or celiac disease.

    These substitutions allow everyone to enjoy the deliciousness and nutrition of Easy Carrot Cake Overnight Oats, regardless of personal preferences or dietary restrictions.

    How to Prepare the Perfect Easy Carrot Cake Overnight Oats Breakfast: Step-by-Step Guide

    Creating your Easy Carrot Cake Overnight Oats is as simple as it is rewarding. Follow these clear steps to enjoy a delicious breakfast:

    1. Prepare the Base: In a medium mixing bowl, combine 1 cup of rolled oats with a pinch of salt. This will be the foundation of your overnight oats, providing texture and sustenance.

    2. Mix the Liquid Ingredients: In a separate bowl, whisk together 1 cup of your chosen milk and 1/4 cup of Greek yogurt (if using). If you are opting for a dairy-free version, substitute accordingly. This mixture will provide creaminess and moisture to the oats.

    3. Incorporate Sweeteners: Stir in 2 tablespoons of maple syrup or honey to the liquid mixture. This step is crucial for adding sweetness and enhancing the flavor profile, so adjust according to your taste.

    4. Add Flavorings and Carrots: Into the bowl of oats, add the grated carrots, 1/2 teaspoon of ground cinnamon, and 1/4 teaspoon of nutmeg. Sprinkle in 1/4 cup of raisins if you’d like a sweeter kick. Mix everything thoroughly until well combined.

    5. Combine Dry and Wet Ingredients: Pour the liquid mixture into the bowl of oats and carrots. Stir everything together until all the oats are coated in the creamy mixture. This step ensures every bite is flavorful.

    6. Add Nuts for Crunch: Stir in 1/4 cup of chopped walnuts or pecans for added texture and health benefits. If you’re making this nut-free, you can skip this step or use seeds instead.

    7. Taste and Adjust: At this point, taste your mixture. If you prefer it sweeter, add a bit more maple syrup or honey.

    8. Transfer to Jars: Divide the mixture into individual jars or containers, ensuring everything is evenly distributed. Clear glass jars work beautifully, allowing you to showcase the colorful layers.

    9. Refrigerate Overnight: Cover the jars with lids or plastic wrap and place them in the refrigerator. This step allows the oats to absorb the liquid and become soft and creamy while you sleep.

    10. Serve and Enjoy: The next morning, grab your jars from the fridge, and dig in! You can top your Ready-to-eat overnight oats with extra toppings such as fresh fruits, a dollop of yogurt, or a sprinkle of nuts for added crunch.

    Each step is designed to ensure you create a delicious breakfast that is not only quick to prepare but also customizable to your dietary needs. Enjoy your Easy Carrot Cake Overnight Oats!

    Mastering Easy Carrot Cake Overnight Oats Breakfast: Advanced Tips and Variations

    While the basic recipe for Easy Carrot Cake Overnight Oats is fantastic on its own, here are some tips and variations to elevate your experience:

    • Add fresh fruits: Top your oats with banana slices, apples, or even pineapple to add a refreshing twist and new flavor dimensions.

    • Use spices wisely: You’re not limited to just cinnamon and nutmeg! Experiment with ginger, cardamom, or even pumpkin spice for a different spin that transforms the flavor entirely.

    • Additional flavors: A splash of vanilla extract adds depth to the oats and can elevate their taste profile even further.

    • Make mini parfaits: Layer your overnight oats with yogurt and fruits in a glass for a beautiful presentation, perfect for sharing or special occasions.

    • Nut butter heaven: Adding a spoonful of almond or peanut butter can enhance creaminess and provide extra protein, making your breakfast even more satisfying.

    • Batch preparation: Make multiple jars at once to enjoy this breakfast throughout the week. Overnight oats keep well in the fridge for up to five days, making meal prep hassle-free!

    Experimenting with these advanced tips allows you to cater the recipe to your taste preferences and keep your breakfast routine fun and exciting!

    How to Store Easy Carrot Cake Overnight Oats Breakfast: Best Practices

    Storing your Easy Carrot Cake Overnight Oats is simple and ensures the flavors develop even more. Here’s how to do it:

    • Refrigeration: The primary storage method is in the fridge. Make sure to keep your jars or containers sealed tightly to prevent them from drying out. Properly stored, your overnight oats will stay fresh in the refrigerator for up to five days.

    • Freezing: If you want to prepare ahead even more, consider freezing your oats. Just be sure to leave room in the container for the oats to expand as they freeze. When you’re ready to eat, thaw them in the refrigerator overnight before consuming.

    • Reheating: You can enjoy overnight oats cold or warmed up! If you prefer them warm, transfer the desired portion into a microwave-safe bowl and heat for about 30-60 seconds. Give it a stir and adjust the temperature as needed.

    These storage tips ensure your Easy Carrot Cake Overnight Oats remain delicious and ready to eat, making breakfast as simple and enjoyable as possible.

    Nutritional Value of Easy Carrot Cake Overnight Oats Breakfast

    Understanding the nutritional value of your food is key to maintaining a balanced diet. Here’s a breakdown of the nutritional content for one serving of Easy Carrot Cake Overnight Oats made with standard ingredients:

    • Calories: Approximately 350-400 kcal
    • Protein: 10g (assuming the use of Greek yogurt)
    • Fat: 8g (depends on nuts used)
    • Carbohydrates: 50g
    • Fiber: 7-8g
    • Sugars: 10g (from the maple syrup and carrots)
    • Vitamins and Minerals: Rich in Vitamin A from carrots, calcium and potassium from yogurt and oats, and magnesium from nuts.

    This recipe is nutritionally balanced, providing fiber to aid digestion, protein to support muscle health, and healthy fats from the nuts. Adjustments can be made depending on substitutions, whether you prefer to reduce sugar content or increase protein with higher yogurt quantities. The combinations are endless!

    FAQs: Frequently Asked Questions About Easy Carrot Cake Overnight Oats Breakfast

    Can I prepare the Easy Carrot Cake Overnight Oats in advance?

    Yes, preparing overnight oats in bulk is one of their greatest advantages! They can be stored in the fridge for up to five days, allowing you to prepare multiple portions for the week in advance.

    Can I use quick oats instead of rolled oats?

    While rolled oats create the ideal texture, you may use quick oats if you prefer a softer consistency. They will absorb liquid faster, so consider adjusting the liquid quantity.

    Can I make this recipe sugar-free?

    Absolutely! You can opt to omit the sweetener entirely or use stevia, monk fruit sweetener, or mashed bananas to achieve desired sweetness without refined sugars.

    Is it necessary to add yogurt?

    Adding Greek yogurt is optional but recommended. It adds creaminess and protein, and you can use dairy-free varieties to make it suitable for vegan diets.

    What can I substitute for walnuts if I have a nut allergy?

    If you can’t have nuts, sunflower seeds or pumpkin seeds offer a crunchy texture while maintaining nutrition without the allergy concern.

    Can I heat the overnight oats before eating?

    Yes! If you prefer warm oats, simply microwave your portion for about 30-60 seconds. Stir occasionally to ensure even heating.

    These FAQs address common curiosities and preferences while providing clarity on customizing the Easy Carrot Cake Overnight Oats to fit your lifestyle.

    In conclusion, Easy Carrot Cake Overnight Oats are not only easy to make but also deliver nutrition and convenience without losing the delightful flavors we all love. So, why not try out this recipe for yourself? Enjoy the process, tweak it to your liking, and experience the joy of having a nutritious breakfast waiting for you every morning!