Blog

  • The Most Addictive Hot Cross Buns YouLl Ever Make

    The Most Addictive Hot Cross Buns YouLl Ever Make

    The Most Addictive Hot Cross Buns You’ll Ever Make!: A Tropical Delight

    Introduction to The Most Addictive Hot Cross Buns You’ll Ever Make!

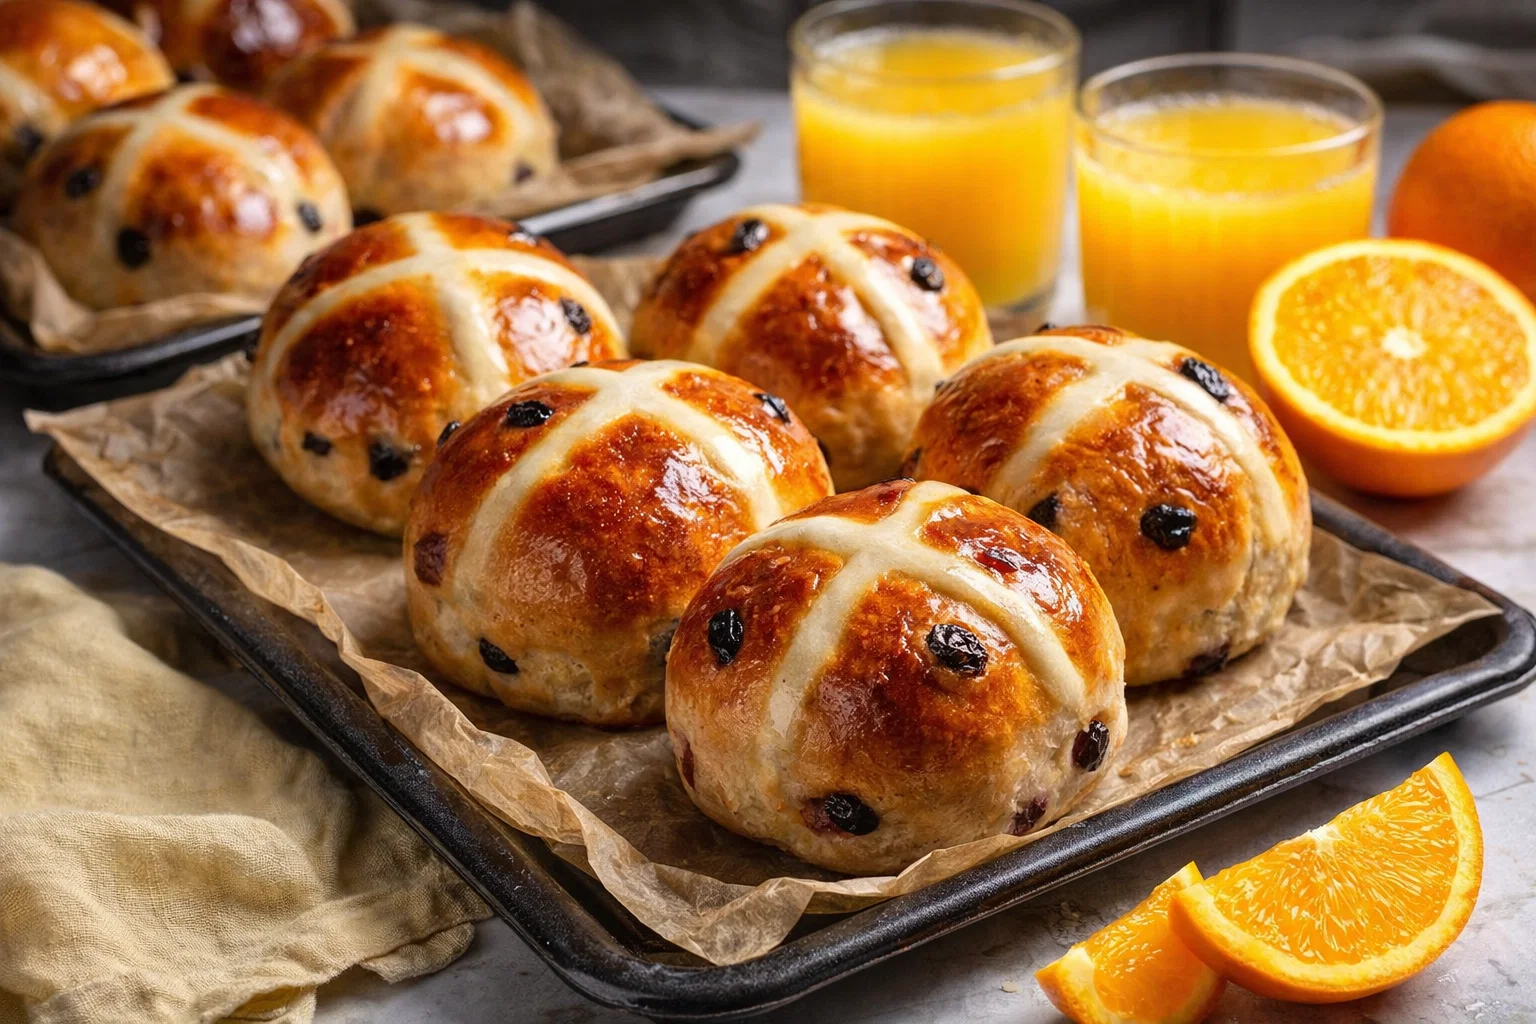
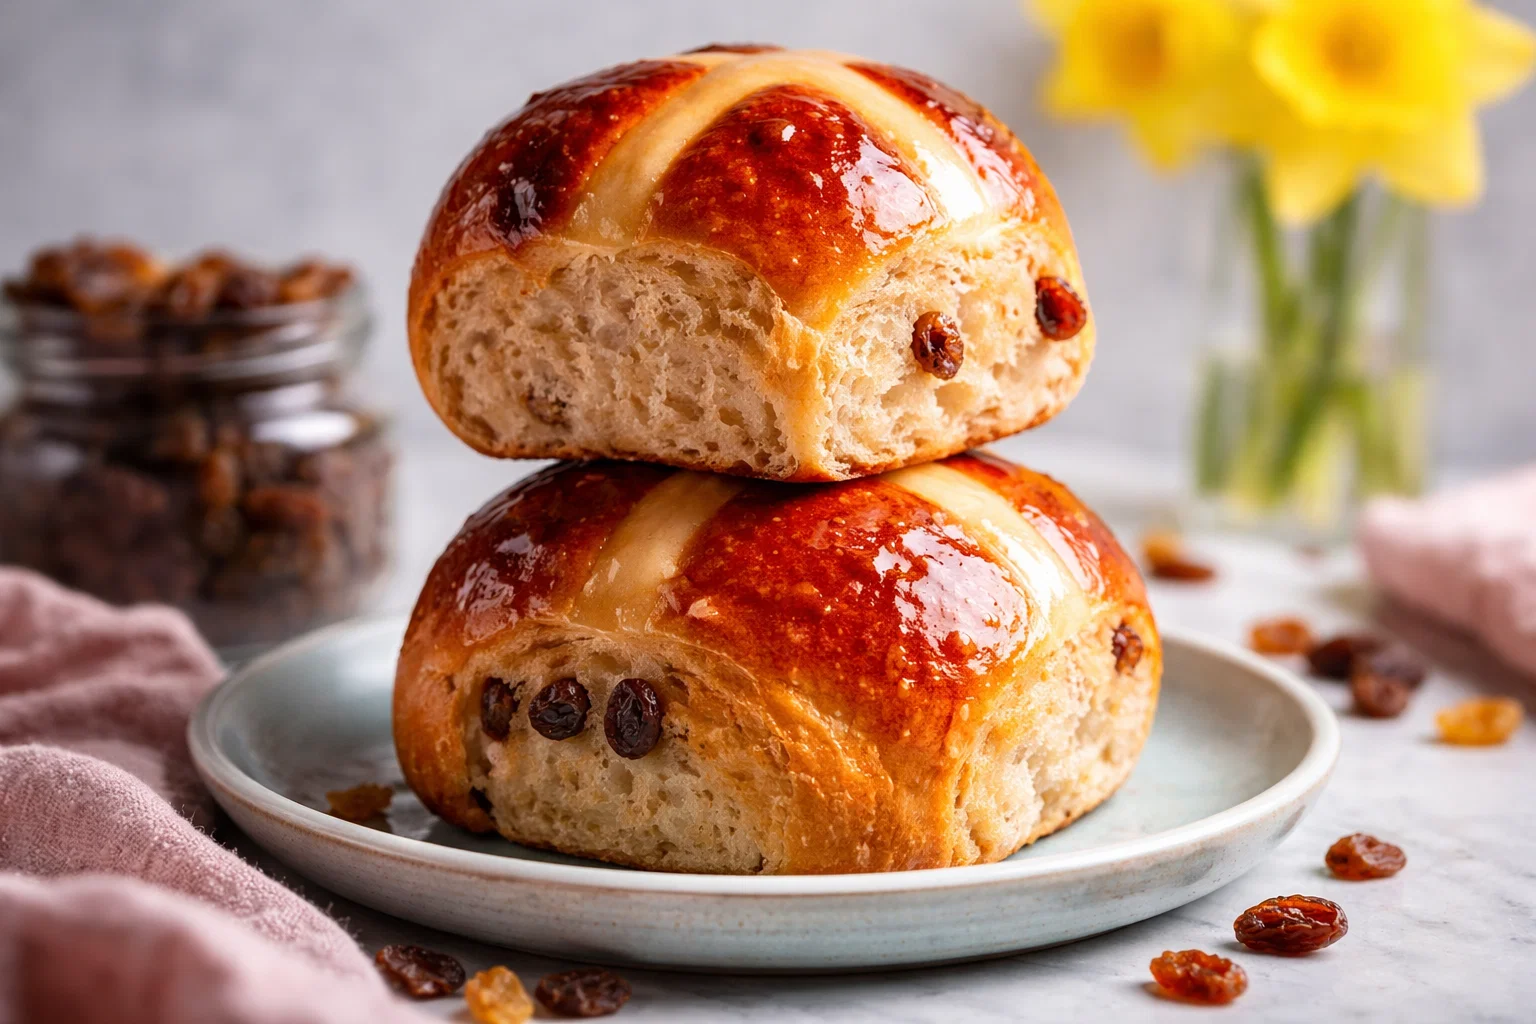
    Are you looking for delightful breakfast ideas that will make your mornings just a little bit sweeter? Look no further than this recipe for The Most Addictive Hot Cross Buns You’ll Ever Make! These golden-brown, fluffy buns are bursting with a tropical flair, filled with luscious spices and topped with a sweet glaze.

    What makes these hot cross buns truly special is their versatility. They are not only simple to prepare but also cater to various dietary preferences, such as vegan and gluten-free options. The combination of warm spices and dried fruits makes them a satisfying choice for breakfast or brunch, and they are perfect for sharing with friends and family during festive occasions or just those cozy weekends when you want to indulge a bit.

    This recipe delivers not just on flavor but also on health benefits. With whole grains and the option for natural sweeteners, these hot cross buns can fit into a balanced diet while tantalizing your taste buds. They are a wonderful addition to your breakfast ideas repertoire and will surely become a favorite in your household. So, roll up your sleeves and let’s dive into the delightful world of hot cross buns!

    Benefits and Advantages of The Most Addictive Hot Cross Buns You’ll Ever Make!

    Creating The Most Addictive Hot Cross Buns You’ll Ever Make is a rewarding culinary experience with an array of benefits. Let’s explore why this recipe stands out among typical breakfast ideas.

    1. Ease of Preparation

    One of the foremost advantages of this recipe is its simplicity. With just a few straightforward steps, even novice bakers can achieve buns that are worthy of a bakery. This makes it an excellent choice for busy parents or working professionals who want to whip up something delightful without spending hours in the kitchen.

    2. Health Benefits

    Hot cross buns can often be laden with sugar and unhealthy fats, but this recipe allows you to control the ingredients. By using whole wheat flour and natural sweeteners, you can create a healthier version that still satisfies. Furthermore, the inclusion of dried fruits adds fiber and essential vitamins, making these buns a more nutritious option.

    3. Customizable for Dietary Needs

    Whether you are vegan, gluten-free, or simply trying to cut down on calories, this recipe is easily adaptable. You can opt for plant-based butter or milk and gluten-free flour to make the buns suitable for different dietary preferences. This flexibility ensures that everyone can enjoy these scrumptious delights.

    4. Flavorful Experience

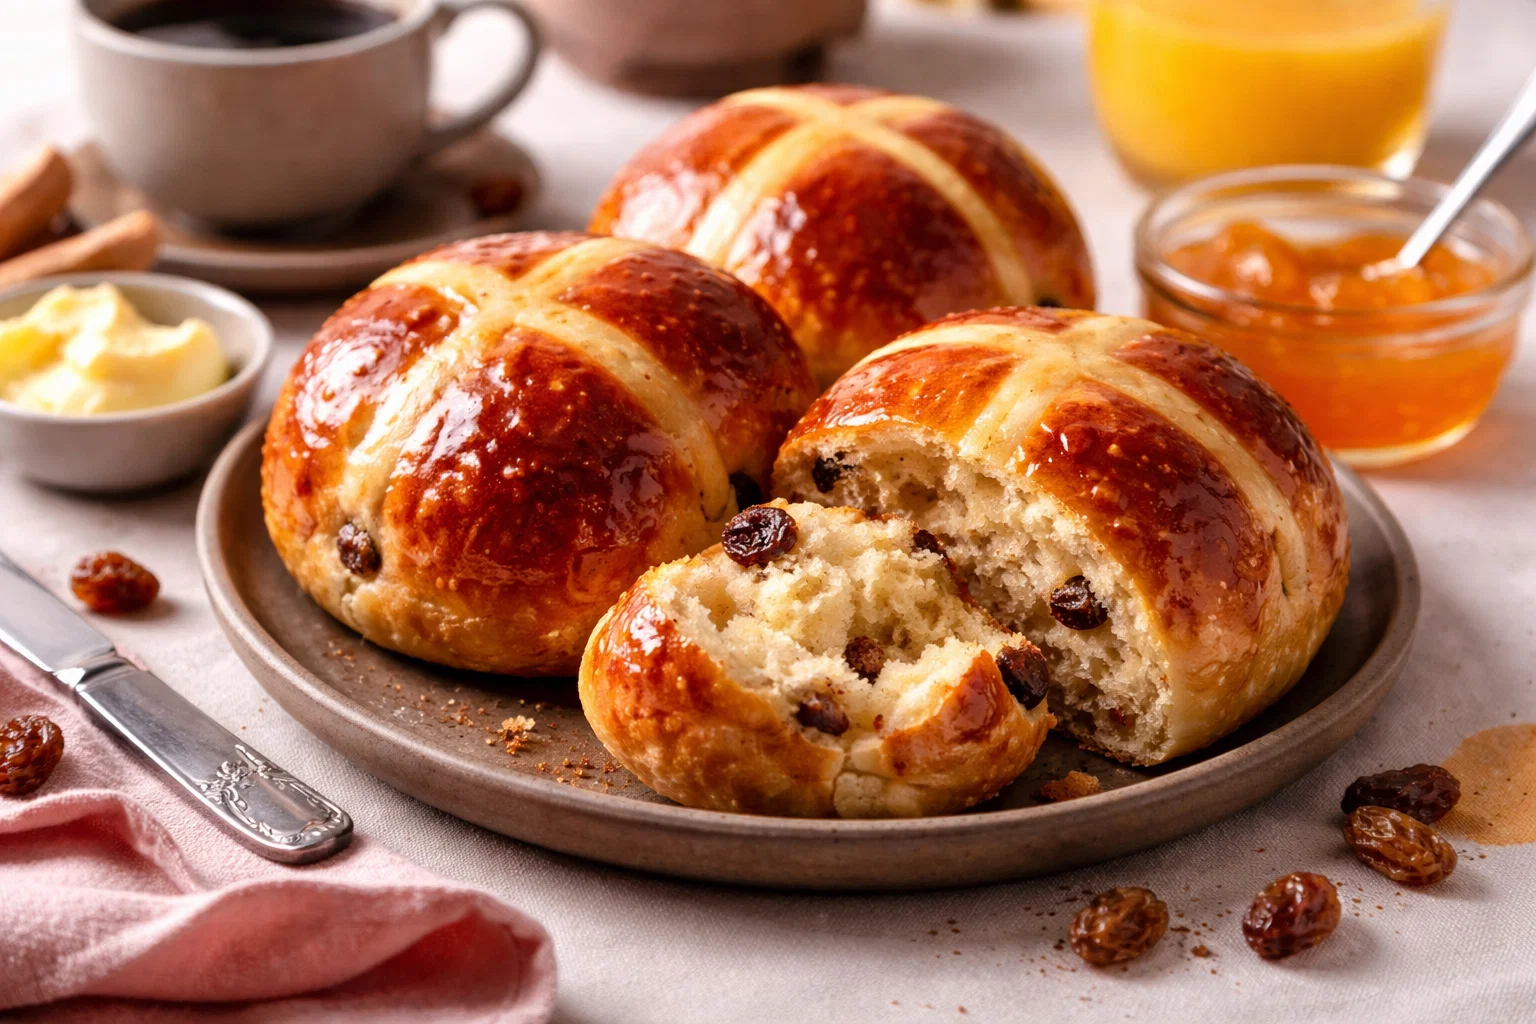
    The blend of spices, such as cinnamon and nutmeg, combined with the sweetness of dried fruits like raisins and currants, creates a flavor explosion in every bite. This sensory experience makes them an indulgent yet guilt-free treat.

    5. Perfect for Any Occasion

    These buns are not just for Easter; they can be enjoyed year-round. From holidays to lazy Sunday breakfasts, they fit seamlessly into any gathering. Their delightful aroma fills the home, inviting everyone to slow down and savor the moment.

    In summary, The Most Addictive Hot Cross Buns You’ll Ever Make offer a plethora of benefits that extend far beyond their fluffy, delicious texture. They’re the epitome of breakfast ideas that combine health, simplicity, and pleasure.

    Ingredients Overview

    Essential Ingredients for The Most Addictive Hot Cross Buns You’ll Ever Make!

    For a successful batch of these addictive hot cross buns, you will need the following ingredients:

    • 3 ½ cups whole wheat flour (or gluten-free flour blend)
    • 1 cup warm milk (or almond milk for vegan option)
    • ¼ cup sugar (or coconut sugar for lower-calorie option)
    • 2 ¼ teaspoons instant yeast
    • 1 teaspoon salt
    • 1 teaspoon ground cinnamon
    • ½ teaspoon ground nutmeg
    • ¼ cup unsalted butter (or vegan butter)
    • 1 cup mixed dried fruits (raisins, currants, or cranberries)
    • 1 egg (or flaxseed egg for vegan option)
    • Zest from 1 orange
    • ¼ cup orange juice
    • For the glaze: 1 cup powdered sugar mixed with 2 tablespoons of water

    Each ingredient contributes uniquely to the final product. Whole wheat flour adds fiber, while the warm milk activates the yeast for a light and fluffy texture. Choosing natural sweeteners not only reduces calories but also enhances the flavor profile, making your buns even more appealing.

    Dietary Substitutions to Customize Your The Most Addictive Hot Cross Buns You’ll Ever Make!

    • Gluten-Free: Replace the whole wheat flour with a gluten-free blend that contains xanthan gum.
    • Vegan: Substitute the egg with a flaxseed egg made from 1 tablespoon of ground flaxseed mixed with 3 tablespoons of water. For milk, use any plant-based alternative.
    • Low-Calorie: Use unsweetened applesauce instead of sugar or reduce the amount of sugar by half.
    • Nut-Free: Exclude any mixed nuts that may be included with dried fruit; instead, add extra seeds for crunch.

    These substitutions allow you to enjoy delicious hot cross buns while catering to individual dietary needs without sacrificing flavor or texture.

    How to Prepare the Perfect The Most Addictive Hot Cross Buns!: Step-by-Step Guide

    Ready to embark on a culinary adventure? Follow this clear step-by-step guide to make The Most Addictive Hot Cross Buns you’ll ever create. It’s a recipe that blends tradition with modern dietary needs, all packed into a delicate bun.

    1. Prepare the Base: In a large mixing bowl, combine the warm milk, sugar, and yeast. Stir gently and let it sit for about 5-10 minutes until the mixture is frothy. This step is crucial, as it ensures that your buns will rise beautifully.

    2. Mix Ingredients: Add the melted butter, egg (or flaxseed egg), orange zest, and orange juice to the yeast mixture. Mix well until all ingredients are well integrated.

    3. Combine Dry Ingredients: In another bowl, whisk together the flour, salt, cinnamon, and nutmeg. Gradually add this dry mixture to the wet ingredients, stirring until a dough begins to form.

    4. Add the Dried Fruits: Gently fold in the mixed dried fruits until evenly distributed throughout the dough. These fruits will add sweetness and texture to the buns.

    5. Knead the Dough: On a floured surface, knead the dough for about 8-10 minutes until it becomes smooth and elastic. Don’t forget that kneading is vital; it develops the gluten needed for perfect buns.

    6. First Rise: Place the kneaded dough in a greased bowl, cover it with a damp cloth, and let it rise in a warm environment for about 1-2 hours or until it has doubled in size. This step is essential for the airy texture.

    7. Shape the Buns: Once the dough has risen, punch it down to release excess air. Divide it into 12 equal portions and shape each piece into a bun. You can arrange them closely together on a baking sheet lined with parchment paper, creating a lovely touch when baked.

    8. Second Rise: Cover the shaped buns with a clean kitchen towel and allow them to rise for another 30-45 minutes. This will ensure they remain fluffy and soft.

    9. Preheat Oven: While your buns are rising, preheat your oven to 375°F (190°C). Ensuring your oven is hot enough will give your buns a lovely golden crust.

    10. Bake: Bake the buns in the preheated oven for 25-30 minutes. You’ll know they are ready when they are golden-brown on top and sound hollow when tapped on the bottom.

    11. Glaze: Once baked, let them cool slightly on a wire rack. For the final touch, mix the powdered sugar and water to make a glaze. Drizzle it over the warm buns to create an irresistible finish.

    12. Serve and Enjoy: Your hot cross buns are ready to be enjoyed! Whether you enjoy them fresh out of the oven or warmed later, they will remain a delightful breakfast idea.

    By following these steps, you can successfully prepare The Most Addictive Hot Cross Buns that everyone will love, regardless of their dietary preferences.

    Mastering The Most Addictive Hot Cross Buns You’ll Ever Make!: Advanced Tips and Variations

    Once you have mastered the basic recipe, feel free to experiment with variations and tips to elevate your hot cross buns experience:

    1. Try Different Spices:

    If you want to shake things up, feel free to play with spices. Add some ginger, cardamom, or even a hint of allspice for an interesting twist.

    2. Different Fruit Options:

    Swap the dried fruits for nuts, seeds, or chocolate chips for an alternate explosion of flavors. For a tropical flavor, consider using pineapple or mango pieces.

    3. Incorporate a Cream Cheese Filling:

    For a richer version, make a cream cheese filling to add to the center of the buns before baking. This will create a melty surprise that everyone will adore.

    4. Top with Seeds:

    Before baking, sprinkle sesame or poppy seeds on top for a crunchy, nutty flavor that contrasts beautifully with the soft buns.

    5. Experiment with Expressions:

    Try shaping the dough into braids or individual rolls. These variations bring a new excitement to a classic recipe.

    6. Store Properly:

    If you have leftovers, consider slicing the hot cross buns and freezing them individually. This will make them ideal for on-the-go breakfast ideas later on.

    With these advanced tips, you’re ready to take your hot cross buns to the next level, creating custom bun experiences that everyone will enjoy.

    How to Store The Most Addictive Hot Cross Buns You’ll Ever Make!: Best Practices

    To keep your hot cross buns fresh and delicious, proper storage is necessary. Here’s how to ensure they maintain their delightful flavor and texture:

    • Room Temperature Storage: Store the buns in an airtight container at room temperature for up to 3 days. Sealing them helps prevent them from drying out.

    • Refrigeration: If you live in a particularly warm climate, consider refrigerating them for up to a week in an airtight container.

    • Freezing: For long-term storage, place baked and cooled buns in a freezer bag or airtight container and freeze them. They can last for up to 3 months in the freezer. When you’re ready to enjoy one, simply thaw and reheat in the oven or microwave.

    • Reheating: For best results, heat the buns in the oven at 350°F (175°C) for 5-10 minutes to restore their fluffy texture and warm them through. You can also microwave them for a quicker option.

    These storage practices ensure that your hot cross buns remain a delightful breakfast idea you can rely on anytime!

    Nutritional Value of The Most Addictive Hot Cross Buns You’ll Ever Make!

    Understanding the nutritional content of The Most Addictive Hot Cross Buns helps you make informed choices, especially for a health-conscious audience. Here’s a breakdown of the nutritional values per bun (based on a dozen servings):

    • Calories: Approximately 200 calories
    • Total Fat: 4g (Saturated Fat: 2g)
    • Cholesterol: 15mg (or 0mg if vegan)
    • Sodium: 150mg
    • Total Carbohydrates: 36g
    • Dietary Fiber: 3g
    • Sugars: 8g
    • Protein: 5g

    These buns provide a balanced mix of nutrients, making them a delightful, energy-boosting option to start your day. By adjusting the ingredients (like using less sugar or different flours), you can easily modify these values to fit your dietary needs.

    Calorie-conscious bakers can also enjoy the same great taste with healthier substitutions. Thus, these hot cross buns are not just indulgences but smart breakfast ideas that fit into a healthy lifestyle.

    FAQs: Frequently Asked Questions About The Most Addictive Hot Cross Buns You’ll Ever Make!

    1. Can I make these hot cross buns ahead of time?

    Yes! You can prepare the dough a day in advance and let it rise in the fridge overnight. Simply shape the buns the next morning and proceed with the second rise and baking.

    2. Is there a gluten-free option available?

    Absolutely! You can substitute the whole wheat flour with a gluten-free flour blend. Be sure to check the blend’s instructions for the best results.

    3. How long do these hot cross buns last?

    When stored properly, they can last up to three days at room temperature, one week in the refrigerator, and up to three months in the freezer.

    4. Can I use fresh fruit instead of dried fruit?

    Fresh fruit will increase moisture content and not yield the same texture. You can use dried fruit, which holds the right consistency and sweetness in the dough.

    5. What is the best way to reheat leftover hot cross buns?

    The best way is to warm them in the oven at 350°F (175°C) for about 5-10 minutes to restore their freshness. You can also microwave them for quicker options.

    6. Can I add nuts or seeds for a crunch?

    Definitely! You can incorporate nuts or seeds into the dough or sprinkle them on top before baking for added flavor and nutrition.

    By answering these frequently asked questions, we hope to clear any doubts you may have about preparing and enjoying The Most Addictive Hot Cross Buns you’ll ever make.


    With this comprehensive guide, you’re fully equipped to tackle this recipe and share the joy of fresh, delicious hot cross buns. Not only are they an enticing treat, but they also contribute positively to a balanced breakfast. Whether you enjoy them fresh out of the oven or with a cup of tea later in the day, these buns are set to become a beloved addition to your breakfast ideas!

  • I CanT Stop Making These Sweet Snickers Treats

    I CanT Stop Making These Sweet Snickers Treats

    I Can’t Stop Making These Sweet Snickers Treats: A Tropical Delight

    Introduction to I Can’t Stop Making These Sweet Snickers Treats

    If you’ve ever craved a chocolatey, nutty dessert, then you are in for a treat with these Sweet Snickers Treats! Not only are they absolutely irresistible, but they also embody the essence of the beloved candy bar while incorporating healthier ingredients. Perfect for busy parents, working professionals, and everyone in between, this recipe makes an excellent addition to your collection of easy dessert recipes.

    These treats are exceptionally simple to whip up and require minimal time and effort in the kitchen. Also, you’ll find that they can cater to various dietary needs, as we’ll provide vegan, gluten-free, and low-calorie options. That means you don’t have to compromise on taste, even if you’re watching your diet.

    Imagine indulging in a fudgy, sweet layer topped with crunchy peanuts and silky chocolate. The best part? You can make these treats ahead of time for parties, family gatherings, or simply for personal enjoyment. In this article, we’ll not only share how to create these delightful morsels but also offer tips on how to personalize them. So let’s get started on this delectable journey!

    Benefits and Advantages of I Can’t Stop Making These Sweet Snickers Treats

    What makes the Sweet Snickers Treats special? This recipe stands out for several reasons, and it’s worth diving into the benefits. First and foremost, ease of preparation is a major selling point. The recipe is straightforward and doesn’t require any baking skills, making it accessible to cooks of all experience levels — from beginners to seasoned chefs.

    Additionally, these treats pack a nutritional punch. With ingredients that can be tailored to lower sugar levels or substitute for more wholesome alternatives, they don’t just satisfy your sweet tooth; they also nourish your body. For example, using natural nut butters adds healthy fats and protein to the mix while still delivering that delectable taste. Call it a guilt-free indulgence!

    These Sweet Snickers Treats can easily fit into various diets, too. They can become a delightful gluten-free dessert if you opt for gluten-free oats and alternatives, or a fully vegan treat using nut or oat milk in the mix. Furthermore, making a batch can yield snacks you can enjoy throughout the week instead of reaching for pre-packaged snacks filled with preservatives.

    In summary, these no-bake snacks shine for their simplicity, healthfulness, and versatility. Whether you are a busy parent searching for quick dessert recipes or a baking enthusiast looking to impress guests, these Sweet Snickers Treats deserve a special spot in your recipe arsenal.

    Ingredients Overview

    Essential Ingredients for I Can’t Stop Making These Sweet Snickers Treats

    To create these mouth-watering treats, you’ll need a few essential ingredients. Here’s the detailed list along with the purpose or health benefits of each one. Feel free to underline any dietary needs for your guests!

    1. Dates (2 cups): Naturally sweet, dates serve as the base for the treats, providing richness and caramel-like flavor. They are also high in fiber, making this treat both satisfying and nutritious.

    2. Peanut Butter (1 cup): Creamy peanut butter is the ultimate binding agent while enhancing the protein content. For vegan options, use natural peanut butter free of added sugars or oils.

    3. Oats (2 cups): Rolled oats provide a heartiness to the recipe and help absorb the sticky sweetness of the dates. Opt for certified gluten-free oats if needed.

    4. Cocoa Powder (1/4 cup): Unsweetened cocoa powder gives the chocolate flavor without the added sugar. It contains antioxidants, making this dessert a bit healthier.

    5. Chopped Peanuts (1/2 cup): For added crunch, chopped peanuts add texture and preserve the signature Snickers vibe.

    6. Chocolate Chips (1 cup): Dairy-free chocolate chips make for a beautiful topping to melt into the treats, only adding to the decadence without compromising on dietary restrictions.

    7. Coconut Oil (1/4 cup): A little melted coconut oil helps to bind the chocolate without overpowering the flavors.

    Each ingredient serves its own purpose, enhancing both flavor and nutrition values. You can substitute ingredients as needed for further customization and dietary requirements.

    Dietary Substitutions to Customize Your I Can’t Stop Making These Sweet Snickers Treats

    Let’s face it; dietary restrictions can feel daunting. Luckily, this recipe is incredibly versatile. If you or your loved ones are following certain diets, here are some great substitutions:

    • Nut-Free Option: Substitute peanut butter with sunbutter (sunflower seed butter) for a nut-free alternative, making it suitable for those with allergies.

    • Vegan Option: Ensure that all ingredients are vegan, such as using flaxseed meal mixed with water as a binding agent instead of honey.

    • Sugar-Free Option: Use sugar-free chocolate chips and reduce the number of dates to lower the sugar load while still maintaining great taste.

    • Gluten-Free Option: Stick with certified gluten-free oats and avoid any potential cross-contamination by using labeled products.

    These alternatives not only broaden the reach of the recipe’s accessibility but also allow everyone to enjoy these delectable treats without worry.

    How to Prepare the Perfect I Can’t Stop Making These Sweet Snickers Treats: Step-by-Step Guide

    With your ingredients ready, let’s dive into the preparation process. Follow these straightforward steps to create your Sweet Snickers Treats:

    1. Prepare the Base: Begin by placing your dates into a food processor. Pulse until they form a sticky paste. You may need to scrape down the sides for an even consistency.

    2. Mix Ingredients: Add in the peanut butter, cocoa powder, and coconut oil to the processed dates. Blend again until fully combined. The mixture should be thick but smooth.

    3. Add Oats: Gradually mix in the rolled oats, stirring with a spatula or spoon until evenly distributed throughout the mixture.

    4. Incorporate Peanuts: Fold in the chopped peanuts for added texture and crunch.

    5. Set the Mixture: Transfer the mixture to a lined baking dish, evenly spreading it out to create a smooth layer. Press it firmly down with your hands or a spatula to ensure it’s compact.

    6. Chill the Base: Place your mixture in the refrigerator for at least 30 minutes to help it firm up before adding the toppings.

    7. Melt the Chocolate: In a microwave-safe bowl, melt the dairy-free chocolate chips and remaining coconut oil in 30-second intervals. Stir in between each interval until the chocolate is totally smooth.

    8. Top with Chocolate: Once the base is firm, pour the melted chocolate over the top and spread it evenly. Feel free to sprinkle additional chopped peanuts on top for extra flair!

    9. Chill Again: Return the dish to the refrigerator for another 30 to 60 minutes to set the chocolate layer.

    10. Cut into Squares: Finally, once fully set, remove the treat from the dish and cut into squares or bars of your desired size.

    Congratulations! You now have a batch of Sweet Snickers Treats ready to be enjoyed! Remember, this recipe showcases the essence of dessert recipes without any fuss, appealing to every type of dessert lover.

    Mastering I Can’t Stop Making These Sweet Snickers Treats: Advanced Tips and Variations

    To elevate your Sweet Snickers Treats to the next level, consider these advanced tips and variations worth trying:

    • Flavor Variations: Add a pinch of sea salt to the chocolate layer for a salted chocolate effect, or mix in some vanilla extract for enhanced flavor.

    • Textures: To make this treat even more delightful, include texture by incorporating shredded coconut or additional mixed nuts for a crunchy mix.

    • Layering: Create a layered dessert by adding additional layers of nut butter or even a protein nut layer. This will introduce a whole new dynamic of flavors!

    • Serving Ideas: Serve these treats with fresh fruit or pair with a scoop of vegan ice cream for a show-stopping dessert experience!

    Remember, experimentation can lead to wonderful surprises, so don’t hesitate to incorporate your preferred flavors and ingredients.

    How to Store I Can’t Stop Making These Sweet Snickers Treats: Best Practices

    To enjoy these Sweet Snickers Treats at their best, proper storage is key. Allow the treats to cool completely before storing. Here are the best methods to keep them fresh:

    • Refrigeration: Store the treats in an airtight container in your refrigerator for up to 1 week. This method keeps the chocolate layer firm and prevents the treats from becoming too soft.

    • Freezing: For longer-term storage, you can freeze the treats. Cut them into squares, place them in a freezer-safe container separated by parchment paper, and they’ll last up to 3 months. When you’re ready to enjoy, thaw at room temperature for about 30 minutes before serving.

    • Reheating: Ideally, these snacks are meant to be served chilled or at room temperature. However, you can lightly microwave them for a few seconds if you prefer a softer treat.

    By adhering to these best practices, you can enjoy your Sweet Snickers Treats whenever the craving strikes!

    Nutritional Value of I Can’t Stop Making These Sweet Snickers Treats

    Understanding the nutritional profile of the Sweet Snickers Treats is essential for the diet-conscious individuals among us. Here’s a rough breakdown of what a single square or piece (based on the entire batch cut into 16 pieces) may provide:

    • Calories: 180-200
    • Fat: 8g (with healthy fats from the nuts)
    • Carbohydrates: 24g
    • Fiber: 4g
    • Sugars: 10g (natural sugars from dates)
    • Protein: 4g

    The exact nutritional value may vary slightly based on substitutions or brand choices, but overall, these treats offer a healthier alternative to conventional sugary snacks.

    Key Nutritional Highlights:

    1. High in Fiber: With ingredients like oats and dates, these treats contribute to digestive health.

    2. Natural Sweetness: Relying on dates for sweetness keeps blood sugar levels stable compared to refined sugars.

    3. Protein-Rich: Peanut butter and the addition of nuts elevate the protein content, making it a great on-the-go snack.

    These treats not only satisfy cravings but also provide nutritional benefits, making them perfect for any time of day.

    FAQs: Frequently Asked Questions About I Can’t Stop Making These Sweet Snickers Treats

    Can I make these Sweet Snickers Treats nut-free?

    Absolutely! Substitute the peanut butter with sunbutter, and ensure the chocolate you use is also nut-free.

    How do I know if my dates are fresh?

    Fresh dates should be plump and soft. If they are hard or dried out, they may not bind well.

    Can I use alternatives for cocoa powder?

    Yes! You can swap cocoa powder with carob powder if you’d like a caffeine-free option.

    Are these treats suitable for kids?

    Yes! These treats make a healthy snack option for children, packed with wholesome ingredients that will satisfy their sweet cravings without a sugar rush.

    How long can I keep these treats?

    They can last in the refrigerator for up to a week and can be frozen for 3 months for longer storage.

    In conclusion, these Sweet Snickers Treats make for an elegant dessert choice that appeals to a wide range of dietary preferences and culinary skills. Easy to prepare, they’re an indulgence you won’t feel guilty about. Why not gather your ingredients today and create your own batch of these delectable treats? The satisfaction they bring will have you making them again and again!

  • Buttery Traditional British Hot Cross Buns

    Buttery Traditional British Hot Cross Buns

    Buttery Traditional British Hot Cross Buns: A Tropical Delight

    Introduction to Buttery Traditional British Hot Cross Buns

    If you’re looking for delightful breakfast ideas that combine tradition with taste, look no further than buttery traditional British hot cross buns. These soft, fragrant buns are not only a delightful treat for Easter but also a fantastic addition to your breakfast table at any time of the year. Warm, spiced, and slightly sweet, they feature a classic cross on the top—symbolizing the crucifixion and rich with historical flavor.

    What makes this recipe appealing is its simplicity. With just a handful of ingredients and a few straightforward steps, even beginner bakers can whip up these delectable buns in no time. Additionally, they can be customized to cater to different dietary needs; you can make vegan or gluten-free variations to ensure everyone at the breakfast table can enjoy them.

    These buns are also more than just a tasty treat. They are packed with health benefits, especially if you choose wholesome alternatives to conventional ingredients. Homemade hot cross buns offer a healthier option to commercially available ones, which might be loaded with preservatives and artificial flavors. Plus, the delightful smell that wafts through your kitchen as they bake is one of life’s simple pleasures, making it a perfect project for families, busy parents, or anyone looking to share a fun activity with loved ones.

    So why wait? Get ready to inspire your cooking journey with these buttery traditional British hot cross buns. They are not just a smart culinary choice but also a delightful way to start your day!

    Benefits and Advantages of Buttery Traditional British Hot Cross Buns

    When you consider breakfast ideas, the versatility of buttery traditional British hot cross buns sets them apart from other morning options. Here’s why:

    1. Ease of Preparation: These buns require minimal ingredients and are relatively easy to make, making them an excellent choice for home cooks of all skill levels. Even if you’re short on time, you can easily prepare the dough, allow it to rise, and bake it fresh within a few hours.

    2. Health Benefits: Hot cross buns can be a healthier breakfast option when made at home. By using whole grains and reducing sugar, you can create a nutritious treat. Whole wheat flour offers added fiber, which promotes digestion and helps maintain a healthy weight. You can also incorporate dried fruits such as raisins or currants, which add natural sweetness and a boost of vitamins and minerals.

    3. Customizable Recipes: This recipe’s adaptability is another massive advantage. You can easily swap out ingredients based on dietary preferences. For instance, you can replace dairy milk with almond milk for a dairy-free option or use gluten-free flour to cater to those with gluten sensitivities.

    4. Perfect for Any Occasion: While traditional hot cross buns are popularly enjoyed during Easter, they are ideal for any celebratory brunch, family gathering, or simply a cozy breakfast on a Sunday morning.

    5. Wonderful Aroma: There’s something magical about the way spices like cinnamon and nutmeg fill your kitchen as these buns bake. The aroma lingers, creating a warm and inviting atmosphere, which is especially comforting during the cooler months.

    In summary, buttery traditional British hot cross buns are more than mere pastries. They marry nutritional value, simplicity, and adaptability in a single delicious bite. Whether you’re a busy parent looking to whip up something quick for the kids or a baking enthusiast wanting to perfect your craft, this recipe is a must-try!

    Ingredients Overview

    Essential Ingredients for Buttery Traditional British Hot Cross Buns

    To start your journey towards baking the perfect buttery traditional British hot cross buns, gather the following ingredients:

    • 500g (4 cups) Bread Flour: This gives the buns their structure and chewiness.
    • 75g (1/3 cup) Sugar: Enhances sweetness and feeds the yeast for better rising.
    • 10g (2 teaspoons) Salt: Balances the flavors and strengthens the dough.
    • 10g (2 teaspoons) Instant Yeast: Essential for leavening and making the buns light.
    • 300ml (1 1/4 cups) Whole Milk: Provides moisture and richness. (For a vegan option, substitute almond or oat milk.)
    • 75g (5 tablespoons) Unsalted Butter: Adds a rich flavor and tenderness. (Use vegan butter for a dairy-free version.)
    • 1 Large Egg: Binds the ingredients together and adds moisture. (Substitute with flaxseed meal or a commercial egg replacer for vegan diets.)
    • 100g (1 cup) Mixed Dried Fruits: Such as raisins, currants, or sultanas for added flavor and sweetness.
    • 1 teaspoon Ground Cinnamon: For that warm and festive flavor.
    • 1/2 teaspoon Ground Nutmeg: Adds a unique fragrance and taste, elevating the overall flavor profile.

    Additionally, you’ll need extra flour for dusting and a few items for the glaze:

    • 75g (1/2 cup) Apricot Jam: For glazing and adding a lovely shine. (Optionally, use a vegan alternative.)
    • 1 tablespoon Water: To thin the jam, if necessary.

    Dietary Substitutions to Customize Your Buttery Traditional British Hot Cross Buns

    Creating the ideal hot cross buns means adjusting ingredients to suit all dietary preferences. Here are some suggestions:

    • Gluten-Free Version: Substitute regular bread flour with a high-quality gluten-free flour blend. Make sure it contains xanthan gum for better structure.
    • Vegan Option: Use plant-based milk and butter. Replace the egg with a mixture of 1 tablespoon of flaxseed meal mixed with 2.5 tablespoons of water, allowing it to sit for a few minutes until it thickens (this acts as a binder).
    • Sugar Reduction: To cut down on sugar, you can decrease the amount of sugar by half; the buns will still retain their sweetness from the dried fruits.
    • Fruit Choices: Substitute mixed dried fruits with fresh blueberries, cranberries, or chopped nuts for different flavor profiles and textures.

    By adjusting these ingredients, you can ensure that your buttery traditional British hot cross buns can be enjoyed by everyone, catering to various dietary needs while still being a delightful and nourishing breakfast treat.

    How to Prepare the Perfect Buttery Traditional British Hot Cross Buns: Step-by-Step Guide

    Now that you have your ingredients ready, it’s time to dive into making these delicious buttery traditional British hot cross buns. Here’s your simple, step-by-step guide:

    1. Prepare the Base:
    2. In a large mixing bowl, combine the bread flour, sugar, instant yeast, and salt. Make sure the salt and yeast are on opposite sides of the bowl initially, as salt can inhibit yeast activation.

    3. Warm the Liquid:

    4. In a saucepan, gently warm the milk until it’s lukewarm (about 37°C/98°F). Remove it from heat and add in the unsalted butter, stirring until melted. This mixture should feel warm to the touch without being hot.

    5. Combine Ingredients:

    6. Make a well in the center of the flour mixture and pour in the warm milk-butter mixture and the beaten egg. Mix together using a wooden spoon or your hands until a sticky dough forms.

    7. Kneading:

    8. Transfer the dough to a lightly floured surface. Knead the dough for about 8-10 minutes until it becomes smooth and elastic. If using a stand mixer, fit the dough hook and knead on medium speed for about 5-6 minutes.

    9. Incorporate Dried Fruits:

    10. Add the mixed dried fruits, ground cinnamon, and nutmeg into the dough. Knead for an additional 2-3 minutes until the fruits and spices are evenly distributed.

    11. First Rise:

    12. Place the dough in a lightly oiled bowl, cover with a damp cloth or plastic wrap. Let it rise in a warm place for about 1-2 hours, or until it has doubled in size.

    13. Shape the Buns:

    14. Once risen, punch down the dough gently to release air bubbles. Divide it into 12 equal portions. Shape each portion into a ball and place them closely together in a greased baking dish.

    15. Second Rise:

    16. Cover the buns with a damp cloth and allow them to rise again for 30-45 minutes or until puffy and almost touching.

    17. Prepare for Baking:

    18. Preheat your oven to 190°C (375°F). While the buns are resting, mix about 75g of flour with enough water to make a thick paste (this will be your cross). Transfer this mixture into a piping bag or a ziplock bag with one corner cut off and pipe crosses on the tops of the buns.

    19. Bake:

      • Bake the buns in the preheated oven for 20-25 minutes, or until they are golden brown on top and sound hollow when tapped on the bottom.
    20. Glazing:

      • While the buns are baking, prepare the glaze by heating apricot jam in a small saucepan, adding a tablespoon of water to thin it out. Once the buns are out of the oven, brush them with the warm glaze to give them a beautiful shine.
    21. Cool and Serve:

      • Allow the buns to cool in the pan for 10 minutes before transferring them to a wire rack to cool completely. Serve warm with butter or your favorite spreads; these buns are a delightful addition to your breakfast ideas collection!

    These buttery traditional British hot cross buns not only taste divine but are also good for gatherings or cozy mornings at home. Feel free to adapt these steps based on dietary preferences, ensuring everyone can relish these delightful treats.

    Mastering Buttery Traditional British Hot Cross Buns: Advanced Tips and Variations

    Once you’ve mastered the basics of making buttery traditional British hot cross buns, you may want to experiment with advanced techniques and variations. Here are some tips to elevate your baking game:

    1. Flavor Enhancements:
    2. Consider infusing your milk with spices like clove or cardamom for an aromatic twist. You can steep the spices in the milk as it warms to extract more flavor.

    3. Different Glazes:

    4. Swap out the apricot glaze for a simple icing made of powdered sugar and water or lemon juice for a sweeter finish. For a savory option, try brushing with melted butter sprinkled with a pinch of sea salt.

    5. Try Different Fruits:

    6. Experiment with interesting dried fruits such as candied orange peel or cherries to create a unique flavor. You might even try incorporating chocolate chips or nuts for a rich twist.

    7. Herbs and Zests:

    8. Add fresh orange or lemon zest for a fragrant burst of citrus. You might also consider adding finely chopped fresh herbs like rosemary or thyme for a savory and aromatic profile.

    9. Batch Freezing:

    10. If you make a large batch, consider freezing some of them. After they cool, wrap the buns individually in plastic wrap and store them in an airtight container. They can be reheated directly from the freezer.

    With these tips, you can personalize your buttery traditional British hot cross buns to your liking, bringing an exciting twist to this classic recipe.

    How to Store Buttery Traditional British Hot Cross Buns: Best Practices

    Storing your buttery traditional British hot cross buns correctly can greatly enhance their longevity and flavor retention. Here’s how to ensure they stay fresh:

    1. Room Temperature:
    2. If you plan to consume the buns within a couple of days, store them at room temperature. Keep them in a bread box or loosely wrapped in parchment paper to allow airflow while preventing them from drying out.

    3. Refrigeration:

    4. For storage beyond a few days, consider refrigerating them. Enclose the buns in a ziplock bag or an airtight container to avoid drying. The cool temperature will slow down spoilage.

    5. Freezing:

    6. To freeze the buns, wrap them tightly in plastic wrap, followed by aluminum foil, and place them in a freezer-safe bag or container. Properly stored, they can last for up to three months. When you’re ready to enjoy them, thaw the buns overnight in the refrigerator or at room temperature.

    7. Reheating:

    8. To reheat, you can either place them in a 150°C (300°F) oven for 10-15 minutes until warmed through or microwave them for about 10-15 seconds. This ensures the buns remain soft and fluffy.

    By following these best practices, you can savor the delightful flavors of your buttery traditional British hot cross buns even days after baking!

    Nutritional Value of Buttery Traditional British Hot Cross Buns

    When considering breakfast ideas, it’s important to understand their nutritional profile. Here’s a breakdown of the approximate nutritional value for one standard buttery traditional British hot cross bun (based on a recipe serving 12):

    • Calories: 220-250
    • Total Fat: 7g
    • Saturated Fat: 4g
    • Cholesterol: 30mg
    • Sodium: 120mg
    • Total Carbohydrates: 36g
    • Dietary Fiber: 1g
    • Sugars: 8g
    • Protein: 5g

    Health Benefits

    1. Source of Energy: These buns are rich in carbohydrates, making them a suitable option for energy replenishment in the morning.
    2. Vitamins & Minerals: The inclusion of dried fruits not only enriches the flavor but also adds important vitamins and minerals like iron and potassium.
    3. Customizable Nutrition: With the ability to swap in different flours or reduce sugar, you can create healthy versions of hot cross buns tailored to your dietary needs while maintaining deliciousness.

    Understanding the nutritional profile can help you enjoy buttery traditional British hot cross buns as part of a well-balanced diet, and when made at home, they can be a wholesome and delightful treat.

    FAQs: Frequently Asked Questions About Buttery Traditional British Hot Cross Buns

    1. Can I make hot cross buns ahead of time?
    2. Yes! You can prepare the dough a day ahead and let it rise in the fridge overnight. Just remember to bring it back to room temperature before baking.

    3. Are there gluten-free options for hot cross buns?

    4. Absolutely! Use a gluten-free flour blend and add xanthan gum to help with the dough’s structure. Many brands offer robust gluten-free blends that work well.

    5. Can I add other spices to the buns?

    6. Yes, you can definitely add spices like ginger or allspice for extra flavor. Get creative based on your preference!

    7. What’s the best way to enjoy my hot cross buns?

    8. While delicious on their own, these buns are also wonderful toasted with a spread of butter or your favorite jam.

    9. How should I store leftover buns?

    10. Keep leftover buns in an airtight container at room temperature for up to two days, or freeze them for later enjoyment. Reheat as needed for the best flavor.

    These FAQs serve to clarify common concerns, ensuring that anyone attempting this recipe feels informed and encouraged to try their hand at these delightful buttery traditional British hot cross buns. Perfect for breakfast or any time you want to indulge in a sweet, spicy treat!

    In conclusion, this comprehensive guide to buttery traditional British hot cross buns has not only offered you a delightful recipe but also outlined its myriad benefits, dietary customizations, and practical storage tips. Whether you’re a seasoned baker or just starting your culinary adventure, these buns will surely elevate your breakfast ideas and impress everyone at your table! Enjoy the process of baking, the rich flavors, and the joy they bring to your mornings. Happy baking!

  • Best Xl Hot Cross Buns

    Best Xl Hot Cross Buns

    Best XL Hot Cross Buns: A Tropical Delight

    Introduction to Best XL Hot Cross Buns

    When it comes to breakfast ideas that bring warmth and joy to the table, nothing beats the distinctive aroma and taste of freshly baked hot cross buns. This recipe for Best XL Hot Cross Buns stands out not just for its delightful flavor but for its incredible versatility, making it a great choice for home cooks of all ages. These buns are larger than traditional ones, providing a hearty breakfast that can satisfy even the busiest of families.

    Moreover, these buns are easy to prepare, beautifully aromatic, and can easily be customized to suit various dietary needs. Whether you’re a busy parent looking for quick breakfast solutions, a student seeking an energizing morning meal, or simply a food enthusiast wanting to whip up something special, this recipe is for you.

    With ingredients that contribute to health, like whole grains and spices, these buns are packed with flavors and are perfect for sharing with friends or family. Best of all, they can be made vegan or gluten-free without sacrificing taste. So roll up your sleeves, preheat your oven, and get ready to create mouthwatering breakfast ideas that will leave everyone craving more!

    Benefits and Advantages of Best XL Hot Cross Buns

    Choosing to bake Best XL Hot Cross Buns comes with a multitude of benefits that go beyond the simple joy of eating them. One of the primary advantages is the ease of preparation. With just a few straightforward steps, even novice bakers can feel accomplished. These buns can be mixed and shaped in under an hour, making them a perfect candidate for those who have limited time in their busy schedules.

    Health-conscious readers will appreciate the nutritional benefits these buns offer. Instead of dense, sugary bakery options, you can indulge in a sweet treat that also contains whole grains, reducing the likelihood of sugar spikes. They can be tailored to fit various dietary requirements—vegan options eliminate animal products while gluten-free flour blends cater to those managing celiac disease or gluten sensitivities.

    Furthermore, the versatility in toppings and spices allows for endless creativity. You can whip them up with traditional ingredients like raisins and cinnamon, or incorporate tropical flavors such as coconut and pineapple for a uniquely delightful twist.

    In addition, making these buns at home means you can control the ingredient quality, reducing processed elements and making these sweet rolls friendlier to dietary preferences. So, whether you’re considering breakfast ideas for a family gathering or just seeking a delicious way to start your day, these buns are the perfect solution.

    Ingredients Overview

    Essential Ingredients for Best XL Hot Cross Buns

    1. Bread Flour (500g): This high-protein flour provides structure and chewiness, giving your buns a robust texture. If you prefer gluten-free options, consider using a blended gluten-free flour.

    2. Yeast (2 Tbsp): Active dry yeast is crucial for providing the rise in your buns, making them fluffy and soft.

    3. Milk (250ml): Warmed dairy or a plant-based milk substitute (almond milk or oat milk) enhances the dough’s flavor and texture.

    4. Sugar (100g): A mix of granulated and brown sugar contributes to the buns’ sweetness and golden crust.

    5. Vegan Butter or Coconut Oil (100g): These fats add flavor and moisture. For a vegan recipe, opt for a plant-based butter alternative or coconut oil.

    6. Egg (1 large): Acts as a binding agent. For a vegan adaptation, a flax egg (1 Tbsp flaxseed meal + 2.5 Tbsp water) can be used.

    7. Spices (1 tsp cinnamon, 1/2 tsp nutmeg, 1/2 tsp allspice): These aromatics provide warmth and depth to the flavor.

    8. Mixed Dried Fruit (300g): Use a combination of raisins, currants, and chopped dried apricots or cranberries for a fruity challenge. For tropical flair, add dried pineapple.

    9. Salt (1 tsp): Essential for balancing flavors and enhancing the taste.

    Dietary Substitutions to Customize Your Best XL Hot Cross Buns

    • Gluten-Free: Replace bread flour with a gluten-free flour blend, ensuring it includes xanthan gum to maintain the structure of the buns. Consult the package for recommended measurements.

    • Vegan: Substitute dairy milk with almond or coconut milk and use a vegan butter or coconut oil in place of regular butter. A flax egg can replace the egg.

    • Low-Sugar: Use natural sweeteners such as mashed bananas or unsweetened applesauce to reduce added sugars. Another option is to use sugar substitutes like stevia or monk fruit.

    • Add-ins: Experiment with tropical fruits like dried mango or coconut flakes or even nuts like chopped pecans for a satisfying crunch.

    These modifications ensure that everyone can enjoy these decadent breakfast ideas, regardless of dietary restrictions or preferences.

    How to Prepare the Perfect Best XL Hot Cross Buns: Step-by-Step Guide

    Creating these delicious buns at home is simpler than you may think! Follow this step-by-step guide for a fun baking experience.

    1. Prepare the Dough:
    2. In a mixing bowl, combine warm milk, sugar, and yeast. Let it sit for about 5-10 minutes until frothy, indicating the yeast is activated.

    3. Mix Dry Ingredients:

    4. In a separate bowl, whisk together the bread flour, salt, and spices (cinnamon, nutmeg, allspice).

    5. Combine Wet and Dry Ingredients:

    6. Pour the activated yeast mixture into the dry ingredients and mix well. Add in melted vegan butter (or coconut oil) and the egg (or flax egg). Stir until a shaggy dough forms.

    7. Knead the Dough:

    8. Transfer dough onto a lightly floured surface and knead for 10-12 minutes, or until smooth and elastic. If using gluten-free flour, kneading may not be necessary—just ensure it is well mixed.

    9. Add Dried Fruits:

    10. Flatten the dough slightly, and fold in the mixed dried fruits. Knead gently to incorporate.

    11. First Rise:

    12. Place the dough in a large, oiled bowl, cover with a damp cloth or plastic wrap, and let it rise in a warm area until doubled in size (approximately 1-2 hours).

    13. Shape the Buns:

    14. Once risen, punch down the dough gently and divide it into 10-12 equal portions. Shape each portion into a round ball and place on a lined baking tray, leaving space between each for expansion.

    15. Second Rise:

    16. Cover the buns again and let them rise for another 30-45 minutes, or until they have doubled in size.

    17. Preheat the Oven:

    18. As the buns rise, preheat your oven to 190°C (375°F).

    19. Prepare the Crosses:

      • Mix a little flour with water to create a thick paste. Transfer it to a piping bag or a plastic bag with a corner cut off. Pipe a cross on top of each bun.
    20. Bake:

      • Bake in the preheated oven for 20-25 minutes, or until golden brown. A skewer should come out clean when inserted.
    21. Glaze (optional):

      • For a shiny finish, mix apricot jam with a little water and brush over the hot buns immediately after they come out of the oven.
    22. Cool and Serve:

      • Allow the buns to cool on a wire rack before serving. Enjoy them warm, or let them cool completely for later!

    By following these steps, you can enjoy gorgeous homemade breakfast ideas!

    Mastering Best XL Hot Cross Buns: Advanced Tips and Variations

    While the base recipe for Best XL Hot Cross Buns is fabulous on its own, incorporating additional techniques and variations can elevate your baking game. Here are some tips and tricks to master this recipe and keep your taste buds excited:

    • Herb Infusion: Consider adding fresh herbs like rosemary or thyme to the dough for a savory twist. This can be particularly delightful when served with cheese spreads.

    • Spice Exploration: Experiment with other spices—cloves or ginger can add depth and warmth. Don’t be afraid to combine spices for a unique aromatic profile.

    • Fillings: Want to take your buns to the next level? Consider stuffing your buns with chocolate chips, marzipan, or even a savory filling like cheese and tomatoes before shaping them.

    • Tropical Flavor: To truly make these buns a tropical delight, infuse the dough with zest from lime or orange. Dried coconut flakes can also add a delightful texture.

    • Gluten-Free Flour Exploration: Each gluten-free flour blend performs differently. Consider trying oat flour or rice flour for varying textures.

    • Creative Icing: Instead of the traditional cross, use cream cheese frosting or a simple icing sugar glaze for a sweet finish.

    These advanced techniques can help you broaden your baking repertoire and impress anyone lucky enough to receive these treats!

    How to Store Best XL Hot Cross Buns: Best Practices

    Once you’ve enjoyed your delicious Best XL Hot Cross Buns, ensuring they’re properly stored is key to maintaining freshness. Here are some best practices to follow:

    • Room Temperature Storage: If you plan to eat the buns within a few days, store them in an airtight container at room temperature. This will help keep them soft and prevent dryness.

    • Refrigeration: For longer storage, you can refrigerate the buns, but be aware that this can sometimes lead to a slightly denser texture. When wrapping, use plastic wrap or aluminum foil to seal them tightly.

    • Freezing: For maximum freshness, consider freezing your leftover buns. Allow them to cool completely before placing them in a freezer-safe bag or container. To thaw, simply leave them at room temperature or pop them in the microwave for a few seconds.

    • Reheating: Reheat the buns in the oven at 160°C (325°F) for about 10 minutes for a warm, fresh-out-of-the-oven taste. You can also microwave them for 15-20 seconds to enjoy them warm.

    By following these storage guidelines, you can savor your breakfast ideas for days to come.

    Nutritional Value of Best XL Hot Cross Buns

    Understanding the nutritional value of your food can help you make informed dietary choices. Here’s an overview of the nutritional content for one serving (one XL hot cross bun), based on the standard recipe outlined above:

    • Calories: 250-300 kcal
    • Fat: 8g (saturated 2g)
    • Carbohydrates: 45g (sugars 12g)
    • Protein: 7g
    • Fiber: 2g
    • Sodium: 300mg

    While these buns are indeed a treat, they can fit comfortably within a balanced diet, especially if you consider modifications like using less sugar or whole grain flours.

    Remember, the nutritional values can fluctuate based on the ingredients you choose, such as milk alternatives or sugar substitutes. Taking these into account allows you to customize your breakfast ideas in accordance with your health goals.

    FAQs: Frequently Asked Questions About Best XL Hot Cross Buns

    Can I make these hot cross buns ahead of time?

    Absolutely! You can prepare the dough in advance and keep it in the refrigerator overnight. Just take it out to let it come to room temperature before shaping and baking.

    What is the best way to serve hot cross buns?

    Hot cross buns are delightful served plain, but for added indulgence, try them with butter, cream cheese, or nut butter. You could even make a breakfast sandwich with eggs!

    Can I customize the fruit in the buns?

    Definitely! You can use any mix of dried fruits you prefer. Feel free to experiment with tropical flavors by adding dried pineapple or coconut.

    How do I ensure my buns are soft?

    Make sure to knead the dough well to develop gluten and ensure that the dough rises sufficiently before baking. Adding enough moisture will also help keep them soft.

    Can I make these hot cross buns gluten-free?

    Yes! Substitute the bread flour with a gluten-free flour blend, ensuring it contains xanthan gum or similar to help bind the ingredients and achieve a good texture.

    Is there a way to make these buns less sweet?

    You can reduce the quantity of sugar in the recipe or use natural sweeteners like applesauce or mashed bananas as alternatives.

    By addressing these frequently asked questions, you can feel confident in your baking journey and create the Best XL Hot Cross Buns that suit your taste and dietary needs perfectly!

    Conclusion

    The Best XL Hot Cross Buns are not just a baked treat; they are a celebration of flavors, textures, and creativity in your kitchen. Perfect for breakfast ideas, snacks, or special occasions, this recipe caters to everyone—from health-conscious dieters to busy families looking for something simple yet delicious.

    Try making them, share them with loved ones, and enjoy the joyous experience of baking and sharing delightful homemade goods. Happy baking!

  • IM Officially Addicted To These Sourdough Brownies

    IM Officially Addicted To These Sourdough Brownies

    I’M Officially Addicted To These Sourdough Brownies!: A Tropical Delight

    Introduction to I’M Officially Addicted To These Sourdough Brownies!

    If you’re on the lookout for a delicious addition to your collection of dessert recipes, look no further than these rich and fudgy sourdough brownies! This recipe is a delightful fusion of traditional brownie flavors and the unique tanginess of sourdough, making it a truly addictive treat. Not only is it simple and easy to prepare, but it also brings some unexpected health benefits to the table.

    Sourdough is known for its probiotic properties, which can help with digestive health. These brownies also have a vegan option, allowing everyone to enjoy them, regardless of dietary restrictions. Plus, they can be made gluten-free with just a few tweaks! Whether you’re a busy parent, a college student, or a seasoned baker, this recipe is perfect for you. Each bite offers a fudgy texture and deep chocolate flavor, all while preventing you from feeling guilty about indulging in a sweet treat. So, grab your baking ingredients and let’s dive into this exceptional recipe!

    Benefits and Advantages of I’M Officially Addicted To These Sourdough Brownies!

    Choosing to bake these sourdough brownies offers numerous benefits that will surely inspire you to try the recipe out! For starters, they’re incredibly easy to make, even for beginner bakers. You don’t need any special equipment; just a mixing bowl and a baking pan will suffice. This simplicity is appealing for the busy home cook who might feel overwhelmed in the kitchen.

    From a health standpoint, these brownies are an excellent way of incorporating the unique benefits of sourdough into your diet. The fermentation process used to create sourdough makes it more gut-friendly, as it helps to break down gluten and phytic acid, often making it easier to digest, even for those with mild gluten sensitivities (though this is not a gluten-free guarantee). Moreover, sourdough’s naturally occurring probiotics can support your gut health and provide better nutrient absorption.

    Beyond being a healthier option, this recipe can easily accommodate various dietary requirements. It offers seamless adaptations for vegan and gluten-free diets. For those calorie-conscious individuals, you can substitute high-calorie ingredients with healthier alternatives without compromising flavor. As such, these brownies stand out among other dessert recipes because they cater to a diverse audience, meeting the needs of anyone craving a sweet yet nourishing treat!

    Ingredients Overview

    Essential Ingredients for I’M Officially Addicted To These Sourdough Brownies!

    To create these delectable sourdough brownies, you will need the following essential ingredients. Here’s a list with precise measurements and their benefits:

    • 1 cup Sourdough Starter (active and bubbly) – Adds a unique flavor and moisture.
    • 1 cup All-Purpose Flour (or gluten-free flour for a GF version) – Provides the structure.
    • 1 cup Unsweetened Cocoa Powder – Adds rich chocolate flavor while keeping it low calorie.
    • 1 cup Brown Sugar – Offers natural sweetness and moisture.
    • 1/2 cup Coconut Oil – A healthy fat that enhances fudginess (can substitute with applesauce for a low-fat version).
    • 1/2 cup Maple Syrup – Natural sweetener that pairs beautifully with chocolate.
    • 1/4 tsp Salt – Enhances flavors.
    • 1 tsp Baking Soda – Helps brownies rise and creates the perfect texture.
    • 1 tsp Vanilla Extract – Adds depth of flavor.

    Vegan Option:

    Replace butter or coconut oil with an equal part of applesauce for a lower-fat option.

    Gluten-Free Option:

    Use a 1:1 gluten-free flour blend to accommodate gluten-sensitive eaters.

    Dietary Substitutions to Customize Your I’M Officially Addicted To These Sourdough Brownies!

    Adapting the ingredients in this sourdough brownie recipe allows it to fit various dietary needs and preferences. Here are some substitutions to consider:

    • Coconut Oil: For those who want a lighter option, replace it with unsweetened applesauce. This substitution can lower the calorie count while maintaining moistness and flavor.

    • Brown Sugar: If you wish to cut down on sugar, try using coconut sugar or honey. If using honey, be mindful of changing the liquid ratios slightly.

    • All-Purpose Flour: For a gluten-free recipe, use a 1:1 gluten-free flour mix which will provide similar texture without the gluten.

    • Egg Replacement: To make these brownies vegan, consider using flax eggs (1 tablespoon of flaxseed meal mixed with 2.5 tablespoons of water for every egg).

    With these substitutions, you can modify the recipe according to your dietary needs, making it versatile and suitable for many lifestyles!

    How to Prepare the Perfect I’M Officially Addicted To These Sourdough Brownies!: Step-by-Step Guide

    Ready to whip up your sourdough brownies? Follow this simple step-by-step guide for the best results:

    1. Preheat Your Oven: Start by preheating your oven to 350°F (175°C). This step is crucial for getting that perfect bake.

    2. Mix the Wet Ingredients: In a medium mixing bowl, combine 1 cup of sourdough starter, 1/2 cup melted coconut oil, 1/2 cup maple syrup, and 1 tsp vanilla extract. Whisk until smooth and fully blended.

    3. Combine Dry Ingredients: In another bowl, add 1 cup of all-purpose flour, 1 cup of unsweetened cocoa powder, 1 cup of brown sugar, 1/4 tsp salt, and 1 tsp baking soda. Stir the dry ingredients thoroughly to ensure they are well mixed.

    4. Combine Wet and Dry Mixtures: Slowly add the dry mix to the wet ingredients, folding gently until all the dry ingredients are fully incorporated. This step is crucial; over-mixing can lead to dense brownies.

    5. Prepare Your Baking Dish: Grease an 8×8-inch baking pan with a bit of coconut oil or line it with parchment paper for easy removal.

    6. Pour the Batter: Transfer the brownie batter into the prepared baking dish, smoothing the top with a spatula for an even bake.

    7. Bake: Place the pan in the preheated oven and bake for 25-30 minutes. Keep an eye on your brownies; they are done when a toothpick inserted into the center comes out mostly clean (a few crumbs are acceptable).

    8. Cool Completely: Once baked, remove the pan from the oven and let it cool in the pan for about 10 minutes. Afterward, transfer them to a wire rack to cool completely.

    9. Cut and Serve: Once cooled, slice the brownies into squares to serve. Enjoy your delectable creation with a scoop of ice cream or fresh fruit!

    This step-by-step guide ensures you create the perfect batch of sourdough brownies, enhancing your repertoire of popular dessert recipes while nurturing your culinary skills!

    Mastering I’M Officially Addicted To These Sourdough Brownies!: Advanced Tips and Variations

    To make your sourdough brownies even more exciting, consider these advanced tips and variations:

    • Nutty Additions: Fold in 1/2 cup of chopped walnuts or pecans into the batter for a delightful crunch. Nuts add a great texture and flavor contrast.

    • Chocolate Chips: Add 1/2 cup of semi-sweet or dark chocolate chips for extra gooeyness. This variation leads to a more decadent treat.

    • Flavor Variations: Experiment with different extracts like almond or orange zest for a unique flavor twist that suits your palette.

    • Frosting: Top your cooled brownies with a simple chocolate ganache or a vegan frosting made from avocado and cocoa powder to elevate the dessert further.

    These insights can help you master your brownies, turning them from a simple recipe into a signature item in your collection of dessert recipes.

    How to Store I’M Officially Addicted To These Sourdough Brownies!: Best Practices

    To keep your sourdough brownies fresh and delicious, follow these storage tips:

    • Refrigeration: Let the brownies cool completely before storing. Place them in an airtight container or wrap them tightly with plastic wrap. When stored this way, they can last for up to a week in the refrigerator.

    • Freezing: If you want to make them ahead of time or have leftovers, you can freeze the brownies for up to 3 months. Cut them into squares, wrap them individually in plastic wrap, and place them in a freezer-safe bag. When you’re ready to enjoy, simply thaw them in the fridge overnight.

    • Reheating: To reheat brownies, preheat your oven to 300°F (150°C). Place the brownies in the oven for about 10 minutes or until warmed through. This method helps maintain their fudgy texture.

    By adhering to these best practices, you can savor your creations for longer periods, ensuring they remain a staple in your stash of dessert recipes.

    Nutritional Value of I’M Officially Addicted To These Sourdough Brownies!

    Understanding the nutritional value of your baked goods is essential, especially when catering to health-conscious eaters. Here’s a breakdown of what to expect from a single brownie (approximately 1/12th of the pan):

    • Calories: 180
    • Total Fat: 8g
    • Saturated Fat: 7g
    • Trans Fat: 0g
    • Cholesterol: 0mg (vegan option)
    • Sodium: 150mg
    • Total Carbohydrates: 26g
    • Dietary Fiber: 2g
    • Sugars: 12g
    • Protein: 2g

    Incorporating sourdough not only enhances flavor but adds beneficial nutrients too. While traditional brownies may be empty calories, these pack in some probiotics and fiber without compromising taste. Customize based on your ingredients for further nutritional adjustments. This way, you can confidently share these delicious brownies with family and friends, knowing they are a healthier option among typical dessert recipes.

    FAQs: Frequently Asked Questions About I’M Officially Addicted To These Sourdough Brownies!

    Q1: Can I make this recipe without a sourdough starter?
    A: While the sourdough starter contributes to the unique texture and flavor, you can replace it with equivalent amounts of applesauce or yogurt if you don’t have it on hand. However, you may lose some of the signature tang.

    Q2: How can I ensure my brownies are fudgy?
    A: To achieve that desired fudgy texture, do not overbake. Check for doneness at the 25-minute mark, and remove them from the oven when a toothpick inserted shows a few moist crumbs.

    Q3: Can I store these brownies in the freezer?
    A: Absolutely! Sourdough brownies can be frozen for up to 3 months. Wrap them individually and store in an airtight container or resealable freezer bag.

    Q4: Does this recipe work with gluten-free flour?
    A: Yes! Using a 1:1 gluten-free flour blend will yield a tasty result. Just be mindful of the texture, which may be slightly different than with all-purpose flour.

    Q5: What if I want nut-free brownies?
    A: This recipe is inherently nut-free! Simply omit any nut add-ins and enjoy delicious brownies without concern.

    These FAQs should help you on your journey to crafting the perfect batch of sourdough brownies, answering common concerns that arise while navigating new dessert recipes. The combination of flavor, texture, and adaptability makes these brownies a must-try for anyone with a sweet tooth!

    Conclusion

    I’M Officially Addicted to These Sourdough Brownies! With their unique flavor and health benefits, this recipe stands out among dessert recipes because of its flexibility and ease of preparation. Whether you’re baking for yourself or for friends and family, these brownies are sure to delight every palate. Enjoy experimenting and discovering your variations, and join the ranks of those officially addicted to these incredible treats!

  • IM Obsessed With Super Fresh Broccoli Salad

    IM Obsessed With Super Fresh Broccoli Salad

    I’M Obsessed With Super Fresh Broccoli Salad!: A Tropical Delight

    Introduction to I’M Obsessed With Super Fresh Broccoli Salad!

    Are you on the lookout for healthy recipes that are simple to prepare, tasty, and packed with nutrients? If so, I’m thrilled to share my obsession with a delightful dish that checks all those boxes: Super Fresh Broccoli Salad! This recipe is not only quick to assemble but also incredibly versatile. It’s a treat for everyone at the table—whether you’re a busy parent, a student, a food enthusiast, or someone simply trying to eat healthier.

    This Super Fresh Broccoli Salad bursts with vibrant colors and flavors, making it as appealing to the eyes as it is to the palate. The crunchy broccoli pairs beautifully with nutty sunflower seeds, tangy cranberries, and a creamy dressing that ties everything together, creating a dish that is both wholesome and satisfying. Best of all, this salad is perfect for vegans and is gluten-free, ensuring that it suits a wide array of dietary needs.

    Imagine serving this salad at your next gathering or simply enjoying it as a quick lunch! With its refreshing taste and nourishing ingredients, it truly is a salad you can feel good about enjoying. Whether you’re meal prepping for the week or looking for an easy side dish for dinner, this recipe is here to inspire you to get creative in the kitchen. Let’s dive into the benefits of this amazing salad that will make you obsessed, just like I am!

    Benefits and Advantages of I’M Obsessed With Super Fresh Broccoli Salad!

    When it comes to healthy recipes, this Super Fresh Broccoli Salad stands out for a multitude of reasons. First and foremost, it’s incredibly easy to prepare, making it ideal for home cooks of all skill levels. The overall prep time is minimal—under 15 minutes—and the cooking time is nonexistent! This means that even the busiest individuals can whip up a nutritious meal in no time.

    One of the best aspects of broccoli is its dense nutrient profile. Broccoli is rich in vitamins C and K, fiber, and antioxidants. These nutrients not only support your immune system but also aid digestion and promote overall health. Pair this with sunflower seeds, which add healthy fats and protein, and you’ve got a meal that’s vibrant and nutritionally balanced.

    Another significant advantage is the adaptability of this salad. Whether you’re vegan, vegetarian, or simply looking for gluten-free options, this recipe can be customized to meet various dietary requirements. It can easily fit into meal plans for those following low-carb, paleo, or even Mediterranean diets. Plus, the colorful array of ingredients and flavors keeps meals exciting, ensuring that you never feel deprived of deliciousness while eating healthy.

    Let’s not forget about the social aspect of food—this salad is a great conversation starter at gatherings! Everyone will enjoy digging into this bowl of goodness, and its fresh, tropical flair sets it apart from traditional salads.

    Ingredients Overview

    Essential Ingredients for I’M Obsessed With Super Fresh Broccoli Salad!

    Here’s what you’ll need to create your very own Super Fresh Broccoli Salad. These ingredients are chosen not just for their taste but also for their health benefits:

    • Fresh Broccoli (4 cups, chopped): The hero of our salad. Broccoli is loaded with vitamins, minerals, and fiber.

    • Sunflower Seeds (1/2 cup): Rich in healthy fats and protein, sunflower seeds add a delightful crunch.

    • Dried Cranberries (1/2 cup): These provide a sweet-tart flavor that balances the savory broccoli and nutty seeds.

    • Red Onion (1/4 cup, finely chopped): Adds a zesty kick to the salad, also packed with antioxidants.

    • Greek Yogurt (1 cup): A creamy dressing alternative that adds probiotics for gut health. (For a vegan option, use dairy-free yogurt.)

    • Mayonnaise (1/4 cup): Adds richness and a smooth texture. (Consider using vegan mayo for a plant-based version.)

    • Apple Cider Vinegar (2 tablespoons): Offers tanginess while providing additional health benefits.

    • Honey (1 tablespoon): A natural sweetener that can be replaced with maple syrup for a vegan-friendly option.

    • Salt and Pepper to taste.

    This mixture of ingredients forms the basis for the Super Fresh Broccoli Salad, ensuring that every bite is filled with flavor, nutrition, and satisfaction.

    Dietary Substitutions to Customize Your I’M Obsessed With Super Fresh Broccoli Salad!

    Customizing your broccoli salad is straightforward. Here are some substitutions that can cater to various dietary preferences:

    1. For a Nut-Free Version: If you’re allergic to nuts, skip the sunflower seeds and opt for pumpkin seeds instead. They offer similar crunch and nutrition without the nut allergens.

    2. To Make it Dairy-Free: As mentioned, swap out the Greek yogurt and mayonnaise for vegan alternatives. Tofutti cream cheese or cashew cream can also add creaminess.

    3. For a Paleo-Friendly Dish: Replace the honey with coconut nectar and use a homemade mayo made from avocado oil.

    4. For an Extra Protein Boost: Adding chickpeas or edamame not only boosts the protein but also enhances the texture of your salad.

    5. Fresh Herbs: Incorporating fresh herbs like parsley or cilantro can elevate the salad’s flavor profile and increase its nutritional value.

    These substitutions not only keep the dish accommodating for various diets but also give you the freedom to experiment and tailor the recipe to your tastes.

    How to Prepare the Perfect I’M Obsessed With Super Fresh Broccoli Salad!: Step-by-Step Guide

    Ready to create your own Super Fresh Broccoli Salad? Follow this simple step-by-step guide to ensure perfection every time:

    1. Prepare the Base: Rinse and chop 4 cups of fresh broccoli into bite-sized florets. Make sure to include some of the stems to maximize your vegetable intake!

    2. Prepare Additional Ingredients: Finely chop 1/4 cup of red onion and set it aside. If you’re using dried cranberries, ensure they’re not clumped together.

    3. Make the Dressing: In a large mixing bowl, combine 1 cup of Greek yogurt, 1/4 cup of mayonnaise, 2 tablespoons of apple cider vinegar, and 1 tablespoon of honey (or maple syrup). Whisk until smooth, adding salt and pepper to taste.

    4. Mix Ingredients: Add the chopped broccoli, red onion, sunflower seeds, and dried cranberries into the bowl with the dressing. Use a spatula to gently fold everything together until the broccoli is well-coated.

    5. Check the Seasoning: Taste the salad and adjust seasoning if needed. You can add more salt, pepper, or vinegar based on your preference.

    6. Let it Chill: Cover the salad and let it sit in the fridge for at least 15-30 minutes. This allows flavors to meld together beautifully.

    7. Serve: Once chilled, give the salad a good stir and serve it chilled or at room temperature. Garnish with additional sunflower seeds if desired.

    8. Store Leftovers: If you have any leftovers, store them in an airtight container in the refrigerator for up to 3 days.

    This step-by-step process makes it easy to assemble the Super Fresh Broccoli Salad and customize it as needed for your dietary preferences.

    Mastering I’M Obsessed With Super Fresh Broccoli Salad!: Advanced Tips and Variations

    As with any recipe, there are ways to make this broccoli salad your own. Here are some advanced tips and variations to elevate your Super Fresh Broccoli Salad even further:

    • Add Protein: For a heartier meal, include grilled chicken or tofu. This change not only enhances the dish’s protein content but also makes it more filling.

    • Create a Crunchy Topping: Toast some panko breadcrumbs or almond slivers for an added crunch on top of your salad.

    • Flavor Infusions: Experiment with spices such as garlic powder or red pepper flakes in the dressing for an added punch of flavor.

    • Seasonal Variations: Incorporate seasonal vegetables like bell peppers in the summer or carrots in the winter. Mixing seasonal produce keeps the recipe fresh and diverse.

    • Dressing Variations: Play around with the dressing by adding herbs like dill, parsley, or even a dash of mustard for a unique twist.

    Mastering this versatile salad means you can adapt it according to your mood, season, or dietary preferences. The options are endless!

    How to Store I’M Obsessed With Super Fresh Broccoli Salad!: Best Practices

    To ensure your Super Fresh Broccoli Salad remains enjoyable after preparing, follow these best practices for storage:

    • Refrigeration: Store any leftover salad in an airtight container in the fridge. It will keep well for up to 3 days. Be mindful that the longer it sits, the more the broccoli may soften.

    • Freezing: Freezing this salad is not recommended due to the mayonnaise and yogurt which do not freeze well. The texture can become compromised once thawed.

    • Reheating: If you prefer to enjoy the salad warm (for the protein addition, for example), quickly heat it in the microwave for a few seconds. However, it’s most delicious served cold or at room temperature.

    By following these storage methods, you can prolong the freshness of your Super Fresh Broccoli Salad and ensure it remains a delightful meal option throughout the week.

    Nutritional Value of I’M Obsessed With Super Fresh Broccoli Salad!

    Not only is this Super Fresh Broccoli Salad delicious, but it’s also nutrition-packed. Here’s a breakdown of its nutritional content per serving when made according to the basic recipe provided (yielding roughly 6 servings):

    • Calories: 220
    • Total Fat: 12g
    • Saturated Fat: 2g
    • Cholesterol: 15mg
    • Sodium: 250mg
    • Total Carbohydrates: 24g
    • Dietary Fiber: 5g
    • Sugars: 5g
    • Protein: 6g

    This nutritional value means you’re treating yourself to a meal that’s not only filling but also supports overall health goals. You’ve got vibrant vitamins and beneficial nutrients proportional to their calories—making it an excellent choice among healthy recipes.

    FAQs: Frequently Asked Questions About I’M Obsessed With Super Fresh Broccoli Salad!

    1. Can I make this salad in advance?
    2. Yes! You can prepare the salad a day ahead of time. Just be sure to store it in an airtight container in the refrigerator. The flavors will continue to meld, enhancing the taste.

    3. What can I use instead of dried cranberries?

    4. You can substitute dried cranberries with raisins, chopped apples, or fresh orange segments for a zesty twist.

    5. Is this salad low-calorie?

    6. This salad is relatively low in calories, but exact values may vary based on your ingredient choices. Feel free to adjust components like dressing and nuts to control calorie intake.

    7. Can I use fresh broccoli instead of frozen?

    8. Absolutely! Fresh broccoli is recommended for optimal taste and texture, though you can use frozen if that’s what’s available. Just remember to thaw and drain excess moisture.

    9. Is this recipe vegan-friendly?

    10. It can be made vegan by using dairy-free yogurt and mayonnaise. This ensures everyone can enjoy it!

    By addressing common queries, you can alleviate potential concerns about dietary needs and substitutions. This ensures that anyone can successfully recreate your healthy recipes.

    Feeling inspired? With the knowledge packed into this article, you’re ready to make your very own Super Fresh Broccoli Salad and share the joy of healthy eating with those around you. Enjoy every bite of this tropical delight!

  • Lemon Broccoli Salad With Italian Dressing

    Lemon Broccoli Salad With Italian Dressing

    Lemon Broccoli Salad With Italian Dressing: A Tropical Delight

    Introduction to Lemon Broccoli Salad With Italian Dressing

    If you’re on the hunt for simple and vibrant healthy dinner recipes, look no further because this Lemon Broccoli Salad with Italian Dressing is a game-changer. Bursting with flavors and nutrients, this delightful salad is an excellent choice for busy parents, working professionals, students, and anyone who appreciates a well-balanced meal without the fuss.

    This recipe shines with its simple preparation, making it perfect for those of you who may feel time-crunched yet still want to provide nourishment to your family. Broccoli stands as the main ingredient here, offering not only crunch but also a wealth of vitamins K and C, fiber, and more. Coupled with a zesty lemon and aromatic Italian dressing, you’ll find yourself savoring a meal that is not just delicious but also vegan and gluten-free.

    Additionally, this salad adapts beautifully to various dietary needs, accommodating dietary restrictions while remaining affordable. It’s a delightful addition to your weeknight dinners, picnics, or barbecues, making it an ideal dish for gatherings and events. With ingredients that are easy to find in any grocery store, you can whip up this Lemon Broccoli Salad swiftly, keeping your evenings stress-free yet flavorful.

    Benefits and Advantages of Lemon Broccoli Salad With Italian Dressing

    When exploring healthy dinner recipes, it’s essential to focus on the benefits that a dish can bring to your health and lifestyle. This Lemon Broccoli Salad with Italian Dressing definitely ticks all the boxes.

    Ease of Preparation

    One of the standout attributes of this salad is its ease of preparation. With only a handful of ingredients, you will spend minimal time in the kitchen. Simply chop, mix, and serve! This stands as a perfect option for meal prep, as it can be made in advance and stored in the refrigerator.

    Nutritional Health Benefits

    Let’s dive deeper into why this salad is a nutritional powerhouse. Broccoli, a cruciferous vegetable, is renowned for its cancer-fighting properties and rich content of vitamins and minerals. It’s low in calories but high in nutrients, making it a staple in any health-conscious cookbook. When paired with the lemon juice, which enhances iron absorption, this salad not only supports overall health but also uplifts your mood with its vibrant flavors.

    Customization Options

    Another advantage is the recipe’s versatility. Whether you’re a strict vegan, someone following a gluten-free lifestyle, or just looking for a refreshing dish, this salad accommodates your needs. You can easily modify the ingredients to suit your palate or dietary requirements. Add-in variations include nuts for crunch or other veggies for added color and taste, making it as visually appealing as it is tasty.

    Incorporating this Lemon Broccoli Salad with Italian Dressing into your meals not only enriches your diet but also makes dinner enjoyable and hassle-free!

    Ingredients Overview

    Essential Ingredients for Lemon Broccoli Salad With Italian Dressing

    Here’s a detailed list of the essential ingredients you’ll need to whip up this Lemon Broccoli Salad, along with their measurements and benefits:

    • 2 cups broccoli florets (fresh or steamed): The star of the show, rich in vitamins K, C, and fiber.
    • 1 cup cherry tomatoes, halved: Adds a sweet burst of flavor along with antioxidants.
    • ½ red onion, thinly sliced: Offers a crunch and zing, with added nutrients.
    • ¼ cup red bell pepper, diced: Provides a pop of color and vitamins A and C.
    • ¼ cup olives (black or green, pitted): A healthy fat source, adding flavor and texture.
    • 3 tablespoons olive oil: A heart-healthy fat that enhances the dressing.
    • 2 tablespoons lemon juice (freshly squeezed): Brightens the flavors and enhances nutrient absorption.
    • 1 teaspoon dried Italian herbs: A blend of herbs that deepens the dressing’s flavor, making it aromatic.
    • Salt and pepper to taste: Essential for balancing flavors.

    Diet-Friendly Options:
    – You can opt for gluten-free olives and ensure that your seasoning is free from gluten.
    – For a low-calorie option, consider using less olive oil or substituting it with a lighter dressing.

    Dietary Substitutions to Customize Your Lemon Broccoli Salad With Italian Dressing

    This recipe is adaptable, allowing you to customize based on dietary needs or ingredient availability. Below are some suggested substitutions:

    • Protein Additions: Add chickpeas or quinoa for an extra protein boost; these additions turn this salad into a more substantial meal.
    • Nut Allergies: If you experience nut allergies, consider sunflower seeds or pumpkin seeds for that crunch without the allergens.
    • Dairy-Free Options: If you want a creamier twist, incorporate some avocado or a dairy-free yogurt.
    • Sweet Variations: A touch of honey or agave for sweetness can balance the lemons’ tang, especially if serving kids or those with a sweet tooth.

    These substitutions help you craft a personalized version of Lemon Broccoli Salad that suits diverse dietary needs, all while retaining the delicious flavors and freshness.

    How to Prepare the Perfect Lemon Broccoli Salad With Italian Dressing: Step-by-Step Guide

    Creating the perfect Lemon Broccoli Salad with Italian Dressing is an exciting journey. Follow these clear steps to enjoy a refreshing and nutrient-dense side or main dish!

    Step 1: Prepare the Base

    1. Wash the Broccoli: Rinse the broccoli florets under cold water to remove any dirt.
    2. Cut the Broccoli: Remove the tough stems and chop the broccoli into bite-sized florets.
    3. Blanch (optional): For a brighter green hue, blanch by boiling broccoli in salt water for 1-2 minutes, followed by an ice-water bath to stop cooking.

    Step 2: Chop Additional Vegetables

    1. Slice the Cherry Tomatoes: Halve each cherry tomato, enhancing sweetness and adding color.
    2. Diced Peppers: Chop the red bell peppers into small, even pieces, contributing crunch and flavor.
    3. Slice the Red Onion: Thinly slice the onion; adjust the quantity to taste, depending on your preference for onions.

    Step 3: Assemble the Salad

    1. Mix Vegetables: In a large mixing bowl, combine the broccoli, halved cherry tomatoes, diced red bell peppers, sliced olives, and red onion.
    2. Toss Together: Gently toss the vegetables to ensure an even distribution.

    Step 4: Prepare the Dressing

    1. Make the Dressing: In a small bowl, whisk together the olive oil, fresh lemon juice, dried Italian herbs, and season with salt and pepper.
    2. Taste and Adjust: Taste the dressing; adjust the lemon or seasoning to your preference.

    Step 5: Combine Dressing with Salad

    1. Dress the Salad: Pour the prepared dressing over the salad mixture.
    2. Toss Again: Gently toss the salad again, ensuring all ingredients are coated with the dressing.

    Step 6: Serve or Store

    1. Serve Immediately: Transfer the salad to a serving bowl. Enjoy it fresh at room temperature or chilled.
    2. Store for Later: If not serving right away, store the salad in an airtight container in the refrigerator. It can last up to 2-3 days.

    This delightful Lemon Broccoli Salad can effortlessly adapt to fit various dietary needs while being an ideal choice for healthy dinner recipes.

    Mastering Lemon Broccoli Salad With Italian Dressing: Advanced Tips and Variations

    To take your Lemon Broccoli Salad to the next level, consider these advanced tips and variations:

    • Toast Nuts and Seeds: Toasting walnuts or sunflower seeds before adding them provides a depth of flavor and enhances crunch.
    • Add Fresh Herbs: Fresh basil or parsley can brighten the dish, bringing a fresh aroma that complements the lemon dressing.
    • Protein Boost: Grilled chicken, shrimp, or tofu can transform this salad into a complete meal suitable for lunch or dinner.
    • Seasonal Adaptations: Take advantage of seasonal vegetables. Add asparagus in spring or roasted pumpkin in autumn for a seasonal twist.
    • Experiment with Dressings: While the Italian dressing is delicious, feel free to explore variations by adding balsamic vinegar or mustard-based dressings for different flavor profiles.

    These advanced tips allow you to continually reinvigorate this recipe, ensuring that it remains a staple in your collection of healthy dinner recipes.

    How to Store Lemon Broccoli Salad With Italian Dressing: Best Practices

    Proper storage of your Lemon Broccoli Salad can help maintain its freshness and flavor.

    • Refrigeration: Store the salad in an airtight container in the refrigerator. It will be at its best for up to 2-3 days.
    • Separation Tip: If you want to prolong its freshness, pack the dressing separately; add it just before serving for the freshest taste.
    • Freezing: For longer storage, consider freezing components like blanched broccoli or individual ingredients. However, avoid freezing the salad as a whole, since dressing and veggies don’t fare well frozen.

    These simple storage practices ensure you can enjoy this vibrant Lemon Broccoli Salad with Italian Dressing for days to come, serving as a quick go-to option among your favorite healthy dinner recipes.

    Nutritional Value of Lemon Broccoli Salad With Italian Dressing

    When selecting healthy dinner recipes, understanding the nutritional value is essential. Here’s a breakdown of the nutritional content per serving of Lemon Broccoli Salad with Italian Dressing (makes approximately 4 servings):

    • Calories: 150
    • Total Fat: 12g
    • Saturated Fat: 1.5g
    • Cholesterol: 0mg
    • Sodium: 200mg
    • Total Carbohydrates: 10g
    • Dietary Fiber: 4g
    • Sugars: 2g
    • Protein: 3g

    This breakdown illustrates how beneficial this salad can be, providing a tantalizing mix of healthy fats, fiber, and protein, all while being low in calories. Not only does this salad help with weight management, but it also offers a nourishing option, adding to your arsenal of healthy dinner recipes.

    FAQs: Frequently Asked Questions About Lemon Broccoli Salad With Italian Dressing

    1. Can I make Lemon Broccoli Salad in advance?

    Yes! This salad can be prepared ahead of time. However, I recommend adding dressing just before serving to maintain the crispness of the veggies.

    2. Can I substitute broccoli with other vegetables?

    Absolutely! You can swap broccoli with cauliflower, asparagus, or even kale, depending on your preference. Each vegetable offers unique flavors and textures.

    3. What can I use if I don’t have Italian herbs?

    No worries! If you lack Italian herbs, a mix of oregano, basil, and thyme will work just as well. Fresh alternatives also work nicely for added flavor.

    4. Is this recipe suitable for meal prepping?

    Yes, indeed! This salad is perfect for meal prepping due to its stability in the fridge. Just remember to keep the dressing separate until you’re ready to eat.

    5. How can I make this salad more filling?

    To turn this salad into a more filling meal, consider adding a protein source like grilled chicken, beans, or quinoa.

    By addressing these common queries, we hope readers feel more confident about trying this refreshing Lemon Broccoli Salad with Italian Dressing and incorporating it into their variety of healthy dinner recipes.

    In conclusion, this Lemon Broccoli Salad with Italian Dressing checks all the boxes for a healthy, delicious, and easy-to-make meal. Its incredible versatility accommodates various dietary needs, making it suitable for everyone—from health enthusiasts to busy families. Whether served as a side or a main, this salad promises to bring joy, nourishment, and vibrant flavor to your table!

  • Quick Greek Yogurt Key Lime Pie

    Quick Greek Yogurt Key Lime Pie

    Quick Greek Yogurt Key Lime Pie: A Tropical Delight

    Introduction to Quick Greek Yogurt Key Lime Pie

    Are you on the hunt for refreshing dessert recipes that are quick, easy, and healthy? Look no further than this tantalizing Quick Greek Yogurt Key Lime Pie! This delightful dessert not only captures the vibrant flavors of key lime, but it also boasts a wholesome twist that makes it perfect for various dietary preferences. Featuring Greek yogurt as the star ingredient, this pie is creamy, satisfying, and lower in calories compared to traditional key lime pie recipes.

    Greek yogurt is the secret behind the pie’s rich texture and tangy flavor profile, all while providing a healthy dose of protein and probiotics. Fortunately, this recipe is incredibly simple to prepare, making it an ideal choice for busy parents, students, or anyone looking to whip up a fantastic treat in minimal time. Plus, it can easily accommodate vegan and gluten-free diets, so you can offer this deliciously indulgent dessert at gatherings without worry. Embrace the tropical flavors of key lime as you create this impressive dessert that will have your friends and family asking for seconds!

    Benefits and Advantages of Quick Greek Yogurt Key Lime Pie

    This Quick Greek Yogurt Key Lime Pie stands out among dessert recipes for several reasons. First and foremost, it is a breeze to prepare. With fewer than ten ingredients and no need for baking, even novice cooks can master it. This simplicity makes it perfect for spontaneous dessert cravings or last-minute gatherings.

    Another advantage is its health benefits. Traditional key lime pies are often laden with heavy creams and sugars, but this recipe swaps those ingredients for Greek yogurt. As a result, you’re not only cutting down on calories—you’re also adding nutritional benefits. Greek yogurt provides a good source of protein, calcium, and probiotics, promoting gut health. This pie offers a guilt-free indulgence without sacrificing flavor.

    Furthermore, versatility is one of the standout features of this recipe. Whether you need a gluten-free option, a vegan alternative, or a low-calorie dessert, you can easily adjust the ingredients to meet specific dietary needs. Busy families, health-conscious individuals, and those with dietary restrictions can all enjoy this delightful pie, making it a must-try addition to your recipe collection.

    Ingredients Overview

    Essential Ingredients for Quick Greek Yogurt Key Lime Pie

    To assemble this delicious pie, you will need the following ingredients, each playing a crucial role in creating the perfect balance of flavors and textures:

    • 1 ½ cups Greek yogurt (plain, non-fat or full-fat): This is the primary ingredient that lends creaminess and tanginess.
    • ½ cup key lime juice (freshly squeezed or bottled): Provides the signature tart flavor that complements the sweetness of the pie.
    • ½ cup sweetened condensed milk (or coconut cream for a vegan alternative): Adds creaminess and sweetness to the filling.
    • ½ cup graham cracker crumbs (or gluten-free crust for a gluten-free version): Forms the base of the pie and adds necessary texture.
    • 4 tbsp unsalted butter (or coconut oil for a vegan substitute): Binds the graham crackers to create a sturdy crust.
    • 1 tsp lime zest: Enhances the lime flavor and aroma.
    • 2 tbsp honey or maple syrup (optional): For adjusting sweetness, this can be modified based on personal preference.

    Dietary Substitutions to Customize Your Quick Greek Yogurt Key Lime Pie

    For those looking to tailor the recipe to meet specific dietary requirements, here are some fantastic substitutions:

    • Vegan: Swap the Greek yogurt for coconut yogurt, and replace the sweetened condensed milk with coconut cream.
    • Gluten-Free: Use almond flour or gluten-free graham cracker crumbs to create the crust.
    • Low-Calorie: Opt for a sugar-free sweetened condensed milk to cut further on sugar, and choose non-fat Greek yogurt for lower calories.
    • Dairy-Free: Again, coconut yogurt serves as a great base, along with coconut cream instead of condensed milk.

    These substitutions ensure that everyone can enjoy this delightful key lime pie, no matter their dietary preferences.

    How to Prepare the Perfect Quick Greek Yogurt Key Lime Pie: Step-by-Step Guide

    Creating your Quick Greek Yogurt Key Lime Pie is a straightforward process. Follow these simple steps for a delightful dessert that will impress family and friends!

    1. Prepare the Crust:
    2. In a mixing bowl, combine the graham cracker crumbs and melted butter (or coconut oil) until the mixture resembles wet sand. Press this mixture firmly into the bottom of a pie dish to form an even crust layer.

    3. Bake the Crust (Optional):

    4. If you prefer a crispier crust, you can bake the crust in a preheated oven at 350°F (175°C) for about 10 minutes. Allow it to cool completely afterward.

    5. Mix the Filling:

    6. In a large bowl, combine the Greek yogurt, key lime juice, sweetened condensed milk (or coconut cream), lime zest, and honey (if using). Mix with a whisk until smooth and well combined.

    7. Taste and Adjust:

    8. Sample your filling! If it needs more sweetness, add a bit more maple syrup or honey to taste. This is important since key limes can vary in tartness.

    9. Pour the Filling into the Crust:

    10. Carefully pour the mixture into the cooled crust, smoothing the top with a spatula.

    11. Chill:

    12. Cover the pie with plastic wrap and refrigerate for at least 2-4 hours, or until set. For best results, let it chill overnight.

    13. Garnish (Optional):

    14. Before serving, consider garnishing with whipped topping or a sprinkle of additional lime zest. Fresh mint leaves can also add an appealing touch!

    15. Serve and Enjoy:

    16. Slice into wedges and serve your Quick Greek Yogurt Key Lime Pie chilled. Your friends and family will delight in the tropical flavors!

    By following these simple steps, you can create a stunning dessert that showcases the refreshing taste of key limes, making it a standout among dessert recipes.

    Mastering Quick Greek Yogurt Key Lime Pie: Advanced Tips and Variations

    To take your Quick Greek Yogurt Key Lime Pie to the next level, consider these tips and variations:

    • Add a Twist:
    • Experiment with flavors by incorporating crushed berries like raspberries or strawberries into the filling for a fruity twist on the classic pie.

    • Experiment with Crusts:

    • Try using crushed nuts or oats instead of graham crackers for a unique spin. A cookie crust made from one of your favorite cookies can also add a different flavor profile.

    • Garnishing techniques:

    • Whip some coconut cream and pipe it elegantly on top of the pie for a beautiful presentation. Sprinkle some lime zest or shaved chocolate to elevate the aesthetic appeal.

    • Make it a Mini Pie:

    • For individual servings, consider using muffin tins or mini pie pans instead of a standard pie dish. This is perfect for parties and makes serving easier!

    • Substitute Alternative Sweeteners:

    • If you want to explore sugar alternatives, try using stevia or monk fruit sweetener, especially for a low-carb version.

    By creatively adapting your recipe through these variations, you can ensure that your Quick Greek Yogurt Key Lime Pie remains fresh and exciting each time you prepare it.

    How to Store Quick Greek Yogurt Key Lime Pie: Best Practices

    Proper storage is critical to maintain the fresh flavor and texture of your Quick Greek Yogurt Key Lime Pie. Here are some best practices for keeping your pie as delightful as when it was first made:

    • Refrigerate:
    • Cover the pie tightly with plastic wrap or aluminum foil to prevent it from absorbing other flavors in the refrigerator. Consume within 4-5 days for the best taste and texture.

    • Freezing:

    • If you want to store the pie for an extended period, slice it into portions and store them in airtight containers or ziplock bags. The pie can last up to two months in the freezer. To serve, simply let the slices thaw in the fridge overnight.

    • Reheating:

    • Unlike traditional baked pies, this dessert is best enjoyed cold. If you’ve frozen it, there’s no need to reheat—just let it thaw in the refrigerator for a few hours before serving.

    By following these storage tips, you can ensure your Quick Greek Yogurt Key Lime Pie remains delicious whether enjoyed immediately or saved for later.

    Nutritional Value of Quick Greek Yogurt Key Lime Pie

    Knowing the nutritional value of your dessert is essential, especially for those who are mindful of their dietary intake. Below is an approximate nutritional breakdown for one slice (1/8 of a pie) of Quick Greek Yogurt Key Lime Pie made with low-fat ingredients:

    • Calories: 150
    • Protein: 5g
    • Fat: 6g
    • Carbohydrates: 20g
    • Fiber: 1g
    • Sugar: 10g

    By using lighter ingredients, such as non-fat Greek yogurt and reduced-sugar sweetened condensed milk, you can adjust these numbers even further, making this pie an excellent option for those watching their caloric intake without compromising on taste.

    Additionally, the probiotics from Greek yogurt can contribute to digestive health. This makes your dessert not just delicious but also beneficial to your well-being.

    FAQs: Frequently Asked Questions About Quick Greek Yogurt Key Lime Pie

    1. Can I substitute key lime juice with regular lime juice?

    Yes, regular lime juice can be used as a substitute, although it may not provide the same unique tartness.

    2. Can I make this pie without a crust?

    Absolutely! You can skip the crust entirely for a lower-carb version, serving the filling in small ramekins for individual portions.

    3. How can I make this dessert vegan?

    Substituting Greek yogurt with coconut yogurt, using coconut cream instead of sweetened condensed milk, and opting for a vegan crust will make this pie entirely plant-based.

    4. Is it possible to make this dessert in advance?

    Yes! This pie can be made a day or two in advance and will maintain its delicious flavor and texture. Just ensure it is kept covered in the refrigerator.

    5. What variation can I try to change the flavor?

    You can add your favorite berries, like blueberries or raspberries, into the filling or use flavored yogurt to mix things up!

    6. How long can I keep leftovers in the fridge?

    You can keep the pie covered in the refrigerator for about 4-5 days. Just be mindful of it absorbing odors from other food items.

    This Quick Greek Yogurt Key Lime Pie is not only a fantastic way to satisfy your sweet tooth, but it also serves various dietary needs without compromising flavor. By combining health with simplicity and affordability, this pie illustrates how enjoyable healthy eating can be. So gather your ingredients, and get ready to serve a dessert that will have everyone asking for seconds!

  • Tasty Blended Chia Seed Pudding

    Tasty Blended Chia Seed Pudding

    Tasty Blended Chia Seed Pudding: A Tropical Delight

    Introduction to Tasty Blended Chia Seed Pudding

    Welcome to the delightful world of Tasty Blended Chia Seed Pudding, a luxurious yet simple treat perfect for anyone seeking delicious and nutritious healthy snacks. This tropical-inspired pudding not only satisfies your sweet cravings but also supports your health goals. Rich in omega-3 fatty acids, fiber, and protein, chia seeds are a powerhouse ingredient that contributes to heart health and digestion. Moreover, this recipe is beautifully versatile—it caters to various dietary preferences, making it an ideal choice for vegans, gluten-free eaters, and anyone watching their calorie intake.

    In today’s fast-paced lifestyle, finding the perfect balance between indulgence and nutrition is crucial. Tasty Blended Chia Seed Pudding can be a part of your everyday routine, whether you’re a busy parent trying to whip up a healthy dessert for your kids or a student looking for a quick meal between classes. The pudding boasts a creamy texture and can be made in advance, saving you time during the week while ensuring you always have a nutritious option on hand.

    Let’s dive deeper into what makes this pudding an exceptional choice for your healthy lifestyle.

    Benefits and Advantages of Tasty Blended Chia Seed Pudding

    The Tasty Blended Chia Seed Pudding is not just another dessert; it is a recipe brimming with benefits. First and foremost, its preparation is remarkably simple. With just a handful of ingredients, you can create a sophisticated treat without requiring extensive culinary skills or equipment. Chia seeds, when combined with your choice of milk (or non-dairy alternatives), slowly expand, forming a delightful pudding-like consistency that kids and adults alike will enjoy.

    From a nutritional standpoint, chia seeds rank as one of the healthiest foods on the planet. They are an excellent source of fiber, which aids in digestion and contributes to a feeling of fullness. This makes chia pudding a fantastic option for healthy snacks that can help curb unhealthy cravings. Additionally, the omega-3 fatty acids found in chia seeds promote heart health, while their high protein content supports muscle repair and growth, making this pudding a great snack for active individuals.

    The versatility of this recipe cannot be overstated. It can be easily tailored to suit any palate or dietary preference. Whether you are looking to satisfy a sweet tooth or meet specific dietary requirements, Tasty Blended Chia Seed Pudding allows for countless variations—adding fruits, natural sweeteners, or spices can create customized flavors to suit everyone in your family.

    In terms of convenience, this pudding can be made ahead of time, stored in the refrigerator for several days, and enjoyed as needed. It remains fresh and delicious, providing a quick healthy snack that is ready when you are.

    Ingredients Overview

    Essential Ingredients for Tasty Blended Chia Seed Pudding

    To create the delightful Tasty Blended Chia Seed Pudding, gather the following ingredients:

    • 1/4 cup chia seeds: Rich in omega-3 fatty acids, fiber, and antioxidants, chia seeds are the star ingredient that provides texture and nutrition.
    • 1 cup milk (or non-dairy alternative): Cow’s milk, almond milk, coconut milk, or oat milk can be used to create a creamy base. Opt for unsweetened varieties to manage sugar intake.
    • 2 tablespoons maple syrup or honey (optional): Natural sweeteners that provide flavor without artificial additives. Substitute with stevia or agave syrup for a lower-calorie option.
    • 1 teaspoon vanilla extract: For added flavor, this elevates the taste profile of your pudding.
    • Fresh or frozen fruit (e.g., mango, berries, banana): Adding fruit not only enhances flavor but also boosts nutritional value, making it one of the most delicious healthy snacks.
    • A pinch of salt: Balances sweetness and enhances overall flavor.

    This recipe is naturally vegan and gluten-free, making it suitable for a variety of dietary needs. You can even adjust the sweetness based on your preference, making it a must-try for dessert lovers and health enthusiasts alike.

    Dietary Substitutions to Customize Your Tasty Blended Chia Seed Pudding

    Customizing your Tasty Blended Chia Seed Pudding is simple, enabling you to cater to different dietary needs. Here are some substitutions you can consider:

    • Milk Alternatives: If you’re lactose-intolerant or vegan, use almond milk, soy milk, or oat milk. Each option contributes a unique flavor and texture.
    • Sweeteners: For a lower glycemic index, consider using monk fruit sweetener or erythritol. Both are great alternatives to honey and maple syrup.
    • Add-ins for Flavor Variations: Consider adding peanut butter or almond butter for a nutty flavor, or mix in spices like cinnamon or cardamom for added warmth.
    • Fruit Varieties: Use seasonal fruits to keep your pudding fresh and vibrant; berries, peaches, and kiwi work wonderfully.

    With these substitutions, you can create your ideal chia pudding, ensuring everyone can enjoy this delicious and nutritious treat.

    How to Prepare the Perfect Tasty Blended Chia Seed Pudding: Step-by-Step Guide

    Creating your Tasty Blended Chia Seed Pudding is both easy and enjoyable. Follow these steps to make a deliciously creamy dessert or snack:

    1. Prepare the Base: Start by choosing your base liquid. Pour 1 cup of your chosen milk (dairy or non-dairy) into a mixing bowl.

    2. Add Chia Seeds: Measure 1/4 cup of chia seeds and add them to the milk. Stir gently to ensure the seeds are evenly distributed.

    3. Sweeten Your Mix: If you’re using sweeteners, add 2 tablespoons of maple syrup or honey at this stage. For a sugar-free approach, consider a few drops of liquid stevia instead.

    4. Flavor It Up: Add 1 teaspoon of vanilla extract into the mixture to enhance the flavor. If you’re using spices, now is the time to incorporate them.

    5. Blend (Optional): For a smoother texture, pour the mixture into a blender and blend on low until combined. This step is optional but yields a creamier pudding.

    6. Chill Out: Transfer the mixture into a container with a lid and refrigerate for at least 2 hours or overnight. The longer the mix sits, the thicker the pudding becomes.

    7. Check Consistency: After chilling, take the pudding out and stir well. If it’s too thick, stir in a bit more milk to loosen it.

    8. Add Toppings: Cut your chosen fruits and add them on top of your pudding. You could also sprinkle nuts or granola for added crunch.

    9. Serve and Enjoy: Dish out your delicious pudding into bowls or jars for a ready-to-eat snack throughout the week.

    10. Store Leftovers: If you’ve made a large batch, remember to store it in the fridge. It can stay fresh for 5-7 days!

    By following these simple yet effective steps, you’ll create a creamy and nutritious Tasty Blended Chia Seed Pudding that can be enjoyed any time as a healthy snack.

    Mastering Tasty Blended Chia Seed Pudding: Advanced Tips and Variations

    Once you’ve mastered the basic recipe, explore some exciting tips and variations to elevate your Tasty Blended Chia Seed Pudding experience:

    • Different Flavor Profiles: Experiment with flavors! Try matcha powder for a green tea version, or cocoa powder for a chocolate twist. Both options provide unique health benefits.
    • Layering: Create a parfait by layering your chia pudding with yogurt or additional fruit for a beautiful presentation and varied textures.
    • Nut Butters: Blend in a tablespoon of almond or peanut butter for a delightful nutty flavor while adding protein, making this pudding even more satisfying.
    • Tropical Twist: Add diced pineapple or coconut flakes for a refreshing tropical kick that enhances the overall flavor profile.
    • Meal Prep: Make individual servings in mason jars for grab-and-go breakfasts or snacks. They are not only convenient but also visually appealing.

    These additional tips and variations make the Tasty Blended Chia Seed Pudding not only a delicious treat but also a versatile option that can fit any occasion or palate.

    How to Store Tasty Blended Chia Seed Pudding: Best Practices

    Storing your Tasty Blended Chia Seed Pudding properly is essential to maintain its freshness and quality. Here are the best practices:

    • Refrigeration: Always store your pudding in an airtight container in the refrigerator. This will keep it fresh for up to 5-7 days. Remember to give it a good stir before serving to regain its creamy texture.
    • Freezing: While it’s not recommended for long-term storage due to the textural changes, if you’d like to freeze it, place the pudding in a freezer-safe container. It can last for up to a month. To enjoy, simply thaw it in the refrigerator overnight and stir well before eating.
    • Reheating: If you’re taking the pudding out of the fridge and it seems too thick, you can add some milk to loosen it and stir. Avoid microwaving directly as it can change the texture; it’s best to stir in additional liquid instead.

    By following these storage guidelines, you can have delicious and healthy snacks ready at your convenience, ensuring that your Tasty Blended Chia Seed Pudding remains a convenient delight.

    Nutritional Value of Tasty Blended Chia Seed Pudding

    Creating your healthy snacks doesn’t just focus on taste; nutrition is equally essential. Here’s the approximate nutritional breakdown for one serving (based on the base recipe provided) of Tasty Blended Chia Seed Pudding:

    • Calories: 160
    • Total Fat: 7 g (Saturated Fat 1 g)
    • Cholesterol: 0 mg
    • Sodium: 60 mg
    • Carbohydrates: 19 g
    • Fiber: 10 g
    • Sugars: 4 g
    • Protein: 5 g

    This pudding is low in calories, high in fiber, and packed with essential nutrients, making it a fantastic choice for anyone looking to maintain a healthy diet. Whether you’re a fitness enthusiast or focusing on a balanced lifestyle, this pudding serves as a nourishing option.

    FAQs: Frequently Asked Questions About Tasty Blended Chia Seed Pudding

    Here are some common questions readers might have about Tasty Blended Chia Seed Pudding.

    Can I make Tasty Blended Chia Seed Pudding in advance?

    Absolutely! This pudding is perfect for meal prep. It can be made in large batches and stored in the refrigerator for up to a week.

    What can I substitute for chia seeds?

    If you don’t have chia seeds on hand, you could use ground flaxseeds as a substitute, though it will alter the texture and flavor of the pudding.

    Is Tasty Blended Chia Seed Pudding suitable for a gluten-free diet?

    Yes, this recipe is naturally gluten-free! Simply ensure that all your ingredients, particularly any sweeteners or add-ins, are certified gluten-free.

    How can I add protein to this recipe?

    To increase the protein content, consider adding a scoop of protein powder or incorporating Greek yogurt into the pudding after it’s set.

    How do I know when the pudding has set properly?

    Once refrigerated for at least 2 hours, the chia pudding will have thickened and become gel-like. Give it a stir; if it holds its shape but isn’t too solid, it’s ready to enjoy.

    With these easy answers, you can navigate the process of making Tasty Blended Chia Seed Pudding with improved confidence and creativity.


    In summary, the Tasty Blended Chia Seed Pudding serves as a delectable, versatile, and nutritious option for any meal or snack. With its numerous health benefits, easy preparation, and ability to cater to various dietary needs, it stands out as a top choice for healthy snacks for every occasion. Whether you’re indulging alone or preparing a sweet treat for friends and family, this pudding is bound to impress. Happy cooking!

  • Homemade Big Batch Chia Seed Pudding

    Homemade Big Batch Chia Seed Pudding

    Homemade Big Batch Chia Seed Pudding: A Tropical Delight

    Introduction to Homemade Big Batch Chia Seed Pudding

    Are you searching for healthy snacks that are not only delicious but also incredibly easy to prepare? Look no further than this Homemade Big Batch Chia Seed Pudding! This recipe is perfect for busy individuals, families, and anyone looking to incorporate nutritious options into their diet. Chia seeds are tiny superfoods packed with Omega-3 fatty acids, fiber, protein, and essential minerals. These tiny seeds absorb liquid, transforming into a delightful pudding that can be enjoyed at any time of the day.

    With a base of chia seeds, milk of your choice (dairy or plant-based), and endless possibilities for flavor, you can whip up this big batch pudding in no time. Furthermore, it’s a vegan and gluten-free recipe, making it suitable for a diverse range of dietary needs. Whether you are a health-conscious individual, a busy parent looking for quick and nutritious snacks for the kids, or a student needing a filling meal between classes, this chia pudding is your go-to solution. Get ready to embark on a culinary adventure that promises to nourish the body and delight the taste buds!

    Benefits and Advantages of Homemade Big Batch Chia Seed Pudding

    Homemade Big Batch Chia Seed Pudding is more than just a convenient recipe—it’s a powerhouse of nutrition and versatility. Here are several reasons why this recipe is a fantastic cooking choice for anyone looking to create healthy snacks:

    1. Ease of Preparation: One of the standout features of this recipe is its simplicity. With minimal ingredients and only a few easy steps, you can prepare a week’s worth of pudding in under 10 minutes. Just mix, refrigerate, and enjoy!

    2. Health Benefits: Chia seeds are often celebrated for their impressive health credentials. They are a rich source of Omega-3 fatty acids, which promote heart health, as well as fiber that aids digestion. Moreover, these small seeds are packed with antioxidants, calcium, magnesium, and protein, making them a superfood staple for health-conscious eaters.

    3. Dietary Versatility: This recipe caters to various dietary preferences and restrictions. It’s naturally gluten-free and vegan, ensuring that anyone can enjoy it. You can make swaps to accommodate allergies, such as using nut milk or coconut milk as alternatives to dairy.

    4. Meal Prep-Friendly: Preparing a big batch saves you time and effort during hectic weekdays. You won’t have to worry about last-minute snacks or meals, as this pudding can serve as breakfast, dessert, or a midday snack. Simply portion it into containers for convenience.

    5. Flavor Customization: The base chia pudding is a blank canvas that allows you to experiment with flavors. From tropical fruits like mango and pineapple to creamy nut butters, chocolate, or vanilla—there’s no shortage of ways to indulge your taste buds. You can easily adjust sweetness levels with natural sweeteners like honey, maple syrup, or agave.

    Incorporating this pudding into your weekly meal prep will transform your healthy snacking habits and help you feel energized throughout the day!

    Ingredients Overview

    Essential Ingredients for Homemade Big Batch Chia Seed Pudding

    To make your Homemade Big Batch Chia Seed Pudding, you’ll need the following ingredients:

    • Chia Seeds (1 cup): These tiny seeds are full of fiber and protein. They absorb liquid, creating the pudding’s delightful texture.
    • Milk (4 cups): You can use any type of milk, such as almond, soy, coconut, oat, or dairy milk. Choose the one that fits your dietary needs.
    • Sweetener (to taste): Options for sweeteners include maple syrup, honey, or agave syrup. Start with 3 tablespoons and adjust according to your preference.
    • Vanilla Extract (2 teaspoons): Adds a delicious flavor profile to the pudding.
    • Cocoa Powder, Fruit Puree, or Spices (optional): Depending on your flavor choices, feel free to add cocoa powder for a chocolate version or spices like cinnamon or nutmeg for a warming touch.

    This comforting and nutritious concoction hits all the right notes, making it one of the most delightful healthy snacks!

    Dietary Substitutions to Customize Your Homemade Big Batch Chia Seed Pudding

    Customizing your chia pudding can easily accommodate dietary needs:

    1. For a Low-Calorie Option: Use unsweetened almond milk or any low-calorie alternative, and reduce or skip sweeteners altogether for a lighter treat.

    2. Nut-Free Version: Opt for oat milk or coconut milk if you’re avoiding nuts, ensuring you’re still getting a creamy texture without allergens.

    3. Sugar-Free Option: Substitute regular sweeteners with stevia or erythritol for a sugar-free alternative that still satisfies your sweet cravings.

    4. Protein Boost: For added protein, mix in protein powder of your choice or some Greek yogurt into the mixture post-setting.

    Experimenting with these substitutions makes this pudding not only flexible but also suitable for a diverse audience!

    How to Prepare the Perfect Homemade Big Batch Chia Seed Pudding: Step-by-Step Guide

    Ready to jump into preparation? Let’s dive into the easy-to-follow steps for crafting your Homemade Big Batch Chia Seed Pudding.

    1. Gather Ingredients: Start by gathering all your ingredients. You’ll need chia seeds, the milk of your choice, sweetener, and vanilla extract.

    2. Mix Ingredients: In a large mixing bowl, combine 1 cup of chia seeds with 4 cups of milk. Stir gently to combine the ingredients well. Be sure there are no clumps of chia seeds left uncombined.

    3. Add Sweetener and Flavoring: Next, add your desired sweetener (start with about 3 tablespoons) and 2 teaspoons of vanilla extract. Stir through the mixture until everything is evenly distributed.

    4. Let it Sit: Allow the mixture to sit for about 10 minutes. This resting period lets the chia seeds absorb liquid and swell up.

    5. Stir Again: After resting, give the mixture a good stir again to break up any clumps. It’s essential for achieving smooth pudding.

    6. Refrigerate: Cover your bowl with a lid or plastic wrap and refrigerate the mixture for at least 4 hours, ideally overnight. This step is critical for achieving the perfect pudding consistency.

    7. Check Consistency: After refrigeration, check the consistency. If it’s too thick, add a little more milk to your liking, and mix well before serving.

    8. Prepare for Serving: Once set, divide the pudding into individual portions in small jars or bowls. This step is especially helpful for meal prepping your healthy snacks throughout the week.

    9. Top It Off: Add your favorite toppings! Fresh fruits, nuts, seeds, or a drizzle of honey always enhance the flavor and presentation.

    10. Enjoy!: Your Homemade Big Batch Chia Seed Pudding is now ready to be enjoyed. It can be stored in the fridge and consumed within a week, making it a hassle-free and nutritious option anytime.

    Feel free to adapt the recipe as needed for different tastes and dietary preferences, and enjoy your delightful healthy snack!

    Mastering Homemade Big Batch Chia Seed Pudding: Advanced Tips and Variations

    To elevate your chia pudding game, consider these advanced tips and variations:

    • Flavor Combinations: Besides vanilla, try adding a pinch of cocoa powder for a chocolate pudding, or throw in some matcha powder for an antioxidant boost.

    • Infuse Natural Flavors: Steep your choice of spices (like cinnamon or ginger) in your milk before mixing with chia seeds for a fragrant twist.

    • Add Creaminess: Blend in a small amount of coconut milk or nut butter (like almond or peanut butter) for an extra layer of creaminess and flavor.

    • Seasonal Fruits: Using seasonal fruits can consistently refresh your pudding. Consider adding pumpkin puree in fall or strawberries in spring for an exciting taste experience.

    • Mix-Ins: Just before serving, fold in chia pudding mix-ins like granola, shredded coconut, or hemp seeds to add fun textures and enhance the nutritional profile.

    These ideas allow you to create unique and delectable variations of your big batch chia pudding to suit any palate!

    How to Store Homemade Big Batch Chia Seed Pudding: Best Practices

    Storing your Homemade Big Batch Chia Seed Pudding properly ensures you enjoy its fresh taste and optimal texture. Here are some best practices for storage:

    1. Refrigeration: Store your chia pudding in airtight containers, placing them in the refrigerator. This method preserves its freshness for up to a week.

    2. Portion Control: For convenience, consider portioning out individual servings into small jars or containers. This strategy makes grab-and-go snacking easy.

    3. Freezing: If you have a large quantity that you can’t eat within a week, you can freeze it! Portion the pudding into ice cube trays or freezer-safe containers. When you need a quick snack, simply thaw in the refrigerator or microwave briefly.

    4. Reheating: If you’ve frozen your chia pudding, defrost it overnight in the fridge. For a quick snack, you can microwave it for about 30 seconds. Stir before enjoying to ensure even consistency.

    Following these storage tips keeps your chia pudding tasting great while giving you the convenience of having healthy snacks at your fingertips!

    Nutritional Value of Homemade Big Batch Chia Seed Pudding

    Understanding the nutritional benefits of your chia seed pudding is essential, especially for those focused on a balanced diet. Here’s a breakdown of the nutritional value per serving (based on a standard serving of approximately 1/2 cup):

    • Calories: 150-200 (depending on the choice of milk and sweetener)
    • Protein: 5-6 grams
    • Fat: 7-8 grams (primarily healthy Omega-3 fatty acids)
    • Carbohydrates: 15-20 grams
    • Fiber: 5-10 grams
    • Sugars: 3-7 grams (varies based on added sweeteners)
    • Calcium: Varies significantly with milk choice (almond milk tends to have the least; dairy and fortified plant milks tend to have more)

    In addition to these numbers, chia seeds are a great source of antioxidants, calcium, and valuable minerals that contribute to overall health. Counting this healthy snack as part of your day ensures you’re fueling your body with essential nutrients.

    FAQs: Frequently Asked Questions About Homemade Big Batch Chia Seed Pudding

    Here are some common questions about preparing your Homemade Big Batch Chia Seed Pudding:

    1. Can I use flavored milk?
    2. Yes! Flavored milk can add a delicious twist to your pudding. Just be mindful of the sugar content.

    3. How long does chia pudding last in the fridge?

    4. Properly stored in an airtight container, chia pudding lasts up to a week in the refrigerator.

    5. What can I use instead of sweeteners?

    6. If you’re avoiding sugar, consider using stevia, monk fruit sweetener, or skipping sweeteners altogether and relying on fruits for natural sweetness.

    7. Can I prep chia pudding in advance?

    8. Absolutely! Prepare it on a Sunday for easy access to a week’s worth of healthy snacks.

    9. What are some topping ideas for chia pudding?

    10. Fresh fruits, nuts, granola, coconut flakes, or nut butters make excellent toppings that add flavor and texture.

    Now you are all set to create your very own Homemade Big Batch Chia Seed Pudding. Enjoy experimenting with flavors and adapt it to your lifestyle while relishing this healthy snack!