Category: brownies-bars

  • Easy Strawberry Rhubarb Pie Bars

    Easy Strawberry Rhubarb Pie Bars

    Easy Strawberry Rhubarb Pie Bars: A Tropical Delight

    Introduction to Easy Strawberry Rhubarb Pie Bars

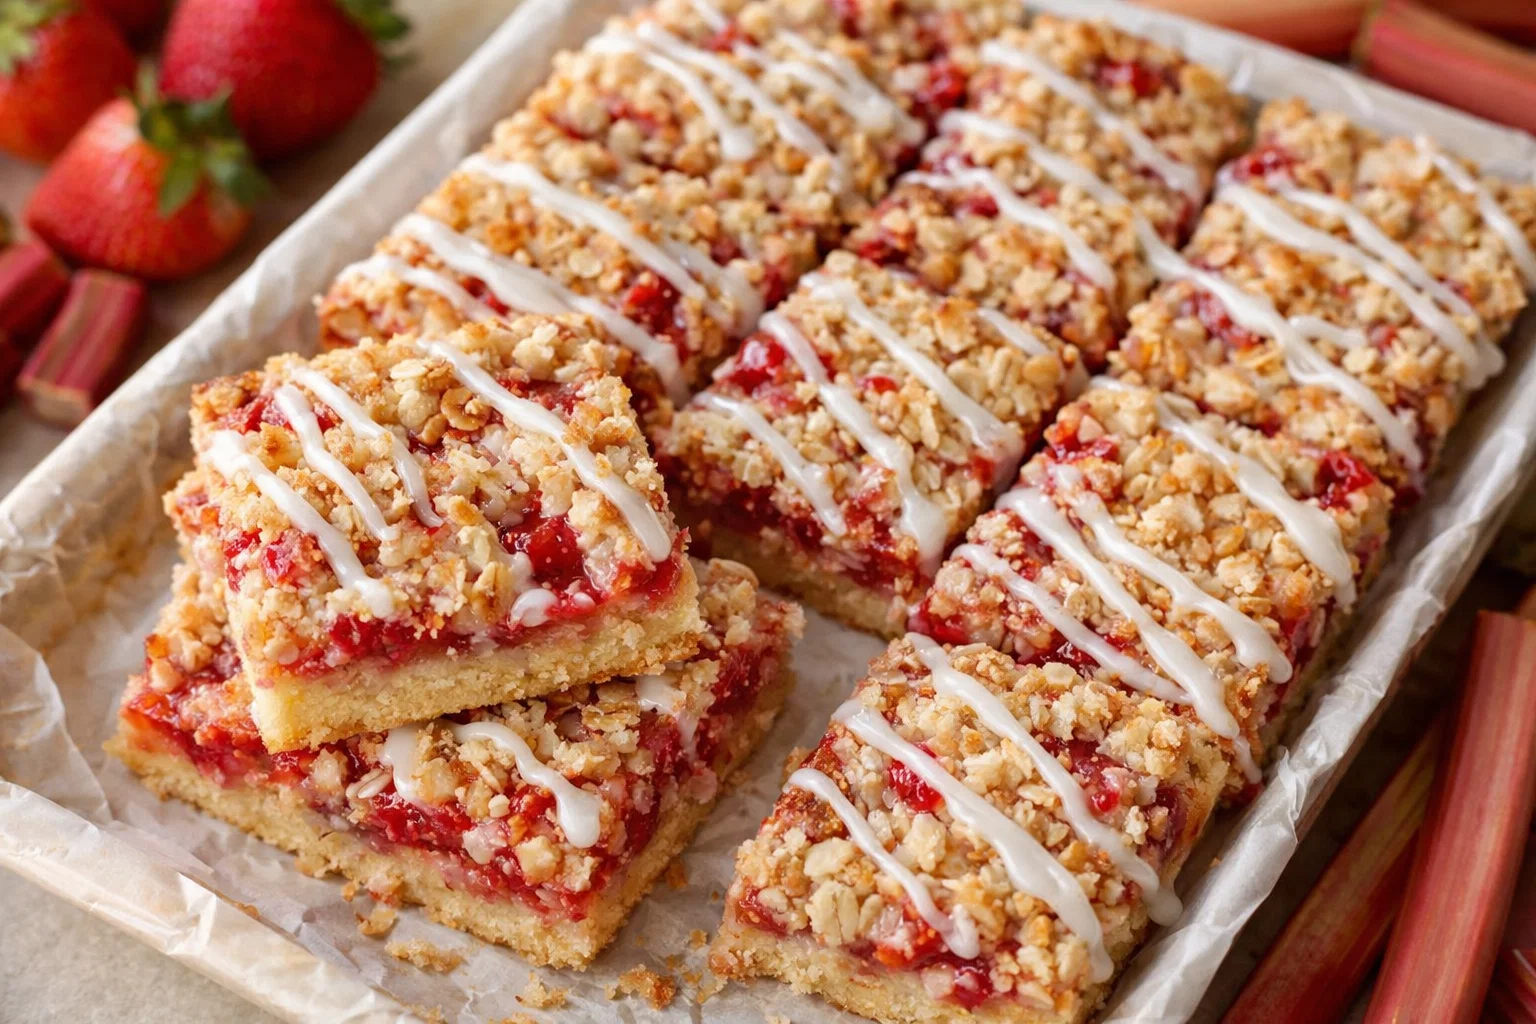
    If you’re on the lookout for simple yet delightful strawberry recipes, look no further. Our Easy Strawberry Rhubarb Pie Bars combine the sweet and tangy flavors of strawberries and rhubarb, resulting in a treat that’s perfect for any occasion. Whether you’re hosting a family gathering, enjoying a picnic in the park, or simply treating yourself after a busy week, these pie bars are an excellent choice.

    Not only are these bars incredibly straightforward to make, but they also cater to various dietary preferences, including vegan and gluten-free options. The combination of fresh strawberries and rhubarb not only tantalizes your taste buds but also offers numerous health benefits. Strawberries are loaded with antioxidants and vitamins, while rhubarb provides dietary fiber essential for digestion. Together, they create a dessert that’s not only delicious but also a healthier option than traditional pie.

    With just a handful of ingredients and easy steps, these strawberry rhubarb pie bars can become a favorite recipe in your kitchen. Ideal for home cooks, busy parents, students, and baking enthusiasts alike, this recipe inspires creativity and simplicity. So, gather your ingredients, and let’s dive into the world of Easy Strawberry Rhubarb Pie Bars.

    Benefits and Advantages of Easy Strawberry Rhubarb Pie Bars

    One of the standout features of our Easy Strawberry Rhubarb Pie Bars is their incredible ease of preparation. With minimal cooking skills required, even novice cooks can whip up these bars in no time. The straightforward steps allow you to focus on enjoying the experience of baking rather than getting bogged down by complicated instructions. Additionally, they chill easily, making them perfect for warm days when you don’t want to turn on the oven for too long.

    Furthermore, this recipe is health-conscious. By opting for whole, fresh ingredients, these bars are lower in sugar and calories compared to many dessert options. This makes them a smart choice for those watching their dietary intake, including low-calorie dieters and health enthusiasts.

    Also, the versatility of these strawberry recipes means you can easily make them gluten-free using almond flour or oats and substitute regular sugar with alternatives like maple syrup or coconut sugar, allowing you to cater to different dietary needs.

    Finally, as the bars contain no artificial additives, you can feel good about serving them to your family and friends. The natural flavors of strawberries and rhubarb shine through, offering a fresh and delicious treat that can be enjoyed guilt-free. In a nutshell, Easy Strawberry Rhubarb Pie Bars bring together the joy of baking and the benefits of wholesome ingredients, making them a worthy addition to any dessert table!

    Ingredients Overview

    Essential Ingredients for Easy Strawberry Rhubarb Pie Bars

    To make these delectable strawberry recipes, you will need the following ingredients:

    • 2 cups fresh strawberries, diced (approximately 300g): These sweet berries add flavor and nutrients.
    • 2 cups rhubarb, chopped (approximately 250g): This tangy vegetable balances the sweetness of strawberries, adding depth.
    • 1 cup rolled oats: Provides texture and adds fiber.
    • 1 cup almond flour (or whole wheat flour): A gluten-free option, the almond flour contributes healthy fats and protein.
    • 1/2 cup brown sugar: Use less for a healthier option or replace with coconut sugar.
    • 1/4 cup maple syrup: A natural sweetener that adds moisture.
    • 1/2 cup coconut oil, melted (or unsalted butter): This fat source keeps your bars moist without compromising flavor.
    • 1 tsp vanilla extract: Enhances overall flavor.
    • 1 tsp baking powder: Helps the mixture rise slightly.
    • Pinch of salt: Balances the sweetness.

    Consider using organic produce whenever possible to maximize nutritional benefits.

    Dietary Substitutions to Customize Your Easy Strawberry Rhubarb Pie Bars

    You can easily customize these pie bars to cater to specific dietary needs:

    • Gluten-Free: Instead of regular flour, use almond flour or gluten-free oats. This makes the bars suitable for those with gluten sensitivities.

    • Vegan Option: Swap the coconut oil for plant-based butter, and utilize flaxseed meal with water as an egg replacer for an ethical twist.

    • Lower Sugar: Reduce the amount of brown sugar or substitute it with stevia or monk fruit sweetener to cut down on calories without sacrificing flavor.

    • Nut-Free: To make this recipe nut-free, simply replace almond flour with oat flour or a seed-based flour like sunflower seed flour.

    With these substitutions, customization is at your fingertips, ensuring everyone can enjoy the delightful taste of Easy Strawberry Rhubarb Pie Bars.

    How to Prepare the Perfect Easy Strawberry Rhubarb Pie Bars: Step-by-Step Guide

    Creating your own Easy Strawberry Rhubarb Pie Bars is not only enjoyable but also straightforward. Follow this step-by-step guide to whip up a batch of delectable treats.

    1. Preheat the Oven:
      Preheat your oven to 350°F (175°C). This ensures an even bake for your bars.

    2. Prepare the Baking Dish:
      Grease a 9×9-inch baking dish or line it with parchment paper for easy removal later.

    3. Combine the Filling Ingredients:

    4. In a large mixing bowl, combine the diced strawberries and chopped rhubarb.
    5. Add 1/4 cup of brown sugar and sprinkle with a bit of salt. Toss to combine, then set aside to let the juices meld.

    6. Prepare the Crust Mixture:

    7. In another bowl, mix together the rolled oats, almond flour, remaining 1/4 cup of brown sugar, baking powder, and salt.
    8. Pour in the melted coconut oil and vanilla extract. Stir until all the dry ingredients are well incorporated.

    9. Layer the Crust:

    10. Press half of the oat mixture into the prepared baking dish, forming an even layer at the bottom.

    11. Add the Filling:

    12. Spoon the strawberry and rhubarb mixture evenly over the pressed oat layer. Make sure to spread it out for an even taste.

    13. Top with Remaining Crust:

    14. Sprinkle the remaining oat mixture over the fruit filling. Ensure it’s evenly distributed to cover the strawberries and rhubarb.

    15. Bake the Bars:

    16. Place the baking dish in the preheated oven. Bake for approximately 30-35 minutes, or until the top is golden brown and the fruit is bubbling slightly.

    17. Cool and Slice:

    18. Once baked, remove from the oven and allow to cool for at least 15 minutes in the dish. After cooling, slice into bars of your desired size.

    19. Serve and Enjoy:

      • Enjoy these strawberry rhubarb pie bars warm or chilled. They pair beautifully with a scoop of vanilla ice cream or a dollop of whipped cream!

    Mastering Easy Strawberry Rhubarb Pie Bars: Advanced Tips and Variations

    To ensure your Easy Strawberry Rhubarb Pie Bars turn out perfectly every time and to add some variety, consider these advanced tips and creative variations:

    1. Experiment with Spices:
    2. Add a pinch of cinnamon or nutmeg to the crust for an additional layer of flavor.

    3. Include Other Fruits:

    4. Try mixing in other seasonal fruits such as blueberries or raspberries to enhance the flavor profile of your bars.

    5. Add a Crunch:

    6. For an extra texture boost, mix in a handful of chopped nuts or seeds into the crust mixture.

    7. Serving Suggestions:

    8. Serve the bars at room temperature with a side of yogurt or ice cream for a refreshing dessert. Alternatively, serve them with a cup of herbal tea for a perfect afternoon snack.

    9. Make it a Breakfast Treat:

    10. These bars can also double as a nutritious breakfast option. Just grab one on your way out for a quick, portable meal!

    By incorporating these tips and variations, you can elevate your Easy Strawberry Rhubarb Pie Bars while personalizing them to your taste and preferences.

    How to Store Easy Strawberry Rhubarb Pie Bars: Best Practices

    Proper storage is essential to keep your Easy Strawberry Rhubarb Pie Bars fresh and delicious:

    • Refrigeration:
      After they have cooled, store bars in an airtight container in the refrigerator. They can last for up to one week if properly sealed.

    • Freezing:
      To extend their shelf life, you can freeze these bars. Cut them into pieces, wrap individually in plastic wrap, then place them in a freezer-safe container or zip-top bag. They will keep well for 2-3 months.

    • Reheating:
      To enjoy your bars warm, simply place individual pieces in the microwave for about 15-20 seconds. If they are frozen, allow them to thaw in the refrigerator overnight before reheating.

    With these simple storage methods, you can look forward to enjoying your Easy Strawberry Rhubarb Pie Bars for days to come!

    Nutritional Value of Easy Strawberry Rhubarb Pie Bars

    Understanding the nutritional value of your food can help you make informed decisions. Here’s a breakdown of the approximate nutritional content per serving (assuming 16 servings per pan):

    • Calories: 180
    • Fat: 8g (Saturated Fat: 4g)
    • Carbohydrates: 26g (Fiber: 2g, Sugars: 5g)
    • Protein: 3g
    • Vitamin C: 15% of Daily Value (from strawberries)
    • Calcium: 4% of Daily Value (from almond flour)

    This nutrient profile illustrates how you can enjoy a delicious dessert that also offers substantial health benefits. The combination of strawberries and rhubarb enriches the bars with vitamins, minerals, and antioxidants that are beneficial to overall health.

    FAQs: Frequently Asked Questions About Easy Strawberry Rhubarb Pie Bars

    Can I use frozen strawberries or rhubarb?

    Yes! Frozen strawberries and rhubarb can work well in this recipe. However, they may release more moisture during cooking, so reduce the amount of sweetener slightly if needed.

    How do I cut the bars without them falling apart?

    Allow the pie bars to cool completely before slicing. Use a sharp knife and make sure to cut straight down rather than using a sawing motion to avoid crumbling.

    Can I reduce the sugar in the recipe?

    Absolutely! You can decrease the sugar to suit your taste preferences or substitute with natural sweeteners like honey or agave nectar.

    Can these bars be made ahead of time?

    Yes, these pie bars can be made ahead of time. You can store them in the fridge for up to a week or freeze them for later enjoyment.

    What can I serve with these pie bars?

    These delicious bars pair wonderfully with a scoop of vanilla ice cream, whipped cream, or even a sprinkle of powdered sugar.

    Now that you are equipped with all the information, tips, and answers to make these bars a reality, it’s time to gather your ingredients and get baking! Enjoy the delightful combination of strawberries and rhubarb in every bite of your Easy Strawberry Rhubarb Pie Bars. Happy baking!

  • The Best Biscoff Rice Krispie Treats Recipe

    The Best Biscoff Rice Krispie Treats Recipe

    The Best Biscoff Rice Krispie Treats Recipe: A Tropical Delight

    Introduction to The Best Biscoff Rice Krispie Treats Recipe

    Welcome to an exciting adventure in dessert recipes! If you’re looking for a delightful treat that combines nostalgic flavors with a tropical twist, look no further than the Best Biscoff Rice Krispie Treats Recipe. This scrumptious dessert not only satisfies your sweet tooth but also brings forth the rich, caramel-like goodness of Biscoff cookies.

    What makes this recipe so special? For one, it’s incredibly simple to prepare, using just a handful of ingredients that are likely already in your pantry. These treats are not just delightful; they also offer some healthy alternatives. With options for vegan, gluten-free, and low-calorie adaptations, they cater to various dietary needs. Whether you’re a busy parent in need of a quick dessert or a student looking for a sweet study snack, these Rice Krispie Treats are guaranteed to inspire.

    Additionally, these treats are perfect for sharing — be it at family gatherings, birthday parties, or just a cozy night in. As you dive into crafting these irresistible squares of joy, you’ll realize just how easy and rewarding it is to create something delicious from scratch. So, put on your apron and let’s get those taste buds tingling with this incredible recipe!

    Benefits and Advantages of The Best Biscoff Rice Krispie Treats Recipe

    The Best Biscoff Rice Krispie Treats Recipe is not just another dessert; it comes with numerous benefits that make it stand out in the realm of dessert recipes. To begin with, the simplicity of preparation is a major draw. This recipe requires minimal ingredients and steps, making it an easy option for novice bakers and busy cooks alike. You can whip up a batch in under 30 minutes, allowing you to surprise guests or indulge your cravings without spending hours in the kitchen.

    In addition to ease of preparation, this recipe is highly versatile. You can modify it to cater to various dietary preferences, whether you’re vegan, gluten-free, or simply health-conscious. This inclusivity allows everyone to enjoy a tasty treat without feeling left out.

    Health benefits also play a crucial role in its appeal. While traditional Rice Krispie treats are often loaded with marshmallows, this Biscoff version uses less sugar and incorporates the wholesome ingredients of nut butter and brown rice cereal. The use of Biscoff cookies adds a unique flavor twist while providing a moderate amount of calories.

    Moreover, these treats can serve as an energy booster, ideal for busy parents on the go or students needing a pick-me-up. With the option to reduce sugar and use healthier butters, these Biscoff Rice Krispie Treats can fit into a balanced diet while still satisfying your sweet cravings.

    Lastly, the delightful flavor combination of vanilla, caramel, and cinnamon makes them a treat for both the eyes and the palate. When you present these to friends and family, you’ll surely hear “Wow!” more than once.

    In summary, the Best Biscoff Rice Krispie Treats Recipe is simple to make, customizable, wholesome, and downright delicious. It’s a delightful concoction that invites everyone to indulge, making it a staple among popular dessert recipes.

    Ingredients Overview

    Essential Ingredients for The Best Biscoff Rice Krispie Treats Recipe

    To successfully create the Best Biscoff Rice Krispie Treats, gather the following essential ingredients:

    • 3 cups Rice Krispies cereal: This forms the base of your treats, providing that iconic “snap, crackle, pop.”
    • ½ cup Biscoff spread: The star ingredient of this recipe, delivering a rich, caramel-like flavor. For a healthier version, consider using a reduced-sugar or natural spread.
    • ¼ cup unsalted butter or dairy-free butter: This binds the mixture together. Vegan options can be used for those who are lactose intolerant. Additionally, coconut oil can be used as a substitute for a unique flavor.
    • 2 tablespoons brown sugar: A subtle sweetness that enhances the flavor of the Biscoff spread. You can omit this for lower sugar content or replace it with a natural sweetener like agave syrup.
    • 1 teaspoon vanilla extract: This adds depth and complements the Biscoff flavors.
    • Pinch of salt: A small touch to balance sweetness.

    Dietary Substitutions to Customize Your The Best Biscoff Rice Krispie Treats Recipe

    To make this delightful recipe accessible to everyone, consider the following substitutions:

    • Vegan Option: Replace unsalted butter with coconut oil or a plant-based butter alternative. Use dairy-free chocolate or yogurt bites instead of traditional chocolate chips for an extra twist.

    • Gluten-Free Option: Ensure that your Rice Krispies are labeled gluten-free. Additionally, check the Biscoff spread packaging to confirm gluten-free status.

    • Low-Calorie Option: Use a low-calorie Biscoff spread or make homemade oat-based Biscoff-style spread. You may also utilize unsweetened applesauce in place of butter for a lighter texture.

    With these substitutions, you can tailor the Best Biscoff Rice Krispie Treats Recipe to suit any dietary need while still retaining that heavenly flavor.

    How to Prepare the Perfect The Best Biscoff Rice Krispie Treats Recipe: Step-by-Step Guide

    Now that you have prepared your ingredients, it’s time to embark on the journey of making your Biscoff Rice Krispie Treats. Follow these simple steps to create your delightful dessert:

    1. Prepare the Base: Begin by lining an 8×8-inch square pan with parchment paper. This will help your treats come out easily once they’re set.

    2. Melt the Butter: In a medium saucepan over low heat, melt your unsalted butter (or coconut oil). Be careful not to let it burn; constant stirring helps!

    3. Add the Biscoff Spread: Once the butter is melted, stir in the Biscoff spread until the mixture is smooth and creamy. This step is essential for achieving that luscious caramel flavor throughout the treats.

    4. Mix in Sugar and Vanilla: Add the brown sugar and vanilla extract to the Biscoff and butter mixture. Stir continuously until everything is well combined and heated through, allowing the flavors to meld.

    5. Incorporate the Rice Krispies: Remove the mixture from the heat. Gradually fold in the Rice Krispies cereal, ensuring every piece gets coated in the delicious gooey mixture. Be gentle during this step to avoid crushing the cereal.

    6. Transfer to the Pan: Pour the mixture into the prepared pan. Using a spatula or your hands, evenly spread and press the mixture into the corners of the pan. Wetting your hands can help prevent sticking.

    7. Cool the Treats: Allow your Biscoff Rice Krispie Treats to cool at room temperature for about 30 minutes before cutting them into squares. For quicker cooling, you can refrigerate them for 15 minutes.

    8. Serve and Enjoy!: Once set, cut into squares and serve. Feel free to garnish with drizzled chocolate or chopped Biscoff cookies for added flair.

    These delightful squares evoke a sense of nostalgia while allowing for modern dietary considerations. Each step is easy enough that even beginner cooks can master it!

    Mastering The Best Biscoff Rice Krispie Treats Recipe: Advanced Tips and Variations

    Now that you know how to make the classic version of Biscoff Rice Krispie Treats, let’s explore some advanced tips and variations to elevate your creation even further:

    • Add-ins for Extra Flavor: Creations are limitless; consider adding chopped nuts, mini marshmallows, or dried fruit to incorporate other textures and flavors into the treats.

    • Chocolate Drizzle: Once your treats are set and cut, melt some dark or white chocolate and drizzle it over the top for a decadent finish.

    • Biscoff Cookie Crumble: Sprinkle crushed Biscoff cookies on top before cutting for an additional crunch.

    • Layering Options: For a segmented treat, you could create layers by pouring half the mixture into the pan, adding a layer of chocolate or nut butter, and then topping it off with the remaining mixture.

    • Use Cookie Butter Dip: Instead of traditional toppings, create a cookie butter dip with the remaining Biscoff spread paired with your favorite fruits or pretzels for a unique scooping experience.

    Engaging with these variations adds a personal touch to the recipe while expanding its versatility. Perfect for parties or just a fun twist when you’re looking for something a bit different!

    How to Store The Best Biscoff Rice Krispie Treats Recipe: Best Practices

    To keep your Biscoff Rice Krispie Treats fresh and delicious, follow these best practices for storage:

    • Room Temperature Storage: Store in an airtight container for up to 3 days at room temperature. Ensure the container is sealed properly to keep moisture out and maintain the treats’ texture.

    • Refrigeration: If your kitchen is warm or if you want to store them longer, you can refrigerate the treats. They will last for about one week when refrigerated.

    • Freezing: For long-term storage, freeze individual squares in a single layer using parchment paper between layers to avoid sticking. Store them in a freezer-safe container for up to three months.

    • Reheating: To enjoy your treats after freezing, simply let them thaw at room temperature for about 30 minutes or warm them briefly in the microwave for about 10 seconds.

    By following these storage practices, you’ll ensure that your Biscoff Rice Krispie Treats remain tasty and inviting, making them a delightful addition to your go-to dessert recipes.

    Nutritional Value of The Best Biscoff Rice Krispie Treats Recipe

    Understanding the nutritional value of your desserts helps you make informed choices. Here is the approximate nutritional breakdown per serving (based on 16 squares):

    • Calories: 150
    • Total Fat: 7g
    • Saturated Fat: 3g
    • Cholesterol: 15mg
    • Sodium: 100mg
    • Total Carbohydrates: 22g
    • Dietary Fiber: 1g
    • Sugars: 6g
    • Protein: 1g

    To adapt this recipe for a healthier option, consider the following:

    • Reduce sugar: Opt for natural sweeteners like agave or coconut sugar to minimize added sugars.
    • Use whole grain Rice Krispies: For added fiber and nutrients.
    • Add Protein: Incorporate protein powder to boost its nutritional value for those needing extra energy.

    These adjustments can cater to various dietary plans while ensuring that you still enjoy a delicious treat!

    FAQs: Frequently Asked Questions About The Best Biscoff Rice Krispie Treats Recipe

    1. Can I substitute the Biscoff spread with another type of spread?

    Yes! You can use almond butter, peanut butter, or any other cookie spread you prefer. Just be aware that it may alter the final flavor slightly.

    2. Are these treats suitable for vegans?

    Absolutely! By using dairy-free butter and ensuring your Biscoff spread is vegan-friendly, these treats cater perfectly to vegan diets.

    3. How can I make the treats gluten-free?

    Simply ensure that you use gluten-free Rice Krispies and check the ingredient list of your Biscoff spread for any gluten-containing items.

    4. How long do these treats stay fresh?

    At room temperature, they last about 3 days, while refrigeration extends their freshness up to a week. They can be frozen for up to three months.

    5. Can I add chocolate chips to the recipe?

    Definitely! Mini chocolate chips make a great addition. You can mix them in, or sprinkle them on top before letting the treats set.

    Each of these questions aims to help you better understand and adapt the recipe to suit your needs while keeping dessert enjoyment at the forefront.

    In conclusion, making the Best Biscoff Rice Krispie Treats is both a delightful and straightforward process. With various modifications available for different dietary requirements, this recipe is a fantastic way to enter the world of delectable dessert recipes! So gather your ingredients and get ready to enjoy a tropical delight that everyone will love!

  • Easy Cake Mix Toffee Bars Dessert Recipe

    Easy Cake Mix Toffee Bars Dessert Recipe

    Easy Cake Mix Toffee Bars Dessert Recipe: A Tropical Delight

    Introduction to Easy Cake Mix Toffee Bars Dessert Recipe

    If you’re on the lookout for quick and mouthwatering dessert recipes, the Easy Cake Mix Toffee Bars are here to impress both your palate and your schedule. These delightful bars blend the richness of toffee with the simplicity of cake mix, creating a dessert that not only satisfies your sweet tooth but also simplifies your baking routine. Whip them up in less than an hour, making them an ideal choice for busy parents, students, or anyone eager to indulge in something sweet without spending the entire afternoon in the kitchen.

    The beauty of this recipe extends beyond its ease; it can also cater to various dietary preferences. For example, by choosing a gluten-free cake mix or replacing butter with plant-based alternatives, these bars can be tailored for gluten-sensitive individuals or vegans. Loaded with toffee bits, chocolate chips, and topped with a sprinkle of sea salt, these bars bridge the gap between indulgence and convenience.

    Moreover, preparing these bars demands minimal equipment and cleanup, making it perfect for the less experienced bakers or those just getting started. Think of it as a fantastic way to involve children in the kitchen, allowing them to help with mixing and pouring. Bake, slice, and serve, and you’ve got a delightful dessert ready to be enjoyed during gatherings, as a midday snack, or simply as a sweet treat after dinner.

    Benefits and Advantages of Easy Cake Mix Toffee Bars Dessert Recipe

    The Easy Cake Mix Toffee Bars Dessert Recipe stands out for numerous reasons. Firstly, its preparation is remarkably straightforward. The use of cake mix eliminates the need to measure out multiple ingredients like flour, baking powder, and sugar. Instead, with just one or two shop-bought items, you are ready to go. This feature is a huge advantage for time-strapped individuals eager to create delicious dessert recipes without the hassle of traditional baking.

    Secondly, these bars offer an opportunity to incorporate health-conscious alternatives. By choosing a low-sugar cake mix or incorporating healthier sweeteners, you can easily create a version that aligns with your nutritional goals. For instance, substituting coconut sugar in place of traditional white sugar provides a hint of caramel flavor while lowering the glycemic index.

    Another noteworthy advantage of this recipe is its versatility. You can easily customize the ingredients based on personal preferences or dietary restrictions. For those who love adding a crunch, a layer of chopped nuts can enhance the texture of these bars. If you fancy a fruity twist, consider adding diced dried apricots or cranberries for a chewy contrast to the crunchy toffee.

    Lastly, these bars are incredibly accommodating for special occasions. Whether it’s a birthday party, holiday gathering, or office potluck, these easy-to-make squares can be dressed up with icing or served alongside fresh fruit for an elevated presentation. Its adaptability and scrumptious nature make it a winning addition to any dessert table.

    Ingredients Overview

    Essential Ingredients for Easy Cake Mix Toffee Bars Dessert Recipe

    To bring your Easy Cake Mix Toffee Bars to life, gather the following ingredients:

    1. 1 Box of Yellow or Chocolate Cake Mix (15.25 oz) – The base of your bars. Gluten-free cake mix can be used for those with dietary restrictions.

    2. 1/2 Cup Unsalted Butter (1 stick, melted) – Adds richness and moisture. For a vegan option, substitute with melted coconut oil or vegan butter.

    3. 1 Large Egg – Binds the ingredients together. Flaxseed meal (1 tablespoon mixed with 2.5 tablespoons of water) can be used as a vegan egg replacer.

    4. 1 Cup Toffee Bits – Provides a delightful toffee flavor and crunchy texture. Chopped chocolate or caramel bits can be alternatives for a different flavor.

    5. 1 Cup Semi-Sweet Chocolate Chips – Enhances the dessert’s sweetness and creates a chocolatey layer. Dark chocolate chips provide a healthier option.

    6. 1/2 Cup Chopped Nuts (Optional) – Nuts add an extra crunch and are a great source of healthy fats. Almonds or pecans work wonderfully here.

    7. 1/4 Teaspoon Sea Salt – A sprinkle on top balances the sweetness and elevates the flavors.

    Dietary Substitutions to Customize Your Easy Cake Mix Toffee Bars Dessert Recipe

    Creating a tailor-made dessert is easier than ever with these suggested substitutions:

    • For Gluten-Free: Use a gluten-free cake mix to ensure all dietary needs are met. Always check labels for cross-contamination warnings for allergies.

    • For Vegan: Replace the egg with a flaxseed egg or a chia seed egg. Additionally, swap out the butter for vegan alternatives, ensuring your dessert remains plant-based.

    • For Reduced Sugar: Opt for a cake mix labeled as low-sugar or sugar-free. You can also experiment with alternative sweeteners like stevia or monk fruit for a lower-calorie version without sacrificing taste.

    • For Lower Fat: Use unsweetened applesauce instead of butter for a moist texture with fewer calories.

    With these substitutions, you can enjoy a delicious treat that suits various dietary requirements while still being easy to prepare.

    How to Prepare the Perfect Easy Cake Mix Toffee Bars Dessert Recipe: Step-by-Step Guide

    Now, it’s time to roll up your sleeves and dive into the baking process. Follow this easy-to-follow step-by-step guide to create your Easy Cake Mix Toffee Bars.

    1. Preheat the Oven: Begin by preheating your oven to 350°F (175°C). Proper preheating ensures even cooking and perfect browning.

    2. Prepare the Baking Dish: Grease a 9×13 inch baking pan with butter or cooking spray. For easy removal, consider using parchment paper.

    3. Combine Cake Mix and Butter: In a large mixing bowl, combine the cake mix and melted butter until fully integrated. The mixture should resemble wet sand.

    4. Add Egg and Mix Well: Crack in the egg and stir until smooth. Ensure there are no lumps; a well-mixed batter translates to a better texture.

    5. Incorporate Toffee Bits and Chocolate Chips: Fold in the toffee bits and chocolate chips, reserving a handful for the topping. This not only enhances the flavor but embeds a delightful surprise within each bite.

    6. Spread Batter into Pan: Pour the batter into the prepared baking dish, spreading it evenly. Use a spatula to gently smooth the surface, ensuring an even bake.

    7. Sprinkle with Reserved Toppings: Scatter any reserved toffee bits and chocolate chips over the top. This step creates an enticing layer that will caramelize beautifully as it bakes.

    8. Bake in Oven: Place the baking dish into the preheated oven. Bake for about 20-25 minutes, or until the edges are golden, and the center appears set. You may reach doneness by inserting a toothpick; it should come out with moist crumbs.

    9. Cool the Bars: Once baked, remove the bars from the oven and allow them to cool in the pan on a wire rack. This step is crucial for achieving the right texture.

    10. Slice and Serve: Once cooled, cut the bars into squares. Serve as is, or elevate further with a dusting of powdered sugar or a drizzle of melted chocolate.

    These simple yet effective steps will guide you to scrumptious cake mix toffee bars, worth every bite!

    Mastering Easy Cake Mix Toffee Bars Dessert Recipe: Advanced Tips and Variations

    To take your Easy Cake Mix Toffee Bars Dessert Recipe to the next level, consider the following expert tips and delicious variations:

    • For a Nutty Twist: Add a combination of nuts and toffee bits for a crunchy texture. Try toasted walnuts or peanuts for a delightful contrast.

    • Use Different Cake Flavors: While yellow and chocolate cake mixes are a classic choice, consider vibrant flavors like lemon or carrot cake for a unique spin. The flavor combinations can create a whole new dessert experience.

    • Experiment with Fillings: Consider adding caramel sauce or peanut butter swirls into the batter before baking. This adds an exciting layer of flavor and gooeyness.

    • Top with Frosting: A simple chocolate ganache or cream cheese frosting can elevate the bars to a more gourmet level. Frost them after they’ve cooled for an indulgent dessert.

    • Add Seasonal Fruits: For a refreshing touch, mix in some diced strawberries, blueberries, or cherries. This adds a fruity flavor and a pop of color to your dessert.

    These tips will not only enhance your experience while baking but also allow you to impress your guests with a diverse array of flavors and textures.

    How to Store Easy Cake Mix Toffee Bars Dessert Recipe: Best Practices

    Storing your Easy Cake Mix Toffee Bars properly ensures they remain fresh and delicious for days. Here are the best practices for refrigeration, freezing, and reheating:

    • Refrigeration: Allow the toffee bars to cool completely before slicing. Next, place them in an airtight container to keep them from drying out. They can be stored in the refrigerator for up to one week.

    • Freezing: If you want to extend their life, freezing is a great option! Wrap individual squares in plastic wrap and then place them in a zip-top freezer bag. They can be stored in the freezer for up to three months. Simply thaw at room temperature or warm them in the microwave for a few seconds before serving.

    • Reheating: If you prefer warm toffee bars, you can briefly microwave a piece for 10-15 seconds. This will bring back their gooey texture without compromising taste.

    By following these simple storage tips, you will ensure that every bite of your Easy Cake Mix Toffee Bars remains just as delightful as the day they were baked.

    Nutritional Value of Easy Cake Mix Toffee Bars Dessert Recipe

    Understanding the nutritional value of the Easy Cake Mix Toffee Bars can help you make informed choices while indulging in sweet treats. Here is a breakdown of the estimated nutritional information per serving (based on 16 servings):

    • Calories: 210
    • Total Fat: 9g
    • Saturated Fat: 5g
    • Cholesterol: 30mg
    • Sodium: 150mg
    • Total Carbohydrates: 30g
    • Dietary Fiber: 1g
    • Sugars: 18g
    • Protein: 2g

    For those health-conscious individuals, you may consider using alternative sweeteners or lower-calorie options to make the bars lighter. Additionally, nuts can provide healthy fats and protein, making this treat more balanced.

    If you choose gluten-free mixes or high-fiber cake mixes, you can tailor these bars according to your dietary needs while indulging in a delicious dessert.

    FAQs: Frequently Asked Questions About Easy Cake Mix Toffee Bars Dessert Recipe

    Q1: Can I use a different flavor of cake mix for this recipe?

    Absolutely! Feel free to experiment with different flavors of cake mix to create unique bars. Lemon, red velvet, or spice cake mixes can make delightful variants.

    Q2: Are there dairy-free options for this recipe?

    Yes, you can easily make this a dairy-free treat by using almond milk, coconut oil or vegan butter, and a dairy-free chocolate option.

    Q3: How do I introduce more protein into my bars?

    To increase the protein content, consider adding nuts or using protein powder in your cake mix. Alternatively, serve the bars with a dollop of Greek yogurt.

    Q4: Can I leave out the toffee bits?

    Yes, you can omit the toffee bits if you prefer a less sweet bar. Swap them with dried fruits or additional nuts for a delightful flavor twist.

    Q5: How do I ensure my bars are chewy and not dry?

    Be careful not to overbake your toffee bars and allow them to cool completely before slicing. The residual heat helps maintain moistness in the bars.

    With these frequently asked questions, we hope to ease your journey into baking these fantastic Easy Cake Mix Toffee Bars!

    In conclusion, the Easy Cake Mix Toffee Bars Dessert Recipe is the perfect blend of indulgence and simplicity, making it a fantastic choice for various occasions. From busy weekdays to special gatherings, these bars suit everyone while also offering customization possibilities to fit any dietary requirement. Enjoy baking and tasting your tropical delight!

  • Cozy Soft Baked Maple Donut Bars

    Cozy Soft Baked Maple Donut Bars

    Cozy Soft Baked Maple Donut Bars: A Tropical Delight

    Introduction to Cozy Soft Baked Maple Donut Bars

    When it comes to unique breakfast ideas, nothing beats Cozy Soft Baked Maple Donut Bars. These bars deliver a luscious combination of maple and spices, making them both comforting and delightfully satisfying. If you’ve been searching for a delicious, easy-to-make recipe that fits into various diets, look no further!

    This recipe stands out not only for its delightful flavor but also because it can be easily adjusted to fit vegan, gluten-free, and low-calorie diets. By preparing these bars, you’re opening the door to a healthier alternative to traditional donuts that can be enjoyed by busy parents, kitchen novices, and seasoned bakers alike. With an easy preparation method and minimal mess, you can whip up a batch of these scrumptious bars in no time.

    Plus, they offer an excellent source of energy for a busy day ahead, making them one of the best choices for breakfast ideas that nourish your body and soul. Imagine enjoying these beautifully baked treats with a cup of coffee or tea, sharing them with loved ones, or even packing them for lunch—a versatile recipe that satisfies every craving.

    Benefits and Advantages of Cozy Soft Baked Maple Donut Bars

    There are various reasons why Cozy Soft Baked Maple Donut Bars are an exceptional addition to your repertoire of breakfast ideas. First and foremost, their ease of preparation allows anyone to bake them with minimal effort. You do not need specialized baking skills or equipment, making them perfect for novice cooks and busy families alike.

    Health benefits also shine through in this recipe. The use of natural sweeteners like pure maple syrup helps reduce refined sugar intake, while substituting regular flour for whole grain or gluten-free alternatives contributes to a more balanced nutrition profile. These bars also incorporate healthier fats, providing a satisfying mouthfeel without heavy calories.

    In addition to being tasty and nutritious, they are incredibly adaptable. Families with dietary restrictions—such as vegans or those avoiding gluten—will appreciate how simple it is to swap out certain ingredients. Need to make them dairy-free? Just use plant-based milk! Want to add some protein? Introduce a scoop of your favorite protein powder to the mix. This recipe shines in its versatility, ensuring you tailor it to suit every craving and lifestyle.

    Furthermore, these donut bars can be a fantastic snack or a treat. Offering a quick breakfast or an energy-boosting snack for busy professionals or students is where their true advantage lies. With their inviting aroma and delightful flavor, these bars will entice anyone looking for wholesome breakfast ideas.

    Ingredients Overview

    Essential Ingredients for Cozy Soft Baked Maple Donut Bars

    To create these delicious Cozy Soft Baked Maple Donut Bars, gather the following ingredients:

    • 2 cups oat flour (or all-purpose flour, for non-gluten-free): Provides a tender base and a mild flavor.
    • 1/2 cup maple syrup: The star of the recipe, offering a rich sweetness and flavor.
    • 1/2 cup unsweetened applesauce (or mashed banana, for a natural sweetness): Acts as a binding agent while adding moisture without excess fat.
    • 1 cup almond milk (or any plant-based milk for dairy-free): Adds moisture and enhances the texture without dairy.
    • 2 tsp baking powder: Helps the bars rise to create a soft, fluffy texture.
    • 1/2 tsp cinnamon: Provides warmth and depth in the flavor.
    • 1/4 tsp nutmeg: A hint of spice that perfectly complements the maple flavor.
    • 1/4 cup coconut oil (melted, or another oil): Contributes to a delightful texture and moistness.
    • A pinch of salt: Balances the sweetness and enhances overall flavor.

    Vegan / Gluten-Free Substitutes: If you want to keep this recipe vegan, simply ensure your plant-based milk is unsweetened. For gluten-free options, using oat flour guarantees a gluten-free outcome as long as you choose certified gluten-free oats.

    Dietary Substitutions to Customize Your Cozy Soft Baked Maple Donut Bars

    To accommodate varying diets and preferences, consider these substitutions:

    1. Flour: Instead of oat flour, you can use gluten-free all-purpose flour or whole wheat flour for added nutrients.
    2. Sweeteners: If you’re trying to reduce sugar, alternatives like agave nectar or coconut nectar work well in equal measures.
    3. Oil: Unsweetened applesauce can substitute for oil entirely if you’re looking for a low-fat option.
    4. Milk: Use oat, coconut, soy, or almond milk, depending on dietary restrictions or personal taste.
    5. Fats: For a healthier fat option, you can use unsweetened pumpkin puree in place of coconut oil for a seasonal twist.
    6. Add-ins: Consider adding nuts, seeds, or chocolate chips for extra texture.

    These substitutions allow you to create a recipe that meets your specific dietary needs while still providing all the comforting flavors you expect from these delectable breakfast bars.

    How to Prepare the Perfect Cozy Soft Baked Maple Donut Bars: Step-by-Step Guide

    Follow this detailed guide to create your Cozy Soft Baked Maple Donut Bars:

    1. Preheat Your Oven: Preheat your oven to 350°F (175°C) to prepare for baking.

    2. Prepare the Baking Pan: Line a 9×9-inch baking pan with parchment paper or lightly grease it with coconut oil to ensure easy removal later.

    3. Mix Dry Ingredients: In a large bowl, whisk together the oat flour, baking powder, cinnamon, nutmeg, and salt. This step helps evenly distribute the leavening agents and spices.

    4. Combine Wet Ingredients: In another bowl, blend the maple syrup, unsweetened applesauce, almond milk, and melted coconut oil. Mixing these well guarantees a uniform batter.

    5. Merge Ingredients: Slowly add the wet ingredients to the dry ingredients. Stir gently until just combined; be careful not to overmix, as this could result in dense bars.

    6. Transfer to Pan: Pour the batter into the prepared baking pan, spreading it evenly to ensure uniform cooking.

    7. Bake: Place your pan in the preheated oven and bake for 25-30 minutes or until a toothpick inserted into the center comes out clean.

    8. Cool Down: Once baked, remove the bars from the oven and let them cool in the pan for about 10 minutes. Then, transfer them to a wire rack to cool completely.

    9. Slice: Once cooled, slice into bars or squares as preferred. These bars can be served warm or at room temperature.

    10. Enjoy: Pair your Cozy Soft Baked Maple Donut Bars with your favorite coffee or tea for the perfect breakfast idea or snack.

    Feel free to adapt any of these steps to suit your dietary needs, whether it’s using plant-based milk, opting for whole grain flour, or adding in extra flavors and textures.

    Mastering Cozy Soft Baked Maple Donut Bars: Advanced Tips and Variations

    To truly master the Cozy Soft Baked Maple Donut Bars and elevate your baking game, consider these practical tips:

    • Test for Doneness: Every oven is slightly different; check the bars a few minutes before the recommended baking time to avoid overbaking.
    • Add Toppings: Drizzle extra maple syrup on top or sprinkle with chopped nuts or shredded coconut before baking for added texture and flavor.
    • Layer Flavors: Adjust the spices according to your preference. Adding a touch of cardamom or even some cocoa powder can vary the flavor profile.
    • Personalize with Mix-Ins: Feel free to throw in add-ins such as dried fruits, chocolate chips, or pumpkin spices to customize these bars to your liking.
    • Try Alternative Icings: For a treat, top with a simple glaze made from powdered sugar and a splash of almond milk, or for something unique, opt for a nut butter spread for added creaminess and flavor.

    Exploring variations and enhancements makes the Cozy Soft Baked Maple Donut Bars a versatile favorite that your family will always enjoy!

    How to Store Cozy Soft Baked Maple Donut Bars: Best Practices

    To keep your Cozy Soft Baked Maple Donut Bars fresh, follow these storage guidelines:

    • Room Temperature: If you plan to enjoy your bars within 2-3 days, store them in an airtight container at room temperature. This will preserve their soft texture.

    • Refrigeration: For longer-lasting freshness, place the bars in the refrigerator. They can last up to a week when stored properly in an airtight container. This is a perfect way to keep your breakfast ideas ready and waiting.

    • Freezing: If you want to stock up for later, wrap each bar in foil or parchment paper and place them in a freezer-safe bag. They can be stored in the freezer for up to 3 months. When craving a bar, simply thaw them in the fridge overnight or allow them to come to room temperature before serving.

    • Reheating: To enjoy warm bars, microwave individual servings on a low setting for about 15-20 seconds, or you can heat them in the oven for a few minutes, wrapped in foil to retain moisture.

    These storage solutions make it easy to keep your delicious breakfast ideas on hand whenever you need them!

    Nutritional Value of Cozy Soft Baked Maple Donut Bars

    One of the benefits of Cozy Soft Baked Maple Donut Bars is their nutritional profile. Here’s a general overview of what to expect per serving (based on a recipe yielding 12 bars):

    • Calories: Approximately 150 calories
    • Total Fat: 4g (Healthy fats from coconut oil)
    • Saturated Fat: 3g
    • Cholesterol: 0mg (Vegan-friendly!)
    • Sodium: 50mg
    • Total Carbohydrates: 25g
    • Dietary Fiber: 2g
    • Sugars: 7g (from natural maple syrup and applesauce)
    • Protein: 3g

    Incorporating wholesome ingredients like oat flour and pure maple syrup not only provides delicious flavor but also brings along various health benefits. These bars are an excellent source of energy for a busy day, making them a respectable choice among breakfast ideas!

    FAQs: Frequently Asked Questions About Cozy Soft Baked Maple Donut Bars

    Q1: Can I use a different flour?
    A: Yes! You can substitute oat flour with gluten-free all-purpose flour, whole wheat flour, or even almond flour for added nutrition.

    Q2: How do I know when they’re done baking?
    A: The bars are done when a toothpick inserted in the center comes out clean. Keep an eye on them as baking times may vary based on your oven.

    Q3: Can I make them ahead of time?
    A: Absolutely! These bars store well and can be baked a few days in advance. Just make sure to store them properly in an airtight container.

    Q4: Can I freeze the bars?
    A: Yes! To freeze, wrap each bar in foil or parchment paper and store them in a freezer-safe bag. They last up to 3 months in the freezer.

    Q5: How can I adjust the sweetness?
    A: You can reduce the amount of maple syrup or substitute it with another sweetener, like agave syrup or coconut sugar, depending on your preference.

    By addressing common questions, readers will feel more confident in trying these delightful breakfast ideas and carving out a special place for Cozy Soft Baked Maple Donut Bars in their recipe collections.


    Thus, Cozy Soft Baked Maple Donut Bars offer a perfect blend of comfort, nutrition, and versatility, making them a delightful addition to any meal or snack. Whether you’re catering to dietary needs or simply looking for a delicious new recipe to try, these bars are sure to please!

  • The Best Orange Bars Dessert Recipe

    The Best Orange Bars Dessert Recipe

    The Best Orange Bars Dessert Recipe: A Tropical Delight

    Introduction to The Best Orange Bars Dessert Recipe

    Welcome to one of the most vibrant and mouth-watering dessert recipes that will transform your baking adventures: The Best Orange Bars Dessert Recipe! These delightful treats offer a burst of citrus flavor combined with a melt-in-your-mouth texture, making them an irresistible choice for dessert lovers everywhere. This recipe is not only simple to whip up, but it is also versatile, accommodating various dietary preferences, including vegan, gluten-free, and low-calorie options. It’s perfect for busy parents looking to create delicious snacks for their kids, students who want to impress friends with a sweet treat, or anyone looking to add a refreshing touch to their dessert table!

    Imagine indulging in a luscious orange bar, with its zesty aromatic scent filling your kitchen while you prepare it. These bars pack a nutritional punch, being rich in vitamin C and antioxidants. Plus, their easy preparation means you can have your dessert ready in no time—ideal for those weeknight cravings! With just a handful of ingredients, you can whip up a delightful dish that brightens up any occasion. Whether you serve them during family gatherings, at celebrations, or just for an afternoon snack, you’ll find these orange bars will quickly become a favorite. Let’s get started and dive into the benefits of preparing this fantastic dessert!

    Benefits and Advantages of The Best Orange Bars Dessert Recipe

    When it comes to dessert recipes, The Best Orange Bars not only tantalize your taste buds, but they also bring numerous benefits to the table. First and foremost, their easy preparation makes them a preferred choice for bakers of all skill levels. With fewer ingredients and straightforward steps, you can create an impressive dessert without the stress. Whether you’re a novice in the kitchen or a seasoned chef, these bars are the perfect addition to your recipe arsenal.

    In addition to their simplicity, these orange bars are a healthier alternative to many traditional desserts. Using fresh orange juice and zest, they are naturally sweet and can be modified to reduce sugar content or swap in healthier substitutes. This treat also caters wonderfully to various dietary needs. For those who are vegan, egg replacements like applesauce or flaxseed can easily be used. Additionally, gluten-free options are just as achievable by substituting regular flour with almond or oat flour.

    Not only do these bars taste great, but they also offer health benefits associated with oranges. Oranges are rich in vital nutrients, including vitamin C, fiber, and antioxidants, which can support immune function and contribute to overall well-being. As a bonus, you can enjoy these bars guilt-free, knowing they are a step towards maintaining a balanced diet while satisfying your sweet tooth.

    Overall, The Best Orange Bars highlight how making mindful choices while indulging in dessert recipes can lead to truly delicious outcomes. With each bite, you experience the joy of a bright citrus flavor, making these bars not just a treat but a moment of happiness shared with friends and family!

    Ingredients Overview

    Essential Ingredients for The Best Orange Bars Dessert Recipe

    Creating The Best Orange Bars requires just a few essential ingredients, each carefully chosen to contribute to the depth of flavor and texture. Here’s what you will need:

    • 1 ½ cups all-purpose flour (for a gluten-free option, substitute with almond or oat flour)
    • 1 cup granulated sugar (or coconut sugar for a lower glycemic index)
    • ½ cup unsalted butter, softened (can use coconut oil for a vegan alternative)
    • 2 large eggs (use flaxseed meal mixed with water as a vegan substitute)
    • 1 tablespoon orange zest (freshly grated for the best flavor)
    • ½ cup freshly squeezed orange juice (about 2-3 medium oranges)
    • 1 teaspoon baking powder
    • ¼ teaspoon salt
    • Optional toppings: powdered sugar, fresh orange slices, or a light glaze

    Dietary Substitutions to Customize Your The Best Orange Bars Dessert Recipe

    To make this recipe even more inclusive, consider these suggested substitutions based on dietary needs or ingredient availability:

    1. Vegan: Replace the eggs with a mixture of 1 tablespoon flaxseed meal combined with 2.5 tablespoons of water per egg. Use coconut oil or vegan butter in place of regular butter.

    2. Gluten-Free: Opt for almond flour or a gluten-free flour blend instead of all-purpose flour. Ensure that your baking powder is gluten-free.

    3. Low-Sugar: Substitute granulated sugar with a natural sweetener like honey, maple syrup, or stevia, adjusting the liquid content in the recipe as needed.

    4. Nut-Free: If you’re concerned about nut allergies, simply ensure that the gluten-free flour used is also nut-free and use sunflower oil instead of coconut oil.

    By customizing your The Best Orange Bars Recipe, you cater to a wider audience, making it a hit at gatherings, social events, or family dinners!

    How to Prepare the Perfect The Best Orange Bars Dessert Recipe: Step-by-Step Guide

    Now that you’ve gathered your ingredients, let’s dive into the detailed preparation steps to create your The Best Orange Bars.

    1. Prepare the Oven:
      Preheat your oven to 350°F (175°C). This ensures an even bake for a perfect texture.

    2. Grease the Baking Dish:
      Lightly grease an 8×8-inch baking dish with non-stick cooking spray or line it with parchment paper for easy removal.

    3. Mix the Dry Ingredients:
      In a mixing bowl, whisk together the flour, baking powder, and salt until well combined. This step helps to evenly distribute the leavening agent throughout the flour.

    4. Cream the Butter and Sugar:
      In a separate bowl, beat the softened butter and granulated sugar together until fluffy. This process typically takes about 2-3 minutes. If using coconut oil, ensure it’s softened but not melted.

    5. Add Eggs and Orange Zest:
      Incorporate the eggs, one at a time, beating well after each addition. Then, mix in the freshly grated orange zest, which infuses the filling with a delightful citrus aroma.

    6. Combine Wet and Dry Mixtures:
      Gradually add the dry ingredients to the butter-sugar mixture, alternating with the freshly squeezed orange juice. Start and finish with the dry ingredients, mixing until just combined. Be sure not to overmix.

    7. Pour into the Baking Dish:
      Transfer the batter into the prepared baking dish, smoothing the top with a spatula for an even cook.

    8. Bake:
      Place the baking dish in the preheated oven and bake for approximately 25-30 minutes, or until a toothpick inserted into the center comes out clean.

    9. Cool the Bars:
      Once baked, remove the bars from the oven and allow them to cool in the pan for about 10 minutes. Afterward, transfer them onto a wire rack to cool completely.

    10. Slice and Serve:
      Once cooled, slice the bars into squares or rectangles, and optionally dust with powdered sugar before serving. You can also consider adding a light glaze made of powdered sugar and orange juice for extra sweetness.

    You’ve now crafted The Best Orange Bars! With a zesty flavor and satisfying texture, this dessert will brighten any gathering or afternoon snack break.

    Mastering The Best Orange Bars Dessert Recipe: Advanced Tips and Variations

    To elevate your The Best Orange Bars Dessert Recipe, consider incorporating these advanced tips and delicious variations:

    Enhance the Flavor

    • Spices: Add a hint of cinnamon or nutmeg to the batter to complement the orange flavor.
    • Extra Zest: Experiment with different citrus fruits like lemon or lime by swapping a portion of the orange juice with their juices to create a mixed citrus bar.

    Texture Variations

    • Chilled Bars: For a refreshing take, refrigerate the bars after baking and serve them cold as a summer dessert. They will have a delightful, chilled taste.
    • Add-ins: Experiment by folding in white chocolate chips, nuts (such as almonds or walnuts), or dried cranberries for additional texture and flavor.

    Festive Touch

    • Decoration: Top your bars with a simple glaze made from powdered sugar and orange juice for an extra sweet touch, perfect for special occasions!
    • Holiday Inspiration: Use this recipe as a base during different holidays by adding themed colors or garnishes, such as edible flowers in spring or festive sprinkles during winter.

    By mastering these variations, the humble Orange Bar becomes a versatile canvas for your creativity, making it suitable for any event or simply for your own enjoyment!

    How to Store The Best Orange Bars Dessert Recipe: Best Practices

    To keep your The Best Orange Bars fresh and delicious, follow these best storage practices:

    1. Refrigeration: Allow the bars to cool completely before storing. Place them in an airtight container and refrigerate; they will stay fresh for up to a week.

    2. Freezing: To extend their shelf life, you can freeze the bars! Wrap them tightly in plastic wrap or foil, then place them in a freezer-safe bag. They can last up to three months in the freezer. When ready to enjoy, thaw in the refrigerator overnight.

    3. Reheating: If you prefer warm bars, you can reheat individual servings in the microwave for about 10-15 seconds. Just be cautious, as overheating can make the texture too soft.

    By following these storage tips, your The Best Orange Bars will be just as delightful on the second or third day as they were fresh out of the oven!

    Nutritional Value of The Best Orange Bars Dessert Recipe

    Understanding the nutritional value of The Best Orange Bars Dessert Recipe allows you to enjoy them guilt-free. Here’s a breakdown of the estimated nutrition per serving (assuming 12 bars), keeping in mind that these values can vary based on the specific ingredients used:

    • Calories: Approximately 130-150 calories per bar
    • Total Fat: 6g (includes 4g saturated fat)
    • Cholesterol: 30mg
    • Sodium: 50mg
    • Total Carbohydrates: 20g
    • Dietary Fiber: 1g
    • Sugars: 8g
    • Protein: 2g
    • Vitamin C: 10% of Daily Value
    • Calcium: 2% of Daily Value
    • Iron: 3% of Daily Value

    With a modest calorie count and a good source of vitamin C, these bars are a delicious yet healthier indulgence. Feel free to modify the recipe with healthier substitutes to personalize the nutritional profile further!

    FAQs: Frequently Asked Questions About The Best Orange Bars Dessert Recipe

    1. Can I make these orange bars gluten-free?

    Yes! Simply replace the all-purpose flour with a gluten-free flour blend or almond flour. Ensure that all other ingredients, like baking powder, are gluten-free.

    2. What can I use instead of eggs in the recipe?

    You can substitute each egg with 1 tablespoon of flaxseed meal mixed with 2.5 tablespoons of water. Let it sit for a few minutes to thicken before adding it to the mixture.

    3. How do I store uneaten orange bars?

    Store the bars in an airtight container in the refrigerator for up to a week or freeze them for longer storage (up to three months).

    4. Can I add additional flavors or ingredients?

    Definitely! Feel free to incorporate mix-ins like nuts, chocolate chips, or a swirl of blueberry jam for added flavor and texture.

    5. How do I know if the orange bars are done baking?

    Insert a toothpick into the center of the bars. If it comes out clean or with a few moist crumbs, they are ready. Avoid overbaking, which can lead to dry bars.

    6. How can I serve these dessert bars?

    Top with a simple glaze made from powdered sugar and orange juice or serve them plain with fresh orange slices for a delightful presentation.

    With these answers, you’re now well-equipped to tackle any questions regarding The Best Orange Bars Dessert Recipe. Enjoy baking this delightful treat, and share it with friends and family as a sweet reminder of the joys of home cooking!

  • Fun Rainbow Peeps Rice Krispie Treats

    Fun Rainbow Peeps Rice Krispie Treats

    Fun Rainbow Peeps Rice Krispie Treats: A Tropical Delight

    Introduction to Fun Rainbow Peeps Rice Krispie Treats

    Are you ready to embark on a colorful culinary adventure? Enter the world of Fun Rainbow Peeps Rice Krispie Treats, a delightful twist on classic dessert recipes that guarantees to bring a smile to your face. These treats are not only bursting with vibrant colors but are also incredibly simple to prepare, making them a perfect option for busy parents, enthusiastic bakers, and anyone looking to add a sweet touch to their day.

    Imagine gooey marshmallows, crispy Rice Krispies, and fluffy, sugary Peeps mingling together. This dessert recipe captures the essence of fun and creativity, perfect for birthdays, celebrations, or simply to brighten up a regular day. Moreover, they are customizable! Whether you prefer gluten-free, vegan, or low-calorie options, this recipe allows for substitutions that cater to various dietary preferences.

    Additionally, with just a handful of ingredients, this colorful treat is an approachable and enjoyable recipe for novice cooks and seasoned chefs alike. Not to mention, the bonding experience it provides for families, as everyone can join in mixing, molding, and decorating. This recipe is destined to be a favorite in your dessert repertoire, packed with nostalgic flavors that evoke feelings of joy and happiness.

    Benefits and Advantages of Fun Rainbow Peeps Rice Krispie Treats

    The Fun Rainbow Peeps Rice Krispie Treats offer an array of benefits that make this dessert recipe a standout choice:

    1. Ease of Preparation: The simplicity of this recipe is a significant advantage. With only three primary ingredients—Rice Krispies, marshmallows, and Peeps—it’s a quick and fun treat to whip up. Just melt, mix, and mold, and you’ll enjoy delicious results in no time. This makes them an ideal project for busy parents looking to occupy their children with a fun kitchen activity.

    2. Customizability: One of the greatest attributes of this recipe is its adaptability. You can easily swap ingredients to suit specific dietary preferences. For instance, opt for gluten-free Rice Krispies and vegan marshmallows, allowing those with dietary restrictions to enjoy these treats without worry. Additionally, it offers the opportunity to experiment with flavors and colors, turning basic ingredients into an eye-catching masterpiece.

    3. Health Benefits: While these treats are undoubtedly indulgent, they also lend themselves to healthier versions. By using lower-sugar or reduced-calorie marshmallows, you can enjoy them without the added guilt. Furthermore, you can include additional ingredients such as dried fruits or nuts for a nutrient boost, making these desserts a bit more wholesome.

    4. Perfect for Various Occasions: Whether you’re throwing a birthday party, organizing a school event, or preparing for a holiday celebration, these colorful treats can brighten any occasion. They’re not only fun to eat but also visually appealing, adding a festive flair to the dessert table. Plus, who can resist a treat topped with adorable, colorful Peeps?

    5. Engaging Activity: Making these treats can transform into a creative, bonding experience with family and friends. From choosing color combinations to decorating the treats, each step can encourage interaction and boost teamwork. This baking project becomes more than just food; it turns into memorable moments together.

    In summary, Fun Rainbow Peeps Rice Krispie Treats are a fun and fabulous way to express creativity, cater to dietary needs, and enjoy the delightful aspects of cooking with beloved ingredients. With their simplicity, health-conscious adaptations, and ability to fit seamlessly into any event, these treats are a must-add to your dessert recipe collection.

    Ingredients Overview

    Essential Ingredients for Fun Rainbow Peeps Rice Krispie Treats

    To create your vibrant Fun Rainbow Peeps Rice Krispie Treats, you will need the following ingredients:

    • 3 tablespoons unsalted butter (can be substituted with vegan butter for a dairy-free option)
    • 1 package (10 oz) mini marshmallows (use vegan marshmallows for a plant-based version)
    • 6 cups Rice Krispies cereal (gluten-free alternatives are available)
    • 1 package (10-count) Peeps in various colors (these can be arranged creatively on top or mixed in)

    Each ingredient plays a pivotal role in creating your delightful dessert:
    Butter: Adds richness and helps bind the ingredients together.
    Mini Marshmallows: The star ingredient that gives Rice Krispie treats their signature chewy texture. Their sweetness balances the slight crunch of the Rice Krispies.
    Rice Krispies: This cereal forms the base of the recipe, providing that quintessential crispy texture.
    Peeps: These marshmallow treats not only add color but offer a layer of flavor and fun, making the finished treat visually appealing.

    Dietary Substitutions to Customize Your Fun Rainbow Peeps Rice Krispie Treats

    To cater to various dietary needs, consider the following substitutions:

    • Gluten-Free: Swap regular Rice Krispies with gluten-free Rice Krispies, which are widely available at most grocery stores.
    • Vegan: Use vegan butter and marshmallows (such as Dandies or another brand) to keep this treat fully vegan-friendly.
    • Lower Sugar: Look for sugar-free or reduced-sugar marshmallows if you want a lighter version.
    • Flavor Variations: For a twist, consider adding a teaspoon of vanilla extract for extra flavor, or mix in festive sprinkles for a celebratory touch.
    • Textural Elements: You can incorporate nuts (such as almonds or pecans) or dried fruits (like cranberries or raisins) for additional nutrition and texture.

    These substitutions make it easy to adapt the recipe for individual dietary needs while maintaining the delightful experience of making and enjoying these colorful treats!

    How to Prepare the Perfect Fun Rainbow Peeps Rice Krispie Treats: Step-by-Step Guide

    Creating your Fun Rainbow Peeps Rice Krispie Treats is straightforward and enjoyable. Here’s a step-by-step guide to ensure your treat turns out perfectly every time:

    1. Prepare the Base: Begin by greasing a 9×13 inch pan with butter or cooking spray to prevent sticking.

    2. Melt the Butter: In a large saucepan, over low heat, melt 3 tablespoons of unsalted butter. Be careful not to let it brown.

    3. Add Marshmallows: Once the butter is completely melted, add the entire package of mini marshmallows to the saucepan. Stir continuously until the marshmallows are fully melted and mixed with the butter, creating a smooth and gooey mixture.

    4. Incorporate Rice Krispies: Remove the saucepan from heat, and immediately add 6 cups of Rice Krispies cereal to the marshmallow mixture. Stir gently but thoroughly until all of the cereal is evenly coated in the marshmallow.

    5. Add Peeps: If you like, you can fold in a few chopped Peeps into the mixture at this stage. This adds an extra layer of flavor.

    6. Spread Mixture into Pan: Transfer the mixture into the greased pan. Use a spatula or your hands (but be careful of the heat!) to press the mixture evenly into the pan. Ensure it’s compacted, so it holds together.

    7. Set the Treats: Allow the Rice Krispie mixture to sit at room temperature for about 30 minutes, or until set. Avoid placing it in the refrigerator, as this can make the treats too hard.

    8. Decorate with Peeps: Once set, take your Peeps and place them in fun patterns on top of the Rice Krispie treats. You can arrange them by color, or create whimsical shapes to enhance the overall presentation.

    9. Cut into Squares: To serve, use a sharp knife to cut the treats into squares or rectangles. You can also use cookie cutters to create fun shapes, ideal for parties.

    10. Serve and Enjoy: Arrange your colorful treats on a platter, and get ready to enjoy your vibrant, chewy creations with family and friends!

    Note on Customization

    Throughout the preparation process, feel free to get creative! You can customize colors, and flavors, and even mix in fun ingredients based on your preferences and dietary needs. The possibilities are endless!

    Mastering Fun Rainbow Peeps Rice Krispie Treats: Advanced Tips and Variations

    While the basic version of Fun Rainbow Peeps Rice Krispie Treats is sure to delight, here are some advanced tips and exciting variations to elevate your dessert recipe:

    1. Layered Treats: Create a fun layered effect by preparing different colors of Rice Krispie mixtures. Simply divide the marshmallow mixture into bowls and color them with a few drops of food coloring. Layer different colors in the pan for a vibrant visual.

    2. Chocolate Drizzle: For a decadent twist, melt some chocolate (milk, dark, or white) and drizzle it over the set treats before adding the Peeps. Allow the chocolate to harden for added flavor and visual appeal.

    3. Peep Variations: Use different themed Peeps depending on holidays or events—Halloween Peeps for spooky treats, heart-shaped Peeps for Valentine’s Day, or Christmas-themed Peeps can make these treats festive all year round.

    4. Fun Add-ins: Mix in mini chocolate chips, candy corn, or rice chips for a delightful texture variation. These add-ins not only provide flavor but also elevate the overall enjoyment of the treats.

    5. Serve with Dipping Sauce: Serve your treats with a side of melted chocolate or caramel as a dipping option. This adds another layer of indulgence while offering serving variety.

    By applying these tips and variations, you can transform your Fun Rainbow Peeps Rice Krispie Treats into a stunning centerpiece for any occasion!

    How to Store Fun Rainbow Peeps Rice Krispie Treats: Best Practices

    To keep your Fun Rainbow Peeps Rice Krispie Treats fresh and delicious, it’s essential to store them properly:

    • Room Temperature: The best way to store these treats is in an airtight container at room temperature. They can typically last about 3-5 days without losing their chewy texture.

    • Refrigeration: If you want to extend their shelf life, you can keep the treats in the fridge for up to a week. However, be aware that refrigeration may make them slightly harder. Allow them to come to room temperature before serving for optimal chewiness.

    • Freezing: For longer storage, you can freeze the Rice Krispie treats. Cut them into squares, wrap them tightly in plastic wrap, and place them in a resealable freezer bag. They can last up to 2 months in the freezer. When ready to enjoy, allow them to thaw at room temperature before indulging.

    • Avoiding Sticking: To prevent the treats from sticking together, you can layer parchment paper between the treats in the storage container. This simple technique keeps them manageable and easy to serve.

    By employing these storage tips, you can maintain the deliciousness of your Fun Rainbow Peeps Rice Krispie Treats, ensuring they remain a delightful treat for all!

    Nutritional Value of Fun Rainbow Peeps Rice Krispie Treats

    Understanding the nutritional value of your Fun Rainbow Peeps Rice Krispie Treats can help you indulge mindfully. Here’s an approximate nutritional breakdown per serving (based on 16 servings):

    • Calories: 140
    • Total Fat: 4g
    • Saturated Fat: 2.5g
    • Carbohydrates: 24g
    • Dietary Fiber: 0g
    • Sugars: 12g
    • Protein: 1g

    These numbers can vary based on specific ingredient choices and portions. Moreover, if you opt for dietary substitutions like sugar-free marshmallows or gluten-free Rice Krispies, the nutritional profile can change accordingly. You may want to consider amounts based on portions and any additional ingredients used.

    If you’re serving these treats at a gathering, consider balancing them out with healthier snacks options. By doing so, you can create a well-rounded spread that caters to a variety of tastes while ensuring there’s something for everyone.

    FAQs: Frequently Asked Questions About Fun Rainbow Peeps Rice Krispie Treats

    Q1: Can I use different types of cereal for this recipe?

    Absolutely! While traditional Rice Krispies work best, you can experiment with other cereals like Fruity Pebbles or Corn Flakes for a unique twist.

    Q2: How can I make these treats without marshmallows?

    For a marshmallow-free version, consider using a mixture of melted nut butter or sunflower seed butter combined with honey or maple syrup. Mix in the Rice Krispies until fully coated.

    Q3: How can I make this recipe allergy-friendly?

    To cater to allergies, use certified gluten-free Rice Krispies, vegan marshmallows, and substitutes for nuts or allergens based on individual needs. Always check labels before use.

    Q4: Can I prepare these treats ahead of time?

    Yes, you can prepare them a few days in advance. Just follow the best storage practices mentioned earlier to keep them fresh until you’re ready to serve.

    Q5: Is there a way to make these treats healthier?

    To create a healthier option, reduce the sugar by using lower sugar marshmallows, swap the butter for a healthy fat option, or incorporate nuts and dried fruits for added nutrition.

    By addressing these common questions, you can create a more informed and enjoyable baking experience. With the right knowledge, your Fun Rainbow Peeps Rice Krispie Treats will shine bright in every kitchen setting!

  • Easy Caramel Crush Bars Dessert Recipe

    Easy Caramel Crush Bars Dessert Recipe

    Easy Caramel Crush Bars Dessert Recipe: A Tropical Delight

    Introduction to Easy Caramel Crush Bars Dessert Recipe

    In the world of dessert recipes, few delights can compete with the rich, gooey satisfaction of caramel. The Easy Caramel Crush Bars Dessert Recipe is not only a mouthwatering treat but also a fantastic option for those seeking simplicity and health benefits. Designed with home cooks, busy parents, students, and health-conscious individuals in mind, this dessert is versatile enough to suit various dietary needs.

    Perfect for casual gatherings, family celebrations, or a sweet ending to a busy day, these bars combine the indulgent flavor of caramel with a crunchy base that makes every bite a delightful experience. Taking only a handful of ingredients, this recipe showcases how easy it can be to create amazing desserts without spending hours in the kitchen.

    Moreover, the Easy Caramel Crush Bars are adaptable, providing gluten-free and vegan options to ensure that everyone at the table can enjoy a slice of this tropical delight. Its straightforward preparation makes it an excellent choice for beginners and seasoned bakers alike. By embracing the essence of sweet, crunchy, and creamy, this dessert recipe effortlessly embodies comfort and joy.

    Benefits and Advantages of Easy Caramel Crush Bars Dessert Recipe

    When it comes to creating a fantastic dessert, simplicity often reigns supreme. The Easy Caramel Crush Bars Dessert Recipe stands out due to its straightforward process and adaptable nature. Within a short time, even the busiest of individuals can whip up a delightful treat that impresses both family and friends.

    1. Ease of Preparation

    One of the key attractions of this recipe is its simplicity. With minimal steps involved, busy parents and working professionals can create something that tastes gourmet without demanding hours of their precious time. Even novices in the kitchen will find this recipe approachable, allowing them to gain confidence in their baking skills.

    2. Health-Conscious Choices

    Beyond ease, health is an essential factor in today’s culinary landscape. By offering alternatives such as gluten-free or vegan ingredients, this dessert recipe accommodates various dietary preferences, ensuring that nobody misses out on dessert. For instance, utilizing coconut oil instead of butter makes these bars dairy-free and suitable for vegans.

    3. Satisfying Sweetness with Balanced Nutrition

    Although caramel usually suggests indulgence, this recipe includes options like nuts and oats that add nutritional value. These ingredients contribute beneficial fibers and proteins, making each bar a perfect balance of sweetness and sustenance. By incorporating whole food options, you not only satisfy your sweet tooth but also offer your body something nutritious.

    4. Perfect for Any Occasion

    Whether it’s a birthday party, an afternoon snack, or a romantic dinner, these bars fit seamlessly into a variety of occasions. They are easy to slice and share, making them an excellent option for gatherings. Plus, they keep well, meaning you can bake them in advance and serve them later.

    All these benefits combined make the Easy Caramel Crush Bars a standout choice among other dessert recipes. It invites everyone—be it travelers seeking easy-to-carry snacks or baking enthusiasts looking for their next project—to join in on the fun of creating something delicious.

    Ingredients Overview

    Essential Ingredients for Easy Caramel Crush Bars Dessert Recipe

    Creating delectable Easy Caramel Crush Bars couldn’t be simpler when you have the right ingredients. Below is a detailed list of what you’ll need:

    • 1 cup of rolled oats: A wholesome base that provides fiber and texture.
    • 1/2 cup of all-purpose flour (or gluten-free flour blend): Acts as a binding agent for the base.
    • 3/4 cup of brown sugar: Adds sweetness and depth of flavor to the bars.
    • 1/2 cup of unsalted butter (or coconut oil for a vegan option): Provides moisture and richness.
    • 1 cup of soft caramels: The star of this dessert, offering a rich sweetness.
    • 1/4 cup of whole milk (or any dairy/non-dairy milk substitute): Helps to melt the caramels smoothly.
    • 1/2 cup of crushed nuts (optional): Adds a delightful crunch, with almonds or pecans being popular choices.

    This ingredient list is simple yet effective, making it easy to whip up a batch without any hassle. Furthermore, those who prefer healthier options can substitute the brown sugar with coconut sugar and use almond flour instead of regular flour.

    Dietary Substitutions to Customize Your Easy Caramel Crush Bars Dessert Recipe

    This recipe can easily cater to various dietary needs. Here are some suggested substitutions:

    • Gluten-Free: Replace all-purpose flour with a gluten-free flour alternative such as almond flour or a store-bought gluten-free blend.

    • Vegan: Use coconut oil instead of butter and substitute whole milk with almond milk or oat milk. Ensure that the caramels used are vegan-friendly.

    • Low-Calorie Options: Swap out brown sugar for a granular sugar substitute like erythritol or stevia to reduce calories without sacrificing sweetness.

    By providing these alternatives, this recipe ensures it suits everyone’s dietary preferences, allowing anyone to enjoy a treat that feels indulgent without the guilt.

    How to Prepare the Perfect Easy Caramel Crush Bars Dessert Recipe: Step-by-Step Guide

    Creating these Easy Caramel Crush Bars is straightforward and enjoyable. Here’s how to prepare them step-by-step:

    1. Prepare the Base:
    2. Preheat your oven to 350°F (175°C). Grease an 8-inch square baking dish or line it with parchment paper for easy removal.

    3. Mix Dry Ingredients:

    4. In a large mixing bowl, combine rolled oats, all-purpose flour, and brown sugar. Stir until well blended.

    5. Add Wet Ingredients:

    6. Melt the butter (or coconut oil) in a saucepan over low heat. Once melted, pour it into the dry mixture and combine until a crumbly dough forms.

    7. Press the Mixture:

    8. Take about two-thirds of the mixture and press it firmly into the bottom of the prepared baking dish to form an even base.

    9. Prepare the Caramel Layer:

    10. In a separate saucepan, combine the soft caramels and whole milk (or non-dairy alternative). Heat on low, stirring continuously until melted and smooth.

    11. Spread the Caramel:

    12. Once the caramel is evenly melted, pour it over the pressed base and spread it evenly using a spatula.

    13. Top with Crumble:

    14. Take the remaining one-third of the oat mixture and scatter it evenly over the caramel layer, pressing down gently to adhere.

    15. Bake:

    16. Place the baking dish in the preheated oven and bake for about 20-25 minutes or until the top is golden brown.

    17. Cool:

    18. Allow the bars to cool in the pan for at least 30 minutes before lifting them out using the edges of the parchment paper.

    19. Slice and Serve:

      • Cut the bars into squares and serve. They can be enjoyed warm or stored for later.

    This step-by-step guide ensures that anyone can successfully create these caramel bars with ease. Feel free to adapt each step for different dietary needs, tweaking ingredients as necessary.

    Mastering Easy Caramel Crush Bars Dessert Recipe: Advanced Tips and Variations

    To elevate your Easy Caramel Crush Bars, consider the following advanced tips and variations:

    • Flavor Enhancements: Adding a teaspoon of vanilla extract or a pinch of sea salt to the caramel will enhance the flavor profile. Similarly, incorporating spices like cinnamon or nutmeg can add warmth to the bars.

    • Nut Butter Swirls: For a nutty twist, consider drizzling almond or peanut butter over the caramel layer before adding the crumble on top. This adds depth and richness.

    • Chocolate Drizzle: For chocolate lovers, melt dark chocolate and drizzle it over the cooled bars for an extra layer of indulgence.

    How to Store Easy Caramel Crush Bars Dessert Recipe: Best Practices

    Storing your Easy Caramel Crush Bars properly ensures they remain fresh and delicious.

    • Refrigeration: Store the bars in an airtight container in the fridge for up to one week. This will help keep them firm and fresh, preventing any excess moisture.

    • Freezing: For longer storage, you can freeze the bars. Wrap them well in plastic wrap or aluminum foil, and then place them in a freezer bag. When properly stored, they can last for up to three months. Simply let them thaw in the fridge or at room temperature before serving.

    • Reheating: If you enjoy warm bars, you can reheat them in the microwave for a few seconds or in the oven at a low temperature. This will refresh the gooey caramel and bring back the delightful texture.

    By following these guidelines, you’ll ensure your Easy Caramel Crush Bars stay delicious and irresistible for days.

    Nutritional Value of Easy Caramel Crush Bars Dessert Recipe

    A clear understanding of the nutritional profile of your Easy Caramel Crush Bars Dessert Recipe can help you enjoy each bite more mindfully. Here’s a general breakdown per serving (assuming 16 servings):

    • Calories: Approx. 150 calories
    • Total Fat: 7 grams
    • Saturated Fat: 4 grams
    • Trans Fat: 0 grams
    • Cholesterol: 15 mg
    • Sodium: 55 mg
    • Total Carbohydrates: 20 grams
    • Dietary Fiber: 1 gram
    • Sugars: 10 grams
    • Protein: 2 grams

    These values can vary based on substitutions made (like using coconut oil or sugar alternatives). Hence, if you adapt the recipe for dietary needs, be mindful of recalculating nutritional values accordingly.

    FAQs: Frequently Asked Questions About Easy Caramel Crush Bars Dessert Recipe

    1. Can I make these bars ahead of time?

    Absolutely! These bars can be made in advance and stored in the refrigerator for up to a week or frozen for up to three months.

    2. What can I substitute for caramels?

    If you wish, you can use homemade caramel sauce or store-bought vegan caramel as a substitute.

    3. Are these bars suitable for a gluten-free diet?

    Yes, simply replace all-purpose flour with a gluten-free flour alternative to cater to gluten-sensitive individuals.

    4. How can I make these bars healthier?

    To make them healthier, you can capitalize on natural sweeteners like honey or maple syrup and add nuts for protein.

    5. Can I vary the toppings?

    Yes! Feel free to add chocolate chips, dried fruits, or different nuts to the base for unique variations.

    Creating the Easy Caramel Crush Bars Dessert Recipe is not just about baking; it’s about crafting a delightful experience that everyone can enjoy. With its attractive appearance, delicious flavors, and healthy variations, this recipe is sure to become a staple in your collection of go-to dessert recipes. Whether for family gatherings, holiday celebrations, or cozy evenings at home, these bars are bound to impress. Happy baking!

  • The Best Easter Mini Egg Brownies

    The Best Easter Mini Egg Brownies

    The Best Easter Mini Egg Brownies: A Tropical Delight

    Introduction to The Best Easter Mini Egg Brownies

    Are you ready to indulge in a delightful dessert that celebrates the spirit of Easter while satisfying your sweet tooth? Welcome to The Best Easter Mini Egg Brownies, a unique treat that combines the richness of brownies with the playful charm of colorful mini chocolate eggs. These brownies are not just a feast for the eyes but also a deliciously satisfying choice among various dessert recipes, making them perfect for any occasion.

    What makes this recipe even better is its incredible simplicity. Whether you’re a busy parent, a student juggling studies, or a novice baker, you can whip up these brownies with minimal fuss. With straightforward ingredients and simple steps, you’ll be in and out of the kitchen in no time.

    Additionally, this recipe offers flexibility, catering to vegetarian, gluten-free, and low-calorie diets. Enjoy the delicious combination of fudgy brownies and crunchy, creamy mini eggs, while knowing you can modify the recipe to fit your needs. These brownies not only taste divine, but they can be part of a balanced lifestyle, too. It’s time to gather your ingredients and bake a batch of these delightful treats that everyone will love!

    Benefits and Advantages of The Best Easter Mini Egg Brownies

    When it comes to dessert recipes, The Best Easter Mini Egg Brownies stand out for several compelling reasons. Firstly, the ease of preparation makes them accessible to all levels of bakers. You don’t need to be a professional chef to create these indulgent treats; just a few simple ingredients and you’re ready to go! This is particularly appealing for busy individuals and parents who want to whip up a sweet surprise without spending hours in the kitchen.

    Beyond their simplicity, these brownies can be tailored to fit various dietary preferences, making them a versatile choice. For instance, if you need a vegan version, you can easily substitute traditional eggs and dairy with plant-based alternatives. Gluten-free flour options are readily available, ensuring that those with gluten sensitivities can also enjoy the same rich flavors.

    Moreover, the mini eggs provide a fun texture and beautiful appearance, making the brownies perfect for celebrations or family gatherings. The visual appeal, combined with the ease of baking, leads to a satisfying experience for bakers and eaters alike. With a balanced approach to indulgence, these brownies can even serve as a guilt-free treat, especially when you swap in lower-calorie ingredients.

    How about we delve into the components of this scrumptious recipe? You’re about to discover the essential ingredients that will bring your Easter Mini Egg Brownies to life!

    Ingredients Overview

    Essential Ingredients for The Best Easter Mini Egg Brownies

    Here is a detailed list of all the ingredients you will need to create The Best Easter Mini Egg Brownies. Each ingredient has been chosen for its specific purpose in delivering a rich flavor and satisfying texture.

    • 1 cup (200g) granulated sugar
    • Sweetens your brownies, giving them that classic dessert taste.

    • 1 cup (200g) brown sugar

    • This adds depth and moisture, resulting in fudgy brownies.

    • 1 cup (240ml) unsweetened applesauce (Vegan Option)

    • Acts as a binding agent, replacing eggs and contributing to moistness.

    • 1 cup (240ml) vegetable oil

    • Provides richness and prevents the brownies from drying out.

    • 1 tsp vanilla extract

    • Enhances the flavor, making your brownies aromatic and delicious.

    • 1 cup (125g) all-purpose flour (Gluten-Free Option: almond flour or gluten-free flour blend)

    • The backbone of your brownies, giving them structure.

    • 1/2 cup (50g) unsweetened cocoa powder

    • Imparts a deep chocolate flavor, crucial for delicious brownies.

    • 1 tsp baking powder

    • Helps the brownies rise, ensuring a light and fluffy texture.

    • 1/2 tsp salt

    • Balances the sweetness and enhances the flavors.

    • 1 to 2 cups (200-400g) mini chocolate eggs

    • These are the star of the show, adding a surprise in each bite!

    With these essential components, you’re all set to create delectable brownies that can be enjoyed by anyone who appreciates sweet treats.

    Dietary Substitutions to Customize Your The Best Easter Mini Egg Brownies

    One of the greatest advantages of The Best Easter Mini Egg Brownies is their adaptability. Here are some substitutions to cater to various dietary needs or ingredient availability:

    1. Vegan Variations:
    2. You can replace the eggs with flax eggs (1 tbsp ground flaxseed + 2.5 tbsp water per egg, allow to sit until gel-like) or use commercial egg replacers. Opt for unsweetened almond milk in place of dairy-based options.

    3. Gluten-Free Options:

    4. Use gluten-free all-purpose flour or almond flour instead of regular all-purpose flour. The gluten-free blends often contain xanthan gum to mimic the elasticity of wheat flour, ensuring you still get that perfect brownie texture.

    5. Reduced Sugar:

    6. For a lower-sugar option, replace half the granulated sugar with a sugar substitute like Stevia or Erythritol. The brownies will still taste sweet while being lighter on the sugar content.

    7. Nut-Free Variations:

    8. Should you or your guests have nut allergies, using sunflower seed butter instead of any nut butter makes for an equally satisfying and allergy-friendly treat.

    By adjusting these ingredients accordingly, you can create a batch of brownies that everyone can enjoy without compromising on flavor.

    How to Prepare the Perfect The Best Easter Mini Egg Brownies: Step-by-Step Guide

    Ready to make The Best Easter Mini Egg Brownies? Here’s the detailed, step-by-step guide to preparing these incredible treats. Let’s dive in!

    1. Preheat the Oven:
    2. Start by preheating your oven to 350°F (175°C). This ensures that your brownies bake evenly and come out perfectly moist.

    3. Prepare the Baking Pan:

    4. Grease a 9×13 inch (23×33 cm) baking pan with cooking spray or line it with parchment paper for easy removal after baking.

    5. Mix Sugars:

    6. In a large mixing bowl, combine 200g granulated sugar and 200g brown sugar. Whisk together until thoroughly mixed.

    7. Incorporate Wet Ingredients:

    8. Add 1 cup unsweetened applesauce and 1 cup vegetable oil into the sugar mixture. Stir in 1 tsp vanilla extract. Whisk until the mixture is smooth and well combined.

    9. Combine Dry Ingredients:

    10. In a separate bowl, sift together 125g all-purpose flour, 50g cocoa powder, 1 tsp baking powder, and 1/2 tsp salt. This helps to eliminate any lumps in the cocoa and flour.

    11. Combine Wet and Dry Ingredients:

    12. Gradually add the dry ingredient mixture into the wet ingredients. Stir carefully until just combined. Avoid overmixing to ensure that your brownies stay tender.

    13. Add Mini Eggs:

    14. Fold in 1 to 2 cups of mini chocolate eggs gently, reserving a handful to sprinkle on top before baking.

    15. Pour into the Pan:

    16. Pour the brownie batter into the prepared baking pan. Use a spatula to spread it evenly.

    17. Sprinkle Additional Mini Eggs:

    18. Before placing the pan in the oven, add the reserved mini eggs on the surface of the brownie batter, pressing them slightly to secure.

    19. Bake:

      • Bake in the preheated oven for approximately 25-30 minutes, or until a toothpick inserted into the center comes out with a few moist crumbs (not wet batter).
    20. Cool:

      • Once baked, remove the pan from the oven and allow it to cool completely in the pan for at least 15 minutes before slicing.
    21. Slice and Serve:

      • Cut into squares and serve. You can add a dusting of powdered sugar on top or serve with a scoop of ice cream for an elevated treat!

    These straightforward steps make it easy for anyone to create delicious brownies at home.

    Mastering The Best Easter Mini Egg Brownies: Advanced Tips and Variations

    To elevate your baking game even further, consider these advanced tips and exciting variations for your Easter Mini Egg Brownies:

    • Include a Swirl:
    • For a visually appealing brownie, consider adding a swirl of homemade or store-bought peanut butter or Nutella into your brownie batter before baking. Simply spoon it over the batter and swirl with a knife.

    • Add Nuts for Flavor:

    • If you enjoy a crunch, try adding chopped nuts (like walnuts or pecans) into the mixture. This additional texture enhances the brownies’ overall appeal.

    • Top with Ganache:

    • After the brownies have cooled, create a simple chocolate ganache by melting chocolate and heavy cream and pouring it over the top. Allow this to set for an extra rich flavor experience.

    • Seasonal Sprinkles:

    • As an alternative to mini eggs, consider using seasonal sprinkles or even dried fruits like cranberries or cherries to give the brownies a unique twist while keeping the festive spirit alive.

    By utilizing these tips and exploring variations, you can continue to adapt the recipe, making it your own while impressing friends and family.

    How to Store The Best Easter Mini Egg Brownies: Best Practices

    Storing your The Best Easter Mini Egg Brownies properly ensures they remain fresh and delicious longer. Here are the best practices for refrigerating, freezing, and reheating them:

    • At Room Temperature:
    • For short-term storage, simply keep the brownies in an airtight container at room temperature. They will stay fresh for up to 3 days.

    • Refrigeration:

    • If you need to keep them longer, transfer the brownies to the fridge. Ensure they’re covered well to prevent them from drying out. They can last up to one week in the refrigerator.

    • Freezing:

    • For longer-term storage, brownies freeze exceptionally well! Cut them into squares and wrap each square tightly in plastic wrap, then place them in a freezer-safe container. They can be frozen for up to 3 months.

    • Reheating:

    • When you’re ready to enjoy your frozen brownies, let them thaw in the refrigerator overnight. If you want to serve them warm, pop them in a microwave for a few seconds, or reheat in an oven at 300°F (150°C) for about 10 minutes.

    Utilizing these storage methods not only extends the life of your brownies but ensures they remain as delightful as the day they were baked!

    Nutritional Value of The Best Easter Mini Egg Brownies

    Understanding the nutritional value of your treats can help you enjoy them mindfully. Here’s a general breakdown of the nutritional information for The Best Easter Mini Egg Brownies based on standard ingredients, assuming 16 servings:

    • Calories per Serving: 210
    • Total Fat: 10g
    • Saturated Fat: 3g
    • Cholesterol: 0mg
    • Sodium: 150mg
    • Total Carbohydrates: 30g
    • Dietary Fiber: 2g
    • Sugars: 18g
    • Protein: 2g

    By utilizing low-calorie sweeteners or swapping in healthier oils, you can lower the calorie count and fat content. These brownies can fit into a balanced diet, especially when enjoyed in moderation.

    FAQs: Frequently Asked Questions About The Best Easter Mini Egg Brownies

    Q: Can I use different candies instead of mini eggs?

    A: Absolutely! Feel free to use chocolate chips, M&Ms, or seasonal candies that you love. This will customize your brownies and make them even more fun!

    Q: Are there any vegan options for this recipe?

    A: Yes! Replace eggs with flax eggs and use cocoa powder that’s dairy-free. Make sure to choose vegan mini eggs or use plant-based chocolate chunks.

    Q: How do I know when my brownies are baked perfectly?

    A: The best indication is to insert a toothpick in the center. It should come out with a few moist crumbs but not wet batter.

    Q: Can I double the recipe?

    A: Yes! You can easily double the ingredients for a larger batch. Make sure to adjust your baking time if you’re using a larger pan.

    Q: How can I make these brownies lower in sugar?

    A: Use a sugar substitute or decrease the amount of sugar by replacing some of it with applesauce. This keeps moisture while reducing calories.

    Q: What’s the best way to cut brownies neatly?

    A: Use a sharp knife or a plastic knife (to avoid sticking) and clean it between cuts to achieve perfectly sliced squares.

    Now you’re equipped with all the knowledge to bake The Best Easter Mini Egg Brownies, be it for a festive occasion or any sweet craving! Enjoy the blend of flavors and textures in these rich brownies that promise to be a hit with anyone who tries them.

  • Easy Ooey Gooey Banana Bars Dessert

    Easy Ooey Gooey Banana Bars Dessert

    Easy Ooey Gooey Banana Bars Dessert: A Tropical Delight

    Introduction to Easy Ooey Gooey Banana Bars Dessert

    If you’re on the lookout for a simple yet indulgent treat, then Easy Ooey Gooey Banana Bars Dessert should be at the top of your list. This delectable dessert combines the comforting flavors of ripe bananas with a gooey consistency that will satisfy your sweet tooth without requiring you to spend hours in the kitchen. Perfect for busy parents, health-conscious individuals, and baking enthusiasts alike, this banana bars recipe serves not just as a delightful dessert but as a versatile snack too.

    What makes this recipe stand out is its adaptability. Whether you’re following a vegan lifestyle, need a gluten-free option, or just want to whip up something healthy for your family, these banana bars tick all the right boxes. Plus, they are an excellent way to use up those overripe bananas that you might otherwise toss away. With all the nutritional benefits of bananas—like being rich in potassium and fiber—this easy banana bars recipe not only satisfies cravings but also fuels your body.

    In the coming sections, you’ll discover why this recipe excels, the health benefits it offers, and how you can customize it to meet various dietary restrictions. Grab your apron, and let’s dive into the world of these ooey gooey banana bars!

    Benefits and Advantages of Easy Ooey Gooey Banana Bars Dessert

    Making Easy Ooey Gooey Banana Bars Dessert is not just about indulging in a sweet treat; it also means enjoying a range of advantages that make it an ideal choice for modern cooks. First and foremost, these bars are incredibly easy to prepare, making them perfect for even the busiest of schedules. With just a handful of ingredients and minimal prep time, you can whip up a batch in no time at all.

    Health Benefits

    When discussing a banana bars recipe, it’s essential to highlight the nutritional value that bananas contribute. Not only are they an excellent source of natural energy, but they are also packed with vitamins, minerals, and dietary fiber. Using ripe bananas in your baking ensures natural sweetness while reducing the need for added sugars. This means that you can enjoy these bars while also keeping your health goals in check.

    You can easily modify the ingredients to make this recipe fit your dietary needs. For those following a vegan diet, substitutes for eggs and dairy products can effortlessly make this a wholesome treat. Gluten-free options like almond flour can replace traditional wheat flour, making these banana bars accessible for individuals with gluten sensitivities.

    Furthermore, the recipe allows for ingredient swaps, such as replacing sugar with natural sweeteners like maple syrup or coconut sugar, enhancing its health profile even further. This adaptability makes the Easy Ooey Gooey Banana Bars not just a dessert but a guilt-free option for any gathering.

    Ingredients Overview

    Essential Ingredients for Easy Ooey Gooey Banana Bars Dessert

    To create these banana bars, you’ll need the following essential ingredients:

    • Bananas (3 large, ripe): The star of the recipe, providing natural sweetness and moisture.
    • Flour (1.5 cups): All-purpose or gluten-free flour can be used for different dietary preferences.
    • Granulated Sugar (1/3 cup): For sweetness; consider using coconut sugar or maple syrup as alternatives.
    • Baking Powder (1 tsp): This will help the bars rise, giving them a light texture.
    • Salt (1/4 tsp): A pinch of salt accentuates the sweetness of the bars.
    • Vegetable Oil or Melted Coconut Oil (1/3 cup): Adds moisture; avocado oil can also be a great substitute.
    • Eggs (2 large): To bind the ingredients together; replace with flaxseed meal and water for a vegan option.
    • Vanilla Extract (1 tsp): Enhances the overall flavor of the bars.
    • Optional Mix-ins: Choose from chocolate chips, nuts, or dried fruits to customize your banana bars.

    Dietary Substitutions to Customize Your Easy Ooey Gooey Banana Bars Dessert

    Customizing your Easy Ooey Gooey Banana Bars is simple! For a gluten-free version, swap out the all-purpose flour for almond flour or a dedicated gluten-free baking blend. If you’re vegan or trying to reduce cholesterol intake, substituting eggs with chia or flaxseed meal will work perfectly. Use 1 tablespoon of chia seeds or flaxseeds mixed with 3 tablespoons of water for each egg you replace.

    For those looking to cut back on sugar, consider using ripe bananas alone for sweetness or incorporate stevia or monk fruit sweetener as a healthier alternative. You can also adjust the oil to use applesauce, which will not only cut down the calories but also add a hint of fruity flavor.

    With these alternatives in mind, you can tailor this recipe without sacrificing flavor or texture, making it an excellent choice for anyone—whether you have specific dietary needs or simply want to experiment in the kitchen.

    How to Prepare the Perfect Easy Ooey Gooey Banana Bars Dessert: Step-by-Step Guide

    Creating your Easy Ooey Gooey Banana Bars Dessert is a straightforward process! Follow these simple steps to whip up a batch that will delight your taste buds.

    1. Preheat the Oven: Preheat your oven to 350°F (175°C) and prepare a baking dish (9×13 inches) by greasing it or lining it with parchment paper.

    2. Mash the Bananas: In a large mixing bowl, mash the ripe bananas with a fork until smooth. Aim for a uniform consistency to ensure even distribution in your bars.

    3. Mix Wet Ingredients: Add the vegetable oil and sugar to the mashed bananas. Blend these using a whisk or a hand mixer until the mixture is well combined. Incorporate the eggs (or substitutes) and the vanilla extract, mixing until smooth.

    4. Combine Dry Ingredients: In a separate bowl, whisk together the flour, baking powder, and salt. This step is crucial for ensuring that your leavening agent evenly distributes throughout the mixture.

    5. Combine Wet and Dry Mixtures: Gradually fold the dry ingredients into the wet banana mixture, using a spatula or wooden spoon. Avoid overmixing; just combine until there are no dry spots.

    6. Add Optional Mix-Ins: If you’re including chocolate chips, nuts, or dried fruits, gently fold them into the batter at this point. These add-ins will elevate your ooey gooey bars!

    7. Pour into Baking Dish: Transfer the batter into your pre-prepared baking dish, spreading it evenly using a spatula. Give it a gentle shake to evenly distribute the mixture.

    8. Bake: Place the dish in the oven and bake for 25-30 minutes or until a toothpick inserted into the center comes out clean or with just a few moist crumbs attached.

    9. Cool and Slice: Once baked, remove the bars from the oven and let them cool in the pan for about 10 minutes. Then, transfer to a wire rack to cool completely before slicing them into squares.

    10. Serve and Enjoy: Once cooled, enjoy your Easy Ooey Gooey Banana Bars Dessert! Perfect for a snack, a dessert, or even breakfast on-the-go.

    This step-by-step guide highlights how simple it is to prepare this delicious treat. Each action flows smoothly into the next, ensuring that you can customize this banana bars recipe according to your tastes or dietary needs.

    Mastering Easy Ooey Gooey Banana Bars Dessert: Advanced Tips and Variations

    To elevate your Easy Ooey Gooey Banana Bars Dessert, consider these advanced tips and variations. First, for a richer flavor, you could use browned butter in place of regular vegetable oil. The nutty aroma adds depth and enhances the overall taste of the bars.

    Flavor Variations

    Don’t hesitate to experiment with flavors! Adding a pinch of cinnamon or nutmeg can bring warmth and an inviting aroma to the bars. Alternatively, mix in a tablespoon of cocoa powder for chocolate-infused banana bars. For those who prefer a tropical twist, adding shredded coconut or crushed pineapple can transform your treat into a tropical delight.

    Texture Enhancements

    For even gooier bars, try reducing the baking time slightly or adding extra banana to the recipe. This will yield a denser, more fudgy texture that some people absolutely love. Additionally, you can create a streusel topping by mixing oats, brown sugar, and butter for a crunchy layer atop your banana bars.

    Presentation Tips

    Lastly, don’t underestimate the power of presentation. Serve your banana bars warm, drizzled with a little honey or maple syrup for an extra dash of sweetness. Garnishing with fresh banana slices or a sprinkle of powdered sugar can make these bars visually appealing for gatherings or special occasions.

    With these tips, you will not only master the base recipe but also unlock a world of flavors and variations to impress your family and friends.

    How to Store Easy Ooey Gooey Banana Bars Dessert: Best Practices

    Proper storage is essential for keeping your Easy Ooey Gooey Banana Bars Dessert fresh and delicious. These bars can be stored in several ways for maximum freshness:

    Refrigeration

    To keep your banana bars moist and flavorful, store them in an airtight container in the refrigerator. They will last for about 5-7 days. If you prefer them warm, simply heat individual servings in the microwave for a few seconds.

    Freezing

    For longer preservation, consider freezing the banana bars. Cut them into individual squares and wrap each piece tightly in plastic wrap. Then, place them in a freezer-safe bag or container. Frozen banana bars can effectively last for up to 3 months. When you’re ready to enjoy, simply thaw overnight in the refrigerator or reheat directly from the freezer in the microwave.

    Reheating

    Reheating is simple—just place your banana bar on a microwave-safe plate and heat for 15-20 seconds. Alternatively, you can warm them in an oven preheated to 300°F (150°C) for about 5-8 minutes to regain their gooey goodness.

    These best practices ensure that your Easy Ooey Gooey Banana Bars Dessert remains a delightful treat right from the first bite until the last!

    Nutritional Value of Easy Ooey Gooey Banana Bars Dessert

    Understanding the nutritional value of your Easy Ooey Gooey Banana Bars Dessert can make your baking experience even more rewarding. Based on the ingredient breakdown for a standard batch (approximately 12 servings), here’s a simplified analysis:

    • Calories: 180 per serving
    • Total Fat: 7g
    • Saturated Fat: 3.5g
    • Cholesterol: 30mg
    • Sodium: 100mg
    • Total Carbohydrates: 26g
    • Dietary Fiber: 1.5g
    • Sugars: 10g
    • Protein: 2g

    These numbers provide a general idea of what you’re consuming, and they can fluctuate based on specific ingredient choices and portion sizes. For instance, replacing granulated sugar with a natural sweetener can reduce the overall sugar content, while utilizing whole grain flours can up the fiber levels.

    Moreover, if you add nuts or chocolate, keep in mind that this will change the calorie and nutritional profile. Utilizing this information can help you tailor the recipe to your health goals or dietary preferences.

    FAQs: Frequently Asked Questions About Easy Ooey Gooey Banana Bars Dessert

    1. Can I use frozen bananas for this recipe?

    Absolutely! Frozen bananas work just as well as fresh ones. Just ensure they are thawed and well-drained before mashing them into the mix.

    2. How do I know when the banana bars are done baking?

    Insert a toothpick into the center of the bars. If it comes out clean or with slightly moist crumbs, they are ready. Overbaking can lead to dry bars.

    3. Can I make these banana bars ahead of time?

    Yes, you can make them ahead of time and store them in an airtight container in the fridge for up to a week. You can also freeze them for longer storage.

    4. What can I substitute for eggs in this recipe?

    You can replace each egg with 1 tablespoon of flaxseed meal mixed with 3 tablespoons of water. Let it sit for about 5 minutes until it becomes gel-like.

    5. Can I add more sweetness to my banana bars?

    If you want extra sweetness, feel free to add chocolate chips or dried fruits. You can also drizzle some honey or maple syrup on top before serving.

    6. How can I make this recipe lower in calories?

    You can reduce the oil content, use applesauce instead of sugar, and opt for low-calorie sweeteners. This way, you’ll maintain flavor while cutting back on calories.

    These frequently asked questions not only address common concerns but also reinforce the versatility of the Easy Ooey Gooey Banana Bars Dessert, making it a plethora of possibilities for all palates.


    In conclusion, Easy Ooey Gooey Banana Bars Dessert is a fantastic treat for everyone, showcasing the goodness of bananas while allowing for customization to cater to a range of dietary needs. Its simplicity, health benefits, and versatility make it a recipe you’ll want to return to time and time again. Whether you’re indulging in these bars at a family gathering or enjoying one as a quick breakfast option, this banana bars recipe is sure to impress. Happy baking!

  • Fudgy Vegan Sourdough Brownies

    Fudgy Vegan Sourdough Brownies

    Fudgy Vegan Sourdough Brownies: A Tropical Delight

    Introduction to Fudgy Vegan Sourdough Brownies

    Are you searching for innovative dessert recipes that cater to your dietary preferences without sacrificing taste? Look no further! Fudgy Vegan Sourdough Brownies are a delightful combination of rich flavors and healthy ingredients, making them a fantastic option for anyone—whether you’re a busy parent, a student on the go, or someone simply trying to adopt a healthier lifestyle. These brownies are the perfect fusion of moistness, fudginess, and a subtle tang from the sourdough, ensuring that every bite is an explosion of deliciousness.

    What makes these brownies stand out is their versatility. They’re not just vegan; they’re also gluten-free and low-calorie, making them suitable for various dietary needs. You don’t need to feel guilty after enjoying a sweet treat! With simple preparation and wholesome ingredients, these brownies prove that you can indulge your sweet tooth without compromising on health.

    Moreover, the satisfaction of making desserts from scratch can bring joy to anyone. So, whether you’re a seasoned baker looking for a new challenge or a novice trying out new dessert recipes, this guide will inspire you to whip up a batch of these decadent brownies that will impress your family and friends. Let’s dive into the benefits of these fudgy delights!

    Benefits and Advantages of Fudgy Vegan Sourdough Brownies

    When it comes to dessert recipes, Fudgy Vegan Sourdough Brownies shine for multiple reasons. First and foremost, they are extraordinarily easy to prepare. With a handful of common ingredients and straightforward steps, you can create these scrumptious brownies in no time! Perfect for those busy weekdays or for a spontaneous dessert craving, these brownies are a reliable go-to.

    Health benefits are another standout feature of this recipe. Traditional brownies often pack in calories and unhealthy fats, but our vegan version uses ingredients that are kind to your body. For example, the sourdough adds nutritional value, promoting digestive health while contributing to the delectable texture. Plus, using wholesome plant-based substitutes ensures that these brownies are lower in saturated fats. The inclusion of nut butter, oats, and plant-based milks offers healthy fats and proteins, giving you energy to power through your day.

    In terms of flavor, these brownies draw you in with their unique taste. They’re not just your average dessert; they deliver a rich, chocolatey experience combined with a hint of tanginess. You will find that they easily satisfy even the most discerning sweet tooth while being mindful of dietary preferences. Additionally, these fudgy wonders are perfect for gatherings, potlucks, or simply enjoying at home, showcasing your culinary prowess without intense effort.

    The versatility doesn’t end there! You can adapt this recipe to include your favorite add-ins, such as nuts, seeds, or dried fruit, to elevate them even further. For those in search of wholesome dessert recipes that deliver both taste and comfort, look no further than these brownies.

    Ingredients Overview

    Essential Ingredients for Fudgy Vegan Sourdough Brownies

    To create these delectable Fudgy Vegan Sourdough Brownies, you’ll need the following ingredients:

    1. Sourdough Starter (1 cup): This will provide the distinct tanginess and contribute moisture to the brownies. If you’re new to sourdough, check your local bakery for a starter, or you can create your own at home.

    2. Flour (1 cup): Use gluten-free flour (e.g., almond or oat flour) for a gluten-free version. This is essential for structure without making the brownies dense.

    3. Cocoa Powder (⅓ cup): Unsweetened cocoa powder gives that classic chocolaty flavor. Aim for high-quality cocoa for the best results.

    4. Nut Butter (½ cup): Options include almond, peanut, or cashew butter. This adds creaminess and healthy fats, ensuring a fudgy texture.

    5. Maple Syrup or Agave Syrup (¾ cup): Use these natural sweeteners as a substitute for refined sugars. They will also provide moisture.

    6. Plant-Based Milk (¼ cup): Almond, soy, or oat milk work best. This will keep the brownies moist without dairy.

    7. Baking Powder (½ tsp): This helps the brownies rise slightly and adds a bit of fluffiness.

    8. Salt (¼ tsp): Enhances flavor, balancing the sweetness.

    9. Dark Vegan Chocolate Chips (optional, ½ cup): For chocolate lovers, these add richness and additional texture.

    These ingredients are not only easy to find but also allow for various modifications to suit your taste preferences while sticking to vegan, gluten-free, and low-calorie diets.

    Dietary Substitutions to Customize Your Fudgy Vegan Sourdough Brownies

    Here’s how you could customize your Fudgy Vegan Sourdough Brownies based on dietary needs or personal preferences:

    • Flour: Substitute with any gluten-free flour blends or even whole wheat flour if you are not gluten-sensitive.

    • Sugar: Swap maple syrup with date syrup or coconut sugar for a different sweet profile.

    • Nut Butter: If you have nut allergies, try using sunflower seed butter or tahini for a nut-free option.

    • Milk Alternatives: Choose any plant-based milk depending on your flavor preference, such as coconut milk for a tropical twist.

    • Add-Ins: Consider incorporating ingredients like chopped nuts, dried fruits, or even a dash of espresso powder for an enhanced flavor punch.

    There’s no limit to how you can make these brownies your own, proving yet again that dessert recipes can be flexible and adjustable for everyone!

    How to Prepare the Perfect Fudgy Vegan Sourdough Brownies: Step-by-Step Guide

    Now that you have everything you need, let’s get to the fun part: preparing your Fudgy Vegan Sourdough Brownies!

    1. Preheat the Oven: Begin by preheating your oven to 350°F (175°C). This ensures that your brownies bake evenly.

    2. Prepare Your Baking Dish: Line an 8×8 inch square baking dish with parchment paper, allowing some overhang for easy removal later. Lightly grease the parchment for the best results.

    3. Mix Dry Ingredients: In a large mixing bowl, combine the flour, cocoa powder, baking powder, and salt. Whisk these together until evenly mixed.

    4. Combine Wet Ingredients: In another bowl, mix the sourdough starter, nut butter, maple syrup, and plant-based milk until well blended. Use a hand mixer to ensure a smooth consistency for your wet ingredients.

    5. Combine Wet & Dry Mixtures: Gradually fold the wet mixture into the dry ingredients using a spatula. Take care to mix until just combined. Overmixing may lead to a denser texture.

    6. Add Chocolate Chips (Optional): If you’re including dark chocolate chips, gently fold them into the brownie batter now.

    7. Pour Batter into the Baking Dish: Transfer the brownie mixture into your prepared baking dish. Smooth the top with the spatula for an even bake.

    8. Bake: Place the dish in the preheated oven and bake for 25-30 minutes, or until a toothpick inserted into the center comes out with a few moist crumbs. This ensures a fudgy center.

    9. Cool: Allow the brownies to cool in the baking dish for about 10-15 minutes before removing them using the parchment paper. Transfer to a wire rack to cool completely.

    10. Cut and Serve: Once fully cooled, slice the brownies into squares and enjoy! For an extra touch, dust with cocoa powder or serve with a scoop of vegan ice cream.

    This step-by-step guide makes it easy for anyone to follow along and create delicious Fudgy Vegan Sourdough Brownies. Remember, the beauty of baking is that you can tailor it to your tastes and preferences!

    Mastering Fudgy Vegan Sourdough Brownies: Advanced Tips and Variations

    To take your Fudgy Vegan Sourdough Brownies to the next level, consider these advanced tips and variations:

    • Texture Tweaks: If you prefer a less fudgy brownie, fold in an extra 1-2 tablespoons of flour. Conversely, more nut butter can enhance the fudginess.

    • Flavor Infusion: Add a splash of vanilla extract or peppermint extract for a unique taste experience. You could also incorporate spices such as cinnamon for an extra depth of flavor.

    • Swirl It Up: Try creating a marbled effect by swirling in some vegan cream cheese or additional nut butter on top before baking.

    • Nut Varieties: Experiment with different nuts. Walnuts or pecans can add a delightful crunch, while also contributing healthy fats and nutrients.

    • Frosting Options: If you want to elevate your brownies further, consider topping them with a vegan chocolate frosting or a simple dusting of powdered sugar before serving.

    These tips and variations not only offer opportunities for creativity but also ensure that your brownies become a signature dish that impresses anyone who gets to enjoy them.

    How to Store Fudgy Vegan Sourdough Brownies: Best Practices

    To keep your Fudgy Vegan Sourdough Brownies fresh and delicious, proper storage is essential. Here are some best practices:

    • Room Temperature: If you plan to consume the brownies within a few days, you can store them in an airtight container at room temperature. They should stay fresh for about 3-4 days depending on humidity.

    • Refrigeration: For longer storage, refrigerate the brownies in an airtight container lined with parchment paper. They will keep well for up to a week. This will slightly firm up the brownies but will still retain their rich flavor.

    • Freezing: To extend their shelf life even further, these brownies can be frozen. Wrap them individually in plastic wrap, then place them in a freezer-safe bag or container. Enjoy them for up to 3 months. To eat, simply let them thaw at room temperature or microwave for a few seconds.

    • Reheating: If you prefer warm brownies, simply pop a square in the microwave for about 10-15 seconds, or until warmed through.

    By following these storage tips, you can enjoy your brownies long after they’ve left the oven while also maintaining their fudgy texture and rich flavor!

    Nutritional Value of Fudgy Vegan Sourdough Brownies

    Knowing the nutritional information can enhance the baking experience, especially for those watching their diet. Below is an approximate nutritional breakdown for a serving (1 square) of Fudgy Vegan Sourdough Brownies, assuming the recipe yields 16 squares:

    • Calories: 120
    • Total Fat: 6g
    • Saturated Fat: 1g
    • Cholesterol: 0mg
    • Sodium: 65mg
    • Total Carbohydrates: 15g
    • Dietary Fiber: 2g
    • Sugars: 7g
    • Protein: 3g

    These brownies provide a wholesome treat packed with nutrients while being lower in calories than traditional options. The healthy fats from nut butter and the fiber from whole ingredients contribute to a more balanced dessert that fits well within your nutritional goals.

    FAQs: Frequently Asked Questions About Fudgy Vegan Sourdough Brownies

    1. Can I use a different sweetener besides maple syrup?

    Absolutely! You can use agave syrup, coconut sugar, or date syrup as alternatives. Just make sure the consistency aligns with the recipe for best results.

    2. Is it possible to make these brownies nut-free?

    Yes, simply substitute the nut butter with sunbutter (sunflower seed butter) or tahini. Ensure that any add-ins you use, like chocolate chips, are also nut-free.

    3. How do I know when the brownies are done baking?

    Check for doneness by inserting a toothpick into the center. If it comes out with a few moist crumbs, they are ready. Be wary not to overbake, as you want that fudgy consistency!

    4. Can I bake these brownies in a larger or smaller pan?

    Yes, you can; however, adjust the baking time accordingly. A larger pan yields thinner brownies that will bake faster, while a smaller pan will create thicker brownies requiring a longer bake time.

    5. How can I enhance the flavor of these brownies?

    Consider adding espresso powder, spices like cinnamon, or your favorite extract (like almond or vanilla) to elevate the flavor profile of your brownies!

    These FAQs address common queries to help readers confidently prepare their Fudgy Vegan Sourdough Brownies.

    In conclusion, Fudgy Vegan Sourdough Brownies are more than just a dessert; they’re a versatile and healthy treat that fits perfectly into a diverse lifestyle. From their rich flavor to their nutritional benefits, these brownies stand out as an ideal option for anyone seeking delicious dessert recipes. So roll up your sleeves and give this recipe a try; you won’t be disappointed!