This Healthy Strawberry Bar Recipe Will Change Your Life!: A Tropical Delight
Introduction to This Healthy Strawberry Bar Recipe Will Change Your Life!
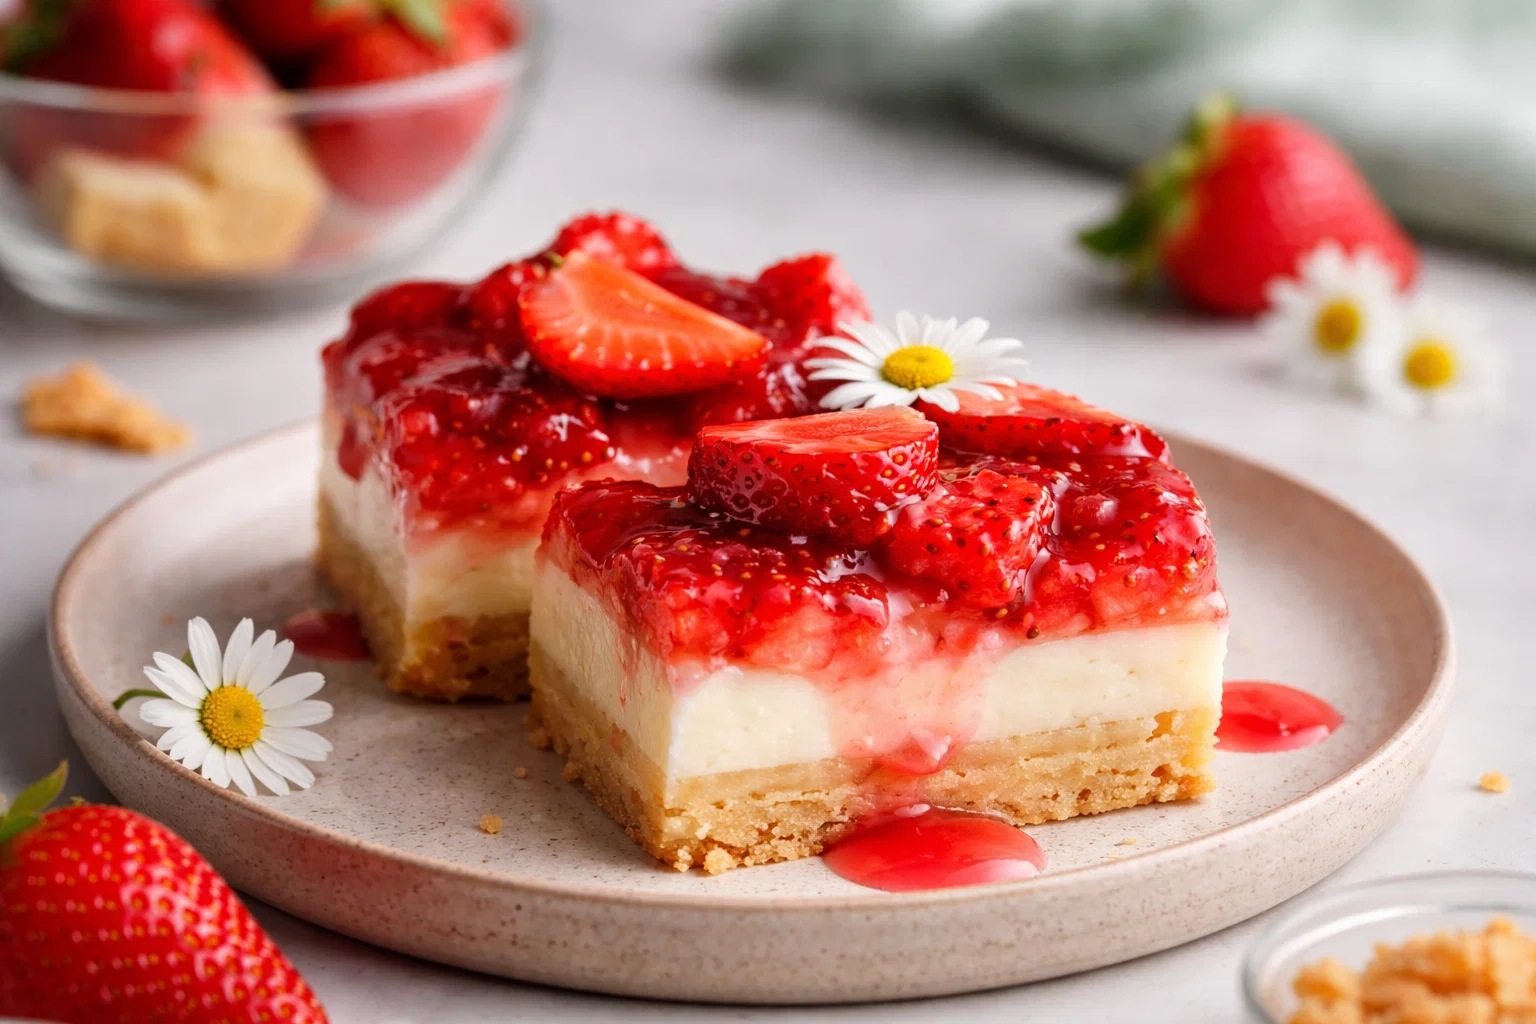
Welcome to a culinary adventure that will transform your dessert game with a burst of fruity flavor! This Healthy Strawberry Bar Recipe will change your life—not only because of its delightful taste but also due to its impressive health benefits. Renowned for their vibrant color and refreshing flavor, strawberries are the star ingredients in many healthy strawberry recipes. In this recipe, we harness their natural sweetness to create a guilt-free treat that’s not only easy to make but also caters to various dietary needs.
Imagine a dessert that is simple to whip up, packed with nutrients, and suitable for vegans, gluten-free eaters, and calorie-conscious individuals. Yes, this recipe checks all those boxes! It’s perfect for busy parents who want to prepare something wholesome for their kids, students looking for a quick yet satisfying snack, or even newlyweds seeking sweet ways to impress their partners. As you explore this recipe, you’ll discover that indulging in sweets doesn’t have to mean compromising your health.
So grab your mixing bowls and baking supplies, because this strawberry bar recipe is about to become your new go-to for all occasions, whether it’s a cozy night in or a picnic with friends. Embrace the tropical delight and let’s dive into crafting these scrumptious bars together!
Benefits and Advantages of This Healthy Strawberry Bar Recipe Will Change Your Life!
This Healthy Strawberry Bar Recipe offers a multitude of benefits, making it one of the best strawberry recipes you’ll ever come across. First and foremost, its ease of preparation makes it incredibly appealing. You don’t have to be a baking expert to succeed with this recipe; it requires minimal ingredients and simple techniques. Furthermore, it comes together quickly, allowing even the busiest of individuals to whip up a batch on a weeknight.
Nutritionally, strawberries are often celebrated for their high vitamin C content and powerful antioxidants, which contribute to a robust immune system and healthy skin. This strawberry bar recipe incorporates whole ingredients, ensuring you consume minimal refined sugars and unhealthy additives. Instead, it utilizes natural sweeteners and whole grains, providing sustained energy without the sugar crash associated with traditional desserts.
Another significant advantage is its versatility. You can easily modify this recipe to accommodate your specific dietary needs. Whether you’re gluten-sensitive or follow a vegan lifestyle, you can make adjustments without sacrificing taste. Additionally, the bars are a great source of fiber, which can aid in digestion and keep you feeling full longer.
These bars are perfect for various situations—snack time for kids, a healthy dessert option at family gatherings, or a sweet treat to satisfy your cravings while maintaining a healthy lifestyle. With all these benefits combined, it’s clear that trying out this strawberry bar recipe is an opportunity you won’t want to miss!
Ingredients Overview
Essential Ingredients for This Healthy Strawberry Bar Recipe Will Change Your Life!
To create these delicious strawberry bars, you’ll need the following essential ingredients:
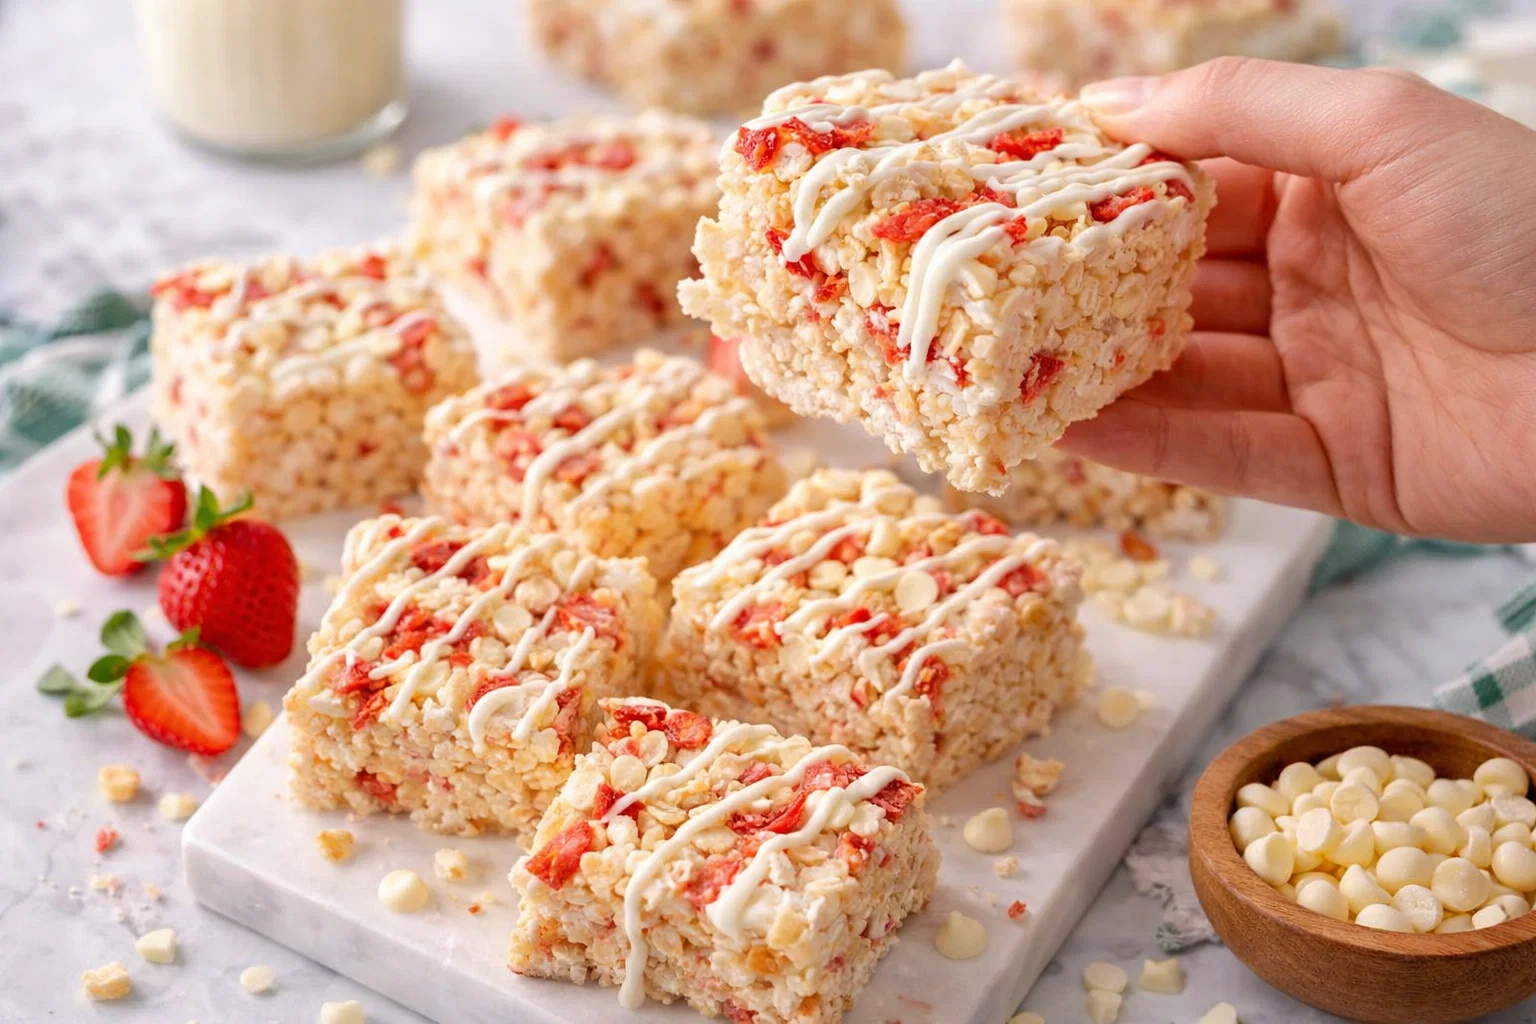
- 2 cups fresh strawberries, pureed (or 1 1/2 cups if chopped for a chunkier texture)
- 1 cup rolled oats (Gluten-free option available)
- 1/2 cup almond flour (For a gluten-free option, substitute with oat flour)
- 1/4 cup maple syrup (or agave syrup for a vegan alternative)
- 1/4 cup coconut oil, melted (or applesauce for a lower fat option)
- 1 teaspoon vanilla extract
- 1 teaspoon baking powder
- 1/4 teaspoon salt
- Optional: 1/2 cup chopped nuts or seeds (like walnuts or chia seeds for added texture)
These ingredients not only ensure a delightful taste but also contribute to a nutritious profile. The rolled oats provide a good source of fiber and complex carbohydrates, while almond flour offers healthy fats and protein. Additionally, using maple syrup as a sweetener keeps the dish refined sugar-free.
Dietary Substitutions to Customize Your This Healthy Strawberry Bar Recipe Will Change Your Life!
Customizing this strawberry bar recipe to meet different dietary preferences is simple. Here are some suggested substitutions:
- For Gluten-Free Needs: Use certified gluten-free rolled oats and replace almond flour with oat flour or coconut flour. This change will maintain the texture while ensuring safety for gluten-sensitive individuals.
- For Nut Allergies: If nuts are a concern, you can replace almond flour with sunflower seed flour, and simply omit the chopped nuts added on top.
- For Vegan Options: This recipe is inherently vegan if you use maple syrup and coconut oil. For an additional boost of flavor without added sugar, consider using ripe bananas as a natural sweetener.
- Lower-Calorie Option: If you’d prefer to lower the calorie count even further, swap the coconut oil with unsweetened applesauce. This will create a moist bar without the fat.
Marching forward, with these customizations, everyone can enjoy a slice of these delightful strawberry bars, making them truly adaptable for any occasion!
How to Prepare the Perfect This Healthy Strawberry Bar Recipe Will Change Your Life!: Step-by-Step Guide
Creating your Healthy Strawberry Bars is as easy as following these step-by-step instructions. Let’s get started!
-
Preheat the Oven: Begin by preheating your oven to 350°F (175°C). This ensures that the bars bake evenly and become perfectly golden brown.
-
Prepare the Baking Dish: Line an 8×8-inch baking dish with parchment paper. Allow the paper to hang over the edges for easy removal later.
-
Combine Dry Ingredients: In a large mixing bowl, combine the rolled oats, almond flour, baking powder, and salt. Whisk the ingredients together to ensure they are evenly mixed.
-
Mix Wet Ingredients: In another bowl, combine the pureed strawberries, maple syrup, melted coconut oil, and vanilla extract. Stir until well combined.
-
Combine Both Mixtures: Gradually add the wet ingredient mixture into the dry ingredients. Stir gently until everything is well combined; avoid overmixing to maintain the texture.
-
Fold in Optional Ingredients: If you’re using nuts or seeds, fold them in gently at this stage for an added crunch.
-
Transfer to Baking Dish: Pour the batter into the prepared baking dish and spread it evenly using a spatula. Press down lightly to compact the mixture.
-
Bake the Bars: Place the baking dish in the preheated oven and bake for 25-30 minutes, or until the edges start to turn golden and a toothpick inserted in the center comes out clean.
-
Cool: Once baked, remove the dish from the oven and let it cool in the pan for about 15 minutes. Gently lift the bars out using the parchment paper and transfer them to a wire rack to cool completely.
-
Slice and Serve: Once the bars have cooled down, slice them into squares or rectangles, depending on your preferred size. Serve immediately, or store them for later!
Feel free to adjust baking times depending on your oven or desired texture—more time for a firmer bar, less for a softer one. This step-wise recipe captures the essence of snacking on healthy strawberry recipes, making it a delight for everyone!
Mastering This Healthy Strawberry Bar Recipe Will Change Your Life!: Advanced Tips and Variations
To truly master your Healthy Strawberry Bars, consider these advanced tips and variations:
-
Add Other Fruits: Mix in different fruits for varied flavors. Blueberries, raspberries, or even bananas work phenomenally well with strawberries. Each can introduce a new burst of sweetness and nutrition.
-
Experiment with Spices: Incorporate cinnamon or nutmeg for an added aromatickick. A sprinkle of cinnamon not only enhances the flavor but also adds additional health benefits.
-
Top it Off: Before baking, you can sprinkle a mixture of oats and a bit of brown sugar or coconut sugar on top for an added crunch and sweetness. This will create a delightful topping that elevates the bars.
-
Storage Tip: These bars can also be frozen in individual servings. Wrap the cooled bars in plastic wrap or store them in an airtight container to maintain freshness. This makes them great for meal prep for busy weeks ahead!
Make these delicious strawberry recipes truly your own by implementing these variations; your taste buds will thank you!
How to Store This Healthy Strawberry Bar Recipe Will Change Your Life!: Best Practices
Storing your Healthy Strawberry Bars properly is essential to ensure they maintain their flavor and texture. Here are some best practices:
-
Refrigeration: Store the bars in an airtight container in the refrigerator. They will stay fresh for up to a week. Placing parchment between the bars can help prevent sticking.
-
Freezing: To freeze, wrap each bar individually in plastic wrap and then store them in a freezer bag. They can last up to 3 months in the freezer. When you’re ready to enjoy, simply thaw at room temperature or pop them in the microwave for a few seconds.
-
Reheating: If you prefer your strawberry bars warm, consider reheating them in a toaster oven or microwave. This will refresh their delightful texture and aroma!
Effective storage ensures that you always have a delicious, healthy treat at your fingertips. With these tips in mind, you can enjoy your strawberry bars longer!
Nutritional Value of This Healthy Strawberry Bar Recipe Will Change Your Life!
Understanding the nutritional value of your Healthy Strawberry Bars can help you appreciate this dessert even more. Here’s a nutritional breakdown per serving based on an 8-serving batch:
- Calories: Approximately 150-180 calories
- Total Fat: 7-9g (depending on the oil used)
- Saturated Fat: 5g (if using coconut oil)
- Carbohydrates: 20-25g
- Dietary Fiber: 3-5g
- Sugars: 8-10g (natural sugars from strawberries and maple syrup)
- Protein: 3-5g
Additionally, strawberries are a rich source of vitamin C and manganese, while oats provide you with essential B vitamins and iron. The combination of healthy fats from almond flour and coconut oil also contributes to overall heart health.
With every bite of these strawberry bars, you’re not only satisfying your sweet tooth but also nourishing your body. This is one of the many reasons why this Healthy Strawberry Bar Recipe will truly change your life!
FAQs: Frequently Asked Questions About This Healthy Strawberry Bar Recipe Will Change Your Life!
To ensure you have all the information you need, here are some frequently asked questions about this strawberry bar recipe:
1. Can I use frozen strawberries instead of fresh?
Yes, frozen strawberries can be used, but be sure to thaw them and drain any excess liquid before mixing to avoid a soggy texture.
2. How can I lower the sugar content?
Consider reducing the amount of maple syrup or using a sugar substitute like monk fruit sweetener, which can significantly lower the sugar content while maintaining sweetness.
3. What if I don’t have almond flour?
You can substitute almond flour with any nut flour or use oats blended to a fine powder to achieve a similar texture.
4. Can I make these bars nut-free?
Absolutely! Just replace almond flour with sunflower seed flour or use coconut flour and omit any nuts from the recipe.
5. How long do these strawberry bars last?
When stored properly in an airtight container in the refrigerator, they should last about a week. You can also freeze them for up to 3 months.
There you have it—everything you need to know about making this Healthy Strawberry Bar Recipe! With its simplicity and health benefits, this dessert is sure to become a staple in your kitchen. Enjoy making and indulging in these delicious strawberry bars, and remember, you’re not just treating yourself; you’re nourishing your body!