Easy Ooey Gooey Banana Bars Dessert: A Tropical Delight
Introduction to Easy Ooey Gooey Banana Bars Dessert
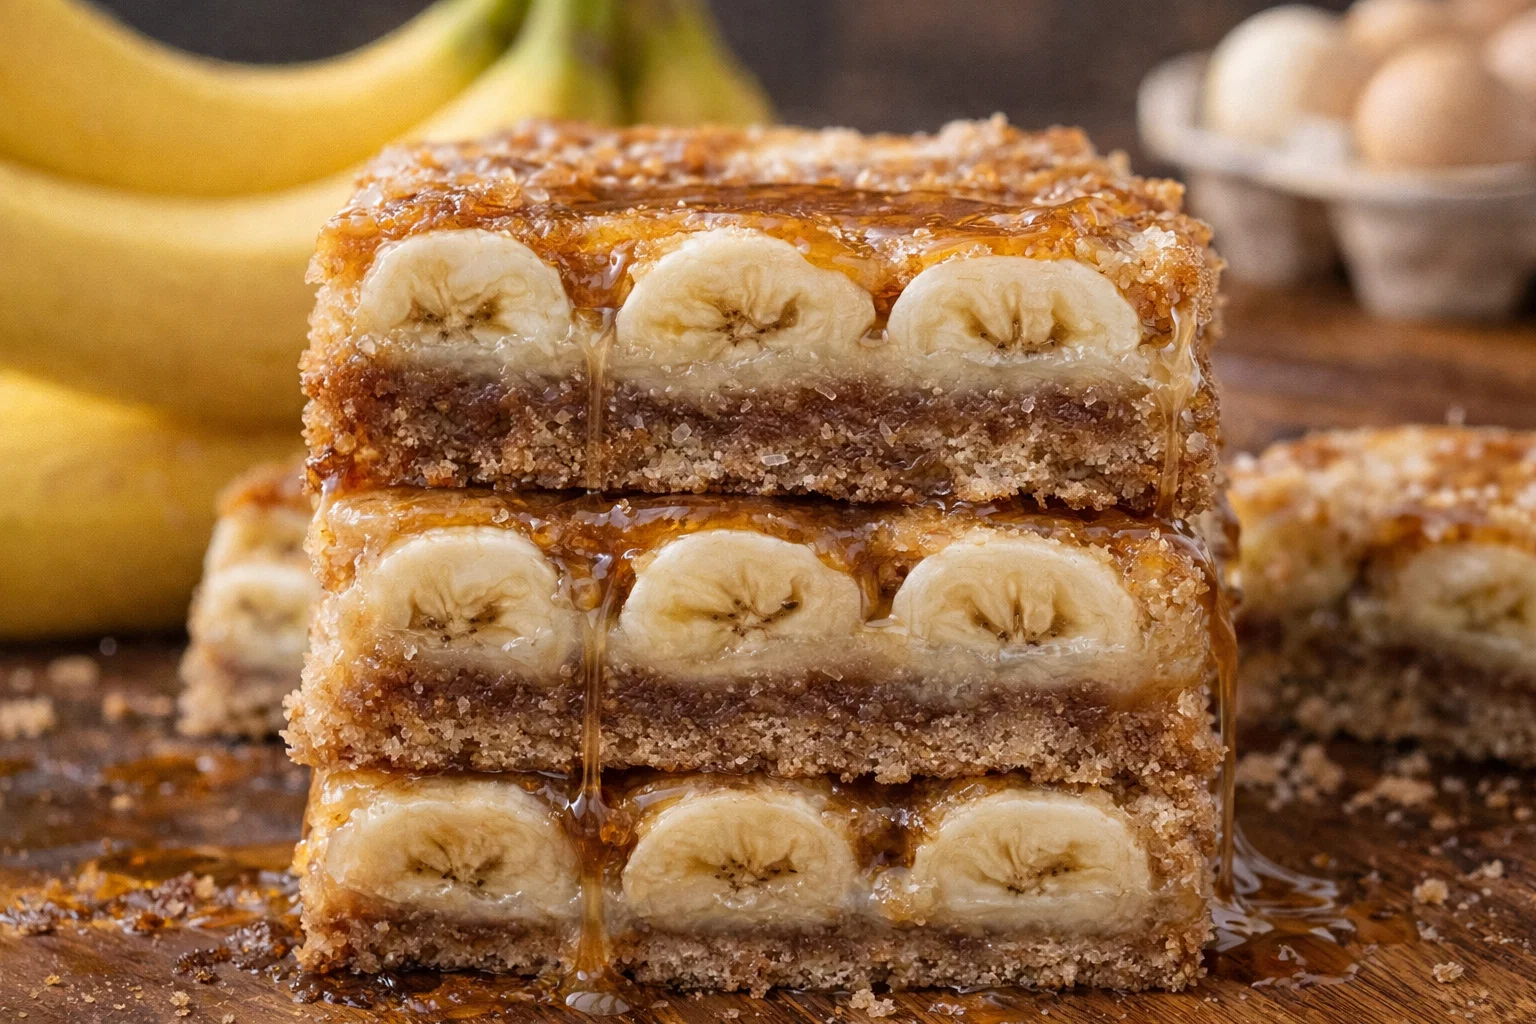
If you’re on the lookout for a simple yet indulgent treat, then Easy Ooey Gooey Banana Bars Dessert should be at the top of your list. This delectable dessert combines the comforting flavors of ripe bananas with a gooey consistency that will satisfy your sweet tooth without requiring you to spend hours in the kitchen. Perfect for busy parents, health-conscious individuals, and baking enthusiasts alike, this banana bars recipe serves not just as a delightful dessert but as a versatile snack too.
What makes this recipe stand out is its adaptability. Whether you’re following a vegan lifestyle, need a gluten-free option, or just want to whip up something healthy for your family, these banana bars tick all the right boxes. Plus, they are an excellent way to use up those overripe bananas that you might otherwise toss away. With all the nutritional benefits of bananas—like being rich in potassium and fiber—this easy banana bars recipe not only satisfies cravings but also fuels your body.
In the coming sections, you’ll discover why this recipe excels, the health benefits it offers, and how you can customize it to meet various dietary restrictions. Grab your apron, and let’s dive into the world of these ooey gooey banana bars!
Benefits and Advantages of Easy Ooey Gooey Banana Bars Dessert
Making Easy Ooey Gooey Banana Bars Dessert is not just about indulging in a sweet treat; it also means enjoying a range of advantages that make it an ideal choice for modern cooks. First and foremost, these bars are incredibly easy to prepare, making them perfect for even the busiest of schedules. With just a handful of ingredients and minimal prep time, you can whip up a batch in no time at all.
Health Benefits
When discussing a banana bars recipe, it’s essential to highlight the nutritional value that bananas contribute. Not only are they an excellent source of natural energy, but they are also packed with vitamins, minerals, and dietary fiber. Using ripe bananas in your baking ensures natural sweetness while reducing the need for added sugars. This means that you can enjoy these bars while also keeping your health goals in check.
You can easily modify the ingredients to make this recipe fit your dietary needs. For those following a vegan diet, substitutes for eggs and dairy products can effortlessly make this a wholesome treat. Gluten-free options like almond flour can replace traditional wheat flour, making these banana bars accessible for individuals with gluten sensitivities.
Furthermore, the recipe allows for ingredient swaps, such as replacing sugar with natural sweeteners like maple syrup or coconut sugar, enhancing its health profile even further. This adaptability makes the Easy Ooey Gooey Banana Bars not just a dessert but a guilt-free option for any gathering.
Ingredients Overview
Essential Ingredients for Easy Ooey Gooey Banana Bars Dessert
To create these banana bars, you’ll need the following essential ingredients:
- Bananas (3 large, ripe): The star of the recipe, providing natural sweetness and moisture.
- Flour (1.5 cups): All-purpose or gluten-free flour can be used for different dietary preferences.
- Granulated Sugar (1/3 cup): For sweetness; consider using coconut sugar or maple syrup as alternatives.
- Baking Powder (1 tsp): This will help the bars rise, giving them a light texture.
- Salt (1/4 tsp): A pinch of salt accentuates the sweetness of the bars.
- Vegetable Oil or Melted Coconut Oil (1/3 cup): Adds moisture; avocado oil can also be a great substitute.
- Eggs (2 large): To bind the ingredients together; replace with flaxseed meal and water for a vegan option.
- Vanilla Extract (1 tsp): Enhances the overall flavor of the bars.
- Optional Mix-ins: Choose from chocolate chips, nuts, or dried fruits to customize your banana bars.
Dietary Substitutions to Customize Your Easy Ooey Gooey Banana Bars Dessert
Customizing your Easy Ooey Gooey Banana Bars is simple! For a gluten-free version, swap out the all-purpose flour for almond flour or a dedicated gluten-free baking blend. If you’re vegan or trying to reduce cholesterol intake, substituting eggs with chia or flaxseed meal will work perfectly. Use 1 tablespoon of chia seeds or flaxseeds mixed with 3 tablespoons of water for each egg you replace.
For those looking to cut back on sugar, consider using ripe bananas alone for sweetness or incorporate stevia or monk fruit sweetener as a healthier alternative. You can also adjust the oil to use applesauce, which will not only cut down the calories but also add a hint of fruity flavor.
With these alternatives in mind, you can tailor this recipe without sacrificing flavor or texture, making it an excellent choice for anyone—whether you have specific dietary needs or simply want to experiment in the kitchen.
How to Prepare the Perfect Easy Ooey Gooey Banana Bars Dessert: Step-by-Step Guide
Creating your Easy Ooey Gooey Banana Bars Dessert is a straightforward process! Follow these simple steps to whip up a batch that will delight your taste buds.
-
Preheat the Oven: Preheat your oven to 350°F (175°C) and prepare a baking dish (9×13 inches) by greasing it or lining it with parchment paper.
-
Mash the Bananas: In a large mixing bowl, mash the ripe bananas with a fork until smooth. Aim for a uniform consistency to ensure even distribution in your bars.
-
Mix Wet Ingredients: Add the vegetable oil and sugar to the mashed bananas. Blend these using a whisk or a hand mixer until the mixture is well combined. Incorporate the eggs (or substitutes) and the vanilla extract, mixing until smooth.
-
Combine Dry Ingredients: In a separate bowl, whisk together the flour, baking powder, and salt. This step is crucial for ensuring that your leavening agent evenly distributes throughout the mixture.
-
Combine Wet and Dry Mixtures: Gradually fold the dry ingredients into the wet banana mixture, using a spatula or wooden spoon. Avoid overmixing; just combine until there are no dry spots.
-
Add Optional Mix-Ins: If you’re including chocolate chips, nuts, or dried fruits, gently fold them into the batter at this point. These add-ins will elevate your ooey gooey bars!
-
Pour into Baking Dish: Transfer the batter into your pre-prepared baking dish, spreading it evenly using a spatula. Give it a gentle shake to evenly distribute the mixture.
-
Bake: Place the dish in the oven and bake for 25-30 minutes or until a toothpick inserted into the center comes out clean or with just a few moist crumbs attached.
-
Cool and Slice: Once baked, remove the bars from the oven and let them cool in the pan for about 10 minutes. Then, transfer to a wire rack to cool completely before slicing them into squares.
-
Serve and Enjoy: Once cooled, enjoy your Easy Ooey Gooey Banana Bars Dessert! Perfect for a snack, a dessert, or even breakfast on-the-go.
This step-by-step guide highlights how simple it is to prepare this delicious treat. Each action flows smoothly into the next, ensuring that you can customize this banana bars recipe according to your tastes or dietary needs.
Mastering Easy Ooey Gooey Banana Bars Dessert: Advanced Tips and Variations
To elevate your Easy Ooey Gooey Banana Bars Dessert, consider these advanced tips and variations. First, for a richer flavor, you could use browned butter in place of regular vegetable oil. The nutty aroma adds depth and enhances the overall taste of the bars.
Flavor Variations
Don’t hesitate to experiment with flavors! Adding a pinch of cinnamon or nutmeg can bring warmth and an inviting aroma to the bars. Alternatively, mix in a tablespoon of cocoa powder for chocolate-infused banana bars. For those who prefer a tropical twist, adding shredded coconut or crushed pineapple can transform your treat into a tropical delight.
Texture Enhancements
For even gooier bars, try reducing the baking time slightly or adding extra banana to the recipe. This will yield a denser, more fudgy texture that some people absolutely love. Additionally, you can create a streusel topping by mixing oats, brown sugar, and butter for a crunchy layer atop your banana bars.
Presentation Tips
Lastly, don’t underestimate the power of presentation. Serve your banana bars warm, drizzled with a little honey or maple syrup for an extra dash of sweetness. Garnishing with fresh banana slices or a sprinkle of powdered sugar can make these bars visually appealing for gatherings or special occasions.
With these tips, you will not only master the base recipe but also unlock a world of flavors and variations to impress your family and friends.
How to Store Easy Ooey Gooey Banana Bars Dessert: Best Practices
Proper storage is essential for keeping your Easy Ooey Gooey Banana Bars Dessert fresh and delicious. These bars can be stored in several ways for maximum freshness:
Refrigeration
To keep your banana bars moist and flavorful, store them in an airtight container in the refrigerator. They will last for about 5-7 days. If you prefer them warm, simply heat individual servings in the microwave for a few seconds.
Freezing
For longer preservation, consider freezing the banana bars. Cut them into individual squares and wrap each piece tightly in plastic wrap. Then, place them in a freezer-safe bag or container. Frozen banana bars can effectively last for up to 3 months. When you’re ready to enjoy, simply thaw overnight in the refrigerator or reheat directly from the freezer in the microwave.
Reheating
Reheating is simple—just place your banana bar on a microwave-safe plate and heat for 15-20 seconds. Alternatively, you can warm them in an oven preheated to 300°F (150°C) for about 5-8 minutes to regain their gooey goodness.
These best practices ensure that your Easy Ooey Gooey Banana Bars Dessert remains a delightful treat right from the first bite until the last!
Nutritional Value of Easy Ooey Gooey Banana Bars Dessert
Understanding the nutritional value of your Easy Ooey Gooey Banana Bars Dessert can make your baking experience even more rewarding. Based on the ingredient breakdown for a standard batch (approximately 12 servings), here’s a simplified analysis:
- Calories: 180 per serving
- Total Fat: 7g
- Saturated Fat: 3.5g
- Cholesterol: 30mg
- Sodium: 100mg
- Total Carbohydrates: 26g
- Dietary Fiber: 1.5g
- Sugars: 10g
- Protein: 2g
These numbers provide a general idea of what you’re consuming, and they can fluctuate based on specific ingredient choices and portion sizes. For instance, replacing granulated sugar with a natural sweetener can reduce the overall sugar content, while utilizing whole grain flours can up the fiber levels.
Moreover, if you add nuts or chocolate, keep in mind that this will change the calorie and nutritional profile. Utilizing this information can help you tailor the recipe to your health goals or dietary preferences.
FAQs: Frequently Asked Questions About Easy Ooey Gooey Banana Bars Dessert
1. Can I use frozen bananas for this recipe?
Absolutely! Frozen bananas work just as well as fresh ones. Just ensure they are thawed and well-drained before mashing them into the mix.
2. How do I know when the banana bars are done baking?
Insert a toothpick into the center of the bars. If it comes out clean or with slightly moist crumbs, they are ready. Overbaking can lead to dry bars.
3. Can I make these banana bars ahead of time?
Yes, you can make them ahead of time and store them in an airtight container in the fridge for up to a week. You can also freeze them for longer storage.
4. What can I substitute for eggs in this recipe?
You can replace each egg with 1 tablespoon of flaxseed meal mixed with 3 tablespoons of water. Let it sit for about 5 minutes until it becomes gel-like.
5. Can I add more sweetness to my banana bars?
If you want extra sweetness, feel free to add chocolate chips or dried fruits. You can also drizzle some honey or maple syrup on top before serving.
6. How can I make this recipe lower in calories?
You can reduce the oil content, use applesauce instead of sugar, and opt for low-calorie sweeteners. This way, you’ll maintain flavor while cutting back on calories.
These frequently asked questions not only address common concerns but also reinforce the versatility of the Easy Ooey Gooey Banana Bars Dessert, making it a plethora of possibilities for all palates.
In conclusion, Easy Ooey Gooey Banana Bars Dessert is a fantastic treat for everyone, showcasing the goodness of bananas while allowing for customization to cater to a range of dietary needs. Its simplicity, health benefits, and versatility make it a recipe you’ll want to return to time and time again. Whether you’re indulging in these bars at a family gathering or enjoying one as a quick breakfast option, this banana bars recipe is sure to impress. Happy baking!