Tasty Garlic Dough Balls: A Tropical Delight
Introduction to Tasty Garlic Dough Balls
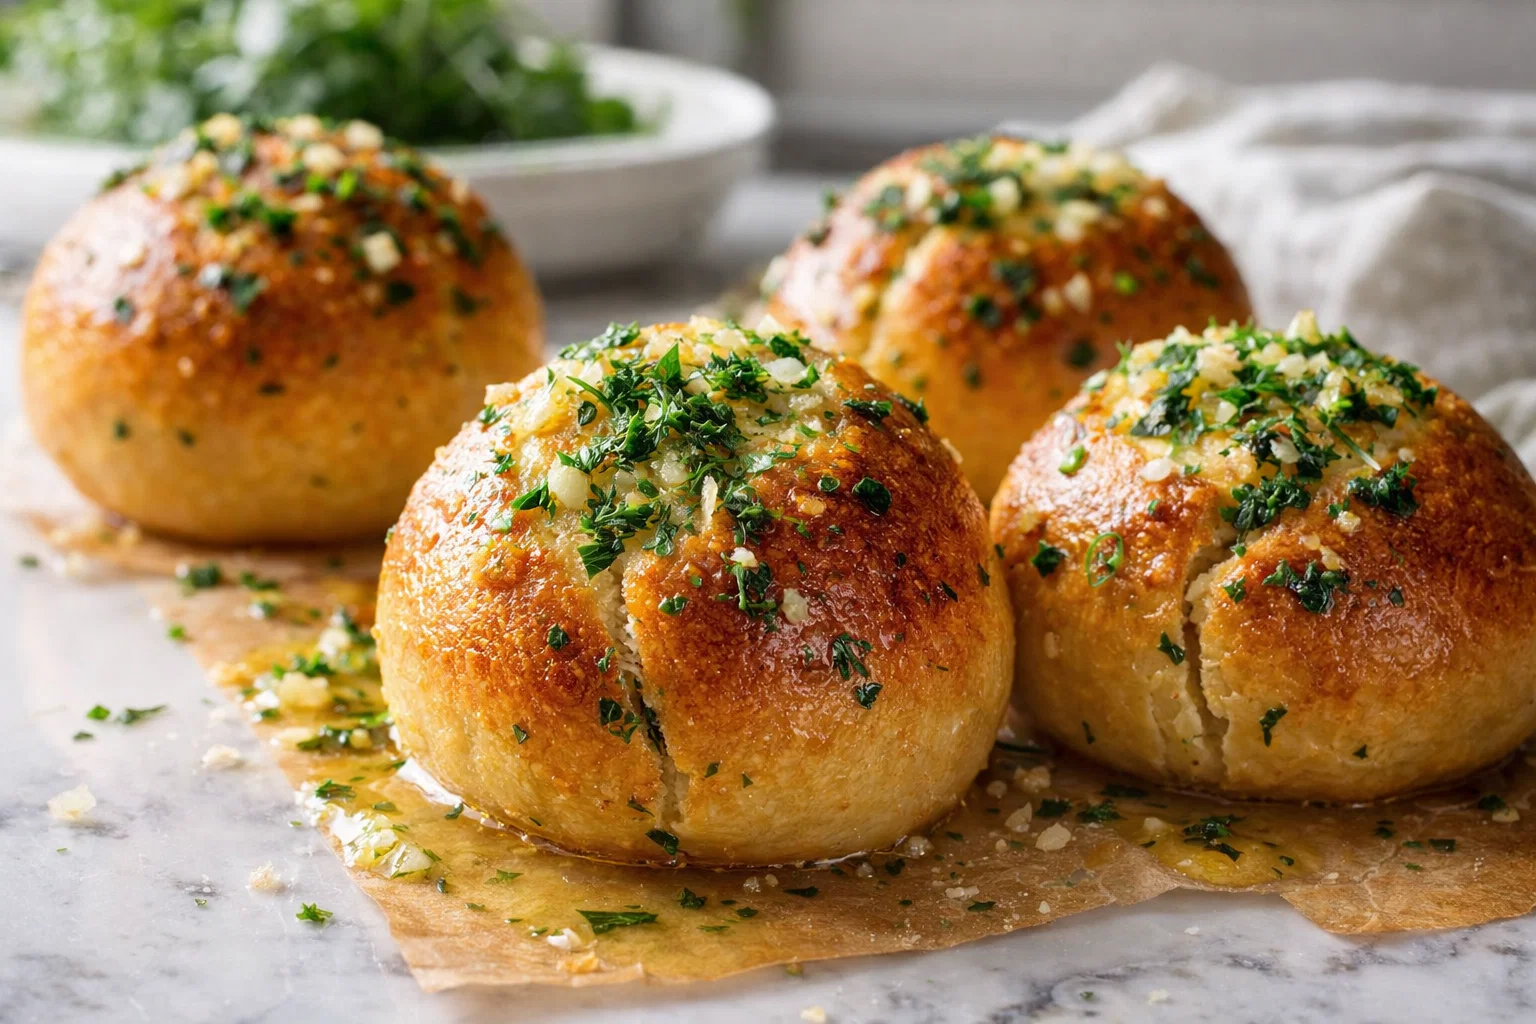
If you’re on the lookout for an easy and delectable starter, Tasty Garlic Dough Balls are your answer! Perfect as an appetizer recipe, they’re not only simple to whip up but also cater to various dietary needs, making them a fantastic choice for everyone—from busy parents to health-conscious individuals. Imagine biting into warm, fluffy dough infused with aromatic garlic and a hint of herbs. Whether served at a family gathering, a dinner party, or just a cozy night in, these garlic dough balls are sure to impress.
This recipe shines in its simplicity. Unlike more complex dishes, it requires minimal ingredients and a straightforward cooking process. Moreover, these dough balls are easily adaptable—vegan options exist for plant-based eaters, and gluten-free variants ensure that those with sensitivities can indulge without worry. The health benefits are substantial, as the recipe uses wholesome ingredients that provide good nutrition without empty calories.
Moreover, these garlic dough balls can be paired with various dips, making them versatile and suitable for any occasion. Whether you’re preparing a special meal for your loved ones or just a casual snack, you can’t go wrong with this delightful recipe that balances flavor, simplicity, and health benefits.
Benefits and Advantages of Tasty Garlic Dough Balls
There are numerous reasons to fall in love with Tasty Garlic Dough Balls! First and foremost, their preparation is incredibly straightforward. In just a few simple steps, you can create a delicious appetizer that impresses both family and friends. Furthermore, they require minimal cooking skills, making them accessible for home cooks of all experience levels.
Additionally, these garlic-infused delights are not just delicious but also nutritious. Garlic is well-known for its health benefits, including boosting your immune system and possessing anti-inflammatory properties. When combined with whole wheat flour or gluten-free alternatives, these dough balls turn into a nutritious treat that fits into various diets. They are hearty and satisfying while being low in calories compared to many fried snacks.
Another important aspect is versatility. These dough balls can be enjoyed as a casual finger food, a side dish, or even as a main course when served with a salad or soup. From succulent garlic butter to fragrant herbs, the flavor palette is expansive, allowing for creative expression based on your tastes and preferences.
Ultimately, Tasty Garlic Dough Balls stand out among numerous appetizer recipes due to their delightful taste, health benefits, and ease of customization. They can fit seamlessly into busy lives, offering something delicious that everyone can enjoy.
Ingredients Overview
Essential Ingredients for Tasty Garlic Dough Balls
To make the best Tasty Garlic Dough Balls, gather the following ingredients:
- All-Purpose Flour: 2 cups
- Purpose: Serves as the base for your dough; gluten-free flour can be substituted for those with gluten sensitivities.
- Active Dry Yeast: 1 packet (2¼ teaspoons)
- Purpose: Helps dough rise, giving it that fluffy texture.
- Sugar: 1 tablespoon
- Purpose: Feeds the yeast for optimal rising.
- Salt: ½ teaspoon
- Purpose: Enhances flavor and controls yeast activity.
- Warm Water: ¾ cup (around 110°F)
- Purpose: Activates yeast; too hot or too cold can hinder yeast functionality.
- Olive Oil: 2 tablespoons
- Purpose: Adds moisture and flavor, and promotes a crispy crust.
- Garlic: 4 cloves, minced (or more for a robust flavor)
- Purpose: The star ingredient, providing the signature garlic flavor.
- Fresh Parsley (or Italian seasoning): 1 tablespoon, chopped
- Purpose: Adds a touch of freshness and enhances the flavor profile; optional for a herbal twist.
Diet-Conscious Options:
– To make vegan dough balls, simply replace the butter found in some variations with more olive oil or vegan butter.
– Gluten-free flour can be substituted for those with gluten sensitivities.
Dietary Substitutions to Customize Your Tasty Garlic Dough Balls
One of the great aspects of Tasty Garlic Dough Balls is their adaptability! Here are some valuable substitutions:
- Flour: Instead of all-purpose flour, opt for a gluten-free flour blend, such as almond flour or coconut flour. Just remember that cooking times may vary when using alternative flours.
- Oil: If olive oil isn’t accessible, any mild-flavored oil—such as canola or avocado oil—can work just as well.
- Garlic Alternative: For those who prefer a less intense flavor, roasted garlic or garlic powder can be used as a milder alternative.
- Herbs: Experiment with different herbs: oregano, rosemary, or thyme can replace the parsley for a different flavor profile.
- Dipping Sauces: Of course, feel free to customize the dips as well! Options like marinara, lemongrass dipping sauce, or savory yogurt dip can provide exciting experiences.
By embracing such substitutions, anyone can enjoy this tasty dish while catering to their specific dietary needs.
How to Prepare the Perfect Tasty Garlic Dough Balls: Step-by-Step Guide
Ready to indulge in Tasty Garlic Dough Balls? Here’s a clear, step-by-step guide to help you create these delightful morsels:
-
Activate the Yeast:
In a small bowl, combine warm water (¾ cup) with sugar and active dry yeast. Allow it to sit for about 5-10 minutes until frothy. This indicates that the yeast is active. -
Mix Dry Ingredients:
In a large mixing bowl, combine the all-purpose flour (2 cups) and salt (½ teaspoon). Whisk them together to ensure even distribution. -
Combine Mixtures:
Once the yeast is active, pour it into the bowl with dry ingredients. Then, add olive oil (2 tablespoons) and minced garlic (4 cloves). Mix until the dough begins to form. -
Knead the Dough:
On a floured surface, transfer the dough and knead for about 5-7 minutes. If the dough is too sticky, sprinkle a little more flour. You should achieve a smooth, elastic texture. -
First Rise:
Place the kneaded dough in a lightly oiled bowl. Cover it with a clean kitchen towel or plastic wrap and let it rise in a warm place for about 1-1.5 hours or until it doubles in size. -
Shape the Dough Balls:
After the dough has risen, punch it down to release air. Divide the dough into 16 equal pieces. Roll each piece into a ball using your palms. -
Second Rise:
Arrange the dough balls on a lightly greased baking sheet, close together but not touching. Cover them with a towel and let them rise for another 30-45 minutes. -
Preheat the Oven:
While the dough is rising, preheat your oven to 375°F (190°C) to prepare for baking. -
Bake:
Once the dough balls have risen again, place them in the oven. Bake for 15-20 minutes until they are golden brown on top. -
Brush with Butter:
(Optional) If desired, melt some butter with a little garlic powder or minced garlic. Brush it generously over the dough balls immediately after removing them from the oven for an extra flavor boost. -
Serve and Enjoy:
Serve warm alongside your favorite dipping sauce and enjoy!
This preparation process seamlessly incorporates the keyphrase “appetizer recipes,” highlighting how easy it is to follow, ensuring adaptations for various dietary needs, and satisfying your cravings.
Mastering Tasty Garlic Dough Balls: Advanced Tips and Variations
To elevate your Tasty Garlic Dough Balls, consider these advanced tips and variations:
-
Garlic Confit: For a more refined flavor, utilize garlic confit instead of raw garlic. Simply cook garlic cloves slow and low in olive oil until soft and sweet.
-
Cheesy Version: Add cheese—such as mozzarella or parmesan—into the dough for an extra cheesy experience. This transforms the dough balls into a more indulgent treat.
-
Sweet Potato Dough Balls: Incorporate mashed sweet potatoes into the dough for added nutrition and a sweet flavor twist. This variation is ideal for both health-conscious individuals and those who enjoy experimenting.
-
Herb-Infused Oil: Experiment with infusing the olive oil with herbs such as rosemary or thyme before adding it to the dough. This small change can elevate the flavor significantly.
-
Serving Suggestions: Pair your dough balls with a variety of dips like balsamic vinegar, aioli, or guacamole. You could even create a small platter with assorted dips to delight your guests.
These tips not only enhance the flavors but also provide additional texture and options that suit various palates and occasions.
How to Store Tasty Garlic Dough Balls: Best Practices
If you have any leftover Tasty Garlic Dough Balls (though unlikely), follow these best practices for storage:
-
Refrigeration: Once the dough balls have cooled completely, store them in an airtight container. They can last up to 3 days in the fridge. When ready to enjoy, simply reheat them in the oven for about 5-10 minutes at 350°F (175°C) to regain their crispy texture.
-
Freezing: For longer storage, freeze the baked dough balls. Place them in a single layer on a baking sheet until frozen, then transfer them to a freezer-safe bag or container. They can be stored in the freezer for up to 3 months. To reheat, bake from frozen at 375°F (190°C) for 15-20 minutes.
-
Dough Storage: If you’d like to store unbaked dough balls, freeze them before the second rise. Once shaped, place on a baking sheet, freeze until solid, and store in a bag. You can bake them right from frozen, just add a few extra minutes to the baking time.
This information reflects the adaptability of this recipe and how it fits within various appetizer recipes.
Nutritional Value of Tasty Garlic Dough Balls
Understanding the nutritional makeup of Tasty Garlic Dough Balls can help you incorporate them into your meal planning. Here’s a general breakdown per dough ball (assuming recipes yield 16):
- Calories: 90
- Protein: 2g
- Fat: 2g
- Saturated Fat: 0.3g
- Carbohydrates: 16g
- Dietary Fiber: 1g
- Sugars: 0g
- Sodium: 100mg
This breakdown may vary based on substitutions and additional ingredients. Overall, Tasty Garlic Dough Balls offer a satisfying yet light option that won’t derail your dietary plans. With the right adjustments, they can easily fit into a balanced diet, making them ideal for those seeking to enjoy tasty yet health-conscious appetizer recipes.
FAQs: Frequently Asked Questions About Tasty Garlic Dough Balls
1. Can I make these dough balls ahead of time?
Absolutely! You can prepare the dough and let it rise, then shape it into balls and store them in the fridge or freezer. Cook them right before serving for the freshest taste.
2. How can I make these dough balls gluten-free?
Replace all-purpose flour with a gluten-free flour blend. Ensure that your yeast is also gluten-free.
3. What’s the best way to reheat leftover dough balls?
Reheat in the oven at 350°F (175°C) for about 5-10 minutes. This will help maintain their crispy texture.
4. Can I use fresh herbs instead of dried?
Yes! Fresh herbs can add vibrant flavor; just adjust the quantities to your taste.
5. Can I freeze the dough balls before baking?
Yes! Shape the dough, freeze until firm, and then store in a freezer bag. Bake directly from frozen, adding extra time as needed.
6. How do I know when the dough has risen enough?
The dough should roughly double in size and feel lighter and more airy when ready.
By addressing these common queries, beginners and experienced cooks alike will feel confident in their ability to recreate this delightful recipe.
Tasty Garlic Dough Balls offer a perfect blend of taste, health, and Easy cooking. With the tips, variations, and storage practices shared above, you can ensure a delightful culinary experience, whether you’re serving them at a dinner party, family feast, or cozy night in. Indulging in this versatile appetizer not only satisfies the palate, but it also draws everyone together, creating meaningful moments around the dining table. Enjoy!