Tag: salad

  • Simple Celery Salad With Cranberries

    Simple Celery Salad With Cranberries

    Simple Celery Salad With Cranberries: A Tropical Delight

    Introduction to Simple Celery Salad With Cranberries

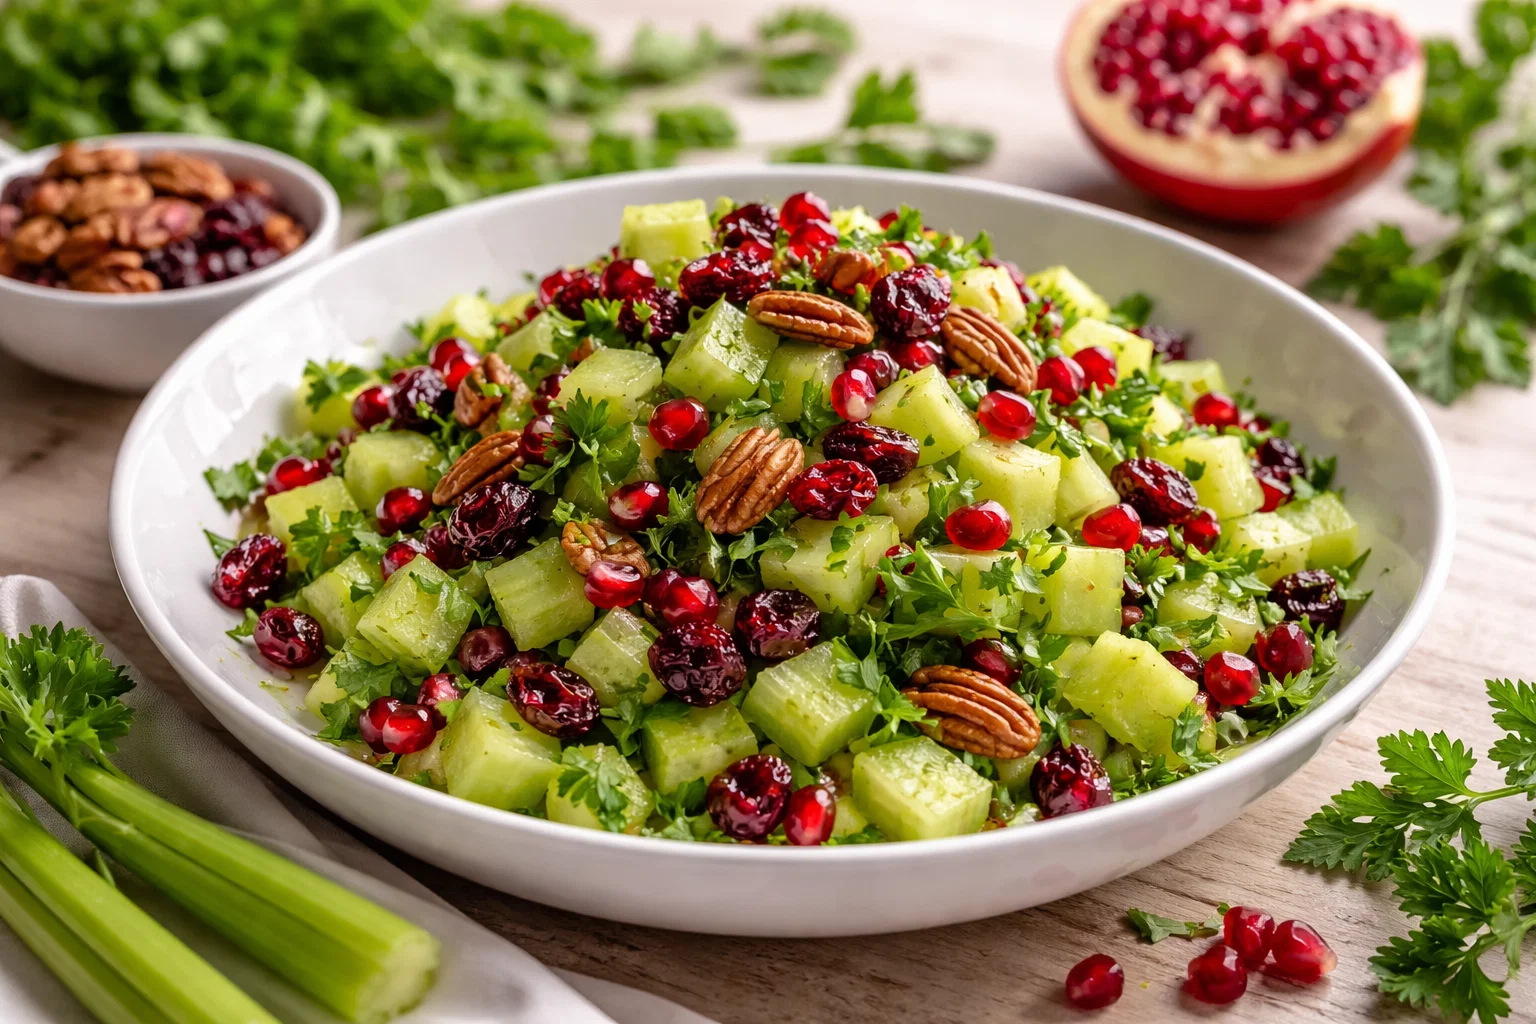
    When it comes to easy and healthy recipes, the Simple Celery Salad With Cranberries stands out as a refreshing and vibrant dish that caters to a variety of dietary needs. Not only does it boast an impressive flavor profile, but it also offers numerous health benefits, making it an excellent choice for any meal. Whether you are a busy parent needing a quick side, a health-conscious individual aiming to incorporate more greens into your diet, or a food enthusiast looking for a delicious new recipe, this salad is designed to impress.

    The crunch of fresh celery combined with the sweetness of dried cranberries creates a delightful contrast that excites your taste buds. Meanwhile, the simple dressing keeps the preparation quick and hassle-free. With minimal ingredients required, this salad is perfect for those who may not have extensive culinary skills, making it accessible for students and beginners alike.

    Moreover, this salad is naturally vegan, gluten-free, and low-calorie, making it suitable for everyone, from seniors who require lighter fare to newlyweds trying to maintain a healthy lifestyle. This dish not only promotes physical health but also celebrates the joy of cooking without overwhelming anyone. So, whether you serve it as a light lunch, a side dish at dinner, or a healthy snack, the Simple Celery Salad With Cranberries is sure to become a staple in your kitchen.

    Benefits and Advantages of Simple Celery Salad With Cranberries

    One of the most significant advantages of the Simple Celery Salad With Cranberries is its ease of preparation. Most home cooks can whip up this healthy dish in under 15 minutes, making it an ideal option for busy parents and working professionals who want a nutritious meal without spending hours in the kitchen. Simply chop, mix, and enjoy!

    In addition to convenience, this salad is packed with health benefits. Celery is a powerhouse of essential vitamins and minerals. It is low in calories and rich in dietary fiber, which aids digestion and helps you feel full longer. Meanwhile, cranberries add a burst of sweetness and are known for their antioxidant properties, which can help combat inflammation and improve overall health. This combination makes the salad both satisfying and guilt-free, truly embodying the essence of healthy recipes.

    Another fantastic aspect of this salad is its flexibility. The Simple Celery Salad can serve as an excellent base for other delectable toppings and ingredients. You can easily add in protein sources like nuts, seeds, or even shredded chicken to create a more filling meal. Additionally, its vibrant colors and flavors appeal to both children and adults, making it a great choice for family gatherings.

    For those conscious of their dietary needs, this recipe can be easily customized. Replace any ingredient to suit your preferences or check for food allergies while maintaining its core health benefits. The salad can fit seamlessly into various diets – be it vegan, low-carb, or gluten-free – making it an indispensable addition to your cuisine repertoire.

    Ingredients Overview

    Essential Ingredients for Simple Celery Salad With Cranberries

    For a delicious and refreshing Simple Celery Salad With Cranberries, you will need the following ingredients:

    • 4 cups fresh celery, thinly sliced (provides crunch and fiber)
    • 1 cup dried cranberries (adds a touch of sweetness and antioxidants)
    • 1/2 cup walnuts or pecans, chopped (optional, for extra protein and healthy fats; vegan-friendly)
    • 1/4 cup red onion, finely chopped (adds depth of flavor)
    • 2 tablespoons olive oil (healthy fat source)
    • 1 tablespoon apple cider vinegar (for a tangy kick)
    • Salt and black pepper, to taste (seasoning)

    For those looking to make this dish gluten-free or accommodate other dietary preferences, all the ingredients listed are naturally gluten-free and perfect for a variety of healthy eating plans.

    Dietary Substitutions to Customize Your Simple Celery Salad With Cranberries

    If you’re looking to switch things up or accommodate specific dietary needs, here are some suggestions for ingredient substitutions:

    • Celery: You can replace celery with cucumber for a different crunch.
    • Cranberries: Fresh pomegranate seeds or chopped apples can be used instead of dried cranberries for a fruity twist.
    • Nuts/Seeds: For nut-free versions, sunflower seeds can replace walnuts or pecans while maintaining crunch and nutrition.
    • Olive Oil: Substitute avocado oil or lemon juice for a lighter dressing option.
    • Vegan Options: For a touch of creaminess, try adding avocado instead of nuts, making it even more nourishing.

    By adjusting these ingredients, you can easily cater to a wide variety of dietary preferences and restrictions, ensuring that everyone can enjoy this healthy recipe.

    How to Prepare the Perfect Simple Celery Salad With Cranberries: Step-by-Step Guide

    Creating the Simple Celery Salad With Cranberries is straightforward and enjoyable. Follow this simple step-by-step guide to prepare your dish:

    1. Prepare the Base:
      Start by thoroughly washing and cleaning your fresh celery. Pat it dry and then slice it thinly, making sure to include both the stalks and the leaves for added flavor and texture.

    2. Slice the Ingredients:
      Next, chop the red onion finely. This will give a nice kick to the salad. If you prefer a milder flavor, soak the chopped onion in cold water for a few minutes to soften its taste.

    3. Mix Ingredients:
      In a large bowl, combine the sliced celery, chopped cranberries, and red onion. If you are adding nuts, include them at this stage for extra crunch.

    4. Make the Dressing:
      In a small bowl or jar, whisk together the olive oil, apple cider vinegar, salt, and black pepper. Taste the dressing and adjust seasonings according to your preference. You can add a bit of honey or maple syrup if you prefer a sweeter dressing.

    5. Toss and Serve:
      Pour the dressing over the celery mixture and toss everything gently until evenly coated. Ensure that none of the ingredients are sitting in a pool of dressing.

    6. Chill (Optional):
      For added flavor, let the salad chill in the refrigerator for about 30 minutes. This allows the flavors to meld together beautifully.

    7. Garnish and Enjoy:
      Serve the salad as is, or garnish it with additional nuts or a sprinkle of herbs, such as parsley or mint, for a vibrant finish. Enjoy your lively, nutritious salad!

    8. Storage Tip:
      If you have leftovers, store them in an airtight container in the refrigerator for up to three days, ensuring that the salad maintains its freshness and crunch.

    By following these straightforward steps, you can quickly prepare a nutritious meal or side dish that fits within your healthy lifestyle. Additionally, feel free to experiment by adding or substituting ingredients to create a salad that suits your taste and dietary needs!

    Mastering Simple Celery Salad With Cranberries: Advanced Tips and Variations

    Once you’ve mastered the basic Simple Celery Salad With Cranberries, consider these advanced tips and variations to elevate your dish:

    • Add Protein: To turn your salad into a main course, consider adding shredded chicken, chickpeas, or tofu, serving up both protein and vibrant flavors.
    • Include More Greens: Feel free to mix in other greens like spinach or kale for a nutrient-packed powerhouse dish.
    • Adjust the Sweetness: For those who prefer less sweetness, reduce the amount of cranberries or opt for unsweetened dried fruit. You can also experiment with different vinegars or citrus juices to create a dressing that perfectly fits your palate.
    • Textures and Flavors: Incorporate other crunchy vegetables, like radishes or bell peppers, to offer additional flavor profiles and a delightful crunch.

    These simple variations can transform the basic recipe, allowing you to enjoy a different twist on the same healthy dish every time!

    How to Store Simple Celery Salad With Cranberries: Best Practices

    Proper storage is key to ensuring that your Simple Celery Salad With Cranberries maintains its freshness and flavor over time. Here are some best practices for storing this salad:

    • Refrigeration: Store your salad in an airtight container in the refrigerator. This will keep it fresh for up to three days. Before serving, you may want to give it a gentle toss to redistribute the dressing.
    • Freezing: While it is possible to freeze the salad, note that the texture of celery may become limp once thawed. If you choose to freeze, consider storing the salad without the dressing and add it just before serving.
    • Reheating: This salad is best served cold, so reheating isn’t recommended. Instead, enjoy it straight from the fridge or as a refreshing addition to a packed lunch.

    By following these storage tips, you can ensure that your healthy creation remains delicious and appetizing well beyond the day it was made.

    Nutritional Value of Simple Celery Salad With Cranberries

    Understanding the nutritional value of the Simple Celery Salad With Cranberries can help you appreciate its role in your diet. Here’s a general idea of the nutrient content per serving:

    • Calories: Approximately 120 calories
    • Protein: 2 grams
    • Fat: 5 grams (healthy fats from olive oil and nuts)
    • Carbohydrates: 18 grams
    • Fiber: 4 grams
    • Sugar: 6 grams (natural sugars from cranberries)

    This salad is rich in essential vitamins such as Vitamin K, Vitamin C, and antioxidants. It serves not only as a nutritious option but also a delightful complement to your healthy recipes collection.

    Additionally, it provides a valuable source of dietary fiber, which is essential for gastrointestinal health and can help lower cholesterol levels. Including this salad in your diet can significantly impact your overall wellness.

    FAQs: Frequently Asked Questions About Simple Celery Salad With Cranberries

    Can I use fresh cranberries instead of dried ones?

    While fresh cranberries can be quite tart, using them will give your salad a unique and refreshing twist. You may choose to sweeten with a little extra honey or agave syrup if desired.

    How long can I store the Simple Celery Salad With Cranberries?

    You can store this salad for up to three days in the refrigerator. Ensure it is kept in an airtight container to maintain freshness.

    Can I make this salad ahead of time?

    Yes! This salad can be prepared a day in advance. Just be sure to dress it right before serving to keep the celery crisp.

    Is this recipe suitable for a Keto diet?

    To make the Simple Celery Salad With Cranberries suitable for a Keto diet, replace the cranberries with a lower-carb fruit or reduce the portion size. Consider adding avocado or cheese for extra flavor without adding carbs.

    What can I add to make this dish a complete meal?

    To create a satisfying meal, you can add protein options such as grilled chicken, chickpeas, or even quinoa for a nutrient-packed addition.

    By addressing these frequently asked questions, you can encourage readers to explore the versatility of this healthy recipe while ensuring they feel confident in making it.


    This comprehensive guide around the Simple Celery Salad With Cranberries highlights its ease of preparation, health benefits, and adaptability for various dietary needs. Whether you’re looking for quick healthy recipes or exploring new flavors, this salad hits all the right notes, ensuring it will be a delightful addition to your culinary journey!

  • Quick Dairy-Free Spring Salad

    Quick Dairy-Free Spring Salad

    Quick Dairy-Free Spring Salad: A Tropical Delight

    Introduction to Quick Dairy-Free Spring Salad

    Spring is the perfect time to indulge in fresh, vibrant meals that not only tantalize your taste buds but also nourish your body. Enter the Quick Dairy-Free Spring Salad—a delightful dish that embodies the essence of seasonal ingredients while catering to various dietary needs. This salad, bursting with colors and textures, is not only simple to prepare but also a testament to the concept of healthy eating.

    One of the best aspects of this recipe is its versatility. Whether you’re a vegan, gluten-free eater, or simply someone looking for nutritious “spring meals,” this salad meets all those criteria. Packed with vitamins, minerals, and antioxidants, it promotes overall well-being and makes for an excellent choice for busy parents, students, or anyone keen on maintaining a healthy lifestyle.

    Moreover, the Quick Dairy-Free Spring Salad can be easily tailored to suit your preferences and ingredient availability. It’s ideal for home cooks who love to experiment in the kitchen or for working professionals enjoying a quick meal during lunch breaks. With its fresh ingredients and invigorating flavors, this salad is a joyful addition to your spring repertoire. Let’s explore why this recipe stands out!

    Benefits and Advantages of Quick Dairy-Free Spring Salad

    The advantages of preparing a Quick Dairy-Free Spring Salad go beyond the fantastic flavor profiles. Here are some key benefits of this delectable dish:

    1. Simplicity in Preparation

    With minimal ingredients and quick preparation time, this salad is perfect for those looking for a fast meal option without compromising on health. In just a few easy steps, you can have a colorful plate filled with nutritious goodness. This is especially beneficial for busy individuals or parents who may not have the luxury of spending hours in the kitchen.

    2. Health Benefits

    Summer is on the horizon, and as the weather warms up, your body craves lighter meals. The ingredients in this salad are rich in vitamins and antioxidants. For instance, leafy greens and bright vegetables offer a slew of nutrients vital for maintaining energy levels. Moreover, this salad is low in calories and completely free from dairy, making it an excellent choice for those monitoring caloric intake or adhering to a specific diet.

    3. Dietary Inclusivity

    Whether you’re a vegan, vegetarian, or someone with food allergies, this salad is adaptable to various dietary preferences. Catering to these dietary needs is crucial in today’s culinary landscape, and with this recipe, everyone can enjoy a nutritious and satisfying meal.

    4. Unleash Your Culinary Creativity

    This salad acts as a canvas for creativity. You can mix and match ingredients based on what you have on hand or what’s in season, allowing you to personalize your dish. This flexibility not only keeps your meals exciting but also encourages experimentation in the kitchen—ideal for food enthusiasts and budding chefs alike.

    This delightful spring meal is not just food; it’s a celebration of health, creativity, and simplicity, making it a must-try dish for anyone looking to enjoy the vibrant flavors of spring!

    Ingredients Overview

    Essential Ingredients for Quick Dairy-Free Spring Salad

    To create your delicious Quick Dairy-Free Spring Salad, gather the following ingredients:

    • Mixed Greens (4 cups): A combination of spinach, arugula, and romaine serves as a robust base that provides essential nutrients.
    • Cherry Tomatoes (1 cup, halved): These sweet gems add a burst of flavor and are rich in antioxidants.
    • Cucumbers (1 medium, diced): Crunchy and hydrating, cucumbers bring freshness to the salad.
    • Avocado (1 medium, diced): A great source of healthy fats, avocados enhance creaminess without dairy.
    • Red Bell Pepper (1 medium, diced): Full of vitamins A and C, this pepper adds color and sweetness.
    • Red Onion (½ medium, thinly sliced): Provides a zesty kick, balancing sweetness and crunch.
    • Fresh Herbs (¼ cup, chopped): Options like basil or cilantro will elevate the salad’s flavor profile.
    • Olive Oil (3 tablespoons): A healthy fat that enhances flavors and provides richness.
    • Lemon Juice (2 tablespoons): Adds brightness and acidity to complement the other ingredients.
    • Salt and Pepper (to taste): Essential for seasoning and enhancing overall flavor.

    This list emphasizes vegan, gluten-free, and low-calorie options, making the salad ideal for health-conscious individuals.

    Dietary Substitutions to Customize Your Quick Dairy-Free Spring Salad

    Customizing the Quick Dairy-Free Spring Salad is a breeze! Here are some suggested substitutions to cater to various dietary needs:

    1. Greens:
    2. Use kale or collard greens if you prefer a sturdier base.
    3. For those with sensitivities to leafy greens, try shredded cabbage or a grain base like quinoa.

    4. Proteins:

    5. To boost protein content, consider adding chickpeas, black beans, or grilled tofu.
    6. Alternatively, serve with your favorite protein — grilled chicken or shrimp for non-vegans.

    7. Dressings:

    8. Instead of olive oil, use avocado oil or flaxseed oil for diverse health benefits.
    9. For added zest, incorporate a balsamic vinaigrette or tahini dressing instead of the lemon-based one.

    By incorporating these substitutions and adjustments, the Quick Dairy-Free Spring Salad remains accommodating, nourishing, and packed with the vibrant flavors of spring meals.

    How to Prepare the Perfect Quick Dairy-Free Spring Salad: Step-by-Step Guide

    This section will provide you with a straightforward guide to preparing the Quick Dairy-Free Spring Salad. Get ready to enjoy a fresh meal in no time!

    Step 1: Prepare the Base

    • Wash and Dry the Greens: Rinse your mixed greens thoroughly under cold water. Use a salad spinner or a clean kitchen towel to remove excess moisture, ensuring the greens are crisp and fresh.

    Step 2: Slice the Vegetables

    • Vegetable Prep: Begin by dicing the cucumbers and red bell peppers. Halve the cherry tomatoes and thinly slice the red onion. The goal is uniformity for consistency in texture and flavor.

    Step 3: Cube the Avocado

    • Cut the Avocado: Carefully cut around the pit of the avocado, twist, and remove it. Scoop out the flesh and cube it. For an extra splash of flavor, you might sprinkle a little lemon juice on the avocado to prevent browning.

    Step 4: Combine Ingredients

    • Mix Ingredients: In a large salad bowl, add the prepared greens, cucumbers, bell peppers, cherry tomatoes, red onion, and cubed avocado. Gently mix, ensuring not to mash the avocado.

    Step 5: Add Fresh Herbs

    • Herb Incorporation: Sprinkle the chopped fresh herbs over the salad. Herbs like basil or cilantro can add distinctive flavors, enhancing the overall freshness of the dish.

    Step 6: Prepare the Dressing

    • Mix the Dressing: In a small bowl, whisk together olive oil and lemon juice. Season with salt and pepper to taste. For extra flavor, try adding a teaspoon of mustard or honey (if not strictly vegan).

    Step 7: Dress the Salad

    • Add Dressing: Pour the dressing onto the salad just before serving. Toss gently to coat all ingredients thoroughly. This ensures that every bite is bursting with flavor.

    Step 8: Serve Immediately

    • Enjoy Your Salad: Serve the salad immediately on individual plates or as a family-style bowl for gatherings. Enjoy the vibrant colors and fresh flavors of this spring meal!

    Special Notes:

    • Feel free to adjust quantities based on your preferences or the number of servings needed. This salad can easily be made ahead of time, but for maximum freshness, it is best to dress it right before consuming.

    Mastering Quick Dairy-Free Spring Salad: Advanced Tips and Variations

    While the Quick Dairy-Free Spring Salad is delicious as-is, there are several tips and variations you can incorporate to elevate your dish:

    1. Add Nuts and Seeds

    Incorporate a handful of nuts or seeds for an additional crunch. Options like sliced almonds, pumpkin seeds, or sunflower seeds add healthy fats and protein.

    2. Change Up the Greens

    Experiment with different greens seasonally. For instance, baby kale or mesclun mix can bring different flavors and textures, refreshing your spring meal routine.

    3. Incorporate Seasonal Fruits

    For a fruity twist, consider adding seasonal fruits such as diced mango, strawberries, or even blueberries. These can enhance the sweetness and make your salad even more colorful and appetizing.

    4. Spice It Up

    If you enjoy a little heat, consider adding sliced jalapeños or a sprinkle of chili flakes to your salad for that extra zing.

    5. Make It a Main Dish

    Transform the salad into a heartier main dish by adding a grain element such as quinoa, farro, or brown rice. This adaptation can turn it into a filling and balanced lunch or dinner option.

    By applying these tips and variations, you create a customized experience that keeps your meals exciting and cohesive with your health and wellness goals.

    How to Store Quick Dairy-Free Spring Salad: Best Practices

    When it comes to leftovers, we want to ensure that your Quick Dairy-Free Spring Salad remains fresh and delightful. Here are some best practices:

    Refrigeration

    • Store in an Airtight Container: Any leftover salad can be placed in an airtight container in the refrigerator. This helps prevent wilting and maintains flavor.

    Freezing

    • Not Recommended: Due to the fresh greens and avocado, freezing this salad is not advisable. The texture and taste may deteriorate upon thawing, making it less enjoyable.

    Reheating

    • Enjoy Cold or At Room Temperature: This salad is best served cold or at room temperature. A light toss before serving will help combine flavors that may separate during refrigeration.

    Note on Dressing

    • If you anticipate leftovers, it’s best to store the dressing separately to prevent the salad from becoming soggy. Dress it just before serving for the best taste and texture.

    Storing your Quick Dairy-Free Spring Salad properly ensures you continue to enjoy this healthy dish throughout the week, making it a hassle-free option during busy days.

    Nutritional Value of Quick Dairy-Free Spring Salad

    Understanding the nutritional value of the Quick Dairy-Free Spring Salad helps you appreciate its health benefits further. Here’s a breakdown:

    • Calories: Approximately 200-250 per serving (varies based on added ingredients).
    • Fat: About 12-15g, mainly from healthy fats found in avocado and olive oil.
    • Carbohydrates: Roughly 20g, courtesy of vegetables and avocado.
    • Fiber: Around 7g, contributing to digestive health and fullness.
    • Protein: About 4-6g, with potential increases depending on added ingredients like beans or seeds.

    Vitamins & Minerals

    • Vitamin C: From tomatoes and bell peppers, essential for immune health.
    • Vitamin K: Present in greens, crucial for bone health.
    • Folate: Comes from beans and greens, important for cell function and tissue growth.
    • Potassium: Found in avocado and cucumbers, helps regulate fluid balance and maintain healthy blood pressure.

    Conclusion

    As you can see, the Quick Dairy-Free Spring Salad is packed with essential nutrients that make it a perfect part of your spring meals. Its low calorie and high fiber content ensure you stay full and satisfied without sacrificing flavor or health.

    FAQs: Frequently Asked Questions About Quick Dairy-Free Spring Salad

    1. Can I use different greens for this salad?
      Absolutely! Feel free to substitute with your favorite greens such as kale, arugula, or even mixed sprouts. Each will give a different flavor profile.

    2. Is this salad suitable for meal prepping?
      Yes, the salad can be prepped ahead of time. Just keep the dressing separate until you’re ready to eat to prevent sogginess.

    3. What are some good protein additions to this salad?
      Great options include grilled chicken, chickpeas, quinoa, or nuts. These will provide an extra boost of protein and make the salad more filling.

    4. How long can I store leftovers?
      The salad will remain fresh for up to 2 days in the refrigerator, but it’s best enjoyed within the first 24 hours for optimal taste.

    5. Can I add fruits to this salad?
      Yes! Seasonal fruits like strawberries, mangoes, or citrus segments can add a refreshing sweetness that complements the savory elements.

    6. What kind of dressing works best with this salad?
      A simple olive oil and lemon juice dressing works beautifully, but feel free to experiment with vinaigrettes or tahini dressings for different flavor dimensions.

    In conclusion, the Quick Dairy-Free Spring Salad is a delightful, versatile option that beautifully showcases the freshness of spring produce. With its healthy ingredients, easy preparation, and adaptability for different dietary needs, it stands out as a must-try recipe for anyone looking to indulge in vibrant spring meals that support their wellness journey. So gather your ingredients and get ready to enjoy a delicious salad that’s not just food but an experience!

  • Light Spring Mix Salad

    Light Spring Mix Salad

    Light Spring Mix Salad: A Tropical Delight

    Introduction to Light Spring Mix Salad

    Spring is a wonderful time of year when fresh produce is at its peak, making it the perfect season for vibrant, rejuvenating meals. Among the myriad of spring meals to whip up in your kitchen, the Light Spring Mix Salad stands out, not only for its simplicity but also for its incredible health benefits. This dish combines an assortment of colorful greens, crisp vegetables, and zesty flavors, creating a delightful balance that can cater to a variety of dietary preferences, including vegan and gluten-free options.

    Imagine serving this salad at your next spring gathering, perhaps a brunch or a family dinner, where everyone can enjoy a refreshing bowl that bursts with flavor. Not only is it a breeze to prepare, but this salad is also loaded with essential nutrients and antioxidants, making it a fantastic addition to your dietary repertoire. Whether you’re a busy parent looking for quick meal ideas, a student on a budget, a health-conscious individual, or simply someone who enjoys gourmet experiences at home, this Light Spring Mix Salad is your go-to recipe.

    In this article, we will guide you through the preparation of this delicious salad, while also highlighting its remarkable health benefits, ingredient details, and practical tips for storing and serving. Get ready to embrace the season’s vibrant flavors with this invigorating salad that will leave you feeling light and refreshed!

    Benefits and Advantages of Light Spring Mix Salad

    The Light Spring Mix Salad is brimming with benefits that make it an ideal choice for any meal. First and foremost, it’s incredibly easy to prepare. With just a few fresh ingredients and minimal cooking required, you can have a beautiful salad ready in no time. This makes it perfect for busy individuals and families who need quick, nutritious options during the spring.

    One of the key health benefits of this salad is its low-calorie count, which allows you to indulge without overloading on calories. Packed with vitamin-rich greens like spinach, kale, and arugula, every serving delivers essential nutrients that support overall health. These greens are high in fiber, aiding digestion and promoting gut health, while also being loaded with antioxidants that help combat free radicals in the body.

    Moreover, the versatility of this salad means that it can easily cater to various dietary needs. Whether you’re following a vegan lifestyle, require gluten-free meals, or are simply trying to eat healthier, the Light Spring Mix Salad can be customized to fit your requirements. Toss in your favorite seasonal vegetables and top it off with a simple homemade dressing for a fulfilling meal that everyone will enjoy.

    In addition to its health benefits, this salad is a feast for the eyes. The myriad colors of greens and vegetables create a striking presentation, making it an attractive centerpiece for your spring table. When you serve it at gatherings or meal-prepping sessions, it is sure to impress guests and family alike. Overall, this recipe encapsulates what spring meals should be: refreshing, healthy, and easy to prepare.

    Ingredients Overview

    Essential Ingredients for Light Spring Mix Salad

    Creating the Light Spring Mix Salad requires wholesome ingredients that are readily available and easy to work with. Here’s a detailed list of what you need to prepare a delicious serving for 4-6 people:

    • Mixed Greens (6 cups): Look for a blend of baby spinach, arugula, and spring mix. These greens are nutrient-dense and form the base of your salad. (Vegan, Gluten-Free)

    • Cherry Tomatoes (1 cup, halved): These bite-sized tomatoes add a juicy sweetness and a pop of color. (Vegan, Gluten-Free)

    • Cucumber (1 medium, diced): For a refreshing crunch. You can use English or Persian cucumbers for a less bitter taste. (Vegan, Gluten-Free)

    • Carrots (2 medium, shredded): Incorporate some shredded carrots for added texture and natural sweetness. (Vegan, Gluten-Free)

    • Red Bell Pepper (1 medium, diced): This ingredient brings a sweet, crunchy element and bright color to the salad. (Vegan, Gluten-Free)

    • Avocado (1 ripe, sliced): Creamy avocado adds healthy fats and flavor depth. (Vegan, Gluten-Free)

    • Nuts or Seeds (1/4 cup): A mix of walnuts, pecans, or sunflower seeds offers crunch and extra nutrition. (Vegan, Gluten-Free)

    • Dressing (1/4 cup): A simple lemon vinaigrette made from 2 tablespoons of lemon juice, 3 tablespoons olive oil, salt, and pepper to taste. This light dressing complements the salad without overwhelming its flavors. (Vegan, Gluten-Free)

    These ingredients harmonize beautifully, creating a light and invigorating salad. However, if you have dietary preferences or restrictions, read on for some dietary substitutions that might suit your needs.

    Dietary Substitutions to Customize Your Light Spring Mix Salad

    Customization is key to making a salad tailor-fit for everyone’s taste and dietary requirements. Here are some substitutions you can consider:

    1. Greens: If you’re avoiding certain greens, feel free to substitute the mixed greens with kale, romaine, or even a pre-packaged salad mix. For a spicier touch, try adding radicchio.

    2. Proteins: To enhance the nutritional profile, add cooked Quinoa for a protein boost or toss in some chickpeas. For a non-vegan version, grilled chicken or salmon would be excellent additions.

    3. Vegetables: You can interchange cherry tomatoes and cucumbers with seasonal options like asparagus, snap peas, or avocados. Feel free to get creative with seasonal produce as it becomes available!

    4. Nuts/Seeds: If you’re allergic to nuts, omit them and choose pumpkin or sunflower seeds instead. For a protein-rich option, consider tossing in some cooked lentils.

    5. Dressing: Experiment with different dressings by blending balsamic vinegar, tahini, or even a yogurt-based dressing for a different perspective on flavor.

    These substitutions not only accommodate individual dietary needs but also allow you to explore new tastes while preparing your ultimate Light Spring Mix Salad.

    How to Prepare the Perfect Light Spring Mix Salad: Step-by-Step Guide

    Creating the perfect Light Spring Mix Salad is as enjoyable as eating it. Follow these simple steps to whip up a fresh bowl of goodness:

    1. Prepare the Base: Start by rinsing your mixed greens thoroughly under cold water. Pat them dry using a salad spinner or clean kitchen towel to avoid watery salad.

    2. Chop the Vegetables: Dice the cherry tomatoes, cucumber, and red bell pepper into bite-sized pieces. Shred the carrots using a grater and slice the avocado.

    3. Combine Ingredients: In a large serving bowl, combine the greens and all the chopped vegetables (tomatoes, cucumber, carrots, red bell pepper, avocado). Mix gently to combine.

    4. Add Crunch: Toss in your choice of nuts or seeds for an extra crunch. This elevates the salad not only in texture but also in nutrition.

    5. Prepare the Dressing: In a small mixing bowl, whisk together the lemon juice, olive oil, salt, and pepper until well blended. Adjust the seasoning according to your taste preference.

    6. Dress the Salad: Drizzle the dressing over the salad just before serving. Toss gently to ensure all ingredients are well-coated but still retain their shape and freshness.

    7. Serve: Present the salad immediately, garnished with additional nuts/seeds if desired. Enjoy your refreshing spring meal with friends or family!

    8. Store Leftovers: Any leftover salad can be stored separately in an airtight container for up to 2 days in the refrigerator. Dress the salad only when you are ready to serve to maintain freshness.

    By following these steps, you will have created a delightful Light Spring Mix Salad that’s perfect for any occasion. Remember, the beauty of this dish lies in its adaptability, making it a scrumptious option for various spring meals all season long!

    Mastering Light Spring Mix Salad: Advanced Tips and Variations

    To elevate your Light Spring Mix Salad beyond the basics, consider these advanced tips and variations:

    • Add Fruits: Incorporate seasonal fruits like strawberries, blueberries, or sliced apples for a hint of sweetness that contrasts beautifully with the savory greens.

    • Cheese Lovers: Top your salad with crumbled feta, goat cheese, or a sprinkle of Parmesan for a touch of creaminess and flavor depth.

    • Herbs Galore: Fresh herbs like basil, cilantro, or mint can transform the taste profile of your salad, providing new flavor dimensions that are perfect for warm weather.

    • Grain Bowls: Make it a complete meal by adding grains like farro, barley, or brown rice to the salad. This addition not only increases the nutrient density but also makes the dish more filling.

    • Spice It Up: Try adding a pinch of chili flakes or a dash of hot sauce to your dressing for those who enjoy a bit of heat.

    • Meal Prep: This salad is a wonderful meal-prepping option for busy individuals. Prepare the vegetables ahead, and store them in separate containers to mix and match throughout the week.

    With these tips and variations in mind, you can continually reinvent your Light Spring Mix Salad, making it new and exciting for each dining experience.

    How to Store Light Spring Mix Salad: Best Practices

    Proper storage is essential for maintaining the freshness of your Light Spring Mix Salad, especially if you’re making it in advance. Follow these guidelines for the best practices:

    • Refrigeration: Store any leftover salad in an airtight container in the refrigerator. This prevents air exposure, which can cause the greens and vegetables to wilt and lose their crispness. Aim to consume the leftover salad within 2-3 days for optimal freshness.

    • Separate Dressing: If you’ve made extra salad, store the dressing separately until you’re ready to serve. Combining the dressing with greens too early may lead to sogginess.

    • Freezing: While it’s not recommended to freeze a salad due to the texture changes in greens and vegetables, you can freeze additional chopped ingredients, such as nuts and grains. These can be thawed and added fresh to the salad later.

    By following these storage methods, you can enjoy your Light Spring Mix Salad well beyond its initial preparation, maximizing your culinary efforts effortlessly.

    Nutritional Value of Light Spring Mix Salad

    When considering any recipe, knowing its nutritional value can help you assess how it fits into your dietary goals. The Light Spring Mix Salad is nutrient-rich and offers the following approximate values per serving (based on a 1-cup serving size):

    • Calories: 150
    • Protein: 5 g
    • Fat: 9 g
    • Carbohydrates: 12 g
    • Fiber: 5 g
    • Sugars: 3 g
    • Vitamins: High in Vitamins A, C, and K
    • Minerals: Rich in Iron, Calcium, and Potassium

    This calorie-friendly salad delivers a considerable dose of vitamins and minerals without compromising on flavor or satisfaction. The high fiber content aids digestion while supporting overall health and wellness. Given its versatility, you can customize the salad with protein options such as beans or grilled chicken to further increase the protein content.

    Incorporating Light Spring Mix Salad into your diet is not just a delicious choice; it also complements a balanced lifestyle and reflects the spirit of spring meals that are both satisfying and nourishing.

    FAQs: Frequently Asked Questions About Light Spring Mix Salad

    1. Can I make this salad in advance?

    Absolutely! You can prepare the salad ingredients ahead of time and store them in the refrigerator. Just be sure to keep the dressing separate until serving to maintain freshness.

    2. What if I don’t have some of the ingredients?

    No problem! The Light Spring Mix Salad is highly adaptable. Feel free to substitute any ingredients with seasonal produce or ones you have on hand. Refer to the dietary substitutions section above for more options.

    3. Can I make this salad without nuts or seeds?

    Definitely! If you or someone you’re serving is allergic to nuts or seeds, you can easily skip them. You might consider adding crunch with extra vegetables like celery or radishes instead.

    4. Is this recipe suitable for meal planning?

    Yes! This salad is perfect for meal prepping. Prepare the ingredients in bulk and store them separately so you can assemble quick lunches or dinners throughout the week.

    5. How can I enhance the flavor of the dressing?

    You can customize the dressing by adding ingredients like honey for a hint of sweetness, Dijon mustard for tanginess, or various herbs for additional flavor complexity. Experiment to find a combination that you love!

    6. What should I serve this salad with?

    The Light Spring Mix Salad makes a perfect side dish. Pair it with grilled meats, seafood, or even as part of a spring picnic spread. It’s refreshing and complements rich dishes beautifully.

    By addressing these frequently asked questions, we aim to remove any uncertainties you might have as you embark on creating your delicious Light Spring Mix Salad.


    Embrace the season of renewal with this diverse and tantalizing Light Spring Mix Salad. Serving this dish not only provides a delicious meal but also enriches your table with health and nourishment. With its adaptability and flavor versatility, it truly embodies what spring meals should represent—celebrating freshness and vitality with every bite!

  • Goat Cheese Spring Mix Salad With Raspberry Dressing

    Goat Cheese Spring Mix Salad With Raspberry Dressing

    Goat Cheese Spring Mix Salad With Raspberry Dressing: A Tropical Delight

    Introduction to Goat Cheese Spring Mix Salad With Raspberry Dressing

    Spring is a season of renewal and vibrant colors, making it the perfect time to explore fresh and light dishes. One such delightful creation is the Goat Cheese Spring Mix Salad with Raspberry Dressing. This salad is not just a feast for the eyes but also a culinary celebration of the flavors and textures that spring meals often feature.

    This dish combines a medley of crisp greens, creamy goat cheese, and a zesty raspberry dressing, producing a harmonious blend of sweet and tangy. With its simple preparation and wholesome ingredients, this salad is perfect for busy home cooks, nurturing parents looking for an easy yet nutritious dish, and busy professionals seeking a quick but elegant meal. Furthermore, it caters to various dietary needs, being inherently gluten-free and easily adaptable for vegan diets by substituting traditional ingredients.

    By incorporating fresh produce and nutrient-dense foods, this salad not only satisfies your taste buds but also contributes to your well-being. The combination of goat cheese, spring greens, and antioxidant-rich raspberry dressing elevates it beyond a typical salad while maintaining its ease of preparation. Whether you’re planning a light lunch, a side dish for a dinner party, or a refreshing picnic treat, this Goat Cheese Spring Mix Salad promises to be a hit that transcends seasons.

    With such enticing characteristics, this recipe will inspire even the most novice cooks to embrace more vibrant and colorful spring meals in their kitchens.

    Benefits and Advantages of Goat Cheese Spring Mix Salad With Raspberry Dressing

    The Goat Cheese Spring Mix Salad with Raspberry Dressing is a stellar representation of what spring meals should embody: freshness, health, and flavor. Its preparation is as straightforward as it gets, consisting of minimal cooking while highlighting the natural flavors of seasonal ingredients.

    Nutritional Benefits

    One of the primary benefits of this salad lies in its nutritional profile. The spring mix greens—often a combination of spinach, arugula, and other leafy greens—are loaded with vitamins A, C, and K, as well as fiber. Goat cheese not only adds creaminess but also provides protein and beneficial fatty acids, enhancing your overall nutrient intake.

    The raspberry dressing encapsulates the tangy sweetness of fresh berries, packed with antioxidants that combat oxidative stress in the body. Additionally, preparing the dressing at home allows for a healthier option compared to store-bought ones that can be high in added sugars and preservatives.

    Ease of Preparation

    This recipe shines in its simplicity. With just a handful of ingredients and minimal kitchen equipment required, busy parents or students can whip it up in under 30 minutes. The ability to prepare the components ahead of time makes it a practical choice for meal prep, ensuring you can enjoy balanced spring meals without the hassle of daily cooking.

    Versatility

    Versatility is another key advantage of this salad. You can easily customize it to accommodate various dietary preferences. Whether you’re looking for vegan alternatives or need a gluten-free option, this salad’s basic premise allows it to adapt seamlessly. It can be enjoyed as a main dish, a side, or even scaled up for meal prep.

    Ultimately, the Goat Cheese Spring Mix Salad with Raspberry Dressing stands out as a vibrant, nourishing option that embraces the spirit of spring while meeting diverse dietary needs. Its ease of preparation, health benefits, and flexibility truly make it a must-try for anyone looking to elevate their spring meals.

    Ingredients Overview

    Essential Ingredients for Goat Cheese Spring Mix Salad With Raspberry Dressing

    Here’s a detailed list of the ingredients you will need for this refreshing salad, along with their precise measurements:

    • 4 cups spring mix greens
      (You can use a blend of baby spinach, arugula, and other baby greens.)

    • 1 cup fresh raspberries
      (Rich in antioxidants and vitamins, ideal for the dressing.)

    • 1/3 cup goat cheese, crumbled
      (Provides a creamy texture and tangy flavor. Can be substituted with vegan cheese.)

    • 1/4 cup walnuts or pecans, toasted
      (Adds crunch and healthy fats; you can also use sunflower seeds for a nut-free option.)

    • 1/4 cup red onion, thinly sliced
      (A great source of antioxidants; can be omitted if you prefer a milder flavor.)

    • 1/2 cup extra virgin olive oil
      (Provides healthy monounsaturated fats; choose cold-pressed for maximum benefits.)

    • 1/4 cup balsamic vinegar
      (For acidity, enhancing the flavor of the salad; can substitute with apple cider vinegar.)

    • Honey or agave syrup to taste
      (Used in the dressing to balance the tartness of the raspberries. Optional for vegan diets.)

    Dietary Substitutions to Customize Your Goat Cheese Spring Mix Salad With Raspberry Dressing

    Adapting this salad for different dietary needs is as easy as a few ingredient swaps. For a vegan version, replace the goat cheese with crumbled tofu, avocado, or a store-bought vegan cheese option that meets your palate. Instead of honey in the dressing, a liquid sweetener like agave syrup or maple syrup works beautifully while adhering to vegan guidelines.

    For gluten-free meals, you’ll be glad to know this salad is naturally free from gluten as long as you check the labels on vinaigrettes or any packaged ingredients.

    If you’re looking for a lower-calorie option, you might reduce the amount of oil in the dressing or use a lighter variant like Greek yogurt mixed with raspberry puree.

    These substitutions ensure that the Goat Cheese Spring Mix Salad with Raspberry Dressing can cater to every dietary requirement without compromising on taste.

    How to Prepare the Perfect Goat Cheese Spring Mix Salad With Raspberry Dressing: Step-by-Step Guide

    Creating the perfect Goat Cheese Spring Mix Salad with Raspberry Dressing involves a few simple steps. Follow this clear guide to achieve a vibrant and delicious salad.

    1. Prepare the Dressing: In a blender or food processor, combine the fresh raspberries, balsamic vinegar, and honey (or agave syrup). Blend until smooth. Gradually add in the olive oil while blending until well emulsified. Taste and adjust seasoning as necessary, setting aside to allow the flavors to meld.

    2. Toast the Nuts: In a small skillet over medium heat, toast your walnuts or pecans until they become golden and fragrant, usually around 5-7 minutes. Stir frequently to prevent burning. Once done, set aside to cool.

    3. Prepare the Base: Rinse and dry the spring mix greens thoroughly. In a large salad bowl, add the greens as your base, allowing for plenty of space to mix the other ingredients easily.

    4. Add Vegetables: Thinly slice the red onion and scatter it among the greens. This will impart its flavor throughout the salad.

    5. Add the Cheese: Crumble the goat cheese over the greens. Keeping it chunky will create varied textures in the salad.

    6. Add the Berries and Nuts: Scatter the fresh raspberries and toasted nuts over the salad. Their pop of color will enhance the salad’s visual appeal.

    7. Dress the Salad: Just before serving, pour the raspberry dressing over the salad. Gently toss to coat all ingredients evenly with the dressing.

    8. Serve Immediately: This is best enjoyed fresh, as the greens can wilt if dressed too early. Serve with extra dressing on the side.

    By following these easy steps, you’re sure to create a colorful, delicious dish. This process also opens up options to customize and adjust based on any dietary needs. Feel free to add or remove any ingredients you prefer or have on hand. In no time, you’ll be enjoying a refreshing spring meal that satisfies both your palate and health goals.

    Mastering Goat Cheese Spring Mix Salad With Raspberry Dressing: Advanced Tips and Variations

    To elevate your Goat Cheese Spring Mix Salad with Raspberry Dressing and make it even more delightful, consider these advanced tips and variations:

    • Incorporate Seasonal Fruits: Beyond raspberries, feel free to add seasonal fruits like strawberries, blueberries, or even diced apples to bring additional sweetness and flavor complexity to your salad. This is a great way to enhance the fruitiness and allow for creative variations.

    • Explore Different Greens: While spring mix is delicious, consider mixing it up! Blend in some kale, romaine, or even cooked quinoa or farro for added texture and nutrition. This will create a unique base for your salad each time you prepare it.

    • Experiment with Dressings: Don’t shy away from experimenting with other dressings. A lemon vinaigrette or a poppy seed dressing could provide a different yet complementary flavor profile and experience in your spring meals.

    • Add Proteins for a Complete Meal: Mix in some grilled chicken, shrimp, or chickpeas to turn this salad into a full meal, making it even more satisfying for hungry family members or friends.

    • Garnish for Presentation: Lastly, think about garnishing your salad with edible flowers, such as nasturtiums, which are safe to eat and add a stunning visual element. This brings elegance to your dish, perfect for hosting a spring gathering.

    These advanced tips will help you master the Goat Cheese Spring Mix Salad with Raspberry Dressing and personalize it to your taste, making it a go-to dish for spring meals or any nutrition-packed occasion.

    How to Store Goat Cheese Spring Mix Salad With Raspberry Dressing: Best Practices

    Storing leftover Goat Cheese Spring Mix Salad with Raspberry Dressing requires careful attention to maintain its freshness and quality. Here are the best practices for storing your salad:

    • In the Refrigerator: Place any leftovers in an airtight container without the dressing to keep the greens crisp. If the salad is tossed with dressing, the greens will become soggy over time. Consume any dressed salad within one day for the best taste.

    • Separating Components: If you want to store this salad for later meals, store the components separately. The dressing can be kept in a sealed jar in the refrigerator for up to a week. Just give it a shake before using.

    • Freezing: While it is not recommended to freeze the dressing or greens, you can freeze the toasted nuts or leftover goat cheese. When ready to use, thaw them in the refrigerator before adding them to your salad.

    Following these storage tips will help maintain the salad’s quality, ensuring that whenever you’re ready to enjoy again, it will taste fresh and delightful as your first serving.

    Nutritional Value of Goat Cheese Spring Mix Salad With Raspberry Dressing

    The nutritional value of the Goat Cheese Spring Mix Salad with Raspberry Dressing makes it an excellent choice for health-conscious individuals. Each serving offers a range of essential nutrients that contribute to a balanced diet. Below is a breakdown of the approximate nutritional values per serving, based on the ingredients listed above:

    • Calories: 250-300 kcal
    • Total Fat: 20g
    • Saturated Fat: 5g
    • Carbohydrates: 15g
    • Dietary Fiber: 5g
    • Sugars: 8g
    • Protein: 6g

    Nutritional Highlights:

    • Vitamins and Minerals: Rich in vitamins A, C, and K due to the leafy greens and raspberries, promoting a healthy immune system and skin.
    • Antioxidants: Raspberries offer powerful antioxidants, combating free radicals and reducing inflammation.
    • Healthy Fats: The extra virgin olive oil and goat cheese provide heart-healthy fats necessary for nutrient absorption and overall health.

    The balanced macronutrients while remaining low in calories make this salad a fantastic option for anyone aiming to incorporate more nutritious meals into their diet. You can confidently enjoy this filling meal knowing it aligns with your health goals while being immensely satisfying.

    FAQs: Frequently Asked Questions About Goat Cheese Spring Mix Salad With Raspberry Dressing

    1. Can I make the Goat Cheese Spring Mix Salad ahead of time?

    Yes, you can prepare the components ahead but keep the dressing separate until just before serving for the best texture.

    2. Is this salad suitable for vegans?

    Absolutely! Substitute the goat cheese with a vegan cheese option or avocado, and use agave syrup instead of honey in the dressing.

    3. What if I don’t have fresh raspberries?

    If fresh raspberries are unavailable, you can use frozen raspberries—just make sure to thaw and drain them before blending.

    4. Can I add protein to this salad?

    Yes! Grilled chicken, shrimp, or even beans can be added for a heartier meal, making it perfect for lunch or dinner.

    5. How long does the raspberry dressing last?

    When stored in a sealed container in the refrigerator, the raspberry dressing should be consumed within 5-7 days.

    6. What can I substitute for goat cheese?

    You can try feta cheese, crumbled tofu, or nutritional yeast for a similar creamy texture with added flavor.

    7. What are some other spring meals I can prepare?

    Besides this salad, consider light pasta dishes, vegetable stir-frys, or fresh fruit bowls filled with seasonal produce to celebrate spring.

    Empowering readers with clear answers to these frequently asked questions will enhance their cooking experience and encourage them to embrace this Goat Cheese Spring Mix Salad with Raspberry Dressing as a staple in their spring meals. Whether you’re hosting gatherings or enjoying a solo meal, this salad is sure to impress.

  • Vegan Asparagus Pesto Pasta Salad

    Vegan Asparagus Pesto Pasta Salad

    Vegan Asparagus Pesto Pasta Salad: A Tropical Delight

    Introduction to Vegan Asparagus Pesto Pasta Salad

    Are you in search of a bright, fresh dish that effortlessly combines flavor, nutrition, and versatility? Look no further than Vegan Asparagus Pesto Pasta Salad! This wonderful creation features tender pasta tossed with vibrant asparagus and a creamy, dairy-free pesto sauce that bursts with flavor. Not only is this pasta salad simple to whip up—making it a fantastic option for busy weeknights or meal prepping—but it is also vegan and gluten-free, appealing to a wide audience of health-conscious eaters.

    This scrumptious pasta salad boasts an array of nutrients, providing a satisfying meal or side dish that’s perfect for anyone from students to families to professionals on the go. The star ingredient, asparagus, is packed with vitamins A, C, E, and K, making this salad not just delicious, but rich in health benefits as well. You can easily customize it to suit different dietary preferences, making this dish not only a culinary delight but a convenient solution for providing nutritious meals without the hassle.

    With its colorful presentation and earthy flavors, this Vegan Asparagus Pesto Pasta Salad truly embodies a tropical respite. So, grab your apron, and let’s dive into the world of healthy, delicious, and satisfying cooking!

    Benefits and Advantages of Vegan Asparagus Pesto Pasta Salad

    The Vegan Asparagus Pesto Pasta Salad is an exceptional recipe designed to cater to a vast range of culinary needs. Here are a few compelling reasons why you will love making this dish:

    1. Ease of Preparation: One of the most notable advantages of this pasta salad is its simplicity. You can prepare it in under 30 minutes, making it ideal for busy families or anyone with a hectic lifestyle. With just a few fresh ingredients combined with cooked pasta, you have an enticing meal at your fingertips without spending hours in the kitchen.

    2. Health Benefits: This salad is not only bursting with flavors, but it’s also packed with nutrients. Asparagus is a fantastic source of dietary fiber and antioxidants, which can promote overall health and reduce inflammation. Additionally, using whole-grain or gluten-free pasta not only caters to various dietary needs but also increases fiber content, ensuring you feel full and satisfied.

    3. Vegan and Gluten-Free: With the rising trend towards plant-based diets, this recipe checks off all the boxes. It’s free from animal products, making it a perfect choice for vegans and vegetarians alike. Plus, it’s gluten-free when made with the right type of pasta, ensuring everyone at your table can enjoy it without worry.

    4. Versatility: The Vegan Asparagus Pesto Pasta Salad is highly adaptable. You can enjoy it warm or cold, making it suitable for any season or occasion. Whether you need a quick lunch, a potluck contribution, or a light dinner, this dish fits seamlessly into any menu.

    5. Satisfying and Flavorful: While being healthy, it doesn’t compromise on taste. The combination of basil, garlic, pine nuts, and nutritional yeast in the pesto sauce creates a rich and hearty flavor profile. Your taste buds will rejoice with every bite!

    In summary, the Vegan Asparagus Pesto Pasta Salad is a must-try recipe that combines health, ease of preparation, and deliciousness in one memorable dish. You can be assured that making this pasta salad will not only cater to your taste but also provide a nourishing meal for yourself and your loved ones.

    Ingredients Overview

    Essential Ingredients for Vegan Asparagus Pesto Pasta Salad

    Here’s a detailed list of the ingredients you will need to create a mouthwatering Vegan Asparagus Pesto Pasta Salad:

    • Pasta (16 oz): Choose whole-grain pasta, gluten-free pasta, or chickpea pasta for added protein and fiber.
    • Asparagus (1 lb): Fresh asparagus, trimmed and cut into 1-inch pieces.
    • Fresh Basil (1 cup): Packed with flavor, basil is an essential ingredient for pesto.
    • Pine Nuts (⅓ cup): These nuts add a rich creaminess to the pesto; alternatively, you can use walnuts or sunflower seeds for a nut-free version.
    • Garlic (2 cloves): Adds an aromatic kick; you can adjust to your preference.
    • Nutritional Yeast (¼ cup): Provides a cheesy flavor without dairy, making this dish a favorite among cheese lovers (without the guilt!).
    • Olive Oil (½ cup): Acts as a base for the pesto sauce while offering healthy fats.
    • Lemon Juice (2 tablespoons): Adds freshness and brightness to the salad.
    • Salt and Pepper (to taste): Enhance the flavors of the pasta salad to your liking.

    By selecting high-quality ingredients, you not only ensure the best flavor but also enhance the nutritional profile of your dish. For those looking to create a low-calorie version of this pasta salad, consider reducing the olive oil and using less pasta while increasing the proportion of vegetables.

    Dietary Substitutions to Customize Your Vegan Asparagus Pesto Pasta Salad

    Cooking is an art, and your ingredients should reflect your palette, lifestyle, and dietary needs. Here are some substitutions you can make to customize your Vegan Asparagus Pesto Pasta Salad:

    • Pasta Options: If you’re following a low-carb diet, consider using spiralized zucchini or spaghetti squash. For higher fiber content, choose lentil or black bean pasta.
    • Nut Alternatives: If you have nut allergies, try using pumpkin seeds or hemp hearts instead of pine nuts for the pesto, which will still provide creaminess.
    • Herb Variations: While basil is traditional, feel free to mix in parsley, spinach, or arugula for added flavor and color.
    • Creaminess Boost: For a creamier texture, incorporate a tablespoon of tahini or a few tablespoons of vegan yogurt into the pesto.

    By following these suggestions, you can create your personalized version of Vegan Asparagus Pesto Pasta Salad, ensuring that it suits your taste preferences or dietary restrictions perfectly.

    How to Prepare the Perfect Vegan Asparagus Pesto Pasta Salad: Step-by-Step Guide

    Creating a mouthwatering Vegan Asparagus Pesto Pasta Salad is straightforward. Follow these simple steps:

    1. Prepare the Pasta:
    2. Bring a large pot of salted water to a boil. Add the pasta of your choice and cook according to package instructions until al dente. Drain and rinse under cold water to stop the cooking process. Set aside.

    3. Cook Asparagus:

    4. In a steaming pot, steam the asparagus pieces for about 3-5 minutes until they are tender yet vibrant. You want them to maintain a slight crunch for texture. Remove from heat and let cool.

    5. Make the Pesto:

    6. In a food processor, combine the basil, pine nuts, garlic, nutritional yeast, lemon juice, and olive oil. Blend until smooth, scraping down the sides as needed. Adjust the seasoning with salt and pepper to your taste.

    7. Mix Ingredients:

    8. In a large mixing bowl, combine the cooked pasta, steamed asparagus, and pesto. Toss gently until everything is evenly coated.

    9. Taste and Adjust:

    10. Sample the pasta salad and adjust the seasoning, adding more salt, pepper, or lemon juice depending on your preference.

    11. Chill (Optional):

    12. For best results, let the salad sit for at least 30 minutes in the refrigerator. This allows the flavors to meld together beautifully.

    13. Serve:

    14. Serve the Vegan Asparagus Pesto Pasta Salad chilled or at room temperature. Garnish with extra pine nuts or nutritional yeast if desired.

    15. Storage Instructions:

    16. If you have leftovers, store them in an airtight container in the fridge for up to 3 days. The flavors will deepen as it sits!

    This detailed guide helps you conquer the art of pasta salad preparation with ease, ensuring everyone at your table enjoys this delightful experience.

    Mastering Vegan Asparagus Pesto Pasta Salad: Advanced Tips and Variations

    To elevate your Vegan Asparagus Pesto Pasta Salad to an extraordinary level, consider these advanced tips and variations:

    • Add Protein: For a heartier meal, incorporate protein-rich ingredients like chickpeas, tofu, or edamame. They enhance the nutrition of the dish while keeping it plant-based.

    • Roast the Asparagus: For an added depth of flavor, roast the asparagus in the oven drizzled with olive oil for about 15 minutes at 400°F before adding it to the pasta salad.

    • Spice It Up: If you enjoy a kick, consider adding crushed red pepper flakes to your pesto or tossing in some cherry tomatoes for contrast.

    • Herbed Beyond Basil: Mix and match fresh herbs to change the flavor profile. Try cilantro or mint for a fresh tint that changes the nature of the entire dish.

    • Hosting a Gathering: If serving at a gathering, consider adding some color with diced bell peppers, carrots, or even a sprinkle of toasted sesame seeds on top for extra flair.

    By influencing the dish with these personalized touches, you’ll inspire your family and friends to embrace vegan cuisine wholeheartedly while enjoying varied flavors.

    How to Store Vegan Asparagus Pesto Pasta Salad: Best Practices

    When it comes to food storage, proper techniques can ensure the quality and freshness of your Vegan Asparagus Pesto Pasta Salad:

    • Refrigeration: Store your pasta salad in an airtight container in the refrigerator to maintain its freshness. It should last for about 3-5 days, though the flavor may deepen over time.

    • Freezing: If you’ve prepared a large batch and want to save it for later, consider freezing the salad without the pesto. When ready to eat, defrost and mix with fresh pesto for an enjoyable meal.

    • Reheating: If you must reheat, do so gently in a microwave with a splash of olive oil or water to maintain its moisture without compromising texture. Remember, this pasta salad is delightful served cold too!

    By following these storage tips, you can ensure that your Vegan Asparagus Pesto Pasta Salad remains fresh and flavorful, ready for you to enjoy anytime.

    Nutritional Value of Vegan Asparagus Pesto Pasta Salad

    Understanding the nutritional profile of this delicious Vegan Asparagus Pesto Pasta Salad offers insight into its health benefits. Here’s a rough breakdown of the nutritional values for a standard serving (1 cup):

    • Calories: 350-400
    • Total Fat: 14-16g (mainly healthy fats from olive oil and nuts)
    • Saturated Fat: 2g
    • Carbohydrates: 45-50g (with a good amount of fiber depending on the pasta used)
    • Fiber: 7-9g
    • Protein: 11-13g (without protein boosters such as tofu or chickpeas)
    • Vitamins: Rich in Vitamin A, C, K, and Folate

    This nutrient density not only ensures you stay satisfied and energized, but it also aligns perfectly with a holistic approach to eating well. So whether you’re watching your macros, or simply aiming for a colorful plate, this pasta salad can help you reach your dietary goals deliciously!

    FAQs: Frequently Asked Questions About Vegan Asparagus Pesto Pasta Salad

    1. Can I make the pesto in advance?

    Absolutely! You can prepare the pesto a few days in advance. Store it in an airtight container in the fridge, and add it to your pasta salad when you’re ready to serve.

    2. Is this pasta salad good for meal prep?

    Yes, this Vegan Asparagus Pesto Pasta Salad stores well and makes an excellent meal prep option. Just store the pesto separately if you plan to enjoy it over several days to maintain its freshness.

    3. Can I substitute asparagus with other vegetables?

    Certainly! You can use a variety of vegetables such as broccoli, zucchini, or bell peppers. Just remember to adjust cooking times accordingly for different veggies.

    4. How can I adjust the flavor of the pesto?

    Feel free to personalize your pesto! Add more garlic for a stronger flavor, or lemon juice for extra zing. You can also include different herbs to suit your taste preferences.

    5. Is this a suitable dish for kids?

    Definitely! This pasta salad can be a hit among kids, especially when you customize it with their favorite veggies or even serve it with a side of added protein like chickpeas or beans.

    Conclusion

    In conclusion, the Vegan Asparagus Pesto Pasta Salad is more than just a meal; it’s an experience. Combining fresh ingredients, health benefits, and adaptability, this dish serves as a perfect testament to the joys of vegan cooking. Whip it up for a family gathering or savor it solo. This vibrant, nutritious pasta salad is sure to delight and inspire those who partake. So, gather your ingredients and treat yourself to a vibrant taste of health!

  • IM Obsessed Been Making These Deviled Eggs Non-Stop

    IM Obsessed Been Making These Deviled Eggs Non-Stop

    I’M Obsessed! Been Making These Deviled Eggs Non-Stop!: A Tropical Delight

    Introduction to I’M Obsessed! Been Making These Deviled Eggs Non-Stop!

    Are you looking for a quick yet impressive dish that will surely delight guests and family alike? Well, search no further! This recipe for deviled eggs is not just any appetizer; it’s a culinary masterpiece that transports the ordinary to extraordinary with ease. A perfect addition to your collection of appetizer recipes, these deviled eggs combine simplicity and robust flavor, making them ideal for any occasion—be it a family gathering, picnic, or a casual get-together with friends.

    What makes this recipe even more appealing is its healthy twist. Rich in protein yet low in carbohydrates, this option caters effortlessly to various dietary needs, including being gluten-free and low-calorie. Furthermore, it can be easily modified to suit vegan diets without sacrificing any flavor. Just imagine serving a delightful dish everyone can enjoy while effortlessly impressing your loved ones. By following this easy recipe and its variations, you’ll find yourself making these scrumptious deviled eggs non-stop!

    Benefits and Advantages of I’M Obsessed! Been Making These Deviled Eggs Non-Stop!

    The advantages of preparing these deviled eggs go beyond just taste. Firstly, let’s highlight the ease of preparation. This recipe requires minimal cooking and fewer than ten ingredients, making it ideal for busy parents, working professionals, and students. All you need are some eggs, a few condiments, and spices to create this delicious appetizer that enhances its appeal.

    Moreover, when considering the health benefits, deviled eggs provide a solid source of protein, essential vitamins, and minerals. Eggs are known for their nutritional richness; they contain choline, which supports brain health, and various antioxidants that keep your body functioning optimally.

    Furthermore, if you make these deviled eggs the centerpiece of your appetizer spread, they cater to diverse dietary needs. For health-conscious individuals, swapping traditional mayonnaises with Greek yogurt or avocado can result in a creamy texture without the extra calories—delivering a delicious dip that even the pickiest eaters will appreciate.

    These deviled eggs also stand out for their versatility! Feel free to get creative with flavors. From classic to contemporary, there are numerous ways to put your spin on them; why not add some tropical flair? A sprinkle of pineapple or a dash of curry can elevate this classic recipe to something truly unique. Consequently, this dish can blend seamlessly into any occasion, making it a must-try in your collection of appetizer recipes.

    Ingredients Overview

    Essential Ingredients for I’M Obsessed! Been Making These Deviled Eggs Non-Stop!

    To prepare these delightful deviled eggs, you’ll need the following ingredients:

    • 6 large eggs: The base of your dish, providing protein and a creamy texture.
    • 3 tablespoons mayonnaise: Adds creaminess; substitute with Greek yogurt or avocado for a healthier option.
    • 1 teaspoon Dijon mustard: Brings a zesty flavor; can be replaced with yellow mustard for a milder taste.
    • 1 teaspoon white vinegar: Enhances flavor; lemon juice can be a great substitute.
    • Salt and pepper: Essential seasonings; adjust according to taste.
    • Paprika: A classic garnish that adds color and a slight smokiness; optional.
    • Chives or green onions: For a fresh touch and garnish; can also be omitted if unavailable.

    Diet-Conscious Options:
    1. Vegan: For a vegan version, replace eggs with tofu or use a pre-packaged vegan egg substitute.
    2. Gluten-Free: Confirm that condiments used (especially mayonnaise) are gluten-free, as brands vary.

    Dietary Substitutions to Customize Your I’M Obsessed! Been Making These Deviled Eggs Non-Stop!

    As we aim to cater to diverse dietary preferences, here are some suggested substitutions for varying tastes:

    • Substituting Eggs: For those avoiding eggs, consider using silken tofu to mimic the creamy texture typically associated with deviled eggs. Simply blend it with your desired seasonings for a scrumptious vegan filling.

    • Healthy Fat Options: Instead of mayonnaise, experiment with Greek yogurt or hummus. Both provide a creamy texture with added protein and nutrients, ideal for anyone looking to cut out unnecessary calories while still satisfying their palate.

    • Flavor Variations: Want to bring a twist to your deviled eggs? Add some sriracha or hot sauce for those who like it spicy, or incorporate some smoked salmon for a gourmet touch. Spice blends like cajun seasoning or Old Bay can uplift the typical flavors to something sensational.

    • Herb Enhancements: Fresh herbs can significantly alter your dish’s profile. Garnish with dill, cilantro, or basil for an aromatic presentation that tantalizes the taste buds.

    By modifying these ingredients, you can not only cater to specific dietary requirements but make your deviled eggs even more scrumptious.

    How to Prepare the Perfect I’M Obsessed! Been Making These Deviled Eggs Non-Stop!: Step-by-Step Guide

    Now that we’ve covered the essential ingredients and substitutions, let’s get into the nitty-gritty of preparing these delightful deviled eggs.

    1. Boil the Eggs: Place the eggs in a pot, cover with water, and bring to a boil. As soon as it boils, cover the pot, remove it from heat, and let the eggs sit for 12 minutes.

    2. Cool and Peel: After 12 minutes, transfer the eggs to an ice water bath. Let them cool for about 5 minutes. Once cool, carefully crack the shell and peel under running water for a smoother finish.

    3. Slice Eggs: Once peeled, cut the eggs in half vertically. Carefully scoop out the yolks and place them in a mixing bowl.

    4. Mix Ingredients: To the yolks, add mayonnaise, mustard, vinegar, a pinch of salt, and pepper. Whisk everything together until smooth and creamy.

    5. Taste and Adjust: Before proceeding to fill the eggs, taste the mixture and adjust seasonings if necessary—feel free to add a touch more mustard or vinegar.

    6. Fill the Egg Whites: Using a spoon or pastry bag, carefully fill each halved egg white with the yolk mixture.

    7. Garnish and Serve: Finally, sprinkle with paprika or fresh herbs, depending on your choice. Chill for at least 30 minutes to enhance the flavors before serving.

    8. Serve your Creations: Arrange the deviled eggs on a platter and serve immediately. Alternatively, they can be stored in the refrigerator, making them ideal for party prep.

    With these straightforward steps, you’ll establish an appetizer that is bound to impress guests and suit various dietary preferences!

    Mastering I’M Obsessed! Been Making These Deviled Eggs Non-Stop!: Advanced Tips and Variations

    To elevate your dilapidated eggs from ordinary to extraordinary, consider these advanced tips and exciting variations:

    • Spice It Up: For the adventurous eater, add spices like cayenne pepper, garlic powder, or even curry powder into your filling for an exciting twist.

    • International Influence: Take inspiration from different cultures! Consider adding wasabi for an Asian-inspired flavor or pesto for an Italian flair.

    • Presentation Matters: Elevate the visual element by using different colors of paprika or finely chopped fresh herbs as a garnish. Making your deviled eggs visually appealing enhances the overall dining experience.

    • Create a Theme: If you’re hosting a party, consider having a deviled egg bar with various fillings that guests can mix and match. This interactivity can be a fun focal point at any gathering.

    • Make Ahead: Prepare your egg filling a day ahead for a more efficient hosting experience. Just fill the egg whites right before serving for maximum freshness.

    By integrating these tips and variations, you not only keep your dish exciting but also adapt it easily to seasonal flavors, ensuring your guests are constantly impressed.

    How to Store I’M Obsessed! Been Making These Deviled Eggs Non-Stop!: Best Practices

    If you have any leftover deviled eggs, here’s how to store them without losing their quality:

    1. Refrigeration: Place the deviled eggs in an airtight container or cover with plastic wrap to keep them fresh for up to 3-4 days in the refrigerator.

    2. Freezing: While it’s not recommended to freeze the completed deviled eggs due to their texture, you can freeze the egg yolk mixture in freezer-safe bags for up to one month. Just remember to thaw and mix in the remaining ingredients before filling the egg whites to maintain that creamy consistency.

    3. Reheating: If you’re planning to serve them warm, avoid microwaving them as it can alter the texture. Instead, let them sit at room temperature for a brief period, or use a gentle oven heat method to warm them slightly.

    Using proper storage techniques not only saves leftovers but also maintains the integrity of these beloved appetizer recipes.

    Nutritional Value of I’M Obsessed! Been Making These Deviled Eggs Non-Stop!

    One of the best aspects of deviled eggs is their impressive nutritional profile. Here’s a breakdown of the nutrition per serving (2 egg halves):

    • Calories: Approximately 140 kcal
    • Protein: 6 g
    • Fat: 11 g
    • Saturated Fat: 2 g
    • Carbohydrates: 1 g
    • Fiber: 0 g
    • Cholesterol: 186 mg
    • Sodium: 150 mg

    With high protein content, low calorie count, and good fats, deviled eggs are a perfect snack or appetizer choice, especially for those mindful of their diets. Additionally, you can boost the nutritional profile further by adding fresh herbs or making healthy substitutions, ensuring they remain a staple in your delicious repertoire of appetizer recipes.

    FAQs: Frequently Asked Questions About I’M Obsessed! Been Making These Deviled Eggs Non-Stop!

    1. Can I make deviled eggs in advance?
      Yes! You can prepare them a day in advance and store them covered in the refrigerator. Just add garnishes right before serving to maintain freshness.

    2. Can I make these vegan?
      Absolutely! Boil silken tofu or use store-bought vegan egg products as a substitute for the eggs. Mix it with herbs and spices to create a flavorful filling.

    3. What can I use instead of mayonnaise?
      Greek yogurt, avocado, or hummus can swap mayonnaise, decreasing calories while increasing nutrition.

    4. How can I store leftovers?
      Store leftovers in an airtight container in the fridge for up to 3-4 days. While it’s best to consume them fresh, they can still be tasty later on.

    5. What are some interesting flavor variations?
      Try incorporating ingredients like bacon bits, sriracha, or jalapeños for a spicy kick. Consider flavored oils or infused vinegars to explore different taste profiles.

    6. Are deviled eggs gluten-free?
      Yes! Traditional deviled eggs without added ingredients are gluten-free. Always check any condiments used, such as mayonnaise, for gluten-free certification.

    In conclusion, the experience of making and sharing these deviled eggs can be fulfilling, enriching not only your palate but also inviting connections among loved ones. With tips, variations, and a straightforward recipe, you have everything you need to create a delightful culinary experience that keeps everyone coming back for more. Enjoy your cooking adventure!

  • Homemade Deviled Eggs Without Mayo

    Homemade Deviled Eggs Without Mayo

    Homemade Deviled Eggs Without Mayo: A Tropical Delight

    Introduction to Homemade Deviled Eggs Without Mayo

    Eggs have long been a staple in many kitchens, celebrated for their versatility and nutritional value. One of the most popular ways to enjoy eggs is by making deviled eggs. However, if you are looking for appetizer recipes that are healthier and different from the traditional versions, look no further! These homemade deviled eggs without mayo offer a delightful twist that will please both your palate and your health-conscious friends.

    Imagine creamy egg yolks mixed with zesty ingredients, all while eliminating mayo. This recipe is not only simple to follow but is also vegan-friendly, gluten-free, and low-calorie. The lack of mayonnaise means that it is lighter, allowing the natural flavors of the eggs and accompanying spices to shine through. This dish is perfect for a variety of occasions—from casual family meals to festive gatherings, ensuring there’s something for everyone to enjoy.

    Furthermore, the ease of preparation means that even busy parents, students, and working professionals can whip up a batch with minimal effort. Whether you’re traveling, newlywed, or simply someone who loves to try new snacks, these deviled eggs provide a burst of flavor and can be made quickly, requiring just a few basic ingredients. So roll up your sleeves and get ready to impress your family and friends with this delectable and healthy version of a classic appetizer.

    Benefits and Advantages of Homemade Deviled Eggs Without Mayo

    Homemade deviled eggs without mayo truly stand out for several reasons. First and foremost, the simplicity of the recipe makes it accessible for cooks of all skill levels. You don’t have to be a culinary expert to execute this dish perfectly. Moreover, this appetizer is a breeze to assemble, requiring little more than eggs and a few flavorings.

    Health-minded individuals will appreciate that this recipe excludes mayonnaise, which can be high in calories and fats. Instead, ingredients like avocado, Greek yogurt, or mustard can be utilized to create that creamy texture while adding beneficial nutrients. Avocado, for example, contributes healthy fats that promote heart health and keep you feeling satiated longer. Including Greek yogurt adds protein and probiotics, making this dish not only delicious but also nutritious.

    These deviled eggs are an excellent option for anyone with dietary restrictions. They are naturally gluten-free and can be tailored to meet vegan needs by using plant-based substitutes, ensuring that no one misses out at gatherings. For busy parents or working professionals, these deviled eggs serve as a quick snack or a nutritious addition to a lunch box, providing essential protein and vitamins on the go.

    To top it all off, homemade deviled eggs without mayo are every bit as delightful as their traditional counterparts, making them perfect for gatherings. These flavorful little bites will surely earn rave reviews and are versatile enough to fit into any party spread or meal plan.

    Ingredients Overview

    Essential Ingredients for Homemade Deviled Eggs Without Mayo

    To create these delectable homemade deviled eggs without mayo, you will need the following ingredients:

    • 6 large eggs: The foundation of the recipe; hard-boiled for the right texture.
    • 1 ripe avocado: Acts as a creamy substitute for mayo, packed with healthy fats.
    • 2 tablespoons Greek yogurt (use dairy-free versions for vegan option): Adds creaminess and a slight tang, while also boosting protein content.
    • 1 teaspoon Dijon mustard: Provides a kick of flavor and depth.
    • 1 tablespoon freshly squeezed lemon juice: Brightens and enhances the overall taste while preventing browning of the avocado.
    • Salt and pepper to taste: Essential seasoning to bring all flavors together.
    • Paprika or cayenne pepper for garnish: Enhances visual appeal and adds a hint of spice.

    This ingredient list caters specifically to those who seek health benefits without sacrificing taste. Feel free to experiment with additional seasonings or herbs such as chives, dill, or cilantro to further personalize your deviled eggs to suit your taste buds.

    Dietary Substitutions to Customize Your Homemade Deviled Eggs Without Mayo

    This recipe is highly adaptable, making it easy to modify based on dietary needs. Here are some suggested substitutions:

    • For a Vegan Option: Use an additional avocado in place of Greek yogurt, blending it until smooth. You could also opt for a store-bought vegan mayo if you desire that vegan creaminess.
    • For a Lower-Calorie Version: Substitute the Greek yogurt with plain yogurt (fat-free or low-fat) or omit it entirely and use additional lemon juice to keep the structure.
    • Spice Variations: Swap out the Dijon mustard for hot sauce or horseradish for a spicier kick.
    • Herb Add-Ins: Add finely chopped fresh herbs like parsley or dill to infuse more flavor.

    Tailoring the ingredients to fit your dietary needs or personal preferences is part of what makes this recipe exciting. No matter how you choose to customize it, the delightful essence of deviled eggs remains intact!

    How to Prepare the Perfect Homemade Deviled Eggs Without Mayo: Step-by-Step Guide

    Creating the perfect homemade deviled eggs without mayo is as easy as following these step-by-step instructions:

    1. Hard Boil Your Eggs: Place the eggs in a saucepan and cover them with cold water. Bring to a boil over medium heat. Once boiling, cover the pot, remove it from the heat, and let it sit for 12-15 minutes.

    2. Cool the Eggs: Carefully drain the hot water and transfer the eggs to an ice bath. Let them cool for about 5-10 minutes before peeling.

    3. Peel the Eggs: Once cooled, gently tap each egg on a hard surface and roll it to crack the shell. Peel under running water for easier removal of the shell.

    4. Cut and Scoop: Slice each egg in half lengthwise. Carefully scoop out the yolks and place them in a mixing bowl. You should have 12 egg halves ready for stuffing.

    5. Mix Ingredients: In the bowl with the yolks, add the ripe avocado, Greek yogurt, Dijon mustard, lemon juice, salt, and pepper. Mash the ingredients together using a fork or potato masher until smooth and creamy.

    6. Taste and Adjust: Taste the mixture and adjust the seasoning by adding more salt, pepper, or mustard if needed. You want the filling to be flavorful and refreshing.

    7. Fill the Eggs: Using a spoon or a piping bag, fill each egg white half with the yolk mixture until they are heaping.

    8. Garnish and Serve: Sprinkle paprika or cayenne pepper over the top for a touch of color and flavor. You can also garnish with fresh herbs or chopped vegetables for an extra pop.

    9. Chill Before Serving (optional): For best taste, refrigerate the deviled eggs for 15-30 minutes before serving to allow the flavors to meld.

    This simple guide ensures that you can create delicious homemade deviled eggs without mayo that everyone will love. Whether you serve them as an appetizer at a gathering, a snack at home, or a packed lunch, they are guaranteed to be a hit every time.

    Mastering Homemade Deviled Eggs Without Mayo: Advanced Tips and Variations

    To truly master the art of homemade deviled eggs without mayo, consider these advanced tips and variations for even better results:

    • Experiment with Flavors: Try incorporating spices like curry powder, smoked paprika, or even tahini for unique flavor profiles that surprise your guests.
    • Texture Enhancements: Add crunch by mixing in finely chopped celery, pickles, or bell peppers into the yolk mixture with the avocado for an exciting texture.
    • Herbed Variations: Try using flavored oils or vinegar (like truffle oil or red wine vinegar) mixed into the filling for an aromatic flair.
    • Presentation: Serve your deviled eggs on a decorative platter or individual egg racks for a beautiful display. You could even use avocado skins as natural cups for a fun presentation!
    • Themed Twists: Create themed deviled eggs for holidays. For Halloween, use black olives for spiders, or for Christmas, sprinkle red and green herbs and spices for a festive touch.

    The versatility of this recipe means that there are endless ways to make it your own! Your friends and family will marvel at your creativity with variations that keep them coming back for more.

    How to Store Homemade Deviled Eggs Without Mayo: Best Practices

    To enjoy your homemade deviled eggs without mayo at their best, knowing how to store them properly is essential. Here’s how to maximize freshness:

    • Refrigeration: After preparing your deviled eggs, store them in an airtight container in the refrigerator. They can last for up to 3 to 5 days if stored correctly. Cover the eggs with a piece of plastic wrap or parchment paper to retain moisture and flavors.
    • Freezing: It’s generally not recommended to freeze deviled eggs, as the texture of the egg whites may become rubbery after thawing. However, if you must make a large batch, you can freeze the yolk filling mixture separately. Just ensure to blend it well after thawing before using.
    • Ready-to-Eat: When it’s almost time for serving, you can make an as-needed garnish with herbs or spices just before serving for maximum freshness.

    Storing your deviled eggs properly ensures they remain flavorful and safe to eat, so you can savor them at your leisure!

    Nutritional Value of Homemade Deviled Eggs Without Mayo

    When it comes to nutritional content, homemade deviled eggs without mayo shine. Each serving (2 halves) contains:

    • Calories: Approximately 70-80 calories
    • Protein: 5-6 grams
    • Fat: 5-6 grams (dependent on the use of avocado or yogurt)
    • Carbohydrates: 1-2 grams
    • Fiber: 1-2 grams (from avocado)
    • Cholesterol: 186 mg (from eggs, which is still within heart-healthy limits for most people)

    Many vitamins and minerals can also be found in deviled eggs, including B vitamins, vitamin K, and selenium. The presence of avocado increases fiber intake and provides an array of healthy fats beneficial for heart health.

    This nutritious snack can easily fit within various dietary plans, making it a flexible option for any health-conscious individual. Enjoy these homemade deviled eggs as part of a balanced diet, and relish the knowledge that you’re fueling your body with positive nutrition.

    FAQs: Frequently Asked Questions About Homemade Deviled Eggs Without Mayo

    Can I use regular mayonnaise in this recipe instead of Greek yogurt or avocado?
    Yes, you can! However, the aim of this recipe is to create a healthier version without mayo. For a creamier texture while maintaining health benefits, consider the alternative options listed.

    What if I don’t have Dijon mustard? Can I use regular mustard?
    Absolutely! Any type of mustard will work, whether it’s yellow, spicy brown, or whole grain. Adjust the amount according to your taste preference.

    How can I make this recipe vegan?
    To make vegan deviled eggs, substitute the Greek yogurt with additional avocado or use a plant-based yogurt alternative. Additionally, ensure to avoid any egg products.

    How do I prevent the avocado from browning?
    Add lemon juice to the avocado immediately after cutting it. The acidity helps slow down the browning process and keeps your filling looking fresh.

    Can these be served at room temperature?
    While they can be served at room temperature, it’s advised to keep them refrigerated until just before serving for best flavors and food safety.

    Can I prepare them ahead of time?
    Yes! You can prepare the filling a day ahead and store it separately in the refrigerator. Just fill the egg whites right before serving to keep them fresh and visually appealing.

    Discover the joy of homemade deviled eggs without mayo—this recipe encourages healthy living without sacrificing flavor. Perfect for any gathering, these delightful little bites will quickly become a favorite among friends and family alike. Enjoy your culinary adventure!

  • Quick Cucumber Pea Salad

    Quick Cucumber Pea Salad

    Quick Cucumber Pea Salad: A Tropical Delight

    Introduction to Quick Cucumber Pea Salad

    When it comes to light and refreshing dishes, Quick Cucumber Pea Salad is the undisputed champion. This vibrant cucumber salad combines crisp cucumbers and sweet peas to create a delightful medley that is not only delicious but also incredibly nourishing. Perfect for busy home cooks and individuals following a health-conscious lifestyle, this salad is a fantastic choice for any meal. Packed with essential vitamins and minerals, it is suitable for various dietary needs, including vegan, gluten-free, and low-calorie options.

    Imagine serving this colorful dish at a picnic, cookout, or even as a quick weekday lunch. Its simple preparation makes it a go-to for busy parents and students alike. You can easily whip up this cucumber salad in just 15 minutes, making it an ideal option for those pressed for time but still wanting to enjoy a wholesome meal. Furthermore, the light and refreshing flavors can transport you to tropical paradises, while the crispness of the cucumbers and the sweetness of the peas tantalize your taste buds.

    As we delve deeper into this quick cucumber pea salad recipe, prepare yourself to be inspired by its simplicity, health benefits, and versatility. Whether you are a seasoned cook or a novice in the kitchen, this salad is sure to become a staple in your culinary repertoire.

    Benefits and Advantages of Quick Cucumber Pea Salad

    Nutritional Powerhouse

    The combination of cucumbers and peas in this cucumber salad ensures that you consume a wealth of nutrients in every serving. Cucumbers are low in calories, high in water content, and an excellent source of vitamin K. They also provide potassium and magnesium, crucial for maintaining muscle function and electrolyte balance. On the other hand, peas are a powerhouse of protein, fiber, and essential vitamins such as vitamin A, vitamin C, and B vitamins. Together, these ingredients create a nutritious salad that supports overall health and well-being.

    Easy Preparation

    One of the main advantages of the Quick Cucumber Pea Salad is how convenient it is to prepare. In just a few straightforward steps, you can have a delicious dish ready that serves as a side or main course. For busy parents or working professionals, this means you can put together a healthy meal without a significant time investment. Simply chop your vegetables, mix the dressing, and toss everything together in a bowl—easy peasy!

    Versatility for Everyone

    This cucumber salad caters to a wide range of dietary requirements. Whether you’re following a vegan diet, need something gluten-free, or are watching your calorie intake, this salad has it all covered. You can easily adjust the recipe based on available ingredients or personal preferences. This adaptability also makes it a perfect dish for potlucks, barbecues, and family gatherings, ensuring that everyone can enjoy it, no matter their dietary restrictions.

    Great for Meal Prepping

    Another noteworthy benefit of the Quick Cucumber Pea Salad is its suitability for meal prepping. It can be made in bulk and stored in the refrigerator for a few days, allowing you to plan healthy lunches or dinners throughout the week effortlessly. In fact, the flavors continue to meld together as it sits, which can enhance the overall taste of the dish! Simply pack it in meal prep containers, and you’ve got lunch sorted for several days.

    Refreshing Taste

    The crispness of cucumbers and the sweetness of peas create a light, refreshing taste that can brighten up any meal. This makes the cucumber salad the perfect companion alongside heavier dishes, adding balance to your plate. Furthermore, its refreshing nature makes it an excellent option for warm summer days or alongside grilled meats at a cookout.

    Ingredients Overview

    Essential Ingredients for Quick Cucumber Pea Salad

    This cucumber salad recipe features a simple list of essential ingredients, each playing a crucial role in the dish’s flavor and texture. Here’s what you’ll need:

    1. Cucumbers (2 medium-sized): Slice them for a refreshing base. Cucumbers have high-water content, which is excellent for hydration.

    2. Fresh Peas (1 cup): You can use fresh or frozen peas (thawed) for sweetness and color.

    3. Cherry Tomatoes (1 cup, halved): For vibrant color and a burst of flavor. They are also rich in antioxidants.

    4. Red Onion (1 small, finely chopped): Adds tanginess to the salad. You can opt for shallots for a milder taste.

    5. Fresh Dill or Mint (2 tablespoons, chopped): These herbs enhance the salad’s fresh flavor profile. Mint offers a cooling effect, while dill adds a savory twist.

    6. Olive Oil (3 tablespoons): Acts as a flavorful dressing base, providing healthy fats.

    7. Lemon Juice (2 tablespoons): Adds acidity to balance the flavors.

    8. Salt and Pepper (to taste): Essential for enhancing all flavors in the salad.

    Dietary Substitutions to Customize Your Quick Cucumber Pea Salad

    Customizing the cucumber salad to suit various dietary needs is easy. Here are some substitution ideas:

    • Cucumbers: For individuals who are looking for something crunchier, zucchini can serve as an alternative.

    • Peas: Chickpeas or black beans can replace peas for those seeking a higher protein content.

    • Cherry Tomatoes: If you dislike tomatoes, you could use bell peppers for a different texture and flavor.

    • Olive Oil: Avocado oil or any light oil can be an alternative, particularly for those who prefer different flavor profiles.

    • Lemon Juice: In case of citrus allergies or preferences, apple cider vinegar can provide a similar tang.

    • Herbs: Don’t have dill or mint on hand? Basil or cilantro could lend unique flavors and freshness.

    For vegan eaters, the salad remains entirely plant-based as it has no animal products. This flexibility makes the Quick Cucumber Pea Salad a delightful option for gatherings and meal prep, aligning with diverse tastes and requirements.

    How to Prepare the Perfect Quick Cucumber Pea Salad: Step-by-Step Guide

    Now that you have all your ingredients ready, let’s dive into the step-by-step guide to preparing your cucumber salad.

    1. Prepare the Base: Begin by washing your cucumbers thoroughly. Slice them in half lengthwise, then cut them into half-moon shapes for easy eating.

    2. Mix Ingredients: Place the sliced cucumbers in a large mixing bowl. Next, add the fresh peas, diced cherry tomatoes, and chopped red onion.

    3. Make the Dressing: In a separate small bowl, whisk together olive oil, lemon juice, salt, and pepper. Adjust the seasoning to your preference—add more salt or lemon juice if desired.

    4. Combine Everything: Drizzle the dressing over the cucumber and pea mixture. Use a spatula or spoon to toss the ingredients gently until everything is well-coated.

    5. Add Herbs: Lastly, sprinkle the chopped dill or mint over the salad. Toss again gently, ensuring the herbs are distributed evenly.

    6. Chill: For the best flavor, allow the salad to sit in the refrigerator for about 20 minutes. This waiting period helps all the flavors meld together nicely.

    7. Serve: Once chilled, give the salad a final toss before serving. You can garnish with additional herbs or seeds for extra flair.

    Optional Cooking Steps (For Those Who Prefer Cooked Peas)

    If you prefer your peas cooked, simply bring a pot of water to a boil, add the peas, and cook for about 2-3 minutes until tender. Drain and cool the peas before adding them to your salad.

    Presentation Tips

    To elevate your cucumber salad, serve it in a chilled bowl or over a bed of greens. You can also add some crumbled feta or goat cheese for an extra layer of flavor.

    Mastering Quick Cucumber Pea Salad: Advanced Tips and Variations

    To truly master the Quick Cucumber Pea Salad, consider these advanced tips and variations:

    • Add Crunch: For an extra crunch, toss in some chopped nuts or seeds, like sunflower seeds or sliced almonds.

    • Spice it Up: If you enjoy heat, a pinch of red pepper flakes can add a delightful spice.

    • Change the Dressing: Experiment with different dressings like tahini or yogurt-based dressings for a creamier texture.

    • Protein Boost: Incorporate some protein by adding grilled chicken or shrimp, making the salad more filling for larger meals.

    • Social Gatherings: Make a larger batch and serve it as a refreshing dish at barbecues or parties, where guests can help themselves.

    These ideas will not only add variety but also ensure that your cucumber salad stays interesting, no matter how often you make it.

    How to Store Quick Cucumber Pea Salad: Best Practices

    To ensure your Quick Cucumber Pea Salad remains fresh and delicious, proper storage is essential. Here are some best practices to keep in mind:

    • Refrigeration: Place the salad in an airtight container and store it in the refrigerator. The salad should last 3-4 days when properly stored. Note that the cucumbers may release water over time, making the dressing thinner. This is normal, and you can always give it a quick toss before serving.

    • Freezing: It’s not recommended to freeze this salad due to the high-water content of cucumbers, which can turn mushy after thawing. Enjoy it fresh instead!

    • Reheating: If you choose to add cooked peas or any other ingredients that need to be heated, gently warm them in a pot before mixing them with the other cold ingredients to avoid sogginess.

    Nutritional Value of Quick Cucumber Pea Salad

    The nutritional benefits of this cucumber salad are noteworthy. Here’s a rough estimate of the nutritional profile per serving (approximately 1 cup):

    • Calories: 120
    • Protein: 4g
    • Fat: 7g (mostly from olive oil)
    • Carbohydrates: 13g
    • Fiber: 4g
    • Sugars: 3g

    Vitamins and Minerals

    • Vitamin A: 10% of Daily Value (DV)
    • Vitamin C: 40% of DV
    • Vitamin K: 35% of DV
    • Potassium: 10% of DV

    This balance of macronutrients and the abundance of vitamins make the cucumber salad an excellent choice for maintaining a healthy diet. The high fiber content aids digestion, while the healthy fats from olive oil promote heart health.

    FAQs: Frequently Asked Questions About Quick Cucumber Pea Salad

    1. Can I add other vegetables to this cucumber salad?

    Absolutely! Feel free to add any veggies you enjoy. Bell peppers, carrots, or avocados can add a delightful crunch and additional nutrients.

    2. How long does Quick Cucumber Pea Salad last in the fridge?

    When stored in an airtight container, this salad can last for up to 3-4 days. However, for the freshest flavor, it’s best enjoyed within the first couple of days.

    3. Is the salad suitable for a vegan diet?

    Yes! The Quick Cucumber Pea Salad is entirely plant-based, making it suitable for vegans and those avoiding animal products.

    4. Can I use dried herbs instead of fresh?

    Certainly! If fresh herbs are unavailable, you can use dried herbs, keeping in mind that dried herbs are more concentrated. Typically, one tablespoon of fresh herbs equals about one teaspoon of dried.

    5. What can I use instead of peas?

    If you don’t have peas, consider using diced avocado, cooked chickpeas, or edamame for a similar texture. Each will lend a unique flavor profile to your salad.

    6. How can I enhance the flavor of my cucumber salad?

    Consider adding a splash of balsamic vinegar, a pinch of garlic powder, or even a dash of hot sauce for an extra kick, depending on your taste preferences.

    In conclusion, the Quick Cucumber Pea Salad is not only simple and quick to make but also serves as a nutritious addition to your meal plans. With its versatility and vibrant flavors, it’s sure to become a favorite recipe for any occasion. Dive into this tropical delight and enjoy the health benefits it has to offer!

  • Homemade Pea Salad Lettuce Cups

    Homemade Pea Salad Lettuce Cups

    Homemade Pea Salad Lettuce Cups: A Tropical Delight

    Introduction to Homemade Pea Salad Lettuce Cups

    Are you searching for a refreshing and easy-to-prepare dish that fits perfectly within your healthy lifestyle? Look no further than Homemade Pea Salad Lettuce Cups. This vibrant and colorful recipe stands out as one of the most delightful healthy recipes you can add to your culinary repertoire. Not only does it burst with flavor, but it also boasts a plethora of health benefits, making it an excellent choice for anyone, whether you’re a busy parent, a student, or just someone looking to eat better.

    This recipe shines particularly during warmer months or as an appetizer for gatherings. The crunch of fresh lettuce cups combined with the sweet and savory tastes of peas creates a delightful contrast that is both satisfying and nutritious. Each bite is packed with protein, vitamins, and minerals while remaining vegan, gluten-free, and low-calorie. This is a versatile dish that caters to various dietary needs without skimping on flavor.

    Homemade Pea Salad Lettuce Cups are perfect for those who appreciate simple, yet delicious meals. Whether you are entertaining guests, prepping quick lunches for the week, or simply enjoying a fresh snack, this recipe checks all the boxes. So, roll up your sleeves and get ready to dive into the world of effortless, healthy cooking!

    Benefits and Advantages of Homemade Pea Salad Lettuce Cups

    When it comes to quick and nutritious dishes, Homemade Pea Salad Lettuce Cups rise to the top for several reasons.

    1. Ease of Preparation: This delightful dish requires minimal cooking time and effort. With just a few simple steps, you can whip this up in less than 30 minutes. Grab your fresh ingredients, toss them together, and serve!

    2. Health Benefits: Peas are a powerhouse of nutrients. They are high in protein and fiber, both of which promote satiety and aid in weight management. Additionally, peas are rich in antioxidants such as vitamins A, C, and K, and they have been linked to numerous health benefits, including improved digestion and heart health.

    3. Dietary Versatility: Because this recipe is naturally vegan and gluten-free, it can be easily adapted for various dietary needs. It’s a great meal prep option for health-conscious individuals and can be modified to fit a variety of diet plans, making it accessible for everyone, from busy professionals to homes filled with food enthusiasts.

    4. Customizable Flavor: You can make the salad to suit your taste preferences; for example, adding ingredients like nuts for extra crunch, herbs for freshness, or alternative dressings for different flavor profiles. This adaptability ensures that you’ll never tire of this dish.

    5. Suitable for All Occasions: Whether you’re hosting a weekend barbecue, packing school lunches, or enjoying a quiet dinner at home, these lettuce cups can transition seamlessly from casual to elegant dining.

    Thanks to these wonderful advantages, Homemade Pea Salad Lettuce Cups are not just another dish; they are a celebration of health, simplicity, and flavor.

    Ingredients Overview

    Essential Ingredients for Homemade Pea Salad Lettuce Cups

    To create these scrumptious Healthy Pea Salad Lettuce Cups, you’ll need the following key ingredients:

    • 2 cups of fresh or frozen peas: Peas form the base of this recipe. Fresh peas bring a delightful sweetness, while frozen peas can be used when fresh ones aren’t available.

    • 1 cup of diced bell peppers (red and yellow for color): Bell peppers offer a nice crunch and a boost of vitamins A and C.

    • ½ cup of finely chopped red onion: This adds a pop of flavor and a bit of color. If you’re sensitive to raw onion, consider soaking it in cold water for a few minutes before using.

    • 1 avocado, diced: Avocados add creaminess and healthy fats, enriching the salad’s texture and nutritional profile.

    • 2 tablespoons of fresh lime juice: Lime juice brightens the salad, bringing all the flavors together while also providing a source of vitamin C.

    • ¼ cup of chopped fresh herbs (like cilantro or parsley): Fresh herbs enhance flavor and add health benefits, including anti-inflammatory properties.

    • Salt and pepper to taste: These are essential for seasoning, ensuring each component shines.

    • For the dressing (optional):

    • 2 tablespoons of olive oil for healthy fats (or a vegan alternative if desired).
    • A pinch of cumin or chili powder for an extra kick.

    These ingredients are not only packed with nutrients but also work together harmoniously to create a mouthwatering dish.

    Dietary Substitutions to Customize Your Homemade Pea Salad Lettuce Cups

    Further enhance your Homemade Pea Salad Lettuce Cups with the following substitutions and modifications:

    1. For a Protein Boost: Consider adding cooked quinoa, chickpeas, or black beans. These ingredients will not only increase the protein content but will also keep you full longer.

    2. For Gluten-Free: All the ingredients listed are naturally gluten-free. However, if you choose to add a dressing or toppings, ensure they are gluten-free to maintain the dish’s dietary integrity.

    3. Vegan Friendly: The recipe is already vegan. If you want a creamier texture, a vegan mayonnaise or tahini could substitute for traditional dressings.

    4. Herb Variations: If you want a different flavor, you can try using dill instead of cilantro or even add some chopped green onions for a milder onion flavor.

    5. Change the Greens: Instead of lettuce cups, you can serve this salad in whole grain wraps, or over a bed of mixed greens for a salad bowl presentation.

    By incorporating these suggestions, you can make tailor-made versions of the salad that cater to specific tastes or dietary preferences, ensuring that everyone can indulge in this delicious healthy recipe.

    How to Prepare the Perfect Homemade Pea Salad Lettuce Cups: Step-by-Step Guide

    Preparing Homemade Pea Salad Lettuce Cups is straightforward and enjoyable! Follow these easy steps to create your new favorite healthy recipe:

    1. Gather Your Ingredients: Ensure you have all the ingredients ready for a smooth preparation process. Wash the vegetables and herbs thoroughly.

    2. Prepare the Peas:

    3. If you’re using fresh peas, shell them and quickly blanch in boiling water for 1-2 minutes until vibrant green. Drain and set them aside to cool.
    4. If using frozen peas, just thaw and drain well.

    5. Chop the Vegetables: Dice the bell peppers, red onion, and avocado. The key here is to keep all pieces roughly the same size for uniform flavor and texture.

    6. Combine Ingredients: In a large mixing bowl, add your peas, bell peppers, red onion, and avocado. Gently toss the mixture with a spatula to combine.

    7. Add Fresh Herbs: Sprinkle the chopped cilantro or parsley over the top of your mixture for added flavor. Mix it all gently so the herbs are evenly distributed.

    8. Mix the Dressing: In a small bowl, whisk together the lime juice, olive oil, cumin, salt, and pepper. This will create a zesty dressing for your salad.

    9. Dress the Salad: Drizzle the dressing over the pea mixture. Be mindful to add it gradually and mix gently to avoid mashing the avocado.

    10. Prepare the Lettuce Cups: Carefully separate the leaves from the head of lettuce. Choose larger leaves to hold your filling—these will serve as your cups.

    11. Assemble the Cups: Spoon the pea salad mixture generously into each lettuce leaf. Ensure each cup is filled without overstuffing to prevent spills.

    12. Serve: Transfer the filled lettuce cups to a serving dish. They can be served immediately or chilled in the refrigerator for 30 minutes before serving for a refreshing bite!

    13. Garnish (optional): A sprinkle of more herbs or a dash of chili powder can add visual appeal and an extra flavor pop.

    This step-by-step guide ensures that you’ll be making these delightful, health-conscious lettuce cups effortlessly. They are deliciously versatile, adapting beautifully to the ingredients on hand or your preferred taste profiles.

    Mastering Homemade Pea Salad Lettuce Cups: Advanced Tips and Variations

    To take your Homemade Pea Salad Lettuce Cups to the next level, consider the following advanced tips and variations:

    1. Add Crunch: For more texture, throw in some chopped nuts or seeds, such as sunflower seeds or slivered almonds. These additions will not only lend a satisfying crunch but also enrich the nutritional profile.

    2. Spice it Up: If you like it hot, consider layering in some diced jalapeños or a splash of hot sauce to elevate the flavor. Adjust the amount according to your heat preference.

    3. Experiment with Fruits: For a refreshing twist, add diced mango or pineapple to the pea salad. The sweetness of these fruits can beautifully complement the savory aspects of the peas and vegetables.

    4. Create a Layered Salad: If you want to serve this as a main dish, layer the salad on quinoa or rice to create a satisfying bowl meal. This adds dimensions to the flavors.

    5. Marinated Peas: For an added depth of flavor, marinate the peas in lime juice, balsamic vinegar, or your favorite vinaigrette before mixing. The marination process enhances their flavor profile.

    6. Herbal Infusion: Select herbs like mint or basil instead of traditional herbs to transform the flavor completely. These will provide a refreshing twist.

    By implementing these advanced variations, you can turn these healthy recipes into a unique dish that resonates with your personal tastes or showcases your creativity in the kitchen.

    How to Store Homemade Pea Salad Lettuce Cups: Best Practices

    Storing your Homemade Pea Salad Lettuce Cups correctly ensures that you can enjoy your healthy dish later without sacrificing flavor or texture. Here are some best practices:

    1. Refrigeration: If you have leftovers, store any uneaten salad mixture in an airtight container in the refrigerator. The salad will last for about 2-3 days. However, it’s best to store the salad filling and the lettuce cups separately to maintain the crispness of the leaves.

    2. Freezing: While freezing is not recommended due to the high water content in the peas and avocado, if you’ve made a larger batch of the pea mixture without the dressing, it can be frozen in an airtight container. To use, thaw in the refrigerator overnight and stir in fresh ingredients upon serving.

    3. Reheating: If you’ve frozen the mixture, gently reheat it in a saucepan over low heat, stirring frequently to prevent it from becoming mushy. There’s no need to reheat if you enjoy it cold.

    By following these best practices for storage, you can ensure the longevity and quality of your Homemade Pea Salad Lettuce Cups.

    Nutritional Value of Homemade Pea Salad Lettuce Cups

    Understanding the nutritional value of your food is critical in a health-conscious diet. Here’s a breakdown of the nutritional value for one serving (approximately two lettuce cups filled with pea salad):

    • Calories: 150
    • Protein: 7 grams
    • Total Fat: 9 grams (with healthy fats primarily from avocado and olive oil)
    • Carbohydrates: 16 grams
    • Fiber: 6 grams (excellent for digestive health)
    • Sugars: 5 grams (natural sugars from vegetables)
    • Vitamins:
    • Vitamin A: 30% DV
    • Vitamin C: 60% DV
    • Vitamin K: 40% DV
    • Minerals:
    • Iron: 15% DV
    • Potassium: 10% DV

    These nutritional facts highlight why Homemade Pea Salad Lettuce Cups are one of the best healthy recipes you can prepare. They are low in calories but packed with essential nutrients, making them the perfect meal or snack for individuals of all ages.

    FAQs: Frequently Asked Questions About Homemade Pea Salad Lettuce Cups

    1. Can I make this salad ahead of time?

    Yes! You can prepare the pea salad mixture up to 2-3 days in advance. However, it’s best to assemble the lettuce cups just before serving to maintain the crispness of the lettuce.

    2. How can I make this dish spicier?

    If you enjoy a kick, add diced jalapeños or sprinkle in some cayenne pepper or chili powder to the mixture. Adjust the amount based on your preferred spice tolerance.

    3. Is there a way to make this salad without avocado?

    Absolutely! If you prefer to omit avocado, you could add diced cucumbers or add a nut-based yogurt for creaminess.

    4. What type of lettuce should I use for the lettuce cups?

    Butter lettuce, romaine, or even cabbage leaves work well as cups. Choose leaves that are sturdy enough to hold the salad without tearing.

    5. Can I use canned peas for the recipe?

    Yes, you can use canned peas, but make sure to rinse and drain them well to remove excess sodium and to improve the flavor.

    6. How do I store leftover salad?

    Keep any uneaten salad mixture in an airtight container in the refrigerator for 2-3 days. For best results, store the salad filling and lettuce leaves separately until serving.

    7. What other ingredients can I add to customize the flavor?

    Feel free to experiment! Additional ingredients like nuts, seeds, or different herbs can change the flavor and texture of your salad.

    8. How protein-rich is this dish?

    Each serving of Homemade Pea Salad Lettuce Cups contains about 7 grams of protein, primarily sourced from peas and optional enhancements like chickpeas or quinoa.

    By addressing these FAQs, you can prepare a stellar dish knowing that you’ll be able to accommodate various questions and preferences.


    With these instructions, tips, and nutritional insights, you are now well-equipped to create your own Homemade Pea Salad Lettuce Cups, a delectable example of how healthy recipes can be both simple and satisfying. Enjoy your culinary journey!

  • IM Obsessed Been Making This Pea Salad Non-Stop

    IM Obsessed Been Making This Pea Salad Non-Stop

    I’M Obsessed! Been Making This Pea Salad Non-Stop!: A Tropical Delight

    Introduction to I’M Obsessed! Been Making This Pea Salad Non-Stop!

    Spring is the perfect time to embrace fresh ingredients and bring vibrant flavors to your table. If you’re searching for an easy and delightful addition to your spring meals, look no further than this incredibly versatile pea salad! Bursting with bright green peas, crunchy vegetables, and a zesty dressing, this dish embodies the freshness of the season.

    What makes me rave about this pea salad is its simplicity and the joy it brings to any meal. With minimal prep time and straightforward ingredients, even the busiest of home cooks can whip this up in a flash. Moreover, this salad is not just easy; it’s incredibly healthy. Packed with fiber, protein, and essential vitamins, it caters effortlessly to various dietary needs—including vegan and gluten-free.

    Whether you’re a busy parent looking for quick meal solutions, a student wanting healthy options on a budget, or simply someone who loves good food, this pea salad offers something for everyone. It’s perfect for picnic lunches, holiday gatherings, or just as a light snack during those warm spring afternoons. So, let’s dive into why this salad has become my go-to recipe that simply can’t be missed!

    Benefits and Advantages of I’M Obsessed! Been Making This Pea Salad Non-Stop!

    This pea salad is more than just a dish; it’s a wholesome experience packed with benefits that speak to both your taste buds and your health. Here are some key reasons why you should make it part of your regular spring meals lineup:

    1. Ease of Preparation: One of the best aspects of this recipe is that it requires minimal cooking skills and time. With just a few simple steps, anyone can combine these ingredients, making it accessible for everyone—no fancy equipment or lengthy processes necessary.

    2. Health Benefits: Peas are an excellent source of plant protein, making this salad a fantastic option for vegetarians and vegans alike. Packed with vitamins such as Vitamin A, C, and K, as well as essential minerals like iron and magnesium, this salad helps you maintain a balanced diet. The combination of ingredients offers a wealth of fiber, promoting gut health and supporting digestion.

    3. Versatility: This salad can easily adapt to your dietary needs. Whether you’re following a low-carb regimen, a gluten-free lifestyle, or a vegan diet, this pea salad provides a delicious foundation. You can also incorporate seasonal vegetables for a personalized touch, making this a staple dish for your spring meals.

    4. Great for Meal Prep: If you’re a busy professional or a parent juggling multiple tasks, this pea salad can be prepped in advance. It stores well, allowing you to have nutritious meals ready in the refrigerator, making your week much easier.

    5. Colorful and Appealing: Not only is this salad nutritious, but it’s also visually appealing. The vibrant colors of green peas, crisp vegetables, and fresh herbs make it a feast for the eyes, enticing even the pickiest eaters.

    With all these benefits combined, this pea salad transcends being just another dish on your table; it becomes a reliable ally in your quest for health, flavor, and convenience during springtime feasts.

    Ingredients Overview

    Essential Ingredients for I’M Obsessed! Been Making This Pea Salad Non-Stop!

    Here’s a detailed list of the essential ingredients, complete with measurements and their roles in the salad:

    • 2 cups of fresh or frozen peas (340g): Peas are the star of this salad, providing sweetness and protein.
    • 1 cup of diced bell peppers (150g): Adds crunch and a burst of color. You can use any color you prefer.
    • 1/2 cup of red onion, finely chopped (75g): Offers a sharp flavor that complements the sweetness of the peas.
    • 1/2 cup of cherry tomatoes, halved (75g): These add juiciness and a touch of acidity.
    • 1/4 cup of fresh herbs (e.g., parsley or mint): Enhances flavor and provides freshness. Fresh herbs can also support immune health.
    • 1/3 cup of olive oil (80ml): Acts as a healthy fat to help absorb the fat-soluble vitamins and adds richness to the dish.
    • 1/4 cup of apple cider vinegar (60ml): Provides acidity to balance the flavors and aids in digestion.
    • 1 tablespoon of honey or maple syrup (optional for sweetness): This is a vegan option if you choose maple syrup.
    • Salt and pepper to taste: Essential for seasoning, enhancing the flavors of the ingredients.

    This combination of ingredients not only tastes amazing but also meets various dietary requirements. The salad is naturally vegan and gluten-free, and it can be modified further to lower calories or eliminate certain allergens.

    Dietary Substitutions to Customize Your I’M Obsessed! Been Making This Pea Salad Non-Stop!

    If you’re looking to adjust this spring meal to suit specific dietary needs or to use what you have on hand, consider the following substitutions:

    • Peas: For a different flavor and texture, consider using edamame or chickpeas.
    • Bell Peppers: Substitute with finely diced cucumbers for a lighter taste, or go for roasted red peppers for a smoky flavor.
    • Red Onion: Sweet onions or shallots can work too. If you prefer a milder taste, use green onions or omit them entirely.
    • Fresh Herbs: Basil, cilantro, or dill can replace the traditional herbs, offering varied flavor profiles. For those allergic or sensitive to herbs, spinach or arugula adds a green dimension without the herbaceous notes.
    • Vinegar: Any type of vinegar can be used, such as lemon juice, balsamic vinegar, or red wine vinegar for varied acidity and flavor.
    • Olive Oil: Substitute with avocado oil for a different healthy fat profile. For a low-cal option, use a light vinaigrette.

    These substitutions ensure that everyone can enjoy the pea salad according to personal preferences, making it truly adaptable while still being a highlight of your spring meals!

    How to Prepare the Perfect I’M Obsessed! Been Making This Pea Salad Non-Stop!: Step-by-Step Guide

    Now, let’s dive into the preparation of this delightful pea salad with a step-by-step guide. Follow these actions closely to create a dish that is sure to impress!

    1. Gather Your Ingredients: Start by collecting all your fresh ingredients for the salad, ensuring they are properly washed and prepped.

    2. Prepare the Base: If you are using frozen peas, cook them according to the package instructions until just tender. For fresh peas, simply shell them and rinse under cold water. Drain and set aside.

    3. Chop the Vegetables: Dice the bell peppers and finely chop the red onion. Cut the cherry tomatoes in half and remove any excess seeds for a less watery salad.

    4. Combine the Veggies: In a large mixing bowl, combine the peas, bell peppers, red onion, and cherry tomatoes.

    5. Chop Fresh Herbs: Finely chop your choice of fresh herbs (parsley or mint recommended). Add them to the mixing bowl, stirring gently to combine.

    6. Mix the Dressing: In a separate small bowl, whisk together the olive oil, apple cider vinegar, honey or maple syrup, salt, and pepper. Taste and adjust the seasoning if needed.

    7. Dress the Salad: Pour the dressing over the vegetable mixture in the large bowl. Toss gently until everything is beautifully coated.

    8. Chill (Optional): For optimal flavor, cover the mixing bowl with plastic wrap or a lid and refrigerate for at least 30 minutes to 1 hour. This step allows the flavors to meld together, making your spring meals even more delightful!

    9. Serve and Enjoy: After chilling, give the salad a light toss one more time before serving. This pea salad pairs excellently with grilled meats, as a side dish, or as a light meal on its own.

    10. Store Leftovers: Should you have any leftovers, store them in an airtight container for up to 3 days for freshness.

    Follow these steps, and you’ll end up with a vibrant, healthy pea salad that exemplifies what spring meals should be about—freshness, ease, and deliciousness!

    Mastering I’M Obsessed! Been Making This Pea Salad Non-Stop!: Advanced Tips and Variations

    To truly master your pea salad, here are some advanced tips and exciting variations you can embrace for even more flavor:

    • Add Protein: For a more filling meal, feel free to add cooked quinoa, grilled chicken, or even feta cheese to boost protein content. This makes the salad more substantial while enriching its flavor profile.

    • Experiment with Textures: For added crunch, consider including toasted nuts or seeds, such as sunflower seeds or nuts like almonds. These not only enhance flavor but also provide healthy fats.

    • Spice It Up: If you enjoy a little kick, add some red pepper flakes or diced jalapeños to your dressing. This simple adjustment can bring an exciting twist to your spring meal.

    • Use What’s Seasonal: Embrace the seasons by including other spring vegetables like asparagus, radishes, or even diced zucchini. This allows the salad to evolve with each culinary season, giving you a reason to keep making it!

    • Creative Dressings: Don’t be afraid to venture beyond the classic dressing! Consider a tahini dressing or a yogurt-based dressing for a creamy alternative.

    • Make It a Pasta Salad: If you desire a heartier version, incorporate cooked pasta like orzo or bow-tie pasta. This turns your pea salad into a satisfying pasta salad perfect for picnics!

    These variations help you keep your pea salad interesting and new. Whether you’re meal prepping for the week or serving at a family gathering, experimenting with these tips elevates this dish, keeping everyone excited about your spring meals!

    How to Store I’M Obsessed! Been Making This Pea Salad Non-Stop!: Best Practices

    To enjoy the freshness of your pea salad for longer, following precise storage methods is key. Here are the best practices for storing your spring meal:

    1. Refrigeration: Store your pea salad in an airtight container as soon as you’re finished eating. If you’re not serving immediately, keep it in the fridge to maintain its freshness. It can last up to 3 days in the refrigerator.

    2. Freezing: If you want to save leftovers for a longer period, consider freezing! However, be cautious—freezing can change the texture of fresh vegetables. Instead, freeze only the components like peas and herbs if you anticipate them lasting longer without changing flavor. Also, refrain from freezing any dressing.

    3. Reheating: To enjoy your salad again, it’s best to let it thaw in the fridge overnight before re-serving. If it loses some crunch, consider adding fresh ingredients—like diced cucumber or new herbs—to revive its texture.

    Following these best practices ensures that your spring meals remain fresh and enjoyable, allowing you to savor every bite long after you first prepare it.

    Nutritional Value of I’M Obsessed! Been Making This Pea Salad Non-Stop!

    Understanding the nutritional value of your meals is vital, especially when striving for a balanced diet. Here’s the estimated nutritional breakdown of one serving of this pea salad (approx. 1 cup):

    • Calories: 150
    • Total Fat: 9g
    • Saturated Fat: 1.5g
    • Cholesterol: 0mg
    • Sodium: 300mg
    • Total Carbohydrates: 15g
    • Dietary Fiber: 5g
    • Sugars: 3g
    • Protein: 5g

    The nutritional benefits of this salad are vast. The healthy fats from olive oil contribute to heart health, while the vivid veggies provide essential vitamins and dietary fiber, helping maintain a healthy digestive system. Additionally, substituting sweeteners or adjusting the additional ingredients can easily alter the calorie content, making it adaptable for various dietary requirements.

    Enjoy your spring meals while taking comfort in knowing you are satisfying both your taste buds and nutritional needs with this refreshing pea salad!

    FAQs: Frequently Asked Questions About I’M Obsessed! Been Making This Pea Salad Non-Stop!

    Can I use frozen peas instead of fresh peas?

    Absolutely! Frozen peas are an excellent option. They are often just as nutritious as fresh since they are frozen shortly after harvest. If using frozen peas, make sure to thaw them before adding them to the salad.

    How long can I store the pea salad?

    You can store the leftover pea salad in an airtight container in the refrigerator for up to 3 days. However, for the best taste and texture, it’s recommended to consume it within the first two days.

    Can I make this salad ahead of time?

    Yes! This salad can definitely be made ahead of time. Just keep the dressing separate until you are ready to serve to ensure the salad doesn’t become watery.

    What can I substitute for honey in the dressing?

    If you prefer a vegan option, maple syrup is a great substitute for honey. For a sugar-free alternative, consider using stevia or an equivalent sweetener.

    Is this salad gluten-free?

    Yes! The pea salad is naturally gluten-free, making it an excellent choice for those with gluten sensitivities. Just be sure to check the labels of any added ingredients for gluten content.

    With this recipe, tips, and answers to your questions, you’re well-equipped to create a delectable pea salad that is sure to elevate your spring meals and keep your taste buds entertained! Enjoy the journey of culinary creativity as you explore this refreshing salad!