Tag: cookies

  • Easy Easter Cookie Decorating Ideas

    Easy Easter Cookie Decorating Ideas

    Easy Easter Cookie Decorating Ideas: A Tropical Delight

    Introduction to Easy Easter Cookie Decorating Ideas

    Easter is just around the corner, and it’s the perfect opportunity to get creative in the kitchen with cookie recipes that are not only festive but also easy to make. Decorating cookies is a fun-filled activity that brings together families, friends, and anyone who loves to bake. Whether you are a busy parent looking to engage your kids, a food enthusiast wanting to impress your guests, or a newlywed preparing your first holiday feast, these Easy Easter Cookie Decorating Ideas will inspire you to get into the kitchen and decorate delightful treats.

    What makes these cookie recipes particularly appealing is their simplicity. You don’t need to be a professional baker to create beautiful designs that will wow your friends and family. These recipes can also be tailored to meet various dietary preferences, including vegan and gluten-free options! They promote healthier snacking without sacrificing flavor, allowing you to indulge without the guilt. With colorful icing and fun toppings, these cookies can be transformed into little masterpieces, perfect for an Easter gathering or simply to enjoy at home.

    Let’s hop right into the fun and flavorful world of Easy Easter Cookie Decorating Ideas!

    Benefits and Advantages of Easy Easter Cookie Decorating Ideas

    One of the standout aspects of Easy Easter Cookie Decorating Ideas is their versatility. These cookie recipes allow for a personal touch, enabling you to express your creativity. Not to mention, decorating cookies can be a fantastic bonding experience. So whether you’re planning an Easter party or simply enjoying time with your kids, cookie decorating serves as a memorable and enjoyable activity.

    The ease of preparation is another enticing factor. With straightforward instructions and a handful of essential ingredients, you won’t feel overwhelmed when making these cookies. Even if you are new to the baking scene, these cookie recipes are approachable, ensuring delicious results.

    In addition, these cookies can be designed to cater to different health needs. You can swap refined sugars for healthier alternatives, use whole grain flour to up the fiber content, or incorporate natural food colors in your icing. Even better? Many of these cookie recipes can be made vegan or gluten-free, so everyone can enjoy them!

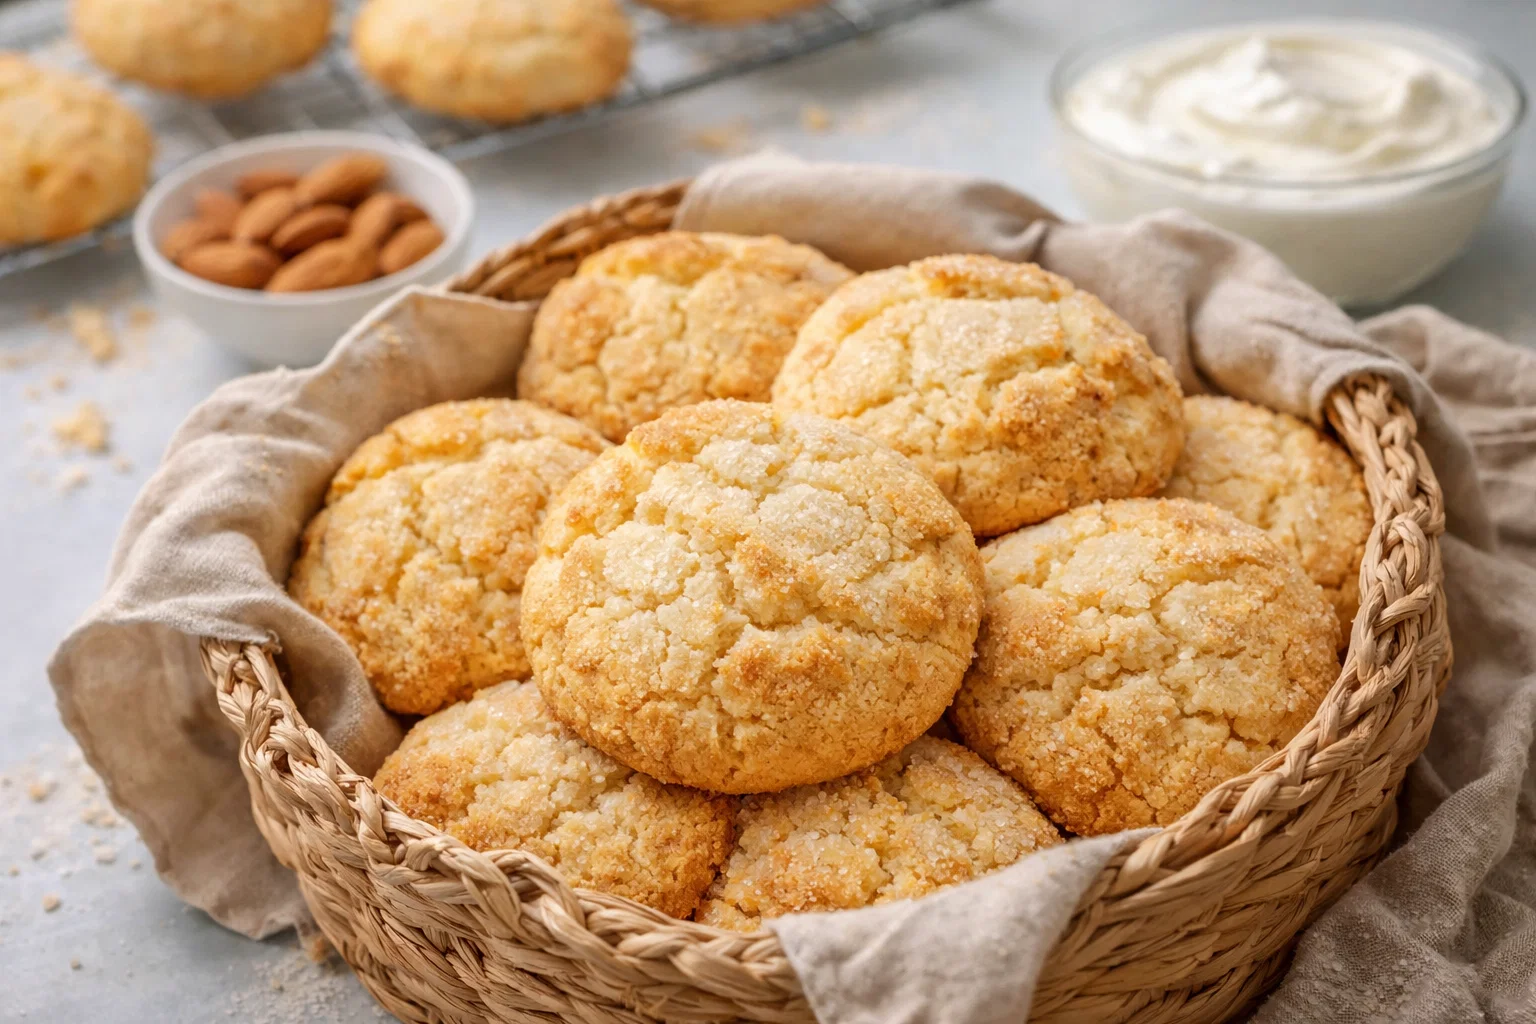
    Furthermore, the health benefits of home-baked cookies can’t be overstated. When you control the ingredients, you know exactly what goes into each bite. This means you can reduce preservatives and artificial additives commonly found in store-bought cookies. Plus, they are an opportunity to sneak in some nutritious ingredients like almond flour or coconut oil, paving the way for guilt-free enjoyment.

    Ingredients Overview

    Essential Ingredients for Easy Easter Cookie Decorating Ideas

    To create these delightful cookies, you’ll need the following essential ingredients:

    • 2 ¾ cups all-purpose flour or gluten-free flour blend
    • 1 cup unsalted butter (softened; can substitute with coconut oil for a dairy-free option)
    • 1 cup granulated sugar (or coconut sugar for a lower glycemic index)
    • 1 large egg (or a flaxseed egg for a vegan alternative)
    • 2 teaspoons vanilla extract
    • ½ teaspoon baking powder
    • ½ teaspoon salt
    • Food coloring (for your icing; natural food dyes for a healthier option)

    These ingredients form the base of your cookies. Each plays a crucial role:

    • Flour: Provides structure and texture.
    • Butter: Adds moisture and flavor.
    • Sugar: Sweetens the cookie and enhances browning.
    • Egg: Acts as a binder (substitutes available).
    • Vanilla extract: Infuses a delightful aroma and flavor.

    Dietary Substitutions to Customize Your Easy Easter Cookie Decorating Ideas

    If you’re looking to cater to specific dietary needs, here are some substitutions you can consider:

    • Dairy-Free: Replace unsalted butter with coconut oil or vegan butter.
    • Gluten-Free: Use a gluten-free flour blend; be sure to include a binder like xanthan gum if necessary.
    • Vegan: Swap the egg for a flaxseed or chia seed egg (1 tablespoon flaxseed meal with 2.5 tablespoons of water; let sit for 5 minutes).
    • Reduced Sugar: Substitute granulated sugar with mashed bananas, unsweetened applesauce, or use natural sweeteners like maple syrup in moderation.
    • Low-Calorie: Use a stevia blend for sugar reduction, but adjust the measurement according to the brand.

    These adaptations allow you to enjoy the fun of decorating while adhering to your dietary goals or restrictions.

    How to Prepare the Perfect Easy Easter Cookie Decorating Ideas: Step-by-Step Guide

    Let’s dive into preparing these fabulous cookies! Follow this step-by-step guide to create your own wonderful Easter-themed cookies.

    1. Prepare the Base: Start by preheating your oven to 350°F (175°C). Line your baking sheets with parchment paper or silicone mats, ensuring the cookies don’t stick.

    2. Cream the Butter and Sugar: In a large mixing bowl, beat the softened butter and granulated sugar together until light and fluffy. This takes about 2-3 minutes on medium speed.

    3. Add the Egg and Vanilla: Mix in the large egg (or flaxseed egg) and vanilla extract. Beat until the mixture is well-combined.

    4. Combine Dry Ingredients: In a separate bowl, whisk together the all-purpose flour, baking powder, and salt. Gradually add this mixture to the wet ingredients, mixing until no flour is visible.

    5. Chill the Dough: Cover your dough with plastic wrap and refrigerate for at least 30 minutes. This step prevents the cookies from spreading too much during baking.

    6. Roll Out the Dough: Once chilled, divide the dough into manageable portions. Roll out each portion on a floured surface to about ¼-inch thickness.

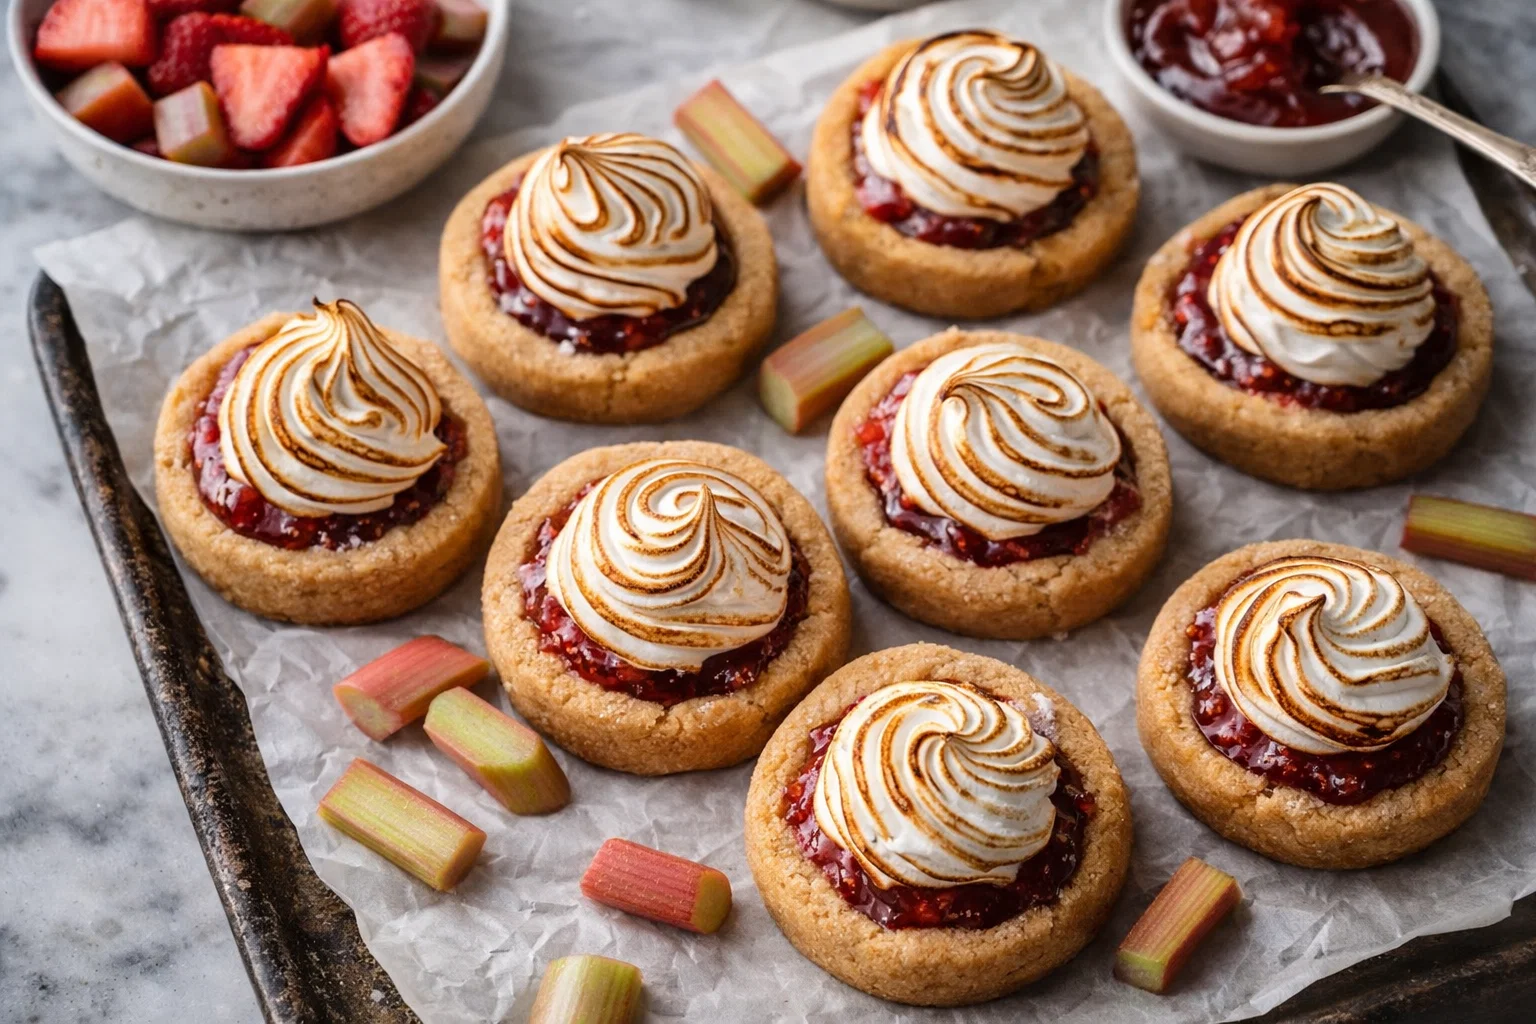
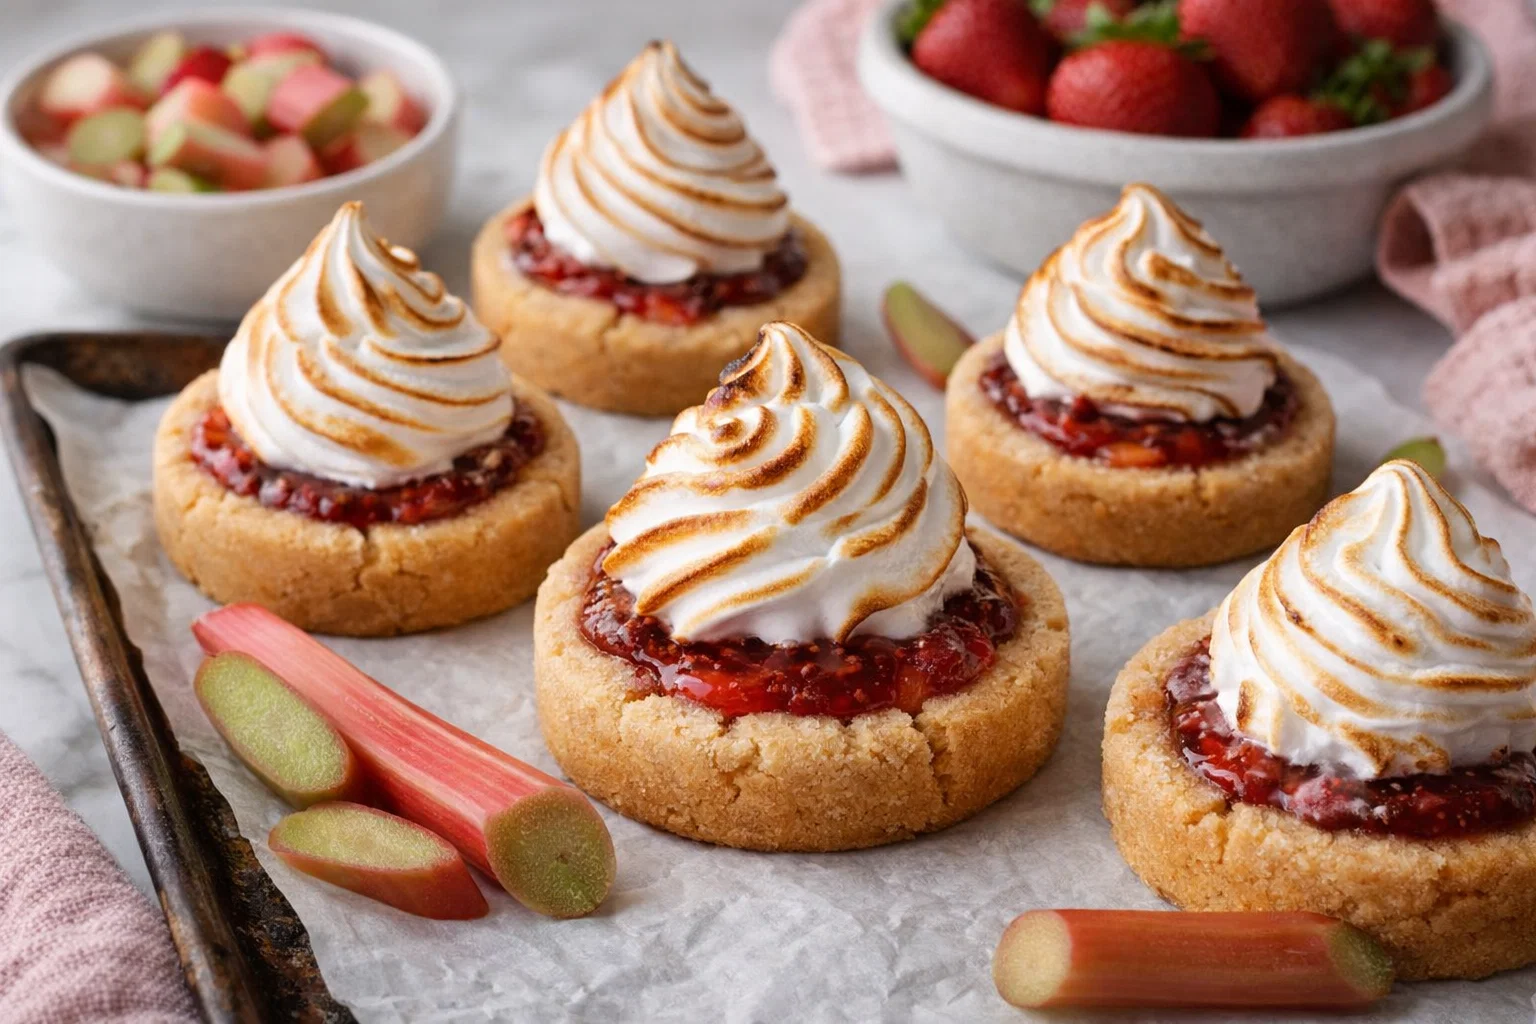
    7. Cut Out Shapes: Use cookie cutters to cut out fun Easter shapes. Traditional bunnies and eggs are always a hit!

    8. Bake the Cookies: Place your shapes on the prepared baking sheets and bake for 8-10 minutes, or until the edges are lightly golden. Keep an eye on them, as ovens vary in temperature!

    9. Cool Completely: Allow the cookies to cool on the baking sheets for about 5 minutes before transferring them to wire racks to cool completely. This cooling allows the icing to adhere better later.

    10. Prepare Icing: While your cookies cool, mix up some icing! Use powdered sugar, a splash of milk (or a non-dairy substitute), and food coloring. Aim for a thick consistency that holds its shape.

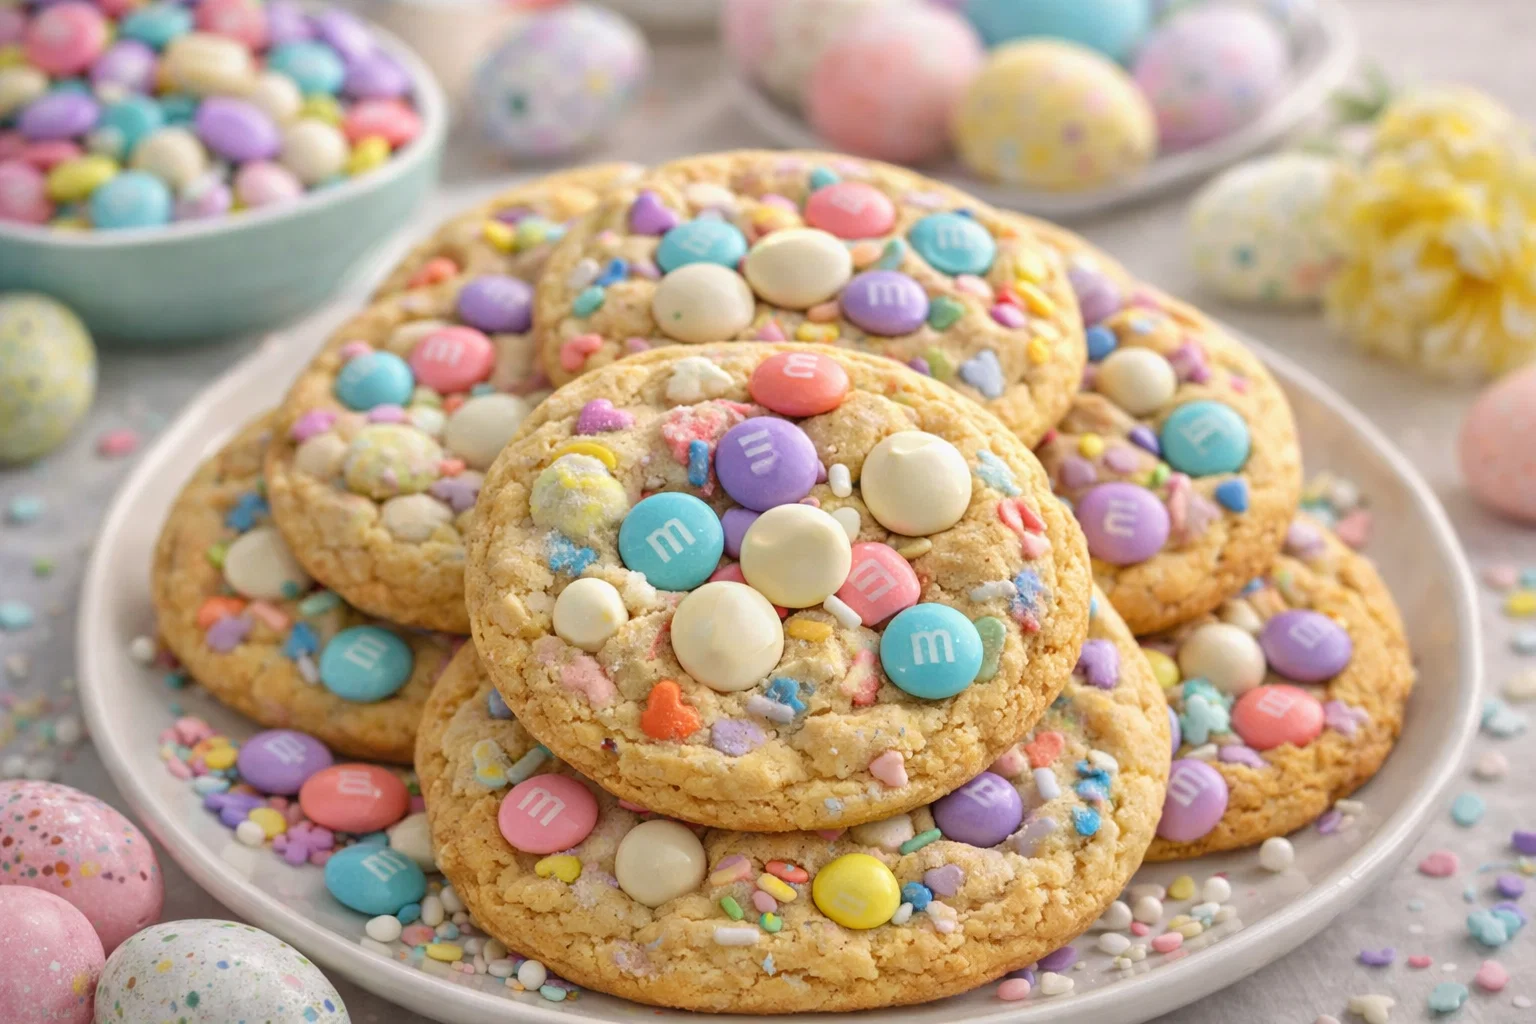
    11. Decorate Your Cookies: Now the fun begins! Use piping bags or simple ziplock bags with the tip cut off to pipe out your designs. Get creative—draw patterns, create flowers, or even write names!

    12. Let Set: Allow the decorated cookies to set for at least 30 minutes before serving or storing. This ensures the icing hardens properly.

    Follow these steps, and you’ll have a batch of beautifully decorated cookies that will amaze everyone. And remember, you can always switch up your decorating techniques, or even fill your cookies with different treats!

    Mastering Easy Easter Cookie Decorating Ideas: Advanced Tips and Variations

    To truly master your cookie decorating skills, here are some advanced tips and variations you can try:

    1. Layered Icing: Use multiple layers of icing in different colors for a more dynamic look. Allow each layer to dry completely before applying the next.

    2. Themed Variations: Utilize other themes beyond Easter. Consider using floral designs for spring or adding festive elements for birthdays and weddings.

    3. Experiment with Flavors: Add almond extract, lemon zest, or orange juice to your dough for a unique flavor twist that complements the traditional vanilla taste.

    4. Use Edible Glitter: For an extra touch, sprinkle edible glitter or colored sugar on top of your icing before it sets. This addition will make your cookies shimmer and shine!

    5. Go Natural: Instead of artificial food dyes, try using beet juice for red, spirulina for green, and turmeric for yellow. These natural colorings are healthier and still vibrant!

    With these advanced techniques, you will undoubtedly transform your cookie decorating from ordinary to extraordinary.

    How to Store Easy Easter Cookie Decorating Ideas: Best Practices

    Storing your decorated cookies correctly is essential to maintaining their freshness. Here are some best practices to follow:

    • Cool Completely: Ensure cookies are completely cooled before storing them to prevent moisture build-up that leads to sogginess.

    • Use Airtight Containers: Store your cookies in airtight containers layered with parchment paper to maintain crispness.

    • Refrigeration: If your icing contains cream cheese or perishable items, keep the cookies in the refrigerator, but be aware that this may cause the icing to lose some of its shine.

    • Freezing: For long-term storage, freeze your cookies in a single layer on a baking sheet until solid. Then, place them in freezer-safe bags or containers. Thaw them at room temperature before serving.

    Following these storage tips allows you to enjoy your delicious cookie creations long after Easter!

    Nutritional Value of Easy Easter Cookie Decorating Ideas

    When looking at the nutritional value of your Easy Easter Cookie Decorating Ideas, it’s essential to consider the base ingredient.

    A standard cookie made using classic ingredients might contain the following approximate values per cookie (based on a batch of 24 cookies):

    • Calories: 150-200
    • Total Fat: 7g (Saturated Fat: 4g)
    • Cholesterol: 15 mg
    • Sodium: 50 mg
    • Total Carbohydrates: 22g (Dietary Fiber: 1g, Sugars: 8g)
    • Protein: 2g

    These values can fluctuate based on ingredient choices, such as opting for coconut oil in place of butter or using lower sugar alternatives.

    To keep your cookie recipes healthier, consider:

    • Reducing sugar content.
    • Using whole grain flours for added fiber.
    • Incorporating nut flours for added protein.

    By making small adjustments, you can create satisfying treats that contribute to your overall well-being while still being delicious.

    FAQs: Frequently Asked Questions About Easy Easter Cookie Decorating Ideas

    1. Can I make these cookies ahead of time?
    Yes! You can bake the cookies in advance and store them properly. Decorate them closer to your event for the best results.

    2. How can I make the icing thicker?
    To thicken your icing, add more powdered sugar until it reaches your desired consistency.

    3. Are there vegan alternatives for these cookie recipes?
    Absolutely! You can replace butter with coconut oil, and you can use a flaxseed or chia egg substitute.

    4. How do I achieve vibrant colors with my icing?
    To achieve vibrant colors, use gel food coloring, as it gives richer colors without adding too much liquid.

    5. Can I use different shapes for my cookies?
    Of course! Feel free to use any cookie cutters you have on hand to create various festive shapes.

    By using these tips and tricks, you will elevate your baking and decorating skills, unleashing endless possibilities for creativity in the kitchen. Enjoy making these Easy Easter Cookie Decorating Ideas and have fun sharing them with family and friends!

  • Decorated Bunny Cookies With Royal Icing

    Decorated Bunny Cookies With Royal Icing

    Decorated Bunny Cookies With Royal Icing: A Tropical Delight

    Introduction to Decorated Bunny Cookies With Royal Icing

    Are you searching for the perfect cookie recipes that combine creativity and flavor? Look no further than these Decorated Bunny Cookies with Royal Icing. Not only do they bring a touch of sweetness to any occasion, but they also offer an engaging project for the whole family. Whip them up for Easter gatherings, children’s birthdays, or simply as a delightful weekend treat.

    What sets these bunny cookies apart is their versatility. The base recipe is entirely adaptable, making it an excellent choice for those seeking vegan, gluten-free, or low-calorie options. The royal icing allows for an intricate touch, enabling bakers of all skill levels to unleash their artistic flair. Plus, the health-conscious will appreciate that we use simple, wholesome ingredients free from artificial additives.

    Making cookies can often seem like a daunting task, but this recipe simplifies the process, ensuring delicious results every time. With just a few key ingredients and easy-to-follow steps, these decorated bunny cookies are sure to become a favorite in your cookie collection. So gather your supplies and get ready to create heartwarming treats that delight not just the palate, but also the eye!


    Benefits and Advantages of Decorated Bunny Cookies With Royal Icing

    When it comes to baking, the appeal of cookie recipes often lies in their simplicity and satisfaction. Here’s why Decorated Bunny Cookies with Royal Icing stands out as a fantastic choice for both novice and experienced bakers alike:

    Ease of Preparation

    Unlike many elaborate dessert recipes, these bunny cookies are straightforward and can be prepared in just a few hours. Baking them does not require specialized equipment or techniques, making this recipe accessible for home cooks of all skill levels. The fun part is decorating them, allowing for creativity to shine.

    Health Benefits

    More than just a sweet treat, these cookies can be tailored to meet your dietary needs. By selecting gluten-free flour or natural sweeteners, you can create cookies that fit a healthier lifestyle. Additionally, using egg substitutes in royal icing can accommodate vegan diets, ensuring everyone enjoys a treat without feeling left out.

    A Great Interactive Activity

    For parents and children, decorating cookies can evolve into a fun, interactive experience. Let your kids dive into the world of baking, mix colors for the icing, and come up with creative designs. This enhances the joy of cooking and builds lasting memories, making the cookies not only a treat for the taste buds but for the family as well.

    Aesthetically Pleasing

    There’s something enchanting about a beautifully decorated cookie. With the royal icing, you can achieve vibrant colors and intricate designs that will impress any guest. These bunny cookies can be a centerpiece on your Easter table or a charming gift for friends and family.

    Versatility for Different Occasions

    From casual get-togethers to festive occasions, these cookies fit perfectly. They can be customized for different themes and holidays, making them an evergreen addition to your baking repertoire.

    Overall, Decorated Bunny Cookies with Royal Icing brings together ease, health benefits, and pure joy, making it an irresistible option in the realm of cookie recipes.


    Ingredients Overview

    Essential Ingredients for Decorated Bunny Cookies With Royal Icing

    To create these delightful bunny cookies, you will need the following ingredients:

    For the Cookies

    1. All-Purpose Flour (2 ½ cups) – This is the base of the cookies, providing structure.
    2. Granulated Sugar (1 cup) – Adds sweetness and helps achieve a delicate texture.
    3. Baking Powder (1 tsp) – A leavening agent that helps the cookies rise.
    4. Unsalted Butter (1 cup) – Creates a rich flavor and crumbly texture. (For a vegan option, substitute with coconut oil or vegan butter.)
    5. Eggs (2 large) – Essential for binding and moisture. (Use flaxseed meal for a vegan substitute: 1 tbsp flaxseed meal + 2.5 tbsp water = 1 egg.)
    6. Vanilla Extract (1 tsp) – Enhances the flavor profile of the dough.
    7. Salt (½ tsp) – Balances the sweetness.

    For the Royal Icing

    1. Powdered Sugar (3 cups) – Forms the base for the icing.
    2. Merengue Powder (2 tbsp) – Stabilizes the icing. (Use aquafaba or a vegan meringue alternative if desired.)
    3. Water (4-5 tbsp) – Used to achieve the desired consistency of the icing.
    4. Food Coloring – Various colors for decoration. Use natural food coloring for a healthier alternative.

    Benefits of Key Ingredients

    • Butter vs. Coconut Oil: Opting for coconut oil can create a dairy-free variant.
    • Flours: Substitute all-purpose flour with almond or oat flour for gluten-free options.
    • Icing Variants: Using aquafaba in royal icing allows this recipe to be friendly for those avoiding eggs.

    By selecting quality ingredients and considering health-conscious options, these bunny cookies can easily adapt to suit many dietary preferences, ensuring everyone can enjoy a sweet bite.


    Dietary Substitutions to Customize Your Decorated Bunny Cookies With Royal Icing

    Gluten-Free Substitutions:

    • Flour: Replace all-purpose flour with a gluten-free blend or almond flour. This will help in achieving the right texture while keeping them safe for gluten-intolerant eaters.

    Vegan Substitutions:

    • Butter: Use vegetable shortening or a dairy-free butter alternative.
    • Eggs: Flax eggs or applesauce can work well in place of conventional eggs, helping to bind the ingredients together without compromising on texture.

    Low-Calorie Options:

    • Sugar: Substitute regular sugar with coconut sugar or a stevia blend to reduce calories.
    • Royal Icing: Opt for a light version using less sugar and more water. Natural extracts can help maintain flavor without the excess calories.

    Conclusion on Customizations

    These substitutions make the Decorated Bunny Cookies with Royal Icing versatile and approachable for those adhering to various dietary restrictions. Each custom version still delivers on the delightful taste and fun presentation.


    How to Prepare the Perfect Decorated Bunny Cookies With Royal Icing: Step-by-Step Guide

    To create these decorated bunny cookies, follow this detailed step-by-step guide ensuring your baking experience is smooth and enjoyable:

    Preparing the Bunny Cookies

    1. Prepare the Base: In a large bowl, cream together the softened butter and sugar until light and fluffy.
    2. Add Eggs and Vanilla: Mix in the eggs one at a time along with the vanilla extract, ensuring each is incorporated before adding the next.
    3. Sift Dry Ingredients: In another bowl, combine the flour, baking powder, and salt. Sift to ensure there are no lumps.
    4. Combine Mixtures: Gradually add the dry mixture to the wet mixture, stirring until combined. The dough should come together but not be sticky.
    5. Chill Dough: Wrap the dough in plastic wrap and refrigerate for at least one hour, or until firm. This is crucial for easy rolling and cutting.

    Baking the Cookies

    1. Preheat Oven: Preheat your oven to 350°F (175°C).
    2. Roll & Cut: On a floured surface, roll out the chilled dough to about ¼ inch thick. Use bunny-shaped cookie cutters to cut out shaped cookies and place them on a parchment-lined baking tray.
    3. Bake: Bake the cookies for 8-10 minutes, or until the edges are just lightly golden. Allow them to cool completely on a wire rack.

    Preparing Royal Icing

    1. Mix Icing: In a mixing bowl, combine powdered sugar and meringue powder. Gradually add water and beat on medium speed until stiff peaks form.
    2. Coloring the Icing: Separate icing into smaller bowls and mix in food coloring to achieve desired colors. Keep the icing covered with a damp cloth to prevent it from drying out.

    Decorating the Cookies

    1. Outline: Using a piping bag fitted with a small round tip, outline the bunny shapes on the cookies.
    2. Flood Icing: Thin the remaining icing with a bit more water to a flood consistency, then fill in the outlined areas using the piping bag or a squeeze bottle.
    3. Add Details: Allow the base layer to dry before adding small decorative elements like eyes or patterns with different colors of royal icing.

    Final Touch

    1. Dry and Enjoy: Let the decorated cookies sit at room temperature until the royal icing has fully set, typically several hours or overnight.

    This step-by-step process ensures that even busy parents or beginners can create beautiful, delicious results that will dazzle friends and family alike. Enjoy sharing these wonderful cookie recipes with your loved ones!


    Mastering Decorated Bunny Cookies With Royal Icing: Advanced Tips and Variations

    While the basic Decorated Bunny Cookies with Royal Icing recipe is incredibly delightful, here are some advanced tips and creative variations to elevate your cookie-making skills:

    Advanced Tips

    • Chilling the Dough: Don’t skip chilling the dough! This prevents the cookies from spreading too much and helps maintain their shape.
    • Royal Icing Consistency: Practice achieving the right consistency of royal icing – stiff for outlines and flood consistency for filling. Test it out by drawing a figure-eight. If it holds its shape and settles back slowly, you’re good to go.
    • Decorative Techniques: Use toothpicks for marbling different colors of icing or creating unique patterns. Stencils can also be fun for creating consistent designs.

    Creative Variations

    • Flavor Enhancements: Consider adding almond extract for a different flavor profile or experimenting with citrus zest for brightness.
    • Different Cookie Shapes: Instead of only using bunny shapes, create an entire farmyard by including cookie cutters for chicks, eggs, and flowers.
    • Seasonal Themes: Dye the royal icing seasonal colors or add decorations relevant to different holidays and celebrations, using sprinkles, edible glitter, or fondant accents.

    Incorporating these advanced techniques and creative variations will surely impress guests and inspire future baking endeavors, making your cookie recipes even more enjoyable.


    How to Store Decorated Bunny Cookies With Royal Icing: Best Practices

    Once you have created your beautiful Decorated Bunny Cookies with Royal Icing, you might wonder how best to store them to maintain their freshness and presentation. Here are some best practices:

    At Room Temperature

    • Storage Containers: Store the cookies in an airtight container at room temperature if you plan to consume them within a week. Layer them with parchment paper to prevent sticking.
    • Humidity Caution: Keep the container away from direct sunlight and moisture, as royal icing can become sticky when exposed to humidity.

    Refrigeration

    • Cooler Climates: If you live in a particularly warm area, consider refrigerating the cookies. However, allow them to come to room temperature before serving, as this will keep the icing stable.

    Freezing

    • Long-term Storage: For longer storage, you can freeze the cookies. Place them in a single layer in an airtight container with parchment paper between layers.
    • Thawing: Let the cookies thaw in the container at room temperature to avoid condensation forming on the icing.

    By following these storage recommendations, your Decorated Bunny Cookies can retain their delightful taste and beautiful decoration, ready to be enjoyed on any occasion.


    Nutritional Value of Decorated Bunny Cookies With Royal Icing

    Understanding the nutritional composition of your decorated bunny cookies enables you to enjoy them responsibly. Here’s a general breakdown based on the classic recipe:

    Per Cookie (based on 48 cookies):

    • Calories: Approximately 130
    • Total Fat: 5g
    • Saturated Fat: 3g
    • Cholesterol: 20mg
    • Sodium: 50mg
    • Total Carbohydrates: 20g
    • Dietary Fiber: 0g
    • Sugars: 10g
    • Protein: 1g

    Health Considerations

    • Sugar Content: While these cookies offer delightful sweetness, keep in mind the sugar content—especially for those watching their intake.
    • Fat Options: The option to use unsalted butter or coconut oil can affect the total saturated fat content.
    • Custom Nutritional Profiles: If you opt for substitutions like almond flour or stevia, the nutritional values will change, often reducing calories and carbohydrates.

    By tailoring the ingredients to meet specific dietary needs, you can ensure that your Decorated Bunny Cookies with Royal Icing fit into your lifestyle while still providing a tasty treat.


    FAQs: Frequently Asked Questions About Decorated Bunny Cookies With Royal Icing

    What can I substitute for eggs in the bunny cookie recipe?

    You can use flaxseed meal (1 tablespoon flaxseed mixed with 2.5 tablespoons water), applesauce, or a commercial egg replacer for a vegan option.

    How long can I store these cookies?

    Stored properly in an airtight container, Decorated Bunny Cookies can remain fresh at room temperature for up to a week, while refrigeration extends their lifespan.

    Can I use store-bought frosting instead of royal icing?

    While store-bought frosting can be used, royal icing is recommended for its unique hardening properties that make decorating easier and more visually appealing.

    How can I achieve a smooth royal icing finish?

    Once the cookies are frosted, gently tap the cookie on the counter to help the icing settle. A little sanding sugar before icing sets can also add texture.

    How do I make my icing colors more vibrant?

    Gradually add gel food coloring, mixing well until you achieve the desired shade. Gel colors require less liquid, yielding vibrant hues.

    By providing these answers, we hope to reassure you as you bake and decorate your delightful bunny cookies, making your baking adventure more enjoyable and less stressful.


    In conclusion, these Decorated Bunny Cookies with Royal Icing offer a perfect blend of fun, creativity, and taste. Their simplicity, health benefits, and adaptability cater to a variety of dietary preferences, encouraging everyone to participate in the joy of baking. Whether you’re a novice or a seasoned baker, this cookie recipe promises an enjoyable experience that will soon become a staple in your kitchen. Get ready to impress friends and family with your beautiful creations, just in time for your next gathering! Happy baking!

  • Sweet Bunny Cookies With Royal Icing

    Sweet Bunny Cookies With Royal Icing

    Sweet Bunny Cookies With Royal Icing: A Tropical Delight

    Introduction to Sweet Bunny Cookies With Royal Icing

    Welcome to the delightful world of Sweet Bunny Cookies With Royal Icing! These charming, whimsical treats are perfect for any occasion, whether you’re planning a spring celebration, hosting a tea party, or simply indulging your sweet tooth. Cookie recipes that bring joy and creativity to your kitchen are always a hit, and this particular recipe stands out not only for its gorgeous presentation but also for its simplicity and versatility.

    Imagine crafting a batch of bunnies, each adorned with intricate royal icing patterns that mimic the softness of their fluffy tails. These cookies are not only a feast for the eyes but also a canvas for your creativity. The best part? They can cater to various dietary preferences. Whether you’re looking for vegan, gluten-free, or low-calorie options, this recipe adapts beautifully to meet your needs.

    Moreover, Sweet Bunny Cookies promote a sense of accomplishment. They’re simple enough for beginners yet detailed enough to challenge more experienced bakers. In this article, we’ll guide you step-by-step through the process, ensuring that anyone can embark on this baking adventure with confidence. So, grab your apron and let’s make some magical Sweet Bunny Cookies!

    Benefits and Advantages of Sweet Bunny Cookies With Royal Icing

    When considering which cookie recipes to try, Sweet Bunny Cookies With Royal Icing surely deserves a spot at the top of your list. Here are several benefits and advantages that highlight why this recipe is so effective and enjoyable:

    1. Simplicity and Speed: The ingredients for these cookies are straightforward and easy to find. With just a few pantry staples, you can whip up a delightful batch that showcases your baking skills. The royal icing, while stunning, requires minimal preparation and drying time, making it an accessible choice for busy parents and working professionals.

    2. Health-Conscious Adaptability: Unlike many traditional cookies, this recipe can easily be modified to suit various dietary needs. Want to go vegan? Substitute eggs with flaxseeds. Need a gluten-free option? Simply replace all-purpose flour with gluten-free flour alternatives. This adaptability allows health-conscious individuals and those with dietary restrictions to enjoy these sweet treats without compromise.

    3. Engagement and Creativity: Making cookie crafts like these bunnies can be a fun activity for families, especially during holidays. It’s an opportunity for children and adults alike to express themselves creatively while honing essential baking and decorating skills. Hosting a cookie-decorating party can be a great way for friends, students, or newlyweds to bond and build lasting memories.

    4. Visual Appeal: The enchanting design of the bunny cookies brings whimsy to any table setting, making them an ideal choice for celebrations, gifts, or simply to make a regular day special. Attractive cookie recipes like this one not only taste good but also add a decorative touch to gatherings.

    With these many advantages, it’s clear that Sweet Bunny Cookies With Royal Icing encompasses everything you could desire in a cookie recipe. It combines fun, health benefits, and deliciousness, making it a cherished addition to your baking repertoire.

    Ingredients Overview

    Essential Ingredients for Sweet Bunny Cookies With Royal Icing

    To recreate these beautifully decorated Sweet Bunny Cookies, gather the following essential ingredients:

    For the Cookies:
    2 ½ cups All-Purpose Flour: The foundation for your cookies; feel free to use gluten-free flour for a gluten-free version.
    1 tsp Baking Powder: Provides lift and helps the cookies maintain their shape.
    ½ tsp Salt: Enhances flavor and balances sweetness.
    1 cup Unsalted Butter (or Vegan Butter): Adds richness and flavor. Use vegan butter for a dairy-free option.
    1 cup Granulated Sugar: The sweetness is essential; consider coconut sugar for a lower glycemic index option.
    1 large Egg (or Flax Egg): Binds the ingredients together. A flax egg can be used for a vegan version.
    1 tsp Vanilla Extract: Adds aromatic sweetness; exchange with almond extract for a new flavor twist.

    For the Royal Icing:
    2 large Egg Whites (or aquafaba): Traditionally used for binding and aeration; use aquafaba for a vegan option.
    4 cups Powdered Sugar: Sweetens the icing while providing a smooth consistency.
    1 tsp Lemon Juice: Adds a pleasant acidity and helps stabilize the icing.
    Food Coloring (Optional): Gel coloring works best for vibrant designs.

    Dietary Substitutions to Customize Your Sweet Bunny Cookies With Royal Icing

    Flexibility in cookie recipes allows everyone to enjoy them, regardless of dietary restrictions. Below are some suggested substitutions to suit different dietary needs:

    • Gluten-Free: Substitute all-purpose flour with a 1:1 gluten-free flour blend like Bob’s Red Mill or King Arthur Flour.
    • Vegan: Use vegan butter in place of regular butter, flax eggs instead of chicken eggs, and aquafaba as an alternative to egg whites for royal icing.
    • Lower Sugar: Consider using monk fruit sweetener or stevia in your cookie mixture and icing to lower the overall sugar content without sacrificing flavor.

    Each of these substitutions will ensure you can enjoy Sweet Bunny Cookies tailored to your personal preferences, making these cookie recipes approachable for everyone.

    How to Prepare the Perfect Sweet Bunny Cookies With Royal Icing: Step-by-Step Guide

    Now that you have your ingredients ready, let’s dive into the delightful preparation of Sweet Bunny Cookies With Royal Icing. Follow these steps for a fun and successful baking experience:

    1. Prepare the Base: Preheat your oven to 350°F (180°C). Line two baking sheets with parchment paper to prevent sticking.

    2. Mix Dry Ingredients: In a separate mixing bowl, whisk together the flour, baking powder, and salt until well combined. Set aside.

    3. Cream Butter and Sugar: In a large mixing bowl, beat the unsalted butter and granulated sugar until light and fluffy, about 3-5 minutes using an electric mixer on medium speed. This is an important step that adds air to the mixture.

    4. Incorporate Egg and Vanilla: Add the egg and vanilla extract to the creamed mixture. Continue mixing until fully combined.

    5. Combine Dry and Wet Ingredients: Gradually add the dry mixture to the wet mixture, stirring until a soft dough forms. Be careful not to over-mix, as this can result in tough cookies.

    6. Chill the Dough: Divide the dough into two discs, wrap them in plastic wrap, and refrigerate for at least 30 minutes. This chilling step is crucial for shaping the cookies.

    7. Roll Out the Dough: Once chilled, place a disc of dough onto a lightly floured surface. Roll it out to about ¼-inch thickness for the perfect cookie texture. Use extra flour as needed to avoid sticking.

    8. Cut Out Bunny Shapes: Using a bunny-shaped cookie cutter, cut out your cookies and place them on the prepared baking sheets, leaving space in between each cookie.

    9. Bake the Cookies: Bake for 8-10 minutes or until the edges begin to turn golden brown. Keep an eye on them to prevent overbaking. Remove them from the oven and let them cool on a wire rack.

    10. Prepare Royal Icing: In a clean mixing bowl, beat the egg whites (or aquafaba) until frothy. Gradually add the powdered sugar and lemon juice, mixing until the icing reaches a stiff peak consistency.

    11. Color the Icing: Divide the royal icing into batches and color each with food coloring to create an array of vibrant colors for decorating your bunny cookies.

    12. Decorate Your Cookies: Once the cookies are completely cool, use a piping bag or a fine-tipped knife to outline and fill your bunny cookies with the royal icing. Allow the icing to dry completely for at least 2-3 hours.

    13. Store or Serve: Your Sweet Bunny Cookies With Royal Icing are now ready to be enjoyed! Serve them at gatherings, or store them in an airtight container.

    By following these clear steps, you can create extraordinary Sweet Bunny Cookies With Royal Icing that will impress anyone, from kids to sophisticated palates.

    Mastering Sweet Bunny Cookies With Royal Icing: Advanced Tips and Variations

    To elevate your baking game with Sweet Bunny Cookies, consider the following advanced tips and fun variations:

    1. Use Quality Ingredients: Always opt for high-quality vanilla extract and food coloring. The taste and appearance of your cookies will greatly benefit from it.

    2. Add Flavor Variations: Experiment with different extracts like almond or lemon to give your cookie dough unique flavor profiles.

    3. Elevation Techniques: For an even more refined finish, use a sifter to dust powdered sugar for an elegant touch on your decorated cookies.

    4. Themed Decor: Besides bunnies, why not create other animal shapes or designs relevant to seasons or occasions? Use cookie cutters all year round to change up the theme.

    5. Sprinkles and Accessories: Once your icing is applied, sprinkle edible glitter or colored sprinkles on the wet icing for added flair. These decorations can make the cookies even more enticing.

    6. Chill the Icing: If the royal icing becomes too runny while you’re decorating, refrigerate it briefly to stifle the mixing and restore its thickness.

    By integrating these advanced tips and exploring variations, you can take your Sweet Bunny Cookies With Royal Icing to the next level, transforming a simple recipe into a delightful masterpiece.

    How to Store Sweet Bunny Cookies With Royal Icing: Best Practices

    Keeping your Sweet Bunny Cookies fresh is essential if you want to enjoy them over several days or share them later. Here are some best practices for storing your cookie creations:

    1. Cool Completely: Ensure that all cookies are completely cooled and the royal icing is fully set before storing. This step prevents moisture buildup, which could ruin the decorations.

    2. Airtight Containers: Use airtight containers to store your cookies. They can typically be kept at room temperature for about a week. For added freshness, place a piece of bread or a few marshmallows inside the container to help retain moisture without making them soggy.

    3. Freezing Cookies: If you have leftover cookies or want to prepare ahead of time, consider freezing them. Wrap cookies tightly in plastic wrap, then place them in a freezer bag or airtight container. They can last up to three months in the freezer. When you’re ready to enjoy them, thaw them overnight in the refrigerator.

    4. Avoid Stacking Iced Cookies: Iced cookies should not be stacked before the icing has completely dried as it can smudge the designs. Store them in a single layer if possible.

    By following these storage tips, you can ensure your Sweet Bunny Cookies maintain their delightful taste and intricate designs.

    Nutritional Value of Sweet Bunny Cookies With Royal Icing

    Understanding the nutritional aspects of your baking can help you make informed choices. Here is the estimated nutritional value of Sweet Bunny Cookies With Royal Icing per cookie (based on standard ingredients):

    • Calories: 120
    • Total Fat: 5g
    • Saturated Fat: 3g
    • Cholesterol: 15mg
    • Sodium: 50mg
    • Total Carbohydrates: 18g
    • Dietary Fiber: 0g
    • Sugars: 10g
    • Protein: 1g

    Keep in mind that these values can vary significantly based on substitutions such as reduced sugar or the usage of alternative flours and fats. Additionally, for health-conscious bakers, modifying the recipe with lower-fat alternatives or reducing sugar can create a healthier treat without losing the essence of this delightful cookie recipe.

    FAQs: Frequently Asked Questions About Sweet Bunny Cookies With Royal Icing

    Below are some common questions regarding Sweet Bunny Cookies With Royal Icing, along with concise answers to guide you.

    1. Can I use a different shape for these cookies?
      Yes! Feel free to use any cookie cutter shape you desire. The recipe is versatile and can cater to various holidays and themes.

    2. How do I achieve perfectly smooth royal icing?
      To achieve smooth icing, ensure the consistency is right. It should be thick enough to hold its shape but thin enough to spread seamlessly when piped.

    3. Are there vegan options for the royal icing?
      Absolutely! Aquafaba (the liquid from canned chickpeas) is a great vegan substitute for egg whites in royal icing.

    4. Can I refrigerate the dough before rolling it out?
      Yes, refrigerating the dough helps it firm up, making it easier to roll and cut. Just ensure it’s wrapped well to prevent drying out.

    5. What if my royal icing hardens too quickly?
      If your royal icing hardens too fast while decorating, simply stir in a few drops of water until you reach the desired consistency.

    By addressing these common questions, you can bake confidently, ensuring your Sweet Bunny Cookies With Royal Icing turn out perfectly every time.

    Now that you’ve learned the ins and outs of crafting these delightful cookies, we encourage you to gather your ingredients, unleash your creativity, and share your cookie creations with loved ones. Happy baking!

  • Chewy Strawberry Rhubarb Pie Cookies

    Chewy Strawberry Rhubarb Pie Cookies

    Chewy Strawberry Rhubarb Pie Cookies: A Tropical Delight

    Introduction to Chewy Strawberry Rhubarb Pie Cookies

    If you’re on the hunt for delicious strawberry recipes that combine the juicy sweetness of strawberries with the tartness of rhubarb, look no further! Our Chewy Strawberry Rhubarb Pie Cookies are cheerful morsels that perfectly embody the spirit of a classic pie but with the convenience of a cookie. These delightful bites are simple to make and are ideal for busy families, working professionals, students, and anyone who loves to savor sweet treats. You can enjoy them fresh out of the oven or pack them in a lunchbox or picnic basket for a delightful snack on the go.

    The allure of this recipe lies in its versatility. Chewy Strawberry Rhubarb Pie Cookies are not only quick to whip up but can also easily adapt to various dietary needs. Interested in a vegan or gluten-free option? We’ve got you covered! The combination of strawberries and rhubarb gives these cookies a unique flavor profile that will impress friends and family alike, making them perfect for gatherings, celebrations, and casual afternoon snacks.

    Plus, you’ll love the health benefits! Strawberries are rich in vitamins, minerals, and antioxidants, contributing to overall well-being. Rhubarb, while less commonly known, is high in fiber and low in calories. When combined in our Chewy Strawberry Rhubarb Pie Cookies, they create a sweet treat that’s not just tasty but also has some nutritional perks. This recipe brings a delightful twist to traditional cookie baking—let’s dive into this scrumptious adventure together!

    Benefits and Advantages of Chewy Strawberry Rhubarb Pie Cookies

    Why choose Chewy Strawberry Rhubarb Pie Cookies over other strawberry recipes? Allow us to share the myriad benefits and advantages this recipe provides!

    First and foremost, these cookies are incredibly easy to make. With just a few pantry staples, you can craft delicious cookies in under an hour. This is a perfect option for busy parents who want to whip up a quick and satisfying treat after a long day.

    Moreover, the health benefits are worth noting. Strawberries, well-known for their vitamin C and antioxidant content, are great for boosting immunity. Rhubarb adds a unique tartness and is a good source of dietary fiber, which helps with digestion and keeping you feeling full longer. By combining both of these ingredients, you’re not just indulging; you’re also nourishing your body!

    Additionally, these cookies stand out because they cater to diverse dietary requirements, including vegan, gluten-free, and low-calorie options. By adjusting a few ingredients or using substitutes, everyone can enjoy these chewy delights regardless of their dietary restrictions.

    Another advantage of this recipe is its versatility. Beyond just enjoying them as is, these cookies can be further enhanced with add-ins like nuts, oats, or chocolate chips to create even more flavor combinations. For those who love creativity in the kitchen, experimenting with texture and taste will only enhance the experience.

    In short, Chewy Strawberry Rhubarb Pie Cookies are a delightful blend of simplicity, health benefits, and versatility. Perfect for all kinds of cooks, they make for an enjoyable baking excursion that you won’t soon forget.

    Ingredients Overview

    Essential Ingredients for Chewy Strawberry Rhubarb Pie Cookies

    To make your Chewy Strawberry Rhubarb Pie Cookies, you will need the following ingredients:

    • 1 cup all-purpose flour (or gluten-free all-purpose flour for a gluten-free option)
      Provides the base for the cookies and contributes to their chewy texture.

    • 1/2 teaspoon baking soda
      Helps the cookies rise and achieve that perfect chewy texture.

    • 1/4 teaspoon salt
      Balances the sweetness and enhances flavor.

    • 1/2 cup unsalted butter (or coconut oil for a vegan option)
      Adds moisture and richness.

    • 1/2 cup brown sugar
      Introduces deep molasses flavor and contributes to chewiness.

    • 1/4 cup granulated sugar
      Enhances sweetness while providing a nice texture contrast.

    • 1 large egg (or flaxseed egg for a vegan option)
      Acts as a binding agent and helps with the structure.

    • 1 cup fresh strawberries, chopped
      Brings sweetness and moisture to the cookies.

    • 1 cup rhubarb, chopped
      Creates that unique tartness that sets these cookies apart.

    • 1 teaspoon vanilla extract
      Adds depth of flavor and enhances sweetness.

    You can always adjust the quantities or ingredients based on personal preferences or dietary needs. These substitutions ensure the cookies remain delightful no matter who you’re baking for.

    Dietary Substitutions to Customize Your Chewy Strawberry Rhubarb Pie Cookies

    One of the best parts about baking is that it’s all about customization! Here are some suggestions for dietary substitutions you can implement while making your Chewy Strawberry Rhubarb Pie Cookies:

    • Vegan Option: Substitute the unsalted butter with coconut oil or vegan butter. Replace the egg with a flaxseed egg (1 tablespoon ground flaxseed + 2.5 tablespoons water; let sit for 5 minutes to thicken). This makes the recipe completely plant-based.

    • Gluten-Free Option: Use a high-quality gluten-free all-purpose flour mix in place of regular flour. Be sure it has xanthan gum in the blend to hold the cookies together properly.

    • Lower Sugar Option: Feel free to substitute one-half of the brown sugar with an equal amount of applesauce in order to reduce added sugars while maintaining moisture. It also contributes to a fruity flavor.

    • Sweetener Alternatives: Substitute sugar with coconut sugar or stevia for a low-calorie option, adjusting based on the sweetness level desired.

    Each of these substitutions will allow you to customize this cookie recipe to meet various dietary needs while still delivering that chewy, decadent flavor profile everyone will love. Now that we’ve covered the ingredients and how to make them work for your dietary restrictions, let’s move on to the fun part: preparing the perfect batch!

    How to Prepare the Perfect Chewy Strawberry Rhubarb Pie Cookies: Step-by-Step Guide

    Now that you have your ingredients ready, let’s dive into the step-by-step instructions for preparing the Chewy Strawberry Rhubarb Pie Cookies. Follow this guide to bake deliciously chewy and flavorful cookies that everyone will adore!

    1. Preheat the Oven:
      Preheat your oven to 350°F (175°C). This ensures your cookies bake evenly and attain a beautiful golden color.

    2. Prepare the Baking Sheet:
      Line a baking sheet with parchment paper or a silicone baking mat for easy cleanup. This prevents the cookies from sticking and helps them bake evenly.

    3. Mix Dry Ingredients:
      In a medium bowl, whisk together the all-purpose flour, baking soda, and salt. Set this mixture aside. This combination will provide the right structure and texture for your cookies.

    4. Cream Butter and Sugars:
      In a large mixing bowl, use an electric mixer to cream the unsalted butter with the brown sugar and granulated sugar until light and fluffy, about 2-3 minutes. This step aerates the butter, aiding in a light and chewy texture.

    5. Add Egg and Vanilla:
      Beat in the egg (or flaxseed egg) and vanilla extract. Mix until fully incorporated. The egg binds the ingredients and adds moisture.

    6. Combine Dry and Wet Ingredients:
      Gradually add the dry ingredient mixture to the wet ingredients, mixing just until combined. Do not overmix, as this can lead to tougher cookies.

    7. Fold in the Strawberries and Rhubarb:
      Gently stir in the chopped strawberries and rhubarb. Make sure to fold them in evenly, distributing the fruity goodness throughout the dough.

    8. Scoop the Dough:
      Using a cookie scoop or tablespoon, portion out cookie dough onto the prepared baking sheet, spacing them about 2 inches apart. The cookies will spread while baking.

    9. Bake:
      Place the baking sheet in the preheated oven and bake for 10-12 minutes or until the edges are golden brown. The centers may look slightly underbaked, but they will continue cooking on the baking sheet as they cool.

    10. Cool the Cookies:
      Once baked, remove the sheet from the oven and let the cookies cool on the pan for 5 minutes. Then transfer them to a wire rack to cool completely. This step ensures they retain their chewy texture.

    11. Enjoy!
      Once cooled, dig into your delightful Chewy Strawberry Rhubarb Pie Cookies! They can be paired with a warm cup of tea or coffee for an extra special treat.

    Feel free to make adjustments based on personal preference or dietary needs at various stages. Enjoying the baking process and being creative can lead to delicious discoveries in your kitchen.

    Mastering Chewy Strawberry Rhubarb Pie Cookies: Advanced Tips and Variations

    Baking is a world of endless possibilities, and your Chewy Strawberry Rhubarb Pie Cookies can be made even more enjoyable with these expert tips and variations:

    1. Add-ins and Mix-ins:
      Consider incorporating additional mix-ins like chopped nuts (walnuts or pecans), chocolate chips, or shredded coconut to enhance flavor and texture. These add-ins can create a unique twist that takes the cookies up a notch.

    2. Zest it up:
      Try adding a hint of lemon or orange zest to the dough for a citrusy brightness. The acidity will highlight the natural flavors of the strawberries and rhubarb beautifully.

    3. Experiment with Oats:
      For a chewy cookie with added fiber, consider mixing in some rolled oats. They impart a nutty flavor and delightful texture that complements the sweetness of the fruits.

    4. Rhubarb Sauce Variations:
      If you’re looking to deepen the rhubarb flavor, create a quick rhubarb sauce with sugar and water, letting it simmer until thickened, then fold it into the cookie dough. This packs in extra moisture and flavor.

    5. Chill Your Dough:
      For a firmer cookie, chill the dough in the refrigerator for 30 minutes before baking. Chilling helps prevent excessive spreading while baking.

    6. Chocolate Drizzle or Glaze:
      Once cooled, consider drizzling melted chocolate over the cookies for an elegant touch. A white chocolate drizzle adds visual appeal and pairs nicely with the fruity flavors.

    By adding these advanced tips and variations, you can take your Chewy Strawberry Rhubarb Pie Cookies to the next level and impress your friends and family with your baking prowess.

    How to Store Chewy Strawberry Rhubarb Pie Cookies: Best Practices

    Proper storage of your Chewy Strawberry Rhubarb Pie Cookies ensures they remain fresh and delicious for days. Here’s how to store them effectively:

    • Room Temperature Storage:
      If you plan to enjoy the cookies within a few days, simply place them in an airtight container at room temperature. Keeping them sealed will help preserve their chewy texture and flavor.

    • Refrigeration:
      For longer storage, consider refrigerating the cookies. Place them in an airtight container with parchment paper between layers to prevent sticking. They can last up to a week in the fridge.

    • Freezing Options:
      To freeze, layer the cookies between sheets of parchment paper in an airtight freezer bag. They’ll maintain their quality for up to three months. When ready to enjoy, simply thaw them at room temperature or reheat them in the oven for a few minutes to regain that fresh-baked warmth.

    By following these storage guidelines, your Chewy Strawberry Rhubarb Pie Cookies can be enjoyed long after they’re baked, making them perfect for planning ahead for snacks, lunchboxes, or parties.

    Nutritional Value of Chewy Strawberry Rhubarb Pie Cookies

    Understanding the nutritional value of your Chewy Strawberry Rhubarb Pie Cookies can help you make informed decisions for your diet. Here’s a nutritional breakdown per cookie (assuming this recipe yields about 24 cookies):

    • Calories: 130
    • Total Fat: 7g
    • Saturated Fat: 4g
    • Cholesterol: 20mg
    • Sodium: 50mg
    • Total Carbohydrates: 15g
    • Dietary Fiber: 1g
    • Sugars: 7g
    • Protein: 2g

    These cookies contain essential vitamins and minerals, especially thanks to the strawberries and rhubarb. The wholesome ingredients also provide beneficial fiber and antioxidants from the fruit, contributing to your daily nutrient goals. Keep in mind that nutritional values may vary based on ingredient substitutions, so adapt accordingly based on your choices.

    By savoring Chewy Strawberry Rhubarb Pie Cookies, you not only delight your taste buds but also enjoy a treat that offers some wholesome benefits.

    FAQs: Frequently Asked Questions About Chewy Strawberry Rhubarb Pie Cookies

    1. Can I use frozen strawberries and rhubarb for this recipe?

    Absolutely! Frozen strawberries and rhubarb can be used, but make sure to thaw them and drain any excess moisture before adding them to the cookie dough to prevent sogginess.

    2. What can I substitute for eggs in this recipe?

    If you’re looking to make a vegan version, you can substitute one egg with a flaxseed egg. To make this, mix 1 tablespoon of ground flaxseed with 2.5 tablespoons of water and let it rest for about 5 minutes until it thickens.

    3. How can I make these cookies gluten-free?

    Simply replace all-purpose flour with a good-quality gluten-free flour blend. Ensure it includes xanthan gum or add a small amount to aid in binding and structural stability.

    4. How do I prevent my cookies from spreading too much while baking?

    Chilling the cookie dough for at least 30 minutes before baking can help. It firms up the fat in the dough, leading to less spreading.

    5. Can I store leftover cookies in the freezer?

    Yes! Place cooled cookies in an airtight container or resealable bag with parchment paper in between layers to prevent sticking. They can be frozen for up to three months.

    6. What should I do if I don’t have rhubarb on hand?

    If you don’t have rhubarb, you can experiment with other tart fruits like cranberries or a combination of tart apples and a bit of lemon juice. Adjust the sugar content accordingly to balance sweetness.

    7. Are these cookies suitable for kids?

    Yes, Chewy Strawberry Rhubarb Pie Cookies are kid-friendly! Their sweet and fruity flavor profile makes them an excellent treat for children. Plus, engaging kids in the baking process can be a fun and educational activity!

    With these frequently asked questions, we hope to clarify any uncertainties and inspire you to embark on this delicious Chewy Strawberry Rhubarb Pie Cookies baking adventure! Happy baking!

  • Best Keto Greek Yogurt Cookies

    Best Keto Greek Yogurt Cookies

    Best Keto Greek Yogurt Cookies: A Tropical Delight

    Introduction to Best Keto Greek Yogurt Cookies

    If you’re on the lookout for delicious and easy-to-make cookie recipes, look no further than these Best Keto Greek Yogurt Cookies. This recipe combines the tangy goodness of Greek yogurt with the warmth of tropical flavors, making it a delightful treat for anyone following a ketogenic diet or simply aiming to reduce sugar intake. These cookies are not only low in carbs but are also packed with protein, resulting in a wholesome snack that satisfies your sweet tooth without the guilt.

    Imagine biting into a soft, chewy cookie that feels indulgent yet is laden with nutrients. What sets these cookies apart is their versatility. They cater to various dietary needs; they’re gluten-free, and you can easily tailor them to be vegan-friendly. Whether you’re a busy parent looking to whip up a quick treat for your kids, a health-conscious individual wanting to stay on track with your diet, or a baking enthusiast eager to experiment in the kitchen, this recipe is the right fit for you. Not only do they tantalize the taste buds, but they also invite opportunities for creativity, as you can mix in your favorite flavors or toppings. Let’s dive into this tropical delight and discover why you should make these Best Keto Greek Yogurt Cookies today!

    Benefits and Advantages of Best Keto Greek Yogurt Cookies

    Baking is an exciting journey, and finding the perfect cookie recipes that match your lifestyle can be challenging. However, the Best Keto Greek Yogurt Cookies stand out due to their outstanding health benefits and ease of preparation. Here’s why you should consider adding this cookie recipe to your baking repertoire.

    1. Health-Conscious Ingredients: Made with Greek yogurt, these cookies contain valuable nutrients and protein that help maintain muscle mass and support gut health. The yogurt also introduces probiotics essential for digestion, making these cookies a healthier option than traditional dessert recipes often loaded with sugar and calories.

    2. Keto-Friendly: With minimal carbohydrates, these cookies seamlessly fit into a ketogenic lifestyle. They provide a tasty solution for those craving sweets while striving to stay within their macro counts. The low sugar content means you won’t have to worry about blood sugar spikes.

    3. Simplicity: The ingredient list is minimal, and the steps to create these cookies are straightforward, encouraging even novice bakers to try their hand at cookie-making. You won’t need special equipment or complicated techniques; just basic kitchen tools and a few wholesome ingredients.

    4. Customizable: Another significant advantage is the ability to customize flavors and mix-ins to fit different tastes and dietary preferences. Whether you prefer adding nuts, seeds, dark chocolate chunks, or even dried fruits, the possibilities are endless. You can easily adapt the recipe according to the flavors you enjoy or what you have on hand.

    5. Suitable for the Whole Family: These cookies cater to various dietary needs. With a few adjustments, they can be gluten-free and dairy-free, making them perfect for families with particular dietary restrictions.

    6. Quick Preparation Time: Perfect for busy parents or individuals on the go, these cookies can be prepared in under 30 minutes. You don’t have to plan a whole day for baking, making it easy to whip up a batch whenever cravings strike.

    In essence, the Best Keto Greek Yogurt Cookies are not just a snack; they’re a nutritious treat that allows you to enjoy dessert without the added sugars and unhealthy fats. Why not embrace the joy of baking while nourishing your body with wholesome ingredients?

    Ingredients Overview

    Essential Ingredients for Best Keto Greek Yogurt Cookies

    Here is a detailed list of all the essential ingredients you’ll need to make the Best Keto Greek Yogurt Cookies, complete with precise measurements and explanations on their benefits:

    • 1 cup Greek yogurt (preferably full-fat): Adds moisture, protein, and tanginess, functioning as a great binding agent while cutting down on the need for added fats. Ideal for keeping the cookies soft and chewy.

    • 1 cup almond flour (or coconut flour for a gluten-free option): Provides the necessary structure and a subtle nutty flavor. Almond flour is lower in carbs compared to traditional wheat flour, making it keto-friendly.

    • 1/4 cup erythritol (or another keto-friendly sweetener): A natural sugar substitute that provides sweetness without the calories or sugar spikes, making it perfect for those on a keto diet.

    • 1 large egg: Serves as a binder and helps with the cookie’s rise. It also contributes protein to the recipe.

    • 1 tsp baking powder: Helps the cookies rise and create the desired texture.

    • 1 tsp vanilla extract: Adds depth and a sweet, inviting flavor that elevates the overall taste of the cookies.

    • 1/2 cup sugar-free chocolate chips (optional): Adds a delicious hint of chocolate while keeping the carbs in check. You can also use nuts or dried fruit based on your preference.

    Optional Toppings and Add-Ins

    • Shredded coconut: For a tropical flair and added texture.
    • Chopped nuts: Such as walnuts or pecans, for extra crunch and healthy fats.
    • Spices: A dash of cinnamon or nutmeg can bring warmth to your cookies.

    Dietary Substitutions to Customize Your Best Keto Greek Yogurt Cookies

    To ensure that everyone can enjoy these delectable cookies, consider these dietary substitutions:

    • Vegan Version: Replace the egg with a flaxseed meal or chia seed egg substitute (1 tbsp of flaxseed meal or chia seeds soaked in 2.5 tbsp of water for 15 minutes).

    • Gluten-Free Options: Stick with almond flour or try using a gluten-free all-purpose blend to keep the cookies free from gluten and still delicious.

    • Low-Calorie Sweetener Options: If erythritol isn’t available, consider Monk Fruit sweetener or stevia, adjusting to taste as each sweetener has different levels of sweetness.

    • Nut-Free: Use oat flour as a substitute for almond flour to make the cookies nut-free while still maintaining a low-carb count.

    These substitutions not only enhance the cookies but also ensure that they can be tailored for those with various dietary restrictions. By modifying a few ingredients, you can create a cookie that meets any dietary requirement without sacrificing taste.

    How to Prepare the Perfect Best Keto Greek Yogurt Cookies: Step-by-Step Guide

    Baking the Best Keto Greek Yogurt Cookies is a rewarding experience that anyone can enjoy. Here’s your detailed step-by-step guide on how to whip up this tropical delight:

    1. Prepare the Base: Preheat your oven to 350°F (175°C) and line a baking sheet with parchment paper. This ensures that your cookies don’t stick and makes cleanup easy.

    2. Mix Ingredients: In a large mixing bowl, combine the Greek yogurt, erythritol, and egg. Use a whisk or a spatula to thoroughly mix these ingredients together until smooth. The yogurt should be creamy and well-blended with the sweetener and egg.

    3. Combine Dry Ingredients: In a separate bowl, mix the almond flour and baking powder. This ensures even distribution of the baking powder throughout the cookies, leading to a uniform rise and texture.

    4. Add Dry to Wet: Gradually incorporate the dry mixture into the wet mixture. Stir gently until fully combined. It’s crucial to not over-mix; simply combine until you see no dry flour.

    5. Incorporate Flavorings: At this point, add in the vanilla extract and any optional add-ins like sugar-free chocolate chips or shredded coconut. Mix gently just until evenly distributed.

    6. Scoop Cookies: Using a cookie scoop or spoon, drop the dough onto the prepared baking sheet, spacing them a couple of inches apart. These cookies won’t spread much, so you can shape them as desired.

    7. Bake: Place the baking sheet in the preheated oven and bake for about 10-12 minutes or until the edges are light golden brown. The center will remain soft, which is perfect for a chewy texture.

    8. Cool: Allow the cookies to cool on the baking sheet for five minutes before transferring them to a wire rack to cool completely. This step is essential for achieving the right texture.

    9. Enjoy or Store: Once cooled, enjoy your tropical treats with a cup of tea or coffee. Alternatively, store them in an airtight container for later.

    10. Freezing (Optional): If you’d like to make a batch ahead of time, these cookies freeze beautifully! Just make sure they’re fully cooled before storage.

    Throughout the preparation, feel free to adapt the instructions based on dietary needs; the beauty of these cookies is in their versatility!

    Mastering Best Keto Greek Yogurt Cookies: Advanced Tips and Variations

    While the Best Keto Greek Yogurt Cookies are simple and delicious on their own, here are some advanced tips and variations to elevate your cookie-baking experience:

    1. Flavor Variations: Experiment with different flavor extracts! For instance, almond extract can give a delightful twist, or consider orange or mint extract for a refreshing change.

    2. Mix-In Ideas: Create your own custom flavor profile by adding spices like cinnamon or cardamom. You can also incorporate cocoa powder for chocolate-flavored cookies.

    3. Texture Adjustment: If you prefer a crunchier cookie, consider briefly chilling the dough before baking. This helps them hold their shape better and provides a firmer bite.

    4. Cookies as a Base: Use these cookies as a base for ice cream sandwiches – simply place your favorite keto-friendly ice cream between two cookies for a decadent treat!

    5. Frosting Options: A keto-friendly cream cheese frosting drizzled on top transforms these cookies into an elevated dessert without sacrificing health goals.

    Experimenting with these tips can enhance your baking journey and allow you to create unique versions of the Best Keto Greek Yogurt Cookies. The pleasure of baking extends beyond following the recipe; it’s about personalizing your experience!

    How to Store Best Keto Greek Yogurt Cookies: Best Practices

    Proper storage extends the life of your delicious cookies while preserving their texture and taste. Here’s how to keep your Best Keto Greek Yogurt Cookies in top condition:

    Room Temperature

    • Airtight Container: Store cookies in an airtight container at room temperature for up to five days. Just ensure they’re completely cool before sealing, or moisture may build up and lead to sogginess.

    Refrigeration

    • Chilled Storage: If you want your cookies to last longer, storing them in the refrigerator increases their shelf life to about two weeks. Again, place them in a sealed container, but ensure they’re spaced apart to avoid sticking.

    Freezing

    • Long-Term Storage: To freeze your cookies, place them in a single layer in a freezer-safe container. You can separate layers with parchment paper to prevent sticking. Properly stored, they’ll keep for up to three months. When ready to eat, thaw at room temperature or warm them in the microwave for a few seconds for that fresh-baked taste.

    By following these best practices, you can always have a delightful treat ready to accompany your coffee, satisfying your sweet tooth without straying from your dietary goals.

    Nutritional Value of Best Keto Greek Yogurt Cookies

    Knowing the nutritional content of your meals can help you stay aligned with your dietary goals. Here’s a breakdown of the nutritional value for one Best Keto Greek Yogurt Cookie (assuming the recipe yields 12 cookies):

    • Calories: 110
    • Total Fat: 6g
    • Saturated Fat: 1g
    • Cholesterol: 30mg
    • Sodium: 50mg
    • Total Carbohydrates: 4g
    • Dietary Fiber: 2g
    • Sugars: 0g
    • Protein: 4g

    These cookies present an excellent snack with balanced macros suitable for those on a keto plan. They offer ample protein while keeping carbohydrates low, making them a healthier alternative to traditional cookie recipes.

    Feel free to adjust the measurements or ingredients based on your dietary needs while maintaining a healthy balance of nutrition.

    FAQs: Frequently Asked Questions About Best Keto Greek Yogurt Cookies

    1. Can I substitute Greek yogurt for regular yogurt?
    2. Yes! However, Greek yogurt has a higher protein content, which contributes to a better texture. Non-fat or low-fat yogurt could work, but might alter the final result.

    3. What can I use instead of almond flour?

    4. You can use coconut flour, which is a great low-carb alternative. Just remember that coconut flour absorbs more moisture, so adjust the liquid in the recipe accordingly.

    5. How can I make these cookies vegan?

    6. You can replace the egg with a flaxseed or chia seed egg, as mentioned earlier, creating a plant-based option without sacrificing flavor.

    7. Can I add protein powder to the recipe?

    8. Absolutely! You can add in powdered protein, but reduce the almond flour slightly, as protein powder may change the dough’s consistency.

    9. What sweeteners can I use besides erythritol?

    10. Other keto-friendly options include monk fruit sweetener or stevia. Always adjust to taste, as sweetness can vary significantly between sweeteners.

    These FAQs should help clarify common concerns and enable you to adapt the Best Keto Greek Yogurt Cookies to suit your needs perfectly.

    The Best Keto Greek Yogurt Cookies are not just a treat; they are a celebration of healthy baking that can be enjoyed by everyone, regardless of dietary restrictions or preferences. Embrace the joy of baking these cookies and experience the delightful flavors and textures they offer! Happy baking! 🍪

  • 4-Ingredient Keto Greek Yogurt Cookies

    4-Ingredient Keto Greek Yogurt Cookies

    4-Ingredient Keto Greek Yogurt Cookies: A Tropical Delight

    Introduction to 4-Ingredient Keto Greek Yogurt Cookies

    If you’re on the lookout for simple and delicious cookie recipes that cater to various dietary preferences, look no further than these 4-Ingredient Keto Greek Yogurt Cookies. What’s appealing about this recipe is its sheer simplicity—requiring only a handful of ingredients that you probably have at home. These cookies are not just a delicious treat; they also align beautifully with health-conscious choices, making them a fabulous option for everyone from busy parents to health enthusiasts.

    Using Greek yogurt as a base, these cookies remain moist and flavorful while taking full advantage of lower carbs and higher protein content. This makes them not only a delightful treat but also a smart choice for those on keto diets or anyone looking to indulge in guilt-free sweetness. Moreover, the recipe is inherently gluten-free and can accommodate vegan needs with minor tweaks. Whether you’re treating yourself after a long day, or preparing snacks for a family gathering, these cookies serve as a perfect solution that everyone will enjoy.

    In the kitchen, these cookies can spark joy and creativity. The process is straightforward, making it ideal for novice bakers and seasoned cooks alike. If you are keen on health and flavor, you’ll quickly become a fan of these easy-to-make delights. So, gather your ingredients and let’s discover the many benefits and easy steps to bring these heavenly cookies to life!

    Benefits and Advantages of 4-Ingredient Keto Greek Yogurt Cookies

    When it comes to dessert, many people often find themselves torn between satisfying their cravings and staying true to their health goals. The 4-Ingredient Keto Greek Yogurt Cookies elegantly bridge this gap, making them an excellent addition to your go-to cookie recipes list. Let’s explore the numerous benefits that make these cookies stand out.

    First and foremost, simplicity reigns supreme in this recipe. With just four ingredients, you can whip up a batch in minutes. This quality is particularly appealing for busy parents or individuals who want a quick yet indulgent treat without navigating complicated instructions. Anyone can master these cookies!

    Additionally, these cookies are rich in protein thanks to Greek yogurt, which gives them a substantial nutritional profile. Each bite offers not only a delightful flavor experience but also beneficial nutrients that align with low-carb eating patterns. Unlike traditional cookies that can leave you feeling sluggish, these treats are designed to keep your energy levels stable. This is especially beneficial for those on a weight loss journey or anyone managing their diet consciously.

    Moreover, the versatility of the 4-Ingredient Keto Greek Yogurt Cookies allows for dietary substitutions and variations. For instance, if you’re vegan, substituting Greek yogurt with a plant-based alternative ensures that no one misses out on the fun. Additionally, those with gluten sensitivities can enjoy these cookies with a gluten-free flour blend, maintaining the enjoyable texture and flavor.

    These cookies fit seamlessly into various lifestyles, whether you are a student cramming for exams, a traveler looking for easy snacks, or a working professional needing a quick pick-me-up. By incorporating whole, nourishing ingredients, you can actually feel good about treating yourself. Overall, these cookies perfectly exemplify how dessert can be both delicious and healthful.

    Ingredients Overview

    Essential Ingredients for 4-Ingredient Keto Greek Yogurt Cookies

    Before diving into the preparation, here’s a breakdown of the essential ingredients you’ll need for these Keto Greek Yogurt Cookies. Each ingredient serves a unique purpose, contributing to the cookies’ flavor, texture, and nutritional value.

    1. Greek Yogurt (1 cup) – Serves as the base and provides moisture and protein. Opt for full-fat Greek yogurt for best results. A dairy-free alternative can be used for a vegan version.

    2. Almond Flour (1 ¾ cups) – This gluten-free flour is perfect for keto diets. It adds a nutty flavor and fine texture to cookies. You can substitute it with coconut flour, but make sure to adjust the amount as coconut flour is denser.

    3. Sweetener (½ cup) – Erythritol or monk fruit sweetener can be used to keep the cookies low in calories and sugar. Choose a granular sweetener that measures 1:1 with sugar.

    4. Baking Powder (1 tsp) – Ensures the cookies are light and airy. It acts as a leavening agent.

    This concise list of ingredients captures the essence of what makes these cookies special, keeping them accessible yet delightful for everyone.

    Dietary Substitutions to Customize Your 4-Ingredient Keto Greek Yogurt Cookies

    Dietary preferences often dictate what we consume, and fortunately, these 4-Ingredient Keto Greek Yogurt Cookies are easily customizable.

    • Vegan Options: Use a dairy-free yogurt or silken tofu to replace Greek yogurt. Opt for flaxseed meal mixed with water as an egg substitute if your recipe requires a binder.

    • Flour Alternatives: If you can’t find almond flour, sunflower seed flour is a fantastic nut-free option. Similarly, if you wish to avoid flour altogether, you can experiment by substituting a nut butter, but keep in mind adjustments may be needed in baking time.

    • Sugar Alternatives: If erythritol or monk fruit is not available, you can replace them with stevia; however, keep in mind that stevia is much sweeter than sugar, so adjust the quantity accordingly.

    These dietary substitutions ensure that everyone can enjoy this delightful cookie. It’s simple to make adjustments, catering to gluten-free, vegan, or low-carb diets without compromising on the delectable flavor.

    How to Prepare the Perfect 4-Ingredient Keto Greek Yogurt Cookies: Step-by-Step Guide

    Prepare to delight your taste buds with these quick and easy 4-Ingredient Keto Greek Yogurt Cookies. Follow this detailed step-by-step guide to create your homemade cookies efficiently and enjoyably.

    1. Preheat the Oven: Set your oven to preheat at 350°F (175°C). This step is essential for achieving the perfect texture and flavor of your cookies.

    2. Prepare Your Baking Sheet: Lay parchment paper on a baking sheet to prevent sticking. This will ensure a delicate and clean release of each cookie.

    3. Mix the Greek Yogurt and Sweetener: In a large mixing bowl, combine the Greek yogurt and your chosen sweetener. Use a whisk or an electric mixer on low until smooth and well-combined. This forms the base of your cookie dough and should have a creamy consistency.

    4. Add the Almond Flour: Gradually sift in the almond flour. Fold it gently into the yogurt mixture until a soft, sticky dough forms. Be careful not to overmix, as that would lead to tough cookies.

    5. Incorporate Baking Powder: Sprinkle in the baking powder and stir gently until it is evenly distributed throughout the dough. This addition is crucial for a light, fluffy texture.

    6. Scoop the Dough: Using a cookie scoop or your hands, portions of dough should be placed onto the prepared baking sheet. Leave space between the cookie dough mounds to allow for spreading during baking.

    7. Bake the Cookies: Place the tray in your preheated oven and bake for 12-15 minutes, or until the edges start forming a light golden color.

    8. Cool Your Cookies: Once out of the oven, let your cookies cool on the baking sheet for 5 minutes before transferring them to wire racks to cool completely. This cooling period solidifies their shape and texture.

    9. Enjoy: Your delightful 4-Ingredient Keto Greek Yogurt Cookies are ready for savoring! Pair them with a cup of tea or coffee for an added touch of indulgence.

    Following this detailed guide not only ensures that your cookies turn out perfectly every time but also makes it easy for you to adapt the recipe based on dietary needs or ingredient availability.

    Mastering 4-Ingredient Keto Greek Yogurt Cookies: Advanced Tips and Variations

    To truly master the art of baking these delicious cookies, consider the following advanced tips and variations. These insights not only enhance flavor but also elevate your baking skills.

    • Flavor Infusions: For an exciting twist, add a teaspoon of vanilla or almond extract to the dough. You can also consider incorporating lemon zest or orange zest for an added citrusy zing, which brightens the flavor profile.

    • Add-Ins: Toss in some sugar-free chocolate chips, nuts, or dried fruits to introduce texture and richness. Just remember to adjust for any added sweetness you might need.

    • Texture Adjustments: For those preferring crunchy over soft cookies, flatten the dough mounds slightly before baking. This will help create a crispier edge while keeping the center soft.

    • Thicker Moist Cookies: To achieve a more cake-like consistency, increase the amount of almond flour slightly. You can experiment with adding an egg to enrich flavor and provide additional moisture.

    These tips will allow you to make the 4-Ingredient Keto Greek Yogurt Cookies your own and impress anyone who gets to taste them. You’ll quickly realize that these cookies can adapt to whatever craving you have!

    How to Store 4-Ingredient Keto Greek Yogurt Cookies: Best Practices

    After indulging in your 4-Ingredient Keto Greek Yogurt Cookies, you may be wondering how to store any leftovers (if there are any!). Here’s how to properly preserve these cookies to maintain their freshness.

    • Refrigeration: Place cookies in an airtight container and store them in the refrigerator for up to a week. This method helps the cookies maintain their moisture without becoming stale.

    • Freezing: If you want to enjoy your cookies later, freeze them! Simply place the cooled cookies in a single layer on a baking sheet and freeze until solid. Then transfer them to a freezer-safe airtight container or a sealable plastic bag. They can last for up to three months in the freezer.

    • Reheating: To enjoy frozen cookies, allow them to thaw in the refrigerator overnight, then warm them in the oven or microwave before serving for that fresh-baked feel.

    Storing cookies correctly preserves their taste and texture while allowing you to enjoy the benefits of these delicious treats even longer!

    Nutritional Value of 4-Ingredient Keto Greek Yogurt Cookies

    Nutritional information is often a high priority for health-conscious individuals. Fortunately, the 4-Ingredient Keto Greek Yogurt Cookies provide a favorable nutritional profile. Let’s break down what these cookies offer per serving (assuming a yield of 12 cookies):

    • Calories: Approximately 75 calories per cookie
    • Protein: About 3 grams
    • Fat: Roughly 6 grams
    • Carbohydrates: Approximately 4 grams
    • Fiber: 2 grams
    • Net Carbs: 2 grams (after subtracting fiber)

    The cookies are a fantastic option for anyone seeking a low-carb treat without sacrificing flavor. The healthy dose of protein provides energy while keeping you satiated, making these cookies a worthy addition to your selection of cookie recipes. Not only do they cater to dietary regulations like keto, but they also offer a balanced approach to sweets.

    FAQs: Frequently Asked Questions About 4-Ingredient Keto Greek Yogurt Cookies

    If you have further questions about the 4-Ingredient Keto Greek Yogurt Cookies, you are not alone! Here are some common queries addressed for your convenience:

    1. Can I use regular yogurt instead of Greek yogurt?
    2. While you can use regular yogurt, Greek yogurt results in a thicker texture that is less runny, leading to better cookie formation. If you choose regular yogurt, consider reducing the amount slightly.

    3. What other flours can I use if I can’t find almond flour?

    4. You can try coconut flour, but use only ¼ of the amount called for as it is more absorbent. Other options such as sunflower seed flour could work as well.

    5. How do I make these cookies vegan?

    6. Simply substitute the Greek yogurt with a plant-based yogurt alternative and adjust the sweetener as needed.

    7. Are these cookies suitable for meal prep?

    8. Yes! They freeze well, making them a perfect option for meal prep. You can easily grab one whenever you need a quick snack.

    9. Can I add toppings to the cookies?

    10. Absolutely! Try drizzling melted dark chocolate or a dollop of peanut butter for an added gourmet touch.

    Answering these frequently asked questions can help clarify any uncertainties and enhance your baking experience, making it easier for you to enjoy these 4-Ingredient Keto Greek Yogurt Cookies.

    In conclusion, making 4-Ingredient Keto Greek Yogurt Cookies is not just easy but also rewarding. They embrace multiple dietary needs while satisfying any sweet tooth. So gather your ingredients and embark on a delightful baking journey that suits everyone.

  • IM Officially Addicted To These Royal Icing Cookies

    IM Officially Addicted To These Royal Icing Cookies

    I’M Officially Addicted To These Royal Icing Cookies!: A Tropical Delight

    Introduction to I’M Officially Addicted To These Royal Icing Cookies!

    Welcome to my culinary adventure where I share a delightful recipe that’s transformed my baking experience! Allow me to introduce you to the irresistibly tasty royal icing cookies—popular for their vibrant colors and beautiful designs. Whether you’re a seasoned baker or a novice, this cookie recipe is perfect for you. It combines simplicity with an artistic flair, making it suitable for various occasions, such as birthdays, holidays, or simply enjoying a sweet treat at home.

    What makes these royal icing cookies stand out? For one, they are not only visually stunning but also incredibly versatile. With ingredients you probably already have in your pantry, these cookies can be easily adapted to fit your dietary needs. Whether you’re vegan, gluten-free, or simply looking for a healthier dessert alternative, this recipe can accommodate those preferences. The royal icing, made from egg whites and powdered sugar, forms a beautiful, glossy finish that hardens to create a stunning canvas for your creative designs.

    In a world filled with cookie recipes that can be overwhelming, this one is refreshingly simple yet immensely rewarding. It encourages creativity and provides not only a delicious treat but also an enjoyable crafting experience with friends and family. Let’s dive into the benefits and advantages of these royal icing cookies!

    Benefits and Advantages of I’M Officially Addicted To These Royal Icing Cookies!

    When it comes to baking, we often search for recipes that balance flavor, ease, and healthiness. These royal icing cookies shine in all these aspects. Here are some compelling reasons why you should try this delightful cookie recipe:

    1. Simplicity and Ease of Preparation: This recipe is straightforward, requiring only basic baking skills. Even if you’re a busy parent, student, or working professional, you can whip up a batch without feeling overwhelmed. The recipe details all the steps clearly, ensuring that you can follow along easily.

    2. Health Benefits and Customization Options: Unlike many traditional cookie recipes that are loaded with sugar and unhealthy fats, these royal icing cookies can be made healthier by using natural sweeteners or reducing sugar without sacrificing taste. For health-conscious individuals or those on specific diets, you can easily substitute ingredients. For example, almond flour can replace all-purpose flour for a gluten-free option, or coconut sugar can be used for a lower glycemic index.

    3. Visual Appeal and Creativity: Unlike most cookie recipes that often lack presentation, these cookies are canvases for your creativity. You can mix colors, create complex designs, and form anything from simple shapes to intricate patterns. They are perfect for creative baking sessions with kids, inspiring imagination while still enjoying a delicious sweet treat.

    4. Versatile for Any Occasion: These royal icing cookies are suitable for various events—birthdays, holidays, or even as gifts. You can customize colors and decorations based on the season or theme of your celebration, making them a thoughtful and fun addition to any festivity.

    5. Builds Memories and Connection: Baking these cookies can be a great bonding experience for families or friends. It provides a way to spend quality time together and creates fond memories.

    In short, this royal icing cookie recipe is designed with accessibility, creativity, and health in mind, making it the perfect addition to your recipe collection. Let’s explore the essential ingredients you’ll need to make these exquisite cookies!

    Ingredients Overview

    Essential Ingredients for I’M Officially Addicted To These Royal Icing Cookies!

    To create your royal icing cookies, you’ll need the following ingredients:

    1. All-Purpose Flour (2 ½ cups) – The base of our cookies, providing structure.
    2. Unsalted Butter (1 cup, softened) – Adds richness and flavor. For a vegan option, substitute with coconut oil or vegan butter.
    3. Granulated Sugar (1 cup) – Sweetens the dough. You can replace it with coconut sugar for a healthier option.
    4. Eggs (2 large) – Essential for binding. For a vegan alternative, use flax seed meal mixed with water in a ratio of 1:3 (1 tablespoon of flax seed meal with 3 tablespoons of water).
    5. Vanilla Extract (2 teaspoons) – Provides aromatic flavor. Pure vanilla extract is preferred for optimal taste.
    6. Royal Icing Ingredients:
    7. Powdered Sugar (4 cups) – Primary ingredient for icing.
    8. Egg Whites (2 large) – For stability and texture. A vegan alternative can include aquafaba (the liquid from canned chickpeas) in a 3:1 ratio.
    9. Lemon Juice (1 tablespoon) – Enhances flavor and helps with the icing consistency.

    Dietary Substitutions to Customize Your I’M Officially Addicted To These Royal Icing Cookies!

    For those who have special dietary needs, here are some substitutions you can implement:

    • Gluten-Free: Substitute all-purpose flour with a 1:1 gluten-free baking blend.
    • Vegan: Use coconut oil, flax eggs, and aquafaba for royal icing instead of egg whites.
    • Low-Calorie: Use stevia or erythritol in place of sugar and opt for a sugar-free royal icing recipe.

    By making these simple substitutions, you can easily cater this delectable cookie recipe to fit various dietary requirements while still enjoying the deliciousness of royal icing cookies!

    How to Prepare the Perfect I’M Officially Addicted To These Royal Icing Cookies!: Step-by-Step Guide

    Ready to embark on your baking journey? Here’s a detailed step-by-step guide to create these royal icing cookies:

    1. Prepare the Base:
    2. Preheat your oven to 350°F (175°C). Line a baking sheet with parchment paper to prevent sticking.

    3. Cream Butter and Sugar:

    4. In a large mixing bowl, combine the softened unsalted butter and granulated sugar. Beat them together until the mixture is light and fluffy, usually about 3-4 minutes.

    5. Add Eggs and Vanilla:

    6. Crack in the eggs (or flax eggs) and add the vanilla extract. Continue to beat the mixture until everything is well combined.

    7. Combine Dry Ingredients:

    8. In a separate bowl, whisk together the all-purpose flour and a pinch of salt. Gradually add this mixture to the wet ingredients, ensuring a smooth cookie dough forms.

    9. Roll Out the Dough:

    10. Place the dough onto a floured surface. Divide it into two portions for easier handling. Roll each section out to about ¼ inch thick.

    11. Cut Out Shapes:

    12. Use cookie cutters to cut out festive shapes from the rolled-out dough. Place the cutouts onto the prepared baking sheet, spaced about an inch apart.

    13. Bake:

    14. Bake in the preheated oven for 10-12 minutes or until the edges are slightly golden. Be careful not to overbake.

    15. Cool the Cookies:

    16. Remove cookies from the oven and let them cool on the baking sheet for about 5 minutes, then transfer to a wire rack to cool completely.

    17. Prepare the Royal Icing:

    18. In a mixing bowl, combine powdered sugar, egg whites (or aquafaba), and lemon juice. Beat until you achieve stiff peaks, which is critical for decorating.

    19. Adjust Consistency:

      • If the icing is too stiff, add a few drops of water. For flooding (the base layer), it should be a bit thinner, while the piping consistency should remain thick.
    20. Decorate with Icing:

      • Fill piping bags with the royal icing and start decorating your cooled cookies. Use different colors for a fun variety! Allow the first layer to dry before adding more designs.
    21. Let Set:

      • Allow the decorated cookies to sit at room temperature for 6-12 hours to ensure the royal icing hardens effectively.

    Using these steps, you can enjoy a fun and creative day baking royal icing cookies that not only look delicious but taste fantastic, too!

    Mastering I’M Officially Addicted To These Royal Icing Cookies!: Advanced Tips and Variations

    To further enhance your cookie experience, consider these advanced tips and variations:

    • Flavor Variations: Add extracts such as almond, lemon, or peppermint to the cookie dough for a unique twist on flavor.
    • Themed Decorations: Use seasonal colors and shapes. For Halloween, create pumpkins and ghosts; during Christmas, think snowflakes and Christmas trees.
    • Using Stencils: If you’re looking for intricate designs, stencils can be very helpful for creating delicate patterns.
    • Texture Variations: For a fun texture, mix in some finely chopped nuts or chocolate chips into the base cookie dough prior to baking.
    • Royal Icing Techniques: Experiment with different piping tips for diverse decorative techniques, like “flooding” and “piping” to create beautiful effects.

    With these advanced tips, you can master this royal icing cookie recipe while letting your imagination run wild!

    How to Store I’M Officially Addicted To These Royal Icing Cookies!: Best Practices

    Storing your royal icing cookies properly will keep them fresh and maintain their beautiful appearance. Here’s how to achieve that:

    1. At Room Temperature: Allow the royal icing to fully dry (about 24 hours) before storing. Once dried, you can store them in an airtight container at room temperature for up to two weeks.

    2. Refrigeration: If you live in a particularly hot or humid area, consider refrigerating the cookies in an airtight container for up to a week. Always let them come to room temperature before enjoying.

    3. Freezing: For longer storage, you can freeze the cookies. Place them in a single layer on a baking sheet until frozen, then transfer them to zip-top bags. They can be stored frozen for up to three months. When ready to eat, let them thaw in the refrigerator overnight or at room temperature.

    By following these best practices, your royal icing cookies will remain delicious and visually striking for any occasion!

    Nutritional Value of I’M Officially Addicted To These Royal Icing Cookies!

    Understanding the nutritional information of these royal icing cookies allows you to enjoy them responsibly. Here’s a breakdown of the nutrition per cookie (based on a batch of 24 servings):

    • Calories: Approximately 120 kcal
    • Total Fat: 5 g
    • Saturated Fat: 3 g
    • Cholesterol: 25 mg
    • Sodium: 50 mg
    • Total Carbohydrates: 18 g
    • Dietary Fiber: 0.5 g
    • Sugars: 7 g
    • Protein: 1.5 g

    Remember, these nutritional values can fluctuate based on ingredient choices and portion sizes. By substituting healthier options, you can reduce sugar and fat while still enjoying a delightful treat.

    FAQs: Frequently Asked Questions About I’M Officially Addicted To These Royal Icing Cookies!

    Here are some common questions and answers regarding the royal icing cookie recipe:

    Q1: Can I use store-bought icing instead of making my own?
    A1: Absolutely! Store-bought icing can save time. However, homemade royal icing tends to yield better results in terms of flavor and consistency.

    Q2: How long do these cookies last?
    A2: When stored properly, decorated royal icing cookies can last up to two weeks at room temperature or longer in the freezer!

    Q3: Can I make these cookies ahead of time?
    A3: Yes! You can bake and decorate your cookies days in advance. Just be sure to store them correctly to maintain their quality.

    Q4: Are these cookies suitable for vegan diets?
    A4: Yes, simply substitute the eggs with flax eggs and use aquafaba in place of egg whites for the icing.

    Q5: Can I make the dough and freeze it?
    A5: Yes! You can freeze the dough before baking. Just shape it into discs, wrap in plastic, and store in the freezer. When ready, thaw it in the refrigerator before rolling and cutting.

    With these answers, you’re well-equipped to enjoy this royal icing cookie recipe to its fullest extent. Now, roll up your sleeves and start baking, because these cookies are bound to make you fall in love!

  • Delicious Strawberry Rhubarb Pie Cookies

    Delicious Strawberry Rhubarb Pie Cookies

    Delicious Strawberry Rhubarb Pie Cookies: A Tropical Delight

    Introduction to Delicious Strawberry Rhubarb Pie Cookies

    Imagine biting into a cookie that transports you straight to summertime picnics with its vibrant flavors and irresistible aroma. Welcome to the world of Delicious Strawberry Rhubarb Pie Cookies! This delightful treat offers a unique blend of sweet strawberries and tart rhubarb, capturing the essence of classic strawberry recipes but in a fun and portable cookie form. These cookies are not just delicious; they are also simple to make, healthy, and adaptable for various dietary needs, making them a versatile addition to your baking repertoire.

    Perfect for home cooks, busy parents, and students looking for a quick sweet treat, these cookies stand out with their easy preparation and wholesome ingredients. The combination of strawberries and rhubarb not only offers a symphony of flavors but also packs a nutritional punch, rich in vitamins and antioxidants. Plus, with options to make them vegan, gluten-free, or low-calorie, there’s something for everyone. Whether you’re a baking enthusiast, a newlywed wanting to impress, or simply seeking a new snack, these pie cookies will not only delight your tastebuds but also inspire you to explore more strawberry recipes.

    Benefits and Advantages of Delicious Strawberry Rhubarb Pie Cookies

    There’s a myriad of reasons why these Delicious Strawberry Rhubarb Pie Cookies make for the perfect treat. First and foremost, the simplicity of the recipe is a game-changer for any home cook. With just a handful of ingredients, you can whip up a batch of cookies that look and taste like a specialized pastry without the fuss.

    Moreover, this recipe comes with significant health benefits. Strawberries are known for being high in Vitamin C, manganese, and antioxidants, while rhubarb is rich in dietary fiber and low in calories. Together, they create a balanced snack that satisfies your sweet tooth while still being nutritious. This means you can enjoy your cookies guilt-free!

    Another major advantage is the adaptability of this recipe. Busy parents will appreciate that you can batch-bake these cookies and have them ready when cravings strike during hectic weekdays. For diet-conscious individuals, these cookies can easily be made vegan and gluten-free, allowing you to cater to specific dietary restrictions without compromising flavor or texture. With these cookies, you’ll not only impress friends and family, but also explore the delightful world of strawberry recipes with ease.

    In addition, they are perfect for sharing at gatherings or as unique homemade gifts. Cut them into fun shapes with cookie cutters, and you’ve got a delightful, personalized treat for birthday parties or holiday celebrations. Given all these incredible advantages, it’s clear why Delicious Strawberry Rhubarb Pie Cookies should become a staple in every household.

    Ingredients Overview

    Essential Ingredients for Delicious Strawberry Rhubarb Pie Cookies

    Here is a detailed list of all the necessary ingredients you’ll need to prepare Delicious Strawberry Rhubarb Pie Cookies:

    • 1 cup all-purpose flour (or gluten-free flour): Serves as the base for the cookie dough, providing structure and texture.
    • 1/2 cup rolled oats: Adds heartiness and great texture to the cookies.
    • 1/2 cup unsalted butter (or vegan butter): Adds richness and moisture. For a lower-calorie option, you can substitute with coconut oil.
    • 1/2 cup sugar (or coconut sugar): Sweetens the cookies. You can also try a natural sugar substitute if desired.
    • 1/2 cup strawberries (chopped): Provides the primary flavor and sweetness.
    • 1/2 cup rhubarb (chopped): Imparts a refreshing tartness that balances the sweetness of strawberries.
    • 1 egg (or flaxseed egg for vegan): Acts as a binding agent. For a vegan option, mix 1 tablespoon of ground flaxseed with 3 tablespoons of water, let it sit for a few minutes to thicken.
    • 1 teaspoon vanilla extract: Enhances the flavors and adds warmth.
    • 1/2 teaspoon baking soda: Helps the cookies rise.
    • 1/2 teaspoon salt: Balances the sweetness and enhances overall flavor.

    With these ingredients, you can easily create a delightful cookie that aligns with various dietary preferences. Whether you’re preparing for a gathering, a snack at work, or desserts for family, you’ll have all the foundational pieces you need to perfect this recipe!

    Dietary Substitutions to Customize Your Delicious Strawberry Rhubarb Pie Cookies

    Customization is key when it comes to accommodating various dietary needs. Here are some substitution ideas for the Delicious Strawberry Rhubarb Pie Cookies:

    1. Flours: Apart from all-purpose or gluten-free flour, almond flour or coconut flour can be useful alternatives for gluten-free baking. Both options offer distinctive flavors and are also nutrient-rich.

    2. Sugars: If you want to lower the glycemic index, consider using stevia or monk fruit sweetener as a low-calorie substitute for sugar. They provide sweetness without the added calories.

    3. Fats: Coconut oil, as previously mentioned, is a great vegan replacement for butter. For a dairy-free option, you can use applesauce or a vegan yogurt to enhance moisture without added fat.

    4. Binders: Instead of using eggs, you can also replace them with silken tofu or a small amount of mashed banana, which can contribute to the cookie’s moisture.

    With these substitutions, anyone can enjoy Delicious Strawberry Rhubarb Pie Cookies, regardless of their dietary preferences or restrictions.

    How to Prepare the Perfect Delicious Strawberry Rhubarb Pie Cookies: Step-by-Step Guide

    Creating Delicious Strawberry Rhubarb Pie Cookies is simple and rewarding! Follow these easy steps for a successful baking session:

    1. Preheat the Oven: Start by preheating your oven to 350°F (175°C). This step is essential for getting that perfect cookie texture.

    2. Prepare Your Baking Sheet: Line a baking sheet with parchment paper or lightly grease it to prevent the cookies from sticking.

    3. Mix Dry Ingredients: In a medium bowl, combine the flour, rolled oats, baking soda, and salt. Whisk them together until well mixed. This step ensures even distribution of leavening agents.

    4. Cream Butter and Sugar: In a large mixing bowl, cream together the unsalted butter and sugar until the mixture is light and fluffy. This should take about 2-3 minutes with an electric mixer or 5-7 minutes by hand.

    5. Incorporate the Egg and Vanilla: Add in the egg (or flaxseed mixture) and vanilla extract. Mix until fully combined, making sure there are no streaks of butter remaining.

    6. Combine Wet and Dry Mixtures: Gradually add the flour mixture to the butter mixture. Stir until just combined; avoid overmixing, as this can lead to tough cookies.

    7. Fold in Strawberries and Rhubarb: Gently fold in the chopped strawberries and rhubarb into the cookie dough. Ensure the pieces are evenly distributed for even flavor in every bite.

    8. Scoop the Dough: Using a cookie scoop or tablespoon, drop the dough onto the prepared baking sheet, spacing them about 2 inches apart to allow for spreading.

    9. Bake the Cookies: Place the baking sheet in the preheated oven and bake for 10-12 minutes, or until the edges are golden brown while the centers remain slightly soft.

    10. Cool: Remove the cookies from the oven and let them cool on the baking sheet for about 5 minutes. Transfer them to a wire rack to cool completely. Enjoy warm or store for later!

    These step-by-step instructions will guide you to create perfect Delicious Strawberry Rhubarb Pie Cookies that you can share with friends and family or keep all to yourself!

    Mastering Delicious Strawberry Rhubarb Pie Cookies: Advanced Tips and Variations

    To elevate your Delicious Strawberry Rhubarb Pie Cookies, consider these advanced tips and variations:

    • Add Spices: Introduce a pinch of cinnamon or nutmeg to the cookie dough to offer an added depth of flavor. This can enhance the overall sweetness while complementing the fruity notes.

    • Incorporate Nuts: Mixing in chopped walnuts or almonds can add a delightful crunch to the cookies, making for a more textural experience. This not only adds flavor but also boosts the nutritional profile by increasing healthy fats and protein.

    • Try Different Fruit Combinations: While strawberry and rhubarb are a classic pair, experimenting with other fruits like blueberries, peaches, or even apples can lead to new and exciting flavors. A berry mix would create a delightful assortment of tastes!

    • Make a Glaze: For an extra layer of sweetness, consider drizzling a simple glaze made with powdered sugar and lemon juice over the cooled cookies. This would add both a touch of elegance and an irresistible sweetness!

    With these tips and variations in mind, you can customize your Delicious Strawberry Rhubarb Pie Cookies to suit your taste preferences. Whether you stick to the classic recipe or add a twist, you’ll find joy in baking these delicious treats!

    How to Store Delicious Strawberry Rhubarb Pie Cookies: Best Practices

    Storing your Delicious Strawberry Rhubarb Pie Cookies properly will ensure they maintain their freshness and delightful flavor. Here are some best practices for storage:

    • At Room Temperature: If you plan to consume the cookies within a few days, store them in an airtight container at room temperature. This will keep them soft and chewy.

    • Refrigeration: For longer storage, you may refrigerate the cookies. Place them in a sealed container lined with parchment paper to prevent moisture buildup. They should remain fresh for up to a week in the fridge.

    • Freezing: If you want to keep the cookies for an extended period, freezing them is ideal. Place the cooled cookies in a single layer on a baking sheet and freeze until firm. Then, transfer them to a freezer-safe bag or container, where they can last up to three months. For easy access, you can layer parchment paper between the cookies.

    • Reheating: To enjoy your cookies warm, simply microwave them for about 10-15 seconds, or place them in an oven preheated to 350°F for a few minutes. This will result in soft, delicious cookies that feel freshly baked.

    With these storage tips, you can ensure that your Delicious Strawberry Rhubarb Pie Cookies maintain their delectable taste and texture for as long as possible.

    Nutritional Value of Delicious Strawberry Rhubarb Pie Cookies

    When enjoying your Delicious Strawberry Rhubarb Pie Cookies, it’s good to be aware of their nutritional content. Below is an approximate nutritional breakdown per cookie (based on a batch of 12 cookies using standard ingredients):

    • Calories: 150
    • Total Fat: 7g
    • Saturated Fat: 3g
    • Cholesterol: 20mg
    • Sodium: 50mg
    • Total Carbohydrates: 20g
    • Dietary Fiber: 1g
    • Sugars: 8g
    • Protein: 2g

    Health Benefits

    • Rich in Fiber: Both strawberries and rhubarb contribute fiber, which is beneficial for digestive health.
    • Low in Calories: This cookie is a relatively low-calorie dessert compared to other options, especially if you choose to use natural sugar substitutes and healthy fats.
    • Vitamins and Antioxidants: Strawberries are particularly high in Vitamin C and antioxidants, enhancing immune function and combating oxidative stress.

    Feel free to customize your cookies per your dietary needs, ensuring they fit well into your healthy eating habits while still being an absolute delight!

    FAQs: Frequently Asked Questions About Delicious Strawberry Rhubarb Pie Cookies

    1. Can I use frozen strawberries and rhubarb instead of fresh?
    Yes, you can use frozen fruits! Make sure to thaw and drain them before adding them to the dough to prevent excess moisture, which can affect the texture of the cookies.

    2. How can I make this recipe gluten-free?
    Simply substitute the all-purpose flour with a gluten-free blending flour, and ensure that any other ingredients, like oats, are certified gluten-free.

    3. How do I know when the cookies are done baking?
    The cookies should be slightly golden around the edges while still appearing soft in the center. They will firm up as they cool.

    4. Can I double the recipe?
    Absolutely! If you want extra cookies for sharing, just double the ingredients and follow the same steps. You may need to bake in batches depending on your oven size.

    5. How should I store my cookies?
    Store the cookies in an airtight container at room temperature for up to a week, or freeze them for up to three months. Reheat for a warm treat later!

    By addressing these common queries, we hope to make your baking experience smooth and enjoyable while you create Delicious Strawberry Rhubarb Pie Cookies. Happy baking!

  • Classic Bunny Cookies With Royal Icing

    Classic Bunny Cookies With Royal Icing

    Classic Bunny Cookies With Royal Icing: A Tropical Delight

    Introduction to Classic Bunny Cookies With Royal Icing

    If you’re looking for a delightful treat that brings fun and creativity into the kitchen, Classic Bunny Cookies with Royal Icing are just the thing! These adorable cookies are not only visually appealing but also incredibly easy to make, making them perfect for bakers of all skill levels. With the added bonuses of being customizable, healthy, and suitable for various dietary preferences, these cookies can cater to everyone—from busy parents looking for special snack ideas to newlyweds eager to impress guests at their first gathering.

    These delightful confections conjure images of spring and Easter celebrations, making them a festive choice for family gatherings, parties, or simply enjoying with loved ones at home. The royal icing adds a touch of elegance, transforming simple cookies into artistic delights. Moreover, you can easily adapt the base recipe to be gluten-free or vegan, ensuring that nobody misses out on the fun! So whether you’re a seasoned baking enthusiast or just starting your culinary journey, these cookies are sure to inspire and delight.

    With vibrant colors and intricate designs made possible through royal icing, these bunny cookies serve not only as a delicious treat but also as a canvas for creativity. Imagine presenting a tray of these charming cookies at your next gathering; they will surely brighten up the table and bring smiles to the faces of both young and old alike. So grab your apron and let’s dive into the wonderful world of baking!

    Benefits and Advantages of Classic Bunny Cookies With Royal Icing

    When considering the advantages of Classic Bunny Cookies with Royal Icing, several aspects come to light that make this recipe particularly beneficial for both your health and enjoyment. First and foremost, the simplicity of the preparation is a significant draw. These cookies do not require an extensive list of ingredients or complicated techniques—perfect for home cooks and busy parents alike. With just a few straightforward steps, you can whip up a batch of cookies that look and taste divine!

    One of the remarkable aspects of these cookies is their versatility. The basic cookie dough can be flavored with vanilla, almond, or even citrus zest, allowing you to customize the taste to your liking. Additionally, the royal icing can be tinted with natural food colorings, making these cookies not only delicious but also visually stunning. This customization aspect not only makes baking fun but also allows health-conscious individuals to modify the recipe according to dietary preferences.

    For those keeping a close eye on calories or ingredients, substituting traditional sugar with healthier alternatives or using gluten-free flour can make a significant difference. This means you can enjoy guilt-free indulgence without sacrificing flavor. Additionally, by making these cookies in smaller sizes, you can satisfy your sweet tooth while controlling portion sizes.

    Moreover, these cute little bunnies are perfect for various occasions—from Easter gatherings to birthdays and festive celebrations. Their playful and appealing shapes can serve as the centerpiece of your dessert table. As more people look for ways to incorporate more joy into their everyday lives, baking these cookies can be a delightful experience for families and a wonderful activity to share with children. Whether you’re exploring your culinary skills or simply looking to customize a fun treat, the potential for joy and creativity is limitless with these bunny cookies!

    Ingredients Overview

    Essential Ingredients for Classic Bunny Cookies With Royal Icing

    Creating Classic Bunny Cookies with Royal Icing requires a delicious blend of ingredients that ensure both taste and aesthetic appeal. Here’s a detailed list of what you will need, along with some insightful tips on select ingredients:

    • 2 ¾ cups all-purpose flour: Provides the structure and texture for these cookies.
    • 1 cup unsalted butter (or vegan butter for a dairy-free option): Adds richness and flavor; vegan butter can be used without compromising texture.
    • 1 cup granulated sugar: Sweetens the cookie base, but can be substituted with coconut sugar or agave for a healthier option.
    • 1 large egg (flax egg for a vegan option): Binds the ingredients together; a flax egg can be made by mixing 1 tablespoon of ground flaxseed with 3 tablespoons of water.
    • 2 teaspoons vanilla extract: Enhances the flavor; consider using almond extract for a different twist.
    • ½ teaspoon baking powder: Helps the cookies rise slightly.
    • ¼ teaspoon salt: Balances the sweetness and enhances flavors.

    For the royal icing:
    4 cups powdered sugar: The base for the icing; can be substituted with sugar-free powdered sugar if desired.
    2-3 tablespoons meringue powder (or aquafaba for a vegan alternative): Helps to achieve the right consistency for spreading and decorating.
    Water as needed: Used to thin out the icing to your preferred consistency.

    This combination of ingredients can cater to various dietary needs, making it easier for everyone to enjoy these yummy cookies. Always remember to check the labels for allergen information if you’re accommodating dietary restrictions.

    Dietary Substitutions to Customize Your Classic Bunny Cookies With Royal Icing

    One of the true highlights of Classic Bunny Cookies with Royal Icing is their adaptability. There are numerous substitutions you can make to fit almost any dietary requirement:

    • Gluten-Free Version: Replace all-purpose flour with a gluten-free flour blend, ensuring it contains xanthan gum for structure.
    • Vegan Option: As mentioned earlier, substitute the egg with a flax egg or a store-bought egg replacer. Use vegan butter in place of regular butter.
    • Low-Calorie Sweetener: Opt for natural sweeteners like stevia or erythritol in place of granulated sugar to reduce calorie content, while keeping in mind that the texture may slightly vary.
    • Natural Dyes for Icing: Instead of commercial food coloring, opt for beet juice, spirulina, or turmeric to color your royal icing naturally, making it healthier while still fun.
    • Fruit Purees: Add fruit purees to the cookie dough for a burst of flavor and color. You could include raspberry for a touch of sweetness and vibrant hue.

    Every baker has different preferences and needs, and the beauty of this recipe is that it empowers you to create your dream cookie while still ensuring everyone can enjoy them, regardless of dietary restrictions.

    How to Prepare the Perfect Classic Bunny Cookies With Royal Icing: Step-by-Step Guide

    Now that you have all the essentials, let’s get started on preparing Classic Bunny Cookies with Royal Icing! Follow this detailed step-by-step guide:

    1. Prepare the Base: In a large mixing bowl, cream together the unsalted butter and granulated sugar until light and fluffy. This should take about 3-5 minutes using a hand mixer or stand mixer.

    2. Mix in the Egg: Add the egg (or flax egg) and vanilla extract to the butter and sugar mixture. Continue mixing until fully combined.

    3. Combine Dry Ingredients: In a separate bowl, whisk together the all-purpose flour, baking powder, and salt. Gradually add this mixture to the wet ingredients, mixing on low speed until a dough forms.

    4. Chill the Dough: Divide the cookie dough into two halves, wrap each portion in plastic wrap, and chill in the refrigerator for at least 1 hour. This helps the cookies maintain their shape while baking.

    5. Preheat the Oven: Preheat your oven to 350°F (177°C) while your dough chills.

    6. Roll Out the Dough: On a lightly floured surface, roll out the chilled dough to about ¼ inch thick. Use a bunny-shaped cookie cutter to cut out shapes.

    7. Bake the Cookies: Place the cut-out cookies on parchment-lined baking sheets, spaced a few inches apart. Bake in the preheated oven for 8-10 minutes or until the edges are lightly golden.

    8. Cool Completely: Once baked, remove the cookies from the oven and let them cool on the baking sheets for a few minutes before transferring them to a wire rack to cool completely.

    9. Prepare the Royal Icing: In a mixing bowl, combine the powdered sugar and meringue powder. Gradually add water to achieve the desired consistency (thicker for outlines and thinner for flooding). Mix on medium speed until glossy and holds peaks.

    10. Decorate the Cookies: Use piping bags fitted with small round tips to outline your cookies with royal icing. After outlining, flood the inside with thinned icing, using a toothpick to help spread if necessary.

    11. Let Icing Dry: Allow the decorated cookies to set for at least 6 hours or overnight for best results. Once dry, they can be stored or given as gifts.

    12. Show off Your Creativity: Add additional details with colored icing, edible glitter, or sprinkles to give your bunny cookies a whimsical look!

    By following these detailed steps, you’ll create charming bunny cookies that are sure to impress your family and friends. The process is fun and allows for experimentation, so don’t hesitate to add your personal touch along the way!

    Mastering Classic Bunny Cookies With Royal Icing: Advanced Tips and Variations

    To truly elevate your baking experience with Classic Bunny Cookies with Royal Icing, consider these advanced tips and fun variations:

    • Texture Tweaks: For thicker cookies, try chilling your dough longer or adding a tablespoon of cornstarch to the dry ingredients. This will give your cookies a more tender crumb.

    • Flavor Infusions: Experiment with flavor extracts! Almond, coconut, or even peppermint can be fantastic alternatives to vanilla that add unique taste profiles.

    • Glazing Instead of Icing: If you prefer a less time-consuming decorating method, consider using a simple glaze made with powdered sugar and milk or water. This provides a sweet finish without the intricate detailing of royal icing.

    • Themed Cookies: Beyond bunny shapes, use other seasonal cookie cutters for holidays (like hearts for Valentine’s Day or stars for Christmas). The same royal icing technique works across forms!

    • Layered Flavors: Try sandwiching two cookies with a layer of jam, chocolate ganache, or a thicker cream filling for an exciting twist on the standard cookie.

    • Workshops and Gatherings: Consider hosting a cookie-decorating party! Provide various toppings, colors, and other decorative elements; it’s a delightful way to bond with friends and family.

    By incorporating these tips and variations, you will further enhance your skills in the kitchen while whipping up these Classic Bunny Cookies. Have fun experimenting, and enjoy the process!

    How to Store Classic Bunny Cookies With Royal Icing: Best Practices

    Proper storage is crucial to ensure your Classic Bunny Cookies with Royal Icing remain fresh and delicious. Here are the best practices for storing your creations:

    • Cool Completely: It’s essential to let your cookies cool entirely after baking before frosting. This prevents condensation from forming, which could lead to sogginess.

    • Storage Method: Store unfrosted cookies in an airtight container at room temperature for up to one week. If already decorated with royal icing, they can also be stored similarly, but make sure they are not stacked directly on top of each other to avoid smudging the icing.

    • Freezing for Longevity: If you need to keep your cookies longer, consider freezing them. Place the cooled, unfrosted cookies in a single layer on a baking sheet until solid, then transfer them to a freezer-safe bag or container. They will maintain freshness for up to three months.

    • Thawing Instructions: To thaw, simply remove the cookies from the freezer and allow them to come to room temperature. Once thawed, you can frost them if desired, or enjoy them as they are.

    Following these storage tips will prolong the life of your lovely cookie creations and keep them as delightful as the day you made them!

    Nutritional Value of Classic Bunny Cookies With Royal Icing

    Understanding the nutritional value of your delightful Classic Bunny Cookies with Royal Icing is essential for those mindful of their dietary goals. The nutritional content can vary based on ingredient choices, but here is an approximate breakdown of a standard cookie (using all the ingredients in the main recipe):

    • Serving Size: 1 cookie
    • Calories: ~120 kcal
    • Total Fat: 5g
    • Saturated Fat: 3g
    • Cholesterol: 15mg
    • Sodium: 40mg
    • Total Carbohydrates: 18g
    • Dietary Fiber: 0.5g
    • Sugars: 8g
    • Protein: 1g

    By making dietary substitutions (like using coconut sugar, reducing butter, or using a vegan butter substitute), you can lower overall calories, sugars, and fats even further. Always consider your ingredient choices when assessing nutritional profiles.

    This breakdown is particularly useful for diet-conscious individuals or those with specific health goals. Remember that enjoying cookies in moderation can absolutely fit within a balanced diet!

    FAQs: Frequently Asked Questions About Classic Bunny Cookies With Royal Icing

    1. Can I make the dough ahead of time?

    Yes! You can prepare the dough and refrigerate it for up to 3 days. This allows for quick baking later. Just ensure it’s wrapped tightly in plastic wrap.

    2. Can I use different types of flour?

    Absolutely! For gluten-free options, a gluten-free flour blend works well. Just ensure it has xanthan gum for texture.

    3. What’s the best method to color the royal icing?

    Natural food dyes or gel food colorings are great for vibrant colors. Gradually add coloring until your desired shade is reached.

    4. How long does royal icing take to dry?

    Royal icing typically needs at least 6 hours to set completely. For best results, leave it overnight after decorating.

    5. Can I use store-bought cookies instead of making my own?

    While making your cookies from scratch ensures quality, you can certainly use store-bought cookies if you need a quicker option. Just be mindful of the texture.

    6. How can I prevent my cookies from spreading during baking?

    Chilling the dough before baking is crucial. If the dough is warm, the cookies will spread more. Also, make sure your baking sheets are cool when placing the dough on them.

    7. What if my royal icing is too thick?

    You can thin royal icing by adding a few drops of water until you reach the desired consistency. Mix thoroughly to avoid lumps.

    8. Can I freeze my decorated cookies?

    While it’s technically possible, it’s better to freeze undecorated cookies to preserve the design. Decorated cookies can be stored airtight at room temperature for up to a week.

    9. How can I make my cookies more flavorful?

    Consider adding spices such as cinnamon, nutmeg, or citrus zests to the dough for additional flavor profiles.

    By addressing these frequently asked questions, we hope to enhance your baking experience and help you create delightful bunny cookies that everyone will enjoy. Remember, experimentation in the kitchen is key, so embrace your creative side! Happy baking!

  • Easy Keto Greek Yogurt Cookies

    Easy Keto Greek Yogurt Cookies

    Easy Keto Greek Yogurt Cookies: A Tropical Delight

    Introduction to Easy Keto Greek Yogurt Cookies

    Welcome to the wonderful world of Easy Keto Greek Yogurt Cookies! If you’re on a keto diet but still crave the delightful sweetness of cookies, then you’re in for a treat. These cookies are not only simple to make, but they are also healthy, gluten-free, and satisfyingly delicious. With just a handful of ingredients, you can whip up a batch of cookies that is not only nutritious but also perfect for any occasion.

    Greek yogurt serves as the base for these cookies, adding a creamy texture and a boost of protein. Unlike traditional cookies that can be loaded with refined sugars and carbs, these cookies offer a guilt-free indulgence that fits seamlessly within a low-carb lifestyle. Whether you’re a busy parent looking for a nutritious snack for your kids, a student needing a quick pick-me-up, or simply someone who enjoys baking, this easy keto recipe will inspire you to head to the kitchen and treat yourself.

    What makes these cookies especially appealing is their versatility. You can customize the flavors by adding spices, nuts, or even sugar-free chocolate chips. They’re an excellent choice for those who are health-conscious but still want something sweet. Let’s dive into the benefits of these fantastic cookies and see why they should be your next baking adventure!

    Benefits and Advantages of Easy Keto Greek Yogurt Cookies

    Creating healthy desserts can often seem daunting, but our Easy Keto Greek Yogurt Cookies simplify the process without sacrificing flavor. One of the main advantages of this cookie recipe is the use of Greek yogurt. It not only lends a moist texture to your cookies but also provides an excellent source of protein and probiotics. This is great news for those looking to support their digestive health while enjoying a sweet treat.

    In addition, these cookies are incredibly simple to prepare. In only a few steps, you can take these ingredients from pantry to plate. Even novice bakers will find this recipe approachable, allowing them to gain confidence in the kitchen while creating a delicious product.

    From a health perspective, the low-carb nature of these cookies makes them suitable for a variety of diets, particularly keto, diabetic, and gluten-free diets. This means you can serve these cookies to friends and family without worrying about dietary restrictions. Additionally, these cookies are lower in calories than many traditional cookie recipes, making them a smart choice for anyone who wants to maintain or lose weight.

    Furthermore, time-saving is essential in our busy lives. This recipe is quick to prepare and bake, emphasizing convenience for busy individuals and families. With these cookies, you can enjoy a sweet snack that’s also wholesome, and they can be stored for later, making them perfect for meal prep.

    Ingredients Overview

    Essential Ingredients for Easy Keto Greek Yogurt Cookies

    To make your Easy Keto Greek Yogurt Cookies, gather the following essential ingredients:

    • 1 cup Greek yogurt (plain): This is the star ingredient that brings creaminess and protein.
    • 1/2 cup almond flour or coconut flour: Both are excellent low-carb options, with almond flour providing a nutty flavor and coconut flour offering a unique texture.
    • 1/4 cup sweetener (erythritol or stevia): Choose your preferred keto-friendly sweetener to add a touch of sweetness.
    • 1 large egg: This helps bind the cookie mixture together, giving cookies that soft texture we all love.
    • 1 tsp vanilla extract: For added flavor, making each bite even more enjoyable.
    • 1 tsp baking powder: This leavening agent helps the cookies rise and become fluffy.
    • Pinch of salt: Enhances the overall flavor, balancing the sweetness.
    • Optional add-ins: Sugar-free chocolate chips, chopped nuts, or dried coconut flakes can elevate the flavors even more.

    Dietary Substitutions to Customize Your Easy Keto Greek Yogurt Cookies

    This cookie recipe is already quite flexible, but if you want to cater to specific dietary needs, here are some suggested substitutions:

    1. Vegan Option: Simply replace the egg with a flax egg (1 tablespoon ground flaxseed mixed with 2.5 tablespoons water) to maintain moisture and structure in your cookies.

    2. Gluten-Free Alternatives: Always check labels, but both almond and coconut flours are naturally gluten-free. You can also consider gluten-free all-purpose flour, though the carb count may vary.

    3. Low-Calorie Sweeteners: If you prefer natural sweeteners, consider using monk fruit or allulose. Adjust the quantity according to your taste preference, as these sweeteners can differ in sweetness levels.

    4. Nut-Free Options: For those with nut allergies, coconut flour is a great alternative, but you can also experiment with sunflower seed flour or oat flour, ensuring they still align with your dietary goals.

    5. Flavor Variations: Feel free to swap in different extracts (like almond or coconut) or spices (such as cinnamon or nutmeg) to stir up novel flavors. These substitutions can energize your baking routine and keep your snacks exciting.

    How to Prepare the Perfect Easy Keto Greek Yogurt Cookies: Step-by-Step Guide

    Ready to bake some delicious cookies? Let’s follow this easy, step-by-step guide that will lead you to cookie perfection!

    1. Prepare the Base: Start by preheating your oven to 350°F (175°C). Line a baking sheet with parchment paper for easy cleanup.

    2. Mix Yogurt and Sweetener: In a mixing bowl, combine the Greek yogurt and your choice of sweetener. Stir until it’s well blended and smooth.

    3. Add the Egg: Crack the egg into the mixture. Beat it until fully incorporated, helping to create a uniform batter.

    4. Incorporate Dry Ingredients: In a separate bowl, mix together the almond flour (or coconut flour), baking powder, and salt. Gradually add this into your wet ingredients, ensuring no lumps remain.

    5. Add Flavorings: Pour in the vanilla extract and mix thoroughly, allowing the flavors to meld together.

    6. Introduce Optional Add-Ins: If using add-ins like chocolate chips or nuts, gently fold them into the dough at this stage.

    7. Scoop and Shape: Using a cookie scoop or tablespoon, scoop portions of dough onto the prepared baking sheet, spacing them about 2 inches apart. Flatten each scoop gently with your fingers or a spatula.

    8. Bake: Place the baking sheet in the preheated oven and bake for 12-15 minutes or until the edges are golden brown. Keep an eye on them, as oven times may vary.

    9. Cool Down: Once baked, remove the cookies from the oven and let them cool on the baking sheet for about 5 minutes before transferring them to a wire rack to cool completely.

    10. Enjoy Your Cookies: Once cooled, savor the delicious cookies as a delightful snack, with coffee, or as an after-meal treat.

    By following these easy steps, you’re on your way to baking delicious keto-friendly cookies that everyone will love!

    Mastering Easy Keto Greek Yogurt Cookies: Advanced Tips and Variations

    Now that you’re familiar with the basics, let’s look at some advanced tips and exciting variations for your Easy Keto Greek Yogurt Cookies.

    1. Texture Variation: If you prefer a crunchier cookie, consider adding a tablespoon of coconut oil into the mix. It will change the texture and provide a richer taste.

    2. Storage Prep: For meal planning, you can prep the cookie dough in advance and freeze it. Portion out the dough on a baking sheet, freeze until solid, and then transfer to a zip-top bag. When you’re ready for fresh cookies, simply bake from frozen, adding a few extra minutes to the baking time.

    3. Flavor Combinations: Try swapping the vanilla extract for almond extract for a nutty flavor or incorporate lemon zest for a refreshing citrus note. Dried fruit, like cranberries or blueberries, can also add a pop of color and flavor.

    4. Further Sweetness: If you like your cookies sweeter, feel free to adjust the amount of sweetener based on your taste preferences. Just remember that some sweeteners are more concentrated than others!

    5. Decorate: After your cookies are cooled, drizzle them with a sugar-free chocolate or a sweetened yogurt glaze to elevate their appearance and add a touch of flair.

    By implementing these advanced tips, you’ll master the art of baking cookies that are not only delightful but also uniquely yours!

    How to Store Easy Keto Greek Yogurt Cookies: Best Practices

    Once you’ve created your delicious Easy Keto Greek Yogurt Cookies, you want to enjoy them at their best! Here’s how to safely store your cookies:

    1. Refrigeration: If you plan to consume your cookies within a week, simply store them in an airtight container in the refrigerator. This will help them retain moisture and flavor.

    2. Freezing: For longer-term storage, cookies can be frozen. Place cooled cookies in a single layer in a freezer-safe container or a zip-top bag, separating layers with parchment paper. This way, you can easily grab a couple whenever the craving strikes.

    3. Reheating: When you’re ready to enjoy your frozen cookies, remove them from the freezer and let them thaw at room temperature for about 15 minutes. You can warm them slightly in the microwave for a few seconds if you prefer them warm.

    By following these storage tips, you’ll have your cookies ready to go whenever you need a tasty snack or treat!

    Nutritional Value of Easy Keto Greek Yogurt Cookies

    Curious about the nutritional benefits of these delightful cookies? Let’s break down the key nutritional components per cookie (assuming the batch yields 12 cookies):

    • Calories: Approximately 70 kcal
    • Fat: 4g (sourced mainly from almond flour)
    • Carbohydrates: 4g
    • Fiber: 2g
    • Net Carbs: 2g (net carbs are total carbs minus fiber)
    • Protein: 3g

    These cookies are low-calorie yet high in protein, making them a suitable option for anyone looking to maintain or shed pounds while still enjoying delicious snacks. If you add ingredients like chocolate chips or nuts, be mindful of the additional calories, carb load, and nutritional values.

    Overall, these keto cookies provide a balanced indulgence while supporting your dietary preferences. So go ahead, relish the benefits, and indulge in guilt-free snacking!

    FAQs: Frequently Asked Questions About Easy Keto Greek Yogurt Cookies

    Can I use regular yogurt instead of Greek yogurt?

    Yes, you can use regular yogurt, but keep in mind it may alter the texture slightly. Greek yogurt is thicker and provides additional protein content.

    Are these cookies suitable for a vegan diet?

    Yes, substitute the egg with a flax egg. This adjustment keeps the cookies vegan while maintaining their structure.

    How can I make these cookies even fluffier?

    To make fluffier cookies, consider adding an extra half teaspoon of baking powder or whisking your egg until frothy before adding it to the wet mixture.

    How long will these cookies last?

    Stored in an airtight container in the refrigerator, these cookies can last up to a week. If frozen, they can last for several months without losing quality.

    Can I use another type of flour?

    Yes, you can experiment with other low-carb flours like sunflower seed flour or a gluten-free all-purpose blend, though you may need to adjust the amounts based on the flour’s absorption characteristics.

    Is it possible to make a batch without any sweetener?

    While it’s possible, the cookies may lose their signature taste. If you prefer a no-sweetener option, consider adding spices like cinnamon to enhance flavor instead.

    How can I customize these cookies for different flavors?

    Feel free to add your favorite nuts, extracts, or sugar-free chocolate chips to the dough. You can also experiment with spices or zest for a creative twist.

    By addressing these common questions, you can feel confident about trying and loving your Easy Keto Greek Yogurt Cookies. Enjoy baking and indulging in these delights!