Tag: cookies

  • Classic Thermomix Condensed Milk Cookies

    Classic Thermomix Condensed Milk Cookies

    Classic Thermomix Condensed Milk Cookies: A Tropical Delight

    Introduction to Classic Thermomix Condensed Milk Cookies

    Cookie recipes have captivated baking enthusiasts around the globe, and nothing exemplifies this delight quite like the Classic Thermomix Condensed Milk Cookies. These delightful treats are not only irresistibly sweet, but they are also incredibly simple to make. With just a handful of ingredients and the magic of your Thermomix, these cookies can be ready in no time, making them a perfect choice for busy parents, students, and anyone looking to satisfy their sweet tooth.

    What makes these cookies truly stand out is their versatility. They are a fantastic option for individuals seeking healthier snacks, as they can be easily adapted to meet various dietary requirements. In fact, they can be made vegan by using plant-based condensed milk, and gluten-free by substituting regular flour with a gluten-free alternative. Plus, the process of making these cookies is as simple as pie—well, cookies! That said, you’ll experience both joy and ease when attempting this recipe, encouraging even the most novice home cooks to give it a go.

    So, if you’re looking for a delightful yet easy-to-make treat that the whole family will enjoy, look no further! With just a few ingredients and a few steps, you’ll be able to whip up a batch of Classic Thermomix Condensed Milk Cookies that is sure to bring smiles all around. Let’s dive into the benefits and advantages of this scrumptious recipe.

    Benefits and Advantages of Classic Thermomix Condensed Milk Cookies

    One of the most appealing aspects of the Classic Thermomix Condensed Milk Cookies is their simplicity. Designed for effortless preparation, this recipe allows anyone—whether a seasoned baker or a first-time cook—to experience the joy of baking without feeling overwhelmed. The Thermomix takes care of most of the heavy lifting, meaning less mess and more time to enjoy these delicious treats.

    From a health perspective, these cookies offer delightful benefits, especially when alternatives are used. For example, by opting for a sugar substitute, you can create a lower-calorie version that is suitable for diet-conscious individuals. Additionally, using gluten-free flour makes this recipe inclusive for those with gluten sensitivities, allowing everyone to partake in the fun.

    Moreover, these cookies have a soft and chewy texture, perfect for satisfying cravings while being light enough to not feel overly indulgent. They can also serve as an excellent snack for travelers or busy professionals, providing energy in a convenient and portable form.

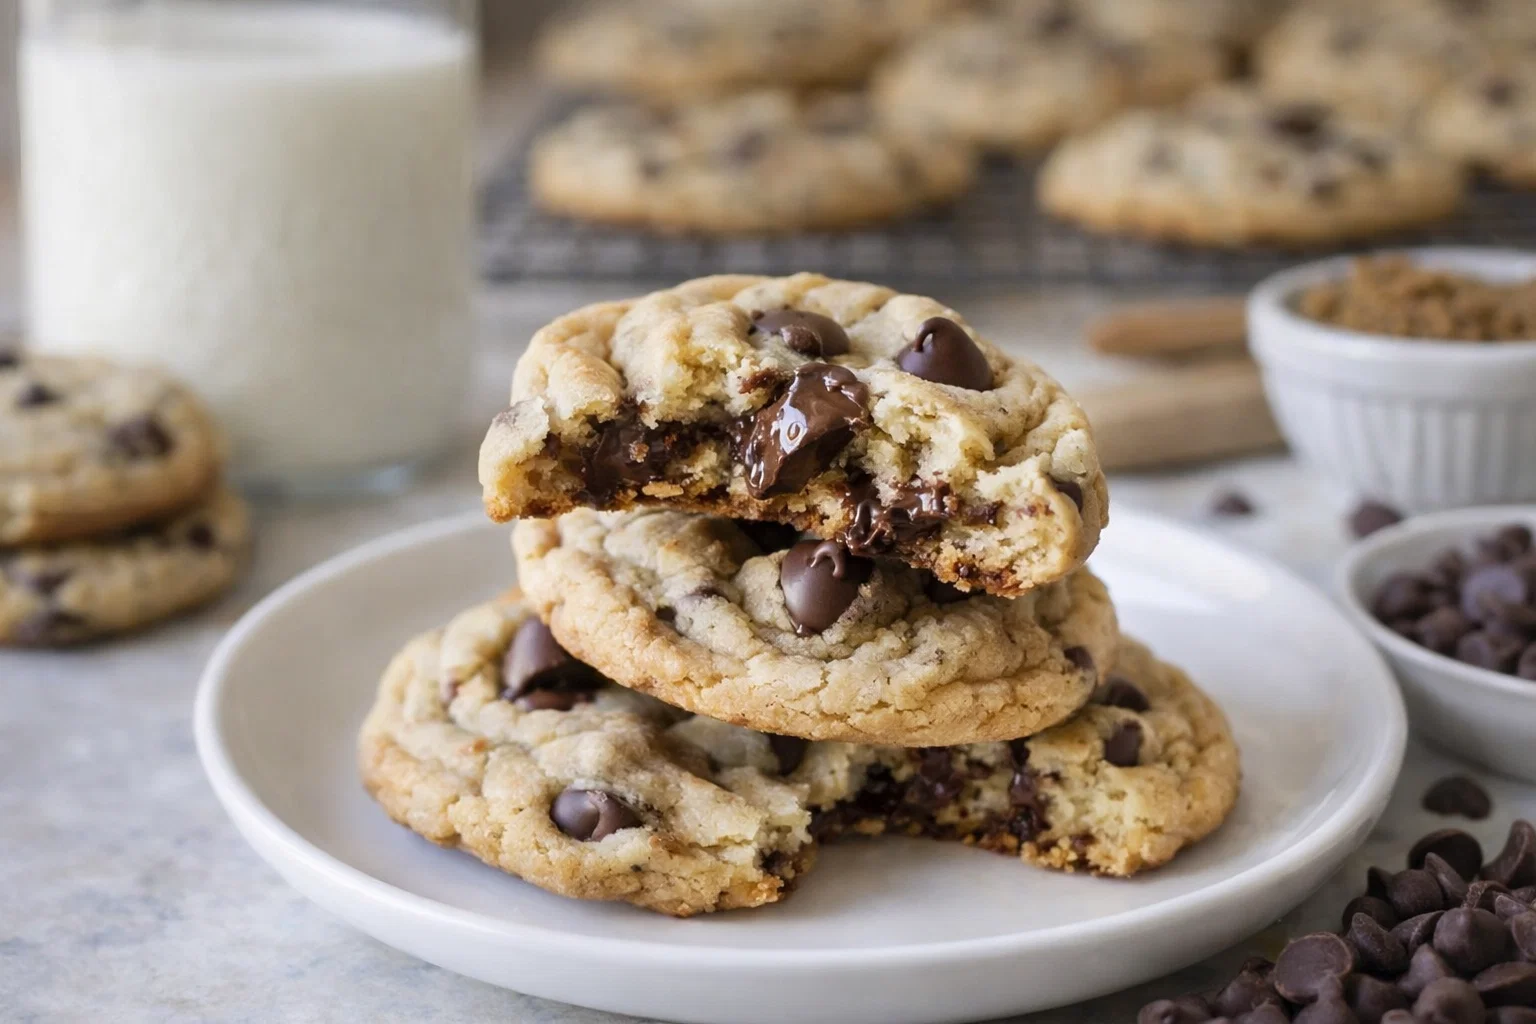
    Lastly, the Classic Thermomix Condensed Milk Cookies make for a straightforward yet crowd-pleasing dessert option when entertaining guests. Pair them with a cold glass of milk or a cup of tea, and you’ve got a treat that can elevate any gathering.

    With all these advantages, it’s no wonder this cookie recipe has become a staple in many households. Whether for an afternoon snack, a special occasion, or simply to share with loved ones, these cookies are sure to impress.

    Ingredients Overview

    Essential Ingredients for Classic Thermomix Condensed Milk Cookies

    To make these delectable cookies, you will need the following ingredients:

    • 200g of Condensed Milk: The star ingredient provides sweetness and moisture.
    • 100g of Unsalted Butter: Adds richness; can be substituted with dairy-free margarine for a vegan option.
    • 250g of All-Purpose Flour: Forms the base of the cookies; gluten-free flour can be used for a gluten-free version.
    • 1tsp of Baking Powder: Helps the cookies rise beautifully.
    • A Pinch of Salt: Balances the sweetness for a more rounded flavor.
    • 1tsp of Vanilla Extract: Adds an aromatic depth to your cookies.
    • Optional Add-ins: Chocolate chips, nuts, or dried fruit for added texture and flavor.

    Dietary Substitutions to Customize Your Classic Thermomix Condensed Milk Cookies

    This recipe accommodates various dietary needs seamlessly.

    For a Vegan Option:
    – Substitute the unsalted butter with coconut oil or a vegan margarine. Ensure you use vegan condensed milk available in stores or make your own from almond or soy milk.

    For a Gluten-Free Option:
    – Replace the all-purpose flour with a 1:1 gluten-free flour blend. Ensure that it contains a binding agent, such as xanthan gum, for best results.

    For a Lower-Calorie Version:
    – Use a sugar substitute like stevia or erythritol to reduce the calories in the condensed milk. You may also opt for a low-fat margarine instead of butter.

    By making these substitutions, you can cater to a variety of dietary preferences without sacrificing flavor.

    How to Prepare the Perfect Classic Thermomix Condensed Milk Cookies: Step-by-Step Guide

    Ready to whip up some Classic Thermomix Condensed Milk Cookies? Follow these simple steps for cookies that are sure to impress:

    1. Prepare the Base: Begin by placing the butter and condensed milk into the Thermomix bowl. Set the temperature to 60°C and mix on speed 2 for about 3 minutes until melted and well blended.

    2. Add Dry Ingredients: Next, remove the lid and allow the mixture to cool slightly. Add the all-purpose flour, baking powder, and salt into the bowl. Secure the lid and mix on speed 3 for 30 seconds to combine the dry ingredients with the wet mixture until just incorporated.

    3. Incorporate Flavor: Once combined, add the vanilla extract to the dough and mix on speed 2 for an additional 15 seconds. At this point, you can stir in any optional add-ins, such as chocolate chips or nuts, if desired.

    4. Chill the Dough: Transfer the cookie dough to a bowl, cover it with plastic wrap, and chill it in the refrigerator for about 30 minutes. Chilling helps improve texture and makes it easier to handle.

    5. Preheat the Oven: While the dough is chilling, preheat your oven to 180°C (350°F). Line a baking tray with parchment paper to prevent sticking.

    6. Form the Cookies: Once the dough is chilled, scoop spoonfuls of dough and roll them into balls. Place them on the prepared baking tray, leaving some space between each cookie, as they will spread out while baking.

    7. Bake: Bake the cookies in your preheated oven for 10-12 minutes, or until they turn a light golden brown. Keep an eye on them, as baking times may vary depending on your oven.

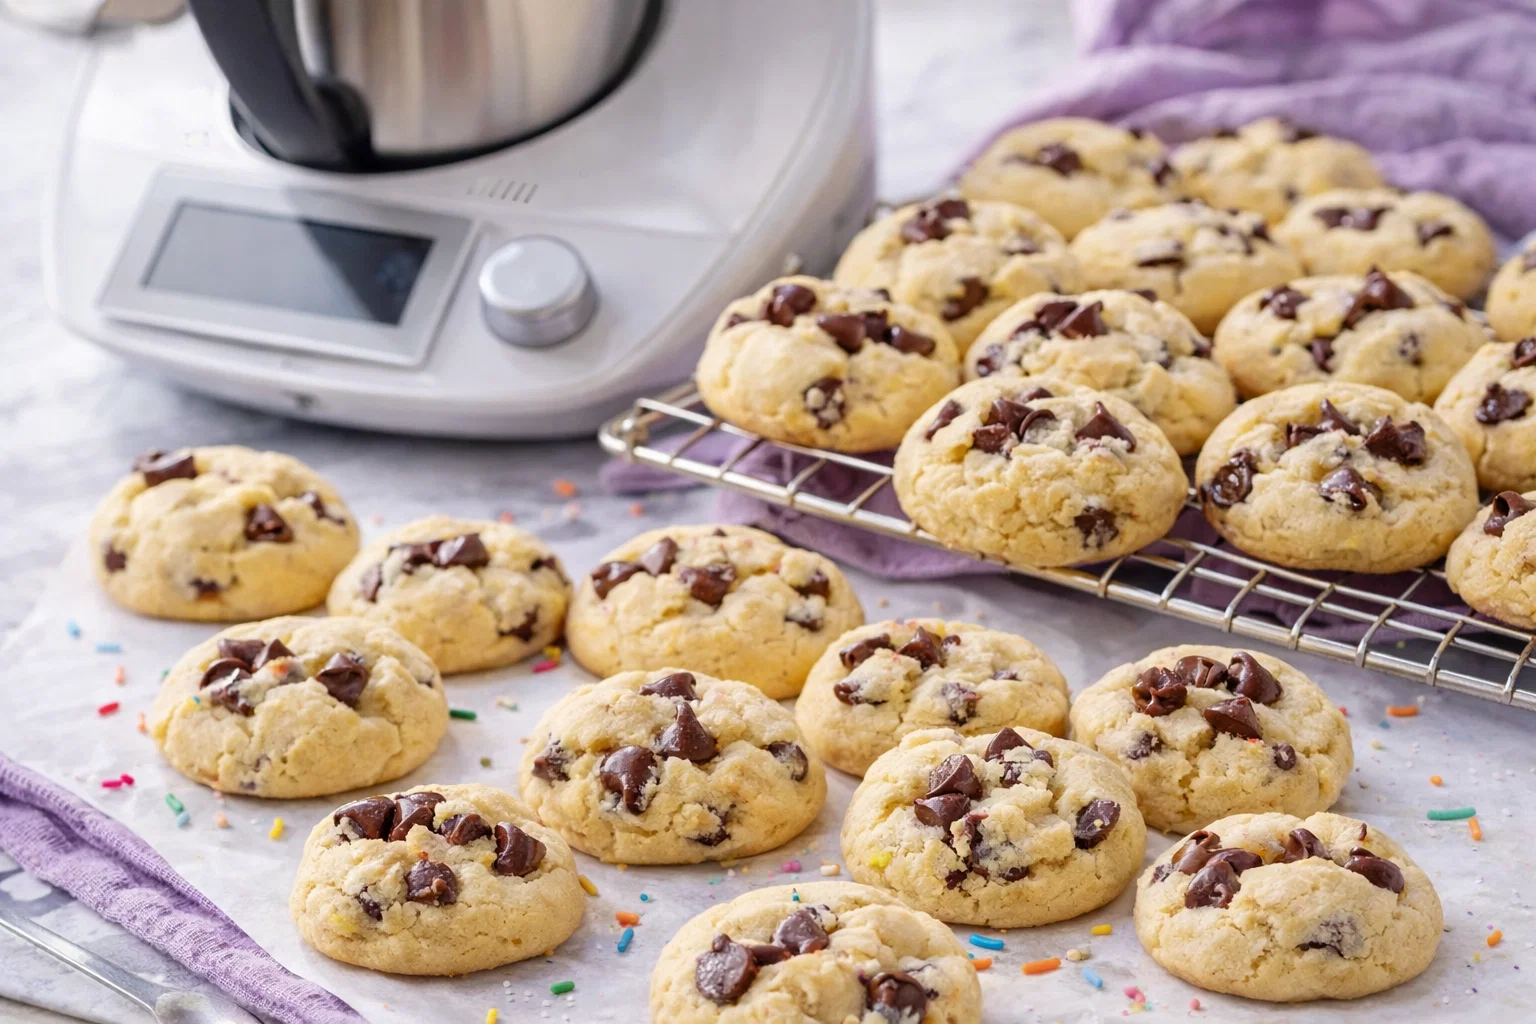
    8. Cool and Enjoy: Once baked, remove the cookies from the oven and let them cool on the tray for 5 minutes before transferring them to a wire rack to cool completely. Enjoy your warm Classic Thermomix Condensed Milk Cookies with a glass of cold milk!

    Feel free to experiment with the add-ins based on your preferences or dietary needs. Whether you prefer them plain, with chocolate chips, or nuts, this cookie recipe can be tailored to satisfy any craving!

    Mastering Classic Thermomix Condensed Milk Cookies: Advanced Tips and Variations

    To elevate your baking game with the Classic Thermomix Condensed Milk Cookies, consider the following tips and variations:

    • Add spices: A pinch of cinnamon or nutmeg can enhance the flavor, giving your cookies a unique twist.
    • Experiment with shapes: Instead of traditional cookie rounds, use cookie cutters to create fun shapes for special occasions. This is particularly appealing for family gatherings or festive celebrations.
    • Stuffed Cookies: Try placing a chocolate square in the center of the cookie dough before baking for a gooey surprise.
    • Frozen Cookie Dough: Prepare the cookie dough in advance and freeze it in pre-portion sizes. This way, you can have fresh-baked cookies anytime by simply baking them from frozen (you may need to add a couple of extra minutes to the bake time).
    • Nut Allergies: For those with nut allergies, always check ingredient labels and opt for nut-free add-ins like seeds or dried fruits instead.

    By considering these variations and tips, you can consistently impress friends and family with your baking prowess.

    How to Store Classic Thermomix Condensed Milk Cookies: Best Practices

    To keep your Classic Thermomix Condensed Milk Cookies fresh, it’s essential to store them properly. Here are the best methods for refrigeration, freezing, and reheating:

    • At Room Temperature: Store the cookies in an airtight container at room temperature for up to a week. This willensure they remain soft and flavorful.

    • Refrigeration: If you want them to last a little longer, you can refrigerate the cookies. They can remain fresh for up to 10-14 days in an airtight container in the fridge. Just note that they may lose some of their soft texture.

    • Freezing: For even longer storage, freeze the cookies for up to 3 months. To freeze, place the cookies in a single layer on a baking sheet and freeze until firm. Then transfer them to a sealed freezer bag, removing as much air as possible. Whenever you crave a cookie, simply thaw at room temperature for about 30 minutes before serving.

    • Reheating: To enjoy them warm, you can pop them in the microwave for a few seconds or warm them in an oven for a few minutes at 180°C (350°F). This will help revive the delicious gooey texture, making them feel freshly baked!

    Using these storage methods ensures that your Classic Thermomix Condensed Milk Cookies remain delightful for as long as possible.

    Nutritional Value of Classic Thermomix Condensed Milk Cookies

    When it comes to cookie recipes, understanding the nutritional value can help you enjoy them guilt-free. Below is the approximate nutritional information for one Classic Thermomix Condensed Milk Cookie, based on the whole batch yielding about 24 cookies:

    • Calories: 95
    • Total Fat: 4 g
    • Saturated Fat: 2.5 g
    • Cholesterol: 10 mg
    • Sodium: 60 mg
    • Total Carbohydrates: 13 g
    • Dietary Fiber: 0.5 g
    • Sugars: 6 g
    • Protein: 1 g

    Health Benefits

    These cookies can be customizable to enhance their nutritional profile:
    – By using coconut oil instead of butter, you can provide healthier fats.
    – Incorporate nuts for added protein and healthy fats if not avoiding for dietary restrictions.
    – Using low-sugar alternatives offers a more managed sugar intake.

    This nutritional breakdown helps you remain informed about your treats, ensuring you can indulge without guilt!

    FAQs: Frequently Asked Questions About Classic Thermomix Condensed Milk Cookies

    Can I use low-fat condensed milk for a healthier option?

    Yes, low-fat condensed milk can be used to reduce calories while still maintaining sweetness.

    What can I substitute for eggs in this cookie recipe?

    This recipe does not require eggs. However, if you want to add moisture, a flaxseed or chia seed egg can offer a similar binding effect (1 tablespoon of ground flaxseed or chia mixed with 2.5 tablespoons of water).

    How can I make these cookies dairy-free?

    Replace the unsalted butter with a dairy-free margarine and use a plant-based condensed milk. Both changes will yield delicious results!

    Can I freeze the cookie dough?

    Definitely! You can freeze pre-formed cookie dough to bake cookies fresh whenever you want. Just be sure to wrap it tightly in plastic wrap or store it in a freezer-safe bag.

    How do I know when my cookies are done?

    Look for a light golden edge and a soft center. Baking them too long can lead to a drier texture. Remember, they will continue to cook slightly once removed from the oven!

    By addressing these frequently asked questions, you can ensure that both novice and experienced bakers can enjoy a successful experience making Classic Thermomix Condensed Milk Cookies.


    In conclusion, whether you’re looking to satisfy a sweet craving, share with friends and family, or simply want to explore a new baking adventure, Classic Thermomix Condensed Milk Cookies are the perfect answer. The simplicity, adaptability for dietary needs, and delectable flavor make this cookie recipe a must-try. So gather your ingredients, fire up that Thermomix, and get baking!

  • Tasty Condensed Milk Thumbprint Cookies

    Tasty Condensed Milk Thumbprint Cookies

    Tasty Condensed Milk Thumbprint Cookies: A Tropical Delight

    Introduction to Tasty Condensed Milk Thumbprint Cookies

    If you’re searching for an easy and delightful treat to satisfy your sweet tooth, look no further than Tasty Condensed Milk Thumbprint Cookies! This recipe stands out in the realm of cookie recipes due to its simplicity and unique flavor profile. Unlike traditional cookies, thumbprint cookies are renowned for their charming, thumb-sized depressions filled with delicious jams or chocolate. Not only are they an absolute joy to make, but they also offer a plethora of benefits.

    This recipe is incredibly versatile—perfect for busy parents, students, or anyone craving a quick baking session. With fewer ingredients than many other cookie recipes, you can whip up a batch in no time. Additionally, for those mindful of their diet, these cookies can be easily adapted to be vegan and gluten-free, thanks to the magic of condensed milk and gluten-free flour alternatives.

    What’s more? They are not overly sweet, making them a guilt-free indulgence that you can share with friends, family, or enjoy solo. Whether you’re a baking enthusiast or a novice in the kitchen, these cookies will inspire and guide you every step of the way. Join me on this culinary adventure as we delve into the delicious world of Tasty Condensed Milk Thumbprint Cookies!

    Benefits and Advantages of Tasty Condensed Milk Thumbprint Cookies

    Tasty Condensed Milk Thumbprint Cookies come with a myriad of advantages that make them a fantastic choice for any occasion. Let’s explore the various reasons why this recipe excels among cookie recipes.

    Ease of Preparation

    One of the key benefits of this recipe is its simplicity. With just a handful of ingredients, it doesn’t require advanced baking skills or extensive preparation time. In fact, most ingredients can be found in your pantry! This ease of preparation allows busy individuals—whether you’re a working professional or a student—to take part in the joy of baking without spending hours in the kitchen.

    Health Benefits

    When considering cookies, health may not be the first thing that comes to mind. However, these thumbprint cookies can be made with healthier alternatives, such as using whole grain or gluten-free flour. Additionally, using condensed milk can reduce the need for added sugars, making them a better option for those looking to indulge without guilt. You can even substitute with low-calorie jam or fresh fruit preserves for a fresher take, further elevating the health factor!

    Dietary Adaptability

    Unlike many traditional cookie recipes, this thumbprint version caters to various dietary needs, including vegan and gluten-free options. Whether you or your loved ones have dietary restrictions or preferences, these cookies make it easy to bring everyone together at the dessert table. This quality makes them an excellent choice for potlucks, gatherings, or just a quiet evening at home.

    Perfect for All Occasions

    Finally, Tasty Condensed Milk Thumbprint Cookies are incredibly versatile. Whether you’re celebrating a birthday, holiday, or simply enjoying the weekend, these delightful cookies can suit any occasion. The festive nature of thumbprint cookies allows you to get creative with fillings like caramel, lemon curd, chocolate ganache, or seasonal fruit jams.

    With incredible taste, ease of preparation, and adaptability, Tasty Condensed Milk Thumbprint Cookies are a powerhouse in the world of cookie recipes!

    Ingredients Overview

    Essential Ingredients for Tasty Condensed Milk Thumbprint Cookies

    Creating Tasty Condensed Milk Thumbprint Cookies requires a straightforward list of ingredients. Each component plays a crucial role in delivering flavor, texture, and that signature thumbprint look. Here’s what you need:

    • 1 cup all-purpose flour (For a gluten-free version, substitute with gluten-free flour blend)
    • ½ cup condensed milk (You can opt for sweetened condensed milk or a vegan alternative)
    • ¼ cup unsalted butter (Use coconut oil or vegan butter for a dairy-free option)
    • 1 tsp baking powder (This aids in giving the cookies a light texture)
    • ¼ tsp salt (Enhances the flavors of the other ingredients)
    • 1 tsp vanilla extract (Adds depth to the overall flavor profile)
    • 1/3 cup jam or fruit preserve (Choose your favorite flavor for the thumbprint filling)

    These ingredients collectively yield a delicious treat that barely takes any time to prepare!

    Dietary Substitutions to Customize Your Tasty Condensed Milk Thumbprint Cookies

    If you have specific dietary preferences or restrictions, you can easily customize this recipe to suit your needs. Here are a few substitutions:

    • Flour: Instead of all-purpose flour, you can use almond flour for a nutty flavor or a gluten-free blend to cater to those avoiding gluten.
    • Condensed Milk: To make these cookies vegan, opt for a plant-based condensed milk available in many grocery stores or make your own at home using coconut milk.
    • Butter: Substitute unsalted butter with coconut oil or vegan butter to maintain that rich flavor without any dairy.
    • Sugar: For a healthier alternative, consider using a natural sweetener like honey or maple syrup. However, this will alter the texture slightly, requiring you to adjust the flour a bit.

    With these substitutions, you can create a wonderful batch of Tasty Condensed Milk Thumbprint Cookies that everyone can enjoy, regardless of their dietary needs!

    How to Prepare the Perfect Tasty Condensed Milk Thumbprint Cookies: Step-by-Step Guide

    Making Tasty Condensed Milk Thumbprint Cookies is a delightful experience, especially when you follow these easy-to-follow steps. Grab your ingredients, put on your apron, and let’s get started!

    Step 1: Preheat the Oven

    Start by preheating your oven to 350°F (175°C). This initial step ensures your cookies bake evenly and come out perfectly golden brown.

    Step 2: Prepare the Baking Sheet

    Line a baking sheet with parchment paper to prevent sticking. This will help maintain the shape of your cookies while baking.

    Step 3: Combine the Dry Ingredients

    In a mixing bowl, sift together 1 cup of all-purpose flour, 1 tsp of baking powder, and ¼ tsp of salt. This combination will help aerate the flour, giving your cookies a lighter texture.

    Step 4: Mix the Wet Ingredients

    In a separate bowl, cream together ½ cup of condensed milk and ¼ cup of unsalted butter until smooth. Add 1 tsp of vanilla extract and mix until combined. This mixture forms the base of your cookies.

    Step 5: Combine Dry and Wet Mixtures

    Gradually add the dry ingredients to the wet mixture, stirring gently until a soft dough forms. Avoid overmixing, as this could lead to denser cookies. Your dough should be soft and slightly sticky.

    Step 6: Shape the Cookies

    Using your hands, form small balls of dough about 1 inch in diameter. Place them on the prepared baking sheet, spaced about 2 inches apart, to allow for spreading as they bake.

    Step 7: Create the Thumbprint

    With your thumb or the back of a small spoon, gently press down on the center of each cookie ball to create a well. This is where you will add your filling! Make sure the well isn’t too deep; just enough to hold the jam or preserve.

    Step 8: Fill with Jam

    Using a teaspoon, fill each thumbprint with 1 tsp of jam or fruit preserve of your choice. This step is where you can get creative, experimenting with flavors!

    Step 9: Bake the Cookies

    Place the baking sheet in the preheated oven and bake for approximately 10-12 minutes, or until the edges are slightly golden. Keep an eye on them to prevent over-baking, which can result in a dry texture.

    Step 10: Cool the Cookies

    Once done, remove them from the oven and allow them to cool on the baking sheet for about 5 minutes before transferring them to a wire rack. This cooling period helps the cookies firm up and makes them easier to handle.

    Step 11: Enjoy!

    Your Tasty Condensed Milk Thumbprint Cookies are now ready to be enjoyed! Perfect with a cup of tea or coffee, these cookies promise to please everyone around.

    Throughout this process, feel free to adapt the recipe as needed—whether you’re using alternative ingredients or trying new jam flavors, have fun and enjoy experimenting in the kitchen!

    Mastering Tasty Condensed Milk Thumbprint Cookies: Advanced Tips and Variations

    Now that you’ve mastered the basics of Tasty Condensed Milk Thumbprint Cookies, consider these advanced tips and variations to take your cookie game to the next level!

    Experiment with Fillings

    While traditional thumbprint cookies often use fruit preserves or jam, don’t hesitate to get creative! Try fillings like:

    • Nutella or Chocolate Ganache: For a decadent twist, fill the thumbprint with rich chocolate.
    • Lemon Curd: Brighten your cookies with a zesty lemon filling.
    • Peanut Butter: A simple yet delightful peanut butter filling can elevate the flavor.
    • Coconut Cream: Add a tropical flair with coconut-infused Jam or cream.

    Add Texture

    For a delightful contrast, consider rolling the cookie dough balls in finely chopped nuts, shredded coconut, or sprinkles before baking. This adds an interesting texture to your cookies and enhances their visual appeal!

    Double the Batch

    Batches of these cookies can disappear quickly, so why not double the recipe? These cookies freeze well, so prepare a larger batch and store some for emergencies or unexpected guests.

    Adjust Sweetness Levels

    If you prefer less sweetness, feel free to reduce the amount of condensed milk or fill them with less sugary fillings. This tailored approach helps cater to various palettes.

    Tempting Glazes

    Add a touch of elegance to your cookies by drizzling them with a simple icing glaze after they’ve cooled. Mix powdered sugar with a splash of milk or water, and create a drizzle over the thumbprints!

    Having fun with variations and advanced tips ensures that your Tasty Condensed Milk Thumbprint Cookies are far from ordinary, making them a memorable treat for all who try them!

    How to Store Tasty Condensed Milk Thumbprint Cookies: Best Practices

    Storing your Tasty Condensed Milk Thumbprint Cookies properly ensures they stay fresh and delicious for longer. Whether you’ve baked a large batch or just a few, knowing how to store them will enhance your cookie experience.

    Refrigeration

    For short-term storage, keep cookies in an airtight container at room temperature for up to 5 days. If you wish to extend their freshness, consider refrigerating them, especially if you’ve used dairy-based ingredients. However, remember that refrigeration can change the texture slightly, making them a bit firmer.

    Freezing

    For longer-term storage, freezing is an excellent option! To freeze, first flash freeze the cookies by placing them in a single layer on a baking sheet and putting them in the freezer until firm. Once they’ve set, transfer them to a freezer-safe bag or container, ensuring to label it with the date. Cookies can be frozen for up to three months and thawed at room temperature for a delicious treat whenever the craving strikes.

    Reheating

    To enjoy that freshly baked taste again, reheat your cookies in the oven. Preheat your oven to 300°F (150°C) and warm the cookies for about 5-7 minutes. This gentle reheating can bring back the delightful texture and flavor of your cookies.

    By following these storage practices, you can prolong the enjoyment of your Tasty Condensed Milk Thumbprint Cookies!

    Nutritional Value of Tasty Condensed Milk Thumbprint Cookies

    Understanding the nutritional value of Tasty Condensed Milk Thumbprint Cookies allows you to enjoy them mindfully. Here’s a breakdown of the nutritional information per cookie, based on the recipe outlined above:

    • Calories: Approximately 80 kcal
    • Fat: 4.2 g (Saturated Fat: 2.5 g)
    • Carbohydrates: 10.5 g
    • Fiber: 0.4 g
    • Sugar: 4.5 g
    • Protein: 1 g

    Nutritional Insights

    These cookies provide a delightful balance of fun and indulgence without overwhelming your daily caloric intake. For diet-conscious individuals, remember that you can reduce calories by using less filling or opting for lower-calorie alternatives.

    Each ingredient offers its own health benefits:

    • Condensed Milk contributes calcium, while being lower in sugar compared to many traditional cookie recipes.
    • Butter provides a source of healthy fats when consumed in moderation, providing energy and flavor.
    • A gluten-free substitute ensures those with gluten sensitivities can enjoy the fun without discomfort.

    Enjoying Tasty Condensed Milk Thumbprint Cookies doesn’t just satisfy your cravings; they can also fit neatly into a balanced diet, especially when made mindfully.

    FAQs: Frequently Asked Questions About Tasty Condensed Milk Thumbprint Cookies

    Can I make Tasty Condensed Milk Thumbprint Cookies ahead of time?

    Absolutely! You can prepare and shape the cookie dough ahead of time and store it in the refrigerator for up to 24 hours or freeze it for longer storage. Just remember to thaw before shaping the thumbprints.

    What can I use instead of condensed milk?

    If you’re looking for a substitute, options include homemade condensed milk made from coconut milk or a store-bought dairy-free option. Additionally, for a different flavor, sweetened nut milks can work in a pinch.

    How do I ensure my cookies don’t spread too much?

    To prevent cookies from spreading, chill the dough for at least 30 minutes prior to baking. This helps the fats solidify and can retain their shape during baking.

    Can I use whole wheat flour instead of all-purpose flour?

    Definitely! Whole wheat flour can be used, but it may result in a denser texture. If you opt for it, consider adding a little more liquid to maintain the dough’s softness.

    What jams work best for the filling?

    The beauty of thumbprint cookies lies in their versatility. You can use various flavors, such as strawberry, raspberry, blueberry, or even chocolate ganache! Try seasonal jams to keep things exciting or go for homemade options for the freshest flavor.

    In conclusion, Tasty Condensed Milk Thumbprint Cookies represent an exciting adventure in baking—one that’s simple, adaptable, and downright delicious. Dive into this charming recipe for an unforgettable cookie experience, whether for gathering friends and family, an afternoon tea, or a quiet indulgence at home. Happy baking!

  • Easy Lemon Raspberry Cookies Dessert Treat

    Easy Lemon Raspberry Cookies Dessert Treat

    Easy Lemon Raspberry Cookies Dessert Treat: A Tropical Delight

    Introduction to Easy Lemon Raspberry Cookies Dessert Treat

    Are you on the hunt for delightful dessert recipes that are easy to whip up, bursting with flavor, and suitable for various dietary needs? Look no further than these Easy Lemon Raspberry Cookies! This treat showcases a perfect blend of tangy lemon and sweet raspberries, ensuring a refreshing escape into tropical flavors with every bite.

    One of the most appealing aspects of this cookie recipe is its simplicity. With a handful of ingredients and minimal preparation time, even novice bakers can create a stunning dessert that impresses family and friends. Plus, these cookies are not only delicious—they’re also a healthier option compared to traditional cookies. You can easily adjust them to meet vegan, gluten-free, or low-calorie diets without sacrificing flavor.

    By including nutritious ingredients, this recipe allows you to indulge guilt-free. The balance of sweet and tart makes these cookies ideal for various occasions—from a casual family gathering to a fancy tea party. With so many benefits, it’s time to grab your apron and discover the joys of baking with these Easy Lemon Raspberry Cookies!

    Benefits and Advantages of Easy Lemon Raspberry Cookies Dessert Treat

    The appeal of Easy Lemon Raspberry Cookies goes beyond their vibrant taste; these delightful cookies offer an array of benefits that make them a standout choice among dessert recipes. First and foremost, their ease of preparation caters to busy lifestyles. In just 30 minutes, you can go from craning over your ingredient list to pulling a batch of warm cookies from the oven.

    Health-conscious bakers will appreciate the natural ingredients in this recipe. Raspberries are packed with antioxidants and Vitamin C, while lemons provide a refreshing burst of flavor along with additional health benefits. The use of whole grain flour or a gluten-free alternative makes them lighter, yet filling—perfect for satisfying your sweet tooth without the heavy guilt often associated with desserts.

    In addition, these cookies are versatile. Whether you’re making a batch for yourself or wish to impress guests, you can easily adjust your recipe for various dietary preferences. The option to make these cookies vegan by replacing eggs with applesauce or chia seeds, and using a plant-based butter, makes this dessert universally appealing.

    Another advantage is that these cookies have a beautiful presentation. The vibrant ruby red of raspberries against the sunny lemon-yellow base creates a visually stunning treat. Perfectly portioned and easy to serve, these cookies can be enjoyed alongside tea, coffee, or as a light snack post-meal.

    In summary, the myriad benefits of these Easy Lemon Raspberry Cookies—from their health-conscious ingredients to the ease of preparation—ensure they will become a beloved addition to your collection of dessert recipes.

    Ingredients Overview

    Essential Ingredients for Easy Lemon Raspberry Cookies Dessert Treat

    Here’s what you’ll need to make your Easy Lemon Raspberry Cookies:

    • 1 ½ cups all-purpose flour (or gluten-free flour for gluten-free version)
    • ½ teaspoon baking soda
    • ¼ teaspoon salt
    • ½ cup granulated sugar (or coconut sugar for a healthier option)
    • ½ cup unsalted butter (or vegan butter for a vegan option)
    • 1 large egg (or ¼ cup unsweetened applesauce as a vegan substitute)
    • Zest of 1 lemon
    • 2 tablespoons fresh lemon juice
    • 1 cup fresh raspberries (or frozen, thawed)
    • 1 teaspoon vanilla extract

    The all-purpose flour serves as the main structure for the cookies, while baking soda helps them rise nicely. The butter, whether traditional or vegan, creates a rich, flavorful base. Fresh lemon juice and zest provide that tangy undertone that balances the sweetness of the raspberries perfectly.

    Dietary Substitutions to Customize Your Easy Lemon Raspberry Cookies Dessert Treat

    While the basic recipe is a crowd-pleaser on its own, here are some suggested substitutions for various dietary needs:

    • Gluten-Free: Substitute all-purpose flour with gluten-free flour blends or almond flour for a nutty flavor. You might need to adjust the liquid slightly for the perfect consistency.
    • Vegan: Replace the egg with ¼ cup of unsweetened applesauce or use a flaxseed meal (1 tablespoon ground flaxseed mixed with 3 tablespoons water) for a binding agent.
    • Sugar-Free: Use a sugar substitute like erythritol or stevia if you’re watching your sugar intake, being mindful to adjust quantities as necessary.
    • Low-Calorie: Decrease the amount of sugar used and substitute half of the butter with unsweetened applesauce to maintain moisture and reduce calories.

    Feel free to mix and match these substitutions based on your dietary needs or preferences while still enjoying every bite of your Easy Lemon Raspberry Cookies!

    How to Prepare the Perfect Easy Lemon Raspberry Cookies Dessert Treat: Step-by-Step Guide

    Baking these Easy Lemon Raspberry Cookies is simpler than you might think! Follow these detailed steps to create a batch of delightful cookies.

    1. Preheat the Oven: Start by preheating your oven to 350°F (175°C). This ensures that your cookies bake evenly and achieve that lovely golden color.

    2. Mix Dry Ingredients: In a mixing bowl, whisk together 1 ½ cups of all-purpose flour, ½ teaspoon of baking soda, and ¼ teaspoon of salt. This step is essential since it distributes the baking soda evenly throughout the flour.

    3. Cream Butter and Sugar: In a separate large mixing bowl, beat together ½ cup of unsalted butter (or vegan butter) and ½ cup of granulated sugar (or coconut sugar) until the mixture is light and fluffy. This should take about 3-4 minutes.

    4. Add Egg and Zest: Beat in 1 large egg (or applesauce) and incorporate the zest of 1 lemon. The zest not only enhances the flavor but also makes the batter smell delightful!

    5. Add Lemon Juice and Vanilla: Stir in 2 tablespoons of fresh lemon juice and 1 teaspoon of vanilla extract. These ingredients provide an additional depth of flavor.

    6. Combine Dry Ingredients: Gradually mix the dry ingredients into the wet mixture until just combined. Avoid overmixing, as this can lead to tough cookies.

    7. Fold in Raspberries: Gently fold in 1 cup of fresh raspberries. If using frozen, ensure they are thawed and drained of excess moisture to prevent soggy cookies.

    8. Scoop the Dough: Using a spoon or a cookie scoop, drop rounded tablespoons of dough onto a baking sheet lined with parchment paper, leaving space between each cookie to allow for spreading.

    9. Bake the Cookies: Bake in your preheated oven for about 12–15 minutes or until the edges are lightly golden. The centers might appear slightly soft—don’t worry! They will continue to firm up as they cool.

    10. Cool: Once baked, remove from the oven and let the cookies cool on the baking sheet for about 5 minutes. Then transfer them to a wire rack to cool completely.

    And there you have it—your Easy Lemon Raspberry Cookies are ready to be enjoyed! These cookies can be stored for a few days, but they’re so delicious, they might not last long!

    Mastering Easy Lemon Raspberry Cookies Dessert Treat: Advanced Tips and Variations

    To elevate your baking experience even further, here are some advanced tips and variations to try:

    • Add a Glaze: For an extra touch, consider drizzling a lemon glaze over your cookies. Combine powdered sugar with a little lemon juice for a simple yet flavorful glaze.

    • Experiment with Flours: Try almond or coconut flour for a different texture and taste profile. These nut flours add protein and healthy fats while providing a unique flavor.

    • Incorporate Nuts: If you enjoy a crunch, fold in some chopped walnuts or almonds along with the raspberries for an exciting surprise.

    • Infuse Flavor: Consider infusing your butter with herbs such as rosemary or thyme for an unconventional yet intriguing flavor profile. This can give your cookies a gourmet twist.

    • Muffin Variation: Turn this cookie recipe into a muffin. Simply pour the batter into a muffin tin and bake for about 20-25 minutes, adding a crumb topping for extra texture.

    These tips will not only enhance the flavor but also personalize your Easy Lemon Raspberry Cookies to suit your taste!

    How to Store Easy Lemon Raspberry Cookies Dessert Treat: Best Practices

    Storing your Easy Lemon Raspberry Cookies properly will help retain their freshness for longer. Here’s how to keep them tasting delicious:

    • Room Temperature: If you plan to enjoy your cookies within a few days, store them in an airtight container at room temperature. This keeps them soft and chewy.

    • Refrigeration: For extended freshness, place the cookies in the refrigerator in an airtight container. They will last up to 1 week. However, be mindful that refrigeration might slightly change their texture.

    • Freezing: If you want to keep these cookies for an extended period, freeze them! Place cooled cookies in a single layer on a baking sheet until solid, then transfer them to a freezer-safe bag or container. They can be frozen for up to 3 months. Thaw overnight in the fridge before enjoying.

    By applying these storage techniques, you can enjoy your Easy Lemon Raspberry Cookies anytime the craving strikes!

    Nutritional Value of Easy Lemon Raspberry Cookies Dessert Treat

    Understanding the nutritional value of your Easy Lemon Raspberry Cookies helps make informed choices about your treats. Below is an approximate breakdown of the nutritional content per cookie, assuming you yield about 24 cookies from this recipe:

    • Calories: 90-120 calories
    • Fat: 4-6g (depending on butter or butter substitute)
    • Carbohydrates: 12-15g
    • Fiber: 1g
    • Sugars: 4-6g
    • Protein: 1-2g

    These cookies are a relatively healthy choice among classic dessert recipes, especially when you opt for whole grain flour and natural sweeteners. The antioxidants found in raspberries and the vitamin C from lemons contribute to the overall nutritional profile, making these treats not only enjoyable but also beneficial!

    FAQs: Frequently Asked Questions About Easy Lemon Raspberry Cookies Dessert Treat

    Q: Can I use frozen raspberries?
    A: Yes! Make sure to thaw and drain any excess moisture from frozen raspberries to avoid soggy cookies.

    Q: Can these cookies be made gluten-free?
    A: Absolutely! Substitute all-purpose flour with a gluten-free flour blend or almond flour for a delicious gluten-free option.

    Q: How can I make these cookies vegan?
    A: Replace the egg with ¼ cup of unsweetened applesauce or a flaxseed mixture to keep the recipe entirely plant-based.

    Q: Can I add other fruits to this recipe?
    A: Certainly! Feel free to experiment with blueberries, blackberries, or even diced strawberries that complement the lemon flavor well.

    Q: How can I keep the cookies from spreading too much while baking?
    A: Ensure that your butter is at room temperature but not melted; also, refrigerating the dough for 30 minutes before baking can help maintain their shape.

    Q: How long do these cookies last?
    A: When stored properly in an airtight container, these cookies can last up to a week at room temperature and up to three months in the freezer.

    With these FAQs answered, you’re ready to embark on your baking adventure with Easy Lemon Raspberry Cookies! Enjoy every delightful bite while savoring the flavors of this tropical-inspired treat.

  • Quick Condensed Milk Thumbprint Cookies

    Quick Condensed Milk Thumbprint Cookies

    Quick Condensed Milk Thumbprint Cookies: A Tropical Delight

    Introduction to Quick Condensed Milk Thumbprint Cookies

    Welcome to a delightful culinary journey with our Quick Condensed Milk Thumbprint Cookies! If you’re in search of easy and delectable cookie recipes, you’ve landed on the right page. These cookies are not only a delicious treat, but they also shine in versatility, making them suitable for various dietary needs—whether you follow a vegan lifestyle, require a gluten-free option, or are simply seeking a guilt-free indulgence.

    The base of these cookies features sweetened condensed milk, which lends a rich creaminess that significantly enhances the flavor and moisture of the cookies. With just a handful of ingredients, they come together quickly, making them perfect for busy parents, students, and working professionals who desire a sweet treat without dedicating hours to baking.

    Moreover, the thumbprint design allows you to personalize each cookie with your favorite jam or filling, creating a tropical delight to enjoy with friends or family. Imagine hosting a gathering where dessert options don’t conflict with dietary restrictions, as these cookies can easily be tailored to meet various preferences.

    So, roll up your sleeves and get ready to whip up a batch of these sumptuous cookies that appeal to everyone’s palate!

    Benefits and Advantages of Quick Condensed Milk Thumbprint Cookies

    One of the standout attributes of our Quick Condensed Milk Thumbprint Cookies is their ease of preparation. This recipe is tailored for both novice bakers and busy cooks looking for something quick yet satisfying. Within minutes, the dough can be ready to bake, letting you indulge in delicious cookies in a fraction of the time compared to traditional recipes.

    Health Benefits: These cookies can be made using natural, wholesome ingredients. The use of sweetened condensed milk adds sweetness without the need for excessive sugars or artificial sweeteners. Furthermore, substituting some ingredients can make them lower in calories without sacrificing flavor, accommodating health-conscious individuals who crave a fast dessert.

    As a bonus, this recipe caters to various dietary needs. For those following a vegan or gluten-free diet, this recipe allows for numerous substitutions—for instance, using coconut flour or almond flour in place of traditional wheat flour. This adaptability means guests or family members with dietary restrictions can enjoy a sweet treat without worry.

    These cookie recipes stand out not only because they taste great, but also because they offer an inclusive dessert option for gatherings. With how easy they are to bake, you can whip up a batch for unexpected guests or for those cozy nights in. Who doesn’t love cookies fresh from the oven?

    Ingredients Overview

    Essential Ingredients for Quick Condensed Milk Thumbprint Cookies

    Here’s a list of essential ingredients you’ll need for these delightful cookies:

    • 1 cup sweetened condensed milk (Provides richness and sweetness)
    • 2 cups all-purpose flour (Serves as the base for the cookie)
    • 1/2 cup unsalted butter, softened (Adds a creamy texture)
    • 1 teaspoon vanilla extract (Infuses flavor)
    • 1/2 teaspoon baking powder (Helps cookies rise)
    • 1/4 teaspoon salt (Enhances flavors)
    • Your choice of jam or fruit preserves (For the thumbprint center)

    Dietary Substitutions to Customize Your Quick Condensed Milk Thumbprint Cookies

    • Vegan Option: Substitute the unsalted butter with coconut oil or a vegan butter alternative, and use a plant-based sweetened condensed milk.
    • Gluten-Free Option: Swap the all-purpose flour for gluten-free flour blend or almond flour. Additionally, use a gluten-free jam for the filling to ensure a fully gluten-free cookie.
    • Low-Calorie Option: Use a reduced-fat butter or yogurt in place of full-fat butter. Consider opting for a sugar-free jam or fruit preserve to keep the calorie count low while still enjoying flavor.

    No matter your dietary preferences, these variants ensure that everyone can join in on the cookie-making fun!

    How to Prepare the Perfect Quick Condensed Milk Thumbprint Cookies: Step-by-Step Guide

    Making Quick Condensed Milk Thumbprint Cookies is as simple as following these detailed steps:

    1. Prepare the Base: Begin by preheating your oven to 350°F (175°C) and lining a baking sheet with parchment paper. This ensures your cookies won’t stick and makes cleanup a breeze.

    2. Mix Ingredients: In a mixing bowl, combine the softened butter and sweetened condensed milk. Beat on medium speed until the mixture is smooth and creamy. This will be your base that creates the soft texture of the cookies.

    3. Add Vanilla: Pour in the vanilla extract, mixing until well incorporated. This adds a pleasant, sweet aroma that will linger as your cookies bake.

    4. Combine Dry Ingredients: In a separate bowl, whisk together the all-purpose flour, baking powder, and salt. This step is crucial for ensuring the even distribution of baking powder and salt throughout your cookie dough.

    5. Incorporate Dry Mixture: Gradually add the dry mixture into your creamy butter and condensed milk mixture. Stir with a wooden spoon or spatula until just combined. Avoid over-mixing; a few lumps are perfectly fine!

    6. Chill the Dough: For optimal results, refrigerate the dough for about 30 minutes. This helps to solidify the butter, making it easier to shape and preventing excessive spreading in the oven.

    7. Form Cookies: Once chilled, take tablespoon-sized amounts of dough and roll them into balls. Place them on the prepared baking sheet, spacing them a few inches apart.

    8. Create Thumbprints: Using your thumb (or the back of a spoon), gently press down the center of each cookie dough ball to create an indent for your jam or filling.

    9. Fill the Thumbprints: Spoon in your choice of jam into the indents. Be careful not to overfill, as the jam might spread while baking.

    10. Bake: Place your cookies in the preheated oven and bake for 12-15 minutes or until the edges turn lightly golden. Keep an eye on them to prevent burning!

    11. Cool Down: Once baked, remove the cookies from the oven and allow them to cool on the baking sheet for about 10 minutes. Transfer to a wire rack to cool completely.

    12. Serve and Enjoy: Once cooled, serve your delectable cookies with a cup of tea or coffee. These cookie recipes are perfect for sharing or treating yourself!

    Mastering Quick Condensed Milk Thumbprint Cookies: Advanced Tips and Variations

    To elevate your baking game, consider the following tips and variations for your Quick Condensed Milk Thumbprint Cookies:

    • Flavor Variations: Experiment with different extracts, like almond or coconut, to enhance the cookie’s flavor. You can also add zests from citrus fruits like lemon or orange for a refreshing touch.

    • Creative Fillings: While traditional jarred jam is fantastic, think outside the box! Use chocolate ganache, lemon curd, or even marzipan for diverse flavors that can surprise your palate.

    • Frosting Option: For a more decadent dessert, after they cool, consider drizzling a simple vanilla glaze or chocolate icing over the tops of your cookies!

    • Add-Ins: Fold in a handful of chopped nuts (such as almonds or walnuts) or chocolate chips into your dough for added texture and flavor.

    • Serving Ideas: Try serving your cookies alongside a scoop of vanilla ice cream for a delightful dessert combination!

    By incorporating these tips, you’ll elevate your cookie-making experience and impress everyone at your next gathering.

    How to Store Quick Condensed Milk Thumbprint Cookies: Best Practices

    To keep your Quick Condensed Milk Thumbprint Cookies fresh and delicious, use the following storage methods:

    • Room Temperature: Place cookies in an airtight container; they can typically be stored at room temperature for up to one week.

    • Refrigeration: If you live in a warmer climate or want them to last longer, store in the fridge where they can last about 10-14 days.

    • Freezing: For long-term storage, freeze your cookies by placing them in a single layer on a baking sheet for about an hour. Afterward, transfer them to a freezer-safe bag or container, ensuring to remove as much air as possible. They can last up to three months in the freezer.

    • Thawing: To enjoy frozen cookies, remove them from the freezer and let them sit at room temperature for about 30 minutes or microwave them for a few seconds until they are warmed through.

    Storing your cookies properly ensures you can enjoy them fresh, anytime the craving strikes!

    Nutritional Value of Quick Condensed Milk Thumbprint Cookies

    Understanding the nutritional profile of your cookies can help you make informed choices. Here’s a breakdown of the approximate nutritional values per cookie, based on a standard recipe that yields about 24 cookies:

    • Calories: 110
    • Total Fat: 5g
    • Saturated Fat: 3g
    • Cholesterol: 15mg
    • Sodium: 45mg
    • Total Carbohydrates: 15g
    • Dietary Fiber: 0g
    • Sugars: 6g
    • Protein: 2g

    These values can vary based on ingredient substitutions. For a healthier cookie, using low-calorie ingredients and opting for fruit preserves that are low in sugar can make a difference. This nutritional insight lets you enjoy these cookie recipes while pairing them with your dietary goals.

    FAQs: Frequently Asked Questions About Quick Condensed Milk Thumbprint Cookies

    1. Can I use other types of milk in this recipe?

    Yes! You can substitute sweetened condensed milk with any plant-based alternatives, such as almond or coconut milk, but be sure to add a sweetener to achieve the desired taste and texture.

    2. How long can I store these cookies?

    When airtight, they can be stored at room temperature for about a week, in the refrigerator for up to two weeks, or frozen for up to three months.

    3. What can I use instead of butter?

    For a vegan option, you can use coconut oil or a vegan butter alternative. If you’re looking for a lower-fat substitute, consider using applesauce for added moisture.

    4. Can I omit the jam filling?

    Absolutely! If you prefer plain cookies, feel free to omit the jam filling. Alternatively, you can frost them or add chocolate chips into the dough before baking.

    5. Can I make these cookies gluten-free?

    Yes, simply substitute the all-purpose flour with a gluten-free flour blend or almond flour to create a delicious gluten-free version of these thumbprint cookies.

    By addressing these frequently asked questions, we’re excited to guide everyone in making the perfect Quick Condensed Milk Thumbprint Cookies, making them enjoyable for all. So gather your ingredients and enjoy the fun of baking these delicious cookies!

  • The Best Chocolate Chip Cookies Recipe

    The Best Chocolate Chip Cookies Recipe

    The Best Chocolate Chip Cookies Recipe: A Tropical Delight

    Introduction to The Best Chocolate Chip Cookies Recipe

    When it comes to comfort food, few things can rival the classic appeal of chocolate chip cookies. These delightful treats have a unique place in our hearts and kitchens, embodying the balance between sweet, chewy, and slightly crisp. The Best Chocolate Chip Cookies Recipe not only captures that essence but also presents an accessible, simple, and versatile way to indulge in this beloved dessert.

    This recipe shines, making it a popular choice for home cooks, busy parents, students, and even health-conscious individuals. Crafted with wholesome ingredients, the cookies incorporate minimal sugar and can easily adapt to fit vegan or gluten-free diets. The beauty of this chocolate chip cookie recipe lies in its flexibility; you can customize it according to your tastes and dietary preferences.

    With a few basic ingredients and straightforward instructions, whipping up these cookies becomes a delightful experience for everyone involved. Whether you’re baking for a gathering, surprising a loved one, or simply enjoying a cozy evening at home, chocolate chip cookies can be your perfect partner. Join us in exploring this beautiful recipe and discover how easy and rewarding it is to make the best cookies right in your kitchen!

    Benefits and Advantages of The Best Chocolate Chip Cookies Recipe

    The Best Chocolate Chip Cookies Recipe is a standout for numerous reasons. First and foremost, it encourages inclusivity in the kitchen. As a versatile recipe, it accommodates various dietary needs—be it gluten-free, vegan, or low-calorie options—without compromising on flavor. By using alternative ingredients, you can satisfy the cravings of friends and family, ensuring that everyone can enjoy a sweet treat.

    One of the key advantages of this recipe is its simplicity. With just a handful of ingredients, you won’t find yourself overwhelmed. In fact, for busy parents or working professionals, this chocolate chip cookie recipe offers a quick solution to satisfy snack cravings without an elaborate kitchen adventure. Besides, kids love to participate, making it a fun family activity.

    Health benefits stand out as another significant factor. By choosing the right ingredients, such as whole-grain flour or natural sweeteners like coconut sugar, you can create cookies that not only please the palate but also provide nourishment. You and your family can indulge without the guilt often associated with traditional baked goods.

    Finally, this recipe stands out due to its adaptability. You can easily modify it to explore exciting variations like adding nuts, spices, or even fruits. This aspect allows bakers to express creativity and cater to personal preferences, transforming simple chocolate chip cookies into a delightful experience every time.

    Ingredients Overview

    Essential Ingredients for The Best Chocolate Chip Cookies Recipe

    To make the most delightful chocolate chip cookies, you’ll need the following essential ingredients:

    • All-Purpose Flour (2 cups): This forms the base of your cookies, providing structure.
    • Baking Soda (1 teaspoon): This ingredient helps the cookies rise and become fluffy.
    • Salt (½ teaspoon): Enhances the flavor and balances sweetness.
    • Unsalted Butter (1 cup, melted): Adds richness and moisture. For a healthier version, substitute with coconut oil or vegan butter for a dairy-free option.
    • Brown Sugar (¾ cup): This sugar gives the cookies a deeper flavor and chewy texture. Substitute with coconut sugar for a low-calorie approach.
    • Granulated Sugar (¾ cup): Provides sweetness and helps achieve the perfect cookie crisp.
    • Vanilla Extract (1 tablespoon): Enhances the flavors of your cookies.
    • Eggs (2 large): Binds all ingredients together. For a vegan alternative, use aquafaba (3 tablespoons) or flaxseeds (1 tablespoon ground flaxseed mixed with 2.5 tablespoons water).
    • Chocolate Chips (2 cups): The star of the show! Dark chocolate chips are a healthier option, while carob chips can serve as a substitute for those avoiding caffeine.

    Dietary Substitutions to Customize Your The Best Chocolate Chip Cookies Recipe

    To ensure this chocolate chip cookie recipe accommodates various dietary needs, here are some suggested substitutions:

    1. Gluten-Free Option: Replace all-purpose flour with a gluten-free flour blend. Make sure the blend contains xanthan gum, or add ½ teaspoon to help with structure.

    2. Vegan Option: Substitute eggs with flaxseed or chia egg (1 tablespoon of flaxseed/chia seeds mixed with 3 tablespoons of water, set aside until gel-like) and use vegan butter or coconut oil instead of unsalted butter.

    3. Low-Calorie Option: Use a sugar substitute like stevia or erythritol. Additionally, opt for reduced-fat margarine or applesauce in place of butter.

    4. Nut-Free Option: Ensure that any chocolate chips used are nut-free, and you can enhance flavor by adding spices such as cinnamon or nutmeg instead.

    By implementing these thoughtful substitutions, you can enjoy the deliciousness of chocolate chip cookies guilt-free!

    How to Prepare the Perfect The Best Chocolate Chip Cookies Recipe: Step-by-Step Guide

    Creating mouthwatering chocolate chip cookies is easier than you might think! Follow this step-by-step guide to bake the best cookies you’ve ever had.

    1. Preheat the Oven: Begin by preheating your oven to 350°F (175°C). This step ensures that your cookies bake evenly to perfection.

    2. Prepare Your Baking Sheet: Line a baking sheet with parchment paper. This makes transferring the cookies easy and prevents sticking.

    3. Mix Dry Ingredients: In a medium bowl, whisk together 2 cups of all-purpose flour, 1 teaspoon of baking soda, and ½ teaspoon of salt. Set this mixture aside for later.

    4. Cream Butter and Sugars: In a large bowl, combine 1 cup of melted unsalted butter, ¾ cup brown sugar, and ¾ cup granulated sugar. Using an electric mixer, beat until the mixture becomes creamy and light in color, about 2 minutes.

    5. Add Wet Ingredients: To the butter-sugar mixture, add 1 tablespoon of vanilla extract and 2 large eggs (or your vegan substitute). Beat until fully incorporated.

    6. Incorporate Dry Ingredients: Gradually add the dry mixture to the wet mixture, mixing on low speed until just combined. Avoid over-mixing, as this can lead to tough cookies.

    7. Fold in Chocolate Chips: Gently fold in 2 cups of chocolate chips with a spatula or wooden spoon, ensuring they are evenly distributed throughout the dough.

    8. Scoop the Dough: Using a cookie scoop or tablespoon, portion out the dough onto the prepared baking sheet, leaving enough space between each cookie for them to spread as they bake.

    9. Bake: Place the cookie sheet in the preheated oven and bake for 10-12 minutes, or until the edges are golden brown, and the centers are slightly undercooked.

    10. Cool on Wire Racks: Once baked, remove the cookies from the oven and allow them to cool on the baking sheet for 5 minutes before transferring to wire racks to cool completely.

    11. Store: Once cooled, enjoy these delectable cookies right away! For long-term storage, place them in an airtight container.

    The adaptability of this chocolate chip cookie recipe allows you to tweak the ingredients or baking time based on dietary preferences, making it a versatile treat!

    Mastering The Best Chocolate Chip Cookies Recipe: Advanced Tips and Variations

    For those ready to elevate their cookie game, here are some advanced tips and delightful variations to consider:

    • Brown Butter Cookies: For a nutty flavor, brown the butter before mixing it with sugars. Simply heat the butter on medium heat, stirring constantly until it turns golden brown and smells nutty. Allow it to cool slightly before continuing with the recipe.

    • Chill the Dough: Chilling the dough for 30 minutes to 2 hours can enhance the flavor and texture of your cookies. It allows the flavors to meld, resulting in a richer taste.

    • Add Nuts: For a delightful crunch, fold in 1 cup of your favorite nuts, such as walnuts or pecans, along with the chocolate chips.

    • Mix in Other Flavors: Experiment with different types of chocolate chips (milk, dark, white, or even butterscotch chips), or add a teaspoon of espresso powder for a subtle coffee flavor that enhances the chocolate.

    • Stuffed Cookies: Try stuffing your cookies by placing a chocolate piece in the center of the dough ball. This creates a melty, gooey surprise in every bite.

    These tips can transform a classic recipe into unique culinary creations, ensuring that the chocolate chip cookies never become monotonous!

    How to Store The Best Chocolate Chip Cookies Recipe: Best Practices

    Proper storage of your chocolate chip cookies is essential to preserve their taste and texture. Here are some best practices for storing these delightful treats:

    1. Room Temperature Storage: Store cooled cookies in an airtight container on the counter for 3-5 days. This helps retain their freshness, so you can easily enjoy them any time.

    2. Refrigeration: If you’d like to extend their life, consider placing the cookies in the refrigerator. Just keep in mind that chilled cookies may become slightly harder, so let them sit at room temperature for a few minutes before enjoying.

    3. Freezing: For longer storage, freeze your cookies. Place individual cookies in an even layer on a baking sheet and freeze until solid. Then, transfer them to a freezer-safe container or bag, where they’ll last for up to 3 months. When ready to eat, simply thaw them at room temperature or reheat in the microwave for a few seconds.

    These storage techniques will help ensure your cookies stay fresh and delicious, allowing you to savor each bite long after baking.

    Nutritional Value of The Best Chocolate Chip Cookies Recipe

    Understanding the nutritional value of your cookies can help you make informed choices. Below is a rough estimate of the nutritional content per cookie, based on a batch yielding 24 cookies made with conventional ingredients:

    • Calories: 150-200
    • Total Fat: 8-10g
    • Saturated Fat: 5g
    • Cholesterol: 15-25mg
    • Sodium: 90-120mg
    • Total Carbohydrates: 22-25g
    • Dietary Fiber: 1g
    • Sugars: 10-12g
    • Protein: 2-3g

    Keep in mind that these values can vary based on ingredient substitutions and add-ins. For example, using coconut sugar or reducing the amount of sugar can decrease the total calories and sugar content.

    Feel free to explore variations with whole grain flour or use dark chocolate chips to enhance antioxidants and overall health benefits.

    FAQs: Frequently Asked Questions About The Best Chocolate Chip Cookies Recipe

    Q1: Can I use margarine instead of butter?
    Absolutely! You can substitute margarine for butter in equal amounts if you’re looking for a dairy-free option.

    Q2: How do I make my chocolate chip cookies chewy?
    To achieve chewiness, be careful not to overbake your cookies. Removing them from the oven when they are slightly underbaked allows them to retain moisture as they cool.

    Q3: Can I freeze the cookie dough?
    Yes, you can freeze the cookie dough. Scoop the dough into balls and freeze them on a baking sheet. Once solid, transfer them to a freezer bag. When you are ready to bake, you can bake them directly from the freezer—just add a couple of minutes to the baking time.

    Q4: Are there any sugar substitutes that work well for this recipe?
    Sure! Coconut sugar, stevia, or erythritol are excellent sugar substitutes. They can help reduce calorie content while maintaining sweetness.

    Q5: How can I increase the flavor profile?
    Add spices like cinnamon, a pinch of nutmeg, or even espresso powder to amplify the flavor and give your chocolate chip cookies a unique twist.

    Conclusion

    Baking The Best Chocolate Chip Cookies is a delightful experience, allowing you to gather friends, family, or even enjoy some quiet moments by yourself. The versatility of this recipe means you can cater to various tastes and dietary choices while creating a luxurious treat that is both satisfying and comforting. Whether you choose the classic version or experiment with unique variations, chocolate chip cookies are bound to bring joy to your kitchen. So gather your ingredients, preheat that oven, and embark on the sweet journey to cookie perfection! Happy baking!

  • The Best Chewy Chocolate Chip Cookies Recipe

    The Best Chewy Chocolate Chip Cookies Recipe

    The Best Chewy Chocolate Chip Cookies Recipe: A Tropical Delight

    Introduction to The Best Chewy Chocolate Chip Cookies Recipe

    There’s something inexplicably comforting about biting into a warm, chewy chocolate chip cookie. The sweet aroma fills your kitchen, inviting loved ones to gather around and savor each bite. You’ve just stumbled upon the ultimate recipe for chocolate chip cookies that not only satisfies your sweet tooth but also excels in simplicity and health benefits.

    This delectable recipe offers a perfect balance of rich flavor and delightful texture, making it an ideal choice for home cooks, busy parents, students, and anyone looking to indulge their culinary passion without spending hours in the kitchen. What makes this iteration stand out is its versatility – you can easily customize it to suit various dietary needs. Whether you’re looking for a vegan-friendly version or a gluten-free option, this recipe provides simple substitutions to help you create delicious chocolate chip cookies that everyone can enjoy.

    Baking doesn’t need to be complicated or time-consuming. With straightforward steps and readily available ingredients, this recipe will inspire novice bakers and seasoned chefs alike. Join me in creating these scrumptious cookies that are sure to impress friends and family. Plus, they make a great treat for any occasion, from weekend get-togethers to midnight snacks!


    Benefits and Advantages of The Best Chewy Chocolate Chip Cookies Recipe

    Baking the best chocolate chip cookies at home comes with numerous benefits that extend beyond simply satisfying your sweet cravings. Here’s why this recipe should be your go-to when you want a reliable and delicious treat:

    1. Simplicity in Preparation: This recipe features easy-to-follow instructions, making it perfect for beginner bakers or those with limited time. With just a handful of ingredients and a few steps, you can have freshly baked cookies hot from the oven in no time.

    2. Health Benefits: While cookies are often seen as indulgent treats, this recipe allows you to incorporate healthier ingredients that can make them a guilt-free dessert option. You can use whole grain flour instead of all-purpose flour, natural sweeteners like honey or maple syrup, and high-quality chocolate to enhance the nutritional profile of your chocolate chip cookies.

    3. Dietary Adaptability: Whether you’re following a vegan diet, need to avoid gluten, or simply want to lower the calorie count, this recipe can easily be adapted. I’ll share alternatives that you can use to make these cookies fit your dietary needs without sacrificing taste or texture.

    4. Sense of Accomplishment: There’s immense satisfaction that comes from baking a batch of chocolate chip cookies from scratch. The smell of baking chocolate and the joy of sharing with family and friends make for delightful memories.

    5. Versatility: This recipe serves as a base for numerous variations. You can add nuts, dried fruits, or even experiment with different types of chocolate for unique flavor combinations.

    In a world where convenience often takes precedence, creating your own batch of cookies combines enjoyment and creativity. You’ll not only fill your home with a cozy fragrance but also experience the joy that comes from baking and sharing your personal culinary triumphs.


    Ingredients Overview

    Essential Ingredients for The Best Chewy Chocolate Chip Cookies Recipe

    Here’s a detailed breakdown of the ingredients you’ll need to create the best chewy chocolate chip cookies. Each ingredient plays a vital role in achieving that perfect texture and taste.

    1. All-Purpose Flour (2 ¼ cups): The foundation of the cookies, all-purpose flour gives them structure. For a gluten-free option, use almond flour or a gluten-free flour blend.

    2. Baking Soda (1 tsp): This leavening agent helps the cookies rise and gives them that soft, chewy interior.

    3. Salt (½ tsp): A pinch of salt enhances the sweetness of the chocolate and balances flavors beautifully.

    4. Unsalted Butter (1 cup, softened): Butter not only adds flavor but also contributes to the cookie’s chewy texture. For a vegan alternative, substitute with coconut oil or a dairy-free butter substitute.

    5. Brown Sugar (¾ cup): Packed brown sugar retains moisture, lending a rich flavor. You can also use coconut sugar for a less refined option.

    6. Granulated Sugar (½ cup): The combination of both sugars gives the cookies a delightful sweetness while allowing them to crisp up perfectly.

    7. Vanilla Extract (2 tsp): This adds depth to the flavor and enhances the overall taste of the cookies.

    8. Eggs (2 large): Eggs help bind the ingredients, contributing to the chewy texture. For a vegan substitute, use flaxseed meal or an egg replacer.

    9. Chocolate Chips (2 cups): The hero of this recipe! Use semi-sweet, dark, or even vegan chocolate chips based on your preference.

    10. Optional Add-ins: Consider adding chopped nuts, such as walnuts or pecans, or swirl in some peanut butter or butterscotch chips to create your own unique twist.

    Dietary Substitutions to Customize Your The Best Chewy Chocolate Chip Cookies Recipe

    Not only is this recipe adaptable to various palates, but it also accommodates dietary needs. Here are some suggested substitutions to cater to different preferences:

    • Gluten-Free: Use a blend of gluten-free flours, such as almond flour and coconut flour, combined with xanthan gum to mimic the elasticity of traditional flour.

    • Vegan: Substitute butter with a margarine alternative and replace eggs with flaxseed eggs (1 tablespoon of flaxseed meal mixed with 2.5 tablespoons of water per egg).

    • Low-Calorie: Swap out the sugars for stevia or erythritol, and use a light butter substitute. Alternatively, reduce the amount of chocolate chips to cut back on calories without losing flavor.

    • Nut-Free: Omit any nuts in the mix or choose sunflower seeds as a crunchy alternative for those with allergies.

    By using these substitutions, you can create a recipe that aligns perfectly with your dietary needs while still enjoying the classic taste of chocolate chip cookies.


    How to Prepare the Perfect The Best Chewy Chocolate Chip Cookies Recipe: Step-by-Step Guide

    Now that we understand the ingredients, it’s time to roll up our sleeves and dive into the baking process. Follow this step-by-step guide to create the perfect chocolate chip cookies:

    1. Preheat the Oven: Start by preheating your oven to 350°F (175°C). This ensures that the cookies bake evenly.

    2. Prepare the Baking Sheet: Line a baking sheet with parchment paper or a silicone baking mat to prevent the cookies from sticking and to ensure even baking.

    3. Mix Dry Ingredients: In a mixing bowl, combine the all-purpose flour, baking soda, and salt. Whisk together until well combined. This helps to evenly distribute the baking soda and salt throughout the flour.

    4. Cream the Butter and Sugars: In a separate large bowl, use an electric mixer to cream together the softened unsalted butter, brown sugar, and granulated sugar until the mixture is light and fluffy. This usually takes about 3-5 minutes.

    5. Add Eggs and Vanilla: Add the eggs, one at a time, to the butter-sugar mixture, mixing well after each addition. Follow up with the vanilla extract and beat until fully combined.

    6. Incorporate Dry Ingredients: Gradually add the dry ingredient mixture to the wet mixture. Stir just until combined; avoid over-mixing, as this can result in dense cookies.

    7. Fold in Chocolate Chips: Gently fold in the chocolate chips using a spatula or wooden spoon, ensuring they are evenly distributed throughout the dough.

    8. Scoop the Dough: Use a cookie scoop or tablespoon to portion out the dough onto the prepared baking sheet, leaving enough space between each cookie as they will spread while baking.

    9. Bake the Cookies: Place the baking sheet in the preheated oven and bake for 10-12 minutes or until the edges are golden brown and the centers look slightly undercooked. This will help keep them chewy.

    10. Cool the Cookies: Remove the cookies from the oven and let them cool on the baking sheet for 5 minutes before transferring them to a wire rack to cool completely.

    11. Enjoy: Once they’re cooled, dig in and savor your delicious, homemade chocolate chip cookies!

    Feel free to adjust the baking time based on your oven’s characteristics or your preferred level of chewiness. Remember, cookies continue to cook slightly after you take them out.


    Mastering The Best Chewy Chocolate Chip Cookies Recipe: Advanced Tips and Variations

    To take your cookie-making skills to the next level, here are some advanced tips and creative variations to try:

    1. Chill the Dough: For even chewier cookies, consider chilling the dough for at least an hour before baking. This allows the flavors to meld and can enhance texture.

    2. Experiment with Mix-ins: Besides chocolate chips, try adding dried cranberries, toffee bits, or even sea salt on top before baking for an elevated flavor experience.

    3. Vary Chocolate Types: Don’t be afraid to mix different types of chocolate – dark, milk, white, or even a combination of chips and chunks for a delightful texture.

    4. Add Flavor Boosts: Spice things up by incorporating a dash of cinnamon or coffee granules into the dough for a unique twist on the usual cookie flavor profile.

    5. Create Stuffed Cookies: Try stuffing your cookies with peanut butter, Nutella, or chocolate ganache for a decadent treat that takes cookie-making to new heights.

    By incorporating these advanced tips and variations into your baking routine, you’ll not only master the basic chocolate chip cookies but also create endless possibilities that will wow your family and friends.


    How to Store The Best Chewy Chocolate Chip Cookies Recipe: Best Practices

    Proper storage is essential to keep your cookies fresh and chewy. Here are the best practices for storing your homemade chocolate chip cookies:

    1. Room Temperature: Once cooled, store your cookies in an airtight container lined with parchment paper. This will keep them soft for up to a week at room temperature.

    2. Refrigeration: If you want your cookies to last longer, you can refrigerate them. Just ensure they’re in a well-sealed container to prevent drying out. They can stay good for about two weeks in the fridge.

    3. Freezing: To preserve your cookies for an extended period, freezing is the best method. Place the cookies in a single layer in a zip-top freezer bag or container, separating layers with parchment paper. They can be frozen for up to 3 months.

    4. Reheating: When you’re ready to enjoy frozen or refrigerated cookies, let them sit at room temperature for five minutes. Alternatively, you can microwave them for about 10-15 seconds to restore their softness.

    By following these storage tips, you can enjoy your homemade chocolate chip cookies whenever the craving strikes!


    Nutritional Value of The Best Chewy Chocolate Chip Cookies Recipe

    Understanding the nutritional value of your homemade chocolate chip cookies can help you enjoy them guilt-free. The nutritional content may vary based on the specific ingredients you choose, but here’s a general idea for one cookie (based on a standard recipe):

    • Calories: 150
    • Total fat: 7g (Saturated fat: 4g, Trans fat: 0g)
    • Cholesterol: 25mg
    • Sodium: 100mg
    • Total carbohydrates: 22g (Dietary fiber: 1g, Sugars: 10g)
    • Protein: 2g

    Health Considerations:

    • Fiber Intake: Incorporating whole grain flour can increase the fiber content.
    • Sugar Alternatives: Using natural sweeteners or reducing sugar can improve the overall health profile.
    • Fat Content: Opting for healthier fats, like coconut oil or nut butters, may enhance nutritional value.

    Being informed about the nutritional profile allows you to enjoy these chocolate chip cookies without compromising your dietary goals!


    FAQs: Frequently Asked Questions About The Best Chewy Chocolate Chip Cookies Recipe

    Q: Can I substitute the butter with margarine?
    A: Yes, you can use margarine as a substitute for butter in the recipe.

    Q: What can I use instead of eggs for vegan cookies?
    A: Flaxseed meal or chia seeds mixed with water can serve as a great egg substitute in vegan recipes.

    Q: How can I make my cookies chewier?
    A: To achieve a chewier consistency, you can increase the brown sugar ratio, chill the dough before baking, or slightly underbake them.

    Q: Can I freeze the cookie dough?
    A: Absolutely! You can scoop out the dough onto a baking sheet to freeze individual cookie portions. Once frozen, transfer to a zip-top freezer bag for up to three months.

    Q: How long can I store baked cookies?
    A: Baked cookies can typically be stored at room temperature in an airtight container for up to a week.

    Enjoy experimenting with this fantastic recipe for chocolate chip cookies and happy baking!

  • Tasty Thermomix Condensed Milk Cookies

    Tasty Thermomix Condensed Milk Cookies

    Tasty Thermomix Condensed Milk Cookies: A Tropical Delight

    Introduction to Tasty Thermomix Condensed Milk Cookies

    Looking for a quick and delicious treat that satisfies your sweet tooth? Look no further than these Tasty Thermomix Condensed Milk Cookies! This delightful recipe is not just easy to prepare but also caters to a variety of dietary needs, making it a perfect addition to your collection of cookie recipes. Enjoy the rich, tropical flavor of condensed milk, which provides a unique twist to traditional cookies.

    These cookies are incredibly simple to whip up, making them an excellent choice for busy parents, students, and anyone who loves to bake but has limited time. The use of condensed milk not only adds creaminess and moisture but also reduces the need for additional fats and sugars, allowing you to enjoy a sweet treat with fewer calories.

    Moreover, this recipe offers a vegan option and can easily be adapted for gluten-free diets. By showcasing the versatility of these cookies, you can serve them at family gatherings, bake sales, or simply to brighten up your day. So, whether you’re a beginner or an experienced baker, these cookies promise to be a delightful and satisfying experience. Get ready to enjoy a tropical delight that everyone can appreciate!

    Benefits and Advantages of Tasty Thermomix Condensed Milk Cookies

    One of the standout features of the Tasty Thermomix Condensed Milk Cookies is their ease of preparation. These cookie recipes rely on simple steps that take advantage of the Thermomix blender’s efficiency, meaning you can combine ingredients in no time. The result is a batch of soft, chewy cookies ready to enjoy within just 30 minutes—including baking time!

    Another significant advantage is their health-conscious nature. The use of condensed milk not only delivers sweetness, but it packs in nutrients such as calcium and vitamin D. With fewer ingredients than traditional cookie recipes, you can enjoy a guilt-free indulgence while maintaining a balanced diet.

    Beyond health benefits, these cookies are incredibly customizable. There’s something for everyone, whether you’re accommodating gluten allergies or selecting vegan options. Want deliciously flavored bites? You can easily add ingredients like chocolate chips, nuts, or dried fruits to elevate your cookies’ divine taste. This adaptability makes these cookies accessible to busy families, health-conscious individuals, and baking enthusiasts everywhere.

    Furthermore, the convenience of storing these cookies means they can be prepared in advance. Make a large batch, freeze them, and you’ve got a sweet treat ready for unexpected guests or a quick snack after a long day. No need to compromise on flavor or health with these cookies; their versatility and deliciousness make them a go-to recipe in any cookie collection!

    Ingredients Overview

    Essential Ingredients for Tasty Thermomix Condensed Milk Cookies

    Creating these delightful Thermomix Condensed Milk Cookies requires just a handful of ingredients, many of which you may already have in your pantry. Here’s what you’ll need:

    1. Condensed Milk: 1 can (397g) – the star ingredient, providing sweetness and moisture.
    2. All-Purpose Flour: 2 cups (250g) – the base that gives the cookies structure. For gluten-free options, substitute with almond flour or a gluten-free blend.
    3. Baking Powder: 1 teaspoon – helps the cookies rise and become fluffy.
    4. Vanilla Extract: 1 teaspoon – adds aromatic flavor.
    5. Butter or Coconut Oil: ½ cup (115g) – water, low in fats, adds richness and helps bind the cookies. For a vegan version, use coconut oil.
    6. Salt: a pinch – enhances the flavors of the other ingredients.
    7. Optional Add-Ins: ½ cup of chocolate chips, nuts, or dried fruits – customize your cookies to meet your taste preferences!

    Dietary Substitutions to Customize Your Tasty Thermomix Condensed Milk Cookies

    Adapting this cookie recipe to fit various dietary needs is easy and rewarding. Here are some suggestions:

    • Vegan Option: Replace regular butter with coconut oil or margarine. Ensure the condensed milk is a plant-based alternative made from coconut or almond milk.
    • Gluten-Free Option: Substitute all-purpose flour with almond flour or a gluten-free flour blend to ensure the cookies come out tender and puffy without gluten.
    • Low-Calorie Version: Use a light condensed milk option or sugar alternatives to minimize caloric intake while still enjoying the buttery flavor.
    • Sugar-Free Version: Swap out the condensed milk for low-calorie sweeteners, considering the balance of moisture required for the cookies.

    By customizing the ingredients in these cookie recipes, everyone can enjoy the deliciousness of Tasty Thermomix Condensed Milk Cookies without compromising on dietary preferences or restrictions!

    How to Prepare the Perfect Tasty Thermomix Condensed Milk Cookies: Step-by-Step Guide

    Ready to whip up your own batch of cookies? Follow these step-by-step instructions to make the Tasty Thermomix Condensed Milk Cookies:

    1. Prepare the Base: Assemble your ingredients and preheat the oven to 180°C (350°F). Line a baking sheet with parchment paper or a silicone mat.

    2. Combine Ingredients: Place the condensed milk, softened butter (or coconut oil), and vanilla extract in the Thermomix bowl. Blend on speed 4 for 30 seconds until creamy and smooth.

    3. Mix Dry Ingredients: In a separate bowl, whisk together the flour, baking powder, and salt to ensure even distribution throughout the batter.

    4. Mix Ingredients Together: Gradually add the dry mixture to the wet ingredients in the Thermomix bowl. Blend gently on speed 3 until just combined; be careful not to overmix, as it can lead to tough cookies.

    5. Add Optional Mix-ins: If you’re opting for chocolate chips or nuts, fold them into the cookie dough by hand using a spatula. This helps ensure they are evenly distributed and not over-processed.

    6. Shape the Cookies: Use a tablespoon or cookie scoop to portion out the dough onto the prepared baking sheet. Leave some space between each cookie, as they will spread out while baking.

    7. Bake the Cookies: Place the baking sheet in the preheated oven and bake for approximately 10-12 minutes. The cookies should be lightly golden around the edges while still soft in the center.

    8. Cool and Enjoy: Once baked, remove the cookies from the oven and let them cool on the baking sheet for 5 minutes. Transfer them to a wire rack to cool completely. Enjoy your luscious cookies warm or store them for later!

    Each of these steps highlights the simplicity and adaptability of this recipe, making it a perfect fit for anyone looking to create tasty cookies with minimal hassle.

    Mastering Tasty Thermomix Condensed Milk Cookies: Advanced Tips and Variations

    Now that you have your basic recipe down, let’s talk about some advanced tips and enticing variations to help you master these Thermomix Condensed Milk Cookies!

    • Flavor Variations: Get creative by adding spices like cinnamon or nutmeg for a warm flavor. For a touch of zest, consider adding the zest of an orange or lemon for a refreshing twist!

    • Texture and Crunch: For a crunchy texture, add oats (about ½ cup) to the cookie dough. This variation adds fiber and a satisfying chewiness.

    • Substitute Flavors: Consider using flavored extracts, such as almond or mint, instead of vanilla for a different spin. The cookie base beautifully absorbs different flavoring, which can create a new profile altogether.

    • Storage Tips: Store baked cookies in an airtight container at room temperature for up to a week. For longer storage, freeze the uncooked dough in portions for up to three months, allowing you to have freshly baked cookies at any time. Simply bake directly from frozen, adding a couple of extra minutes to the baking time.

    Experiment with these tips and variations for an exciting take on the Tasty Thermomix Condensed Milk Cookies and make baking your own creations even more enjoyable!

    How to Store Tasty Thermomix Condensed Milk Cookies: Best Practices

    After preparing these Tasty Thermomix Condensed Milk Cookies, you might be wondering how to best store them. Following proper storage guidelines will help keep your cookies fresh and flavorful:

    • At Room Temperature: Store cookies in an airtight container at room temperature, where they will stay fresh for about a week. You can layer parchment paper between them to prevent sticking.

    • Refrigeration: If you live in a particularly warm climate, consider refrigerating your cookies to help maintain their structure. Place them in a sealed container, and they can last up to ten days.

    • Freezing Cookies: For extended storage, freeze individual cookies for up to three months. Arrange them on a baking sheet to freeze until solid, then transfer them to a freezer bag or container. To enjoy them, simply leave them at room temperature for a few minutes, or bake them straight from the freezer for a fresh-out-of-the-oven experience!

    These best practices ensure that your Tasty Thermomix Condensed Milk Cookies continue to satisfy your cravings long after baking.

    Nutritional Value of Tasty Thermomix Condensed Milk Cookies

    Understanding the nutritional value of your treats can help you incorporate them into your diet mindfully. Here’s a breakdown for a standard Tasty Thermomix Condensed Milk Cookie:

    • Serving Size: 1 cookie
    • Calories: Approx. 120-150 based on ingredients
    • Protein: 2g
    • Fat: 6g (varying based on butter or coconut oil)
    • Carbohydrates: 18g
    • Fiber: 0.5g
    • Sugar: 7g
    • Calcium: Approximately 40mg
    • Iron: Approximately 0.3mg

    By tailoring the ingredients, you can easily modify the nutritional profile to fit your dietary goals. For instance, using a sugar alternative can significantly reduce the calorie count, while portion control can help satisfy your sweet tooth without overindulgence.

    Understanding the nutritional make-up empowers you to enjoy these delicious cookies while balancing your dietary intake!

    FAQs: Frequently Asked Questions About Tasty Thermomix Condensed Milk Cookies

    1. Can I use sweetened condensed milk instead of unsweetened?

    Yes, sweetened condensed milk is typically used in these recipes. Just keep in mind that this will add a bit more sweetness to your cookies.

    2. What can I substitute for condensed milk in a vegan recipe?

    In a vegan cookie recipe, you can use coconut condensed milk or homemade nut milk mixed with sugar or maple syrup to achieve a similar consistency and sweetness.

    3. Can I freeze the cookie dough for later use?

    Absolutely! You can freeze the cookie dough. Just scoop the dough into portions, place them on a baking sheet to freeze, and then transfer them to a freezer bag. They can be baked straight from frozen with a slight extension on time.

    4. Are these cookies gluten-free?

    These cookies can easily be made gluten-free by substituting all-purpose flour with almond flour or a gluten-free flour blend. Be sure to check the labels to confirm they are gluten-free.

    5. How do I know when the cookies are done baking?

    The cookies are done when they are lightly golden around the edges and appear slightly underbaked in the center. They will continue to cook as they cool on the baking sheet.

    With these tips and answers to common questions, you’re fully equipped to embark on your baking adventure with Tasty Thermomix Condensed Milk Cookies! Enjoy these delightful cookies and make them your own!

  • Tasty Butterscotch Cookies Soft Chewy Recipe

    Tasty Butterscotch Cookies Soft Chewy Recipe

    Tasty Butterscotch Cookies Soft Chewy Recipe: A Tropical Delight

    Introduction to Tasty Butterscotch Cookies Soft Chewy Recipe

    If you’re on the hunt for delightful cookie recipes that bring joy with every bite, look no further than these Tasty Butterscotch Cookies. These cookies are soft and chewy, offering a perfect blend of flavor and texture that will captivate anyone who takes a bite. Beyond their scrumptious taste, this recipe is simple and can easily be tailored to suit various dietary needs, including vegan and gluten-free options. Imagine delighting your family, friends, or even your personal taste buds with these tropical-inspired treats!

    Butterscotch cookies harmoniously merge the warmth of a classic cookie with a touch of sweetness reminiscent of tropical vacations. A simple recipe makes them an ideal choice for busy parents looking to whip up a quick treat, students wanting to impress friends, or baking enthusiasts searching for new ideas. Moreover, their chewy texture and rich flavor allow these cookies to stand out in any cookie jar, making them a go-to snack for kids and adults alike. The ingredients are easily accessible, making this delightful recipe an exciting addition to your baking repertoire.

    Join us as we dive into a world of flavor, health benefits, and versatility with this irresistible cookie recipe. You’ll discover how easy it is to create these delightful cookies that are perfect for any occasion, whether it’s a family gathering, a cozy evening at home, or as a gift for someone special.

    Benefits and Advantages of Tasty Butterscotch Cookies Soft Chewy Recipe

    This Tasty Butterscotch Cookies Soft Chewy recipe offers numerous advantages, making it a standout option among various cookie recipes. Firstly, the ease of preparation ensures that even novice bakers can create these delectable treats with minimal fuss. The straightforward steps allow you to spend less time in the kitchen and more time enjoying the company of loved ones. Plus, the baking process fills your home with a tantalizing aroma that will have everyone asking when the cookies will be ready.

    Incorporating wholesome ingredients contributes to not only fantastic flavor but also certain health benefits. For instance, the use of whole grains or alternative flours enriches your cookies with valuable nutrients like fiber, which can aid in digestion. Moreover, with a few tweaks, you can make these cookies suitable for a variety of dietary preferences. Whether you prefer vegan options made with coconut oil or gluten-free alternatives using almond flour, this recipe has you covered.

    Additionally, butterscotch holds unique flavor profiles that add an exciting twist to your usual baking repertoire. The sweet, buttery taste makes them a crowd favorite, pulling people back for seconds. Not only do they satisfy your sweet tooth, but they also provide a nostalgic flavor reminiscent of childhood treats, making them perfect for baking with little ones. Imagine sharing these sweet moments and creating lasting memories as you bake together.

    Furthermore, these cookies are perfect for varied occasions, from casual family dinners to more festive gatherings. With their adaptable nature and delightful flavor, you can confidently present these soft, chewy treats on any dessert table. Overall, the Tasty Butterscotch Cookies recipe stands out not just for its simplicity and delectable taste but also for its potential for customization, making it an appealing choice for everyone.

    Ingredients Overview

    Essential Ingredients for Tasty Butterscotch Cookies Soft Chewy Recipe

    1. All-purpose flour (2 cups): The base of the cookies provides structure. For gluten-free variations, use almond flour or a gluten-free blend certified for baking.

    2. Baking soda (1 teaspoon): This leavening agent helps the cookies rise slightly and retain a soft texture.

    3. Salt (1/2 teaspoon): Balances the sweetness and enhances flavors.

    4. Unsalted butter, softened (1 cup): Adds rich flavor. For a vegan alternative, use coconut oil or vegan butter.

    5. Brown sugar (1 cup): The primary sweetener that infuses a deep, caramel-like flavor into the cookies.

    6. Granulated sugar (1/2 cup): Adds sweetness and helps achieve a chewy texture.

    7. Large egg (1): Provides moisture and binds the ingredients together. For a vegan option, substitute with a flaxseed egg (1 tablespoon of ground flaxseed mixed with 2.5 tablespoons of water).

    8. Vanilla extract (1 teaspoon): Enhances the overall flavor profile; opt for pure vanilla for the best taste.

    9. Butterscotch chips (1 to 1.5 cups): The star ingredient provides the signature butterscotch flavor; opt for dairy-free chips for a vegan alternative.

    This thoughtful combination of ingredients makes each bite utterly scrumptious, and options to cater to various dietary needs only enhance the recipe’s appeal.

    Dietary Substitutions to Customize Your Tasty Butterscotch Cookies Soft Chewy Recipe

    1. Vegan Alternatives: As mentioned above, replace butter with coconut oil or a plant-based butter substitute, and swap the regular egg for a flaxseed egg. These changes allow those following a vegan diet to enjoy the same delightful taste and texture.

    2. Gluten-Free Options: Substitute the all-purpose flour with a certified gluten-free flour mix or almond flour. This adaptation ensures that those with gluten sensitivities or celiac disease can still indulge in these cookies without worrying about their dietary restrictions.

    3. Low-Calorie Version: For a healthier twist, consider reducing the sugar by one-half or opting for a sugar substitute, such as stevia or monk fruit sweetener. You can also use applesauce instead of half of the butter to enhance moistness while cutting calories.

    4. Nut-Free Versions: If you have allergies to nuts, ensure that your flours and butters are nut-free, and always check the labels on butterscotch chips and other ingredients.

    These substitutions make the Tasty Butterscotch Cookies a versatile choice, ensuring that everyone at the table can take part in the heavenly experience of these soft and chewy delights.

    How to Prepare the Perfect Tasty Butterscotch Cookies Soft Chewy Recipe: Step-by-Step Guide

    To create your own batch of Tasty Butterscotch Cookies, follow these detailed, easy-to-follow steps:

    1. Preheat the Oven: Preheat your oven to 350°F (175°C) and prepare a baking sheet by lining it with parchment paper. This step ensures easy removal of cookies and minimal cleanup.

    2. Mix Dry Ingredients: In a medium bowl, whisk together the all-purpose flour, baking soda, and salt. Make sure these ingredients are well combined to avoid clumps, which can interfere with baking.

    3. Cream the Butter and Sugars: In a large mixing bowl, cream together the softened unsalted butter, brown sugar, and granulated sugar until the mixture becomes light and fluffy. This usually takes about 3-4 minutes on medium speed using an electric mixer.

    4. Add Egg and Vanilla: Incorporate the large egg and vanilla extract into the butter-sugar mixture. Mix until fully combined; the batter should look smooth and creamy.

    5. Combine Dry and Wet Ingredients: Gradually add the dry ingredients to the wet mixture. Stir continuously until just combined to avoid over-mixing, ensuring your cookies stay soft and chewy.

    6. Fold in Butterscotch Chips: Gently fold in the butterscotch chips using a spatula or wooden spoon until they are evenly distributed. This step allows the sweet morsels to shine in every bite.

    7. Scoop Cookies onto Baking Sheet: Using a tablespoon or ice cream scoop, drop rounded tablespoons of dough onto the prepared baking sheet. Space them about 2 inches apart, as the cookies will spread as they bake.

    8. Bake the Cookies: Place the baking sheet in the preheated oven and bake for 10-12 minutes or until the edges look golden brown but the centers remain soft. Remember, the cookies will continue to set as they cool.

    9. Cool the Cookies: Remove the baking sheet from the oven and allow the cookies to cool on the baking sheet for approximately 5 minutes before transferring them to a wire rack to cool completely. This will help maintain their chewy texture.

    10. Store or Enjoy: Enjoy your freshly baked butterscotch cookies warm, or store them in an airtight container. This helps preserve their delightful texture for days to come.

    Following these simple, step-by-step instructions makes it easy to create delicious butterscotch cookies that cater to a variety of dietary preferences. Whether you’re sharing them at a party or keeping them all to yourself, these cookies are sure to be a hit!

    Mastering Tasty Butterscotch Cookies Soft Chewy Recipe: Advanced Tips and Variations

    To elevate your butterscotch cookies to new heights, consider the following advanced tips and variations:

    1. Add nuts: For added texture and flavor, consider incorporating chopped walnuts, pecans, or macadamia nuts into the mix. This not only enhances the cookie’s richness but also provides nutritional benefits such as healthy fats.

    2. Experiment with spices: Add a pinch of cinnamon or nutmeg to the dry ingredients for a unique flavor profile that complements the butterscotch without overshadowing it. This easily transforms your cookies into a warm, spiced treat.

    3. Make sandwich cookies: Create delightful sandwich cookies by spreading a layer of cream cheese frosting or chocolate ganache between two cookies for a rich treat that’s sure to impress.

    4. Drizzle with chocolate: Melt chocolate chips or dark chocolate and drizzle them on top of your completed cookies for a visually stunning finish that adds an extra layer of decadence.

    5. Use cookie cutters: Roll out the dough and use cookie cutters to create themed shapes for special occasions like holidays or birthday parties. Decorate the cooled cookies with icing to make them even more festive.

    With these helpful tips and variations, your Tasty Butterscotch Cookies will not only satisfy your sweet tooth but also please the crowd, making this recipe a memorable experience for family and friends.

    How to Store Tasty Butterscotch Cookies Soft Chewy Recipe: Best Practices

    To keep your Tasty Butterscotch Cookies fresh and delicious, follow these best practices for storage:

    1. Room Temperature Storage: If you plan to enjoy your cookies within a few days, store them in an airtight container at room temperature. This keeps them soft and chewy, making them a perfect snack anytime.

    2. Refrigeration: If you live in a very humid climate, it might be a good idea to refrigerate the cookies to prevent them from becoming too soft. However, note that refrigeration may alter the texture slightly, so let them sit at room temperature for a bit before serving.

    3. Freezing for Later: For long-term storage, freeze the cookies in an airtight container or freezer bag. You can freeze the cookies for up to three months. For best results, layer parchment paper between cookies to prevent them from sticking together. When ready to eat, simply allow them to thaw at room temperature or warm them in the oven for a few minutes for that fresh-baked taste.

    By following these storage methods, you ensure that each bite of your Tasty Butterscotch Cookies stays just as delectable as when they first came out of the oven.

    Nutritional Value of Tasty Butterscotch Cookies Soft Chewy Recipe

    Understanding the nutritional value of our baking creations is essential, especially for those who are health-conscious. Below is an estimated breakdown of the nutritional content for one Tasty Butterscotch Cookie, assuming this recipe yields about 24 cookies:

    • Calories: Approximately 130-150 kcal
    • Protein: 1.5g
    • Carbohydrates: 20g
    • Fat: 6g (of which saturated fat is around 4g)
    • Fiber: 0.5g
    • Sugar: 10g
    • Cholesterol: 15mg

    Note: Nutritional values may vary based on ingredient brands and specific measurements. To cater to dietary needs, consider using alternative ingredients like almond flour or coconut oil, which can impact the nutrition counts.

    By being mindful of the ingredients we incorporate, we can ensure that our Tasty Butterscotch Cookies not only satisfy cravings but also align with our health goals.

    FAQs: Frequently Asked Questions About Tasty Butterscotch Cookies Soft Chewy Recipe

    1. Can I make these cookies gluten-free?

    Absolutely! You can substitute the all-purpose flour with a gluten-free flour blend or almond flour to create gluten-free Tasty Butterscotch Cookies.

    2. How can I achieve chewier cookies?

    To promote chewiness, reduce the baking time slightly and ensure you do not over-mix the dough. Using brown sugar enhances moisture, contributing to that delightful chewy texture.

    3. Can I freeze the cookie dough?

    Yes! You can scoop and freeze the dough in advance. When ready to bake, let it thaw in the refrigerator for a few hours before baking, extending the baking time by a minute or two.

    4. Are these cookies suitable for vegans?

    Yes! Simply substitute the butter with coconut oil or a vegan butter alternative, and replace the egg with a flaxseed egg to prepare vegan-friendly Tasty Butterscotch Cookies.

    5. How can I store leftover cookies?

    Store your leftover Tasty Butterscotch Cookies in an airtight container at room temperature for several days or refrigerate them for longer freshness. You can also freeze them for up to three months.

    This detailed FAQ section will help readers navigate common queries and concerns, allowing them to create their own batch of these delightful cookies with confidence.

    In conclusion, the Tasty Butterscotch Cookies Soft Chewy Recipe is not only easy to prepare but also versatile enough to cater to various dietary needs. With its rich flavors and soft, chewy texture, this recipe deserves a spot in your baking collection. Happy baking!

  • Soft Bunny Cookies With Royal Icing

    Soft Bunny Cookies With Royal Icing

    Soft Bunny Cookies With Royal Icing: A Tropical Delight

    Introduction to Soft Bunny Cookies With Royal Icing

    Soft Bunny Cookies With Royal Icing are not only incredibly adorable but also an excellent addition to your collection of cookie recipes. Perfect for holidays, parties, or simply cherishing joy in your home, these delightful treats are simple to make, healthy, and can cater to various dietary preferences such as vegan and gluten-free. The combination of a soft, chewy cookie base with a glossy, decorative royal icing creates a stunning visual appeal while providing a delectable taste that anyone can enjoy.

    These bunny-shaped cookies offer several benefits, making them a go-to choice for busy parents, students, and baking enthusiasts alike. They are made with wholesome ingredients, ensuring that you can treat yourself and your family without compromising on nutrition. The icing adds an artistic touch that allows you to unleash your creativity — making them great for family activities or special occasions.

    Beyond being simple and fun, this recipe is incredibly versatile. You can adjust the flavors and colors of the royal icing to match the theme of your event. Whether it’s pastel colors for Easter or vibrant shades for a birthday celebration, the creative possibilities are endless. This means that anyone—whether you are a newlywed trying your hand at baking, a senior looking for a fun project, or a working professional seeking a quick baking idea—can bring joy with these cookies.

    Benefits and Advantages of Soft Bunny Cookies With Royal Icing

    When it comes to cookie recipes, Soft Bunny Cookies With Royal Icing stands out for several reasons. Firstly, their ease of preparation means that both novice and experienced bakers can create these treats without any fuss. The straightforward steps ensure that busy individuals can whip up a batch in no time. Imagine coming home after a long day and being able to create something delightful to brighten your evening!

    One of the prominent benefits of this recipe is its adaptability to health-conscious lifestyles. You can choose healthier alternatives like whole wheat flour instead of all-purpose flour, or switch refined sugars for natural sweeteners like honey or maple syrup. You can even make them gluten-free by selecting alternatives like almond flour or a gluten-free baking blend.

    These cookies are a delightful treat packed with health benefits when prepared with nutrient-rich ingredients. They can provide a satisfying energy boost without the heavy feel that often accompanies traditional desserts. Using natural flavorings like vanilla extract or citrus zest adds a fresh taste, enhancing the overall flavor profile while minimizing the need for added sugars.

    Additionally, Soft Bunny Cookies can easily fit into various dietary needs. Whether accommodating a vegan diet by using plant-based ingredients and egg substitutes or making them low-calorie for diet-conscious individuals, this recipe can be modified without losing its delicious appeal.

    Furthermore, the visual aspect of these cookies makes them an engaging project for the whole family. Decorating the bunnies with royal icing not only allows creativity but also serves as a bonding experience for kids and adults alike. Thus, these cookies are not merely a culinary delight; they are a fun and wholesome family activity that brings joy and laughter into the kitchen.

    Ingredients Overview

    Essential Ingredients for Soft Bunny Cookies With Royal Icing

    To create these Soft Bunny Cookies, gather the essential ingredients listed below, which will ensure a rich and flavorful cookie base, as well as a beautiful royal icing:

    • 2 ½ cups all-purpose flour: This forms the foundation of the cookies. For gluten-free options, substitute with gluten-free flour.
    • 1 teaspoon baking powder: This helps the cookies rise and achieve a light, soft texture.
    • ½ teaspoon salt: Enhances the flavor of the cookies.
    • ½ cup unsalted butter, softened: Provides richness and moisture. You can use coconut oil or vegan butter for a dairy-free option.
    • 1 cup granulated sugar: Sweetens the cookie. For a healthier alternative, use coconut sugar or stevia as a low-calorie option.
    • 1 large egg: Binds the ingredients together. For a vegan option, substitute with a flaxseed egg (1 tablespoon ground flaxseed mixed with 2.5 tablespoons water).
    • 2 teaspoons vanilla extract: Adds an aromatic flavor that elevates the cookie.
    • Royal Icing Ingredients:
    • 2 cups powdered sugar: The base for royal icing. Adjust the amount based on desired thickness.
    • 1 egg white or 2 tablespoons meringue powder: This can be replaced with aquafaba for a vegan-friendly icing.
    • Water: To achieve the right consistency.
    • Food coloring (optional): For decorating your cookies.

    If you’re interested in exploring different flavors, consider adding spices like cinnamon or nutmeg to the cookie dough. This can add a unique twist while still ensuring that these remain delightful cookie recipes.

    Dietary Substitutions to Customize Your Soft Bunny Cookies With Royal Icing

    Depending on dietary constraints or personal preferences, here are some fantastic substitutions to customize your Soft Bunny Cookies:

    • Flour Alternatives: Use almond flour or oatmeal flour for a gluten-free version. Coconut flour is another low-carb option for those following keto diets.
    • Sugar Variations: For a lower glycemic index, consider using natural sweeteners like monk fruit or erythritol. Honey or agave syrup can be great natural alternatives, though be mindful that they will slightly alter the texture.
    • Dairy-free Options: Substitute the butter with coconut oil or a dairy-free butter alternative. Similarly, the royal icing egg whites can be replaced with aquafaba to maintain the vegan integrity of the cookies.
    • Flavor Additions: Incorporate zest from citrus fruits for an extra flavor boost or white chocolate chips for a special treat.
    • Coloring Agents: For a more natural food coloring option, consider using beet juice for pinks or turmeric for yellows.

    With these substitutions, you can easily cater to the various dietary needs of friends and family, making these bunny cookies a truly inclusive treat.

    How to Prepare the Perfect Soft Bunny Cookies With Royal Icing: Step-by-Step Guide

    Now that you have gathered your ingredients, let’s delve into the step-by-step instructions on how to prepare these delicious and cute Soft Bunny Cookies with Royal Icing. Follow these simple steps to ensure perfect results:

    1. Preheat the Oven: Preheat your oven to 350°F (175°C). This is a crucial step to ensure that the cookies bake evenly.

    2. Prepare the Baking Sheet: Line your baking sheet with parchment paper or silicone mats. This prevents cookies from sticking and makes cleanup easier.

    3. Mix Dry Ingredients: In a mixing bowl, whisk together the all-purpose flour, baking powder, and salt. This ensures that the leavening agent is evenly distributed throughout the flour.

    4. Cream Butter and Sugar: In a separate bowl, cream the softened butter and granulated sugar together until light and fluffy. This usually takes about 2-3 minutes with an electric mixer.

    5. Add Egg and Vanilla: Beat in the egg, followed by the vanilla extract. Mix until smoothly combined.

    6. Incorporate Dry Mixture: Gradually add the dry mixture into the wet ingredients, mixing on low speed until just combined. Be careful not to overmix, as this can lead to tough cookies.

    7. Chill the Dough: Refrigerate the cookie dough for at least one hour. Chilling will help prevent spreading during baking.

    8. Roll and Cut Shapes: Once chilled, roll out the dough on a lightly floured surface to about ¼-inch thickness. Use a bunny-shaped cookie cutter to cut out the shapes.

    9. Place on Baking Sheet: Carefully transfer the cut shapes to the prepared baking sheet, ensuring they are spaced appropriately for baking.

    10. Bake: Bake the cookies in the preheated oven for 8-10 minutes or until the edges are lightly golden. Keep an eye on them to prevent over-baking for that soft texture.

    11. Cool Cookies: Remove the cookies from the oven and let them cool on the baking sheet for about 5 minutes before transferring them to a wire rack to cool completely.

    12. Prepare Royal Icing: While the cookies cool, prepare your royal icing. In a mixing bowl, combine powdered sugar, egg whites (or meringue powder), and a splash of water. Beat until you reach a smooth and thick consistency. Add food coloring if desired.

    13. Decorate: Once the cookies are completely cool, use piping bags or a small spatula to decorate the bunny cookies with royal icing. Let the icing dry completely, which might take several hours.

    14. Store Appropriately: Store your decorated cookies in an airtight container to keep them fresh for longer.

    These steps ensure that you create visually stunning and delicious cookies perfect for any occasion. The key to success in making cookie recipes like this is patience and attention to detail, especially during the decorating phase!

    Mastering Soft Bunny Cookies With Royal Icing: Advanced Tips and Variations

    To elevate your Soft Bunny Cookies to the next level, consider the following advanced tips and variations:

    • Baking Tip: Pay attention to the exact temperature of your ingredients. Room temperature butter and eggs result in a smoother batter and evenly baked cookies.

    • Coloring Icing: If you wish to create intricate designs, consider using piping bags fitted with different tips. This allows for fine detailing, such as bunny faces or patterns on the ears.

    • Texture Adjustment: For a twist on texture, try incorporating finely chopped nuts or chocolate chips into the dough for different flavors and bites.

    • Flavor Infusion: Experiment with adding almond extract instead of vanilla for a unique flavor or even baking spices like cinnamon or nutmeg for warmth.

    • Themed Icing: Change up the color and design of your icing based on the season or event. For example, add pastel shades for spring or bold colors for a birthday celebration.

    • Layered Icing: Create layered designs by allowing the first layer of icing to dry before applying on top. This can result in a multidimensional look.

    Using these simple tips, you can not only master the original recipe but create your own unique variations that will wow your friends and family. With cookie recipes like this, the only limit is your creativity!

    How to Store Soft Bunny Cookies With Royal Icing: Best Practices

    Storing your Soft Bunny Cookies properly is essential to maintain their delicious taste and adorable appearance. Here are the best practices for refrigerating, freezing, and reheating these delightful treats:

    • Room Temperature Storage: If you plan to consume the cookies within a week, store them in an airtight container at room temperature. This will keep them soft while preventing them from drying out.

    • Refrigeration: If the weather is particularly warm or humid, consider placing your cookies in the refrigerator. However, be mindful that chilled cookies may become slightly harder. Allow them to sit at room temperature for a short period before serving them, restoring some softness.

    • Freezing Cookies: If you wish to extend the shelf life of your cookies, freezing is a safe option. Start by letting your cookies cool completely. Then, place them in a single layer on a baking sheet and freeze until solid. After that, transfer them to a freezer-safe bag or container, separating layers with parchment paper. They can last in the freezer for up to three months.

    • Thawing: When you’re ready to enjoy your frozen cookies, simply remove them from the freezer and let them thaw in the refrigerator for a few hours or at room temperature for about 30-60 minutes. This will help retain their soft texture.

    Following these storage tips ensures that your cookies remain as fresh and delightful as the day they were baked, allowing you to enjoy these lovely cookie recipes any time you wish!

    Nutritional Value of Soft Bunny Cookies With Royal Icing

    When following this recipe for Soft Bunny Cookies With Royal Icing, it’s essential to understand their nutritional values. Below is the approximate nutritional information per cookie (based on a batch of 24 cookies):

    • Calories: 120
    • Total Fat: 5g
    • Saturated Fat: 2g
    • Cholesterol: 15mg
    • Sodium: 50mg
    • Total Carbohydrates: 17g
    • Dietary Fiber: 0g
    • Sugars: 8g
    • Protein: 2g

    Health Considerations

    These cookies offer a delightful treat while being relatively low in calories compared to many store-bought alternatives. The option to modify ingredients allows for a healthier version that could have less sugar or calories—making sure that you don’t have to compromise on your dietary goals while enjoying a homemade sweet.

    If you opt for healthier substitutions—like whole wheat flour, coconut sugar, or natural sweeteners—these cookies can become a guilt-free indulgence. The beauty of these cookie recipes is that they can be modified to fit a variety of dietary requirements and still taste delicious!

    FAQs: Frequently Asked Questions About Soft Bunny Cookies With Royal Icing

    1. Can I make these cookies vegan?

    Yes! To make these cookies vegan, replace the butter with vegan butter, the egg with a flaxseed egg (1 tablespoon ground flaxseed + 2.5 tablespoons water), and use aquafaba instead of egg whites for the royal icing.

    2. How can I achieve the right consistency for royal icing?

    For a smooth royal icing, aim for a consistency similar to that of toothpaste. You can adjust the thickness by adding small amounts of water or powdered sugar. For outlining cookies, achieve a thicker consistency; for flooding (filling in shapes), aim for a slightly thinner mix.

    3. How do I store the decorated cookies?

    Store fully decorated cookies in an airtight container at room temperature. If the weather is warm, consider refrigerating them to avoid melting of the icing. For longer storage, freeze the cookies before decorating.

    4. Can I use a different shape for the cookies?

    Absolutely! While the recipe focuses on bunny shapes, feel free to use any cookie cutter you desire! Heart shapes are lovely for Valentine’s Day, while festive shapes would work well for the holidays.

    5. What type of flour can I use for gluten-free cookies?

    You can use a gluten-free all-purpose flour blend or almond flour. Be sure to check the brand for added thickeners, such as xantham gum, which may be necessary for the same texture as regular flour.

    6. How can I add flavor variations to these cookies?

    You can easily enhance the flavor by adding spices such as cinnamon, nutmeg, or ginger. Flavored extracts (like almond or lemon) can also create delightful twists in your cookie dough!

    7. How long do these cookies stay fresh?

    When stored properly in an airtight container, Soft Bunny Cookies With Royal Icing stay fresh for up to a week at room temperature and can be frozen for up to three months.

    By addressing these common questions, we hope to assist you in mastering the Soft Bunny Cookies With Royal Icing, making them a beloved recipe in your baking repertoire. These cookie recipes are not just simple to create; they also foster cherished memories as you enjoy the process of baking and decorating with family and friends. Enjoy crafting your unique bunny cookies!

  • Easy Strawberry Shortbread Cookies Recipe

    Easy Strawberry Shortbread Cookies Recipe

    Easy Strawberry Shortbread Cookies Recipe: A Tropical Delight

    Introduction to Easy Strawberry Shortbread Cookies Recipe

    Are you on the lookout for delightful strawberry recipes to satisfy your sweet tooth? Look no further than our Easy Strawberry Shortbread Cookies! This recipe showcases the vibrant flavor of fresh strawberries, perfectly complemented by the buttery texture of shortbread. Not only is this treat unbelievably simple to make, but it is also adaptable for various dietary needs—making it ideal for families, busy professionals, and anyone craving a sweet snack.

    What makes these cookies stand out is their healthful ingredient list. You can easily create vegan, gluten-free, or low-calorie versions without compromising on taste. They’re perfect for serving at a summer party, packing in lunchboxes, or enjoying as a late-night snack. Moreover, with fresh strawberries packed with Vitamin C and antioxidants, these cookies provide a burst of nutrition that elevates your dessert experience to something joyous and heartwarming.

    This Easy Strawberry Shortbread Cookies Recipe not only encourages creativity in the kitchen but also invites you to enjoy the simple pleasures of baking. Whether you’re a novice baker or a seasoned pro, you’ll find this recipe to be a delightful addition to your collection of strawberry recipes. Let’s dive into the benefits and advantages of this wonderful treat!

    Benefits and Advantages of Easy Strawberry Shortbread Cookies Recipe

    This Easy Strawberry Shortbread Cookies recipe isn’t just easy to make; it’s also incredibly beneficial for those who want to balance taste and nutrition. Here are the key benefits:

    1. Simplicity: With few ingredients and straightforward instructions, this recipe allows even the novice cook to whip up a delicious batch of cookies in no time. You can easily prepare the dough in under 15 minutes!

    2. Health Benefits: Using fresh strawberries means you’re infusing your cookies with essential nutrients. Strawberries are high in antioxidants, Vitamin C, and fiber, all of which support overall well-being. Furthermore, you can modify the sugar content to make it healthier, catering to those mindful of their sugar intake.

    3. Versatility: This recipe caters to various dietary requirements. Whether you’re making vegan versions using plant-based butter or gluten-free options using almond flour, there’s a modification for everyone. It’s also ideal for busy parents who can involve their kids in the kitchen, teaching them valuable cooking skills!

    4. Customizable Flavor: The beauty of shortbread cookies lies in their adaptability. While these cookies shine with strawberries, you can always swap in your favorite fruits or flavors—blueberries, raspberries, or even chocolate chips!

    5. Perfect for Any Occasion: Be it a holiday gathering, an afternoon tea, or just a cozy family evening, these cookies are suitable for every occasion. They also make fabulous gifts or party favors.

    Incorporating the focus keyphrase “strawberry recipes” throughout highlights the allure of this delicious treat while reinforcing its appeal to health-conscious individuals. By focusing on simplicity and flavor, you can’t go wrong with this scrumptious recipe!

    Ingredients Overview

    Essential Ingredients for Easy Strawberry Shortbread Cookies Recipe

    Good baking begins with quality ingredients. Here’s what you will need to make these delicious Easy Strawberry Shortbread Cookies:

    • 1 cup (226g) unsalted butter (or dairy-free margarine for a vegan option)
    • ½ cup (100g) granulated sugar (adjust based on preference or use a healthy substitute like coconut sugar)
    • 2 cups (250g) all-purpose flour (or gluten-free flour for a gluten-free version)
    • ½ cup (75g) chopped fresh strawberries (be sure to use ripe strawberries for the best flavor)
    • 1 tsp vanilla extract
    • A pinch of salt

    These ingredients come together to create the perfect balance of sweetness and buttery flavor that showcases the strawberries beautifully. For those looking for healthier options, replacing white sugar with a natural sweetener or using whole wheat flour can add nutritional value without sacrificing flavor.

    Dietary Substitutions to Customize Your Easy Strawberry Shortbread Cookies Recipe

    Here are some substitutions to cater to your dietary needs:

    1. Butter: Swap unsalted butter with coconut oil or dairy-free margarine for a vegan approach. This alternative keeps the cookies rich yet plant-based.

    2. Flour: If gluten is an issue, gluten-free all-purpose flour or almond flour can be substituted. This modification still provides a deliciously crumbly texture.

    3. Sugar: For those watching their sugar intake, consider using a sugar substitute like stevia or monk fruit sweetener. These alternatives keep the cookies sweet without the calories of traditional sugar.

    4. Additional Flavoring: Feel free to add spices like cinnamon or nutmeg to the cookie dough for an extra flavor punch, although the classic beauty of the strawberry flavor stands on its own.

    You can modify the recipe effortlessly, accommodating various dietary needs while ensuring everyone can enjoy these scrumptious cookies. Emphasizing flexibility guarantees that your strawberry recipes remain enjoyable for every palate!

    How to Prepare the Perfect Easy Strawberry Shortbread Cookies Recipe: Step-by-Step Guide

    Ready to bake some cookies? Follow this step-by-step guide to create your Easy Strawberry Shortbread Cookies:

    1. Prepare the Base:

    Start by preheating your oven to 350°F (175°C). Line a baking sheet with parchment paper to prevent sticking and make cleanup easier.

    2. Cream Butter and Sugar:

    In a large mixing bowl, beat the unsalted butter and sugar together until light and fluffy. This should take about 3-5 minutes. The creaming process helps incorporate air into the mixture, producing a light cookie.

    3. Add Vanilla:

    Add the vanilla extract to the mixture and blend well. This enhances the flavor profile, complementing the sweet strawberries.

    4. Mix Dry Ingredients:

    In a separate bowl, whisk together the all-purpose flour and a pinch of salt to combine. If you’re using gluten-free flour, ensure it is entirely blended for a uniform mixture.

    5. Incorporate Dry Mix:

    Gradually add the dry mixture into the butter-sugar blend, stirring gently until just incorporated. Be careful not to over-mix! Overworking the dough can lead to tough cookies.

    6. Fold in Strawberries:

    Gently fold in the chopped strawberries. The beautiful red color and fresh taste will shine through in every bite.

    7. Shape the Cookies:

    Using a tablespoon or cookie scoop, drop dollops of dough onto the prepared baking sheet, spacing them about 2 inches apart. Flatten them slightly with your palm or the bottom of a glass.

    8. Bake:

    Place the cookies in the preheated oven and bake for 12-15 minutes, or until the edges turn a light golden brown. Keep an eye on them, as baking times may vary based on your oven.

    9. Cool and Serve:

    Once baked, remove the cookies from the oven and let them cool on the baking sheet for about 5 minutes before transferring them to a wire rack. This cooling time allows them to firm up a bit.

    10. Enjoy:

    Once cooled thoroughly, your Easy Strawberry Shortbread Cookies are ready to enjoy. Pair them with a cup of tea or enjoy them as a fresh snack that everyone will love!

    This easy-to-follow recipe ensures you’ll have delicious homemade cookies in no time, reinforcing the appeal of various strawberry recipes available for any occasion.

    Mastering Easy Strawberry Shortbread Cookies Recipe: Advanced Tips and Variations

    Once you’ve gotten the hang of this Easy Strawberry Shortbread Cookies recipe, you can experiment with various tips and variations to make it your own:

    Advanced Tips:

    • Hydrate Strawberries: If your strawberries are overly juicy, consider patting them dry with a paper towel to prevent the dough from becoming too wet. This helps maintain a perfect cookie texture.

    • Chill the Dough: For a firmer cookie, chill the dough in the refrigerator for about 30 minutes before baking. This step enhances the flavors and ensures your cookies keep their shape while baking.

    • Test for Doneness: Don’t wait until the edges are brown for perfect cookies. They should be just set in the middle. They will continue to cook slightly after removed from the oven.

    Variations to Try:

    • Chocolate-Dipped Cookies: After the cookies have cooled, dip half of each cookie in melted dairy-free chocolate for an indulgent twist.

    • Lemon Zest Addition: Include the zest of one lemon in the dough for a bright, citrusy flavor that pairs beautifully with strawberries.

    • Replace Strawberries: Try substituting strawberries with other fruits like raspberries, blackberries, or even dried fruits for a different taste experience.

    Experimenting with these advanced tips and suggestions ensures that you can enjoy a rich variety of strawberry recipes made from this delightful base cookie dough. Your creativity can shine!

    How to Store Easy Strawberry Shortbread Cookies Recipe: Best Practices

    To maintain the freshness and flavor of your Easy Strawberry Shortbread Cookies, proper storage is essential:

    1. Room Temperature Storage: Keep your cookies in an airtight container at room temperature. They will stay fresh for about 3-5 days. After this period, they may become less crisp but still delicious.

    2. Refrigeration: If you live in a warm climate or want them to last longer, store the cookies in the fridge for up to a week. Place parchment paper between layers to prevent them from sticking.

    3. Freezing: To freeze your cookies, allow them to cool completely before placing them in a single layer on a baking sheet. Freeze until solid, then transfer them to freezer-safe bags. They can last up to 3 months in the freezer. Thaw them in the refrigerator or at room temperature before serving.

    4. Reheating: If you like them warm, pop them in the oven at 300°F (150°C) for about 5-10 minutes or use the microwave for a few seconds—just be careful not to overheat, or they may become chewy.

    This storage information will help you keep your strawberry recipes fresh and enjoyable, ensuring you can savor each cookie at its best!

    Nutritional Value of Easy Strawberry Shortbread Cookies Recipe

    Understanding the nutritional content of your cookies is crucial, especially when adapting recipes for various dietary needs. Here’s a general nutritional breakdown per cookie (based on a yield of 24 cookies):

    • Calories: Approximately 120
    • Total Fat: 7g
    • Saturated Fat: 4g
    • Cholesterol: 20mg
    • Sodium: 50mg
    • Total Carbohydrates: 14g
    • Dietary Fiber: 0.5g
    • Sugars: 6g
    • Protein: 1g

    It’s worth noting that these values can vary based on ingredient substitutions. Gluten-free flour options may yield a different calorie count, while using plant-based butter can reduce cholesterol levels. Adjusting the sugar will also affect overall calories.

    These delicious cookies offer a balance of sweetness while providing some health benefits thanks to the strawberries. They present a wholesome option among other strawberry recipes, and with mindful adjustments, they can fit seamlessly into various dietary regimens.

    FAQs: Frequently Asked Questions About Easy Strawberry Shortbread Cookies Recipe

    1. Can I use frozen strawberries instead of fresh ones?

    Yes! While fresh strawberries yield the best flavor, you can use frozen strawberries. Make sure to thaw and drain them beforehand to avoid excess moisture in the dough.

    2. How can I make these cookies healthier?

    You can use whole wheat flour instead of all-purpose flour and substitute sugar with natural sweeteners. Additionally, using less butter or opting for a low-calorie alternative can help reduce the cookie’s calorie count.

    3. Can I double the recipe?

    Absolutely! If you’re in the mood for a large batch, simply double the quantities of each ingredient. It’s a fantastic way to share with friends or to save some cookies for later.

    4. What’s the best way to enjoy these cookies?

    These cookies can be enjoyed on their own or paired with tea, coffee, or a scoop of vanilla ice cream for a delightful dessert experience.

    5. How can I make the cookies more flavorful?

    Experiment with adding almond extract or even spices like cinnamon to the dough. The combination of flavors can elevate the cookie experience.

    By addressing these FAQs, we aim to enhance your baking journey with the Easy Strawberry Shortbread Cookies Recipe, ensuring that this delightful treat finds its way into your home while embracing various interpretations of strawberry recipes!