Blog

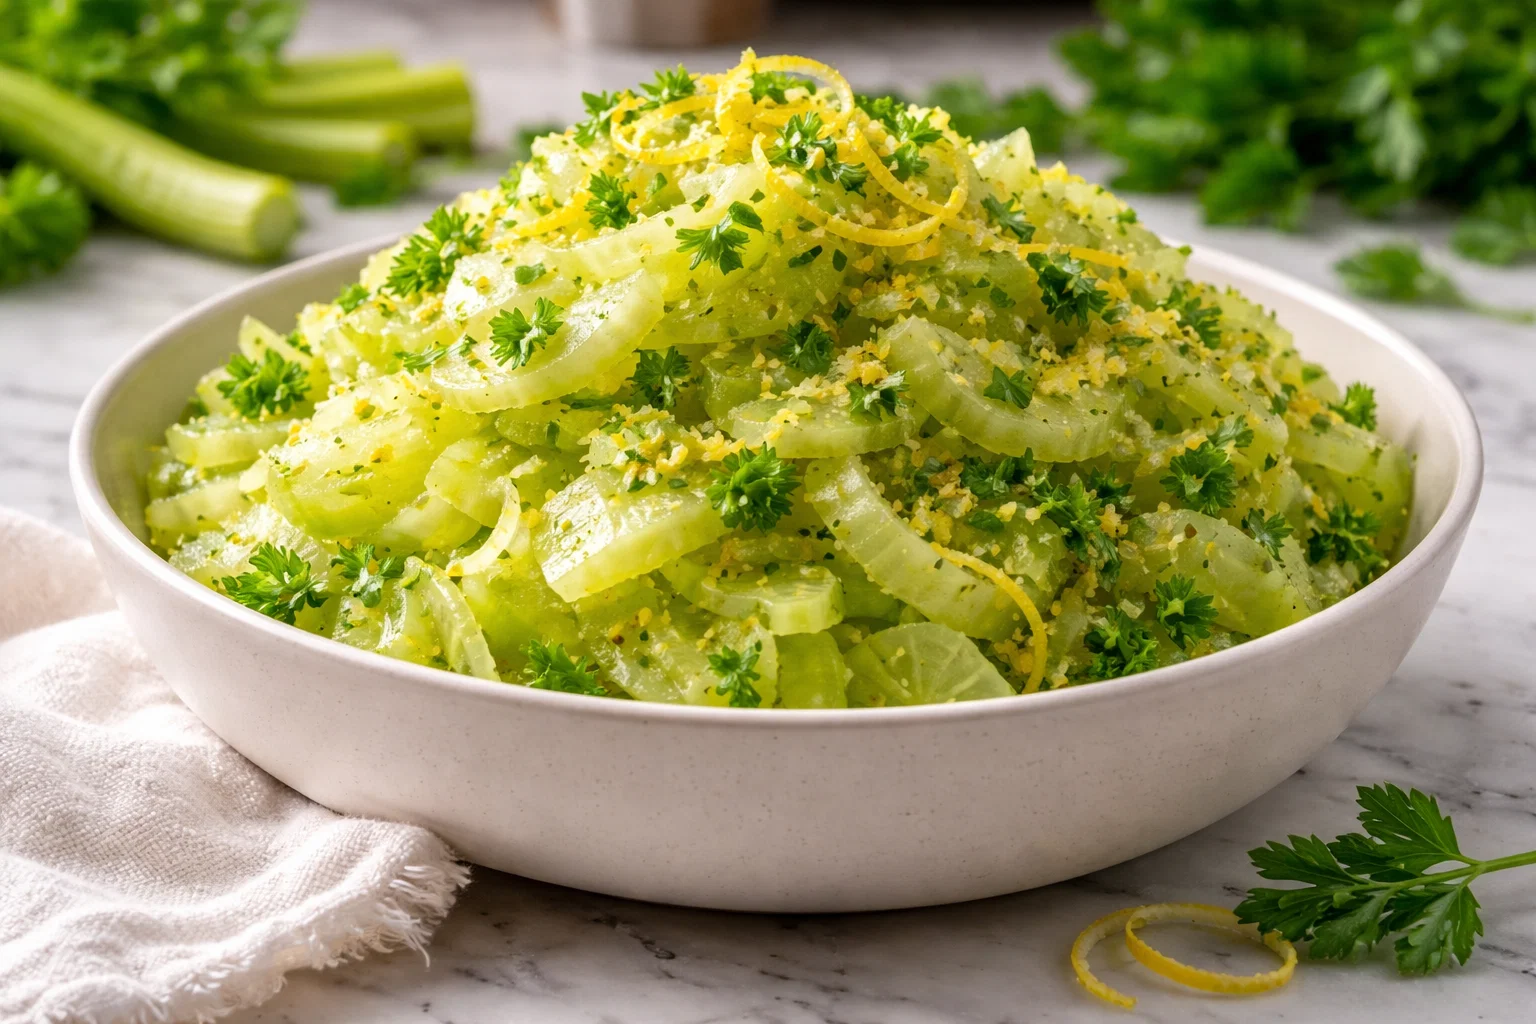
  • Easy Vegan Celery Salad

    Easy Vegan Celery Salad

    Easy Vegan Celery Salad: A Tropical Delight

    Introduction to Easy Vegan Celery Salad

    If you are looking for a refreshing and healthy recipe to add to your collection of healthy snacks, look no further than this Easy Vegan Celery Salad. This vibrant dish is packed with an array of textures and flavors that will tantalize your taste buds while satisfying your crunch cravings. Not only is it incredibly simple to prepare, but it also fits seamlessly into various dietary lifestyles, making it a versatile option for busy parents, students, health-conscious individuals, and anyone who enjoys vibrant, plant-based meals.

    Celery, the star of this salad, offers a wealth of health benefits. It is low in calories, high in fiber, and rich in vitamins and minerals. Coupled with tantalizing ingredients like juicy cherry tomatoes, creamy avocado, and a zesty lemon vinaigrette, this salad is not just nutritious but also delightful. Making it vegan and gluten-free means that everyone at the table can enjoy it without concern.

    Whether you are looking for a quick lunch option, a side dish for dinner, or just a delightful afternoon snack, this Easy Vegan Celery Salad checks all the boxes. With its bright and crisp ingredients, it not only nourishes your body but also brings a smile to your face. So grab those fresh ingredients and let’s embark on a journey to create a dish that embodies health, simplicity, and deliciousness!

    Benefits and Advantages of Easy Vegan Celery Salad

    Creating an Easy Vegan Celery Salad comes with a multitude of benefits. First and foremost, the recipe is straightforward and quick, requiring minimal kitchen skills. This makes it perfect for novice cooks, busy professionals, or anyone who prefers to spend less time in the kitchen and more time enjoying their meals. You can have this dish prepped and ready in under 15 minutes, and it requires no cooking!

    The health advantages of this salad are significant. With celery as the primary ingredient, you get a low-calorie, high-water content veggie that keeps you hydrated and feeling full for longer periods. Celery is known for its anti-inflammatory properties and is rich in antioxidants and vitamins K and C, which are essential for maintaining good health. Moreover, combining celery with avocado provides healthy fats, which are crucial for overall well-being. This salad is not just a delicious side dish; it’s a powerhouse of nutrition, making it an excellent choice for anyone seeking to incorporate more healthy snacks into their diet.

    Another standout feature of the Easy Vegan Celery Salad is its adaptability. You can easily customize the recipe to suit various dietary preferences, whether you are following a vegan, vegetarian, or gluten-free lifestyle. It can also easily be transformed into a protein-packed meal by adding chickpeas or tofu for those looking for a more filling option. The vibrant colors and diverse textures of the ingredients showcase the beauty of plant-based eating, appealing to food enthusiasts and health-conscious individuals alike.

    Overall, the Easy Vegan Celery Salad not only nourishes your body with wholesome ingredients but also serves as a stunning centerpiece for any meal. Whether you’re hosting a casual gathering or enjoying a quiet dinner at home, this salad is sure to impress with its delightful flavors and health benefits.

    Ingredients Overview

    Essential Ingredients for Easy Vegan Celery Salad

    To create your Easy Vegan Celery Salad, you will need a few wholesome ingredients. Below is a comprehensive list, featuring specific measurements and the role each item plays in this flavorful dish.

    • 4 stalks of celery: The primary ingredient; packed with hydration and a satisfying crunch.
    • 1 cup of cherry tomatoes: Adds natural sweetness and a pop of color.
    • 1 ripe avocado: Provides creaminess and healthy fats, enhancing the salad’s texture.
    • 1/4 cup of red onion: Offers a sharp flavor and complements the other ingredients well.
    • 1/4 cup of fresh parsley: A burst of freshness and nutrients.
    • Juice of 1 lemon: Adds brightness and a tangy flavor.
    • 1 tablespoon of olive oil: A healthy fat that helps with nutrient absorption while enhancing flavor.
    • Salt and black pepper to taste: Essential seasonings for balancing flavors.

    This combination results in a well-rounded, delicious salad that feels indulgent while remaining healthy. All ingredients are vegan, gluten-free, and low in calories, making them perfect for those seeking healthy snacks.

    Dietary Substitutions to Customize Your Easy Vegan Celery Salad

    Customization is a key feature of the Easy Vegan Celery Salad! Here are some suggested substitutions that cater to various dietary needs or ingredient availability:

    • Celery: If you’re not a fan, you can replace it with cucumber for a different crunch or even shredded carrots for a sweeter, earthier flavor.
    • Cherry tomatoes: You may use diced bell peppers or shredded red cabbage for a different flavor profile, ensuring your salad remains colorful and delicious.
    • Avocado: If you’re looking for a lower-fat alternative, consider using silken tofu or a scoop of hummus for creaminess.
    • Red onion: This can be replaced with green onions for a milder flavor or omitted entirely for those sensitive to onion flavor.
    • Lemon juice: Apple cider vinegar is a great substitute that still offers acidity and brightness without the need for fresh lemons.

    Feel free to mix and match these substitutions according to your personal preferences and dietary requirements, ensuring your Easy Vegan Celery Salad is uniquely yours while still being a great addition to the world of healthy snacks.

    How to Prepare the Perfect Easy Vegan Celery Salad: Step-by-Step Guide

    Now that you have all your ingredients ready, it’s time to create your Easy Vegan Celery Salad. Follow these straightforward steps to achieve the perfect salad in no time!

    1. Prepare the Base: Start by washing the stalks of celery thoroughly under running water to remove any dirt and impurities. Pat them dry with a kitchen towel before chopping.

    2. Chop Celery: Slice the celery into thin, bite-sized pieces for the best texture. Place the chopped celery in a large mixing bowl.

    3. Dice Cherry Tomatoes: Next, wash the cherry tomatoes and cut each one in half. Add them to the bowl with the celery.

    4. Cut Avocado: Carefully slice the avocado in half, remove the pit, and scoop the flesh out using a spoon. Cut the avocado into cubes and layer them into the salad.

    5. Finely Chop Red Onion: Peel the red onion and slice it thinly. If the flavor is too strong for you, soak the slices in cold water for about 10 minutes. Then drain and add them to the salad bowl.

    6. Add Fresh Parsley: Rinse the fresh parsley, shake off excess water, and chop it finely. Toss the chopped parsley into the salad for a fresh flavor boost.

    7. Make the Dressing: In a small bowl, combine the freshly squeezed lemon juice, olive oil, salt, and black pepper. Whisk together until the mixture is well combined.

    8. Mix Ingredients: Drizzle the dressing over the salad ingredients and gently toss everything together. Make sure the dressing evenly coats all the ingredients for maximum flavor.

    9. Taste Test: Before serving, taste the salad and adjust the seasoning if necessary. You may want to add a pinch more salt or pepper, depending on your preferences.

    10. Chill and Serve: For optimal flavor, let the salad sit in the fridge for about 15 minutes. This allows the flavors to meld together beautifully. Serve chilled.

    11. Meal Preparation Tip: For those busy days, you can prepare a larger batch of this salad. Just store individual portions in airtight containers for quick and easy healthy snacks throughout the week!

    By following these simple steps, you can make a vibrant, delicious Easy Vegan Celery Salad that’s perfect for any occasion, whether it’s a casual lunch, a picnic, or as an appetizer at a dinner party.

    Mastering Easy Vegan Celery Salad: Advanced Tips and Variations

    Now that you know how to create the fundamental Easy Vegan Celery Salad, let’s explore some advanced tips and delicious variations that will take your salad to the next level!

    • Add Protein: To make this salad a complete meal, consider adding cooked chickpeas, black beans, or lentils. These protein-dense ingredients not only keep you full but also add a satisfying texture.

    • Incorporate Seeds and Nuts: Toss in some sunflower seeds, pumpkin seeds, or sliced almonds for added crunch and healthy fats. They bring a delightful nutty flavor to your salad.

    • Experiment with Dressings: While a lemon-olive oil dressing works wonders, feel free to try different dressings! A balsamic vinaigrette, tahini dressing, or even a simple vegan ranch can offer a new twist on flavors while ensuring they remain healthy snacks.

    • Use Seasonal Ingredients: Tailor your salad to reflect the seasons by adding fresh herbs like basil or cilantro in the summer, or diced apples in the fall for sweetness and crunch.

    • Spice It Up: If you enjoy a little heat, sprinkle in some red pepper flakes or chopped jalapeños to add a fiery kick to your salad.

    • Vegetable Variations: Don’t hesitate to get creative with the vegetables. Thinly sliced radishes, cucumber, bell peppers, or shredded zucchini can add color and flavor contrasts.

    With these tips and variations, you can master the art of preparing an Easy Vegan Celery Salad that goes beyond basic expectations, allowing you to impress family and friends with your culinary creativity.

    How to Store Easy Vegan Celery Salad: Best Practices

    Storing your Easy Vegan Celery Salad properly is key to maintaining freshness and flavor. Here are some best practices for refrigerator storage, freezing, and reheating:

    • Refrigeration: If you have leftover salad, place it in an airtight container and store it in the fridge. It’s best consumed within 1 to 2 days. The longer it sits, the more the ingredients may lose their crunch, especially the celery.

    • Freezing: While the entire salad doesn’t freeze well due to the avocados and tomatoes, you can freeze the chopped celery separately. This way, you can use it in soups or stir-fries later. Just remember, thawed celery will lose its crispness.

    • Reheating: Since this salad is enjoyed cold, there’s no reheating necessary. If you wish to enhance its flavors, however, refreshing it with a squeeze of lemon juice just before serving can perk it up wonderfully.

    • Meal Prep: For those who love to prepare meals in advance, keep the dressing separate from the salad until you are ready to eat. This will prevent the salad from becoming soggy, ensuring every bite remains fresh and inviting.

    Knowing how to store your Easy Vegan Celery Salad strengthens your pantry management skills and helps you stay on track with your healthy snacks plan!

    Nutritional Value of Easy Vegan Celery Salad

    Understanding the nutritional value of your Easy Vegan Celery Salad can help you appreciate how it fits into your overall diet. The following estimates provide a breakdown of commonly analyzed nutrients per serving (about one cup of prepared salad):

    • Calories: Approximately 150-200 calories
    • Protein: Around 3-4 grams
    • Fat: Roughly 10-15 grams (varies greatly depending on the amount of avocado added)
    • Carbohydrates: About 15-20 grams
    • Fiber: 5-6 grams
    • Vitamin C: 15-20% of the Daily Value (DV)
    • Vitamin K: 25-30% of the DV

    These nutritional facts highlight how this salad serves as a wonderful addition to your diet, aiding in hydration, providing essential vitamins, and promoting digestive health due to its high fiber content. It’s a perfect example of satisfying and nutritious healthy snacks.

    Additionally, adjusting the amounts or substituting some ingredients can impact nutritional values, allowing you to tailor the salad according to your dietary goals. Keeping this in mind, you can personalize your Easy Vegan Celery Salad to not only fit your taste preferences but also your nutritional needs.

    FAQs: Frequently Asked Questions About Easy Vegan Celery Salad

    Here are some common questions readers might have about the Easy Vegan Celery Salad:

    Can I make this salad ahead of time?

    Yes! You can prepare the salad a few hours in advance. Just remember to keep the dressing separate until you’re ready to serve to maintain freshness.

    What can I substitute for avocado?

    If you prefer not to use avocado, silken tofu or a few tablespoons of tahini can add creaminess without compromising flavor.

    Is this salad suitable for meal prep?

    Absolutely! You can prepare the ingredients ahead of time and store them separately, mixing them just before serving. This will ensure the salad maintains its crispness.

    How can I make this salad more filling?

    To increase the protein content and make the salad more satisfying, consider adding cooked quinoa, chickpeas, or diced grilled tofu.

    How long does this salad keep in the fridge?

    The salad is best eaten within 1-2 days. If you notice any ingredients wilting or losing texture, it’s best to consume it sooner rather than later.

    Can I add other vegetables to this salad?

    Yes, feel free to add whatever vegetables you enjoy! Cucumbers, bell peppers, or even sprouts can enhance flavor and nutritional diversity.

    With those questions addressed, you are well on your way to enjoying your Easy Vegan Celery Salad and the many healthy snacks it can inspire in your kitchen. Celebrate the joy of healthy cooking and enjoy the vibrant world of plant-based flavors!
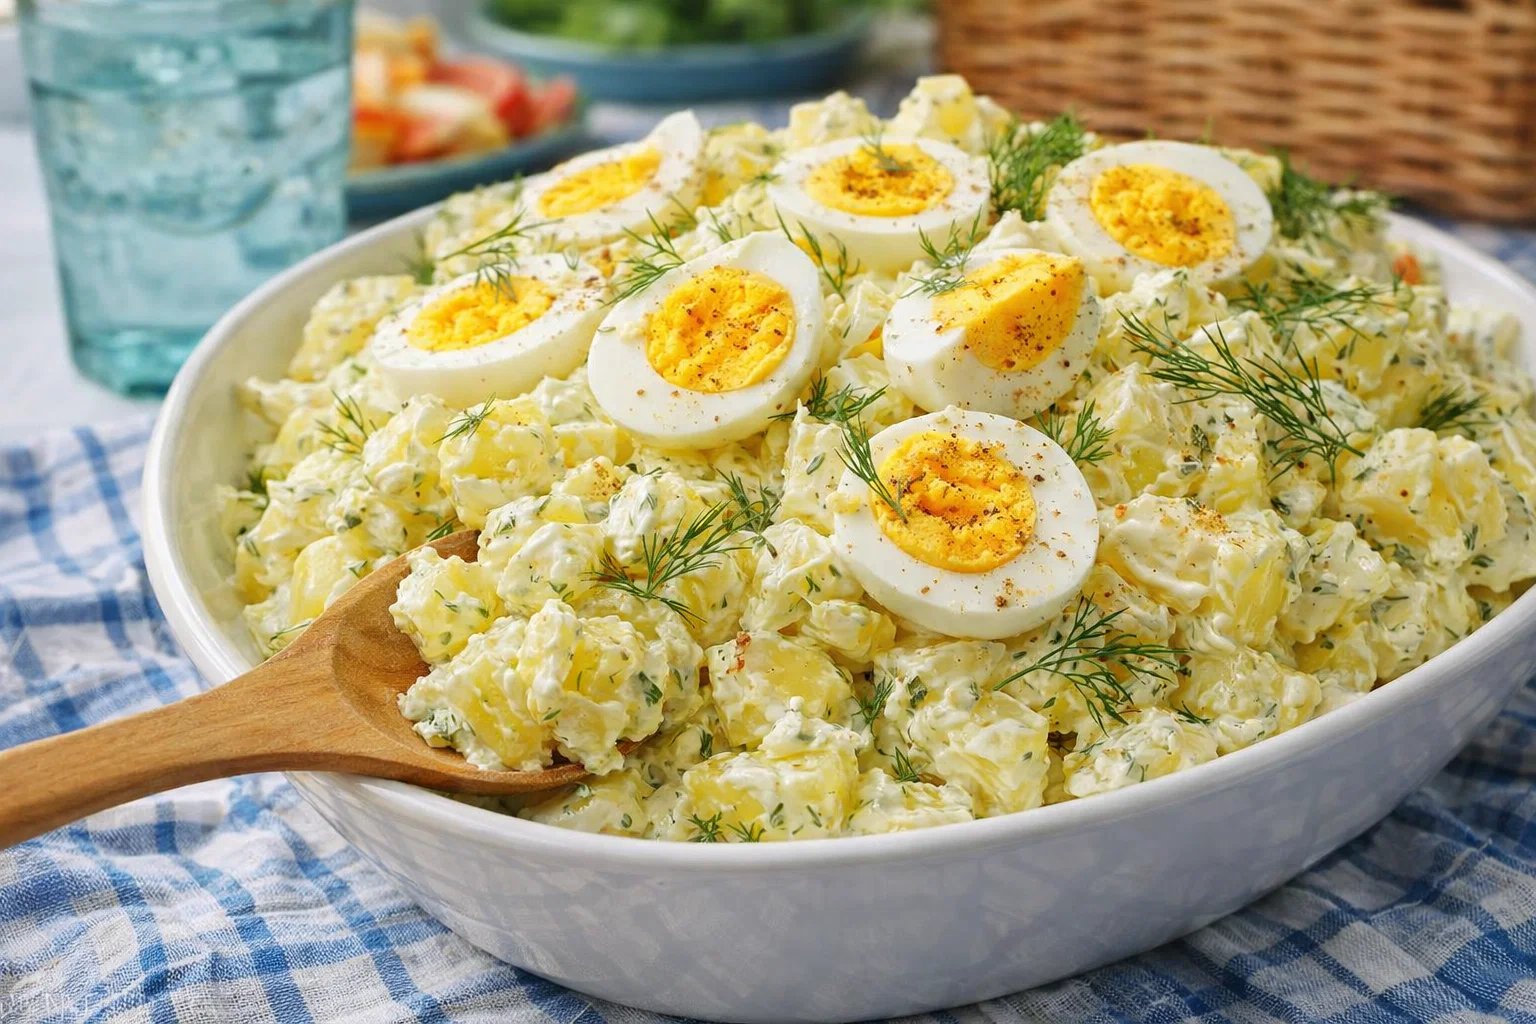

  • Tangy Creamy Potato Salad With Eggs

    Tangy Creamy Potato Salad With Eggs

    Tangy Creamy Potato Salad With Eggs: A Tropical Delight

    Introduction to Tangy Creamy Potato Salad With Eggs

    Welcome to the vibrant world of Tangy Creamy Potato Salad With Eggs, where flavors mingle in perfect harmony! This recipe is a fantastic addition to your repertoire, especially if you are browsing through delicious and easy recipe ideas for gatherings, picnics, or even a cozy meal at home. You may wonder, what sets this dish apart? The answer lies in its simplicity. Made with just a handful of ingredients, it offers a delightful balance between creamy, tangy, and satisfying flavors.

    One of the standout features of this potato salad is its versatility. Not only is it easy to prepare, but it also caters to various dietary needs. Whether you are a busy parent, a student living away from home, or simply someone conscious about their health, this potato salad checks all the boxes. The key ingredients bring a treasure trove of health benefits: potatoes provide essential vitamins and minerals, eggs are a fantastic source of protein, and the dressing components offer a zing that invigorates the dish.

    Moreover, this potato salad can easily adapt to different diets, making it suitable for those who follow vegan or gluten-free lifestyles. Additionally, it packs beautifully for lunch boxes or picnic baskets, ensuring that you can relish this tropical delight anytime, anywhere. In the following sections, we will dive deeper into the benefits of this dish, provide an overview of the ingredients, and guide you through preparing the perfect tangy creamy potato salad.

    Benefits and Advantages of Tangy Creamy Potato Salad With Eggs

    Creating a dish that is both delicious and nourishing can sometimes feel challenging, but that’s where our Tangy Creamy Potato Salad With Eggs shines. This recipe is known for its exceptional ease of preparation, making it an ideal option for both novice cooks and seasoned chefs. With minimal time and effort, you can whip up a dish that is both filling and refreshing, perfect for any occasion.

    Health Benefits

    Understanding the health benefits of the key ingredients helps you appreciate this dish even more. Potatoes, the primary ingredient, are rich in potassium and vitamin C, essential for maintaining a healthy immune system. They are naturally gluten-free and low in calories, making them an excellent choice for those looking to enjoy a satisfying meal without the extra calories.

    Eggs, included in this delicious salad, provide high-quality protein and essential nutrients like Vitamin D and choline. These nutrients are beneficial, especially for busy parents and working professionals needing to fuel their bodies for a hectic day. The creamy dressing using natural yogurt or avocado not only adds richness but also offers healthy fats that keep you satiated longer.

    Incorporating a tangy element, like pickles or vinegar, elevates the flavor while providing a burst of freshness that pairs beautifully with the eggs and potatoes. All these components come together to create a delightful dish that satisfies your taste buds while nourishing your body.

    Versatility and Adaptability

    One of the greatest advantages of this potato salad is its versatility. You can easily modify the recipe to accommodate various dietary restrictions, making it an excellent option for gatherings. Whether you want to suit gluten-free eaters or those on a vegan diet, there’s room to play. For instance, if you’re opting for a vegan twist, simply replace the eggs with chickpeas for added protein or use a vegan mayo in the dressing.

    The adaptability of this recipe enables it to serve different occasions. Whether you’re attending a potluck, hosting a barbecue, or enjoying a simple weeknight dinner, this dish can be your go-to. Additionally, you can incorporate seasonal vegetables, add herbs, or even sprinkle nuts for an interesting twist. The endless recipe ideas and variations encouraged by this potato salad make it a worthwhile addition to your culinary collection.

    Ingredients Overview

    Essential Ingredients for Tangy Creamy Potato Salad With Eggs

    To make the finest Tangy Creamy Potato Salad With Eggs, you’ll need the following ingredients:

    1. Potatoes (2 lbs): Preferred varieties include Yukon gold or red potatoes, which are creamy and flavorful.
    2. Hard-Boiled Eggs (4 large): These provide texture and protein; consider adding more if desired.
    3. Celery (1 cup, diced): For crunch and freshness.
    4. Red Onion (½ cup, chopped): To add flavor and an appealing color contrast.
    5. Pickles (1 cup, diced): Adds tanginess; use dill or bread-and-butter pickles according to preference.
    6. Mayonnaise (½ cup): The base for the creamy dressing; substitute with Greek yogurt or plant-based mayo for healthier options.
    7. Dijon Mustard (1 tablespoon): For a zesty kick.
    8. Apple Cider Vinegar (2 tablespoons): Enhances flavor and adds acidity.
    9. Salt and Pepper (to taste): Essential for seasoning; adjust to your liking.

    For those looking to accommodate specific dietary constraints:
    – Vegan Substitute: Use chickpeas in place of eggs and a vegan mayo blend.
    – Gluten-Free Note: All listed ingredients are naturally gluten-free.

    Dietary Substitutions to Customize Your Tangy Creamy Potato Salad With Eggs

    Customization is one of the unique features of this potato salad. Here are a few suggested substitutions to cater to different dietary needs:

    • For a Creamier Texture: Swap out half of the mayonnaise with crushed avocado. This will not only provide a rich texture but also infuse healthy fats into your dish.
    • Egg-Free Version: Replace the hard-boiled eggs with tofu squares or omit them and add extra legumes like black beans or lentils for added protein.
    • Herbage and Greens: Consider adding chopped fresh herbs like dill, parsley, or chives for a burst of freshness. Spinach or kale can also provide nutrition and a colorful touch.
    • Fruity Twist: Some enjoy adding diced apples or grapes for a sweet contrast. Adjust the dressing slightly by adding a touch of honey or maple syrup to balance the flavors.

    With these modifications, this tangy creamy potato salad becomes a versatile recipe that suits everyone around the table!

    How to Prepare the Perfect Tangy Creamy Potato Salad With Eggs: Step-by-Step Guide

    Let’s jump into the preparation of this delectable Tangy Creamy Potato Salad With Eggs! Follow these simple steps to create a dish that is bound to impress:

    1. Prepare the Potatoes:
    2. Wash and peel the potatoes. Cut them into evenly sized cubes (about 1-inch thick) for consistent cooking.
    3. Place them in a large pot and cover with salted water. Bring to a boil, then reduce the heat and let simmer for 15-20 minutes until tender but not falling apart. Test doneness with a fork; they should be easy to pierce but firm.

    4. Boil the Eggs:

    5. While the potatoes cook, place the eggs in a separate saucepan and cover them with water. Bring to a soft boil, then turn off the heat, cover, and let them sit for about 12-15 minutes for hard-boiled eggs.
    6. Cool the eggs under cold running water, peel, and chop them. Set aside.

    7. Prepare the Vegetables:

    8. Drain the cooked potatoes and allow them to cool for a bit. In the meantime, dice the celery, red onion, and pickles.

    9. Make the Dressing:

    10. In a large mixing bowl, combine mayonnaise, Dijon mustard, apple cider vinegar, salt, and pepper. Whisk together until smooth. If using yogurt or a vegan mayonnaise, the same ratios apply.

    11. Combine Ingredients:

    12. In a large serving bowl, gently fold the cooled potatoes with the dressing. Mix in the diced celery, red onion, pickles, and chopped eggs.

    13. Final Seasoning:

    14. Taste and adjust seasoning as necessary by adding more salt, pepper, or vinegar according to your preference.

    15. Chill the Salad:

    16. Cover the potato salad and refrigerate for at least 30 minutes before serving. This step allows the flavors to meld fantastically.

    17. Serve and Enjoy:

    18. Garnish with fresh herbs if desired, serve chilled or at room temperature, and enjoy!

    With these detailed steps, each cook can carve their unique path to creating the perfect tangy creamy potato salad tailored to diverse dietary needs.

    Mastering Tangy Creamy Potato Salad With Eggs: Advanced Tips and Variations

    To elevate your potato salad game, consider these advanced tips and variations for mastering the dish:

    1. Experiment with Flavors: Adding a touch of smoked paprika or curry powder can introduce an intriguing depth of flavor.

    2. Incorporate Seasonal Ingredients: Depending on the season, feel free to throw in roasted bell peppers, fresh corn kernels, or even sun-dried tomatoes for an added taste adventure.

    3. Use Different Dressings: Try swapping out the mayonnaise for a yogurt-based dressing or a vinaigrette for a lighter touch.

    4. Texture Variations: Try roasting or grilling the potatoes for a charred flavor or swapping in different shapes, such as using spiraled potatoes or sweet potatoes for a unique texture.

    5. Layering Presentation: Serve the potato salad in a glass bowl to showcase the colorful layers.

    6. Smart Plate Up: If serving at gatherings, consider offering small cups or jars of potato salad for easy access and portion control.

    These masterful tips will allow any home cook the chance to explore fantastic recipe ideas while impressing dinner guests!

    How to Store Tangy Creamy Potato Salad With Eggs: Best Practices

    Proper storage ensures your Tangy Creamy Potato Salad With Eggs maintains its delicious flavors and freshness. Here are best practices:

    • Refrigeration: Store the potato salad in an airtight container in the refrigerator. It will last up to three to five days. However, it’s best consumed within the first 48 hours after preparation for optimal flavor and texture.

    • Freezing: While it’s generally not recommended to freeze potato salad due to the potential change in texture (especially with mayonnaise), you can freeze the potato and egg components separately before combining them. Prepare them fresh when you’re ready to enjoy your salad.

    • Reheating: If you have leftovers that need reheating, do so gently in the microwave, but keep in mind that the salad is typically best enjoyed cold. You can mix in a little extra dressing after reheating to revive any lost creaminess.

    These storage tips will ensure that your delightful potato salad remains a top choice in your upcoming meals, showcasing great recipe ideas that last!

    Nutritional Value of Tangy Creamy Potato Salad With Eggs

    Understanding the nutritional composition of the Tangy Creamy Potato Salad With Eggs can help you appreciate this dish even more. Here’s a breakdown of nutrients per serving (assuming 8 servings total):

    • Calories: Approximately 210
    • Protein: 5g
    • Total Fat: 10g
    • Saturated Fat: 2g
    • Carbohydrates: 29g
    • Dietary Fiber: 3g
    • Sugars: 2g
    • Cholesterol: 70mg
    • Sodium: 330mg
    • Vitamin A: 5%
    • Vitamin C: 20%
    • Calcium: 2%
    • Iron: 6%

    This is a healthy side dish that provides a balance of macronutrients while also delivering valuable vitamins and minerals. Being aware of its nutritional value can inspire you to customize portion sizes based on individual dietary goals, effectively transforming this potato salad recipe into an enjoyable and guilt-free treat.

    FAQs: Frequently Asked Questions About Tangy Creamy Potato Salad With Eggs

    Can I make this potato salad ahead of time?

    Yes, indeed! The flavors of the potato salad improve with time, so you can make it a day in advance. Just remember to store it in an airtight container.

    How can I make this dish vegan?

    To make it vegan, simply substitute the eggs with chickpeas or omit them entirely, and use a vegan mayonnaise alternative.

    Can I eat this potato salad warm?

    While many prefer it chilled, you can enjoy this dish at room temperature or slightly warm. Nevertheless, remember that the textures may differ, so adjust expectations.

    What if I don’t have mayonnaise?

    If mayonnaise isn’t an option, consider using Greek yogurt or avocado to achieve creaminess and moisture in your salad.

    Is it okay to add different vegetables to the potato salad?

    Absolutely! Incorporating ingredients like diced bell peppers, peas, or finely grated carrots can add an extra layer of flavor and nutrition.

    How long can I store leftover potato salad?

    Leftovers can be stored in the refrigerator for up to five days. Simply ensure it’s in an airtight container to maintain freshness.

    The Tangy Creamy Potato Salad With Eggs is a classic recipe filled with potential for creativity and adaptation, ensuring that it fits any dietary lifestyle or preferences. Gather your ingredients and give this tropical delight a try—your taste buds will thank you!

  • IM Officially Addicted To These Royal Icing Cookies

    IM Officially Addicted To These Royal Icing Cookies

    I’M Officially Addicted To These Royal Icing Cookies!: A Tropical Delight

    Introduction to I’M Officially Addicted To These Royal Icing Cookies!

    Welcome to my culinary adventure where I share a delightful recipe that’s transformed my baking experience! Allow me to introduce you to the irresistibly tasty royal icing cookies—popular for their vibrant colors and beautiful designs. Whether you’re a seasoned baker or a novice, this cookie recipe is perfect for you. It combines simplicity with an artistic flair, making it suitable for various occasions, such as birthdays, holidays, or simply enjoying a sweet treat at home.

    What makes these royal icing cookies stand out? For one, they are not only visually stunning but also incredibly versatile. With ingredients you probably already have in your pantry, these cookies can be easily adapted to fit your dietary needs. Whether you’re vegan, gluten-free, or simply looking for a healthier dessert alternative, this recipe can accommodate those preferences. The royal icing, made from egg whites and powdered sugar, forms a beautiful, glossy finish that hardens to create a stunning canvas for your creative designs.

    In a world filled with cookie recipes that can be overwhelming, this one is refreshingly simple yet immensely rewarding. It encourages creativity and provides not only a delicious treat but also an enjoyable crafting experience with friends and family. Let’s dive into the benefits and advantages of these royal icing cookies!

    Benefits and Advantages of I’M Officially Addicted To These Royal Icing Cookies!

    When it comes to baking, we often search for recipes that balance flavor, ease, and healthiness. These royal icing cookies shine in all these aspects. Here are some compelling reasons why you should try this delightful cookie recipe:

    1. Simplicity and Ease of Preparation: This recipe is straightforward, requiring only basic baking skills. Even if you’re a busy parent, student, or working professional, you can whip up a batch without feeling overwhelmed. The recipe details all the steps clearly, ensuring that you can follow along easily.

    2. Health Benefits and Customization Options: Unlike many traditional cookie recipes that are loaded with sugar and unhealthy fats, these royal icing cookies can be made healthier by using natural sweeteners or reducing sugar without sacrificing taste. For health-conscious individuals or those on specific diets, you can easily substitute ingredients. For example, almond flour can replace all-purpose flour for a gluten-free option, or coconut sugar can be used for a lower glycemic index.

    3. Visual Appeal and Creativity: Unlike most cookie recipes that often lack presentation, these cookies are canvases for your creativity. You can mix colors, create complex designs, and form anything from simple shapes to intricate patterns. They are perfect for creative baking sessions with kids, inspiring imagination while still enjoying a delicious sweet treat.

    4. Versatile for Any Occasion: These royal icing cookies are suitable for various events—birthdays, holidays, or even as gifts. You can customize colors and decorations based on the season or theme of your celebration, making them a thoughtful and fun addition to any festivity.

    5. Builds Memories and Connection: Baking these cookies can be a great bonding experience for families or friends. It provides a way to spend quality time together and creates fond memories.

    In short, this royal icing cookie recipe is designed with accessibility, creativity, and health in mind, making it the perfect addition to your recipe collection. Let’s explore the essential ingredients you’ll need to make these exquisite cookies!

    Ingredients Overview

    Essential Ingredients for I’M Officially Addicted To These Royal Icing Cookies!

    To create your royal icing cookies, you’ll need the following ingredients:

    1. All-Purpose Flour (2 ½ cups) – The base of our cookies, providing structure.
    2. Unsalted Butter (1 cup, softened) – Adds richness and flavor. For a vegan option, substitute with coconut oil or vegan butter.
    3. Granulated Sugar (1 cup) – Sweetens the dough. You can replace it with coconut sugar for a healthier option.
    4. Eggs (2 large) – Essential for binding. For a vegan alternative, use flax seed meal mixed with water in a ratio of 1:3 (1 tablespoon of flax seed meal with 3 tablespoons of water).
    5. Vanilla Extract (2 teaspoons) – Provides aromatic flavor. Pure vanilla extract is preferred for optimal taste.
    6. Royal Icing Ingredients:
    7. Powdered Sugar (4 cups) – Primary ingredient for icing.
    8. Egg Whites (2 large) – For stability and texture. A vegan alternative can include aquafaba (the liquid from canned chickpeas) in a 3:1 ratio.
    9. Lemon Juice (1 tablespoon) – Enhances flavor and helps with the icing consistency.

    Dietary Substitutions to Customize Your I’M Officially Addicted To These Royal Icing Cookies!

    For those who have special dietary needs, here are some substitutions you can implement:

    • Gluten-Free: Substitute all-purpose flour with a 1:1 gluten-free baking blend.
    • Vegan: Use coconut oil, flax eggs, and aquafaba for royal icing instead of egg whites.
    • Low-Calorie: Use stevia or erythritol in place of sugar and opt for a sugar-free royal icing recipe.

    By making these simple substitutions, you can easily cater this delectable cookie recipe to fit various dietary requirements while still enjoying the deliciousness of royal icing cookies!

    How to Prepare the Perfect I’M Officially Addicted To These Royal Icing Cookies!: Step-by-Step Guide

    Ready to embark on your baking journey? Here’s a detailed step-by-step guide to create these royal icing cookies:

    1. Prepare the Base:
    2. Preheat your oven to 350°F (175°C). Line a baking sheet with parchment paper to prevent sticking.

    3. Cream Butter and Sugar:

    4. In a large mixing bowl, combine the softened unsalted butter and granulated sugar. Beat them together until the mixture is light and fluffy, usually about 3-4 minutes.

    5. Add Eggs and Vanilla:

    6. Crack in the eggs (or flax eggs) and add the vanilla extract. Continue to beat the mixture until everything is well combined.

    7. Combine Dry Ingredients:

    8. In a separate bowl, whisk together the all-purpose flour and a pinch of salt. Gradually add this mixture to the wet ingredients, ensuring a smooth cookie dough forms.

    9. Roll Out the Dough:

    10. Place the dough onto a floured surface. Divide it into two portions for easier handling. Roll each section out to about ¼ inch thick.

    11. Cut Out Shapes:

    12. Use cookie cutters to cut out festive shapes from the rolled-out dough. Place the cutouts onto the prepared baking sheet, spaced about an inch apart.

    13. Bake:

    14. Bake in the preheated oven for 10-12 minutes or until the edges are slightly golden. Be careful not to overbake.

    15. Cool the Cookies:

    16. Remove cookies from the oven and let them cool on the baking sheet for about 5 minutes, then transfer to a wire rack to cool completely.

    17. Prepare the Royal Icing:

    18. In a mixing bowl, combine powdered sugar, egg whites (or aquafaba), and lemon juice. Beat until you achieve stiff peaks, which is critical for decorating.

    19. Adjust Consistency:

      • If the icing is too stiff, add a few drops of water. For flooding (the base layer), it should be a bit thinner, while the piping consistency should remain thick.
    20. Decorate with Icing:

      • Fill piping bags with the royal icing and start decorating your cooled cookies. Use different colors for a fun variety! Allow the first layer to dry before adding more designs.
    21. Let Set:

      • Allow the decorated cookies to sit at room temperature for 6-12 hours to ensure the royal icing hardens effectively.

    Using these steps, you can enjoy a fun and creative day baking royal icing cookies that not only look delicious but taste fantastic, too!

    Mastering I’M Officially Addicted To These Royal Icing Cookies!: Advanced Tips and Variations

    To further enhance your cookie experience, consider these advanced tips and variations:

    • Flavor Variations: Add extracts such as almond, lemon, or peppermint to the cookie dough for a unique twist on flavor.
    • Themed Decorations: Use seasonal colors and shapes. For Halloween, create pumpkins and ghosts; during Christmas, think snowflakes and Christmas trees.
    • Using Stencils: If you’re looking for intricate designs, stencils can be very helpful for creating delicate patterns.
    • Texture Variations: For a fun texture, mix in some finely chopped nuts or chocolate chips into the base cookie dough prior to baking.
    • Royal Icing Techniques: Experiment with different piping tips for diverse decorative techniques, like “flooding” and “piping” to create beautiful effects.

    With these advanced tips, you can master this royal icing cookie recipe while letting your imagination run wild!

    How to Store I’M Officially Addicted To These Royal Icing Cookies!: Best Practices

    Storing your royal icing cookies properly will keep them fresh and maintain their beautiful appearance. Here’s how to achieve that:

    1. At Room Temperature: Allow the royal icing to fully dry (about 24 hours) before storing. Once dried, you can store them in an airtight container at room temperature for up to two weeks.

    2. Refrigeration: If you live in a particularly hot or humid area, consider refrigerating the cookies in an airtight container for up to a week. Always let them come to room temperature before enjoying.

    3. Freezing: For longer storage, you can freeze the cookies. Place them in a single layer on a baking sheet until frozen, then transfer them to zip-top bags. They can be stored frozen for up to three months. When ready to eat, let them thaw in the refrigerator overnight or at room temperature.

    By following these best practices, your royal icing cookies will remain delicious and visually striking for any occasion!

    Nutritional Value of I’M Officially Addicted To These Royal Icing Cookies!

    Understanding the nutritional information of these royal icing cookies allows you to enjoy them responsibly. Here’s a breakdown of the nutrition per cookie (based on a batch of 24 servings):

    • Calories: Approximately 120 kcal
    • Total Fat: 5 g
    • Saturated Fat: 3 g
    • Cholesterol: 25 mg
    • Sodium: 50 mg
    • Total Carbohydrates: 18 g
    • Dietary Fiber: 0.5 g
    • Sugars: 7 g
    • Protein: 1.5 g

    Remember, these nutritional values can fluctuate based on ingredient choices and portion sizes. By substituting healthier options, you can reduce sugar and fat while still enjoying a delightful treat.

    FAQs: Frequently Asked Questions About I’M Officially Addicted To These Royal Icing Cookies!

    Here are some common questions and answers regarding the royal icing cookie recipe:

    Q1: Can I use store-bought icing instead of making my own?
    A1: Absolutely! Store-bought icing can save time. However, homemade royal icing tends to yield better results in terms of flavor and consistency.

    Q2: How long do these cookies last?
    A2: When stored properly, decorated royal icing cookies can last up to two weeks at room temperature or longer in the freezer!

    Q3: Can I make these cookies ahead of time?
    A3: Yes! You can bake and decorate your cookies days in advance. Just be sure to store them correctly to maintain their quality.

    Q4: Are these cookies suitable for vegan diets?
    A4: Yes, simply substitute the eggs with flax eggs and use aquafaba in place of egg whites for the icing.

    Q5: Can I make the dough and freeze it?
    A5: Yes! You can freeze the dough before baking. Just shape it into discs, wrap in plastic, and store in the freezer. When ready, thaw it in the refrigerator before rolling and cutting.

    With these answers, you’re well-equipped to enjoy this royal icing cookie recipe to its fullest extent. Now, roll up your sleeves and start baking, because these cookies are bound to make you fall in love!

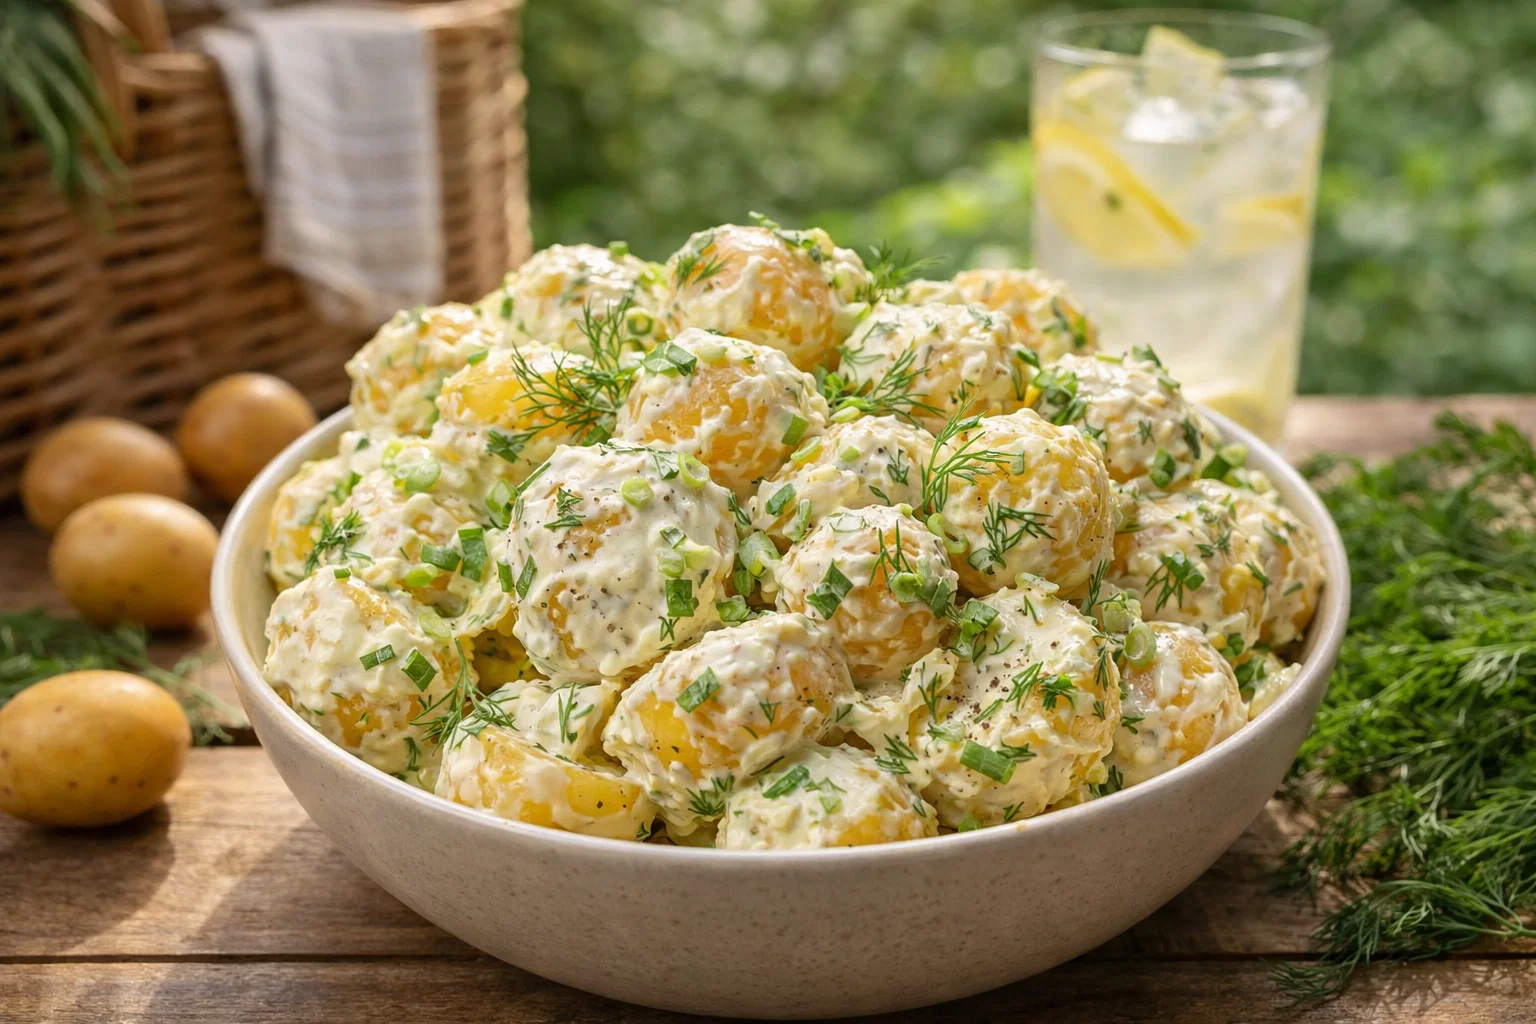
  • Easy Creamy Dill Potato Salad

    Easy Creamy Dill Potato Salad

    Easy Creamy Dill Potato Salad: A Tropical Delight

    Introduction to Easy Creamy Dill Potato Salad

    When you think of summer gatherings or casual picnics, nothing beats a classic potato salad. One such crowd-pleaser is the Easy Creamy Dill Potato Salad, which combines rich creaminess with the refreshing zestiness of dill. This hearty dish is not only simple to prepare but also offers incredible versatility, making it an excellent choice for busy home cooks, diet-conscious individuals, and anyone looking to serve something delicious and satisfying.

    Crafted with minimal effort, Easy Creamy Dill Potato Salad allows you to enjoy the perfect combination of textures and flavors in every bite. Freshly cooked potatoes provide a comforting base that pairs beautifully with a creamy dressing made from yogurt and mayonnaise, embellished with the unique flavors of dill. Additionally, this recipe is adaptable to accommodate various dietary preferences, including vegan, gluten-free, and low-calorie options, which means almost anyone can indulge in this delight.

    Incorporating this potato salad into your meals not only offers a refreshing side that pairs well with grilled meats, sandwiches, or a simple green salad, but it also brings a significant boost in nutrition. Potatoes are rich in vitamins and minerals, providing essential carbohydrates, potassium, and vitamin C. They can even be a filling option for those watching their caloric intake.

    This article inspires you to create your very own Easy Creamy Dill Potato Salad, demonstrating just how easy it is to whip up a dish that will win hearts and stomachs alike. Let’s dive into the benefits and advantages of this delightful blend!

    Benefits and Advantages of Easy Creamy Dill Potato Salad

    Creating a delicious potato salad does not require hours of preparation. With just a few straightforward steps, you can have a delightful dish ready in no time. Ease of preparation is one of the standout features of this Easy Creamy Dill Potato Salad. Suitable for both seasoned chefs and novice cooks, this recipe allows anyone to walk away with a gourmet touch without the hassle.

    Health Benefits

    Potato salad doesn’t have to be unhealthy; in fact, it can be quite the opposite! By using fresh ingredients, it becomes a nutrient-rich side dish. Potatoes are naturally low in calories while providing essential vitamins like B6 and vitamin C. The creamy dressing can easily be tailored to your liking or dietary needs; for instance, using Greek yogurt instead of traditional mayonnaise makes it lower in fat while boosting protein content. This salad can act as a light meal as it sustains energy levels and makes you feel full longer thanks to its high fiber content.

    A Dish for All

    Whether you are feeding a large gathering or enjoy intimate meals with loved ones, potato salad is perfect for every occasion. It is incredibly adaptable; you can serve it in warm weather alongside grilled meats or as a cooling counterpart to spicy dishes. Additionally, it’s an excellent recipe for meal prepping, as it stores well in the refrigerator.

    By incorporating fresh dill—a wonderful herb that not only enhances taste but offers its own health benefits—you elevate the dish. Dill is known for its anti-inflammatory properties and supports digestion, making it a perfect herb companion to the main ingredient.

    Whether you’re a busy parent looking to prepare a healthy dish for your family or a food enthusiast searching for new recipes, you can rely on Easy Creamy Dill Potato Salad. Everyone can enjoy this delightful, versatile dish!

    Ingredients Overview

    Essential Ingredients for Easy Creamy Dill Potato Salad

    To create a superb Easy Creamy Dill Potato Salad, you’ll need the following ingredients:

    • 2 pounds of baby potatoes: These are tender and flavorful, and their smaller size ensures they cook quickly.
    • 1 cup of Greek yogurt (or sour cream for creamier texture): Provides a protein-packed base with a tangy flavor.
    • 1/2 cup of mayonnaise: For a richer taste that complements the yogurt.
    • 1 tablespoon of fresh dill (or 1 teaspoon dried dill): Adds a fresh flavor with multiple health benefits.
    • 1 teaspoon of garlic powder: For an added depth of flavor.
    • 1 tablespoon of lemon juice: Brightens the potato salad and helps balance flavors.
    • 1/2 teaspoon of salt: Enhances all the other flavors.
    • 1/4 teaspoon of black pepper: Adds a hint of spice.
    • 1/2 cup of chopped celery: Adds a fresh crunch and enhances texture.
    • 1/2 cup of diced red onion: For sweetness and a bit of bite.

    Dietary Options: To cater to various diets:
    – Vegan Option: Substitute Greek yogurt and mayonnaise with a plant-based yogurt and vegan mayo.
    – Gluten-Free Option: Ensure all ingredients are certified gluten-free, as most of the main components are naturally gluten-free.
    – Low-Calorie Option: Use low-fat versions of yogurt and mayonnaise.

    Dietary Substitutions to Customize Your Easy Creamy Dill Potato Salad

    When cooking, it’s essential to adjust recipes to fit dietary restrictions or personal preferences. Here are some substitutions to customize your Easy Creamy Dill Potato Salad:

    • Yogurt Alternatives: Instead of Greek yogurt, you can also use dairy-free products like almond or coconut yogurt.
    • Mayonnaise Alternatives: If you’re aiming for a lighter version, try using avocado instead of mayonnaise for extra creaminess while adding healthy fats.
    • Fresh Herbs: If dill isn’t available, swap it out for other fresh herbs such as parsley or chives for a different flavor profile.
    • Add-In Options: Consider including additional vegetables like bell peppers, radishes, or hard-boiled eggs for extra nutrition and taste.

    By experimenting with ingredients based on personal preferences and dietary needs, you can create a potato salad that is both delicious and suitable for everyone at the table.

    How to Prepare the Perfect Easy Creamy Dill Potato Salad: Step-by-Step Guide

    Now that you have gathered your ingredients, it is time to culminate your efforts into a delicious potato salad. By following these precise yet easy steps, you can master the art of making Easy Creamy Dill Potato Salad:

    1. Prepare the Potatoes: Begin by washing the baby potatoes thoroughly to remove any dirt. Place them in a large pot filled with cold water. Add a pinch of salt, and bring to a boil over medium-high heat. Cook until fork-tender, which typically takes about 15-20 minutes.

    2. Cool the Potatoes: Once the potatoes are tender, drain them in a colander and rinse under cold water to stop the cooking process. Let them cool completely before handling.

    3. Cut the Potatoes: Once cooled, slice the potatoes into bite-sized pieces. The skin can either be left on or peeled based on personal preference.

    4. Mix the Creamy Base: In a separate bowl, combine the Greek yogurt, mayonnaise, fresh dill, garlic powder, lemon juice, salt, and pepper. Whisk until smooth, ensuring all ingredients are well incorporated.

    5. Combine the Ingredients: Gently fold the cooled potatoes into the creamy mixture. Using a spatula, ensure each piece is well-covered without overly mashing them for a pleasant texture.

    6. Add Celery and Onions: Incorporate the chopped celery and diced red onion into the potato mixture. Stir gently to distribute evenly throughout the potato salad.

    7. Taste and Adjust: Give a final taste to the potato salad, adjusting salt and pepper as necessary. If you prefer a little more zing, feel free to add an additional squeeze of lemon juice.

    8. Chill: For optimal flavor, cover the salad and refrigerate for at least 1 hour before serving. This allows the flavors to meld beautifully.

    9. Serve: Transfer the potato salad to a serving platter or bowl. You can garnish with additional dill for a touch of elegance before serving.

    Following this step-by-step guide allows you to make a wonderful Easy Creamy Dill Potato Salad that caters to your taste and dietary needs. Your loved ones will surely appreciate the effort you put into crafting this delightful dish.

    Mastering Easy Creamy Dill Potato Salad: Advanced Tips and Variations

    To elevate your Easy Creamy Dill Potato Salad, here are some advanced tips and variations that will enhance its deliciousness:

    • Experiment with Textures: For an added crunch, consider incorporating chopped pickles, crushed nuts, or sunflower seeds. These elements introduce an exciting contrast to the creamy base.

    • Experiment with Flavors: Introduce spices or other flavors into the creamy mixture. For instance, a pinch of smoked paprika or a teaspoon of mustard can add delightful depth.

    • Create a Loaded Potato Salad: Take it a step further by adding toppings such as crispy bacon bits, cheese, or even fresh corn for a satisfying twist.

    • Try Different Cooking Methods: Instead of boiling, consider roasting the potatoes with olive oil and spices for a smoky, flavorful variation of the salad.

    • Serving Idea: This Easy Creamy Dill Potato Salad can be served as a filling in a sandwich or wrap—just layer it between two slices of whole grain bread or in a tortilla with fresh greens.

    These advanced tips and variations allow you to personalize the potato salad, ensuring it fits your unique taste buds. Your creativity knows no bounds!

    How to Store Easy Creamy Dill Potato Salad: Best Practices

    Proper storage of your Easy Creamy Dill Potato Salad is vital to maintain its flavor and freshness. Here are the best practices for refrigeration, freezing, and reheating:

    • Refrigeration: Store any leftover potato salad in an airtight container in the refrigerator. It will stay fresh for about 3-5 days. Be sure to take it out of the fridge approximately 30 minutes before serving to let it come to room temperature.

    • Freezing: Although freezing potato salad is generally not recommended due to the creamy ingredients, if you must, consider freezing the potato base without the dressing. Thaw overnight in the refrigerator, then prepare the dressing fresh before serving.

    • Reheating: If you choose to enjoy it warm, reheat gently in the microwave. Cover the bowl with a damp paper towel to prevent it from drying out. However, many prefer enjoying the potato salad cold or at room temperature to savor the fresh flavors.

    Following these storage solutions ensures that you get the most out of your Easy Creamy Dill Potato Salad, making it a convenient dish to have on hand for several meals.

    Nutritional Value of Easy Creamy Dill Potato Salad

    The Easy Creamy Dill Potato Salad is not just a tasty side; it also provides a variety of nutrients that can complement any diet. Here’s a basic breakdown of the nutritional value per serving (assuming 8 servings):

    • Calories: Approximately 200 calories
    • Total Fat: 8 grams
    • Saturated Fat: 2 grams
    • Cholesterol: 10mg (if using mayonnaise)
    • Sodium: 250mg
    • Total Carbohydrates: 30 grams
    • Dietary Fiber: 3 grams
    • Sugars: 1 gram
    • Protein: 5 grams

    Nutritional Benefits

    • Potatoes: Rich in potassium, fiber, and vitamin C, they provide energy and essential nutrients.
    • Greek Yogurt: Packed with protein that can aid in muscle repair and growth; it also contains probiotics that benefit digestive health.
    • Dill: This herb has both anti-inflammatory properties and is known to support digestion.

    By enjoying a serving of Easy Creamy Dill Potato Salad, you not only treat your palate, but you also nourish your body with important vitamins and minerals.

    FAQs: Frequently Asked Questions About Easy Creamy Dill Potato Salad

    1. Can I make this potato salad in advance?

    Absolutely! Preparing the Easy Creamy Dill Potato Salad a day ahead gives the flavors time to meld beautifully. Just remember to store it in an airtight container in the refrigerator.

    2. Is this potato salad gluten-free?

    Yes! Most ingredients in this recipe are naturally gluten-free. Just ensure that any products used, like mayonnaise, are certified gluten-free.

    3. Can I substitute Greek yogurt with something else?

    Yes, you can easily substitute Greek yogurt with regular yogurt, sour cream, or even dairy-free alternatives, depending on your dietary needs.

    4. What do I do if I don’t have fresh dill?

    If fresh dill is unavailable, you can substitute with dried dill. Keep in mind that dried herbs are more concentrated, so use about one-third of the amount.

    5. How can I spice up my potato salad?

    Consider adding ingredients like diced bell peppers, jalapeños, or bacon bits for an extra twist. Additionally, a dash of hot sauce can elevate the flavor!

    6. How long does the potato salad last in the fridge?

    The Easy Creamy Dill Potato Salad can last for 3-5 days in the refrigerator if stored properly in an airtight container.

    7. Can I freeze this potato salad?

    It’s not recommended to freeze potato salad due to the creamy dressing. However, you can freeze the potato base and prepare the dressing fresh later.

    By addressing these common inquiries, you can ensure that anyone exploring your recipe feels confident in adapting it to their own dietary needs. Your Easy Creamy Dill Potato Salad can become a staple in any household!


    In conclusion, Easy Creamy Dill Potato Salad is a simple yet scrumptious side dish that can elevate any meal. The bright flavors, creamy texture, and numerous benefits make it an excellent fit for any table, whether it’s a grand feast or a casual family gathering. By following the easy directions, dietary options, and tips provided here, you can create a delectable dish that will leave everyone craving more. With just a few ingredients and a bit of time, you can whip up a delightful dish that is not only healthy but incredibly satisfying! Enjoy your culinary journey and the smiles that come along with it.

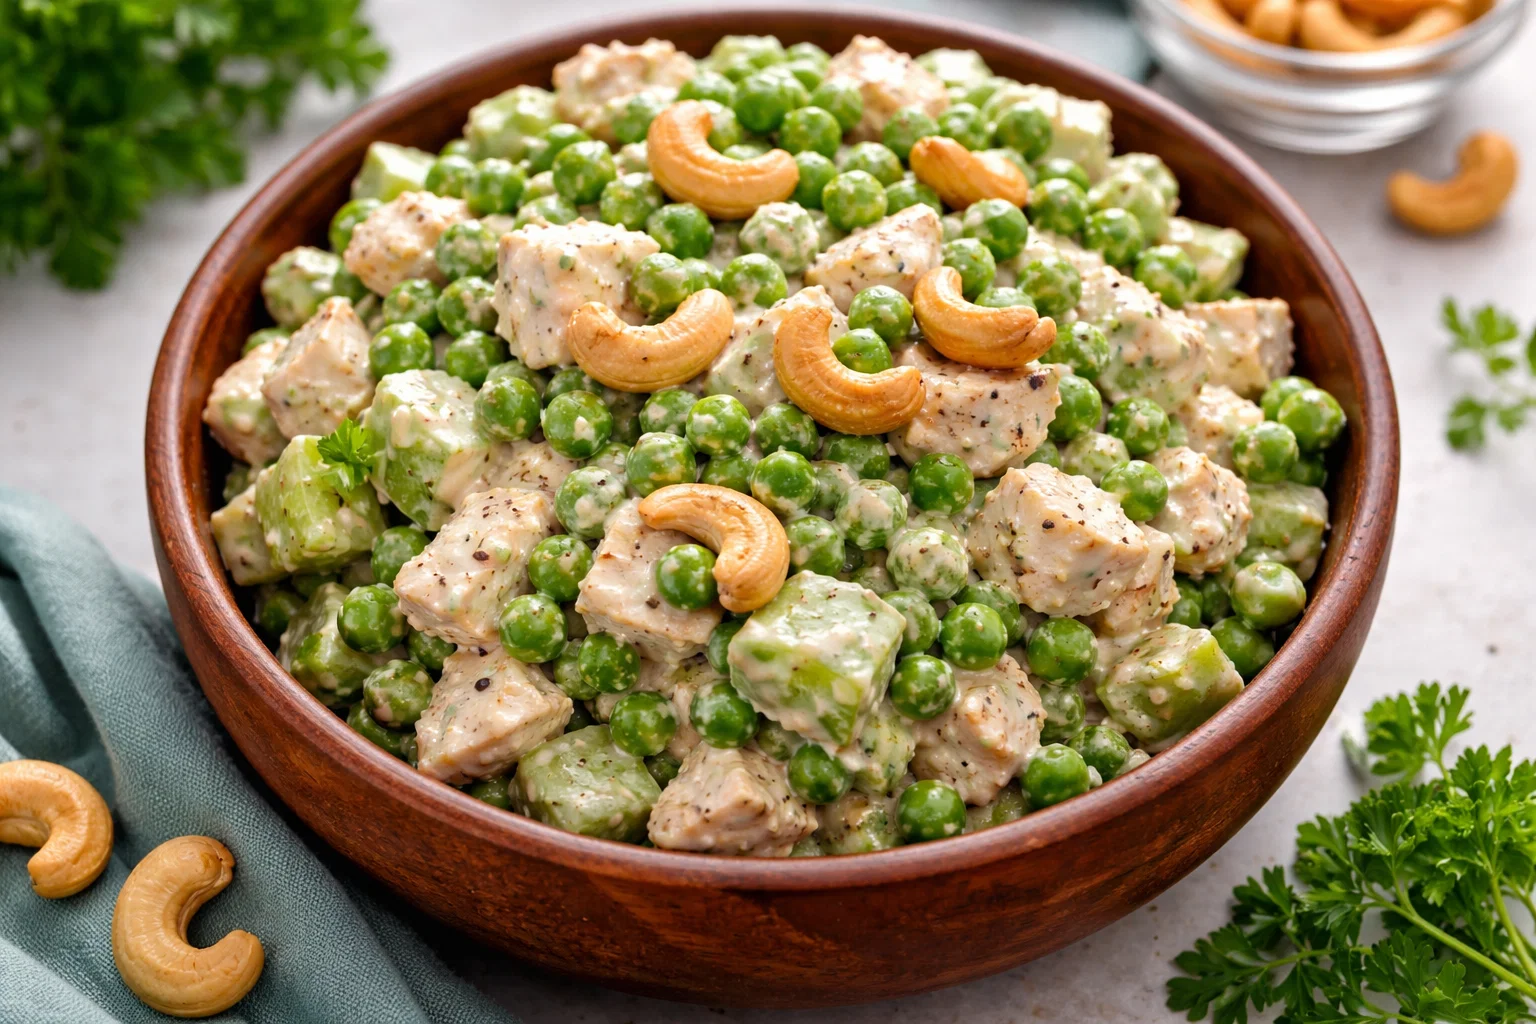
  • Best Cashew Pea Salad

    Best Cashew Pea Salad

    Best Cashew Pea Salad: A Tropical Delight

    Introduction to Best Cashew Pea Salad

    Are you searching for healthy dinner recipes that are not only delicious but also easy to make? Look no further than the Best Cashew Pea Salad! This vibrant dish combines the crunchiness of cashews with the sweetness of peas, resulting in a tropical delight that appeals to a variety of palates. If you are a busy parent, a student looking to impress your friends, or simply someone who enjoys fresh, nourishing meals, this salad is perfect for you.

    This recipe stands out for its simplicity and versatility. It’s vegan, gluten-free, and packed with nutritional goodness. The freshness of the ingredients makes it ideal for warm summer days, while the richness of the cashews provides a satisfying crunch that will leave you feeling full and satisfied. Best of all, it’s a quick dish to prepare—ideal for those hectic weeknights when you want to whip up something healthy in no time!

    Not only does this Best Cashew Pea Salad showcase an enticing combination of textures and flavors, but it also boasts a wealth of health benefits that cater to various dietary needs. Not only can it serve as a main dish for dinner, but it also functions beautifully as a side or potluck contribution, ensuring you’ll make a great impression wherever you go.

    Benefits and Advantages of Best Cashew Pea Salad

    When it comes to healthy dinner recipes, the Best Cashew Pea Salad is unrivaled in terms of ease of preparation and health benefits. First and foremost, this recipe takes less than 30 minutes from start to finish, making it perfect for those with busy schedules who still prioritize nutritious meals. The ingredients are easily accessible and require no complicated cooking methods, allowing even novice cooks to shine in the kitchen.

    Nutritional Powerhouse

    Peas are not just a vibrant addition to your plate; they are also packed with vitamins A, C, and K, as well as essential minerals like iron and magnesium. They contribute to better digestion while being low in calories, making them a perfect component of any healthy dinner recipe. On the other hand, cashews provide healthy fats that help keep your heart in shape while providing a good source of protein, which enhances satiety.

    Frequency of Use

    This salad’s versatility means you can enjoy it throughout the year. In the summer, adding fresh herbs like mint or cilantro enhances the flavors, while in the fall or winter, roasted vegetables can provide additional warmth and sustenance. Being vegan and gluten-free, it’s suitable for various dietary needs, giving you the freedom to experiment with your ingredients.

    Suitable for Everyone

    Whether you’re a busy parent juggling a thousand tasks or a health-conscious individual, this dish aligns with your goals. Plus, it’s an excellent option for serving guests who may adhere to specific dietary restrictions, ensuring that everyone enjoys a delightful meal without compromise.

    Ingredients Overview

    Essential Ingredients for Best Cashew Pea Salad

    To create your Best Cashew Pea Salad, gather the following ingredients:

    • 2 cups green peas (fresh or frozen, thawed): Provides essential vitamins and a sweet flavor.
    • 1 cup raw cashews: A source of healthy fats and protein that adds crunch.
    • 1/4 cup red onion, diced: Adds a sharp flavor and color contrast to the salad.
    • 1 red bell pepper, diced: For sweetness and vibrant color.
    • 1/4 cup fresh cilantro, chopped: Enhances flavor with a fresh, herbal note.
    • 2 tablespoons olive oil: for a healthy fat source and to help meld the flavors.
    • 1 tablespoon apple cider vinegar: Offers a tangy balance to the dish.
    • Salt and pepper to taste: Essential for elevating flavor.

    This recipe is naturally vegan, gluten-free, and low-calorie, making it a fantastic option for those looking for healthy dinner recipes.

    Dietary Substitutions to Customize Your Best Cashew Pea Salad

    While the above ingredients create the perfect base for the Best Cashew Pea Salad, don’t hesitate to customize it according to your pantry inventory or personal dietary needs:

    1. Nut-Free Alternative: Swap cashews for sunflower seeds or pumpkin seeds to maintain the crunch without nuts.
    2. Low-Carb Option: Replace green peas with chopped broccoli or cauliflower florets to suit a low-carb lifestyle.
    3. Herb Variations: If cilantro isn’t your favorite, substitute it with parsley or dill for a different flavor profile.
    4. Add Your Own Twist: Toss in ingredients like cherry tomatoes, avocado, or even cooked quinoa to elevate the salad’s flavor and nutritional value.

    Feel free to mix and match according to your preferences; this salad can be as creative as you wish!

    How to Prepare the Perfect Best Cashew Pea Salad: Step-by-Step Guide

    Now, let’s dive into how to whip up this delightful dish in a few quick steps:

    1. Prepare the Veggies: Start by rinsing your fresh green peas (if using fresh) and letting them dry. If you’re using frozen peas, simply thaw them.
    2. Chop the Ingredients: Dice the red onion and red bell pepper. Be sure to chop everything finely for a harmonious blend of flavors.
    3. Mix the Base Ingredients: In a large mixing bowl, combine the peas, cashews, diced onion, and bell pepper. This colorful mixture will be the base of your salad.
    4. Add Fresh Herbs: Sprinkle the chopped cilantro over the mix, adding a freshness that brightens the dish.
    5. Prepare the Dressing: In a separate small bowl, whisk together olive oil, apple cider vinegar, and season with salt and pepper to taste.
    6. Combine Dressing and Salad: Pour the dressing over your salad and gently toss everything together until well combined.
    7. Taste and Adjust: Always taste your salad and adjust the seasoning if necessary. You might want to add a little more salt, pepper, or vinegar.
    8. Let it Sit: For the best flavor, let your salad sit for 10-15 minutes at room temperature or refrigerated to allow the flavors to meld.
    9. Serve & Enjoy: Serve chilled or at room temperature and enjoy your healthy dinner recipes with friends and family!

    Mastering Best Cashew Pea Salad: Advanced Tips and Variations

    Making the Best Cashew Pea Salad is straightforward, but there are a few advanced tips to elevate it further:

    • Toasting Cashews: For added depth of flavor, consider toasting cashews in a non-stick skillet over medium heat for about 5 minutes before adding them to the salad.
    • Veggie Variations: Integrate shredded carrots or chopped zucchini for an extra nutritional punch.
    • Switch Up the Dressing: Experiment with different salad dressings such as tahini or yogurt-based options for diverging flavor profiles.
    • Meal Prep: Advance preparation is a great way to keep the time spent on healthy dinner recipes at a minimum. You can chop the vegetables and prepare the dressing a day ahead for quick assembly.

    By employing these tips, you’ll create a Best Cashew Pea Salad that’s both traditional and innovatively tailored to your taste.

    How to Store Best Cashew Pea Salad: Best Practices

    Storing your Best Cashew Pea Salad correctly preserves its freshness and flavor:

    • Refrigeration: Keep the salad in an airtight container in the refrigerator for up to 3 days. The flavors will continue to deepen as it chills.
    • Freezing: For longer storage, consider freezing the salad—though this may alter the texture of fresh vegetables, it can still work in a pinch. Make sure to consume it within a month.
    • Reheating: If you prefer a warm salad, lightly sauté it in a pan for a few minutes before serving. However, fresh veggies are usually best enjoyed cold.

    Ensuring proper storage practices extends the life of your healthy dinner recipes, allowing you to enjoy them throughout the week.

    Nutritional Value of Best Cashew Pea Salad

    When striving for healthy dinner recipes, it’s essential to know the nutritional value of your meals. Here’s a rough breakdown of each serving (based on 4 servings):

    • Calories: 250
    • Fat: 17g (with healthy fats from cashews)
    • Protein: 8g (a considerable amount from both peas and nuts)
    • Carbohydrates: 25g (mostly from peas and bell peppers)
    • Fiber: 5g (beneficial for digestion, found in peas)
    • Vitamins and Minerals:
      • Vitamin A: 20% of the Daily Value (DV)
      • Vitamin C: 25% of the DV
      • Iron: 10% of the DV
      • Magnesium: 15% of the DV

    This salad balances macronutrients while packing a punch with essential vitamins and minerals, showcasing its role in your list of healthy dinner recipes.

    FAQs: Frequently Asked Questions About Best Cashew Pea Salad

    Q: Can I substitute frozen peas for fresh peas?
    A: Absolutely! Frozen peas work perfectly in this recipe—just make sure to thaw and drain them before using.

    Q: Is it safe to serve this salad during warm weather?
    A: Yes, just keep it chilled until serving. This salad is refreshing and ideal for summer gatherings.

    Q: Can I make this salad ahead of time?
    A: Yes, preparing the salad up to a day in advance gives flavors time to meld, enhancing the taste.

    Q: How can I make this salad spicier?
    A: Incorporate chopped jalapeños or a dash of cayenne pepper into the dressing to add heat.

    Q: Is this salad suitable for meal prep?
    A: Definitely! Just keep the dressing separate until you’re ready to serve to prevent the greens from wilting.

    The Best Cashew Pea Salad is a delightful meal that offers numerous benefits while fitting seamlessly into any modern kitchen. This dish not only enriches your list of healthy dinner recipes but also becomes a flavorful indulgence you’ll want to enjoy regularly. Embrace the culinary adventure, and feel inspired to share this delicious experience with family and friends!

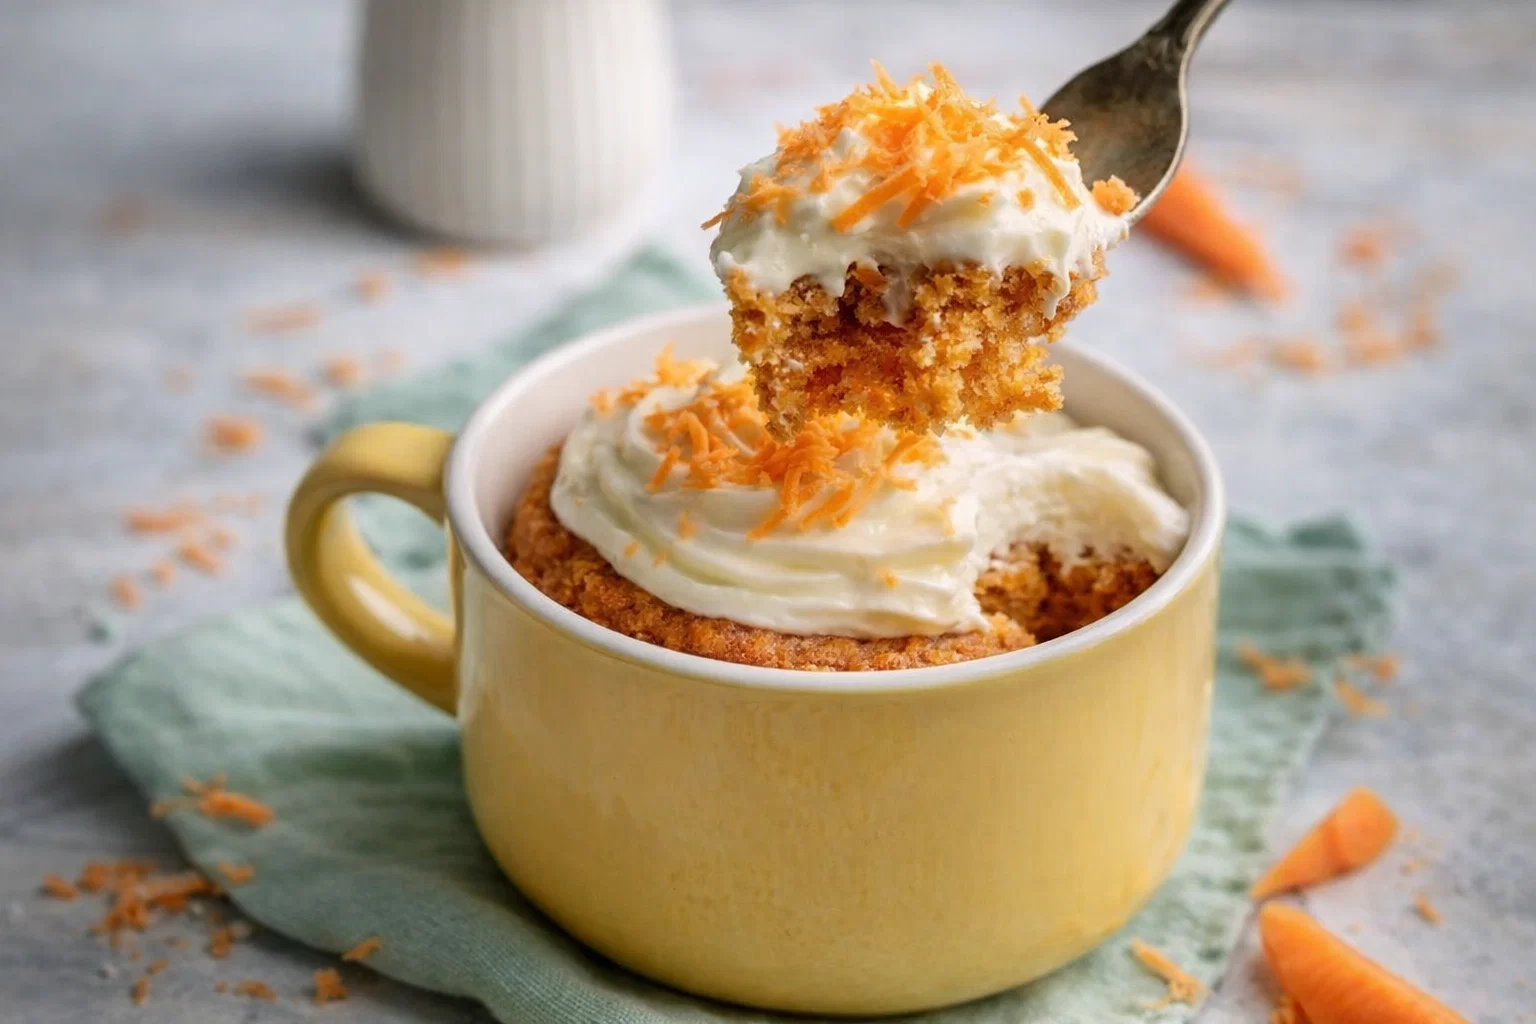
  • Irresistible Carrot Mug Cake

    Irresistible Carrot Mug Cake

    Irresistible Carrot Mug Cake: A Tropical Delight

    Introduction to Irresistible Carrot Mug Cake

    If you are in search of dessert recipes that combine indulgence with health, look no further than this Irresistible Carrot Mug Cake. This delightful dessert is not only scrumptious but also incredibly simple to prepare. In just a matter of minutes, you can create a decadent treat that caters to various dietary needs, making it a versatile choice for everyone—from busy parents to health-conscious individuals.

    This mug cake is packed with the goodness of carrots, offering dietary fiber, vitamins, and antioxidants while keeping added sugars to a minimum. Additionally, it can easily be modified to be gluten-free or vegan without compromising taste. Whether you are a novice baker or a seasoned chef, you will appreciate how quickly this recipe comes together. It’s perfect for those late-night cravings, busy student lifestyles, or a sweet afternoon pick-me-up. The beauty of the Irresistible Carrot Mug Cake lies in its adaptability; you can enjoy it warm, topped with a dollop of yogurt or a sprinkle of nuts. Let’s dive into the benefits and advantages that make this mug cake a must-try!

    Benefits and Advantages of Irresistible Carrot Mug Cake

    Ease of Preparation

    One of the most striking features of this mug cake is how easy it is to prepare. Unlike traditional cakes which often require multiple bowls, mixers, and extensive baking times, our Irresistible Carrot Mug Cake comes together in just a few minutes. This makes it ideal for those times when you’re in a rush or simply do not want to spend hours in the kitchen. All you need is your favorite mug and a microwave!

    Health Benefits

    This cake is a fantastic choice for those seeking healthier dessert recipes. Carrots are known for their numerous health benefits, including promoting good vision, aiding in digestion, and improving skin health. Moreover, this recipe allows you to control how much sweetener to add, meaning you can tailor it based on your dietary needs. With the option to make it vegan by substituting eggs with flax or chia seeds, it opens up a world of possibilities for accommodating various diets.

    Versatility

    The beauty of the Irresistible Carrot Mug Cake is that it can be enjoyed any time of day. Whether you want a satisfying breakfast, a mid-afternoon snack, or a simple dessert, this mug cake fits the bill. Plus, it’s an excellent way to sneak in some extra veggies, making it a fantastic choice for kids who might not be too keen on eating their greens.

    Suitable for All Lifestyles

    Whether you’re a student cramming for exams, a busy professional needing a quick dessert, or a parent looking for a simple treat the kids will love, this recipe provides a stress-free solution. It’s perfect for travel too; just pack your ingredients, and enjoy a homemade dessert wherever you are!

    In essence, the Irresistible Carrot Mug Cake is not just a dessert—it’s a quick, healthy, and adaptable recipe that can suit the lifestyle and dietary restrictions of nearly anyone. Now, let’s take a closer look at the ingredients that make this cake so special.

    Ingredients Overview

    Essential Ingredients for Irresistible Carrot Mug Cake

    To whip up this delicious carrot mug cake, gather the following ingredients:

    • 1 medium carrot (about 3/4 cup grated): Provides natural sweetness and moisture.
    • 4 tablespoons all-purpose flour (or gluten-free flour): The base for structure.
    • 2 tablespoons brown sugar (or coconut sugar): Adds sweetness; can be adjusted based on preference.
    • 1/8 teaspoon baking powder: Ensures the cake rises well.
    • 1/8 teaspoon cinnamon (optional): For flavor; feel free to add more for an extra spice kick.
    • Pinch of salt: Balances the sweetness.
    • 1 tablespoon vegetable oil (or melted coconut oil): Adds moisture to the cake.
    • 3 tablespoons plant-based milk (or any milk of choice): Helps bind the ingredients together.
    • 1/4 teaspoon vanilla extract: For that warm flavor.

    Dietary Substitutions to Customize Your Irresistible Carrot Mug Cake

    • Vegan Options: Substitute 1 egg with 1 tablespoon of ground flaxseed mixed with 2.5 tablespoons of water. Let it sit for 5 minutes until it gels.
    • Gluten-Free Options: Use a 1:1 gluten-free baking flour blend instead of traditional flour.
    • Lower Sugar: If you are watching your sugar intake, consider using a sugar alternative like Stevia or monk fruit.

    This overview gives you a clear understanding of how to personalize your Irresistible Carrot Mug Cake while ensuring it meets various dietary needs. In the next section, I’ll walk you through the step-by-step guide to preparing this delightful mug cake.

    How to Prepare the Perfect Irresistible Carrot Mug Cake: Step-by-Step Guide

    Creating the Irresistible Carrot Mug Cake is straightforward. Follow these simple steps for a perfect treat:

    1. Prepare the Base: Start by gathering all your ingredients in a microwave-safe mug. Ensure your carrot is peeled and finely grated to achieve a soft texture.
    2. Mix Dry Ingredients: In the mug, add the all-purpose flour (or gluten-free flour), brown sugar, baking powder, cinnamon, and salt. Stir the dry ingredients together until evenly combined.
    3. Add Wet Ingredients: Drizzle in the vegetable oil and vanilla extract. Follow this with your choice of plant-based milk. Mix all the ingredients until you achieve a smooth batter, ensuring no lumps remain.
    4. Incorporate Carrots: Fold in the grated carrots, stirring well to distribute them evenly throughout the batter. This is where the moisture and flavor come into play.
    5. Microwave Cooking: Place your mug in the microwave and cook on high for about 1 to 1.5 minutes. Keep an eye on it to ensure it doesn’t overflow; microwave times may vary depending on your appliance.
    6. Check Doneness: The cake is done when it has puffed up and a toothpick inserted in the center comes out clean. If it’s slightly wet, microwave in additional 10-second intervals.
    7. Let Cool: Allow the mug cake to cool for a minute before digging in. This makes it easier to enjoy and allows the flavors to settle.
    8. Optional Toppings: If desired, add toppings like a dollop of yogurt, a sprinkle of nuts, or a drizzle of honey. Enjoy your delicious carrot mug cake!

    The key to achieving the perfect Irresistible Carrot Mug Cake is to keep tracking your microwave’s power settings. Different wattages can significantly affect cooking time. Now that you have your mug cake, let’s explore some advanced tips and variations to elevate your baking game!

    Mastering Irresistible Carrot Mug Cake: Advanced Tips and Variations

    To take your Irresistible Carrot Mug Cake to the next level, consider the following tips and variations:

    Advanced Tips

    • Texture Enhancement: For a more cake-like texture, try sifting your flour before adding it to the mixture. This will help to create a light and airy cake.
    • Mix-ins: Add a handful of walnuts or pecans for a pleasant crunch. Dried fruits like raisins or cranberries can also impart a wonderful taste.
    • Flavor Elevation: Feel free to add a dash of nutmeg or a drop of almond extract alongside the vanilla for a unique twist that enhances the cake’s flavor profile.

    Variations

    • Spiced Version: Grandparents’ style? Add a pinch of ginger or allspice. This gives your cake a rich, festive flavor that’s perfect for chilly days.
    • Carrot Cake with a Twist: Swap out half of the carrot for grated zucchini or apple—for a milder flavor and extra moisture without sacrificing the functionality of the cake.
    • Glazed Delight: After it cools down, you can drizzle a simple glaze made from powdered sugar and lemon juice over it for a burst of freshness.

    With these tips and variations, your Irresistible Carrot Mug Cake will never feel monotonous. It’s adaptable to suit your preferred flavors and textures. Now, let’s discuss how to store our cake to keep all those flavors fresh!

    How to Store Irresistible Carrot Mug Cake: Best Practices

    To ensure your Irresistible Carrot Mug Cake remains fresh and delicious, follow these storage tips:

    Refrigeration

    If you happen to have leftovers (which is somewhat unlikely given its delectable nature), simply cover the mug with plastic wrap or transfer it to an airtight container. It will last in the fridge for up to 2 days. Reheating it in the microwave for 10-15 seconds can help restore its warm, cozy texture.

    Freezing

    To freeze, allow the mug cake to cool completely before transferring it to a freezer-safe container. It can last up to 2 months in the freezer. When you’re ready to enjoy it again, simply defrost in the fridge overnight and then reheat in the microwave.

    Reheating

    For best results when reheating, remove any plastic wrap, and add a splash of milk on top. This helps to restore moisture during reheating, preventing the cake from drying out. Microwave in short intervals until warmed through.

    Now that you know how to store this delightful treat, let’s review the nutritional value of the Irresistible Carrot Mug Cake to understand its health benefits.

    Nutritional Value of Irresistible Carrot Mug Cake

    One serving of Irresistible Carrot Mug Cake (using prepared recipe with standard ingredients) contains approximately:

    • Calories: 200
    • Total Fat: 9g
    • Saturated Fat: 1g
    • Cholesterol: 0mg (if vegan)
    • Sodium: 150mg
    • Total Carbohydrates: 28g
    • Dietary Fiber: 2g
    • Sugar: 10g
    • Protein: 3g

    This nutritional profile makes the carrot mug cake a healthier option compared to traditional cakes. With its combination of fiber, healthy fats, and natural sugars, it provides a good balance of nutrients. Plus, you can easily modify it to meet your dietary requirements by using alternative ingredients.

    Now that you’re equipped with the recipe’s nutritional information, let’s address some common questions regarding the Irresistible Carrot Mug Cake in our FAQs section.

    FAQs: Frequently Asked Questions About Irresistible Carrot Mug Cake

    1. Can I make this mug cake gluten-free?

    Absolutely! Simply use a gluten-free flour blend in place of the regular all-purpose flour. Many of these blends contain xanthan gum to help with binding.

    2. Can I prepare this cake without a microwave?

    While microwaves provide the quickest results, you can also bake it in the oven at 350°F for about 15-20 minutes in a small oven-safe dish.

    3. What can I use instead of eggs?

    Flaxseed meal or chia seeds mixed with water make excellent egg substitutes. Use 1 tablespoon of flaxseed meal with 2.5 tablespoons of water as a substitute for one egg.

    4. How do I make it sweeter?

    If you prefer a sweeter cake, feel free to increase the amount of sugar. Conversely, you can also substitute sugar with a low-calorie sweetener like erythritol or stevia for a diabetic-friendly option.

    5. How can I enhance the flavor?

    Consider adding spices like nutmeg or ginger, or even a bit of cocoa powder for a chocolatey twist that pairs well with the carrots.

    Conclusion

    The Irresistible Carrot Mug Cake is more than just a dessert; it’s a quick, adaptable recipe that appeals to various dietary needs and personal preferences. With its ease of preparation, health benefits, and delightful flavor, it’s a delightful treat you can enjoy anytime. Whether you share it with family or treat yourself after a long day, this mug cake is bound to become a favorite in your recipe arsenal. So, gather your ingredients and give it a try—you won’t be disappointed!

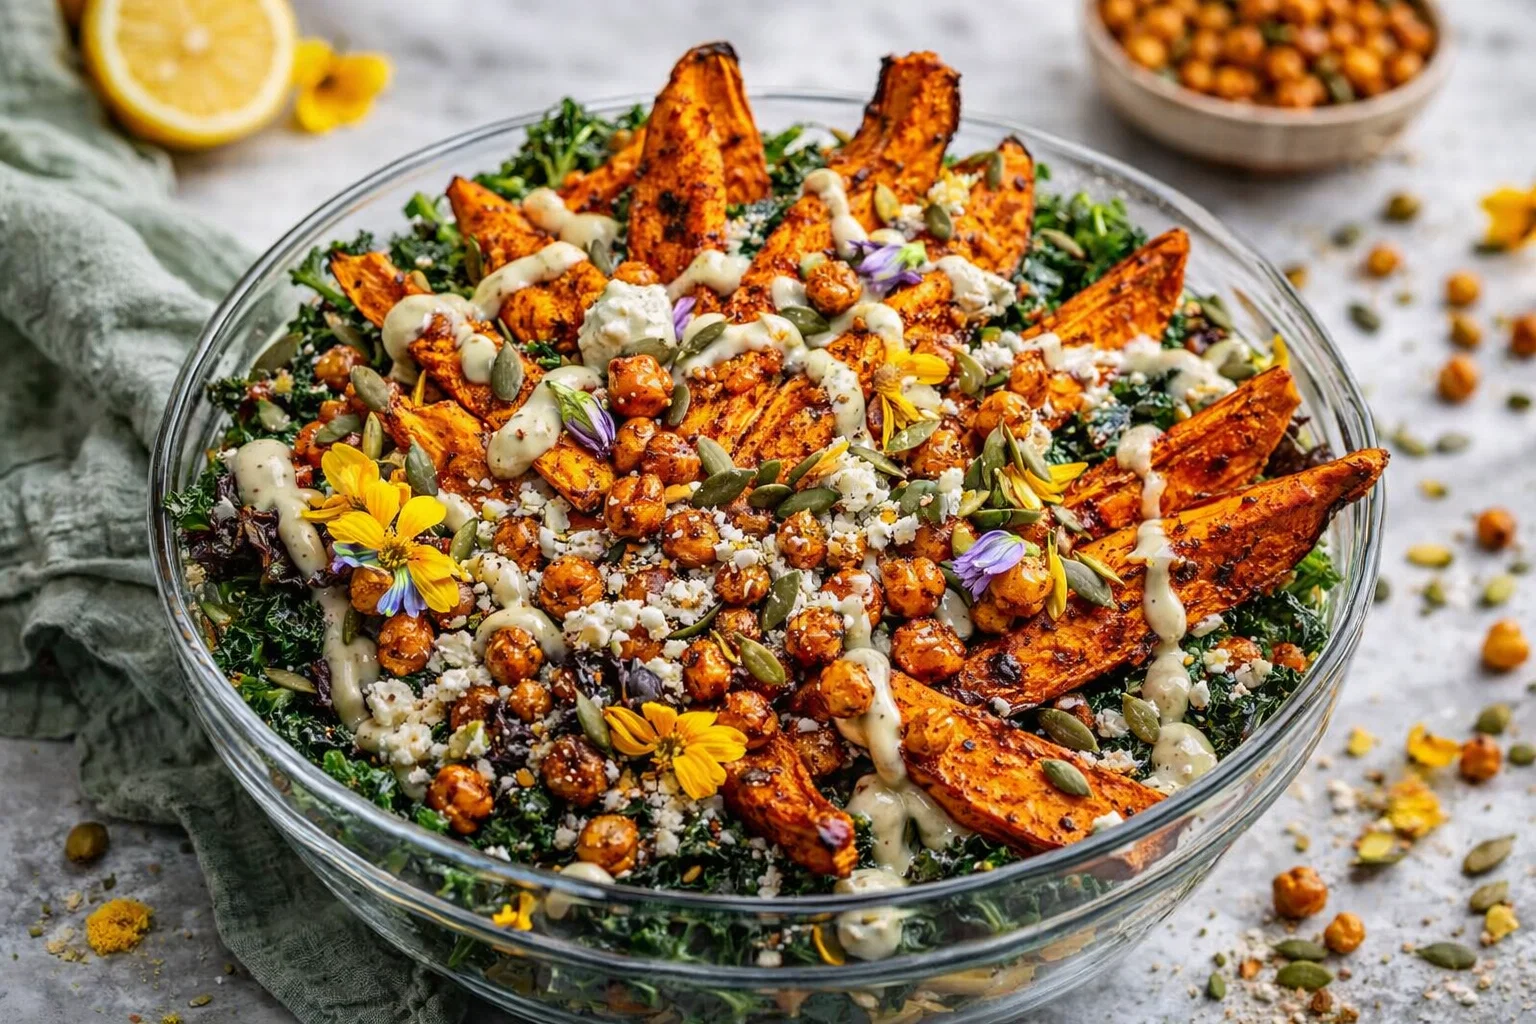
  • Healthy Creamy Kale And Sweet Potato Salad

    Healthy Creamy Kale And Sweet Potato Salad

    Healthy Creamy Kale And Sweet Potato Salad: A Tropical Delight

    Introduction to Healthy Creamy Kale And Sweet Potato Salad

    Welcome to a culinary adventure that perfectly blends flavors, textures, and nutrition with our Healthy Creamy Kale And Sweet Potato Salad. This delightful dish is more than just a salad; it’s a versatile meal brimming with wholesome ingredients while also being a standout option among healthy dinner recipes.

    Packed with nutrient-dense kale and naturally sweet roasted sweet potatoes, this salad is a treat for your taste buds and your body. With its creamy dressing made from simple, clean ingredients, it serves as a convenient yet elegant option for busy parents, working professionals, and anyone looking to eat healthier without sacrificing flavor.

    This recipe is vegan, gluten-free, and can easily accommodate various dietary preferences, making it perfect for every table—from the family dinner to a potluck gathering. The ease of preparation is a bonus, allowing both novice and experienced cooks to whip it up in no time. In addition to its deliciousness, kale and sweet potatoes offer essential vitamins, minerals, and antioxidants—perfect for anyone looking to boost their health. So, whether you’re a student meal prepping for the week, a traveler looking for a nutritious bites, or simply someone who enjoys healthy dining experiences, this salad is for you!

    Benefits and Advantages of Healthy Creamy Kale And Sweet Potato Salad

    The Healthy Creamy Kale And Sweet Potato Salad stands out as one of the most remarkable healthy dinner recipes for a multitude of reasons. First and foremost, it is incredibly simple to prepare, requiring minimal kitchen skill yet yielding impressive results. This is particularly beneficial for busy parents and working professionals who may not have hours to spare in the kitchen.

    The health benefits are another highlight. Kale is often referred to as a superfood due to its high levels of vitamins A, C, and K, as well as calcium and iron. Sweet potatoes, on the other hand, are a fantastic source of beta-carotene, fiber, and complex carbohydrates, providing sustained energy and helping to improve digestion. When combined, these superfoods create a nutrient-rich foundation for your meal.

    Moreover, this salad is incredibly versatile. If you’re looking for healthy dinner recipes that fit into specific dietary restrictions, you’ll be pleased to know that this dish can be made vegan, gluten-free, and even low-calorie with simple ingredient adjustments. The creamy dressing complements the fresh flavors of the kale and sweet potatoes while adding a satisfying richness that elevates the dish without overwhelming it.

    Whether you’re meal-prepping for the week, needing an exquisite dish for entertaining, or just craving a fresh and filling salad, this Healthy Creamy Kale And Sweet Potato Salad checks all the boxes. Plus, its colorful presentation not only makes it visually appealing but also indicative of the nutritional wealth packed inside!

    Ingredients Overview

    Essential Ingredients for Healthy Creamy Kale And Sweet Potato Salad

    Here is your shopping list for creating the Healthy Creamy Kale And Sweet Potato Salad. Each ingredient has been selected for its unique flavor and health benefits:

    • 4 cups kale, chopped (about one large bunch)
    • Benefits: Rich in vitamins A, C, and K.
    • 2 medium sweet potatoes, peeled and diced (approximately 2 cups)
    • Benefits: High in beta-carotene, vitamin C, and fiber.
    • 1 cup cherry tomatoes, halved
    • Benefits: Adds freshness and is a source of antioxidants.
    • ½ cup red onion, thinly sliced
    • Benefits: Offers a zesty flavor and rich in antioxidants.
    • ½ cup quinoa, rinsed and cooked (optional for added protein)
    • Benefits: Complete protein source, gluten-free.
    • ¼ cup olive oil
    • Benefits: Healthy fat packed with omega-3s.
    • 3 tablespoons lemon juice
    • Benefits: Enhances flavors and provides vitamin C.
    • 2 tablespoons tahini (or Greek yogurt for a non-vegan option)
    • Benefits: Creamy texture and source of healthy fats.
    • Salt and pepper to taste
    • Benefits: Enhances the overall flavor profile.

    This salad can easily be customized based on your preferences.

    Dietary Substitutions to Customize Your Healthy Creamy Kale And Sweet Potato Salad

    When it comes to dietary restrictions or personal preferences, there are numerous ways to adapt this Healthy Creamy Kale And Sweet Potato Salad while still enjoying its deliciousness. Here are some suggested substitutions:

    • Kale Alternatives: If kale is not your favorite green, you can substitute it with spinach, Swiss chard, or arugula. Each green offers unique flavors and nutrients.
    • Sweet Potato Options: Swap sweet potatoes for roasted butternut squash or pumpkin for a different twist. Both are rich in vitamins and maintain a similar sweet flavor.
    • Dressing Changes: For those seeking a lighter dressing, consider using a vinaigrette made with apple cider vinegar, mustard, and a touch of honey. Alternatively, create a creamy dressing using avocado and Greek yogurt if tahini is not available.
    • Protein Boost: Include chickpeas, black beans, or diced grilled chicken for added protein if desired, making this salad perfect for a full meal.
    • Grain Alternatives: Quinoa can be replaced with brown rice or farro for those looking for different textures; all options offer excellent nutritional benefits.

    These substitutions make this Healthy Creamy Kale And Sweet Potato Salad adaptable for everyone, ensuring that all your guests can enjoy it!

    How to Prepare the Perfect Healthy Creamy Kale And Sweet Potato Salad: Step-by-Step Guide

    Now, let’s dive into the preparation process of our Healthy Creamy Kale And Sweet Potato Salad. Follow these easy steps for a delightful outcome:

    1. Prepare the Sweet Potatoes:
      Preheat your oven to 400°F (200°C). Peel and dice the sweet potatoes into bite-sized pieces. Spread them evenly on a baking sheet lined with parchment paper. Drizzle with 1 tablespoon of olive oil, and season with salt and pepper. Toss to coat. Roast in the oven for 25-30 minutes, or until tender and lightly caramelized.

    2. Cook the Quinoa (if using):
      While the sweet potatoes roast, rinse ½ cup of quinoa under cold water. Add it to a saucepan with 1 cup of water. Bring to a boil, reduce heat, and simmer for 15 minutes, or until all the water is absorbed. Fluff with a fork when done.

    3. Prepare the Kale:
      In a large mixing bowl, add 4 cups of chopped kale. Using your hands, massage the kale for 1-2 minutes until softened. This step enhances the flavors and texture.

    4. Mix in Additions:
      To the bowl with kale, add the roasted sweet potatoes, 1 cup of halved cherry tomatoes, ½ cup of thinly sliced red onion, and the cooked quinoa (if using).

    5. Make the Dressing:
      In a small bowl, whisk together the remaining 3 tablespoons of olive oil, 3 tablespoons of lemon juice, and 2 tablespoons of tahini until well combined. Season with salt and pepper to taste.

    6. Combine the Salad:
      Drizzle the dressing over the salad mixture in the large bowl. Gently toss to combine all ingredients well, ensuring the dressing coats everything evenly.

    7. Taste and Adjust:
      Taste the salad and adjust seasoning if necessary. If you’d like more creaminess, add a bit more tahini or a dollop of Greek yogurt.

    8. Serve and Enjoy:
      Transfer to a serving dish or individual bowls. Garnish with seeds or nuts for crunch, if desired. Enjoy this delicious and healthy dinner recipe immediately or store it for later!

    This step-by-step guide ensures that even novice cooks can recreate this delightful dish with ease. Feel free to adapt your preparation based on dietary preferences throughout!

    Mastering Healthy Creamy Kale And Sweet Potato Salad: Advanced Tips and Variations

    To elevate your culinary skills and maximize the enjoyment of your Healthy Creamy Kale And Sweet Potato Salad, try these advanced tips and variations:

    • Add Crunch: Incorporate toasted nuts (almonds, walnuts) or seeds (pumpkin, sunflower) for an extra textural layer. This not only enhances the flavor but also boosts the salad’s nutritional profile with healthy fats.
    • Herbs and Spices: Fresh herbs like parsley, cilantro, or mint bring freshness that complements the creamy elements. Spice it up with a pinch of cayenne or a dash of paprika for some heat.
    • Make it a Meal: Transform this salad into a hearty meal by adding cooked lentils or chickpeas to enhance protein content while keeping it plant-based.
    • Dress it Up: Experiment with different dressings! A balsamic vinaigrette or a sesame ginger dressing could create delightful variations that keep your taste buds excited.
    • Meal Prep: This salad stores exceptionally well, making it perfect for meal prep. Prepare portions in advance and store them in the refrigerator for quick and easy lunches throughout the week.

    These advanced tips will help you master not just the Healthy Creamy Kale And Sweet Potato Salad, but also become a more versatile cook in the kitchen. There is no wrong way to enjoy this salad—feel free to get creative!

    How to Store Healthy Creamy Kale And Sweet Potato Salad: Best Practices

    To maximize the freshness and taste of your Healthy Creamy Kale And Sweet Potato Salad, follow these best storage practices:

    • Refrigeration: Store any leftovers in an airtight container in the refrigerator. This salad is best consumed within 3-4 days. The kale holds its texture relatively well, ensuring you enjoy lovely crunch even the next day.

    • Freezing: While not recommended, you can freeze the sweet potatoes separately if you plan to make a large batch. However, the salad as a whole doesn’t freeze well due to kale’s texture and the creaminess of the dressing, which may separate.

    • Reheating: For those who prefer warm ingredients, gently reheat the sweet potatoes in the oven to preserve crispness, rather than using a microwave, which can make them mushy. Mix with the kale when serving.

    By following these storage tips, you can ensure your Healthy Creamy Kale And Sweet Potato Salad maintains its delightful flavor and texture!

    Nutritional Value of Healthy Creamy Kale And Sweet Potato Salad

    Understanding the nutritional value of your meals is essential, especially when selecting healthy dinner recipes. Here’s a breakdown of the estimated nutrition per serving (based on 4 servings):

    • Calories: 300 – 350
    • Total Fat: 15 – 17 grams
    • Saturated Fat: 2 – 3 grams
    • Cholesterol: 0 mg
    • Sodium: 150 – 200 mg
    • Total Carbohydrates: 45 – 50 grams
    • Dietary Fiber: 8 – 10 grams
    • Sugars: 4 – 6 grams
    • Protein: 8 – 10 grams
    • Vitamin A: 160% of Daily Value (DV)
    • Vitamin C: 50% of DV
    • Calcium: 8% of DV
    • Iron: 15% of DV

    These values can vary based on specific ingredient choices, but overall, this Healthy Creamy Kale And Sweet Potato Salad is a powerhouse of nutrition—rich in vitamins, healthy fats, and fiber, making it an excellent staple in any healthy eating routine.

    FAQs: Frequently Asked Questions About Healthy Creamy Kale And Sweet Potato Salad

    Q1: Can I make the salad ahead of time?

    A: Yes! You can prepare the salad components in advance and store them separately. Combine right before serving for optimal freshness, particularly the dressing.

    Q2: How long will leftovers last?

    A: Leftover salad will typically last 3-4 days in the refrigerator if stored in an airtight container. The kale retains its texture, allowing for enjoyable leftovers.

    Q3: Can I substitute regular potatoes for sweet potatoes?

    A: Absolutely! While sweet potatoes add a unique flavor, regular potatoes can work if that’s what you have on hand. Just be mindful of the difference in flavor and texture.

    Q4: Is this salad suitable for meal prepping?

    A: Yes! This salad is perfect for meal prepping. Prepare portions in advance for an easy, quick meal during the week.

    Q5: Can I use a different grain instead of quinoa?

    A: Yes, feel free to substitute quinoa with brown rice, farro, or even couscous based on your preference and dietary needs. Each grain brings its unique flavor and texture!

    Q6: What can I use instead of tahini for the dressing?

    A: If you don’t have tahini, you can use Greek yogurt for creaminess or make a simple vinaigrette using olive oil and vinegar. Both options work well!

    These FAQs aim to provide clarity on common queries regarding this delightful Healthy Creamy Kale And Sweet Potato Salad, helping ensure you have all the information for a successful dish ahead.


    With this comprehensive guide, you’re equipped to create an enticing and nutritious Healthy Creamy Kale And Sweet Potato Salad that is perfect for any occasion. Enjoy the delightful flavors and health benefits as you inspire others to explore healthier dining choices!

  • Homemade Rhubarb Pie Cake

    Homemade Rhubarb Pie Cake

    Homemade Rhubarb Pie Cake: A Tropical Delight

    Introduction to Homemade Rhubarb Pie Cake

    Welcome to your new favorite dessert recipes—the Homemade Rhubarb Pie Cake! A delightful blend of tart rhubarb and sweet cake, this dish serves as the perfect comfort food that is both simple to prepare and incredibly satisfying. Whether you’re a busy parent seeking a quick dessert for your children, a student needing a sweet fix between classes, or a baking enthusiast looking to impress friends, this recipe is tailored for you.

    Rhubarb, often called a vegetable but used as a fruit, is a powerhouse of health benefits. It’s low in calories yet rich in Vitamin K, aiding in bone health and reducing inflammation. As you indulge in this cake, you can feel good knowing you’re enjoying a dessert that is somewhat nutritious. Moreover, this recipe adapts easily for various dietary needs: it’s easily made vegan or gluten-free, ensuring that everyone at your table can enjoy a slice. So whether you’re looking for a quick weeknight bake or a showstopper for a family gathering, the Homemade Rhubarb Pie Cake shines through with its unique flavors and appealing texture. Let’s dive deeper into the benefits ofthis cake!

    Benefits and Advantages of Homemade Rhubarb Pie Cake

    The Homemade Rhubarb Pie Cake stands out for several compelling reasons.

    1. Ease of Preparation: One of the main advantages of this recipe is its simplicity. It requires minimal ingredients and can be whipped up in just over an hour. The most time-consuming part may be chopping the rhubarb, and even that is straightforward with a sharp knife. No fancy baking skills are required here.

    2. Health Benefits: Rhubarb is often overlooked for its health benefits. It’s not just low-calorie; it’s also a rich source of dietary fiber, which aids in digestion, and Vitamin C, which supports the immune system. This makes it a healthier alternative to many traditional dessert recipes that usually rely on sugar and fats for flavor.

    3. Customization: Another highlight is how easily versatile this cake is. With just a few tweaks, you can cater to various dietary restrictions. Want a gluten-free version? Simply substitute regular flour with gluten-free all-purpose flour. Need it to be vegan? Use almond or oat milk instead of regular milk, and replace eggs with flaxseed or applesauce.

    4. Appeal to All: This cake isn’t just for those following specific diets. It draws everyone in—carrying the perfect balance of sweet and tart flavors, catering to all taste preferences. Plus, it’s a magnificent treat for gatherings, celebrations, and even as a casual afternoon snack!

    All of these factors combined make the Homemade Rhubarb Pie Cake an enticing option among dessert recipes. It’s delicious, nutritious, and incredibly easy to prepare—a delightful dish that keeps giving!

    Ingredients Overview

    Essential Ingredients for Homemade Rhubarb Pie Cake

    Before getting to the heavenly cake, gather the following ingredients:

    • 2 cups of Rhubarb (diced): The star ingredient. It provides a unique flavor and excellent vitamins.
    • 1 ½ cups of Granulated Sugar: This balances the tartness of rhubarb; you can adjust the sugar to your taste.
    • ½ cup of Unsalted Butter (softened): Adds richness to the cake. You can use coconut oil for a dairy-free version!
    • 3 large Eggs: These help bind the ingredients. Substitute with 1/4 cup of unsweetened applesauce or flax eggs for a vegan version.
    • 1 ½ cups of All-Purpose Flour: Provides structure for the cake; gluten-free flour can be used as a substitute.
    • 1 teaspoon of Baking Powder: Helps the cake rise.
    • 1 teaspoon of Vanilla Extract: Enhances the flavors.
    • ½ teaspoon of Salt: Balances the sweetness.

    Optional Add-Ins:

    • 1 teaspoon of Cinnamon or Nutmeg: Adds warmth.
    • 1 cup of Chopped Nuts (optional): For crunch!

    Dietary Substitutions to Customize Your Homemade Rhubarb Pie Cake

    1. Vegan Version: Replace butter with coconut oil and use flax eggs or applesauce instead of chicken eggs. Choose a plant-based milk to increase moisture.

    2. Gluten-Free: Swap out the all-purpose flour with an equivalent amount of gluten-free flour blend. This ensures everyone can enjoy a slice without dietary concerns.

    3. Reduced Sugar: For a lower-calorie cake, consider substituting sugar with a natural sweetener like agave nectar or stevia. Adjust the amount based on your desired sweetness.

    4. Sugar-Free: Use erythritol or monk fruit sweetener for a sugar-free version while maintaining taste.

    With these options, you can create a stunning pie cake that aligns with numerous dietary preferences and needs!

    How to Prepare the Perfect Homemade Rhubarb Pie Cake: Step-by-Step Guide

    Creating your Homemade Rhubarb Pie Cake is an enjoyable process. Follow these simple steps for a delicious outcome:

    1. Preheat the Oven: Set your oven to 350°F (175°C). This ensures that your cake will bake evenly.

    2. Prepare the Baking Pan: Grease a 9×13 inch baking pan with butter or cooking spray to prevent sticking. You can also line it with parchment paper for extra ease.

    3. Mix the Dry Ingredients: In a medium-sized bowl, whisk together the flour, baking powder, and salt. This helps to evenly distribute the leavening agent.

    4. Cream the Butter and Sugar: In another large bowl, beat the softened butter and sugar together using an electric mixer on medium speed until fluffy (about 3 minutes).

    5. Incorporate Eggs and Vanilla: Add the eggs one at a time, mixing well after each addition. Then, add the vanilla extract and blend until combined.

    6. Combine Mixtures: Gradually add the dry mixture into the wet ingredients, alternating with the chopped rhubarb. Stir until just combined—don’t overmix!

    7. Bake the Cake: Pour the batter into the prepared baking pan. Smooth the top and place in your preheated oven. Bake for 45-50 minutes or until a toothpick inserted in the center comes out clean.

    8. Cool Down: Allow the cake to cool in the pan for 10-15 minutes, then transfer it to a wire rack to cool completely.

    9. Serve and Enjoy: Once cooled, slice your cake. Enjoy plain or top it with whipped cream, yogurt, or ice cream for a festive touch.

    This step-by-step process highlights how accessible it is to make a delightful homemade dessert. You can customize each step further to align with personal preferences or dietary needs, ensuring that everyone can enjoy this luscious treat!

    Mastering Homemade Rhubarb Pie Cake: Advanced Tips and Variations

    While the basic Homemade Rhubarb Pie Cake is delectable on its own, there are several advanced tips and variations you can introduce to elevate your baking experience.

    1. Add a Crumble Topping: Enhance your cake into a pie by making a simple crumble topping with oats, flour, and butter (or coconut oil for a vegan version). Sprinkle it on top before baking to add an extra layer of flavor and texture.

    2. Incorporate Other Fruits: Combine the tart rhubarb with strawberries or apples to enrich the flavor. Mix in one cup of diced strawberries to add sweetness and color.

    3. Cream Cheese Swirl: For an indulgent twist, prepare a simple cream cheese mixture (with cream cheese, sugar, and vanilla) and swirl it through the cake batter before baking.

    4. Spice it Up: Add spices such as ginger or cardamom to the batter to give a warm, aromatic flavor. Perhaps, a hint of citrus by zesting a lemon might brighten the overall flavor.

    5. Serving Suggestions: Consider pairing your cake with fresh fruits or a dusting of powdered sugar for a professional finish.

    These advanced ideas can elevate your Homemade Rhubarb Pie Cake, guaranteeing it wows everyone at the table and turns ordinary dessert recipes into show-stoppers.

    How to Store Homemade Rhubarb Pie Cake: Best Practices

    To ensure your Homemade Rhubarb Pie Cake remains fresh and flavorful, proper storage is essential. Here are the best practices:

    1. Refrigeration: Allow the cake to cool completely, then store it in an airtight container in the fridge. It can last for up to five days. Be sure to tightly cover it to prevent it from drying out.

    2. Freezing: If you want to enjoy your cake later, consider freezing it. Wrap the cooled cake with plastic wrap, then in aluminum foil for added protection. It can be frozen for up to three months. Thaw in the refrigerator overnight before serving.

    3. Reheating: To reheat individual slices, pop them in the microwave for about 10-15 seconds until warmed through. Alternatively, you can reheat it in a preheated oven at 350°F (175°C) for about 10 minutes.

    By following these storage tips, you’ll ensure that your delicious cake remains as delightful as when you first baked it.

    Nutritional Value of Homemade Rhubarb Pie Cake

    Understanding the nutritional composition of your Homemade Rhubarb Pie Cake can help you enjoy it more mindfully. Here’s a general idea of what to expect per serving (about 1 slice, based on 12 servings):

    • Calories: Approximately 220
    • Total Fat: 8g
    • Saturated Fat: 4.5g
    • Cholesterol: 50mg
    • Sodium: 200mg
    • Total Carbohydrates: 35g
    • Dietary Fiber: 1g
    • Sugars: 15g
    • Protein: 3g

    These values may vary based on specific ingredient substitutions, but this cake generally offers a moderate calorie count, making it an enjoyable treat even for those watching their intake. When made with healthier swaps, like reducing sugar or using healthier fats, you further enhance its nutritional profile without sacrificing flavor.

    FAQs: Frequently Asked Questions About Homemade Rhubarb Pie Cake

    Q: Can I use frozen rhubarb?
    A: Absolutely! Just ensure it is properly thawed and drained to avoid excess moisture in the batter.

    Q: Can I substitute the sugar?
    A: Yes, consider using coconut sugar, agave nectar, or other natural sweeteners. You may need to adjust the liquid content if using liquid sweeteners.

    Q: Is it possible to make this cake ahead of time?
    A: Yes, the cake can easily be made a day in advance. Just store it in the refrigerator, and it will retain its flavor.

    Q: What’s the best way to serve this cake?
    A: Serve it warm with whipped cream, ice cream, or fresh berries for an exceptional dessert experience.

    Q: How can I achieve a more moist texture?
    A: To intensify moisture, consider adding sour cream or yogurt into the batter or replacing some of the butter with applesauce.

    With these frequently asked questions answered, you can confidently create your own Homemade Rhubarb Pie Cake. It’s a delightful addition to your collection of dessert recipes, infused with love and versatile enough for any gathering!

    Give it a try, and savor every delicious bite!

  • Delicious Strawberry Rhubarb Pie Cookies

    Delicious Strawberry Rhubarb Pie Cookies

    Delicious Strawberry Rhubarb Pie Cookies: A Tropical Delight

    Introduction to Delicious Strawberry Rhubarb Pie Cookies

    Imagine biting into a cookie that transports you straight to summertime picnics with its vibrant flavors and irresistible aroma. Welcome to the world of Delicious Strawberry Rhubarb Pie Cookies! This delightful treat offers a unique blend of sweet strawberries and tart rhubarb, capturing the essence of classic strawberry recipes but in a fun and portable cookie form. These cookies are not just delicious; they are also simple to make, healthy, and adaptable for various dietary needs, making them a versatile addition to your baking repertoire.

    Perfect for home cooks, busy parents, and students looking for a quick sweet treat, these cookies stand out with their easy preparation and wholesome ingredients. The combination of strawberries and rhubarb not only offers a symphony of flavors but also packs a nutritional punch, rich in vitamins and antioxidants. Plus, with options to make them vegan, gluten-free, or low-calorie, there’s something for everyone. Whether you’re a baking enthusiast, a newlywed wanting to impress, or simply seeking a new snack, these pie cookies will not only delight your tastebuds but also inspire you to explore more strawberry recipes.

    Benefits and Advantages of Delicious Strawberry Rhubarb Pie Cookies

    There’s a myriad of reasons why these Delicious Strawberry Rhubarb Pie Cookies make for the perfect treat. First and foremost, the simplicity of the recipe is a game-changer for any home cook. With just a handful of ingredients, you can whip up a batch of cookies that look and taste like a specialized pastry without the fuss.

    Moreover, this recipe comes with significant health benefits. Strawberries are known for being high in Vitamin C, manganese, and antioxidants, while rhubarb is rich in dietary fiber and low in calories. Together, they create a balanced snack that satisfies your sweet tooth while still being nutritious. This means you can enjoy your cookies guilt-free!

    Another major advantage is the adaptability of this recipe. Busy parents will appreciate that you can batch-bake these cookies and have them ready when cravings strike during hectic weekdays. For diet-conscious individuals, these cookies can easily be made vegan and gluten-free, allowing you to cater to specific dietary restrictions without compromising flavor or texture. With these cookies, you’ll not only impress friends and family, but also explore the delightful world of strawberry recipes with ease.

    In addition, they are perfect for sharing at gatherings or as unique homemade gifts. Cut them into fun shapes with cookie cutters, and you’ve got a delightful, personalized treat for birthday parties or holiday celebrations. Given all these incredible advantages, it’s clear why Delicious Strawberry Rhubarb Pie Cookies should become a staple in every household.

    Ingredients Overview

    Essential Ingredients for Delicious Strawberry Rhubarb Pie Cookies

    Here is a detailed list of all the necessary ingredients you’ll need to prepare Delicious Strawberry Rhubarb Pie Cookies:

    • 1 cup all-purpose flour (or gluten-free flour): Serves as the base for the cookie dough, providing structure and texture.
    • 1/2 cup rolled oats: Adds heartiness and great texture to the cookies.
    • 1/2 cup unsalted butter (or vegan butter): Adds richness and moisture. For a lower-calorie option, you can substitute with coconut oil.
    • 1/2 cup sugar (or coconut sugar): Sweetens the cookies. You can also try a natural sugar substitute if desired.
    • 1/2 cup strawberries (chopped): Provides the primary flavor and sweetness.
    • 1/2 cup rhubarb (chopped): Imparts a refreshing tartness that balances the sweetness of strawberries.
    • 1 egg (or flaxseed egg for vegan): Acts as a binding agent. For a vegan option, mix 1 tablespoon of ground flaxseed with 3 tablespoons of water, let it sit for a few minutes to thicken.
    • 1 teaspoon vanilla extract: Enhances the flavors and adds warmth.
    • 1/2 teaspoon baking soda: Helps the cookies rise.
    • 1/2 teaspoon salt: Balances the sweetness and enhances overall flavor.

    With these ingredients, you can easily create a delightful cookie that aligns with various dietary preferences. Whether you’re preparing for a gathering, a snack at work, or desserts for family, you’ll have all the foundational pieces you need to perfect this recipe!

    Dietary Substitutions to Customize Your Delicious Strawberry Rhubarb Pie Cookies

    Customization is key when it comes to accommodating various dietary needs. Here are some substitution ideas for the Delicious Strawberry Rhubarb Pie Cookies:

    1. Flours: Apart from all-purpose or gluten-free flour, almond flour or coconut flour can be useful alternatives for gluten-free baking. Both options offer distinctive flavors and are also nutrient-rich.

    2. Sugars: If you want to lower the glycemic index, consider using stevia or monk fruit sweetener as a low-calorie substitute for sugar. They provide sweetness without the added calories.

    3. Fats: Coconut oil, as previously mentioned, is a great vegan replacement for butter. For a dairy-free option, you can use applesauce or a vegan yogurt to enhance moisture without added fat.

    4. Binders: Instead of using eggs, you can also replace them with silken tofu or a small amount of mashed banana, which can contribute to the cookie’s moisture.

    With these substitutions, anyone can enjoy Delicious Strawberry Rhubarb Pie Cookies, regardless of their dietary preferences or restrictions.

    How to Prepare the Perfect Delicious Strawberry Rhubarb Pie Cookies: Step-by-Step Guide

    Creating Delicious Strawberry Rhubarb Pie Cookies is simple and rewarding! Follow these easy steps for a successful baking session:

    1. Preheat the Oven: Start by preheating your oven to 350°F (175°C). This step is essential for getting that perfect cookie texture.

    2. Prepare Your Baking Sheet: Line a baking sheet with parchment paper or lightly grease it to prevent the cookies from sticking.

    3. Mix Dry Ingredients: In a medium bowl, combine the flour, rolled oats, baking soda, and salt. Whisk them together until well mixed. This step ensures even distribution of leavening agents.

    4. Cream Butter and Sugar: In a large mixing bowl, cream together the unsalted butter and sugar until the mixture is light and fluffy. This should take about 2-3 minutes with an electric mixer or 5-7 minutes by hand.

    5. Incorporate the Egg and Vanilla: Add in the egg (or flaxseed mixture) and vanilla extract. Mix until fully combined, making sure there are no streaks of butter remaining.

    6. Combine Wet and Dry Mixtures: Gradually add the flour mixture to the butter mixture. Stir until just combined; avoid overmixing, as this can lead to tough cookies.

    7. Fold in Strawberries and Rhubarb: Gently fold in the chopped strawberries and rhubarb into the cookie dough. Ensure the pieces are evenly distributed for even flavor in every bite.

    8. Scoop the Dough: Using a cookie scoop or tablespoon, drop the dough onto the prepared baking sheet, spacing them about 2 inches apart to allow for spreading.

    9. Bake the Cookies: Place the baking sheet in the preheated oven and bake for 10-12 minutes, or until the edges are golden brown while the centers remain slightly soft.

    10. Cool: Remove the cookies from the oven and let them cool on the baking sheet for about 5 minutes. Transfer them to a wire rack to cool completely. Enjoy warm or store for later!

    These step-by-step instructions will guide you to create perfect Delicious Strawberry Rhubarb Pie Cookies that you can share with friends and family or keep all to yourself!

    Mastering Delicious Strawberry Rhubarb Pie Cookies: Advanced Tips and Variations

    To elevate your Delicious Strawberry Rhubarb Pie Cookies, consider these advanced tips and variations:

    • Add Spices: Introduce a pinch of cinnamon or nutmeg to the cookie dough to offer an added depth of flavor. This can enhance the overall sweetness while complementing the fruity notes.

    • Incorporate Nuts: Mixing in chopped walnuts or almonds can add a delightful crunch to the cookies, making for a more textural experience. This not only adds flavor but also boosts the nutritional profile by increasing healthy fats and protein.

    • Try Different Fruit Combinations: While strawberry and rhubarb are a classic pair, experimenting with other fruits like blueberries, peaches, or even apples can lead to new and exciting flavors. A berry mix would create a delightful assortment of tastes!

    • Make a Glaze: For an extra layer of sweetness, consider drizzling a simple glaze made with powdered sugar and lemon juice over the cooled cookies. This would add both a touch of elegance and an irresistible sweetness!

    With these tips and variations in mind, you can customize your Delicious Strawberry Rhubarb Pie Cookies to suit your taste preferences. Whether you stick to the classic recipe or add a twist, you’ll find joy in baking these delicious treats!

    How to Store Delicious Strawberry Rhubarb Pie Cookies: Best Practices

    Storing your Delicious Strawberry Rhubarb Pie Cookies properly will ensure they maintain their freshness and delightful flavor. Here are some best practices for storage:

    • At Room Temperature: If you plan to consume the cookies within a few days, store them in an airtight container at room temperature. This will keep them soft and chewy.

    • Refrigeration: For longer storage, you may refrigerate the cookies. Place them in a sealed container lined with parchment paper to prevent moisture buildup. They should remain fresh for up to a week in the fridge.

    • Freezing: If you want to keep the cookies for an extended period, freezing them is ideal. Place the cooled cookies in a single layer on a baking sheet and freeze until firm. Then, transfer them to a freezer-safe bag or container, where they can last up to three months. For easy access, you can layer parchment paper between the cookies.

    • Reheating: To enjoy your cookies warm, simply microwave them for about 10-15 seconds, or place them in an oven preheated to 350°F for a few minutes. This will result in soft, delicious cookies that feel freshly baked.

    With these storage tips, you can ensure that your Delicious Strawberry Rhubarb Pie Cookies maintain their delectable taste and texture for as long as possible.

    Nutritional Value of Delicious Strawberry Rhubarb Pie Cookies

    When enjoying your Delicious Strawberry Rhubarb Pie Cookies, it’s good to be aware of their nutritional content. Below is an approximate nutritional breakdown per cookie (based on a batch of 12 cookies using standard ingredients):

    • Calories: 150
    • Total Fat: 7g
    • Saturated Fat: 3g
    • Cholesterol: 20mg
    • Sodium: 50mg
    • Total Carbohydrates: 20g
    • Dietary Fiber: 1g
    • Sugars: 8g
    • Protein: 2g

    Health Benefits

    • Rich in Fiber: Both strawberries and rhubarb contribute fiber, which is beneficial for digestive health.
    • Low in Calories: This cookie is a relatively low-calorie dessert compared to other options, especially if you choose to use natural sugar substitutes and healthy fats.
    • Vitamins and Antioxidants: Strawberries are particularly high in Vitamin C and antioxidants, enhancing immune function and combating oxidative stress.

    Feel free to customize your cookies per your dietary needs, ensuring they fit well into your healthy eating habits while still being an absolute delight!

    FAQs: Frequently Asked Questions About Delicious Strawberry Rhubarb Pie Cookies

    1. Can I use frozen strawberries and rhubarb instead of fresh?
    Yes, you can use frozen fruits! Make sure to thaw and drain them before adding them to the dough to prevent excess moisture, which can affect the texture of the cookies.

    2. How can I make this recipe gluten-free?
    Simply substitute the all-purpose flour with a gluten-free blending flour, and ensure that any other ingredients, like oats, are certified gluten-free.

    3. How do I know when the cookies are done baking?
    The cookies should be slightly golden around the edges while still appearing soft in the center. They will firm up as they cool.

    4. Can I double the recipe?
    Absolutely! If you want extra cookies for sharing, just double the ingredients and follow the same steps. You may need to bake in batches depending on your oven size.

    5. How should I store my cookies?
    Store the cookies in an airtight container at room temperature for up to a week, or freeze them for up to three months. Reheat for a warm treat later!

    By addressing these common queries, we hope to make your baking experience smooth and enjoyable while you create Delicious Strawberry Rhubarb Pie Cookies. Happy baking!

  • Garlic Olive GardenS Fettuccine Alfredo

    Garlic Olive GardenS Fettuccine Alfredo

    Garlic Olive Garden’s Fettuccine Alfredo: A Tropical Delight

    Introduction to Garlic Olive Garden’s Fettuccine Alfredo

    If you’re a fan of creamy pasta dishes, then look no further than Garlic Olive Garden’s Fettuccine Alfredo! This delightful recipe combines the rich flavors of garlic with a smooth, cheesy sauce, creating a dish that is both comforting and satisfying. With its simple preparation method, this dish makes for a perfect weeknight dinner or an impressive meal for special occasions.

    In the world of pasta recipes, Fettuccine Alfredo stands out for its versatility and ease of preparation. Whether you’re a busy parent juggling work and kids, a student looking for a quick meal, or a health-conscious individual, this dish adapts effortlessly to meet various dietary needs.

    What makes this recipe even more appealing is its emphasis on wholesome ingredients, providing a rich yet healthy option. You can customize your Fettuccine Alfredo to suit vegan or gluten-free diets, making it an inclusive choice for everyone at your table. This recipe invites you to unleash your inner chef, regardless of your culinary experience. Expect to create a meal that not only pleases the palate but also offers a satisfying dining experience for all. So let’s dive into the marvelous world of Garlic Olive Garden’s Fettuccine Alfredo!

    Benefits and Advantages of Garlic Olive Garden’s Fettuccine Alfredo

    Garlic Olive Garden’s Fettuccine Alfredo is not just another pasta recipe; it’s a joyous adventure in flavor and nutrition. Here are some incredible benefits of this classic dish:

    1. Simplicity: This recipe relies on a few basic ingredients—pasta, garlic, cream, and cheese—making it straightforward to prepare. Even novice cooks can follow the step-by-step instructions with ease, reducing the chance of kitchen mishaps.

    2. Customizable Health Benefits: The traditional recipe can easily be adapted to meet dietary restrictions. For example, by swapping out heavy cream for a lower-calorie alternative or using gluten-free pasta, this dish becomes a health-friendly option without sacrificing flavor.

    3. Quick and Convenient: Busy individuals will appreciate the minimal time required to whip up this dish, often ready in less than 30 minutes. This makes it a perfect go-to during hectic weeks when you crave comfort food with minimal effort.

    4. Flavorful and Satisfying: The rich flavor of the garlic combined with the creaminess of the sauce is guaranteed to tantalize your taste buds. This dish is a quintessential comfort food that leaves everyone feeling satisfied.

    5. Versatile: Fettuccine Alfredo can easily pair with various proteins like grilled chicken, shrimp, or veggies, offering you even more ways to enjoy it. This flexibility allows you to mix things up and keep your meals exciting.

    Overall, preparing Garlic Olive Garden’s Fettuccine Alfredo results in a crowd-pleasing dish that effortlessly unites friends and family around the table. Along with the health benefits and ease of preparation, there’s a lot to love about this pasta creation!

    Ingredients Overview

    Essential Ingredients for Garlic Olive Garden’s Fettuccine Alfredo

    To create a delectable batch of Garlic Olive Garden’s Fettuccine Alfredo, you’ll need the following ingredients:

    • Fettuccine Pasta (12 oz): The star of the recipe, fettuccine is known for its flat and thick shape, allowing it to hold creamy sauces beautifully. You can opt for regular, whole grain, or gluten-free pasta variants.

    • Butter (4 tablespoons): This provides richness and aids in creating a silky sauce.

    • Minced Garlic (4 cloves): Fresh garlic adds depth and a robust flavor to the dish.

    • Heavy Cream (2 cups): For a rich and creamy sauce. If you’re aiming for lower calories, consider substituting it with half-and-half or a plant-based cream to fit vegan needs.

    • Parmesan Cheese (1 cup, freshly grated): A sprinkle of Parmesan cheese enriches the sauce with nutty notes. Nutritional yeast works as a great dairy-free alternative if you’re in need of vegan options.

    • Salt and Pepper: To taste, these seasonings enhance the overall flavor of the dish.

    Healthier Options:

    • Gluten-Free Pasta: There are various options available in stores, including chickpea or lentil-based pasta.

    • Dairy-Free Cream: Look for coconut cream or almond-based alternatives to keep the dish vegan-friendly.

    Dietary Substitutions to Customize Your Garlic Olive Garden’s Fettuccine Alfredo

    Your Garlic Olive Garden’s Fettuccine Alfredo can adapt to fit a variety of dietary preferences. Here are some recommended substitutions you might consider:

    • For Vegan Diets: Use a plant-based cream, such as cashew cream or coconut milk, and replace butter with vegan margarine. Nutritional yeast can replace Parmesan cheese for that cheesy flavor without dairy.

    • For Gluten-Free Diets: Swap regular fettuccine for gluten-free varieties made from rice, corn, or quinoa, ensuring that everyone at your table can enjoy this dish.

    • For Lower Calorie Options: Replace heavy cream with light cream or buttermilk. Another fantastic approach is to blend cauliflower into a cream-like consistency to offer an even healthier twist to the Alfredo sauce without sacrificing taste.

    By customizing your Garlic Olive Garden’s Fettuccine Alfredo, you can cater to everyone’s unique dietary needs while still enjoying the great flavors of this beloved pasta recipe.

    How to Prepare the Perfect Garlic Olive Garden’s Fettuccine Alfredo: Step-by-Step Guide

    Now let’s get to the heart of the matter—how to whip up this classic dish effortlessly. Here’s your step-by-step guide to making the perfect Garlic Olive Garden’s Fettuccine Alfredo:

    1. Prepare the Pasta:
    2. In a large pot, bring salted water to a boil. Add the fettuccine pasta and cook according to package instructions until al dente (typically about 8-10 minutes).
    3. Drain and set aside. You can toss the pasta with a little olive oil to prevent sticking.

    4. Melt the Butter:

    5. In a large skillet over medium heat, melt the butter. Keep an eye on it to ensure it doesn’t burn.

    6. Sauté the Garlic:

    7. Once the butter is melted, add minced garlic into the skillet. Sauté for about 1-2 minutes until fragrant but not browned, as burnt garlic can turn bitter.

    8. Add Cream:

    9. Slowly pour in the heavy cream while stirring continuously. Allow the mixture to simmer gently for 3-5 minutes, stirring occasionally, until it begins to thicken.

    10. Incorporate Cheese:

    11. Gradually whisk in the grated Parmesan cheese until it melts and the sauce becomes creamy. Make sure to reserve a little cheese for garnish!

    12. Season:

    13. Taste the sauce and season with salt and pepper. Remember, the cheese will add some saltiness, so adjust accordingly.

    14. Combine Pasta and Sauce:

    15. Add the cooked fettuccine to the skillet, tossing to combine and coat the noodles evenly with the creamy sauce. If the sauce seems too thick, you can adjust the consistency by adding a splash of pasta water.

    16. Finish with Garnish:

    17. Remove from heat and serve garnished with additional Parmesan cheese and freshly cracked pepper, if desired. For an extra kick, consider adding fresh herbs like parsley or basil.

    18. Optional Add-Ins:

    19. To take your Garlic Olive Garden’s Fettuccine Alfredo to the next level, consider adding proteins such as grilled chicken or sautéed shrimp, or even roasted vegetables for a nutritious boost.

    Every step of this process highlights how pasta recipes can be both simple and delightful, ensuring that you make the most of every ingredient used!

    Mastering Garlic Olive Garden’s Fettuccine Alfredo: Advanced Tips and Variations

    After you’ve mastered the basic recipe, you might want to experiment with further tips and variations:

    1. Use Fresh Ingredients: Always opt for fresh garlic and homemade sauce for the best flavor. It’s a game-changer!

    2. Add Zest: A pinch of nutmeg can elevate the flavors in your creamy sauce. Experiment with a dash to find complementary tastes.

    3. Spice it Up: Incorporate a pinch of crushed red pepper flakes for subtle heat. This is particularly great if you enjoy a bit of spice in your meals.

    4. Try Different Cheeses: Blend in other cheese varieties, such as Gouda or Fontina, for unique flavors. Mix together cheeses for a creamy texture.

    5. Finish with A Splash of Lemon Juice: Just a hint of lemon juice can brighten up the dish and balance the richness of the sauce.

    6. Experiment with Veggies: Toss in some sautéed spinach, mushrooms, or sun-dried tomatoes for added flavor and nutrition.

    Variations allow you to create a signature dish that caters to your flavor preferences while still enjoying the original essence of Garlic Olive Garden’s Fettuccine Alfredo!

    How to Store Garlic Olive Garden’s Fettuccine Alfredo: Best Practices

    Storing your Garlic Olive Garden’s Fettuccine Alfredo properly can help maintain its fantastic flavor and texture, allowing you to enjoy leftovers for days. Here are the best practices for storing this delicious dish:

    1. Refrigeration:
    2. Allow the pasta to cool to room temperature before transferring it into an airtight container. Store in the refrigerator for up to 3-4 days.

    3. Freezing:

    4. If you want to keep it for a longer period, consider freezing the Alfredo. However, be mindful that cream-based sauces may separate when thawed. To freeze, portion the pasta into microwave-safe containers and consume within 2-3 months for best quality.

    5. Reheating:

    6. When you’re ready to enjoy your leftovers, gently reheat in a skillet over low heat, adding a splash of milk or cream to help restore the sauce’s creaminess. Stir frequently to avoid sticking. Microwaving works too, but do so in smaller intervals to prevent uneven heating.

    Following these storage methods ensures that your delicious Garlic Olive Garden’s Fettuccine Alfredo stays fresh whenever you crave it again!

    Nutritional Value of Garlic Olive Garden’s Fettuccine Alfredo

    Understanding the nutritional value of your dish is essential, especially if you are diet-conscious. Below is an approximate nutritional breakdown for one serving (assuming 6 servings total in the recipe). These figures may vary based on specific ingredient choices:

    • Calories: 650
    • Total Fat: 40g
    • Saturated Fat: 25g
    • Cholesterol: 125mg
    • Sodium: 800mg
    • Total Carbohydrates: 53g
    • Dietary Fiber: 2g
    • Sugars: 1g
    • Protein: 18g

    Health Considerations:

    • Use Whole Grain or Gluten-Free Pasta: Choose whole-grain varieties to increase fiber content.
    • Reduce Cream for Lower Calories: Opting for lighter cream or incorporating cauliflower as mentioned can significantly reduce calorie count.
    • Control Portion Size: Being mindful of serving sizes is crucial, especially for calorie-dense meals like this.

    This nutritional breakdown encourages you to balance indulgence with moderation in mind. Enjoy your Garlic Olive Garden’s Fettuccine Alfredo as part of a well-rounded diet!

    FAQs: Frequently Asked Questions About Garlic Olive Garden’s Fettuccine Alfredo

    1. Can I make Garlic Olive Garden’s Fettuccine Alfredo in advance?
    Yes! You can cook the pasta and prepare the sauce separately ahead of time. Combine them just before serving for the freshest taste.

    2. Can I freeze this pasta recipe?
    Absolutely! While freezing is an option, keep in mind that the cream sauce may not have the same texture when reheated. Portion into serving sizes and consume within 2-3 months.

    3. What can I substitute for heavy cream?
    You can use half-and-half, light cream, or even plant-based cream alternatives such as coconut cream to suit dietary needs.

    4. How do I customize the flavor of my Fettuccine Alfredo?
    Feel free to add your favorite protein, vegetables, or herbs to customize the dish and make it your own!

    5. Can I make this vegan?
    Yes, simply substitute heavy cream with a plant-based alternative, use vegan butter, and opt for nutritional yeast or a vegan cheese for flavor.

    6. What are some common mistakes to avoid while making Alfredo sauce?
    Be cautious not to overheat the sauce once the cheese is added, as this can cause it to separate. Stir gently and heat through just until warmed.

    By addressing these frequently asked questions, we hope that you’re well-equipped to create your own fabulous Garlic Olive Garden’s Fettuccine Alfredo at home!

    In conclusion, Garlic Olive Garden’s Fettuccine Alfredo is a delightful dish that brings together comfort, flavor, and simplicity, making it suitable for various diets. Whether enjoyed on a cozy weeknight or as an impressive meal for guests, it’s a recipe you’ll want to revisit. So grab your ingredients, unleash your culinary creativity, and dig into this delicious pasta dish today! Enjoy your cooking journey!