Category: salad

  • Juicy Spring Mix Salad With Raspberry Dressing

    Juicy Spring Mix Salad With Raspberry Dressing

    Juicy Spring Mix Salad With Raspberry Dressing: A Tropical Delight

    Introduction to Juicy Spring Mix Salad With Raspberry Dressing

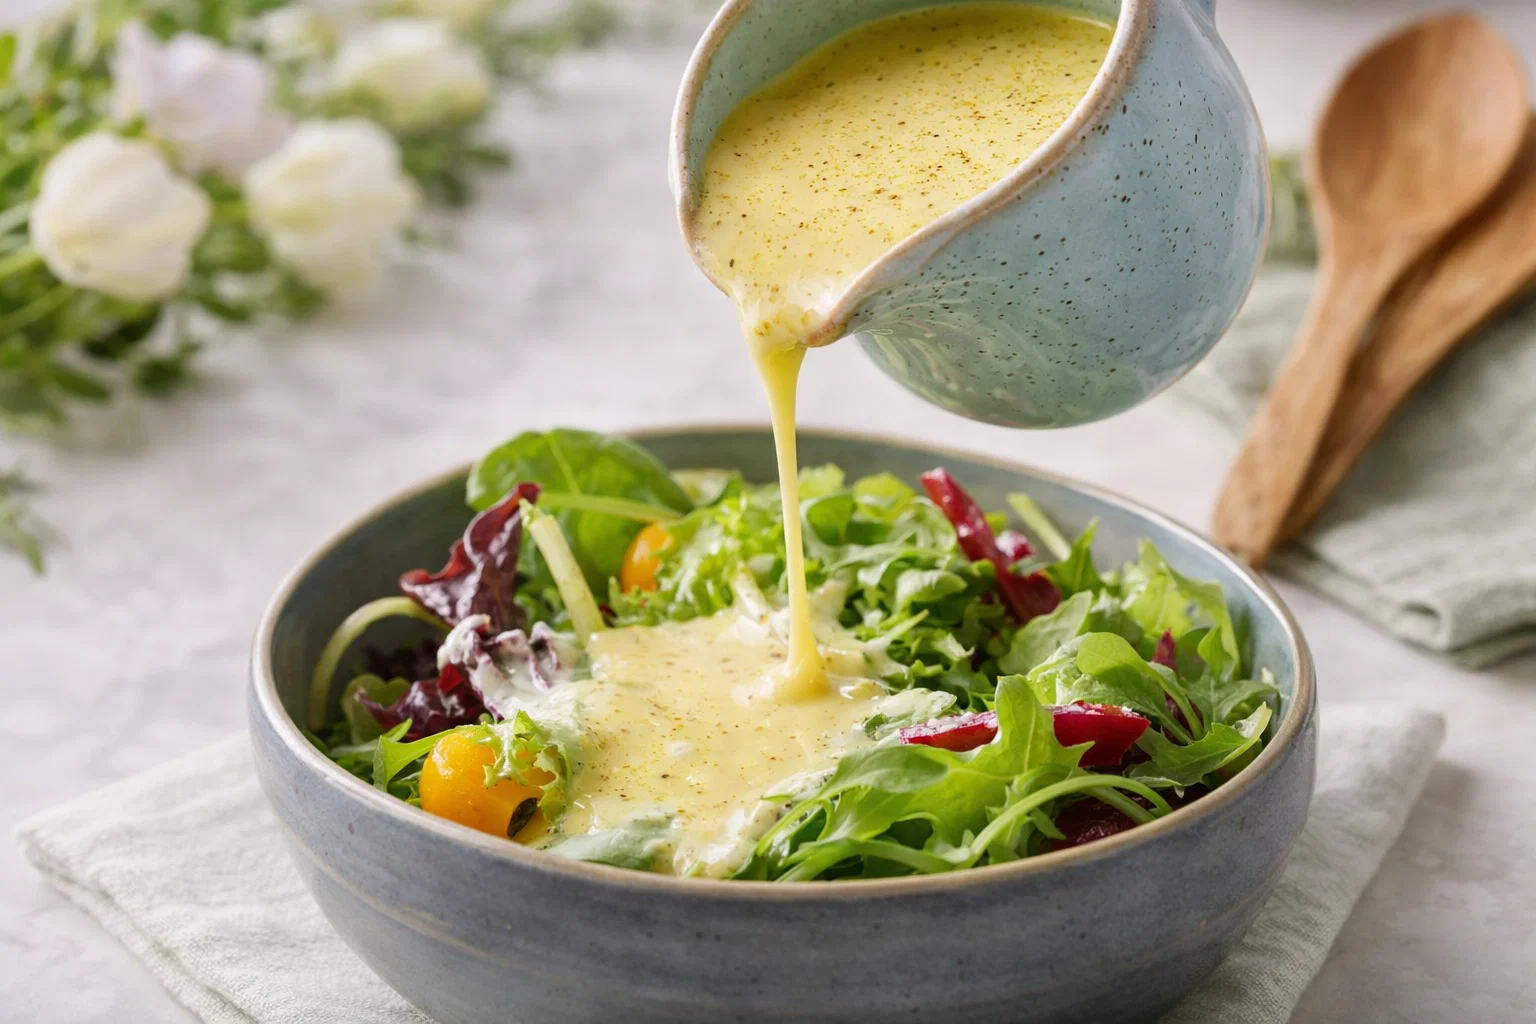
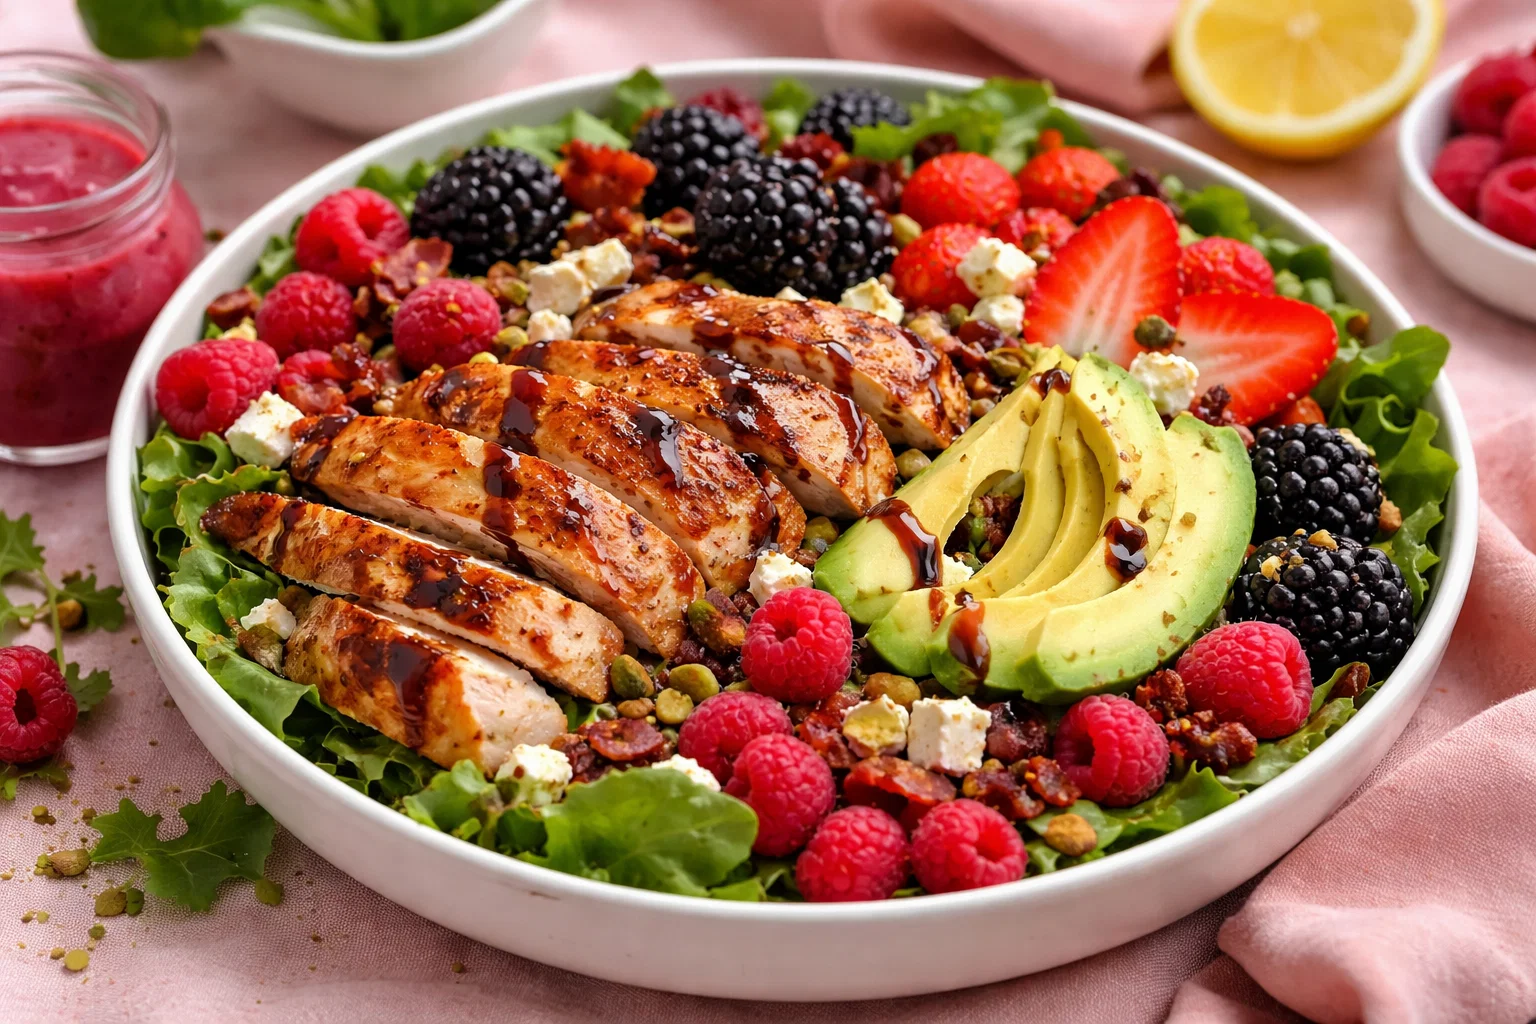
    Spring meals are all about bringing freshness and vibrancy back into our diets after the long winter months. The Juicy Spring Mix Salad with Raspberry Dressing embodies these ideals perfectly. This light, refreshing salad combines peppery greens, crunchy vegetables, and a sweet-tart raspberry dressing, making it an ideal choice for health-conscious individuals. Not only is it simple to make, requiring minimal prep time, but it also caters to a variety of dietary needs, being both vegan and gluten-free.

    The bright colors and dynamic flavors in this salad make it a charming centerpiece for family gatherings, picnics, or lunch boxes, while its healthy ingredients offer a wealth of nutrients. From busy parents looking for a quick, wholesome meal to seniors wanting something light yet satisfying, this salad fits the bill perfectly. Plus, it’s immensely adaptable, making it suitable for food enthusiasts, newlyweds discovering culinary adventures together, and students seeking quick, tasty meals on a budget.

    This Juicy Spring Mix Salad with Raspberry Dressing is more than just a dish; it’s an invitation to embrace the joys of spring and nurture our bodies with wholesome ingredients. So, gather your ingredients and let’s embark on this culinary journey!

    Benefits and Advantages of Juicy Spring Mix Salad With Raspberry Dressing

    Creating a delicious salad doesn’t have to be labor-intensive. The Juicy Spring Mix Salad with Raspberry Dressing stands out for its incredible ease of preparation, making it a go-to option for spring meals. Unlike many complicated recipes that require hours in the kitchen, this salad can be assembled in just 15 minutes. For busy professionals, parents, or anyone with a tight schedule, this dish is a lifesaver.

    The blend of greens and vegetables in this salad also provides a bounty of health benefits. Spring mix greens are typically rich in vitamins A, C, and K, while raspberries are packed with antioxidants and dietary fiber. This combination not only promotes healthy digestion but also supports overall well-being, helping you maintain your energy levels throughout the day. Furthermore, the salad is low in calories, making it an excellent choice for those on a weight management journey.

    In addition to its health benefits, this salad is incredibly customizable. You can easily adapt it to include seasonal ingredients or leftovers from your refrigerator, ensuring minimal food waste. Whether you’re a vegan, vegetarian, or someone who leads a gluten-free lifestyle, the Juicy Spring Mix Salad with Raspberry Dressing is versatile enough to accommodate your specific dietary needs. This adaptability further emphasizes the importance of incorporating fresh, vibrant spring meals into your weekly rotation.

    Ingredients Overview

    Essential Ingredients for Juicy Spring Mix Salad With Raspberry Dressing

    Creating the perfect Juicy Spring Mix Salad with Raspberry Dressing requires the following ingredients:

    • 5 oz. Spring Mix Greens (about 1 bag): This mix typically includes baby spinach, arugula, and baby kale, providing a rich source of vitamins.
    • 1 cup Raspberries: Fresh or frozen, they contribute vibrant flavor and a healthy dose of antioxidants.
    • 1 cup Cherry Tomatoes (halved): These add a burst of sweetness and color, and are an excellent source of vitamin C.
    • 1/2 Cucumber (sliced): Provides crunch and hydration with low calories.
    • 1/4 Red Onion (thinly sliced): Adds a bit of zing and flavor depth.
    • 1/4 cup Feta Cheese (opt for vegan cheese if desired): Sprinkle for creaminess; you can omit if maintaining a strict vegan diet.
    • 1/4 cup Olive Oil: This healthy fat is essential for the dressing.
    • 1/4 cup Raspberry Vinegar or Balsamic Vinegar: For tang and acidity, balancing the sweetness of the raspberries.
    • 1 tbsp Honey or Agave Syrup: This sweetener can be omitted or substituted with maple syrup for a vegan option.
    • Salt and Pepper (to taste).

    This salad is vegan and gluten-free as is, and offers a tantalizing mix of flavors and textures that make spring meals an exciting culinary adventure.

    Dietary Substitutions to Customize Your Juicy Spring Mix Salad With Raspberry Dressing

    Adapting this salad to fit your dietary preferences is easy! Here are a few suggestions for substitutions:

    • Greens: Swap spring mix for kale, arugula, or even romaine if you prefer a heartier option.
    • Vegan Cheese: Use nutritional yeast for a cheesy flavor without using dairy.
    • Sweeteners: If you are avoiding sugars, use natural fruit puree like date paste instead of honey.
    • Nuts/Seeds: For added crunch and nutrition, consider adding walnuts, almonds, or sunflower seeds.
    • Vegetables: If you have other fresh veggies on hand, such as bell peppers, radishes or shredded carrots, feel free to toss them in!

    These substitutions ensure that everyone can enjoy the Juicy Spring Mix Salad, turning it into a personalized dish that suits each individual’s taste and dietary restrictions.

    How to Prepare the Perfect Juicy Spring Mix Salad With Raspberry Dressing: Step-by-Step Guide

    Creating your Juicy Spring Mix Salad with Raspberry Dressing is a breeze! Just follow these simple steps, and you’ll have a bright and fresh dish ready in no time.

    1. Prepare the Base: Rinse the spring mix greens thoroughly under cold water to remove any grit. Pat them dry with a clean towel or use a salad spinner to ensure they are crisp and ready.

    2. Chop the Vegetables: Slice the cherry tomatoes in half, peel and slice the cucumber, and thinly slice the red onion. Set these aside in a bowl.

    3. Make the Dressing: In a small bowl, whisk together the olive oil, raspberry vinegar, and honey until well combined. If you’re looking for a thicker dressing, you can blend it until smooth. Adjust seasoning with salt and pepper to taste.

    4. Combine Ingredients: In a large bowl, combine the spring mix, cherry tomatoes, cucumber, and red onion. Toss gently to mix the ingredients without bruising the greens.

    5. Add Raspberries: Gently fold in the fresh raspberries, being careful not to crush them. These will provide a natural sweetness and beautiful color contrast.

    6. Incorporate Feta: If using feta cheese, sprinkle it over the salad at this point. For a vegan alternative, you can add nutritional yeast as a substitute.

    7. Dress the Salad: Drizzle the prepared raspberry dressing over the salad. Use a large spoon to toss the salad until everything is coated evenly in the dressing.

    8. Taste and Adjust: Give your salad a taste, and adjust salt and pepper if necessary. You can also add more dressing if desired for an extra flavor boost.

    9. Serve Immediately: For the best texture and flavor, serve the salad immediately. However, you can refrigerate the dressing separately if you plan to make it in advance.

    Engaging in this method ensures that you create a salad that is not only delicious but also colorful and appealing, making it a standout for your spring meals.

    Mastering Juicy Spring Mix Salad With Raspberry Dressing: Advanced Tips and Variations

    To make the most of your Juicy Spring Mix Salad with Raspberry Dressing, here are some expert tips and fun variations you can try:

    • Add Protein: For a heartier meal, consider topping it with grilled chicken, chickpeas, or tofu. This will enhance the nutritional value and keep you full for longer.
    • Experiment with Dressings: If you want to switch up the flavors, try using a citrus-based vinaigrette or a creamy tahini dressing for a different twist.
    • Crunch Factor: Include toasted nuts or seeds for an extra layer of texture. Sunflower seeds, pumpkin seeds, or almonds work wonderfully in this recipe.
    • Fruit Variations: Beyond raspberries, feel free to experiment with different berries like strawberries or blueberries. Each will lend a unique sweetness to your dressing.
    • Chill for Flavor: Letting the salad sit for about 30 minutes allows the flavors to meld and creates an even more delicious dish.

    These additions can elevate your basic salad into a spectacular offering, perfect for any occasion and especially delightful during your seasonal spring meals.

    How to Store Juicy Spring Mix Salad With Raspberry Dressing: Best Practices

    To keep your Juicy Spring Mix Salad fresh, it’s essential to pay attention to storage. Here are the best practices for refrigeration, freezing, and reheating:

    • Refrigeration: Store your salad in an airtight container if you have leftovers. It will last for up to 3 days in the refrigerator. Avoid dressing the salad until you are ready to eat it, as the greens can become wilted if they sit in dressing too long.
    • Freezing: While it’s possible to freeze the salad, it’s not ideal, as the greens will lose their texture. However, you can freeze the raspberry dressing in an ice cube tray and thaw individual portions as needed.
    • Reheating: Generally, salads are meant to be served fresh and cool. If you decide to warm your toppings, such as grilled chicken or roasted veggies, do so separately and then mix with the salad when ready to serve.

    Remember that fresh ingredients contribute to the salad’s delightful spring-inspired nature, making proper storage essential for maintaining quality.

    Nutritional Value of Juicy Spring Mix Salad With Raspberry Dressing

    Understanding the nutritional profile of your Juicy Spring Mix Salad with Raspberry Dressing helps you make conscious decisions about your meals. Here’s a general breakdown per serving (about 2 cups of salad without dressing):

    • Calories: Approximately 150 kcal
    • Carbohydrates: 15g
    • Protein: 2g
    • Fat: 10g (mostly from healthy olive oil)
    • Fiber: 4g
    • Sugars: 6g (natural sugars from fruits)

    Notably, this salad is not only low in calories but also high in vitamins, minerals, and antioxidants, making it a fantastic choice for spring meals that nourish and revitalize without excessive calories. Additionally, this salad fits various dietary plans—providing options for vegan, gluten-free, and even high-protein adjustments.

    FAQs: Frequently Asked Questions About Juicy Spring Mix Salad With Raspberry Dressing

    Can I use frozen raspberries?

    Absolutely! You can substitute frozen raspberries for fresh ones, but keep in mind they might be softer and release more juice during mixing.

    What if I don’t have raspberry vinegar?

    If raspberry vinegar is unavailable, you can use balsamic vinegar or apple cider vinegar as an alternative.

    How can I make the salad spicier?

    Add sliced jalapeños or a sprinkle of crushed red pepper flakes for a kick!

    Is this salad suitable for meal prep?

    Definitely! Just store the components separately until you’re ready to mix to ensure the greens remain crisp.

    Can I make this salad a day ahead?

    You can prepare all ingredients in advance but avoid dressing the salad until you are about to serve.

    By answering these common questions, you can help your readers feel more confident in preparing their Juicy Spring Mix Salad with Raspberry Dressing, making it a staple among their spring meals.


    This Juicy Spring Mix Salad with Raspberry Dressing is a testament to the colors and flavors of spring. With its health benefits, quick preparation, and versatility, there’s no reason not to try this delightful recipe. Whether dishing it up for a family meal, a warm picnic, or simply for your everyday dining delight, this salad will surely bring joy and nourishment to your table. Happy cooking!

  • Delicious Asparagus Pesto Pasta Salad

    Delicious Asparagus Pesto Pasta Salad

    Delicious Asparagus Pesto Pasta Salad: A Tropical Delight

    Introduction to Delicious Asparagus Pesto Pasta Salad

    Are you in search of a refreshing and flavorful dish that can be enjoyed year-round? Look no further than this Delicious Asparagus Pesto Pasta Salad! This vibrant pasta salad is not only delicious but also incredibly easy to make, making it ideal for busy parents, students, and anyone seeking a quick yet wholesome meal. With its combination of fresh asparagus, energy-packed pasta, and a fragrant pesto sauce, this dish truly delivers.

    The beauty of this pasta salad lies in its versatility and adaptability; it caters to various dietary preferences, including vegan and gluten-free options. Asparagus is rich in essential vitamins and minerals, offering numerous health benefits such as improved digestion and heart health. Сoupled with a creamy pesto sauce, each bite bursts with flavor, making it a delightful addition to homemade lunch boxes or picnic spreads.

    Both light and filling, this recipe is perfect for quick weeknight dinners or meal prep for the week ahead. Plus, it’s an excellent way to use up leftover pasta or seasonal vegetables. In a nutshell, this delicious pasta salad is a colorful, nutrient-rich choice that will inspire you to whip up this satisfying treat in your kitchen.


    Benefits and Advantages of Delicious Asparagus Pesto Pasta Salad

    When it comes to weeknight meals or weekend gatherings, ease of preparation plays a crucial role. This Delicious Asparagus Pesto Pasta Salad not only simplifies your cooking routine but also offers a multitude of benefits:

    Quick and Easy to Make

    With just a handful of ingredients, this pasta salad can be whipped up in under 30 minutes. For busy parents juggling work and family duties, this recipe makes meal prep a breeze. You can cook the pasta and prepare the pesto in advance, allowing you to mix everything together at the last moment.

    Packed with Nutrients

    Asparagus is a nutrient powerhouse, brimming with vitamins A, C, E, and K. It’s also an excellent source of folate, making this salad beneficial for pregnant women and those looking to boost their nutrient intake. Additionally, the healthy fats from the pesto, which can be made with nuts like pine nuts or walnuts, contribute to a balanced diet.

    Versatility for Everyone

    This pasta salad is incredibly flexible—whether you’re accommodating a dairy-free, vegetarian, or gluten-free diet, there’s a way for everyone to enjoy it. Each ingredient can easily be substituted to fit specific dietary needs without sacrificing flavor.

    A Feel-Good Option

    Using whole-grain or gluten-free pasta elevates this salad’s fiber content, which promotes satiety and aids digestion. The freshness of asparagus combined with the vibrant flavors of homemade pesto makes this dish not only a feast for the eyes but a delight for your palate.

    Perfect for Any Occasion

    Whether you’re hosting a gathering or simply need a quick meal for yourself, this pasta salad checks all the boxes. It can be a side dish, a light main course, or an easy meal prep solution. Furthermore, it can be served warm, chilled, or at room temperature—ideal for picnics or potlucks.

    Armed with these compelling advantages, it’s clear that this Delicious Asparagus Pesto Pasta Salad is a delightful addition to your meal rotation, perfect for a range of culinary cravings.


    Ingredients Overview

    Essential Ingredients for Delicious Asparagus Pesto Pasta Salad

    When preparing a delicious asparagus pesto pasta salad, a careful selection of ingredients ensures the best flavors and nutritional value. Here’s what you will need:

    • Pasta (8 oz): Use any type you prefer—whole grain, gluten-free, or even vegetable-based.
    • Fresh Asparagus (1 lb): Tender, vibrant green asparagus adds crunch and nutrients.
    • Basil (2 cups): Fresh basil is essential for a traditional pesto flavor.
    • Garlic (2 cloves): Adds aromatic richness.
    • Pine Nuts or Walnuts (1/4 cup): Healthy fats and a satisfying crunch.
    • Olive Oil (1/2 cup): Enhances the creaminess of the pesto while providing essential fatty acids. Use extra virgin for the best flavor.
    • Parmesan Cheese (1/2 cup): For traditional pesto. For a vegan option, substitute nutritional yeast.
    • Lemon Juice (1 tbsp): Brightens the flavors and adds freshness.
    • Salt and Pepper: To taste, enhancing the overall flavor.

    Dietary Notes:

    • Vegan and Dairy-Free: Simply substitute Parmesan cheese with nutritional yeast or a dairy-free alternative.
    • Gluten-Free: Use gluten-free pasta varieties like quinoa, brown rice or lentil noodles.

    Dietary Substitutions to Customize Your Delicious Asparagus Pesto Pasta Salad

    Customization is straightforward with this recipe. Some suggested substitutions include:

    • Pasta: Opt for a chickpea or lentil pasta to boost protein.
    • Asparagus: If you cannot find fresh asparagus, try roasted zucchini or grilled bell peppers for a different flavor profile.
    • Nuts: Swap pine nuts for sunflower seeds or pumpkin seeds in the pesto for a nut-free version.
    • Herbs: Utilize parsley or arugula if basil is not available, creating a unique twist on flavor.
    • Additional Ingredients: Consider adding halved cherry tomatoes or olives for more variety.

    With these substitutions, you can easily cater to dietary preferences while maintaining the delightful taste of the pasta salad.


    How to Prepare the Perfect Delicious Asparagus Pesto Pasta Salad: Step-by-Step Guide

    Creating a Delicious Asparagus Pesto Pasta Salad is as easy as 1-2-3. Follow these detailed steps to ensure your dish comes out perfectly every time.

    1. Cook the Pasta: Bring a large pot of salted water to boil. Add your choice of pasta and cook according to the package instructions until al dente. Drain and set aside to cool.

    2. Prepare the Asparagus: While the pasta is cooking, rinse the asparagus under cold water. Trim the woody ends and cut the asparagus into 2-inch pieces. Add to the boiling pasta water during the last 2-3 minutes of pasta cooking to blanch. This will maintain its vibrant color and tender-crisp texture.

    3. Make the Pesto: In a food processor, combine the basil, garlic, pine nuts, Parmesan cheese, lemon juice, and a pinch of salt. While the food processor runs, slowly drizzle in olive oil until the mixture reaches a smooth consistency. Adjust seasoning to taste.

    4. Combine Ingredients: In a large mixing bowl, combine the cooked pasta, blanched asparagus, and homemade pesto. Toss everything gently until well coated.

    5. Serve or Chill: If enjoying immediately, serve the pasta salad warm or at room temperature. For a chilled option, cover and refrigerate for at least 30 minutes to allow the flavors to meld.

    6. Adjustments for Dietary Preferences: If you’re looking for a heartier salad, add grilled chicken, chickpeas, or sautéed spinach for added protein and nutrients.

    7. Garnish and Enjoy: Top with additional herbs or a sprinkle of lemon zest before serving for an extra touch of freshness.

    These straightforward steps ensure a flavorful and nutritious pasta salad that everyone will love.


    Mastering Delicious Asparagus Pesto Pasta Salad: Advanced Tips and Variations

    To take your Delicious Asparagus Pesto Pasta Salad to the next level, consider the following tips and variations:

    Use Seasonal Ingredients

    Incorporate a variety of seasonal veggies such as cherry tomatoes, bell peppers, or even sweet corn for extra color and taste. Seasonal produce not only enhances flavor but also boosts nutritional content.

    Experiment with Flavors

    Infuse your pesto with different herbs or nuts. Try adding mint or arugula for an unexpected twist or experiment with roasted nuts for a deeper flavor profile. You could also add a hint of spice with red pepper flakes or a splash of balsamic vinegar.

    Grilled or Roasted Version

    Roasting the asparagus instead of blanching will produce a smoky depth of flavor. Simply toss the asparagus in olive oil and roast in the oven until tender. The nutty flavors will add complexity to your pasta salad.

    Make it a Meal

    Add protein sources such as grilled chicken, shrimp, or chickpeas for a complete meal that is satisfying and nutritionally balanced.

    Leftover Utilization

    If you have leftover pasta salad, consider it a base for a quick dish the next day. Toss it into an omelet, or cook it with some extra veggies for a delicious fritatta.

    These advanced tips and variations enhance your pasta salad experience, offering new flavors and textures each time you prepare it.


    How to Store Delicious Asparagus Pesto Pasta Salad: Best Practices

    Storing your Delicious Asparagus Pesto Pasta Salad properly ensures that it remains fresh and tasty for days. Here are the best practices:

    Refrigeration

    To store your pasta salad, place it in an airtight container and store it in the refrigerator. It remains good for up to 3-5 days. When ready to enjoy, you can serve it cold or gently reheat it on the stovetop, being careful not to overcook the asparagus.

    Freezing

    Although pesto pasta is best enjoyed fresh, you can freeze leftovers for up to 1 month. To do this, place the salad in a freezer-safe container. Note that the asparagus may lose its texture upon thawing, so adjust your expectations accordingly.

    Reheating

    When you’re ready to eat a frozen portion, thaw it in the refrigerator overnight. Reheat in a pan over low heat, tossing in a splash of olive oil to revive the pasta and prevent it from drying out.

    By following these storage tips, you’ll maximize the shelf life and enjoyment of your delicious pasta salad.


    Nutritional Value of Delicious Asparagus Pesto Pasta Salad

    Understanding the nutritional value of your Delicious Asparagus Pesto Pasta Salad ensures you know exactly what you’re consuming. Here’s a breakdown of the approximate nutrition per serving (based on 4 servings):

    • Calories: 350
    • Total Fat: 18g
    • Saturated Fat: 3g
    • Cholesterol: 15mg (if using cheese)
    • Sodium: 250mg
    • Total Carbohydrates: 40g
    • Dietary Fiber: 6g
    • Sugars: 2g
    • Protein: 10g

    Key Nutritional Benefits

    • Fiber: Promotes digestive health and keeps you fuller for longer.
    • Healthy Fats: From olive oil and nuts, these support heart health.
    • Vitamins and Minerals: Asparagus provides essential nutrients like folate and potassium.

    For those monitoring calorie intake or modifying their diet, this pasta salad presents a nutritious, balanced option.


    FAQs: Frequently Asked Questions About Delicious Asparagus Pesto Pasta Salad

    Q: Can I make this pasta salad ahead of time?
    A: Yes, you can prepare the salad a day ahead. It actually improves in flavor as the ingredients meld. Just store it in an airtight container in the refrigerator.

    Q: Is this pasta salad suitable for meal prep?
    A: Absolutely! This dish is perfect for meal prep. Store it in separate containers for a grab-and-go lunch option throughout the week.

    Q: Can I use other vegetables in this pasta salad?
    A: Certainly! Feel free to substitute asparagus with other vegetables such as bell peppers, broccoli, or peas. Each will offer a unique taste and texture.

    Q: How do I make this dish gluten-free?
    A: Simply substitute regular pasta with gluten-free varieties made from rice, quinoa, or legumes.

    Q: Can I freeze leftovers?
    A: Yes, although the texture of the asparagus may change slightly, you can freeze leftover pasta salad. Just follow proper freezing and reheating practices detailed above.

    Q: What are some good proteins to add?
    A: Adding grilled chicken, shrimp, or even chickpeas can make this salad a hearty, complete meal.

    By addressing these common inquiries, we encourage readers to confidently prepare and enjoy their Delicious Asparagus Pesto Pasta Salad while accommodating their specific dietary needs.


    In conclusion, the Delicious Asparagus Pesto Pasta Salad is not just a dish but a delightful experience in culinary simplicity that can inspire anyone to get creative in the kitchen. Whether it’s for a quick weeknight dinner, an impressive side dish for gatherings, or an energizing meal prep option, this pasta salad embodies versatility, flavor, and health in every bite. Happy cooking!

  • Classic Spring Mix Salad Dressing Recipe

    Classic Spring Mix Salad Dressing Recipe

    Classic Spring Mix Salad Dressing Recipe: A Tropical Delight

    Introduction to Classic Spring Mix Salad Dressing Recipe

    Spring is the ideal time to refresh your palate with vibrant, invigorating flavors, making it the perfect season for spring meals. Among the delightful options available, a Classic Spring Mix Salad Dressing stands out. This simple, health-focused recipe embodies the spirit of fresh ingredients and offers a delightful way to elevate any salad. Whether you are a busy parent, a newlywed exploring culinary delights, or a health-conscious individual, this dressing brings together the right balance of flavors and nutrition.

    Crafted with fresh ingredients, this salad dressing is not just quick to make but also versatile enough to satisfy various dietary needs, including vegan and gluten-free diets. Furthermore, it uses minimal effort to enhance your salads, side dishes, or even grilled vegetables! By incorporating this dressing into your routine, you are not only enriching your meals but also embracing a healthier lifestyle, one drizzle at a time.

    This blog post will guide you through the benefits, ingredients, and preparation steps for the Classic Spring Mix Salad Dressing. It’s time to roll up your sleeves and discover how easy it is to create a dressing that will bring your spring meals to life!

    Benefits and Advantages of Classic Spring Mix Salad Dressing Recipe

    The Classic Spring Mix Salad Dressing brings a plethora of advantages. For starters, it exemplifies simplicity. Many people shy away from homemade dressings, thinking they are too complicated or time-consuming. However, this recipe defies that notion! With just a handful of fresh ingredients and a few minutes of prep time, you can have a delicious dressing ready to complement your meals.

    Nutritionally, this dressing is packed with healthy fats from olive oil, antioxidants from herbs, and tangy brightness from lemon juice. These elements work together to not only enhance the flavor of your salads but also contribute to your overall well-being. Olive oil, in particular, is known for its heart-healthy benefits, and it can even help in absorbing fat-soluble vitamins from the greens consumed alongside.

    Another significant advantage of this salad dressing is its adaptability. Whether you’re preparing a light lunch, for a family dinner, or a quick meal on a busy weeknight, this dressing will fit seamlessly into various spring meals. Additionally, the dressing caters to dietary constraints, making it suitable for vegan, gluten-free, and even keto-friendly diets when you choose the right sweetener.

    Opting for homemade salad dressings like this classic version also means you control the ingredients. You can avoid preservatives and unwanted additives often found in store-bought varieties. By embracing this Classic Spring Mix Salad Dressing, you are not only opting for a cleaner, more nutritious option but also making meal prep more enjoyable and satisfying.

    Ingredients Overview

    Essential Ingredients for Classic Spring Mix Salad Dressing Recipe

    To create the Classic Spring Mix Salad Dressing, you will need the following ingredients:

    1. Extra Virgin Olive Oil (¾ cup)
    2. Benefit: A source of healthy fats, antioxidants, and anti-inflammatory properties.

    3. Fresh Lemon Juice (½ cup)

    4. Benefit: Adds brightness and acidity to balance the oil while providing vitamin C.

    5. Dijon Mustard (1 teaspoon)

    6. Benefit: A flavor enhancer that also acts as an emulsifier to help mix the oil and lemon juice.

    7. Pure Maple Syrup or Honey (1 tablespoon for sweetness)

    8. Benefit: Natural sweeteners that add a mellow flavor; maple syrup is suitable for vegan diets.

    9. Garlic Clove (1 clove, minced)

    10. Benefit: Provides robust flavor and has antimicrobial properties.

    11. Fresh Herbs (2 tablespoons, finely chopped such as basil or parsley)

    12. Benefit: Great for adding flavor and nutrition. Fresh herbs provide vitamins and antioxidants.

    13. Salt and Pepper (to taste)

    14. Benefit: Enhances the overall flavor profile of the dressing.

    All ingredients are easily accessible and allow you to whip up a delightful dressing that can enliven any spring meal. This recipe also ensures that you’re using only the freshest ingredients, enhancing the taste and nutritional value of your salads.

    Dietary Substitutions to Customize Your Classic Spring Mix Salad Dressing Recipe

    Creating a salad dressing that suits your dietary needs doesn’t mean compromising on flavors! Here are a few suggested substitutions:

    • Olive Oil: You can replace olive oil with avocado oil for a different flavor and slightly higher smoke point if you’re planning to use this dressing in warm dishes.

    • Lemon Juice: Instead of fresh lemon, you can use apple cider vinegar to introduce a different acidity level and a flavor twist.

    • Sweeteners: If you’re looking for a low-calorie option, consider using stevia or erythritol instead of maple syrup or honey.

    • Herbs: If fresh herbs are unavailable, you can use dried herbs, but be sure to reduce the quantity since dried herbs are more potent.

    • Garlic Powder: For convenience, you can consider garlic powder instead of fresh garlic if pressed for time.

    Multifunctionality plays a vital role in this recipe’s appeal, as different substitutions can adapt to various dietary constraints or ingredient availability, ensuring a delicious dressing for all spring meals.

    How to Prepare the Perfect Classic Spring Mix Salad Dressing Recipe: Step-by-Step Guide

    Creating your Classic Spring Mix Salad Dressing is as simple as 1-2-3, giving you a flavorful accompaniment for your favorite salads and spring meals. Here’s how to do it:

    1. Prepare the Base:
    2. Gather your ingredients in a mixing bowl. Make sure to use a bowl that allows for easy mixing or whisking.

    3. Whisk the Oil and Acidity:

    4. Pour the extra virgin olive oil and fresh lemon juice into the mixing bowl.
    5. Using a whisk, mix these two ingredients vigorously. The goal is to emulsify the dressing, which means combining the oil and vinegar for a smooth consistency.

    6. Add the Flavor Enhancers:

    7. Stir in the Dijon mustard, minced garlic clove, and maple syrup (or honey).
    8. Continue to whisk until everything is well combined. This will ensure a smooth, well-integrated dressing.

    9. Season to Taste:

    10. Sprinkle in salt and pepper.
    11. Taste the dressing and adjust the seasoning as preferred. You can add more lemon juice for acidity or maple syrup for sweetness based on your taste.

    12. Incorporate Fresh Herbs:

    13. Gently fold in your chopped herbs to finish off the dressing. This will provide an extra burst of flavor and vibrant color.

    14. Rest Before Serving:

    15. Let the dressing sit for at least 10 minutes to allow the flavors to meld.
    16. This waiting period enhances the complexity of the dressing, making it even more delightful when paired with salads.

    17. Store and Use:

    18. Transfer your dressing to a sealed jar or container.
    19. It can be refrigerated for up to two weeks. Remember to shake well before each use, as natural separation may occur.

    With this step-by-step guide, turning your Classic Spring Mix Salad Dressing into a staple for your spring meals is effortlessly achievable. The dressing serves as a versatile companion to any salad, grilled vegetables, or even as a marinade for proteins.

    Mastering Classic Spring Mix Salad Dressing Recipe: Advanced Tips and Variations

    To elevate your Classic Spring Mix Salad Dressing even further, here are some advanced tips and variations:

    • Infused Oils: Consider infusing your olive oil with herbs like rosemary or thyme to add a unique twist. Simply heat the oil gently and steep your chosen herbs to intensify flavors.

    • Nutty Variation: Add a tablespoon of tahini to the dressing for a creamy, nutty flavor. This substitution will yield a thicker consistency and add an extra layer of richness.

    • Spicy Kick: If you enjoy heat, add a pinch of red pepper flakes or a few drops of hot sauce to your dressing. This can elevate your spring meals to a new flavor profile.

    • Creamy Twists: For a creamier dressing, blend in some Greek yogurt or avocado. This addition will provide a luscious texture and additional protein.

    Always remember to taste as you go and adjust based on your personal preference. With these variations, you can customize the dressing to suit different palettes for any meal throughout the spring season.

    How to Store Classic Spring Mix Salad Dressing Recipe: Best Practices

    The Classic Spring Mix Salad Dressing is easy to make and can be stored for later use, perfect for those busy weeks where you want healthy options available.

    • Refrigeration: Store in an airtight container in the refrigerator. It can last for up to two weeks.

    • Freezing: Although freezing salad dressings isn’t common due to potential texture changes, if you choose to, store the dressing in plastic bags or airtight containers in small portions. Be sure to shake well after thawing to recombine.

    • Reheating: If your dressing thickens in the fridge, simply let it sit at room temperature for 15 minutes before using, or stir in a small amount of water to loosen it up.

    By storing your dressing properly, you can ensure it remains flavorful and fresh for all your spring meals, making meal prep efficient and enjoyable.

    Nutritional Value of Classic Spring Mix Salad Dressing Recipe

    Understanding the nutritional value of your meals is crucial for health-conscious individuals. Here’s a breakdown of the approximate nutritional value for a 2-tablespoon serving of the Classic Spring Mix Salad Dressing:

    • Calories: 120
    • Total Fat: 14g
    • Saturated Fat: 2g
    • Polyunsaturated Fat: 2g
    • Monounsaturated Fat: 10g
    • Cholesterol: 0mg
    • Sodium: 40mg
    • Carbohydrates: 2g
    • Dietary Fiber: 0g
    • Sugars: 1g
    • Protein: 0g

    This dressing not only provides a flavorful addition to your spring meals but also contributes healthy fats, essential vitamins, and minerals. The low-calorie count makes it perfect for those watching their intake, while the abundant flavors ensure you never sacrifice taste for health.

    FAQs: Frequently Asked Questions About Classic Spring Mix Salad Dressing Recipe

    1. Can I use other types of oil for this dressing?

    Yes! While olive oil is preferred, you can use avocado oil or even a nut-based oil for different flavor profiles.

    2. How can I make this dressing thicker?

    If you prefer a thicker consistency, consider adding Greek yogurt or tahini. Both options incorporate creaminess and additional flavor.

    3. How long does the dressing last in the fridge?

    The Classic Spring Mix Salad Dressing can last up to two weeks in an airtight container in the refrigerator.

    4. Can I batch cook this dressing?

    Absolutely! This is a great dressing to make in larger quantities, especially if you enjoy salad throughout the week.

    5. What salads pair best with this dressing?

    This dressing is incredibly versatile; it pairs wonderfully with mixed greens, fruit salads, or even grain bowls. Feel free to use it on a variety of spring meals!

    6. Can I skip the sweetener in this recipe?

    Yes, if you prefer a more savory dressing, feel free to omit the sweetener. The lemon juice and mustard still provide complexity and flavor.

    By addressing these frequently asked questions, we hope to encourage you as you explore new culinary adventures with the Classic Spring Mix Salad Dressing Recipe. This dressing is sure to delight everyone at your table—enjoy your springtime!

  • Best Asparagus And Zucchini Pasta Salad

    Best Asparagus And Zucchini Pasta Salad

    Best Asparagus And Zucchini Pasta Salad: A Tropical Delight

    Introduction to Best Asparagus And Zucchini Pasta Salad

    When you’re looking for a light yet satisfying dish, nothing beats the freshness of a vibrant pasta salad. The Best Asparagus and Zucchini Pasta Salad is not only packed with flavor but also offers incredible health benefits and versatility to suit various dietary preferences. Perfect for busy weeknights or elegant gatherings, this salad is a go-to recipe for busy parents, health-conscious individuals, students, and food enthusiasts alike.

    This delightful pasta salad showcases seasonal vegetables, making it an excellent choice for those who appreciate the taste of fresh produce. With its colorful presentation, it’s an eye-catching addition to any table. You can easily adapt this dish for vegan or gluten-free diets, which makes it a thoughtful option when entertaining diverse guests.

    Additionally, the simplicity of preparation—requiring no complex cooking techniques—allows even novice cooks to whip it up in no time. The combination of asparagus and zucchini not only adds a delightful crunch but also brings a host of nutritional benefits. Rich in vitamins and minerals, this salad can easily cater to anyone looking for a low-calorie, satisfying meal. So let’s dive into why this recipe stands out and how you can make it a staple in your kitchen!

    Benefits and Advantages of Best Asparagus And Zucchini Pasta Salad

    The Best Asparagus and Zucchini Pasta Salad offers a plethora of benefits that make it an enticing option for your meal rotations. First and foremost, this dish features an easy preparation process—ideal for busy schedules. You won’t find any complicated steps or lengthy cooking times here; instead, this simple recipe encourages you to embrace your culinary creativity without spending hours in the kitchen.

    Health Benefits

    One of the significant advantages of this pasta salad is its health profile. It includes a variety of wholesome ingredients like whole grain pasta (or gluten-free alternatives), fresh vegetables, and a light dressing that can easily be adjusted to suit your taste. Asparagus is known for its high fiber content, contributing to digestive health and keeping your gut happy. Meanwhile, zucchini adds essential vitamins like C and A, as well as antioxidants that promote healthy skin.

    For those aiming to maintain a balanced diet, this pasta salad serves as a guilt-free option. The inclusion of fresh vegetables ensures that you’re incorporating vital nutrients while keeping calories in check. Plus, its vegan and gluten-free adaptations cater to various dietary restrictions, allowing everyone to enjoy this delicious treat.

    Versatile Serving Options

    Another remarkable feature of the Best Asparagus and Zucchini Pasta Salad is its versatility. It can be served as a main course, side dish, or even as a light lunch option. Furthermore, this salad is perfect for meal prep, meaning you can whip up a batch at the beginning of the week and enjoy it in various ways throughout. It holds well in the refrigerator, allowing the flavors to meld beautifully.

    To elevate this dish’s appeal further, consider adding protein options like chickpeas, grilled chicken, or tofu. This flexibility in serving styles makes the salad a wise choice for families, college students, and anyone looking to experiment in the kitchen.

    Ingredients Overview

    Essential Ingredients for Best Asparagus And Zucchini Pasta Salad

    For the Best Asparagus and Zucchini Pasta Salad, you will need the following essential ingredients:

    1. Pasta (12 oz): Use whole grain or gluten-free pasta.
    2. Asparagus (1 bunch, about 1 pound): Trimmed and cut into bite-sized pieces.
    3. Zucchini (1 medium): Sliced into half-moons.
    4. Cherry Tomatoes (1 cup): Halved for a juicy pop.
    5. Red Onion (1/4 cup): Finely diced for added flavor.
    6. Feta Cheese (optional, 1 cup): Crumbled for creaminess (use a vegan alternative for a dairy-free version).
    7. Olive Oil (1/4 cup): A healthy fat for the dressing.
    8. Lemon Juice (2 tbsp): Freshly squeezed for a zesty kick.
    9. Salt and Pepper: To taste.

    Note: Feel free to replace feta cheese with a nut-based cheese or skip it entirely for a vegan-friendly option.

    Dietary Substitutions to Customize Your Best Asparagus And Zucchini Pasta Salad

    Customizing the Best Asparagus and Zucchini Pasta Salad to meet various dietary preferences is simple. Here are some substitutions you can implement:

    • Vegan: Replace feta cheese with nutritional yeast or omit it entirely. Drizzle the salad with a bit of tahini dressing for a creamy element.
    • Gluten-Free: Use gluten-free pasta alternatives, such as lentil or chickpea pasta.
    • Low-Calorie: Opt for less pasta and increase the vegetable ratio. You can also use light olive oil or a homemade vinaigrette while keeping the lemon juice for flavor.
    • Protein Boost: If desired, add cooked chickpeas, diced grilled chicken, or roasted turkey. These additions will enhance the nutritional profile and make the salad even more satiating.

    By making simple changes, you can create a personalized version of this pasta salad that aligns perfectly with your dietary needs.

    How to Prepare the Perfect Best Asparagus And Zucchini Pasta Salad: Step-by-Step Guide

    Creating the Best Asparagus and Zucchini Pasta Salad is straightforward. Follow these step-by-step instructions to enjoy this dish in your own kitchen:

    1. Prepare the Ingredients: Rinse all the vegetables thoroughly. Trim the asparagus ends and cut them into bite-sized pieces. Slice the zucchini into half-moons. Halve the cherry tomatoes and dice the red onion.

    2. Cook the Pasta: In a large pot of boiling salted water, cook the pasta according to package instructions until al dente. Drain and rinse under cold water to stop the cooking process. This step is crucial to maintain the texture of the pasta.

    3. Blanch the Asparagus: In the same pot, bring fresh water to a boil again. Add the asparagus and cook for about 2-3 minutes or until bright green and tender-crisp. Drain and rinse under cold water to stop the cooking process.

    4. Mix Vegetables: In a large mixing bowl, combine the cooked pasta, blanched asparagus, sliced zucchini, halved cherry tomatoes, and diced red onion.

    5. Prepare the Dressing: In a small bowl, whisk together the olive oil, lemon juice, salt, and pepper. Adjust the seasoning according to your taste.

    6. Combine Ingredients: Drizzle the dressing over the pasta and vegetable mixture. Toss gently to coat the ingredients evenly without breaking the pasta.

    7. Add Feta (If Using): If you’re including feta cheese, crumbled it over the salad and gently mix it in.

    8. Chill and Serve: For the best flavor, let the salad chill in the refrigerator for at least 30 minutes to allow the flavors to meld. Serve cold or at room temperature.

    There you have it—a vibrant, nutritious pasta salad that’s perfect for any occasion!

    Mastering Best Asparagus And Zucchini Pasta Salad: Advanced Tips and Variations

    To elevate your culinary experience with the Best Asparagus and Zucchini Pasta Salad, here are some advanced tips and variations to consider:

    Tips for Success

    • Opt for Seasonal Produce: Always choose the freshest ingredients. In-season vegetables will enhance the flavor and nutritional benefits of the dish.
    • Don’t Overcook the Vegetables: Keep the asparagus crisp for better texture. Overcooking can lead to a mushy salad, which isn’t appealing.
    • Use a Variety of Herbs: Fresh herbs like basil, parsley, or mint can add depth and refreshing notes to your salad. Toss them in just before serving.

    Variations to Try

    • Mediterranean Twist: Add olives, artichoke hearts, and bell peppers for a Mediterranean flair.
    • Asian-Inspired: Substitute the dressing with sesame oil, soy sauce, and rice vinegar. Incorporate edamame and shredded carrots for a new flavor profile.
    • Pesto Pasta Salad: Use pesto sauce in place of olive oil and lemon juice for a rich and savory version.

    These tips and variations ensure your Best Asparagus and Zucchini Pasta Salad remains exciting and adaptable to any occasion!

    How to Store Best Asparagus And Zucchini Pasta Salad: Best Practices

    Properly storing the Best Asparagus and Zucchini Pasta Salad will keep it fresh and ready for enjoyment. Here are the best practices for storage:

    • Refrigeration: Store any leftover pasta salad in an airtight container in the refrigerator. It can last for up to 3 days, allowing you to enjoy your creation over several days.

    • Freezing: While it’s not recommended to freeze this pasta salad because of the vegetables’ texture change after freezing, you can freeze the pasta separately. When ready to eat, prepare fresh vegetables and mix them with the thawed pasta.

    • Reheating: If you prefer it warm, you can reheat the pasta in the microwave for quick servings. However, consider serving the remaining salad cold to enjoy its fresh flavors.

    By following these storage tips, you will reduce food waste and continue to enjoy this delightful pasta salad throughout the week.

    Nutritional Value of Best Asparagus And Zucchini Pasta Salad

    Understanding the nutritional profile of the Best Asparagus and Zucchini Pasta Salad can help integrate it meaningfully into your dietary routine. Here’s a breakdown of the approximate nutritional values per serving (about 1 cup):

    • Calories: 250
    • Carbohydrates: 38g
    • Protein: 8g
    • Fat: 10g
    • Fiber: 4g
    • Sugar: 3g

    This nutritional breakdown demonstrates that this pasta salad is a balance of macronutrients, offering a healthy serving of carbohydrates, protein, and fats, while remaining low-calorie. If you’re using gluten-free pasta, be sure to check the nutrition info on different brands, as they vary.

    In addition, the salad provides significant amounts of vitamins C and A thanks to the vegetables, while the addition of olive oil contributes heart-healthy fats. This dish is an excellent way to incorporate vibrant produce into your meals while keeping your nutritional goals in check.

    FAQs: Frequently Asked Questions About Best Asparagus And Zucchini Pasta Salad

    Q1: Can I make this pasta salad ahead of time?

    Absolutely! In fact, it’s recommended to prepare this pasta salad ahead of time. Storing it in the refrigerator allows the flavors to meld and enhance the overall taste.

    Q2: What can I substitute for feta cheese?

    If you prefer a dairy-free option, you can replace feta with nutritional yeast, or simply leave it out. A nut-based cheese can also serve as a delightful alternative.

    Q3: Is this salad suitable for meal prep?

    Yes! The Best Asparagus and Zucchini Pasta Salad is perfect for meal prep. Just store it in individual containers for easy access throughout the week.

    Q4: How long can I store leftovers?

    Leftovers can be stored in the refrigerator for up to 3 days. After that, the vegetables may become soggy.

    Q5: Can I use other vegetables in this recipe?

    Certainly! Feel free to experiment with other seasonal veggies like bell peppers, peas, or snap peas for added flavor and nutrition.

    By addressing these common questions, you can feel confident and excited about trying out the Best Asparagus and Zucchini Pasta Salad in your own cooking adventures.


    Now that you have a detailed guide on how to prepare the Best Asparagus and Zucchini Pasta Salad, gathered essential tips and variations, and gained insight into its nutritional qualities, it’s time to dive in and enjoy this vibrant summer dish! Happy cooking!

  • Easy Spring Salad With Feta

    Easy Spring Salad With Feta

    Easy Spring Salad With Feta: A Tropical Delight

    Introduction to Easy Spring Salad With Feta

    As the seasons shift and spring arrives, so does the urge for fresh and vibrant spring meals that can uplift your mood and energize your body. One such dish that perfectly encapsulates the essence of the season is the Easy Spring Salad With Feta. This delightful salad bursts with colors, flavors, and nutrients, making it an ideal choice for busy parents, health enthusiasts, newlyweds, or anyone simply looking to indulge in something fresh and delicious.

    One of the best aspects of this recipe is its simplicity and versatility. This salad showcases crispy greens, bright seasonal vegetables, and creamy feta cheese, harmoniously coming together to create a dish that not only pleases the palate but also caters to various dietary preferences. Whether you’re vegan, gluten-free, or just aiming to eat light, this salad is easily adaptable.

    Additionally, the health benefits associated with the ingredients make it a smart choice for those mindful of their dietary intake. Leafy greens provide essential vitamins, while the inclusion of feta cheese offers a protein boost. Plus, its light dressing keeps it heart-healthy without sacrificing flavor. Ideal for picnics, potlucks, or garden parties, the Easy Spring Salad With Feta is your go-to recipe for refreshing spring meals that inspire you to savor every bite.

    Benefits and Advantages of Easy Spring Salad With Feta

    The Easy Spring Salad With Feta brings together a combination of ingredients that not only delight the taste buds but also provide an impressive array of health benefits. Let’s explore why this dish is an effective choice for anyone looking to create exquisite spring meals.

    Ease of Preparation

    In today’s fast-paced world, home cooks understandably seek recipes that don’t require hours in the kitchen. The Easy Spring Salad With Feta is incredibly straightforward, making it a perfect option even for novice cooks. The salads can be prepared in under 15 minutes, allowing you to spend more time enjoying your meal rather than preparing it.

    Nutritional Powerhouse

    This salad isn’t just easy to make; it’s also nutritious. The base of greens provides essential vitamins A, C, and K, which play vital roles in maintaining healthy skin, immune function, and bone health. Feta cheese adds a creamy element while being lower in calories than many other cheeses, making it a delightful addition to any spring meal.

    Versatility for Dietary Needs

    Another compelling reason to make this salad is its remarkable adaptability. It can easily be tailored to fit various dietary needs. For instance, replacing feta with avocado offers a vegan option, while using gluten-free grains can suit those with gluten sensitivities. Its versatility guarantees that everyone can enjoy this dish at gatherings, ensuring it stands out as a celebration of flavors.

    Seasonal Freshness

    By incorporating seasonal ingredients, you not only enjoy superior taste but also support local farmers and reduce your carbon footprint. Seasonal spring meals like this salad allow you to celebrate freshness and sustainability, making your dining experience more meaningful. Emphasizing such ingredients sets the stage for vibrant flavors and a satisfying crunch inherent in fresh produce.

    In summary, the Easy Spring Salad With Feta stands out as a fantastic dish due to its simple preparation, health benefits, and adaptability for various diets. It’s a salad that embodies springtime freshness while aligning perfectly with modern dietary preferences, making it a staple in any kitchen looking to provide delightful and nutritious meals.

    Ingredients Overview

    Essential Ingredients for Easy Spring Salad With Feta

    To create this delightful Easy Spring Salad With Feta, you’ll need the following essential ingredients:

    • 4 cups mixed greens (such as arugula, spinach, and romaine)
    • 1 cup cherry tomatoes, halved
    • 1 cucumber, diced
    • 1 bell pepper, diced (any color)
    • 1/2 red onion, thinly sliced
    • Feta cheese (about 1 cup, crumbled)
    • 1/4 cup Kalamata olives, pitted and sliced (optional)
    • 1/4 cup fresh herbs (such as basil or parsley, chopped)
    • 1/4 cup olive oil
    • 2 tablespoons balsamic vinegar
    • Salt and pepper, to taste

    These ingredients provide a palette of flavors and textures to your salad. The mixed greens form a nutritious base, rich in vitamins and minerals. Cherry tomatoes and cucumbers add a refreshing crunch, while bell peppers provide a natural sweetness. The creamy feta cheese offers a rich flavor, pairing impeccably with the other ingredients.

    Dietary Note: For a vegan option, replace feta with diced avocado or vegan cheese, and use tamari instead of balsamic vinegar to suit gluten-free needs. This keeps the dish equally vibrant and delicious.

    Dietary Substitutions to Customize Your Easy Spring Salad With Feta

    The beauty of the Easy Spring Salad With Feta lies in its flexibility. Here are some substitutions to cater to various dietary preferences and ingredient availability:

    • For Gluten-Free Needs: Substitute the balsamic vinegar with a gluten-free dressing or use a splash of lemon juice for a zesty twist.
    • For Vegan or Dairy-Free Options: Replace feta cheese with nutritional yeast or soft tofu, which offers a similar texture and creaminess while keeping it plant-based.
    • Lower Calorie Options: Cut down on oil by using a lower-calorie dressing or reduce the portion of feta. Alternatively, add beans such as chickpeas for a protein boost while keeping it light.
    • Nuts and Seeds: Adding a handful of nuts or seeds, such as walnuts or sunflower seeds, provides an extra layer of nutrition and can enhance flavor as well.

    These substitutions enable you to create a customized salad that aligns with your preferences while still enjoying the vibrant flavors and textures that make this salad a go-to recipe for spring meals.

    How to Prepare the Perfect Easy Spring Salad With Feta: Step-by-Step Guide

    Creating the Easy Spring Salad With Feta is a seamless process. Follow these simple steps to prepare a vibrant and delicious dish:

    1. Prepare the Base: Start by washing your mixed greens thoroughly under cold water to remove any dirt or impurities. Once washed, pat them dry with a clean kitchen towel or use a salad spinner to remove excess moisture. Place the greens in a large mixing bowl.

    2. Chop Vegetables: Next, slice the cherry tomatoes in half and add them to the bowl. Dice the cucumber and bell pepper, adding them to the mix. Ensure that the vegetables are cut into bite-sized pieces for easy consumption.

    3. Slice Onion: Thinly slice the red onion, adding it to the bowl of vegetables. If you find raw onion too strong, consider soaking the slices in water for 10 minutes to mellow the flavor before adding them.

    4. Add Feta and Olives: Crumble the feta cheese over the salad, ensuring an even distribution. If you are using Kalamata olives, slice them and sprinkle them on top for added flavor and a Mediterranean touch.

    5. Add Fresh Herbs: Chop your chosen fresh herbs, such as basil or parsley, and sprinkle them over the salad for a burst of freshness. Fresh herbs can significantly enhance the overall flavor profile of the dish.

    6. Make the Dressing: In a small bowl, whisk together olive oil, balsamic vinegar, and a pinch of salt and pepper. Adjust the seasoning according to your preference. For a lighter version, swap part of the oil for lemon juice.

    7. Dress the Salad: Drizzle the dressing over the salad components in the mixing bowl. Toss gently but thoroughly to ensure all ingredients are well-coated without bruising the greens.

    8. Taste and Adjust: Before serving, take a moment to taste the salad. You might want to add more salt, pepper, or lemon juice to suit your taste. Remember, the dressing can always be adjusted!

    9. Serve Immediately: This salad is best enjoyed fresh, so serve it right away. It can be accompanied by grilled chicken or fish for a complete meal or served as a side dish at gatherings.

    10. Store Leftovers: If you have any leftovers, store them in an airtight container in the refrigerator. However, it’s best consumed within a day or two, as the greens can wilt when dressed.

    By following these simple steps, you can prepare a delightful Easy Spring Salad With Feta, perfect for spring meals or any other occasion!

    Mastering Easy Spring Salad With Feta: Advanced Tips and Variations

    While the basic Easy Spring Salad With Feta is delicious as is, consider trying these advanced tips and variations to elevate your dish even further:

    • Add Proteins: Boost the power of this salad with some grilled chicken, shrimp, or chickpeas. Adding protein makes it a more rounded meal and keeps you fuller for longer.

    • Go Seasonal: Change the vegetables according to what’s fresh at your local market. Asparagus, snap peas, or radishes can also introduce delightful flavors and textures.

    • Experiment with Dressings: Feel free to experiment with different dressings. A lemon-tahini dressing, honey mustard, or even a yogurt-based dressing can transform the salad to match different cuisines.

    • Temperature Consideration: Serve it chilled for a refreshing treat on warmer days. Additionally, you may try roasting some of the vegetables like bell peppers or zucchini for a comforting option.

    • Presentation: Finally, consider presentation. Use a large, shallow serving bowl and arrange the salad components artfully. A well-presented salad entices the appetite and adds flair to your dining experience.

    With these advanced tips, you can easily master the Easy Spring Salad With Feta and create an impressive dish that impresses family and friends alike!

    How to Store Easy Spring Salad With Feta: Best Practices

    To enjoy the Easy Spring Salad With Feta at its best, storing it correctly is essential. Here are the best practices for refrigeration, freezer storage, and reheating:

    • Refrigeration: Store any leftover salad in an airtight container for optimal freshness. While it will stay crisp for a day or two, the texture may decline as the greens can wilt. If you know there will be leftovers, consider keeping the dressing separate until ready to serve.

    • Freezing: Freezing is not recommended for this salad, as most fresh ingredients, especially greens, do not freeze well and will lose their texture. You can, however, freeze extra ingredients such as dressings or grains if you’ve made bulk items.

    • Reheating: Since this salad is best enjoyed cold or at room temperature, reheating is typically unnecessary. However, if you’ve added protein or cooked items, gently warm them separately before serving atop the salad.

    By following these storage tips, you can ensure your Easy Spring Salad With Feta remains fresh and appetizing.

    Nutritional Value of Easy Spring Salad With Feta

    Understanding the nutritional value of your meals is essential when selecting what to eat. Here’s a general breakdown of the nutrient content for the Easy Spring Salad With Feta (per serving, assuming 4 servings total):

    • Calories: Approximately 250
    • Total Fat: 18g
    • Saturated Fat: 4g
    • Cholesterol: 15mg
    • Sodium: 500mg
    • Total Carbohydrates: 14g
    • Dietary Fiber: 3g
    • Sugars: 3g
    • Protein: 6g

    Health Benefits Summary

    • Low Calorie: At around 250 calories per serving, this salad is a light but filling option.
    • Rich in Vitamins: The mixed greens and vegetables provide a significant boost of vitamins and minerals necessary for overall health.
    • Protein Source: Feta contributes protein, essential for muscle repair and body function.
    • Healthy Fats: Olive oil provides heart-healthy fats, promoting cardiovascular health.

    By choosing the Easy Spring Salad With Feta, you embrace a dish that not only tantalizes the taste buds but also supports nutritious eating—making it an excellent choice for your spring meals.

    FAQs: Frequently Asked Questions About Easy Spring Salad With Feta

    Can I make this salad ahead of time?

    Absolutely! You can prepare the ingredients a few hours in advance. Just keep the dressing separate until you are ready to serve to maintain the texture of the greens.

    How do I customize this salad for specific diets?

    You can easily customize this salad for vegan or gluten-free diets by substituting ingredients. Use avocado instead of feta for a creamy texture, and opt for gluten-free grains and dressings.

    What other vegetables can I include?

    Feel free to incorporate seasonal vegetables such as asparagus, radishes, or even fruits like strawberries or blueberries. Seasonal ingredients enhance flavor and provide more variety.

    Is this salad suitable for meal prep?

    Yes, this salad is excellent for meal prep. Store the individual components in separate containers, and assemble the salad just before eating. This helps retain the freshness of the greens.

    Can I add grains to this salad?

    Certainly! Adding cooked quinoa, bulgur, or farro can make the salad heartier and add more protein.

    The Easy Spring Salad With Feta is not just a meal; it’s an experience that brings the season’s freshness to your table. Perfect for a variety of diets, quick to prepare, and bursting with healthy ingredients, it’s the ideal recipe to incorporate into your repertoire of spring meals, ensuring you always have a go-to dish that delights both the eyes and the palate!

  • Simple Lemon Asparagus Pasta Salad

    Simple Lemon Asparagus Pasta Salad

    Simple Lemon Asparagus Pasta Salad: A Tropical Delight

    Introduction to Simple Lemon Asparagus Pasta Salad

    When you think about a vibrant, fresh dish that brims with flavor and is remarkably simple to prepare, the Simple Lemon Asparagus Pasta Salad comes to mind. This delightful pasta salad serves as a refreshing option for various occasions, from family gatherings to casual weekday dinners. The beauty of a pasta salad lies not only in its taste but in its versatility and health benefits.

    This particular recipe shines a spotlight on the bright flavors of lemon and the crispness of asparagus, offering a tangy yet satisfying experience that many will appreciate. It’s simple enough for novice cooks yet enjoyable for seasoned chefs, making it an ideal dish for home cooks, busy parents, students, or anyone aiming for a gourmet touch in their meals without an exhaustive effort.

    Beyond the enticing flavors, this pasta salad checks numerous boxes for health-conscious individuals. It’s not just a feast for your taste buds; it is healthy, vegan, and gluten-free, accommodating a variety of dietary needs. As you dive into this recipe, you’ll discover how accessible, flavorful, and nourishing this dish truly is. With each bite, you can savor a symphony of tastes that evoke sunny days and warm company. So grab your ingredients and let’s make a delicious batch of pasta salad!

    Benefits and Advantages of Simple Lemon Asparagus Pasta Salad

    The benefits of making a Simple Lemon Asparagus Pasta Salad extend far beyond its delicious taste. Not only is it a crowd-pleaser, but it’s also a nutrient-dense meal perfect for anyone, whether you are a busy professional looking for quick meal options or a diet-conscious individual seeking light yet filling recipes.

    Ease of Preparation

    One of the primary reasons this pasta salad stands out is its simplicity. With readily available ingredients and straightforward cooking techniques, anyone can whip it up in under 30 minutes. This convenience is a boon for busy parents or students, who often juggle time between various commitments.

    Health Benefits

    Packed with healthful ingredients, this pasta salad incorporates fresh asparagus, known for its high fiber content and rich vitamins. Asparagus is low in calories but high in nutrients, making it a great addition for weight watchers. The dish also benefits from the antioxidants present in fresh lemons, contributing to good skin health and boosting your immune system.

    Moreover, if you opt for whole wheat or gluten-free pasta, you not only enhance the nutritional profile but also cater to various dietary preferences. This adaptability ensures everyone can enjoy a hearty meal without compromising their health goals.

    Nutrient-Rich Profile

    More than just a delicious dish, this pasta salad delivers a balanced mix of carbohydrates, proteins, and vitamins. Incorporating seasonal vegetables can elevate the nutritional value even further. Feel free to add ingredients like cherry tomatoes or spinach for added flavor and nutrients.

    Overall, the Simple Lemon Asparagus Pasta Salad not only proves to be a fantastic side dish but also serves as a satisfying main course on hot summer days or light winter lunches.

    Ingredients Overview

    Essential Ingredients for Simple Lemon Asparagus Pasta Salad

    Below is a detailed list of ingredients needed to create this vibrant pasta salad. With a perfect balance of flavors and textures, these components come together to delight the palate.

    • 12 ounces of pasta: Choose whole wheat or gluten-free varieties for added nutrition.
    • 1 bunch of fresh asparagus (about 1 pound): Provides a crunchy texture and is rich in vitamins A, C, E, and K.
    • 1 cup of cherry tomatoes: For a burst of sweetness, these also add vibrant color.
    • 1/2 cup of red onion, diced: Adds a punch of flavor and is packed with antioxidants.
    • 1/4 cup of fresh parsley, chopped: A great herb to brighten flavors while introducing added vitamins.
    • 1/2 cup of olive oil: For dressing, provides healthy fats.
    • Juice of 1 large lemon: Offers zest and brightness, elevating the entire dish.
    • Salt and pepper to taste: Essentials for seasoning and enhancing flavors.

    Diet-Friendly Options:
    – Use gluten-free pasta or zoodles (zucchini noodles) for those avoiding gluten.
    – Replace olive oil with avocado oil for a different flavor profile.
    – To make it richer, incorporate toasted nuts or seeds for added crunch and protein, making it more filling without excess calories.

    Dietary Substitutions to Customize Your Simple Lemon Asparagus Pasta Salad

    Creating an inclusive dish allows everyone to enjoy the robust flavors this pasta salad offers. Here are some substitutions you can easily make:

    • Vegetarian/Vegan: Keep the salad vegan by ensuring all dressings and added ingredients are free from animal products.
    • Nut-Free: For those with nut allergies, omit the nuts or substitute with seeds.
    • Low-Calorie: Swap traditional pasta for spiralized vegetables like zucchini or carrots for a lighter option.
    • Add Protein: Incorporate chickpeas, grilled chicken, or tofu to make the dish more filling and protein-rich, ideal for active individuals.

    By adjusting the ingredients to fit your dietary preferences or needs, you can enjoy this unique take on pasta salad guilt-free!

    How to Prepare the Perfect Simple Lemon Asparagus Pasta Salad: Step-by-Step Guide

    Creating the Simple Lemon Asparagus Pasta Salad is straightforward, following this easy step-by-step guide. Let’s dive into the flavor-packed process.

    Step 1: Prepare the Pasta

    1. Boil Water: In a large pot, bring salted water to a rolling boil.
    2. Cook the Pasta: Add your chosen pasta to the boiling water. Stir occasionally to prevent sticking, and cook until al dente, usually about 8-10 minutes for most types.
    3. Drain and Rinse: Once cooked, drain the pasta, and rinse it under cold running water to stop the cooking process. Set aside to cool.

    Step 2: Prepare the Asparagus

    1. Trim the Asparagus: Rinse and trim the ends of the asparagus. You want to remove the tough parts while keeping the tender tips.
    2. Blanching: In a saucepan of boiling water, blanch the asparagus for 2-3 minutes. You want it bright green and still crisp.
    3. Ice Bath: Immediately transfer the blanched asparagus to an ice bath to halt the cooking process. After a couple of minutes, drain and chop into 2-inch pieces.

    Step 3: Mix the Salad Ingredients

    1. Combine Vegetables: In a large mixing bowl, combine the cooled pasta, chopped asparagus, halved cherry tomatoes, diced red onion, and chopped parsley.
    2. Make the Dressing: In a small bowl, whisk together the olive oil, lemon juice, salt, and pepper. Create enough dressing to coat your salad generously.

    Step 4: Toss and Serve

    1. Toss Ingredients Together: Pour the dressing over the salad mixture and gently toss until all components are evenly coated.
    2. Adjust Seasoning: Taste and adjust the seasoning with additional salt or pepper as needed.
    3. Chill (Optional): For the best flavor, chill in the refrigerator for 30 minutes before serving. This allows the pasta salad flavors to meld beautifully.

    Step 5: Garnish and Enjoy

    1. Serve: Serve cold or at room temperature. Garnish with additional parsley or lemon slices for a bright presentation.
    2. Store Leftovers: If you have any leftovers, transfer them into an airtight container and refrigerate for up to three days.

    Enjoy your delicious Simple Lemon Asparagus Pasta Salad as a refreshing side dish or a satisfying main course. It’s versatile enough for any occasion—from festive gatherings to simple lunch breaks.

    Mastering Simple Lemon Asparagus Pasta Salad: Advanced Tips and Variations

    Creating a delightful Simple Lemon Asparagus Pasta Salad is only the beginning. Once you master the basics, there are countless ways to elevate your dish with advanced techniques and variations:

    Advanced Tips

    • Roasting Asparagus: Instead of boiling, try roasting your asparagus for a smokier flavor. Toss the trimmed asparagus with olive oil, salt, and pepper, and roast at 400°F (200°C) for 15-20 minutes.
    • Add Pesto: Toss in some pesto for a nutty flavor that complements the lemon beautifully. Just a couple of tablespoons can elevate the dish dramatically.
    • Use Artisanal Pasta: Experiment with a unique type of pasta, such as farfalle or orecchiette, for a different mouthfeel that merges well with the other ingredients.

    Creative Variations

    • Mediterranean Twist: Include ingredients like olives, feta cheese, or sun-dried tomatoes to create a Mediterranean-inspired version.
    • Protein-Packed: Add grilled shrimp, chicken breast, or chickpeas for extra protein and a heartier dish.
    • Vegan Caesar Twist: Incorporate a vegan caesar dressing for a creamy option that still complements the lemon flavors well.

    With these tips and variations, you can customize your Simple Lemon Asparagus Pasta Salad to keep it fresh and exciting every time you prepare it!

    How to Store Simple Lemon Asparagus Pasta Salad: Best Practices

    Proper storage of your Simple Lemon Asparagus Pasta Salad ensures you can enjoy leftovers without losing flavor or quality. Here are some best practices:

    Refrigeration

    • In the Fridge: Sealed in an airtight container, the pasta salad will keep well in the fridge for 3 to 4 days. This is perfect for meal prep or quick lunches.
    • Serving from the Fridge: If the salad has been refrigerated, you might want to give it a gentle toss to redistribute the ingredients before serving.

    Freezing

    • Freezing is Not Recommended: Due to the pasta and vegetables’ texture, freezing my alter the quality. Fresh ingredients lose their crunch after thawing. It is recommended to enjoy the salad fresh for the best texture and flavor experience.

    Reheating

    • Serving Cold or Room Temperature: The beauty of this pasta salad is that it can be served cold, and it doesn’t require reheating. Just pull it from the fridge, give it a toss, and it’s ready to enjoy!

    By ensuring proper storage, you can indulge in tasty, fresh leftovers while still enjoying the vibrant flavors of your pasta salad.

    Nutritional Value of Simple Lemon Asparagus Pasta Salad

    Understanding the nutritional value of your meals is essential, especially when aiming for a balanced diet. Here’s a breakdown of the nutrition for the Simple Lemon Asparagus Pasta Salad, based on typical ingredients and serving sizes.

    Nutritional Breakdown (Per Serving)

    • Calories: Approximately 250-300 calories
    • Protein: 8-10 grams
    • Carbohydrates: 35-40 grams
    • Dietary Fiber: 5-7 grams
    • Fats: 10-15 grams
    • Vitamin A: 25% DV (Daily Value)
    • Vitamin C: 30% DV
    • Calcium: 4% DV
    • Iron: 10% DV

    Health Benefits

    This nutrient-rich pasta salad supports cardiovascular health, aids in digestion with high fiber content, and provides a range of vitamins and antioxidants that boost your immune system. With its whole-food ingredients and healthy fats from olive oil, this dish stands as a smart choice for anyone looking to nourish their body.

    FAQs: Frequently Asked Questions About Simple Lemon Asparagus Pasta Salad

    As with any recipe, questions may arise about adaptations and specific cooking methods tailored to personal preferences. Here are some common FAQs regarding the Simple Lemon Asparagus Pasta Salad:

    Q1: Can I use other vegetables in this pasta salad?

    Absolutely! Feel free to incorporate seasonal vegetables, such as bell peppers, peas, or spinach, to suit your taste preferences or whatever you have on hand.

    Q2: How can I make this pasta salad gluten-free?

    Simply swap the traditional pasta for a gluten-free variety made from legumes or vegetables. Be sure to check labeling for any gluten-related concerns.

    Q3: Can I prepare the pasta salad ahead of time?

    Yes! Actually, making the salad a few hours—or even a day—ahead of time allows the flavors to meld, enhancing the taste. Just be sure to store it in an airtight container in the fridge.

    Q4: What can I replace lemon juice with if I’m not a fan of citrus?

    You can substitute lemon juice with vinegar, such as apple cider vinegar or red wine vinegar, keeping in mind this will alter the flavor profile.

    Q5: How can I make this recipe higher in protein?

    Consider adding grilled chicken, seared shrimp, or chickpeas to bump up the protein content. These additions will make the pasta salad more filling and suitable as a main course.

    Q6: Is this pasta salad vegan?

    Yes, if you make it without any non-vegan dressings or cheese, this pasta salad is entirely vegan and perfect for those following plant-based diets.

    By considering these FAQs, you can create your Simple Lemon Asparagus Pasta Salad tailored to your needs and preferences, ensuring everyone can enjoy this delightful dish to its fullest!


    Embark on a flavorful journey with this delightful Simple Lemon Asparagus Pasta Salad. Not only is this recipe straightforward and adaptable, but it also brings together vibrant tastes and nutritious ingredients, allowing every cook, from the novice to the expert, to relish a dish that satisfies the palate while meeting various dietary needs. So, prepare to embrace the freshness—your kitchen deserves this culinary delight! Enjoy!

  • IM Obsessed With This Herbed Garden Fresh Salad

    IM Obsessed With This Herbed Garden Fresh Salad

    I’M Obsessed With This Herbed Garden Fresh Salad!: A Tropical Delight

    Introduction to I’M Obsessed With This Herbed Garden Fresh Salad!

    Welcome to the world of vibrant flavors and nutrients with my Herbed Garden Fresh Salad! If you’re on the lookout for healthy dinner recipes that tantalize your taste buds and satisfy your hunger, look no further. This salad is not only strikingly beautiful but also incredibly simple to prepare, full of seasonal vegetables, and bursting with flavor from fresh herbs. The best part? It caters to a plethora of dietary needs—vegan, gluten-free, and low-calorie!

    Imagine indulging in a bowl of crisp mixed greens, juicy tomatoes, and crunchy cucumbers, all drizzled with a light herbed vinaigrette that enhances every bite. This salad is more than just a meal; it’s an experience, making it ideal for busy parents juggling mealtime chaos, students in need of quick nourishment, or health-conscious individuals looking to maintain a balanced diet.

    Not only does this dish deliver wholesome goodness, but it also invites creativity in the kitchen. With the right ingredients and a sprinkle of passion, you can elevate your culinary skills while enjoying a satisfying dish. Dive into the recipe, and embrace the joy of making a refreshing salad that you’ll be obsessed with!

    Benefits and Advantages of I’M Obsessed With This Herbed Garden Fresh Salad!

    Why should you make this Herbed Garden Fresh Salad? Let’s delve into its numerous benefits and attributes that make it a standout choice among healthy dinner recipes.

    1. Easy Preparation: This salad is remarkably simple to prepare. Within minutes, you can assemble an appealing dish that is both nutritious and delicious. Its quick prep time makes it perfect for any home cook, whether you’re a busy parent needing a quick dinner solution or a student who wants to whip up something simple after class.

    2. Health Benefits: Eating a salad packed with fresh vegetables means you’re boosting your intake of vitamins, minerals, and antioxidants. Leafy greens like spinach and kale are great sources of fiber and help in digestion. Furthermore, the colorful vegetables provide hydration and are low in calories, making this dish ideal for anyone trying to maintain or lose weight.

    3. Versatile and Customizable: This recipe is versatile enough to adapt to various dietary preferences. Whether you’re vegan, vegetarian, or simply looking for nutritious meals, this Herbed Garden Fresh Salad can be tailored to fit. By swapping out certain veggies or adjusting the dressing, you can personalize it to suit your taste while adhering to healthy eating habits.

    4. Suitable for Gatherings: Whether it’s a casual family dinner or a potluck with friends, this salad is a showstopper. Its vibrant colors and fresh flavors make it a delightful centerpiece that everyone will appreciate, allowing it to stand tall amidst a plethora of other dishes.

    In essence, this Herbed Garden Fresh Salad stands out due to its easy preparation, health benefits, adaptability, and impressive presentation. It’s a delightful choice that aligns perfectly with the objectives of anyone seeking healthy dinner recipes.

    Ingredients Overview

    Essential Ingredients for I’M Obsessed With This Herbed Garden Fresh Salad!

    To create this delightful Herbed Garden Fresh Salad, you’ll need the following ingredients:

    • 4 cups mixed greens (spinach, arugula, and romaine)
    • Purpose : Provides a nutrient-rich base full of vitamins A, C, and K.

    • 1 cup cherry tomatoes, halved

    • Purpose : Adds sweetness and richness with antioxidants.

    • 1 cucumber, diced

    • Purpose : Offers crunch and hydration, low in calories.

    • 1/2 red onion, thinly sliced

    • Purpose : Contributes flavor and helps in blood circulation.

    • 1 cup fresh herbs (basil, parsley, cilantro)

    • Purpose : Infuses your salad with fresh flavors and various health benefits.

    • 1/4 cup feta cheese (optional)

    • Purpose : Adds creaminess and a touch of tang; use nutritional yeast for a vegan version.

    • 1/4 cup olive oil

    • Purpose : A source of healthy fats that enhances the salad’s flavor.

    • 2 tablespoons balsamic vinegar

    • Purpose : Provides tanginess and balances flavors.

    • Salt and pepper to taste

    For gluten-free options, ensure your balsamic vinegar is certified gluten-free. This salad is naturally low-calorie and easily fits into a variety of dietary plans.

    Dietary Substitutions to Customize Your I’M Obsessed With This Herbed Garden Fresh Salad!

    One of the best aspects of the Herbed Garden Fresh Salad is its adaptability. Here are some substitutions to ensure it meets a range of dietary requirements or personal preferences:

    • For Vegan Adaptations: Use a dairy-free cheese alternative instead of feta or skip it entirely. The salad remains incredibly flavorful without it.

    • Low-Carb Option: Swap the cucumber for avocado to maintain healthy fats while reducing carbohydrates.

    • Nut-Free Variation: Ensure you omit any nuts or seeds (if used) to keep the salad nut-free.

    • Boost Protein: Add grilled chicken or chickpeas to turn this salad into a heartier meal.

    • Change Up the Greens: If romaine isn’t available, feel free to substitute with kale, shredded cabbage, or your favorite leafy greens.

    These substitutions provide flexibility, ensuring everyone can enjoy this refreshing dish while adhering to their unique tastes and dietary needs.

    How to Prepare the Perfect I’M Obsessed With This Herbed Garden Fresh Salad!: Step-by-Step Guide

    Follow this step-by-step guide to prepare the ultimate Herbed Garden Fresh Salad. You’ll appreciate how easy it is to create a colorful, nutritious dish that meets your healthy dinner recipes goals.

    1. Prepare the Base: Begin by washing and drying your mixed greens. Pat them dry gently with a paper towel or use a salad spinner to remove excess water. Place the dried greens into a large salad bowl as the foundation for your salad.

    2. Chop Vegetables: Next, take the cucumber and dice it into bite-sized pieces. Halve the cherry tomatoes and thinly slice the red onion. Incorporate all of these veggies into your bowl of mixed greens for color and texture.

    3. Add Fresh Herbs: Rinse your fresh herbs under running water and gently pat them dry. Chop them coarsely and sprinkle the herbs over your salad to introduce vibrant flavors.

    4. Prepare the Dressing: In a small bowl, whisk together the olive oil, balsamic vinegar, salt, and pepper. Taste it and adjust the seasoning to your preference. Drizzle the dressing over the salad, ensuring an even coating.

    5. Toss the Salad: Gently toss all ingredients together until the greens and vegetables are well-coated with the dressing. Be gentle to keep some of the ingredients intact and not mushy.

    6. Plate and Serve: Transfer your beautifully tossed salad onto individual plates or serve it family-style in the bowl. If desired, sprinkle feta cheese on top just before serving, or keep it on the side for those with dietary restrictions.

    7. Taste and Adjust: Finally, taste your salad. Does it need more salt? A splash of lemon juice for brightness? Make any adjustments right before serving to enhance flavor.

    And just like that, you’ve crafted a stunning Herbed Garden Fresh Salad! Feel free to customize the components, always remembering the delicious and wholesome intention behind this healthy dinner recipe.

    Mastering I’M Obsessed With This Herbed Garden Fresh Salad!: Advanced Tips and Variations

    Once you’re comfortable with the basic Herbed Garden Fresh Salad, consider these advanced tips and variations to elevate your dish:

    1. Mix of Greens: Experiment with different greens like kale, swiss chard, or even spicy arugula for a unique flavor profile. This keeps the salad fresh and gives you an opportunity to explore new textures and tastes.

    2. Dressings: Beyond balsamic vinaigrette, experiment with other dressings like lemon-tahini or honey mustard. Homemade dressings can be low in preservatives and tailored to your flavor preferences.

    3. Incorporate Grains: For a more filling meal, you can add cooked quinoa, farro, or brown rice. These grains provide extra fiber, protein, and make your salad more satisfying.

    4. Fruits & Nuts: Adding slices of apple, pear, or dried cranberries introduces a sweet element that complements the savory flavors. A handful of toasted nuts can also enhance the salad with healthy fats and crunch.

    5. Global Twist: Inspired by different cuisines, add ingredients like avocado and citrus for a Southwest feel or incorporate olives and feta to achieve a Greek-style salad.

    Through these variations, you can continuously discover new favorites while maintaining your healthy dinner recipes standard.

    How to Store I’M Obsessed With This Herbed Garden Fresh Salad!: Best Practices

    To keep your Herbed Garden Fresh Salad fresh and tasty, follow these storage tips:

    1. Refrigeration: If you have leftovers, store the salad components separately when possible. Place the greens without dressing in an airtight container, while veggies can be stored in a separate container. This keeps the greens fresh and prevents wilting.

    2. Freezing: Generally, salads do not freeze well due to moisture content. If you want to prep ingredients ahead, consider freezing cooked grains or proteins separately for later use, adding them to your salad just before serving.

    3. Reheating: Most salads are best served cold, so reheating isn’t necessary. However, if you mixed in grains or proteins, gently warm them on the stovetop without overcooking to prevent the greens from wilting.

    By following these best practices, you can ensure that you maintain the vibrant flavors and textures of your Herbed Garden Fresh Salad, enabling you to enjoy it beyond the first serving.

    Nutritional Value of I’M Obsessed With This Herbed Garden Fresh Salad!

    This Herbed Garden Fresh Salad is packed with nutritional benefits. Here’s a breakdown of its nutritional value:

    • Calories: Approximately 150 calories per serving (excluding optional cheese and grains)
    • Total Fat: 10g (healthy fats from olive oil)
    • Saturated Fat: 1.5g (if including feta)
    • Carbohydrates: 12g
    • Fiber: 5g (high fiber from vegetables and greens)
    • Sugars: 3g (natural sugars from veggies)
    • Protein: 3g (increased with added grains or proteins)

    This salad serves as a nutrient-dense option among the myriad of healthy dinner recipes. It not only provides essential macro and micronutrients but also keeps you satiated, promoting overall well-being.

    FAQs: Frequently Asked Questions About I’M Obsessed With This Herbed Garden Fresh Salad!

    Can I make this salad in advance?

    Yes! You can prep all the ingredients a day ahead. Just store the components separately and assemble right before serving to keep the greens crisp.

    What can I substitute for feta cheese?

    For a vegan alternative, nutritional yeast or a store-bought dairy-free cheese works well. You can also skip it completely for a lighter dish.

    What if I have leftover salad?

    Store leftovers without dressing in an airtight container in the refrigerator to keep it fresh. Consume within a couple of days for the best quality.

    Can I add protein to this salad?

    Definitely! Grilled chicken, chickpeas, or even boiled eggs can enhance the salad’s nutritional profile for a complete meal.

    In conclusion, making the Herbed Garden Fresh Salad is a joy that anyone can experience. It embodies the vibrant essence of healthy eating while being accommodating to different dietary needs. I hope you find as much obsession with this delightful salad as I do! Try it out, make it your own, and enjoy a delicious meal that aligns beautifully with your healthy dinner recipes goals. Happy cooking!

  • Crispy Pea Salad Lettuce Cups

    Crispy Pea Salad Lettuce Cups

    Crispy Pea Salad Lettuce Cups: A Tropical Delight

    Introduction to Crispy Pea Salad Lettuce Cups

    Are you looking for quick, healthy recipes that pack a punch of flavor and nutrition? Look no further than these delightful Crispy Pea Salad Lettuce Cups! This vibrant dish brings a refreshing taste to your table, perfect for busy weeknights, picnics, or entertaining guests. Made primarily with sweet green peas, crisp lettuce, and a medley of colorful vegetables, these lettuce cups serve as a fantastic bite-sized option for anyone seeking a light and satisfying meal.

    One of the standout features of Crispy Pea Salad Lettuce Cups is their versatility. They cater to various dietary needs, making them an excellent choice for vegan, gluten-free, and low-calorie diets. With their bright colors and crunch, these cups are not just visually appealing; they also deliver essential vitamins and minerals, making them a superfood snack. Additionally, the flavor combinations are endlessly adaptable, allowing you to use seasonal ingredients, making it a great recipe for year-round enjoyment.

    As a busy parent, a working professional, or even a student, you’ll appreciate the minimal time it takes to whip these up in the kitchen. This recipe is not just about nourishment—it’s a celebration of global flavors that are easy to create. Let’s dive into the benefits and advantages of these Crispy Pea Salad Lettuce Cups!

    Benefits and Advantages of Crispy Pea Salad Lettuce Cups

    Crispy Pea Salad Lettuce Cups offer numerous benefits that extend beyond their simplicity. First and foremost, the recipe is incredibly easy to prepare. In just 30 minutes or less, you can assemble these delightful bites, making them an excellent option for those with hectic schedules. Whether you are a working professional, a busy parent, or a student cramming for exams, this dish can be your go-to for healthy meals.

    Moreover, these lettuce cups are nutrient-dense. Peas are rich in fiber, vitamins A, C, and K, and plant-based protein, making them a fantastic addition to any meal. They are also low in calories, helping those who are diet-conscious to indulge without guilt. The use of fresh vegetables enhances this salad’s nutritional profile, offering a burst of flavor and varied textures. Green peppers, carrots, and red onions not only add crunch but also bring additional vitamins and antioxidants.

    Another advantage of this recipe is its adaptability. Crispy Pea Salad Lettuce Cups can easily accommodate different dietary preferences. They can easily be turned vegan by keeping with plant-based variations, are naturally gluten-free, and can be made low-calorie with the right ingredient substitutions. Whether you serve them as an appetizer, a light lunch, or a side dish during a family dinner or gathering, these lettuce cups shine as a crowd-pleaser.

    In summary, Crispy Pea Salad Lettuce Cups stand out for their ease of preparation, impressive nutritional benefits, and adaptability to various dietary requirements. With “healthy recipes” like these at your disposal, you can confidently serve meals that are both delicious and nourishing.

    Ingredients Overview

    Essential Ingredients for Crispy Pea Salad Lettuce Cups

    To create Crispy Pea Salad Lettuce Cups, you will need the following essential ingredients:

    • 1 cup green peas (fresh or frozen): Packed with protein, fiber, and vitamins, peas are the star of this dish.
    • 1 medium cucumber, diced: Adds refreshing crunch and hydration.
    • 1 cup cherry tomatoes, halved: Provide sweetness and vibrant color.
    • 1/2 red onion, finely chopped: For a touch of sharpness and flavor depth.
    • 1/2 cup shredded carrots: Adds sweetness and nutrients, making it a great mix.
    • 1/4 cup fresh parsley, chopped: Introduces a herbaceous note for added freshness.
    • 1 tablespoon olive oil: A heart-healthy fat that helps the salad to bind.
    • Juice of 1 lemon: For acidity that brightens flavors.
    • Salt and pepper, to taste: Basic seasonings that enhance all component flavors.
    • 1 head of Romaine or Butter lettuce: Serves as the cups for filling.

    Diet-Conscious Options: The ingredients selected are naturally vegan, gluten-free, and low in calories, making this a guilt-free treat.

    Dietary Substitutions to Customize Your Crispy Pea Salad Lettuce Cups

    You can easily customize your Crispy Pea Salad Lettuce Cups to fit a variety of dietary needs or ingredient preferences:

    • Protein Boost: For added protein, consider mixing in some cooked quinoa, chickpeas, or shredded chicken. These additions work seamlessly within the healthy recipe framework while keeping it nutritious.
    • Low-Carb Alternative: If you’re following a keto or low-carb diet, simply increase the proportion of cucumber and reduce other ingredients that contain carbohydrates.
    • Herbs and Spices: Feel free to experiment with different herbs and spices. Fresh mint or cilantro can give your salad a fresh twist. A sprinkle of cumin or paprika can add warmth to the flavor profile.
    • Dressings: If you prefer a creamier texture, consider adding tahini or a dollop of Greek yogurt. For a spicy kick, a touch of hot sauce can elevate the taste.

    This flexibility allows you to create dishes tailored to your dietary preferences while maintaining the essence of a healthy recipe.

    How to Prepare the Perfect Crispy Pea Salad Lettuce Cups: Step-by-Step Guide

    Creating the perfect Crispy Pea Salad Lettuce Cups is easy, thanks to this step-by-step guide. Follow these instructions to enjoy a deliciously healthy meal.

    1. Prepare the Base: Start by washing your lettuce leaves. Choose large, intact leaves from the Romaine or Butter lettuce. This will serve as the cup, so ensure they are sturdy enough to hold the filling without breaking.

    2. Cook the Peas: If using fresh peas, shell them and boil for about 2-3 minutes until tender. For frozen peas, simply thaw them in warm water. Drain and place them in a large mixing bowl.

    3. Mix Ingredients: Add the diced cucumber, cherry tomatoes, red onion, shredded carrots, and fresh parsley to the bowl with the peas. Use a spatula or wooden spoon to gently fold the ingredients without breaking the peas.

    4. Dress the Salad: In a small bowl, whisk together the olive oil, lemon juice, salt, and pepper until well combined. Pour this dressing over your salad mix, stirring well to ensure all ingredients are coated.

    5. Adjust Seasonings: Taste the salad and adjust the seasonings if necessary. You can add more salt, pepper, or lemon juice based on your preference. Remember, this is a healthy recipe, so less is more with the added flavors!

    6. Fill the Lettuce Cups: Take each lettuce leaf and spoon a generous amount of the pea salad mixture into the center, carefully folding the lettuce around the filling like a taco.

    7. Serve Immediately: You can serve the Crispy Pea Salad Lettuce Cups immediately or place them on a platter for easy serving. They are best enjoyed fresh, but can also be stored briefly in the fridge.

    8. Garnish Options: For an added touch, consider garnishing with extra chopped parsley or a sprinkle of sesame seeds for crunch.

    9. Enjoy Your Meal: Bite into these light, refreshing cups filled with nutritious goodness, perfect for any meal of the day!

    This clear and approachable recipe will help you create deliciously healthy meals perfect for any occasion.

    Mastering Crispy Pea Salad Lettuce Cups: Advanced Tips and Variations

    To elevate your Crispy Pea Salad Lettuce Cups, consider these advanced tips and exciting variations:

    • Add Crunch: For an extra layer of texture, include roasted nuts or seeds such as sunflower seeds or chopped almonds. Not only do they provide crunch, but they also enhance the nutrient profile, aligning nicely with healthy recipes.

    • Cheese Additions: If dairy fits your lifestyle, sprinkle some crumbled feta or goat cheese over the top for a creamy addition that complements the salad beautifully.

    • Spicy Twist: If you love a bit of heat, add diced jalapeños or a dash of chili powder to the mixture. This variation can switch up the flavor and enhance the excitement level of your dish.

    • International Flair: Infuse your salad with international inspiration by using different herbs and spices. For an Asian flair, add sesame oil and garnished sesame seeds; for a Mediterranean twist, consider olives and sun-dried tomatoes.

    • Meal Prep: If preparing meals in advance, store the salad mix and lettuce cups separately to maintain crispness. You can quickly assemble them when ready to serve, saving time while keeping meals fresh.

    Implementing these tips not only refines your cooking skills but offers delicious twists to this already versatile recipe, giving you a plethora of options in your collection of healthy recipes.

    How to Store Crispy Pea Salad Lettuce Cups: Best Practices

    When it comes to storage, it is essential to maintain freshness while reducing waste. Here’s how to keep your Crispy Pea Salad Lettuce Cups in peak condition:

    1. Refrigeration: Store leftover salad filling in an airtight container in the refrigerator. It can be kept for up to 2 days. However, for optimal freshness and texture, consume it within the first day.

    2. Lettuce Storage: Keep the lettuce leaves in a separate container, as wet leaves can spoil quickly. Wrap them in a damp paper towel and place them in a plastic bag or container in the crisper drawer of your fridge.

    3. Freezing: While it is not recommended to freeze the salad mix due to the vegetables’ water content, you can freeze leftover peas. Thaw and integrate them into a new batch of salad mix later.

    4. Re-serving: To serve leftovers, simply combine the salad mix with fresh lettuce cups just before eating. This way, you’ll keep the crunch intact for a delightful experience each time you enjoy your healthy recipe.

    Proper storage ensures that you maximize the lifespan of your meals without compromising flavor or nutrition.

    Nutritional Value of Crispy Pea Salad Lettuce Cups

    Understanding the nutritional profile of your meals helps you make informed dietary choices. Here’s the breakdown for the Crispy Pea Salad Lettuce Cups:

    • Calories: Approximately 150-200 calories per serving, depending on the exact ingredients and portion sizes.
    • Protein: Around 7-10 grams per serving, mainly from peas and optional added ingredients like chickpeas or quinoa.
    • Fat: Approximately 5-7 grams, primarily from olive oil and any nuts or cheese added.
    • Carbohydrates: Roughly 25 grams, depending on the vegetables used and their proportions.
    • Fiber: About 6-8 grams, contributing to daily fiber needs and promoting a healthy digestive system.
    • Vitamins and Minerals: A rich source of vitamins A, C, and K, iron, and calcium, making it a nourishing addition to your diet.

    With nutritional components that cater to various health goals, Crispy Pea Salad Lettuce Cups are an excellent fit for health-conscious eaters looking for delightful flavors and a light meal.

    FAQs: Frequently Asked Questions About Crispy Pea Salad Lettuce Cups

    1. Can I prepare Crispy Pea Salad Lettuce Cups in advance?

    While it’s best to assemble the cups just before serving for maximum crunch, you can prepare the salad mix up to 2 days in advance and store it in the refrigerator. Just keep lettuce leaves separate to avoid wilting.

    2. Are these salad cups suitable for meal prep?

    Yes! They work beautifully for meal prep. Just portion the salad filling and lettuce cups separately to maintain their freshness, making it a perfect option for those seeking healthy recipes throughout the week.

    3. How can I make this recipe more filling?

    You can add higher-protein ingredients like cooked quinoa, chickpeas, or shredded chicken, making it not only satisfying but also a balanced meal option.

    4. What’s the best way to make this recipe gluten-free?

    This recipe is naturally gluten-free. Just ensure all prepackaged ingredients like dressings or additional toppings are labeled gluten-free to suit your dietary needs.

    5. Can I use different types of lettuce?

    Absolutely! While Romaine and Butter lettuce are ideal for their structure, you can also use other varieties like iceberg, butter, or even cabbage leaves. Each will provide a unique texture and taste.

    6. What dips or sauces go well with these lettuce cups?

    For enhanced flavor, consider serving them with dips like tzatziki, hummus, or a spicy yogurt sauce. The addition of such sauces can elevate your dish, making it even more indulgent!

    By addressing common queries, this section brings clarity to your culinary journey with Crispy Pea Salad Lettuce Cups while encouraging culinary creativity consciously.


    Embarking on your culinary adventure with the Crispy Pea Salad Lettuce Cups guarantees nutritious and delightful experiences. Embrace the simplicity, experiment with variations, and savor the health benefits of this beautiful dish! Whether preparing for yourself or feeding a crowd, these cups are sure to impress while aligning with healthy recipes that promote wellness and enjoyment.

  • My Southern MamaS Secret Recipe For The Best Pea Salad

    My Southern MamaS Secret Recipe For The Best Pea Salad

    My Southern Mama’s Secret Recipe For The Best Pea Salad!: A Tropical Delight

    Introduction to My Southern Mama’s Secret Recipe For The Best Pea Salad!

    Welcome to the heart of Southern cooking with a twist, where ‘My Southern Mama’s Secret Recipe For The Best Pea Salad!’ is not just a dish but a celebration of flavors and traditions. This pea salad is a staple at family gatherings, bringing together simplicity and satisfaction in every bite. If you’re seeking recipe ideas that are not only easy to prepare but also pack a nutritional punch, you’ve hit the jackpot.

    At its core, this salad features vibrant green peas, which are a fantastic source of vitamins and minerals. Plus, it’s vegan, gluten-free, and low-calorie, making it an ideal choice for everyone—busy parents, health-conscious individuals, and food enthusiasts alike. Whether you enjoy it as a side dish at your next barbecue or as a light lunch during the week, this pea salad is versatile enough to fit any occasion and dietary need.

    The best part? Preparing this salad is incredibly straightforward. With just a handful of fresh ingredients and a few minutes in the kitchen, you can whip up a dish that feels festive and indulgent without the fuss. This recipe is bound to become a go-to in your kitchen, perfect for serving at casual get-togethers or even more formal occasions. Let’s dive into the details of this delightful pea salad!

    Benefits and Advantages of My Southern Mama’s Secret Recipe For The Best Pea Salad!

    One of the primary reasons why My Southern Mama’s Secret Recipe For The Best Pea Salad! stands out amongst countless recipe ideas is its incredible ease of preparation. All you need are a few fresh ingredients, a mixing bowl, and about 10 minutes of your time. This simplicity allows even novice cooks to create an impressive dish without stress.

    The health benefits are equally compelling. Green peas are low in calories yet high in fiber, protein, and an array of vitamins including A, C, and K. They support digestive health, boost immunity, and are excellent for maintaining muscle mass. Furthermore, this salad is perfect for anyone following a vegan or gluten-free diet, making it a great option for gatherings with diverse dietary preferences.

    Another advantage of this recipe is its adaptability. Feel free to mix in your favorite ingredients, whether it’s crunchy bell peppers, creamy avocado, or zesty onions. This not only enhances the flavors but allows you to customize the dish for those particular taste buds in your family or friend group. The recipe shines in its versatility, making it a perfect addition to lunchboxes, side dishes at summer picnics, or potlucks.

    Furthermore, it pairs wonderfully with various mains, from grilled chicken to hearty plant-based burgers. So if you’re searching for recipe ideas that are nutritious, quick, and inclusive, you’ll find this pea salad to be a refreshing and satisfying choice.

    Ingredients Overview

    Essential Ingredients for My Southern Mama’s Secret Recipe For The Best Pea Salad!

    To prepare My Southern Mama’s Secret Recipe For The Best Pea Salad!, you will need the following essential ingredients:

    • 2 cups fresh or frozen peas (thaw if frozen)
      These little gems are the star of the show, providing protein and fiber.

    • 1 cup diced bell peppers (red, yellow, or green)
      Bell peppers add a pop of color and a sweet crunch.

    • 1/2 cup diced red onion
      This ingredient brings a sharp taste that pairs well with the sweetness of the peas.

    • 1/2 cup vegan mayonnaise (or regular mayonnaise for non-vegan option)
      The mayo serves as a creamy base, ensuring the salad is rich in texture while remaining light.

    • 2 tablespoons apple cider vinegar
      A drizzle of this tangy vinegar balances the creaminess with a pleasant acidity.

    • Salt and pepper to taste
      These staples nourish your salad with essential seasoning to enhance all flavors.

    • 1/4 cup fresh dill or parsley (chopped)
      Adding fresh herbs provides an aromatic freshness that complements the ingredients beautifully.

    Vegan, Gluten-Free, and Low-Calorie Options

    • For a vegan option, ensure to use plant-based mayonnaise—many brands offer amazing substitutes that taste just as good.
    • This recipe is naturally gluten-free, so feel free to serve it to your guests without worries about gluten contamination.
    • Additionally, using non-fat or low-calorie mayonnaise can help reduce the overall calorie count for those watching their intake.

    Dietary Substitutions to Customize Your My Southern Mama’s Secret Recipe For The Best Pea Salad!

    Here are some recipe ideas for substitutions that can cater to various dietary needs or preferences:

    • For Protein: Add diced tofu or chickpeas to enhance the protein content. This addition makes it even more filling.
    • For Extra Crunch: Swap in diced celery or shredded carrots if you’re looking for a crunch that also adds extra color and nutrients.
    • For a Zesty Kick: Introduce diced jalapeños or a touch of hot sauce for those who crave a bold flavor.
    • For Sweetness: A teaspoon of honey or maple syrup can elevate the flavor profile while keeping the dish vegan—just check on the preferences of your group.

    With these ingredients and substitutions in mind, you can tailor the dish to suit nearly any dietary requirement without sacrificing flavor.

    How to Prepare the Perfect My Southern Mama’s Secret Recipe For The Best Pea Salad!: Step-by-Step Guide

    Creating My Southern Mama’s Secret Recipe For The Best Pea Salad! is a breeze! Follow these simple steps to craft your delightful dish:

    1. Prepare the Base: Start by gathering all your ingredients. If using frozen peas, ensure they are completely thawed.

    2. Mix Peas and Vegetables: In a large mixing bowl, combine the peas, diced bell peppers, and red onion. Toss gently to mix the ingredients.

    3. Add the Dressing: In a separate smaller bowl, whisk together the vegan mayonnaise and apple cider vinegar. Pour this mixture over the pea and vegetable mix.

    4. Season and Toss: Sprinkle salt and pepper to taste. Mix everything together until all components are coated in the creamy dressing.

    5. Finish with Fresh Herbs: Add the chopped dill or parsley, giving the salad one final toss to integrate the herb flavor throughout.

    6. Taste Test: Before serving, taste your salad and adjust the seasoning as desired. Feel free to add more herbs, vinegar, or seasoning based on your preferences.

    7. Chill Before Serving: For the best flavor, allow the salad to chill in the refrigerator for at least 30 minutes. This allows the flavors to meld beautifully.

    8. Serve and Enjoy: Present your beautiful pea salad in a bowl, garnished with additional herbs if you desire. Serve cold and watch it disappear!

    With these straightforward steps, you’ll have a delightful dish that anyone can enjoy. The simplicity and adaptability of this recipe make it a fantastic addition to any meal or gathering!

    Mastering My Southern Mama’s Secret Recipe For The Best Pea Salad!: Advanced Tips and Variations

    To take your pea salad to the next level, consider these advanced tips and variations:

    • Experiment with Flavors: Try adding crushed garlic or a squeeze of lemon juice for a depth of flavor. These surprises will elevate your salad!

    • Make It an Entrée: Transform the salad into a main course by adding cooked quinoa, lentils, or whole grain pasta for extra nutrients and satiety.

    • Cheese Lovers Unite: For non-vegan versions, crumbled feta or shredded cheddar can introduce creaminess and add a savory touch.

    • Herb Swaps: While dill is a classic choice, experimenting with herbs like basil, cilantro, or mint can yield delightful outcomes.

    • Nuts and Seeds: Toss in some sunflower seeds or slivered almonds for an added layer of texture and healthy fats.

    Stirring in these variations will not only allow your creativity to shine but will keep this dish refreshing and interesting for each serving occasion.

    How to Store My Southern Mama’s Secret Recipe For The Best Pea Salad!: Best Practices

    To ensure your My Southern Mama’s Secret Recipe For The Best Pea Salad! stays fresh and delicious, follow these storage tips:

    • Refrigeration: Store any leftovers in an airtight container in the refrigerator. This salad will usually keep well for up to 3-5 days, allowing you to enjoy it as a quick lunch or side dish throughout the week.

    • Freezing: While it’s best enjoyed fresh, you can freeze this salad if necessary. Just be aware that the texture may change slightly upon thawing. Place it in a freezer-safe container, and it can last for up to 2 months.

    • Reheating: If you’ve made adjustments or had it frozen, to serve it again, simply thaw it in the fridge overnight and give it a good stir before serving.

    By following these storage practices, you maximize your salad’s shelf life while enjoying its delightful flavors over time.

    Nutritional Value of My Southern Mama’s Secret Recipe For The Best Pea Salad!

    This pea salad is not only a feast for the taste buds, but it also serves as a nutritious addition to your meals. Here’s a closer look at the nutritional value of My Southern Mama’s Secret Recipe For The Best Pea Salad! (serving size: 1 cup).

    • Calories: Approximately 150
    • Total Fat: 5g
      Includes 0g trans fat
    • Saturated Fat: 1g
    • Cholesterol: 0mg
    • Sodium: 200mg
    • Total Carbohydrates: 22g
      Dietary Fiber: 6g, Sugars: 5g
    • Protein: 6g

    Health Benefits

    This nutrient-dense salad is an excellent source of:
    Vitamins A, C, & K
    Magnesium and Iron
    Folate and Antioxidants

    Due to its rich nutrient profile, this salad supports various aspects of health, from improving digestion to enhancing skin health. Incorporating this dish into your diet can help meet your daily vegetable intake while keeping your meals light and fulfilling.

    FAQs: Frequently Asked Questions About My Southern Mama’s Secret Recipe For The Best Pea Salad!

    Q1: Can I make this salad ahead of time?
    Absolutely! The flavors deepen as they sit, so making it a day in advance can enhance the taste. Just store it in the refrigerator.

    Q2: Is this salad suitable for meal prep?
    Yes! This salad keeps well and is great for meal prep. Just ensure you store it in an airtight container to maintain freshness.

    Q3: Can I substitute the mayonnaise?
    Certainly! You can use Greek yogurt, avocado, or even cashew cream for a healthier alternative without sacrificing creaminess.

    Q4: What other ingredients can I add?
    Feel free to get creative! You can add diced avocados, crispy bacon bits, or even nuts for an added crunch.

    Q5: How long does the salad last in the fridge?
    The salad will stay fresh stored in an airtight container in the refrigerator for about 3-5 days.

    By addressing these common questions, we hope to encourage both novice and experienced cooks to embrace My Southern Mama’s Secret Recipe For The Best Pea Salad! and make it their own. The beauty of this recipe is found in its versatility, catering to a variety of tastes and dietary needs. So gather your ingredients and prepare to create a dish that will surely delight yourself and anyone who shares it with you!

  • 15-Minute Dairy Free Pea Salad

    15-Minute Dairy Free Pea Salad

    15-Minute Dairy Free Pea Salad: A Tropical Delight

    Introduction to 15-Minute Dairy Free Pea Salad

    Spring is a delightful time of year, often characterized by vibrant flavors and refreshing meals. Among the simplest and most delicious spring meals you can whip up is this 15-Minute Dairy Free Pea Salad. This salad embodies the essence of spring with its crisp textures and bright colors while being incredibly easy to prepare. With just a few wholesome ingredients, you can create a dish that is not only delightful to the palate but also caters to various dietary needs.

    Imagine a salad bursting with the sweetness of peas, the crunch of fresh vegetables, and the tang of a light dressing—all while being dairy-free and suitable for vegans and gluten-free eaters alike. This recipe incorporates nutritious ingredients, making it a healthful choice for busy parents, students, or anyone aiming for a quick yet satisfying meal.

    Whether you want a refreshing dish to serve at a family picnic or a quick lunch to enjoy on your own, this salad covers all your bases. It requires minimal kitchen skills, making it accessible to novice cooks, and it’s an excellent way to introduce fresh, seasonal produce into your diet. So, grab your mixing bowl, and let’s dive into this easy and nutritious salad that’s perfect for busy lifestyles!

    Benefits and Advantages of 15-Minute Dairy Free Pea Salad

    What makes this 15-Minute Dairy Free Pea Salad so appealing? For starters, it embodies convenience. In today’s fast-paced world, finding time to prepare healthy meals can be challenging, especially for busy parents, working professionals, or students. This salad can be thrown together in 15 minutes, making it ideal for anyone seeking to enjoy a quick, nutrient-dense meal.

    Health-wise, peas are a powerhouse of nutrition. They are rich in vitamins A, C, and K, as well as high in protein and fiber, which makes this salad a wholesome option. Furthermore, being dairy-free, this recipe is suitable for those who are lactose intolerant, vegan, or simply looking to reduce their dairy consumption. It not only caters to diverse dietary needs but also blesses your body with essential nutrients.

    Additionally, this salad is highly adaptable. You can easily tweak the ingredients based on what you have on hand, making it perfect for a last-minute dish or for accommodating varying taste preferences. Whether you want to omit certain vegetables, add some grains for added texture, or throw in your favorite nuts for a crunch, the possibilities are endless.

    This spring meal is also visually appealing, making it a great addition to your lunch table or spring gatherings. Its bright colors and fresh ingredients can make any meal look gourmet. Plus, with its light and refreshing qualities, it can serve as a delightful side dish or a satisfying main course.

    Ingredients Overview

    Essential Ingredients for 15-Minute Dairy Free Pea Salad

    Here is a comprehensive list of the key ingredients you’ll need to make this delicious Dairy Free Pea Salad:

    • 1 ½ cups fresh or frozen peas (thawed) – Packed with protein and fiber, they form the base of the salad.
    • 1 cup cherry tomatoes, halved – These add a burst of sweetness and vibrant color.
    • 1 cup cucumber, diced – Offers a refreshing crunch and hydrating quality.
    • ½ red onion, finely chopped – Provides a sharp flavor that balances the sweetness of the peas and tomatoes.
    • 1 bell pepper (any color), chopped – Adds sweetness and additional crunch.
    • 3 tablespoons olive oil – Acts as a healthy fat, enriching the flavors while being dairy-free.
    • 2 tablespoons lemon juice – Brightens the salad and enhances its fresh taste.
    • Salt and pepper to taste – Essential for seasoning and enhancing all the flavors.

    Note: This recipe is vegan, gluten-free, and low in calories, making it suitable for various dietary preferences.

    Dietary Substitutions to Customize Your 15-Minute Dairy Free Pea Salad

    This recipe’s design allows for numerous modifications, making it easy to customize according to your tastes or dietary restrictions. Here are some options for substitutions:

    • Peas: If you’re not a fan of peas, consider using green beans or edamame as alternatives. Both options bring a similar texture and nutritional value.

    • Vegetables: Feel free to swap in any vegetables you have on hand. Carrots, radishes, or even avocado can complement the dish beautifully.

    • Olive Oil: For a different flavor profile, you can use avocado oil or toasted sesame oil to dress the salad.

    • Lemon Juice: In place of the lemon juice, vinegar (such as apple cider or balsamic) can provide acidity but change the flavor profile slightly.

    • Nuts/Seeds: To add crunch, sprinkle some sunflower seeds or sliced almonds on top. This addition enhances the salad’s protein content and creates a fun texture contrast.

    By complying with dietary needs and ingredient availability, you can easily personalize your 15-Minute Dairy Free Pea Salad without compromising on flavor!

    How to Prepare the Perfect 15-Minute Dairy Free Pea Salad: Step-by-Step Guide

    Creating this refreshing 15-Minute Dairy Free Pea Salad is a breeze! Follow these simple steps for a quick preparation.

    1. Prepare the Base: Begin by rinsing the fresh or thawed peas under cold water. If you’re using frozen peas, ensure they are completely thawed to maintain the salad’s crisp texture.

    2. Chop the Vegetables: Dice the cucumber, halve the cherry tomatoes, and chop the bell pepper into bite-sized pieces. Finely chop the red onion, maintaining an even size for consistent flavor distribution.

    3. Combine Ingredients: In a large mixing bowl, add the peas, chopped cucumber, halved cherry tomatoes, diced bell pepper, and red onion. Toss them together gently until they are well combined.

    4. Prepare the Dressing: In a small bowl, whisk together the olive oil and lemon juice. Add salt and pepper to taste. This dressing provides a simple yet effective way to enhance flavor while keeping it dairy-free.

    5. Dress the Salad: Pour the prepared dressing over the salad ingredients. Toss gently again to ensure each component is coated evenly. This step is crucial for achieving a harmonious blend of flavors.

    6. Taste and Adjust: After tossing, take a moment to taste the salad. If needed, adjust seasoning by adding more salt, pepper, or lemon juice according to your liking.

    7. Serve Immediately or Chill: This salad can be enjoyed immediately, but letting it sit for about 10 minutes allows the flavors to meld beautifully. Alternatively, you can refrigerate it for an hour or two for a refreshing, chilled option.

    8. Customize: Finally, feel free to sprinkle your choice of nuts or seeds on top for added texture before serving. Enjoy your delightful spring meal!

    With these easy steps, you’ll have a colorful, nutritious dish ready in just 15 minutes, perfect for any occasion or quick family dinner!

    Mastering 15-Minute Dairy Free Pea Salad: Advanced Tips and Variations

    To elevate your 15-Minute Dairy Free Pea Salad to the next level, consider trying some of these advanced tips and variations:

    • Herb Infusion: Incorporating fresh herbs can significantly enhance the flavor profile. Try adding chopped mint, cilantro, or basil to give the salad a refreshing twist.

    • Grains and Proteins: You can further indulge this recipe by adding grains like quinoa or farro for added texture and nutritional value. Similarly, incorporating chickpeas or lentils can boost the protein content, making it more filling.

    • Spicy Kick: Add a dash of red pepper flakes or a sprinkle of chili powder if you’re in the mood for a bit of heat. This variation could introduce an unexpected twist to your refreshing salad.

    • Tofu or Tempeh: For a protein-packed option, try adding cubed tofu or tempeh. Just ensure they are properly seasoned to keep the flavor balanced.

    • Noodle Version: If you want something heartier, replace the salad base with noodles. Zoodles (zucchini noodles) or rice noodles can be used to create a unique, light dish perfect for a springtime meal.

    By experimenting with these variations, you can make each serving of this 15-Minute Dairy Free Pea Salad uniquely yours!

    How to Store 15-Minute Dairy Free Pea Salad: Best Practices

    Storing your 15-Minute Dairy Free Pea Salad properly ensures that you can enjoy it for days to come. Here are some simple practices to follow:

    • Refrigerate: Store leftover salad in an airtight container in the refrigerator for up to 3 days. This will help maintain its freshness and crispness. Just be aware that the vegetables may soften after a day or two, affecting texture.

    • Dress Separately: If you plan to keep the salad longer than a day, consider storing the dressing separately and adding it just before serving. This will keep the salad ingredients from becoming soggy.

    • Freezing: While this salad is best enjoyed fresh, if you have leftovers you won’t be able to eat within a few days, you can freeze the peas and other washed vegetables for later use in soups or stews. However, freezing may change the texture, so it’s not ideal for this specific salad.

    With these storage tips, you can ensure your spring meal stays fresh and delicious for several days, allowing for intermittent healthy snacking!

    Nutritional Value of 15-Minute Dairy Free Pea Salad

    When it comes to nutritional benefits, this 15-Minute Dairy Free Pea Salad excels. The following is an approximate nutritional breakdown per serving (based on 4 servings):

    • Calories: 150
    • Total Fat: 7g
    • Saturated Fat: 1g
    • Cholesterol: 0mg
    • Sodium: 200mg
    • Total Carbohydrates: 20g
    • Dietary Fiber: 5g
    • Sugars: 3g
    • Protein: 5g

    This salad provides a good balance of macronutrients, with a focus on protein and fiber, which is essential for promoting satiety and digestive health. The high vitamin content from peas and fresh veggies adds to its health benefits, making it a great option for anyone focused on clean eating or looking to maintain a balanced diet. Enjoy this nutritious meal as part of your spring meals routine for a refreshing dietary boost!

    FAQs: Frequently Asked Questions About 15-Minute Dairy Free Pea Salad

    Can I use frozen peas instead of fresh?

    Absolutely! Frozen peas work just as well and make preparation even quicker. Just be sure to thaw them beforehand.

    How long does this salad last in the fridge?

    The 15-Minute Dairy Free Pea Salad will stay fresh in the refrigerator for approximately 3 days. Just be mindful that the texture may soften a bit over time.

    Can I add more vegetables?

    Certainly! This salad is highly customizable. Feel free to mix in any fresh vegetables you have on hand, such as carrots, radishes, or avocado.

    Is this salad suitable for meal prep?

    Yes, it makes an excellent meal prep option! Just store the dressing separately if you plan to have leftovers for more than one day.

    Can I make this salad ahead of time?

    It’s best to prepare the salad shortly before serving for optimum freshness, but if needed, you can make it up to a few hours in advance. Just dress it right before eating for the best flavor.

    Enjoy crafting this 15-Minute Dairy Free Pea Salad for your family and friends. Its ease, versatility, and health benefits perfectly represent the essence of wonderful and simple spring meals!