Category: salad

  • Light Cucumber Pea Salad

    Light Cucumber Pea Salad

    Light Cucumber Pea Salad: A Tropical Delight

    Introduction to Light Cucumber Pea Salad

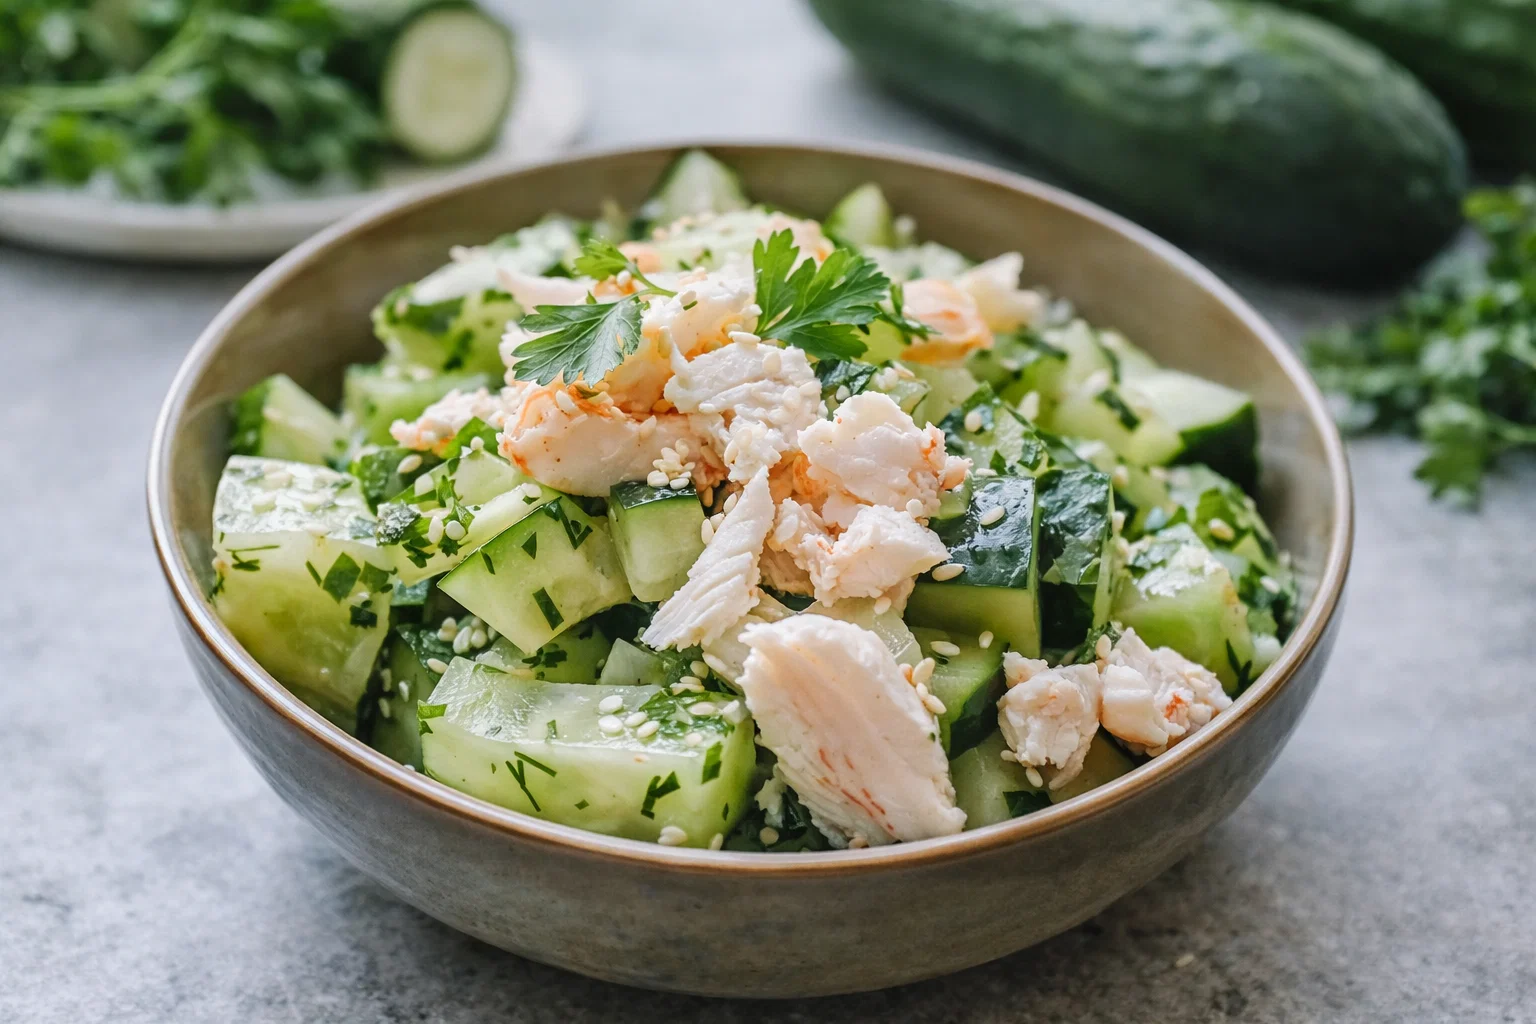
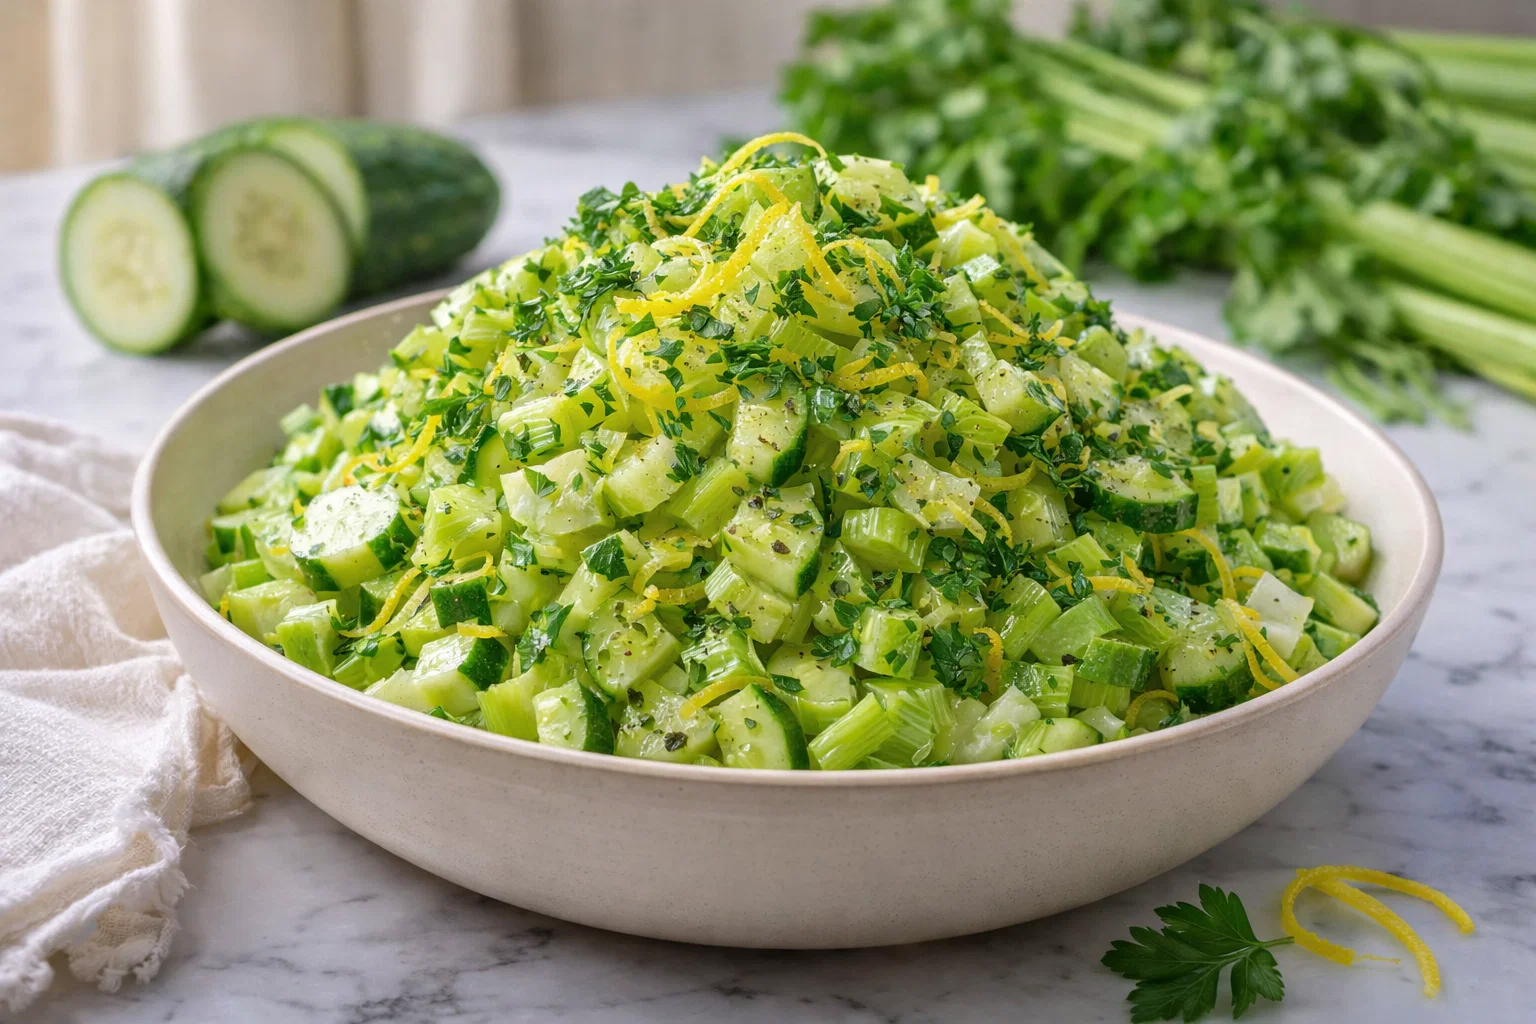
    Welcome to the vibrant world of healthy eating! Today, we present a refreshing Light Cucumber Pea Salad that’s not only a feast for your taste buds but also a nourishing addition to your meals. This cucumber salad is a delightful medley of fresh flavors, perfect for those seeking a light yet satisfying dish. Imagine biting into crisp cucumbers, paired with the subtle warmth of peas, all enveloped in a tangy dressing—this is more than just food; it’s an experience!

    The beauty of this recipe lies in its simplicity. In under 30 minutes, you can whip up a salad that caters to numerous dietary preferences, including vegan and gluten-free options. Whether you’re a busy parent searching for a quick side dish, a health-conscious individual focused on low-calorie meals, or a culinary enthusiast seeking fresh ideas, this salad checks all the boxes. It’s an excellent way to incorporate more vegetables into your diet, loaded with vitamins and minerals that contribute to your overall well-being.

    With its light texture and vibrant colors, this salad is perfect for any occasion—be it a picnic, potluck, or weeknight dinner. It’s a versatile dish that can be enjoyed as a main course or served alongside grilled meats and seafood. So, let’s dive deeper into the benefits and make this simple yet tantalizing cucumber salad the star of your table!

    Benefits and Advantages of Light Cucumber Pea Salad

    Why should you add this delicious cucumber salad to your meal rotation? First, let’s talk about ease of preparation. With a few key ingredients that you can often find in your fridge or pantry, this salad comes together quickly, making it ideal for those busy days when time is precious.

    Apart from convenience, this cucumber salad is packed with health benefits. Cucumbers are exceedingly hydrating, thanks to their high water content, making this salad a perfect choice for hot summer days. They are low in calories but high in essential nutrients. Peas, on the other hand, are rich in protein and fiber, promoting fullness and helping with digestion. Together, these ingredients create a salad that’s not only delicious but also nutritious.

    Additionally, this recipe shines when it comes to dietary versatility. It’s vegan, gluten-free, and low in calories—making it a smart option for anyone watching their diet. Busy parents can easily customize the ingredients to cater to their children’s preferences. For students or individuals living alone, it’s a make-ahead meal that stores well in the fridge.

    Lastly, this Light Cucumber Pea Salad offers a fantastic base for creativity. You can modify the flavor profile by introducing various herbs and spices, making it your own. Whether you’re looking to add a tropical twist with pineapple or an Asian flair with sesame dressings, the possibilities are endless!

    Ingredients Overview

    Essential Ingredients for Light Cucumber Pea Salad

    Here’s what you’ll need to create this scrumptious cucumber salad:

    • 2 cups cucumbers, diced (preferably English cucumbers for a smoother flavor)
    • 1 cup fresh or frozen peas, thawed
    • 1/4 cup red onion, finely chopped
    • 1/2 cup cherry tomatoes, halved
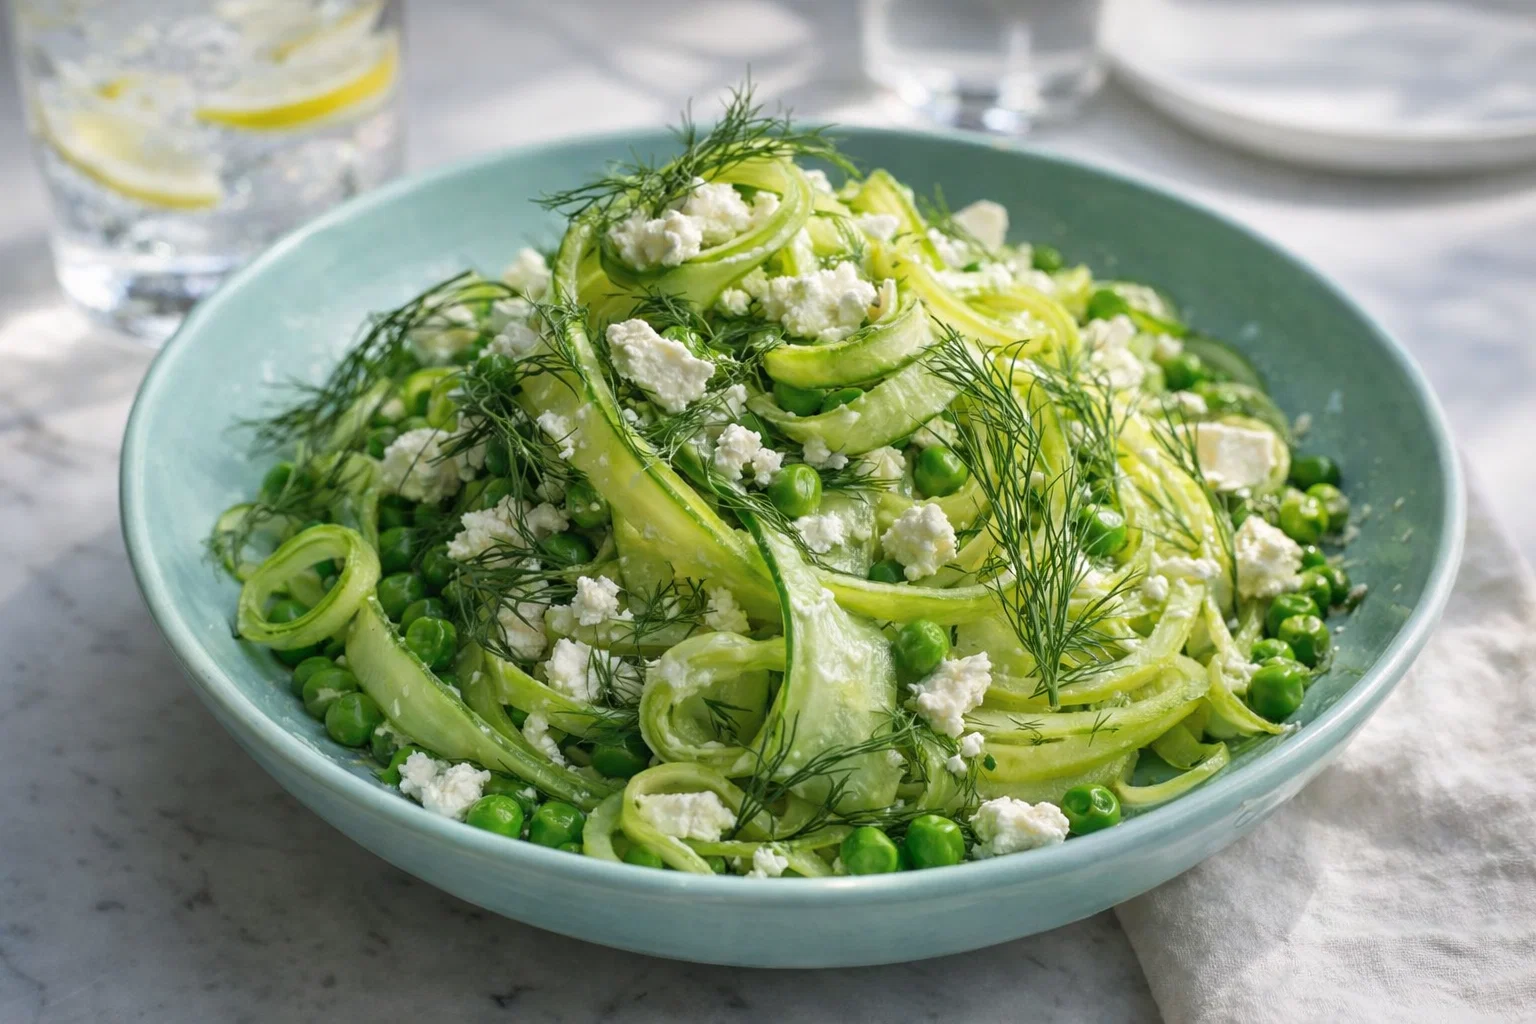
    • 1/4 cup fresh dill, chopped (or substitute with parsley)
    • 3 tablespoons olive oil
    • 2 tablespoons lemon juice
    • Salt and pepper, to taste

    Purpose of Key Ingredients

    • Cucumbers: Provide hydration, crunch, and freshness.
    • Peas: Add protein, fiber, and a touch of sweetness.
    • Red onion: Introduces a slight sharpness, enhancing the overall flavor.
    • Cherry tomatoes: Offer a pop of color and sweetness.
    • Fresh herbs: Elevate the salad with aromatic flavors.
    • Olive oil and lemon juice: Create a light dressing that ties everything together.

    This Light Cucumber Pea Salad can easily accommodate various dietary preferences, ensuring everyone can relish its delightful blend.

    Dietary Substitutions to Customize Your Light Cucumber Pea Salad

    One of the best aspects of this cucumber salad is its adaptability. Here are some substitutions to consider:

    • Cucumbers: For a crunchier alternative, substitute with zucchini.
    • Peas: If fresh peas aren’t available, you can opt for green beans or edamame for a different texture and flavor.
    • Fresh herbs: Use basil or mint as an alternative to dill for a refreshing twist.
    • Dressings: Swap olive oil for avocado oil to introduce healthy fats, or use yogurt for a creamier dressing without compromising health.
    • Vegan option: For a more substantial meal, add cooked quinoa or chickpeas.

    Feel free to experiment with the ingredients based on what you have at home or your specific dietary requirements, making this Light Cucumber Pea Salad not just a dish, but a culinary adventure!

    How to Prepare the Perfect Light Cucumber Pea Salad: Step-by-Step Guide

    Let’s roll up our sleeves and prepare this delightful cucumber salad with these straightforward steps. You’ll discover that making this dish is as rewarding as it is enjoyable!

    1. Gather Your Tools: Start by collecting all the necessary tools and ingredients. You’ll need a large mixing bowl, a cutting board, a knife, and measuring spoons.

    2. Prepare the Cucumbers:

    3. Wash the cucumbers under cold water. If using English cucumbers, peel them if desired; otherwise, simply dice them into bite-sized pieces. Set aside in the bowl.

    4. Cook the Peas:

    5. If using fresh peas, lightly steam them for a couple of minutes until bright green. If using frozen peas, thaw them until they reach room temperature. Add them to the bowl with the cucumbers.

    6. Chop Additional Vegetables:

    7. Finely chop the red onion and halve the cherry tomatoes. These will contribute to the flavor and texture of your salad. Add them to the mixing bowl.

    8. Combine the Fresh Herbs:

    9. Chop the fresh dill or your chosen herb and incorporate it into the mixture. Herbs not only enhance the taste but also add vibrant colors!

    10. Mix the Dressing:

    11. In a small bowl, whisk together the olive oil, lemon juice, salt, and pepper. This simple dressing brings the ingredients together wonderfully. Feel free to adjust the seasoning according to your taste.

    12. Dress the Salad:

    13. Pour the dressing over the salad mixture and gently toss everything until evenly coated. It’s important to treat the salad with care to preserve the texture of the cucumbers and peas.

    14. Chill Before Serving (Optional):

    15. Allow the salad to sit in the refrigerator for at least 15-20 minutes. This helps the flavors meld beautifully. However, you can serve it immediately if you’re pressed for time.

    16. Serve and Enjoy:

    17. Transfer the salad to a serving bowl or individual plates. Garnish with extra herbs or a sprinkle of feta cheese, if desired. Enjoy your fresh cucumber salad as a light meal or a refreshing side dish!

    By following these steps, you’ll create a beautiful, tasty salad that celebrates the freshness of the ingredients.

    Mastering Light Cucumber Pea Salad: Advanced Tips and Variations

    Elevate your cucumber salad with these expert tips and creative variations:

    • Texture: For an added crunch, consider incorporating nuts, such as sliced almonds or walnuts. Toasted nuts can enhance the flavor and give an appealing crunch.

    • Fruits: Introduce a tropical vibe by adding pineapple or mango chunks, which will give a sweet contrast to the savory elements.

    • Spices: Experiment with spices like cumin or smoked paprika to infuse a unique flavor profile. Spices can turn the salad into a whole new experience.

    • Marinating: For a more pronounced taste, let your salad marinate for an hour or more. This enables the cucumbers to absorb the dressing while enhancing all flavors.

    • Serving Suggestions: Serve this salad alongside grilled chicken or fish for a delightful meal, or try it between pita bread for a fresh sandwich alternative.

    By playing around with these ideas, you’ll keep your Light Cucumber Pea Salad fresh and exciting every time you prepare it!

    How to Store Light Cucumber Pea Salad: Best Practices

    Storing your cucumber salad properly is crucial to maintaining its freshness and flavor:

    • Refrigeration: The best way to store this salad is in an airtight container in the refrigerator. It will last for up to 2-3 days. Just keep in mind that the cucumbers may lose their crunch over time.

    • Separation: To keep the cucumbers crisp, you can store the dressing separately and mix it just before serving. This way, the salad remains fresh and maintains its texture.

    • Freezing: While fresh cucumbers do not freeze well, you can freeze the peas. Just thaw and combine them with fresh cucumbers and other ingredients when you’re ready to enjoy the salad.

    By following these storage tips, you can enjoy your salad for days, ensuring that no healthy food goes to waste!

    Nutritional Value of Light Cucumber Pea Salad

    Now, let’s explore the nutritional value of our delicious Light Cucumber Pea Salad. This dish is not only refreshing but also packed with wholesome ingredients that contribute to a balanced diet.

    • Calories: Approximately 120 calories per serving.
    • Protein: Around 4 grams, primarily from peas.
    • Fats: About 8 grams, coming mainly from olive oil.
    • Carbohydrates: Roughly 10 grams, mostly from cucumbers and peas.
    • Fiber: Contains about 3 grams, promoting digestive health.
    • Vitamins & Minerals: Rich in vitamins A, C, K, and various B vitamins, as well as essential minerals like potassium and magnesium.

    This nutrient-dense salad is perfect for light meals or as a side dish, offering a great combination of vitamins, minerals, and hydration.

    FAQs: Frequently Asked Questions About Light Cucumber Pea Salad

    Here are some common queries related to the Light Cucumber Pea Salad:

    Q1: Can I use frozen peas instead of fresh peas?
    Yes, frozen peas work perfectly! Simply thaw them before adding to the salad for a quick and easy solution.

    Q2: How long can I store this salad?
    When stored in an airtight container in the fridge, it can last for 2-3 days. However, the cucumbers may lose their crunch over time.

    Q3: What if I don’t have dill?
    If you don’t have fresh dill, feel free to substitute it with parsley, basil, or mint for a different flavor profile.

    Q4: Can I make this salad ahead of time?
    Absolutely! Preparing it a few hours in advance can enhance the flavors as they meld together. Just be cautious with the cucumbers to ensure they stay crisp.

    Q5: Is this salad suitable for meal prep?
    Yes, this salad is an excellent choice for meal prep! Just store the dressing separately and mix it in right before serving.

    With these FAQs answered, you are all set to enjoy your Light Cucumber Pea Salad on any occasion!


    In conclusion, whether you’re a seasoned chef or a novice in the kitchen, this Light Cucumber Pea Salad is simple, healthy, and versatile enough to suit various dietary preferences. Prepare it as a refreshing side, add it to your lunch box, or serve it as a light meal. With its bright flavors and nutritious ingredients, it’s sure to become a cherished recipe in your collection! So, gather your ingredients and relish the delightful explosion of flavors and textures that await you. Happy cooking!

  • The Best Crispy Asian Brussel Sprouts

    The Best Crispy Asian Brussel Sprouts

    The Best Crispy Asian Brussel Sprouts: A Tropical Delight

    Introduction to The Best Crispy Asian Brussel Sprouts

    In the quest for healthy dinner recipes, one dish stands out for its simplicity, taste, and nutritional benefits—Crispy Asian Brussel Sprouts. This delightful recipe marries the earthy crunch of roasted brussel sprouts with a tangy, umami-laden Asian-inspired glaze. Perfect for busy parents, students, and food enthusiasts alike, this dish appeals to various dietary preferences, including vegan and gluten-free diets, making it a versatile addition to your meal repertoire.

    Imagine serving a vibrant dish that not only pleases the palate but also fuels your body with essential nutrients. Each bite of these crispy brussel sprouts bursts with flavor, while the preparation remains beautifully uncomplicated. In just a short time, you can whip up a crowd-pleaser that fits seamlessly into a healthy lifestyle. Whether you’re entertaining guests or seeking a quick weeknight meal, these brussel sprouts promise to deliver satisfaction on every level.

    Delve into this brilliant recipe that encourages you to explore new flavors. Discover how easy it is to elevate your cooking game while maintaining a focus on health and well-being. Let’s dive in and explore this delectable recipe—a true testament to the joys of preparing healthy, delicious meals that everyone will love!

    Benefits and Advantages of The Best Crispy Asian Brussel Sprouts

    When it comes to healthy dinner recipes, the benefits of preparing The Best Crispy Asian Brussel Sprouts are plentiful. Firstly, the dish is straightforward to make, allowing even novice cooks to impress their friends and family. The roasting process captivates the natural sweetness of brussel sprouts while delivering that desired crispy texture.

    Additionally, brussel sprouts are a nutritional powerhouse. They are rich in vitamins K and C, which contribute to bone health and immune function. Furthermore, they’re high in dietary fiber, which aids digestion and keeps you feeling full longer. This dish stands out precisely because it manages to be both indulgent and nutritious, making it an excellent choice for anyone seeking healthy eating options without sacrificing flavor.

    Moreover, this recipe caters to a variety of dietary needs. It’s naturally gluten-free and vegan, making it a hit among health-conscious individuals and those with dietary restrictions. By substituting a few ingredients, one can easily adapt the recipe for various preferences—whether you’re avoiding gluten, looking for low-calorie options, or indulging in a refined sugar-free treat.

    Ultimately, The Best Crispy Asian Brussel Sprouts transform a simple vegetable into a delightful culinary experience. The balance of textures and flavors leaves you craving more while staying committed to wholesome, nutritious eating. As a flexible and appealing dish, it encourages everyone to enjoy a vibrant, healthful meal.

    Ingredients Overview

    Essential Ingredients for The Best Crispy Asian Brussel Sprouts

    To prepare delicious and perfectly crispy Asian brussel sprouts, you’ll need the following ingredients:

    • 1 pound brussel sprouts (trimmed and halved): The main ingredient, brussel sprouts, are low in calories and high in vitamins and minerals.
    • 2 tablespoons olive oil: For roasting, this oil adds flavor and helps create a crispy texture.
    • 2 tablespoons soy sauce (or tamari for gluten-free): Adds an umami flavor, with tamari ensuring it remains gluten-free.
    • 1 tablespoon maple syrup: A natural sweetener that balances out the savory elements.
    • 1 teaspoon sesame oil: Provides a delicious nutty flavor, perfect for an Asian-style dish.
    • 2 cloves garlic (minced): Adds aromatic depth and complements the brussel sprouts beautifully.
    • 1 teaspoon fresh ginger (grated): Provides a spicy kick and contributes to the overall flavor profile.
    • 1 tablespoon rice vinegar: Adds acidity and brightness, enhancing the dish’s flavors.
    • Sesame seeds (for garnish): A nutritious topping, adding a crunchy finish.
    • Chopped green onions (for garnish): Brightens the dish and adds freshness.

    These ingredients collectively make for an exceptional combination of flavors, texture, and nutrition, ensuring that your brussel sprouts shine on any dinner table.

    Dietary Substitutions to Customize Your The Best Crispy Asian Brussel Sprouts

    Flexible and adaptable, this recipe allows you to cater to various dietary preferences. Here are some substitutions and adjustments you can employ:

    • Soy Sauce Substitution: For those avoiding soy, coconut aminos are an excellent alternative with a similar taste.
    • Vegan Option: This recipe is already vegan but can be customized further by omitting the honey/maple syrup for a completely sugar-free version.
    • Sweetener Alternatives: Use agave nectar or a sugar substitute like stevia to maintain sweetness for low-calorie diets.
    • Oils: If you want a higher aroma of toasted flavor, replace olive oil with avocado oil or sesame oil.
    • Low-Sodium Adaptation: To manage salt intake, utilize low-sodium soy sauce or adjust the quantity to suit your dietary needs.
    • Gluten-Free Options: Ensure that all sauces used are certified gluten-free to accommodate gluten sensitivities.

    Utilizing these substitutions allows you to make The Best Crispy Asian Brussel Sprouts fit into various lifestyles while preserving the deliciousness of the original recipe. Embrace creativity in the kitchen and enjoy customizing according to your preferences!

    How to Prepare the Perfect The Best Crispy Asian Brussel Sprouts: Step-by-Step Guide

    Now that you have a grasp of the ingredients and their purposes, it’s time to bring everything together. Follow this step-by-step guide to prepare The Best Crispy Asian Brussel Sprouts:

    1. Preheat the Oven: Begin by preheating your oven to 425°F (220°C). This hot environment will ensure that your brussel sprouts get that perfect crispy texture.

    2. Prepare the Brussel Sprouts: Rinse the brussel sprouts under cold water to remove any dirt or impurities. Trim the ends and slice each sprout in half. This not only helps them cook evenly but exposes more surface area to get crispy.

    3. Make the Marinade: In a large bowl, combine olive oil, soy sauce, maple syrup, sesame oil, garlic, ginger, and rice vinegar. Whisk the ingredients together until you achieve a smooth and cohesive mixture. The aroma should be delightful!

    4. Toss the Brussel Sprouts: Add the halved brussel sprouts to the bowl with the marinade. Toss them gently, ensuring that each piece is fully coated in the flavorful mixture.

    5. Spread on a Baking Sheet: Line a baking sheet with parchment paper for easier cleanup and spread the brussel sprouts in a single layer, cut side down. Avoid overcrowding as this will allow them to roast instead of steam.

    6. Roast in the Oven: Place the baking sheet in the preheated oven and roast for about 20-25 minutes. Halfway through, give them a good stir to ensure even cooking and browning.

    7. Check for Crispiness: After 25 minutes, check to see if the brussel sprouts are golden brown and crispy. If desired, let them roast for an additional 5 minutes for extra crunch.

    8. Garnish and Serve: Once they are done roasting, remove them from the oven, sprinkle with sesame seeds and chopped green onions for added flavor and presentation.

    9. Enjoy: Serve your crispy Asian brussel sprouts hot as a side dish, or toss them into salads or Buddha bowls for added texture and flavor.

    This step-by-step recipe is designed for anyone, from newlyweds cooking together to busy professionals seeking healthy meals. With just a few simple steps, you can enjoy a nutritious dish that emphasizes freshness and flavor while holding true to your dietary preferences.

    Mastering The Best Crispy Asian Brussel Sprouts: Advanced Tips and Variations

    To elevate your experience with The Best Crispy Asian Brussel Sprouts, it’s helpful to implement a few advanced tips and explore variations:

    • Add Protein: For a heartier meal, consider adding roasted chickpeas or tofu tossed in the same marinade. This addition provides a great protein boost while maintaining the dish’s vegetarian nature.
    • Experiment with Spices: Spice lovers can add a touch of red pepper flakes or cayenne pepper to the marinade for a spicy kick.
    • Nuts and Seeds: Incorporate toasted nuts such as crushed cashews or almonds for added texture and flavor.
    • Use Fresh Herbs: Top your sprouts with fresh cilantro or mint for an herbaceous twist that enhances their appeal.
    • Tropical Touch: For an unexpected twist, add segments of orange or pineapple towards the end of roasting for a refreshing and fruity element.
    • Make it Saucy: Drizzle with a dash of sriracha or chili garlic sauce for an exciting heat and delicious sauce.

    These advanced tips and variations not only enhance the flavor profile but also keep the dish interesting. Feel free to get creative in the kitchen and make The Best Crispy Asian Brussel Sprouts a signature dish that you can modify to suit your taste and preferences!

    How to Store The Best Crispy Asian Brussel Sprouts: Best Practices

    After enjoying your crispy Asian brussel sprouts, you may find yourself with leftovers or want to prep for future meals. Here’s how to store and maintain their quality:

    • Refrigeration: Allow the brussel sprouts to cool completely before transferring them to an airtight container. They can last in the fridge for up to 4 days. When reheating, consider doing so in a skillet for optimal crispiness.

    • Freezing: Although it’s best to consume them fresh, you can freeze cooked sprouts. Place them in a freezer-safe bag after they cool and try to remove as much air as possible. They will maintain quality for up to 3 months.

    • Reheating: To revive your leftover brussel sprouts, heat a small amount of oil in a pan and lightly fry until heated through. This process enhances their crispness, making them just as delightful as when first made.

    For those who prioritize health and flavor, knowing how to properly store your brussel sprouts ensures that your healthy dinner recipes can be enjoyed over time. By following these simple steps, you can reduce food waste and savor every delicious moment!

    Nutritional Value of The Best Crispy Asian Brussel Sprouts

    For those of you who are health-conscious, knowing the nutritional profile of your meals is essential. Here’s a breakdown of the primary nutrients found in The Best Crispy Asian Brussel Sprouts:

    Nutritional Information (Per Serving, Approximate)

    • Calories: 150
    • Total Fat: 10g (Saturated Fat: 1g)
    • Cholesterol: 0mg
    • Sodium: 200mg
    • Total Carbohydrates: 14g (Dietary Fiber: 5g)
    • Sugars: 3g
    • Protein: 4g

    Key Nutritional Benefits

    • Vitamins: Rich in vitamins C and K, supporting immune function and healthy bones.
    • Dietary Fiber: High fiber content aids digestion and helps maintain healthy cholesterol levels.
    • Low-Calorie: With fewer calories than traditional sides, they’re an excellent choice for anyone watching their weight.

    Integrating The Best Crispy Asian Brussel Sprouts into your diet is not only a smart culinary choice but also a commitment to your health. This recipe embodies the essence of healthy dinner recipes—delicious, satisfying, and nutritionally sound.

    FAQs: Frequently Asked Questions About The Best Crispy Asian Brussel Sprouts

    1. Can I make this recipe ahead of time?

    Absolutely! You can prepare the brussel sprouts and store them in the fridge for up to a day before roasting. Just remember to toss them in the marinade right before cooking.

    2. Are brussel sprouts good for you?

    Yes! Brussel sprouts are packed with essential vitamins, minerals, and fiber, making them an excellent choice for a health-conscious diet.

    3. What can I serve with The Best Crispy Asian Brussel Sprouts?

    These brussel sprouts make excellent companions for various dishes, including grilled chicken, tofu, or over a bed of rice or quinoa.

    4. Can I use frozen brussel sprouts for this recipe?

    While fresh brussel sprouts are recommended for the best texture, frozen sprouts can be used in a pinch. Just ensure to thaw them thoroughly before cooking.

    5. How can I make this recipe spicier?

    If you enjoy heat, add red pepper flakes or a drizzle of sriracha in the marinade, or serve with a spicy dipping sauce.

    6. Is there a way to make this dish more suited for meal prepping?

    For meal prepping, roast a large batch and store them in individual containers. They also pair well with grains and proteins for a balanced meal.

    7. Can I substitute the maple syrup for something else?

    Yes, you can use honey, agave syrup, or your preferred sweetener in place of maple syrup to suit your taste preferences.

    This FAQ section addresses common questions about The Best Crispy Asian Brussel Sprouts while subtly reinforcing the recipe’s appeal as part of healthy dinner recipes. They appeal to a wide audience and guide readers toward successfully preparing and enjoying this dish.


    Incorporating The Best Crispy Asian Brussel Sprouts into your weekly meals will not only delight your taste buds but also nourish your body. Embrace the flavors, textures, and health benefits that come from trying new recipes—and watch as this dish quickly becomes a favorite in your household!

  • Easy Cucumber Salad With Crab Meat

    Easy Cucumber Salad With Crab Meat

    Easy Cucumber Salad With Crab Meat: A Tropical Delight

    Introduction to Easy Cucumber Salad With Crab Meat

    If you’re in search of a refreshing and nutritious dish, look no further than this Easy Cucumber Salad With Crab Meat. This salad combines the crisp texture of cucumber with the succulent flavors of crab meat, creating a light and vibrant meal or side dish. Easy to prepare and perfect for any occasion, this cucumber salad is not just a feast for the eyes but also offers a wealth of health benefits.

    Imagine enjoying a dish that’s not only delicious but also quick to whip up, making it ideal for your busy life. Whether you’re a working professional, a student juggling classes, or a parent managing a household, this cucumber salad is here to simplify your culinary experience. Packed with vitamins and minerals from fresh cucumbers, along with the lean protein from crab, this recipe is perfect for those who want to maintain a healthy lifestyle without compromising on flavor.

    Moreover, this salad caters to various dietary needs. It can easily be modified to accommodate gluten-free and low-calorie diets, making it a versatile choice for everyone. Its vibrant colors and tropical flavors will transport your taste buds straight to a sunny beach, making each bite a delightful experience. With the easy steps provided, you’ll find yourself creating a dish that’s bound to impress your family and friends.

    Benefits and Advantages of Easy Cucumber Salad With Crab Meat

    There are countless reasons why this cucumber salad stands out from the rest. To begin with, it’s incredibly simple to prepare. With just a handful of fresh ingredients and minimal cooking required, even those who are new to the kitchen will find it easy to tackle. In about 20 minutes, you can create a dish that looks like it took hours to prepare!

    Health Benefits

    This salad is brimming with health benefits. Cucumbers, the star ingredient, are low in calories yet high in essential nutrients. They are hydrating and provide a refreshing crunch. Rich in antioxidants and vitamins C and K, cucumbers can enhance your skin’s appearance and support bone health.

    Crab meat, on the other hand, is an excellent source of lean protein and contains essential omega-3 fatty acids. These fats are known to promote heart health and reduce inflammation. The combination of these ingredients means you’re getting a meal that is not only satisfying but also nourishing.

    Dietary Flexibility

    Another fantastic aspect of this Easy Cucumber Salad With Crab Meat is its adaptability. You can easily make it vegan by substituting crab meat with artichoke hearts or chickpeas for added protein. Additionally, the salad can be transformed into a gluten-free option simply by ensuring that all your dressings and sauces are free from gluten. This flexibility is ideal for potlucks, gatherings, or family dinners, making it a universally appealing side dish.

    Ultimately, this salad is a modern, health-conscious choice that’s perfect for any meal, be it a casual lunch or an elegant dinner party. The fresh flavors combined with health benefits make it an exceptional dish to include in your recipe rotation.

    Ingredients Overview

    Essential Ingredients for Easy Cucumber Salad With Crab Meat

    For the Easy Cucumber Salad With Crab Meat, you’ll need the following ingredients:

    • 2 large cucumbers, sliced
    • 1 cup of crab meat, preferably lump
    • 1/4 cup finely chopped red onion
    • 1/4 cup diced red bell pepper
    • 1 cup cherry tomatoes, halved
    • 1/2 cup mayonnaise (light or vegan substitutes can be used)
    • 1 tablespoon lemon juice
    • Salt and pepper to taste
    • Fresh dill or parsley for garnish

    These ingredients combine to create a delightful medley of flavors and textures.

    • Cucumbers: Not only low-calorie but also rich in water, this ingredient keeps you hydrated.
    • Crab Meat: Provides lean protein and essential nutrients.
    • Red Onion & Bell Pepper: Introduces a crunch while adding vitamin C, increasing the immune-boosting quality of the dish.

    Dietary Substitutions to Customize Your Easy Cucumber Salad With Crab Meat

    If you or your dining companions have specific dietary preferences or restrictions, here are some substitutions to consider:

    • Mayo Alternatives: Use Greek yogurt for a tangy twist and added protein, or try avocado for a creamy, healthy fat option.
    • Protein Options: Swap out crab meat for firm tofu or cooked chickpeas for a plant-based protein alternative.
    • Gluten-Free Options: Ensure all your dressings are gluten-free, and replace any ingredients with gluten-containing ones with fresh herbs or gluten-free grains like quinoa.

    This adaptability allows everyone to enjoy the deliciousness of a cucumber salad while aligning with their dietary needs.

    How to Prepare the Perfect Easy Cucumber Salad With Crab Meat: Step-by-Step Guide

    Creating your own Easy Cucumber Salad With Crab Meat is simple and straightforward. Just follow these easy steps for a delightful culinary experience:

    1. Gather Your Ingredients: Start by collecting all your ingredients. Make sure your cucumbers are fresh and your crab meat is lump and free from shells.

    2. Prepare the Cucumbers: Wash the cucumbers thoroughly. Slice them thinly (about 1/4 inch thick) to ensure they mix well with the other ingredients.

    3. Chop the Vegetables: Finely chop the red onion and dice the red bell pepper. Halve the cherry tomatoes. This adds vibrant color and crunch to your salad.

    4. Prepare the Crab Meat: If using canned crab meat, drain it and check for any shell pieces. If using fresh crab, cook it until it’s done, then shred it into bite-sized pieces.

    5. Mix Ingredients: In a large mixing bowl, combine the sliced cucumbers, crab meat, red onion, red bell pepper, and cherry tomatoes.

    6. Make the Dressing: In a separate bowl, whisk together the mayonnaise, lemon juice, salt, and pepper. Adjust the seasoning according to your taste. If preferred, you can add chopped fresh dill or parsley for extra flavor.

    7. Combine: Pour the dressing over the cucumber salad mixture and gently toss until everything is evenly coated. Take care not to mash the ingredients.

    8. Chill: For the best flavor, cover the salad and refrigerate it for at least 30 minutes. This allows the flavors to meld beautifully.

    9. Serve: Once chilled, give the salad a final toss. Garnish with additional fresh herbs, if desired, before serving.

    10. Enjoy: Serve your Easy Cucumber Salad With Crab Meat as a refreshing side dish or a light meal.

    These straightforward instructions make this salad approachable for cooks of any skill level. Adjust the ingredients and steps to suit your preferences, keeping in mind any dietary restrictions.

    Mastering Easy Cucumber Salad With Crab Meat: Advanced Tips and Variations

    When mastering your Easy Cucumber Salad With Crab Meat, consider these advanced tips and variations for an enriched experience:

    Tips for Success

    1. Choose Quality Ingredients: Opt for fresh, high-quality crab meat as it significantly enhances the dish’s flavor.
    2. Texture Matters: Slice your cucumbers evenly to ensure a consistent texture throughout the salad.
    3. Chill for Flavor: Allow the salad to chill; this can improve the taste and texture. The longer it sits, the more flavors will develop.

    Variations to Consider

    1. Tropical Twist: Add diced mango or pineapple for a sweet and tropical variation that pairs beautifully with crab.
    2. Spicy Variation: Introduce diced jalapeños for a spicy kick, balancing the coolness of the cucumbers.
    3. Herb Garden: Experiment with different herbs, like basil or mint, for unique depth and flair.

    These tips and variations serve to elevate your dish, making it versatile enough to suit any occasion, from casual family dinners to classy get-togethers.

    How to Store Easy Cucumber Salad With Crab Meat: Best Practices

    Storing your Easy Cucumber Salad With Crab Meat correctly ensures it remains fresh and delicious for longer. Here are some best practices:

    Refrigeration

    • Short-Term Storage: If you plan to eat your salad within a few days, store it in an airtight container in the refrigerator. It can last up to 3 days, though it’s best enjoyed within the first day or two.
    • Preventing Wilt: To prevent cucumbers from getting too soggy, add the dressing right before serving if you plan to store it for longer.

    Freezing

    Freezing this salad is not recommended. The cucumbers will lose their crispness after thawing, and the texture will not be enjoyable. Therefore, prepare only what you plan to consume, leaving out the dressing until serving for optimal freshness.

    By following these storage tips, you can make the most of your cucumber salad’s refreshing flavors, helping you enjoy it over time.

    Nutritional Value of Easy Cucumber Salad With Crab Meat

    Understanding the nutritional composition of your Easy Cucumber Salad With Crab Meat can help you make informed dietary choices. Here’s a breakdown based on typical ingredients:

    Nutritional Information (per serving)

    • Calories: Approximately 200 calories
    • Protein: 15 grams
    • Fat: 10 grams (mainly from the mayonnaise and crab meat)
    • Carbohydrates: 10 grams
    • Fiber: 2 grams
    • Sugars: 3 grams
    • Vitamin C: 25% of the Daily Value (DV)
    • Calcium: 4% of the DV

    This nutritional profile highlights the meal as a excellent source of protein and low in calories, making it a fulfilling choice for various dietary preferences.

    FAQs: Frequently Asked Questions About Easy Cucumber Salad With Crab Meat

    Q1: What type of crab meat is best to use for this salad?

    A1: Lump crab meat is ideal for this recipe as it offers the best texture and flavor. However, you can substitute with imitation crab meat or even other proteins based on your preferences.

    Q2: Can I make this cucumber salad in advance?

    A2: Yes, you can prepare the cucumber salad in advance, but it’s best to avoid adding the dressing until you’re ready to serve to prevent the ingredients from wilting.

    Q3: What can I substitute for mayonnaise?

    A3: You may opt for Greek yogurt for a healthier twist, or use mashed avocado for a creamier, dairy-free alternative.

    Q4: How many servings does this recipe yield?

    A4: This recipe typically serves 4 to 6 people, depending on whether it is served as a side or a main dish.

    Q5: Can I add other vegetables to this salad?

    A5: Absolutely! Feel free to get creative by adding your favorite vegetables, such as radishes, celery, or even a handful of mixed greens for added fiber.

    With these answers, you’ll be better prepared to explore the full potential of your Easy Cucumber Salad With Crab Meat. This delightful dish invites versatility, perfect for any cooking enthusiast’s repertoire.

  • Creamy Roasted Carrots With Whipped Ricotta

    Creamy Roasted Carrots With Whipped Ricotta

    Creamy Roasted Carrots With Whipped Ricotta: A Tropical Delight

    Introduction to Creamy Roasted Carrots With Whipped Ricotta

    If you’re in search of effortless and exquisite dinner recipes, look no further than the delightful Creamy Roasted Carrots With Whipped Ricotta. This dish tantalizes the taste buds with its vibrant flavors and creamy texture, making it an ideal accompaniment or appetizer that fits seamlessly into a variety of culinary contexts.

    The beauty of this recipe lies in its simplicity and health benefits. Roasting brings out the natural sweetness of the carrots while enhancing their nutritious value, making this dish not only delicious but also soul-nourishing. Paired with the light, airy whipped ricotta, it strikes a perfect balance between rich and refreshing. Moreover, this recipe is vegan, gluten-free, and low-calorie, accommodating various dietary needs, including those of busy parents, diet-conscious individuals, or anyone exploring healthier choices in their meals.

    By incorporating seasonal produce, Creamy Roasted Carrots With Whipped Ricotta proves to be a delightful dish from farm to table. This elegant dish can make even a casual dinner feel special and is perfect for entertaining guests or enjoying a quiet night in. With just a handful of ingredients and simple preparation steps, it’s an approachable yet flavorful addition to your repertoire of dinner recipes.


    Benefits and Advantages of Creamy Roasted Carrots With Whipped Ricotta

    Creamy Roasted Carrots With Whipped Ricotta is not only a feast for the senses but also an incredibly practical choice for anyone seeking efficient yet satisfying meal solutions.

    Ease of Preparation: This recipe requires minimal cooking technique, making it accessible even for novice cooks. With just roasting and mixing involved, it doesn’t demand hours spent in the kitchen. While other dinner recipes might require intricate techniques, this dish shines with its straightforward actions, allowing you more time to relax and enjoy your meal or attend to family needs.

    Health Benefits: Carrots are rich in vitamins A, C, and K, which contribute to eye health, immune function, and overall well-being. They also provide fiber, which aids in digestion. Paired with wholesome ricotta—which is a good source of protein and calcium—this dish offers a balanced serving of nutrients while remaining low in calories.

    Versatility: This recipe stands out due to its flexibility. You can serve it warm or at room temperature, making it an excellent choice for potlucks or picnics. Moreover, it adapts to various occasions, whether it’s a weeknight dinner or a special celebration.

    Taste: The sweet, caramelized flavor of roasted carrots combined with the creamy texture of whipped ricotta creates a harmonious duet that will impress your family and friends. Enhanced with herbs or spices, you can easily customize the flavors to suit your preferences or seasonal ingredients.

    By exploring the advantages of Creamy Roasted Carrots With Whipped Ricotta, you open the door to a world of fulfilling and nutritious dinner recipes that cater to diverse lifestyles and dietary preferences.


    Ingredients Overview

    Essential Ingredients for Creamy Roasted Carrots With Whipped Ricotta

    The following simple ingredients will guide you in creating a delicious dish that everyone will love. Each ingredient can be tailored for dietary preferences, ensuring inclusivity.

    • Carrots (2 lbs): The star of the dish, they should be organic if possible. Rich in antioxidants and vitamins, they provide a sweet base for the recipe.
    • Olive Oil (2 tablespoons): Used for roasting the carrots, it adds healthy fats and enhances the flavors. A great source of monounsaturated fats.
    • Salt (to taste): Essential for seasoning, it enhances the natural sweetness of the carrots.
    • Black Pepper (to taste): Adds a hint of spice, complementing the sweetness of the carrots.
    • Ricotta Cheese (1 cup): This creamy cheese not only brings richness to the dish but is also a great source of protein. For a vegan substitute, use an almond or soy-based ricotta available in stores.
    • Fresh Herbs (optional; e.g., thyme or parsley): These add freshness and complexity to the flavors.

    Diet-Conscious Options: By using a vegan ricotta alternative and ensuring all ingredients are gluten-free, this dish becomes suitable for a wide range of diets.

    Dietary Substitutions to Customize Your Creamy Roasted Carrots With Whipped Ricotta

    • Ricotta Alternatives: Use cottage cheese for a lower-fat option or tofu for a vegan alternative. Blending silken tofu with nutritional yeast, lemon juice, and a pinch of salt replicates a similar texture and taste.
    • Herbal Additions: Explore different herbs like rosemary or basil for a unique twist. You may also drizzle some infused olive oil to add complexity to the flavor.
    • Spice Variations: Consider adding cayenne or paprika for a kick of heat. Alternatively, a sprinkle of cinnamon can complement the sweetness of the carrots.
    • Nutty Crunch: Add toasted nuts, such as walnuts or hazelnuts, for extra texture and a nutritious boost.

    Through these substitutions and enhancements, you can adjust the Creamy Roasted Carrots With Whipped Ricotta to better fit your unique preferences or dietary restrictions.


    How to Prepare the Perfect Creamy Roasted Carrots With Whipped Ricotta: Step-by-Step Guide

    Follow this clear and concise guide for preparing Creamy Roasted Carrots With Whipped Ricotta, ensuring delightful results every time.

    1. Prepare the Carrots: Begin by washing and peeling the carrots. Cut them into uniform sticks for even roasting. This not only improves aesthetics but also ensures that they cook through at the same rate.

    2. Seasoning: In a mixing bowl, toss the carrot sticks with olive oil, salt, and black pepper. Make sure they are evenly coated to achieve that perfect caramelization during roasting.

    3. Roasting: Preheat your oven to 425°F (220°C). Spread the seasoned carrots evenly on a baking sheet lined with parchment paper. Roast in the hot oven for about 25-30 minutes, flipping them halfway through. Look for a golden-brown exterior and tender interior.

    4. Preparing the Whipped Ricotta: While the carrots are roasting, take a mixing bowl and add the ricotta cheese. Use an electric mixer or a whisk to beat it until it’s smooth and creamy. If using, consider adding some herbs or spices to enhance the flavor.

    5. Combining Flavors: Once the carrots are fully roasted, remove them from the oven and let them cool slightly. Serve them warm alongside a generous dollop of whipped ricotta.

    6. Garnishing: Sprinkle with fresh herbs, zest of lemon, or a drizzle of balsamic glaze if desired. For an extra touch, you can sprinkle some crushed nuts on top for added texture.

    7. Serving Suggestion: Present this dish on a comfy platter as a vibrant centerpiece for your dinner table, enhancing any gathering with a healthful, visually appealing option among your dinner recipes.

    By following these straightforward steps, you’re guaranteed to create a flavorful, eye-catching dish that will delight all who partake in your meal.


    Mastering Creamy Roasted Carrots With Whipped Ricotta: Advanced Tips and Variations

    To elevate your cooking experience and create a dish that impresses, consider these advanced tips and variations.

    • Marinating Carrots: For enhanced flavor, marinate the carrot sticks in olive oil, honey, and herbs for up to an hour before roasting. This will infuse deep flavors into the carrots.

    • Roasting Techniques: Try roasting the carrots with different cooking techniques—such as grilling or air frying—for a unique appeal. Each method provides flavor differences worth exploring.

    • Infused Ricotta: Experiment with different flavor profiles by infusing your ricotta with garlic, lemon zest, or dill. This can create a full-bodied flavor that complements the sweetness of the roasted carrots.

    • Serving Variations: Incorporate the roasted carrots and ricotta into a mixed greens salad or use them as a vibrant topping on a grain bowl. They can be the star of your dish or a perfect side companion.

    By utilizing these advanced techniques and variations, you will not only create the original dish but also encourage culinary creativity that can transform simple ingredients into satisfying meals.


    How to Store Creamy Roasted Carrots With Whipped Ricotta: Best Practices

    Proper storage of your Creamy Roasted Carrots With Whipped Ricotta ensures that they maintain their flavor and texture for later enjoyment.

    • Refrigeration: If you have leftovers, place the roasted carrots in an airtight container and refrigerate them. They should be consumed within 3-4 days for the best taste.

    • Freezing: To freeze, allow the carrots to cool completely. Next, place them in a freezer-safe bag, removing as much air as possible to avoid freezer burn. These can be stored for up to 2 months. However, note that the texture may change post-thawing.

    • Reheating: When ready to enjoy, reheat in the oven at a low temperature or microwave for a quick warm-up. If you store the whipped ricotta separately, stir it well after the refrigerator time, and consider adding a splash of olive oil to revive its creamy texture.

    These best practices ensure that your Creamy Roasted Carrots With Whipped Ricotta remains a viable and delightful dish even days after initial preparation, perfect for those busy weeks filled with dinner recipes.


    Nutritional Value of Creamy Roasted Carrots With Whipped Ricotta

    Understanding the nutritional value of your meals aids in making informed dietary choices. Here’s a brief overview of the nutrition facts:

    • Calories: Approximately 200-250 calories per serving (based on standard ingredients).
    • Fat: 10-15 grams; primarily from olive oil and ricotta—choose a low-fat ricotta for lower calories.
    • Protein: 6-10 grams, depending on the type of ricotta used—vegan alternatives may vary.
    • Carbohydrates: 25-30 grams; these mainly come from the natural sugars in carrots, perfect for energy.
    • Fiber: 5-6 grams; beneficial for digestion, derived from the carrots.

    By being mindful about the nutritional makeup of your Creamy Roasted Carrots With Whipped Ricotta, you can enjoy the health benefits of this vibrant dish while managing your dietary needs effectively.


    FAQs: Frequently Asked Questions About Creamy Roasted Carrots With Whipped Ricotta

    1. Can I make this dish in advance?

    Yes! You can roast the carrots a day prior and store them in the refrigerator. Make the whipped ricotta fresh just before serving to maintain its creamy texture.

    2. What can I substitute for ricotta cheese to make this dish vegan?

    Silken tofu blended with lemon juice and nutritional yeast replicates ricotta’s creamy texture while keeping it vegan.

    3. How can I adjust the seasonings for different taste preferences?

    Feel free to add spices like cumin, paprika, or mixed herbs to adapt the flavors of the dish. It’s all about experimenting with what suits your palate!

    4. Can I use baby carrots for this recipe?

    Absolutely! If using baby carrots, roasting time will decrease, so keep a close watch to prevent them from becoming mushy.

    5. How long does the dish last in the refrigerator?

    When stored properly in an airtight container, Creamy Roasted Carrots With Whipped Ricotta can last for about 3-4 days.

    Exploring these frequently asked questions provides guidance and clarity about Creamy Roasted Carrots With Whipped Ricotta, ensuring that your cooking experience is as enjoyable and successful as possible.


    Embrace the flavorful journey of mastering Creamy Roasted Carrots With Whipped Ricotta. This satisfying dish not only fulfills cravings for comfort food but also aligns with healthier eating habits. So gather your ingredients, unleash your creativity, and let this delightful dish take center stage in your dinner recipes tonight!

  • Tasty Roasted Brussels Sprouts And Carrots

    Tasty Roasted Brussels Sprouts And Carrots

    Tasty Roasted Brussels Sprouts And Carrots: A Tropical Delight

    Introduction to Tasty Roasted Brussels Sprouts And Carrots

    If you’re looking for healthy dinner recipes that are simple, nutritious, and bursting with flavor, you’ve landed in the right place! This Tasty Roasted Brussels Sprouts And Carrots recipe perfectly embodies what modern home cooks crave: a dish that’s easy to prepare, caters to various dietary needs, and packed with vibrant flavors. The combination of crispy Brussels sprouts and sweet carrots creates a delightful contrast that is undeniably delicious.

    In addition to being vegan and gluten-free, this recipe is also rich in vitamins, minerals, and fiber, making it an excellent choice for health-conscious individuals. Whether you’re a busy parent juggling meals, a student navigating your first kitchen, or a food enthusiast exploring new flavors, roasting these colorful vegetables provides a simple yet satisfying culinary experience. Not to mention, it brings warmth and comfort to any table.

    This recipe also stands out because of its versatility. You can easily pair it with your favorite protein for a complete meal. Plus, it offers endless possibilities for customization with different herbs and spices. With straightforward steps and minimal ingredients, this wholesome dish is perfect for those who want to eat well without spending hours in the kitchen.

    So, grab your apron, and let’s dive into this delicious and healthy culinary journey!

    Benefits and Advantages of Tasty Roasted Brussels Sprouts And Carrots

    Tasty Roasted Brussels Sprouts And Carrots not only taste great but also offer numerous benefits that make them a fantastic addition to your repertoire of healthy dinner recipes. One of the primary advantages is the ease of preparation. This dish involves simple chopping and tossing, requiring minimal kitchen skill. You can have a nutritious side dish ready in under 30 minutes — perfect for busy weeknights.

    In terms of health benefits, Brussels sprouts are a powerhouse of nutrients. They are high in vitamins C and K, which support immune function and bone health. Carrots are equally impressive; they provide an excellent source of beta-carotene, promoting good vision and skin health. Together, they create a nutrient-dense dish that supports a balanced diet and contributes to overall wellness.

    Another standout feature is the fiber content, which aids digestion and promotes a feeling of fullness. This makes it an excellent choice for those watching their weight or looking to incorporate more plant-based meals into their diet. The fact that this recipe is vegan and gluten-free increases its appeal, allowing it to accommodate various dietary restrictions and preferences.

    Moreover, roasted Brussels sprouts and carrots are incredibly versatile. You can experiment with different spices such as garlic powder, paprika, or even a hint of maple syrup for an unexpected twist. This adaptability helps keep your meals exciting and flavorful while still falling under the umbrella of healthy dinner recipes.

    Finally, sharing this dish with family and friends is a joy. The vibrant colors and enticing aroma will surely impress your guests, making it a perfect addition to holiday dinners and gatherings. Whether served as a side or a main dish, these roasted vegetables can truly elevate your meal and make your dinner experience more enjoyable.

    Ingredients Overview

    Essential Ingredients for Tasty Roasted Brussels Sprouts And Carrots

    To prepare Tasty Roasted Brussels Sprouts And Carrots, you will need the following essential ingredients:

    • 1 pound Brussels sprouts – Trimmed and halved; these cruciferous vegetables are high in nutrients and provide a delicious crispy texture once roasted.
    • 1 pound carrots – Peeled and cut into 1-inch pieces; carrots add a natural sweetness and vibrant color to the dish.
    • 3 tablespoons olive oil – This healthy fat helps to caramelize the vegetables, enhancing the flavors. You can also substitute with avocado oil for a different taste.
    • Salt and pepper – To taste; basic seasonings that enhance the overall flavor of the dish.
    • 1 teaspoon garlic powder – Optional; adds a lovely aromatic flavor that complements the vegetables.
    • Fresh herbs (e.g., thyme or rosemary) – Optional but recommended; these can add an earthy aroma and depth of flavor.

    This recipe is inherently vegan, gluten-free, and low in calories, making it suitable for a wide audience looking for healthy dinner recipes.

    Dietary Substitutions to Customize Your Tasty Roasted Brussels Sprouts And Carrots

    While the above ingredients create a delicious base for this recipe, there are numerous ways to customize it according to dietary preferences or ingredient availability:

    • Oil Alternatives: If you want to reduce calories further, consider using vegetable broth for sautéing the vegetables instead of olive oil. For a creamier texture, you can experiment with coconut oil.

    • Spice Variations: Feel free to experiment with spices to suit your taste. Smoked paprika, cumin, or even curry powder can bring unique profiles to the dish while still being healthy.

    • Sweeteners: If you’d like to add a hint of sweetness, consider drizzling a tablespoon of honey or maple syrup before roasting. Both options keep the recipe vegan if using maple syrup.

    • Veggie Mix: To add more color and nutrition, incorporate other vegetables such as bell peppers, sweet potatoes, or zucchini, depending on what you have at hand.

    By playing with substitutions, you can tailor this dish to meet various dietary needs, making it not just a simple recipe but a canvas for creativity.

    How to Prepare the Perfect Tasty Roasted Brussels Sprouts And Carrots: Step-by-Step Guide

    Roasting is one of the easiest and most rewarding cooking techniques, especially for Brussels sprouts and carrots. Follow this step-by-step guide to create perfectly Tasty Roasted Brussels Sprouts And Carrots:

    1. Preheat the Oven: Set your oven to 425°F (220°C). A hot oven ensures that the vegetables get beautifully caramelized, enhancing their natural sweetness.

    2. Prep Your Vegetables: Rinse and trim the Brussels sprouts, cutting them in half. Peel the carrots and chop them into 1-inch pieces. The even size helps them cook uniformly.

    3. Mix Ingredients: In a large bowl, combine the prepared Brussels sprouts and carrots. Drizzle with olive oil, and sprinkle salt, pepper, and garlic powder. Toss well to ensure everything is evenly coated in the oil and seasonings.

    4. Spread on Baking Sheet: Line a baking sheet with parchment paper for easy cleanup. Spread the seasoned vegetables in a single layer, making sure they have some space between them. Overcrowding can lead to steaming rather than roasting.

    5. Roast the Vegetables: Place the baking sheet in the preheated oven and roast for about 25-30 minutes. Halfway through cooking, stir the vegetables to promote even browning.

    6. Check for Doneness: The Brussels sprouts should be crispy on the outside and tender on the inside, while the carrots should caramelize beautifully. A fork should easily pierce through the vegetables.

    7. Add Fresh Herbs: If using fresh herbs, sprinkle them over the vegetables during the last five minutes of roasting for a fresh flavor boost.

    8. Serve Hot: Once roasted to perfection, remove the baking sheet from the oven. Transfer the vegetables to a serving dish and enjoy them warm as a side or over a bed of greens for a nutritious main course.

    This recipe for Tasty Roasted Brussels Sprouts And Carrots is designed to be adaptable, making it an ideal choice for those exploring healthy dinner recipes. You can customize it based on your preferences and target dietary needs, ensuring everyone at the table finds something they love.

    Mastering Tasty Roasted Brussels Sprouts And Carrots: Advanced Tips and Variations

    To elevate your Tasty Roasted Brussels Sprouts And Carrots, consider these advanced tips and variations:

    • Experiment with Different Ovens: If you have a convection setting, use it! Convection ovens circulate air, leading to a perfectly roasted texture. Keep in mind to reduce the roasting time by a few minutes.

    • Add a Crunch: For an added layer of texture, toss in some chopped nuts like almonds or walnuts during the last five minutes of roasting. They will get golden and crunchy, complementing the softness of the vegetables beautifully.

    • Cheesy Variation: If dairy is not a concern for you, sprinkle some grated Parmesan cheese in the last few minutes of roasting. The cheese will melt and form a delicious crust.

    • Serving Suggestions: Try serving the roasted vegetables over a quinoa or brown rice base. You could also toss them with a light vinaigrette or a squeeze of fresh lemon juice right before serving for an extra flavor boost.

    • Layer with Proteins: Consider pairing this dish with grilled chicken, tofu, or tempeh for a complete meal. The roasted vegetables will complement the protein wonderfully, enhancing both flavor and nutrition.

    These tips not only guarantee a delicious outcome but also allow you to personalize the dish to your taste preferences, making it a standout choice among healthy dinner recipes.

    How to Store Tasty Roasted Brussels Sprouts And Carrots: Best Practices

    If you’ve made a large batch of Tasty Roasted Brussels Sprouts And Carrots, proper storage will help maintain their taste and texture:

    • Refrigerating Leftovers: Allow the vegetables to cool completely before placing them in an airtight container. They can be stored in the refrigerator for up to 3-4 days. To reheat, simply warm them in the oven at 350°F (175°C) for about 10-15 minutes for the best results.

    • Freezing: If you want to keep these vegetables longer, freezing is a viable option. Spread the cooled roasted veggies on a baking sheet in a single layer and freeze them for a couple of hours. Once solid, transfer them to a freezer-safe bag, squeezing out as much air as possible. They can last for up to 3 months in the freezer.

    • Reheating Frozen Vegetables: When you’re ready to eat, there’s no need to thaw. Simply bake from frozen at 400°F (200°C) for 20-25 minutes, or until hot and crisp.

    Remember, proper storage practices not only extend the life of your meal but also maintain its flavor, ensuring that you enjoy this delightful dish even on your busiest nights.

    Nutritional Value of Tasty Roasted Brussels Sprouts And Carrots

    Understanding the nutritional value of Tasty Roasted Brussels Sprouts And Carrots can help you appreciate this dish even more. Here’s a breakdown of the approximate nutritional values per serving, assuming the recipe serves four:

    • Calories: 135
    • Total Fat: 6g
    • Saturated Fat: 1g
    • Sodium: 150mg
    • Total Carbohydrates: 20g
    • Dietary Fiber: 6g
    • Sugars: 5g
    • Protein: 4g
    • Vitamin A: 130% DV
    • Vitamin C: 150% DV
    • Calcium: 4% DV
    • Iron: 6% DV

    As you can see, this dish is not only low in calories but also rich in vitamins, particularly vitamins A and C, which are essential for maintaining a strong immune system and healthy skin. The fiber content helps with digestion and contributes to feeling full, which is beneficial for those looking to maintain a healthy weight.

    By incorporating Tasty Roasted Brussels Sprouts And Carrots into your meal plans, you’re making a nutritious choice that aligns seamlessly with your healthy dinner recipes goal.

    FAQs: Frequently Asked Questions About Tasty Roasted Brussels Sprouts And Carrots

    Can I make this recipe ahead of time?

    Yes, you can prepare the Brussels sprouts and carrots ahead of time by cleaning and cutting them. Store them in the refrigerator until you’re ready to roast them.

    Can I use frozen Brussels sprouts or carrots?

    While fresh vegetables yield better texture when roasted, you can use frozen ones. However, their water content is higher, which may result in a softer texture.

    What can I serve with Tasty Roasted Brussels Sprouts And Carrots?

    This dish pairs well with a variety of proteins, including grilled chicken, fish, or plant-based options like tofu or lentils.

    How can I enhance the flavor?

    Consider adding spices like cumin or herbs such as basil and dill for a flavor boost. You can also drizzle balsamic glaze or lemon juice before serving for extra zing.

    What if I don’t have olive oil?

    Feel free to substitute with other oils like avocado oil or coconut oil. Butter also works if you’re not avoiding dairy.

    By addressing these common questions, you can prepare your Tasty Roasted Brussels Sprouts And Carrots with confidence, ensuring an enjoyable and satisfying meal experience.

    In conclusion, this recipe showcases the beauty of simplicity and healthfulness, aligning perfectly with your quest for healthy dinner recipes. Happy cooking!

  • Tasty Greek Broccoli Salad

    Tasty Greek Broccoli Salad

    Tasty Greek Broccoli Salad: A Tropical Delight

    Introduction to Tasty Greek Broccoli Salad

    Are you on the lookout for healthy recipes that are not only nutritious but also easy to prepare? Look no further than the Tasty Greek Broccoli Salad, a vibrant dish that marries the earthy crunch of broccoli with the zesty tang of Greek flavors. This salad is incredibly simple to make, making it a perfect choice for busy parents, diet-conscious individuals, and anyone aiming to add a burst of health to their meals.

    This delightful recipe is vegan and gluten-free, catering to various dietary needs while ensuring you don’t have to compromise on flavor. The Tasty Greek Broccoli Salad is packed with vitamins, minerals, and antioxidants, offering benefits such as improved digestion, enhanced immunity, and a boost of energy—all in one colorful bowl. The combination of fresh ingredients creates a burst of flavor that is both refreshing and satisfying.

    Not only is this salad a perfect side dish for family dinners or potlucks, but it also shines as a standalone meal ideal for lunch boxes or quick snacks. So whether you’re a student, working professional, or simply someone who loves delicious food, this easy-to-make salad will inspire you to embrace healthy eating without sacrificing taste. Ready to dive in? Let’s create a dish that’s not just good for you, but truly tantalizing!

    Benefits and Advantages of Tasty Greek Broccoli Salad

    This remarkable Tasty Greek Broccoli Salad serves up multiple benefits, making it a standout choice among healthy recipes. First and foremost, the preparation is uncomplicated. With just a handful of ingredients and minimal cooking involved, you can have this salad ready in no time. This is especially beneficial for busy individuals or parents juggling various responsibilities.

    Moreover, the salad is rich in health benefits. Broccoli is a nutritional powerhouse, loaded with vitamins C and K, as well as fiber and folate. These nutrients contribute to improved heart health, better digestion, and reduced inflammation. Pairing broccoli with other ingredients such as olives, tomatoes, and a tangy dressing not only enhances the flavor but also boosts the nutritional profile of your meal.

    In addition to these health advantages, this Tasty Greek Broccoli Salad is versatile. It can be altered to suit various dietary restrictions, such as vegan, gluten-free, and low-calorie diets. You can easily swap ingredients for whatever suits your taste preferences or available ingredients, showcasing its adaptability.

    One of the most compelling aspects of this salad is its flavor. The combination of crunchy broccoli, savory olives, and fresh herbs creates a medley of tastes that is energizing. Whether you’re preparing it for a family gathering, to please picky eaters, or as a nutritious meal prep option, this dish ticks all the boxes. Don’t miss out on this exceptional recipe that offers ease, health benefits, and versatility in one delicious package.

    Ingredients Overview

    Essential Ingredients for Tasty Greek Broccoli Salad

    For the Tasty Greek Broccoli Salad, you will need the following essential ingredients:

    • 2 cups of fresh broccoli florets (health benefits: rich in vitamins K and C)
    • 1 cup of cherry tomatoes, halved (adds a burst of vitamins A and C)
    • 1 cup of Kalamata olives, pitted and sliced (provides healthy fats and antioxidants)
    • 1/2 cup of red onion, finely chopped (adds flavor and nutrients)
    • 1/2 cup of feta cheese, crumbled (optional for non-vegan diets; delivers calcium and protein)
    • 1/4 cup of fresh parsley, chopped (aids digestion and adds freshness)
    • 1/4 cup of olive oil (source of healthy fats)
    • 2 tablespoons of red wine vinegar (adds acidity and tang)
    • 1 teaspoon of dried oregano (provides flavor and health benefits)
    • Salt and pepper to taste (adjust to preference)

    Diet-conscious options:
    Vegan: Omit feta cheese or replace it with a vegan cheese alternative.
    Gluten-free: This recipe is inherently gluten-free, just ensure any substitutes used are also gluten-free.

    Dietary Substitutions to Customize Your Tasty Greek Broccoli Salad

    One of the appealing aspects of Tasty Greek Broccoli Salad is its adaptability. Here are some suggested substitutions you can make to cater to different dietary needs or ingredient availability:

    • For a protein boost: Add chickpeas or grilled chicken for non-vegetarian versions.
    • Nut-free option: If you’re allergic to peanuts or tree nuts, simply skip any nuts or nut-based substitutions.
    • Low-carb option: Replace cherry tomatoes with sliced cucumbers for a lighter, low-carb portrayal while still retaining texture.
    • Dairy-free: Use plant-based feta cheese or nutritional yeast to maintain a cheesy flavor without dairy.

    These substitutions allow you to personalize the salad to suit your taste preferences or dietary requirements without sacrificing flavor or nutrition. The versatility of this dish makes it a fantastic addition to your repertoire of healthy recipes.

    How to Prepare the Perfect Tasty Greek Broccoli Salad: Step-by-Step Guide

    Creating the Tasty Greek Broccoli Salad is an effort-free process that even beginner cooks can master. Follow this easy step-by-step guide to ensure a delightful dish that you can serve with pride!

    1. Prepare the Broccoli: Rinse the fresh broccoli florets under cold water. Trim any stem pieces to ensure only the freshest parts enter the salad. Then, cut them into bite-sized pieces for easy eating.

    2. Chop the Vegetables: Next, halve the cherry tomatoes and finely chop the red onion. A sharp knife will make this task quicker and safer. If you’re keen on a milder onion flavor, soak the chopped red onion in cold water for a few minutes before adding to your salad.

    3. Slice the Olives: Using a cutting board, slice the Kalamata olives. These savory additions will introduce healthy fats and support digestive health.

    4. Make the Dressing: In a small bowl, whisk together the olive oil, red wine vinegar, dried oregano, salt, and pepper. This dressing is where much of the flavor will come from, so mix it well until it’s emulsified and creamy.

    5. Combine Ingredients: In a large mixing bowl, add the broccoli, chopped tomatoes, sliced olives, chopped red onion, and parsley. Gently toss the ingredients together until they’re evenly dispersed.

    6. Add Cheese: If you are including feta cheese, sprinkle it on top of the tossed salad, then gently fold it into the mixture, ensuring there’s a bit of cheese in every bite.

    7. Dress the Salad: Pour the prepared dressing over the salad, and toss gently until everything is well-coated. Take care to not overmix so that the vegetables don’t get bruised.

    8. Taste and Adjust: Sample a spoonful of your salad. Adjust salt and pepper as necessary, perhaps adding more lemon juice or vinegar to boost the acidity if desired.

    9. Chill: For the best flavor experience, let the salad chill in the fridge for at least 15 minutes before serving. The resting time allows the flavors to meld beautifully.

    10. Serving: Spoon the Tasty Greek Broccoli Salad into serving bowls. You can garnish it with additional parsley or an extra sprinkle of feta for visual appeal.

    With this step-by-step guide, making a Tasty Greek Broccoli Salad will be hassle-free. Each step has suggestions for customization, allowing everyone to enjoy this dish aligned with their dietary needs.

    Mastering Tasty Greek Broccoli Salad: Advanced Tips and Variations

    To elevate your Tasty Greek Broccoli Salad experience, consider these advanced tips and variations:

    • Incorporate Grains: You can add cooked quinoa or farro for a heartier version that’s still nutritious. These grains provide additional fiber and energy, perfect for post-workout meals.

    • Flavor Infusions: Infuse your dressing with fresh garlic or lemon zest for a richer flavor. Just a small amount can go a long way in enhancing the freshness of your salad.

    • Herb Variations: Experiment with different herbs like dill or basil to give the salad a distinct regional flair. Each herb brings a unique set of flavors.

    • Add Seasonal Veggies: If you have vegetables available in your garden or market, consider adding additional seasonal veggies like bell peppers, cucumbers, or even avocado for a creamy texture.

    • Presentation Matters: Present your Tasty Greek Broccoli Salad in a beautiful serving bowl and consider garnishing it with toasted pine nuts for an added crunch and flavor.

    • Make it a Meal: To transform this salad into a main dish, add grilled chicken or baked tofu, which provides high protein content to keep you satisfied longer.

    By incorporating these advanced tips and variations, you will master the Tasty Greek Broccoli Salad, allowing you to impress family and friends while also maintaining a selection of healthy recipes.

    How to Store Tasty Greek Broccoli Salad: Best Practices

    Proper storage is vital to keep your Tasty Greek Broccoli Salad fresh and delicious. Here are the best practices:

    • Refrigeration: Store any leftover salad in an airtight container in the refrigerator. It should stay fresh for about 3 to 5 days. Keep in mind that the broccoli might become slightly softer over time, so it’s best enjoyed fresh.

    • Freezing: While freezing is not recommended for salads with fresh vegetables that contains dressing, you can freeze components like the dressing separately. This allows you to make a fresh salad later by just adding new veggies.

    • Reheating: If you want to enjoy the salad warm, it’s best to cook or bake it lightly instead of microwaving, as this can lead to a mushy texture. Sauté it briefly in a non-stick pan if you prefer warm salads.

    By understanding these storage tips, you can enjoy your Tasty Greek Broccoli Salad over several days without compromising its taste or quality, aligning it with the principles of healthy recipes.

    Nutritional Value of Tasty Greek Broccoli Salad

    The nutritional profile of the Tasty Greek Broccoli Salad is impressive and makes it a standout option among healthy recipes. Below is an approximate breakdown of the nutrients per serving, assuming 4 servings:

    • Calories: 180
    • Total Fat: 12g
    • Saturated Fat: 3g
    • Cholesterol: 10mg (if feta is included)
    • Sodium: 320mg
    • Total Carbohydrates: 15g
    • Dietary Fiber: 4g
    • Sugars: 2g
    • Protein: 5g

    Vitamins and Minerals:
    – Vitamin C: Provides over 100% Daily Value (DV) from broccoli and tomatoes.
    – Vitamin K: Essential for bone health, abundant in broccoli.
    – Calcium: Present from feta cheese, managing bone health.
    – Iron: Vital for red blood cell formation, in part from broccoli.

    This nutritious salad gives you a healthy dose of vital nutrients while keeping calorie counts manageable. These factors will appeal to diet-conscious individuals who seek to boost their health without sacrificing satisfaction.

    FAQs: Frequently Asked Questions About Tasty Greek Broccoli Salad

    Here are some frequently asked questions about Tasty Greek Broccoli Salad, along with clear and concise answers:

    Q: Can I make Tasty Greek Broccoli Salad ahead of time?
    A: Yes! This salad can be prepared up to two days in advance. Just hold off on adding the dressing until you’re ready to serve to keep ingredients fresh and crunchy.

    Q: Is it possible to customize the salad for specific dietary needs?
    A: Absolutely! You can easily make it vegan by omitting the cheese or using a dairy-free alternative. For gluten-free needs, ensure all products used, including dressings and toppings, are certified gluten-free.

    Q: How long should I let it chill before serving?
    A: A chill time of at least 15 minutes allows flavors to meld beautifully, but you can also store it overnight for even more enhanced flavors.

    Q: Can I use frozen broccoli instead of fresh?
    A: While fresh broccoli is recommended for optimal texture, you can use frozen broccoli. Just be sure to thaw and drain it thoroughly before adding it to the salad.

    Q: What are some good additions to the salad?
    A: You could include roasted red peppers, chickpeas, or even small pasta shapes. This enhances both taste and texture, making the salad more filling.

    This FAQ section aims to address common questions, providing clarity and actionable information. Whether you are looking for substitutions, storage tips, or modifications, you’ll find helpful insights focused on maintaining the integrity of this Tasty Greek Broccoli Salad and aligning it with healthy recipes.


    By following the detailed instructions and tips found in this extensive guide to Tasty Greek Broccoli Salad, you will inspire others to embrace healthy eating without sacrificing flavor. With its multitude of customization options and straightforward preparation, this salad truly stands out as a versatile addition to your collection of healthy recipes. Now, gather your ingredients, follow these steps, and enjoy a delicious, nutritious meal that will have everyone asking for seconds!

  • Easy Broccoli Salad With Honey Mustard Dressing

    Easy Broccoli Salad With Honey Mustard Dressing

    Easy Broccoli Salad With Honey Mustard Dressing: A Tropical Delight

    Introduction to Easy Broccoli Salad With Honey Mustard Dressing

    Looking for a delightful addition to your meal prep repertoire that perfectly embodies the essence of healthy recipes? Look no further than our Easy Broccoli Salad With Honey Mustard Dressing! This vibrant salad not only boasts an array of colors and textures but also packs a nutritional punch. Perfect for busy weeknights, this dish offers a quick and satisfying way to enjoy cruciferous vegetables.

    Packed with antioxidants from fresh broccoli and enriched with the sweetness of honey, this salad is both healthy and delicious. Whether you’re a savvy home cook, a student on the go, or a health-conscious parent seeking a tasty meal option for your family, this recipe caters to varied dietary needs. Not only is it vegan-friendly (with a simple adjustment for the dressing) and gluten-free, but it is also a low-calorie option that won’t compromise your dietary goals.

    The combination of crisp broccoli, crunchy nuts, and a creamy yet tangy honey mustard dressing elevates this salad from ordinary to extraordinary. The best part? It requires minimal preparation yet results in a dish that will impress your guests. So, gather your ingredients and discover this refreshing, flavorful recipe that can brighten your plate and nourish your body.

    Benefits and Advantages of Easy Broccoli Salad With Honey Mustard Dressing

    One of the standout features of our Easy Broccoli Salad With Honey Mustard Dressing is its remarkable ease of preparation. Specifically designed for individuals with busy lifestyles, the salad comes together in under 20 minutes. This means that you can enjoy a gourmet-quality dish even on the tightest of schedules. Whatever your situation—be it a last-minute family gathering or a simple weeknight dinner—this salad is your go-to option.

    From a health perspective, broccoli is an excellent source of vitamins C and K, fiber, and various antioxidants, making it a star component of many healthy recipes. This salad utilizes the vegetable’s natural flavors while ensuring maximum nutrition. The honey mustard dressing, made with wholesome ingredients, compliments the broccoli without overwhelming it, offering a perfect balance between sweetness and tanginess.

    Additionally, this nutritious dish is versatile. It can serve as a light meal, a filling side, or even as a potluck favorite. Given that it can be easily adapted for various dietary preferences, including vegan or gluten-free diets, this salad is universally appealing. You can customize it with other ingredients like fresh fruits or different nuts to keep it interesting and aligned with your health goals.

    Ultimately, our Easy Broccoli Salad With Honey Mustard Dressing not only provides intricate flavors and textures but also brings a plethora of benefits that make it a must-try for anyone interested in nourishing their body while enjoying delicious meals.

    Ingredients Overview

    Essential Ingredients for Easy Broccoli Salad With Honey Mustard Dressing

    To prepare this delicious salad, you’ll need a few essential ingredients. Here’s the detailed list along with precise measurements:

    • Fresh Broccoli: 2 cups, washed and chopped (provides essential vitamins and fiber)
    • Red Bell Pepper: 1, diced (adds color and vitamin C)
    • Carrots: ½ cup, shredded (for sweetness and crunch)
    • Red Onion: ¼ cup, finely chopped (adds flavor and aroma)
    • Sunflower Seeds: ¼ cup (healthy fats and crunch)
    • Dried Cranberries: ½ cup (provides a sweet-tart flavor)
    • Olive Oil: 2 tablespoons (heart-healthy fat)
    • Dijon Mustard: 1 tablespoon (for a zesty twist)
    • Honey: 2 tablespoons (natural sweetness; can be substituted with agave syrup for vegan diets)
    • Apple Cider Vinegar: 2 tablespoons (adds acidity and depth of flavor)

    This combination of ingredients not only creates a colorful and appetizing salad but also ensures a nutritious meal that aligns with various dietary restrictions including vegan and gluten-free options.

    Dietary Substitutions to Customize Your Easy Broccoli Salad With Honey Mustard Dressing

    Adapting recipes to meet your dietary needs is easy with this Easy Broccoli Salad. Here are some substitutions to cater to different preferences:

    • Nut-Free Option: If you have nut allergies, you can easily replace sunflower seeds with pumpkin seeds or omit them entirely.
    • Vegan Alternative: If you’d like to transform the dressing into a fully vegan option, substitute honey with maple syrup or agave nectar.
    • Low-Carb Version: To make the salad lower in carbohydrates, consider replacing dried cranberries with fresh berries or skipping the dried fruits altogether.
    • Adding Protein: Feel free to toss in grilled chicken, chickpeas, or edamame for an extra protein boost, making the salad more filling.

    These substitutions ensure that your Easy Broccoli Salad With Honey Mustard Dressing not only meets diverse dietary needs but also maintains its delicious flavor profile.

    How to Prepare the Perfect Easy Broccoli Salad With Honey Mustard Dressing: Step-by-Step Guide

    Preparing the Easy Broccoli Salad With Honey Mustard Dressing is a breeze! Follow these straightforward steps for a delicious, nourishing dish.

    1. Prepare the Base: Start by washing your fresh broccoli thoroughly. Chop it into bite-sized florets and set aside in a large mixing bowl.
    2. Add Vegetables: Next, add the diced red bell pepper, shredded carrots, and finely chopped red onion to the bowl. These colorful veggies will provide a variety of nutrients and textures.
    3. Incorporate Seeds and Fruits: Toss in the sunflower seeds for crunch and the dried cranberries for a touch of sweetness. These elements not only enhance the flavor but also add nutritional benefits.
    4. Make the Dressing: In a separate mixing bowl, combine 2 tablespoons of olive oil, 1 tablespoon of Dijon mustard, 2 tablespoons of honey (or maple syrup for a vegan option), and 2 tablespoons of apple cider vinegar. Whisk well until the mixture emulsifies into a creamy dressing.
    5. Combine Ingredients: Once the dressing is ready, pour it over the salad ingredients. Using salad tongs, gently toss everything together until evenly coated. This step is crucial, as the dressing should lightly dress the salad without overpowering it.
    6. Refrigerate for Flavor: For best results, consider refrigerating the salad for at least 15-30 minutes to allow the flavors to meld. This step enhances the taste and makes it even more refreshing.
    7. Serve and Enjoy: Finally, serve the salad cold or at room temperature. Garnish with a sprinkle of additional sunflower seeds or fresh herbs if desired.

    And there you have it! A simple yet delightful Easy Broccoli Salad With Honey Mustard Dressing that is a standout example of healthy recipes.

    Mastering Easy Broccoli Salad With Honey Mustard Dressing: Advanced Tips and Variations

    While the basic recipe is already fantastic, there are a few advanced tips and variations to elevate your Easy Broccoli Salad With Honey Mustard Dressing:

    • Add Fresh Herbs: Introducing fresh herbs like parsley, cilantro, or mint can bring a vibrant flavor to your salad. They not only enhance the taste but also add a fresh aroma.
    • Citrus Twist: Consider adding a splash of lemon or lime juice to the dressing. This can brighten the overall flavor profile, making it even more refreshing.
    • Additional Ingredients: If you enjoy experimenting, consider adding chopped apples, pears, or even feta cheese for a tangy kick. These additions can provide interesting contrasts and deepen the flavor complexity.
    • Meal Prep Delight: This salad stores wonderfully, making it an ideal candidate for meal prep. Simply double the recipe and store in airtight containers for an easy grab-and-go lunch throughout the week.

    With these tips and variations, you can customize and perfect your Easy Broccoli Salad With Honey Mustard Dressing to match your taste preferences or dietary needs!

    How to Store Easy Broccoli Salad With Honey Mustard Dressing: Best Practices

    Proper storage of the Easy Broccoli Salad With Honey Mustard Dressing ensures that you can enjoy its great taste and fresh ingredients for a longer period. Here are some best practices:

    • Refrigeration: Store the salad in an airtight container in the refrigerator. When properly sealed, it can last for about 3-5 days. Be sure to give it a gentle toss before serving to redistribute the dressing.
    • Short-term Storage: If you plan to enjoy the salad within a couple of days, no need to separate the dressing. However, if you want to keep it for a longer duration, consider storing the dressing separately and combining it just before serving.
    • Freezing: Although it’s not recommended to freeze this salad due to the texture of the broccoli, you can freeze any leftovers of the dressing in small ice cube trays. Just thaw as needed for a quick addition to new salads later.

    By following these storage tips, you can enjoy your vibrant Easy Broccoli Salad With Honey Mustard Dressing, ensuring it remains a delicious part of your meals throughout the week!

    Nutritional Value of Easy Broccoli Salad With Honey Mustard Dressing

    Understanding the nutritional value of dishes is essential for maintaining a balanced diet, especially when looking for healthy recipes. Here’s the breakdown of the nutrition obtained from one serving of this Easy Broccoli Salad With Honey Mustard Dressing, assuming 6 servings in total:

    • Calories: 150
    • Total Fat: 8g (of which only 1g is saturated fat)
    • Cholesterol: 0mg
    • Sodium: 150mg
    • Total Carbohydrates: 15g
    • Dietary Fiber: 3g
    • Sugars: 6g (includes natural sugar from honey and dried cranberries)
    • Protein: 4g

    This salad is low in calories yet packed with essential vitamins and minerals, making it an excellent option for those who are health-conscious or on specialized diets. It provides 200% of your daily value of Vitamin C per serving and is rich in dietary fiber, contributing to improved digestion and overall gut health.

    FAQs: Frequently Asked Questions About Easy Broccoli Salad With Honey Mustard Dressing

    Can I make this salad in advance?

    Absolutely! This salad can be prepared a day in advance. Just keep it refrigerated in an airtight container. If you’re concerned about sogginess, consider storing the dressing separately and mixing it in just before serving.

    Is this salad keto-friendly?

    If you’re following a ketogenic diet, you can modify the recipe to reduce the carb count. Try using fewer dried cranberries or substituting them for fresh berries. This will keep the sugar content low.

    How can I make this salad vegan-friendly?

    To make this Easy Broccoli Salad vegan, simply replace the honey in the dressing with maple syrup or agave nectar. Rest assured, it will still provide that delightful sweetness!

    What other vegetables can I add to this salad?

    Feel free to experiment with various vegetables! Options like cauliflower, snap peas, or celery can complement the existing ingredients and add additional crunch and flavor.

    Can I substitute broccoli with another vegetable?

    While broccoli is the star of this recipe, you can use other vegetables such as cauliflower or even Brussels sprouts. Just remember to adjust the cooking or preparation time accordingly.

    Creating a crisp and refreshing Easy Broccoli Salad With Honey Mustard Dressing is a blend of nutritious ingredients and effortless preparation. Packed with health benefits and flexible in terms of dietary considerations, this recipe is bound to impress a variety of palates. Give it a try, and enjoy the vibrant explosion of flavors in your kitchen!

  • Quick Broccoli Salad With Italian Dressing

    Quick Broccoli Salad With Italian Dressing

    Quick Broccoli Salad With Italian Dressing: A Tropical Delight

    Introduction to Quick Broccoli Salad With Italian Dressing

    If you’re searching for a scrumptious yet quick dish to brighten your meals, look no further. Our Quick Broccoli Salad With Italian Dressing encapsulates everything you love about vibrant, healthy recipes. This salad not only offers a delightful crunch but is also packed with essential nutrients, making it the ideal dish for health-conscious individuals and busy families alike.

    Creating a perfect blend of refreshing broccoli, colorful vegetables, and a zesty Italian dressing takes minimal time, allowing you to whip up a wholesome dish even on the busiest of days. Whether you’re a student juggling classes, a busy parent managing family meals, or someone looking to indulge in a guilt-free delicacy, this salad promises to be your go-to recipe.

    What makes this dish exceptionally remarkable is its versatility. It’s a vibrant salad that caters to various dietary preferences: whether you’re vegan, gluten-free, or just looking for low-calorie options, this recipe accommodates them all. Additionally, you can easily customize the ingredients based on your taste preferences or what you have on hand. Why not treat yourself and your loved ones to this bright, flavorful salad today? Your journey into healthy cooking starts here!

    Benefits and Advantages of Quick Broccoli Salad With Italian Dressing

    The Quick Broccoli Salad With Italian Dressing doesn’t just taste great; it offers a myriad of health benefits that can fit seamlessly into any lifestyle. First and foremost, broccoli is a nutritional powerhouse. It is rich in dietary fiber, vitamins C and K, and several antioxidants. Eating broccoli regularly can support heart health, enhance digestion, and provide an anti-inflammatory effect, all of which contribute to overall well-being.

    One of the standout features of this recipe is its ease of preparation. With just a handful of ingredients combined in under 15 minutes, this dish is perfect for those enthusiastic home cooks and busy professionals. From preparing a quick lunch to serving as a side dish during family gatherings, its straightforward recipe makes it an inviting choice for anyone.

    This salad stands out for its adaptability as well. If you’re vegan, simply substitute the cheese with nutritional yeast or avocado to keep the creaminess while avoiding animal products. For those who are gluten-sensitive, the Italian dressing can be easily prepared gluten-free, while someone on a low-calorie diet can reduce the oil for a lighter dressing.

    Moreover, as the seasonal vegetables change, you can modify the recipe through substitutions, ensuring you’re always using the freshest ingredients. All these factors combined make this broccoli salad a reliable part of your repertoire of healthy recipes.

    Ingredients Overview

    Essential Ingredients for Quick Broccoli Salad With Italian Dressing

    To create a delightful Quick Broccoli Salad With Italian Dressing, here’s what you will need:

    • Fresh Broccoli Florets (3 cups): This will be the base of your salad, offering a crunchy texture and plenty of nutrients.
    • Cherry Tomatoes (1 cup, halved): These provide sweetness and vibrant color.
    • Red Onion (1 small, thinly sliced): For a hint of sharpness that balances the flavors.
    • Bell Pepper (1 cup, diced): You may use any color for extra vibrancy; they are high in vitamins A and C.
    • Olives (½ cup, pitted and sliced): Adds a briny contrast to the salad. Choose green for a milder taste or black for a stronger flavor.
    • Italian Dressing (½ cup): You can use store-bought or homemade. A simple blend of olive oil, vinegar, and Italian herbs will suffice.
    • Feta Cheese (optional, ½ cup): Adds creaminess and saltiness. If you’re vegan, consider using a plant-based alternative or simply omit this for a lighter salad.

    Diet-Conscious Note: All ingredients above are naturally gluten-free, and the entire recipe can be made vegan by omitting the feta cheese.

    Dietary Substitutions to Customize Your Quick Broccoli Salad With Italian Dressing

    Adaptations are key in making this Quick Broccoli Salad With Italian Dressing cater to various dietary needs or preferences:

    • Broccoli: If you’re looking for a milder flavor, you can substitute broccoli with cauliflower or Brussels sprouts. Lightly steam these options to retain some crunch.
    • Cherry Tomatoes: Substitute with diced cucumber or carrots for a different texture and taste profile while maintaining freshness.
    • Onion: For those who prefer milder flavors, green onions or shallots can take the place of red onion.
    • Olives: Feel free to swap olives for toasted nuts like almonds or walnuts for an extra crunch.
    • Vegan Option: To veganize the dressing, replace regular vinegar with apple cider vinegar and add a bit of agave syrup for sweetness.
    • Gluten-Free: Ensure the dressing is made with gluten-free ingredients, as many store-bought options may contain gluten.

    These substitutions not only maintain the delicious flavor and appeal of the salad but also ensure that everyone at the table can enjoy it!

    How to Prepare the Perfect Quick Broccoli Salad With Italian Dressing: Step-by-Step Guide

    Are you ready to create the Quick Broccoli Salad With Italian Dressing? Follow these simple steps to achieve a stunning salad that’s not only nutritious but visually appealing.

    1. Prepare the Base:
    2. Begin by washing 3 cups of fresh broccoli florets thoroughly under running water. Pat them dry with a clean kitchen towel. Cut the florets into bite-sized pieces to facilitate easy consumption.

    3. Chop the Vegetables:

    4. Next, chop 1 cup of cherry tomatoes in half. Thinly slice 1 small red onion and dice 1 cup of bell peppers of your choice (red, yellow, or green). Ensure they’re uniformly sized for consistent flavor throughout.

    5. Prepare the Olives:

    6. Take ½ cup of pitted olives and slice them into circles. Choose green or black olives based on your preference. Set aside for later incorporation into the salad.

    7. Combine the Vegetables:

    8. In a large mixing bowl, combine the prepared broccoli, cherry tomatoes, red onion, bell pepper, and olives. Gently toss with your hands to mix these vibrant vegetables, ensuring an even distribution of colors.

    9. Make the Dressing:

    10. In a small bowl, whisk together ½ cup of Italian dressing. For a homemade option, blend ⅓ cup of extra-virgin olive oil, 2 tablespoons of red wine vinegar, and your favorite Italian seasonings (like oregano, basil, and garlic powder).

    11. Dress the Salad:

    12. Pour the Italian dressing over the mixed vegetables in the large bowl. Toss gently to coat all the ingredients evenly. This is where the magic happens—the dressing adds flavor and brings all the ingredients together.

    13. Add Cheese (Optional):

    14. If you’re including feta cheese, crumble ½ cup of it over the salad. Again, if you’re vegan, skip this step or use a dairy-free alternative.

    15. Garnish:

    16. For an extra touch, sprinkle some fresh herbs like parsley or basil on top just before serving. This not only enhances the beauty but elevates the flavor profile as well.

    17. Taste and Adjust:

    18. Before serving, taste the salad. If necessary, adjust seasoning by adding a pinch of salt and pepper to enhance the flavors.

    19. Chill:

    20. For best results, let the salad chill in the fridge for about 10-20 minutes. Chilling allows the flavors to meld beautifully.

    21. Serve:

    22. Finally, transfer the salad to a serving dish or bowl. Garnish with additional herbs if desired, and serve it to your guests or save it for a delicious healthy meal later in the week.

    By following these simple steps, you’re guaranteed to create a flavorful, refreshing salad that can become a star attraction at any meal.

    Mastering Quick Broccoli Salad With Italian Dressing: Advanced Tips and Variations

    To truly master the Quick Broccoli Salad With Italian Dressing, here are some pro tips and different variations you can explore to tailor this dish to your preferences:

    • Experiment with Dressings: While the Italian dressing is delicious, feel free to try other dressings like balsamic vinaigrette or lemon-tahini for a distinctive flavor twist. Each dressing can dramatically change the salad’s taste profile.

    • Incorporate Nuts and Seeds: Adding toasted pine nuts, sunflower seeds, or pumpkin seeds can enhance the salad’s texture and provide added nutrition. Nuts also contribute healthy fats and proteins.

    • Include Grains: For a heartier version, consider adding cooked grains such as quinoa, farro, or bulgur wheat. They will make the salad more filling and provide additional fiber.

    • Add Protein: To convert this salad into a complete meal, toss in some cooked chickpeas, kidney beans, or grilled chicken. These additions boost the protein content, making it perfect for athletes or anyone needing extra sustenance.

    • Seasonal Variations: As new fruits and vegetables come into season, feel free to incorporate them. For instance, diced apples or pears can add sweetness during the fall, while fresh strawberries can create a refreshingly summery twist.

    • Presentation: Make your salad visually appealing by layering ingredients in a clear bowl. This will showcase the range of colors and textures, capturing the attention of your guests.

    By integrating these advanced tips and variations, you’ll not only create a unique dish but also explore new flavor profiles and textures, enriching your culinary journey with healthy recipes.

    How to Store Quick Broccoli Salad With Italian Dressing: Best Practices

    Storing your Quick Broccoli Salad With Italian Dressing properly ensures that it remains refreshing and delicious for days to come. Here’s how to do it:

    • Refrigeration: After preparing your salad, store it in an airtight container. Ensure the salad is completely chilled before sealing the container. It will keep well in the fridge for up to 3 days. However, for best flavor and texture, try to consume it within the first day or two.

    • Freezing: Freezing this salad isn’t recommended due to the change in texture of the vegetables once thawed. However, if you have leftover dressing, you can freeze it in ice cube trays for future use.

    • Separation of Ingredients: If you anticipate having leftovers, consider storing the dressing separately. Combine the vegetables, and store them in a different container. This will prevent the broccoli from becoming soggy, maintaining the salad’s crunchy texture.

    By following these best practices for storing the salad, you can enjoy healthy recipes without compromising on taste or freshness.

    Nutritional Value of Quick Broccoli Salad With Italian Dressing

    Understanding the nutritional value of your meals is essential for maintaining a balanced diet. Here is a breakdown of the nutritional profile for one serving (about 1 cup) of the Quick Broccoli Salad With Italian Dressing:

    • Calories: Approximately 150-200 calories, depending on the amount of dressing used and whether cheese is included.
    • Protein: 4-6 grams, with the potential to increase when additional beans or chicken are added.
    • Fat: 8-12 grams, primarily from the olive oil and the optional cheese.
    • Carbohydrates: 10-15 grams, mostly from the vegetables.
    • Fiber: 4-5 grams, thanks to the broccoli and other vegetables, promoting digestive health.
    • Vitamins and Minerals: Rich in Vitamin C, Vitamin A, and Vitamin K, along with essential minerals like potassium and calcium.

    This Quick Broccoli Salad With Italian Dressing not only supports healthy living but also aligns well with diverse dietary preferences. By being mindful of the ingredients, you can adjust portions or opt for more substantial additions to meet your particular nutritional requirements.

    FAQs: Frequently Asked Questions About Quick Broccoli Salad With Italian Dressing

    Here are some common questions people often ask about the Quick Broccoli Salad With Italian Dressing, along with clear and concise answers:

    1. Can I make this salad ahead of time?
    2. Yes! You can prepare the salad a few hours in advance. Just store it in the refrigerator in an airtight container until serving. For optimal freshness, consider adding the dressing just before serving.

    3. Can I substitute the broccoli with another vegetable?

    4. Absolutely! Cauliflower, Brussels sprouts, or even cooked green beans can work well. Just ensure the substituted vegetable maintains a similar texture and flavor profile.

    5. Is this salad suitable for meal prep?

    6. Yes, it’s perfect for meal prep! Portion it out into individual containers for easy grabbing throughout the week. As mentioned, store the dressing separately if you want to keep the salad crisp.

    7. How can I make this salad even healthier?

    8. Consider adding extra veggies like spinach or kale, or incorporating superfoods like quinoa or legumes for added protein and fiber.

    9. What can I use instead of Italian dressing?

    10. A homemade vinaigrette made from balsamic vinegar, olive oil, and your choice of herbs can serve as a delicious alternative.

    11. Can I add fruits to this salad?

    12. Yes! Adding fruits like sliced apples, oranges, or berries can provide contrasting flavors and sweetness to balance the salad.

    By addressing these FAQs, you can anticipate and resolve common concerns about preparing and enjoying the Quick Broccoli Salad With Italian Dressing, ensuring a stress-free cooking experience.


    With its vibrant colors, numerous health benefits, and impressive versatility, the Quick Broccoli Salad With Italian Dressing is a must-try recipe. Whether you’re a seasoned cook or a culinary novice, this dish will enhance your collection of healthy recipes. Embrace the joy of cooking and treat your loved ones to delicious, nutritious meals that are simple to prepare. Happy cooking!

  • IM Officially Addicted To This Citrus Celery Salad

    IM Officially Addicted To This Citrus Celery Salad

    I’M Officially Addicted To This Citrus Celery Salad!: A Tropical Delight

    Introduction to I’M Officially Addicted To This Citrus Celery Salad!

    Spring is the perfect time to refresh your palate and embrace the vibrant flavors of the season with light, nutritious meals. One recipe that truly embodies the essence of spring meals is the Citrus Celery Salad. This delightful dish combines the crispness of celery with the zing of citrus, creating a fantastic medley that is not only refreshing but also packed with health benefits.

    Imagine the bright colors and fresh flavors all coming together in one bowl! This salad is ideal for busy parents looking for a quick, healthy meal, diet-conscious individuals wanting a low-calorie option, as well as food enthusiasts eager to explore new culinary creations. Whether enjoyed as a standalone dish, a side for your favorite protein, or packed for a picnic, this Citrus Celery Salad is versatile enough to fit any occasion.

    What makes this salad even better? It’s simple to make, entirely vegan, and gluten-free, catering to various dietary needs. If you’re in search of a quick recipe that’s as nutritious as it is delicious, look no further. This dish will elevate your spring meals and leave you feeling energized and satisfied!

    Benefits and Advantages of I’M Officially Addicted To This Citrus Celery Salad!

    One of the most appealing aspects of this Citrus Celery Salad is its ease of preparation. Whether you’re a novice home cook or an experienced chef, this recipe allows you to whip up a healthy meal in no time. You can combine all ingredients in a matter of minutes, making it one of the most convenient options for those busy weeknights or spring picnics.

    From a health perspective, this salad is brimming with advantages. Celery is known for its hydrating properties and is low in calories while being rich in fibers, helping promote digestive health. Citrus fruits, such as oranges and grapefruits, add a dose of Vitamin C and antioxidants, which are essential for immunity during the changing seasons. As a bonus, they lend a burst of flavor that brightens the otherwise earthy notes of celery.

    Moreover, this salad is highly adaptable to suit various dietary preferences. It is not only vegan and gluten-free but also low-calorie and can be made without added sugars for those watching their intake. This makes it a fantastic option for seniors looking for easy-to-digest options, students needing healthy meals on a budget, and newlyweds aiming to impress with a simple yet exquisite dish.

    In summary, the Citrus Celery Salad stands out as a nutritious choice for your spring meals, ensuring you enjoy delightful flavors while nourishing your body.

    Ingredients Overview

    Essential Ingredients for I’M Officially Addicted To This Citrus Celery Salad!

    Here’s a detailed list of the fresh ingredients you’ll need to create this vibrant Citrus Celery Salad:

    • 4 cups of celery, chopped (about 4 large stalks): Adds crunch and nutrition.
    • 1 large orange, segmented (or 2 small oranges): Provides sweetness and vitamin C.
    • 1 pink grapefruit, segmented: Grants a tangy punch and is rich in antioxidants.
    • 1/4 cup of red onion, thinly sliced: Offers depth and sharpness to the flavors.
    • 1/2 cup of walnuts, chopped (optional): For healthy omega-3 fatty acids and crunch.
    • 2 tablespoons of olive oil: Enhances flavor and contributes healthy fats.
    • Juice of 1 lemon: Brightens the dish and adds a refreshing tang.
    • Salt and pepper (to taste): To season and elevate the flavors.

    Vegan & Gluten-Free Options: Every ingredient is vegan and gluten-free, making it suitable for those with dietary restrictions. The addition of walnuts is optional, so you can easily make a nut-free version if needed.

    Dietary Substitutions to Customize Your I’M Officially Addicted To This Citrus Celery Salad!

    If you’re looking for alternatives to customize your Citrus Celery Salad, here are some suggested substitutions:

    1. For Nuts: If you have a nut allergy or prefer not to include walnuts, sunflower seeds or pumpkin seeds can provide a similar crunch without compromising nutrition.
    2. For Oil: Replace olive oil with avocado oil for a different flavor profile while retaining healthy fats. Additionally, you can use vegetable broth for a lower-calorie, oil-free version.
    3. For Sweetness: If you desire extra sweetness, consider adding a drizzle of agave syrup or maple syrup. Conversely, for a less sweet version, you can exclude citrus and use diced apples for a subtle taste.
    4. For Citrus: Feel free to mix and match citrus fruits based on your preference—meyer lemons or blood oranges can add unique flavors.
    5. For Additional Flavor: Try adding herbs like cilantro or mint to enhance the freshness of the salad.

    With these substitutions, you can tailor the Citrus Celery Salad to fit any dietary need while retaining its refreshing essence.

    How to Prepare the Perfect I’M Officially Addicted To This Citrus Celery Salad!: Step-by-Step Guide

    Creating the Citrus Celery Salad is a breeze. Follow these detailed steps to prepare a dish that will surely become one of your favorite spring meals:

    1. Prepare the Base: Start by washing and chopping 4 cups of celery into bite-sized pieces. This crunchy vegetable forms the foundation of your salad.

    2. Segment the Citrus: Next, take 1 large orange and 1 pink grapefruit. Carefully peel and segment them, extracting the juicy flesh while discarding any pith. You can achieve this by slicing between the membranes of the fruit. This method ensures maximum juice and flavor.

    3. Slice the Red Onions: Thinly slice 1/4 cup of red onion. If you prefer a milder flavor, soak the slices in cold water for about 10 minutes before adding them to the salad to reduce sharpness.

    4. Mix the Ingredients: In a large bowl, combine the chopped celery, orange segments, grapefruit segments, and red onion slices. Toss them gently to ensure even distribution of flavors.

    5. Add the Walnuts: If you choose to include nuts, add 1/2 cup of chopped walnuts to the mixture. Not only do they boost the nutritional value, but they also add a delightful crunch.

    6. Prepare the Dressing: In a separate small bowl, whisk together 2 tablespoons of olive oil, the juice of 1 lemon, and salt and pepper to taste. This dressing will enhance the flavors of all the ingredients.

    7. Dress the Salad: Drizzle the dressing over the salad mixture and toss everything gently until well-coated. Make sure every ingredient is mingling harmoniously.

    8. Chill and Serve: For an even more refreshing experience, chill the salad in the refrigerator for about 30 minutes before serving. This allows the flavors to meld beautifully.

    This Citrus Celery Salad can be customized for various dietary needs, making it a perfect option for spring meals that cater to everyone at the table.

    Mastering I’M Officially Addicted To This Citrus Celery Salad!: Advanced Tips and Variations

    To elevate your Citrus Celery Salad experience further, consider these advanced tips and delicious variations:

    1. Herbs Galore: Experiment with fresh herbs according to your tastes. Basil, cilantro, or dill can add a burst of freshness that will make your salad unforgettable.

    2. Spice it Up: Add a pinch of red pepper flakes for a touch of heat or sprinkle some smoked paprika for a deeper flavor.

    3. Cheese Options: If dairy is not an issue for you, consider crumbling some feta or goat cheese on top for a creamy contrast.

    4. Different Salads: Try using different bases like mixed greens or quinoa to create a heartier version of the salad. Combining grains with vegetables offers unique textures and flavors.

    5. Tropical Twist: To add more tropical flavors, include diced mango or pineapple, which will enhance the salad’s sweetness and provide a fresh, vibrant note.

    By incorporating these tips, you can create a personalized version of the Citrus Celery Salad that will impress guests at any gathering or meal.

    How to Store I’M Officially Addicted To This Citrus Celery Salad!: Best Practices

    Properly storing your Citrus Celery Salad can help retain its freshness and flavor. Here are the best practices for storing your delicious dish:

    • Refrigeration: If you have leftover salad, store it in an airtight container in the refrigerator. It’s best consumed within 2-3 days for optimal freshness and crunchiness. To keep the salad from wilting, store the dressing separately until you’re ready to serve.

    • Freezing: While it’s not recommended to freeze this salad due to its water content, you can freeze the precut ingredients (like celery or citrus) separately in freezer-safe bags. However, salad preparation is best enjoyed fresh.

    • Reheating: If you prefer to enjoy the salad warm—though it’s generally served cold—briefly toss it in a pan over low heat. Add a bit of olive oil to enhance flavor.

    Implementing these storage methods will ensure your Citrus Celery Salad stays fresh and delicious for your spring meals.

    Nutritional Value of I’M Officially Addicted To This Citrus Celery Salad!

    Understanding the nutritional value of your meals can help you make healthier choices. Here’s a breakdown of the nutrients found in the Citrus Celery Salad:

    • Calories: Approximately 180 calories per serving, depending on the addition of walnuts and cheese.
    • Fat: About 12g (with walnuts) primarily from healthy fats found in olive oil and walnuts—great for heart health.
    • Carbohydrates: Roughly 18g, mainly from the natural sugars in fruits and veggies.
    • Fiber: Around 5g, which promotes digestive health and helps keep you feeling full.
    • Protein: Approximately 3g, mainly from walnuts and celery, making it less than a traditional protein-rich meal but excellent for a light side dish.
    • Vitamins: Contains high levels of Vitamin C, calcium, and potassium—all beneficial for immune function and overall health.

    Including this salad in your rotation of spring meals provides refreshing nutrition that complements a well-rounded diet.

    FAQs: Frequently Asked Questions About I’M Officially Addicted To This Citrus Celery Salad!

    Q: Can I make this salad ahead of time?
    A: Yes! However, it’s best when eaten fresh. If you need to prepare it ahead, store the dressing separately from the salad ingredients to prevent wilting.

    Q: Is this salad good for meal prep?
    A: Absolutely! Just remember to keep the dressing separate until you’re ready to serve for the best texture.

    Q: Can I eat this salad if I’m on a low-carb diet?
    A: While it contains some carbohydrates mainly from fruits, you can make it lower in carbs by reducing or eliminating the citrus portions and focusing on the celery.

    Q: What can I substitute for citrus if allergic?
    A: You can use apple cider vinegar mixed with a little honey for sweetness, or opt for mild, crunchy vegetables like cucumbers and bell peppers to replace citrus.

    Q: How can I make this salad more filling?
    A: Adding protein sources such as chickpeas, grilled chicken, or tofu can turn this salad into a hearty meal.

    By addressing these common questions, you’ll feel more equipped to prepare and enjoy your Citrus Celery Salad. It’s time to be officially addicted to this refreshing delight!

  • My GrandmaS Secret Recipe For The Best Celery Salad

    My GrandmaS Secret Recipe For The Best Celery Salad

    My Grandma’S Secret Recipe For The Best Celery Salad!: A Tropical Delight

    Introduction to My Grandma’S Secret Recipe For The Best Celery Salad!

    Welcome to the culinary journey of discovering “My Grandma’s Secret Recipe for the Best Celery Salad!” This delightful dish isn’t just a side—it’s a refreshing treat that combines vibrant flavors and crunchy textures, making it an ideal addition to any meal. Imagine a salad that brings together crisp celery, juicy cucumbers, and a medley of herbs and spices—the perfect cucumber salad for a hot day.

    This recipe stands out for its simplicity and health benefits. Not only is it easy to prepare, but it’s also packed with vitamins, minerals, and fiber. Whether you’re a busy parent looking for a quick lunch, a health-conscious student, or a newlywed eager to impress your partner, this salad has something for everyone. Moreover, it’s vegan and gluten-free, making it suitable for a wide array of dietary preferences.

    With just a bit of preparation, you can have a refreshing dish that bursts with flavor and is perfect for any occasion—from picnics to potlucks. So, get ready to discover how to make the best celery salad that will not only satisfy your taste buds but also promote your overall well-being.

    Benefits and Advantages of My Grandma’S Secret Recipe For The Best Celery Salad!

    This recipe for celery salad offers a wealth of benefits that go beyond its delicious taste. Here are a few reasons why you should whip up this delightful dish:

    1. Ease of Preparation: One of the most significant advantages of this recipe is how easy it is to prepare. With minimal ingredients, you can have a refreshing dish ready in just a matter of minutes. It’s a perfect solution for those busy weeknights or impromptu gatherings where you want to serve something healthy without spending hours in the kitchen.

    2. Health Benefits: The star ingredient—celery—is low in calories but high in essential vitamins and minerals like vitamin K, folate, and potassium. Combined with cucumbers, which are hydrating and rich in antioxidants, and fresh herbs, this salad becomes a nutrient powerhouse. It’s an excellent choice for anyone looking to increase their vegetable intake or maintain a healthy lifestyle.

    3. Dietary Versatility: This salad speaks to a diverse audience. It is not only vegan and gluten-free but can also easily be made low-carb. Whether you are a busy professional trying to eat healthier while on the go or a student managing dietary restrictions, this celery salad meets multiple needs.

    4. Customizable Options: The beauty of this recipe is its adaptability. You can mix and match ingredients based on your preferences or what you have on hand. Whether you want to add a handful of nuts for extra crunch or a splash of your favorite dressing, the possibilities are endless.

    5. Refreshing Addition: As temperatures rise, nothing beats a light, refreshing salad. This celery salad is not only delicious but also revitalizing, making it a fantastic choice for summer barbecues, brunches, or even as a light starter for dinner parties.

    By adopting this recipe into your cooking repertoire, you not only get to enjoy a delicious meal but also enhance your health and culinary skills.

    Ingredients Overview

    Essential Ingredients for My Grandma’S Secret Recipe For The Best Celery Salad!

    • 4 cups celery, chopped – Celery is low in calories and high in fiber, making it a great base for any salad.
    • 1 cucumber, diced – Cucumbers add a refreshing crunch and hydration.
    • 1 cup cherry tomatoes, halved – Tomatoes add sweetness and essential vitamins.
    • 1/4 cup red onion, finely chopped – Red onions provide a zesty flavor and beneficial nutrients.
    • 1/4 cup fresh parsley, chopped – This herb adds flavor and is packed with antioxidants.
    • 2 tablespoons olive oil – A healthy fat that enhances flavor and promotes heart health.
    • 1 tablespoon lemon juice – Fresh lemon juice brightens the dish and provides vitamin C.
    • Salt and pepper, to taste – Simple seasonings that enhance the natural flavors of the vegetables.

    Dietary Note: All ingredients listed above are vegan, gluten-free, and low in calories, making this a perfect choice for health-conscious eaters.

    Dietary Substitutions to Customize Your My Grandma’S Secret Recipe For The Best Celery Salad!

    Feel free to get creative with this salad! Here are some substitutions and additions you might consider based on dietary needs or ingredient availability:

    1. Proteins: Add chickpeas or black beans for a protein boost.
    2. Nuts & Seeds: Toss in sunflower seeds or walnuts for additional crunch and healthy fats.
    3. Alternative Dressings: Swap olive oil for avocado oil or a favorite vinaigrette if you prefer a different flavor profile.
    4. Herbs: Experiment with basil or mint instead of parsley for a different twist.
    5. Spicy Kick: If you like some heat, consider adding diced jalapeños or a dash of hot sauce.

    The customizable nature of this recipe allows you to enjoy a fresh, satisfying dish that meets your taste preferences while accommodating different dietary requirements.

    How to Prepare the Perfect My Grandma’S Secret Recipe For The Best Celery Salad!: Step-by-Step Guide

    Follow these easy steps to create “My Grandma’s Secret Recipe for the Best Celery Salad!” You’ll find that with each step, you’ll be one step closer to enjoying this delightful cucumber salad.

    1. Prepare the Base:
    2. Start by thoroughly washing all vegetables. The freshness of your ingredients is key, so ensure your celery and cucumbers are fresh and unblemished.

    3. Chop the Celery:

    4. Using a sharp knife, chop the celery into bite-sized pieces. Aim for about 1/2-inch thickness for perfect crunch.

    5. Dice the Cucumber:

    6. Slice the cucumber in half lengthwise and scoop out the seeds if they are particularly watery. Then, slice again into half-moons.

    7. Halve the Cherry Tomatoes:

    8. Cut the cherry tomatoes in half, which will help their juices mix well with the other ingredients.

    9. Finely Chop Red Onion:

    10. Take a small onion and chop it finely. If you find the flavor too strong, soak the diced onions in cold water for 10 minutes to mellow the taste, then drain.

    11. Chop Fresh Parsley:

    12. Using a knife, carefully chop the parsley until it is finely minced.

    13. Combine Vegetables:

    14. In a large mixing bowl, combine the chopped celery, cucumber, cherry tomatoes, red onion, and parsley.

    15. Make the Dressing:

    16. In a separate small bowl, whisk together the olive oil and lemon juice. Add salt and pepper to taste. This dressing complements the cucumber salad beautifully and enlivens its flavors.

    17. Dress the Salad:

    18. Pour the dressing over the salad mixture. Gently toss everything together until well combined. Be careful not to over-mix; the goal is for the vegetables to remain crisp.

    19. Let it Rest:

      • Allow the salad to sit for about 10-15 minutes before serving. This lets all the flavors blend beautifully.
    20. Serve and Enjoy:

      • Transfer the salad to a serving dish. Garnish with additional parsley or even some feta cheese if desired.

    By following these steps, you will create a colorful and wholesome cucumber salad that appeals to both the eye and the palate!

    Mastering My Grandma’S Secret Recipe For The Best Celery Salad!: Advanced Tips and Variations

    To truly make “My Grandma’s Secret Recipe for the Best Celery Salad!” your own, consider these advanced tips and variations:

    1. Flavorful Additions:
    2. For an extra depth of flavor, try adding a tablespoon of Dijon mustard into the dressing. This will add a tangy punch that complements the fresh vegetables.

    3. Herb Infusion:

    4. Infuse the olive oil by letting it sit with herbs like rosemary or thyme for a couple of hours. This imbues a lovely fragrance into your salad.

    5. Fruit Addition:

    6. Add diced apples or pears for a sweet contrast to the crisp vegetables. Their subtle sweetness can elevate the dish.

    7. Experiment with Textures:

    8. Roasted nuts can be included for a crunchy contrast; consider almonds or pistachios for an interesting flavor profile.

    9. Make it a Meal:

    10. Transform this refreshing salad into a complete meal by serving it over a bed of quinoa or alongside grilled chicken or shrimp.

    11. Layering Flavors:

    12. Let the salad chill in the refrigerator prior to serving. The cold will enhance the freshness and allow the flavors to marry beautifully.

    Using these advanced tips, you can tweak and modify your salad to match the season or your mood, making it versatile and always exciting.

    How to Store My Grandma’S Secret Recipe For The Best Celery Salad!: Best Practices

    To keep your celery salad fresh and enjoyable, proper storage techniques are essential. Here are some best practices:

    1. Refrigeration:
    2. Store leftover cucumber salad in an airtight container in the refrigerator. It will hold up well for about 2-3 days.

    3. Avoiding Sliminess:

    4. If you determine that you have extra liquid pooling at the bottom of the container after a day, simply drain it before serving again. This practice helps maintain the salad’s crispiness.

    5. Freezing:

    6. Freezing is not recommended for this salad due to its fresh ingredients, which may lose their texture. However, you may freeze the dressing separately for later use.

    7. Serving Cold:

    8. This salad is best enjoyed cold. Serve it directly from the refrigerator to enhance the refreshing qualities of the veggies.

    Follow these storage tips to maximize freshness and enjoy your celery salad for days to come!

    Nutritional Value of My Grandma’S Secret Recipe For The Best Celery Salad!

    Understanding the nutritional value of “My Grandma’s Secret Recipe for the Best Celery Salad!” is essential, especially for diet-conscious individuals. Here’s a breakdown of what you can typically expect in a serving:

    • Calories: Approximately 100 calories
    • Protein: 2 grams
    • Carbohydrates: 12 grams
    • Dietary Fiber: 4 grams
    • Fats: 5 grams (largely from olive oil, a healthy fat source)

    Vitamins and Minerals:

    • Vitamin K: Essential for bone health
    • Vitamin C: Boosts immunity and skin health
    • Potassium: Important for heart health and muscle function
    • Folate: Supports healthy cell division and is essential for pregnant women

    This salad is nutrient-dense while being low in calories, making it a fantastic option for those looking to maintain their weight or increase their vegetable intake.

    FAQs: Frequently Asked Questions About My Grandma’S Secret Recipe For The Best Celery Salad!

    1. Can I make the salad a day ahead?

    Yes, you can prepare this cucumber salad a day in advance. Just make sure to store it in the refrigerator in an airtight container.

    2. What can I use instead of celery?

    If celery isn’t your thing, you can replace it with jicama or even shredded carrots for a different crunch.

    3. Is this salad suitable for meal prep?

    Absolutely! This salad holds well in the refrigerator for a few days and is perfect for meal prepping.

    4. How can I make this salad spicier?

    Consider adding some diced jalapeños or a sprinkle of red pepper flakes to give your salad a kick.

    5. What’s the best way to serve this salad?

    This celery salad is best served cold. Pair it as a refreshing side with grilled meats, sandwiches, or enjoy it on its own for a light snack.

    6. Can I add cheese to this salad?

    Yes! Adding feta or goat cheese can enhance the flavor and texture, making this cucumber salad even more delicious.

    Now that you’re equipped with all the knowledge to make “My Grandma’s Secret Recipe for the Best Celery Salad!” a hit in your kitchen, it’s time to roll up your sleeves and get cooking. This refreshing salad is not only a delight to make but also a pleasure to eat. Enjoy the flavors and the health benefits that come along with it!