Category: breakfast

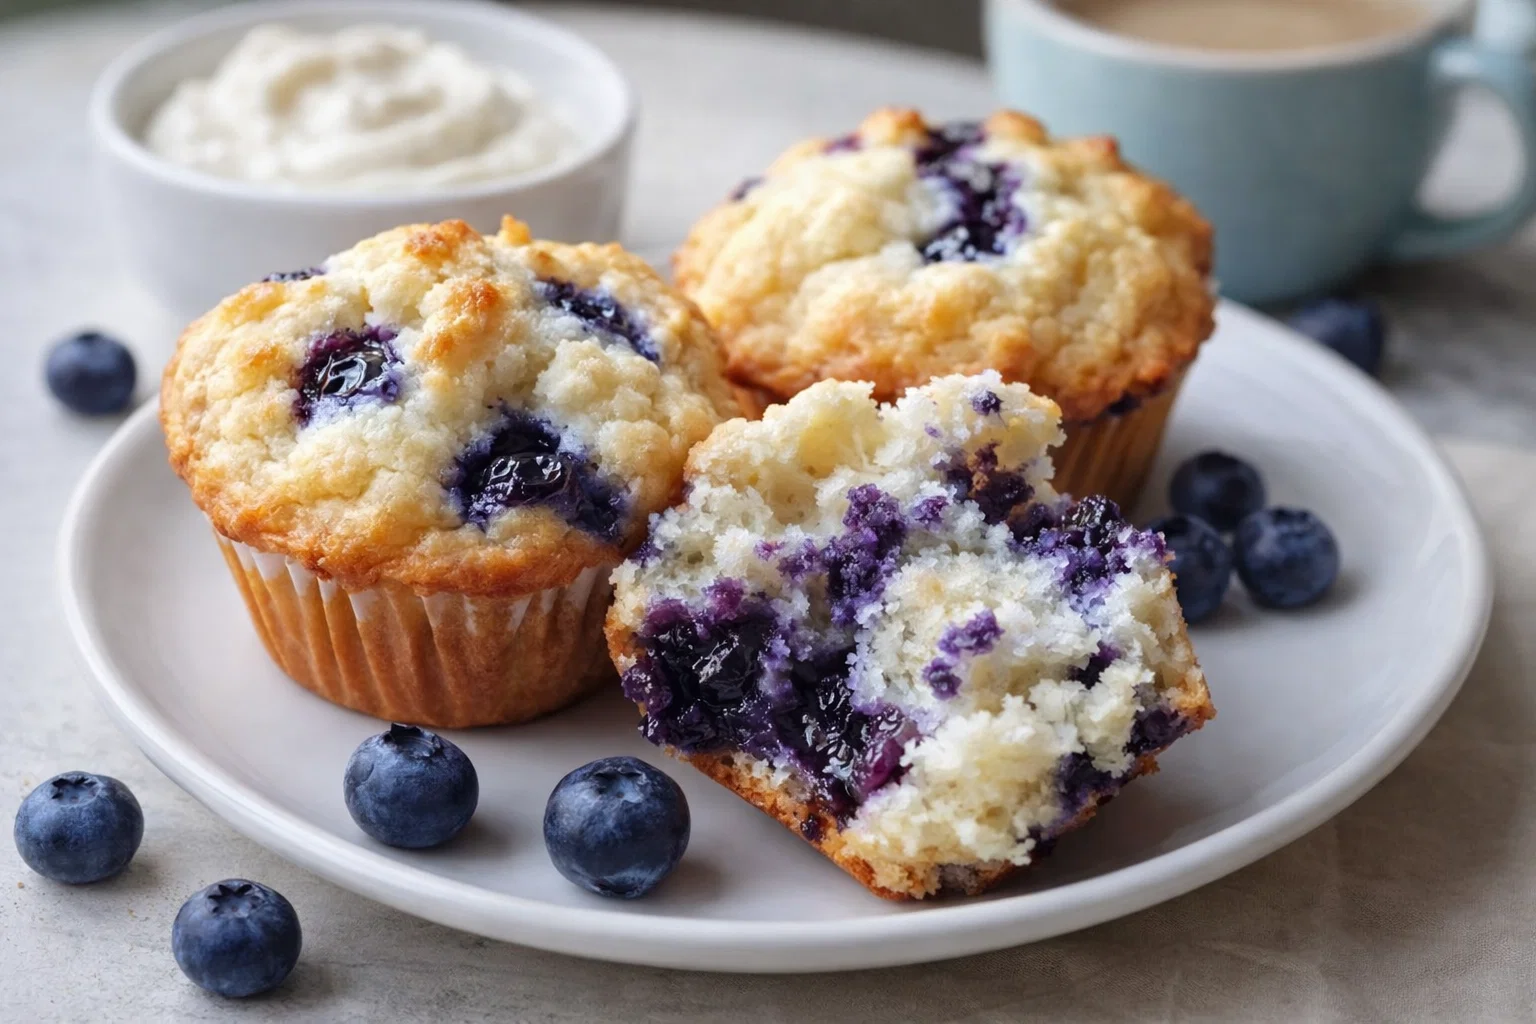
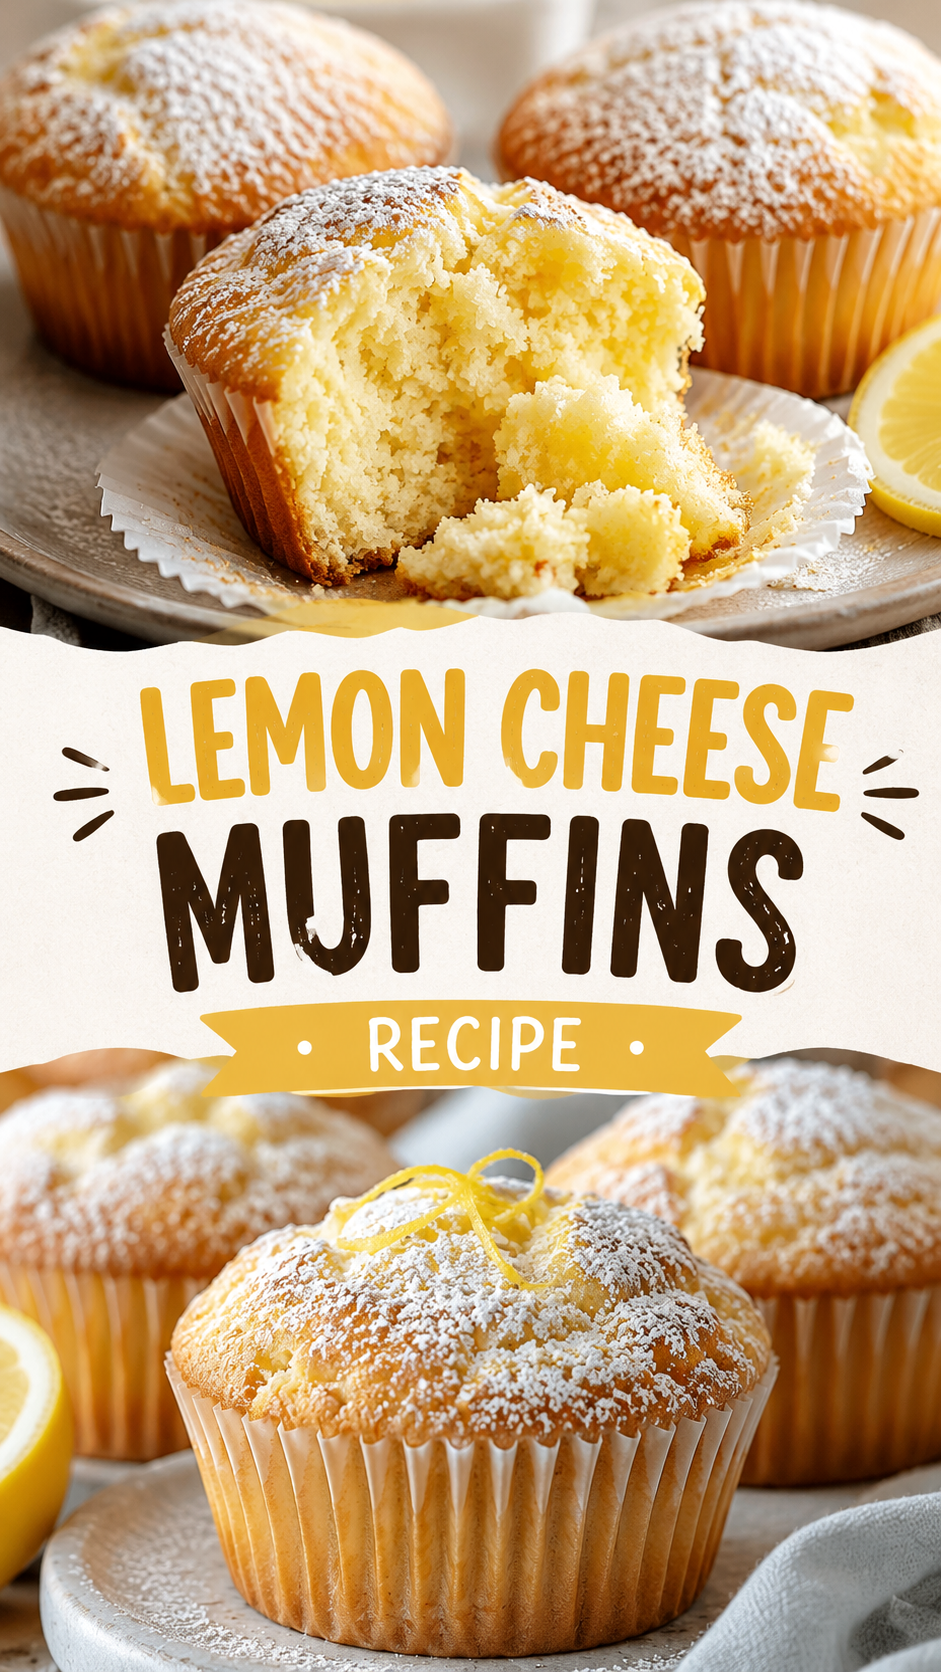
  • Easy Lemon Cream Cheese Muffins Recipe for Breakfast  Brunch Ideas

    Easy Lemon Cream Cheese Muffins Recipe for Breakfast Brunch Ideas

    Bright citrus flavor, soft crumb, and creamy richness come together beautifully in lemon cream cheese muffins. These bakery-style muffins are the perfect balance of sweet and tangy, making them a favorite for breakfast, brunch, afternoon snacks, or even dessert. With their light golden tops and dusting of powdered sugar, they look impressive while still feeling warm and homemade.

    Whether you love easy baking recipes or simply want a fresh twist on classic muffins, lemon cream cheese muffins deliver comfort and flavor in every bite. Their moist texture and vibrant lemon aroma instantly make mornings feel more special.

    Key Takeaways

    • Lemon cream cheese muffins are soft, fluffy, and full of fresh citrus flavor.
    • They work perfectly for breakfast, brunch, tea time, or meal prep snacks.
    • Cream cheese adds moisture and a rich bakery-style texture.
    • Simple pantry ingredients can create impressive homemade muffins.
    • These muffins pair wonderfully with coffee, tea, or fresh fruit.

    Why Lemon Muffins Continue to Be a Breakfast Favorite

    Lemon desserts and breakfast pastries have remained popular for generations because they feel refreshing, comforting, and light at the same time. Unlike heavier baked goods, lemon muffins offer a bright flavor profile that wakes up the palate. The addition of cream cheese makes the texture richer while still keeping the crumb airy and delicate.

    Many home bakers love lemon muffins because they feel elegant without requiring complicated techniques. A simple batter transforms into fluffy muffins with golden edges and soft centers. The powdered sugar topping adds visual appeal and a subtle sweetness that complements the tart citrus notes.

    Important: Fresh lemon flavor is what truly sets these muffins apart. Using lemon zest along with juice creates a deeper citrus aroma and gives homemade muffins a bakery-quality taste.

    The Secret Behind Soft and Moist Muffins

    One of the most appealing features of lemon cream cheese muffins is their incredibly moist texture. Cream cheese helps retain moisture while adding richness that standard muffins often lack. Combined with butter or oil, it creates a tender bite that stays soft longer.

    Another key factor is avoiding overmixing the batter. Gentle mixing keeps muffins fluffy instead of dense. Once the dry ingredients are combined with the wet mixture, stirring only until incorporated helps maintain a light crumb.

    Essential Ingredients That Make a Difference

    • Lemon zest: Provides concentrated citrus flavor.
    • Cream cheese: Adds richness and moisture.
    • Butter or oil: Creates tenderness.
    • Eggs: Improve structure and texture.
    • Powdered sugar: Adds sweetness and visual appeal.

    Simple ingredients often create the best baked goods. The beauty of these muffins lies in how basic pantry staples combine to produce something that feels special and indulgent.

    Perfect Occasions for Lemon Cream Cheese Muffins

    These muffins fit into nearly every occasion. Their cheerful citrus flavor makes them ideal for spring and summer gatherings, but they are comforting enough to enjoy year-round.

    Weekend Brunch Tables

    Lemon muffins bring brightness to brunch spreads filled with coffee, fresh fruit, eggs, and pastries. Their soft texture and sweet aroma make them a crowd favorite.

    Quick Grab-and-Go Breakfasts

    Busy mornings become easier when homemade muffins are ready to enjoy. Pairing one with yogurt or fruit creates a simple breakfast that feels satisfying without being too heavy.

    Afternoon Coffee Breaks

    The citrus flavor pairs beautifully with coffee and tea. A warm muffin during an afternoon break can instantly feel comforting and relaxing.

    Why This Matters

    Homemade baked goods often create a stronger sense of comfort and connection than store-bought alternatives. Lemon cream cheese muffins combine nostalgic flavors with fresh citrus brightness, making them both comforting and uplifting.

    How to Achieve Bakery-Style Muffin Tops

    Tall muffin tops are one of the defining features of bakery-style muffins. Achieving that beautiful rise requires a few simple baking techniques.

    1. Fill muffin liners generously to encourage higher domes.
    2. Start baking at a slightly higher temperature for the first few minutes.
    3. Use fresh baking powder for better lift.
    4. Avoid overmixing the batter.

    These small adjustments can dramatically improve both appearance and texture. The result is a muffin with a soft center and beautifully rounded top dusted with powdered sugar.

    Pro Tip: Let muffin batter rest for several minutes before baking. This allows the flour to hydrate properly and can help create taller, fluffier muffin tops.

    Creative Variations to Try

    One reason lemon cream cheese muffins remain popular is their versatility. Bakers can easily customize them while keeping the signature citrus flavor intact.

    Berry Lemon Muffins

    Blueberries, raspberries, or strawberries pair beautifully with lemon. Fresh berries add sweetness and bursts of juicy texture.

    Lemon Glaze Finish

    Instead of powdered sugar, a light lemon glaze creates extra sweetness and shine. The glaze also intensifies the citrus flavor.

    Crunchy Streusel Topping

    A buttery crumble topping adds texture contrast and gives the muffins an even more bakery-inspired appearance.

    Tips for Storing and Freezing Muffins

    Proper storage helps maintain freshness and texture. Because cream cheese is included, storing muffins correctly is important.

    • Keep muffins in an airtight container for up to three days.
    • Refrigerate for longer freshness.
    • Warm slightly before serving for the best texture.
    • Freeze individually wrapped muffins for convenient breakfasts.

    Freezing works especially well for meal prep. A quick reheat can make frozen muffins taste freshly baked again.

    Pairing Ideas for a Complete Breakfast

    Lemon cream cheese muffins pair wonderfully with many breakfast favorites. Their citrus notes complement both sweet and savory dishes.

    Fresh Fruit

    Strawberries, blueberries, and sliced oranges create a colorful and refreshing breakfast plate alongside lemon muffins.

    Coffee and Tea

    Rich coffee balances the sweetness of the muffins, while herbal teas highlight the citrus aroma.

    Yogurt Parfaits

    Greek yogurt layered with granola and berries creates a balanced breakfast combination when served with a muffin.

    Important: Lemon baked goods often taste even better after resting for several hours because the citrus flavor becomes more pronounced as the muffins cool.

    Why Homemade Muffins Feel So Special

    Homemade muffins create a comforting atmosphere that store-bought pastries rarely match. The scent of lemon and vanilla filling the kitchen instantly makes a home feel warm and inviting.

    There is also something deeply satisfying about baking from scratch. Measuring ingredients, mixing batter, and watching muffins rise in the oven turns a simple recipe into an enjoyable experience.

    For many people, lemon muffins bring back memories of family breakfasts, weekend baking sessions, or cozy mornings with coffee. That emotional connection is part of what makes them timeless.

    Serving Ideas That Elevate Presentation

    Presentation can make homemade muffins feel even more impressive. A few simple touches can transform them into centerpiece-worthy treats.

    • Dust generously with powdered sugar before serving.
    • Arrange on a white serving platter for a bakery-inspired look.
    • Add lemon slices or fresh berries as garnish.
    • Serve warm with butter or lemon curd.

    These details help create an inviting breakfast or brunch table that feels polished without requiring much extra effort.

    At a Glance

    • Bright lemon flavor keeps muffins fresh and light.
    • Cream cheese creates a soft, moist texture.
    • Perfect for breakfast, brunch, snacks, or dessert.
    • Easy to customize with berries or glaze toppings.
    • Freezer-friendly for convenient meal prep.

    Conclusion

    Lemon cream cheese muffins combine everything people love about homemade baking. They are soft, flavorful, visually beautiful, and easy to enjoy at any time of day. The refreshing citrus flavor paired with rich cream cheese creates a balanced treat that feels comforting yet light.

    Whether served during a relaxed brunch, packed for a quick breakfast, or enjoyed with coffee in the afternoon, these muffins bring warmth and brightness to the table. Their bakery-style appearance and homemade charm make them a recipe worth baking again and again.

    Tags

    Lemon Muffins Cream Cheese Muffins Breakfast Recipes Homemade Baking Brunch Ideas Easy Muffin Recipe Citrus Desserts Bakery Style Muffins
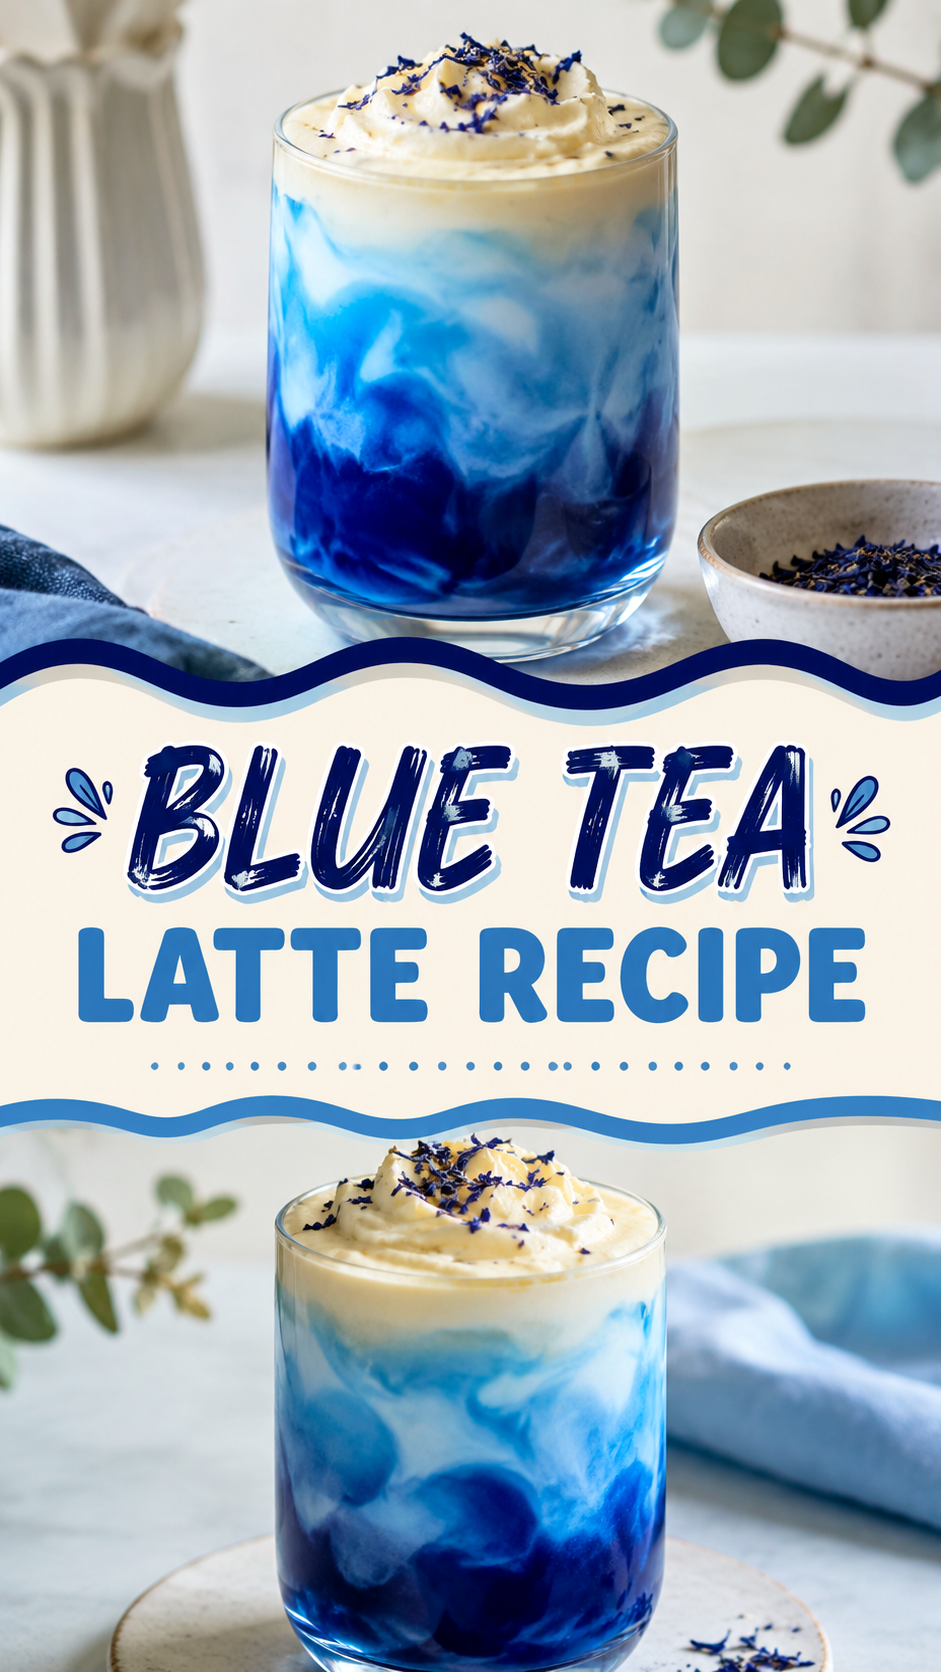
  • Blue Tea Latte Recipe Starbucks Copycat Butterfly Pea Flower Latte

    Blue Tea Latte Recipe Starbucks Copycat Butterfly Pea Flower Latte

    There’s something undeniably captivating about a beautifully layered drink, especially when it features rich shades of blue melting into creamy whites and soft golden tones. This stunning blue tea latte brings together visual elegance and comforting flavor, making it a perfect addition to your homemade café lineup. Inspired by popular Starbucks-style creations, this recipe delivers both aesthetic appeal and a soothing, customizable experience right from your kitchen.

    Whether you’re a fan of trendy beverages or simply love experimenting with natural ingredients, this blue latte offers a refreshing twist. It’s not just a drink, it’s a moment worth savoring. From its calming hues to its creamy texture, every sip feels special.

    Key Takeaways

    • This blue latte uses butterfly pea flower tea for its vibrant color
    • It’s naturally caffeine-free and perfect for any time of day
    • Customizable with different milks and sweeteners
    • Visually stunning and perfect for social media sharing
    • Easy to recreate with simple ingredients at home

    What Makes This Blue Latte So Special?

    The magic behind this drink lies in butterfly pea flower tea, a natural herbal infusion known for its deep blue color. When combined with milk, it creates a dreamy, cloud-like effect that instantly elevates your drink game. Unlike traditional lattes, this version stands out not only for its taste but also for its visual appeal.

    Important: Butterfly pea flower tea is naturally caffeine-free, making this latte a calming choice for evenings or anyone looking to avoid caffeine without sacrificing flavor or experience.

    The layered look comes from carefully pouring milk over the brewed tea, allowing the colors to blend slowly. The result is a mesmerizing gradient that feels both luxurious and approachable.

    Ingredients You’ll Need

    Creating this Starbucks-inspired blue latte at home requires only a few simple ingredients. Most of them are easy to find, and the process is beginner-friendly.

    • 1 cup hot water
    • 1 to 2 teaspoons butterfly pea flower tea
    • 1/2 cup milk (dairy or plant-based)
    • Sweetener of choice (honey, sugar, or syrup)
    • Ice cubes (optional for iced version)

    Optional additions like vanilla extract or flavored syrups can enhance the overall taste while keeping the drink personalized.

    Choosing the Right Milk

    The type of milk you use can significantly impact both flavor and texture. Almond milk adds a nutty touch, oat milk offers creaminess, and coconut milk pairs beautifully with the floral notes of the tea.

    Step-by-Step Preparation

    Making this latte is as enjoyable as drinking it. Follow these steps to achieve that signature layered look.

    1. Brew the butterfly pea flower tea in hot water for 5 to 7 minutes
    2. Strain the tea and let it cool slightly
    3. Add sweetener and stir well
    4. Fill a glass with ice if making an iced version
    5. Pour the tea into the glass
    6. Slowly add milk over the back of a spoon to create layers

    Pro Tip: Pouring the milk slowly is key to achieving that beautiful gradient effect. Take your time and enjoy the process.

    Hot vs Iced Version

    This latte works well both hot and iced. The iced version highlights the layered look more dramatically, while the hot version offers a cozy, comforting experience.

    Expert Insight

    Balancing temperature and layering is essential. Cooler tea and chilled milk help maintain distinct layers, while warmer versions blend more quickly but create a softer visual transition.

    Flavor Profile and Experience

    Butterfly pea flower tea has a very mild, earthy flavor. This makes it an excellent base for experimentation. When paired with sweeteners and milk, it transforms into a lightly floral, creamy beverage that feels both refreshing and indulgent.

    Adding vanilla or a hint of citrus can elevate the taste even further. Lemon juice, for example, can shift the color from blue to purple, creating a fun and interactive element.

    Why People Love It

    • Visually stunning and Instagram-worthy
    • Easy to customize
    • Perfect for relaxing moments
    • Unique alternative to coffee-based drinks

    Tips for the Perfect Blue Latte

    Small details can make a big difference when preparing this drink. Paying attention to technique ensures a better result every time.

    Important: Always use clear glassware if you want to showcase the layered effect. Presentation plays a huge role in the overall experience.

    • Use high-quality butterfly pea flowers for vibrant color
    • Adjust sweetness gradually to suit your taste
    • Experiment with milk frothing for added texture
    • Serve immediately for best visual impact

    Creative Variations to Try

    Once you master the basic recipe, there are endless ways to customize your blue latte.

    Vanilla Blue Latte

    Add a splash of vanilla extract for a warm, comforting flavor.

    Coconut Blue Latte

    Use coconut milk for a tropical twist that pairs beautifully with the floral notes.

    Iced Honey Blue Latte

    Sweeten with honey and serve over ice for a refreshing summer drink.

    Serving and Presentation Ideas

    Presentation is part of what makes this drink so appealing. Serve it in a tall glass to highlight the layers. Garnish with whipped cream or a sprinkle of edible flowers for an extra touch of elegance.

    For social media or entertaining guests, consider pairing it with neutral backgrounds to let the colors shine. The visual impact alone can turn a simple drink into a memorable experience.

    Why This Recipe Fits the Starbucks Copycat Trend

    Homemade café-style drinks are more popular than ever. People love recreating their favorite beverages while adding personal touches. This blue latte fits perfectly into that trend by offering something unique, beautiful, and easy to make.

    It captures the essence of Starbucks-style creativity while allowing full control over ingredients and customization. Plus, it’s a great way to explore new flavors without needing professional equipment.

    At a Glance

    • Quick and easy to prepare
    • Highly customizable
    • Visually striking layered effect
    • Perfect for home café experiences

    Conclusion

    This blue tea latte is more than just a drink. It’s a creative expression that blends beauty, simplicity, and flavor into one delightful experience. Whether you’re exploring new recipes or looking to recreate café favorites at home, this latte offers a perfect starting point.

    Its calming color, gentle taste, and customizable nature make it a standout choice for any occasion. From quiet mornings to social gatherings, it brings a sense of joy and creativity to every sip.

    Try it once, and it might just become your go-to homemade indulgence.

    Tags

    Blue Tea Latte Butterfly Pea Flower Starbucks Copycat Recipes Homemade Latte Aesthetic Drinks Caffeine Free Drinks DIY Cafe Drinks

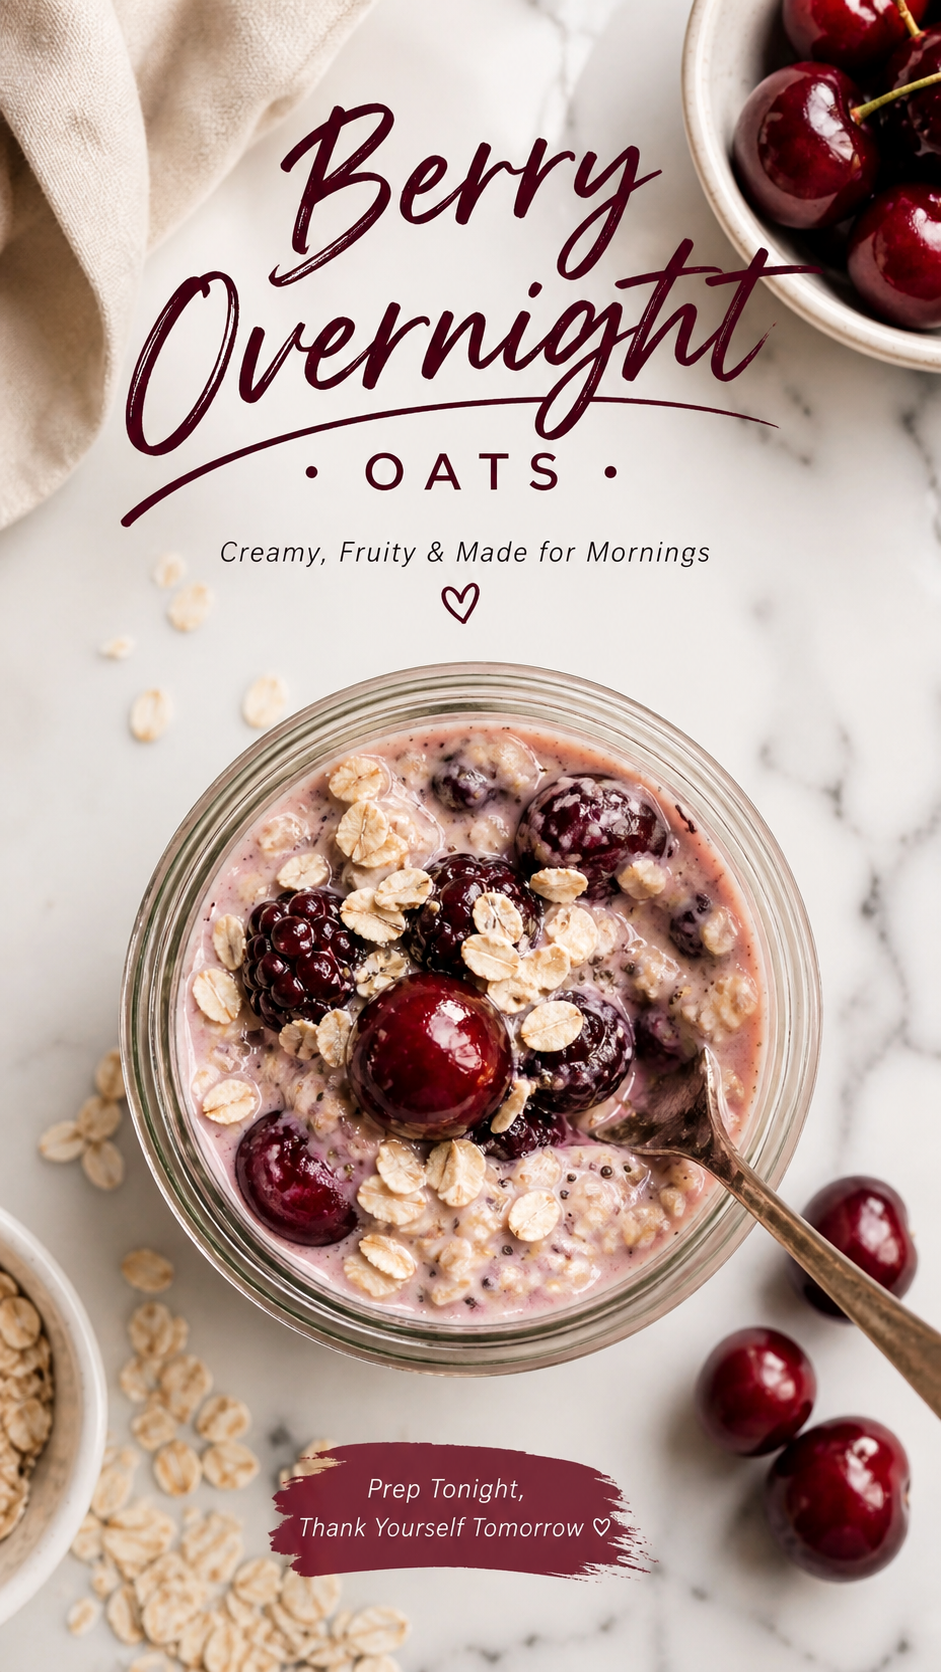
  • Cherry Overnight Oats with Chia Seeds  Healthy Easy Breakfast Recipe

    Cherry Overnight Oats with Chia Seeds Healthy Easy Breakfast Recipe

    There’s something incredibly satisfying about waking up to a ready-made breakfast that’s both nourishing and delicious. Overnight oats have become a go-to option for anyone looking to simplify mornings while still enjoying a wholesome, balanced meal. With their creamy texture, customizable flavors, and minimal prep time, they offer the perfect blend of convenience and nutrition.

    This version, featuring juicy cherries, hearty oats, and nutrient-rich chia seeds, brings together vibrant flavor and satisfying texture in every bite. Whether you’re focused on healthy eating, meal prepping, or simply love a good breakfast jar, this combination checks all the boxes.

    Key Takeaways

    • Overnight oats are a quick, no-cook breakfast option
    • Cherries add natural sweetness and antioxidants
    • Chia seeds boost fiber, omega-3s, and texture
    • Perfect for meal prep and busy mornings
    • Highly customizable with toppings and flavors

    What Makes Overnight Oats So Popular?

    Overnight oats have surged in popularity for good reason. They are easy to prepare, endlessly versatile, and packed with nutrients. Unlike traditional oatmeal, there’s no cooking involved. Instead, oats soak overnight in liquid, absorbing flavors and softening into a creamy, pudding-like consistency.

    This method preserves nutrients while saving time. You can prepare several jars at once, making them ideal for meal prepping your week ahead.

    Important: Overnight oats are not just convenient. They provide a balanced mix of complex carbohydrates, fiber, and protein that helps maintain energy levels throughout the morning.

    The Flavor Power of Cherries

    Cherries bring a burst of color and flavor that transforms simple oats into something truly special. Their natural sweetness reduces the need for added sugars, while their slightly tart edge keeps the dish refreshing.

    Beyond taste, cherries are known for their antioxidant properties. They can support recovery, reduce inflammation, and contribute to overall wellness. Whether you use fresh or frozen cherries, they blend beautifully with creamy oats and seeds.

    Fresh vs Frozen Cherries

    • Fresh cherries: Bright flavor and firm texture
    • Frozen cherries: Convenient and available year-round
    • Tip: Frozen cherries release juices that naturally sweeten the oats

    Why Chia Seeds Are a Game Changer

    Chia seeds might be tiny, but they pack a serious nutritional punch. When soaked, they expand and create a gel-like consistency that enhances the creaminess of overnight oats.

    They are rich in fiber, omega-3 fatty acids, and plant-based protein. This combination supports digestion, heart health, and sustained energy.

    Pro Tip: Stir your oats well after adding chia seeds to prevent clumping and ensure an even texture throughout the jar.

    How to Make Cherry Overnight Oats

    Preparing this breakfast is incredibly simple. With just a few ingredients and a couple of minutes, you’ll have a ready-to-go meal waiting for you in the morning.

    Basic Ingredients

    • Rolled oats
    • Milk or plant-based alternative
    • Fresh or frozen cherries
    • Chia seeds
    • Optional sweetener like honey or maple syrup

    Simple Steps

    1. Add oats, chia seeds, and milk to a jar
    2. Mix thoroughly to combine
    3. Stir in cherries and optional sweetener
    4. Cover and refrigerate overnight
    5. Enjoy chilled or let sit at room temperature briefly before eating

    Expert Insight

    Layering ingredients instead of mixing everything at once can create a more visually appealing and textured breakfast experience. Try alternating oats and fruit for a parfait-style jar.

    Texture and Taste Experience

    The beauty of this dish lies in its contrast of textures. The oats are soft and creamy, the chia seeds add a subtle pop, and the cherries provide juicy bursts of flavor.

    This combination keeps each bite interesting and satisfying. It’s not just a healthy breakfast. It’s an enjoyable one.

    Customization Ideas to Keep It Exciting

    One of the best things about overnight oats is how easily you can tailor them to your preferences.

    Add-Ons to Try

    • Nuts like almonds or walnuts for crunch
    • Yogurt for extra creaminess and protein
    • Dark chocolate chips for a treat
    • Vanilla extract for added depth
    • Granola topping for texture

    Important: Adding toppings just before eating helps maintain texture and prevents sogginess, especially for crunchy ingredients like nuts and granola.

    Meal Prep Benefits

    Overnight oats are a meal prep dream. You can prepare multiple jars at once and store them in the fridge for several days. This makes it easier to stick to healthy eating habits, even during busy weeks.

    They are also portable, making them perfect for commuting, office breakfasts, or quick snacks between activities.

    Storage Tips

    • Store in airtight containers or jars
    • Consume within 3 to 4 days for best freshness
    • Stir before eating if separation occurs

    Nutritional Benefits at a Glance

    This simple breakfast delivers a strong nutritional profile without requiring complex preparation.

    • Fiber: Supports digestion and fullness
    • Protein: Helps with muscle maintenance and satiety
    • Healthy fats: From chia seeds for heart health
    • Antioxidants: From cherries to support overall wellness

    At a Glance

    • Prep time under 5 minutes
    • No cooking required
    • Ideal for meal prep routines
    • Balanced mix of nutrients

    Conclusion

    Cherry overnight oats with chia seeds offer a simple yet powerful way to upgrade your breakfast routine. They combine ease, nutrition, and flavor into one convenient jar that fits seamlessly into modern lifestyles.

    Whether you’re preparing for a busy week, looking for healthier options, or simply want a delicious way to start your day, this recipe delivers. With endless customization possibilities and minimal effort, it’s easy to see why overnight oats have become a staple in so many kitchens.

    Tags

    overnight oats healthy breakfast meal prep ideas chia seed recipes easy breakfast clean eating fruit oats

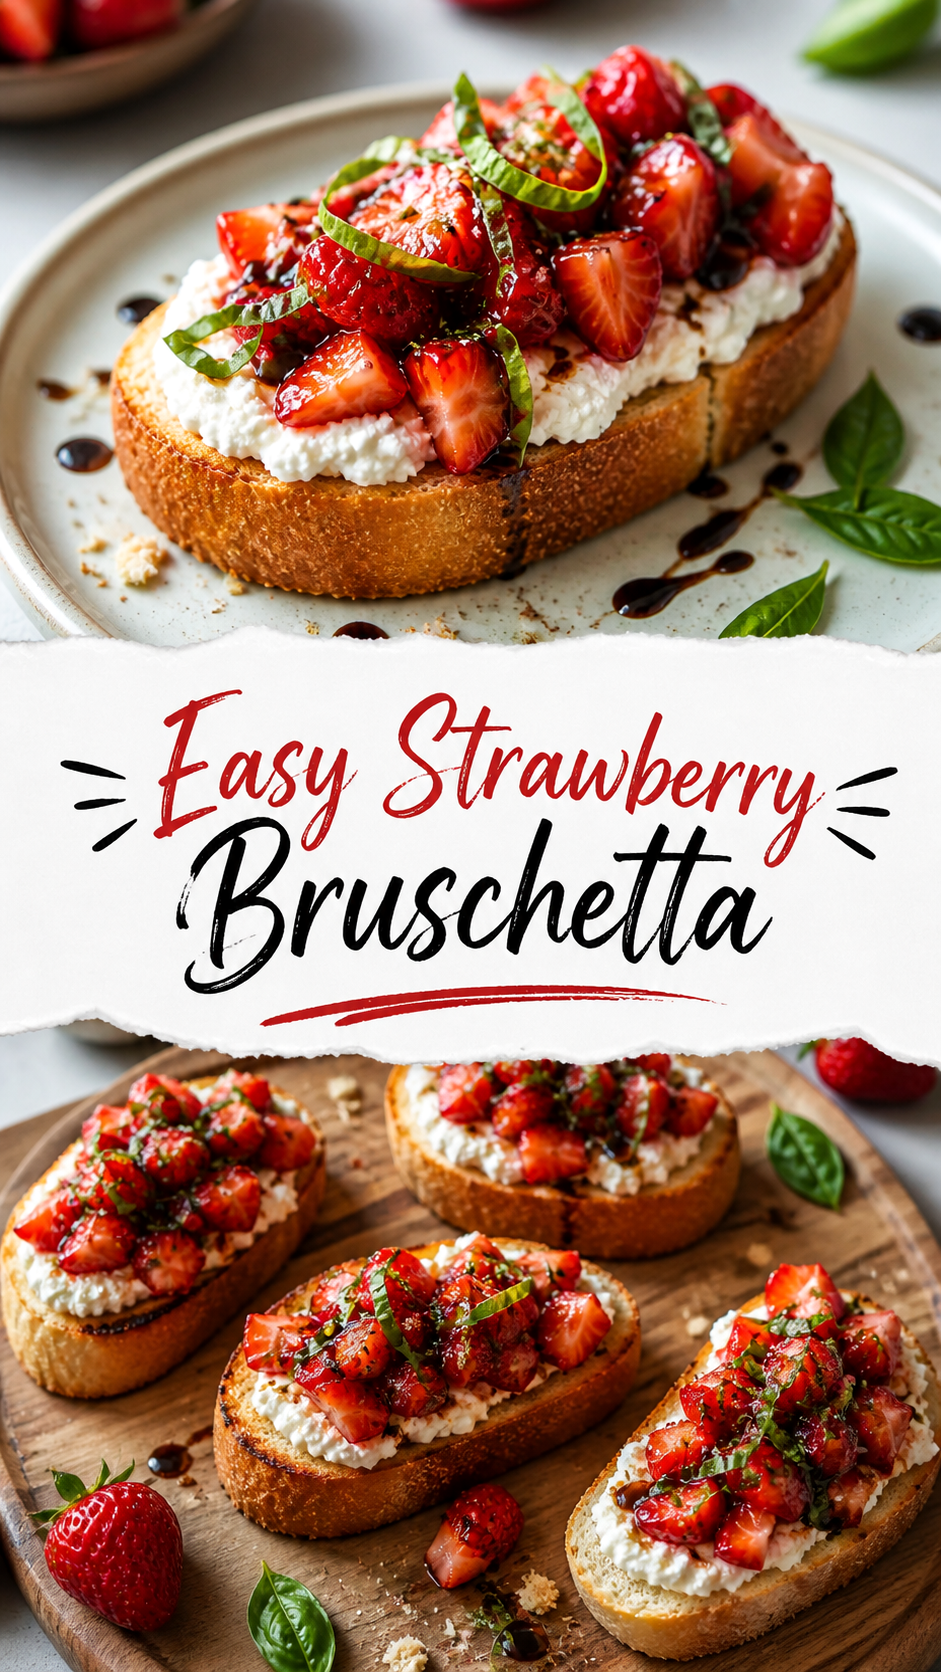
  • Easy Strawberry Bruschetta Recipe Sweet Savory Appetizer Fresh Strawberry Ideas

    Easy Strawberry Bruschetta Recipe Sweet Savory Appetizer Fresh Strawberry Ideas

    Sweet, juicy strawberries meet creamy cheese and crisp toasted bread in one irresistible bite. Strawberry bruschetta is a fresh twist on a classic appetizer, blending bright fruit flavors with savory elements for a dish that feels both elegant and effortless. Whether you are hosting a brunch, planning a summer gathering, or simply craving something light and flavorful, this recipe delivers a perfect balance of texture and taste.

    Key Takeaways

    • Strawberry bruschetta combines sweet, savory, and tangy flavors in one bite
    • Perfect as an appetizer, snack, or light summer meal
    • Quick to prepare with simple, fresh ingredients
    • Highly customizable with herbs, cheeses, and toppings
    • Ideal for entertaining or casual gatherings

    What Makes Strawberry Bruschetta So Special

    Unlike traditional tomato-based bruschetta, this version uses ripe strawberries as the star ingredient. Their natural sweetness pairs beautifully with creamy spreads like ricotta or goat cheese, while fresh herbs add a subtle aromatic finish. The contrast between the crunchy toasted bread and the soft topping creates a satisfying bite every time.

    Important: The key to exceptional strawberry bruschetta lies in using high-quality, ripe strawberries. Their flavor defines the entire dish, so freshness matters more than anything else.

    Ingredients That Bring It All Together

    This recipe thrives on simplicity. Each ingredient plays a clear role, contributing to the overall harmony of flavors.

    Core Ingredients

    • Fresh strawberries, diced
    • Crusty bread such as baguette slices
    • Ricotta or goat cheese
    • Fresh basil, thinly sliced
    • Honey or balsamic glaze
    • Olive oil

    Optional Enhancements

    • A sprinkle of parmesan for added depth
    • A pinch of black pepper for contrast
    • Lemon zest for brightness

    Step-by-Step Preparation

    Making strawberry bruschetta is surprisingly easy and quick, making it ideal for last-minute entertaining.

    1. Prepare the Bread

    Slice your baguette and brush lightly with olive oil. Toast until golden and crisp. This provides the perfect crunchy base.

    2. Mix the Strawberry Topping

    Combine diced strawberries with a drizzle of honey or balsamic glaze. Add chopped basil and gently mix to preserve the fruit’s texture.

    3. Assemble the Bruschetta

    Spread a layer of ricotta or goat cheese on each toasted slice. Spoon the strawberry mixture on top and finish with herbs or cheese.

    Pro Tip: Serve immediately after assembling to keep the bread crisp and prevent sogginess.

    Expert Insight

    Balancing sweetness and acidity is essential. If your strawberries are very sweet, add a touch of balsamic or citrus to keep the flavor profile vibrant and not overly sugary.

    Flavor Variations to Try

    This dish is incredibly versatile, allowing you to experiment with different combinations depending on your preferences.

    Savory Twist

    Add prosciutto or a drizzle of olive oil with cracked pepper for a more savory direction.

    Dessert Style

    Swap basil for mint and add a touch of whipped cream cheese or mascarpone for a sweeter finish.

    Spicy Kick

    Include a hint of chili flakes or a dash of hot honey to create a bold contrast.

    When to Serve Strawberry Bruschetta

    This dish shines in a variety of settings. Its fresh and vibrant appearance makes it perfect for occasions where presentation matters as much as flavor.

    • Summer parties and picnics
    • Brunch spreads
    • Light appetizers before dinner
    • Casual gatherings with friends

    Important: Presentation enhances appeal. Arrange the bruschetta neatly on a platter and garnish with fresh herbs for a visually stunning dish.

    Health Benefits of Strawberries

    Beyond taste, strawberries offer nutritional value. They are rich in vitamin C, antioxidants, and fiber, making them a smart addition to your diet. Pairing them with wholesome ingredients like whole grain bread and fresh herbs creates a snack that feels indulgent yet balanced.

    Why They Work in Savory Dishes

    The natural acidity of strawberries helps cut through creamy textures, preventing dishes from feeling too heavy. This makes them ideal for recipes that combine rich and light elements.

    At a Glance

    • Prep time is under 20 minutes
    • Requires minimal cooking
    • Easy to customize
    • Perfect for entertaining

    Tips for Perfect Results Every Time

    • Use sturdy bread that can hold toppings without becoming soggy
    • Dice strawberries evenly for better texture
    • Do not overload each slice to maintain balance
    • Serve fresh for the best flavor and crunch

    Conclusion

    Strawberry bruschetta is proof that simple ingredients can create something truly memorable. Its combination of fresh fruit, creamy textures, and crisp bread makes it a standout dish for any occasion. Easy to prepare and endlessly adaptable, it is a recipe worth returning to again and again. Whether you are entertaining guests or treating yourself, this delightful appetizer brings a burst of flavor that feels both refreshing and satisfying.

    Tags

    strawberry recipes bruschetta easy appetizers summer recipes fresh strawberries party food

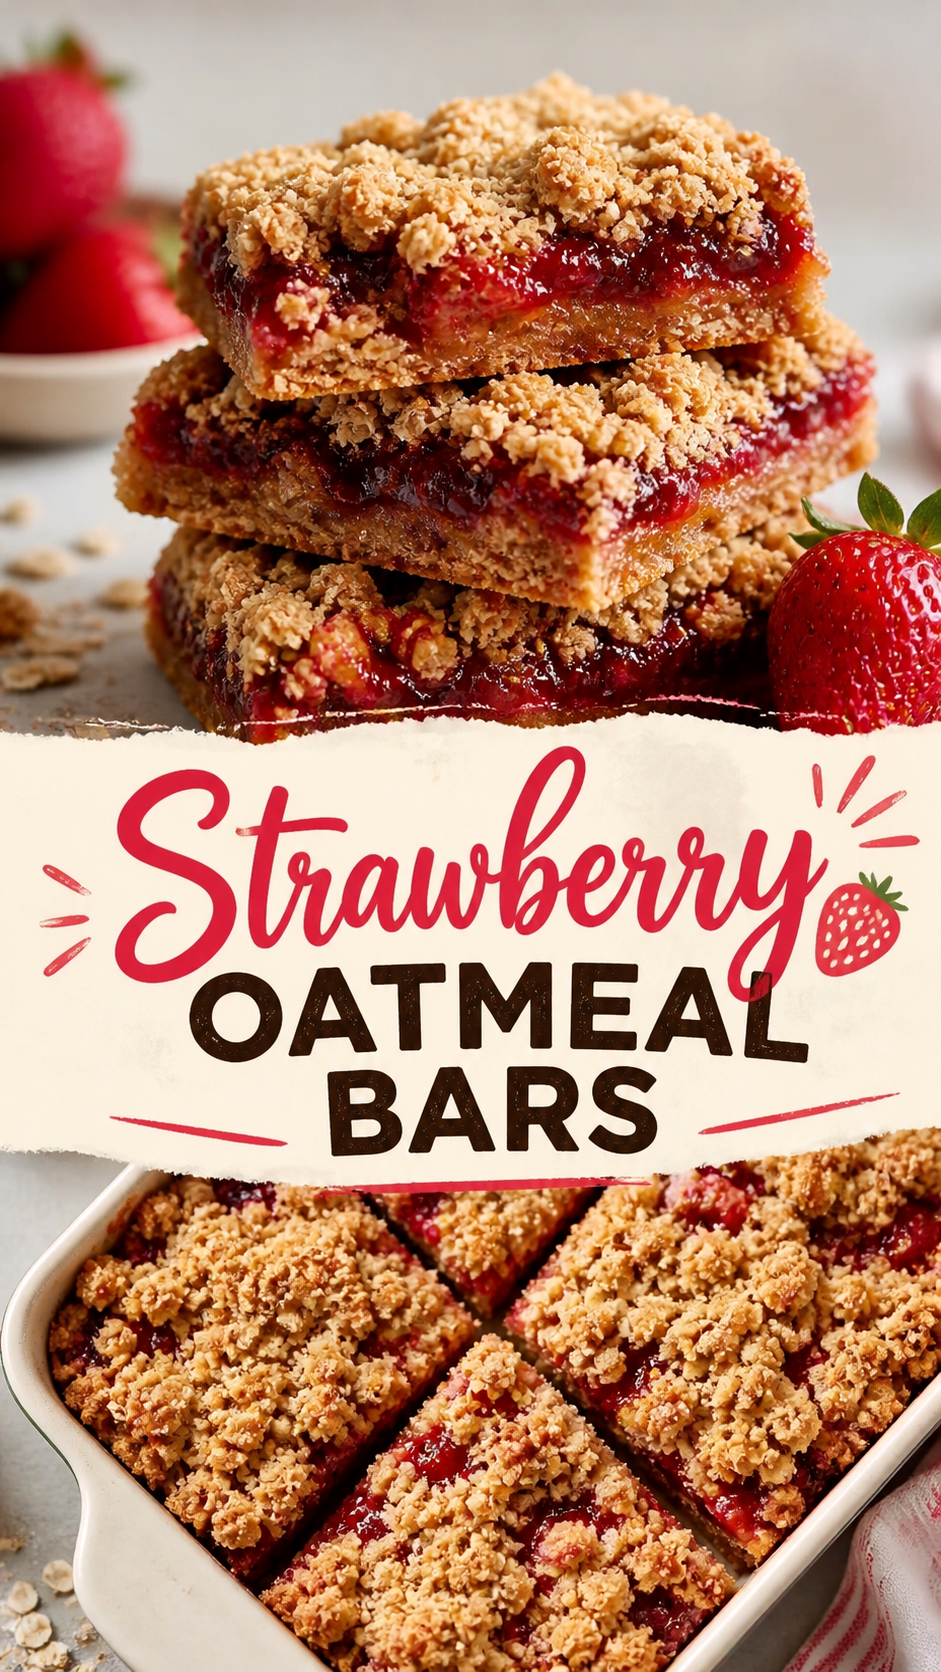
  • Strawberry Oatmeal Bars Recipe Easy Homemade Dessert Crumble Bars

    Strawberry Oatmeal Bars Recipe Easy Homemade Dessert Crumble Bars

    There’s something undeniably comforting about a dessert that blends buttery texture, fruity sweetness, and a hint of wholesome goodness. Strawberry oatmeal bars are the perfect example of that balance. With a golden crumb topping, a soft oat-based crust, and a vibrant layer of strawberry filling, these bars offer a delightful treat that feels both indulgent and homemade. Whether you are baking for a weekend gathering or simply craving a cozy dessert, this recipe delivers flavor and simplicity in every bite.

    Key Takeaways

    • Strawberry oatmeal bars combine fruity freshness with a crunchy crumble topping
    • They are easy to prepare using simple pantry ingredients
    • Perfect for dessert, snacks, or even breakfast treats
    • Customizable with different fruits or add-ins
    • Great for meal prep and storing for later enjoyment

    What Makes Strawberry Oatmeal Bars So Irresistible

    The appeal of strawberry oatmeal bars lies in their layered texture and natural sweetness. The base is typically made from oats, flour, butter, and sugar, creating a rich yet slightly chewy foundation. The middle layer bursts with strawberry flavor, often made from fresh or preserved fruit, while the top adds a crisp crumble that ties everything together.

    Important: The contrast between the crumbly oat topping and the soft strawberry filling is what elevates these bars from simple baked goods to a memorable dessert experience.

    Ingredients That Bring It All Together

    One of the best things about these bars is how approachable the ingredient list is. You likely already have most of what you need in your kitchen.

    Core Ingredients

    • Rolled oats for texture and heartiness
    • All-purpose flour for structure
    • Butter for richness and flavor
    • Brown sugar or granulated sugar for sweetness
    • Strawberry jam or fresh strawberries for the filling
    • A pinch of salt to balance flavors

    Optional Additions

    • Vanilla extract for added depth
    • Lemon zest to brighten the strawberry flavor
    • Nuts like almonds or walnuts for crunch

    Step-by-Step Preparation Guide

    Creating strawberry oatmeal bars is straightforward and beginner-friendly. The process involves preparing a crumb mixture, layering the filling, and baking until golden.

    1. Prepare the Crumble Mixture

    Mix oats, flour, sugar, and melted butter until a crumbly texture forms. This mixture will serve as both the base and topping.

    2. Form the Base Layer

    Press about two-thirds of the mixture firmly into a lined baking pan. This creates a sturdy base that holds the filling.

    3. Add the Strawberry Filling

    Spread the strawberry mixture evenly across the base. Ensure it reaches all edges for consistent flavor in every bite.

    4. Add the Crumble Topping

    Sprinkle the remaining oat mixture over the top. This will bake into a golden, slightly crisp layer.

    5. Bake and Cool

    Bake until the top is lightly browned and the filling is bubbling. Allow the bars to cool completely before slicing to maintain clean edges.

    Expert Insight

    Letting the bars cool fully is essential. Cutting too early can cause the layers to fall apart. Patience ensures perfect squares with defined layers.

    Why These Bars Are Perfect for Any Occasion

    Strawberry oatmeal bars are incredibly versatile. They can be served as a dessert, packed as a snack, or even enjoyed as a sweet breakfast option. Their portability makes them ideal for picnics, lunchboxes, or sharing at gatherings.

    Pro Tip: For a bakery-style finish, lightly dust the top with powdered sugar or drizzle a simple glaze for added visual appeal and sweetness.

    Creative Variations to Try

    While strawberry is a classic choice, these bars are highly adaptable. Switching up the filling or adding new elements can create entirely different flavor profiles.

    Fruit Variations

    • Blueberry or raspberry for a tart twist
    • Peach or apricot for a summery flavor
    • Mixed berries for a more complex taste

    Texture Enhancements

    • Add coconut flakes for a tropical note
    • Incorporate chocolate chips for richness
    • Use chopped nuts for extra crunch

    Storage and Shelf Life

    These bars store well, making them a great make-ahead option. Keep them in an airtight container at room temperature for up to two days or refrigerate for up to a week. They can also be frozen for longer storage.

    Important: For best texture, allow refrigerated bars to come to room temperature before serving. This softens the filling and enhances flavor.

    Tips for Perfect Results Every Time

    • Use high-quality strawberry filling for richer flavor
    • Do not overpack the crumble topping to maintain texture
    • Line your pan with parchment paper for easy removal
    • Adjust sweetness based on your preference and fruit choice

    At a Glance

    • Prep time is quick and beginner-friendly
    • Combines fruity, buttery, and crunchy textures
    • Easy to customize with different ingredients
    • Perfect for sharing or storing

    Conclusion

    Strawberry oatmeal bars are more than just a dessert. They are a comforting, versatile treat that brings together simple ingredients in a delicious way. With their balanced flavors and satisfying texture, they appeal to both casual bakers and seasoned dessert lovers. Whether you stick to the classic version or experiment with creative variations, these bars are sure to become a staple in your kitchen. Bake a batch, share with loved ones, and enjoy every crumb-filled bite.

    Tags

    Strawberry Recipes Oatmeal Bars Easy Desserts Homemade Baking Fruit Bars Snack Ideas Crumble Bars

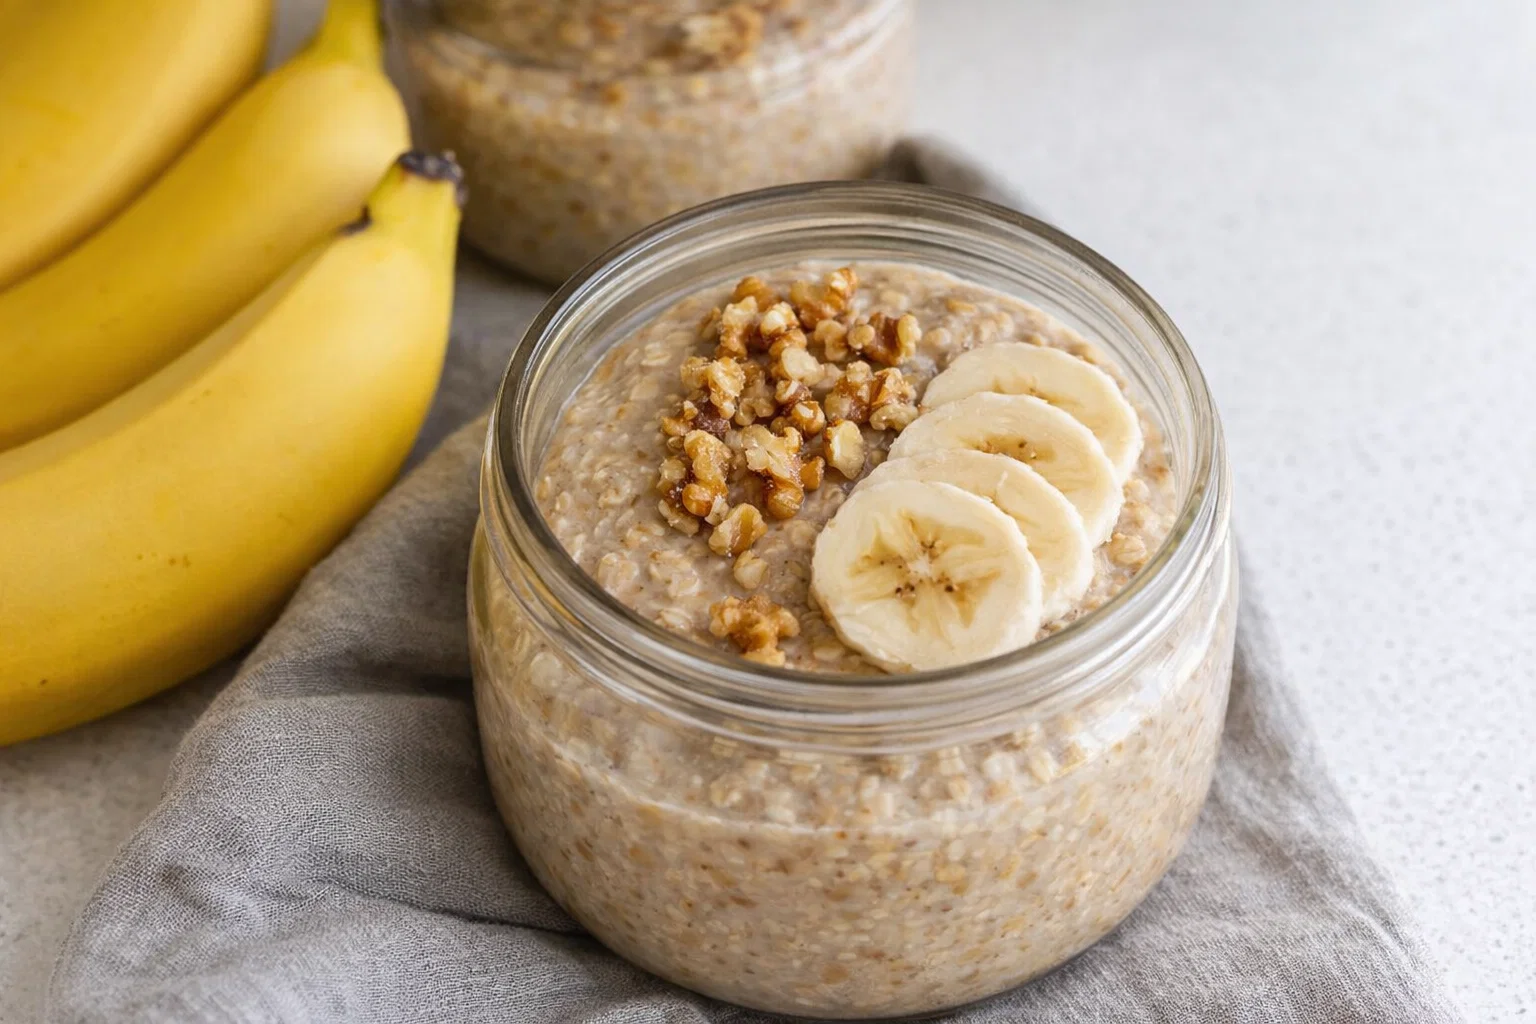
  • Easy Brown Sugar Overnight Oats Breakfast

    Easy Brown Sugar Overnight Oats Breakfast

    Easy Brown Sugar Overnight Oats Breakfast: A Tropical Delight

    Introduction to Easy Brown Sugar Overnight Oats Breakfast

    If you’re searching for a simple, nutritious breakfast that is as delicious as it is easy to prepare, look no further than this Easy Brown Sugar Overnight Oats Breakfast. Overnight oats have taken the breakfast scene by storm, and for good reason. They require minimal effort, are incredibly versatile, and can fit into a variety of dietary lifestyles, making them perfect for busy parents, students, working professionals, and health-conscious individuals alike. With just a few ingredients and a little bit of time in the fridge, you can wake up to a delightful, creamy bowl of oats that will keep you satisfied all morning long.

    This recipe features brown sugar, which adds a rich sweetness to the oats, perfectly complemented by a touch of vanilla and a sprinkle of cinnamon for an extra depth of flavor. Whether you’re vegan, gluten-free, or simply focused on incorporating more nutritious options into your diet, this easy overnight oats recipe is adaptable to meet those requirements. Healthy, hearty, and undeniably delicious, it’s a perfect blend of convenience and goodness. So grab your favorite jar, mix your ingredients, and let them soak overnight for a breakfast you’ll look forward to day after day!


    Benefits and Advantages of Easy Brown Sugar Overnight Oats Breakfast

    Choosing overnight oats for breakfast is not just a trendy choice; it’s a practical one with multiple benefits. One major advantage of this recipe is its simplicity. Preparing overnight oats takes only a matter of minutes, making it an excellent option for those hectic mornings. With this easy recipe, you can mix your ingredients in a jar the night before and let the fridge do the work. No cooking is required, which also means fewer dishes to clean afterward!

    From a health perspective, overnight oats are packed with essential nutrients. Rolled oats, the primary ingredient, are a powerhouse of whole grains, providing a significant source of dietary fiber that helps keep you feeling full longer. This makes them a smart option for anyone looking to manage their weight or simply make healthier food choices. Additionally, this breakfast is highly customizable, allowing you to tailor the ingredients to suit your dietary needs. Want to go vegan? Substitute the milk with your favorite plant-based alternative. Gluten-free? Just ensure your oats are certified gluten-free. This flexibility makes overnight oats appealing to a broad audience, ensuring there’s something for everyone.

    Moreover, overnight oats can contribute to better digestion, thanks to the soluble fiber they contain. They have a low glycemic index, which helps regulate blood sugar levels, making them a suitable option for diet-conscious individuals, including those with diabetes. Ultimately, the Easy Brown Sugar Overnight Oats Breakfast combines convenience with nutrition and versatility, making it the perfect meal to kickstart your day!


    Ingredients Overview

    Essential Ingredients for Easy Brown Sugar Overnight Oats Breakfast

    To make your Easy Brown Sugar Overnight Oats, you’ll need the following essential ingredients:

    • 1/2 cup rolled oats: Provide the base of your overnight oats; they are whole grains packed with fiber and nutrients.
    • 1 cup milk of choice (dairy, almond, oat, or soy): Moisture for the oats; choose plant-based milk for vegan options.
    • 2 tablespoons brown sugar: Sweetens the mixture; you can adjust to taste or replace with stevia or maple syrup.
    • 1/2 teaspoon vanilla extract: Adds depth of flavor.
    • 1/2 teaspoon ground cinnamon: Offers a warm spice that complements the brown sugar.
    • 1/4 cup yogurt (optional): Adds creaminess and additional protein; choose plant-based yogurt for a vegan option.
    • Fresh fruits or nuts for topping: Adds flavor, texture, and nutrients; options like bananas, berries, or almonds work beautifully.

    This combination of ingredients not only creates a delightful flavor profile but also ensures a balanced meal filled with essential nutrients, catering to various dietary needs.

    Dietary Substitutions to Customize Your Easy Brown Sugar Overnight Oats Breakfast

    To further make the Easy Brown Sugar Overnight Oats work for you, consider these substitutions:

    • Oats: If you have sensitivities, consider using gluten-free rolled oats or quick oats for a softer texture.
    • Milk: Replace dairy milk with almond milk, coconut milk, or cashew milk for a creamy, plant-based option that fits the vegan lifestyle. For lower calories, opt for unsweetened versions.
    • Brown Sugar: Swap brown sugar for honey, maple syrup, or coconut sugar for a healthier sweetener. Stevia or monk fruit sweetener can be used for a lower-calorie option.
    • Yogurt: Greek yogurt can be substituted for standard yogurt if you want an extra protein boost, while non-dairy yogurt can keep it vegan-friendly.
    • Toppings: Customize the toppings to your liking! Try adding chia seeds for added fiber, flaxseed for Omega-3s, or various fruits based on what you have on hand.

    By making these substitutions, you can ensure this delicious breakfast meets your personal dietary needs while still delivering on taste and nutrition.


    How to Prepare the Perfect Easy Brown Sugar Overnight Oats Breakfast: Step-by-Step Guide

    Creating your Easy Brown Sugar Overnight Oats Breakfast is a straightforward process that requires little effort while providing maximum satisfaction. Follow these steps to achieve a delicious and creamy bowl of overnight oats.

    1. Prepare the Base: In a medium-sized mixing bowl or a mason jar, combine 1/2 cup rolled oats with 1 cup of milk. If you’re using dairy-free milk, feel free to choose almond, coconut, or soy milk for added flavor.

    2. Add Sweetness: Stir in 2 tablespoons of brown sugar to sweeten your mixture. Adjust this according to your taste preference; if you like it sweeter, feel free to add an extra teaspoon.

    3. Incorporate Flavors: Mix in 1/2 teaspoon of vanilla extract for a lovely aromatic quality, along with 1/2 teaspoon of ground cinnamon to bring warmth to the dish.

    4. Creamy Addition: If you opt for yogurt, add 1/4 cup of yogurt into the mixture. This step is optional but adds a delightful creaminess and protein boost.

    5. Combine Well: Stir all the ingredients until they are well combined. Make sure the oats are evenly coated with the milk and sweetener to enhance their flavor.

    6. Refrigerate Overnight: Transfer the mixture into the fridge to chill overnight, or for at least 4-5 hours. This allows the oats to absorb the liquid and become creamy and ready to eat.

    7. Prepare for Serving: In the morning, remove your oats from the fridge and give them a good stir. If the mixture is too thick, add a splash of milk to achieve your desired consistency.

    8. Add Toppings: Finally, top your oats with your choice of fresh fruits, nuts, or seeds. Consider sliced bananas, berries, or chopped nuts for flavor and crunch.

    9. Enjoy: Your Easy Brown Sugar Overnight Oats Breakfast is now ready to enjoy! This dish can be eaten cold right out of the fridge, but feel free to microwave it if you prefer it warm.

    10. Store Leftovers: If you have any leftovers, store them in an airtight container in the fridge for up to 3 days.

    By following these steps, you’ll create a mouth-watering, nutritious breakfast that can be enjoyed any day of the week, accommodating various tastes and dietary needs.


    Mastering Easy Brown Sugar Overnight Oats Breakfast: Advanced Tips and Variations

    Once you’ve mastered the basics of the Easy Brown Sugar Overnight Oats Breakfast, you may want to explore some additional tips and variations to keep things exciting.

    • Experiment with Textures: For a creamy and more filling option, consider mixing in protein powder or nut butter, such as almond or peanut butter, before refrigerating. This will not only enhance flavors but also provide extra protein to fuel your day.

    • Try Different Sweeteners: Instead of using brown sugar, try incorporating natural sweeteners like mashed banana or applesauce for a healthier twist. These options add sweetness and moisture while also giving you additional nutrients.

    • Add Superfoods: For a nutritional boost, consider mixing in superfoods like chia seeds, flaxseeds, or hemp seeds. They will add texture and are excellent sources of healthy fats and proteins.

    • Seasonal Variations: Seasonal fruits like pumpkin puree (in the fall) or fresh berries (in summer) can make your overnight oats feel fresh and exciting. Adjust your spices accordingly—like adding pumpkin spice for autumn.

    • Savory Option: If you prefer a savory take, skip the sweeteners, and mix in diced vegetables like spinach or cherry tomatoes, topped with an avocado slice or a soft-boiled egg for a filling and nutritious breakfast.

    • Batch Cooking: To save time, consider preparing multiple servings at once. Portion them into jars, and you’ll have breakfast ready for several days.

    By trying out these tips and variations, you can unravel the full potential of overnight oats and keep your breakfast routine dynamic and satisfying.


    How to Store Easy Brown Sugar Overnight Oats Breakfast: Best Practices

    Proper storage of your Easy Brown Sugar Overnight Oats is key to ensuring freshness and flavor. Here are the best practices for refrigerating, freezing, and reheating your oats:

    • Refrigeration: Store your prepared overnight oats in an airtight container in the refrigerator. This method not only keeps them fresh but also prevents any contamination from other foods. Oats can typically last up to 3-5 days in the fridge, making it a convenient option for meal prep.

    • Freezing: If you anticipate not eating the oats within a few days, consider freezing portions. Use freezer-safe containers or jars, leaving some space at the top to allow for expansion. When you’re ready to enjoy, simply thaw overnight in the fridge or set out at room temperature for a few hours before consuming.

    • Reheating: If you prefer warm oats, you can microwave them for about 30-60 seconds. Stir well before eating. If the oats have become too thick after refrigeration, add a splash of your milk of choice to reach desired consistency, and mix before serving.

    Following these storage practices ensures that your Easy Brown Sugar Overnight Oats maintain their taste, texture, and nutrition, allowing you to enjoy them anytime you like!


    Nutritional Value of Easy Brown Sugar Overnight Oats Breakfast

    Understanding the nutritional value of your Easy Brown Sugar Overnight Oats is essential for maintaining a balanced diet. Here’s a breakdown of approximate nutrition values per serving, based on standard ingredients:

    • Calories: Approximately 350 kcal
    • Total Fat: 8g
    • Saturated Fat: 2g
    • Cholesterol: 5mg (if using dairy milk)
    • Sodium: 150mg
    • Total Carbohydrates: 56g
    • Dietary Fiber: 7g
    • Sugars: 12g (includes natural and added sugars)
    • Protein: 12g (can vary based on milk and yogurt types)

    These nutritional values can vary based on substitutions and portion sizes, but this base profile gives a good idea of the health benefits. The oats provide high fiber, which helps in digestion and keeps you fuller longer, while the addition of yogurt or milk adds protein and essential nutrients for an all-around satisfying meal. Customize your recipe by choosing low-calorie sweeteners and non-fat dairy alternatives for a healthier option!


    FAQs: Frequently Asked Questions About Easy Brown Sugar Overnight Oats Breakfast

    1. Can I prepare overnight oats in advance?

    Absolutely! Overnight oats are perfect for meal prep. You can prepare several jars at once and keep them in the fridge for up to 3-5 days.

    2. Can I use instant oats instead of rolled oats?

    Yes, you can use instant oats, but keep in mind that the texture will be different. They may become mushy, so adjust the liquids accordingly.

    3. What can I use instead of brown sugar?

    You can substitute brown sugar with honey, maple syrup, agave syrup, or any natural sweetener like stevia or erythritol.

    4. Are overnight oats gluten-free?

    They can be gluten-free, provided you use certified gluten-free oats, as regular oats may be processed in facilities that handle gluten.

    5. How can I make my overnight oats more filling?

    Adding nuts, seeds, or nut butters can increase the fiber and protein content, making the meal more satisfying and filling.

    6. Can I eat overnight oats warm?

    Yes! While they are commonly eaten cold, you can microwave them for a quick warm breakfast. Just be sure to add a little extra milk if needed.

    7. Can I add different fruits and toppings?

    Absolutely! Feel free to get creative with fruits, nuts, seeds, or nut butters. It’s the perfect recipe to experiment and customize based on your preferences.

    8. How long do overnight oats last in the fridge?

    Properly stored, they can last up to 3-5 days in the refrigerator, making them an ideal option for meal prep.

    By providing these answers, you can address common concerns from readers and guide them toward making their own Easy Brown Sugar Overnight Oats Breakfast with confidence, reinforcing the recipe’s appeal.


    By engaging with the topic intricately and holistically, this guide offers an in-depth look at creating and enjoying Easy Brown Sugar Overnight Oats for breakfast, ensuring ease of preparation while maximizing health benefits. Try it today to discover a delightful breakfast that seamlessly integrates into your lifestyle!

  • Tasty Greek Yogurt Muffins Easy Bake

    Tasty Greek Yogurt Muffins Easy Bake

    Tasty Greek Yogurt Muffins Easy Bake: A Tropical Delight

    Introduction to Tasty Greek Yogurt Muffins Easy Bake

    When it comes to quick and delicious breakfast ideas that cater to a variety of dietary needs, Tasty Greek Yogurt Muffins are a phenomenal choice. These muffins are not only simple to make but also packed with nutrients, perfect for busy mornings when you need something wholesome to jumpstart your day. Whether you’re a busy parent, a dedicated student, or someone who enjoys a healthy lifestyle, these muffins promise to satisfy your cravings while providing essential health benefits.

    The primary ingredient—Greek yogurt—adds protein to these muffins, making them satiating and ideal for those watching their calorie intake. They’re also incredibly versatile, allowing for substitutions to accommodate vegan, gluten-free, or low-sugar diets. For instance, using plant-based yogurt in place of Greek yogurt can easily make this recipe suitable for vegans. Additionally, replacing all-purpose flour with almond or oat flour serves to cater to gluten-free enthusiasts.

    These Tasty Greek Yogurt Muffins are perfect for various occasions, from holiday gatherings to quick snacks during the day. They can be customized with your favorite mix-ins, allowing you to create your unique flavor profile. In summary, this recipe is an easy way to enjoy delightful breakfast ideas that you can feel good about.

    Benefits and Advantages of Tasty Greek Yogurt Muffins Easy Bake

    Opting for the Tasty Greek Yogurt Muffins Easy Bake is a winning choice, packed with not just flavor but also significant health benefits. Here’s why this recipe stands out:

    1. Ease of Preparation: These muffins can be prepared in under 30 minutes, making them an invaluable breakfast solution for those with busy schedules. The straightforward steps (mix, bake, and enjoy) mean even novice bakers can achieve success with minimal effort.

    2. Health Benefits: Greek yogurt is renowned for its high protein content, which can help keep you full longer and may assist in muscle repair if you’re active. Additionally, Greek yogurt has probiotic properties that can improve gut health, contributing to your overall well-being.

    3. Caloric Control: Compared to traditional muffins high in sugar and fat, these muffins are made with wholesome ingredients that can be adjusted based on dietary preferences. You can use natural sweeteners like honey or maple syrup, keeping the calorie count in check while still enhancing flavor.

    4. Versatile for Various Diets: This recipe can be adapted for gluten-free and vegan options, making it inclusive for everyone, regardless of dietary restrictions. For gluten-free fans, substituting with gluten-free flour works wonders, and replacing eggs with a flaxseed mixture allows for a vegan alternative.

    5. Ideal for Meal Prep: These muffins can easily be batch-cooked ahead of time and stored for a busy week, allowing you to grab a healthy breakfast on the run. The freezing option ensures that you can always have a nutritious option available without the hassle of daily preparation.

    In conclusion, Tasty Greek Yogurt Muffins offer the best of both worlds: easy preparation with numerous health advantages. Whether for breakfast, a snack, or anything in-between, these muffins check all the boxes for delicious and nutritious eating.

    Ingredients Overview

    Essential Ingredients for Tasty Greek Yogurt Muffins Easy Bake

    Below is a detailed list of ingredients you will need to create these delightful muffins, along with their purposes and benefits:

    • 1 cup Greek yogurt (or plant-based yogurt for vegan option): This is the base ingredient that provides protein and moisture, keeping the muffins tender.
    • 1 large egg: Functions as a binder and adds richness. (Use 1 tablespoon of flaxseed meal mixed with 3 tablespoons of water as a vegan substitute.)
    • 1/2 cup honey or maple syrup: Natural sweeteners that enhance flavor without overwhelming the muffins with sugar.
    • 1/4 cup coconut oil or unsweetened applesauce: Provides healthy fats. For a lighter option, applesauce can be used to maintain moisture without added calories.
    • 1 cup all-purpose flour (or gluten-free flour for a gluten-free option): The foundation of the muffin. All-purpose flour provides structure while gluten-free flour allows for inclusivity.
    • 1 cup oatmeal (for added texture or can be omitted): Whole-grain oats increase fiber content and add a delightful chew.
    • 1 teaspoon baking powder: Helps the muffins rise and achieve a fluffy texture.
    • 1/2 teaspoon baking soda: Works with the yogurt’s acidity to provide further leavening.
    • 1/2 teaspoon salt: Enhances overall flavor.
    • 1 teaspoon vanilla extract: Adds depth and complexity to the flavor.
    • 1/2 cup mix-ins (e.g., fruit, nuts, chocolate chips, or seeds): Customize your muffins! Opt for berries for a fresh twist, nuts for crunch, or dark chocolate chips for indulgence.

    Dietary Substitutions to Customize Your Tasty Greek Yogurt Muffins Easy Bake

    Understanding that everyone has different dietary needs is essential, and making substitutions can ensure that these muffins fit seamlessly into various lifestyles:

    • Gluten-Free: Use gluten-free flour blends that measure 1:1 with all-purpose flour. Almond flour also offers a nutritious alternative. Always check your baking powder for gluten.
    • Vegan: Replace Greek yogurt with dairy-free alternative yogurt, use a flaxseed meal mixture as an egg substitute, and choose minimal-calorie sweeteners to make the muffins suitable for vegan diets.
    • Low-Calorie Options: Substituting coconut oil for unsweetened applesauce can drastically cut calories, while using stevia or erythritol instead of honey reduces sugar content significantly.
    • Low-Carb: Instead of flour, try almond flour or coconut flour, and use erythritol or monk fruit sweetener to keep the carb count low while achieving similar texture.

    These dietary substitutions encourage inclusivity for all home cooks, helping to make the Tasty Greek Yogurt Muffins accessible to everybody, regardless of their nutritional requirements or preferences.

    How to Prepare the Perfect Tasty Greek Yogurt Muffins Easy Bake: Step-by-Step Guide

    Creating Tasty Greek Yogurt Muffins is a straightforward process. Follow these step-by-step instructions to achieve muffin perfection:

    1. Preheat the Oven: Preheat your oven to 350°F (175°C) and line a muffin tin with paper liners, or grease it lightly with cooking spray to prevent sticking.

    2. Mix Wet Ingredients: In a large mixing bowl, combine 1 cup of Greek yogurt, 1 large egg, 1/2 cup of honey/maple syrup, and 1/4 cup of melted coconut oil. Whisk until smooth and all ingredients are fully incorporated.

    3. Incorporate Dry Ingredients: In a separate bowl, mix together 1 cup of all-purpose flour, 1 cup of oatmeal, 1 teaspoon of baking powder, 1/2 teaspoon of baking soda, and 1/2 teaspoon of salt. Make sure these dry ingredients are mixed well to avoid clumping.

    4. Combine the Mixtures: Gradually add the dry mixture to the wet ingredients, whisking gently until just combined. Avoid over-mixing; a few lumps are okay as it keeps the muffins tender.

    5. Add Flavor and Texture: Gently fold in your choice of mix-ins. If you’re using fresh fruits like blueberries or chunks of bananas, ensure they are evenly distributed throughout the batter.

    6. Fill the Muffin Tins: Use a spatula or ice cream scoop to fill each muffin cup about 2/3 full with batter. This allows room for them to rise without overflowing.

    7. Bake to Perfection: Place the muffin tin in the oven and bake for 20-25 minutes or until a toothpick inserted into the center comes out clean. Keep an eye on them to avoid overbaking.

    8. Cool: Once done, remove from the oven and let the muffins cool in the tin for about 5-10 minutes. Then, transfer them to a wire rack to cool completely.

    9. Enjoy: These muffins can be enjoyed warm or at room temperature. They make for wonderful breakfast ideas, snacks, or even as a light dessert!

    10. Adapt for Needs: Remember, this recipe allows for quick adjustments based on dietary preferences. From reducing sweetness for diabete-friendly versions to introducing protein powder for fitness enthusiasts, the possibilities are endless!

    By following these steps, you’ll create a batch of Tasty Greek Yogurt Muffins that are not only delicious but also tailored to accommodate various dietary needs. It’s perfect for anyone looking for quick breakfast ideas or healthy snacks.

    Mastering Tasty Greek Yogurt Muffins Easy Bake: Advanced Tips and Variations

    Once you have mastered the basic recipe for Tasty Greek Yogurt Muffins Easy Bake, you might want to explore some advanced tips and variations to add diversity to your baking repertoire:

    1. Experiment with Flavor Combinations: Try different combinations of spices and extracts to create unique flavors. Cinnamon and nutmeg make a warm autumn muffin, while adding lemon zest gives a refreshing summer twist.

    2. Try Different Mix-Ins: Swap out the mix-ins to suit your preference. Use shredded coconut for a tropical muffin, walnuts for a nice crunch, or dark chocolate chips for a delightful treat.

    3. Mini Muffins: For a fun brunch idea, use a mini muffin tin to create bite-sized versions that are perfect for gatherings. Adjust the baking time to about 10-12 minutes.

    4. Double the Batch: If you find yourself enjoying these muffins, consider doubling the recipe for quick meal prep. They freeze well, so you’ll always have a delicious snack on hand.

    5. Health Enhancements: For added nutrition, consider adding chia seeds or flaxseeds to the batter. They provide healthy omega-3 fatty acids and additional fiber.

    By experimenting and adjusting this recipe as needed, you’ll create Tasty Greek Yogurt Muffins that can cater to every occasion and palates. Offering variety in your breakfast ideas will keep things exciting and flavorful.

    How to Store Tasty Greek Yogurt Muffins Easy Bake: Best Practices

    Proper storage of your Tasty Greek Yogurt Muffins ensures that they remain fresh and delicious for days to come. Here are the best practices to keep in mind:

    1. Room Temperature Storage: If you plan to enjoy the muffins within a few days, store them in an airtight container at room temperature. They should stay fresh for about 2-3 days.

    2. Refrigeration: For added longevity, you can refrigerate the muffins. They will typically last up to a week if stored properly. Make sure to wrap them tightly in plastic wrap or store them in an airtight container to prevent them from drying out.

    3. Freezing: If you want to save some muffins for the long term, freezing is a fantastic option. Place the cooled muffins in a freezer-safe bag or container, ensuring to remove excess air. They can last up to 3 months in the freezer.

    4. Reheating: To enjoy frozen muffins, let them thaw in the refrigerator overnight, or microwave them for 20-30 seconds for a quick treat. If you prefer, you can warm them in the oven at 350°F (175°C) for about 10 minutes.

    With these storage techniques, your Tasty Greek Yogurt Muffins will stay delectable and perfect for anytime snacking, breakfast, or whichever occasion demands a healthy and flavorful treat.

    Nutritional Value of Tasty Greek Yogurt Muffins Easy Bake

    Understanding the nutritional profile of Tasty Greek Yogurt Muffins is essential for making informed choices about your diet. Here’s a breakdown of what to expect per muffin based on standard ingredients:

    • Calories: Approximately 150-180 kcal
    • Protein: 4-6 grams (depends largely on whether Greek yogurt or a plant-based alternative is used)
    • Carbohydrates: 25-30 grams
    • Fat: 5-7 grams (if using coconut oil; lower with applesauce)
    • Fiber: 2-3 grams (to be increased with added oats)
    • Sugar: 5-10 grams (varies based on sweetener used)

    Health Aspects:
    Probiotics Benefits: Greek yogurt contributes beneficial probiotics that support gut health.
    High in Protein: Supports sustained energy levels, particularly useful for active individuals.
    Low in Saturated Fat: Using healthier fats ensures that these muffins are heart-friendly.

    Each muffin is a balance of complex carbohydrates from oats and flour, healthy fats, and protein, making them an excellent choice for breakfast or snacks. By adjusting the recipe according to dietary goals—such as reducing sugars or including more fiber-rich elements—you can further enhance the nutritional value.

    FAQs: Frequently Asked Questions About Tasty Greek Yogurt Muffins Easy Bake

    Q1: Can I make these muffins gluten-free?
    A1: Absolutely! You can substitute all-purpose flour with a gluten-free flour blend or almond flour for a delicious gluten-free option. Ensure your baking powder is gluten-free as well.

    Q2: Is it possible to freeze these muffins?
    A2: Yes, Tasty Greek Yogurt Muffins freeze wonderfully! Just ensure they are cooled completely, then store them in a freezer-safe bag or container. They can last up to three months in the freezer.

    Q3: How can I make these muffins vegan?
    A3: To make the muffins vegan, replace Greek yogurt with dairy-free yogurt, use a flaxseed meal mixture for the egg, and choose a plant-based sweetener.

    Q4: Can I add chocolate chips or fruit to the recipe?
    A4: Yes! Feel free to mix in your favorite fruits, nuts, or chocolate chips into the batter. This customization enhances flavor and adds exciting textures.

    Q5: How long do these muffins last?
    A5: When stored at room temperature in an airtight container, they can last for about 2-3 days. If refrigerating, they will stay fresh for a week.

    By addressing these frequently asked questions, readers can easily adapt the Tasty Greek Yogurt Muffins to their lifestyle and preferences, ensuring a delightful baking experience!


    Armed with this comprehensive guide, you’re ready to dive into the wonderful world of Tasty Greek Yogurt Muffins. Enjoy the baking process and savor every delectable bite!

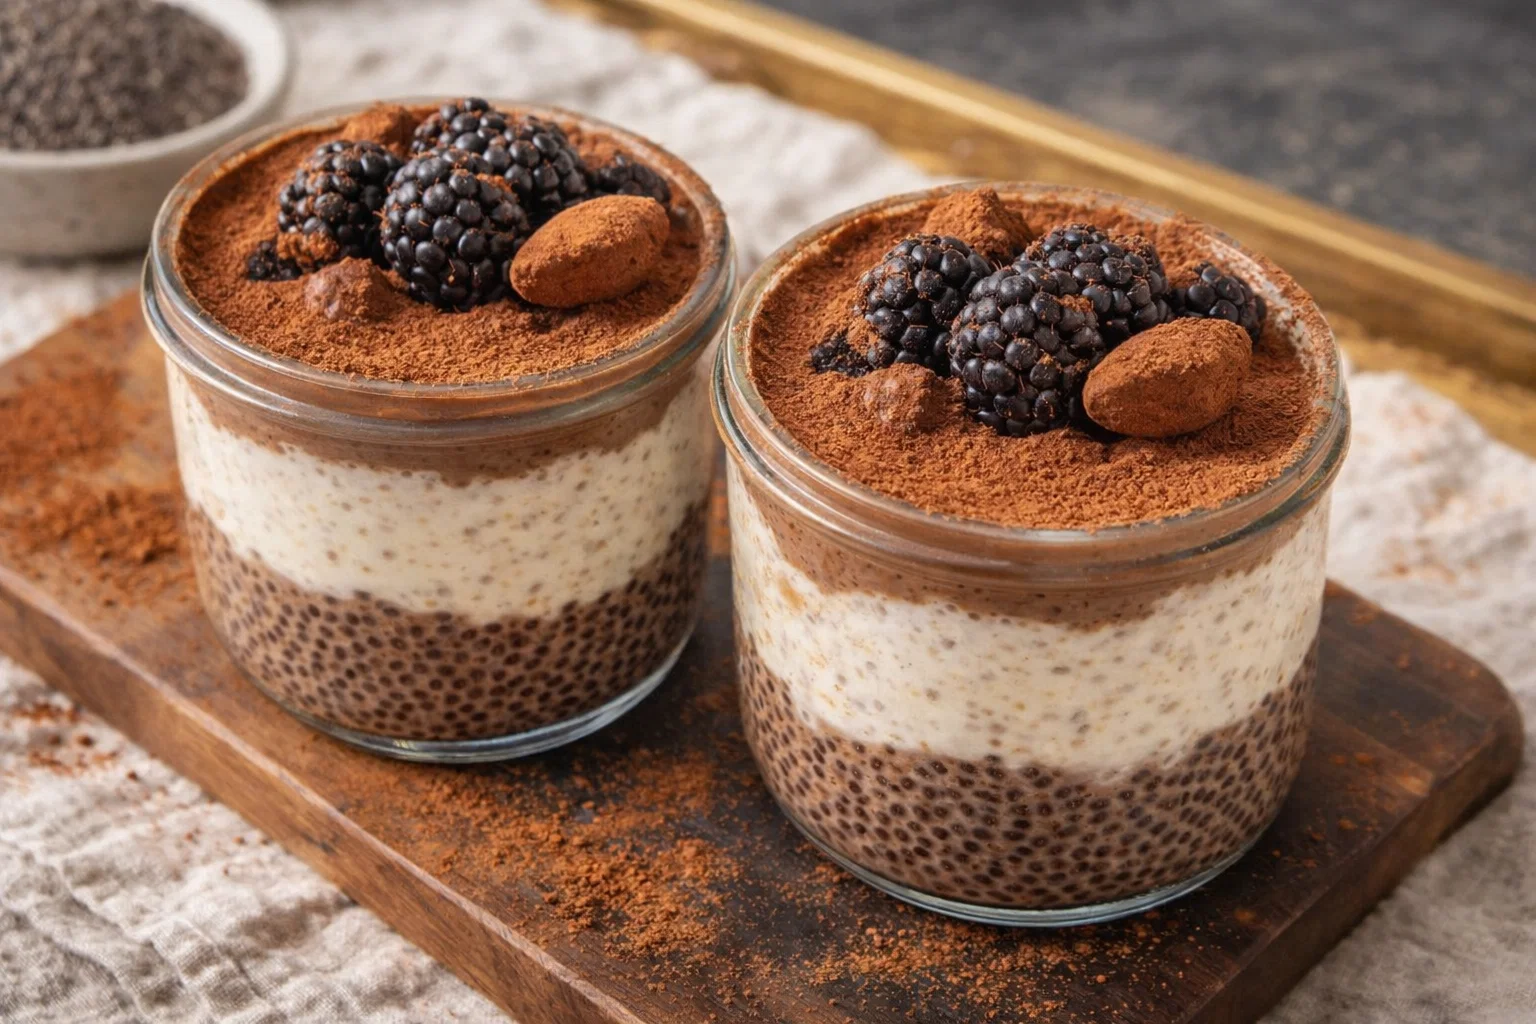
  • The Best Tiramisu Chia Pudding Breakfast

    The Best Tiramisu Chia Pudding Breakfast

    The Best Tiramisu Chia Pudding Breakfast: A Tropical Delight

    Introduction to The Best Tiramisu Chia Pudding Breakfast

    Are you in search of delightful breakfast ideas that balance health and indulgence? Look no further! The Best Tiramisu Chia Pudding Breakfast is a creative twist on the classic Italian dessert turned into a nutritious morning meal. This delicious recipe combines the rich flavors of tiramisu with the health benefits of chia seeds, making it an excellent choice for busy mornings.

    Chia seeds are renowned for their high fiber, protein, and omega-3 fatty acids, which help keep you satisfied throughout your busy day. Additionally, this chia pudding is naturally vegan and gluten-free, providing tasty options for diverse dietary needs.

    Preparation is remarkably easy and can be done in under ten minutes! Simply mix a few ingredients, let them sit overnight, and wake up to a luscious, creamy dessert-like breakfast. It’s perfect for everyone—busy parents can prep it in advance, students can grab it before heading to class, and health-conscious individuals can indulge without the guilt. This recipe encourages you to take a moment for yourself while enjoying a delicious, nutritious start to the day.

    Benefits and Advantages of The Best Tiramisu Chia Pudding Breakfast

    The Best Tiramisu Chia Pudding Breakfast stands out among typical breakfast options for several compelling reasons. First and foremost, its simplicity makes it an accessible choice for cooks of all skill levels. Following a few straightforward steps allows you to whip up a delectable, nutritious meal in no time. All you need are a handful of ingredients and a little patience as you let the chia seeds work their magic.

    From a health perspective, chia seeds are a powerhouse. Rich in fiber, protein, and healthy fats, these tiny seeds contribute to a feeling of fullness that can aid in weight management. Furthermore, they are high in antioxidants, which may help combat inflammation in the body. By incorporating ingredients like almond milk and cocoa, you can enhance the flavor without sacrificing your dietary goals.

    In today’s fast-paced world, people often overlook breakfast, choosing instead to skip it altogether. With this chia pudding, you can easily prep this satisfying meal ahead of time. Without the hassle of cooking, you’ll find it fits seamlessly into your busy lifestyle, allowing you to enjoy a treat that feels indulgent but nourishes your body.

    Moreover, the Best Tiramisu Chia Pudding Breakfast is easily customizable, catering to various dietary preferences—whether vegan, gluten-free, or vegetarian. It allows you to experiment with different flavors, making each serving uniquely yours. With myriad variations and additions, this recipe transforms a once simple meal into an exciting culinary adventure!

    Ingredients Overview

    Essential Ingredients for The Best Tiramisu Chia Pudding Breakfast

    Below is a detailed list of ingredients you’ll need to create this delectable Tiramisu Chia Pudding along with their measurements and benefits:

    1. Chia Seeds: ½ cup
      Chia seeds form the base of the pudding, providing essential nutrients, including fiber and omega-3 fatty acids.

    2. Almond Milk (or any plant-based milk): 2 cups
      This serves as the liquid component and keeps the recipe dairy-free. It absorbs easily into the chia seeds for a creamy texture.

    3. Maple Syrup or Agave Nectar: 3 tablespoons
      These natural sweeteners enhance the flavor without added refined sugars.

    4. Vanilla Extract: 1 teaspoon
      It adds a subtle sweetness that rounds out the flavors in the pudding.

    5. Cocoa Powder: ¼ cup
      This gives the pudding its delightful chocolatey taste, reminiscent of tiramisu, while being rich in antioxidants.

    6. Strong Coffee or Espresso: ½ cup
      A vital ingredient that mimics the traditional tiramisu flavor profile. Feel free to replace it with decaf if you prefer.

    7. Coconut Cream: ¼ cup
      For an added creamy texture and rich flavor, this ingredient can be blended in or used as a topping.

    8. Dark Chocolate Shavings (for garnish): Optional
      A delicious finishing touch that enhances both taste and presentation.

    This pudding is perfect for meal preppers and can easily be adjusted based on personal preferences.

    Dietary Substitutions to Customize Your The Best Tiramisu Chia Pudding Breakfast

    1. Milk Alternatives: While almond milk works beautifully, you can substitute it with any plant-based milk. Options include coconut milk for richness or oat milk for creaminess.

    2. Sweeteners: If you’re on a keto diet, consider using erythritol or monk fruit sweetener in place of maple syrup to keep the sugar content low.

    3. Cocoa Powder: For a chocolate-free version, you might try carob powder for a different flavor profile.

    4. Decaf Coffee: For those avoiding caffeine, feel free to use decaffeinated coffee or substitute espresso with a non-caffeinated chai latte for exciting flavor.

    5. Flavor Variations: Add flavors like strawberry extract or almond extract instead of vanilla. You could also mix in flavored instant coffee for a unique twist.

    6. For an extra protein boost: Stir in a scoop of your favorite protein powder to the mixture before refrigerating, yielding a breakfast that’s even more hearty.

    These substitutions ensure anyone can enjoy this delicious recipe while enhancing their nutritional benefits, making your breakfast ideas even more versatile.

    How to Prepare the Perfect The Best Tiramisu Chia Pudding Breakfast: Step-by-Step Guide

    Making The Best Tiramisu Chia Pudding Breakfast is a joyfully simple process! Follow these straightforward steps for a delicious and nutritious start to your day:

    1. Gather Your Ingredients: Begin by collecting all the ingredients listed above. This ensures a smoother preparation process.

    2. Prepare the Base: In a medium-sized mixing bowl, combine ½ cup of chia seeds with 2 cups of almond milk. Mix thoroughly to ensure no clumps form.

    3. Add Sweetness & Flavor: Pour in 3 tablespoons of maple syrup, and add 1 teaspoon of vanilla extract. Stir well until all ingredients are blended.

    4. Incorporate Cocoa and Coffee: Add ¼ cup of cocoa powder and ½ cup of strong coffee or espresso into your mixture. Blend until smooth, making sure the cocoa is well distributed without lumps.

    5. Let It Rest: Cover the bowl with plastic wrap or a lid and place it in the refrigerator for at least 4 hours or overnight. This step is crucial, as it allows the chia seeds to absorb liquid, expanding to form a pudding-like texture.

    6. Check for Consistency: After the resting period, check the mixture. If it’s too thick, stir in a splash more almond milk until you reach your desired consistency.

    7. Prepare for Serving: Once the pudding is set, spoon it into individual serving bowls or jars. You can layer it with additional dairy-free yogurt or fresh fruit for added flavor and nutrition.

    8. Coconut Cream Topping: If you opted for coconut cream, whip it until fluffy and dollop it on top of your pudding.

    9. Garnish and Enjoy: Finally, garnish with dark chocolate shavings or even a sprinkle of cocoa powder for extra presentation.

    10. Serve & Relish: Your Tiramisu Chia Pudding Breakfast is ready to be enjoyed! Take a moment to appreciate the delightful combination of flavors as you indulge in this guilt-free treat.

    Bonus Tip: For serving variations, you can incorporate layers of the pudding with crushed graham crackers or digestive biscuits to mimic the layers of traditional tiramisu!

    Mastering The Best Tiramisu Chia Pudding Breakfast: Advanced Tips and Variations

    To elevate your Tiramisu Chia Pudding and truly master this breakfast idea, consider following these advanced tips:

    1. Experiment with Textures: Blend half of the chia pudding with additional coconut cream or yogurt for a velvety layer, or fold in some whipped coconut cream for creaminess.

    2. Add a Crispy Element: Sprinkle some crushed nuts or granola on top for a crunchy texture that complements the creamy pudding.

    3. Infuse with Flavors: Try infusing your coffee with a splash of vanilla or hazelnut syrup for an added taste dimension. You might even mix in a little cinnamon for a warm flavor!

    4. Personalize Toppings: Instead of dark chocolate shavings, consider topping with fresh berries, banana slices, or a drizzle of nut butter for a personalized treat.

    5. Create a Breakfast Parfait: Layer your chia pudding with layers of granola and fruit in a clear glass for a visually stunning breakfast that could wow your guests.

    By being a little adventurous with your variations, you can create multiple breakfast ideas from the same foundation recipe.

    How to Store The Best Tiramisu Chia Pudding Breakfast: Best Practices

    Proper storage is essential for keeping your Tiramisu Chia Pudding fresh! Here are some best practices:

    • Refrigerate: After preparing your chia pudding, ensure it’s stored in airtight containers. It can stay fresh in the refrigerator for up to 5 days, making it an excellent option for meal prep.

    • Freezing: You can freeze the chia pudding for longer storage. However, the texture may change slightly upon thawing. To freeze, spoon it into freezer-safe containers and ensure the lid is airtight.

    • Reheating: If you prefer a warm pudding, transfer the desired amount to a microwave-safe bowl and heat gently in 15-second increments until warmed through.

    • Serving: If you decide to layer it again after freezing, you may want to add fresh toppings after thawing, which enhances the quality while serving.

    By following these storage guidelines, you ensure your breakfast ideas remain tasty and ready whenever you need a quick meal!

    Nutritional Value of The Best Tiramisu Chia Pudding Breakfast

    Understanding the nutritional value of your meals is beneficial, especially for the diet-conscious individual. Here is a breakdown of the estimated nutritional values per serving of The Best Tiramisu Chia Pudding Breakfast:

    • Calories: Approximately 240 calories
    • Protein: 6 grams (primarily from chia seeds and almond milk)
    • Fat: 8 grams (mostly from chia seeds and coconut cream)
    • Carbohydrates: 34 grams
    • Fiber: 10 grams (great for digestive health)
    • Sugar: 7 grams (depends on sweetener and optional toppings)

    This nutritional profile showcases how this recipe can serve as a filling, energy-boosting breakfast without excessive sugar or unhealthy fats. Moreover, the combination of vitamins and minerals supports overall health.

    As you savor this delightful recipe, rest assured that you’re nourishing your body with wholesome ingredients. With its rich flavor and nutritional benefits, this chia pudding is guaranteed to impress even the most discerning breakfast fans!

    FAQs: Frequently Asked Questions About The Best Tiramisu Chia Pudding Breakfast

    Can I substitute the coffee in the recipe?

    Absolutely! If you want to avoid caffeine, you can use a decaffeinated coffee or simply replace it with a flavored tea or a chai mix for a delightful twist on the flavor.

    How long can I store the chia pudding in the fridge?

    The Tiramisu Chia Pudding can be stored in an airtight container in the refrigerator for up to five days.

    Can this recipe be made in advance?

    Yes! In fact, it’s best to prepare it the night before so that the chia seeds have ample time to absorb the liquid and achieve the perfect consistency.

    Is this recipe suitable for children?

    Yes, this pudding makes for a nutritious breakfast that children often love due to its sweet, dessert-like flavor. Just adjust the sweetness level as preferred.

    Can I use other types of sweeteners?

    Definitely! Feel free to substitute maple syrup with any preferred sweetener. Honey is also an excellent option if you are not strictly vegan.

    Are there any toppings I can add?

    Yes, you can top it with a variety of options including fresh fruits like berries or bananas, granola, nuts, and even nut butters depending on your taste preference.

    With these FAQs, you’ll be thoroughly prepared to make The Best Tiramisu Chia Pudding Breakfast, ensuring a delightful start to your day!


    This comprehensive article should inspire readers and encourage them to experiment with their own Tiramisu Chia Pudding Breakfast, enhancing their breakfast repertoire with this unique recipe. Enjoy creating delicious memories with each spoonful!

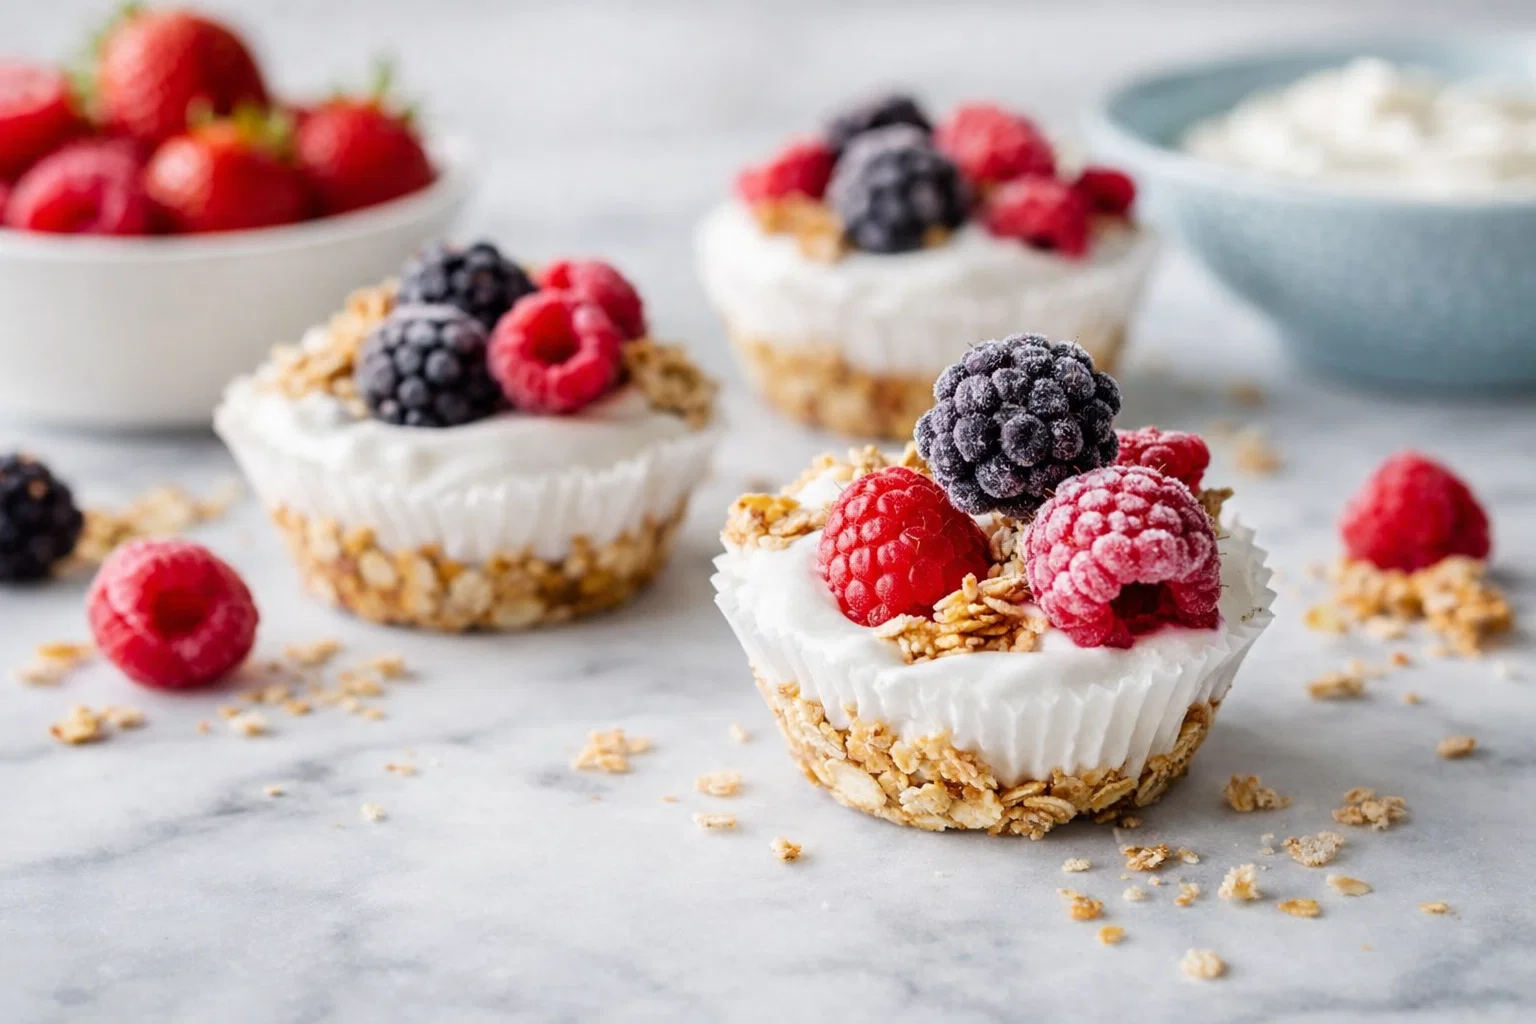
  • Easy Frozen Yogurt Granola Cups Breakfast Snack

    Easy Frozen Yogurt Granola Cups Breakfast Snack

    Easy Frozen Yogurt Granola Cups Breakfast Snack: A Tropical Delight

    Introduction to Easy Frozen Yogurt Granola Cups Breakfast Snack

    In an era where convenience often wins over health, finding breakfast ideas that perfectly blend simplicity and nutrition can feel like a battle. Enter the Easy Frozen Yogurt Granola Cups Breakfast Snack — a delightful combination that not only satisfies hunger but also nourishes the body. Whether you’re a busy parent, a health-conscious individual, or just someone looking to beat the morning blues, these yogurt granola cups are your perfect solution.

    These delightful cups are crafted from creamy yogurt, crunchy granola, and a burst of tropical flavors. They are incredibly easy to make and can be tailored to fit a variety of dietary needs including vegan, gluten-free, and low-calorie options. Imagine starting your day with a frozen treat that feels like dessert but packs a nutritional punch!

    Not only are they a flavorful breakfast, but they’re also a great grab-and-go option for those busy mornings. Kids will love them, making them a family favorite. Moreover, they are an excellent source of protein and probiotics, promoting gut health while keeping you full and energetic. Let’s dive deeper into the benefits and preparations that make these yogurt granola cups a standout option in your collection of healthy breakfast ideas!

    Benefits and Advantages of Easy Frozen Yogurt Granola Cups Breakfast Snack

    The Easy Frozen Yogurt Granola Cups are not just another snack; they are a well-thought-out breakfast option that brings numerous advantages:

    1. Ease of Preparation: One of the standout features of this recipe is its simplicity. With just a few ingredients and minimal preparation steps, you can whip up a batch in no time. All it takes is some mixing, spooning into cups, and freezing. This is perfect for busy mornings when simplicity is key.

    2. Health Benefits: These yogurt granola cups are packed with essential nutrients. Greek yogurt provides a creamy base rich in protein and probiotics, which are essential for gut health. Granola adds fiber and healthy fats, making this snack not only satisfying but also a great way to keep your digestive system in check.

    3. Customizable to Different Diets: Whether you’re vegan, gluten-free, or simply watching your caloric intake, this recipe is versatile enough to cater to most dietary preferences. By selecting plant-based yogurt and gluten-free granola, you can ensure that everyone at your table can enjoy these delicious granola cups.

    4. A Sweet Treat in Disguise: The taste of these granola cups is akin to dessert, yet they are nutritious enough to serve as a breakfast item. This duality makes them a favorite among audiences of all ages — kids will be eager to dig in, while adults will appreciate the health-conscious ingredients.

    5. Perfect for Meal Prep: These cups can be made in advance, allowing you to prepare your breakfast for the entire week in one go. Simply store them in the freezer, and grab one as you rush out the door.

    In summary, Easy Frozen Yogurt Granola Cups Breakfast Snacks are a refreshing addition to the realm of breakfast ideas. Combining health and convenience, they make mornings a little sweeter and a lot easier.

    Ingredients Overview

    Essential Ingredients for Easy Frozen Yogurt Granola Cups Breakfast Snack

    Creating these delicious yogurt granola cups is easier than you might think. Below is a detailed list of ingredients to get you started:

    • 1 ½ cups Greek yogurt (or dairy-free yogurt for vegan option): This serves as the nutritious base, offering protein and probiotics.
    • 2 cups granola (gluten-free if needed): For a crunchy texture, granola provides fibers and healthy fats.
    • 1 banana (sliced): Adds natural sweetness and creaminess.
    • ½ cup mixed berries (fresh or frozen): A delightful burst of flavor and antioxidants.
    • 2 tablespoons honey or maple syrup: Natural sweeteners that can be adjusted based on taste preferences; skip if using flavored yogurt.
    • ½ teaspoon vanilla extract: For additional flavoring.
    • Optional toppings: Chia seeds, nuts, coconut flakes, or additional fresh fruit.

    These ingredients can be easily sourced from any grocery store. The Greek yogurt can be substituted for vegan yogurt options, and there are many kinds of granola available to suit dietary needs.

    Dietary Substitutions to Customize Your Easy Frozen Yogurt Granola Cups Breakfast Snack

    Providing flexibility in ingredient choices ensures this recipe can cater to various dietary needs:

    • For a Vegan Option: Use plant-based yogurt alternatives made from almond, coconut, or soy instead of Greek yogurt. Additionally, select granola that does not contain honey.

    • Gluten-Free Option: Ensure that the granola is certified gluten-free to avoid any gluten exposure. Many brands now offer a wide variety of gluten-free granolas.

    • Low-Calorie: Choose non-fat yogurt and select a granola that is lower in sugar. You can also reduce or omit the honey/maple syrup when using flavored yogurt.

    • Sugar-Free: For a sugar-free alternative, use unsweetened yogurt and opt for a sugar-free granola.

    By catering to such diverse dietary requirements, these easy frozen yogurt granola cups allow everyone to enjoy this nutritious breakfast treat!

    How to Prepare the Perfect Easy Frozen Yogurt Granola Cups Breakfast Snack: Step-by-Step Guide

    Creating these delightful yogurt granola cups is a straightforward process. Follow this easy step-by-step guide to ensure your success:

    1. Gather Your Ingredients: Start by assembling all your ingredients. Having everything in one place makes the process smoother.

    2. Prepare the Cups: Choose silicone baking cups or muffin tins, as they make it easier to pop out the finished product. Lightly grease them if not using silicone.

    3. Mix Yogurt and Sweetener: In a large mixing bowl, combine the Greek yogurt with honey (or maple syrup) and vanilla extract. Stir until well incorporated and creamy.

    4. Add Fruit and Granola:

    5. Fold in the Fruit: Gently mix in the sliced banana and berries into the yogurt mixture, being careful not to mash them too much.
    6. Layering: Spoon a layer of the yogurt mixture into each cup, filling them halfway.

    7. Add Granola Layer: Add a spoonful of granola on top of the yogurt in each cup. This adds a delightful crunch.

    8. Final Yogurt Layer: Top each cup with the remaining yogurt mixture, ensuring that the granola is well-covered.

    9. Chill and Freeze: Place the prepared cups into the freezer. Freeze for at least 4 hours or until completely firm.

    10. Remove and Serve: After freezing, gently twist the cups to release the granola cups. Serve immediately or store in an airtight container.

    11. Garnish (Optional): For an extra flavor boost, consider drizzling a bit of honey or sprinkling additional toppings such as chia seeds or coconut flakes before serving.

    Adaptations for Dietary Needs

    • Vegan: Ensure that the yogurt and granola are entirely plant-based.
    • Gluten-Free: Use certified gluten-free granola and be mindful of cross-contamination during preparation.
    • No Added Sugars: Use unsweetened yogurt and opt for fruit to provide natural sweetness.

    With this step-by-step guide, your Easy Frozen Yogurt Granola Cups will not only look appetizing but also taste delicious. Enjoy the fun and satisfaction of making a healthy breakfast snack that fits perfectly within your morning routine!

    Mastering Easy Frozen Yogurt Granola Cups Breakfast Snack: Advanced Tips and Variations

    Once you’ve mastered the basic recipe, why not get creative? Here are some advanced tips and variations:

    1. Flavor Experimentation: Don’t hesitate to mix in different flavors of yogurt. Try coconut yogurt with pineapple for a tropical twist or berry-flavored yogurt paired with dark chocolate granola.

    2. Seasonal Fruit Additions: Depending on the season, you can swap out the suggested fruits. In summer, use peaches, while fall calls for pumpkin puree mixed with cinnamon.

    3. Add Crunch: For an added layer of texture, consider mixing in chopped nuts, seeds, or even a few chocolate chips (dark chocolate is a healthier option!) into the granola layer.

    4. Layering Techniques: For aesthetic purposes, consider layering the yogurt and granola in clear cups. This way, you not only enjoy the taste but also the visual appeal of the colorful ingredients.

    5. Batch Cooking: Make a large batch and freeze in individual servings to ensure that you always have a nutritious snack at hand. Consider labeling them with dates to keep track of freshness.

    Using Different Containers

    Experiment with different types of containers. Small jars or dessert glasses can create a beautiful presentation, perfect for hosting guests or family gatherings.

    With these advanced tips and variations, the Easy Frozen Yogurt Granola Cups can become a staple in your breakfast ideas with infinite possibilities!

    How to Store Easy Frozen Yogurt Granola Cups Breakfast Snack: Best Practices

    Proper storage of your yogurt granola cups ensures they maintain their flavor and texture longer. Here are some best practices to follow:

    1. Freezing: After preparing and freezing your yogurt cups, make sure to store them in an airtight container. This protects them from developing freezer burn and ensures a fresher taste when you thaw them.

    2. Thawing: When you’re ready to enjoy a frozen yogurt granola cup, simply remove it from the freezer and let it sit at room temperature for about 5-10 minutes to soften slightly before consuming.

    3. Refrigerating Loaded Cups: If you have leftover cups that you plan to consume within a week, you can store them in the refrigerator. However, be mindful that granola may lose some crunch when refrigerated, so it’s always best to enjoy the cups as soon as possible after preparation.

    4. Labeling: When storing in the freezer, use labels. Mark the date of preparation and the expected consumption date to ensure you enjoy them while they’re fresh.

    By following these storage practices, you will always have delicious, ready-to-eat breakfast ideas waiting for you in your freezer!

    Nutritional Value of Easy Frozen Yogurt Granola Cups Breakfast Snack

    The nutritional profile of these Easy Frozen Yogurt Granola Cups varies based on the ingredients you choose. Below is a general overview based on the main ingredients outlined earlier:

    • Calories: Approximately 150-200 calories per cup.
    • Protein: About 8-10 grams from the Greek yogurt.
    • Carbohydrates: Roughly 30-35 grams, including sugars from the yogurt and fruit.
    • Fats: Around 5-7 grams, depending on the granola used.
    • Fiber: 2-4 grams, primarily from the granola and berries.
    • Vitamins and Minerals: Rich in calcium, vitamin C, and potassium, contributing valuable nutrients for a balanced diet.

    You can tailor the nutritional content to suit your dietary needs by selecting low-fat yogurt, using less processed granola, or adding nutrient-dense toppings.

    In conclusion, maintaining a focus on nutrition will only enhance the appeal of your Easy Frozen Yogurt Granola Cups as a top contender in your collection of nutritious breakfast ideas.

    FAQs: Frequently Asked Questions About Easy Frozen Yogurt Granola Cups Breakfast Snack

    Q1: How long can I store these yogurt granola cups?
    A1: They can be stored in the freezer for up to three months. If kept in the refrigerator, consume them within five days for optimal freshness.

    Q2: Can I use any type of yogurt for this recipe?
    A2: Yes! You can use Greek yogurt, regular yogurt, dairy-free options, or even flavored yogurts based on your preferences.

    Q3: How can I make it sugar-free?
    A3: Use unsweetened yogurt and omit additional sweeteners like honey or maple syrup, opting to rely on the natural sweetness of fruits.

    Q4: Are there any nut-free granola options?
    A4: Many brands offer nut-free granola choices, or you can easily make your own at home by substituting nuts with seeds like pumpkin or sunflower seeds.

    Q5: Can I prepare these in advance?
    A5: Absolutely! These yogurt cups are perfect for meal prep. Simply make a batch over the weekend and enjoy them throughout the week.

    With these FAQs, you are now well informed and ready to recreate this delightful Easy Frozen Yogurt Granola Cups Breakfast Snack! Your journey to delicious and nutritious breakfast ideas has never been easier. So, what are you waiting for? Grab your ingredients and get started on this simple yet delightful recipe today!

  • Tasty Banana Chia Pudding Healthy Breakfast

    Tasty Banana Chia Pudding Healthy Breakfast

    Tasty Banana Chia Pudding Healthy Breakfast: A Tropical Delight

    Introduction to Tasty Banana Chia Pudding Healthy Breakfast

    Looking for easy and nutritious breakfast ideas that will not only satiate your hunger but also fuel your day? Look no further than the delicious Tasty Banana Chia Pudding! This recipe combines ripe bananas, creamy coconut milk, and nutrient-rich chia seeds, making it a perfect choice for busy mornings, work-from-home brunches, or leisurely weekend breakfasts.

    The beauty of this dish lies in its simplicity. Preparation takes only a few minutes, and once you let it chill, the chia seeds work their magic, transforming the mixture into a delightful pudding-like consistency. It caters to various dietary needs, as this breakfast idea is naturally vegan, gluten-free, and low in calories. Whether you’re navigating a hectic lifestyle as a busy parent, a student juggling classes, or a health-conscious individual, this Tasty Banana Chia Pudding is a convenient, healthful option that you can enjoy guilt-free.

    Not only is the flavor divine, but the health benefits are also remarkable. With the main ingredients rich in omega-3 fatty acids, fiber, and proteins, you’ll feel fuller for longer and energized throughout the day. Whether you’re looking to switch up your breakfast routine or impress guests with a healthy yet tasty dish, Tasty Banana Chia Pudding is a winner. So let’s dive into this tropical delight!

    Benefits and Advantages of Tasty Banana Chia Pudding Healthy Breakfast

    Tasty Banana Chia Pudding makes for an excellent breakfast choice due to its numerous health benefits and ease of preparation. Let’s explore why this delectable dish stands out among other breakfast ideas and why you’ll love to make it a staple.

    1. Simplicity and Quick Preparation

    One of the most significant advantages of this pudding is how easy it is to prepare. With minimal ingredients and steps needed, even novice cooks can whip up this dish in no time. All you need to do is blend, mix, and refrigerate, making it a fantastic option for busy mornings. As a result, it’s perfect for parents rushing out the door or students looking for a quick meal after late-night studying.

    2. High in Nutritional Value

    Chia seeds are superstars in the health food world, packed with omega-3 fatty acids, antioxidants, protein, vitamins, and minerals. They’re also incredibly high in fiber, promoting digestive health and keeping you satiated longer. Combined with bananas, which offer a natural sweetness along with potassium and vitamin C, this breakfast idea not only pleases your taste buds but nourishes your body too.

    3. Dietary Flexibility

    This recipe caters to a wide range of dietary preferences, making it highly adaptable. Whether you’re vegan, gluten-intolerant, or simply looking to cut back on calories, Tasty Banana Chia Pudding fits the bill. The use of coconut milk ensures that everyone can enjoy it without compromising their dietary restrictions.

    4. Meal Prep Friendly

    Tasty Banana Chia Pudding is perfect for meal prep. Prepare a larger batch on Sunday evening, and you’ll have nutritious breakfasts ready for the week! Simply portion them out into jars or containers, and grab one when you need a healthy option.

    5. Customizable and Versatile

    This recipe serves as a fantastic base that invites creativity! You can easily add various toppings, such as nuts, seeds, or fruits, depending on your liking or what you have on hand. You can also infuse flavors with spices like cinnamon or vanilla to suit your tastes.

    In summary, Tasty Banana Chia Pudding isn’t just another breakfast option; it’s simple, nutritious, and adaptable for various dietary needs, making it the ideal choice as breakfast ideas go!

    Ingredients Overview

    Essential Ingredients for Tasty Banana Chia Pudding Healthy Breakfast

    Here’s the list of essential ingredients you will need to prepare Tasty Banana Chia Pudding. Each component serves a purpose in making this dish healthy and delicious.

    • Ripe Bananas (2 Medium): Provides natural sweetness and creaminess to the pudding, along with potassium, fiber, and vitamin C.
    • Chia Seeds (1/4 cup): Rich in omega-3 fatty acids, fiber, and protein; helps to create the pudding texture.
    • Coconut Milk (1 cup): Adds creaminess and a rich flavor while remaining dairy-free and vegan-friendly. For lighter options, use light coconut milk or almond milk.
    • Maple Syrup (1-2 tablespoons) Optional: To sweeten the pudding further; feel free to adjust based on your sweetness preference. Honey can also be used if not adhering to a strict vegan regimen.
    • Vanilla Extract (1 teaspoon): Enhances flavor and brings harmony to the sweetness of bananas and syrup.
    • Cinnamon (1/2 teaspoon) Optional: Adds warmth and depth to the flavor profile.

    Each of these ingredients offers unique health benefits and contributes to the overall texture and taste of this satisfying breakfast idea!

    Dietary Substitutions to Customize Your Tasty Banana Chia Pudding Healthy Breakfast

    Considering dietary preferences? Here are some suggested substitutions you can incorporate to ensure everyone can enjoy this Tasty Banana Chia Pudding:

    • Dairy-Free Options: If coconut milk doesn’t appeal to you, feel free to substitute it with almond milk, oat milk, or any other plant-based milk of your choice.
    • Natural Sweeteners: Instead of maple syrup, try agave nectar or a date syrup for a lower glycemic index sweetener. For a more natural option, perhaps use mashed ripe dates.
    • Nut-Free Options: If you’re nut-free, skip adding nuts as toppings and consider using seeds such as pumpkin or sunflower seeds to maintain crunch.
    • Additional Flavor Profiles: Add a tablespoon of cocoa powder for a chocolatey version, or incorporate fruit purees to create variations of flavors such as strawberry or mango.

    By leveraging these substitutions, you can customize Tasty Banana Chia Pudding to fit various dietary needs, ensuring an inclusive experience for everyone.

    How to Prepare the Perfect Tasty Banana Chia Pudding Healthy Breakfast: Step-by-Step Guide

    Now that you have the ingredients sorted, let’s delve into preparing the Tasty Banana Chia Pudding step by step. This straightforward method will guide you through creating this delightful dish that can easily become one of your favorite breakfast ideas!

    1. Prepare the Base: In a medium mixing bowl, mash 2 ripe bananas until smooth. Ensure there are no lumps for a creamy texture—this will be the base of your pudding.

    2. Mix Ingredients: Add 1 cup of coconut milk, 1/4 cup of chia seeds, 1-2 tablespoons of maple syrup (if desired), and 1 teaspoon of vanilla extract to the mashed bananas. Sprinkle in 1/2 teaspoon of cinnamon for added flavor. Stir everything together until well-combined. The chia seeds should be evenly distributed throughout the mixture.

    3. Let It Sit: Allow the mixture to rest for about 5-10 minutes. This step is crucial because it allows the chia seeds to absorb the liquid and swell into a gel-like consistency. Stir again to prevent clumping.

    4. Refrigerate the Pudding: Transfer the mixture into individual jars or a bowl, cover it with a lid or plastic wrap, and refrigerate for at least 2 hours or overnight. This waiting period is essential for achieving the pudding-like texture that everyone loves.

    5. Perfecting the Texture: After chilling, check the pudding’s consistency. If it’s too thick, stir in a bit more coconut milk to loosen it up. If it’s too thin, you can add a bit of chia seeds and let it rest for an additional 30 minutes.

    6. Add Toppings: Before serving, add your choice of toppings! Consider sliced fruits like strawberries or berries, chopped nuts, shredded coconut, or a drizzle of extra maple syrup for a delightful finishing touch.

    7. Serve and Enjoy: Scoop out your perfectly set banana chia pudding into bowls or jars and dig in! It’s a great healthy breakfast idea that complements different tastes and preferences.

    Optional Add-Ins

    Furthermore, here are some enjoyable variations to explore:
    – For a nutty flavor, integrate almond or peanut butter into the mixture.
    – Can add superfoods like spirulina, cacao nibs, or protein powder into the mix for a nutritional boost.

    With these steps, your Tasty Banana Chia Pudding is not just a breakfast option but also a delightful dish that can be enjoyed at any time of day!

    Mastering Tasty Banana Chia Pudding Healthy Breakfast: Advanced Tips and Variations

    Once you’ve got the basic recipe down, you might want to explore creative elements to elevate your Tasty Banana Chia Pudding experience. Here are advanced tips and fun variations to try:

    1. Experiment with Flavorings

    Try modifying the flavor profile by adding different extracts like almond or hazelnut. Alternatively, incorporate spices such as nutmeg, cardamom, or ginger to add an exciting twist.

    2. Utilize Different Fruits

    Incorporate various fruits when serving to keep your Tasty Banana Chia Pudding fresh and exciting. Top with seasonal fruits such as sliced peaches, mangoes, or pears. You can also blend fruits directly into the pudding for added flavor.

    3. Create Layered Parfaits

    For an eye-catching presentation, layer Tasty Banana Chia Pudding with yogurt or granola to form delicious parfaits. This not only enhances the dish’s aesthetics but also adds more texture and taste.

    4. Try Different Sweeteners

    You can switch between sweeteners based on your health goals. For instance, if aiming for lower sugar, consider using stevia or monk fruit. On the flip side, blend in some honey or other natural sweeteners based on personal preferences.

    5. Add Superfoods

    Boost the nutritional profile by mixing in superfoods like hemp seeds, flaxseeds, or chia seed milk in place of coconut milk. These additions enhance both the nutrition and flavor profile of your breakfast idea.

    6. Make it Savory

    Dare to switch things up by creating a savory chia pudding base. Swap the banana for avocado, skip sweeteners, and incorporate sea salt, herbs, or spices. Top with chopped tomatoes, cucumber, or radish for an entirely new dish.

    By embracing these advanced tips and variations, you’ll ensure that Tasty Banana Chia Pudding remains a staple in your repertoire of breakfast ideas while creating an experience that suits your taste preferences.

    How to Store Tasty Banana Chia Pudding Healthy Breakfast: Best Practices

    Storing your Tasty Banana Chia Pudding adequately ensures that you can enjoy this healthy breakfast throughout the week without compromising its quality. Here are some best practices for storing your pudding:

    1. Refrigeration

    You can store leftovers in an airtight container in the refrigerator for up to 5 days. This is perfect for those who like meal prepping their breakfast ideas—simply grab and go in the morning!

    2. Freezing

    For longer storage, consider freezing portions of the pudding. They can freeze well for up to 3 months. To do this, pour individual servings into freezer-safe containers or silicone molds, and once they’re frozen, transfer them to a zip-lock bag for space-saving.

    3. Thawing

    When ready to use, thaw overnight in the refrigerator for a smooth texture. If you find the pudding too thick after thawing, simply stir in a little more coconut milk to reach your desired consistency.

    4. Reheating

    The beauty of this breakfast idea is that it can conveniently be prepared in advance and enjoyed cold, but if you prefer a warm treat, gently heat it on the stove or microwave. Remember to add a splash of coconut milk to keep it creamy.

    By following these storage practices, you can ensure that your Tasty Banana Chia Pudding remains fresh and enjoyable, making it a fantastic addition to your array of breakfast ideas.

    Nutritional Value of Tasty Banana Chia Pudding Healthy Breakfast

    Understanding the nutritional profile of your meals helps you make informed food choices. Here is the nutritional breakdown of one serving of Tasty Banana Chia Pudding based on the above recipe (approx. 1/2 cup serving):

    • Calories: 220
    • Protein: 4g
    • Fat: 10g
    • Saturated Fat: 8g
    • Carbohydrates: 30g
    • Fiber: 8g
    • Sugars: 7g
    • Sodium: 20mg

    Health Benefits

    • High Fiber Content: The combination of chia seeds and bananas contributes to your daily fiber intake, aiding in digestion and promoting satiety.
    • Antioxidants: Chia seeds are rich in antioxidants that help fight free radicals in the body.
    • Heart Healthy: Omega-3 fatty acids present in chia seeds contribute positively to heart health.

    This nutritious breakdown highlights why Tasty Banana Chia Pudding is an excellent option for breakfast ideas—it’s a delicious way to start your day while nurturing your body!

    FAQs: Frequently Asked Questions About Tasty Banana Chia Pudding Healthy Breakfast

    Q1: Can I make Tasty Banana Chia Pudding ahead of time?

    Yes! This breakfast idea is perfect for meal prep. You can make it up to five days in advance when stored in the refrigerator.

    Q2: How long does the pudding stay fresh in the refrigerator?

    The pudding stays fresh for up to 5 days when stored in an airtight container in the fridge.

    Q3: Can I use any other milk besides coconut milk?

    Absolutely! You can use almond milk, oat milk, or any dairy-free milk of your choice.

    Q4: Why does it need to rest before serving?

    Letting the banana chia pudding rest allows the chia seeds to absorb the liquid and swell, creating a thick, pudding-like texture.

    Q5: Is it possible to make this pudding without bananas?

    Definitely! If you prefer a different flavor or have an allergy, consider substitute fruits like avocados or mangoes to provide creaminess.

    Q6: Can I adjust the sweetness level?

    Yes! You can omit the sweetener entirely, or adjust it according to your preference. Use natural sweeteners like honey, maple syrup, or try stevia for a lower-calorie option.

    Q7: Are there any known allergens in this recipe?

    The recipe is generally gluten-free and vegan; however, some may have allergies to bananas, chia seeds, or coconut. Always check ingredient labels based on your dietary restrictions.

    Through these FAQs, you can see how versatile and approachable Tasty Banana Chia Pudding is, enhancing its appeal as a top choice among breakfast ideas.


    This complete article provides an engaging, detailed, and SEO-optimized guide for creating Tasty Banana Chia Pudding, making it a valuable asset for your recipes blog. By following this structure, readers will be inspired to try making this simple, nutritious dish fit for anyone’s dietary needs.