Tag: salad

  • Easy Cucumber Carrot Salad Side

    Easy Cucumber Carrot Salad Side

    Easy Cucumber Carrot Salad Side: A Tropical Delight

    Introduction to Easy Cucumber Carrot Salad Side

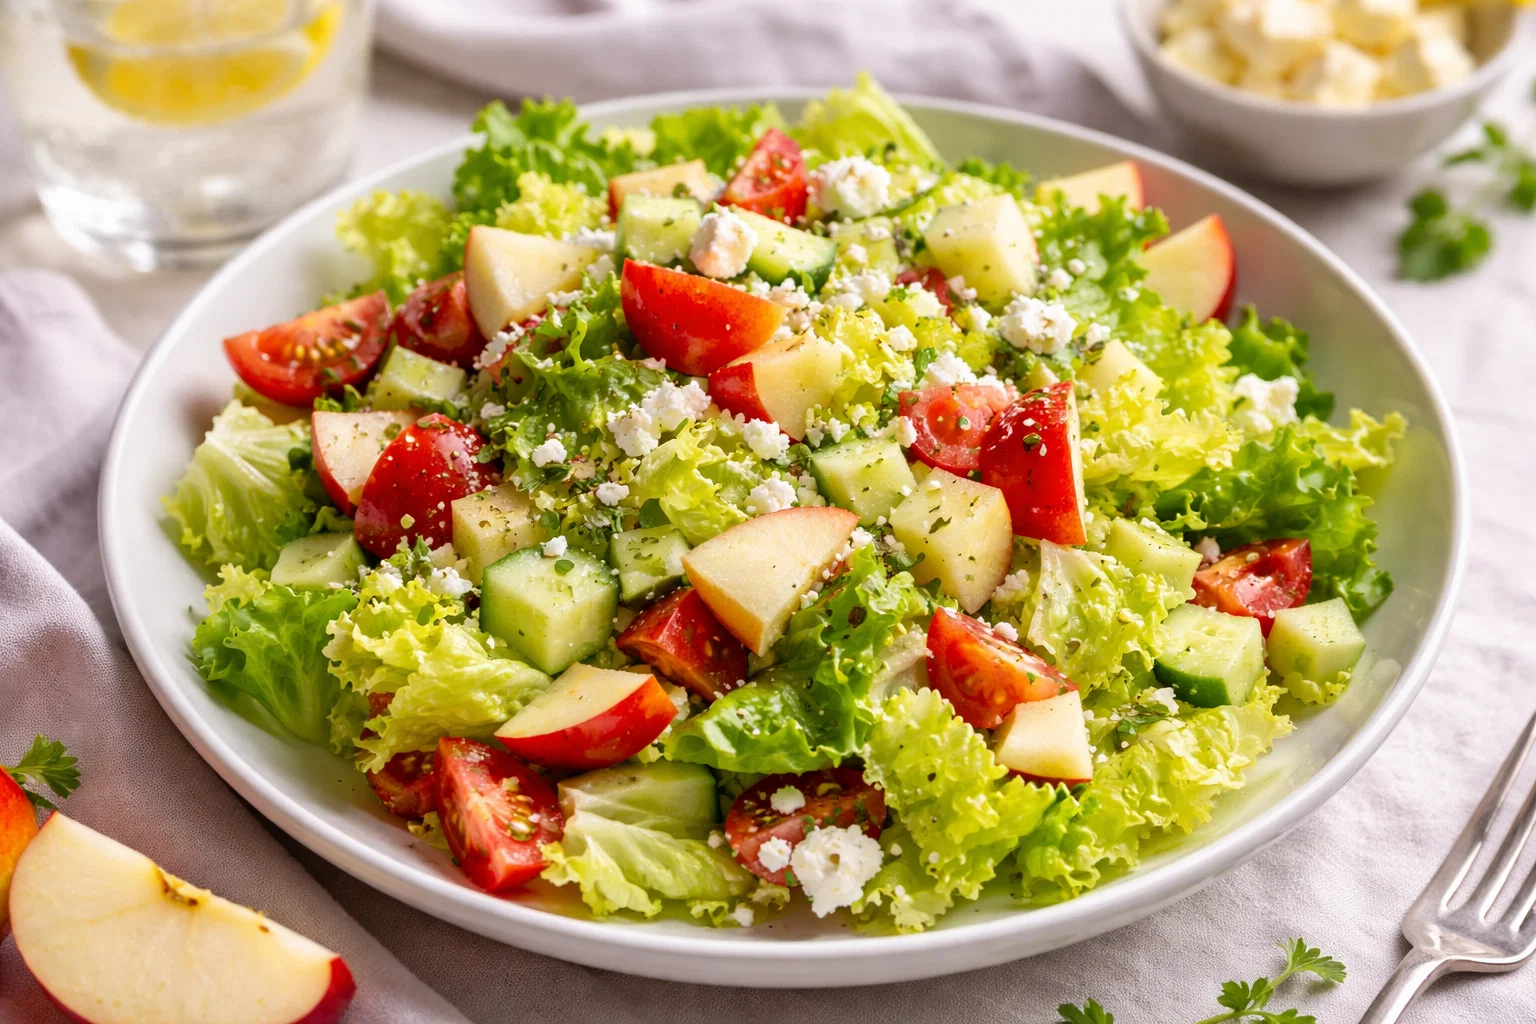
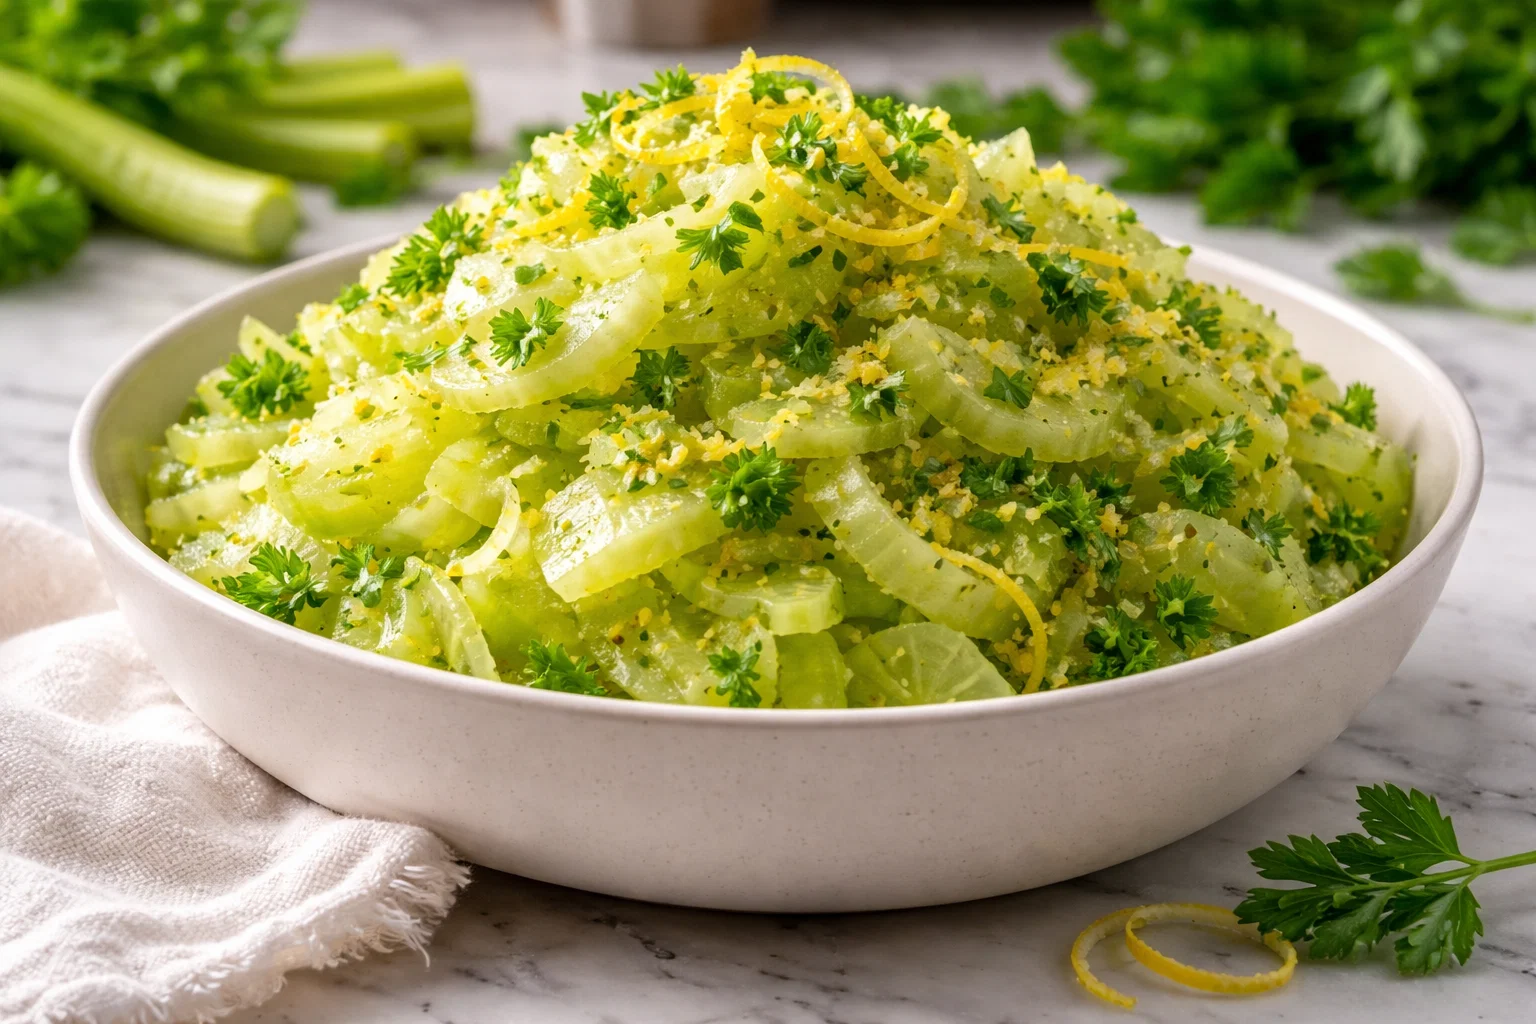
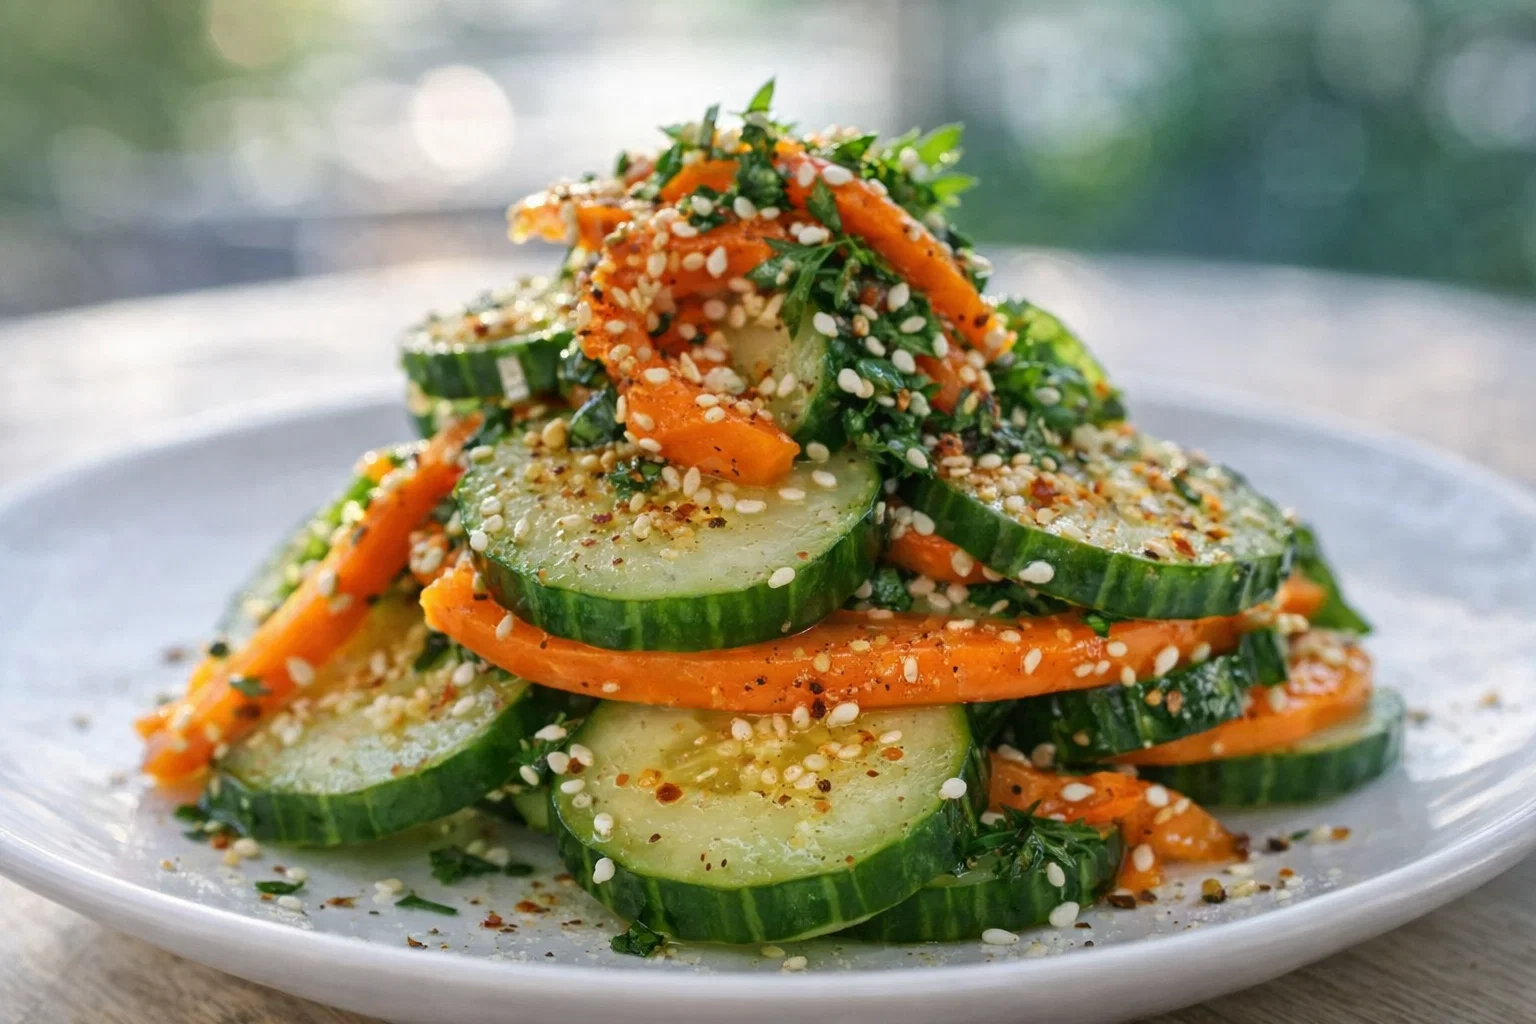
    Are you looking for a refreshing yet straightforward dish to elevate your meals? Look no further than this Easy Cucumber Carrot Salad! This vibrant medley combines crunchy cucumbers, crisp carrots, and a zesty dressing that not only pleases the palate but also enriches your dining experience with a burst of flavors. Whether you’re a busy parent, a health-conscious individual, or simply a food enthusiast, this salad is perfect for all occasions.

    This cucumber salad stands out for its incredible health benefits. With cucumbers offering hydration and vitamins, along with carrots providing essential nutrients and fiber, this side dish is both nourishing and satisfying. It’s completely vegan and gluten-free, making it an excellent choice for those with dietary restrictions or lifestyle choices. Whether served alongside grilled meats, as a light lunch, or taken as a refreshing snack, this salad is versatile enough to become a staple in your kitchen.

    Plus, the ease and quick preparation time (20 minutes or less) mean you can whip it up effortlessly, even on your busiest days. With simple ingredients and a straightforward process, the Easy Cucumber Carrot Salad is not just food; it’s a celebration of fresh produce that inspires you to eat healthier without sacrificing flavor or enjoyment. The delightful combination of textures and flavors in this dish will surely entice everyone, from children to seniors, making it a family favorite.

    Benefits and Advantages of Easy Cucumber Carrot Salad Side

    Why should you take a moment to prepare this delightful cucumber salad? Beyond its simplicity, this dish brings numerous advantages that make it a favorite for home cooks and food enthusiasts alike.

    Quick and Easy Preparation

    One of the standout features of this cucumber and carrot medley is how effortlessly you can prepare it. In just a few minutes, you can have a vibrant side dish ready to complement your meals. The most labor-intensive task is slicing, but with a sharp knife and a little practice, you can master this in no time. This ease makes it perfect for busy individuals or families who want healthy options at the dinner table without spending hours in the kitchen.

    Nutritional Powerhouse

    Eating cucumbers and carrots together offers a wealth of nutritional benefits. Cucumbers are low in calories, high in water content, and packed with antioxidants, making them a fantastic choice for weight-conscious individuals. Carrots are rich in beta-carotene, which promotes eye health, and provide fiber that aids digestion. Together, these ingredients create a refreshing salad that helps keep you hydrated and nourished, especially during hot summer months.

    Adaptable for Various Diets

    The Easy Cucumber Carrot Salad is not only tasty but also inclusive. It caters to various dietary needs, making it suitable for vegans, vegetarians, and those following gluten-free diets. Additionally, you can easily modify the salad by adding ingredients like chickpeas, nuts, or seeds for an extra protein punch, making it a well-rounded meal.

    Perfect for Any Occasion

    Whether you are hosting a picnic, planning a family gathering, or having a quiet dinner at home, this salad adapts effortlessly to any occasion. Its vibrant colors make it a feast for the eyes, while its fresh flavors complement a multitude of dishes, making it a favored side for barbecues, potlucks, or even upscale dinners.

    These benefits make the Easy Cucumber Carrot Salad Side not just a meal component but a versatile contributor to a healthier lifestyle.

    Ingredients Overview

    Essential Ingredients for Easy Cucumber Carrot Salad Side

    To create the perfect Easy Cucumber Carrot Salad, you’ll need the following ingredients:

    • 2 medium cucumbers: Peel if desired, sliced thinly. Cucumbers provide a refreshing crunch and hydration.
    • 2 large carrots: Peeled and grated or julienned. Carrots add natural sweetness and vibrant color.
    • 1/4 cup red onion: Finely chopped. This adds a sharp bite that contrasts beautifully with the sweetness of the carrots.
    • 1/4 cup fresh parsley: Chopped. Adds freshness to the salad.
    • 1/4 cup apple cider vinegar: For tanginess that brightens the flavors.
    • 2 tablespoons olive oil: Provides healthy fats and enhances flavor.
    • 1 tablespoon honey or maple syrup: Optional, for sweetness.
    • Salt and pepper: To taste.

    All ingredients are naturally gluten-free and vegetarian-friendly, making this salad an excellent option for various dietary lifestyles.

    Dietary Substitutions to Customize Your Easy Cucumber Carrot Salad Side

    If you have specific dietary restrictions or preferences, here are some substitutions to make the Easy Cucumber Carrot Salad work for you:

    • Low-Sugar Option: For those watching their sugar intake, you can skip the honey or maple syrup and replace it with a sugar substitute like stevia or simply increase the amount of vinegar for extra zing.
    • Swap for Other Fresh Herbs: If parsley isn’t your favorite, consider using cilantro, dill, or even basil to enhance flavors further.
    • Add Crunch with Nuts/Seeds: For extra crunch and protein, toss in some sliced almonds, walnuts, or sunflower seeds. This addition will also elevate the nutritional profile of the salad.

    These substitutions make it easy to adapt the Easy Cucumber Carrot Salad Side to fit any dietary need or personal taste.

    How to Prepare the Perfect Easy Cucumber Carrot Salad Side: Step-by-Step Guide

    Ready to whip up your Easy Cucumber Carrot Salad? Follow these detailed steps for a flawless preparation:

    1. Wash and Prepare Vegetables: Start by rinsing the cucumbers and carrots under cool water. This ensures that they are clean and free from any pesticides or dirt.

    2. Peel and Slice the Cucumbers: If you prefer, peel the cucumbers. Use a slicing knife or mandoline to cut them into thin rounds or half-moons, depending on your preference.

    3. Prepare the Carrots: Peel the carrots and either grate them with a box grater or slice them into thin julienne strips. This adds texture and visual appeal.

    4. Chop the Red Onion: Finely chop the red onion. If you find the flavor too intense, you can soak the chopped onion in cold water for a few minutes to mellow it out.

    5. Chop the Fresh Parsley: Finely chop the fresh parsley. This will bring a burst of fresh flavor to your salad.

    6. Combine Ingredients: In a large bowl, combine the sliced cucumbers, grated carrots, red onion, and parsley. Give it a light toss to mix the ingredients well.

    7. Prepare the Dressing: In a separate bowl or jar, combine the apple cider vinegar, olive oil, honey (if using), salt, and pepper. Whisk or shake until well blended.

    8. Dress the Salad: Pour the dressing over the salad mixture and gently toss everything to coat evenly.

    9. Taste and Adjust: Give the salad a taste. You can adjust the seasoning by adding more salt, pepper, or vinegar as desired.

    10. Chill and Serve: Let the salad sit in the refrigerator for at least 15-30 minutes before serving. This allows the flavors to meld together beautifully. Serve chilled and enjoy!

    The Easy Cucumber Carrot Salad is now ready to be the star of your meal. These straightforward steps and adaptability make it a staple for both novice cooks and culinary experts alike.

    Mastering Easy Cucumber Carrot Salad Side: Advanced Tips and Variations

    To take your Easy Cucumber Carrot Salad to the next level, consider these advanced tips and delicious variations:

    • Herb Variations: Experiment with different herbs like dill, mint, or cilantro for a unique twist. Each herb brings its distinct flavor that can completely change the salad’s profile.

    • Add Protein: Transform this salad into a more substantial meal by adding cooked, shredded chicken, tofu, or chickpeas. This addition makes it perfect for a light lunch or dinner.

    • Explore Alternatives in Dressings: Try different dressings like tahini, yogurt-based, or a tangy mustard vinaigrette, which will provide a different taste experience each time.

    • Include Other Veggies: Feel free to incorporate additional vegetables such as bell peppers, cherry tomatoes, or radishes to enhance the nutritional value and flavor of your salad.

    These tips not only enrich the flavor but also keep things exciting in your kitchen each time you prepare the Easy Cucumber Carrot Salad.

    How to Store Easy Cucumber Carrot Salad Side: Best Practices

    Storing your Easy Cucumber Carrot Salad carefully ensures optimal freshness. Here are the best practices:

    • Refrigeration: Store the salad in an airtight container in the fridge if you have leftovers. It will stay good for up to three days. The flavors will continue to meld, enhancing the taste for the next day’s lunch!

    • Freezing: It is not advisable to freeze this salad because cucumbers and carrots can become mushy once thawed. Instead, prepare only what you can consume within a few days.

    • Reheating and Serving: If you have added protein that may need reheating, make sure to microwave gently or warm it in a pan. However, the salad is best served cold and fresh.

    By following these tips on storing the Easy Cucumber Carrot Salad, you’ll maintain its bright colors and refreshing crunch throughout the week.

    Nutritional Value of Easy Cucumber Carrot Salad Side

    Understanding the nutritional value of your Easy Cucumber Carrot Salad is important, especially for those monitoring their intake. Here’s a breakdown of the nutrition per serving (approximately 1 cup):

    • Calories: 80
    • Total Fat: 5g
    • Saturated Fat: 0.7g
    • Total Carbohydrates: 10g
    • Dietary Fiber: 3g
    • Sugars: 3g
    • Protein: 1g

    Vitamins and Minerals:

    • High in Vitamin A (from carrots)
    • Good source of Vitamin K (from cucumbers and parsley)
    • Contains potassium (from cucumbers)

    This salad is not only low in calories but also offers a wealth of vitamins and antioxidants, making it an ideal addition to any meal. The nutritional profile can improve even more by incorporating protein-rich variations or healthy fats like avocado.

    FAQs: Frequently Asked Questions About Easy Cucumber Carrot Salad Side

    1. Can I make the salad ahead of time?

    Absolutely! The Easy Cucumber Carrot Salad can be made a few hours ahead of time; in fact, letting it sit in the refrigerator helps the flavors meld beautifully. However, it’s best eaten within a day or two for optimal freshness.

    2. What should I do if I don’t have apple cider vinegar?

    If you don’t have apple cider vinegar, you can substitute it with regular white vinegar, lemon juice, or even rice vinegar for a slightly different flavor profile.

    3. Can I add other ingredients to my salad?

    Certainly! Feel free to add ingredients such as bell peppers, cherry tomatoes, or even toasted nuts to give the salad a personal touch and enhance its flavor further.

    4. Is this salad suitable for kids?

    Yes! This cucumber salad is not only colorful and appealing to kids, but it also offers a delightful crunch that many children enjoy. You can adjust the seasoning to make it more appealing to younger palates.

    5. Can I customize the dressing?

    Yes! The dressing is easily customizable. You can experiment with different flavors like adding sesame oil for a nutty taste or using a yogurt-based dressing for creaminess.

    By addressing common queries, we hope that you feel more confident in preparing the Easy Cucumber Carrot Salad and adapting it to fit your tastes and dietary needs.

    In summary, the Easy Cucumber Carrot Salad is not just a side dish—it’s a fresh, versatile, and healthful addition to any meal. With its simple ingredients and adaptable nature, it’s a perfect inclusion for various dietary preferences. Enjoy crafting your salad, explore the myriad of variations, and relish in the healthy goodness it brings to your table!

  • Roasted Easter Quinoa Salad

    Roasted Easter Quinoa Salad

    Roasted Easter Quinoa Salad: A Tropical Delight

    Introduction to Roasted Easter Quinoa Salad

    Spring is the perfect time to refresh your dining table with delightful, colorful dishes that celebrate the season. One such recipe that embodies the spirit of spring meals is the Roasted Easter Quinoa Salad. This vibrant dish not only promotes healthy eating but also brings an explosion of flavor and texture to your plate. With the perfect blend of roasted vegetables, protein-packed quinoa, and zesty dressings, this salad is a fantastic addition to family gatherings, potlucks, or cozy dinners.

    What makes this Roasted Easter Quinoa Salad exceptionally appealing is its simplicity and versatility. Not only is it incredibly easy to prepare, but it also caters to various dietary needs. Gluten-free? Check. Vegan? Absolutely. Low-calorie? You bet! It’s a guilt-free indulgence that everyone can enjoy, from busy parents looking for nutritious meals to students managing their budgets. Plus, the combination of quinoa and seasonal vegetables ensures you’re getting a rich source of vitamins and minerals, making this a wholesome choice for the health-conscious.

    As you explore this recipe, you’ll appreciate how the colors and flavors blend harmoniously, reminiscent of a tropical paradise. The added crunch of fresh vegetables combined with the warm, nutty flavors of roasted ingredients makes this salad a delectable option for those seeking light yet satisfying spring meals. So, gather your ingredients and let’s embark on this delicious culinary adventure!

    Benefits and Advantages of Roasted Easter Quinoa Salad

    The Roasted Easter Quinoa Salad stands out for numerous reasons, making it a must-try for anyone seeking quick, healthy, and satisfying meals. First and foremost, the ease of preparation is outstanding. With just a few basic steps, you can create a meal that feels both elegant and homely. Simply roast your favorite seasonal vegetables, mix them with fluffy quinoa, and let your imagination guide the seasoning. You will find that with a little effort, you can achieve maximum flavor.

    Health benefits abound in this salad as well. Quinoa is often referred to as a superfood due to its high protein content and balance of essential amino acids, making it a fantastic choice for vegetarians and vegans alike. Alongside the quinoa, the addition of colorful vegetables provides a spectrum of nutrients, antioxidants, and fiber that is vital for your overall health. Your body will thank you for incorporating this nutrient-dense dish into your spring meals.

    Another advantage of the Roasted Easter Quinoa Salad is its adaptability. Whether you’re a working professional squeezing in a healthy lunch, a traveler looking for easy meal prep, or a family member catering to picky eaters, this recipe is infinitely customizable. You can swap out vegetables based on seasonality or personal preference, add protein sources like chickpeas or grilled chicken, or even experiment with dressings to make it uniquely yours.

    In essence, the Roasted Easter Quinoa Salad encapsulates everything a spring meal should be: nutritious, vibrant, and easy to prepare. You can make it your go-to option for picnics, gatherings, or simply a fulfilling family dinner.

    Ingredients Overview

    Essential Ingredients for Roasted Easter Quinoa Salad

    Creating a delicious Roasted Easter Quinoa Salad starts with gathering the right ingredients. Here’s what you’ll need:

    • Quinoa (1 cup): A versatile grain that serves as the perfect base. Loaded with protein, it is gluten-free and a great choice for vegan dishes.

    • Bell Peppers (1 cup): Choose a mix of colors (red, yellow, green) for a vibrant presentation. They add sweetness and crunch to the salad.

    • Red Onion (1/2 cup): Adds depth and a mild sweetness. You can use green onions as a substitute for a milder taste.

    • Zucchini (1 cup): Sliced into half-moons, zucchini adds a tender texture that compliments the quinoa well.

    • Cherry Tomatoes (1 cup): These sweet bursts of flavor elevate the salad, making it even more delightful.

    • Olive Oil (2 tablespoons): This heart-healthy oil is perfect for tossing the vegetables before roasting, bringing out their flavor.

    • Lemon Juice (2 tablespoons): Freshly squeezed lemon juice adds brightness and acidity, enhancing the overall taste of your dish.

    • Salt and Pepper: To taste. Seasoning is essential for bringing out the flavors of your ingredients.

    • Fresh Herbs (1/4 cup): A combination of parsley, basil, or cilantro gives freshness to the salad.

    • Optional Proteins: Adding chickpeas (1 cup) or grilled chicken can elevate the nutritional value and make it more filling.

    Diet-Conscious Options:
    Low-Calorie: This salad is naturally low in calories. You can further reduce calories by minimizing oil and using less avocado.
    Gluten-Free: Quinoa is gluten-free, making this salad suitable for those with gluten intolerance or celiac disease.
    Vegan: No animal products are necessary, and you can add nutritional yeast for a cheesy flavor without dairy.

    Dietary Substitutions to Customize Your Roasted Easter Quinoa Salad

    The beauty of the Roasted Easter Quinoa Salad lies in its flexibility. Here are some suggested substitutions to tailor the recipe to meet different dietary needs or personal preferences:

    • Quinoa Alternatives: If quinoa isn’t available, try using farro or brown rice for a different grain texture. Both options provide hearty insights into your spring meals.

    • Vegetable Variations: Not a fan of zucchini? Swap it for roasted beets, carrots, or asparagus. Seasonal ingredients can enhance flavor while meeting dietary restrictions.

    • Protein Options: Incorporate plant-based proteins like black beans or lentils in place of chickpeas for added fiber and nutrients. Alternatively, marinated tofu can make a great vegan option.

    • Dressing Choices: Feel free to experiment with different dressings such as balsamic vinaigrette, tahini sauce, or a yogurt-based dressing if you prefer a creamy touch. This can further customize the flavor profile of your spring meals.

    • Herbs and Spices: Elevate the flavors by using different herbs and spices that you enjoy. Consider adding cumin, smoked paprika, or fresh mint for an exciting twist.

    By adapting the Roasted Easter Quinoa Salad to suit your dietary preferences, you guarantee that everyone at your table enjoys a nourishing and satisfying meal.

    How to Prepare the Perfect Roasted Easter Quinoa Salad: Step-by-Step Guide

    Why not embark on a delightful journey of culinary exploration? Here’s a step-by-step guide to prepare the Roasted Easter Quinoa Salad that feels effortless yet fabulous, complemented perfectly by your favorite spring meals.

    1. Prepare the Quinoa:
    2. Start by rinsing 1 cup of quinoa under cold water to remove the natural coating called saponin, which can impart a bitter taste.
    3. In a saucepan, combine the rinsed quinoa with 2 cups of water or vegetable broth for added flavor. Bring the mixture to a boil, then reduce to a simmer, cover, and cook for about 15 minutes or until all the liquid has been absorbed.
    4. Once cooked, remove from heat and allow the quinoa to sit covered for 5 minutes. Fluff it with a fork before transferring it to a large mixing bowl.

    5. Prepare the Vegetables:

    6. Preheat your oven to 400°F (200°C).
    7. Chop the bell peppers, zucchini, and red onion into approximately bite-sized pieces. Slice the cherry tomatoes in half.
    8. In a large mixing bowl, toss the chopped vegetables with 2 tablespoons of olive oil, salt, and pepper to taste.

    9. Roast the Vegetables:

    10. Spread the seasoned vegetables evenly on a baking sheet lined with parchment paper. Ensure they are not overcrowded to allow even roasting.
    11. Roast in the preheated oven for about 20-25 minutes or until the vegetables are lightly browned and tender. Stir halfway through for even cooking.

    12. Combine Ingredients:

    13. Once the vegetables are roasted and the quinoa is fluffed, combine both in the large mixing bowl.
    14. Squeeze the juice of 2 tablespoons of fresh lemon juice over the mixture for a zesty kick.

    15. Add Fresh Herbs:

    16. Chop your choice of fresh herbs (parsley, basil, or cilantro) and stir them into the salad.

    17. Optional Enhancements:

    18. For added protein, fold in 1 cup of cooked chickpeas or grilled chicken. This will make your salad even more nutritious and fulfilling.

    19. Taste and Adjust:

    20. Before serving, taste the salad to see if any additional seasoning is needed. Adjust with extra salt, pepper, or lemon juice to enhance the flavor profile.

    21. Serve Fresh:

    22. Your Roasted Easter Quinoa Salad is now ready to be enjoyed! Serve it warm, at room temperature, or chilled, according to your preference.

    Additional Tips:

    • Scaling Up: If you’re hosting a gathering, simply double or triple the recipe! It makes a generous amount of salad, perfect for sharing during spring meals.
    • Presentation: For an attractive presentation, layer your salad in large glass bowls to show off the colorful ingredients.

    The beauty of this recipe lies in its adaptability and quick preparation, making it an ideal addition to your collection of favorite spring meals.

    Mastering Roasted Easter Quinoa Salad: Advanced Tips and Variations

    Once you’ve mastered the base recipe for Roasted Easter Quinoa Salad, why not take it a step further with these advanced tips and variations? The goal is to make your salad even more personalized and enjoyable.

    • Grilled Fruit Addition: For a unique blend of flavors, consider adding grilled or roasted fruit like peaches or pineapples. Their natural sweetness will complement the roasted vegetables and quinoa beautifully.

    • Diverse Grains: Try blending quinoa with other grains like barley or couscous for a multi-textured experience in your spring meals. Different grains can bring unique flavors and nutritional benefits.

    • Nutty Flavor Boost: Add a handful of toasted nuts such as almonds or walnuts for a delightful crunch and additional healthy fats. They can elevate your Roasted Easter Quinoa Salad to new heights of satisfaction.

    • Flavorful Dressings: Experiment with different dressings. A honey-lime dressing or a spicy tahini sauce can add a whole new dimension to your salad.

    • Colorful Layering: Create a visually stunning salad by layering the ingredients in a jar. This makes it an excellent option for meal prep, showcasing all the beautiful colors.

    • Seasonal Variations: Change the vegetables each season to reflect what’s fresh and vibrant. Your spring meals can evolve beautifully throughout the year with new ingredients.

    Incorporating these tips and variations ensures that the Roasted Easter Quinoa Salad remains an exciting, go-to recipe in your culinary repertoire while staying aligned with seasonal eating.

    How to Store Roasted Easter Quinoa Salad: Best Practices

    Storing your Roasted Easter Quinoa Salad properly can extend its shelf life and preserves its delicious flavors, which makes it a practical option for meal prep. Here are the best practices for storage:

    • Refrigeration: Place any leftover Roasted Easter Quinoa Salad in an airtight container to retain freshness. It can be stored in the refrigerator for up to 4 days. Enjoy it cold or take the opportunity to heat it in the microwave for a few minutes.

    • Freezing: Although it is best enjoyed fresh, you can freeze the salad for later use. If you intend to freeze it, skip adding the dressing until you’re ready to eat it. Instead, put the salad in a freezer-safe container and enjoy within 2-3 months. When ready to use, simply thaw it in the refrigerator overnight.

    • Reheating Guidelines: If you prefer your salad warm, reheat individual portions in the microwave for about 30 seconds. Stir the salad to redistribute the heat evenly.

    Storing your Roasted Easter Quinoa Salad with these practices ensures it remains a delightful option in your line-up of spring meals, ready for a quick lunch or dinner whenever you need it.

    Nutritional Value of Roasted Easter Quinoa Salad

    When considering a filling salad for your spring meals, the nutritional profile is essential. Here’s a breakdown of the approximate nutritional values for one serving of Roasted Easter Quinoa Salad (including vegetables and optional chickpeas):

    • Calories: 320
    • Protein: 12g
    • Fat: 10g
    • Saturated Fat: 1g
    • Carbohydrates: 48g
    • Fiber: 8g
    • Sugar: 4g
    • Sodium: 180mg
    • Vitamins and Minerals: Rich in Vitamins A, C, K, and a variety of essential minerals such as magnesium, phosphorus, and potassium.

    This substantial nutritional information highlights that the Roasted Easter Quinoa Salad not only serves as a satisfying meal but also supports your body’s nutritional needs. Pairing protein-rich ingredients like quinoa and chickpeas with vibrant vegetables ensures you have a well-balanced dish to enjoy during your spring meals.

    FAQs: Frequently Asked Questions About Roasted Easter Quinoa Salad

    Can I prepare the Roasted Easter Quinoa Salad in advance?

    Absolutely! This salad is perfect for meal prep. You can make it a day ahead of time and store it in the refrigerator until you’re ready to enjoy.

    How can I adapt this salad for a gluten-free diet?

    Since quinoa is naturally gluten-free, this salad is an excellent option for those with gluten intolerance. Just ensure that any additional ingredients, such as dressings, are also gluten-free.

    Are there any alternatives to quinoa in this recipe?

    Yes! You can use farro, bulgur, or even brown rice as an alternative to quinoa. They provide a different texture while remaining hearty and nutritious.

    Can I add protein to the salad?

    Definitely! Grilled chicken, chickpeas, or tofu are great additions to make your salad more filling. This can transform it into a complete meal.

    What vegetables can I substitute in the salad?

    Feel free to substitute or add in any seasonal vegetables you enjoy. Roasted carrots, asparagus, or even sweet potatoes work fabulously!

    Is this salad suitable for meal prep?

    Yes, the Roasted Easter Quinoa Salad is perfect for meal prep. Just store it in an airtight container, and it will stay fresh in the refrigerator for up to 4 days.

    What dressings pair well with this salad?

    Lemon vinaigrette, balsamic dressing, or tahini sauce complement the salad beautifully. Feel free to experiment to find your preferred flavor profile!

    In summary, the Roasted Easter Quinoa Salad is not just a dish; it’s a vibrant celebration of seasonal ingredients, suitable for any dietary preference. Whether preparing for a gathering or a simple meal at home, this recipe guarantees delicious, satisfying results. Explore this culinary gem, and let the joy of spring meals inspire you!

  • Apple Feta Easter Romaine Salad

    Apple Feta Easter Romaine Salad

    Apple Feta Easter Romaine Salad: A Tropical Delight

    Introduction to Apple Feta Easter Romaine Salad

    Spring is a time of renewal and fresh beginnings, making it the perfect season for vibrant and refreshing spring meals. The Apple Feta Easter Romaine Salad encapsulates this spirit beautifully. Picture crisp romaine lettuce adorned with juicy slices of apple, creamy feta cheese, and a sprinkle of colorful toppings that excite the senses. This delightful salad is not just a feast for the eyes—it is also simple to prepare and offers a host of health benefits.

    This salad is an excellent choice for busy parents looking for quick and nutritious meals, food enthusiasts aiming to impress guests, or diet-conscious individuals seeking low-calorie options. Its ingredients are versatile and can easily accommodate a range of dietary preferences, making it suitable for vegans and those with gluten sensitivities. Whether you’re a seasoned cook or a culinary novice, creating this salad will inspire you to embrace the joys of cooking with fresh, seasonal produce.

    Packed with vitamins and healthy fats, the Apple Feta Easter Romaine Salad is a must-try for anyone looking to enjoy the blooming flavors of spring. Plus, its vibrant colors add a festive touch to any meal, making it an ideal dish for celebrations or family gatherings. So grab your apron and let’s dive into the delightful world of this refreshing, satisfying salad!

    Benefits and Advantages of Apple Feta Easter Romaine Salad

    The Apple Feta Easter Romaine Salad boasts numerous benefits that make it an outstanding option for spring meals. Its preparation is incredibly straightforward, requiring minimal cooking skills, which makes it accessible for any level of home cook—from novice to expert. The simplicity doesn’t compromise flavor; rather, it enhances the natural sweetness of apples and the creaminess of feta cheese.

    One of the standout features of this salad is its nutritional profile. The combination of romaine lettuce, apples, and feta provides a perfect blend of vitamins, minerals, and antioxidants. Romaine lettuce is rich in Vitamin K, which supports bone health, while apples are an excellent source of fiber and Vitamin C, contributing to immune support. Feta cheese adds a boost of protein and healthy fats, keeping you full longer, which is particularly beneficial for busy professionals and students on the go.

    Additionally, this salad is easily adaptable to various dietary needs. Whether you aim for a vegan version by omitting feta or seek gluten-free options by ensuring your dressing complies, this recipe welcomes customization. For those managing calories, the portions of cheese can be adjusted without sacrificing flavor.

    In summary, choosing the Apple Feta Easter Romaine Salad for your next spring meal means enjoying a recipe that is simple, healthy, and versatile enough to satisfy various dietary preferences. The combination of fresh ingredients not only tantalizes the taste buds but also supports overall health, making it a perfect addition to your springtime table.

    Ingredients Overview

    Essential Ingredients for Apple Feta Easter Romaine Salad

    Here’s a detailed list of the essential ingredients you’ll need to make this vibrant salad, along with their precise measurements and key benefits:

    • Romaine Lettuce: 6 cups, chopped
    • Provides a crisp texture and is packed with Vitamins A and C.

    • Apples: 2 medium-sized (such as Gala or Granny Smith), sliced

    • Adds natural sweetness, fiber, and Vitamin C; choose organic for the best flavor.

    • Feta Cheese: 1 cup, crumbled

    • Brings creaminess and a savory flavor; use a dairy-free alternative for a vegan option.

    • Walnuts: ½ cup, chopped (optional)

    • Adds a crunchy texture and healthy omega-3 fats; can be substituted with pumpkin seeds for a nut-free diet.

    • Red Onion: ¼ cup, thinly sliced

    • Introduces a savory kick; if you prefer a milder taste, soak the onion in water before adding.

    • Craisins: ½ cup (dried cranberries)

    • Provides a sweet-tart contrast; substitute with raisins or omit for lower sugar content.

    • Olive Oil: 3 tablespoons (extra virgin recommended)

    • A healthy fat that enhances flavor and provides anti-inflammatory properties.

    • Balsamic Vinegar: 2 tablespoons

    • A bit of acidity that helps balance the salad; can be swapped with apple cider vinegar for a different flavor twist.

    • Salt and Pepper to taste

    • Essential seasonings for enhancing the overall flavor of the salad.

    Each ingredient plays a vital role, contributing to the overall taste and nutritional profile of the Apple Feta Easter Romaine Salad, making it a delightful choice for your upcoming spring meals.

    Dietary Substitutions to Customize Your Apple Feta Easter Romaine Salad

    To make this salad fit various dietary needs, here are some suggested substitutions:

    • Vegan Version: Replace feta with crumbled tofu seasoned with nutritional yeast for a cheesy flavor without dairy.

    • Nut-Free Version: If there’s a nut allergy, simply replace walnuts with sunflower seeds or omit them completely.

    • Gluten-Free Version: Ensure that all condiments, including balsamic vinegar, are gluten-free. Most are, but it’s always good to check labels.

    • Low-Calorie Version: Reduce feta cheese or use a reduced-fat version and consider cutting back on the craisins to decrease sugar intake.

    • Fruity Variations: To shake things up, use pears or berries instead of apples for a twist on flavor.

    These simple substitutions allow you to cater this delicious salad to fit any dietary need, making it an excellent choice for social gatherings or family meals during the spring season.

    How to Prepare the Perfect Apple Feta Easter Romaine Salad: Step-by-Step Guide

    Preparing the Apple Feta Easter Romaine Salad is a breeze! Follow these simple steps to create a fresh and delicious dish that’s perfect for your next spring meal.

    1. Prepare the Base:
    2. Start by thoroughly washing the romaine lettuce under cool running water. Shake off excess water or use a salad spinner to dry it. Once dry, chop the lettuce into bite-sized pieces and place them in a large salad bowl.

    3. Slice the Apples:

    4. Core and slice the apples into thin wedges. You can leave the skin on for added nutrition. As you cut, toss them lightly in lemon juice to prevent browning and add a hint of zest.

    5. Add the Feta:

    6. Crumble the feta cheese over the romaine lettuce. Distributing it evenly will ensure that every bite has that creamy goodness.

    7. Incorporate Other Ingredients:

    8. Add the chopped walnuts, sliced red onion, and craisins into the bowl. Use your hands or tongs to gently mix everything together to prevent bruising the lettuce.

    9. Make the Dressing:

    10. In a small bowl, whisk together the olive oil, balsamic vinegar, salt, and pepper. You can adjust the seasoning to your taste!

    11. Combine the Dressing:

    12. Pour the dressing over the salad mixture. Toss gently to coat the ingredients evenly without bruising the delicate greens.

    13. Serve Immediately:

    14. This salad is best enjoyed fresh! Serve it in individual bowls or family-style in the large bowl. For added flair, consider garnishing with extra walnuts or a sprinkle of feta on top.

    15. Refrigerate Leftovers:

    16. If you have any leftovers, store them in an airtight container in the refrigerator. Just remember that the texture may change slightly, but it will still be enjoyable!

    Cooking this Apple Feta Easter Romaine Salad is not only a straightforward process but can be adapted for various dietary preferences. Making it your own is part of the joy of creating fresh spring meals.

    Mastering Apple Feta Easter Romaine Salad: Advanced Tips and Variations

    To master the Apple Feta Easter Romaine Salad, consider these advanced tips and variations that can elevate your dish:

    • Herbs for Extra Flavor:
    • Incorporate fresh herbs like mint or cilantro for an aromatic touch. Herbs can brighten the flavors and make each bite more exciting.

    • Citrus Zest:

    • Grate some lemon or orange zest into the salad for an extra pop of flavor. The zest can balance the sweetness of apples and enhance the overall freshness.

    • Spiced Up Dressing:

    • Add a teaspoon of Dijon mustard or a pinch of red pepper flakes to the dressing for a kick. This will give your salad an unexpected twist that guests will love.

    • Add Protein:

    • To turn this salad into a heartier meal, consider topping it with grilled chicken, shrimp, or chickpeas. This addition will increase the protein content, perfect for more substantial spring meals.

    • Visual Presentation:

    • Layer the ingredients in a clear glass bowl to create a stunning visual effect. Presenting your salad beautifully makes it more inviting and appealing.

    With these advanced techniques and variations, you can tailor the Apple Feta Easter Romaine Salad to fit any occasion, impressing guests or simply enjoying it with your family.

    How to Store Apple Feta Easter Romaine Salad: Best Practices

    To ensure the Apple Feta Easter Romaine Salad stays fresh and tasty, proper storage practices are essential. Here are some guidelines:

    • Short-term Storage:
    • If you have leftovers, refrigerate the salad in an airtight container for up to three days. The key to retaining crispness is to keep the dressing separate until ready to serve. Assemble un-dressed salads to maintain maximum freshness.

    • Longer-Term Storage:

    • If you want to prepare the salad ahead of time for a spring meal, serve it within 24 hours for the best taste. Slice apples just before serving to avoid browning.

    • Reheating (if applicable):

    • If you do have a hearty version with proteins involved, it can be reheated lightly in the microwave for about 30 seconds. This is not typically necessary for a salad but works for those variations.

    Following these best practices will help preserve the taste and texture of your Apple Feta Easter Romaine Salad, allowing you to enjoy its delightful flavors for an extended period.

    Nutritional Value of Apple Feta Easter Romaine Salad

    The nutritional value of the Apple Feta Easter Romaine Salad makes it an advantageous choice for spring meals. Here’s a breakdown of the macro and micronutrients per serving:

    • Calories: Approximately 220
    • Total Fat: 15g
    • Saturated Fat: 5g
    • Cholesterol: 20mg
    • Sodium: 300mg
    • Carbohydrates: 18g
    • Dietary Fiber: 3g
    • Sugars: 6g
    • Protein: 6g

    Vitamins & Minerals:

    • Vitamin A: 35% Daily Value (DV)
    • Vitamin C: 15% DV
    • Calcium: 10% DV
    • Iron: 6% DV

    The combination of healthful ingredients not only makes this salad low in calories while being rich in essential vitamins and minerals, supporting overall wellness. Whether consumed as a side or a main dish, the Apple Feta Easter Romaine Salad fits wonderfully into a balanced diet, appealing to those who are health-conscious or simply looking to enjoy delicious spring meals.

    FAQs: Frequently Asked Questions About Apple Feta Easter Romaine Salad

    1. Can I make this salad ahead of time?
    Yes, for best results, prepare the ingredients ahead but keep the dressing separate until you’re ready to serve to maintain freshness.

    2. Is it possible to substitute feta cheese with something else?
    Absolutely! For a vegan option, use crumbled tofu or a dairy-free cheese alternative.

    3. Can I make this salad nut-free?
    Yes, simply omit the walnuts and consider pumpkin seeds instead for crunch, or leave them out altogether.

    4. What dressing can I use if I want to change it up?
    Feel free to experiment with other dressings such as a lemon vinaigrette or a creamy yogurt dressing to suit your taste.

    5. How do I adjust this salad for weight loss or calorie reduction?
    Reduce the feta cheese amount, minimize the craisins, and ensure your dressing is light to keep calorie intake low.

    This Apple Feta Easter Romaine Salad is sure to become a staple in your collection of know-how for delightful spring meals. Its refreshing flavor profile, healthy ingredients, and versatility cater to a vast audience, making every meal an enjoyable experience. Get cooking, and let this salad inspire your efforts in the kitchen!

  • Simple Easter Tortellini Salad

    Simple Easter Tortellini Salad

    Simple Easter Tortellini Salad: A Tropical Delight

    Introduction to Simple Easter Tortellini Salad

    Welcome to the vibrant world of the Simple Easter Tortellini Salad, a delightful dish that encapsulates the essence of spring celebrations. This pasta salad is an exquisite combination of flavors and textures, making it a perfect addition to your Easter festivities or any special gathering. What makes this salad even more appealing is its remarkable simplicity—ideal for those of us who find cooking challenging or are pressed for time.

    The stars of this dish are tender tortellini, fresh vegetables, and a zesty dressing that awakens the palate. Not only does it have an eye-catching presentation, but this tortellini salad is also packed with essential nutrients, catering to various dietary needs. Whether you are vegan, gluten-free, or simply looking for a healthier alternative, this recipe offers flexible options suitable for everyone—from busy parents to health-conscious students and even food enthusiasts eager to impress their guests.

    As we explore the nuances of this delightful pasta salad, you’ll discover its impressive health benefits. It’s a well-balanced dish that combines carbohydrates, protein, and plenty of vitamins from the fresh ingredients. By incorporating colorful vegetables, participants can enjoy the visual appeal and nutritional richness. Get ready to make your Easter celebration even more special with this Simple Easter Tortellini Salad!

    Benefits and Advantages of Simple Easter Tortellini Salad

    The Simple Easter Tortellini Salad is more than just a delicious dish; it stands out for several compelling reasons.

    1. Ease of Preparation

    One of the main advantages of this tortellini salad is its straightforward preparation. Even novice cooks can handle it with ease! With only three main steps—cooking the tortellini, chopping vegetables, and mixing the ingredients—it makes for a stress-free cooking experience. Busy parents and working professionals will appreciate how quickly this dish can come together. Plus, you can prepare it ahead of time!

    2. Health Benefits

    Packed with vital nutrients, the pasta salad combines carbohydrates from tortellini with a hefty dose of antioxidants from fresh vegetables like bell peppers, spinach, and cherry tomatoes. These ingredients provide a range of health benefits, including improved digestion and enhanced immune function.

    If you’re aiming to reduce calories or incorporate more veggies into your diet, consider using whole grain or gluten-free tortellini. Swapping in seasonal vegetables further boosts the salad’s nutrition profile, making it a guilt-free indulgence.

    3. Suitable for Various Diets

    In this modern culinary landscape, catering to different dietary needs is essential. The Simple Easter Tortellini Salad is versatile enough to accommodate various preferences. For a vegan version, opt for plant-based tortellini and dress it with a vegan dressing. Need a gluten-free option? Many brands now offer gluten-free pasta that doesn’t sacrifice taste or texture. This adaptiveness makes it a fantastic choice for gatherings where guests have different dietary restrictions.

    4. Aesthetically Pleasing

    Let’s not forget the visual appeal! This pasta salad is vibrant and colorful, making it the centerpiece of your Easter feast. The striking contrast of colors from fresh herbs and vegetables garners attention and adds a festive touch to the table setting.

    5. Great for Leftovers

    If you find yourself with any leftovers, don’t worry! The Simple Easter Tortellini Salad holds up well in the fridge. This quality makes it ideal for meal prepping, allowing you to enjoy nutritious lunches throughout the week with minimal effort.

    Overall, this salad effectively combines convenience, health benefits, dietary adaptability, aesthetic appeal, and leftovers management, making it a standout choice for any occasion.

    Ingredients Overview

    Essential Ingredients for Simple Easter Tortellini Salad

    To make this Simple Easter Tortellini Salad a reality, you’ll need the following ingredients:

    • 9 oz (250g) tortellini (choose whole grain or gluten-free for specific diets)
    • 1 cup cherry tomatoes, halved
    • 1 cup bell peppers, diced (mix of colors)
    • 1 cup fresh spinach, chopped
    • 1/2 cup red onion, finely diced
    • 1/4 cup olives, sliced (optional)
    • 1/4 cup feta cheese (or vegan cheese)
    • 1/4 cup fresh basil, chopped (or substitute with parsley)
    • 1/4 cup extra virgin olive oil
    • 2 tablespoons balsamic vinegar
    • 1 teaspoon Italian seasoning
    • Salt and pepper to taste

    Health Benefits

    • Tortellini: Provides carbs and protein—opt for whole grain or gluten-free options to enhance nutritional value.
    • Tomatoes: Rich in lycopene and vitamins A and C, promoting heart health.
    • Bell Peppers: Packed with vitamin C and antioxidants, they boost immunity and skin health.
    • Spinach: Loaded with iron and essential vitamins, contributing to bone health.
    • Olives: Provide healthy fats for heart health—optional for those avoiding extra fat.
    • Feta Cheese: Adds creaminess and flavor, while vegan cheese options cater to lactose-intolerant individuals or vegans.

    Dietary Substitutions to Customize Your Simple Easter Tortellini Salad

    Given the diverse preferences in the culinary world, here are some suggested substitutions you can make based on dietary necessities or ingredient availability:

    • Replace Tortellini with: Tri-color rotini, whole wheat pasta, or gluten-free pasta for a pasta salad twist!
    • For a Vegan Option: Use plant-based tortellini (many brands offer options)—substitute feta with tofu or avocado for creamy textures.
    • Add Extra Protein: Include chickpeas or grilled chicken to make the salad more filling, perfect for a hearty lunch or dinner.
    • Vegetable Variations: If cherry tomatoes or bell peppers are out of season, consider cucumbers, zucchini, or roasted vegetables for different flavors.

    With these delicious ingredients and customizable options, the Simple Easter Tortellini Salad can serve any family member or guest at your celebration!

    How to Prepare the Perfect Simple Easter Tortellini Salad: Step-by-Step Guide

    Follow these easy steps to create your Simple Easter Tortellini Salad that will impress everyone at the table.

    1. Cook the Tortellini

    Start by bringing a large pot of salted water to a boil. Add your chosen tortellini and cook according to the package instructions (typically 3-5 minutes), until they’re fully cooked yet firm to the bite.

    2. Prepare the Vegetables

    While the tortellini cooks, rinse and chop your vegetables. Halve the cherry tomatoes, dice the bell peppers, finely chop the red onion, and prepare the spinach. For an extra flavor boost, you can sauté the onions lightly in olive oil or use them raw for a sharper bite.

    3. Mix the Dressing

    In a small bowl, whisk together the extra virgin olive oil, balsamic vinegar, Italian seasoning, salt, and pepper. Adjust the seasoning according to your taste. This dressing brings the entire salad to life with its tangy flavor!

    4. Combine Ingredients

    Once the tortellini is cooked, drain it in a colander and rinse with cold water to stop the cooking process. In a large mixing bowl, combine the tortellini, prepared vegetables, basil, and olives. Gently fold in the feta cheese.

    5. Dress the Salad

    Drizzle the prepared dressing over the salad and mix gently to coat all ingredients evenly.

    6. Chill and Serve

    For the best flavor, let the salad sit for at least 30 minutes in the refrigerator to let all the flavors meld together. Before serving, give it another gentle toss to combine.

    7. Presentation

    Serve your Simple Easter Tortellini Salad in a large bowl or platter. Garnish with extra basil or a sprinkle of feta for added flair.

    Whether you’re serving it chilled or at room temperature, this pasta salad shines during any gathering, making it an excellent choice for your Easter celebration!

    Mastering Simple Easter Tortellini Salad: Advanced Tips and Variations

    To elevate your Simple Easter Tortellini Salad, consider customizing it further or optimizing your cooking methods:

    1. Advance Prep

    Prep vegetables the night before and store them in the fridge. Cook the tortellini and refrigerate until you’re ready to assemble. This approach makes it incredibly easy to whip together just before your guests arrive.

    2. Herbal Infusion

    For a more aromatic experience, infuse your dressing with herbs like rosemary or thyme. Let the dressing sit for an hour before using, allowing the flavors to deepen.

    3. Add Nuts for Crunch

    Sprinkle some toasted pine nuts or walnuts on top of your salad for added crunch and healthy fats. Nuts serve as a delicious contrast to the soft tortellini and creamy cheese.

    4. Seasonal Variations

    Incorporate seasonal fruits for a fresh twist in spring! Consider adding diced strawberries or mandarin oranges for a touch of sweetness that pairs beautifully with the tangy dressing.

    5. Use Different Oils

    Feel free to experiment with flavored oils like garlic-infused or lemon-infused olive oil to create new layers of flavor in your pasta salad.

    These advanced tips offer even more ways to enjoy your Simple Easter Tortellini Salad, allowing you to adapt and make it truly unique to your palate and preferences.

    How to Store Simple Easter Tortellini Salad: Best Practices

    Refrigeration

    Your Simple Easter Tortellini Salad stores beautifully in the refrigerator. Always ensure your salad is in an airtight container to maintain its freshness. The pasta salad can typically last in the fridge for up to 3-5 days.

    Freezing

    Although freezing is not recommended for this salad due to the ingredients’ water content, you can freeze leftovers of the tortellini before mixing with other components. To enjoy later, store cooked tortellini in a freezer-safe bag for up to three months, then thaw and mix with fresh veggies before serving.

    Reheating

    If you enjoy your tortellini warm, feel free to gently heat it in the microwave or on the stove. However, be careful not to overheat, as fresh vegetables will lose their crunch and freshness.

    By following these storage tips, you’ll maximize the shelf life of your Simple Easter Tortellini Salad, ensuring it stays as delightful as when you first made it!

    Nutritional Value of Simple Easter Tortellini Salad

    Understanding the nutritional breakdown of your Simple Easter Tortellini Salad can help you make informed dietary choices. Here’s an approximate analysis per serving based on typical ingredients (assuming the addition of feta and olive oil):

    • Calories: 320
    • Protein: 12g
    • Fat: 18g (with healthy fats from olive oil and cheese)
    • Carbohydrates: 32g
    • Fiber: 4g (enhanced by vegetables and whole-grain pasta)
    • Sugars: 3g
    • Vitamin A: 45% of Daily Value
    • Vitamin C: 60% of Daily Value
    • Calcium: 10% of Daily Value (depending on cheese used)

    This nutrient-rich pasta salad serves as a balanced option, especially relevant for those keeping a close eye on caloric intake while enjoying a wide variety of flavors.

    FAQs: Frequently Asked Questions About Simple Easter Tortellini Salad

    Can I make the tortellini salad ahead of time?

    Yes! This salad can be prepared a day in advance. Just remember to dress it close to serving time to maintain freshness.

    What other vegetables can I use?

    Feel free to get creative! Zucchini, asparagus, or even roasted vegetables can be excellent additions or substitutes in this dish.

    Is it possible to make a vegan version?

    Absolutely! Simply swap the tortellini for a plant-based option and replace the feta cheese with a vegan alternative or omit it entirely.

    Can I freeze leftovers?

    As mentioned earlier, freezing is not recommended for the entire salad, but cooked tortellini can be frozen. Combine it with fresh vegetables for the best taste.

    How can I add more protein?

    To add protein, consider including chickpeas, grilled chicken, or shrimp for a satisfying meal option.

    What dressing pairs well with this pasta salad?

    While balsamic vinaigrette works incredibly well, opt for Italian dressing, lemon vinaigrette, or even homemade creamy dressings for different flavor profiles!

    In conclusion, this Simple Easter Tortellini Salad stands out as an exceptional dish that combines ease, nutrition, adaptability, and aesthetic appeal—all while providing a delightful flavor experience. Give it a try for your next gathering; it might just become your new go-to salad!

  • IM Obsessed Been Making These Carrots Non-Stop

    IM Obsessed Been Making These Carrots Non-Stop

    I’M Obsessed! Been Making These Carrots Non-Stop!: A Tropical Delight

    Introduction to I’M Obsessed! Been Making These Carrots Non-Stop!

    If you’re looking for a vibrant addition to your dinner recipes repertoire, then you’re in for a treat with this carrot recipe! Not only is it incredibly simple and quick to make, but it also makes eating your veggies enjoyable and exciting. Imagine perfectly roasted carrots glazed with a sweet and spicy tropical sauce that bursts with flavors. This dish is perfect for everyone—whether you’re a busy parent, a health-conscious individual, or a food enthusiast.

    In just a matter of minutes, you can whip up this dish that caters to various dietary needs. The carrots can be prepared vegan, gluten-free, and low-calorie, making them suitable for almost anyone at your dining table. This recipe not only highlights the humble carrot but transforms it into a tropical delight that is not only eye-catching but also packed with nutrients. So, come along as we dive into this colorful adventure that guarantees everyone will be obsessed with these roasted carrots, just like I am!

    Benefits and Advantages of I’M Obsessed! Been Making These Carrots Non-Stop!

    There are many benefits to adding this carrot dish to your meal planning, elevating its status beyond the average vegetable side. Firstly, the preparation is incredibly straightforward. With just a handful of ingredients that you likely already have at home, you can make a delicious side dish in under 30 minutes. This makes it ideal for those busy weeknights when you want to serve your family a healthy dinner but are short on time.

    Moreover, carrots are an excellent source of essential vitamins and minerals. They are rich in vitamin A, which is vital for good vision, and are packed with antioxidants that help protect the body from disease. Additionally, the natural sweetness of the carrots allows for a delightful flavor profile, especially when paired with a tropical glaze made from fruits, herbs, and spices. Not to mention, this dish is vegan and gluten-free, making it accessible for those following specific dietary restrictions.

    Another appealing aspect of this dish is its versatility. You can serve these roasted carrots as a side for grilled meats, stir them into a salad, or even mash them for a comforting vegetarian main course. This adaptability means that you can easily integrate this dish into any meal or cuisine, making it one of those essential dinner recipes you’ll want to keep revisiting.

    Furthermore, the technique of roasting carrots enhances their natural flavors while also concentrating their sweetness. This method means you can enjoy the health benefits of the carrots while indulging in a rich and satisfying dish. With a handful of spices and herbs, you can customize the flavor to suit your preferences, ensuring every meal feels unique and tailored to your taste.

    Ingredients Overview

    Essential Ingredients for I’M Obsessed! Been Making These Carrots Non-Stop!

    To create these delicious roasted carrots, gather the following essential ingredients:

    • 2 pounds of fresh carrots: Select firm carrots that have a vibrant color. Baby carrots work too, but whole carrots offer a richer flavor.
    • 2 tablespoons of olive oil: For a healthy fat option, this helps achieve that golden-brown color and crispy texture.
    • 1 tablespoon maple syrup or agave nectar: This adds natural sweetness to enhance the caramelization of the carrots.
    • 1 teaspoon ground cumin: A warm spice that complements the carrots beautifully.
    • 1 teaspoon smoked paprika: Provides a hint of smokiness and depth of flavor.
    • Salt and black pepper (to taste): Essential seasonings to elevate the dish.
    • Fresh herbs like cilantro or parsley (for garnish): Adds freshness and color to the final plate.

    This base recipe is not just simple; it’s also wonderfully adaptable. You can make this entirely vegan and gluten-free, ensuring it fits numerous dietary needs.

    Dietary Substitutions to Customize Your I’M Obsessed! Been Making These Carrots Non-Stop!

    This carrot recipe can easily accommodate various dietary preferences with just a few simple substitutions:

    • Oil Alternative: For a lower-calorie version, you may replace olive oil with cooking spray or vegetable broth.
    • Sweetener Substitute: If you’re avoiding sugar, feel free to skip the maple syrup entirely or swap it with a sugar substitute like stevia or monk fruit.
    • Spice Variations: If you’re not keen on certain spices, consider using ground ginger for a zesty kick or cinnamon for a sweeter flavor.
    • Herb Choices: If cilantro isn’t available, parsley, dill, or even green onions could work as excellent alternatives for garnishing.

    These substitutions ensure that everybody can enjoy this vibrant dish while accommodating their dietary preferences without compromising flavor.

    How to Prepare the Perfect I’M Obsessed! Been Making These Carrots Non-Stop!: Step-by-Step Guide

    Creating these mouthwatering roasted carrots is a breeze, thanks to these easy-to-follow steps. Make sure to gather your ingredients before starting to streamline the process.

    1. Preheat the Oven: Start by preheating your oven to 425°F (220°C). This high temperature will allow the carrots to roast perfectly, developing that enticing caramelization.

    2. Wash and Cut the Carrots: Rinse the carrots thoroughly under cold water to remove any dirt. Trim the tops and tails, then slice them into equal-sized pieces: about 1-inch thick for optimal cooking. If using baby carrots, they can be left whole.

    3. Prepare the Dressing: In a mixing bowl, whisk together the olive oil, maple syrup, ground cumin, smoked paprika, salt, and black pepper until well combined. This mixture acts as both a glaze and a seasoning for the carrots.

    4. Toss the Carrots: In another large bowl, place the sliced carrots, then pour the dressing over them. Use your hands or a spatula to ensure every carrot piece is well-coated with the glaze. This step is crucial for maximum flavor.

    5. Arrange on a Baking Sheet: Spread the glazed carrots out in a single layer on a baking sheet lined with parchment paper. Make sure they have space between them to ensure even roasting. This prevents them from steaming and encourages that lovely char.

    6. Roast the Carrots: Place the baking sheet in the preheated oven and roast for about 20-25 minutes. After the first 15 minutes, you may want to stir the carrots to ensure even cooking. Keep an eye on them; they should be tender with a lovely golden-brown exterior.

    7. Garnish and Serve: Once cooked, remove the carrots from the oven and let them cool for a moment. If desired, sprinkle fresh herbs such as chopped cilantro or parsley on top for a burst of freshness before serving.

    8. Enjoy Your Creation: These beautifully roasted carrots can be served hot as a side to any of your favorite main courses or can be cooled and added to salads for a delicious twist on traditional dishes.

    You now have a colorful and delightful dish that elevates your dinner recipes effortlessly! Feel free to adjust seasonings or colors to suit your family’s preferences entirely.

    Mastering I’M Obsessed! Been Making These Carrots Non-Stop!: Advanced Tips and Variations

    While this recipe is perfectly delicious as is, there are ways to take it to the next level or customize it to make it even more exciting:

    • Spice It Up: If you’re looking for some heat, consider adding a pinch of cayenne pepper or some chili flakes to your glaze. This adds a fantastic kick that offsets the sweetness beautifully.

    • Add Nuts or Seeds: For a satisfying crunch, sprinkle some toasted walnuts, pecans, or pumpkin seeds over the dish just before serving. This addition adds texture and healthy fats.

    • Infuse with Citrus: For added brightness, toss the roasted carrots with a squeeze of fresh lemon or lime juice right before serving, enhancing their flavor even further.

    • Experiment with Sauces: Drizzle a tahini sauce or a yogurt-based sauce over the carrots for an extra layer of flavor and creaminess.

    These variations allow you to explore different cultures’ flavors, making this dish a versatile option for any occasion, laden with delightful surprises every time you prepare it.

    How to Store I’M Obsessed! Been Making These Carrots Non-Stop!: Best Practices

    Storing any leftover roasted carrots is quite simple, ensuring you can enjoy this delicious dish later. Here are some best practices:

    • Refrigerating Leftovers: After your meal, let the roasted carrots cool completely. Once cooled, store them in an airtight container in the refrigerator. They can be stored this way for up to 4 days.

    • Freezing: If you want to save leftovers for a longer period, consider freezing your cooked carrots. Spread them on a baking sheet in a single layer, freeze them until solid, and then transfer them to a freezer-safe bag or container. They can be stored in the freezer for up to 3 months.

    • Reheating: When you’re ready to enjoy your leftovers, simply preheat your oven to 375°F (190°C). Spread the leftovers on a baking sheet and heat for about 10-15 minutes until warmed through. Alternatively, you can use a microwave for quicker reheating, keeping in mind the texture may not be as crisp.

    By following these storage techniques, you can ensure your adored roasted carrots remain fresh and full of flavor, ready to elevate future meals.

    Nutritional Value of I’M Obsessed! Been Making These Carrots Non-Stop!

    Understanding the nutritional value of your food is essential, especially for dinner recipes where health and flavor collide. Here’s the nutritional breakdown for one serving (about ½ cup) of this roasted carrot dish:

    • Calories: 80
    • Fat: 4 g
    • Carbohydrates: 12 g
    • Fiber: 3 g
    • Sugars: 5 g (natural sugars from carrots and maple syrup)
    • Protein: 1 g
    • Vitamin A: 187% of the Daily Value (DV)
    • Vitamin C: 9% of the DV
    • Calcium: 3% of the DV
    • Iron: 2% of the DV

    The carrots provide a wealth of antioxidants, particularly beta-carotene, making them a superfood for eye health. The inclusion of healthy fats from olive oil amplifies nutrient absorption, ensuring you’re not only enjoying a delicious dish but also one brimming with health benefits.

    Note that these values may vary based on the exact ingredients used, particularly sweeteners or herbs. This dish is low-calorie and supports a balanced diet, perfect for anyone looking to maintain or lose weight without sacrificing taste.

    FAQs: Frequently Asked Questions About I’M Obsessed! Been Making These Carrots Non-Stop!

    Can I make this carrot recipe ahead of time?

    Yes! You can prepare the carrots in advance and store them in the refrigerator for a day before roasting. This can also help the flavors to meld together for an even tastier dish!

    What can I use instead of carrots?

    If you’re looking to mix things up, consider substituting other root vegetables like sweet potatoes or parsnips. Each will have its unique flavor and texture but will also roast beautifully!

    How can I achieve a sweeter glaze?

    If you prefer a sweeter flavor profile, feel free to increase the amount of maple syrup or add a touch of brown sugar. Honey is another option that can provide additional sweetness if you’re not strictly vegan.

    Are there any common allergies I should be aware of with this recipe?

    This dish is generally safe for most diets. However, if you are allergic to nuts, be cautious with toppings like walnuts or pecans. Always check ingredient labels for allergens in processed products like olive oil or seasonings.

    Can I grill these carrots instead?

    Absolutely! Grilling offers a fantastic smoky flavor. Follow the same steps for the glaze, then place the carrots on a grill basket or skewers and cook them over medium heat until tender.

    This vibrant and flavorful carrot dish ensures every meal shines. With these answers and helpful tips, you’re more than equipped to dive into making it your own!

    In conclusion, whether you’re a seasoned cook or a kitchen novice, the “I’M Obsessed! Been Making These Carrots Non-Stop!” recipe is an easy and delightful addition to your collection of dinner recipes. So gather your ingredients and let’s get cooking!

  • 5-Ingredient Roasted Brussels Sprouts And Carrots

    5-Ingredient Roasted Brussels Sprouts And Carrots

    5-Ingredient Roasted Brussels Sprouts And Carrots: A Tropical Delight

    Introduction to 5-Ingredient Roasted Brussels Sprouts And Carrots

    Are you on the hunt for healthy dinner recipes that require minimal effort yet bring maximum flavor? Look no further! This delightful combination of roasted Brussels sprouts and carrots is not only simple to prepare but also a healthful addition to your dinner table. This magical dish, crafted with just five ingredients, is vegetarian, gluten-free, and perfect for anyone looking to eat healthily without compromising on taste.

    Brussels sprouts are renowned for their nutrient density, packed with vitamins C and K, while carrots add a natural sweetness and a rich source of beta-carotene. Roasting these vibrant vegetables enhances their flavors, creating a caramelized exterior that is hard to resist. This dish is not just for busy weeknights; it works wonderfully as a side for festive gatherings or intimate dinners alike.

    As you dive into this recipe, you’ll discover that its versatility makes it suitable for a variety of dietary needs. Whether you’re a busy parent, a student, or someone following a specific diet plan, this roasted dish is a perfect fit. Give it a try, and you’ll see that healthy cooking doesn’t have to be complicated or time-consuming. Join us as we explore how to create a mouthwatering, nutritious side dish that will inspire your culinary journey!

    Benefits and Advantages of 5-Ingredient Roasted Brussels Sprouts And Carrots

    Why should you make the effort to include 5-Ingredient Roasted Brussels Sprouts And Carrots in your meal plan? Let’s uncover the numerous benefits of this delightful recipe that will have you reaching for it again and again.

    Quick and Easy Preparation

    One of the standout features of this recipe is its simplicity. With just five ingredients that you likely already have in your kitchen, it takes only minutes to prepare. Ideal for busy individuals and families, this dish is not only easy to make but also requires minimal clean-up. The straightforward steps ensure that even novice cooks can whip it up without any stress.

    Nutritional Powerhouse

    Next, let’s delve into the health benefits. Brussels sprouts and carrots are laden with essential nutrients. Brussels sprouts are an excellent source of antioxidants, which combat free radicals in your body, while carrots contribute to better vision and skin health thanks to their high beta-carotene content. Together, these vegetables pack a nutritional punch, making them a perfect fit for healthy dinner recipes. This dish keeps you full without weighing you down, promoting a balanced meal.

    Versatile and Customizable

    Another advantage of this recipe is its versatility. Feel free to get creative! You can easily customize it by adding other seasonal vegetables or spices. This flexibility makes Brussels sprouts and carrots a great base for experimentation, allowing those with specific dietary preferences, such as vegan or gluten-free, to enjoy a meal that aligns with their lifestyle.

    Budget-Friendly

    Let’s not forget about the cost-effectiveness. Both Brussels sprouts and carrots are affordable, especially when bought in bulk or during their peak seasons. This recipe focuses on keeping your grocery bill low while providing a delicious and nutritious meal, which is a bonus for students and families alike.

    Great for Meal Prep

    Lastly, this dish is perfect for meal prepping. Roasted Brussels sprouts and carrots keep well in the refrigerator, making them an excellent choice for quick meal options throughout the week. Simply make a large batch, store it in airtight containers, and enjoy it alongside other meals.

    In summary, the combination of ease, nutrition, versatility, affordability, and meal prep suitability makes these roasted Brussels sprouts and carrots a fantastic addition to your repertoire of healthy dinner recipes.

    Ingredients Overview

    Essential Ingredients for 5-Ingredient Roasted Brussels Sprouts And Carrots

    To recreate this roasted delight, you need only a handful of ingredients. Here’s a detailed overview of what you’ll need:

    1. Brussels Sprouts (1 pound)
    2. Purpose: The primary vegetable in this dish; they provide a rich source of vitamins and minerals. Choose fresh, bright green sprouts for the best flavor.

    3. Carrots (1 pound)

    4. Purpose: These add natural sweetness and crunch; they’re packed with beta-carotene. Opt for medium-sized carrots; baby carrots can also be used for convenience.

    5. Olive Oil (3 tablespoons)

    6. Purpose: This not only helps in roasting the vegetables evenly but also contributes healthy fats. You can substitute it with canola or avocado oil if preferred.

    7. Salt (1 teaspoon)

    8. Purpose: Enhances flavor; feel free to adjust according to your taste or dietary requirements. For those on low-sodium diets, consider using sea salt or herb-infused salt for extra taste.

    9. Black Pepper (½ teaspoon)

    10. Purpose: Adds a touch of spice and depth to the dish. This can be replaced with other spices or herbs, depending on your taste preferences.

    Dietary Substitutions to Customize Your 5-Ingredient Roasted Brussels Sprouts And Carrots

    Even with such a simple list, there are ways to adapt this recipe for various dietary needs:

    • Vegan: This recipe is inherently vegan, but if you want to add a gourmet twist, consider adding nutritional yeast for a cheesy flavor without the dairy.

    • Gluten-Free: This recipe is already gluten-free; enjoy it without any modifications!

    • Low-Carb or Keto: While carrots do contain carbs, you can substitute them with cauliflower or zucchini to keep the carbohydrate count lower.

    • For Extra Flavor: Add garlic cloves, fresh herbs like rosemary or thyme, or a splash of balsamic vinegar to elevate the taste profile.

    These substitutions allow you to tailor your roasted Brussels sprouts and carrots to accommodate your dietary preferences while maintaining nutritional balance.

    How to Prepare the Perfect 5-Ingredient Roasted Brussels Sprouts And Carrots: Step-by-Step Guide

    Ready to bring this vibrant dish to life? Here’s a detailed step-by-step guide on preparing your 5-Ingredient Roasted Brussels Sprouts and Carrots:

    1. Preheat the Oven: Start by preheating your oven to 425°F (220°C). A hot oven helps create that perfectly roasted, caramelized outer layer.

    2. Prepare the Brussels Sprouts: Rinse the Brussels sprouts under cold water to clean them. Trim the ends, removing any yellow or damaged leaves. Then, cut them in half for even roasting.

    3. Slice the Carrots: Peel the carrots and slice them into uniform pieces, approximately 1/2-inch thick. Uniformity ensures even cooking.

    4. Mix Ingredients: In a large mixing bowl, combine the halved Brussels sprouts and sliced carrots. Drizzle with olive oil and sprinkle with salt and black pepper. Toss well until all vegetables are coated evenly. This step is crucial for flavor and ensures that the spices adhere to the veggies.

    5. Spread on a Baking Sheet: Arrange the coated vegetables evenly on a large baking sheet, making sure they are not overcrowded. Overlapping can lead to steaming rather than roasting, preventing that desired crispiness.

    6. Roast in the Oven: Place the baking sheet in the preheated oven and set a timer for 20 minutes. Halfway through, take a moment to stir the vegetables to ensure even cooking.

    7. Check for Tenderness: After 20 minutes, check for doneness. The Brussels sprouts should be tender with golden brown edges, and the carrots should be fork-tender. If you prefer a more caramelized finish, leave them in for an additional 5-10 minutes.

    8. Serve: Remove the baking sheet from the oven and allow the vegetables to cool slightly before serving. This dish is best enjoyed warm, straight from the oven.

    9. Garnishing Optional: If desired, drizzle with balsamic glaze or sprinkle with toasted nuts or seeds for added texture. Fresh herbs can also add a pop of color and flavor.

    10. Enjoy: Place the roasted Brussels sprouts and carrots on a serving dish and watch them disappear as you serve your healthy dinner recipes to family and friends.

    By following these clear steps, you’ll create a delicious dish that not only fits into your busy lifestyle but also appeals to health-conscious diners. Feel free to adapt as needed!

    Mastering 5-Ingredient Roasted Brussels Sprouts And Carrots: Advanced Tips and Variations

    To elevate your dish further, here are some advanced tips and variations to try with your roasted Brussels sprouts and carrots:

    Explore Flavor Combinations

    1. Add Heat: Want more spice? Incorporate chili flakes or a sprinkle of cayenne pepper for a kick.

    2. Sweeten the Deal: Drizzle a little maple syrup or honey (if not vegan) over the vegetables before roasting for a sweet-savory profile.

    3. Cheesy Finish: If you’re not strictly vegan, top with grated Parmesan cheese right at the end of roasting for a rich flavor.

    Experiment With Herbs and Spices

    Try experimenting with different herbs such as thyme, rosemary, or even a hint of cumin for a unique twist. Fresh herbs can be either layered during the cooking or added post-roasting for a fresh taste.

    Add Extra Veggies

    You can easily add other vegetables like bell peppers, sweet potatoes, or zucchini to enhance the dish’s visual appeal and nutritional content. Just adjust the cooking time based on the vegetables used.

    Roasting Alternative

    If you’re short on time, consider blanching the Brussels sprouts and carrots in boiling water for a few minutes before roasting. This method reduces oven time while retaining vibrant color and flavor.

    Quick Turnaround: Pan-Fried Version

    For a quick version, consider pan-frying the vegetables instead of roasting. Heat a non-stick skillet, add your veggies with olive oil, and sauté until tender, allowing for a slightly different texture and flavor profile.

    These variations allow you to create a dish that never feels boring, maintaining excitement and creativity in your kitchen while exploring the wonders of healthy dinner recipes.

    How to Store 5-Ingredient Roasted Brussels Sprouts And Carrots: Best Practices

    If you happen to have leftovers (which is unlikely given how delicious this dish is!), storing them correctly ensures that you maintain their quality.

    Refrigeration

    • Cool Down: Allow the Brussels sprouts and carrots to cool before storing them. Hot vegetables can create moisture in the storage container, leading to sogginess.

    • Use Airtight Containers: Transfer the cooled vegetables to airtight containers. They can be stored in the refrigerator for up to 4 days.

    Freezing

    • Prepare for Freezing: For longer storage, consider flash freezing. Spread the cooled veggies on a baking sheet and freeze until solid. Once frozen, transfer them to freezer bags and store for up to 3 months.

    • Reheating: To reheat, bake from frozen without thawing, extending the cooking time, or sauté in a pan until heated through.

    Best Reheating Practices

    • Oven Reheat: Preheat your oven to 350°F (175°C). Spread the vegetables on a baking sheet and heat for about 10-15 minutes until warmed through.

    • Microwave Option: The microwave is a quick option too. Place the veggies in a microwave-safe dish with a splash of water and cover. Heat in short bursts, stirring every 30 seconds until hot.

    By following these storage tips, you can enjoy your roasted Brussels sprouts and carrots a second time, making it a convenient part of your healthy dinner recipes rotation.

    Nutritional Value of 5-Ingredient Roasted Brussels Sprouts And Carrots

    Understanding the nutritional value of your meal aids in maintaining a balanced diet. Here’s a breakdown of what’s in this fabulous dish:

    • Calories: Approximately 150 calories per serving
    • Total Fat: 7g (mostly healthy fats from olive oil)
    • Saturated Fat: 1g
    • Sodium: 300mg (adjustable based on salt used)
    • Total Carbohydrates: 20g
    • Dietary Fiber: 6g
    • Sugars: 6g
    • Protein: 4g

    Vitamins and Minerals

    • Vitamin A: Significant source due to carrots
    • Vitamin C: Abundant in Brussels sprouts
    • Vitamin K: High amounts to support bone health
    • Potassium: Aids in muscle function and electrochemical balance

    Balancing these nutrients while enjoying the wonderful flavors of this dish makes it not only a satisfying option but truly one of the best healthy dinner recipes out there.

    FAQs: Frequently Asked Questions About 5-Ingredient Roasted Brussels Sprouts And Carrots

    Have questions about your roasted Brussels sprouts and carrots? Let’s address some of the most common inquiries:

    Can I use frozen Brussels sprouts?

    While fresh is recommended for the best flavor and texture, you can use frozen Brussels sprouts. Just consider adjusting your cooking time, as frozen veggies may release extra moisture.

    Can I add other vegetables?

    Absolutely! Feel free to mix in other favorite vegetables like sweet potatoes, parsnips, or bell peppers. Just keep an eye on cooking times to ensure everything is perfectly tender.

    What can I serve with roasted Brussels sprouts and carrots?

    These roasted delights pair well with a variety of main dishes. Consider serving them with grilled chicken, salmon, or even as part of a hearty grain bowl. They also work wonderfully in salads.

    How can I adjust the recipe for a larger crowd?

    Scaling the recipe up is quite simple! Just maintain the 1:1 ratio for ingredients; however, ensure you have sufficient oven space and use larger baking sheets to avoid overcrowding.

    What is the best way to reheat leftovers?

    For the best results, reheating in the oven is preferred to retain crispness. Just note that microwaving can make them soggy. Following the suggested storage and reheating methods will help maintain quality.

    Using this detailed guide, you can navigate through cooking and serving 5-Ingredient Roasted Brussels Sprouts And Carrots with ease, ensuring that you and your loved ones enjoy a delicious and nutritious meal! With its undeniable health benefits, simplicity, and room for experimentation, this recipe is bound to become a household favorite.

  • Easy Vegan Celery Salad

    Easy Vegan Celery Salad

    Easy Vegan Celery Salad: A Tropical Delight

    Introduction to Easy Vegan Celery Salad

    If you are looking for a refreshing and healthy recipe to add to your collection of healthy snacks, look no further than this Easy Vegan Celery Salad. This vibrant dish is packed with an array of textures and flavors that will tantalize your taste buds while satisfying your crunch cravings. Not only is it incredibly simple to prepare, but it also fits seamlessly into various dietary lifestyles, making it a versatile option for busy parents, students, health-conscious individuals, and anyone who enjoys vibrant, plant-based meals.

    Celery, the star of this salad, offers a wealth of health benefits. It is low in calories, high in fiber, and rich in vitamins and minerals. Coupled with tantalizing ingredients like juicy cherry tomatoes, creamy avocado, and a zesty lemon vinaigrette, this salad is not just nutritious but also delightful. Making it vegan and gluten-free means that everyone at the table can enjoy it without concern.

    Whether you are looking for a quick lunch option, a side dish for dinner, or just a delightful afternoon snack, this Easy Vegan Celery Salad checks all the boxes. With its bright and crisp ingredients, it not only nourishes your body but also brings a smile to your face. So grab those fresh ingredients and let’s embark on a journey to create a dish that embodies health, simplicity, and deliciousness!

    Benefits and Advantages of Easy Vegan Celery Salad

    Creating an Easy Vegan Celery Salad comes with a multitude of benefits. First and foremost, the recipe is straightforward and quick, requiring minimal kitchen skills. This makes it perfect for novice cooks, busy professionals, or anyone who prefers to spend less time in the kitchen and more time enjoying their meals. You can have this dish prepped and ready in under 15 minutes, and it requires no cooking!

    The health advantages of this salad are significant. With celery as the primary ingredient, you get a low-calorie, high-water content veggie that keeps you hydrated and feeling full for longer periods. Celery is known for its anti-inflammatory properties and is rich in antioxidants and vitamins K and C, which are essential for maintaining good health. Moreover, combining celery with avocado provides healthy fats, which are crucial for overall well-being. This salad is not just a delicious side dish; it’s a powerhouse of nutrition, making it an excellent choice for anyone seeking to incorporate more healthy snacks into their diet.

    Another standout feature of the Easy Vegan Celery Salad is its adaptability. You can easily customize the recipe to suit various dietary preferences, whether you are following a vegan, vegetarian, or gluten-free lifestyle. It can also easily be transformed into a protein-packed meal by adding chickpeas or tofu for those looking for a more filling option. The vibrant colors and diverse textures of the ingredients showcase the beauty of plant-based eating, appealing to food enthusiasts and health-conscious individuals alike.

    Overall, the Easy Vegan Celery Salad not only nourishes your body with wholesome ingredients but also serves as a stunning centerpiece for any meal. Whether you’re hosting a casual gathering or enjoying a quiet dinner at home, this salad is sure to impress with its delightful flavors and health benefits.

    Ingredients Overview

    Essential Ingredients for Easy Vegan Celery Salad

    To create your Easy Vegan Celery Salad, you will need a few wholesome ingredients. Below is a comprehensive list, featuring specific measurements and the role each item plays in this flavorful dish.

    • 4 stalks of celery: The primary ingredient; packed with hydration and a satisfying crunch.
    • 1 cup of cherry tomatoes: Adds natural sweetness and a pop of color.
    • 1 ripe avocado: Provides creaminess and healthy fats, enhancing the salad’s texture.
    • 1/4 cup of red onion: Offers a sharp flavor and complements the other ingredients well.
    • 1/4 cup of fresh parsley: A burst of freshness and nutrients.
    • Juice of 1 lemon: Adds brightness and a tangy flavor.
    • 1 tablespoon of olive oil: A healthy fat that helps with nutrient absorption while enhancing flavor.
    • Salt and black pepper to taste: Essential seasonings for balancing flavors.

    This combination results in a well-rounded, delicious salad that feels indulgent while remaining healthy. All ingredients are vegan, gluten-free, and low in calories, making them perfect for those seeking healthy snacks.

    Dietary Substitutions to Customize Your Easy Vegan Celery Salad

    Customization is a key feature of the Easy Vegan Celery Salad! Here are some suggested substitutions that cater to various dietary needs or ingredient availability:

    • Celery: If you’re not a fan, you can replace it with cucumber for a different crunch or even shredded carrots for a sweeter, earthier flavor.
    • Cherry tomatoes: You may use diced bell peppers or shredded red cabbage for a different flavor profile, ensuring your salad remains colorful and delicious.
    • Avocado: If you’re looking for a lower-fat alternative, consider using silken tofu or a scoop of hummus for creaminess.
    • Red onion: This can be replaced with green onions for a milder flavor or omitted entirely for those sensitive to onion flavor.
    • Lemon juice: Apple cider vinegar is a great substitute that still offers acidity and brightness without the need for fresh lemons.

    Feel free to mix and match these substitutions according to your personal preferences and dietary requirements, ensuring your Easy Vegan Celery Salad is uniquely yours while still being a great addition to the world of healthy snacks.

    How to Prepare the Perfect Easy Vegan Celery Salad: Step-by-Step Guide

    Now that you have all your ingredients ready, it’s time to create your Easy Vegan Celery Salad. Follow these straightforward steps to achieve the perfect salad in no time!

    1. Prepare the Base: Start by washing the stalks of celery thoroughly under running water to remove any dirt and impurities. Pat them dry with a kitchen towel before chopping.

    2. Chop Celery: Slice the celery into thin, bite-sized pieces for the best texture. Place the chopped celery in a large mixing bowl.

    3. Dice Cherry Tomatoes: Next, wash the cherry tomatoes and cut each one in half. Add them to the bowl with the celery.

    4. Cut Avocado: Carefully slice the avocado in half, remove the pit, and scoop the flesh out using a spoon. Cut the avocado into cubes and layer them into the salad.

    5. Finely Chop Red Onion: Peel the red onion and slice it thinly. If the flavor is too strong for you, soak the slices in cold water for about 10 minutes. Then drain and add them to the salad bowl.

    6. Add Fresh Parsley: Rinse the fresh parsley, shake off excess water, and chop it finely. Toss the chopped parsley into the salad for a fresh flavor boost.

    7. Make the Dressing: In a small bowl, combine the freshly squeezed lemon juice, olive oil, salt, and black pepper. Whisk together until the mixture is well combined.

    8. Mix Ingredients: Drizzle the dressing over the salad ingredients and gently toss everything together. Make sure the dressing evenly coats all the ingredients for maximum flavor.

    9. Taste Test: Before serving, taste the salad and adjust the seasoning if necessary. You may want to add a pinch more salt or pepper, depending on your preferences.

    10. Chill and Serve: For optimal flavor, let the salad sit in the fridge for about 15 minutes. This allows the flavors to meld together beautifully. Serve chilled.

    11. Meal Preparation Tip: For those busy days, you can prepare a larger batch of this salad. Just store individual portions in airtight containers for quick and easy healthy snacks throughout the week!

    By following these simple steps, you can make a vibrant, delicious Easy Vegan Celery Salad that’s perfect for any occasion, whether it’s a casual lunch, a picnic, or as an appetizer at a dinner party.

    Mastering Easy Vegan Celery Salad: Advanced Tips and Variations

    Now that you know how to create the fundamental Easy Vegan Celery Salad, let’s explore some advanced tips and delicious variations that will take your salad to the next level!

    • Add Protein: To make this salad a complete meal, consider adding cooked chickpeas, black beans, or lentils. These protein-dense ingredients not only keep you full but also add a satisfying texture.

    • Incorporate Seeds and Nuts: Toss in some sunflower seeds, pumpkin seeds, or sliced almonds for added crunch and healthy fats. They bring a delightful nutty flavor to your salad.

    • Experiment with Dressings: While a lemon-olive oil dressing works wonders, feel free to try different dressings! A balsamic vinaigrette, tahini dressing, or even a simple vegan ranch can offer a new twist on flavors while ensuring they remain healthy snacks.

    • Use Seasonal Ingredients: Tailor your salad to reflect the seasons by adding fresh herbs like basil or cilantro in the summer, or diced apples in the fall for sweetness and crunch.

    • Spice It Up: If you enjoy a little heat, sprinkle in some red pepper flakes or chopped jalapeños to add a fiery kick to your salad.

    • Vegetable Variations: Don’t hesitate to get creative with the vegetables. Thinly sliced radishes, cucumber, bell peppers, or shredded zucchini can add color and flavor contrasts.

    With these tips and variations, you can master the art of preparing an Easy Vegan Celery Salad that goes beyond basic expectations, allowing you to impress family and friends with your culinary creativity.

    How to Store Easy Vegan Celery Salad: Best Practices

    Storing your Easy Vegan Celery Salad properly is key to maintaining freshness and flavor. Here are some best practices for refrigerator storage, freezing, and reheating:

    • Refrigeration: If you have leftover salad, place it in an airtight container and store it in the fridge. It’s best consumed within 1 to 2 days. The longer it sits, the more the ingredients may lose their crunch, especially the celery.

    • Freezing: While the entire salad doesn’t freeze well due to the avocados and tomatoes, you can freeze the chopped celery separately. This way, you can use it in soups or stir-fries later. Just remember, thawed celery will lose its crispness.

    • Reheating: Since this salad is enjoyed cold, there’s no reheating necessary. If you wish to enhance its flavors, however, refreshing it with a squeeze of lemon juice just before serving can perk it up wonderfully.

    • Meal Prep: For those who love to prepare meals in advance, keep the dressing separate from the salad until you are ready to eat. This will prevent the salad from becoming soggy, ensuring every bite remains fresh and inviting.

    Knowing how to store your Easy Vegan Celery Salad strengthens your pantry management skills and helps you stay on track with your healthy snacks plan!

    Nutritional Value of Easy Vegan Celery Salad

    Understanding the nutritional value of your Easy Vegan Celery Salad can help you appreciate how it fits into your overall diet. The following estimates provide a breakdown of commonly analyzed nutrients per serving (about one cup of prepared salad):

    • Calories: Approximately 150-200 calories
    • Protein: Around 3-4 grams
    • Fat: Roughly 10-15 grams (varies greatly depending on the amount of avocado added)
    • Carbohydrates: About 15-20 grams
    • Fiber: 5-6 grams
    • Vitamin C: 15-20% of the Daily Value (DV)
    • Vitamin K: 25-30% of the DV

    These nutritional facts highlight how this salad serves as a wonderful addition to your diet, aiding in hydration, providing essential vitamins, and promoting digestive health due to its high fiber content. It’s a perfect example of satisfying and nutritious healthy snacks.

    Additionally, adjusting the amounts or substituting some ingredients can impact nutritional values, allowing you to tailor the salad according to your dietary goals. Keeping this in mind, you can personalize your Easy Vegan Celery Salad to not only fit your taste preferences but also your nutritional needs.

    FAQs: Frequently Asked Questions About Easy Vegan Celery Salad

    Here are some common questions readers might have about the Easy Vegan Celery Salad:

    Can I make this salad ahead of time?

    Yes! You can prepare the salad a few hours in advance. Just remember to keep the dressing separate until you’re ready to serve to maintain freshness.

    What can I substitute for avocado?

    If you prefer not to use avocado, silken tofu or a few tablespoons of tahini can add creaminess without compromising flavor.

    Is this salad suitable for meal prep?

    Absolutely! You can prepare the ingredients ahead of time and store them separately, mixing them just before serving. This will ensure the salad maintains its crispness.

    How can I make this salad more filling?

    To increase the protein content and make the salad more satisfying, consider adding cooked quinoa, chickpeas, or diced grilled tofu.

    How long does this salad keep in the fridge?

    The salad is best eaten within 1-2 days. If you notice any ingredients wilting or losing texture, it’s best to consume it sooner rather than later.

    Can I add other vegetables to this salad?

    Yes, feel free to add whatever vegetables you enjoy! Cucumbers, bell peppers, or even sprouts can enhance flavor and nutritional diversity.

    With those questions addressed, you are well on your way to enjoying your Easy Vegan Celery Salad and the many healthy snacks it can inspire in your kitchen. Celebrate the joy of healthy cooking and enjoy the vibrant world of plant-based flavors!

  • Tangy Creamy Potato Salad With Eggs

    Tangy Creamy Potato Salad With Eggs

    Tangy Creamy Potato Salad With Eggs: A Tropical Delight

    Introduction to Tangy Creamy Potato Salad With Eggs

    Welcome to the vibrant world of Tangy Creamy Potato Salad With Eggs, where flavors mingle in perfect harmony! This recipe is a fantastic addition to your repertoire, especially if you are browsing through delicious and easy recipe ideas for gatherings, picnics, or even a cozy meal at home. You may wonder, what sets this dish apart? The answer lies in its simplicity. Made with just a handful of ingredients, it offers a delightful balance between creamy, tangy, and satisfying flavors.

    One of the standout features of this potato salad is its versatility. Not only is it easy to prepare, but it also caters to various dietary needs. Whether you are a busy parent, a student living away from home, or simply someone conscious about their health, this potato salad checks all the boxes. The key ingredients bring a treasure trove of health benefits: potatoes provide essential vitamins and minerals, eggs are a fantastic source of protein, and the dressing components offer a zing that invigorates the dish.

    Moreover, this potato salad can easily adapt to different diets, making it suitable for those who follow vegan or gluten-free lifestyles. Additionally, it packs beautifully for lunch boxes or picnic baskets, ensuring that you can relish this tropical delight anytime, anywhere. In the following sections, we will dive deeper into the benefits of this dish, provide an overview of the ingredients, and guide you through preparing the perfect tangy creamy potato salad.

    Benefits and Advantages of Tangy Creamy Potato Salad With Eggs

    Creating a dish that is both delicious and nourishing can sometimes feel challenging, but that’s where our Tangy Creamy Potato Salad With Eggs shines. This recipe is known for its exceptional ease of preparation, making it an ideal option for both novice cooks and seasoned chefs. With minimal time and effort, you can whip up a dish that is both filling and refreshing, perfect for any occasion.

    Health Benefits

    Understanding the health benefits of the key ingredients helps you appreciate this dish even more. Potatoes, the primary ingredient, are rich in potassium and vitamin C, essential for maintaining a healthy immune system. They are naturally gluten-free and low in calories, making them an excellent choice for those looking to enjoy a satisfying meal without the extra calories.

    Eggs, included in this delicious salad, provide high-quality protein and essential nutrients like Vitamin D and choline. These nutrients are beneficial, especially for busy parents and working professionals needing to fuel their bodies for a hectic day. The creamy dressing using natural yogurt or avocado not only adds richness but also offers healthy fats that keep you satiated longer.

    Incorporating a tangy element, like pickles or vinegar, elevates the flavor while providing a burst of freshness that pairs beautifully with the eggs and potatoes. All these components come together to create a delightful dish that satisfies your taste buds while nourishing your body.

    Versatility and Adaptability

    One of the greatest advantages of this potato salad is its versatility. You can easily modify the recipe to accommodate various dietary restrictions, making it an excellent option for gatherings. Whether you want to suit gluten-free eaters or those on a vegan diet, there’s room to play. For instance, if you’re opting for a vegan twist, simply replace the eggs with chickpeas for added protein or use a vegan mayo in the dressing.

    The adaptability of this recipe enables it to serve different occasions. Whether you’re attending a potluck, hosting a barbecue, or enjoying a simple weeknight dinner, this dish can be your go-to. Additionally, you can incorporate seasonal vegetables, add herbs, or even sprinkle nuts for an interesting twist. The endless recipe ideas and variations encouraged by this potato salad make it a worthwhile addition to your culinary collection.

    Ingredients Overview

    Essential Ingredients for Tangy Creamy Potato Salad With Eggs

    To make the finest Tangy Creamy Potato Salad With Eggs, you’ll need the following ingredients:

    1. Potatoes (2 lbs): Preferred varieties include Yukon gold or red potatoes, which are creamy and flavorful.
    2. Hard-Boiled Eggs (4 large): These provide texture and protein; consider adding more if desired.
    3. Celery (1 cup, diced): For crunch and freshness.
    4. Red Onion (½ cup, chopped): To add flavor and an appealing color contrast.
    5. Pickles (1 cup, diced): Adds tanginess; use dill or bread-and-butter pickles according to preference.
    6. Mayonnaise (½ cup): The base for the creamy dressing; substitute with Greek yogurt or plant-based mayo for healthier options.
    7. Dijon Mustard (1 tablespoon): For a zesty kick.
    8. Apple Cider Vinegar (2 tablespoons): Enhances flavor and adds acidity.
    9. Salt and Pepper (to taste): Essential for seasoning; adjust to your liking.

    For those looking to accommodate specific dietary constraints:
    Vegan Substitute: Use chickpeas in place of eggs and a vegan mayo blend.
    Gluten-Free Note: All listed ingredients are naturally gluten-free.

    Dietary Substitutions to Customize Your Tangy Creamy Potato Salad With Eggs

    Customization is one of the unique features of this potato salad. Here are a few suggested substitutions to cater to different dietary needs:

    • For a Creamier Texture: Swap out half of the mayonnaise with crushed avocado. This will not only provide a rich texture but also infuse healthy fats into your dish.
    • Egg-Free Version: Replace the hard-boiled eggs with tofu squares or omit them and add extra legumes like black beans or lentils for added protein.
    • Herbage and Greens: Consider adding chopped fresh herbs like dill, parsley, or chives for a burst of freshness. Spinach or kale can also provide nutrition and a colorful touch.
    • Fruity Twist: Some enjoy adding diced apples or grapes for a sweet contrast. Adjust the dressing slightly by adding a touch of honey or maple syrup to balance the flavors.

    With these modifications, this tangy creamy potato salad becomes a versatile recipe that suits everyone around the table!

    How to Prepare the Perfect Tangy Creamy Potato Salad With Eggs: Step-by-Step Guide

    Let’s jump into the preparation of this delectable Tangy Creamy Potato Salad With Eggs! Follow these simple steps to create a dish that is bound to impress:

    1. Prepare the Potatoes:
    2. Wash and peel the potatoes. Cut them into evenly sized cubes (about 1-inch thick) for consistent cooking.
    3. Place them in a large pot and cover with salted water. Bring to a boil, then reduce the heat and let simmer for 15-20 minutes until tender but not falling apart. Test doneness with a fork; they should be easy to pierce but firm.

    4. Boil the Eggs:

    5. While the potatoes cook, place the eggs in a separate saucepan and cover them with water. Bring to a soft boil, then turn off the heat, cover, and let them sit for about 12-15 minutes for hard-boiled eggs.
    6. Cool the eggs under cold running water, peel, and chop them. Set aside.

    7. Prepare the Vegetables:

    8. Drain the cooked potatoes and allow them to cool for a bit. In the meantime, dice the celery, red onion, and pickles.

    9. Make the Dressing:

    10. In a large mixing bowl, combine mayonnaise, Dijon mustard, apple cider vinegar, salt, and pepper. Whisk together until smooth. If using yogurt or a vegan mayonnaise, the same ratios apply.

    11. Combine Ingredients:

    12. In a large serving bowl, gently fold the cooled potatoes with the dressing. Mix in the diced celery, red onion, pickles, and chopped eggs.

    13. Final Seasoning:

    14. Taste and adjust seasoning as necessary by adding more salt, pepper, or vinegar according to your preference.

    15. Chill the Salad:

    16. Cover the potato salad and refrigerate for at least 30 minutes before serving. This step allows the flavors to meld fantastically.

    17. Serve and Enjoy:

    18. Garnish with fresh herbs if desired, serve chilled or at room temperature, and enjoy!

    With these detailed steps, each cook can carve their unique path to creating the perfect tangy creamy potato salad tailored to diverse dietary needs.

    Mastering Tangy Creamy Potato Salad With Eggs: Advanced Tips and Variations

    To elevate your potato salad game, consider these advanced tips and variations for mastering the dish:

    1. Experiment with Flavors: Adding a touch of smoked paprika or curry powder can introduce an intriguing depth of flavor.

    2. Incorporate Seasonal Ingredients: Depending on the season, feel free to throw in roasted bell peppers, fresh corn kernels, or even sun-dried tomatoes for an added taste adventure.

    3. Use Different Dressings: Try swapping out the mayonnaise for a yogurt-based dressing or a vinaigrette for a lighter touch.

    4. Texture Variations: Try roasting or grilling the potatoes for a charred flavor or swapping in different shapes, such as using spiraled potatoes or sweet potatoes for a unique texture.

    5. Layering Presentation: Serve the potato salad in a glass bowl to showcase the colorful layers.

    6. Smart Plate Up: If serving at gatherings, consider offering small cups or jars of potato salad for easy access and portion control.

    These masterful tips will allow any home cook the chance to explore fantastic recipe ideas while impressing dinner guests!

    How to Store Tangy Creamy Potato Salad With Eggs: Best Practices

    Proper storage ensures your Tangy Creamy Potato Salad With Eggs maintains its delicious flavors and freshness. Here are best practices:

    • Refrigeration: Store the potato salad in an airtight container in the refrigerator. It will last up to three to five days. However, it’s best consumed within the first 48 hours after preparation for optimal flavor and texture.

    • Freezing: While it’s generally not recommended to freeze potato salad due to the potential change in texture (especially with mayonnaise), you can freeze the potato and egg components separately before combining them. Prepare them fresh when you’re ready to enjoy your salad.

    • Reheating: If you have leftovers that need reheating, do so gently in the microwave, but keep in mind that the salad is typically best enjoyed cold. You can mix in a little extra dressing after reheating to revive any lost creaminess.

    These storage tips will ensure that your delightful potato salad remains a top choice in your upcoming meals, showcasing great recipe ideas that last!

    Nutritional Value of Tangy Creamy Potato Salad With Eggs

    Understanding the nutritional composition of the Tangy Creamy Potato Salad With Eggs can help you appreciate this dish even more. Here’s a breakdown of nutrients per serving (assuming 8 servings total):

    • Calories: Approximately 210
    • Protein: 5g
    • Total Fat: 10g
    • Saturated Fat: 2g
    • Carbohydrates: 29g
    • Dietary Fiber: 3g
    • Sugars: 2g
    • Cholesterol: 70mg
    • Sodium: 330mg
    • Vitamin A: 5%
    • Vitamin C: 20%
    • Calcium: 2%
    • Iron: 6%

    This is a healthy side dish that provides a balance of macronutrients while also delivering valuable vitamins and minerals. Being aware of its nutritional value can inspire you to customize portion sizes based on individual dietary goals, effectively transforming this potato salad recipe into an enjoyable and guilt-free treat.

    FAQs: Frequently Asked Questions About Tangy Creamy Potato Salad With Eggs

    Can I make this potato salad ahead of time?

    Yes, indeed! The flavors of the potato salad improve with time, so you can make it a day in advance. Just remember to store it in an airtight container.

    How can I make this dish vegan?

    To make it vegan, simply substitute the eggs with chickpeas or omit them entirely, and use a vegan mayonnaise alternative.

    Can I eat this potato salad warm?

    While many prefer it chilled, you can enjoy this dish at room temperature or slightly warm. Nevertheless, remember that the textures may differ, so adjust expectations.

    What if I don’t have mayonnaise?

    If mayonnaise isn’t an option, consider using Greek yogurt or avocado to achieve creaminess and moisture in your salad.

    Is it okay to add different vegetables to the potato salad?

    Absolutely! Incorporating ingredients like diced bell peppers, peas, or finely grated carrots can add an extra layer of flavor and nutrition.

    How long can I store leftover potato salad?

    Leftovers can be stored in the refrigerator for up to five days. Simply ensure it’s in an airtight container to maintain freshness.

    The Tangy Creamy Potato Salad With Eggs is a classic recipe filled with potential for creativity and adaptation, ensuring that it fits any dietary lifestyle or preferences. Gather your ingredients and give this tropical delight a try—your taste buds will thank you!

  • Easy Creamy Dill Potato Salad

    Easy Creamy Dill Potato Salad

    Easy Creamy Dill Potato Salad: A Tropical Delight

    Introduction to Easy Creamy Dill Potato Salad

    When you think of summer gatherings or casual picnics, nothing beats a classic potato salad. One such crowd-pleaser is the Easy Creamy Dill Potato Salad, which combines rich creaminess with the refreshing zestiness of dill. This hearty dish is not only simple to prepare but also offers incredible versatility, making it an excellent choice for busy home cooks, diet-conscious individuals, and anyone looking to serve something delicious and satisfying.

    Crafted with minimal effort, Easy Creamy Dill Potato Salad allows you to enjoy the perfect combination of textures and flavors in every bite. Freshly cooked potatoes provide a comforting base that pairs beautifully with a creamy dressing made from yogurt and mayonnaise, embellished with the unique flavors of dill. Additionally, this recipe is adaptable to accommodate various dietary preferences, including vegan, gluten-free, and low-calorie options, which means almost anyone can indulge in this delight.

    Incorporating this potato salad into your meals not only offers a refreshing side that pairs well with grilled meats, sandwiches, or a simple green salad, but it also brings a significant boost in nutrition. Potatoes are rich in vitamins and minerals, providing essential carbohydrates, potassium, and vitamin C. They can even be a filling option for those watching their caloric intake.

    This article inspires you to create your very own Easy Creamy Dill Potato Salad, demonstrating just how easy it is to whip up a dish that will win hearts and stomachs alike. Let’s dive into the benefits and advantages of this delightful blend!

    Benefits and Advantages of Easy Creamy Dill Potato Salad

    Creating a delicious potato salad does not require hours of preparation. With just a few straightforward steps, you can have a delightful dish ready in no time. Ease of preparation is one of the standout features of this Easy Creamy Dill Potato Salad. Suitable for both seasoned chefs and novice cooks, this recipe allows anyone to walk away with a gourmet touch without the hassle.

    Health Benefits

    Potato salad doesn’t have to be unhealthy; in fact, it can be quite the opposite! By using fresh ingredients, it becomes a nutrient-rich side dish. Potatoes are naturally low in calories while providing essential vitamins like B6 and vitamin C. The creamy dressing can easily be tailored to your liking or dietary needs; for instance, using Greek yogurt instead of traditional mayonnaise makes it lower in fat while boosting protein content. This salad can act as a light meal as it sustains energy levels and makes you feel full longer thanks to its high fiber content.

    A Dish for All

    Whether you are feeding a large gathering or enjoy intimate meals with loved ones, potato salad is perfect for every occasion. It is incredibly adaptable; you can serve it in warm weather alongside grilled meats or as a cooling counterpart to spicy dishes. Additionally, it’s an excellent recipe for meal prepping, as it stores well in the refrigerator.

    By incorporating fresh dill—a wonderful herb that not only enhances taste but offers its own health benefits—you elevate the dish. Dill is known for its anti-inflammatory properties and supports digestion, making it a perfect herb companion to the main ingredient.

    Whether you’re a busy parent looking to prepare a healthy dish for your family or a food enthusiast searching for new recipes, you can rely on Easy Creamy Dill Potato Salad. Everyone can enjoy this delightful, versatile dish!

    Ingredients Overview

    Essential Ingredients for Easy Creamy Dill Potato Salad

    To create a superb Easy Creamy Dill Potato Salad, you’ll need the following ingredients:

    • 2 pounds of baby potatoes: These are tender and flavorful, and their smaller size ensures they cook quickly.
    • 1 cup of Greek yogurt (or sour cream for creamier texture): Provides a protein-packed base with a tangy flavor.
    • 1/2 cup of mayonnaise: For a richer taste that complements the yogurt.
    • 1 tablespoon of fresh dill (or 1 teaspoon dried dill): Adds a fresh flavor with multiple health benefits.
    • 1 teaspoon of garlic powder: For an added depth of flavor.
    • 1 tablespoon of lemon juice: Brightens the potato salad and helps balance flavors.
    • 1/2 teaspoon of salt: Enhances all the other flavors.
    • 1/4 teaspoon of black pepper: Adds a hint of spice.
    • 1/2 cup of chopped celery: Adds a fresh crunch and enhances texture.
    • 1/2 cup of diced red onion: For sweetness and a bit of bite.

    Dietary Options: To cater to various diets:
    Vegan Option: Substitute Greek yogurt and mayonnaise with a plant-based yogurt and vegan mayo.
    Gluten-Free Option: Ensure all ingredients are certified gluten-free, as most of the main components are naturally gluten-free.
    Low-Calorie Option: Use low-fat versions of yogurt and mayonnaise.

    Dietary Substitutions to Customize Your Easy Creamy Dill Potato Salad

    When cooking, it’s essential to adjust recipes to fit dietary restrictions or personal preferences. Here are some substitutions to customize your Easy Creamy Dill Potato Salad:

    • Yogurt Alternatives: Instead of Greek yogurt, you can also use dairy-free products like almond or coconut yogurt.
    • Mayonnaise Alternatives: If you’re aiming for a lighter version, try using avocado instead of mayonnaise for extra creaminess while adding healthy fats.
    • Fresh Herbs: If dill isn’t available, swap it out for other fresh herbs such as parsley or chives for a different flavor profile.
    • Add-In Options: Consider including additional vegetables like bell peppers, radishes, or hard-boiled eggs for extra nutrition and taste.

    By experimenting with ingredients based on personal preferences and dietary needs, you can create a potato salad that is both delicious and suitable for everyone at the table.

    How to Prepare the Perfect Easy Creamy Dill Potato Salad: Step-by-Step Guide

    Now that you have gathered your ingredients, it is time to culminate your efforts into a delicious potato salad. By following these precise yet easy steps, you can master the art of making Easy Creamy Dill Potato Salad:

    1. Prepare the Potatoes: Begin by washing the baby potatoes thoroughly to remove any dirt. Place them in a large pot filled with cold water. Add a pinch of salt, and bring to a boil over medium-high heat. Cook until fork-tender, which typically takes about 15-20 minutes.

    2. Cool the Potatoes: Once the potatoes are tender, drain them in a colander and rinse under cold water to stop the cooking process. Let them cool completely before handling.

    3. Cut the Potatoes: Once cooled, slice the potatoes into bite-sized pieces. The skin can either be left on or peeled based on personal preference.

    4. Mix the Creamy Base: In a separate bowl, combine the Greek yogurt, mayonnaise, fresh dill, garlic powder, lemon juice, salt, and pepper. Whisk until smooth, ensuring all ingredients are well incorporated.

    5. Combine the Ingredients: Gently fold the cooled potatoes into the creamy mixture. Using a spatula, ensure each piece is well-covered without overly mashing them for a pleasant texture.

    6. Add Celery and Onions: Incorporate the chopped celery and diced red onion into the potato mixture. Stir gently to distribute evenly throughout the potato salad.

    7. Taste and Adjust: Give a final taste to the potato salad, adjusting salt and pepper as necessary. If you prefer a little more zing, feel free to add an additional squeeze of lemon juice.

    8. Chill: For optimal flavor, cover the salad and refrigerate for at least 1 hour before serving. This allows the flavors to meld beautifully.

    9. Serve: Transfer the potato salad to a serving platter or bowl. You can garnish with additional dill for a touch of elegance before serving.

    Following this step-by-step guide allows you to make a wonderful Easy Creamy Dill Potato Salad that caters to your taste and dietary needs. Your loved ones will surely appreciate the effort you put into crafting this delightful dish.

    Mastering Easy Creamy Dill Potato Salad: Advanced Tips and Variations

    To elevate your Easy Creamy Dill Potato Salad, here are some advanced tips and variations that will enhance its deliciousness:

    • Experiment with Textures: For an added crunch, consider incorporating chopped pickles, crushed nuts, or sunflower seeds. These elements introduce an exciting contrast to the creamy base.

    • Experiment with Flavors: Introduce spices or other flavors into the creamy mixture. For instance, a pinch of smoked paprika or a teaspoon of mustard can add delightful depth.

    • Create a Loaded Potato Salad: Take it a step further by adding toppings such as crispy bacon bits, cheese, or even fresh corn for a satisfying twist.

    • Try Different Cooking Methods: Instead of boiling, consider roasting the potatoes with olive oil and spices for a smoky, flavorful variation of the salad.

    • Serving Idea: This Easy Creamy Dill Potato Salad can be served as a filling in a sandwich or wrap—just layer it between two slices of whole grain bread or in a tortilla with fresh greens.

    These advanced tips and variations allow you to personalize the potato salad, ensuring it fits your unique taste buds. Your creativity knows no bounds!

    How to Store Easy Creamy Dill Potato Salad: Best Practices

    Proper storage of your Easy Creamy Dill Potato Salad is vital to maintain its flavor and freshness. Here are the best practices for refrigeration, freezing, and reheating:

    • Refrigeration: Store any leftover potato salad in an airtight container in the refrigerator. It will stay fresh for about 3-5 days. Be sure to take it out of the fridge approximately 30 minutes before serving to let it come to room temperature.

    • Freezing: Although freezing potato salad is generally not recommended due to the creamy ingredients, if you must, consider freezing the potato base without the dressing. Thaw overnight in the refrigerator, then prepare the dressing fresh before serving.

    • Reheating: If you choose to enjoy it warm, reheat gently in the microwave. Cover the bowl with a damp paper towel to prevent it from drying out. However, many prefer enjoying the potato salad cold or at room temperature to savor the fresh flavors.

    Following these storage solutions ensures that you get the most out of your Easy Creamy Dill Potato Salad, making it a convenient dish to have on hand for several meals.

    Nutritional Value of Easy Creamy Dill Potato Salad

    The Easy Creamy Dill Potato Salad is not just a tasty side; it also provides a variety of nutrients that can complement any diet. Here’s a basic breakdown of the nutritional value per serving (assuming 8 servings):

    • Calories: Approximately 200 calories
    • Total Fat: 8 grams
    • Saturated Fat: 2 grams
    • Cholesterol: 10mg (if using mayonnaise)
    • Sodium: 250mg
    • Total Carbohydrates: 30 grams
    • Dietary Fiber: 3 grams
    • Sugars: 1 gram
    • Protein: 5 grams

    Nutritional Benefits

    • Potatoes: Rich in potassium, fiber, and vitamin C, they provide energy and essential nutrients.
    • Greek Yogurt: Packed with protein that can aid in muscle repair and growth; it also contains probiotics that benefit digestive health.
    • Dill: This herb has both anti-inflammatory properties and is known to support digestion.

    By enjoying a serving of Easy Creamy Dill Potato Salad, you not only treat your palate, but you also nourish your body with important vitamins and minerals.

    FAQs: Frequently Asked Questions About Easy Creamy Dill Potato Salad

    1. Can I make this potato salad in advance?

    Absolutely! Preparing the Easy Creamy Dill Potato Salad a day ahead gives the flavors time to meld beautifully. Just remember to store it in an airtight container in the refrigerator.

    2. Is this potato salad gluten-free?

    Yes! Most ingredients in this recipe are naturally gluten-free. Just ensure that any products used, like mayonnaise, are certified gluten-free.

    3. Can I substitute Greek yogurt with something else?

    Yes, you can easily substitute Greek yogurt with regular yogurt, sour cream, or even dairy-free alternatives, depending on your dietary needs.

    4. What do I do if I don’t have fresh dill?

    If fresh dill is unavailable, you can substitute with dried dill. Keep in mind that dried herbs are more concentrated, so use about one-third of the amount.

    5. How can I spice up my potato salad?

    Consider adding ingredients like diced bell peppers, jalapeños, or bacon bits for an extra twist. Additionally, a dash of hot sauce can elevate the flavor!

    6. How long does the potato salad last in the fridge?

    The Easy Creamy Dill Potato Salad can last for 3-5 days in the refrigerator if stored properly in an airtight container.

    7. Can I freeze this potato salad?

    It’s not recommended to freeze potato salad due to the creamy dressing. However, you can freeze the potato base and prepare the dressing fresh later.

    By addressing these common inquiries, you can ensure that anyone exploring your recipe feels confident in adapting it to their own dietary needs. Your Easy Creamy Dill Potato Salad can become a staple in any household!


    In conclusion, Easy Creamy Dill Potato Salad is a simple yet scrumptious side dish that can elevate any meal. The bright flavors, creamy texture, and numerous benefits make it an excellent fit for any table, whether it’s a grand feast or a casual family gathering. By following the easy directions, dietary options, and tips provided here, you can create a delectable dish that will leave everyone craving more. With just a few ingredients and a bit of time, you can whip up a delightful dish that is not only healthy but incredibly satisfying! Enjoy your culinary journey and the smiles that come along with it.

  • Best Cashew Pea Salad

    Best Cashew Pea Salad

    Best Cashew Pea Salad: A Tropical Delight

    Introduction to Best Cashew Pea Salad

    Are you searching for healthy dinner recipes that are not only delicious but also easy to make? Look no further than the Best Cashew Pea Salad! This vibrant dish combines the crunchiness of cashews with the sweetness of peas, resulting in a tropical delight that appeals to a variety of palates. If you are a busy parent, a student looking to impress your friends, or simply someone who enjoys fresh, nourishing meals, this salad is perfect for you.

    This recipe stands out for its simplicity and versatility. It’s vegan, gluten-free, and packed with nutritional goodness. The freshness of the ingredients makes it ideal for warm summer days, while the richness of the cashews provides a satisfying crunch that will leave you feeling full and satisfied. Best of all, it’s a quick dish to prepare—ideal for those hectic weeknights when you want to whip up something healthy in no time!

    Not only does this Best Cashew Pea Salad showcase an enticing combination of textures and flavors, but it also boasts a wealth of health benefits that cater to various dietary needs. Not only can it serve as a main dish for dinner, but it also functions beautifully as a side or potluck contribution, ensuring you’ll make a great impression wherever you go.

    Benefits and Advantages of Best Cashew Pea Salad

    When it comes to healthy dinner recipes, the Best Cashew Pea Salad is unrivaled in terms of ease of preparation and health benefits. First and foremost, this recipe takes less than 30 minutes from start to finish, making it perfect for those with busy schedules who still prioritize nutritious meals. The ingredients are easily accessible and require no complicated cooking methods, allowing even novice cooks to shine in the kitchen.

    Nutritional Powerhouse

    Peas are not just a vibrant addition to your plate; they are also packed with vitamins A, C, and K, as well as essential minerals like iron and magnesium. They contribute to better digestion while being low in calories, making them a perfect component of any healthy dinner recipe. On the other hand, cashews provide healthy fats that help keep your heart in shape while providing a good source of protein, which enhances satiety.

    Frequency of Use

    This salad’s versatility means you can enjoy it throughout the year. In the summer, adding fresh herbs like mint or cilantro enhances the flavors, while in the fall or winter, roasted vegetables can provide additional warmth and sustenance. Being vegan and gluten-free, it’s suitable for various dietary needs, giving you the freedom to experiment with your ingredients.

    Suitable for Everyone

    Whether you’re a busy parent juggling a thousand tasks or a health-conscious individual, this dish aligns with your goals. Plus, it’s an excellent option for serving guests who may adhere to specific dietary restrictions, ensuring that everyone enjoys a delightful meal without compromise.

    Ingredients Overview

    Essential Ingredients for Best Cashew Pea Salad

    To create your Best Cashew Pea Salad, gather the following ingredients:

    • 2 cups green peas (fresh or frozen, thawed): Provides essential vitamins and a sweet flavor.
    • 1 cup raw cashews: A source of healthy fats and protein that adds crunch.
    • 1/4 cup red onion, diced: Adds a sharp flavor and color contrast to the salad.
    • 1 red bell pepper, diced: For sweetness and vibrant color.
    • 1/4 cup fresh cilantro, chopped: Enhances flavor with a fresh, herbal note.
    • 2 tablespoons olive oil: for a healthy fat source and to help meld the flavors.
    • 1 tablespoon apple cider vinegar: Offers a tangy balance to the dish.
    • Salt and pepper to taste: Essential for elevating flavor.

    This recipe is naturally vegan, gluten-free, and low-calorie, making it a fantastic option for those looking for healthy dinner recipes.

    Dietary Substitutions to Customize Your Best Cashew Pea Salad

    While the above ingredients create the perfect base for the Best Cashew Pea Salad, don’t hesitate to customize it according to your pantry inventory or personal dietary needs:

    1. Nut-Free Alternative: Swap cashews for sunflower seeds or pumpkin seeds to maintain the crunch without nuts.
    2. Low-Carb Option: Replace green peas with chopped broccoli or cauliflower florets to suit a low-carb lifestyle.
    3. Herb Variations: If cilantro isn’t your favorite, substitute it with parsley or dill for a different flavor profile.
    4. Add Your Own Twist: Toss in ingredients like cherry tomatoes, avocado, or even cooked quinoa to elevate the salad’s flavor and nutritional value.

    Feel free to mix and match according to your preferences; this salad can be as creative as you wish!

    How to Prepare the Perfect Best Cashew Pea Salad: Step-by-Step Guide

    Now, let’s dive into how to whip up this delightful dish in a few quick steps:

    1. Prepare the Veggies: Start by rinsing your fresh green peas (if using fresh) and letting them dry. If you’re using frozen peas, simply thaw them.
    2. Chop the Ingredients: Dice the red onion and red bell pepper. Be sure to chop everything finely for a harmonious blend of flavors.
    3. Mix the Base Ingredients: In a large mixing bowl, combine the peas, cashews, diced onion, and bell pepper. This colorful mixture will be the base of your salad.
    4. Add Fresh Herbs: Sprinkle the chopped cilantro over the mix, adding a freshness that brightens the dish.
    5. Prepare the Dressing: In a separate small bowl, whisk together olive oil, apple cider vinegar, and season with salt and pepper to taste.
    6. Combine Dressing and Salad: Pour the dressing over your salad and gently toss everything together until well combined.
    7. Taste and Adjust: Always taste your salad and adjust the seasoning if necessary. You might want to add a little more salt, pepper, or vinegar.
    8. Let it Sit: For the best flavor, let your salad sit for 10-15 minutes at room temperature or refrigerated to allow the flavors to meld.
    9. Serve & Enjoy: Serve chilled or at room temperature and enjoy your healthy dinner recipes with friends and family!

    Mastering Best Cashew Pea Salad: Advanced Tips and Variations

    Making the Best Cashew Pea Salad is straightforward, but there are a few advanced tips to elevate it further:

    • Toasting Cashews: For added depth of flavor, consider toasting cashews in a non-stick skillet over medium heat for about 5 minutes before adding them to the salad.
    • Veggie Variations: Integrate shredded carrots or chopped zucchini for an extra nutritional punch.
    • Switch Up the Dressing: Experiment with different salad dressings such as tahini or yogurt-based options for diverging flavor profiles.
    • Meal Prep: Advance preparation is a great way to keep the time spent on healthy dinner recipes at a minimum. You can chop the vegetables and prepare the dressing a day ahead for quick assembly.

    By employing these tips, you’ll create a Best Cashew Pea Salad that’s both traditional and innovatively tailored to your taste.

    How to Store Best Cashew Pea Salad: Best Practices

    Storing your Best Cashew Pea Salad correctly preserves its freshness and flavor:

    • Refrigeration: Keep the salad in an airtight container in the refrigerator for up to 3 days. The flavors will continue to deepen as it chills.
    • Freezing: For longer storage, consider freezing the salad—though this may alter the texture of fresh vegetables, it can still work in a pinch. Make sure to consume it within a month.
    • Reheating: If you prefer a warm salad, lightly sauté it in a pan for a few minutes before serving. However, fresh veggies are usually best enjoyed cold.

    Ensuring proper storage practices extends the life of your healthy dinner recipes, allowing you to enjoy them throughout the week.

    Nutritional Value of Best Cashew Pea Salad

    When striving for healthy dinner recipes, it’s essential to know the nutritional value of your meals. Here’s a rough breakdown of each serving (based on 4 servings):

    • Calories: 250
    • Fat: 17g (with healthy fats from cashews)
    • Protein: 8g (a considerable amount from both peas and nuts)
    • Carbohydrates: 25g (mostly from peas and bell peppers)
    • Fiber: 5g (beneficial for digestion, found in peas)
    • Vitamins and Minerals:
      • Vitamin A: 20% of the Daily Value (DV)
      • Vitamin C: 25% of the DV
      • Iron: 10% of the DV
      • Magnesium: 15% of the DV

    This salad balances macronutrients while packing a punch with essential vitamins and minerals, showcasing its role in your list of healthy dinner recipes.

    FAQs: Frequently Asked Questions About Best Cashew Pea Salad

    Q: Can I substitute frozen peas for fresh peas?
    A: Absolutely! Frozen peas work perfectly in this recipe—just make sure to thaw and drain them before using.

    Q: Is it safe to serve this salad during warm weather?
    A: Yes, just keep it chilled until serving. This salad is refreshing and ideal for summer gatherings.

    Q: Can I make this salad ahead of time?
    A: Yes, preparing the salad up to a day in advance gives flavors time to meld, enhancing the taste.

    Q: How can I make this salad spicier?
    A: Incorporate chopped jalapeños or a dash of cayenne pepper into the dressing to add heat.

    Q: Is this salad suitable for meal prep?
    A: Definitely! Just keep the dressing separate until you’re ready to serve to prevent the greens from wilting.

    The Best Cashew Pea Salad is a delightful meal that offers numerous benefits while fitting seamlessly into any modern kitchen. This dish not only enriches your list of healthy dinner recipes but also becomes a flavorful indulgence you’ll want to enjoy regularly. Embrace the culinary adventure, and feel inspired to share this delicious experience with family and friends!