Tag: chicken

  • Tasty Slow Cooker Honey Mustard Chicken

    Tasty Slow Cooker Honey Mustard Chicken

    Tasty Slow Cooker Honey Mustard Chicken: A Tropical Delight

    Introduction to Tasty Slow Cooker Honey Mustard Chicken

    Welcome to this delightful culinary adventure with our Tasty Slow Cooker Honey Mustard Chicken! This recipe is not only a breeze to prepare but is also a fantastic addition to your collection of crockpot recipes. It combines the sweetness of honey, the tang of mustard, and the tenderness of slow-cooked chicken to create a dish that the whole family will love. Perfect for busy parents, students, or anyone wanting to whip up a quick and healthy meal, this recipe is simple enough to follow yet impressive enough to serve at gatherings.

    The slow cooker method emphasizes simplicity, allowing you to set it and forget it while your meal develops rich flavors. Additionally, this dish offers health benefits, as it’s made with lean protein and wholesome ingredients. Whether you need a hearty dinner option or a meal-prep favorite for the week, our Honey Mustard Chicken checks all the boxes. Plus, it can easily cater to various dietary needs, making it a versatile choice not just for food enthusiasts but also for anyone keeping an eye on their health. Let’s dive into why this slow-cooked marvel is the ideal recipe for your next meal!

    Benefits and Advantages of Tasty Slow Cooker Honey Mustard Chicken

    Why should you add the Tasty Slow Cooker Honey Mustard Chicken to your list of favorite crockpot recipes? The answer lies in its myriad benefits! First and foremost, this recipe is exceptionally easy to prepare. With minimal ingredients and straightforward instructions, it’s perfect for those who lead busy lives—like working professionals, busy parents, or even students juggling classes.

    The health benefits are impressive as well. Chicken is a lean protein source that supports muscle health and aids in weight management. When combined with honey and mustard, you get a dish that maintains a balanced profile without excess calories or unhealthy fats. For those looking to eat healthily, the use of natural ingredients means less processed food, which can often be high in additives and preservatives.

    Moreover, this honey mustard chicken recipe is incredibly adaptable. Need a gluten-free option? Swap out traditional sauces for gluten-free ones. Interested in a vegan alternative? Simply use tofu or jackfruit instead of chicken! This adaptability makes our recipe suitable for everyone, from newlyweds exploring the kitchen to seniors looking for delectable yet nutritious meals.

    In sum, the Tasty Slow Cooker Honey Mustard Chicken is a winner for its ease of preparation, nutritional benefits, and versatility. Embrace the joy of cooking and make this dish a staple in your home!

    Ingredients Overview

    Essential Ingredients for Tasty Slow Cooker Honey Mustard Chicken

    To create this delightful dish, you will need the following ingredients. Each component has its purpose, ensuring that your honey mustard chicken is flavorful and tender.

    • 2 lbs Chicken Thighs (boneless and skinless): Provides a rich source of protein and is incredibly moist when slow-cooked.
    • 1/2 cup Honey: Adds natural sweetness and helps create a sticky glaze.
    • 1/4 cup Dijon Mustard: Offers a tangy kick that balances the sweetness of the honey.
    • 1/4 cup Apple Cider Vinegar: Helps tenderize the chicken and adds acidity to enhance flavors.
    • 2 cloves Garlic (minced): Infuses the dish with aromatic flavors.
    • 1 tsp Salt: Enhances the taste of the ingredients.
    • 1/2 tsp Black Pepper: Adds a mild heat and depth of flavor.
    • 1/2 cup Chicken Broth: Keeps the chicken moist and adds depth to the sauce.
    • Fresh Herbs (optional, e.g., thyme or rosemary): For garnish and added freshness.

    Dietary Notes:
    Vegan Option: Substitute chicken thighs with firm tofu or shredded jackfruit. Use vegetable broth instead of chicken broth.
    Gluten-Free Option: Ensure that your Dijon mustard and chicken broth are certified gluten-free.
    Low-Calorie Option: Use skinless chicken breasts in place of chicken thighs to lower the calorie count per serving.

    Dietary Substitutions to Customize Your Tasty Slow Cooker Honey Mustard Chicken

    Customization is key in the kitchen, especially for those with dietary restrictions or preferences. Here are some substitutions to make our Tasty Slow Cooker Honey Mustard Chicken truly your own:

    • Honey: For a vegan-friendly option, you can replace honey with agave syrup or maple syrup. Both will provide a similar sweetness.
    • Dijon Mustard: If you’re not a fan of mustard, you can substitute it with yogurt or a homemade mustard sauce to keep the tantalizing flavor.
    • Chicken: For a lower-fat dish, use skinless chicken breasts instead of thighs. For vegetarians or vegans, consider using seitan or chickpeas instead of meat altogether.

    By making these small adjustments, you can cater the honey mustard chicken to meet your tastes and health needs without sacrificing flavor!

    How to Prepare the Perfect Tasty Slow Cooker Honey Mustard Chicken: Step-by-Step Guide

    Creating your own Tasty Slow Cooker Honey Mustard Chicken is straightforward and enjoyable. Follow these simple steps to craft a delicious meal that your friends and family will rave about!

    1. Prepare the Base: Begin by placing the chicken thighs at the bottom of your slow cooker. This ensures they absorb all the delicious flavors as they cook.

    2. Mix Ingredients: In a medium-sized bowl, whisk together the honey, Dijon mustard, apple cider vinegar, minced garlic, salt, and black pepper until well blended.

    3. Combine the Mixtures: Pour the honey mustard mixture over the chicken in the slow cooker, ensuring that each piece is well coated.

    4. Add Chicken Broth: Pour the chicken broth around the edges of the slow cooker (not directly on top of the chicken) to maintain the glaze’s integrity.

    5. Add Fresh Herbs: If you’re using fresh herbs, sprinkle them over the top of the mixture for an aromatic finish.

    6. Set Your Slow Cooker: Cover the slow cooker with the lid. Cook on low for 6-8 hours or on high for 3-4 hours. The longer cooking time allows the flavors to meld beautifully.

    7. Check for Doneness: The chicken should be cooked through and easily shred with a fork when done. If it’s still a bit tough, continue cooking for another 30 minutes and check again.

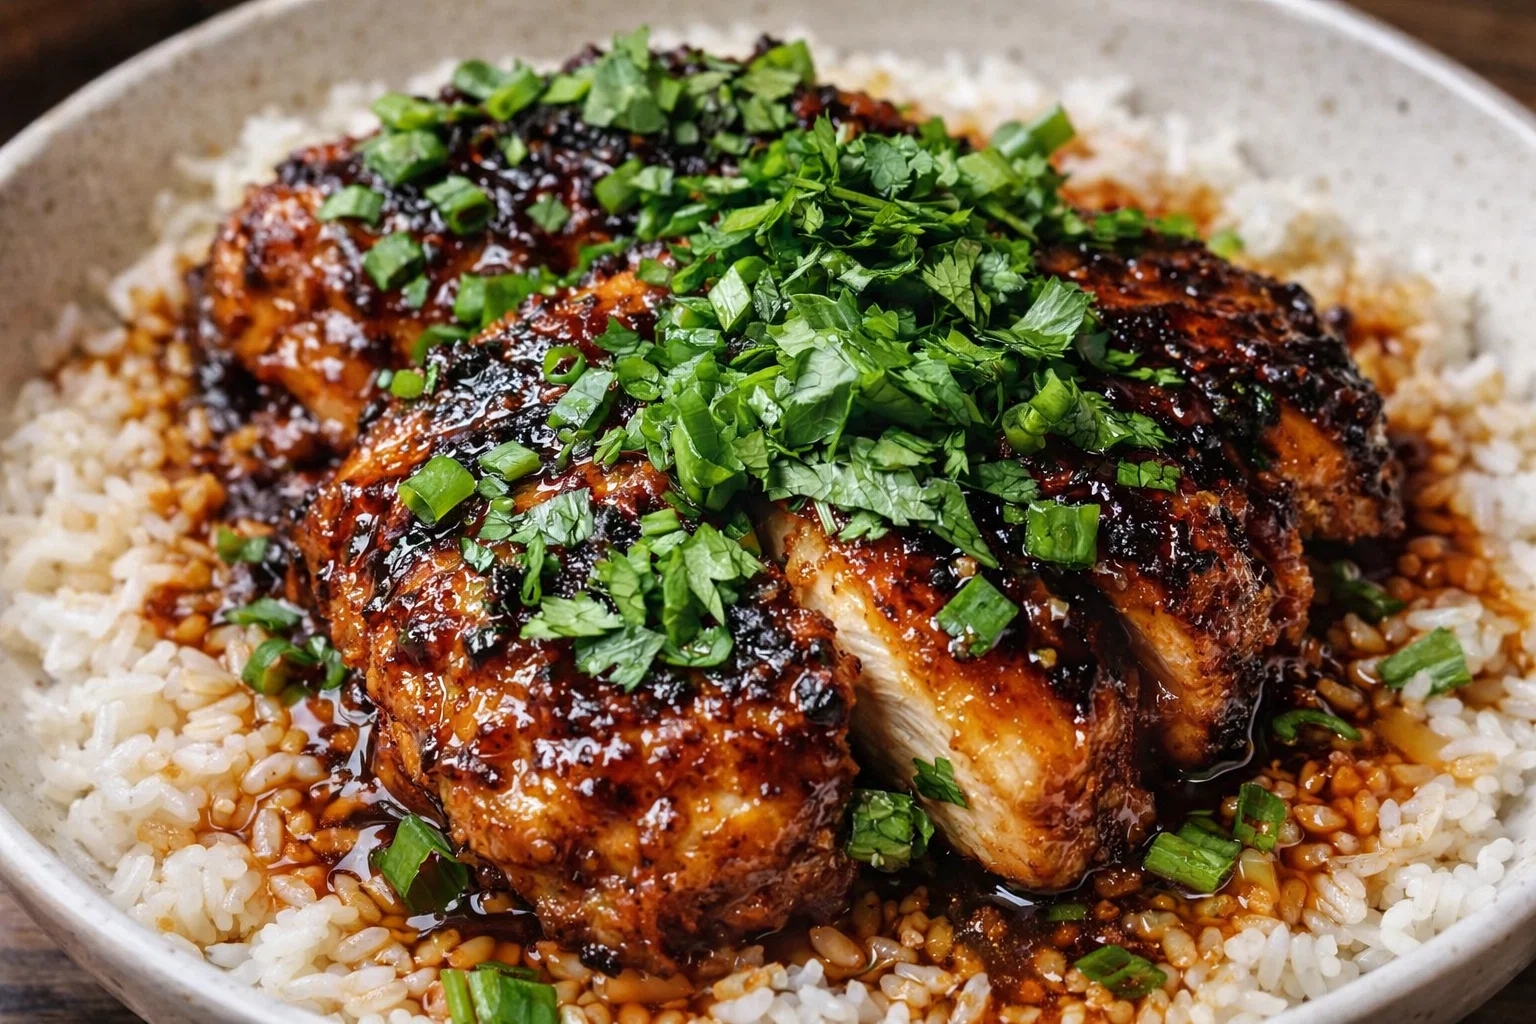
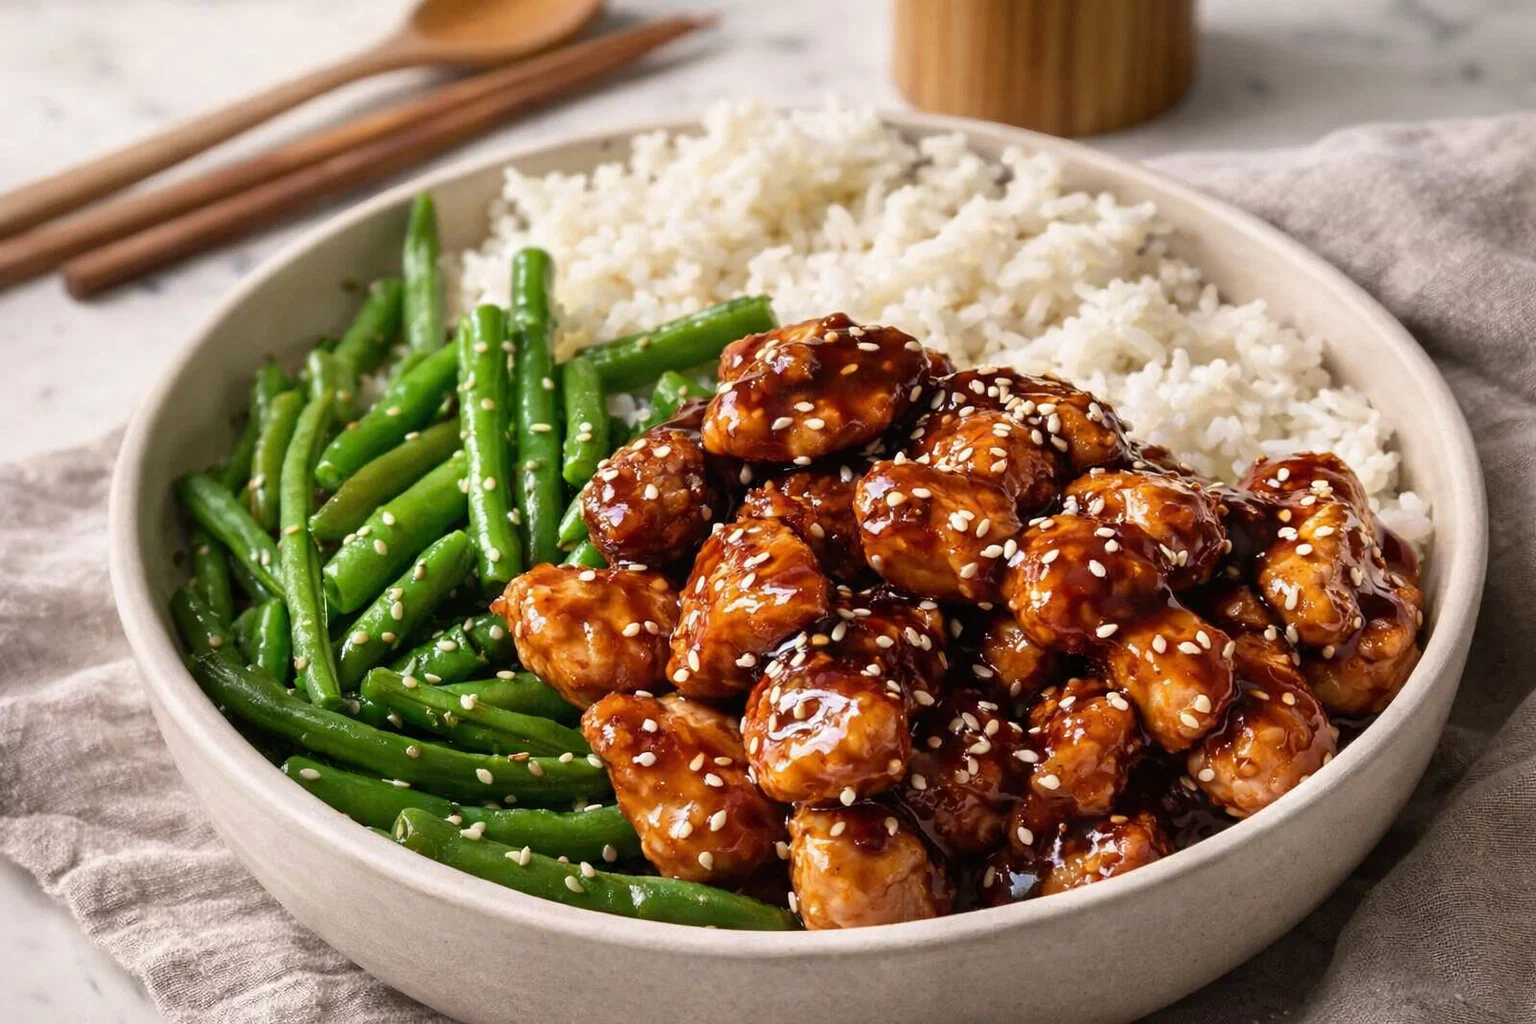
    8. Serve and Garnish: Once cooked, shred the chicken directly in the slow cooker, then serve it warm on a bed of rice, quinoa, or fresh salad. Don’t forget to drizzle more of that honey mustard sauce on top!

    9. Adapt for Dietary Needs: For those avoiding gluten, ensure that you utilize gluten-free alternatives as mentioned before. For vegans, simply adjust the chicken to tofu or chickpea options as described in previous sections.

    10. Store Leftovers: If you have any leftovers, wait for the dish to cool to room temperature before transferring it into airtight containers.

    This recipe makes cooking enjoyable and fosters creativity in the kitchen! By using your slow cooker, you can create a meal that’s as comforting as it is delicious.

    Mastering Tasty Slow Cooker Honey Mustard Chicken: Advanced Tips and Variations

    To elevate your kitchen prowess, here are some tips and variations to try while making your Tasty Slow Cooker Honey Mustard Chicken:

    • Infuse More Flavor: Consider adding ingredients like soy sauce for a savory touch or a splash of Worcestershire sauce for depth.

    • Vegetable Additions: Incorporate diced carrots, potatoes, or bell peppers into the slow cooker for a complete meal in one pot. The vegetables will soak up the honey mustard flavors and create a comforting mix.

    • Spice it Up: For those who enjoy heat, adding a pinch of red pepper flakes while cooking will impart a spicy kick.

    • Serving Suggestions: Pair the honey mustard chicken with a side of steamed veggies or a crisp green salad. The freshness of the greens complements the rich, sweet sauce beautifully.

    • Make it a Meal Prep Classic: By using more chicken thighs and scaling the recipe, you can prepare meals for the entire week. Just store portions in the fridge or freezer and reheat when needed.

    These advanced tips will not only enhance your cooking skills but will also allow you to customize your honey mustard chicken to your family’s tastes and dietary requirements.

    How to Store Tasty Slow Cooker Honey Mustard Chicken: Best Practices

    Storing your Tasty Slow Cooker Honey Mustard Chicken properly will ensure it remains delicious and safe to eat. Here are some best practices for refrigeration, freezing, and reheating:

    Refrigeration

    • Allow the chicken to cool to room temperature after cooking.
    • Transfer it into airtight containers. It’s ideal for meals throughout the week. Storing in the fridge, it can last up to 3-4 days.

    Freezing

    • For long-term storage, you can freeze the honey mustard chicken. Ensure it is completely cooled before placing it in freezer-safe bags or airtight containers.
    • Label the bags with the date and contents for easy identification.
    • The chicken can be frozen for up to 2-3 months. When ready to reuse, thaw it overnight in the refrigerator or use the defrost setting on your microwave.

    Reheating

    • When reheating, you can do so on the stovetop or in the microwave. For the stovetop, place the chicken in a pan over medium heat with a splash of broth to keep it moist. Stir occasionally until heated.
    • In the microwave, heat in 1-minute intervals, stirring between to ensure even heating.

    Proper storage will help retain the flavors and textures, making it a delightful meal to enjoy days after preparation. Just remember to keep your crockpot recipes in mind for future meal planning!

    Nutritional Value of Tasty Slow Cooker Honey Mustard Chicken

    Understanding the nutritional value of your meals is essential for keeping a balanced diet. Here’s a breakdown of the nutritional information for our Tasty Slow Cooker Honey Mustard Chicken recipe, assuming a serving is approximately 1/4 of the total dish, or around 6 oz of chicken.

    • Calories: Approximately 320
    • Total Fat: 5g (Saturated Fat: 1g)
    • Cholesterol: 130mg
    • Sodium: 450mg
    • Carbohydrates: 20g (Dietary Fiber: 0g, Sugars: 18g)
    • Protein: 38g

    Health Benefits

    • Lean Protein: Provides ample protein for muscle maintenance and growth.
    • Low Calorie: A healthy option for those mindful of calorie intake.
    • Versatile Nutrition: Options to customize ingredients to fit dietary preferences.

    By understanding this nutritional information and making thoughtful ingredient choices in your cooking, you can enjoy flavorful meals that also contribute positively to your health.

    FAQs: Frequently Asked Questions About Tasty Slow Cooker Honey Mustard Chicken

    Here are some of the most frequently asked questions regarding our Tasty Slow Cooker Honey Mustard Chicken:

    Q1: Can I use chicken breast instead of thighs?
    A1: Yes, chicken breast can be used for a leaner option. However, thighs tend to be more flavorful and remain tender during the slow cooking process.

    Q2: Is this a gluten-free recipe?
    A2: Indeed! To make it gluten-free, simply select gluten-free Dijon mustard and chicken broth.

    Q3: How do I make this recipe vegan?
    A3: To make this dish vegan friendly, replace the chicken with firm tofu or jackfruit, and adjust the cooking time accordingly.

    Q4: Can I freeze leftovers?
    A4: Yes! Allow the dish to cool, then store in freezer-safe containers. It’s great for meals later on, with a lifespan of 2-3 months in the freezer.

    Q5: What sides pair well with this dish?
    A5: You may serve the honey mustard chicken with steamed vegetables, rice, or a fresh salad for a balanced meal.

    By addressing these common concerns, this section aims to alleviate doubts and inspire confidence when preparing the Tasty Slow Cooker Honey Mustard Chicken.


    In conclusion, our Tasty Slow Cooker Honey Mustard Chicken presents an array of benefits—simplicity, health consciousness, and adaptability to various dietary preferences. It’s convenient for busy lifestyles and perfect for family dinners. Embrace the joy of cooking with this slow cooker recipe that’s bound to become a beloved staple in your home! Enjoy the journey and the delicious results.

  • Easy General Tsos Cauliflower Bowls

    Easy General Tsos Cauliflower Bowls

    Easy General Tso’s Cauliflower Bowls: A Tropical Delight

    Introduction to Easy General Tso’s Cauliflower Bowls

    Are you looking for an easy dinner recipe that’s both delicious and nutritious? Look no further than these Easy General Tso’s Cauliflower Bowls! This vibrant dish combines crispy cauliflower with a zesty, sweet-and-spicy sauce, creating a delightful fusion of flavors that will wow your taste buds. It’s a fantastic option for busy weeknights, health-conscious individuals, and everyone in between.

    The beauty of this dish lies in its simplicity. With just a handful of ingredients, you can whip up a satisfying meal in no time. Plus, it caters to various dietary needs—it’s vegan, gluten-free, and packed with nutrients. The cauliflower serves as a low-carb alternative to traditional proteins, making it an excellent choice for vegetarians, vegans, and even those following a gluten-free diet.

    Imagine a hearty bowl filled with crispy cauliflower, colorful vegetables, and a luscious sauce that adds just the right amount of sweetness. Whether you’re a student juggling classes, a busy parent in search of quick meals, or a food enthusiast looking to try something new, this Easy General Tso’s Cauliflower bowl is the perfect recipe to incorporate into your weeknight dinner rotation. So, roll up your sleeves and let’s dive into this tropical delight that you can easily adapt to suit your taste!

    Benefits and Advantages of Easy General Tso’s Cauliflower Bowls

    When it comes to easy dinner recipes, the Easy General Tso’s Cauliflower Bowls shine in numerous ways. Let’s explore the key benefits that make this recipe stand out:

    1. Simplicity and Convenience

    This recipe is designed for everyone, from novice cooks to seasoned chefs. With minimal prep time and straightforward cooking steps, you’ll spend more time enjoying your meal and less time in the kitchen.

    2. Health Benefits

    One of the best aspects of this dish is its health benefits. Cauliflower is renowned for its low calorie and high fiber content, making it a great choice for weight management. Additionally, it is an excellent source of vitamins C, K, and B6, along with folate and antioxidants.

    3. Dietary Versatility

    Whether you’re vegan, gluten-free, or just looking to eat a bit healthier, this recipe adapts effortlessly. You can easily swap out ingredients or adjust seasoning levels to suit your specific dietary requirements without sacrificing flavor.

    4. Flavor Explosion

    The sweet and spicy sauce brings life to the dish, marrying perfectly with the crispy cauliflower. You’ll experience a delightful interplay of textures and tastes, which transforms an ordinary meal into a flavorful feast.

    5. Meal Prep Friendly

    These bowls store beautifully. You can prepare a batch ahead of time and reheat them for quick lunches or dinners throughout the week. They make for excellent leftovers, saving you time when you’re busy or tired.

    6. Family-Friendly

    Kids and adults alike love this meal! It’s playful enough to entice picky eaters while providing enough substance to keep everyone full and satisfied. By involving young ones in the cooking process, you can instill a love for healthy eating habits.

    By highlighting these numerous benefits, it’s clear why Easy General Tso’s Cauliflower Bowls rank highly among easy dinner recipes. The ease of preparation, health advantages, and versatile options make it a top choice for all home cooks.

    Ingredients Overview

    Essential Ingredients for Easy General Tso’s Cauliflower Bowls

    To create the perfect Easy General Tso’s Cauliflower Bowls, you’ll need the following ingredients:

    1. 1 medium head of cauliflower—about 4 cups, cut into bite-sized florets
    2. Cauliflower serves as the main ingredient, offering a hearty, vegetable base.

    3. 1 cup of cornstarch

    4. This helps achieve a crispy coating when combined with the cauliflower.

    5. 1 tablespoon of vegetable oil

    6. Essential for crisping the cauliflower in the oven or air fryer without excess fats.

    7. Salt and black pepper to taste

    8. These basic seasonings enhance the flavor of the dish.

    9. For the sauce:

    10. 1/2 cup rice vinegar
      • Adds acidity and a touch of sweetness.
    11. 1/4 cup soy sauce (or coconut aminos for gluten-free)
      • Offers the umami flavor without gluten.
    12. 1/4 cup brown sugar or maple syrup
      • Provides sweetness to balance the sauce.
    13. 2 cloves of garlic, minced
      • Enhances flavor and adds freshness.
    14. 1 tablespoon fresh ginger, grated
      • Adds a warming, aromatic element.
    15. 1 teaspoon chili flakes (optional)

      • Introduces heat; adjust according to your preference.
    16. For garnish:

    17. Sesame seeds
      • Adds crunch and a nutty flavor.
    18. Sliced green onions
      • Provides a fresh, aromatic note.

    This ingredient list is designed to be straightforward yet flavorful, catering to various dietary needs while making your dish wonderfully satisfying.

    Dietary Substitutions to Customize Your Easy General Tso’s Cauliflower Bowls

    You can easily modify this recipe to cater to different dietary preferences. Here are some substitutions you might consider:

    • Gluten-Free: Opt for coconut aminos instead of soy sauce for a gluten-free and soy-free solution.
    • Sugar-Free: Use a sugar substitute like Stevia or erythritol if you’re looking to reduce sugar intake.
    • Nut-Free: If you have nut allergies, all ingredients mentioned can be kept nut-free, as no nuts are included in the primary recipe.
    • Oil-Free: You can skip the vegetable oil and opt for baking the cauliflower with a light spray of cooking spray instead.
    • Add Protein: Enhance the nutritional content by incorporating tofu or chickpeas. For a protein boost, add grilled chicken or shrimp for those who are not vegan.

    By understanding these dietary substitutions, you’re empowered to customize the dish to fit your lifestyle and health needs, making these Easy General Tso’s Cauliflower Bowls versatile as well as delicious.

    How to Prepare the Perfect Easy General Tso’s Cauliflower Bowls: Step-by-Step Guide

    Creating your Easy General Tso’s Cauliflower Bowls is not only easy but also fun! Follow these simple steps:

    1. Prepare the Base: Preheat your oven to 425°F (220°C). Line a baking sheet with parchment paper for easy cleanup.

    2. Coat the Cauliflower: In a large bowl, combine the cauliflower florets with cornstarch, salt, and pepper. Ensure that every piece is evenly coated, creating a crispy texture when baked.

    3. Drizzle with Oil: Add the vegetable oil to the cauliflower mixture and toss to coat. This step is essential for achieving that desired crispy texture.

    4. Bake the Cauliflower: Spread the coated cauliflower evenly on the lined baking sheet. Bake for 25-30 minutes, flipping halfway through, or until golden brown and crispy.

    5. Prepare the Sauce: While the cauliflower bakes, gather a medium saucepan. Combine rice vinegar, soy sauce, brown sugar, minced garlic, grated ginger, and chili flakes (if using). Place over medium heat, stirring occasionally until the sugar dissolves and the mixture starts to simmer.

    6. Thicken the Sauce: In a small bowl, mix 1 tablespoon of cornstarch with 2 tablespoons of water to create a slurry. Add this slurry to the simmering sauce and stir until the sauce thickens, about 2-3 minutes.

    7. Toss Cauliflower with Sauce: Once the cauliflower is fully cooked, remove it from the oven. In a large mixing bowl, toss the baked cauliflower with the prepared sauce until well-coated.

    8. Serve: Spoon the cauliflower into bowls, garnishing with sesame seeds and sliced green onions. Serve hot, with optional side dishes such as steamed rice or quinoa.

    9. Leftovers: If you have leftovers, allow them to cool and store them in an airtight container in the refrigerator for up to 4 days. Reheat in the microwave or oven.

    By following these steps, you will create mouth-watering Easy General Tso’s Cauliflower Bowls perfect for a quick family dinner or meal prep for the week ahead.

    Mastering Easy General Tso’s Cauliflower Bowls: Advanced Tips and Variations

    Once you’ve mastered the basic recipe, consider these tips and variations to elevate your Easy General Tso’s Cauliflower Bowls:

    • Add More Veggies: Include vibrant vegetables such as bell peppers, snap peas, or baby corn for added color, nutrition, and crunch. You can roast them alongside the cauliflower or sauté them separately.

    • Make it Spicy: If you love heat, experiment by adding sriracha or a dash of hot sauce to the sauce mix for an extra kick.

    • Try Different Proteins: For added complexity, swapping in proteins such as tofu, tempeh, or even chicken can cater to multiple palates while enhancing the nutritional profile of the dish.

    • Use Rice Alternatives: Instead of traditional rice or quinoa, try cauliflower rice for a lower-carb option, or mix in some brown rice for added fiber.

    • Customize the Sauce: Feel free to make the sauce your own! Add sesame oil for richness, or mix in some peanut butter for a creamy texture and nutty flavor if no allergies are present.

    These advanced tips and variations will not only provide new flavors but also cater to various dietary preferences and allow you to enjoy these Easy General Tso’s Cauliflower Bowls repeatedly without boredom.

    How to Store Easy General Tso’s Cauliflower Bowls: Best Practices

    Storing your Easy General Tso’s Cauliflower Bowls correctly ensures they maintain their delicious flavor and texture. Follow these best practices for storage:

    1. Refrigeration: After allowing the dish to cool, place it in an airtight container in the refrigerator. This keeps leftovers fresh for up to four days.

    2. Freezing: If you’ve made a large batch or want to save some for later, the baked cauliflower can be frozen. Place the cooled cauliflower in a freezer-safe container or zip-top bag, ensuring you remove as much air as possible. This method preserves the texture for about 3 months.

    3. Reheating: When you’re ready to enjoy the leftovers, reheat in the microwave or in a preheated oven at 375°F (190°C) until warmed through. If frozen, allow the dish to thaw in the refrigerator overnight before reheating.

    By following these storage tips, you will extend the shelf life of your Easy General Tso’s Cauliflower Bowls, making them ideal for meal prep and quick dinners.

    Nutritional Value of Easy General Tso’s Cauliflower Bowls

    Understanding the nutritional value of your meals helps you make informed choices. Here’s a breakdown of the typical nutritional content per serving (based on 4 servings):

    • Calories: 250
    • Protein: 4g
    • Fat: 5g
    • Saturated Fat: 0.5g
    • Carbohydrates: 48g
    • Fiber: 5g
    • Sugar: 10g
    • Sodium: 600mg

    This nutritional information showcases that these Easy General Tso’s Cauliflower Bowls are not only flavorful but also wholesome. With a focus on vegetables and healthy ingredients, you can indulge without guilt, making it an excellent addition to your repertoire of easy dinner recipes. Feel free to adjust the ingredients based on your dietary goals to create a meal that suits your lifestyle.

    FAQs: Frequently Asked Questions About Easy General Tso’s Cauliflower Bowls

    1. Can I use frozen cauliflower instead of fresh?

    Yes, frozen cauliflower works well in this recipe! Just make sure to thaw and drain the cauliflower to prevent excess moisture before baking.

    2. How can I make this recipe spicier?

    To increase the heat, consider adding more chili flakes, sriracha, or even chopped fresh chilies to the sauce.

    3. Is this dish suitable for meal prep?

    Absolutely! This dish stores well in the fridge, and reheating it is quick and easy, making it a perfect candidate for meal prepping.

    4. Can I incorporate other proteins?

    Yes! Tofu, tempeh, shrimp, or chicken can be added to the bowl for added protein. Adjust your cooking time accordingly based on which protein you choose.

    5. How long do leftovers last?

    When stored properly in an airtight container, leftovers can last up to four days in the refrigerator or three months in the freezer.

    By addressing these frequently asked questions, you equip yourself with the knowledge and confidence to create and adapt this dish to fit your lifestyle, making it one of your go-to options for easy dinner recipes.

    In conclusion, Easy General Tso’s Cauliflower Bowls offer a flavorful, healthy, and versatile dish that can fit into various diets and lifestyles. With its ease of preparation and the ability to customize, it is an excellent choice for anyone looking to enjoy delicious meals without the stress of complex cooking. Now, get started on this delightful bowl that will surely impress your friends and family! Enjoy your cooking adventure!

  • Tasty Southwest Chicken Wrap Lunch

    Tasty Southwest Chicken Wrap Lunch

    Tasty Southwest Chicken Wrap Lunch: A Tropical Delight

    Introduction to Tasty Southwest Chicken Wrap Lunch

    Are you in search of delicious and nutritious lunch ideas that cater to various lifestyles and dietary preferences? Look no further! The Tasty Southwest Chicken Wrap Lunch is the perfect solution. This delightful wrap blends vibrant flavors with wholesome ingredients, making it both satisfying and healthy. Whether you are a busy parent seeking quick meal prep, a student looking for nutritious options, or someone simply wanting to enjoy a flavorful lunch, this recipe has you covered.

    This wrap is not only easy to prepare, but it’s also flexible enough to suit many dietary needs. With options for gluten-free and vegan variations, you can enjoy it guilt-free. Packed with lean protein, fresh vegetables, and bold spices, this lunch wraps everything you need for a balanced meal. Trust me; your taste buds will thank you!

    The Tasty Southwest Chicken Wrap Lunch is also ideal for meal prepping. You can prepare several wraps at once and store them for the week, making them a convenient pick for lunch breaks or road trips. With just a few simple steps, you can have a delicious, healthy, and exciting lunch ready in no time.

    Benefits and Advantages of Tasty Southwest Chicken Wrap Lunch

    The Tasty Southwest Chicken Wrap Lunch has several advantages that set it apart from other meal options. First, it’s incredibly easy to prepare. With a few basic ingredients and minimal cooking time, you can create a gourmet-style meal in just minutes. This makes it one of the best lunch ideas for busy individuals who still want to eat healthily.

    One of the standout features of this recipe is its health benefits. The lean chicken offers a great source of protein, essential for building and repairing muscles. Coupled with an array of colorful vegetables including bell peppers, spinach, and avocado, this wrap provides a spectrum of vitamins and minerals that are vital for overall well-being. Additionally, you can customize the ingredients to create a low-calorie option by using whole grain wraps or substituting heavier sauces with zesty salsa or Greek yogurt.

    Moreover, the Tasty Southwest Chicken Wrap Lunch is perfect for various dietary preferences. If you’re vegan or vegetarian, you can replace chicken with marinated tofu or tempeh, ensuring everyone can enjoy this incredible wrap. If gluten is a concern, you can easily find gluten-free tortillas to accommodate your needs.

    Finally, the vibrant southwest flavors make this dish truly mouthwatering. From the zesty lime juice to the smoky seasoning, every bite transports you to a sunny taco stand. The blend of spices not only tantalizes your taste buds but also offers additional health perks as well, such as anti-inflammatory properties from spices like cumin and paprika. Overall, this wrap will satisfy your cravings while keeping you full and energized throughout the day.

    Ingredients Overview

    Essential Ingredients for Tasty Southwest Chicken Wrap Lunch

    For the Tasty Southwest Chicken Wrap Lunch, you’ll need the following key ingredients, which are designed to enhance both flavor and nutrition. Here’s what you’ll need:

    • 2 large whole wheat tortillas (gluten-free options are available)
      Whole wheat tortillas provide complex carbohydrates and fiber, keeping you full longer.

    • 1 pound cooked chicken breast, diced
      A lean source of protein, chicken breast is essential for muscle repair and satiety.

    • 1 cup black beans, rinsed and drained
      Black beans add fiber, protein, and a heartier texture to the wrap.

    • 1 cup corn (canned or frozen)
      Corn introduces a sweet crunch and more vitamins to the dish.

    • 1 cup bell peppers (various colors), sliced
      Rich in antioxidants and vitamin C, bell peppers brighten the wrap visually and nutritionally.

    • 1 avocado, sliced
      Avocado provides healthy fats, enhancing the nutritive profile of the wrap.

    • 1 cup spinach or mixed greens
      These greens add freshness and are a great source of vitamins K and A.

    • ½ cup salsa (mild or spicy based on preference)
      Salsa acts as both a condiment and a flavor enhancer while being low in calories.

    • 1 teaspoon chili powder
      This spice adds the southwest flair and a bit of zest to the wrap.

    • 1 tablespoon lime juice
      Lime juice brightens flavors and adds a refreshing twist.

    • Optional: cilantro, cheese, or Greek yogurt for toppings
      Customize your wrap with toppings that suit your taste and dietary needs.

    These ingredients combine to create a filling and flavorful wrap that is not only convenient but also nutritionally balanced.

    Dietary Substitutions to Customize Your Tasty Southwest Chicken Wrap Lunch

    Customization is key when it comes to dietary preferences, and this Tasty Southwest Chicken Wrap Lunch excels in versatility. Here are some substitutions you can make to accommodate various diets:

    • For a Vegan Version: Substitute the chicken with seasoned tofu, tempeh, or chickpeas. These plant-based proteins maintain that satisfying element while ensuring the wrap remains filling.

    • For Gluten-Free Options: Use gluten-free tortillas or large lettuce leaves (like romaine or butter lettuce) as a wrap alternative for a light, carb-friendly option.

    • Dairy-Free: For those who want to omit dairy, simply skip the cheese or use vegan cheese options. Greek yogurt can be replaced with cashew cream or avocado spread for creaminess without the dairy.

    • Low-Calorie Option: Opt for a low-calorie tortilla and reduce avocado serving or skip the cheese to cut down on calories while maintaining the flavor.

    • Extra Nutrients: Add in other vegetables like cucumber, zucchini, or shredded carrots for added nutrients without significantly increasing calories.

    These substitutions ensure that everyone can enjoy the Tasty Southwest Chicken Wrap Lunch, regardless of dietary restrictions.

    How to Prepare the Perfect Tasty Southwest Chicken Wrap Lunch: Step-by-Step Guide

    Creating your Tasty Southwest Chicken Wrap Lunch is easy and straightforward. Follow this step-by-step guide to craft your delicious and vibrant wraps:

    1. Prepare the Base: Start by laying out the whole wheat tortilla on a clean, flat surface. If you’re using gluten-free tortillas, ensure they are pliable by warming them up slightly in the microwave for 10-20 seconds.

    2. Mix Ingredients: In a medium bowl, combine the diced cooked chicken, black beans, corn, diced bell peppers, lime juice, and chili powder. Stir thoroughly until all ingredients are well-coated and evenly mixed.

    3. Layer the Fillings: Place a generous amount of the chicken mixture in the center of the tortilla. Be mindful not to overfill, as it can make wrapping difficult.

    4. Top with Greens: Add a handful of fresh spinach or mixed greens on top of the chicken mixture to introduce levels of freshness and nutrition.

    5. Add Avocado Slices: Carefully arrange the avocado slices over the greens—this adds creaminess and healthy fats.

    6. Salsa Time: Spoon some delicious salsa over the top of the avocado slices, adjusting the quantity to your taste preference. This will enhance the flavor while adding moisture to the wrap.

    7. Fold and Enclose: To wrap, fold both sides of the tortilla inward, then roll up from the bottom. Tuck it in tightly while rolling to keep everything enclosed.

    8. Cut and Serve: Once you’ve secured your wrap, use a sharp knife to cut it in half diagonally. This not only makes it easier to eat but also showcases the colorful fillings.

    9. Enjoy Your Meal: Serve the wraps immediately or pack them for lunch. This Tasty Southwest Chicken Wrap Lunch is perfect for on-the-go meals or dining at home.

    Mastering Tasty Southwest Chicken Wrap Lunch: Advanced Tips and Variations

    To elevate your Tasty Southwest Chicken Wrap Lunch, consider these advanced tips and variations:

    • Grill the Wraps: For added flavor, try grilling your assembled wraps on medium heat for about 3-4 minutes on each side. This toasts the tortilla and enhances the overall taste.

    • Creamy Dressing: If you prefer a creamy element, drizzle on your favorite dressing (like ranch or a southwest dressing) prior to rolling. Just keep an eye on the calories if that’s a concern.

    • Make It Spicy: Add jalapeños or a dash of hot sauce to the filling for added heat. This is an excellent way to make the wrap even more flavorful.

    • Pre-Made Options: For convenience, consider buying pre-cooked chicken or canned chicken if in a rush. Ensure to drain and rinse properly before using.

    • Variations: Get creative! Experiment with different proteins like steak, shrimp, or even falafel for a unique twist. You can also substitute ingredients based on seasonal availability.

    How to Store Tasty Southwest Chicken Wrap Lunch: Best Practices

    To make your Tasty Southwest Chicken Wrap Lunch last longer, follow these storage tips:

    • Refrigeration: If you have leftover wraps, store them in an airtight container in the refrigerator. They can last up to 3 days. If you’ve added ingredients that brown quickly (like avocado), consider storing them separately to keep everything fresh.

    • Freezing Tips: To store for a longer period, wrap the prepared but unfilled tortillas in plastic wrap and place them in a resealable freezer bag. When you’re ready to eat, simply thaw in the refrigerator overnight before filling.

    • Reheating: Reheat the leftover wraps in the microwave for about 30-40 seconds until heated through, or for extra crispiness, pop them in a pan on low heat. Avoid reheating multiple times to maintain quality and freshness.

    Nutritional Value of Tasty Southwest Chicken Wrap Lunch

    Understanding the nutritional content of your meals is crucial for maintaining a healthy lifestyle. Here’s a basic overview of the nutritional value for one serving of the Tasty Southwest Chicken Wrap Lunch, assuming it contains all the ingredients listed:

    • Calories: Approximately 400-500
    • Protein: About 30 grams
    • Fat: Around 15 grams (depending on avocado and cheese)
    • Carbohydrates: Approximately 40 grams
    • Fiber: Approximately 8-10 grams
    • Sugars: Around 4-6 grams
    • Vitamins: High in vitamin A (from spinach and bell peppers), vitamin C (from peppers and lime), and folate (from black beans).

    By enjoying this wrap, you enjoy a balanced meal that’s full of fiber, healthy fats, and essential vitamins and minerals. Adjusting portion sizes can help manage calorie intake while ensuring you get the nutrition needed for a busy day.

    FAQs: Frequently Asked Questions About Tasty Southwest Chicken Wrap Lunch

    1. Can I use a different protein in my wrap?

    Absolutely! Feel free to replace chicken with turkey, grilled shrimp, or a plant-based protein like chickpeas or lentils for a vegetarian version.

    2. Is this recipe suitable for meal prep?

    Yes, the Tasty Southwest Chicken Wrap is excellent for meal prep! You can make multiple wraps in advance and store them in the fridge for ease throughout the week.

    3. How long do leftovers last?

    When stored properly in the fridge, the wraps will last up to 3 days. For best taste, consume them within this time frame.

    4. Can I freeze the wraps?

    Yes, you can freeze the unfilled wraps. Wrap them tightly and store them. When ready to eat, thaw in the fridge and fill as desired.

    5. What can I use instead of tortillas?

    You can use large lettuce leaves for a low-carb alternative or whole wheat pitas for a different style wrap if desired.

    6. Can children enjoy this recipe?

    Definitely! The Tasty Southwest Chicken Wrap Lunch is not only flavorful but also visually appealing, making it perfect for children. Tailor the spiciness to their taste preference for a child-friendly option.

    In conclusion, the Tasty Southwest Chicken Wrap Lunch is more than just a meal; it’s a versatile and exciting part of your lunch ideas repertoire. From quick preparations to delicious flavors and nutritional benefits, this wrap brings satisfaction to any dining occasion. So gather your ingredients and get ready to be amazed by how easy and tasty this wholesome wrap can be!

  • The Most Addictive Chicken Pasta YouLl Ever Make

    The Most Addictive Chicken Pasta YouLl Ever Make

    The Most Addictive Chicken Pasta You’ll Ever Make!: A Tropical Delight

    Introduction to The Most Addictive Chicken Pasta You’ll Ever Make!

    Are you ready to elevate your dinner table with a recipe that combines flavor, convenience, and health benefits? Look no further, as I introduce you to the most addictive chicken pasta you’ll ever make! This dish is not just another one of those ordinary chicken recipes; it’s a true crowd-pleaser that’s perfect for any occasion—from busy weeknights to casual get-togethers.

    What makes this recipe particularly special? First, it’s incredibly simple to prepare, making it ideal for home cooks and busy parents alike. In just about 30 minutes, you can have a delicious, mouthwatering meal ready on the table, ensuring you spend less time cooking and more time enjoying with your loved ones.

    Furthermore, this chicken pasta is packed with fresh ingredients, providing you with a healthy option that meets various dietary needs. It’s easily customizable for those who prefer gluten-free pasta or want to enjoy a low-calorie variant. Whether you’re a student on a budget, newlyweds trying to impress each other with culinary skills, or a working professional looking for quick meals, this addictive chicken pasta is sure to become a staple in your kitchen.

    Beyond its convenience and health benefits, this dish also flaunts a unique blend of tropical flavors, making it a delightful addition to your culinary repertoire. So, let’s get cooking!

    Benefits and Advantages of The Most Addictive Chicken Pasta You’ll Ever Make!

    The most addictive chicken pasta you’ll ever make stands out thanks to multiple benefits and advantages that cater to a diverse audience. Here’s why this recipe is your best choice:

    1. Ease of Preparation: In our fast-paced lives, convenience matters. This dish can be prepared in under 30 minutes, which means it’s perfect for those rushed weekdays when cooking can feel like a chore. With minimal prep time, you can quickly sauté some chicken, toss in vibrant vegetables, and combine everything with your favorite pasta.

    2. Health Benefits: Unlike many other chicken recipes that may be high in calories and saturated fats, this chicken pasta is a healthier alternative. By opting for whole-grain or gluten-free pasta, along with an array of fresh vegetables like bell peppers, spinach, and tomatoes, you get a wholesome meal packed with essential nutrients, dietary fiber, and antioxidants.

    3. Versatility: This chicken pasta recipe can be tailored to fit numerous dietary needs. It works well as a gluten-free dish by simply substituting regular pasta with gluten-free options. For a low-calorie version, you can reduce the amount of olive oil or use zoodles (zucchini noodles) for a lighter take. There are also vegan choices available—just swap the chicken for a combination of chickpeas and your favorite vegetables!

    4. Family-Friendly and Crowd-Pleasing: This dish’s vibrant colors and tropical flavors make it appealing to all, from the kids who refuse vegetables, to guests who are discerning eaters. With all the flavors mingling together, even picky eaters can’t resist going back for seconds!

    In summary, this chicken pasta is not only addictive but also a versatile dish that supports various dietary preferences and needs, making it a great fit for all home cooks. Let’s explore the ingredients that make this dish so compelling!

    Ingredients Overview

    Essential Ingredients for The Most Addictive Chicken Pasta You’ll Ever Make!

    Before diving into the preparation, here’s a detailed list of the ingredients you’ll need. Each ingredient plays a unique role, enhancing flavors and texture while delivering health benefits.

    • 2 chicken breasts (about 1 lb): Boneless, skinless chicken breasts make for a lean protein base.
    • 8 oz whole grain or gluten-free pasta: Adds fiber, supporting digestive health.
    • 1 cup cherry tomatoes: A burst of sweetness and antioxidants.
    • 1 bell pepper (red or yellow): Provides a crunchy texture and is rich in vitamins.
    • 2 cups fresh spinach: Packed with iron, vitamins, and minerals.
    • 3 cloves garlic: For flavor and its health benefits, promoting good immune function.
    • 1/4 cup olive oil: A source of healthy fats.
    • 1/2 teaspoon red pepper flakes: Adds heat and boosts metabolism.
    • 1 teaspoon Italian seasoning: A blend of herbs that enhances flavor.
    • Salt and pepper to taste.

    These ingredients combine to form a beautiful dish that’s not only vibrant but also healthy and satisfying. Now let’s explore how we can modify the ingredients to suit various diets!

    Dietary Substitutions to Customize Your The Most Addictive Chicken Pasta You’ll Ever Make!

    When it comes to crafting a dish that accommodates everyone’s dietary needs, substitutions are key! Here are some fantastic alternatives you can consider:

    • For a Vegan Option: Replace chicken breasts with 1 can of chickpeas (drained and rinsed) or grilled tofu for added protein. Sauté until browned for a tasty substitute.

    • For Gluten-Free Variations: Use gluten-free pasta made from quinoa or brown rice. These options maintain flavor and texture while accommodating gluten sensitivities.

    • For a Low-Carb Version: Substitute pasta with zucchini noodles, which provides a fresh and light dish while keeping carb counts low.

    • Add More Veggies: Feel free to toss in additional vegetables! Mushrooms, broccoli, or even carrots can enhance the dish further while providing essential nutrients.

    With these substitutions, everyone can enjoy the most addictive chicken pasta, tailored to their specific dietary needs and preferences!

    How to Prepare the Perfect The Most Addictive Chicken Pasta You’ll Ever Make!: Step-by-Step Guide

    Ready to make your own tropical chicken pasta? Follow this simple yet detailed step-by-step guide for a seamless cooking experience:

    1. Prepare the Ingredients: Start by dicing the chicken breasts into bite-sized pieces. Rinse the cherry tomatoes and halved them, chop the bell pepper, and mince the garlic.

    2. Cook the Pasta: In a large pot of salted boiling water, add the whole-grain or gluten-free pasta. Cook according to package instructions until al dente. Drain and set aside.

    3. Heat the Olive Oil: In a large skillet or frying pan, heat the olive oil over medium heat. Adding olive oil gives your dish richness without excessive calories.

    4. Sauté the Chicken: Once the oil is hot, add the diced chicken pieces. Season them with salt, pepper, and red pepper flakes. Sauté until the chicken is golden brown and cooked thoroughly (about 5-7 minutes).

    5. Add Garlic and Vegetables: Toss in the minced garlic, tomatoes, and bell pepper, sautéing for an additional 2-3 minutes until the veggies begin to soften.

    6. Mix in Spinach: Add the fresh spinach and Italian seasoning to the skillet. Stir everything together until the spinach wilt and mixes well (approx. 2 minutes).

    7. Combine Pasta and Sauce: Add the cooked pasta to the skillet, gently tossing everything together to ensure the pasta is well-coated. If it seems dry, you can drizzle a bit more olive oil or a splash of pasta water.

    8. Final Seasoning: Taste and adjust the seasoning if necessary. Sprinkle extra salt, pepper, or red pepper flakes for heat!

    9. Serve Immediately: Plate your pasta and enjoy a tropical feast! Drizzle some extra virgin olive oil on top for added richness and flavor if desired.

    This chicken pasta is not only tasty but will have your family asking for seconds. And remember, feel free to adjust the cooking techniques based on your dietary preferences!

    Mastering The Most Addictive Chicken Pasta You’ll Ever Make!: Advanced Tips and Variations

    To take your chicken pasta to the next level, here are some advanced tips and variations:

    • Protein Variations: Swap chicken for shrimp, salmon, or even a plant-based protein like lentils. They all infuse the dish with different flavors and nutritional profiles.

    • Cheesy Delight: For a cheesy variation, consider adding a sprinkle of parmesan cheese or a vegan substitute just before serving. This enhances the dish and introduces a rich, creamy texture.

    • Herb Infusion: Experiment with fresh herbs such as basil, parsley, or cilantro for a unique twist. Sprinkling fresh herbs on top not only enhances flavor but also adds aesthetic appeal.

    • Make it Creamy: If you’re looking for a richer dish, stir in a small amount of cream or a dairy-free alternative just before serving. The creamy consistency will elevate your pasta and leave everyone raving about it.

    With these tips, you can create various versions of the most addictive chicken pasta, appealing to a wide range of tastes and diets!

    How to Store The Most Addictive Chicken Pasta You’ll Ever Make!: Best Practices

    If you find yourself with leftovers after enjoying this fabulous pasta, you can store it to enjoy later. Here’s how to do it:

    • Refrigeration: Allow your chicken pasta to cool down completely. Store it in an airtight container in the refrigerator for up to 3-4 days. When you’re ready to enjoy it again, simply reheat it on the stove with a splash of water or broth to revitalize the flavors.

    • Freezing: For longer storage, the pasta can be frozen. Transfer it into freezer-safe bags or containers, removing as much air as possible. This way, your pasta can last for up to 3 months!

    • Reheating: To reheat frozen pasta, let it thaw overnight in the refrigerator. Then reheat it in a pan over low heat or in the microwave, ensuring it remains moist by adding a tiny splash of water.

    These best practices will ensure your most addictive chicken pasta remains delicious, fresh, and ready for your next craving!

    Nutritional Value of The Most Addictive Chicken Pasta You’ll Ever Make!

    Understanding the nutritional value of your meals is essential, especially if you’re conscious of your diet. Here’s a breakdown of the nutritional information for one serving of the most addictive chicken pasta, estimated to yield about four servings:

    • Calories: 450
    • Protein: 30g
    • Total Fat: 15g
    • Saturated Fat: 2g
    • Cholesterol: 70mg
    • Carbohydrates: 50g
    • Dietary Fiber: 7g
    • Sugars: 4g
    • Vitamin A: 20% of Daily Value (DV)
    • Vitamin C: 40% of DV
    • Calcium: 6% of DV
    • Iron: 15% of DV

    This nutritious profile makes the most addictive chicken pasta not just a treat for the taste buds but also a wholesome, heart-healthy meal option. Feel free to adjust the ingredients to further cater to your health goals!

    FAQs: Frequently Asked Questions About The Most Addictive Chicken Pasta You’ll Ever Make!

    Here are some of the most common questions regarding this tantalizing chicken pasta and their concise answers:

    1. Can I use frozen chicken instead of fresh?
    Yes! You can use frozen chicken; just make sure to thaw it thoroughly before cooking. This ensures even cooking and best results.

    2. Can I replace chicken with other meats?
    Absolutely! Feel free to swap chicken for shrimp, turkey, or even a vegetarian protein like tofu.

    3. How can I make this dish spicy?
    To add spice, increase the amount of red pepper flakes or incorporate diced jalapeños or any other hot pepper for an extra kick!

    4. Is it possible to make this dish in advance?
    Yes! You can prepare the pasta and sauce ahead of time. Store them separately in the refrigerator, and then combine them just before serving.

    5. Can this be a low-carb meal?
    Yes! By substituting regular pasta with zoodles or any other low-carb option, you can significantly reduce the carbohydrate content.

    Feel free to explore this tropical delight further, and remember that cooking is all about enjoying the journey—get creative in the kitchen!

    In conclusion, the most addictive chicken pasta you’ll ever make is more than just a meal; it’s a versatile, health-conscious dish that fits into any lifestyle. Whether you’re catering to family, friends, or just yourself, this recipe will inspire you to bring flavors to your plate like never before. So gather your ingredients, and let’s create moments that are not just delicious but also memorable!

  • Tasty Soy Garlic Chicken Rice Bowl

    Tasty Soy Garlic Chicken Rice Bowl

    Tasty Soy Garlic Chicken Rice Bowl: A Tropical Delight

    Introduction to Tasty Soy Garlic Chicken Rice Bowl

    Welcome to your next culinary adventure with the Tasty Soy Garlic Chicken Rice Bowl! This delightful dish not only satisfies your cravings but also ticks all the boxes when it comes to healthiness, simplicity, and versatility. In the realm of chicken recipes, this one stands out for its flavorful combination of soy sauce, garlic, and succulent chicken, served over a bed of fluffy rice.

    Whether you’re a busy parent juggling work and family, a student on a budget, or someone simply seeking a quick yet nutritious meal, this recipe is perfect for you. With an uncomplicated preparation process, it fits seamlessly into your hectic lifestyle. Packed with protein and essential nutrients, the Tasty Soy Garlic Chicken Rice Bowl is a fantastic option for health-conscious individuals. Moreover, it can easily be adapted for vegan or gluten-free diets, offering something for everyone!

    So, why should you give this recipe a try? Imagine succulent pieces of chicken marinated in a delectable soy-garlic sauce, paired with tender rice and crisp vegetables. Not only does this bowl provide a burst of flavors, but it also delivers a comforting meal that warms the soul. Let’s dive into the benefits and advantages of this flavorful creation, ensuring it finds a cherished spot in your weekly meal rotation!

    Benefits and Advantages of Tasty Soy Garlic Chicken Rice Bowl

    The Tasty Soy Garlic Chicken Rice Bowl is more than just a meal; it’s a wholesome culinary delight with numerous advantages. One of the most compelling reasons to whip up this dish is its ease of preparation. You don’t need to be a master chef to create this flavorful bowl; it’s simple enough for novice cooks and busy individuals alike. In just under 30 minutes, you can serve a satisfying meal that rivals those from your favorite restaurant.

    Health benefits abound in this delicious dish. Chicken, as a lean protein source, provides essential amino acids necessary for muscle building and recovery. The addition of garlic not only enriches the flavor but also offers anti-inflammatory and immune-boosting properties. This recipe allows for a customization of vegetables, meaning you can pack in additional vitamins and minerals from fresh produce.

    Moreover, the Tasty Soy Garlic Chicken Rice Bowl is both appealing and adaptable! Whether you’re following a specific diet or just using what you have on hand, this recipe can easily accommodate. It serves well as a base, allowing you to modify it for vegan or gluten-free options by substituting chicken with tofu or using gluten-free soy sauce.

    Additionally, as many chicken recipes often call for complicated steps, this one simplifies the cooking process. The straightforward steps make it an excellent option for busy parents who want to serve home-cooked meals without spending hours in the kitchen. The Tasty Soy Garlic Chicken Rice Bowl packs a flavorful punch while keeping things uncomplicated, making it a great choice for novices and seasoned cooks alike.

    Ingredients Overview

    Essential Ingredients for Tasty Soy Garlic Chicken Rice Bowl

    To create your own Tasty Soy Garlic Chicken Rice Bowl, gather the following ingredients:

    • For the Marinade:
    • 1 lb (450g) chicken breast, cut into bite-sized pieces (or tofu for a vegan option)
    • 1/4 cup soy sauce (use gluten-free soy sauce for a gluten-free option)
    • 2 tablespoons honey or maple syrup (for vegan)
    • 4 cloves garlic, minced
    • 1 tablespoon sesame oil
    • 1 tablespoon rice vinegar

    • For the Rice:

    • 2 cups cooked white or brown rice (or cauliflower rice for a low-calorie option)

    • For the Vegetables:

    • 1 bell pepper, sliced
    • 1 cup broccoli florets
    • 1 carrot, julienned
    • 2 green onions, chopped
    • 1 tablespoon sesame seeds (for garnish)

    Each ingredient serves a specific purpose: while chicken provides protein, garlic enhances flavor and offers health benefits. The rice serves as a hearty base, absorbing all the lovely flavors from the chicken and sauce. Feel free to mix in your favorite vegetables, as they add color, texture, and additional nutritional value to your meal.

    Dietary Substitutions to Customize Your Tasty Soy Garlic Chicken Rice Bowl

    To cater to various dietary preferences and needs, here are some suggested substitutions:

    • For Vegan Options:
    • Replace chicken with firm tofu, tempeh, or chickpeas.
    • Use maple syrup or agave nectar instead of honey.

    • For Gluten-Free Needs:

    • Opt for gluten-free soy sauce or tamari.
    • Ensure any added sauces or condiments are gluten-free.

    • For Low-Calorie Versions:

    • Substitute white rice with cauliflower rice, reducing the calorie content while maintaining volume and flavor.
    • Use a leaner cut of chicken or opt for skinless chicken thighs.

    These adaptations make it easier for anyone to enjoy this delicious bowl, allowing you to create a meal that aligns perfectly with your dietary needs.

    How to Prepare the Perfect Tasty Soy Garlic Chicken Rice Bowl: Step-by-Step Guide

    Creating the Tasty Soy Garlic Chicken Rice Bowl doesn’t have to be complicated. Follow these straightforward steps for a delicious outcome:

    1. Prepare the Marinade: In a medium-sized bowl, whisk together soy sauce, honey or maple syrup, minced garlic, sesame oil, and rice vinegar. Add chicken pieces (or tofu), ensuring they are well-coated. Let them marinate for at least 15 minutes to absorb the flavors.

    2. Cook the Rice: While the chicken marinates, prepare rice according to package instructions. For a quicker base, consider using leftover rice or pre-cooked options. If using cauliflower rice, sauté it lightly in olive oil for 3-5 minutes until tender.

    3. Sauté the Vegetables: In a large skillet or wok, heat a tablespoon of sesame oil over medium heat. Add the sliced bell pepper, broccoli florets, and carrots. Stir-fry for 5-7 minutes until they start to get tender but remain slightly crisp.

    4. Cook the Chicken: Push the vegetables to one side of the skillet. In the same pan, add the marinated chicken (or tofu). Sauté for about 6-8 minutes, stirring frequently, until the chicken is fully cooked and no longer pink in the middle.

    5. Combine Ingredients: Once the chicken is cooked, mix it with the sautéed vegetables. Cook together for an additional 2 minutes, allowing the flavors to meld. Adjust seasoning to taste.

    6. Serve: To assemble your rice bowl, scoop a generous portion of rice into each serving bowl. Top with the chicken and vegetable mixture, ensuring an even distribution.

    7. Garnish: Sprinkle with chopped green onions and sesame seeds for added texture and flavor.

    8. Enjoy: Serve your Tasty Soy Garlic Chicken Rice Bowl immediately for the best experience.

    This meal doesn’t just taste wonderful; it also looks visually appealing and enticing!

    Mastering Tasty Soy Garlic Chicken Rice Bowl: Advanced Tips and Variations

    To truly master the Tasty Soy Garlic Chicken Rice Bowl, consider these advanced tips and variations to elevate your experience:

    • Flavor Enhancements: Add freshly grated ginger to the marinade for an extra layer of flavor. A splash of chili sauce can spice things up for those who enjoy heat.

    • Try Different Proteins: Experiment with different proteins such as shrimp, beef, or plant-based meat substitutes for a unique twist on this classic.

    • Explore Grain Options: Don’t limit yourself to rice! Quinoa, farro, or even wild rice can serve as flavorful alternatives that enhance the nutritional profile.

    • Swap out the Veggies: Feel free to customize the vegetables based on what’s in season or available. Zucchini, snap peas, or edamame also work well in this dish.

    • Meal Prep: This recipe is perfect for meal prepping! Cook a larger batch and store it in individual containers for easy lunches or dinners throughout the week.

    With these variations and enhancements, you can turn a simple rice bowl into a dynamic meal that never gets monotonous!

    How to Store Tasty Soy Garlic Chicken Rice Bowl: Best Practices

    To ensure your Tasty Soy Garlic Chicken Rice Bowl remains fresh and delicious, follow these best practices for storage:

    • Refrigeration: Store any leftovers in an airtight container in the refrigerator. Properly stored, it should last for about 3-4 days.

    • Freezing: If you want to store the dish for a longer period, consider freezing it. Allow the bowl to cool down completely, then transfer it to a freezer-safe container. It can be kept frozen for up to 3 months.

    • Reheating: When reheating, do so in the microwave or on the stovetop until heated through. If the sauce appears thick, add a splash of water or broth to loosen it up.

    Following these guidelines will help maintain the flavor and texture of your Tasty Soy Garlic Chicken Rice Bowl, allowing for an enjoyable experience each time.

    Nutritional Value of Tasty Soy Garlic Chicken Rice Bowl

    Understanding the nutritional value of your meals is essential, especially when following specific dietary guidelines. Here’s a breakdown of the key nutritional components for the Tasty Soy Garlic Chicken Rice Bowl:

    • Serving Size: 1 bowl (with chicken)
    • Calories: Approximately 450-550 (depending on rice and additional ingredients)
    • Protein: 35g (high protein source from chicken)
    • Fat: 10g (includes healthy fats from sesame oil)
    • Carbohydrates: 60g (includes fiber from rice and vegetables)
    • Fiber: 3g (based on vegetables used)
    • Vitamins and Minerals: Rich in vitamins A, C, and iron from vegetables alongside protein from chicken.

    By customizing the ingredients, like opting for brown rice and more veggies, you can further increase the fiber and nutrient content and decrease the calorie count. This versatility makes the Tasty Soy Garlic Chicken Rice Bowl a fantastic addition to any meal plan!

    FAQs: Frequently Asked Questions About Tasty Soy Garlic Chicken Rice Bowl

    Q1: Can I make this dish in advance?
    A1: Yes! You can prep the chicken and marinade in advance. However, for the best flavor and texture, cook the vegetables and rice closer to serving time.

    Q2: Is this recipe suitable for meal prep?
    A2: Certainly! It stores well in an airtight container in the refrigerator. Reheat it for easy weekday meals.

    Q3: Can I use other proteins for this dish?
    A3: Absolutely! Feel free to replace chicken with tofu, shrimp, or even beef. Just adjust the cooking times accordingly.

    Q4: How can I make this recipe gluten-free?
    A4: Simply use gluten-free soy sauce or tamari. Ensure that any additional sauces used are also gluten-free.

    Q5: Is it easy to customize the ingredients?
    A5: Yes! You can easily swap vegetables or grains to suit your taste or dietary needs. This dish is very versatile!

    With its delicious flavor, nutritional benefits, and customizable options, the Tasty Soy Garlic Chicken Rice Bowl is a fantastic recipe to try. It’s perfect for anyone looking to simplify their weeknight dinners, delight their family, or experiment with new flavors. So, get cooking and enjoy the tropical flavors in every spoonful!

  • Easy Healthy Sticky Chicken Rice Bowl

    Easy Healthy Sticky Chicken Rice Bowl

    Easy Healthy Sticky Chicken Rice Bowl: A Tropical Delight

    Introduction to Easy Healthy Sticky Chicken Rice Bowl

    Are you searching for quick and nutritious healthy dinner recipes that the whole family will love? Look no further than the Easy Healthy Sticky Chicken Rice Bowl! This delightful dish is not just wholesome but also incredibly easy to prepare. Featuring tender chicken, glistening with a savory and slightly sweet sticky glaze, this recipe brings together a medley of flavors that transport you to a tropical paradise.

    The beauty of this chicken rice bowl lies in its simplicity. In under 30 minutes, you can whip up a colorful and filling meal that is both satisfying and good for your body. Plus, it’s versatile for various dietary preferences—whether you’re looking for gluten-free options, vegetarian substitutions, or a low-calorie profile, this recipe adapts effortlessly to meet your needs.

    Packed with protein, fiber, and essential nutrients, this bowl is suitable for busy parents who need a quick dinner solution, students on a budget, diet-conscious individuals, and anyone else looking for a delicious, guilt-free meal. As you follow this recipe, discover how easy it can be to make healthy eating enjoyable and accessible for everyone.

    Benefits and Advantages of Easy Healthy Sticky Chicken Rice Bowl

    This Easy Healthy Sticky Chicken Rice Bowl is not just a meal; it’s an experience filled with benefits that cater to a multitude of lifestyles and dietary requirements. Here are just a few reasons why this dish stands out among healthy dinner recipes.

    1. Quick and Easy Preparation: With basic ingredients and minimal cooking techniques, anyone can master this dish. As a busy parent or working professional, you’ll appreciate how little time it takes to prepare a nutritious meal that pleases the palate and fills hungry stomachs.

    2. Health Benefits: Each bowl is brimming with lean protein from the chicken, which helps in muscle repair and boosts immunity. The accompanying vegetables provide a wealth of vitamins and minerals, and the rice base offers complex carbohydrates, keeping you satiated for longer without the crash.

    3. Customizable: This recipe accommodates a variety of dietary preferences. Whether you’re vegan, gluten-free, or need to reduce calories, you can easily swap out ingredients to suit your needs while retaining the deliciousness of this dish.

    4. Appealing Aesthetic: The colorful presentation is visually enticing, making it appealing for both adults and children. This is particularly important for families, as a well-plated meal can entice picky eaters to try new foods.

    5. Suitable for Meal Prep: Making this dish in bulk allows for seamless lunch or dinner solutions throughout the week. Just divide it into portions, and you’ll have healthy options ready at your fingertips!

    With all these advantages, the Easy Healthy Sticky Chicken Rice Bowl is sure to become a staple in your rotation of healthy dinner recipes.

    Ingredients Overview

    Essential Ingredients for Easy Healthy Sticky Chicken Rice Bowl

    Here’s a detailed list of the ingredients you’ll need to make the Easy Healthy Sticky Chicken Rice Bowl, along with their benefits:

    • Chicken Breast (500g): High in protein and low in fat, chicken breast is the perfect lean meat to use. It provides the energy you need without excess calories.
    • Brown Rice (1 cup): A fiber-rich alternative to white rice, brown rice supports digestion and keeps you feeling full longer. It also helps maintain stable blood sugar levels.
    • Soy Sauce (¼ cup): Adds a savory umami flavor. Use low-sodium soy sauce to keep the sodium content in check.
    • Honey or Maple Syrup (2 tablespoons): Provides natural sweetness that balances the salty flavors. Use maple syrup for a vegan option.
    • Garlic (3 cloves, minced): Packed with antioxidants and known for its immune-boosting properties, garlic adds depth to the dish.
    • Ginger (1 tablespoon, grated): This aromatic adds a warm spice and has anti-inflammatory benefits.
    • Vegetable Oil (1 tablespoon): A small amount is needed to cook the chicken. Use olive oil for added health benefits.
    • Mixed Vegetables (2 cups): Use fresh or frozen options like bell peppers, broccoli, and carrots for color and nutrients.
    • Sesame Seeds (for garnish): Rich in healthy fats, these seeds add crunch to your dish.

    Dietary Substitutions to Customize Your Easy Healthy Sticky Chicken Rice Bowl

    This recipe can be effortlessly customized to cater to various dietary needs:

    • For vegan options: Substitute the chicken with firm tofu or chickpeas—both options provide a protein boost. Ensure you use maple syrup instead of honey.
    • For gluten-free purposes: Use tamari sauce in place of soy sauce to avoid gluten while enjoying the same delicious flavor.
    • Low-calorie options: Reduce the amount of honey or syrup, and opt for sprouted brown rice, which is lower in calories and has a higher fiber content.

    These substitutions ensure that everyone can enjoy the Easy Healthy Sticky Chicken Rice Bowl, regardless of dietary restrictions.

    How to Prepare the Perfect Easy Healthy Sticky Chicken Rice Bowl: Step-by-Step Guide

    Ready to create your own Easy Healthy Sticky Chicken Rice Bowl? Follow these simple steps:

    1. Prepare the Rice: Rinse 1 cup of brown rice under cold water. In a pot, combine the rice with 2 cups of water. Bring to a boil, then reduce heat, cover, and simmer for about 45 minutes until tender.

    2. Marinate the Chicken: While the rice is cooking, cut 500g of chicken breast into bite-sized pieces. In a bowl, mix ¼ cup of low-sodium soy sauce, 2 tablespoons of honey (or maple syrup), 3 minced garlic cloves, and 1 tablespoon of grated ginger. Toss the chicken pieces in the marinade and let them sit for 10 minutes to absorb the flavors.

    3. Prepare the Vegetables: While the chicken is marinating, chop your mixed vegetables (2 cups). You can use a mix of bell peppers, broccoli, and carrots for crunch and color.

    4. Cook the Chicken: In a large skillet or wok, heat 1 tablespoon of vegetable oil over medium-high heat. Add the marinated chicken along with the marinade and sauté for about 5-7 minutes, or until the chicken is cooked through and golden brown.

    5. Add the Vegetables: Stir in the mixed vegetables and sauté for another 3-5 minutes until they are tender but still crisp. This step not only adds flavor but also enriches your dish with vitamins and minerals.

    6. Combine the Ingredients: Once the rice is cooked, fluff it with a fork. In serving bowls, layer the rice on the bottom and top it with the sticky chicken and vegetables mixture.

    7. Garnish: Sprinkle sesame seeds over each bowl for an added layer of flavor and texture. Optionally, add a drizzle of your favorite hot sauce for a spicy kick.

    8. Serve and Enjoy: Your Easy Healthy Sticky Chicken Rice Bowl is ready! This recipe is impressive enough for guests yet easy enough for a quick weeknight dinner.

    By following these clear steps, you’ll successfully create a meal that is not only delicious but also fits within your list of healthy dinner recipes.

    Mastering Easy Healthy Sticky Chicken Rice Bowl: Advanced Tips and Variations

    Now that you know how to prepare the Easy Healthy Sticky Chicken Rice Bowl, consider these advanced tips and variations to elevate your dish even further:

    • Flavor Infusion: For added complexity, marinate your chicken overnight. This enhances the flavor, ensuring that each bite is savory and satisfying.

    • Add Fresh Herbs: Incorporate fresh cilantro or green onions as garnishes. These herbs not only brighten up the dish but also add unique flavors.

    • Different Grain Bases: Instead of brown rice, consider quinoa, cauliflower rice, or even whole wheat noodles to add variety and texture to your bowl.

    • Experiment with Sauces: If you like experimenting, try adding a touch of sriracha or peanut sauce for a different flavor profile.

    • Make it a Salad Bowl: For a lighter option, turn it into a salad by using leafy greens like spinach or kale as the base instead of rice.

    These tips and variations can help keep your meals exciting while maintaining the health benefits you seek in healthy dinner recipes.

    How to Store Easy Healthy Sticky Chicken Rice Bowl: Best Practices

    To ensure your Easy Healthy Sticky Chicken Rice Bowl maintains its freshness and quality, follow these storage tips:

    • Refrigeration: Store leftover chicken rice bowls in airtight containers in the refrigerator for up to 4 days. This is perfect for meal prep, allowing you to grab and go!

    • Freezing: If you’d like to keep it for a longer time, you can freeze individual portions. Just make sure the containers are freezer-safe. When properly stored, it can last up to 2-3 months.

    • Reheating: To reheat, simply microwave your thawed bowl until heated through. If frozen, it’s best to thaw in the refrigerator overnight before reheating. You can also reheat it in a skillet over medium heat for a few minutes, adding a splash of water to steam the rice if needed.

    Using these methods, you can enjoy your Easy Healthy Sticky Chicken Rice Bowl throughout the week without sacrificing taste or quality—just another way to incorporate healthy dinner recipes into your life effortlessly.

    Nutritional Value of Easy Healthy Sticky Chicken Rice Bowl

    Understanding the nutritional profile of your meals helps you make better dietary choices. Here’s a breakdown of the nutritional values for one serving of the Easy Healthy Sticky Chicken Rice Bowl:

    • Calories: 450
    • Protein: 35g
    • Carbohydrates: 55g
    • Fiber: 5g
    • Sugars: 5g
    • Fat: 10g (with olive oil)
    • Sodium: 550mg (using low-sodium soy sauce)

    This nutrient-dense meal provides an excellent balance of macronutrients and is low in unhealthy fats, making it a superstar among healthy dinner recipes. It supports an active lifestyle while providing essential vitamins and minerals through the vegetables contained in each bowl.

    FAQs: Frequently Asked Questions About Easy Healthy Sticky Chicken Rice Bowl

    1. Can I use another protein besides chicken?

    Absolutely! You can substitute chicken with tofu, shrimp, or even lean pork. Adjust cooking times accordingly based on your chosen protein to ensure it’s cooked through.

    2. How spicy is this dish?

    This recipe is relatively mild, but if you enjoy heat, consider adding sriracha or chopped jalapeños. You can also serve hot sauce on the side for those who want an extra kick!

    3. Is this recipe suitable for meal prepping?

    Yes, this bowl is perfect for meal prepping! Just follow the storage tips mentioned and enjoy a healthy meal throughout the week.

    4. How can I reduce the calories in this dish?

    You can decrease the amount of honey used, opt for a smaller serving of rice, or substitute brown rice with cauliflower rice for a low-calorie option.

    5. Are there any gluten-free substitutes for soy sauce?

    Yes, tamari sauce is an excellent gluten-free alternative to conventional soy sauce, allowing you to enjoy the same great flavor without the gluten.

    6. Can I make this dish vegetarian?

    Yes! Replace chicken with firm tofu and use vegetable broth instead of soy sauce if you’re looking for an additional layer of flavor. This way, you can enjoy a vegetarian version of this fantastic meal.

    By addressing these frequently asked questions, I hope to clarify any doubts and inspire you to try the Easy Healthy Sticky Chicken Rice Bowl, a shining example among healthy dinner recipes.

    In conclusion, the Easy Healthy Sticky Chicken Rice Bowl combines simplicity, flavor, and health in a way that is appealing to everyone, regardless of dietary needs. It’s time for you to try making your own—bring a taste of the tropics to your kitchen while enjoying a nourishing meal that’s as easy to make as it is delicious!

  • Easy High Protein Sesame Chicken Dinner

    Easy High Protein Sesame Chicken Dinner

    Easy High Protein Sesame Chicken Dinner: A Tropical Delight

    Introduction to Easy High Protein Sesame Chicken Dinner

    Are you tired of the same old chicken recipes and looking for something fresh, healthy, and simple to prepare? Look no further than our Easy High Protein Sesame Chicken Dinner! This dish not only delights your taste buds but also offers a healthy balance of nutrients, making it an ideal choice for diverse diets. Perfect for busy weeknights or a leisurely weekend dinner, this recipe is quick enough for novices while still impressive for seasoned cooks.

    Imagine succulent chicken pieces coated in a fragrant sesame sauce, served over a bed of fluffy, fragrant rice and accompanied by vibrant steamed vegetables. Not only is it loaded with protein, but it also incorporates the wholesome goodness of sesame seeds. As a bonus, this Easy High Protein Sesame Chicken Dinner is adaptable for vegan and gluten-free diets. Flexibility is key!

    This recipe provides a nutritious meal that fits perfectly into your health-conscious lifestyle. Each bite is packed with flavor and health benefits, making it a fantastic choice for families, students, or anyone looking to maintain a balanced diet without sacrificing taste. An easy, straightforward recipe like this ensures you can prepare a weeknight dinner that pleases the entire household, catering to dietary preferences while being absolutely delightful.

    Benefits and Advantages of Easy High Protein Sesame Chicken Dinner

    The advantages of our Easy High Protein Sesame Chicken Dinner extend well beyond its stellar flavor profile. First, it speaks to the modern cooks’ desire for quick meal solutions without compromising health. In today’s fast-paced world, meal prep can often feel like a chore; however, this recipe offers a straightforward cooking process that minimizes time spent in the kitchen.

    Health Benefits

    1. High Protein Content: Chicken is an excellent source of lean protein that supports muscle growth, repair, and overall health. For those striving to maintain or build muscle mass, this dish serves as a great addition to your diet. Each serving of our sesame chicken provides a significant amount of protein while keeping fat content low.

    2. Incorporation of Healthy Fats: Sesame seeds, featured prominently in this recipe, contain healthy fats and are rich in antioxidants, vitamins, and minerals. They boost the nutritional value of the meal and contribute to heart health.

    3. Balanced Meal: With the combined offering of veggies, protein, and carbs (from rice or quinoa), you’ll have a well-rounded meal in one dish, keeping you satisfied and full for longer.

    4. Customizable: Whether you are looking for a gluten-free option or you prefer plant-based ingredients, this chicken recipe allows for flexibility. You can easily swap chicken for tofu or tempeh, and adapt the sauce to meet specific dietary needs.

    5. Time-Saving: The entire dish can be prepared in under 30 minutes, making it a perfect option for busy individuals, students, and families. You’ll impress your guests and family with a gourmet dinner without the fuss!

    In essence, Easy High Protein Sesame Chicken Dinner is an all-in-one solution for your culinary needs. It’s not only flavorful but also healthy and customizable for various dietary options.

    Ingredients Overview

    Essential Ingredients for Easy High Protein Sesame Chicken Dinner

    To whip up your Easy High Protein Sesame Chicken Dinner, you will need the following ingredients:

    • Chicken Breast (500g): Boneless, skinless chicken breast for lean protein. Alternatively, use tofu or tempeh for a plant-based option.
    • Sesame Oil (2 tbsp): This gives the dish a distinct flavor. For a lighter version, use a neutral oil such as olive oil or avocado oil.
    • Soy Sauce (1/4 cup): A key ingredient for that Asian-inspired flavor. For gluten-free, use tamari or coconut aminos.
    • Honey or Maple Syrup (2 tbsp): Adds a touch of sweetness; use agave syrup for a vegan version.
    • Sesame Seeds (3 tbsp): Roasted for extra nuttiness and health benefits. They’re packed with protein and healthy fats!
    • Garlic (3 cloves, minced): Fresh garlic enhances the overall taste and provides anti-inflammatory benefits.
    • Ginger (1 tbsp, grated): A fantastic digestive aid that brings warmth and spice to the dish.
    • Red Pepper Flakes (1/2 tsp): Optional, for a kick of heat.
    • Vegetables (e.g., broccoli, bell peppers, carrots): Choose your favorites; they add fiber, vitamins, and minerals. Feel free to use frozen mixed vegetables for convenience.
    • Rice or Quinoa (1 cup): Provides carbohydrates; use cauliflower rice for a low-carb option.

    This ingredient list packs a nutritional punch, ensuring your meal is healthy while not skimping on flavor!

    Dietary Substitutions to Customize Your Easy High Protein Sesame Chicken Dinner

    • For Gluten-Free: Replace soy sauce with tamari or coconut aminos. All other ingredients are generally gluten-free.

    • For Vegan: Replace chicken with firm tofu or tempeh, use maple syrup instead of honey, and ensure you are using vegan-friendly sauces.

    • For Low-Carb: Substitute rice with cauliflower rice or greens like spinach and kale to keep carbs in check.

    • For Lower Calorie: Use less honey or syrup and opt for more vegetables; reduce the amount of sesame oil and use low-sodium soy sauce.

    This way, you create a meal that is tailored to your specific dietary needs without losing its signature taste and satisfaction!

    How to Prepare the Perfect Easy High Protein Sesame Chicken Dinner: Step-by-Step Guide

    Ready to dive into cooking? Follow these step-by-step instructions to prepare your Easy High Protein Sesame Chicken Dinner.

    1. Prepare the Base: Start by cooking your choice of rice or quinoa according to package instructions. This usually takes about 15-20 minutes. For extra flavor, cook it with a dash of salt and a teaspoon of sesame oil.

    2. Marinate the Chicken: While your base is cooking, cut the chicken breast into bite-sized pieces. In a bowl, mix together the soy sauce, honey, sesame oil, minced garlic, grated ginger, and red pepper flakes if you’re using them. Add the chicken pieces and let them marinate for at least 10-15 minutes. If you’re using tofu, use the same marinade to enhance flavor.

    3. Sauté the Chicken: Heat a skillet or wok over medium-high heat. Add a tablespoon of oil and once it’s hot, add the marinated chicken (or tofu). Cook for about 5-7 minutes, stirring occasionally, until the chicken is golden brown and cooked through.

    4. Add the Vegetables: Once the chicken is cooked, add your choice of chopped vegetables to the skillet. Sauté alongside the chicken. You can use a variety of colorful veggies, such as broccoli, bell peppers, or snap peas. Cook them for about 3-5 minutes until they’re tender but still crisp.

    5. Glaze and Add Sesame Seeds: Add the leftover marinade to the skillet and allow the mixture to simmer for another 2-3 minutes until it thickens slightly. Toss in sesame seeds and stir well to combine.

    6. Serve it Up: To serve, dish out the rice or quinoa first, then layer the chicken and vegetable mixture on top. Sprinkle additional sesame seeds for presentation if desired, and enjoy your delicious, nutrient-packed meal!

    7. Adapt the Cooking: If you prefer baked chicken, you can marinate it and place it in the oven at 375°F (190°C) for about 25 minutes or until fully cooked.

    As you can see, this recipe is not only quick but also versatile! Feel free to make adjustments based on your dietary preferences and family tastes.

    Mastering Easy High Protein Sesame Chicken Dinner: Advanced Tips and Variations

    Here are some advanced tips and variations to elevate your Easy High Protein Sesame Chicken Dinner:

    • For a Crunchier Texture: Consider breading the chicken or tofu with panko breadcrumbs before cooking for a delightful crunch.

    • Switch Up the Sauce: For an Asian twist, add some hoisin sauce, or for a spicy kick, incorporate Sriracha into the marinade.

    • Experiment with Grains: Swap out standard rice or quinoa for farro or barley for different textures and added nutrients.

    • Make It a Stir-Fry: Try adding more diverse ingredients to make a complete stir-fry, such as cashews, water chestnuts, or baby corn for extra depth.

    • Meal Prep: This dish is great for meal prep! Prepare a larger batch and store it in airtight containers for quick meals throughout the week.

    These tips help you personalize your sesame chicken dinner to your preference, ensuring that it remains a wholesome favorite.

    How to Store Easy High Protein Sesame Chicken Dinner: Best Practices

    Storing your Easy High Protein Sesame Chicken Dinner correctly ensures you can enjoy it later without compromising its freshness. Here are the best practices:

    • Refrigeration: Allow the chicken and vegetables to cool to room temperature. Transfer the leftovers into an airtight container. This dish can be refrigerated for up to 3-4 days.

    • Freezing: If you want to store it for a longer period, consider freezing. Place the cooled chicken and vegetable mix in a freezer-safe container or bag. It will maintain its quality for up to 3 months.

    • Reheating: To reheat, microwave until heated thoroughly, or reheat in a skillet over low heat to maintain the integrity of the texture. You may need to add a splash of water or oil to keep things moist.

    Proper storage will ensure that your Easy High Protein Sesame Chicken Dinner remains delicious and nutritious, allowing you to have a quick, healthy meal ready to go!

    Nutritional Value of Easy High Protein Sesame Chicken Dinner

    When it comes to nutrition, our Easy High Protein Sesame Chicken Dinner is a powerhouse! Here’s a breakdown of a typical serving (approximately 1 cup, assuming it’s made with chicken and regular rice):

    • Calories: Approximately 450
    • Protein: 35g
    • Fat: 18g
    • Carbohydrates: 45g
    • Fiber: 4g
    • Sugar: 6g
    • Sodium: 800mg (can be reduced with low-sodium soy sauce)
    • Vitamins: Rich in Vitamin A & C, thanks to the vegetables.

    The nutritional content can vary based on ingredient substitutions, so you can tailor the recipe to meet your dietary goals. This dish delivers a healthy balance of macronutrients while being flavorful and satisfying!

    FAQs: Frequently Asked Questions About Easy High Protein Sesame Chicken Dinner

    1. Can I use chicken thighs instead of breasts?

    Absolutely! Chicken thighs will yield a juicier texture if you prefer dark meat. Just ensure to adjust the cooking time slightly since thighs take longer to cook through.

    2. Is it possible to make this recipe ahead of time?

    Yes! You can prepare the chicken and sauce in advance and store them separately until ready to cook. Just add the vegetables and any fresh ingredients shortly before serving.

    3. What can I substitute for soy sauce?

    If you’re looking for a soy-free option, try coconut aminos or a homemade soy sauce alternative using miso paste diluted with water.

    4. How spicy is this dish?

    The spiciness depends on the amount of red pepper flakes you add. For a milder version, simply reduce or omit the red pepper flakes.

    5. Can I make it in the oven?

    Definitely! Marinate the chicken and bake at 375°F (190°C) for about 25-30 minutes until fully cooked through. This method yields a tender result.

    By addressing these common questions, we enhance your cooking experience, ensuring that your Easy High Protein Sesame Chicken Dinner meets personal preferences and dietary needs.


    This Easy High Protein Sesame Chicken Dinner is sure to become a staple in your home cooking repertoire, satisfying both taste and nutrition! With its versatility and healthy ingredients, it’s a fabulous choice for anyone looking to elevate their dining experience. Happy cooking!

  • Tasty Cajun Chicken With Bell Peppers

    Tasty Cajun Chicken With Bell Peppers

    Tasty Cajun Chicken With Bell Peppers: A Tropical Delight

    Introduction to Tasty Cajun Chicken With Bell Peppers

    If you’re looking for an irresistible dish that brings the vibrant flavors of the South right to your kitchen, then Tasty Cajun Chicken With Bell Peppers is for you. This recipe not only delivers a punch of spices and colors through juicy chicken thighs and crisp bell peppers, but it also embodies a simplicity that busy home cooks crave. It’s one of those chicken recipes that require minimal time and effort but yield maximum satisfaction for the whole family.

    What sets this dish apart is its adaptability; it’s easy to modify the recipe for different dietary preferences, making it perfect for vegetarians or gluten-free diets. It’s packed with protein and contains nutrient-dense vegetables, ensuring you’re not just indulging in deliciousness but also supporting your health. Whether you’re a working professional with little time to cook, a student looking for quick meal solutions, or even a new parent trying to whip up something nutritious, this recipe meets your needs.

    Tasty Cajun Chicken With Bell Peppers also offers a fantastic way to get kids involved in cooking. The colorful presentation grabs their attention while making it fun to learn how to prepare a delightful dinner. This dish is more than just a meal; it’s an experience designed to bring family and friends together. Read on to discover how incredibly easy this dish is to make and dive into its wonderful world of flavors!

    Benefits and Advantages of Tasty Cajun Chicken With Bell Peppers

    One of the standout features of Tasty Cajun Chicken With Bell Peppers is its ease of preparation. Within just 30 minutes, you can create a flavorful dish that tantalizes taste buds and warms hearts. For busy parents or working professionals, this is a huge plus, ensuring that you can serve a home-cooked meal even on the busiest of weeknights.

    Additionally, this recipe shines in the health department. With lean chicken as a protein source, it offers essential nutrients while being low in saturated fats. The vibrant bell peppers contribute not only textures and flavors but also an array of vital vitamins such as A and C, making this a colorful addition to your diet. This dish stands out among countless chicken recipes due to its ability to support a balanced diet without sacrificing taste.

    Furthermore, Tasty Cajun Chicken With Bell Peppers is perfect for those with varying dietary needs. By opting for gluten-free or low-calorie ingredients, this dish can easily transform to suit everyone at the table. Vegan alternatives, such as chickpeas or tofu, can replace chicken, ensuring that even plant-based diners can enjoy this fantastic flavor profile.

    Finally, its suitability for meal prep makes it an excellent choice for anyone looking to save time. Make a double batch on Sundays, store individual portions in the fridge, and you’ll have a ready-to-eat meal throughout the week. There isn’t just one reason to try this recipe; there are countless!

    Ingredients Overview

    Essential Ingredients for Tasty Cajun Chicken With Bell Peppers

    To whip up your Tasty Cajun Chicken With Bell Peppers, you’ll need the following ingredients:

    • Chicken thighs (1.5 lbs): Juicy and full of flavor, they are less prone to drying out compared to chicken breasts.
    • Bell peppers (2, mixed colors): Provides a beautiful pop of color and important nutrients.
    • Onion (1 medium): Adds depth and sweetness to the dish.
    • Garlic (2 cloves): Enhances the overall flavor.
    • Cajun seasoning (2 tablespoons): The key ingredient that packs this recipe with authentic flavor.
    • Olive oil (2 tablespoons): For sautéing your ingredients.
    • Salt and pepper (to taste): Essential for balancing the flavors.
    • Fresh parsley (for garnish): Provides a fresh touch and enhances visual appeal.

    Note: For those requiring dietary modifications:
    – Substitute chicken with tofu or chickpeas for a vegan option.
    – Use gluten-free seasoning and ensure that the bell peppers are fresh to maintain a gluten-free status.
    – Opt for low-sodium chicken broth for a lower salt version.

    Dietary Substitutions to Customize Your Tasty Cajun Chicken With Bell Peppers

    Whether you’re cooking for specific dietary needs or simply want to experiment with flavors, there are numerous substitutions for this recipe.

    1. Protein Alternatives:

      • Vegan Option: Swap chicken thighs for chickpeas or firm tofu. For tofu, make sure to press it beforehand for better texture and flavor.
      • Other Meats: Turkey thighs or breast can be used for a leaner alternative while still retaining the rich flavor.
    2. Gluten-Free Adjustments:

      • Use gluten-free seasonings and ensure that all ingredients, including canned goods or pre-packaged items, are verified gluten-free.
    3. Spice Level:

      • If you’re sensitive to heat, replace Cajun seasoning with mild paprika, or create a custom blend using dried herbs like oregano, thyme, and a hint of black pepper.

    Feel free to get creative with the recipe! Cooking should be a fun and adaptable experience, and this dish lends itself beautifully to various modifications.

    How to Prepare the Perfect Tasty Cajun Chicken With Bell Peppers: Step-by-Step Guide

    Ready to dive into cooking? Follow these easy steps to prepare your Tasty Cajun Chicken With Bell Peppers:

    1. Prepare the Base: Begin by washing the chicken thighs under cold water and patting them dry with paper towels to ensure they sear properly. Cut them into bite-sized pieces for even cooking.

    2. Chop the Vegetables: Dice the onion and slice the bell peppers into strips. Ensure everything is uniform in size for even cooking and to create an appealing presentation.

    3. Season the Chicken: In a large bowl, combine the chicken pieces with Cajun seasoning, salt, and pepper. Toss well to coat every piece evenly, allowing it to marinate for about 10 minutes while you prepare your cooking surface.

    4. Heat the Olive Oil: In a large skillet, heat olive oil over medium-high heat. Ensure the oil is hot enough before adding the chicken, as this will help achieve a golden sear.

    5. Cook the Chicken: Carefully add the seasoned chicken to the skillet. Sauté for about 5-7 minutes, stirring occasionally, until the chicken is cooked through and reaches an internal temperature of 165°F (75°C).

    6. Add the Vegetables: Once the chicken is nicely browned, add the chopped onion and bell peppers to the skillet. Cook for an additional 5-7 minutes until the vegetables soften but retain some crispness.

    7. Incorporate Garlic: Add minced garlic and sauté for another 1-2 minutes until fragrant. This step is key for enhancing the overall flavor profile.

    8. Adjust Seasoning: Taste the dish and adjust the seasoning if needed. This is the perfect time to add more spice or a dash of salt according to your preference.

    9. Garnish and Serve: Once everything is cooked through, remove the skillet from heat. Transfer your dish to a serving plate and garnish with freshly chopped parsley for an added touch of freshness.

    10. Optional Side Pairing: Serve your Tasty Cajun Chicken With Bell Peppers with steamed rice, quinoa, or in lettuce wraps for a low-carb option.

    Enjoy your delectable, homemade dish! You can savor this meal with family for dinner or even save leftovers for quick lunches throughout the week.

    Mastering Tasty Cajun Chicken With Bell Peppers: Advanced Tips and Variations

    Elevating your Tasty Cajun Chicken With Bell Peppers is simple. Here are some advanced tips and variations to consider:

    • Marinate for Extra Flavor: For enhanced depth, marinate the chicken in the Cajun seasoning concoction for an hour (or overnight) in the refrigerator. This ensures that every bite of chicken is infused with flavor.

    • Add more Veggies: Feel free to add additional vegetables, such as zucchini, squash, or even spinach, to make the dish heartier and more nutritious.

    • Cajun Cream Sauce: For a creamier twist, stir in some heavy cream or coconut milk after cooking the chicken and before adding the vegetables. This tiny tweak will create a rich, savory sauce to spoon over your dish.

    • Herbed Flavors: Introduce fresh herbs, such as thyme or cilantro, along with the parsley for an aromatic accent that enhances the dish further.

    • Serving Variation: For a lively party platter, serve Cajun chicken and peppers in tortilla wraps with guacamole or sour cream for a creative appetizer.

    Experiment with these variations to make the dish uniquely yours.

    How to Store Tasty Cajun Chicken With Bell Peppers: Best Practices

    Storing your Tasty Cajun Chicken With Bell Peppers properly will help maintain its flavor and texture for your future meals. Here are some best practices:

    • Refrigeration: Allow the leftovers to cool before transferring them to an airtight container. Stored properly, this dish can last in the fridge for 3-4 days.

    • Freezing: For longer storage, freeze the cooked chicken and bell peppers in a freezer-safe container. It’s best to do this within 2 days of cooking for the best preservation of flavor. Properly stored, it can last for up to 3 months.

    • Reheating: When you’re ready to enjoy your stored meal, simply thaw it in the refrigerator overnight. Reheat on the stove over low heat, adding a splash of water or broth to keep it juicy. You can also microwave it, covered, for convenience.

    Following these storage tips will allow you to savor the vibrant flavors of this dish well into the week!

    Nutritional Value of Tasty Cajun Chicken With Bell Peppers

    Understanding the nutritional profile of your Tasty Cajun Chicken With Bell Peppers can help you make informed choices while enjoying this delicious dish. Here’s a breakdown of key nutritional information per serving (based on a serving size of one cup):

    • Calories: Approximately 320
    • Protein: 28g
    • Fat: 16g
    • Saturated Fat: 3g
    • Carbohydrates: 12g
    • Dietary Fiber: 2g
    • Sugars: 3g
    • Vitamins: Excellent source of Vitamin A and C due to the bell peppers and onions.
    • Minerals: Rich in iron and potassium, essential for many bodily functions.

    This dish is a great choice for those looking to consume a balanced meal rich in key nutrients while enjoying comforting flavors. It fits within a low-carb, high-protein dietary framework and satisfies cravings without excessive calories.

    FAQs: Frequently Asked Questions About Tasty Cajun Chicken With Bell Peppers

    1. Can I use chicken breasts instead of thighs?
    2. Yes, you can substitute chicken thighs with boneless, skinless chicken breasts. Just be mindful to not overcook them to avoid dryness.

    3. Is this dish gluten-free?

    4. If you ensure your Cajun seasoning and other mixed ingredients are gluten-free, then yes, this dish can be gluten-free.

    5. How spicy is this dish?

    6. The spice level can be adjusted depending on the amount of Cajun seasoning you choose to use. Feel free to start with less and gradually add more to meet your heat preference.

    7. Can I make this dish in advance?

    8. Absolutely! You can prepare and cook this dish in advance. Store leftovers in the refrigerator or freezer for easy reheating throughout the week.

    9. What if I’m a vegan?

    10. For a vegan version, easily substitute chicken with chickpeas or tofu and adjust the seasoning accordingly to suit your taste.

    This Tasty Cajun Chicken With Bell Peppers is not just a meal; it’s a celebration of flavors, health, and ease of preparation. It’s a dish designed to bring joy to busy lives while providing a nutritious, delicious dinner option. Enjoy the cooking adventure!

  • Easy Honey Garlic Chicken Bites Recipe

    Easy Honey Garlic Chicken Bites Recipe

    Easy Honey Garlic Chicken Bites Recipe: A Tropical Delight

    Introduction to Easy Honey Garlic Chicken Bites Recipe

    Welcome to our delightful culinary adventure with the Easy Honey Garlic Chicken Bites Recipe, a dish that transforms simple ingredients into a tropical sensation. If you’re searching for delicious and effortless chicken recipes, you’ve landed in the right place. This delightful recipe harnesses the natural sweetness of honey and the savory touch of garlic, creating a dish that is perfect for any occasion.

    These chicken bites not only make for an excellent appetizer but can also serve as a main dish alongside rice, vegetables, or even a fresh salad. What makes this recipe truly special is that it reflects the balance of flavors while being incredibly easy to prepare—ideal for busy weeknights or a relaxing weekend meal prep session. Additionally, the ingredients are easily accessible, making it a perfect fit for even the most novice of home cooks.

    Moreover, this dish boasts numerous health benefits. Chicken is a fantastic source of lean protein, while the honey adds natural sweetness without excessive processed sugars, and garlic enriches the dish with antioxidants and anti-inflammatory properties. This recipe can also be easily adapted to be gluten-free or made with alternative sweeteners, making it suitable for various dietary needs. So, whether you’re a busy parent looking for a quick dinner option, a newlywed seeking out sensational dishes to impress your partner, or a food enthusiast ready to explore new flavors, Easy Honey Garlic Chicken Bites is a must-try. Let’s dive into its fantastic benefits!

    Benefits and Advantages of Easy Honey Garlic Chicken Bites Recipe

    When it comes to ease of preparation, the Easy Honey Garlic Chicken Bites Recipe shines like a beacon among various chicken recipes available. In just under 30 minutes, you can serve a tasty, finger-licking dish that pleases both the palate and the mind. The combination of marinades used here not only enhances the flavor but also tenderizes the chicken, ensuring each bite is juicy and satisfying.

    Health Benefits

    In addition to being a quick preparation, this dish is incredibly healthy. Using lean chicken breast allows you to benefit from protein without the excess fats found in other meats. Plus, the glaze made from honey and garlic is not just a flavorful coating; it comes with significant health boosts. Honey contains antioxidants that can help boost the immune system, while garlic has been linked to numerous health benefits, including heart health and improved cholesterol levels.

    Versatility

    This recipe adapts beautifully for different dietary needs. If you are catering to vegan guests, swapping the chicken for tofu or jackfruit can yield fabulous results. Likewise, gluten-free diners can enjoy the dish simply by using gluten-free soy sauce. For those conscious about calories, using a sugar alternative in place of honey can help reduce caloric intake while still maintaining flavor integrity.

    Meal Prepping

    Lastly, the Easy Honey Garlic Chicken Bites make an excellent choice for meal prepping. You can cook a larger batch and store them in the fridge or freezer for an easy-to-reheat meal during the week. Not only will this save time, but it encourages healthier eating habits as you’ll have quick and delicious options at your fingertips.

    Ingredients Overview

    Essential Ingredients for Easy Honey Garlic Chicken Bites Recipe

    A stellar dish starts with quality ingredients. Here is a detailed list of what you will need to craft these delightful bites, along with their benefits:

    Main Ingredients

    • 500g Chicken Breast (cut into bite-sized pieces)
    • Lean protein source, excellent for muscle building and repair.

    • 1/4 cup Honey (or maple syrup for a vegan option)

    • Natural sweetener providing flavor and health benefits.

    • 1/4 cup Soy Sauce (use gluten-free if needed)

    • Adds saltiness and umami flavor, enhancing the overall taste.

    • 3 cloves Garlic (minced)

    • Packed with health benefits and flavor depth.

    • 2 tablespoons Olive Oil

    • Healthy fat that ensures moisture and improves texture.

    • 1 teaspoon Ginger (freshly grated, optional)

    • Adds warmth and flavor complexity while offering digestion support.

    • Sesame Seeds (for garnish, optional)

    • Provides crunch and visual appeal, as well as additional nutrients.

    Dietary Substitutions to Customize Your Easy Honey Garlic Chicken Bites Recipe

    To cater to various diets, consider the following substitutions:

    • Vegan Version:
    • Swap out the chicken for tofu cubes or jackfruit. You can follow the same marination and cooking process for delicious results.

    • Gluten-Free:

    • Use tamari instead of soy sauce and confirm any other pre-packaged ingredients are certified gluten-free.

    • Low-Calorie:

    • Use a sugar substitute like erythritol instead of honey while slightly reducing the amount to prevent excessive sweetness.

    • Low-Carb:

    • Serve the chicken bites in lettuce wraps rather than with rice or bread. This keeps the dish light while retaining the incredible flavors.

    Remember, these swaps do not sacrifice taste while being mindful of dietary restrictions, paving the way for everyone to enjoy!

    How to Prepare the Perfect Easy Honey Garlic Chicken Bites Recipe: Step-by-Step Guide

    Now that you’ve gathered all the essential ingredients, let’s dive into the preparation of these fantastic chicken recipes. Follow these simple, numbered steps for success:

    1. Prepare the Marinade:
      In a medium bowl, combine honey, soy sauce, minced garlic, and grated ginger. Whisk until fully blended. This marinade brings together contrasting flavors—sweet and savory.

    2. Marinate the Chicken:
      Add your chicken breast pieces to the marinade. Toss them to ensure a thorough coating, then let them marinate for at least 15 minutes; longer if you have time, as this enhances the flavor significantly.

    3. Heat the Pan:
      Heat 2 tablespoons of olive oil in a large skillet over medium heat. This helps create a beautiful sear on the chicken.

    4. Cook the Chicken:
      Once the oil is hot, add the marinated chicken pieces, ensuring they’re spread out in a single layer. This allows them to cook evenly, achieving that golden-brown color we all love.

    5. Sauté Until Cooked:
      Sauté the chicken for about 5-7 minutes on each side or until cooked through and the internal temperature reaches 165°F (75°C). Watch for the tender, caramelized pieces that develop from the marinade.

    6. Reduce the Marinade:
      If desired, pour the leftover marinade into the pan after the chicken is done cooking. Allow it to simmer for a few minutes until slightly thickened, creating a luscious sauce.

    7. Finish with Garnish:
      Sprinkle sesame seeds over the chicken bites for added texture and visual appeal. This final touch elevates the dish both in flavor and presentation.

    8. Serve Your Dish:
      Serve hot as an appetizer or over a bed of rice or salad for a complete meal. Enjoy the tropical fusion of flavors!

    Tips for Easy Customization

    • For a spicier version, add a pinch of red pepper flakes to the marinade.
    • For extra veggies, toss in some bell peppers and snap peas when cooking the chicken to create a one-pan dish.
    • If you’re meal prepping, consider cooking a large batch to use throughout the week in various dishes.

    By following these steps, you ensure a scrumptious and appealing dish that everyone will rave about!

    Mastering Easy Honey Garlic Chicken Bites Recipe: Advanced Tips and Variations

    Having covered the basics, here are some advanced tips and variations to elevate your Easy Honey Garlic Chicken Bites:

    Enhance with More Flavors

    • Citrus Kick: For a refreshing twist, add the zest of a lime or orange to the marinade for a fruity note that balances sweetness.
    • Herb Infusion: Add fresh herbs—such as parsley, cilantro, or green onions—for a burst of color and freshness.

    Explore Variations

    • Honey Garlic Cauliflower Bites: For a delightful vegetarian option, swap chicken for cauliflower florets. Follow the same marinade and cooking method, and brace for a new favorite.
    • Honey Garlic Shrimp: Those who enjoy seafood can also use shrimp instead of chicken. Shrimp cooks quickly, so reduce your sautéing time to ensure they remain tender.

    Experiment with Cooking Methods

    • Oven-Baked: If you prefer a healthier take, baking the chicken bites until golden brown works wonderfully. Set your oven to 400°F (200°C), arrange the marinated chicken on a baking sheet, and cook for about 15-20 minutes, flipping halfway through.
    • Air Fryer: For a crispier bite with less oil, use an air fryer. Cook at 375°F (190°C) for approximately 12-15 minutes, shaking the basket halfway for even cooking.

    These tips and variations will help keep the Easy Honey Garlic Chicken Bites Recipe fresh and exciting, making it a staple in your home!

    How to Store Easy Honey Garlic Chicken Bites Recipe: Best Practices

    Understanding how to correctly store your Easy Honey Garlic Chicken Bites will ensure they taste just as delicious when reheated.

    Refrigerating

    Once prepared, allow the chicken bites to cool completely before transferring them to an airtight container. They can be stored in the refrigerator for about 3-4 days. This makes for a quick meal throughout the week, simplifying dinner decisions.

    Freezing

    If you prefer to make a larger batch, you can freeze the chicken bites. Make sure they’re cooled and stored in a freezer-safe container. They should last for up to 3 months. To reheat, simply allow them to defrost in the refrigerator overnight or use the microwave.

    Reheating

    To reheat, place in the oven at 350°F (175°C) for about 15-20 minutes until warmed through. If reheating from frozen, it may take a little longer; always check to ensure they reach the proper internal temperature.

    These methods will preserve the deliciousness of your chicken bites while providing options for future meals!

    Nutritional Value of Easy Honey Garlic Chicken Bites Recipe

    Understanding the nutritional aspects of your meals can enhance your dining experiences. Here’s a breakdown of the estimated nutrition for one serving of the Easy Honey Garlic Chicken Bites Recipe (calculated based on standard ingredients for four servings):

    • Calories: Approximately 220
    • Protein: 30g
    • Fat: 7g
    • Carbohydrates: 15g
    • Fiber: 0.5g
    • Sugars: 10g

    These nutrition values can vary based on ingredient choices and portion sizes, especially if you choose substitutes. However, generally speaking, this dish provides a balanced profile of protein, healthy fats, and complex carbohydrates, making it a great addition to your culinary repertoire.

    FAQs: Frequently Asked Questions About Easy Honey Garlic Chicken Bites Recipe

    1. Can I use frozen chicken for this recipe?

    Yes! Just ensure to thaw the chicken completely before marinating and cooking for the best results.

    2. What if I don’t have honey?

    You can substitute the honey with maple syrup or agave nectar for a similar flavor profile while keeping it vegan-friendly.

    3. How do I make this recipe spicier?

    To add heat, incorporate red pepper flakes into the marinade or serve with a spicy dipping sauce.

    4. Can I use chicken thighs instead of breasts?

    Absolutely! Chicken thighs can lend a rich flavor and are slightly juicier. Just ensure to cook them thoroughly.

    5. Is this dish suitable for meal prep?

    Yes! These chicken bites are perfect for meal prepping and can be stored in the refrigerator or freezer for easy reheating.

    Using these Q&A insights, readers are empowered to explore the recipe confidently, catering to their preferences while embarking on a delicious cooking journey.

    In summary, the Easy Honey Garlic Chicken Bites Recipe is a testament to the joy of cooking, emphasizing health, simplicity, and versatility. Whether you’re preparing a weeknight dinner or a festive celebration, this dish promises to delight both the cook and those who gather around the table. Enjoy your culinary journey!

  • Tasty Spicy Brazilian Coconut Chicken Dinner

    Tasty Spicy Brazilian Coconut Chicken Dinner

    Tasty Spicy Brazilian Coconut Chicken Dinner: A Tropical Delight

    Introduction to Tasty Spicy Brazilian Coconut Chicken Dinner

    Welcome to a culinary journey that offers an explosion of flavors in your kitchen! The “Tasty Spicy Brazilian Coconut Chicken Dinner” is not just another dish—it’s an experience that you can easily recreate at home. With its rich coconut milk base, a kick of spice, and tender chicken, this chicken recipe seamlessly combines simplicity and sophistication. This dish is crafted to inspire all cooks, whether you’re a busy parent looking for a quick dinner solution, a student aiming to impress your friends, or a seasoned food enthusiast wanting to explore Brazilian cuisine.

    What makes this meal particularly appealing is its focus on health and well-being. Packed with nutrients from fresh vegetables and coconut milk, it caters to various dietary preferences, making it vegan, gluten-free, and suitable for those seeking low-calorie options. The vibrant flavors and fresh ingredients not only hit the taste buds but also offer numerous health benefits, including anti-inflammatory properties and essential fats that promote heart health.

    Moreover, this Brazilian-inspired dish is ideal for various occasions—be it a cozy family dinner, a casual gathering with friends, or even a romantic date night. Once you master this recipe, you’ll likely find yourself returning to it again and again. Now, let’s venture deeper into what makes this culinary delight so incredible!

    Benefits and Advantages of Tasty Spicy Brazilian Coconut Chicken Dinner

    Opting for the Tasty Spicy Brazilian Coconut Chicken Dinner comes with numerous advantages that go beyond just delightful flavors. This dish stands out among other chicken recipes because of its remarkable ease of preparation. Perfectly suited for busy lifestyles, you can have this delicious meal ready in under an hour without sacrificing quality or taste.

    One of the most appealing attributes of this recipe is its health benefits. The primary ingredient, coconut milk, is not only creamy and aromatic but also packed with healthful components. It contains medium-chain triglycerides (MCTs), which support weight loss and improve metabolism. Furthermore, the use of fresh vegetables like bell peppers, onions, and garlic adds a rich array of vitamins and antioxidants that aid in boosting overall health and immunity.

    Additionally, the versatility of this dish is worth mentioning. You can adjust the spices according to your taste preferences, making it mild or hot, depending on who you’re serving. This flexibility ensures that your chicken recipe can accommodate various taste profiles, enhancing its appeal to a wide audience. Moreover, considering dietary restrictions, the dish can easily be modified to be gluten-free, vegan, or low-carb by using alternative ingredients.

    In conclusion, the Tasty Spicy Brazilian Coconut Chicken Dinner is not just about filling your stomach; it’s about nourishing your body while enjoying the vibrant flavors of Brazil. This meal strikes a chord with every type of cook, making it easier than ever to serve an uplifting blend of taste and health at your dining table.

    Ingredients Overview

    Essential Ingredients for Tasty Spicy Brazilian Coconut Chicken Dinner

    Here’s what you’ll need for this delicious recipe, perfectly balancing flavor and nutrition:

    • 2 cups of chicken breast (cubed, skinless; can use tofu or tempeh for a vegan option)
    • 1 can (14 ounces) of coconut milk (provides creaminess and richness)
    • 1 medium onion (chopped; adds sweetness and flavor)
    • 2 cloves of garlic (minced; enhances flavor and aroma)
    • 1-2 tablespoons of olive oil (for sautéing; can substitute with coconut oil)
    • 1 bell pepper (chopped; use red, yellow, or green for variety)
    • 1-2 tablespoons of red curry paste (adjust according to spice preference; adds depth)
    • 1 tablespoon of soy sauce (substitute with tamari for gluten-free)
    • Salt and pepper (to taste; optional)
    • Fresh cilantro (for garnish; adds freshness)

    This ingredient list ensures that every bite of your chicken recipe is filled with rich tropical flavors.

    Dietary Substitutions to Customize Your Tasty Spicy Brazilian Coconut Chicken Dinner

    This recipe can be easily customized to meet various dietary needs:

    1. For a Vegan Version: Substitute chicken with firm tofu or tempeh. Ensure to press the tofu first to remove excess moisture. This will help it absorb flavors better.

    2. Gluten-Free: Use tamari instead of soy sauce. Always check labels to confirm ingredients meet gluten-free standards.

    3. Low-Calorie Option: Use skinless chicken breast or go completely plant-based with vegetables and tofu. You can reduce the amount of coconut milk used and add more vegetable broth for a lighter base.

    4. Additional Veggies: Feel free to add vegetables like zucchini, spinach, or carrots for added nutrition and color.

    By making these adjustments, you can tailor the Tasty Spicy Brazilian Coconut Chicken Dinner to fit your dietary preferences and needs, ensuring a meal that everyone can enjoy.

    How to Prepare the Perfect Tasty Spicy Brazilian Coconut Chicken Dinner: Step-by-Step Guide

    Preparing this Tropical Delight is simple and straightforward. Follow these steps, and you’ll have a taste of Brazil right from your kitchen!

    1. Prep the Ingredients: Begin by gathering all your ingredients. Dice the chicken into bite-sized pieces and chop the onion and bell pepper. Mince the garlic and set everything aside.

    2. Heat the Oil: In a large pan, add olive oil (or coconut oil) over medium heat. Allow it to warm up for a minute.

    3. Sauté Aromatics: Once the oil is hot, add the chopped onion and cook for 3-4 minutes until it becomes soft and translucent. Stir in the minced garlic and sauté for an additional 1-2 minutes until fragrant.

    4. Cook the Chicken: Add the cubed chicken to the pan (or tofu, if making it vegan) and season with a little salt and pepper. Cook for about 7-10 minutes until the chicken is browned and cooked through.

    5. Incorporate the Vegetables: Add the chopped bell pepper to the pan and stir well to combine. Allow the mixture to cook for another 3-4 minutes until the bell peppers soften slightly.

    6. Stir in the Curry Paste: Add the red curry paste and soy sauce to the pan. Mix everything thoroughly, allowing the spices to coat the chicken and vegetables evenly.

    7. Pour in the Coconut Milk: Slowly pour in the coconut milk, stirring continuously. Bring the mixture to a gentle simmer.

    8. Simmer to Perfection: Lower the heat and let the dish simmer for 10-15 minutes. This allows the flavors to meld beautifully. You can adjust the thickness by adding more coconut milk or broth if desired.

    9. Taste and Adjust: After simmering, taste the sauce and adjust seasoning as needed. If you prefer more heat, feel free to add a dash of chili powder or hot sauce.

    10. Serve Hot: Once ready, serve your Tasty Spicy Brazilian Coconut Chicken Dinner over steamed rice, quinoa, or cauliflower rice. Garnish with freshly chopped cilantro for an extra pop of flavor.

    This step-by-step guide ensures that your dish turns out perfect every time!

    Mastering Tasty Spicy Brazilian Coconut Chicken Dinner: Advanced Tips and Variations

    Everyone loves experimenting with their dishes, and this chicken recipe is no exception. Here are some advanced tips and fun variations to help elevate your culinary adventure:

    1. Add More Heat: If you’re a fan of spice, consider adding sliced jalapeños or a sprinkle of red pepper flakes during the cooking process. This will give your dish an extra kick!

    2. Texture Variations: To add crunch, toss in some roasted peanuts or cashews just before serving. They provide an interesting textural contrast to the creamy sauce.

    3. Herbal Enhancements: Experiment with different herbs! Fresh basil or mint can add a refreshing twist to the dish. Simply chop them finely and sprinkle on top when serving.

    4. Fruit Integration: Consider incorporating fruits like mango or pineapple into the dish for a sweet balance to the spice. Add them in during the last few minutes of simmering to prevent them from breaking down completely.

    5. Use of Other Proteins: Instead of chicken, try shrimp, fish, or even legumes for variation. Each protein brings its own unique flavor and mouthfeel to this vibrant dish.

    By incorporating these advanced tips and variations, you can ensure that your Tasty Spicy Brazilian Coconut Chicken Dinner remains exciting and fresh each time you prepare it.

    How to Store Tasty Spicy Brazilian Coconut Chicken Dinner: Best Practices

    After a delightful meal, you may want to save leftover Tasty Spicy Brazilian Coconut Chicken Dinner for later. Proper storage is essential to maintain its flavor and freshness. Here’s how to do it right:

    • Refrigeration: Allow the dish to cool to room temperature. Transfer it to an airtight container and store it in the fridge. It will remain fresh for up to 3-4 days.

    • Freezing: If you wish to store it for a more extended period, freezing is a great option. Place the cooled dish into a freezer-safe container, leaving some space at the top for expansion. It can last up to 2-3 months in the freezer.

    • Reheating: To reheat, simply thaw it overnight in the refrigerator if frozen. You can reheat it on the stove over a medium flame or in the microwave until heated through. If the sauce thickens during storage, feel free to add a splash of coconut milk or broth to regain its creamy consistency.

    With these simple storage techniques, you can enjoy your chicken recipes even after the first meal!

    Nutritional Value of Tasty Spicy Brazilian Coconut Chicken Dinner

    Understanding the nutritional value of your food is key, especially when embracing a healthy lifestyle. Here’s a breakdown of the nutritional content per serving of the Tasty Spicy Brazilian Coconut Chicken Dinner (approximately one cup):

    • Calories: 450
    • Total Fat: 22g
    • Saturated Fat: 9g (mostly from coconut milk)
    • Cholesterol: 75mg (if using chicken)
    • Sodium: 600mg
    • Carbohydrates: 30g
    • Dietary Fiber: 3g
    • Sugars: 5g
    • Protein: 36g (if using chicken; protein will vary if using tofu or other proteins)

    This dish is not only flavorful but also provides a well-rounded nutrient profile. With a good balance of protein, carbohydrates, and healthy fats, it can fit into most health-conscious diets while satisfying your cravings for something exotic.

    FAQs: Frequently Asked Questions About Tasty Spicy Brazilian Coconut Chicken Dinner

    Can I make this dish vegetarian or vegan?

    Absolutely! Simply replace the chicken with tofu, tempeh, or virtually any protein source that suits your diet.

    How spicy is this dish?

    The level of spiciness mainly depends on the amount of red curry paste you use. For milder heat, start with one tablespoon and increase it as per your preference.

    Can I use other types of meat?

    Yes! You can swap the chicken for shrimp, fish, or even beef if desired. Just adjust the cooking time accordingly to avoid overcooking.

    How well does this dish freeze?

    The Tasty Spicy Brazilian Coconut Chicken Dinner freezes very well. Just ensure you store it appropriately in an airtight container to avoid freezer burn.

    What can I serve this dish with?

    This dish pairs wonderfully with rice, quinoa, or even sautéed greens to balance out the flavors.

    How long does this recipe take to prepare?

    Total preparation and cooking time is about 45 minutes, making it a quick and easy option for busy weeknights.

    With all your questions answered, you are now fully prepared to embark on your culinary adventure with the Tasty Spicy Brazilian Coconut Chicken Dinner! Dive into this delightful recipe and jazz up your table with a vibrant, tropical flair that’s bound to impress everyone at the dinner table!