The Best Latke Eggs Benedict Brunch: A Tropical Delight
Introduction to The Best Latke Eggs Benedict Brunch
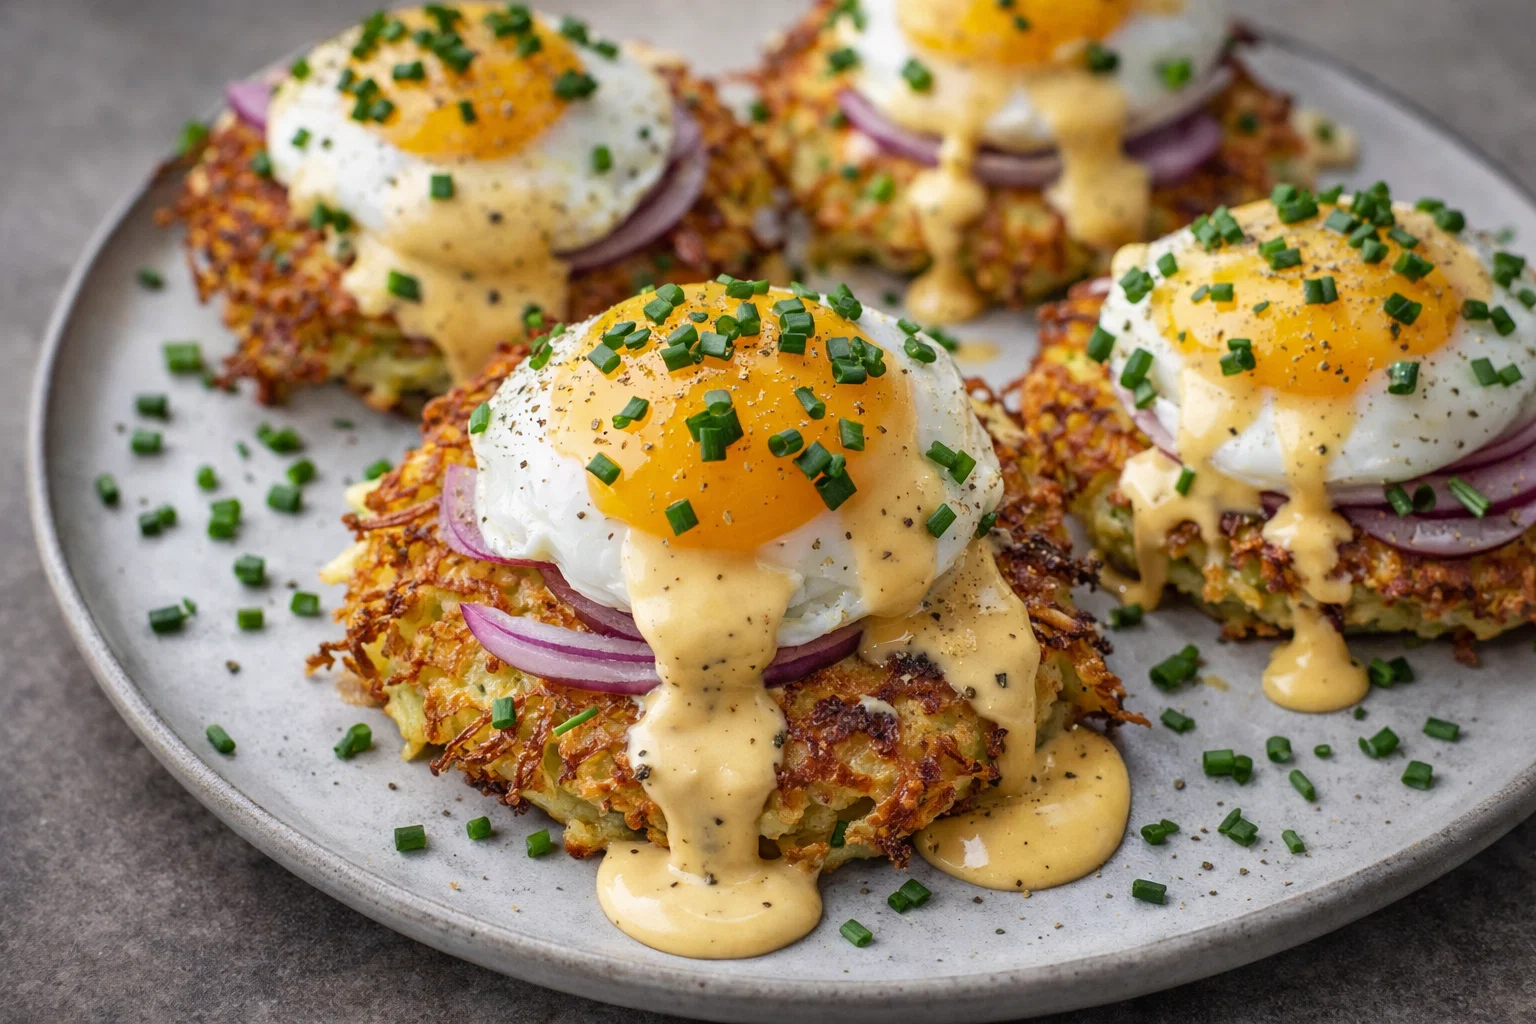
When searching for delicious and satisfying breakfast ideas, look no further than The Best Latke Eggs Benedict Brunch. This vibrant dish combines traditional flavors with a unique twist, creating a perfect blend of textures and tastes. Picture crispy latkes topped with perfectly poached eggs, velvety hollandaise sauce, and a fresh garnish of herbs. Not only is this dish visually stunning, but it is also surprisingly simple to prepare.
The latkes, made from finely grated potatoes, form a delightful base that adds a hearty crunch. Eggs provide a protein boost that’s both wholesome and filling, while a creamy hollandaise sauce delivers richness that elevates the entire dish. This recipe is adaptable to various dietary preferences; it can easily be made vegan or gluten-free, ensuring that everyone at your table can enjoy it. . Whether you are busy preparing for a family brunch, looking to impress guests, or simply seeking a delightful meal, this recipe stands out. With The Best Latke Eggs Benedict Brunch, you can create an unforgettable dining experience that caters to diverse tastes and dietary needs. So roll up your sleeves, gather your ingredients, and embark on a culinary journey that’s as satisfying to make as it is to eat!
Benefits and Advantages of The Best Latke Eggs Benedict Brunch
The Best Latke Eggs Benedict Brunch shines among other breakfast ideas due to its balance of flavor, texture, and nutrition. One of the most significant advantages of this recipe is its ease of preparation. With straightforward steps and accessible ingredients, even novice cooks can create a gourmet-style brunch in under an hour. This makes it an excellent option for those busy mornings when you still want to impress your family or friends.
Health benefits abound in this dish; the primary ingredient, potatoes, is a great source of vitamins C and B6, as well as potassium. By making homemade latkes, you control the ingredients, ensuring a fresher version without the preservatives often found in store-bought alternatives. Moreover, eggs are loaded with protein, supporting muscle health and keeping you satiated. For those health-conscious or diet-sensitive individuals, this recipe can be easily modified to suit various dietary requirements, including gluten-free or vegan versions without sacrificing taste.
The combination of creativity and culinary tradition in this dish also stands out. By merging classic recipes with modern dietary trends, The Best Latke Eggs Benedict Brunch appeals to a broad audience—families looking for a fun weekend project, food enthusiasts eager to experiment, or anyone simply hoping to enjoy a delectable meal that feels indulgent, yet wholesome. It is not just a meal; it’s a celebration of flavor, health, and versatility.
Ingredients Overview
Essential Ingredients for The Best Latke Eggs Benedict Brunch
Creating The Best Latke Eggs Benedict Brunch requires a handful of quality ingredients. Below is the detailed list, including precise measurements and dietary notes to support everyone:
- For the Latkes:
- 4 medium potatoes (Yukon Gold or Russet work well)
- 1 small onion, finely grated
- 2 large eggs (or flax eggs for vegan)
- ½ cup all-purpose flour (gluten-free flour can be substituted)
- 1 teaspoon salt
- ¼ teaspoon black pepper
-
Oil for frying (canola or avocado)
-
For the Eggs:
- 4 large eggs (or egg substitutes for vegan options)
-
1 tablespoon white vinegar (helps with poaching)
-
For the Hollandaise Sauce:
- 3 egg yolks (or tofu for vegan option)
- 1 tablespoon lemon juice
- ½ cup unsalted butter (or avocado oil for vegan)
-
Salt and cayenne pepper to taste
-
Garnish:
- Fresh chives or parsley, chopped
- Slices of avocado (optional, but highly recommended)
Each ingredient has a purpose, ranging from flavor enhancement to nutritional benefits. The latkes serve as a nutritious and hearty base, while eggs bring protein and richness. The hollandaise adds a luxurious element that ties the dish together beautifully.
Dietary Substitutions to Customize Your The Best Latke Eggs Benedict Brunch
This recipe is versatile enough to accommodate various dietary restrictions. Here are some suggested substitutions:
- Vegan Options:
- Flax Eggs: Replace each egg in the latke mixture with 1 tablespoon of ground flaxseed mixed with 2.5 tablespoons of water.
-
Tofu Hollandaise: Blend silken tofu with lemon juice, nutritional yeast, cayenne pepper, and salt to create a creamy sauce.
-
Gluten-Free Options:
- Use gluten-free flour in place of regular flour for the latkes.
-
Ensure your vinegar is gluten-free (most are) and check any packaged ingredients.
-
Lower-Calorie Choices:
- Use an air fryer to prepare latkes with minimal oil.
-
Replace butter in the hollandaise with a light olive oil for lighter flavor.
-
Additional Variations:
- Swap potatoes for sweet potatoes for a slightly sweeter, nutrient-dense version.
- Experiment with different herbs in the hollandaise or add spices to the latkes for flavor variations.
By tailoring the ingredients, The Best Latke Eggs Benedict Brunch becomes an inclusive offering suitable for nearly any dietary need.
How to Prepare the Perfect The Best Latke Eggs Benedict Brunch: Step-by-Step Guide
Now that you have all your ingredients ready, here’s how to create The Best Latke Eggs Benedict Brunch step-by-step. Feel free to modify the process to fit your dietary needs here and there.
-
Prepare the Potatoes:
Peel and grate the potatoes using a fine grater or food processor. Remove excess moisture by placing the grated potatoes in a clean kitchen towel and squeezing out the water. This step is crucial for achieving crispy latkes. -
Make the Latke Mixture:
In a large bowl, combine the grated potatoes, finely grated onion, eggs or flax egg mixture, flour, salt, and pepper. Mix until well combined. Ensure the mixture is slightly thick and holds together. -
Heat the Oil:
In a large frying pan, add oil to a depth of about 1/4 inch and heat over medium-high heat. To test if the oil is hot enough, drop a small amount of the latke mixture into the oil—if it sizzles, you’re ready to cook. -
Fry the Latkes:
Carefully spoon approximately 1/4 cup of latke mixture into the hot oil for each latke, flattening them slightly with the back of the spoon. Cook for about 3-4 minutes on each side until golden brown and crispy. -
Drain and Keep Warm:
Transfer the cooked latkes to a paper towel-lined dish to drain excess oil. You can keep them warm in a low oven (around 200°F or 93°C) while you prepare the eggs and hollandaise. -
Poach the Eggs:
Bring a pot of water to a gentle simmer, then add vinegar. Crack each egg into a small bowl and carefully slide it into the simmering water. Poach for about 3-4 minutes, or until the whites are set but the yolks remain runny. Remove gently with a slotted spoon and drain on paper towel. -
Prepare the Hollandaise Sauce:
In a heatproof bowl, whisk egg yolks and lemon juice together until thickened. Slowly drizzle in melted butter while whisking vigorously until creamy. Season with salt and cayenne pepper to taste. For a vegan version, blend the tofu with lemon juice and salt until smooth. -
Assemble the Dish:
On a plate, place a crispy latke, top with a poached egg, and generously drizzle hollandaise sauce over the top. Garnish with chopped chives or parsley and avocado slices if desired. -
Serve Immediately:
Enjoy your beautifully plated latke eggs benedict right away while the flavors and textures are at their best!
Following these simple steps ensures that your The Best Latke Eggs Benedict Brunch will be a hit, transforming ordinary mornings into extraordinary ones filled with satisfying flavor.
Mastering The Best Latke Eggs Benedict Brunch: Advanced Tips and Variations
To take your The Best Latke Eggs Benedict Brunch to the next level, consider the following advanced tips and variations:
-
Customize Your Seasonings:
Adding cumin, garlic powder, or smoked paprika to the latke mixture can enhance the flavor profile and provide a unique twist. -
Try Different Toppings:
Elevate the dish with variations such as sautéed spinach, smoked salmon, or crispy bacon to add more complexity and flavors. -
Experiment with Hollandaise:
Incorporate flavors like chipotle or dill for a new spin on the classic sauce. You can even replace lemon juice with orange juice for a sweeter note. -
Presentation Matters:
Serve in layers for a stunning visual appeal! Try pairing each component artistically on the plate, perhaps with a side of fresh fruit or a light salad. -
Meal Prep for Ease:
Make the latke mixture ahead of time and refrigerate it overnight. This will save you time in the morning when preparing brunch.
By taking these advanced tips into account, you can personalize The Best Latke Eggs Benedict Brunch to suit your culinary style and impress any guests at your next brunch gathering.
How to Store The Best Latke Eggs Benedict Brunch: Best Practices
Once you’ve enjoyed The Best Latke Eggs Benedict Brunch, you may find yourself with leftovers. Here’s how to store your dish properly:
-
Refrigeration:
Store the components separately in airtight containers. The latkes can be placed in one container, the poached eggs in another, and hollandaise sauce in a small jar. This maintains their textures and freshness. Latkes can typically be refrigerated for up to 3 days, while poached eggs are best consumed within 1 day. -
Freezing:
While it’s not ideal for poached eggs, latkes freeze beautifully. Allow them to cool completely and then place them in a single layer on a baking sheet for freezing. Once frozen, transfer them to a freezer-safe bag or container for up to 3 months. To reheat, bake them in the oven at 400°F (200°C) until hot and crispy. -
Reheating:
It is best to reheat latkes in the oven or air fryer to restore their crispiness. Avoid microwaving them, as this tends to make them soggy. For hollandaise, warm gently over low heat, adding a splash of water if it thickens too much.
By following these storage tips, you ensure that your left-over The Best Latke Eggs Benedict Brunch remains delightful and enjoyable for future meals, giving you even more breakfast ideas to work with.
Nutritional Value of The Best Latke Eggs Benedict Brunch
When it comes to nutrition, The Best Latke Eggs Benedict Brunch offers a balanced meal that packs a healthy punch. Here’s a breakdown of the approximate nutritional values per serving (2 latkes, 1 poached egg, and 2 tablespoons hollandaise):
- Calories: 500 kcal
- Protein: 18g
- Fat: 30g
- Saturated Fat: 10g
- Carbohydrates: 45g
- Dietary Fiber: 4g
- Sugars: 2g
- Cholesterol: 245mg
- Sodium: 600mg
Health Insights
-
Protein-Rich: The recipe serves as a great source of protein, particularly appealing for those needing to fuel up for busy days.
-
Healthy Fats: The dish delivers healthy fats from the eggs and hollandaise, essential for brain health and promoting satiety.
-
Vitamins and Minerals: Potatoes are rich in potassium and vitamin C, while the eggs add B vitamins for overall health.
-
Customization for Diets: By using alternative ingredients, you can lower fat and calorie intake significantly, making it also suitable for lighter diets.
This nutritional overview emphasizes the health benefits of preparing The Best Latke Eggs Benedict Brunch, making it not only delectable but also health-conscious, and perfect for your morning menu or any brunch gathering.
FAQs: Frequently Asked Questions About The Best Latke Eggs Benedict Brunch
-
Can I prepare the latkes in advance?
Yes! You can make the latkes ahead of time and refrigerate them for up to 3 days or freeze them for longer storage. Reheat in the oven or air fryer for best quality. -
What can I substitute for eggs if I’m vegan?
You can use flax eggs (1 tablespoon ground flaxseed mixed with 2.5 tablespoons water equals 1 egg) or silken tofu for the hollandaise sauce to achieve similar textures and flavors. -
How do I poach the eggs perfectly?
Use fresh eggs for the best results. Create a gentle whirlpool in the simmering water before adding the egg to help it hold its shape. Use vinegar to help coagulate the whites. -
Can I make this recipe gluten-free?
Absolutely! Just substitute the all-purpose flour with a gluten-free flour blend. Make sure that your other ingredients (like baking powder and vinegar) are certified gluten-free. -
What pairs well with this dish?
Fresh fruit, a light salad, or even herb-infused potatoes on the side compliment the meal wonderfully, creating a colorful and nutrient-rich brunch.
By addressing these common queries, you provide readers with comprehensive information to ensure their success in making The Best Latke Eggs Benedict Brunch, enhancing their experience and culinary skills.
With its scrumptious appeal and adaptability, The Best Latke Eggs Benedict Brunch reinvents your morning meals into a delightful experience. Whether you’re cooking for yourself or hosting guests, this recipe invites creativity in the kitchen while ensuring a healthful start to the day. Try this delicious brunch creation today, and you won’t regret it!