Tag: bread

  • Best Xl Hot Cross Buns

    Best Xl Hot Cross Buns

    Best XL Hot Cross Buns: A Tropical Delight

    Introduction to Best XL Hot Cross Buns

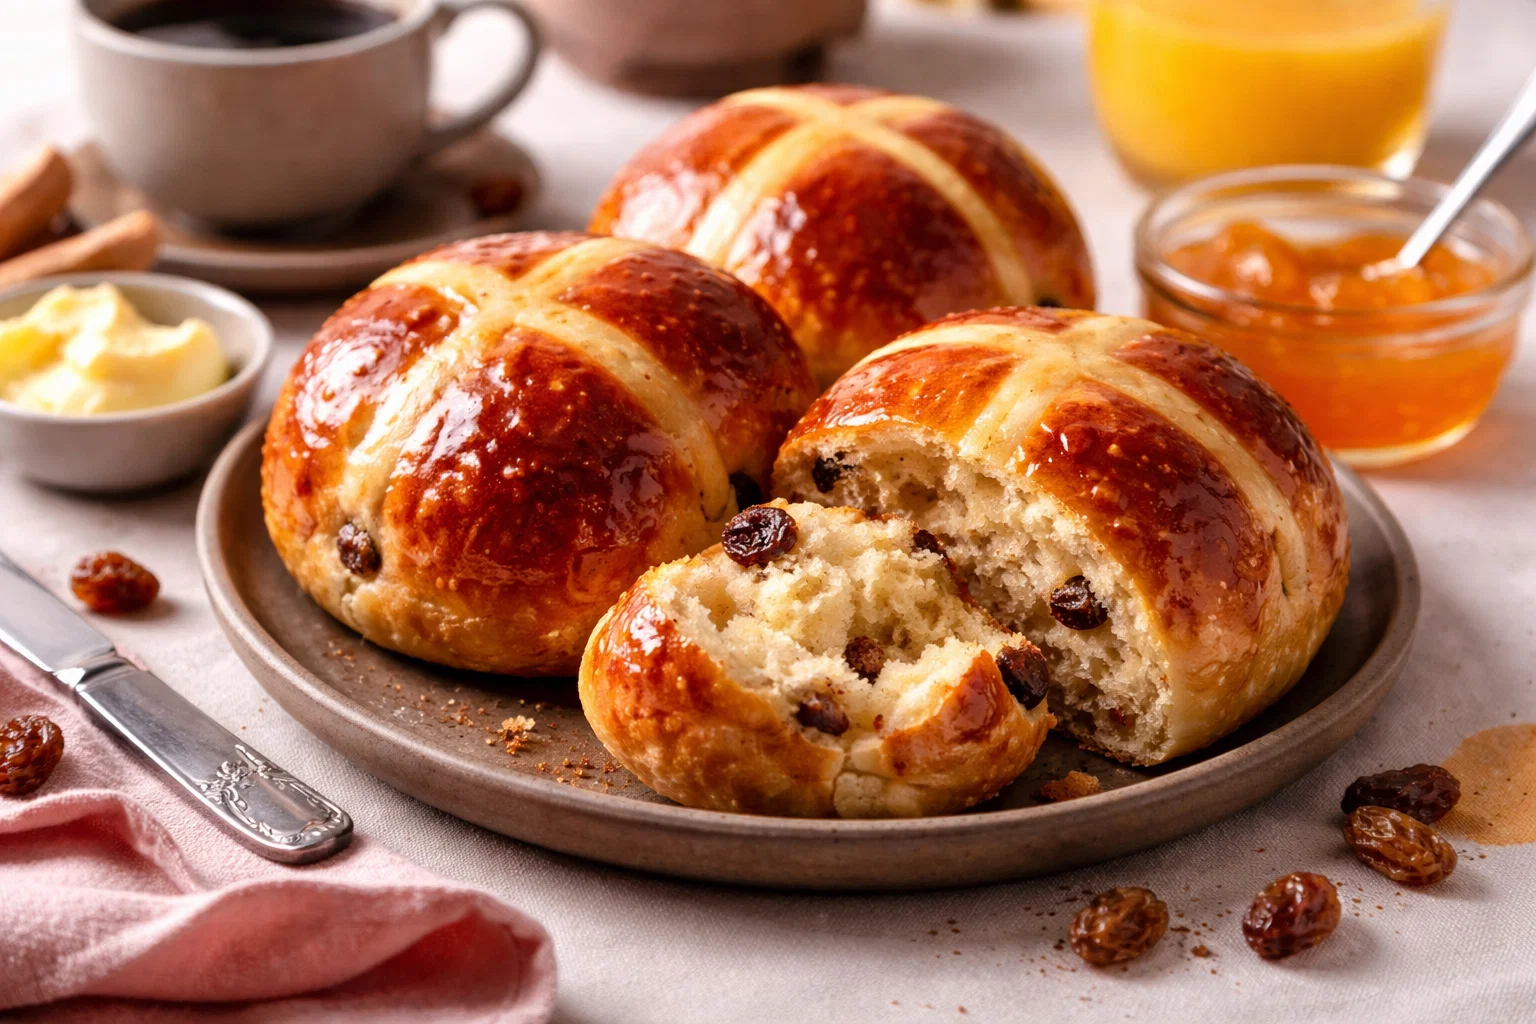
    When it comes to breakfast ideas that bring warmth and joy to the table, nothing beats the distinctive aroma and taste of freshly baked hot cross buns. This recipe for Best XL Hot Cross Buns stands out not just for its delightful flavor but for its incredible versatility, making it a great choice for home cooks of all ages. These buns are larger than traditional ones, providing a hearty breakfast that can satisfy even the busiest of families.

    Moreover, these buns are easy to prepare, beautifully aromatic, and can easily be customized to suit various dietary needs. Whether you’re a busy parent looking for quick breakfast solutions, a student seeking an energizing morning meal, or simply a food enthusiast wanting to whip up something special, this recipe is for you.

    With ingredients that contribute to health, like whole grains and spices, these buns are packed with flavors and are perfect for sharing with friends or family. Best of all, they can be made vegan or gluten-free without sacrificing taste. So roll up your sleeves, preheat your oven, and get ready to create mouthwatering breakfast ideas that will leave everyone craving more!

    Benefits and Advantages of Best XL Hot Cross Buns

    Choosing to bake Best XL Hot Cross Buns comes with a multitude of benefits that go beyond the simple joy of eating them. One of the primary advantages is the ease of preparation. With just a few straightforward steps, even novice bakers can feel accomplished. These buns can be mixed and shaped in under an hour, making them a perfect candidate for those who have limited time in their busy schedules.

    Health-conscious readers will appreciate the nutritional benefits these buns offer. Instead of dense, sugary bakery options, you can indulge in a sweet treat that also contains whole grains, reducing the likelihood of sugar spikes. They can be tailored to fit various dietary requirements—vegan options eliminate animal products while gluten-free flour blends cater to those managing celiac disease or gluten sensitivities.

    Furthermore, the versatility in toppings and spices allows for endless creativity. You can whip them up with traditional ingredients like raisins and cinnamon, or incorporate tropical flavors such as coconut and pineapple for a uniquely delightful twist.

    In addition, making these buns at home means you can control the ingredient quality, reducing processed elements and making these sweet rolls friendlier to dietary preferences. So, whether you’re considering breakfast ideas for a family gathering or just seeking a delicious way to start your day, these buns are the perfect solution.

    Ingredients Overview

    Essential Ingredients for Best XL Hot Cross Buns

    1. Bread Flour (500g): This high-protein flour provides structure and chewiness, giving your buns a robust texture. If you prefer gluten-free options, consider using a blended gluten-free flour.

    2. Yeast (2 Tbsp): Active dry yeast is crucial for providing the rise in your buns, making them fluffy and soft.

    3. Milk (250ml): Warmed dairy or a plant-based milk substitute (almond milk or oat milk) enhances the dough’s flavor and texture.

    4. Sugar (100g): A mix of granulated and brown sugar contributes to the buns’ sweetness and golden crust.

    5. Vegan Butter or Coconut Oil (100g): These fats add flavor and moisture. For a vegan recipe, opt for a plant-based butter alternative or coconut oil.

    6. Egg (1 large): Acts as a binding agent. For a vegan adaptation, a flax egg (1 Tbsp flaxseed meal + 2.5 Tbsp water) can be used.

    7. Spices (1 tsp cinnamon, 1/2 tsp nutmeg, 1/2 tsp allspice): These aromatics provide warmth and depth to the flavor.

    8. Mixed Dried Fruit (300g): Use a combination of raisins, currants, and chopped dried apricots or cranberries for a fruity challenge. For tropical flair, add dried pineapple.

    9. Salt (1 tsp): Essential for balancing flavors and enhancing the taste.

    Dietary Substitutions to Customize Your Best XL Hot Cross Buns

    • Gluten-Free: Replace bread flour with a gluten-free flour blend, ensuring it includes xanthan gum to maintain the structure of the buns. Consult the package for recommended measurements.

    • Vegan: Substitute dairy milk with almond or coconut milk and use a vegan butter or coconut oil in place of regular butter. A flax egg can replace the egg.

    • Low-Sugar: Use natural sweeteners such as mashed bananas or unsweetened applesauce to reduce added sugars. Another option is to use sugar substitutes like stevia or monk fruit.

    • Add-ins: Experiment with tropical fruits like dried mango or coconut flakes or even nuts like chopped pecans for a satisfying crunch.

    These modifications ensure that everyone can enjoy these decadent breakfast ideas, regardless of dietary restrictions or preferences.

    How to Prepare the Perfect Best XL Hot Cross Buns: Step-by-Step Guide

    Creating these delicious buns at home is simpler than you may think! Follow this step-by-step guide for a fun baking experience.

    1. Prepare the Dough:
    2. In a mixing bowl, combine warm milk, sugar, and yeast. Let it sit for about 5-10 minutes until frothy, indicating the yeast is activated.

    3. Mix Dry Ingredients:

    4. In a separate bowl, whisk together the bread flour, salt, and spices (cinnamon, nutmeg, allspice).

    5. Combine Wet and Dry Ingredients:

    6. Pour the activated yeast mixture into the dry ingredients and mix well. Add in melted vegan butter (or coconut oil) and the egg (or flax egg). Stir until a shaggy dough forms.

    7. Knead the Dough:

    8. Transfer dough onto a lightly floured surface and knead for 10-12 minutes, or until smooth and elastic. If using gluten-free flour, kneading may not be necessary—just ensure it is well mixed.

    9. Add Dried Fruits:

    10. Flatten the dough slightly, and fold in the mixed dried fruits. Knead gently to incorporate.

    11. First Rise:

    12. Place the dough in a large, oiled bowl, cover with a damp cloth or plastic wrap, and let it rise in a warm area until doubled in size (approximately 1-2 hours).

    13. Shape the Buns:

    14. Once risen, punch down the dough gently and divide it into 10-12 equal portions. Shape each portion into a round ball and place on a lined baking tray, leaving space between each for expansion.

    15. Second Rise:

    16. Cover the buns again and let them rise for another 30-45 minutes, or until they have doubled in size.

    17. Preheat the Oven:

    18. As the buns rise, preheat your oven to 190°C (375°F).

    19. Prepare the Crosses:

      • Mix a little flour with water to create a thick paste. Transfer it to a piping bag or a plastic bag with a corner cut off. Pipe a cross on top of each bun.
    20. Bake:

      • Bake in the preheated oven for 20-25 minutes, or until golden brown. A skewer should come out clean when inserted.
    21. Glaze (optional):

      • For a shiny finish, mix apricot jam with a little water and brush over the hot buns immediately after they come out of the oven.
    22. Cool and Serve:

      • Allow the buns to cool on a wire rack before serving. Enjoy them warm, or let them cool completely for later!

    By following these steps, you can enjoy gorgeous homemade breakfast ideas!

    Mastering Best XL Hot Cross Buns: Advanced Tips and Variations

    While the base recipe for Best XL Hot Cross Buns is fabulous on its own, incorporating additional techniques and variations can elevate your baking game. Here are some tips and tricks to master this recipe and keep your taste buds excited:

    • Herb Infusion: Consider adding fresh herbs like rosemary or thyme to the dough for a savory twist. This can be particularly delightful when served with cheese spreads.

    • Spice Exploration: Experiment with other spices—cloves or ginger can add depth and warmth. Don’t be afraid to combine spices for a unique aromatic profile.

    • Fillings: Want to take your buns to the next level? Consider stuffing your buns with chocolate chips, marzipan, or even a savory filling like cheese and tomatoes before shaping them.

    • Tropical Flavor: To truly make these buns a tropical delight, infuse the dough with zest from lime or orange. Dried coconut flakes can also add a delightful texture.

    • Gluten-Free Flour Exploration: Each gluten-free flour blend performs differently. Consider trying oat flour or rice flour for varying textures.

    • Creative Icing: Instead of the traditional cross, use cream cheese frosting or a simple icing sugar glaze for a sweet finish.

    These advanced techniques can help you broaden your baking repertoire and impress anyone lucky enough to receive these treats!

    How to Store Best XL Hot Cross Buns: Best Practices

    Once you’ve enjoyed your delicious Best XL Hot Cross Buns, ensuring they’re properly stored is key to maintaining freshness. Here are some best practices to follow:

    • Room Temperature Storage: If you plan to eat the buns within a few days, store them in an airtight container at room temperature. This will help keep them soft and prevent dryness.

    • Refrigeration: For longer storage, you can refrigerate the buns, but be aware that this can sometimes lead to a slightly denser texture. When wrapping, use plastic wrap or aluminum foil to seal them tightly.

    • Freezing: For maximum freshness, consider freezing your leftover buns. Allow them to cool completely before placing them in a freezer-safe bag or container. To thaw, simply leave them at room temperature or pop them in the microwave for a few seconds.

    • Reheating: Reheat the buns in the oven at 160°C (325°F) for about 10 minutes for a warm, fresh-out-of-the-oven taste. You can also microwave them for 15-20 seconds to enjoy them warm.

    By following these storage guidelines, you can savor your breakfast ideas for days to come.

    Nutritional Value of Best XL Hot Cross Buns

    Understanding the nutritional value of your food can help you make informed dietary choices. Here’s an overview of the nutritional content for one serving (one XL hot cross bun), based on the standard recipe outlined above:

    • Calories: 250-300 kcal
    • Fat: 8g (saturated 2g)
    • Carbohydrates: 45g (sugars 12g)
    • Protein: 7g
    • Fiber: 2g
    • Sodium: 300mg

    While these buns are indeed a treat, they can fit comfortably within a balanced diet, especially if you consider modifications like using less sugar or whole grain flours.

    Remember, the nutritional values can fluctuate based on the ingredients you choose, such as milk alternatives or sugar substitutes. Taking these into account allows you to customize your breakfast ideas in accordance with your health goals.

    FAQs: Frequently Asked Questions About Best XL Hot Cross Buns

    Can I make these hot cross buns ahead of time?

    Absolutely! You can prepare the dough in advance and keep it in the refrigerator overnight. Just take it out to let it come to room temperature before shaping and baking.

    What is the best way to serve hot cross buns?

    Hot cross buns are delightful served plain, but for added indulgence, try them with butter, cream cheese, or nut butter. You could even make a breakfast sandwich with eggs!

    Can I customize the fruit in the buns?

    Definitely! You can use any mix of dried fruits you prefer. Feel free to experiment with tropical flavors by adding dried pineapple or coconut.

    How do I ensure my buns are soft?

    Make sure to knead the dough well to develop gluten and ensure that the dough rises sufficiently before baking. Adding enough moisture will also help keep them soft.

    Can I make these hot cross buns gluten-free?

    Yes! Substitute the bread flour with a gluten-free flour blend, ensuring it contains xanthan gum or similar to help bind the ingredients and achieve a good texture.

    Is there a way to make these buns less sweet?

    You can reduce the quantity of sugar in the recipe or use natural sweeteners like applesauce or mashed bananas as alternatives.

    By addressing these frequently asked questions, you can feel confident in your baking journey and create the Best XL Hot Cross Buns that suit your taste and dietary needs perfectly!

    Conclusion

    The Best XL Hot Cross Buns are not just a baked treat; they are a celebration of flavors, textures, and creativity in your kitchen. Perfect for breakfast ideas, snacks, or special occasions, this recipe caters to everyone—from health-conscious dieters to busy families looking for something simple yet delicious.

    Try making them, share them with loved ones, and enjoy the joyous experience of baking and sharing delightful homemade goods. Happy baking!

  • The Best White Chocolate Chip Raspberry Bread

    The Best White Chocolate Chip Raspberry Bread

    The Best White Chocolate Chip Raspberry Bread: A Tropical Delight

    Introduction to The Best White Chocolate Chip Raspberry Bread

    When it comes to dessert recipes that combine convenience with delicious flavors, few can compete with The Best White Chocolate Chip Raspberry Bread. This delightful treat marries the sweetness of white chocolate with the tartness of fresh raspberries, creating a bread that is as aesthetically pleasing as it is scrumptious. Perfect for breakfast, an afternoon snack, or a light dessert, this bread is the epitome of versatility.

    What sets this recipe apart is its inherent simplicity. With minimal ingredients and straightforward instructions, even novice bakers can produce a loaf that looks and tastes gourmet. Not only is this recipe easy to whip up, but it can also cater to various dietary needs. Whether you prefer a vegan option, need gluten-free alternatives, or are counting calories, you’ll find this recipe adaptable.

    Moreover, indulging in this sweet bread doesn’t mean sacrificing health. Raspberries are packed with antioxidants and vitamins, making this treat a guilt-free pleasure. White chocolate, in moderation, adds a creamy twist without overpowering the natural flavors of the fruit. As a result, this bread becomes a delightful dessert option that allows you to enjoy sweet treats without compromising your health goals.

    In summary, The Best White Chocolate Chip Raspberry Bread is an excellent choice for home cooks, busy parents, students, and baking enthusiasts. It not only stands as a delicious treat but also serves as a testament to the idea that dessert can be both healthy and indulgent. So, roll up your sleeves, gather your ingredients, and get ready to create something spectacular!

    Benefits and Advantages of The Best White Chocolate Chip Raspberry Bread

    This recipe offers an array of benefits that make it an outstanding choice for any occasion, whether it’s a dinner party, a casual family gathering, or a simple weekday snack. One of the most significant advantages of The Best White Chocolate Chip Raspberry Bread is its ease of preparation. With straightforward instructions, you don’t need to be a masterchef to impress your friends and family. In less than an hour, you can have a loaf ready to serve.

    Another highlight of this bread is its health benefits. Raspberries are low in calories and rich in dietary fiber, which aids digestion and contributes to overall gut health. Additionally, these berries provide vitamins C and K, essential for immune function and healthy bones. The incorporation of white chocolate chips adds a touch of sweetness, elevating the flavor without making the treat overwhelmingly rich.

    The adaptability of this recipe is also a significant benefit. For those who are health-conscious, you can easily substitute ingredients to align with your dietary preferences. From vegan and gluten-free to low-calorie options, this recipe has something to offer everyone. For instance, replacing eggs with flaxseed meal and using a gluten-free flour blend can make this bread accessible for those with specific dietary restrictions.

    Moreover, this enticing baked good not only satisfies your sweet tooth but also encourages creativity in the kitchen. Feel free to toss in additional mix-ins like nuts or even coconut flakes for a tropical twist. The versatility of The Best White Chocolate Chip Raspberry Bread makes it an exemplary addition to your collection of dessert recipes, inspiring you to explore new flavors and textures with each bake.

    Ultimately, the combination of simplicity, health benefits, and versatility is what makes this raspberry bread stand out. It’s more than just a treat; it’s a delightful experience waiting to be shared with friends, family, or even enjoyed solo with a hot cup of tea.

    Ingredients Overview

    Essential Ingredients for The Best White Chocolate Chip Raspberry Bread

    To create The Best White Chocolate Chip Raspberry Bread, gather the following ingredients:

    • 1 ½ cups all-purpose flour (or gluten-free flour): The base of the bread, providing structure and texture. For a gluten-free version, use a blend designed for baking.
    • 1 cup fresh raspberries: These juicy fruits add tartness and moisture, enhancing the bread’s flavor.
    • ½ cup white chocolate chips: Offering sweetness and a creamy texture that complements the tart raspberries.
    • ½ cup granulated sugar (or coconut sugar): For sweetness; coconut sugar can add a caramel note, appealing to health-conscious bakers.
    • 2 large eggs (or flaxseed meal for vegan option): Eggs help bind the ingredients; for a vegan version, use 2 tablespoons of flaxseed meal mixed with 6 tablespoons of water.
    • ½ cup vegetable oil (or applesauce): Oil contributes to moisture; applesauce can reduce calories and fat in a low-calorie version.
    • 1 teaspoon baking powder: A vital leavening agent that makes the bread rise.
    • 1 teaspoon vanilla extract: Enhances flavor and adds depth to the bread.
    • ½ teaspoon salt: Balances sweetness and rounds out flavors.

    Dietary Substitutions to Customize Your The Best White Chocolate Chip Raspberry Bread

    This recipe is inherently versatile, allowing for multiple substitutions based on dietary needs or ingredient availability:

    • Gluten-Free: Use a gluten-free all-purpose flour blend, ensuring it contains xanthan gum or a binding agent to mimic the structure of wheat flour.
    • Vegan: Substitute eggs with flaxseed meal or a commercial egg replacer. Opt for non-dairy chocolate chips to maintain the vegan status.
    • Lower Calorie: Replace sugar with a zero-calorie sweetener or reduce the amount of white chocolate chips and substitute with a mix of fresh fruits and nuts for added nutrition without added sugars.
    • Additional Mix-ins: Feel free to add ingredients like chopped nuts, chia seeds for extra fiber, or coconut flakes for a tropical twist. Each adds unique flavors and textures, enhancing both the nutritional profile and taste of the bread.

    With these substitutions, each home cook can craft a version of The Best White Chocolate Chip Raspberry Bread that aligns with their dietary restrictions, making it a beloved masterpiece for everyone at the table.

    How to Prepare the Perfect The Best White Chocolate Chip Raspberry Bread: Step-by-Step Guide

    Baking the perfect loaf of White Chocolate Chip Raspberry Bread is a straightforward process that anyone can master. Just follow these easy steps:

    1. Preheat the Oven: Set your oven to 350°F (175°C). Preheating ensures even baking, which is crucial for the texture of the bread.

    2. Prepare the Baking Pan: Grease a 9×5 inch loaf pan with cooking spray or line it with parchment paper. This step will make it easier to remove the bread once baked.

    3. Mix Dry Ingredients: In a large mixing bowl, combine 1 ½ cups of all-purpose flour, 1 teaspoon of baking powder, and ½ teaspoon of salt. Whisk them together to ensure even distribution.

    4. Mix Wet Ingredients: In a separate bowl, whisk together ½ cup of granulated sugar, ½ cup of vegetable oil, 2 large eggs (or flaxseed meal mixed with water for the vegan option), and 1 teaspoon of vanilla extract until the mixture is smooth and well combined.

    5. Combine Dry and Wet Mixtures: Gradually add the dry ingredients to the wet mixture, stirring gently until just combined. Do not over-mix, as this can result in dense bread.

    6. Fold in Raspberries and Chocolate Chips: Carefully fold in 1 cup of fresh raspberries and ½ cup of white chocolate chips. Take care not to crush the raspberries; you want to maintain their shape for bursts of flavor in every slice.

    7. Pour into the Pan: Transfer the batter into the prepared loaf pan, spreading it evenly.

    8. Bake the Bread: Bake in the preheated oven for 50 to 60 minutes or until the top is golden brown and a toothpick inserted in the center comes out clean.

    9. Cool: Once baked, remove the pan from the oven and allow the bread to cool in the pan for about 10 minutes. Then, transfer it to a wire rack to cool completely.

    10. Slice and Serve: Once cooled, slice the bread into even pieces. Serve as is or with a spread of butter for an extra treat!

    Customizing Your Preparation

    Feel free to experiment with timing and texture based on your preferences. For instance, if you prefer a softer bread, reduce the baking time slightly. You can also add a sprinkle of powdered sugar on top for a decorative touch before serving. Enjoy this delightful dessert with friends, family, or simply as a treat for yourself!

    Mastering The Best White Chocolate Chip Raspberry Bread: Advanced Tips and Variations

    To elevate your bread-baking game, consider these advanced tips and variations:

    • Ingredient Quality: Always opt for high-quality chocolate chips and fresh raspberries. The better the ingredients, the more flavorful your bread will be.

    • Experiment with Flavors: Try adding a teaspoon of almond extract for a subtle nutty flavor that pairs wonderfully with raspberries and white chocolate.

    • Use Frozen Raspberries: If fresh raspberries are out of season, frozen raspberries work perfectly in this recipe. Just be sure to gently fold them in straight from the freezer to minimize the bleeding of color.

    • Top It Off: For an added layer of sweetness and texture, consider icing or drizzling melted white chocolate on top of the finished loaf. Simply melt some white chocolate, and use a spoon to drizzle it over the cooled bread.

    • Storage Options: For a unique twist, slice the cooled bread and assemble it into an easy trifle by layering it with whipped cream and more fresh raspberries!

    • Make Muffins Instead: If you prefer individual servings, use a muffin tin! Simply adjust the baking time to around 20-25 minutes, and you’ll have delicious raspberry white chocolate muffins perfect for on-the-go snacks.

    By incorporating these tips and suggestions, you’ll not only master The Best White Chocolate Chip Raspberry Bread but also encourage curiosity and innovation in your baking adventures.

    How to Store The Best White Chocolate Chip Raspberry Bread: Best Practices

    Storing The Best White Chocolate Chip Raspberry Bread correctly will help maintain its flavors and freshness for days:

    • Refrigeration: Once the bread has completely cooled, wrap it tightly in plastic wrap or aluminum foil. Place it in an airtight container before refrigerating. This method can keep your bread fresh for up to a week.

    • Freezing: For longer storage, consider freezing your loaf. Wrap it tightly in plastic wrap, then in aluminum foil. This double-wrapping method prevents freezer burn and can keep the bread fresh for up to three months. When ready to enjoy, simply thaw it at room temperature or warm it up in the oven.

    • Reheating: To reheat slices, place them in a toaster or oven at 350°F (175°C) for 5-10 minutes to restore some freshness. Alternatively, you can microwave slices for about 10-15 seconds for a quick warm-up.

    These storage options ensure that you can enjoy your delicious bread long after you’ve baked it.

    Nutritional Value of The Best White Chocolate Chip Raspberry Bread

    Understanding the nutritional value of The Best White Chocolate Chip Raspberry Bread can help you enjoy it guilt-free. Here’s a breakdown of the key nutritional components per slice (based on a standard recipe divided into 12 slices):

    • Calories: Approximately 180-200 calories
    • Total Fat: 7-9g
    • Saturated Fat: 3-4g
    • Cholesterol: 30mg (if using eggs)
    • Sodium: 150mg
    • Carbohydrates: 28-32g
    • Fiber: 1g
    • Sugars: 8-10g
    • Protein: 3g (varies based on egg substitute)

    Health Insights:

    • Low in Calories: The inclusion of raspberries not only adds flavor but also enhances the fruitiness of each slice while keeping the calorie count reasonable.
    • Antioxidant-Rich: Raspberries are high in antioxidants, which can boost overall health.
    • Variability: Adjustments like using applesauce instead of oil or reducing sugar can further lower calories and fat content while maintaining taste.

    Understanding the nutritional value of this dessert can allow you to make more informed choices. It serves as a sweet treat that can fit into various dietary profiles without the guilt associated with many other dessert recipes.

    FAQs: Frequently Asked Questions About The Best White Chocolate Chip Raspberry Bread

    Can I use frozen raspberries instead of fresh?

    Yes, frozen raspberries work well in this recipe! Just remember not to thaw them beforehand to prevent excessive juice from bleeding into the batter.

    Is it possible to make this bread vegan?

    Absolutely! Substitute the eggs with flaxseed meal mixed with water or a commercial egg replacer, and use non-dairy white chocolate chips for a completely vegan treat.

    How do I know when the bread is done baking?

    The bread is done when the top is golden brown, and a toothpick inserted in the center comes out clean or with just a few crumbs clinging to it.

    Can I make this bread gluten-free?

    Definitely! Just replace the all-purpose flour with a gluten-free flour mix, ensuring it has a binding agent like xanthan gum for the best results.

    How long does the bread stay fresh?

    When stored properly in an airtight container at room temperature, the bread will remain fresh for about 3-5 days. For longer storage, refrigerate or freeze it.

    What are some variations I can try?

    Feel free to add nuts, use a different type of chocolate, or add flavored extracts to experiment with new flavors! The possibilities are as endless as your creativity.

    Can I double the recipe?

    Yes, you can easily double the recipe. Just make sure to adjust your baking times slightly, especially if using larger loaf pans.

    How can I make the bread extra moist?

    Using applesauce as a substitute for some of the oil and incorporating buttermilk or yogurt into the batter can increase moisture and tenderness.

    With these frequently asked questions answered, you’ll feel confident to dive into baking The Best White Chocolate Chip Raspberry Bread, enriching your dessert recipes repertoire. Enjoy sharing it with loved ones or indulging in it all by yourself—either way, you’re in for a treat!

  • Easy Cinnamon Focaccia Sweet Bread

    Easy Cinnamon Focaccia Sweet Bread

    Easy Cinnamon Focaccia Sweet Bread: A Tropical Delight

    Introduction to Easy Cinnamon Focaccia Sweet Bread

    If you are looking for a delightful addition to your list of dessert recipes, look no further than Easy Cinnamon Focaccia Sweet Bread! This recipe offers a perfect blend of sweet and savory, capturing the unique textures of traditional focaccia while incorporating the warm, comforting flavors of cinnamon. It’s an easy recipe to whip up, even for beginners, making it an appealing choice for home cooks, busy parents, students, and anyone wanting to treat themselves or loved ones to something delicious.

    What’s more, this sweet focaccia can effortlessly accommodate various dietary needs. Whether you’re looking for a vegan treat, want to make it gluten-free, or prefer a low-calorie version, it’s all possible with some simple adjustments. Preparing this sweet bread not only satisfies your cravings but also allows you to explore your creativity in the kitchen. With its beautiful presentation and delightful aroma, it’s the ideal dessert for gatherings or simply a cozy night in.

    So if you’re ready to embark on a culinary adventure, join me as I guide you through this easy-to-follow recipe that is sure to become a staple in your dessert repertoire!

    Benefits and Advantages of Easy Cinnamon Focaccia Sweet Bread

    The benefits of Easy Cinnamon Focaccia Sweet Bread extend far beyond its irresistible taste. First and foremost, its ease of preparation makes it perfect for everyone—from young baking enthusiasts just starting out to seasoned chefs looking for a quick, satisfying recipe. Unlike more complicated dessert recipes that require extensive skillsets, this sweet focaccia can be made with minimal fuss.

    Healthwise, cinnamon is well-known for its numerous benefits, including anti-inflammatory properties and potential blood sugar regulation. Moreover, this recipe can be modified to fit diet-conscious lifestyles. For those avoiding gluten, you can easily substitute regular all-purpose flour with gluten-free options. If you’re vegan, simply swap out dairy products for plant-based alternatives. This accessibility makes it an ideal choice for gatherings where diverse dietary needs arise.

    Another advantage is its versatility. Picture it alongside afternoon tea, as part of a brunch spread, or even sliced and served at a cozy family dinner. No matter the occasion, this sweet focaccia adds that special touch, leaving a lasting impression. The combination of cinnamon and the unique texture of focaccia creates a dessert that is not only a treat but also a conversation starter.

    By choosing Easy Cinnamon Focaccia Sweet Bread, you’re not just baking; you’re engaging in a delightful, rewarding experience. Your guests or family members will appreciate the effort you put into this indulgent yet simple recipe that straddles the line between comfort food and a sophisticated dessert.

    Ingredients Overview

    Essential Ingredients for Easy Cinnamon Focaccia Sweet Bread

    For this Easy Cinnamon Focaccia Sweet Bread recipe, you’ll need the following ingredients:

    • 2 cups all-purpose flour (or gluten-free flour for a gluten-free option)
    • 1/2 cup granulated sugar (can use coconut sugar for a healthier option)
    • 1 tablespoon cinnamon
    • 1 teaspoon baking powder
    • 1/2 teaspoon baking soda
    • 1/4 teaspoon salt
    • 1/2 cup milk (dairy or plant-based milk)
    • 1/4 cup olive oil (or melted coconut oil)
    • 1 teaspoon vanilla extract
    • 1 tablespoon apple cider vinegar (this helps create the perfect texture)
    • 1/2 cup mixed nuts or raisins (optional, for added texture)

    These ingredients are chosen not just for their flavor but also for their health benefits. Flour serves as the base for structure, sugar adds sweetness without overpowering, while cinnamon enhances the overall flavor profile and contributes to health advantages.

    Dietary Substitutions to Customize Your Easy Cinnamon Focaccia Sweet Bread

    1. Vegan Options: To make this recipe vegan, substitute milk with almond or oat milk, and replace eggs (if using) with flaxseed meal mixed with water (1 tablespoon flaxseed meal with 3 tablespoons water equals 1 egg).

    2. Gluten-Free Options: Use a 1:1 gluten-free flour blend to replace regular flour. Ensure your baking powder is also certified gluten-free.

    3. Lower Sugar: If you’re watching your sugar intake, consider reducing the sugar by half and replacing it with natural sweeteners like stevia or monk fruit.

    4. Nut-Free: For those with nut allergies, feel free to skip the nuts or use seeds like sunflower or pumpkin to add crunch without the allergens.

    These substitutions cater to a range of dietary needs, making this Easy Cinnamon Focaccia Sweet Bread a universally appealing recipe.

    How to Prepare the Perfect Easy Cinnamon Focaccia Sweet Bread: Step-by-Step Guide

    Here’s how to create the perfect Easy Cinnamon Focaccia Sweet Bread:

    1. Preheat the Oven: Preheat your oven to 350°F (175°C). This ensures even baking, which is crucial for achieving a soft and fluffy texture.

    2. Prepare the Baking Pan: Grease an 8-inch square or round baking pan with a little olive oil or line it with parchment paper. This will prevent sticking and make cleanup easier.

    3. Mix Dry Ingredients: In a large mixing bowl, combine 2 cups of all-purpose flour, 1/2 cup granulated sugar, 1 tablespoon cinnamon, 1 teaspoon baking powder, 1/2 teaspoon baking soda, and 1/4 teaspoon salt. Whisk them together until well mixed.

    4. Combine Wet Ingredients: In another bowl, combine 1/2 cup milk, 1/4 cup olive oil, 1 teaspoon vanilla extract, and 1 tablespoon apple cider vinegar. Stir well until all the liquids are blended.

    5. Combine Mixtures: Gradually pour the wet mixture into the dry ingredients. Mix until just combined; do not overmix. A few lumps are perfectly fine and will contribute to a fluffy texture.

    6. Add Extras: If you are using mixed nuts or raisins, fold them into the batter gently, ensuring that they are evenly distributed.

    7. Transfer to Pan: Pour the batter into the prepared baking pan. Use a spatula to spread it out evenly, smoothing the top.

    8. Create Cinnamon Swirl: To add an extra layer of flavor, you can sprinkle a mixture of cinnamon and sugar on top before placing it in the oven.

    9. Bake: Place the pan in your preheated oven and bake for approximately 25-30 minutes, or until the top is golden and a toothpick inserted in the center comes out clean.

    10. Cool: Once baked, remove the focaccia from the oven and allow it to cool in the pan for 10 minutes. Then, transfer to a wire rack to cool completely.

    11. Serve: Slice the focaccia into squares or wedges and enjoy warm or at room temperature. It pairs wonderfully with coffee, tea, or a sweet spread.

    This Easy Cinnamon Focaccia Sweet Bread recipe is not just delicious; it’s adaptable for various dietary preferences. You can experiment with different toppings or fillings to make it unique each time.

    Mastering Easy Cinnamon Focaccia Sweet Bread: Advanced Tips and Variations

    While this Easy Cinnamon Focaccia Sweet Bread is simple as is, there are several ways to take it up a notch:

    • Herbs and Spices: Try adding other spices like nutmeg or cardamom for a more complex flavor profile. Some fresh herbs, like rosemary, can also be added for a sweet-savory twist.

    • Fruity Variations: Incorporate mashed bananas or applesauce into the batter for added moisture and natural sweetness. Fresh apples on top can also make for a lovely treat.

    • Glazing: Consider drizzling a simple glaze made from powdered sugar and lemon juice over the top once the bread has cooled. This adds an attractive finishing touch and extra sweetness.

    • Layering: For a more elaborate dessert, try layering the batter with a cream cheese filling or even pastry cream to create a stuffed focaccia.

    • Serving Suggestions: Serve slices warm with a dollop of whipped cream or vanilla ice cream for an indulgent dessert experience. Alternatively, toast slices for breakfast and spread a little butter for a delicious morning treat.

    With these variations and tips, you can truly master your Easy Cinnamon Focaccia Sweet Bread, ensuring it never gets boring!

    How to Store Easy Cinnamon Focaccia Sweet Bread: Best Practices

    Proper storage of your Easy Cinnamon Focaccia Sweet Bread will ensure it stays fresh and delicious longer. Here are some best practices:

    • Room Temperature: If you plan to consume the focaccia within a couple of days, store it in an airtight container at room temperature. This will keep it soft and flavorful.

    • Refrigeration: For longer storage, you can store the bread in the refrigerator. Wrap it tightly in plastic wrap or aluminum foil to avoid it drying out. Note that refrigeration may slightly alter the texture.

    • Freezing: For even longer storage, freeze individual slices in a freezer-safe container or bag. When you’re ready to enjoy, simply thaw at room temperature or reheat in the oven to restore that fresh-baked taste.

    • Reheating Suggestions: To reheat, preheat your oven to 350°F (175°C) and bake the focaccia slices for about 10 minutes until warmed through.

    Following these storage methods allows you to enjoy your Easy Cinnamon Focaccia Sweet Bread for an extended period, ensuring no delicious morsel goes to waste.

    Nutritional Value of Easy Cinnamon Focaccia Sweet Bread

    Understanding the nutritional value of your Easy Cinnamon Focaccia Sweet Bread is essential, particularly if you’re conscious about your dietary choices. Below is an approximation per serving (1 slice), assuming it’s made with traditional ingredients:

    • Calories: 200-250 calories
    • Protein: 3-5 grams
    • Fat: 8-12 grams (depending on the use of oil)
    • Carbohydrates: 30-35 grams
    • Fiber: 1 gram
    • Sugar: 8-12 grams
    • Sodium: 100-200 mg

    These values can vary based on the specific ingredients used, especially if substitutes are included. Adjusting sugar, opting for lower-fat options, or increasing fiber with whole grain flours will also modify these nutritional aspects.

    Being aware of the ingredients allows you to customize your focaccia to meet personal health goals while still enjoying a satisfying dessert recipe.

    FAQs: Frequently Asked Questions About Easy Cinnamon Focaccia Sweet Bread

    Q1: Can I make this bread ahead of time?
    Absolutely! You can prepare the dough a day in advance and store it in the refrigerator. Allow it to rest at room temperature for about 30 minutes before baking the next day.

    Q2: How can I tell when the focaccia is done baking?
    The focaccia is done when the top becomes golden brown, and a toothpick inserted into the center comes out clean.

    Q3: What if I’m allergic to cinnamon?
    If cinnamon is not an option, consider using vanilla or ginger as a flavorful alternative in the recipe to keep it delicious.

    Q4: Is this recipe suitable for people watching their calories?
    Yes! You can make this dessert lighter by reducing the sugar, using low-fat milk, and substituting a few ingredients for healthier options.

    Q5: Can I use different fruit or nuts in this recipe?
    Certainly! Feel free to experiment. Apples, cranberries, or walnuts could make great additions, offering varied textures and flavors.

    With these FAQs, you can confidently approach your baking adventure and adapt the recipe to meet your needs and preferences.

    In conclusion, Easy Cinnamon Focaccia Sweet Bread is a wonderful addition to your collection of dessert recipes. It’s simple, versatile, and joyfully delicious – perfect for any gathering or quiet evening at home. So roll up your sleeves and dive into this exciting baking experience; you won’t be disappointed! Enjoy!

  • Tasty German Soft Pretzel Sticks

    Tasty German Soft Pretzel Sticks

    Tasty German Soft Pretzel Sticks: A Tropical Delight

    Introduction to Tasty German Soft Pretzel Sticks

    Are you looking for a fantastic addition to your appetizer recipes that is sure to impress family and friends? Look no further than Tasty German Soft Pretzel Sticks! These delightful snacks combine a crispy, golden-brown exterior with a soft, chewy interior that’s perfect for dipping. Not only are they easy to make, but they are also versatile enough to accommodate various dietary needs, such as vegan and gluten-free options.

    This recipe is not just about taste—it’s about creating a fun and enjoyable cooking experience. With only a handful of ingredients, you can whip up these pretzel sticks in no time. Whether you are a busy parent seeking quick recipe ideas, a health-conscious individual looking for a treat that won’t derail your diet, or even a student needing a delightful snack for a party, these pretzel sticks are an excellent choice.

    Moreover, their unique flavor makes them a fantastic fit for gatherings or as a movie night snack. Dip them in mustard, cheese sauce, or even chocolate for a sweet twist, and watch how they disappear in minutes! Get ready to explore the world of German cuisine right from your kitchen. You’ll find that these Tasty German Soft Pretzel Sticks are not only easy to prepare but also loved by everyone. Let’s dive in and make this delightful appetizer recipe!

    Benefits and Advantages of Tasty German Soft Pretzel Sticks

    Creating Tasty German Soft Pretzel Sticks at home is more than just a fun culinary project; it brings numerous benefits that make this recipe stand out from the crowd. Here are some key advantages of making these delectable sticks:

    1. Simple and Quick Preparation: This recipe requires minimal ingredients, which means you can easily prepare them in under an hour. They’ve got a straightforward process that even novice cooks can follow. The short ingredient list makes shopping easier and ensures you’ll have everything on hand when the craving strikes.

    2. Versatile and Customizable: One of the best things about these pretzel sticks is their versatility. You can easily adapt the recipe to make it vegan by using plant-based butter or coconut oil instead of traditional butter. If you’re looking to reduce carbs, you can explore gluten-free flour alternatives that provide the same delightful flavor.

    3. Health Benefits: When made at home with wholesome ingredients, these pretzel sticks can be a healthier option compared to store-bought snacks. They can be baked rather than fried, allowing you to enjoy a delightful treat without the excess oil and calories. Additionally, the pretzel dough can be enriched with whole grain flour for added nutrition, offering more fiber and nutrients.

    4. Great for Any Occasion: These tasty snacks fit perfectly into any setting, whether a birthday party, a casual family dinner, or a game day gathering. Their finger-friendly size makes them ideal for sharing, and you can pair them with various sauces, making them suitable for a wide range of tastes.

    5. Kid-Friendly: These pretzel sticks are a big hit with children! The fun shape and delicious taste make them an exciting snack. Plus, getting kids involved in the cooking process can introduce them to the joys of baking and healthy eating.

    By incorporating Tasty German Soft Pretzel Sticks into your snack rotation, you’re not just treating your taste buds; you’re also nourishing your body and creating unforgettable memories with loved ones. Get ready to impress your friends and family with this fabulous appetizer recipe!

    Ingredients Overview

    Essential Ingredients for Tasty German Soft Pretzel Sticks

    Before you embark on making these mouthwatering Tasty German Soft Pretzel Sticks, it’s essential to gather the following ingredients:

    1. All-Purpose Flour (4 cups): This will be the base of your dough, providing structure and chewiness.
    2. Warm Water (1 ½ cups, approx. 110°F): Warm water activates the yeast for proper rising.
    3. Active Dry Yeast (2 ¼ teaspoons): This ingredient is crucial for the dough to rise, giving the pretzel its fluffy texture.
    4. Sugar (1 tablespoon): A little sweetness enhances the flavor of the dough and supports yeast activity.
    5. Salt (2 teaspoons): Salt enhances the overall taste and helps control yeast fermentation.
    6. Baking Soda (1/2 cup): This is mixed into boiling water to create that distinct pretzel crust when dipped.
    7. Coarse Sea Salt (for sprinkling): This adds flavor and a beautiful finish to the pretzel sticks.
    8. Butter (4 tablespoons, melted): Brush on top before baking to add flavor and help with browning.

    Vegan Substitute: You can replace butter with melted coconut oil or vegan butter.

    Gluten-Free Option: Opt for a gluten-free all-purpose flour blend that includes xanthan gum for structure.

    Dietary Substitutions to Customize Your Tasty German Soft Pretzel Sticks

    If you’re catering to specific dietary needs or want to get creative with your Tasty German Soft Pretzel Sticks, consider these substitutions:

    1. Flour Alternatives: As mentioned earlier, use a gluten-free flour blend to make these pretzels suitable for gluten-sensitive diets. Whole wheat flour is an excellent option for added fiber and nutrition if gluten is not a concern.

    2. Plant-Based Milk: For a dairy-free alternative, choose unsweetened almond milk or oat milk when activating the yeast instead of regular milk. This method keeps the recipe vegan-friendly.

    3. Sweetener Variations: If you’re aiming to reduce sugar intake, consider using agave syrup or honey (if not strictly vegan) in place of sugar for a different flavor profile.

    4. Additional Seasonings: Add garlic powder, onion powder, or herbs like rosemary for a unique flavor. Experiment with spices to create an exciting twist that caters to your personal preference.

    5. Cheesy Pretzel Sticks: For those who enjoy cheesy snacks, sprinkle shredded cheese (like cheddar or mozzarella) on top of the pretzel sticks just before baking. This option is perfect for non-vegan diets.

    These substitutions allow you and your guests to enjoy customized Tasty German Soft Pretzel Sticks according to personal dietary needs or preferences. With a little creativity, you can make this appetizer recipe uniquely yours!

    How to Prepare the Perfect Tasty German Soft Pretzel Sticks: Step-by-Step Guide

    Now that you have all your ingredients gathered, it’s time to get cooking! Follow these detailed steps to make Tasty German Soft Pretzel Sticks at home.

    1. Prepare the Yeast Mixture: In a small bowl, combine warm water, sugar, and active dry yeast. Stir gently and let it sit for about 5-10 minutes, or until it becomes frothy. This step is crucial as it activates the yeast.

    2. Mix Dry Ingredients: In a large mixing bowl, combine the all-purpose flour and salt. Make a well in the center of the flour and pour in the activated yeast mixture.

    3. Form the Dough: Stir the mixture with a wooden spoon until it begins to come together. Once it’s too hard to stir, use your hands to knead the dough directly in the bowl for about 5-7 minutes until it becomes soft and elastic. If the dough feels too sticky, add a little more flour.

    4. Let the Dough Rise: Shape the dough into a ball and place it in a lightly greased bowl. Cover it with a clean kitchen towel and let it rise in a warm place for about 1 hour, or until it has doubled in size.

    5. Prepare the Baking Soda Bath: While waiting for the dough to rise, bring 10 cups of water to a boil in a large pot. Once boiling, carefully add the baking soda (it will bubble up).

    6. Shape the Pretzel Sticks: After the dough has risen, punch it down to release excess air. Divide the dough into 12 equal pieces. Roll each piece into a long rope, about 12-14 inches long, and twist into pretzel shape. If you prefer pretzel sticks, simply roll the dough into sticks without twisting.

    7. Boil the Pretzel Sticks: Carefully drop each pretzel stick into the boiling baking soda bath for about 30 seconds. Use a slotted spoon to remove them and place them on a parchment-lined baking sheet.

    8. Brush with Butter: After boiling, brush each pretzel stick with melted butter, allowing it to coat the surface.

    9. Sprinkle with Coarse Salt: Generously sprinkle coarse sea salt on top of the butter-brushed pretzel sticks, ensuring even coverage.

    10. Bake the Pretzel Sticks: Preheat your oven to 425°F (220°C). Bake the pretzel sticks for about 12-15 minutes, or until they are golden brown and crusty.

    11. Cool before Serving: Once baked, remove the pretzel sticks from the oven and allow them to cool on a wire rack for a few minutes before serving.

    12. Enjoy Your Treat: Serve your Tasty German Soft Pretzel Sticks warm, accompanied by dips like mustard, cheese sauce, or even chocolate sauce for a special touch.

    By following these steps, you’ll create Tasty German Soft Pretzel Sticks that are perfect for any gathering or just a cozy night at home. Remember, cooking is all about having fun, so don’t hesitate to experiment and make this appetizer recipe your own!

    Mastering Tasty German Soft Pretzel Sticks: Advanced Tips and Variations

    Ready to take your homemade Tasty German Soft Pretzel Sticks to the next level? Here are some advanced tips and creative variations to elevate this classic snack:

    1. Use a Stand Mixer: If you have a stand mixer with a dough hook attachment, use it to make your dough preparation quicker and easier. Mix on low speed until the dough comes together, then increase the speed slightly and knead for 5 minutes.

    2. Add a Flavor Twist: To mix things up, try incorporating different spices like garlic powder, paprika, or dried herbs into the dough. These additions can enhance the flavor profile and please adventurous eaters.

    3. Fill the Pretzels: For a fun surprise, fill the pretzel sticks with ingredients like cheese or chocolate before baking. Just flatten the dough piece and place a small amount of cheese or chocolate in the center before rolling it back into a stick.

    4. Make Mini Pretzel Bites: Instead of long sticks, roll the dough into small bite-sized balls. Boil them in baking soda water and bake as directed for a fun and shareable snack that’s great for parties!

    5. Experiment with Dips: Don’t just stick with traditional mustard or cheese sauce. Try creating unique dips like buffalo sauce, creamy ranch, or a sweet cinnamon sugar glaze for dessert pretzel sticks. The options are limitless!

    6. Play with Shapes: While pretzel sticks are delicious, don’t be afraid to get creative with the shapes! Form traditional pretzel knots, pretzel hearts for Valentine’s Day, or even festive shapes for holidays.

    By trying these tips and variations, you’ll master Tasty German Soft Pretzel Sticks and impress your friends and family with your culinary skills. Baking is all about creativity, so enjoy the process!

    How to Store Tasty German Soft Pretzel Sticks: Best Practices

    Once you’ve created your Tasty German Soft Pretzel Sticks, it’s essential to know how to store them properly to maintain their freshness and flavor:

    1. Refrigeration: If you have leftover pretzel sticks, store them in an airtight container at room temperature for 1-2 days. They can also be refrigerated, but be aware that cold storage may make them tougher.

    2. Freezing: For longer storage, freeze the pretzel sticks after they have cooled completely. Wrap each stick with plastic wrap and place them in a freezer-safe bag or container. Thaw at room temperature before reheating.

    3. Reheating: To warm up your pretzel sticks, preheat your oven to 350°F (175°C). Place the pretzel sticks on a baking sheet and warm for about 5-10 minutes or until heated through. This method will help regain some of the original texture.

    By following these storage tips, you can enjoy your Tasty German Soft Pretzel Sticks long after they’ve come out of the oven, maximizing flavors and minimizing waste.

    Nutritional Value of Tasty German Soft Pretzel Sticks

    Understanding the nutritional value of your homemade Tasty German Soft Pretzel Sticks can help you make informed decisions about indulgence while still enjoying your favorite snacks. Here’s a breakdown of the approximate nutritional content per serving (based on 12 servings):

    • Calories: 220
    • Total Fat: 5g (Saturated Fat: 2g)
    • Cholesterol: 10mg
    • Sodium: 480mg
    • Total Carbohydrates: 40g
    • Dietary Fiber: 2g
    • Sugars: 1g
    • Protein: 6g

    Note: Nutritional content may vary based on specific ingredient choices and preparation methods, especially if alterations are made to the recipe.

    These pretzel sticks can be a delightful treat, boasting carbohydrates for energy and protein to satisfy your hunger. Since they can be adapted for various dietary needs, you can make healthier versions by adjusting ingredients such as fats and sugars. Embrace the balance between enjoyment and nutrition with these Tasty German Soft Pretzel Sticks!

    FAQs: Frequently Asked Questions About Tasty German Soft Pretzel Sticks

    1. Can I make the pretzel dough ahead of time?

    Yes! You can prepare the dough in advance and store it in the refrigerator for up to 24 hours. Just allow it to come to room temperature before proceeding with the recipe steps.

    2. Are there gluten-free options available?

    Absolutely! Simply substitute all-purpose flour with a gluten-free flour blend. Be sure to include xanthan gum in the mix to ensure proper texture.

    3. Can I add toppings or flavors to the pretzel sticks?

    Of course! Feel free to get creative! You can add garlic powder, onion powder, or even sprinkle cheese on top before baking for a delicious twist.

    4. What is the best way to reheat leftovers?

    The best method to reheat pretzel sticks is to place them in a preheated oven at 350°F (175°C) for 5-10 minutes until warmed through.

    5. Can I use a different type of salt?

    Yes! While coarse sea salt is recommended for that authentic pretzel flavor, you can substitute it with kosher salt or flaky sea salt to taste.

    6. How can I keep the pretzel sticks soft?

    To keep your pretzel sticks soft during storage, avoid refrigerating them if possible and store them in an airtight container at room temperature. Reheating in the oven will also help regain their original softness.

    7. How long can I store the pretzel sticks?

    If stored properly, pretzel sticks can last 1-2 days at room temperature or can be frozen for up to 3 months.

    With these FAQs answered, you can confidently make and enjoy your Tasty German Soft Pretzel Sticks, knowing that you have all the information you need at your fingertips. Happy baking!

  • Easy Oreo Banana Bread

    Easy Oreo Banana Bread

    Easy Oreo Banana Bread: A Tropical Delight

    Introduction to Easy Oreo Banana Bread

    Banana bread is a classic favorite among home bakers, and this Easy Oreo Banana Bread takes the traditional recipe to new heights! Picture this: the moist, flavor-packed warmth of banana bread harmoniously entwined with the rich, chocolatey goodness of Oreo cookies. This delightful treat is perfect for just about anyone—from busy parents looking for a quick recipe to students needing a late-night snack. This banana bread recipe not only satisfies your sweet tooth but also encourages you to use up those overripe bananas sitting in your kitchen.

    What makes this recipe stand out? First of all, it’s incredibly simple to make! With minimal ingredients and straightforward steps, you’ll spend less time in the kitchen and more time enjoying the delicious results. Whether you follow a vegan or gluten-free diet, or you’re simply watching your calorie intake, this banana bread recipe includes options for everyone. Plus, the health benefits of bananas are hard to overlook—they provide potassium, vitamin C, and fiber, making this dessert a slightly healthier alternative compared to traditional sweets. So, arise your culinary creativity and let’s dive into this delectable Easy Oreo Banana Bread recipe that promises to be a hit on any occasion!

    Benefits and Advantages of Easy Oreo Banana Bread

    Why should you choose this Easy Oreo Banana Bread recipe? Here are some compelling reasons:

    1. Ease of Preparation: This banana bread recipe is designed for simplicity. With just a handful of ingredients, you’ll be whipping up this flavorful treat in no time. Ideal for busy schedules, it requires minimal prep time, so you can pop it in the oven and attend to other tasks while it bakes.

    2. Nutritional Benefits: Bananas are loaded with essential nutrients, and when combined with Oreos, they create a delightful balance of flavors. Bananas contribute dietary fiber that aids digestion, potassium that helps in muscle function, and vitamins that boost your health. Moreover, by opting for lighter options like sugar substitutes or low-fat butter, you can make this recipe even healthier!

    3. Versatile for Dietary Needs: With its adaptability, this banana bread recipe caters to various diets. Whether you’re looking for a vegan option, gluten-free alternative, or a low-calorie version, the recipe allows for flexibility without compromising taste. You can easily swap traditional ingredients for alternatives, ensuring that everyone can enjoy a slice.

    4. Kid-Friendly Delight: This recipe is not only perfect for adults but also a hit among kids. The fun chocolatey crunch of Oreos mixed into the softness of banana bread creates a delightful texture that young chocolate enthusiasts will love. Whether for an after-school snack or a birthday party treat, this banana bread is bound to please.

    5. Customization Options: Make your Easy Oreo Banana Bread uniquely yours! Whether you’d like to add nuts, swap the Oreos for another cookie flavor, or even mix in some delicious toppings like chocolate chips or coconut flakes, the possibilities are endless. Get creative and tailor it to your taste preferences!

    In summary, this Easy Oreo Banana Bread is not just a recipe but an experience—combining simple preparation, nutritional benefits, and dietary versatility ensures that everyone can indulge without a hint of guilt.

    Ingredients Overview

    Essential Ingredients for Easy Oreo Banana Bread

    To whip up this delightful Easy Oreo Banana Bread, gather the following ingredients:

    • 3 Ripe Bananas (mashed): Provides natural sweetness and moisture.
    • 1/3 Cup Melted Butter: For richness. You can substitute with coconut oil for a dairy-free option.
    • 1/2 Cup Granulated Sugar: Sweetens the bread—consider using coconut sugar or a sugar substitute for a healthier option.
    • 1/2 Cup Brown Sugar: Adds depth of flavor. You can use just granulated sugar if preferred.
    • 1 Egg (beaten): Helps bind the ingredients. For vegan options, substitute with 1/4 cup unsweetened applesauce.
    • 1 Teaspoon Vanilla Extract: For extra flavor.
    • 1 Teaspoon Baking Soda: Leavening agent to make the bread rise.
    • 1/2 Teaspoon Salt: Balances sweetness.
    • 1 1/2 Cups Crushed Oreo Cookies: The star ingredient for our chocolatey twist. For gluten-free alternatives, use gluten-free Oreos.
    • 1/2 Cup Chopped Nuts (optional): Adds a nice crunch. Pecans or walnuts work wonderfully.

    Dietary Substitutions to Customize Your Easy Oreo Banana Bread

    This recipe is flexible! Here are some substitutions to consider based on your dietary needs:

    • Vegan Options: Substitute the egg with 1/4 cup of applesauce or create a flax egg using 1 tablespoon of flaxseed meal mixed with 2.5 tablespoons of water. This keeps the moisture intact while ensuring a vegan-friendly result.

    • Gluten-Free Alternatives: Use gluten-free all-purpose flour instead of regular flour for those avoiding gluten. Just ensure the Oreos you’re using are gluten-free as well.

    • Low-Calorie Swaps: To cut back on calories, consider using Greek yogurt in place of butter, or opt for a sugar substitute like Stevia or monk fruit sweetener to reduce the sugar content without sacrificing flavor.

    • Nut-Free Option: If you’re allergic to nuts, simply omit the chopped nuts or replace them with seeds like sunflower or pumpkin seeds.

    Embracing customization not only allows you to accommodate different dietary needs but also encourages creativity in baking!

    How to Prepare the Perfect Easy Oreo Banana Bread: Step-by-Step Guide

    Ready to bake your own Easy Oreo Banana Bread? Follow this step-by-step guide to ensure that you get it just right.

    1. Preheat the Oven: Preheat your oven to 350°F (175°C). This step is crucial as it ensures the bread bakes evenly.

    2. Prepare Your Baking Pan: Grease a 9×5-inch loaf pan with butter or non-stick spray. For a cleaner release, line the pan with parchment paper, letting it hang over the sides for easy removal later.

    3. Combine Wet Ingredients: In a large mixing bowl, mash the ripe bananas until smooth. Stir in the melted butter until well incorporated.

    4. Add Sugar and Egg: Mix in the granulated sugar and brown sugar until blended. Next, add the beaten egg and vanilla extract, stirring until combined.

    5. Incorporate Dry Ingredients: Sprinkle the baking soda and salt over the mixture. Stir gently to combine. Avoid overmixing to keep your banana bread tender.

    6. Fold in Oreo Cookies: Gently fold in the crushed Oreo cookies, ensuring they’re evenly distributed throughout the batter. This step infuses the chocolatey flavor throughout the loaf.

    7. Pour into Baking Pan: Transfer the batter into your prepared loaf pan, smoothing the top with a spatula for even baking.

    8. Bake the Banana Bread: Place the pan in the preheated oven and bake for 55-60 minutes. Keep an eye on it; you may want to check for doneness a few minutes early by inserting a toothpick in the center. If it comes out clean or with just a few crumbs, it’s ready.

    9. Cool: Once baked, remove the bread from the oven and let it cool in the pan for about 10 minutes. Carefully transfer the banana bread to a wire rack to cool completely.

    10. Slice and Enjoy: After cooling, slice your Easy Oreo Banana Bread and serve it warm or at room temperature. Enjoy with a glass of cold milk or a hot cup of coffee!

    Feel free to freeze any leftovers! Wrap them tightly in plastic or aluminum foil, then store them in an airtight container for up to 3 months.

    Mastering Easy Oreo Banana Bread: Advanced Tips and Variations

    To elevate your baking game, consider these advanced tips and variations:

    • Chocolate Drizzle: For an added touch of indulgence, melt some chocolate and drizzle over the cooled banana bread. This extra layer of chocolate adds richness and a beautiful presentation.

    • Nutty Variations: For those who enjoy texture, consider adding crushed nuts, like walnuts or pecans, to the batter along with the Oreos for some added crunch.

    • Mix of Cookies: Don’t limit yourself to Oreos! Experiment with different cookie flavors like chocolate chip, peanut butter, or gluten-free chocolate cookies for a unique twist each time.

    • Add More Bananas: For a more intense banana flavor, consider adding an additional banana or two, finely chopped, to the batter.

    • Spices and Flavors: A dash of cinnamon or nutmeg can add a warm undertone to your Easy Oreo Banana Bread. For a tropical twist, consider adding shredded coconut or pineapple pieces.

    Always remember, experimenting is part of the fun! Don’t hesitate to try new variations that cater to your taste preferences.

    How to Store Easy Oreo Banana Bread: Best Practices

    Storing your Easy Oreo Banana Bread properly ensures it stays delicious for days to come. Here are some effective methods:

    • Room Temperature: If you plan to consume the bread within a few days, simply cover it with plastic wrap or place it in an airtight container. It will stay fresh for about 3 days at room temperature.

    • Refrigeration: For longer storage, consider refrigerating the banana bread. Wrap it tightly in plastic wrap and store it in the fridge for up to a week. This can help to maintain moisture while extending its shelf life.

    • Freezing: Need to store for an even longer period? Freezing is your best option. Wrap the banana bread tightly in plastic wrap, followed by aluminum foil, or place it in a freezer-safe bag. This way, you can freeze it for up to 3 months. When you’re ready to enjoy, thaw it in the refrigerator overnight or at room temperature for a few hours before slicing.

    • Reheating: To enjoy the banana bread warm, you can pop slices in the microwave for about 15-30 seconds or use a toaster oven for an even crispier texture.

    Proper storage ensures your Easy Oreo Banana Bread remains just as delightful as the first day you baked it!

    Nutritional Value of Easy Oreo Banana Bread

    Curious about the nutritional value of your Easy Oreo Banana Bread? Here’s a breakdown based on a standard serving (1 slice):

    • Calories: Approximately 180-230 calories per slice, depending on ingredient substitutions.
    • Protein: 2-4 grams.
    • Fat: 8-10 grams, mainly from butter or oil.
    • Carbohydrates: 30-36 grams, primarily from bananas and sugar.
    • Fiber: 1-2 grams, thanks to the bananas and any nuts added.
    • Sugars: About 15-20 grams, mainly from the sugars and the Oreos.

    These numbers can vary based on dietary substitutions; using less sugar or alternative fats can lower calories and increase fiber.

    This tasty Easy Oreo Banana Bread offers a rewarding mix of satisfaction and nutrition without levying too much on your daily dietary goals. When enjoyed in moderation, your taste buds as well as your health can be happy!

    FAQs: Frequently Asked Questions About Easy Oreo Banana Bread

    Explore some of the most common questions about making Easy Oreo Banana Bread:

    Q1: Can I use frozen bananas for this banana bread recipe?
    Absolutely! Frozen bananas work just as well, as they are often sweeter and easier to mash. Just make sure to thaw them completely and drain any excess water before adding them to the batter.

    Q2: How can I make this recipe gluten-free?
    Use a gluten-free all-purpose flour and gluten-free Oreos in place of regular ingredients. This way, you can enjoy the recipe without concern for gluten.

    Q3: Can I make this banana bread vegan?
    Indeed! Substitute the egg for unsweetened applesauce or a flax egg. Use melted coconut oil instead of butter, and ensure your Oreos are vegan-friendly.

    Q4: How do I know when my banana bread is done?
    Insert a toothpick or knife into the center of the bread; if it comes out clean or with moist crumbs, it’s done baking. If the batter sticks, leave it in for a few more minutes.

    Q5: Can I add other ingredients to my Easy Oreo Banana Bread?
    Of course! Feel free to add nuts, chocolate chips, or spices. Just be mindful not to overmix the batter to preserve its fluffy texture.

    Q6: What’s the best way to store leftovers?
    Wrap the banana bread tightly in plastic wrap and store it at room temperature for up to 3 days. For longer storage, freeze it!

    Q7: How can I make the bread less sweet?
    Reduce the sugar content or omit the brown sugar altogether for a less sweet result. The bananas themselves add natural sweetness.

    With these tips and insights, you’re well on your way to impressing family and friends with your delicious, easy-to-make Easy Oreo Banana Bread. Get baking today, and satisfy those cravings with this delightful recipe!

  • Easy No Knead Cheddar Bread

    Easy No Knead Cheddar Bread

    Easy No Knead Cheddar Bread: A Tropical Delight

    Introduction to Easy No Knead Cheddar Bread

    If you’re searching for easy and delightful dinner recipes that fit into your busy lifestyle, look no further than this Easy No Knead Cheddar Bread. Whether you’re a parent juggling meal prep or a student learning the ropes of cooking, this recipe simplifies bread-making while delivering incredible flavors. You’ll love how the rich, creamy cheddar infuses the dough, creating a cheesy, crusty loaf that complements any meal.

    This no-knead bread is not only simple to prepare, but it is also healthy, as it requires minimal hands-on time and uses wholesome ingredients. For those conscious of their dietary choices, you’ll find options for vegan and gluten-free adaptations, making it suitable for a wide range of taste preferences. Imagine enjoying freshly baked, warm bread straight from the oven, filled with melted cheddar goodness—perfect for teaming up with soups, salads, or as an impressive starter for dinner parties.

    In summary, Easy No Knead Cheddar Bread is a versatile and delicious option, effortlessly enhancing your culinary repertoire without demanding complex techniques or hours in the kitchen. With this straightforward recipe, you can wow your family and friends, no matter how busy life gets.

    Benefits and Advantages of Easy No Knead Cheddar Bread

    One of the main benefits of creating Easy No Knead Cheddar Bread is its simplicity. With minimal ingredients and no requirement for kneading, even novice cooks can achieve excellent results. In just a few steps, you can produce a decadent loaf that tantalizes the taste buds and elevates your meal. This accessibility makes it a standout choice among dinner recipes for busy individuals or families.

    Moreover, the use of cheddar cheese enhances not only the flavor but also the nutritional aspect of the bread. Cheese is recognized for being rich in calcium and protein, and these nutrients contribute to bone health and muscle maintenance. Using high-quality ingredients ensures that your bread is not only delicious but also a good source of nutrition—perfect for health-conscious individuals or families aiming to improve their eating habits.

    Another significant advantage is the flexibility of this no-knead recipe. With suggestions for substitutions to keep it vegan, gluten-free, or low-calorie, it easily caters to diverse dietary needs. Plus, it allows you to get creative with additional ingredients; consider adding herbs, spices, or different types of cheese to personalize each loaf.

    Lastly, the low-effort nature of this recipe aligns beautifully with today’s fast-paced world. You can mix your ingredients, let them rise, and focus on other tasks while the bread bakes in the oven. Who wouldn’t love the aroma of fresh bread wafting through the house without all the hassle? Easy No Knead Cheddar Bread is more than just a recipe; it’s a solution for enjoying home baking without the usual stress.

    Ingredients Overview

    Essential Ingredients for Easy No Knead Cheddar Bread

    Creating the delectable Easy No Knead Cheddar Bread calls for a handful of simple ingredients, each thoughtfully chosen for its role in the recipe. Below is the detailed list along with precise measurements and explanations of their functions:

    • 3 cups all-purpose flour: The main ingredient that provides the dough’s structure.
    • 1.5 teaspoons salt: Enhances flavor and strengthens the gluten structure, promoting a better rise.
    • 1 teaspoon sugar: Aids in activating yeast and improves browning for a lovely crust.
    • 2 teaspoons instant yeast: This helps the bread rise without the need for kneading. You can also use rapid-rise yeast for quicker results.
    • 1.5 cups warm water (about 110°F): Activates the yeast and hydrates the flour, contributing to a soft, pliable dough.
    • 1.5 cups sharp cheddar cheese, shredded: Adds a rich flavor profile and moisture to the bread. For a vegan-friendly option, substitute dairy-free cheese.
    • Optional: 1 tablespoon dried herbs (such as rosemary or thyme): Customize the flavor by incorporating your favorite herbs.

    Dietary Options:

    • Vegan: Substitute cheddar cheese with a plant-based version.
    • Gluten-Free: Use a gluten-free all-purpose flour blend designed for baking; ensure other ingredients (especially yeast) are certified gluten-free.
    • Low-Calorie: Use reduced-fat cheddar or swap half of the cheese with steamed vegetables for a nutritious twist.

    Dietary Substitutions to Customize Your Easy No Knead Cheddar Bread

    Customization is straightforward with the Easy No Knead Cheddar Bread recipe, allowing you to cater to various dietary needs without sacrificing flavor. Here are some substitutions based on common dietary considerations:

    • Dairy-Free: Utilize non-dairy milk alternatives in place of warm water for a milk bread effect. Opt for nutritional yeast if cheese is not preferred, providing a cheesy flavor without dairy.

    • Gluten-Free: In addition to utilizing a gluten-free flour mix, include a tablespoon of xanthan gum to mimic the elasticity that gluten provides.

    • Low-Carb/Keto: Choose almond flour or coconut flour, recalibrating the liquid quantities accordingly, to create a low-carb version of this bread.

    Experimenting with these substitutions broadens the appeal of this recipe, allowing everyone to join in on the enjoyment of freshly baked bread.

    How to Prepare the Perfect Easy No Knead Cheddar Bread: Step-by-Step Guide

    Baking the perfect Easy No Knead Cheddar Bread is as simple as following these easy steps. Each step ensures you create a delicious loaf while highlighting how adaptive this recipe can be for any dietary needs.

    1. Prepare the Base: In a large mixing bowl, combine the 3 cups of all-purpose flour, 1.5 teaspoons of salt, 1 teaspoon of sugar, and 2 teaspoons of instant yeast. Tip: Use a whisk or spatula to incorporate them evenly.

    2. Mix Ingredients: Gradually pour in 1.5 cups of warm water while stirring with a wooden spoon or your hands until the mixture forms a shaggy dough. This dough should not be kneaded.

    3. Add Cheddar: Fold in 1.5 cups of shredded sharp cheddar cheese until evenly distributed throughout the dough. For variations, consider adding dried herbs or spices at this point.

    4. Cover and Rest: Cover the bowl with a clean kitchen towel or plastic wrap. Allow the dough to rest at room temperature for 12 to 18 hours. This slow fermentation creates a more complex flavor, and the dough will double in size.

    5. Preheat the Oven: About 30 minutes before baking, preheat your oven to 450°F (232°C). Place a Dutch oven or heavy pot (with a lid) inside to heat up.

    6. Shape the Dough: Once the dough has risen, scrape it out onto a floured surface. Use a bench scraper or your hands to form it into a round shape, being careful not to deflate it too much.

    7. Prepare for Baking: Carefully remove your hot pot from the oven. Gently place the dough inside. Tip: You can sprinkle a bit of flour on the bottom of the pot to prevent sticking.

    8. Cover and Bake: Place the lid on the Dutch oven and bake for 30 minutes. This will trap steam in, creating a lovely crust.

    9. Uncover and Brown: After 30 minutes, remove the lid and bake for an additional 15-20 minutes until the top turns golden brown and crispy.

    10. Cool: Once baked, carefully remove the bread from the pot and let it cool on a wire rack for at least 30 minutes before slicing. This ensures the inside finishes setting.

    This method aptly demonstrates how straightforward and adaptable this Easy No Knead Cheddar Bread recipe is, enhancing any meal with minimal effort. Experiment with different flavor profiles or methods, ensuring you have a favorite variation of this delightful recipe!

    Mastering Easy No Knead Cheddar Bread: Advanced Tips and Variations

    To elevate your bread-making game even further, consider these advanced tips and variations for your Easy No Knead Cheddar Bread:

    1. Incorporate Flavored Oils: Experiment with infusing olive oil with garlic or rosemary before mixing it into your dough for an aromatic kick.

    2. Double Cheese Delight: Try using a combination of cheeses, such as a mix of cheddar and gouda, for a more complex flavor.

    3. Herb-Infused Bread: Add fresh herbs such as rosemary, parsley, or basil to the dough for an aromatic lift that can complement any meal—pair it with your favorite dinner recipes.

    4. Baking on a Pizza Stone: For an extra-crispy crust, place the dough on a preheated pizza stone instead of a pot. Just be sure to sprinkle cornmeal to prevent sticking.

    5. Toppings: Before baking, sprinkle the top with seeds (such as sesame or poppy seeds) for added texture and nutritional value.

    Each of these variations showcases the adaptability of the Easy No Knead Cheddar Bread recipe, inviting creativity and personal touch into your kitchen. Enjoy exploring flavors and techniques that best suit your taste buds!

    How to Store Easy No Knead Cheddar Bread: Best Practices

    To ensure your Easy No Knead Cheddar Bread remains delicious for days, it’s essential to store it properly. Here are the best practices for refrigeration and freezing:

    1. Room Temperature Storage: Place the cooled bread in a paper bag or a breadbasket lined with a clean kitchen towel. This prevents moisture loss while keeping the crust from getting stale. Avoid plastic bags as they can make the crust soft.

    2. Refrigeration: If you anticipate not consuming the bread within a few days, refrigerate it in an airtight container. This can help prolong its freshness, although refrigeration may slightly affect the texture.

    3. Freezing: For long-term storage, slice the bread and wrap each piece tightly in plastic wrap followed by aluminum foil to prevent freezer burn. When done correctly, it can last for up to three months. To reheat, thaw in the refrigerator overnight and then toast or warm in the oven at 350°F (175°C) until heated through.

    4. Reheating: To enjoy the bread as if it was fresh out of the oven, reheat in the oven or toaster oven for a few minutes to revive its crusty exterior.

    By following these storage methods, you can keep your Easy No Knead Cheddar Bread at its peak quality, ready to accompany your next dinner recipe seamlessly!

    Nutritional Value of Easy No Knead Cheddar Bread

    Understanding the nutritional value of your Easy No Knead Cheddar Bread makes it easier to fit this delicious option into your overall diet. Here is a breakdown based on a typical serving size of one slice (1/12 of the loaf):

    • Calories: Approximately 180
    • Total Fat: 7g
    • Saturated Fat: 4g
    • Cholesterol: 20mg
    • Sodium: 300mg
    • Total Carbohydrates: 25g
    • Dietary Fiber: 1g
    • Sugars: 1g
    • Protein: 6g

    Health Benefits

    • The combination of cheese and flour provides a good source of protein essential for muscle maintenance.
    • Including fiber in your diet (often enhanced with whole-wheat flour) can aid in digestive health.

    By adjusting the ingredients, it’s possible to create a healthier version of this bread to align with your dietary needs. For example, using whole wheat and reduced-fat cheese will enhance the fiber content while lowering calories and fats.

    Incorporating this comfort food into your meal plans can be both enjoyable and nutritious, so there’s no harm in treating yourself with this delightful bread!

    FAQs: Frequently Asked Questions About Easy No Knead Cheddar Bread

    Here are some common queries regarding Easy No Knead Cheddar Bread, along with clear answers to guide your bread-making experience:

    1. Can I make this bread without cheese?

    Yes! You can omit the cheese entirely to make a plain no-knead bread that pairs well with soups and salads or use nutritional yeast for a cheesy flavor without dairy.

    2. How can I adapt this recipe for vegan diets?

    For a vegan version, simply replace the cheddar cheese with a plant-based alternative and ensure that no animal-based ingredients are used.

    3. My bread is too dense; what went wrong?

    If your bread is dense, it could be due to insufficient rising time or an error in measuring flour. Always measure flour accurately and allow the dough to rise adequately.

    4. How can I enhance the flavor of my bread?

    Incorporating fresh herbs, spices, or even garlic powder into the dough can provide an aromatic flavor. Different types of cheese also introduce unique tastes.

    5. Can I freeze the bread?

    Certainly! Be sure to cool the bread completely, slice it, and wrap it tightly before placing it in the freezer. Thaw and reheat as needed for best results!

    6. How long will the bread last?

    At room temperature, it lasts for about 2-3 days, while refrigerated it can last for up to a week, and freezing extends its freshness for up to three months.

    This FAQ section aims to address common concerns and enable a smooth baking experience for anyone trying the Easy No Knead Cheddar Bread recipe. Happy baking!


    This comprehensive guide covers all your bases for making Easy No Knead Cheddar Bread a staple in your cooking repertoire. With its health-conscious ingredients and user-friendly steps, this recipe ensures delightful, fresh bread can easily fit into your everyday meals, complementing both family dinners and quiet evenings at home. Whether you’re a novice or an experienced baker, you can enjoy this simple, flavorful addition to your menu while impressing loved ones with your culinary prowess.

  • Cozy Garlic Bread Grilled Cheese

    Cozy Garlic Bread Grilled Cheese

    Cozy Garlic Bread Grilled Cheese: A Tropical Delight

    Introduction to Cozy Garlic Bread Grilled Cheese

    When you’re searching for easy dinner recipes, look no further than this Cozy Garlic Bread Grilled Cheese. This delightful dish combines the warmth of a classic grilled cheese with the robust flavor of garlic bread, creating a satisfying meal that is both comforting and indulgent. This recipe is perfect for home cooks looking to impress their families or anyone who craves a quick, delicious option after a long day. Its simplicity doesn’t compromise quality; instead, it makes cooking joyful, whether you’re a novice or an experienced chef.

    Garlic Bread Grilled Cheese is not just about flavor; it offers several health benefits as well. By using whole grain bread and a moderate amount of cheese, you create a dish rich in nutrients, including fiber and protein. For those following specific dietary needs—be it vegan, gluten-free, or low-calorie—this recipe can be easily adjusted without sacrificing taste.

    With its inviting aroma and golden crust, Cozy Garlic Bread Grilled Cheese is suitable for anyone. Busy parents can whip it up for dinner in no time, while college students can enjoy a nourishing meal that’s quick to prepare. Additionally, its versatility makes it a welcome addition for food enthusiasts wanting to explore new flavors, seniors who appreciate simple yet satisfying meals, and couples who desire a romantic meal without the fuss. Your taste buds will thank you for giving this recipe a try!

    Benefits and Advantages of Cozy Garlic Bread Grilled Cheese

    One of the best things about this easy dinner recipe is its uncomplicated preparation. With minimal ingredients, you don’t need to spend hours in the kitchen. This cozy dish can be made in less than 20 minutes, making it an excellent choice for busy weeknights or spontaneous gatherings with friends.

    From a health perspective, Cozy Garlic Bread Grilled Cheese can be made with nutritious ingredients. Opting for whole grain or gluten-free bread adds fiber to your meal, while choosing reduced-fat cheese can result in a lower-calorie version that’s still incredibly satisfying. Garlic also offers numerous health benefits, including its antioxidant properties and ability to improve immunity.

    Moreover, this recipe stands out because of its adaptability. You can easily modify it to suit dietary preferences or restrictions, ensuring that everyone at the table can enjoy it. Whether you’re a vegan substitute cheese for dairy or seeking gluten-free options, the possibilities are endless. Adding in vegetables like spinach, tomatoes, or avocados can also increase its nutritional value while introducing exciting flavors.

    In summary, the Cozy Garlic Bread Grilled Cheese is a fantastic choice for an easy dinner option that not only meets your culinary needs but also indulges your cravings. Its simplicity, health benefits, and versatility make it a dish you can feel good about serving to anyone.

    Ingredients Overview

    Essential Ingredients for Cozy Garlic Bread Grilled Cheese

    To prepare this mouthwatering dish, gather the following ingredients:

    • Bread (4 slices):
      Use whole grain or gluten-free bread for healthier options. This provides the perfect crispy base.

    • Butter (2 tablespoons):
      For that classic grilled cheese taste. You can opt for vegan butter if you’d like a dairy-free version.

    • Garlic powder (1 teaspoon):
      Adds that essential garlic flavor. Fresh garlic can be used as a substitute for a stronger taste.

    • Cheese (4 slices or 1 cup shredded):
      Cheddar or mozzarella work well here, but feel free to substitute with vegan cheese for a dairy-free meal.

    • Optional Add-ins:

    • Spinach or arugula (a handful) for added nutrients.
    • Sliced tomatoes (1-2) for a refreshing twist.
    • Avocado (half) for creaminess and healthy fats.

    By utilizing these ingredients, you’re able to craft a tantalizing and comforting grilled cheese sandwich that appeals to multiple dietary needs.

    Dietary Substitutions to Customize Your Cozy Garlic Bread Grilled Cheese

    • Vegan Option:
      Choose plant-based cheese and use vegan butter for the bread. You can enhance the recipe with nutritional yeast to give an extra cheesy flavor.

    • Gluten-Free Option:
      Opt for gluten-free bread varieties available on the market. This allows those with gluten sensitivities to enjoy this delightful dish without worry.

    • Low-Calorie Option:
      Replace regular cheese with low-fat cheese and use less butter. You can also load up on veggies for more volume without adding calories.

    • Nut-Free Option:
      Ensure you select cheese that doesn’t contain nut-based ingredients and avoid using any nut-based spreads.

    These substitutions ensure everyone can enjoy Cozy Garlic Bread Grilled Cheese, regardless of dietary restrictions or preferences.

    How to Prepare the Perfect Cozy Garlic Bread Grilled Cheese: Step-by-Step Guide

    Ready to indulge in some cozy goodness? Here’s how to prepare a perfect Cozy Garlic Bread Grilled Cheese in just a few simple steps:

    1. Prepare the Bread:
      Start by laying out four slices of your chosen bread on a clean surface.

    2. Mix Garlic Butter:
      In a small bowl, combine the softened butter with the garlic powder. Mix thoroughly until well blended.

    3. Spread Garlic Mixture:
      Evenly spread the garlic butter mix onto one side of each slice of bread. This gives your grilled cheese that iconic garlic bread flavor.

    4. Assemble the Sandwich:
      On the unbuttered side of two slices, layer your cheese. If using add-ins (such as spinach or tomatoes), place them on top of the cheese before placing another slice of bread on top.

    5. Heat the Pan:
      Preheat a skillet over medium heat. Allow it to warm up for a minute.

    6. Place the Sandwich:
      Carefully lay the assembled sandwiches in the skillet, buttered side down. Cook for about 2-4 minutes until the bread turns golden brown.

    7. Flip Carefully:
      Using a spatula, gently flip the sandwiches over. Toast the other side for an additional 2-4 minutes or until it reaches your desired doneness.

    8. Check the Cheese:
      Once both sides are golden and crispy, and the cheese is melted, remove the sandwiches from the skillet.

    9. Serve with a Twist:
      Slice the Cozy Garlic Bread Grilled Cheese in half and serve hot. Consider pairing it with a warm bowl of tomato soup for a classic combo.

    10. Garnish (Optional):
      Sprinkle fresh herbs or a pinch of additional garlic powder to amp up the flavors even more.

    By following these steps, you can enjoy an easy dinner recipe that brings comfort and satisfaction with every bite!

    Mastering Cozy Garlic Bread Grilled Cheese: Advanced Tips and Variations

    To elevate your Cozy Garlic Bread Grilled Cheese experience, keep a few advanced tips in mind:

    • Use Different Cheeses:
      Explore combining different cheese varieties such as Gouda, pepper jack, or feta for a unique flavor profile.

    • Experiment with Breads:
      Try brioche, sourdough, or ciabatta for a twist on the traditional grilled cheese. Each type of bread gives a different texture and flavor.

    • Add Herbs and Spices:
      Incorporating herbs such as basil, oregano, or crushed red pepper flakes can enhance the taste.

    • Flavor Infused Butters:
      Create compound butters with herbs or chili flakes. These can add depth to your sandwiches that elevate them beyond the ordinary.

    • Change the Cooking Method:
      While skillet cooking is traditional, consider using a panini press or even baking the sandwiches in the oven for a hands-off approach.

    These tips will allow you to master your cozy garlic bread grilled cheese and make each meal a new experience.

    How to Store Cozy Garlic Bread Grilled Cheese: Best Practices

    If you find yourself with leftovers, or if you want to prep ahead of time, here are the best storage practices:

    Refrigeration:

    • Allow the grilled cheese to cool completely before placing it in an airtight container. It can stay fresh in the fridge for up to 3 days.

    Freezing:

    • For longer storage, wrap each sandwich individually in plastic wrap or aluminum foil, then place them in a freezer bag or container. They can be stored in the freezer for up to a month.

    Reheating:

    • To reheat, simply place the sandwich in a skillet over medium heat until warmed through and crispy again. Alternatively, you can pop it in the toaster oven for a few minutes. Avoid microwave reheating as it can result in a soggy sandwich.

    By following these storage methods, your Cozy Garlic Bread Grilled Cheese remains delightful, ensuring you can enjoy this easy dinner recipe any day of the week!

    Nutritional Value of Cozy Garlic Bread Grilled Cheese

    Understanding the nutritional value of your meal is essential for health-conscious individuals. Here’s a rough breakdown of the nutritional content for a serving of Cozy Garlic Bread Grilled Cheese using standard ingredients:

    • Calories: Approximately 350-450 (may vary based on ingredients used)
    • Fat: 18g (with options for reduced fat depending on cheese and butter choices)
    • Saturated Fat: 10g
    • Carbohydrates: 30-40g
    • Fiber: 3g
    • Protein: 15g
    • Vitamins and Minerals: Including calcium (from the cheese) and iron (from whole grain bread)

    Always adjust these numbers based on the specific brands and ingredients you choose for your grilled cheese. The recipe can be tailored to meet different dietary goals, making it a versatile option for those focusing on nutrition.

    FAQs: Frequently Asked Questions About Cozy Garlic Bread Grilled Cheese

    1. Can I use any type of cheese?
    Yes, you can use a variety of cheeses! Popular choices include cheddar, mozzarella, gouda, or even vegan cheese for dairy-free options.

    2. How can I make this gluten-free?
    Simply substitute regular bread with gluten-free bread that suits your taste.

    3. Is it possible to make this dish in advance?
    Absolutely! You can prepare the sandwiches and refrigerate them before cooking. Just heat them in the skillet when you’re ready to eat.

    4. What can I serve with Cozy Garlic Bread Grilled Cheese?
    Pair it with tomato soup, a crispy salad, or any of your favorite dips to complement the grilled cheese.

    5. Is it suitable for children?
    Yes! Kids typically love the cheesy, crispy goodness of this dish. You can also sneak in some veggies for added nutrition.

    By addressing these common questions, you’ll feel more confident in preparing and enjoying your Cozy Garlic Bread Grilled Cheese. Now that you are equipped with all this information, it’s time to gather those ingredients and get cooking. Enjoy your meal!

  • The Best Blueberry Muffin Bread Recipe

    The Best Blueberry Muffin Bread Recipe

    The Best Blueberry Muffin Bread Recipe: A Tropical Delight

    Introduction to The Best Blueberry Muffin Bread Recipe

    Welcome to a delightful culinary experience that merges the comfort of home baking with the nutritious goodness of fresh blueberries! This Blueberry Muffin Bread is not just another loaf; it’s an extraordinary take on traditional blueberry muffins, bringing forth a moist, fluffy texture that is simply irresistible. With its genius combination of flavors and health benefits, it serves as one of the best breakfast ideas any busy parent or student can rely upon for making mornings easier and more delicious.

    This recipe is not only easy to follow but also customizable to suit various dietary needs, including vegan and gluten-free options. It’s perfect for everyone—from working professionals needing a quick grab-and-go meal to baking enthusiasts who wish to experiment in their kitchens. This blueberry muffin bread encapsulates the essence of wholesome ingredients while ensuring you won’t compromise on taste. So, grab your apron! Let this recipe inspire your cooking adventures and become a staple in your breakfast rotation.

    Benefits and Advantages of The Best Blueberry Muffin Bread Recipe

    In a world where quick and healthy breakfast ideas are a rarity, our Blueberry Muffin Bread stands out due to its multitude of benefits. First and foremost, the simplicity of preparation is a breath of fresh air; with just one bowl, minimal effort, and about 10 simple ingredients, you can whip up this delightful bread in no time. It’s ideal for busy individuals or families looking for a nutritious breakfast solution without the hassle of overly complex procedures.

    Health is another core aspect of this recipe. Blueberries are packed with antioxidants, vitamins, and smart carbs that promote heart health and lower blood pressure. By incorporating whole-grain flour options or gluten-free alternatives, you can create a loaf that is not only delicious but also conducive to health-conscious lifestyles. You can even opt for reduced-sugar or natural sweetener alternatives to make this treat even more aligned with your dietary preferences.

    What really makes this blueberry muffin bread shine is the versatility it offers. You could slice it for an on-the-go breakfast, toast it for an afternoon snack, or even serve it warm with a smear of almond butter for a wholesome treat. This recipe serves as a canvas, allowing you to add your unique twist, whether by including nuts, seeds, or even a sprinkle of cinnamon or lemon zest. Indeed, it’s an excellent choice for anyone looking to elevate their morning meal options!

    Ingredients Overview

    Essential Ingredients for The Best Blueberry Muffin Bread Recipe

    Here’s the full list of ingredients you’ll need to create the best blueberry muffin bread. Each ingredient serves its purpose and adds to the flavor profile, nutritional content, and overall joinability of the final product:

    • 2 cups all-purpose flour or whole wheat flour (for a healthier option)
    • 1 cup sugar or ½ cup honey (for a natural sweetener option)
    • 1 tablespoon baking powder
    • ½ teaspoon baking soda
    • ½ teaspoon salt
    • 1 cup buttermilk or plant-based milk (like almond or oat milk for vegan options)
    • ½ cup unsalted butter, melted or coconut oil (for dairy-free)
    • 2 large eggs, or flax eggs (1 tablespoon ground flaxseed mixed with 3 tablespoons water for vegan adaptation)
    • 1 teaspoon vanilla extract
    • 2 cups fresh blueberries (or frozen ones if fresh are unavailable)

    This collection of ingredients harmonizes beautifully, creating a balance between sweet, tangy, and healthy, providing a guilt-free option for your breakfast ideas.

    Dietary Substitutions to Customize Your The Best Blueberry Muffin Bread Recipe

    The beauty of this blueberry muffin bread lies in its adaptability to suit various dietary restrictions. Here are some suggested substitutions to ensure your recipe meets your loved ones’ needs:

    • Gluten-Free: Substitute all-purpose flour with gluten-free flour blends or almond flour. Ensure that your baking powder is gluten-free as well.
    • Vegan: Replace eggs with flax eggs (1 tablespoon ground flaxseed mixed with 3 tablespoons water per egg) and use plant-based milk. Coconut oil can be a great butter substitute here.
    • Lower Sugar: Reduce sugar content by utilizing ripe bananas or unsweetened applesauce to sweeten naturally. You can also use stevia or erythritol for a low-calorie sweetener.
    • Healthier Fats: Instead of butter, using unsweetened applesauce or Greek yogurt can also lower the calorie count while maintaining moisture.
    • Additives: Feel free to incorporate nuts (like walnuts or pecans), seeds (chia or hemp), or spices (cinnamon or nutmeg) to enhance flavor while also boosting nutritional content.

    By making these simple ingredient swaps, you can create a blueberry muffin bread tailored perfectly to fit a variety of palates and dietary desires.

    How to Prepare the Perfect The Best Blueberry Muffin Bread Recipe: Step-by-Step Guide

    Crafting your Blueberry Muffin Bread is straightforward and enjoyable. Follow this step-by-step guide for an effortless baking experience. Not only will you enjoy the fruits of your labor, but your creativity in the kitchen will shine through!

    1. Preheat Your Oven:

    Begin by preheating your oven to 350°F (175°C). This ensures even baking, so your bread rises perfectly.

    2. Prepare the Pan:

    Grease a 9×5-inch loaf pan with butter or cooking spray to prevent the bread from sticking, or line it with parchment paper for easy cleanup.

    3. Mix Dry Ingredients:

    In a large mixing bowl, whisk together the flour, sugar, baking powder, baking soda, and salt until well combined. This step is crucial because it evenly distributes the leavening agents.

    4. Combine Wet Ingredients:

    In another bowl, mix the buttermilk, melted butter, eggs, and vanilla extract. Whisk until smooth. This combination adds moisture and richness to the bread.

    5. Blend the Mixtures:

    Pour the wet ingredients into the bowl with the dry ingredients. Use a spatula to gently fold the mixture together until just combined. Be careful not to overmix; small lumps are acceptable!

    6. Add Blueberries:

    Gently fold in the blueberries. If using frozen ones, there’s no need to thaw them, but dust them with a little flour to prevent sinking.

    7. Transfer to Pan:

    Pour the batter into your prepared loaf pan, smoothing the top lightly with a spatula.

    8. Bake:

    Place the loaf in the oven and bake for 60-70 minutes. Check doneness by inserting a toothpick into the center; it should come out clean.

    9. Cool:

    Once baked, remove the bread from the oven and let it cool in the pan for about 15 minutes. Then, transfer it to a wire rack to cool completely.

    10. Slice and Serve:

    After cooling, slice into thick pieces and serve. Enjoy your blueberry muffin bread fresh or toasted!

    This recipe offers flexibility—feel free to enjoy it straight from the oven or add a layer of nut butter or a drizzle of honey, expanding its repertoire as a versatile part of your breakfast ideas!

    Mastering The Best Blueberry Muffin Bread Recipe: Advanced Tips and Variations

    To elevate your baking experience, consider the following advanced tips and variations:

    Tips for Perfecting Your Muffin Bread:

    • Room Temperature Ingredients: Ensure your eggs and milk are at room temperature. This will help your bread rise better and create a fluffier texture.
    • Do Not Overmix: Keep your mixing to a minimum after combining wet and dry ingredients—this results in a tender loaf.
    • Blueberry Quality: Using high-quality, fresh blueberries boosts the flavor significantly. Look for plump, juicy berries!

    Variations to Try:

    • Zesty Lemon: Add the zest of one lemon to the batter for a refreshing kick.
    • Nutty Add-In: Mix in a cup of chopped nuts, such as walnuts or pecans, for a crunchy texture.
    • Spiced Up: Add a teaspoon of cinnamon or nutmeg to bring warmth to the bread, enhancing its cozy vibe.
    • Chocolate Delight: For a dessert twist, fold in semi-sweet dark chocolate chips with the blueberries.

    These tips and variations transform the basic recipe into endless possibilities, ensuring it remains a favorite for everyone, regardless of dietary preferences!

    How to Store The Best Blueberry Muffin Bread Recipe: Best Practices

    Storing your Blueberry Muffin Bread correctly extends its freshness and flavor, ensuring that every slice retains its deliciousness. Here are some effective methods:

    Refrigeration:

    If you plan to eat your bread within a week, store it at room temperature, wrapped tightly in plastic wrap or aluminum foil to avoid drying. Placing it in an airtight container works well, too.

    Freezing:

    For longer storage, freezing is an excellent option. Wrap the cooled bread tightly in plastic wrap, followed by a layer of aluminum foil, ensuring no air pockets for optimal preservation. It can be stored in the freezer for up to three months. When you’re ready to enjoy it, thaw it in the refrigerator overnight before slicing.

    Reheating:

    To rewarm slices, you can either use a toaster or place them briefly in a microwave. For a warm, crusty edge, pop slices in the oven at low heat for a few minutes.

    Whether you’re preparing breakfast options for kids heading to school or a cozy Sunday brunch, knowing how to store and maintain this blueberry muffin bread ensures that it’s always ready to serve!

    Nutritional Value of The Best Blueberry Muffin Bread Recipe

    Understanding the nutritional profile of your Blueberry Muffin Bread allows you to enjoy it guilt-free. An average slice contains:

    • Calories: 210
    • Total Fat: 7g
    • Saturated Fat: 4g
    • Cholesterol: 30mg
    • Sodium: 200mg
    • Total Carbohydrates: 35g
    • Dietary Fiber: 1g
    • Sugars: 12g
    • Protein: 3g

    This can vary based on the substitutions made, such as using agave nectar in place of sugar or non-dairy milk instead of buttermilk.

    Packed with antioxidants from blueberries, as well as vitamins and minerals, this bread supports a balanced diet while delivering an enjoyable taste. Whether enjoyed as a breakfast idea or an afternoon snack, it fits health and taste effortlessly.

    FAQs: Frequently Asked Questions About The Best Blueberry Muffin Bread Recipe

    1. Can I use frozen blueberries?

    Absolutely! Frozen blueberries are a great alternative. Just toss them in a little flour to help prevent them from sinking while baking.

    2. What can I substitute for eggs if I want a vegan option?

    You can use flax eggs (1 tablespoon ground flaxseed mixed with 3 tablespoons water per egg) as a perfect substitute.

    3. How long will the blueberry muffin bread last?

    At room temperature, the bread will last for about 5-7 days. It can be frozen for up to 3 months.

    4. Is it possible to make this recipe gluten-free?

    Yes! Just replace regular flour with a gluten-free blend. Ensure all other ingredients, like baking powder, are gluten-free as well.

    5. Can I add nuts or other fruits?

    Certainly! Feel free to add chopped nuts, or experiment with different fruits like raspberries or chocolate chips for variety.

    With these FAQs, we hope you have all you need to enjoy this scrumptious blueberry muffin bread to its fullest! Your new favorite recipe for versatile breakfast ideas awaits!