Easy Grilled Shrimp Caesar Wraps Lunch: A Tropical Delight
Introduction to Easy Grilled Shrimp Caesar Wraps Lunch
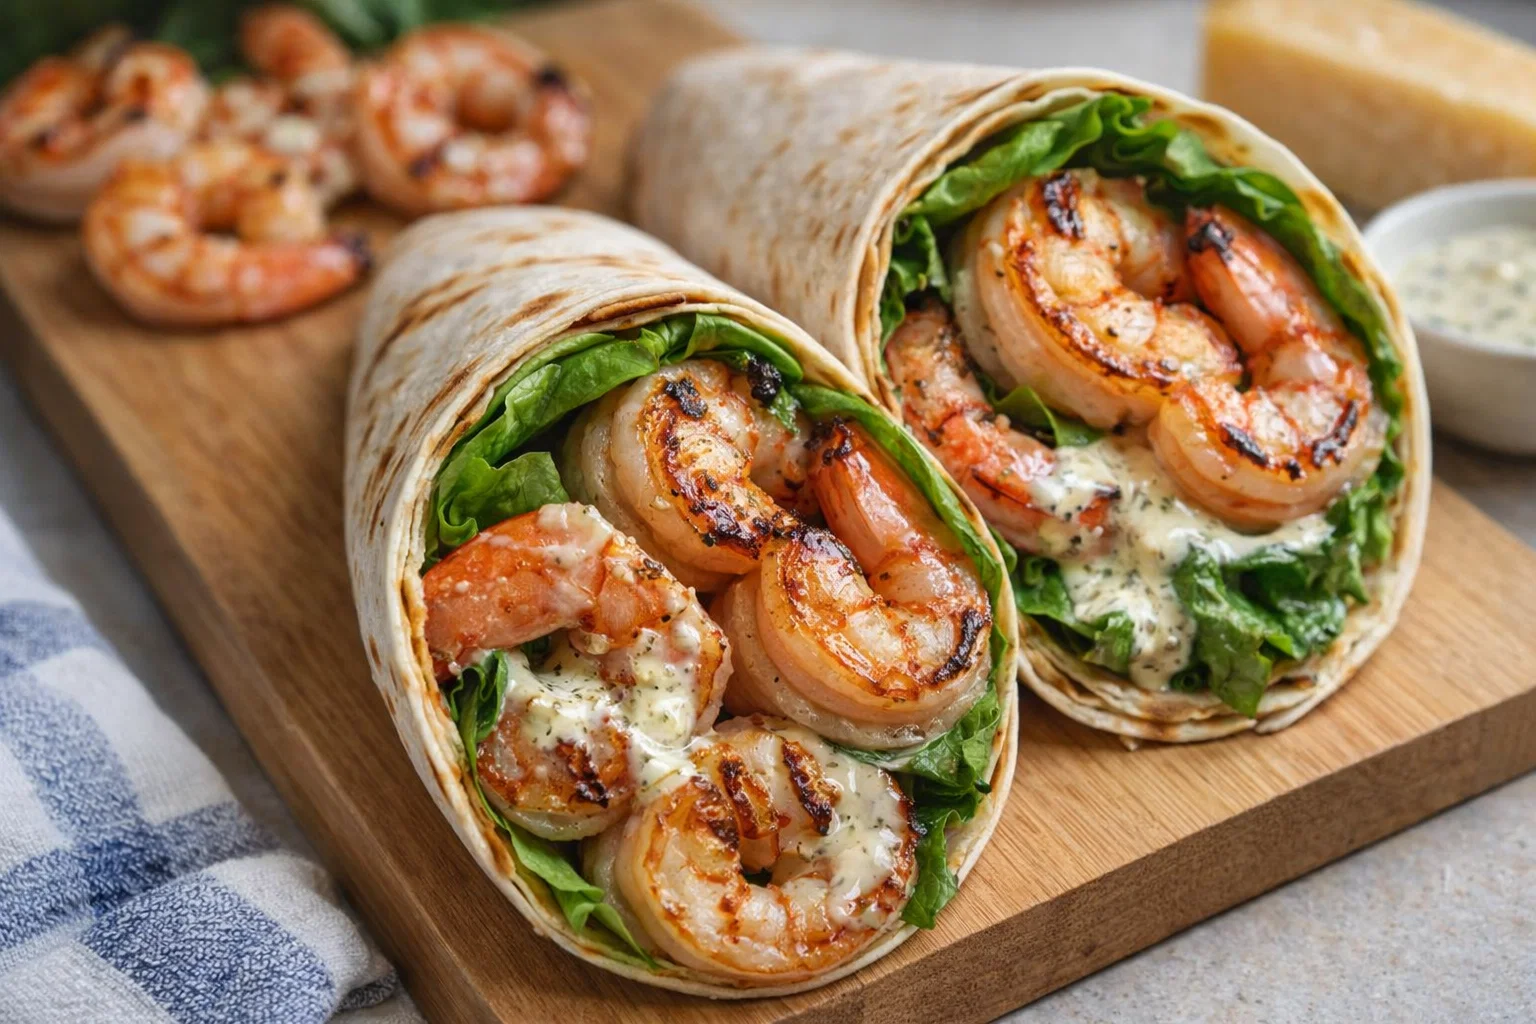
Are you searching for tasty lunch ideas that are not only easy to prepare but also pack a nutritional punch? Look no further than Easy Grilled Shrimp Caesar Wraps! This delightful recipe combines succulent grilled shrimp, crisp romaine lettuce, and creamy Caesar dressing, all wrapped in a soft tortilla. It’s a refreshing and satisfying dish that is perfect for a quick lunch at home or on the go.
What’s more, these wraps can easily cater to various dietary preferences. You can opt for gluten-free tortillas, swap out the shrimp for plant-based protein, or even create a low-calorie version using yogurt-based dressing. The versatility of this recipe is one of its most appealing features!
Imagine enjoying a burst of flavor with every bite while also fueling your body with wholesome ingredients. It’s not just a meal; it’s an experience. Whether you’re a busy parent, a college student, or anyone in search of new lunch ideas, these Easy Grilled Shrimp Caesar Wraps are an excellent way to add a tropical twist to your lunch routine.
Benefits and Advantages of Easy Grilled Shrimp Caesar Wraps Lunch
When it comes to meal planning, the Easy Grilled Shrimp Caesar Wraps shine for several reasons.
-
Simplicity: The preparation requires minimal cooking skills, making it an excellent choice for beginner cooks. You can grill the shrimp on an outdoor grill or a stovetop grill pan, and assemble the wraps in just a few minutes.
-
Health Benefits: Shrimp is rich in high-quality protein and possesses several important vitamins and minerals, including selenium and vitamin B12. Romaine lettuce adds fiber and essential nutrients while being low in calories. This dish leans toward healthy eating without sacrificing flavor.
-
Versatile Options: Besides being suitable for various dietary needs—like making it gluten-free or vegetarian—the wraps can easily accommodate different tastes. By customizing the dressing or adding your favorite veggies, you can create a meal that delights everyone at your table.
-
Meal Prep Friendly: These wraps are perfect for meal prepping. You can prepare the shrimp, chop the vegetables, and make the dressing ahead of time, allowing you to throw the wraps together in seconds during your busy week.
-
Ideal for Various Occasions: Whether you’re inviting friends over, gearing up for a picnic, or looking for healthy lunch ideas for the whole family, these wraps fit the bill perfectly. Their portability makes them a favorite for those who enjoy eating on the go.
With Easy Grilled Shrimp Caesar Wraps, you’ll experience not only a delicious meal but also the satisfaction of knowing you’re making a healthy choice that can be enjoyed any time of year.
Ingredients Overview
Essential Ingredients for Easy Grilled Shrimp Caesar Wraps Lunch
Before diving into the preparation, let’s take a closer look at the ingredients that make these wraps incredibly irresistible:
-
Shrimp (1 pound): Look for peeled, deveined shrimp. For a vegan option, replace shrimp with grilled tofu or chickpeas.
-
Romaine Lettuce (2 cups): Fresh and crunchy, romaine provides texture and nutrients. You can substitute it with spinach for a milder flavor.
-
Tortillas (4 large, gluten-free if necessary): Choose your favorite type, whether whole wheat, spinach, or gluten-free.
-
Caesar Dressing (½ cup): Use store-bought for convenience, or make a healthier homemade version with Greek yogurt as a base.
-
Parmesan Cheese (½ cup, grated): Adds a rich, savory flavor. For a non-dairy option, try nutritional yeast.
-
Olive Oil (2 tablespoons): For grilling the shrimp and adding depth to the dressing.
-
Lemon Juice (1 tablespoon): To give a refreshing zing to the dish.
These ingredients work harmoniously to provide a savory flavor profile while ensuring a nutritious meal that fits various dietary needs.
Dietary Substitutions to Customize Your Easy Grilled Shrimp Caesar Wraps Lunch
Flexibility in cooking allows for creativity, especially when it comes to making substitutions. Here are a few ideas to consider:
-
Shrimp Alternatives: If you’re looking for a vegan-friendly option, swap shrimp for grilled marinated tofu or a blend of chickpeas and vegetables.
-
Tortilla Options: For a lower-carb choice, consider wrapping your Caesar filling in large lettuce leaves instead of tortillas.
-
Dressing Variations: Create a vegan Caesar dressing with cashews blended with garlic, lemon juice, and nutritional yeast. For a lower calorie option, use a mix of Greek yogurt and Dijon mustard.
-
Cheese Substitutes: If you’re dairy-free, use vegan cheese or omit it altogether.
By tailoring these wraps to fit your dietary preferences, you can enjoy them no matter your restrictions.
How to Prepare the Perfect Easy Grilled Shrimp Caesar Wraps Lunch: Step-by-Step Guide
Now that you know the ingredients, let’s dive into the preparation of these succulent wraps. Follow this step-by-step guide to create the ultimate Easy Grilled Shrimp Caesar Wraps:
-
Marinate the Shrimp: In a medium bowl, combine the peeled shrimp with olive oil, lemon juice, salt, and pepper. Let them marinate for at least 15-20 minutes to absorb all the flavors.
-
Preheat the Grill: Prepare your grill to medium-high heat. If you’re using a stovetop grill pan, heat it up on the stove.
-
Grill the Shrimp: Place the marinated shrimp on the grill. Cook for about 2-3 minutes on each side or until they turn pink and opaque. Avoid overcooking to keep them juicy.
-
Prepare the Tortillas: While the shrimp cooks, warm your tortillas slightly on a separate skillet or in the microwave for about 10 seconds, making them easier to roll.
-
Chop the Romaine: Rinse the romaine lettuce thoroughly and chop it into bite-sized pieces.
-
Combine the Ingredients: In a large mixing bowl, combine the grilled shrimp, chopped romaine, Caesar dressing, and grated Parmesan cheese. Toss gently until everything is coated evenly.
-
Assemble the Wraps: Place a generous amount of the shrimp and lettuce mixture onto each tortilla. Fold in the sides and then roll tightly from the bottom up to form a wrap.
-
Cut and Serve: To make it easier to eat, cut the wraps in half diagonally. Serve with extra dressing or a sprinkle of lemon juice if desired.
These wraps can be customized easily! For instance, consider adding diced tomatoes, cucumbers, or avocado for added freshness.
Mastering Easy Grilled Shrimp Caesar Wraps Lunch: Advanced Tips and Variations
While the basic recipe for Easy Grilled Shrimp Caesar Wraps is delicious on its own, consider these advanced tips and variations to elevate your culinary experience:
-
Spice it Up: If you enjoy heat, add some cayenne pepper or chili flakes to your marinade for the shrimp to give your wraps a kick.
-
Add Different Proteins: Besides shrimp, try using grilled chicken or even blackened fish for a different flavor and texture.
-
Experiment with Toppings: Top your wraps with sun-dried tomatoes, avocado slices, or even a light sprinkle of crushed red pepper for extra flavor.
-
Wrap It in a Different Way: Consider using a burrito-style fold for a tighter wrap. Alternatively, consider creating a chilled shrimp salad instead of serving them in tortillas.
-
Flavorful Sides: Pair your wraps with side dishes like steamed vegetables, quinoa salad, or a light couscous to make your meal even more satisfying.
Incorporating these variations not only spices up the original recipe but also allows you to cater to different tastes and preferences.
How to Store Easy Grilled Shrimp Caesar Wraps Lunch: Best Practices
If you intend to make these wraps in advance, proper storage is crucial to maintain freshness and taste:
-
Refrigeration: Wrap each assembled Caesar wrap tightly in plastic wrap or aluminum foil and store them in an airtight container in the fridge. They are best consumed within 2-3 days.
-
Freezing: While the shrimp can be frozen before grilling, it is not recommended to freeze the whole wrapped dish, as lettuce and tortillas can lose their texture. If you want to freeze ingredients for future use, try marinating and freezing the shrimp alone.
-
Reheating: To enjoy if refrigerated, you may warm the wraps slightly in a microwave for about 30 seconds just before eating. However, be aware that heating them may soften the tortilla.
Following these storage tips will ensure that your Easy Grilled Shrimp Caesar Wraps remain delicious, nutritious, and ready for your enjoyment.
Nutritional Value of Easy Grilled Shrimp Caesar Wraps Lunch
As you consider your meal options, understanding the nutritional value is essential, especially for diet-conscious individuals. The estimated nutritional values for one serving (1 wrap) of Easy Grilled Shrimp Caesar Wraps are:
- Calories: 300-350
- Protein: 25-30 grams
- Fat: 15-20 grams
- Carbohydrates: 30-35 grams
- Fiber: 3-5 grams
- Sodium: 600-800 mg
These wraps offer a good balance of protein and healthy fats while remaining relatively low in carbohydrates. For anyone looking for healthy lunch ideas, they deliver essential nutrients without overwhelming calories, making them a fantastic choice for anyone aiming to maintain a balanced diet.
FAQs: Frequently Asked Questions About Easy Grilled Shrimp Caesar Wraps Lunch
Can I use frozen shrimp for this recipe?
Yes, you can use frozen shrimp, but make sure to thaw them properly before marinating and grilling. It’s best to thaw them overnight in the refrigerator or place them in a sealed bag under cold water for about 30 minutes.
What can I use instead of Caesar dressing?
If you prefer not to use Caesar dressing due to dietary restrictions or personal preference, consider using a homemade vinaigrette or a yogurt-based ranch dressing for a different flavor profile.
How many wraps does this recipe make?
This recipe yields approximately four wraps, depending on how generously you fill them. You can adjust the measurements accordingly if you’re feeding more people or prefer smaller portions.
Can the recipe be made ahead of time?
Absolutely! You can prepare the components in advance—grilling the shrimp, chopping salad ingredients, and making the dressing. Store them separately in the refrigerator and assemble the wraps just before serving for the freshest taste.
Is this recipe suitable for meal prepping?
Definitely! The Easy Grilled Shrimp Caesar Wraps are ideal for meal prep. Just keep the ingredients separate and assemble the wraps when you’re ready to eat.
By following this comprehensive guide to Easy Grilled Shrimp Caesar Wraps for lunch, you’ll easily elevate your cooking endeavors while enjoying a delectable meal. Incorporate this recipe into your list of go-to lunch ideas, and you won’t be disappointed! Enjoy the burst of flavors while staying on top of your health goals. Happy cooking!