Category: drinks

  • Refreshing Strawberry Citrus Iced Tea Drink

    Refreshing Strawberry Citrus Iced Tea Drink

    Refreshing Strawberry Citrus Iced Tea Drink: A Tropical Delight

    Introduction to Refreshing Strawberry Citrus Iced Tea Drink

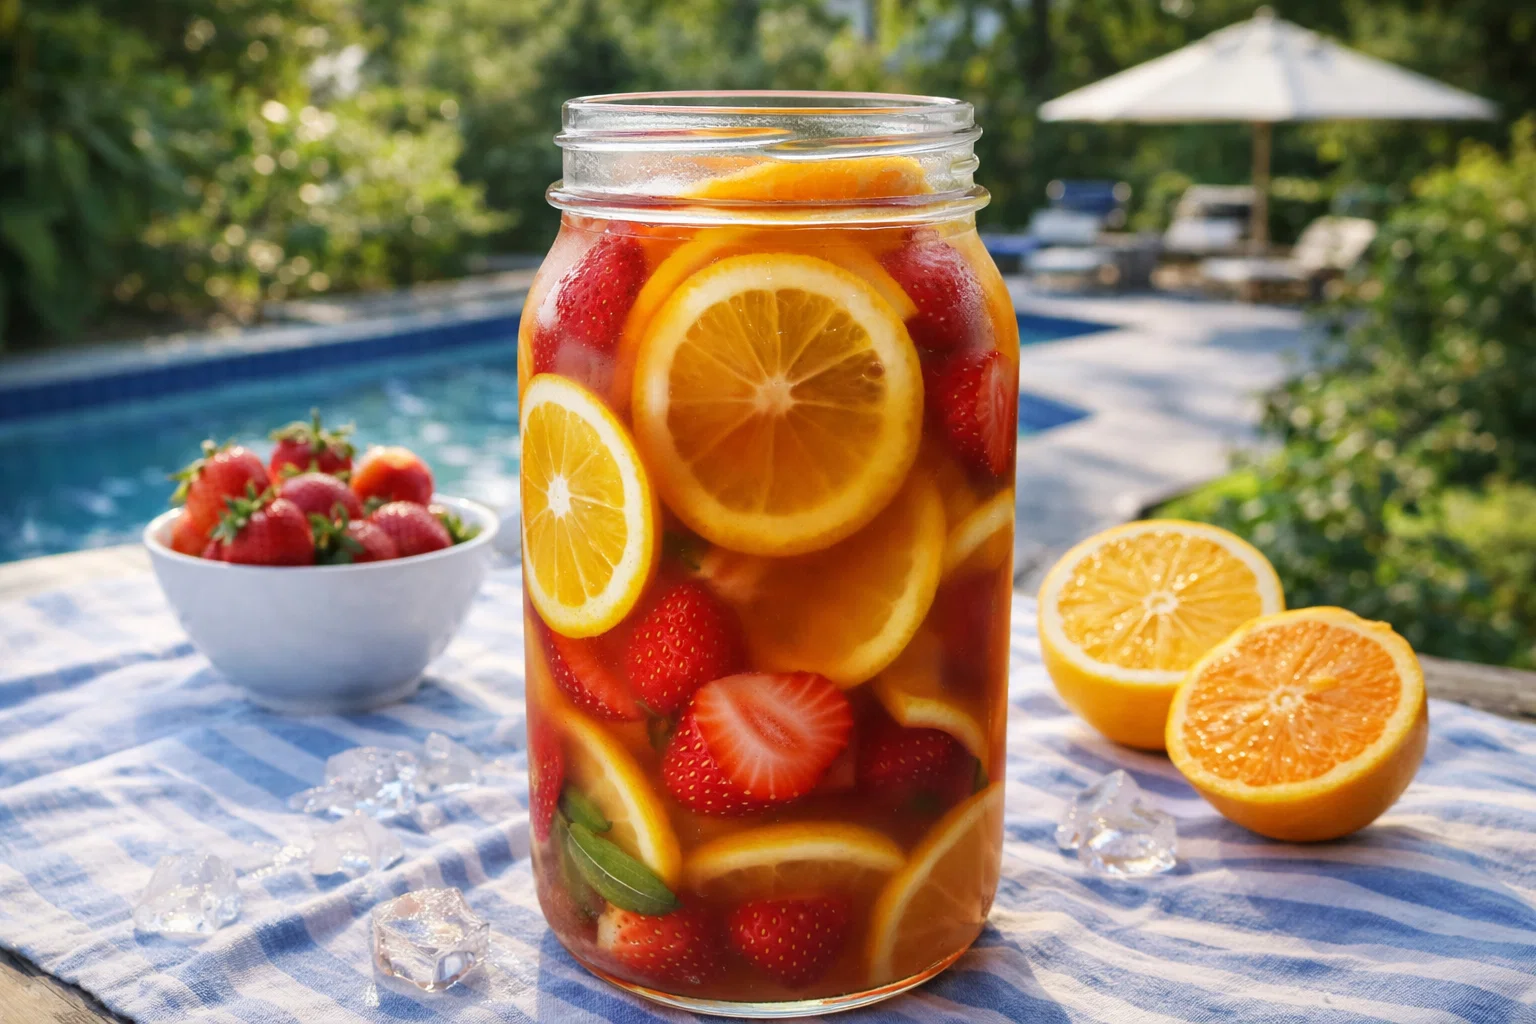
    Are you looking for a deliciously refreshing drink that embodies the essence of summer? Look no further than this Refreshing Strawberry Citrus Iced Tea Drink! This delightful beverage combines the sweetness of strawberries with the zesty tang of citrus, making it an irresistible treat. Not only is this drink a feast for the eyes, turning a sunny afternoon into a tropical getaway, but it also serves as a healthy hydrating option for various occasions. Whether you’re a busy parent craving a quick refreshment, a student needing a mid-study pick-me-up, or a health-conscious individual searching for lower-calorie options, this drink checks all the boxes.

    One of the most appealing aspects of this recipe is its simplicity. You can whip up this strawberry-infused iced tea in a matter of minutes, making it perfect for lazy afternoons or bustling weekends. Furthermore, it caters to diverse dietary needs—it’s vegan, gluten-free, and packed with natural ingredients. You’ll love serving this vibrant drink at gatherings, picnics, or just as a well-deserved treat for yourself. This recipe reflects the best of strawberry recipes while allowing room for creativity as you customize it to suit your tastes.

    So, gather your ingredients and get ready to embark on a flavorful journey that will not only refresh your taste buds but also uplift your spirits. Let’s dive deeper into the benefits and attributes that make this strawberry citrus iced tea stand out!

    Benefits and Advantages of Refreshing Strawberry Citrus Iced Tea Drink

    When it comes to refreshing summer beverages, few can compete with the Refreshing Strawberry Citrus Iced Tea Drink. This drink isn’t just a treat; it’s also brimming with health benefits that make it a favorite among home cooks and health-conscious individuals alike. Here’s why this particular iced tea recipe deserves a spot in your repertoire of strawberry recipes.

    Simple and Quick Preparation

    One of the biggest advantages of this drink is its ease of preparation. Within just 15 minutes, you can have a delicious, homemade iced tea that can serve as a thirst-quencher for any occasion. There’s no need for complex steps or obscure ingredients; you simply brew tea, mix in strawberries and citrus, and chill—a straightforward process that anyone can master.

    Health Benefits

    This refreshing drink is not just tasty but also loaded with numerous health benefits. Strawberries are rich in vitamins C and K, antioxidants, and fiber, contributing to overall well-being. Citrus fruits, on the other hand, are known for their high vitamin C content, boosting your immune system and enhancing skin health. The combination of these nutritious ingredients makes this drink an excellent choice for anyone looking to boost their hydration levels while enjoying the luxury of fresh fruit flavors.

    Versatility

    Whether you’re focusing on weight management, following a vegan diet, or simply wish to indulge in a naturally sweet treat, this iced tea is easily adaptable. You can sweeten it with natural sugars like honey or agave, use herbal teas for a caffeine-free version, or opt for unsweetened options to keep it low-calorie. Thus, the drink accommodates a variety of dietary needs and preferences, making it a metonym for crowd-pleasing strawberry recipes.

    Refreshing Appeal

    Picture yourself lounging by the pool, the sun warming your skin, a refreshing glass of this iced tea in hand. It’s perfect for summer barbecues, birthday parties, or simply a regular day when you deserve something special. Its vibrant colors and delightful flavors are bound to impress anyone, ensuring that your gatherings are memorable and enjoyable.

    In summary, the Refreshing Strawberry Citrus Iced Tea Drink stands out due to its simplicity, health benefits, and versatility, making it a must-try recipe for anyone passionate about cooking and flavorful, nutritious drinks.

    Ingredients Overview

    Essential Ingredients for Refreshing Strawberry Citrus Iced Tea Drink

    Before you embark on your iced tea adventure, let’s take a look at the ingredients you’ll need to prepare this refreshing drink:

    1. Water – 4 cups
    2. The base for brewing the tea; using filtered water enhances taste.

    3. Black Tea Bags – 3 bags

    4. A great source of antioxidants; you may also use green tea or herbal tea if desired.

    5. Fresh Strawberries – 1 cup, sliced

    6. The star of the show! Strawberries add sweetness and a beautiful color.

    7. Citrus Fruits (Lemon and Orange) – 1 each, juiced

    8. Freshly squeezed juice enhances flavor and adds a tart twist.

    9. Honey or Agave Syrup – 1-2 tablespoons (optional)

    10. This natural sweetener is optional, allowing you to control the sweetness level.

    11. Mint Leaves – a handful, for garnish (optional)

    12. Fresh mint adds an aromatic touch and enhances the drink’s refreshing qualities.

    13. Ice Cubes

    14. To chill and serve the drink refreshingly cold.

    This recipe can easily accommodate dietary considerations. It is inherently vegan and gluten-free, and you can opt for low-calorie sweeteners if needed.

    Dietary Substitutions to Customize Your Refreshing Strawberry Citrus Iced Tea Drink

    While the classic version of this iced tea is fantastic as-is, there are plenty of substitutions you can make to cater to different tastes and dietary needs:

    • Tea Options: Swap black tea for green tea, rooibos, or herbal tea for a caffeine-free variant. Each option provides a unique flavor profile while retaining the refreshing essence.

    • Sweeteners: If you prefer a sugar-free option, use stevia or monk fruit as a low-calorie sweetener. Just remember to adjust the quantity to match your taste preferences.

    • Fruit Variations: Feel free to add different fruits like peaches, raspberries, or even blueberries for a twist on the classic strawberry flavor. Each fruit can bring a unique taste to this iced tea.

    • Herb Alternatives: For a different flavor, try basil or rosemary instead of mint. These herbs can infuse your tea with an aromatic flair that’s equally refreshing.

    • Serve Hot or Cold: Depending on the season, this recipe can easily transform from a cold drink into a cozy hot tea. Simply skip the ice and serve it warm for a delightful winter version.

    With these substitutions, your Refreshing Strawberry Citrus Iced Tea Drink can cater to a plethora of dietary preferences while still delivering that scrumptious, refreshing kick.

    How to Prepare the Perfect Refreshing Strawberry Citrus Iced Tea Drink: Step-by-Step Guide

    Now that you have all your ingredients ready and your substitutions considered, it’s time to make the masterpiece! Follow these step-by-step instructions to create the perfect Refreshing Strawberry Citrus Iced Tea Drink.

    1. Prepare the Base:
    2. Pour 4 cups of filtered water into a pot and bring it to a boil over medium heat.

    3. Brew the Tea:

    4. Once the water is boiling, remove it from heat and add the black tea bags. Allow them to steep for about 5 minutes, or until your desired strength is achieved.

    5. Remove Tea Bags:

    6. After brewing, carefully remove the tea bags and allow the tea to cool to room temperature.

    7. Prepare the Strawberries:

    8. While the tea is cooling, rinse and slice 1 cup of fresh strawberries. You can chop them into smaller pieces for better infusion.

    9. Juice the Citrus:

    10. Squeeze the juice from one lemon and one orange into a measuring cup. Remove any seeds that may have fallen in.

    11. Combine Ingredients:

    12. In a large pitcher, combine the cooled tea, sliced strawberries, and the freshly squeezed citrus juice. Stir well to mix the flavors.

    13. Sweeten (Optional):

    14. If you prefer a sweeter drink, add honey or agave syrup at this stage. Adjust to taste, keeping in mind that the strawberries and citrus will add some natural sweetness.

    15. Chill:

    16. Cover the pitcher and refrigerate the mixture for at least one hour to allow flavors to meld and chill the drink thoroughly.

    17. Serve Over Ice:

    18. Once chilled, fill glasses with ice cubes and pour the tea over the ice.

    19. Garnish and Enjoy:

      • Garnish each glass with fresh mint leaves or a slice of citrus for an appealing touch. Serve immediately and enjoy your refreshing iced tea!

    This simple recipe not only promotes the enjoyment of strawberry recipes, but it also allows customization at every step.

    Mastering Refreshing Strawberry Citrus Iced Tea Drink: Advanced Tips and Variations

    To elevate your Refreshing Strawberry Citrus Iced Tea Drink even further, consider these advanced tips and variations:

    Infuse Tea with Flavors

    Experiment with additional flavors by infusing the tea with spices like cinnamon or ginger. Simply add a cinnamon stick during the steeping process or grate fresh ginger. This will impart a warm flavor that contrasts beautifully with the acidity of the citrus.

    Freeze Fruit into Ice Cubes

    For a stunning presentation, freeze find slices of strawberries or small citrus wedges into ice cubes. These fruity ice cubes will not only keep your drink cool but also add a visual flair when served.

    Layered Presentation

    For an eye-catching presentation, serve the drink in clear glasses and layer the ingredients. Start with ice at the bottom, gradually pour in the tea, then float the citrus juice on top. This garnish technique will impress guests and provide multiple flavor experiences with every sip.

    Herbal Variations

    For herbal enthusiasts, consider adding a splash of chamomile tea or lemon balm for a relaxing twist. These herbs will contribute aromatic qualities while enhancing the overall flavor profile.

    Mocktail or Cocktail Version

    You can easily transition this refreshing iced tea into a fun cocktail. Simply add a splash of vodka or gin, making it a delightful, light cocktail for evening gatherings.

    By incorporating these tips into your iced tea preparation, you elevate the experience of enjoying strawberry recipes that promises to be both refreshing and memorable.

    How to Store Refreshing Strawberry Citrus Iced Tea Drink: Best Practices

    Knowing how to properly store your Refreshing Strawberry Citrus Iced Tea Drink ensures that flavors remain vibrant and fresh. Here are some best practices to follow:

    Refrigeration

    Store any leftover iced tea in an airtight container in the refrigerator. This can retain the drink’s refreshing taste for up to 3 days.

    Avoiding Dilution

    Store extra ice cubes outside of the tea mixture to prevent dilution. Instead, keep a separate batch of ice cubes frozen with fruit to add to your drink when serving. This keeps it chilled without compromising flavor.

    Long-Term Storage

    If you wish to make a large batch ahead of time, consider freezing the iced tea mixture in an airtight container. Just make sure to leave some space at the top for expansion as the liquid freezes. Thaw the drink in the refrigerator the day before you plan to serve it.

    By following these best storage practices, you can savor the delightful taste of strawberry recipes even after the initial batch.

    Nutritional Value of Refreshing Strawberry Citrus Iced Tea Drink

    Understanding the nutritional value of your Refreshing Strawberry Citrus Iced Tea Drink is essential for those who are health-conscious or monitoring their dietary intake. Here’s a breakdown of the approximate nutritional information per serving (assuming the recipe makes 6 servings):

    • Calories: 50 (without added sweeteners)
    • Total Fat: 0 g
    • Sodium: 5 mg
    • Total Carbohydrates: 12 g
    • Dietary Fiber: 1 g
    • Sugars: 5 g (may vary with sweetener)
    • Protein: 0 g
    • Vitamin C: 50% of Daily Value (DV)
    • Calcium: 2% of DV
    • Iron: 2% of DV

    This drink is a low-calorie, nutrient-packed choice that allows you to indulge without guilt. The strawberries offer antioxidants and essential vitamins, while the citrus provides hydration and vitamin C. Overall, it’s a refreshing way to stay healthy and hydrated during warmer days.

    FAQs: Frequently Asked Questions About Refreshing Strawberry Citrus Iced Tea Drink

    Can I use other fruits besides strawberries?

    Absolutely! While strawberries are the star in this recipe, you can enhance the flavor by adding other fruits like raspberries, blueberries, or even peaches. Each addition offers a distinct taste that can elevate your iced tea.

    How do I sweeten my iced tea naturally?

    If you’re looking for natural sweeteners, honey, agave syrup, or maple syrup work beautifully. For a non-sweetened version, simply skip this step, as the fruit itself contributes natural sweetness.

    How long does the brewed tea last in the refrigerator?

    The brewed tea can last up to 3 days in the refrigerator if stored in an airtight container. For the best flavor, try to consume it within the first couple of days.

    Can I make this gluten-free?

    Yes! This drink is naturally gluten-free, so feel free to enjoy it without any concerns.

    What is the best way to serve this iced tea?

    For a stunning presentation, serve it over ice in transparent glasses, garnished with fresh mint leaves or additional citrus slices for a refreshing look.

    By addressing these common questions, readers can feel more confident in preparing and customizing their Refreshing Strawberry Citrus Iced Tea Drink to suit their needs.

    Now that you have all the information and steps needed, it’s time to get in the kitchen and make this delightful beverage. Enjoy and share your creations, discovering the joy of strawberry recipes one sip at a time!

  • Tasty Strawberry Sunrise Mocktail Summer Drink

    Tasty Strawberry Sunrise Mocktail Summer Drink

    Tasty Strawberry Sunrise Mocktail Summer Drink: A Tropical Delight

    Introduction to Tasty Strawberry Sunrise Mocktail Summer Drink

    Quench your thirst this summer with the delightful Tasty Strawberry Sunrise Mocktail, a refreshing drink that not only brightens up your day but also caters to your health and dietary preferences. As part of the world of strawberry recipes, this mocktail combines the sweet, succulent flavor of strawberries with zesty citrus notes, making it the perfect go-to beverage for everything from brunches to barbecues.

    What sets this drink apart is its simplicity: requiring minimal ingredients and mere minutes to prepare. It’s a fantastic option for home cooks, busy parents, and anyone who appreciates a hassle-free recipe that still impresses. Plus, this drink is entirely vegan, gluten-free, and low in calories, ensuring that it fits well within various dietary lifestyles. Whether you’re entertaining friends, heading out for a picnic, or simply treating yourself to a delicious beverage, this mocktail serves as a delightful and healthy choice.

    With vibrant colors reminiscent of a tropical sunrise, this mocktail is not just a treat for the taste buds, but also a feast for the eyes. So, dive into the world of strawberry recipes and let’s create something that brings summer vibes right into your home!

    Benefits and Advantages of Tasty Strawberry Sunrise Mocktail Summer Drink

    Embracing the Tasty Strawberry Sunrise Mocktail offers numerous benefits that resonate with diverse audiences ranging from food enthusiasts to health-conscious individuals. Let’s explore some of the remarkable advantages of this delicious mocktail:

    1. Easy to Prepare: The charm of a great recipe lies in its simplicity. This mocktail requires only a handful of fresh ingredients and can be whipped up in less than 10 minutes. Busy parents will appreciate how quickly it can be prepared for warm summer days, while students can easily make it during those long study breaks.

    2. Health Benefits: Strawberries are not just delicious; they are also loaded with vitamins, minerals, and antioxidants. They help promote heart health, improve blood sugar levels, and boost skin health thanks to the high levels of vitamin C. By creating a mocktail with strawberries as the star ingredient, you’re not just enjoying a tasty drink but also benefiting from their nutritional properties.

    3. Versatile: This mocktail can be tailored to fit varied dietary needs. Whether someone is vegan, gluten-free, or simply health-conscious, this recipe offers a guilt-free indulgence that doesn’t compromise on flavor. Furthermore, it serves as a stylish alternative to sugary sodas and alcoholic beverages, making it perfect for all age groups and occasions.

    4. Refreshing and Hydrating: On sun-soaked afternoons, staying hydrated is crucial. This mocktail not only hydrates but also revitalizes, making it an ideal companion for outdoor activities, barbecues, or lazy days by the pool.

    5. Impressive Presentation: The gradient effect created by layering orange juice, strawberry puree, and club soda is as visually appealing as it is delicious. It’s an excellent addition to any gathering, allowing you to impress guests without tremendous effort.

    In summary, this Tasty Strawberry Sunrise Mocktail is designed with the modern lifestyle in mind, offering health benefits, ease of preparation, and adaptability for all. If you’re exploring delightful strawberry recipes, this mocktail certainly deserves a spot on your must-try list!

    Ingredients Overview

    Essential Ingredients for Tasty Strawberry Sunrise Mocktail Summer Drink

    To whip up this refreshing mocktail, you’ll need the following ingredients, all of which are easy to find and deliciously complement each other:

    • Fresh Strawberries (2 cups): The main ingredient, strawberries provide natural sweetness and vibrant flavor, making them a popular choice in summer beverages.
    • Fresh Orange Juice (1 cup): This adds a tangy citrus twist balancing the sweetness of strawberries. Opt for freshly squeezed juice for the best flavor.
    • Sparkling Water or Club Soda (1 cup): This gives the mocktail a light and refreshing fizz, enhancing its summer vibe.
    • Honey or Agave Syrup (optional, 1-2 tablespoons): For those who prefer a sweeter drink, adding honey or agave syrup provides natural sweetness. Use agave for a vegan option.
    • Ice Cubes: Essential for keeping your mocktail chilled and refreshing.

    Dietary Considerations: This recipe is vegan, gluten-free, and low-calorie, making it suitable for a wide range of diets.

    Dietary Substitutions to Customize Your Tasty Strawberry Sunrise Mocktail Summer Drink

    Here are a few suggestions for substituting ingredients to customize your mocktail:

    • No Fresh Strawberries?: If strawberries aren’t in season, consider substituting with frozen strawberries, which still maintain rich flavor and color when blended.

    • Citrus Alternatives: If you’re not a fan of orange juice, try using pineapple juice or even grapefruit juice for a unique twist that still keeps the essence of a tropical drink.

    • Sweetener Options: For a sugar-free alternative, you can use stevia or monk fruit sweetener to keep the drink sweet without the calories of traditional sweeteners.

    • Additional Fruits: Blend in other fruits such as mango or kiwi to create your unique version while adhering to the health benefits of this mocktail.

    By incorporating these substitutions, you can craft a Tasty Strawberry Sunrise Mocktail that is tailored to your personal preferences or dietary restrictions.

    How to Prepare the Perfect Tasty Strawberry Sunrise Mocktail Summer Drink: Step-by-Step Guide

    Creating the Tasty Strawberry Sunrise Mocktail at home is a breeze! Follow these detailed steps to bring this delicious drink to life:

    1. Prepare the Strawberries: Begin by washing 2 cups of fresh strawberries under cold water. Remove the stems and hulls. Set aside a few of the most visually appealing strawberries for garnishing later.

    2. Make the Strawberry Puree: Place the washed strawberries in a blender. Blend until smooth; this should yield approximately 1 cup of strawberry puree. For added sweetness, consider blending in 1-2 tablespoons of honey or agave syrup.

    3. Juice the Oranges: While the strawberries are blending, juice enough fresh oranges to collect 1 cup of juice. Strain through a fine mesh sieve to remove pulp if desired. Using fresh juice elevates the flavor significantly.

    4. Combine the Ingredients: In a sizable pitcher, combine the prepared strawberry puree and freshly squeezed orange juice. Stir well until both ingredients are fully blended together.

    5. Add Ice Cubes: Fill serving glasses or a large pitcher with ice cubes. This will keep your mocktail chilled and refreshing for longer.

    6. Layer the Mocktail: Pour the strawberry-orange mixture over the ice-filled glasses about halfway. Then, slowly top each glass with sparkling water or club soda, allowing the drink to fizz and create a layered effect.

    7. Garnish: Use the reserved strawberries you set aside earlier. Slice them and add one slice to the rim of each glass. For an extra pop of color, garnish with a fresh mint leaf on top.

    8. Serve and Enjoy: Present your stunning mocktails to friends and family, and enjoy the refreshing taste of summer. Take a moment to appreciate the beautiful gradient before digging in!

    Following these steps, you will create a mocktail that delights not just the taste buds, but also visual senses. Plus, you can maintain the health-forward approach that strawberry recipes often embody.

    Mastering Tasty Strawberry Sunrise Mocktail Summer Drink: Advanced Tips and Variations

    To take your Tasty Strawberry Sunrise Mocktail a step further, consider these advanced tips and fun variations:

    1. Spicy Kick: If you enjoy a bit of heat, muddle a few slices of jalapeño before pouring in the mocktail mix. This addition enhances the flavor profile wonderfully and adds an exhilarating twist.

    2. Make it Creamy: For a luxurious version, swirl in a tablespoon of coconut cream or yogurt. This upgrade introduces a delightful creaminess, balancing out the tartness of the strawberries and oranges.

    3. Infuse with Herbs: Enhance the flavor by infusing your mocktail with fresh herbs. Basil, mint, or lavender can offer a refreshing herbaceous note that perfectly complements the sweetness of the strawberries.

    4. Create a Slushy: Blend in ice with the strawberry puree to create a slushy version of this drink. It’s an excellent way to cool off on hot days, offering a fun texture.

    5. Mocktail Pitcher: Planning a gathering? Scale up the recipe. Multiply the ingredients to create a pitcher for easy serving and add sliced fruits for decoration. This also allows guests to serve themselves!

    6. Alcoholic Version: For adults looking to enjoy a spiked drink, add a splash of vodka or rum to each glass. This simple modification transforms your mocktail into a delightful cocktail, perfect for summer gatherings.

    With these tips, you can explore the myriad ways to enjoy your Tasty Strawberry Sunrise Mocktail, ensuring your family and friends are always amazed by the fresh flavors and creativity you bring to the table.

    How to Store Tasty Strawberry Sunrise Mocktail Summer Drink: Best Practices

    To keep your Tasty Strawberry Sunrise Mocktail fresh and enjoyable, follow these storage tips:

    • Refrigeration: If you have leftover mocktail, store it in an airtight container in the refrigerator. It should remain tasty for up to 24 hours. However, remember that the fizz of the club soda may diminish over time, so it’s best enjoyed fresh.

    • Freezing: If you want to prepare the strawberry puree in advance, you can freeze it in ice cube trays. Once frozen, transfer the cubes to a zip-lock bag. This way, you can blend them into smoothies or revive them for fresh mocktails.

    • Avoiding Separation: If you know the mocktail will sit for some time, keep the components separate (strawberry puree, orange juice, and sparkling water) until ready to serve. Mix them immediately before consumption for optimal taste and texture.

    By following these storage best practices, you’ll enjoy your Tasty Strawberry Sunrise Mocktail at its finest, reducing waste and keeping fresh flavors intact.

    Nutritional Value of Tasty Strawberry Sunrise Mocktail Summer Drink

    When crafting a Tasty Strawberry Sunrise Mocktail, you create not only a delightful drink but also one that is low in calories and rich in nutrients. Here’s an overview of the standard nutritional information per serving, assuming the recipe makes four servings:

    • Calories: Approximately 80-100 (depending on the sweetness from honey/agave)
    • Fat: 0g
    • Sodium: 1 mg
    • Carbohydrates: 22g
    • Fiber: 2g
    • Sugars: 15g (naturally occurring from strawberries and orange juice)
    • Protein: 1g

    Health Benefits

    • Rich in Vitamin C: Essential for the immune system, the vitamin C content from strawberries and oranges supports your body’s defense against common colds.
    • Antioxidants: Strawberries have powerful antioxidants that help neutralize free radicals in the body.
    • Hydration: The liquid content and electrolytes in the ingredients effectively aid in hydration during those warm summer days.

    By enjoying the delicious Tasty Strawberry Sunrise Mocktail, you not only savor a delightful drink but also nourish your body with healthy, natural ingredients.

    FAQs: Frequently Asked Questions About Tasty Strawberry Sunrise Mocktail Summer Drink

    What can I substitute for fresh strawberries in the mocktail?

    If fresh strawberries are unavailable, frozen strawberries work well. Simply blend them straight from the freezer for a similar outcome.

    How can I make this mocktail sugar-free?

    You can opt for sugar-free sweeteners like stevia or monk fruit sweetener, adjusting the quantity to achieve your desired sweetness without extra calories.

    Can this mocktail be made ahead of time?

    Yes, the strawberry puree and orange juice can be prepared in advance. However, to maintain its effervescence, add the sparkling water right before serving.

    What other fruits can I use in this recipe?

    Feel free to mix in other fruits like kiwi, mango, or even seasonal berries. Each fruit variant adds a unique flavor profile!

    Is the mocktail suitable for kids and pregnant women?

    Absolutely! This mocktail is non-alcoholic and made with fresh ingredients, making it safe and enjoyable for all ages, including pregnant women.

    Can I make a larger batch for a party?

    Certainly! Multiply the ingredients as needed, and consider creating a presentation pitcher to make serving easy and entertaining.

    In conclusion, the Tasty Strawberry Sunrise Mocktail is an impressive addition to your collection of strawberry recipes. Bringing together health benefits and delightful flavors, it’s sure to become a summer favorite for you and your loved ones. Cheers!

  • Tasty Banana Matcha Smoothie Energy Drink

    Tasty Banana Matcha Smoothie Energy Drink

    Tasty Banana Matcha Smoothie Energy Drink: A Tropical Delight

    Introduction to Tasty Banana Matcha Smoothie Energy Drink

    Are you constantly searching for healthy snacks to energize your day? Look no further! The Tasty Banana Matcha Smoothie Energy Drink is the perfect blend of nutrition and flavor that will not only satisfy your taste buds but also support your active lifestyle. This smoothie is incredibly simple to prepare, making it ideal for busy parents, students, professionals, and anyone who seeks a nutritious pick-me-up. With its rich combination of antioxidants from matcha, natural sweetness from bananas, and creamy texture, this smoothie is both delicious and wholesome.

    What’s more, the Tasty Banana Matcha Smoothie is vegan, gluten-free, and incredibly versatile. It caters to various dietary needs, making it a suitable option for everyone—from health enthusiasts to those looking to indulge in a guilt-free treat. Loaded with vitamins, minerals, and healthy fats, this energy drink helps to improve focus, boost metabolism, and support overall health. If you’re ready to transform your snack game with a delightful twist, let’s dive into this vibrant recipe that promises to become your new go-to for healthy snacks!

    Benefits and Advantages of Tasty Banana Matcha Smoothie Energy Drink

    The Tasty Banana Matcha Smoothie Energy Drink comes with a plethora of health benefits that set it apart from ordinary snacks. First and foremost, it is exceptionally easy to prepare. In under 10 minutes, you can whip up a delicious and nutritious energy drink that serves as a perfect breakfast companion, a post-workout refuel, or a midday snack.

    Health Benefits

    1. Boosts Energy Naturally: Matcha is known for its natural caffeine content, providing a smooth energy boost without the jitters commonly associated with coffee. Combined with the natural sugars found in ripe bananas, this smoothie delivers sustained energy ideal for busy days.

    2. Rich in Antioxidants: Matcha boasts a high concentration of antioxidants, particularly catechins, which help reduce oxidative stress and lower the risk of chronic diseases. It also enhances your body’s detoxification processes.

    3. Supports Digestion: The soluble fiber from both bananas and any additional ingredients like oats or chia seeds promotes a healthy digestive system. Additionally, the potassium from bananas aids in maintaining electrolyte balance.

    4. Improves Mood and Focus: The combination of healthy fats (such as those from nut butter) and the amino acid L-theanine from matcha can support mental clarity and promote a calm state of mind, helping you stay focused throughout your tasks.

    5. Customization for Dietary Needs: Whether you’re adhering to a vegan lifestyle, managing gluten sensitivities, or simply aiming for low-calorie options, the Tasty Banana Matcha Smoothie Energy Drink can be tailored to meet your specific nutritional requirements.

    In essence, this recipe not only provides a convenient way to incorporate superfoods into your diet but also supports your overall well-being—making it a truly exciting option for healthy snacks in your home!

    Ingredients Overview

    Essential Ingredients for Tasty Banana Matcha Smoothie Energy Drink

    To craft a delicious Tasty Banana Matcha Smoothie Energy Drink, you will need the following ingredients:

    • 1 ripe banana (medium-sized): Provides natural sweetness and creaminess. Ripe bananas are also rich in potassium and fiber.
    • 1 teaspoon matcha green tea powder: This superfood gives the smoothie its vibrant green color and is packed with antioxidants.
    • 1 cup almond milk (or any plant-based milk): This keeps the drink creamy and dairy-free. Opt for unsweetened varieties to minimize added sugars.
    • 1 tablespoon almond butter (optional): Adds healthy fats and a nutty flavor; it can be substituted with sunflower seed butter for a nut-free version.
    • 1 tablespoon chia seeds (optional): Boosts fiber content and provides omega-3 fatty acids.
    • Ice cubes (as needed): For a chilled and refreshing texture.
    • Honey or maple syrup (to taste): Optional sweeteners, perfect for those who enjoy a bit more sweetness.

    This ingredient list highlights the versatility of the smoothie, allowing it to cater to various dietary restrictions. Each ingredient plays an important role in contributing to the taste and nutritional benefits of this delightful drink.

    Dietary Substitutions to Customize Your Tasty Banana Matcha Smoothie Energy Drink

    This recipe can be easily customized to fit many dietary preferences:

    1. Nut-Free: If you’re avoiding nuts, replace the almond milk with oat milk or coconut milk, and skip the almond butter, or substitute it with tahini or a scoop of a nut-free protein powder.

    2. Low Calorie: For a lower-calorie version, use unsweetened coconut or almond milk and omit the nut butter. You can also limit the amount of honey or opt out entirely.

    3. Protein Boost: To increase protein content, consider adding a scoop of your favorite plant-based protein powder. This adjustment makes the smoothie perfect post-workout.

    4. Fruity Variations: Feel free to mix in additional fruits such as spinach for added nutrients, or replace the banana with mango or pineapple for a tropical twist.

    5. For an Icy Treat: If you prefer a thicker, more smoothie-like consistency, add more ice or even frozen banana slices to achieve a deliciously creamy texture.

    The flexibility of the Tasty Banana Matcha Smoothie Energy Drink ensures that it’s appropriate for every dietary requirement and allows you to tailor it to your liking.

    How to Prepare the Perfect Tasty Banana Matcha Smoothie Energy Drink: Step-by-Step Guide

    Creating your Tasty Banana Matcha Smoothie Energy Drink is easy and fun! Follow these steps to make a perfect smoothie packed with flavor and nutrition:

    1. Prepare the Base: Start by selecting a blender that suits your needs. Place the banana, matcha powder, and almond milk into the blender. If you like a sweeter smoothie, you can add honey or maple syrup at this stage.

    2. Add Supplementary Ingredients: If you’re using the almond butter or chia seeds, add them now. These ingredients will enhance the smoothie’s nutritional value and creaminess.

    3. Incorporate Ice: Depending on how chilled you want your smoothie, add a cup of ice cubes. This step is optional but recommended for a refreshing drink.

    4. Blend Smoothly: Secure the lid on the blender and start blending at a low speed. Gradually increase the speed until all ingredients are fully combined and the mix achieves a smooth, velvety consistency.

    5. Adjust Smoothie Texture: If the smoothie is too thick, feel free to add a little more almond milk or water to reach the desired consistency. Blend again briefly to incorporate.

    6. Taste and Adjust Sweetness: Before pouring, taste the smoothie. If you prefer a sweeter flavor, add more honey or maple syrup and blend once more.

    7. Serve Immediately: Pour your smoothie into a tall glass and serve straight away for optimal freshness. You can garnish with a sprinkle of matcha powder or chia seeds for that extra touch.

    8. Experiment with Presentation: Consider topping with slices of banana, a drizzle of almond butter, or a sprinkle of nuts and seeds for an appealing look.

    This step-by-step guide ensures a seamless experience as you create this delightful concoction. Remember, the Tasty Banana Matcha Smoothie Energy Drink aligns perfectly with your journey toward healthy snacks!

    Mastering Tasty Banana Matcha Smoothie Energy Drink: Advanced Tips and Variations

    For those wanting to elevate their Tasty Banana Matcha Smoothie Energy Drink, here are a few tips and exciting variations:

    1. Cooling Down with Frozen Fruit: Substitute the banana with frozen fruits like berries or mango chunks for a refreshing twist. This will also enhance the smoothie’s chill factor.

    2. Add Greens: Incorporating a handful of spinach or kale provides vital nutrients while keeping the smoothie light and refreshing.

    3. Flavor Enhancements: Add a pinch of cinnamon or nutmeg for a warm spice note, or include a few drops of vanilla extract for an aromatic experience.

    4. Pre-Made Smoothies: Prepare your smoothie in bulk and freeze it in single servings. Just blend the frozen smoothie in the morning for a quick breakfast that’s still super fresh.

    5. Storage Idea: Consider storing leftovers in an airtight container. Shake or blend again before serving.

    These advanced tips encourage creativity, allowing you to master the art of making Tasty Banana Matcha Smoothie Energy Drinks that suit your palate and health goals. Explore different combinations and remember to enjoy the journey of discovering your favorite version of these healthy snacks!

    How to Store Tasty Banana Matcha Smoothie Energy Drink: Best Practices

    If by chance you have leftover Tasty Banana Matcha Smoothie Energy Drink—though it’s hard to believe you could—it’s important to store it properly:

    1. Refrigeration: Place any leftover smoothie in an airtight container and store it in the refrigerator. Consume within 24 hours for optimal freshness.

    2. Freezing: For longer storage, pour the smoothie into ice cube trays or silicone molds and freeze. These frozen cubes can be blended into future smoothies or enjoyed as a cold snack.

    3. Reheating: Should you want to warm it up (though it’s best served cold), do so gently in a saucepan over low heat. Avoid boiling, as it will change the flavor and nutritional content.

    By adhering to these storage solutions, your Tasty Banana Matcha Smoothie can remain a favorite among your healthy snacks repertoire for days to come!

    Nutritional Value of Tasty Banana Matcha Smoothie Energy Drink

    Understanding the nutritional value of your meals and snacks is essential for maintaining a healthy lifestyle. Here’s a breakdown of the estimated nutrition per serving of the Tasty Banana Matcha Smoothie Energy Drink:

    • Calories: Approximately 250-300 calories (depending on added ingredients like nut butter or sweeteners)
    • Protein: 6-8 grams (can increase with added protein powder)
    • Fats: 8-12 grams (dependent on almond butter or added fats)
    • Carbohydrates: 40-45 grams (from banana, almond milk, and any extra fruits)
    • Fiber: 7-10 grams (excellent for digestion)
    • Sugar: 15-20 grams (mainly from banana and sweeteners)
    • Calcium: 25% RDI (from almond milk)
    • Iron: 10% RDI (from matcha and chia seeds)

    This nutritional summary demonstrates how the Tasty Banana Matcha Smoothie serves as a well-balanced option among healthy snacks. Rich in vitamins, minerals, and health-promoting properties, it packs a punch to keep you energized and satisfied throughout the day.

    FAQs: Frequently Asked Questions About Tasty Banana Matcha Smoothie Energy Drink

    Q: Is the Tasty Banana Matcha Smoothie suitable for a gluten-free diet?

    A: Yes! This smoothie can easily be made gluten-free, especially when you use gluten-free almond milk and avoid any ingredients that may contain gluten.

    Q: Can I make this smoothie without bananas?

    A: Absolutely! You can replace bananas with other fruits like mango or peaches; however, the texture will differ without the creaminess that bananas provide.

    Q: How can I add protein to the Tasty Banana Matcha Smoothie?

    A: A scoop of your favorite plant-based protein powder is an excellent addition. You can also incorporate Greek yogurt or extra nut butter for additional protein content.

    Q: How can I alter the sweetness of the smoothie?

    A: Sweetness can be adjusted by varying the amount of banana or adding sweeteners like honey or maple syrup. For a sugar-free alternative, opt for stevia or monk fruit sweetener.

    Q: How should I store any leftovers?

    A: Leftover smoothie should be stored in an airtight container in the refrigerator for up to 24 hours. It can also be frozen in ice cube trays for later use.

    Embrace the deliciousness and health benefits of the Tasty Banana Matcha Smoothie Energy Drink, and enjoy this nutritious option as one of your top healthy snacks! Whether at home, work, or on-the-go, this beverage is sure to become a favorite. Happy blending!

  • Refreshing Blackberry Coconut Mojito Drink

    Refreshing Blackberry Coconut Mojito Drink

    Refreshing Blackberry Coconut Mojito Drink: A Tropical Delight

    Introduction to Refreshing Blackberry Coconut Mojito Drink

    Welcome to the world of refreshing recipes! Picture yourself on a sun-soaked beach, the sound of waves gently lapping the shore. A glass of a stunning Blackberry Coconut Mojito in hand brings that imagery to life. This drink is a perfect marriage of sweet and tart blackberries, creamy coconut, and invigorating mint, creating a beverage that is nothing short of a tropical delight.

    This Refreshing Blackberry Coconut Mojito Drink isn’t just a visual treat; it’s also simple, healthy, and suitable for various dietary needs. Whether you’re a busy parent looking for a quick mixer for a family gathering, or a college student wanting to impress friends with a delightful drink, this recipe checks all the boxes. It’s vegan, gluten-free, and low in calories – making it an ideal choice for the health-conscious. Plus, the combination of coconut water and blackberries brings you an ample dose of vitamins and hydration, making this mojito not just delicious, but also beneficial.

    In this article, we’ll guide you through every detail—ingredients, tips, nutritional benefits, and even how to customize the drink for your palate. So, pour yourself a tall glass and let’s dive into crafting this easy yet luxurious drink that everyone will love!

    Benefits and Advantages of Refreshing Blackberry Coconut Mojito Drink

    The Refreshing Blackberry Coconut Mojito Drink stands out not only due to its vibrant flavor but also because it offers a myriad of benefits. Here’s why you’ll love this drink:

    1. Simplicity of Preparation: This drink takes mere minutes to make! With just a handful of ingredients and simple steps, you won’t spend hours in the kitchen. Ideal for busy parents or working professionals, this mojito adds a taste of luxury without the hassle.

    2. Health Conscious: One of the standout attributes of this recipe is its health benefits. Blackberries are rich in antioxidants, while coconut water boasts hydrating properties and natural electrolytes. Together, they create a refreshing beverage that can easily replace sugary sodas or cocktails, perfect for those watching their calorie intake.

    3. Vegan and Gluten-Free: For those adhering to specific dietary restrictions, this drink checks all the boxes. It contains no animal products, making it vegan-friendly, and is gluten-free, catering to the needs of those with gluten sensitivities.

    4. Customizable: Feel free to customize the drink’s sweetness and tartness based on your preference. Whether you like it extra sweet or prefer a tangy punch, this mojito is versatile enough to accommodate different tastes.

    5. Socially Appealing: This drink is perfect for gatherings, picnics, or even just a relaxing evening at home. Its eye-catching color and refreshing taste make it a conversation starter and a perfect choice for newlyweds hosting their first gathering or food enthusiasts wanting to impress guests.

    When you think of refreshing recipes, this Blackberry Coconut Mojito undoubtedly deserves a special place, considering its multitude of advantages tailored for any lifestyle.

    Ingredients Overview

    Essential Ingredients for Refreshing Blackberry Coconut Mojito Drink

    Creating the perfect Refreshing Blackberry Coconut Mojito Drink begins with selecting quality ingredients. Below is a detailed list of what you’ll need:

    • 1 cup fresh blackberries: Nature’s candy, providing sweetness and a wealth of antioxidants.
    • 1 cup coconut water: Hydrating and energizing, coconut water is packed with potassium and electrolytes.
    • 1 tablespoon fresh lime juice: Adds a zesty zing that balances the sweetness.
    • 10 fresh mint leaves: For that refreshing, aromatic flavor that makes mojitos legendary.
    • 2 teaspoons agave syrup or honey (optional): Customize the sweetness according to your taste preferences; agave syrup keeps it vegan.
    • Ice cubes: Essential for a chilled, delightful experience.
    • Mint sprigs and lime slices for garnish: For an appealing presentation.

    Dietary Note: This recipe is naturally vegan, gluten-free, and low-calorie. Feel free to use low-calorie sweeteners if you wish to cut down on sugar!

    Dietary Substitutions to Customize Your Refreshing Blackberry Coconut Mojito Drink

    Customizing your Refreshing Blackberry Coconut Mojito Drink is simple! Here are some suggested substitutions that cater to various dietary needs:

    1. Sweetener Alternatives:
    2. Instead of agave syrup or honey, try stevia or monk fruit sweetener to lower the calorie count further.
    3. If you prefer a more traditional sweetener, sugar can be used but may increase calorie content.

    4. Coconut Water Alternatives:

    5. If coconut water is unavailable, substitute it with sparkling water for a fizzy twist.
    6. For a creamier texture, use coconut milk, which can lend a different taste profile but watch for calories.

    7. Changing Up the Berries:

    8. If blackberries aren’t in season, feel free to swap in raspberries or blueberries for a delightful variation that still maintains that summery flavor.

    These substitutions ensure that your drink can fit any occasion or dietary restriction, making it one of the ultimate refreshing recipes!

    How to Prepare the Perfect Refreshing Blackberry Coconut Mojito Drink: Step-by-Step Guide

    Eager to craft your very own Refreshing Blackberry Coconut Mojito Drink? Follow these straightforward steps to concoct this tropical delight:

    1. Prepare the Glass:
    2. Take a tall glass or a mason jar and set it aside, ready for your refreshing mojito.

    3. Muddle Blackberries and Mint:

    4. In the bottom of the glass, add 1 cup of fresh blackberries and 10 fresh mint leaves. Using a muddler (or the back of a spoon), gently press down on the berries and mint to release their juices and aromas. This step is critical for obtaining that vibrant flavor that makes mojitos special.

    5. Add Lime Juice:

    6. Pour in 1 tablespoon of fresh lime juice over the muddled mixture. The lime juice will enhance the flavors beautifully, cutting through the sweetness of the blackberries.

    7. Sweeten to Taste:

    8. If you’re looking for extra sweetness, add 2 teaspoons of agave syrup or honey to the glass. However, this step is optional based on your sweetness preference.

    9. Incorporate Coconut Water:

    10. Now, fill the glass with 1 cup of coconut water. Stir gently to combine all the ingredients.

    11. Add Ice:

    12. Fill the glass to the top with ice cubes. This will keep your mojito refreshing and cool.

    13. Garnish:

    14. Top with a sprig of mint and a slice of lime for a delightful garnish. This not only looks attractive but also adds an extra aromatic element.

    15. Enjoy:

    16. Stir your mojito one last time and dig in! Sip slowly and savor the infusion of blackberry, coconut, and mint.

    17. Experiment with Variations:

    18. This drink can be adapted for special occasions by adding a splash of sparkling wine or rum if desired, transforming it into a cocktail.

    This step-by-step guide ensures a simple yet effective approach to making a Refreshing Blackberry Coconut Mojito Drink. Enjoy with friends, family, or simply relish the personal moment of tropical bliss!

    Mastering Refreshing Blackberry Coconut Mojito Drink: Advanced Tips and Variations

    Once you’ve nailed the basic recipe, why not get adventurous? Here are some advanced tips and variations to elevate your Refreshing Blackberry Coconut Mojito Drink experience:

    1. Make it a Pitcher:
    2. Perfect for parties! Multiply the recipe to make a pitcher of this delightful drink. Combine ingredients in a large bowl and stir well. Be sure to adjust sweetness as needed.

    3. Experiment with Herbs:

    4. Why stop at mint? Try adding basil or cilantro for a unique twist on the traditional mojito flavor profile. These herbs can add refreshing undertones that surprise and delight.

    5. Add A Splash of Citrus:

    6. Besides lime, consider integrating orange or grapefruit juice. This adds another layer of flavor without overwhelming the original taste.

    7. Frozen Treat:

    8. Turn your mojito into a frozen slush! Blend the blackberries, coconut water, and lime juice with ice until smooth for a frosty treat perfect for hot days.

    9. Mocktail-Friendly:

    10. For those avoiding alcohol but still wanting a sophisticated drink, this mojito works beautifully as a non-alcoholic option, maintaining its status as one of the greatest refreshing recipes.

    11. Infuse Your Coconut Water:

    12. Consider infusing your coconut water with other flavors, such as ginger or lemongrass, the night before. This will add an unexpected twist to the flavor that your guests will love.

    13. Garnish Variations:

    14. Use colorful edible flowers as a garnish for a stunning presentation, making it not just a mojito, but an aesthetic masterpiece.

    These advanced tips and variations allow you to play with flavors and concepts, ensuring that your Refreshing Blackberry Coconut Mojito Drink remains exciting and new, whether it’s your first time making it or you’re serving it at a gathering!

    How to Store Refreshing Blackberry Coconut Mojito Drink: Best Practices

    After preparing a delicious batch of your Refreshing Blackberry Coconut Mojito Drink, you may wonder about the best storage methods:

    1. Refrigeration:
    2. If you have leftover mojito, it’s best to store it in a tightly sealed container in the fridge. The drink will remain fresh for up to 24 hours. However, you will want to avoid adding ice cubes until you’re ready to drink it, to prevent dilution.

    3. Freezing:

    4. Want to enjoy your mojito later? You can freeze the mixture (without ice) in an airtight container. When you’re ready to enjoy it, simply thaw it in the fridge and blend it with fresh ice.

    5. Avoiding Nutritional Loss:

    6. For optimal freshness, it’s advisable to keep the blackberries and mint separate and add them freshly to your drink just before consumption. This keeps the flavors at their peak and ensures your mojito remains vibrant.

    7. Mason Jar Storage:

    8. If you prefer a more aesthetically pleasing option, consider storing your mojito in a mason jar. This allows for easy transport if you’re taking it to a picnic or outdoor gathering.

    Remember, the essence of a refreshing recipe like the Blackberry Coconut Mojito is best enjoyed fresh, but with these storage tips, you can keep the tropical vibes alive!

    Nutritional Value of Refreshing Blackberry Coconut Mojito Drink

    Curious about the nutritional profile of your Refreshing Blackberry Coconut Mojito Drink? Here’s a breakdown:

    • Calories: Approximately 70–90 calories per serving when made as per the original recipe without added sweeteners.
    • Carbohydrates: 18g (including natural sugars from blackberries and coconut water).
    • Protein: 1g (primarily from coconut).
    • Fat: 0.5g (minimal, mostly healthy fats from coconut).
    • Vitamin C: More than 25% of the daily value, mainly from the fresh lime juice and blackberries.
    • Potassium: A good source, due to coconut water content, helping with hydration.
    • Antioxidants: Rich in antioxidants from blackberries, offering health benefits and supporting the immune system.

    This drink not only quenches your thirst but also serves as a nutritious and tasty choice for anyone looking to elevate their hydration game. As with all refreshing recipes, the key is balance, and this mojito offers just that.

    FAQs: Frequently Asked Questions About Refreshing Blackberry Coconut Mojito Drink

    1. Can I use frozen blackberries?

    Absolutely! Frozen blackberries work just as well in this recipe. They will create a colder, slushier texture, making for an even more refreshing drink.

    2. Is there a way to make this drink less sweet?

    Certainly! Simply reduce the amount of sweetener, or opt for unsweetened coconut water. You can also increase the lime juice for more tang.

    3. Can I substitute coconut water with anything else?

    Yes! Sparkling water or regular water can act as a substitutes, though they will change the drink’s flavor slightly. Coconut milk can be used as well but will create a creamier drink.

    4. Can the mojito be made ahead of time?

    You can make the mixture ahead of time without the ice and store it in the refrigerator. Add fresh mint, ice, and any optional sweetener right before serving.

    5. What other fruits can I use in this drink?

    You can experiment with a variety of berries like raspberries, strawberries, or even mango for a tropical twist! Each fruit will bring its unique flavor profile.

    This FAQ section addresses common inquiries and offers clear, concise answers, ensuring that any cook, regardless of skill level, will feel informed and confident in making their Refreshing Blackberry Coconut Mojito Drink.


    In crafting this Refreshing Blackberry Coconut Mojito Drink, we’ve explored its making, benefits, and nutritional value. With customization options and storage tips, this recipe is perfect for all – from busy professionals to enthusiastic home cooks. So gather your ingredients, rally your friends, and create this vibrant drink. Cheers to refreshing recipes that bring us together!

  • Easy Matcha Rose Latte

    Easy Matcha Rose Latte

    Easy Matcha Rose Latte: A Tropical Delight

    Introduction to Easy Matcha Rose Latte

    Who doesn’t love a cool, refreshing drink that not only tastes divine but also aligns with health-conscious choices? Enter the Easy Matcha Rose Latte—a recipe that’s perfect for those who wish to bring a touch of café indulgence into their homes. This delightful beverage is more than a tasty treat; it’s a healthful choice that’s simple to prepare and suitable for a variety of dietary needs, including vegan and gluten-free diets.

    The texture of matcha, combined with the floral hints of rose, creates a unique flavor profile that tantalizes the taste buds. Imagine sipping on this vibrant green drink that’s not only beautiful but also packed with antioxidants, thanks to the matcha. You can enjoy this latte warm or cold, making it a versatile drink for any season! For those interested in Starbucks copycat recipes, this one tops the list as it mimics the exotic taste of commercial beverages while using wholesome ingredients that you can easily find in your pantry.

    The Easy Matcha Rose Latte is made with minimal ingredients and is lightning-fast to whip up, perfect for busy lifestyles, whether you’re a student rushing to class, a parent juggling family meals, or a professional in need of a midday pick-me-up. So, grab your whisk, and let’s dive into this captivating recipe that brings a touch of charm and health to your daily routine!

    Benefits and Advantages of Easy Matcha Rose Latte

    The Easy Matcha Rose Latte stands out not just because of its unique flavor, but also due to its numerous health benefits and ease of preparation. Here are some compelling reasons to try this rejuvenating beverage:

    1. Rich in Antioxidants: Matcha is known for its high levels of catechins, particularly EGCG (epigallocatechin gallate), which can help fight free radicals in the body. The antioxidants found in matcha may contribute to improved heart health and support weight management.

    2. Boosts Energy and Focus: Unlike traditional coffee, matcha provides a calm alertness, thanks to the amino acid L-theanine. This means you’ll feel energized without the jitters often associated with coffee consumption.

    3. Hydration and Taste: Infusing your drink with rose water not only enhances the flavor but also provides hydration. Additionally, rose petals are known for their anti-inflammatory properties.

    4. Diet-Friendly: This latte is naturally vegan, gluten-free, and low in calories, making it a reliable option for those who are health-conscious. You can customize it according to your dietary preferences without sacrificing flavor.

    5. Quick and Easy to Make: The preparation time is swift, making it a superb choice for individuals who lead busy lives yet crave a moment of indulgence.

    6. Impressive Presentation: Aesthetics matter, especially for social media-savvy individuals. The beautiful pink and green colors of this drink make it Instagram-worthy, perfect for sharing with friends or enjoying a moment of self-care.

    These qualities position the Easy Matcha Rose Latte as a wonderful addition to anyone’s beverage repertoire, especially for those exploring delicious and healthy Starbucks copycat recipes. Its simplicity allows even novice cooks to create a café-style experience in their own kitchens!

    Ingredients Overview

    Essential Ingredients for Easy Matcha Rose Latte

    To create this vibrant latte, you will need the following ingredients:

    • 1 tsp Matcha Powder: Provides the base flavor and a wealth of health benefits.
    • 1 cup Milk (dairy or plant-based, such as almond, oat, or coconut): Choose your preference; ensure it’s unsweetened for a healthier option.
    • 1 tbsp Rose Water: Adds the distinct floral flavor of rose; look for culinary-grade rose water.
    • 1-2 tsp Sweetener (honey, agave syrup, or maple syrup): Optional, for those who like it sweeter; adjust based on your preference.
    • Ice (optional): For those who prefer iced drinks, especially in warmer months.
    • Edible Rose Petals (for garnish): An optional yet stunning addition that elevates the drink’s presentation.

    Choosing vegan milk alternatives makes this latte accessible for plant-based eaters, while the overall low-calorie nature also caters to those mindful of their diet.

    Dietary Substitutions to Customize Your Easy Matcha Rose Latte

    The great news about the Easy Matcha Rose Latte is its flexibility. Here are some suggested substitutions to customize the recipe to fit various dietary needs:

    • Milk Options: You can substitute the cow’s milk with non-dairy alternatives like soy, almond, coconut, or oat milk. Each offers a unique flavor and texture, with almond milk being a favorite for its low calorie content.

    • Sweeteners: For a sugar-free option, consider using stevia or erythritol. If you prefer a low-glycemic option, opt for monk fruit sweetener.

    • Rose Water Alternatives: If rose water is unavailable, you can replace it with vanilla extract for an entirely different flavor experience.

    • Matcha Quality: Some matcha is ceremonial-grade, while others are culinary-grade. If you’re on a budget, culinary-grade matcha works perfectly for lattes!

    These adjustments make this Easy Matcha Rose Latte an inclusive recipe that can be enjoyed by everyone, regardless of dietary restrictions!

    How to Prepare the Perfect Easy Matcha Rose Latte: Step-by-Step Guide

    Making the Easy Matcha Rose Latte is an easy and enjoyable process. Follow these step-by-step instructions to achieve latte perfection:

    1. Gather Your Ingredients: Start by collecting all necessary ingredients listed above to ensure a smooth preparation process.

    2. Sift Matcha Powder: In a small bowl, sift 1 teaspoon of matcha powder to remove any clumps. This step will ensure a smooth mixture when whisking.

    3. Whisk with Water: Add 2 tablespoons of hot water (not boiling) to the sifted matcha. Use a bamboo whisk (chasen) or a frother to whisk until frothy and well combined. This should take about 1-2 minutes.

    4. Heat the Milk: In a saucepan, heat 1 cup of your chosen milk over medium heat until warm but not boiling. If you prefer an iced latte, skip this step.

    5. Combine Matcha and Milk: Once the milk is heated, pour it into the bowl with the matcha mixture, or use a pitcher to combine them. Stir well to integrate all flavors.

    6. Add Rose Water: Add 1 tablespoon of rose water to the mixture, adjusting the quantity based on your taste preference. For more floral intensity, you may add another teaspoon.

    7. Sweeten to Taste: If desired, add 1-2 teaspoons of your chosen sweetener to the latte. Stir until completely dissolved.

    8. Serve Warm or Cold: For a warm latte, pour it directly into a cup, and garnish with edible rose petals if desired. For an iced version, fill a tall glass with ice and then pour the matcha mixture over the ice.

    9. Enjoy and Customize: Sip your delightful Easy Matcha Rose Latte slowly, savoring the creamy texture and floral essence. Feel free to adjust the sweetness or rose flavor to your liking.

    This simple yet elegant recipe is a fantastic example of Starbucks copycat recipes, offering café-quality flavor right at home.

    Mastering Easy Matcha Rose Latte: Advanced Tips and Variations

    Here are some advanced tips and potential variations to make your Easy Matcha Rose Latte even more extraordinary:

    1. Experiment with Different Milks: Try different types of milk to find your perfect match. For instance, coconut milk will give a richer texture, while almond milk is lighter.

    2. Froth Your Milk: For a barista-style experience, froth your milk using a milk frother or by shaking it in a sealed jar before heating.

    3. Add Vanilla or Chai Spice: Consider enhancing your latte with a dash of vanilla extract or a sprinkle of chai spice for a creative twist.

    4. Layering Flavors: For a more complex flavor profile, you might want to add a layer of flavors, such as turmeric or cocoa powder blended with the matcha.

    5. Make It a Smoothie: Blend the latte ingredients with ice for a delicious matcha rose smoothie, perfect for a summer day!

    These tips will help you elevate your Easy Matcha Rose Latte experience while giving you various options to play with flavors and textures.

    How to Store Easy Matcha Rose Latte: Best Practices

    While this refreshing drink is best enjoyed fresh, you can store leftovers properly to maintain its quality:

    1. Refrigeration: If you have extras, store the Easy Matcha Rose Latte in an airtight container in the refrigerator. It’s best used within 24 hours for optimal flavor.

    2. Iced Lattes: If you’ve made an iced version, avoid storing it with ice cubes, as this could dilute the flavor. Instead, pour the drink into a container and chill.

    3. Reheating: If you’ve stored the latte due to leftovers, you can reheat it on the stovetop over low heat or in the microwave. Stir well to combine before serving.

    These practices can help keep your homemade latte delicious for later enjoyment, offering a practical solution that aligns with the concept of Starbucks copycat recipes!

    Nutritional Value of Easy Matcha Rose Latte

    Understanding the nutritional value of what you consume is crucial, especially in a health-conscious world. Here is the approximate nutrition information for one serving (without sweeteners) of the Easy Matcha Rose Latte:

    • Calories: 80 (approx.)
    • Total Fat: 4g
    • Saturated Fat: 2g (if using coconut or whole milk)
    • Protein: 3g
    • Carbohydrates: 9g
    • Fiber: 0g
    • Sugar: 7g (if sweetened)
    • Calcium: 120mg (depends on milk choice)
    • Antioxidants: High, due to matcha content

    This nutritional overview makes the Easy Matcha Rose Latte an appealing drink that can fit well into a balanced diet. It offers minimal calories and provides antioxidants while being adaptable to lower sugar versions based on your preference or diet.

    FAQs: Frequently Asked Questions About Easy Matcha Rose Latte

    Can I make this latte without matcha?

    While matcha is the star ingredient, you can use green tea instead, but the flavor profile will change.

    How can I make this recipe sugar-free?

    Substituting your sweetener with a sugar-free alternative like stevia or monk fruit will achieve the desired sweetness without calories.

    Is rose water safe to consume?

    Yes, culinary-grade rose water is safe for consumption. Always check the label to ensure it’s food-grade.

    Can I use flavored milk instead of plain?

    Absolutely! Using vanilla almond milk, for instance, will add a delightful flavor to your latte!

    What else can I use this rose matcha for?

    Besides lattes, you can add rose matcha to smoothies, baked goods, or even overnight oats for a unique touch.

    This friendly FAQ section provides insights that will help amateur cooks succeed in making this easy yet elegant Easy Matcha Rose Latte, framing it as an essential recipe among Starbucks copycat recipes.


    Your journey to creating an idyllic beverage begins with this Easy Matcha Rose Latte recipe! With its health benefits, ease of preparation, and endless customization options, it’s sure to become a favorite in your home. So why not give it a try today? Enjoy the rich flavors, the health boosts, and the sheer indulgence of this tropical delight that can elevate any time of day!

  • IM Obsessed Been Making This Matcha Latte Non-Stop

    IM Obsessed Been Making This Matcha Latte Non-Stop

    I’M Obsessed! Been Making This Matcha Latte Non-Stop!: A Tropical Delight

    Introduction to I’M Obsessed! Been Making This Matcha Latte Non-Stop!

    Welcome to the delightful world of matcha lattes! If you’ve been searching for an invigorating beverage that checks all the boxes—delicious, easy to make, healthy, vegan, and gluten-free—look no further. This matcha latte recipe is a perfect take on popular starbucks copycat recipes, meaning you can enjoy its rich flavor and vibrant green color without stepping outside your home. With its smooth and creamy texture, this latte offers not only a delightful taste but also a wealth of health benefits, making it an excellent choice for busy parents, students, food enthusiasts, and health-conscious individuals alike.

    This matcha latte artfully combines quality matcha powder with your choice of milk, creating a refreshing drink that can be customized to cater to various dietary needs. Whether you’re looking for a morning boost, a midday pick-me-up, or a soothing evening ritual, this latte is versatile enough to fit any occasion. Additionally, its simplicity makes it enjoyable for novice cooks and seasoned kitchen warriors. Stir up this vibrant green elixir to discover vibrant flavors and health benefits for yourself!


    Benefits and Advantages of I’M Obsessed! Been Making This Matcha Latte Non-Stop!

    This matcha latte is not just another beverage option; it’s an experience that nourishes both the body and soul. Here are some of the top benefits of making this delightful drink:

    1. Easy Preparation: The beauty of this recipe lies in its simplicity. With just a few key ingredients, you can whip up this matcha latte in less than 10 minutes. Most home cooks can handle this, and busy parents will appreciate how fast it is to make.

    2. Health Benefits: Matcha is packed with antioxidants and essential nutrients. It can boost metabolism, enhance mood, and even promote fat burning. Additionally, it contains L-theanine, an amino acid that helps with relaxation while keeping energy levels up, providing a balanced source of caffeine that avoids typical jitters.

    3. Diet-Friendly: This recipe is inherently vegan and gluten-free, making it an excellent option for those with dietary restrictions. Those who are watching their calorie intake will also relish the possibility to tweak ingredients, using low-calorie sweeteners or milk alternatives.

    4. Versatile Flavor Profiles: Matcha lattes can cater to everyone’s taste buds. Whether you prefer a hint of vanilla, a sprinkle of cinnamon, or a shot of peppermint, this recipe can adapt to suit a variety of flavors.

    By preparing this delicious matcha latte, you’ll not only feel empowered in the kitchen, but you will also be contributing positively to your wellness journey. The fusion of health and flavor makes this recipe stand out in the realm of starbucks copycat recipes.


    Ingredients Overview

    Essential Ingredients for I’M Obsessed! Been Making This Matcha Latte Non-Stop!

    To create your perfect matcha latte, gather the following ingredients:

    • 1 teaspoon matcha powder: Use high-quality ceremonial-grade matcha for the best flavor and health benefits.
    • 1 cup milk or milk alternative (almond, oat, soy, or coconut milk work great): Choose a milk that fits your dietary lifestyle—feel free to go nut-free or low-calorie!
    • 1-2 teaspoons sweetener (maple syrup, honey, agave, or your favorite low-calorie sweetener): Adjust to taste, making it keto-friendly or sugar-free when necessary.
    • 1/4 cup hot water (not boiling): This allows for easier mixing of the matcha without burning the delicate powder.
    • Optional topping: A sprinkle of cinnamon or cocoa powder for added flavor and visual appeal.

    Dietary Substitutions to Customize Your I’M Obsessed! Been Making This Matcha Latte Non-Stop!

    • Milk Alternatives: If you’re lactose intolerant or prefer a plant-based option, almond milk, coconut milk, or oat milk work beautifully with matcha. Make sure to select unsweetened varieties if you want to reduce sugar intake.

    • Sweeteners: For those following a keto diet or reducing sugar, consider using monk fruit sweetener or erythritol as a sugar substitute. For a more natural approach, opt for raw honey or pure maple syrup.

    • Flavorings: Customize your latte with vanilla extract, peppermint oil, or spices such as ginger or nutmeg to explore different flavor dimensions.

    By keeping these adaptable options in mind, your matcha latte can easily cater to your unique dietary needs, ensuring everyone will enjoy this recipe.


    How to Prepare the Perfect I’M Obsessed! Been Making This Matcha Latte Non-Stop!: Step-by-Step Guide

    Ready to create your own delightful matcha latte? Follow these simple steps to achieve the perfect drink.

    1. Prepare the Milk: In a small saucepan, gently heat 1 cup of milk (or your chosen alternative) over low heat. Avoid boiling the milk, as it may alter the taste and texture.

    2. Mix Hot Water with Matcha: In a small bowl, add 1 teaspoon of matcha powder and pour in 1/4 cup of hot water. Use a whisk or matcha whisk to blend until no lumps remain. This ensures a smooth and creamy texture, free of clumps.

    3. Sweeten It Up: Incorporate 1-2 teaspoons of your preferred sweetener into the mix, stirring well. You can adjust the sweetness level to your taste preferences, making it suitable for everyone.

    4. Combine the Ingredients: Once the milk is warm, slowly pour it into the matcha mixture while whisking continuously. This allows the flavors to meld beautifully, resulting in a delightful beverage.

    5. Froth the Milk (Optional): If you desire a frothy latte, use a milk frother or a blender to incorporate air into the milk after combining it with the matcha. Frothing adds a lovely texture and visual appeal.

    6. Serve and Garnish: Pour the matcha latte into your favorite mug. For an extra touch, sprinkle with cinnamon or cocoa powder on top.

    7. Enjoy!: Sip your delicious creation and savor every moment! You can also serve this iced during warmer months; just chill the milk and pour it over ice.

    With these clear instructions, preparing this matcha latte becomes an enjoyable experience in your kitchen, with pointers on customization for those following starbucks copycat recipes.


    Mastering I’M Obsessed! Been Making This Matcha Latte Non-Stop!: Advanced Tips and Variations

    Enhance your matcha latte making skills with these advanced tips and variations:

    • Chill It: For a refreshing iced version, prepare the matcha as directed, then pour it over ice. Substitute ice-cold milk for a invigorating summer drink.

    • Add Vanilla or Almond Extract: Elevate the flavor even further by adding a few drops of pure vanilla or almond extract for an aromatic experience that complements the matcha beautifully.

    • Infuse with Turmeric: Create a wellness-focused latte by adding a pinch of turmeric. Not only does it provide a vibrant yellow color, but it also offers anti-inflammatory benefits.

    • Natural Milk Frothing: Invest in a handheld milk frother to effortlessly create a beautifully frothed latte that mirrors your favorite coffee shop beverages, elevating your at-home latte experience.

    By utilizing these helpful tips, you can explore different horizons with your matcha latte, bringing in diverse flavors while still enjoying the foundational essence of this drink from popular starbucks copycat recipes.


    How to Store I’M Obsessed! Been Making This Matcha Latte Non-Stop!: Best Practices

    Storing your matcha latte can be tricky, but here are some best practices:

    • Refrigeration: If you have leftover matcha latte, store it in an airtight container in the refrigerator. Consume it within 24 hours for the best taste and to ensure the quality of the matcha.

    • Freezing: For long-term storage, consider freezing the matcha latte mixture (without milk) in an ice cube tray. Blend the cubes with milk later for a refreshing drink whenever you desire!

    • Reheating: If you need to reheat the latte, do so gently in a saucepan over low heat, stirring often. Avoid boiling to retain the perfect flavor and texture.

    By following these storage practices, you can ensure that your matcha latte retains its delightful taste while allowing you to concoct your version of starbucks copycat recipes even after some time has passed.


    Nutritional Value of I’M Obsessed! Been Making This Matcha Latte Non-Stop!

    Understanding the nutritional value of your homemade matcha latte can help you make informed dietary choices. Here’s a general overview of the nutritional information per serving (using almond milk and no sweetener):

    • Calories: 80-120 (depending on milk used)
    • Protein: 2-4g
    • Fat: 2.5-7g (depends on type of milk)
    • Carbohydrates: 10-15g (without added sweetener)
    • Fiber: 1g
    • Sugars: 0-2g (without added sweetener)
    • Caffeine: Approximately 35mg from matcha

    This matcha latte stands as an excellent option for a range of dietary considerations, from those who want low-calorie options to individuals craving sustainable energy sources. The mix of nutrients also makes it a smart addition to your healthy lifestyle routine and a joyous twist on starbucks copycat recipes.


    FAQs: Frequently Asked Questions About I’M Obsessed! Been Making This Matcha Latte Non-Stop!

    1. Can I use any type of matcha?
      Yes, while culinary-grade matcha is acceptable, we recommend using ceremonial-grade matcha for the best flavor and health benefits.

    2. What should I do if my matcha clumps?
      Use a whisk or a matcha frother to thoroughly combine the matcha powder with hot water before adding it to the milk. You can also strain the mixture to remove clumps.

    3. Can I make this matcha latte iced?
      Absolutely! Just prepare the matcha and milk separately, let them cool, and then pour them over ice to enjoy a cold beverage.

    4. Is matcha latte safe for everyone?
      Generally, matcha is safe for most people in moderation. However, those who are sensitive to caffeine should be cautious with its consumption.

    5. Can I adjust the sweetness?
      Yes, you can add or reduce sweetener to suit your taste preferences, making adjustments to fit your dietary needs seamlessly.

    By addressing these common queries, we enable you to embrace this recipe confidently, safeguarding your enjoyment and satisfaction when it comes to making your favorite starbucks copycat recipes.


    By following the steps and tips provided, you can fully embrace the art of crafting the perfect matcha latte. Dive into this enriching and flavorful drink that supports your health while showcasing a blend of creativity in your kitchen. Enjoy making it non-stop!

  • Creamy Tiramisu Matcha Latte

    Creamy Tiramisu Matcha Latte

    Creamy Tiramisu Matcha Latte: A Tropical Delight

    Introduction to Creamy Tiramisu Matcha Latte

    Are you looking for an exciting twist on traditional dessert recipes that tantalizes your taste buds while remaining healthy and easy to prepare? If so, the Creamy Tiramisu Matcha Latte is the perfect solution! This delightful beverage combines the rich, indulgent flavors of a classic tiramisu with the vibrant, earthy notes of matcha green tea, making it a unique treat for any occasion. Its creamy texture and unique flavor profile are sure to impress family and friends alike.

    In addition to its indulgent taste, this recipe is also incredibly versatile. It caters to various dietary needs, being easily customizable for those who are gluten-free, vegan, or health-conscious. The matcha powder not only adds stunning color but also packs a range of health benefits, including antioxidants and a natural energy boost. This means that you can enjoy this dessert latte without guilt!

    Impress your loved ones or treat yourself to a cozy afternoon pick-me-up with this Creamy Tiramisu Matcha Latte. Whether you’re a busy parent, a student, or simply someone who wants to indulge in a luxurious but healthy option, this recipe is a must-try. Let’s dive deeper into the advantages and preparation of this captivating dessert drink!

    Benefits and Advantages of Creamy Tiramisu Matcha Latte

    The Creamy Tiramisu Matcha Latte is more than just a delightful treat; it’s a smart choice for a range of reasons. Here’s why this drink stands out in the world of dessert recipes:

    1. Ease of Preparation: One of the key benefits of this recipe is its simplicity. With just a few ingredients and straightforward steps, anyone can whip up this magical drink in less than 30 minutes. It’s an ideal option for busy individuals who still want to enjoy a homemade delight.

    2. Health Benefits: Incorporating matcha into your regimen can do wonders for your health. Matcha is rich in antioxidants known as catechins, specifically epigallocatechin gallate (EGCG), which may help enhance metabolism and support heart health. Compared to regular green tea, matcha offers higher concentrations of these beneficial compounds. Furthermore, it promotes a sense of calm alertness, making it a perfect alternative to coffee for those who want a gentle boost without the jitters.

    3. Customizable to Dietary Needs: This recipe can easily accommodate various dietary preferences. Are you vegan? Simply use a plant-based milk alternative. Gluten-free? You can skip the traditional ladyfingers and use a gluten-free version instead. It’s a dessert latte that nearly everyone can enjoy!

    4. Impressive Flavor Profile: The combination of creamy textures and rich flavors is what sets the Creamy Tiramisu Matcha Latte apart from other dessert recipes. The smooth and velvety milk paired with the deep, complex notes of matcha creates a sophisticated drink that’s perfect for special occasions or even a regular day.

    5. Stress Relief: Caring for your mental health is just as important as physical wellness, and what better way to pamper yourself than with a dreamy beverage? Enjoying this latte can be a nurturing self-care routine, allowing you to take a moment to relax and indulge in something delicious.

    Therefore, if you’re looking for a delightful way to perk up your day, the Creamy Tiramisu Matcha Latte checks all the boxes—deliciousness, nutritional benefits, and adaptability.

    Ingredients Overview

    Essential Ingredients for Creamy Tiramisu Matcha Latte

    Creating this luxurious drink requires a selection of thoughtfully chosen ingredients. Below is a detailed list of what you’ll need, including precision measurements and the purposes of each key ingredient.

    1. Matcha Powder (2 tablespoons)
    2. The star of this recipe, matcha powder, provides flavor, color, and an array of health benefits.

    3. Milk (2 cups, any dairy or non-dairy milk)

    4. For a creamy texture, you can use whole milk for richness, or opt for almond, coconut, or oat milk to keep it vegan.

    5. Sweetener (to taste, options include honey, maple syrup, or agave nectar)

    6. Sweeteners enhance the flavor profile. Choose based on dietary preferences (opt for agave nectar for a vegan option).

    7. Vanilla Extract (1 teaspoon)

    8. This ingredient adds a wonderfully warm aroma that complements the earthy notes of matcha.

    9. Mascarpone Cheese (1/2 cup, optional for creaminess)

    10. Traditional tiramisu includes mascarpone, giving the latte a luxurious creamy texture. For a vegan alternative, consider cashew cream.

    11. Ladyfingers or Cake (optional)

    12. If you wish to add a traditional twist, break up gluten-free ladyfingers or a sponge cake to garnish your latte.

    13. Cocoa Powder (for garnish)

    14. Dusting some cocoa powder on top finishes off the drink and adds a dash of visual appeal.

    By choosing the right blend of ingredients, you can create a nourishing treat that fits perfectly within various dietary preferences while also satisfying the craving for indulgent dessert recipes.

    Dietary Substitutions to Customize Your Creamy Tiramisu Matcha Latte

    Whether you’re adapting the Creamy Tiramisu Matcha Latte for health reasons or personal taste, there are numerous substitutions you can make:

    • Milk Alternatives: If you want to keep this drink dairy-free, consider using cashew milk for its creamy consistency, or unsweetened almond milk for a low-calorie option. You can also use soy or oat milk, depending on what suits your dietary needs better.

    • Sweetener Alternatives: Tailor the sweetness to your liking. For a low-calorie choice, consider stevia or monk fruit sweetener. If you’re looking for a sugar-free option, a vanilla-flavored sugar substitute can work wonders.

    • Vegan Options: Replace mascarpone cheese with blended silken tofu or cashews blended with a little lemon juice and coconut cream to maintain that creamy texture. This transformation keeps it vegan without sacrificing flavor.

    • Gluten-Free Choices: Traditional ladyfingers can be replaced with a gluten-free sponge cake or omitted entirely for a lighter version. You could also try homemade gluten-free cookies for added fun.

    These substitutions ensure that anyone can enjoy this delightful beverage without compromising their dietary needs or personal preferences.

    How to Prepare the Perfect Creamy Tiramisu Matcha Latte: Step-by-Step Guide

    Making the Creamy Tiramisu Matcha Latte is an enjoyable adventure for any home cook. Follow these detailed steps to create your own cup of delight:

    1. Prepare the Matcha:
    2. In a small bowl, sift 2 tablespoons of matcha powder to remove any clumps. This ensures a smooth consistency in your drink.

    3. Mix with Hot Water:

    4. Add about 2-3 tablespoons of hot (not boiling) water to the sifted matcha powder. Using a bamboo whisk (chasen), mix until the matcha is completely dissolved and forms a smooth paste. If you don’t have a whisk, a small frother or even a spoon will work!

    5. Heat the Milk:

    6. In a saucepan, heat your choice of milk on medium heat until it’s warm but not boiling. If you prefer a frothy texture, you can use a milk frother or a blender to froth the milk at this point.

    7. Sweeten to Taste:

    8. While the milk is heating, stir in your preferred sweetener (honey, maple syrup, etc.) to the matcha mixture. Adjust the sweetness according to your preference.

    9. Combine:

    10. Pour the warm milk into the matcha mixture, whisking until fully combined. This is where the creamy latte magic happens!

    11. Add Flavor:

    12. Stir in 1 teaspoon of vanilla extract for an additional flavor dimension. For extra creaminess, blend in mascarpone cheese or your chosen substitute.

    13. Prepare Garnish:

    14. If using, break the ladyfingers or sponge cake into small pieces and arrange them in the bottom of your serving glass or cup.

    15. Layer the Latte:

    16. Pour the matcha latte carefully over the cookie pieces in your glass. The contrast in textures offers an impressive presentation.

    17. Dust with Cocoa Powder:

    18. Finish off by dusting a light sprinkle of cocoa powder on the top for visual appeal and a delicious chocolatey hint.

    19. Serve:

      • Enjoy your Creamy Tiramisu Matcha Latte hot or cold! Pair it with your favorite pastry or enjoy it on its own as a fantastic afternoon treat.

    Following these straightforward steps guarantees that your latte will impress and satisfy anyone who tries it!

    Mastering Creamy Tiramisu Matcha Latte: Advanced Tips and Variations

    To elevate your Creamy Tiramisu Matcha Latte further, consider these advanced tips and variations:

    • Infuse Flavor: Experiment with adding a hint of almond or hazelnut extract for a nutty twist. This adds a refined complexity to your latte that can intrigue more adventurous palates.

    • Adjust the Consistency: If you prefer a thicker latte, increase the amount of mascarpone or substitute it with vegan cream cheese. You can even add a scoop of protein powder for a meal replacement version.

    • Experiment with Matcha Quality: The quality of matcha plays a significant role in flavor. Consider sourcing ceremonial grade matcha for a more vibrant taste, particularly when showcasing it in this beautiful drink.

    • Mix It Up: Consider adding a scoop of vanilla or chocolate protein powder to make your latte more nutritious, perfect for a pre- or post-workout boost.

    • Chill It for Summer: Prefer iced versions during the hot months? Simply make the latte with chilled milk and serve over ice. You can even blend it into a smoothie for an ice cream-style treat!

    By showcasing these variations, you’ll not only perfect your latte but also encourage creativity in the kitchen, making your dessert recipes even more exciting!

    How to Store Creamy Tiramisu Matcha Latte: Best Practices

    If you find yourself with leftovers of your Creamy Tiramisu Matcha Latte, proper storage is key to maintaining its deliciousness.

    • Refrigeration: Ideally, store any leftovers in an airtight container in the refrigerator for up to three days. When you’re ready to enjoy it again, simply stir well and reheat gently in a saucepan or the microwave.

    • Freezing: Freezing is not recommended for this drink, as it may affect the texture of the milk and matcha. However, you can freeze the matcha mixture separately (without milk) in an airtight container for up to a month, thaw, and mix it with fresh, cold milk when you’re ready to serve.

    • Serving Cold: If you prefer to enjoy your latte cold, store it in the fridge until ready to drink. You can add ice cubes just before serving for that refreshing chilled experience.

    Following these best practices ensures you can enjoy your latte throughout the week without compromising flavor or quality, making this recipe an excellent option for meal prep enthusiasts.

    Nutritional Value of Creamy Tiramisu Matcha Latte

    Understanding the nutritional benefits of your creations is essential, especially when it comes to making informed dietary choices. Here’s a breakdown of the nutritional values for a standard serving of Creamy Tiramisu Matcha Latte:

    • Calories: Approximately 250-300 calories, depending on the milk and sweeteners used.
    • Fat: 10-15 grams (varies with the type of milk and whether you include mascarpone cheese).
    • Carbohydrates: 35-40 grams (mainly from sweeteners and milk).
    • Protein: 5-8 grams, depending on whether you choose a fortified non-dairy milk or dairy options.
    • Sugar: 12-20 grams from sweeteners (can be reduced based on your preference).

    This drink not only serves as a treat but also provides essential nutrients. The inclusion of matcha contributes beneficial antioxidants, while the choice of milk can provide calcium and vitamin D, making it an excellent option for a balanced snack or dessert.

    FAQs: Frequently Asked Questions About Creamy Tiramisu Matcha Latte

    Here are some common queries regarding the Creamy Tiramisu Matcha Latte along with clear, concise answers:

    Can I make this recipe without matcha?

    Yes! If you’re not a fan of matcha, you can create a creamy tiramisu latte using espresso for a traditional coffee flavor. Just adjust the measurements accordingly.

    What can I use instead of mascarpone cheese?

    For a lighter, vegan alternative, consider using blended silken tofu or cashew cream as a substitute for mascarpone cheese. This will keep that creamy texture intact.

    Is this drink gluten-free?

    Certainly! By using gluten-free ladyfingers or skipping them altogether for a lighter version, you can easily make this drink gluten-free.

    How much caffeine does this latte contain?

    Matcha contains about 30-50 mg of caffeine per teaspoon (2g), while a standard espresso contains around 63 mg per shot. This makes the matcha option generally lower in caffeine, suitable for those sensitive to high doses.

    Can I make this ahead of time?

    Yes, you can prepare the matcha mixture in advance and combine it with the milk just before serving. It will keep in the fridge for up to three days.

    How can I adjust the sweetness level?

    Sweetness can easily be adjusted based on your preference. Start with a small amount of sweetener and gradually increase it until you reach your desired level of sweetness.

    Embrace the culinary delight of this Creamy Tiramisu Matcha Latte to enjoy a dessert that bridges the gap between indulgence and health. Whether served warm on a chilly day or cold during a hot afternoon, this versatile latte is bound to be a hit with everyone, no matter their dietary restrictions! So grab your apron, and let’s get mixing!

  • The Best Irish Beer Cheese Dip

    The Best Irish Beer Cheese Dip

    The Best Irish Beer Cheese Dip: A Tropical Delight

    Introduction to The Best Irish Beer Cheese Dip

    Are you in search of flavorful appetizer recipes that are easy to make and guaranteed to impress your guests? Look no further! The Best Irish Beer Cheese Dip is a crowd-pleaser that embodies the perfect blend of creamy cheese, robust flavors, and, of course, beer. This recipe is not only simple to prepare, but it also captures the heart of Irish culinary traditions. Whether you are planning a family gathering, a casual get-together with friends, or simply a cozy movie night at home, this dip will elevate your snacking experience.

    Beyond its delicious taste, this Irish beer cheese dip has numerous benefits. It’s versatile enough to cater to various dietary restrictions and preferences. You can easily adapt it to be vegan by using plant-based cheese and gluten-free by opting for gluten-free beer. Regardless of your dietary needs, the dip remains a rich, indulgent treat that is high in flavor without compromising on your health goals. So get ready to impress your loved ones with a delicious appetizer that is quick to whip up and sure to satisfy!

    Benefits and Advantages of The Best Irish Beer Cheese Dip

    When it comes to appetizer recipes, ease of preparation can make all the difference. The Best Irish Beer Cheese Dip excels in this regard! With minimal cooking required, you can prepare this recipe in under 30 minutes. This quick method makes it an excellent choice for busy parents or working professionals who love flavor but have limited time.

    Aside from its simple preparation, this dip also combines a variety of health benefits. Depending on your ingredient choices, this dip can be lower in fat than traditional cheese dips. By using low-fat cheese or yogurt-based alternatives, you keep that creamy consistency while making it healthier. Moreover, incorporating beer not only adds a depth of flavor but also can provide some nutritional benefits, such as B vitamins and antioxidants when consumed in moderation.

    Another factor that sets this recipe apart is its versatility. Whether served with crunchy vegetables, pretzels, bread, or tortilla chips, the flavor profile of the dip complements various sides perfectly. This adaptability makes it a go-to dip for any occasion, from game nights to holiday parties.

    When serving guests, this dip not only tantalizes the taste buds but also sparks conversations. Its unique Irish roots are sure to make a memorable impression and offer a delightful twist to ordinary appetizer offerings.

    Ingredients Overview

    Essential Ingredients for The Best Irish Beer Cheese Dip

    To craft this delectable Irish beer cheese dip, you will need the following ingredients:

    • 1 cup shredded sharp cheddar cheese – Provides a rich, bold flavor.
    • 1 cup shredded mozzarella cheese – Adds creaminess and helps bind the dip.
    • 1 cup cream cheese (or vegan cream cheese for a dairy-free option) – Ensures a smooth texture.
    • ½ cup Irish stout beer (or gluten-free beer for a gluten-free version) – Infuses the dip with a distinctive flavor.
    • 2 tablespoons Dijon mustard – Offers a tangy kick.
    • 1 tablespoon Worcestershire sauce (vegan Worcestershire can be used) – Enhances umami flavor.
    • 2 cloves garlic, minced – Adds aromatic depth.
    • Salt and pepper to taste – Enhances overall flavors.
    • Optional: chopped scallions or parsley for garnish – Adds freshness and a pop of color.

    This list of ingredients promotes a flavorful experience while allowing for substitutions to cater to various dietary preferences.

    Dietary Substitutions to Customize Your The Best Irish Beer Cheese Dip

    If you’re looking to adapt your Irish beer cheese dip, here are some suggested substitutions:

    1. Cheese Options:
    2. For a vegan version, replace dairy cheese with plant-based shredded cheese (many brands now offer delicious flavors).
    3. You can also use nutritional yeast for a cheesy taste without the dairy.

    4. Beer Alternatives:

    5. If you prefer not to use alcohol, opt for a non-alcoholic beer for a similar taste.
    6. For a completely different flavor, try using a flavored soda or ginger ale, which adds sweetness.

    7. Thickening Agents:

    8. If you’re looking to lower calories, replace cream cheese with Greek yogurt or a mix of yogurt and cashew cream.
    9. Silken tofu can also create a velvety texture while being low-calorie.

    10. Add-Ins:

    11. Consider adding cooked bacon for a smoky flavor or sautéed mushrooms for an earthy depth.
    12. Changing the type of mustard can also impact the flavor – spicy or whole grain can provide interesting variations.

    These substitutions will keep the dish accessible to different dietary needs while maintaining its integrity and deliciousness.

    How to Prepare the Perfect The Best Irish Beer Cheese Dip: Step-by-Step Guide

    Follow this simple step-by-step guide to create The Best Irish Beer Cheese Dip that will have your guests coming back for more:

    1. Prepare the Base
    2. In a medium saucepan, combine the cream cheese and shredded cheeses. This forms the base of your dip. Use a spatula to mix it gently over low heat, ensuring the cheese starts melting.

    3. Mix Ingredients

    4. Once the cheese has softened, slowly pour in the Irish stout beer. Continue to stir the mixture until fully combined. The beer will not only contribute flavor but help achieve a smooth consistency.

    5. Incorporate Flavorings

    6. Next, add the Dijon mustard, Worcestershire sauce, minced garlic, and a pinch of salt and pepper to the melted cheese mixture. Stir very well until these ingredients are integrated fully.

    7. Adjust Texture

    8. If the dip becomes too thick, it can be adjusted by adding an additional splash of beer or a bit of milk (dairy or plant-based). Your goal is a creamy texture that holds its form but is also easily spreadable.

    9. Taste Test and Season

    10. Before completing your dip, taste it and adjust the seasoning if necessary. You may want to add more salt, pepper, or even an extra splash of Dijon depending on your flavor preferences.

    11. Garnish

    12. Once satisfied with the flavor and texture, transfer your dip to a serving bowl. For an added touch, garnish with chopped scallions or fresh parsley on top.

    13. Serve Warm

    14. This dip is best enjoyed warm! Serve it immediately with a platter of your favorite dippers such as pretzels, sliced baguette, or assorted vegetables.

    15. Storage Tip

    16. If you have leftovers, allow the dip to cool completely before storing it in an airtight container. You’ll find detailed storage instructions in a later section.

    By following these straightforward steps, you can create an irresistible appetizer that will be a hit at any gathering!

    Mastering The Best Irish Beer Cheese Dip: Advanced Tips and Variations

    To elevate your Irish beer cheese dip further, here are some advanced tips and delightful variations:

    • Add Heat: If you enjoy a bit of spice, consider adding diced jalapeños or a dash of cayenne pepper to the mix. This will give your dip a fun kick.

    • Smoky Flavor: Incorporate smoked cheddar or add a few drops of liquid smoke to enhance the dip’s taste profile and give it a smoky complexity.

    • Herbs and Spices: Experiment with herbs like thyme, rosemary, or even a hint of nutmeg for a unique flavor combination.

    • Change the Cheese: Explore other cheese combinations such as pepper jack for heat or gouda for a creamy texture. Each cheese brings a unique flavor and can transform the dish.

    • Baking Variation: For a baked version, transfer your prepared dip to an oven-safe dish, top with extra cheese, and bake at 375°F (190°C) until bubbly and golden (approximately 20-25 minutes). This method gives a crispy top that many guests will love.

    By employing these tips, you can ensure that your beer cheese dip maintains its status as one of the most delightful appetizer recipes you can serve!

    How to Store The Best Irish Beer Cheese Dip: Best Practices

    Storing your Irish beer cheese dip properly will ensure that it maintains its flavor and texture. Here are the best practices for refrigerating and reheating:

    Refrigeration:
    – If you have leftovers, let the dip cool to room temperature.
    – Transfer it to an airtight container and refrigerate for up to one week. Remember to label it with the date for your reference.

    Freezing:
    – For long-term storage, you can freeze the dip. Pour it into a freezer-safe container, allowing for some expansion space, and seal tightly. It will keep well in the freezer for up to three months.

    Reheating:
    – To reheat refrigerated or thawed dip, transfer it to a saucepan over low heat. Stir continuously until warmed through. You may need to add a splash of beer or cream to restore creaminess.

    • For baked dip, reheat in the oven at 350°F (175°C) until hot and bubbly. Checking frequently will ensure it doesn’t dry out.

    By following these storage guidelines, you can enjoy your Irish beer cheese dip even after the party!

    Nutritional Value of The Best Irish Beer Cheese Dip

    Understanding the nutritional value of The Best Irish Beer Cheese Dip will help you keep track of your diet while relishing this treat. Here is a rough breakdown based on the provided ingredients listed above. Please note that these values may vary depending on specific brands and quantities used.

    1. Calories: Approximately 290 calories per serving (2 tablespoons).
    2. Total Fat: 20g, with around 12g of saturated fat.
    3. Protein: 10g, mainly derived from the cheese.
    4. Carbohydrates: 6g, with less than 1g of dietary fiber.
    5. Sodium: 400mg, depending on added salt and cheese brands.

    When making substitutions for a healthier dip (like using low-fat cheese or reducing cream cheese), you can significantly cut down on the calorie and fat content.

    With every batch, you can enjoy not only its delightful flavors but also feel good about what you are serving!

    FAQs: Frequently Asked Questions About The Best Irish Beer Cheese Dip

    1. Can I make the beer cheese dip ahead of time?

    Absolutely! You can prepare the dip a day in advance. Just store it in the refrigerator and reheat before serving.

    2. Is this dip gluten-free?

    You can easily make this dip gluten-free by using gluten-free beer and being cautious of condiments like Worcestershire sauce.

    3. Can I use a different type of beer?

    Yes! While Irish stout gives this dip its traditional flavor, you can substitute it with any beer you enjoy, such as a lager or IPA.

    4. How do I make this recipe vegan?

    To make the dip vegan, substitute dairy ingredients with animal-free options like cashew cream and plant-based cheese alternatives.

    5. What should I serve with the dip?

    Serve the dip with your choice of dippable items like bread, pretzels, fresh vegetables (carrots, cucumbers, bell peppers), or tortilla chips.

    6. How long can I store the dip?

    In the refrigerator, it will last up to a week in an airtight container. Frozen, it can last for three months.

    7. Can I bake the dip?

    Yes! Baking the dip gives it a delightful texture. Pour it into an oven-safe dish, top with more cheese, and bake until golden and bubbly.

    Now that you’ve answered these common questions, you’re well-equipped to enjoy what many consider the best Irish beer cheese dip—a fantastic addition to your selection of beloved appetizer recipes!

  • Easy Vanilla Raspberry Iced Latte Recipe

    Easy Vanilla Raspberry Iced Latte Recipe

    Easy Vanilla Raspberry Iced Latte Recipe: A Tropical Delight

    Introduction to Easy Vanilla Raspberry Iced Latte Recipe

    Are you craving a refreshing drink that feels like a tropical getaway without leaving the comfort of your home? Look no further than this Easy Vanilla Raspberry Iced Latte Recipe! Not only is this delightful concoction simple to prepare, but it also brings health benefits to the table. Perfect for anyone seeking a delicious way to cool off, this latte is a stunning blend of creamy vanilla, sweet raspberries, and robust coffee.

    This recipe is an excellent addition to your collection of starbucks copycat recipes, allowing you to make a café-quality beverage right at home. It meets a variety of dietary needs, being vegan, gluten-free, and low-calorie. If you’re a busy parent, a student on the go, or just someone looking for a refreshing yet indulgent treat, this iced latte is the perfect fit. With a minimal list of ingredients and straightforward preparation steps, you’ll find this recipe is easy enough for even the novice home cook while being sophisticated enough for food enthusiasts and lovers of sweet beverages alike.

    Imagine making a vibrant, flavorful beverage that satisfies your coffee cravings while also allowing you to enjoy the tastes of summer. Whether you’re entertaining guests, prepping for a study session, or starting your day off right, this Easy Vanilla Raspberry Iced Latte will brighten any moment. Let’s dive deeper into the benefits of this delightful drink!

    Benefits and Advantages of Easy Vanilla Raspberry Iced Latte Recipe

    One of the primary attractions of the Easy Vanilla Raspberry Iced Latte Recipe is its simplicity. You won’t need any extensive culinary skills or special equipment to whip up this delight. By utilizing common ingredients found in many kitchens, this recipe appeals to a broad audience. Home cooks will appreciate the straightforward preparation, while parents can enjoy making this quick treat with their kids.

    • Health Benefits: This iced latte is not just a delicious beverage; it’s also a healthier alternative to many store-bought drinks. By using natural sweeteners and fresh raspberries, you can enjoy an antioxidant-rich drink that contributes to your daily fruit intake and adds essential vitamins and minerals. Moreover, the recipe can easily be adjusted for low-calorie sweeteners, making it an excellent choice for diet-conscious individuals.

    • Versatility: This latte can be enjoyed anytime—a perfect breakfast companion, a midday boost, or a refreshing evening treat. Its ability to be made quickly makes it ideal for busy professionals or students who need a pick-me-up during long study sessions.

    • Diet-Friendly: The recipe’s vegan, gluten-free, and low-calorie components cater to numerous dietary preferences. From health enthusiasts to those on special diets, this iced latte offers a delightful solution that does not compromise on flavor or enjoyment.

    • Inspiring Creativity: Once you’ve mastered this recipe, it opens the door to experimenting with other variations, flavors, and ingredients. Adjust the berry choices or add spices like cinnamon to create your personalized beverage.

    This Easy Vanilla Raspberry Iced Latte isn’t just a drink—it’s a lifestyle choice that encourages flavorful, healthy living. Its ease of preparation and delightful taste make it an excellent addition to your collection of starbucks copycat recipes.

    Ingredients Overview

    Essential Ingredients for Easy Vanilla Raspberry Iced Latte Recipe

    1. Fresh Raspberries (1/2 cup): These berries provide natural sweetness as well as antioxidants and fiber. You can also use frozen raspberries if fresh ones aren’t available.
    2. Vanilla Extract (1 tablespoon): This adds a rich, aromatic flavor that enhances the latte’s sweetness without the need for artificial sweeteners.
    3. Brewed Coffee (1 cup): Choose your favorite brew; splash in stronger coffee for a bolder taste or opt for a milder one for a lighter drink. Cold brew coffee works great too!
    4. Milk of Choice (1 cup): Any milk can work for this recipe—almond, oat, soy, or traditional dairy milk—making this latte versatile for different diets.
    5. Sweetener (To taste): Honey, agave, or a sugar substitute can be used to sweeten your drink while staying mindful of calorie intake.

    Each of these ingredients plays a key role in making this Easy Vanilla Raspberry Iced Latte satisfying and creamy while still being mindful of health benefits. Don’t be afraid to experiment with proportions to find your perfect balance of flavor!

    Dietary Substitutions to Customize Your Easy Vanilla Raspberry Iced Latte Recipe

    Making this delicious iced latte even more suitable for your dietary needs is simple! Here are some effective substitutions:

    • Milk Alternatives: If you’re lactose intolerant or following a vegan diet, opt for unsweetened almond milk, oat milk, or coconut milk. They all create a creamy texture without the dairy.

    • Sweeteners: If you’re watching your sugar intake, consider using stevia, monk fruit, or other low-calorie sweeteners. These are perfect for a guilt-free indulgence.

    • Decaf Options: For those sensitive to caffeine or looking to enjoy this drink later in the day, using decaffeinated coffee can be a great alternative.

    • Fruit Variations: Try swapping out raspberries for other fruits when they’re in season. Strawberries, blueberries, or even peaches would pair nicely with vanilla!

    By incorporating substitutions that align with varying dietary needs, this Easy Vanilla Raspberry Iced Latte can be enjoyed by everyone, enhancing your repertoire of starbucks copycat recipes that accommodate individual tastes and preferences.

    How to Prepare the Perfect Easy Vanilla Raspberry Iced Latte Recipe: Step-by-Step Guide

    Creating a fabulous Easy Vanilla Raspberry Iced Latte at home is not only simple but also incredibly satisfying. Follow these detailed steps to achieve café-quality results:

    1. Prepare the Coffee Base:
    2. Brew 1 cup of your favorite coffee using a coffee maker, French press, or any preferred method.
    3. Allow the coffee to cool down to room temperature or refrigerate for quicker chilling.

    4. Blend the Raspberries:

    5. In a blender, add the 1/2 cup of fresh or frozen raspberries.
    6. Blend until smooth, which may take around 30 seconds. Adjust the thickness by adding a bit of water if desired.

    7. Sweeten the Raspberry Mixture:

    8. Add a sweetener of your choice to the blended raspberries. Start with 1-2 teaspoons and adjust to taste. Blend again to mix thoroughly.

    9. Combine Coffee and Raspberry:

    10. In a large glass or a shaker, combine the cooled coffee with the sweetened raspberry puree. Stir well or shake vigorously to blend the flavors.

    11. Add Vanilla and Milk:

    12. Stir in a tablespoon of vanilla extract to the coffee and raspberry mixture for that aromatic flavor.
    13. Pour in 1 cup of your milk of choice, stirring again to combine everything homogeneously.

    14. Serve Over Ice:

    15. Fill a tall glass with ice cubes to the brim.
    16. Gently pour the coffee and raspberry blend over the ice, being cautious not to spill!

    17. Garnish & Enjoy:

    18. Optional: Top with whipped cream and extra raspberries for a touch of indulgence and visual appeal.
    19. Insert a straw, stir, and enjoy your refreshing Easy Vanilla Raspberry Iced Latte!

    This well-structured process ensures that your drink is prepared perfectly, with each step contributing to the brilliant flavors you would expect from your favorite starbucks copycat recipes.

    Mastering Easy Vanilla Raspberry Iced Latte Recipe: Advanced Tips and Variations

    To elevate your Easy Vanilla Raspberry Iced Latte to the next level, consider these advanced tips and exciting variations:

    • Infuse with Flavors: Experiment by adding different flavored syrups, such as caramel or hazelnut, for added complexity. Use flavored coffee if you’re feeling adventurous!

    • Make it a Smoothie: Blend in a banana or a handful of spinach (for a nutritional boost) when processing the raspberries for added creaminess and health benefits.

    • Chill the Glass: For a cafe-like experience, chill your glass in the freezer for a few minutes before filling it with your latte. This helps keep your drink colder for longer.

    • Froth Your Milk: If you want a creamier latte, try frothing the milk before adding it to the drink. A frother or a simple immersion blender can do the trick!

    By incorporating these tips and trying out the variations, you can make your Easy Vanilla Raspberry Iced Latte a personal favorite and an attractive option for guests, bringing an array of starbucks copycat recipes to your repertoire.

    How to Store Easy Vanilla Raspberry Iced Latte Recipe: Best Practices

    If you find yourself with leftover Easy Vanilla Raspberry Iced Latte, here’s how to store it to maintain its flavor and freshness:

    • Refrigeration: Store the prepared iced latte in an airtight container in the refrigerator. It should be consumed within 24 hours to retain the best flavor.

    • Separation is Normal: When storing in the fridge, the ingredients may separate over time. Simply stir or shake well before serving again.

    • Freezing Options: If you want to make larger batches for entertaining, consider freezing the blended raspberry mixture in ice cube trays. This approach allows you to blend it with fresh coffee and milk later, giving you the flavors of your starbucks copycat recipes on demand.

    • Do Not Freeze Final Drink: Freezing the complete iced latte can alter the texture and flavor due to the separation of ingredients, so it’s best avoided.

    By following these storage practices, you’re ensured a delightful iced latte ready to enjoy at any moment!

    Nutritional Value of Easy Vanilla Raspberry Iced Latte Recipe

    Understanding the nutritional value of your Easy Vanilla Raspberry Iced Latte can enhance your enjoyment and help maintain a balanced diet. Below is a general breakdown per serving, keeping in mind using unsweetened almond milk and natural sweeteners:

    • Calories: Approximately 120-150 calories, depending on chosen ingredients
    • Carbohydrates: Around 25g (mostly from raspberries)
    • Fat: 2-5g (varies depending on milk used)
    • Protein: 2-4g (depends on the milk)
    • Fiber: 3-4g (great source from raspberries)

    This drink provides a delightful way to enjoy your coffee while embracing the health benefits of fresh fruit. With this nutritional insight, the Easy Vanilla Raspberry Iced Latte aligns perfectly with health-conscious individuals exploring starbucks copycat recipes that are both indulgent and nutritious.

    FAQs: Frequently Asked Questions About Easy Vanilla Raspberry Iced Latte Recipe

    Can I make this latte without coffee?

    Absolutely! You can create a delicious raspberry milkshake with the same base ingredients—just skip the coffee.

    Is there a good substitute for fresh raspberries?

    If raspberries aren’t available, feel free to substitute with strawberries or blueberries for a similar flavor profile! You could also consider raspberry syrup.

    Can I use sweetened almond milk instead of regular milk?

    Yes, using sweetened almond milk can add extra sweetness to your latte. Just be aware that it may alter the overall calorie count slightly.

    How can I adjust the sweetness of my iced latte?

    You can easily control the sweetness by adjusting the amount of sweetener added to the raspberry blend. Taste and modify until it meets your preference!

    Are there ways to make this drink lower in calories?

    Yes! Opt for a low-calorie sweetener and use unsweetened plant-based milk to lower calories while still savoring the delicious flavor of your Easy Vanilla Raspberry Iced Latte.

    How can I make a larger batch for friends?

    Simply multiply the ingredient amounts accordingly! Blend the raspberries separately for each serving to maintain freshness, and prepare the coffee in a larger quantity.

    Indulging in a flavorful, nutrient-rich Easy Vanilla Raspberry Iced Latte has never been easier. With its practicality and health benefits, this drink is sure to entrance a wide range of audiences. Enjoy crafting your own version of starbucks copycat recipes, and let this vibrant iced latte brighten your day!